Making a Panorama Within Photoshop (GoPro or Regular Cameras)
by snipir in Circuits > Cameras
4926 Views, 50 Favorites, 0 Comments
Making a Panorama Within Photoshop (GoPro or Regular Cameras)


Disclaimer: I'm not a Photoshop Master or anything. I'm going to try to pass on what I know, but if you want complicated stuff to work, I don't know how much of a help I'll be!
As a heads up, I made this guide for the Photography Contest! If you guys happen to find it useful or like it in any way, please head on over and check it out - there's a bunch of amazing projects going on there. And, of course, please vote for me!
URL: https://www.instructables.com/contest/photography/
So obviously the point of this Instructable is to teach y'all how to stitch together a panorama in Photoshop (CS3 and above).
Now why would we want to do this? TO MAKE ALL YOUR FRIENDS JEALOUS OBVIOUSLY! Duh. I mean, what's better than one small, cropped awesome scene? How about a nice expanded photo of a gorgeous scene?
BOOM! LANDSCAPE PHOTOS TO THE FACE!
So why would you want to do this as opposed to using the iPhone's panorama function? Well the image quality of an iPhone camera is superb but does have its limitations. Also, if you've just gotten your hand on a point-and-shoot or any other camera, you won't have Apple's fancy smancy program, will you?
This method allows you to merge together photos from any source so long as you have the image file.
Anyways, let's get started, shall we?
Take Your Photos!


Now the trickiest part of making a panorama is definitely the taking of the photos. The general idea of the technique is to take your photos with a bit of each frame overlapping the next frame you take. I like to have about a 1/3 overlap in photos. The first image of this step demonstrates this on a beach scene. Notice how each colored frame overlaps the next frame by about 1/3 each time? Good.
Note: it's a good idea to take several shots of each frame. This way if one shot comes out looking like poo, you'll have backups.
Now let's discuss the 2 major points on what you want in your frame.
1.You'll also want to make sure that you're taking your photos with recognizable features in each overlap. For example, the green frame has the leftmost shore. The red frame has the mountains of the leftmost shore and the fluffy clouds above. The yellow frame has the leftmost clouds and the right diagonal clouds. The blue has more diagonal clouds and the trees of the rightmost shore. The pink has the right shore.
The reasoning for this is that we'll be using Photoshop's automated photomerge tool. If you're doing this manually, then it won't matter that you have recognizable features in each shot. But since the computer is doing the work, we need to give it a helping hand.
2. You're going to want to capture any moving subjects in their own frames and not have them in the overlap region. I mean, think of what happens when you use a cell phone's panorama function on a moving subject? You get long cat like in the second photo.
So point being, if you have as subject capable of moving in the photo, you better be sure to capture them in an entire frame first to lock their movements.
Let's take a look at my third photo. You'll notice my buddy chilling in the water. Yes, he's the inconspicuously circled one. If you notice the frame, I captured him in his own frame. This way if he moves later on, he won't get morphed into the Loch Ness Monster or something. The only thing I'd need to watch out for now is for him to stay inside him frame and not wander into my other shots.
Open Up Photoshop!
Ok let's be real. You read the title of this Instructible. You knew what I was going to use to merge these photos.
If you haven't read the title, go back and read it. Now go hang your head in shame and leave this place. Don't come back until you've gotten Photoshop!
I'm using Photoshop CS6 in this guide. Why? Because I have it. Now quit whining and asking questions. We're about to party.
Actually we're not. I just wanted to make sure you guys knew we were going to be using Photoshop. Yea.
Optional: Open Up Lightroom and Edit Your Photos!
Ok, this part is OPTIONAL.
You see that? Optional!
What does Optional mean?
op·tion·al
ˈäpSH(ə)n(ə)l/ adjective
available to be chosen but not obligatory. "a wide range of optional excursions is offered" synonyms:voluntary, discretionary, not required, elective, noncompulsory,nonmandatory;
If you don't have Lightroom or don't want to get it, skip on ahead past these optional chapters!
Alright then. For most of my photos, I edit them in Lightroom. Why? Because it has a pretty clean interface and you can use it to do a wide range of things such as archiving photos and stuff. Sure its editing abilities aren't on par with Photoshop's but it does the job for like 90% of the things I need it to do.
I'm running Lightroom 5.
Let's first start by importing some photos. You'll notice that I'm using the same photos as I'll be using later on in the Photoshop section!
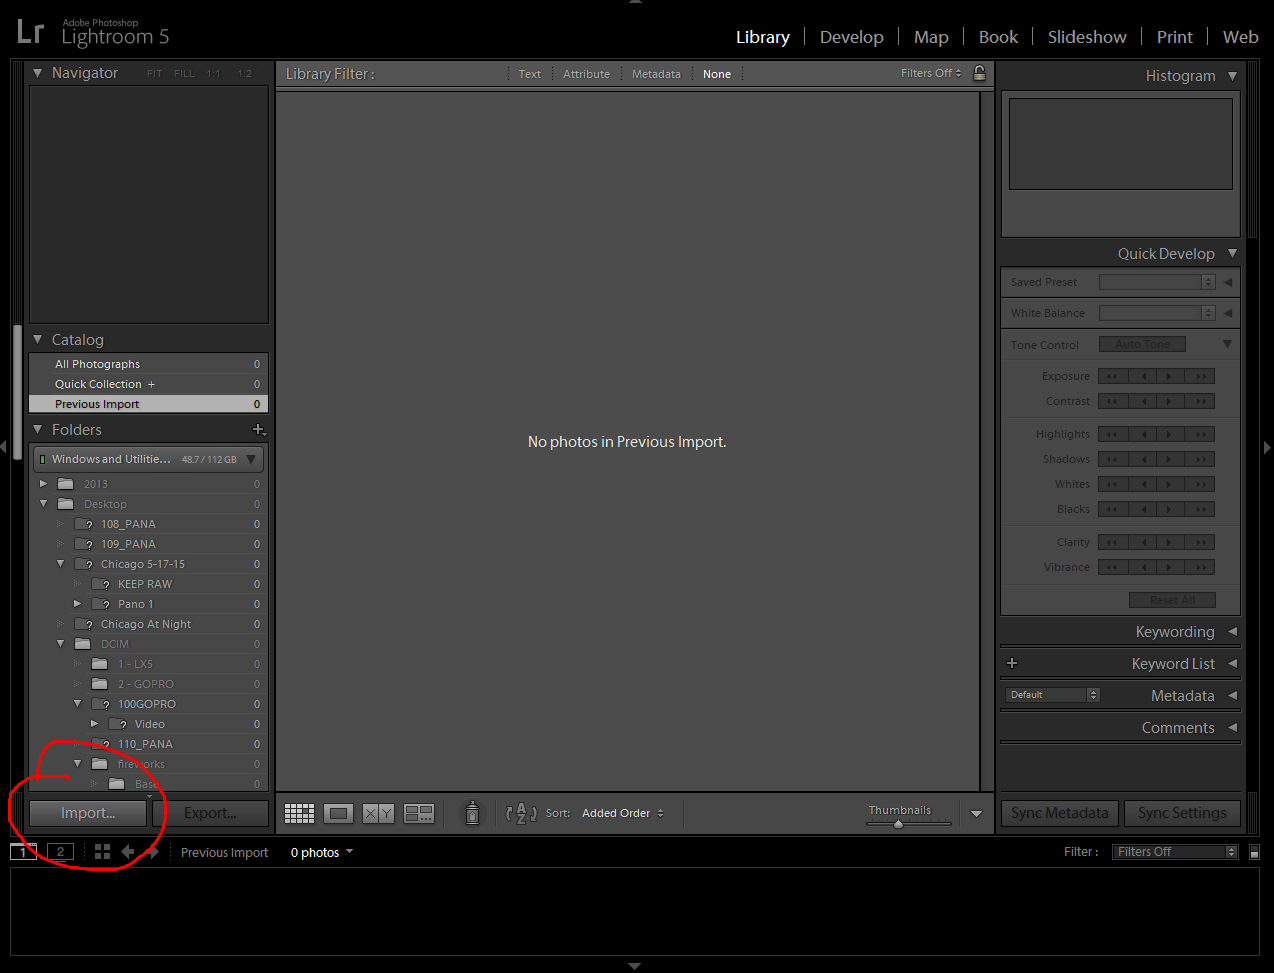
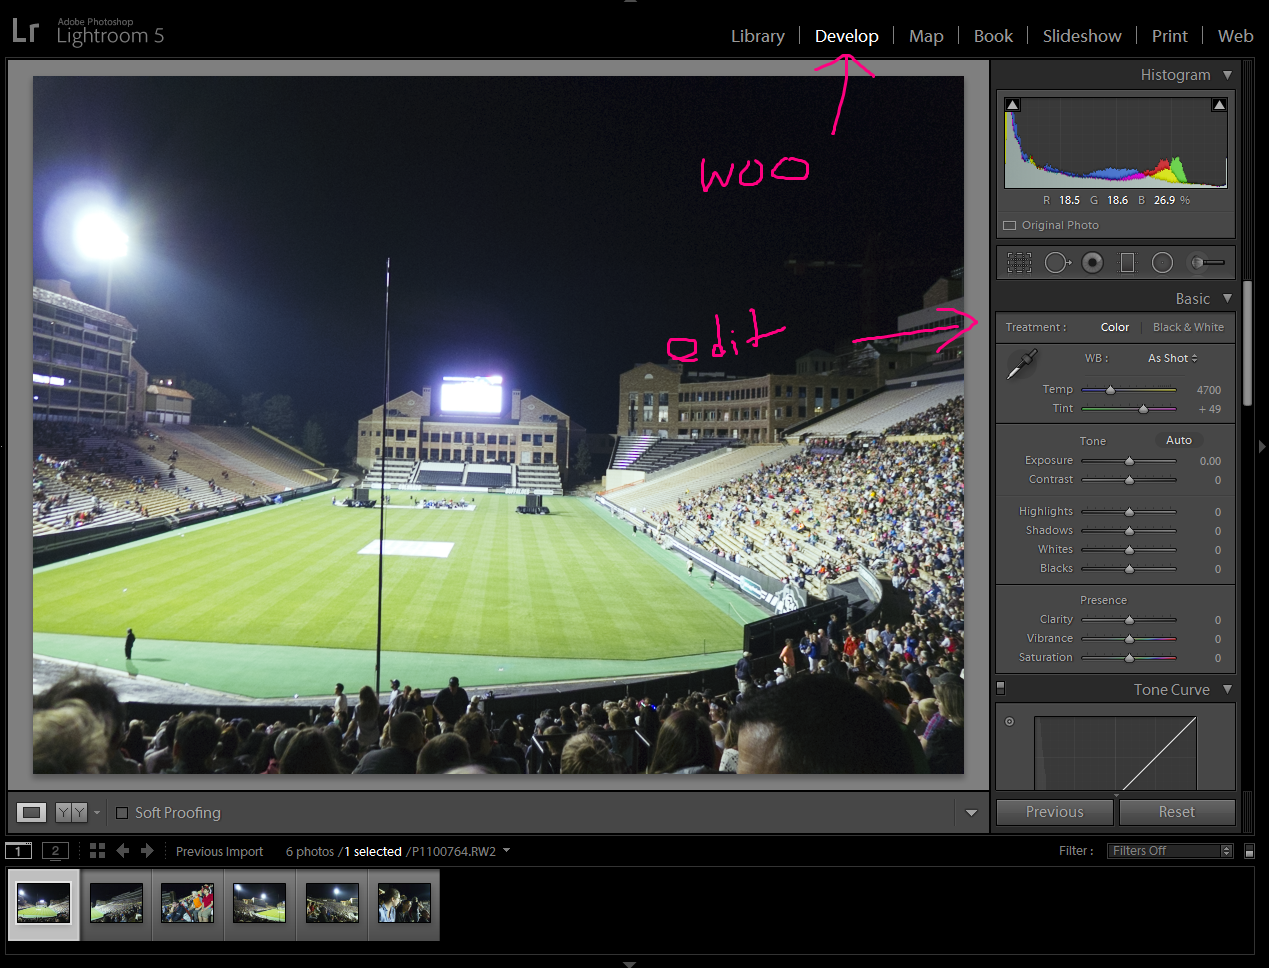
Step 1 (Image 1)
Let's import some photos. Make sure you're in the library tab (top right of your screen) and then hit "import" (bottom left).
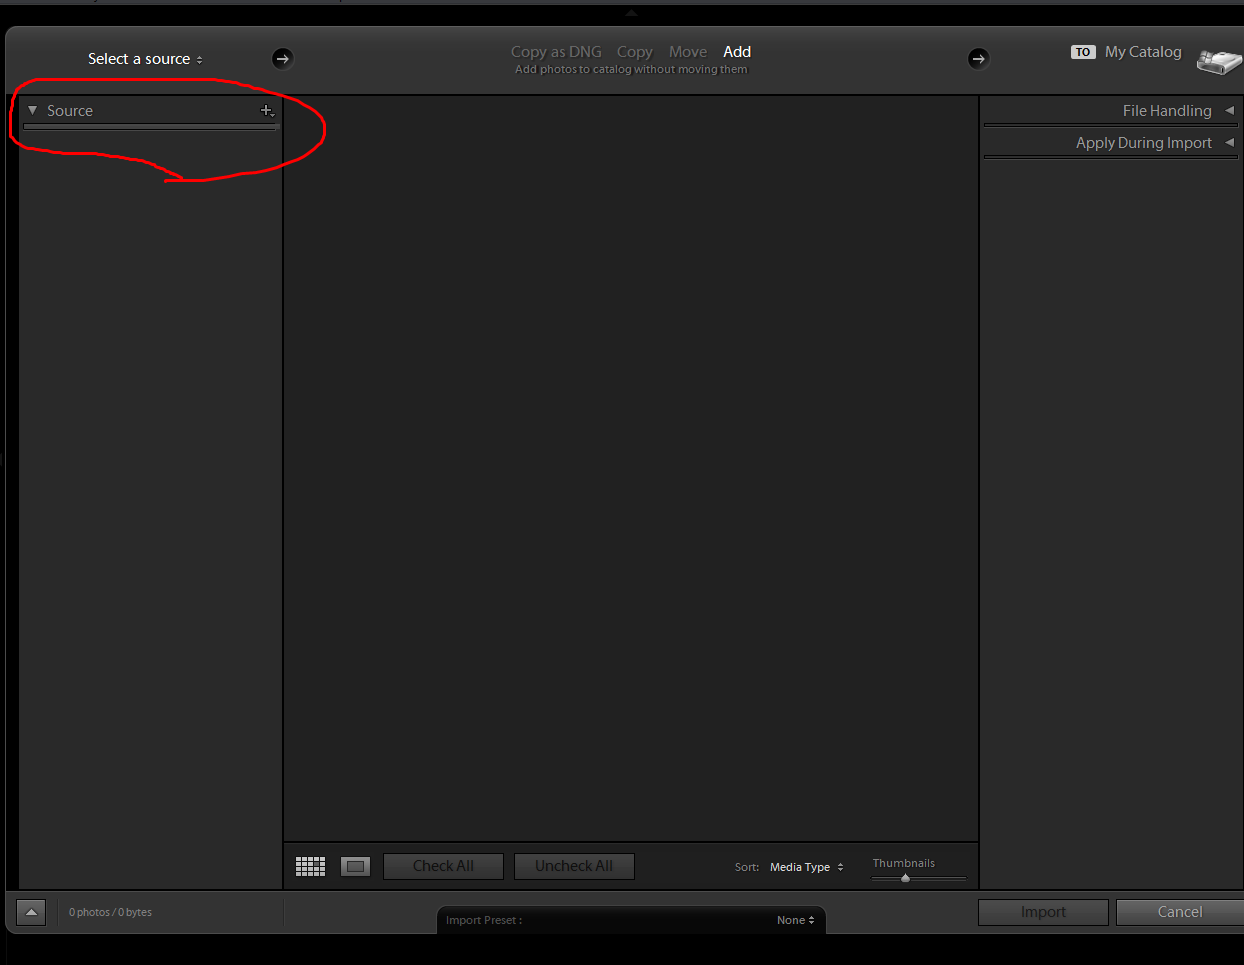
Step 2 (Image 2)
Click on "Source" on the top right to bring down the navigation tree
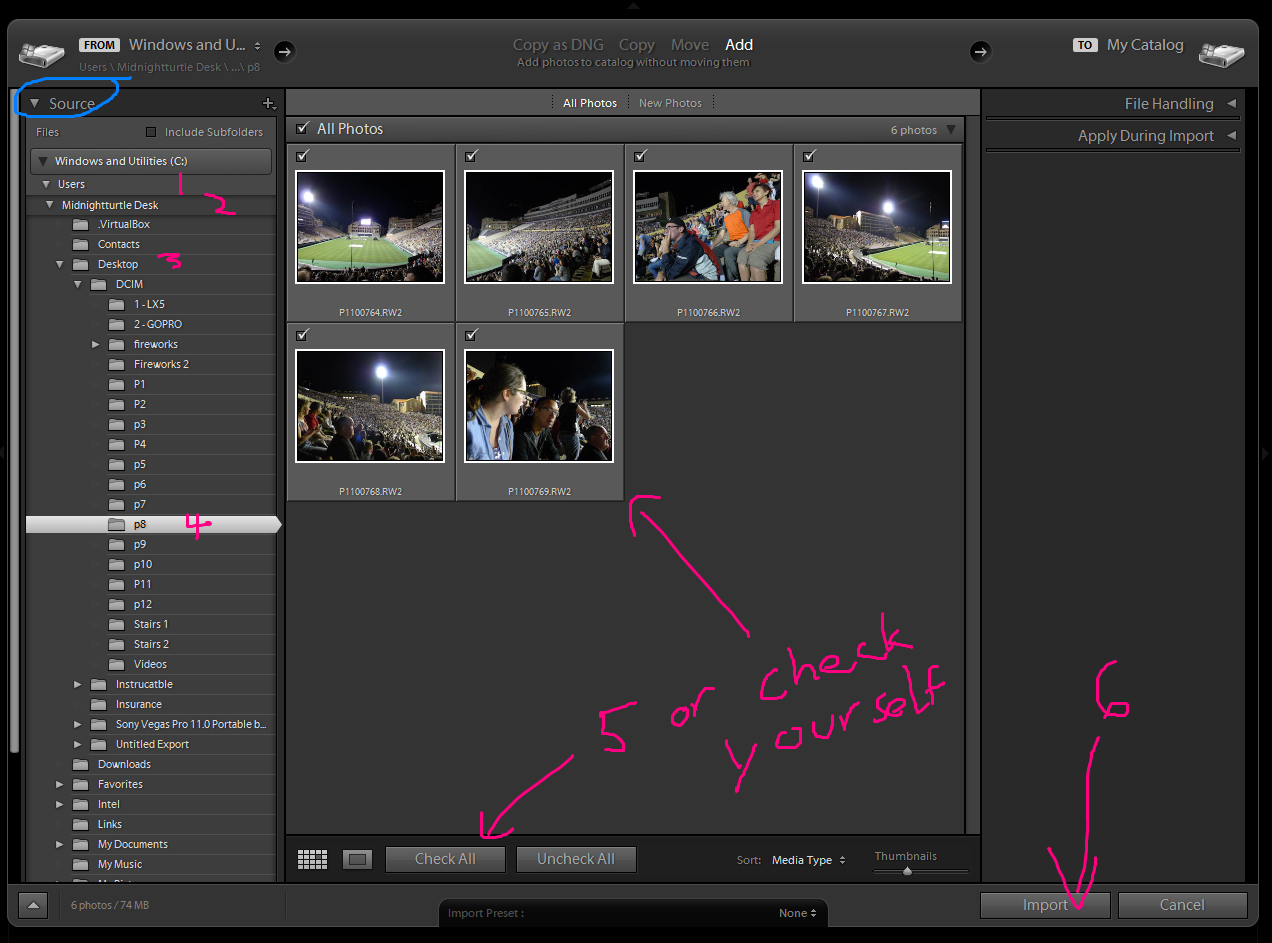
Step 3 (Image 3)
Select the drive your photos are on. I usually leave mine on the desktop before I move them onto an external drive so I know where it is. As you can see, I've navigated to my Desktop, and selected the folder that I kept all my photos in. For me, I put all the panorama photos I've taken into one folder called P# since I usually take a bunch of photos for the same panorama. I sort through them beforehand to delete any shaky or ugly copies before I throw them into Lightroom or Photoshop.
Now check all the photos you want and hit import!
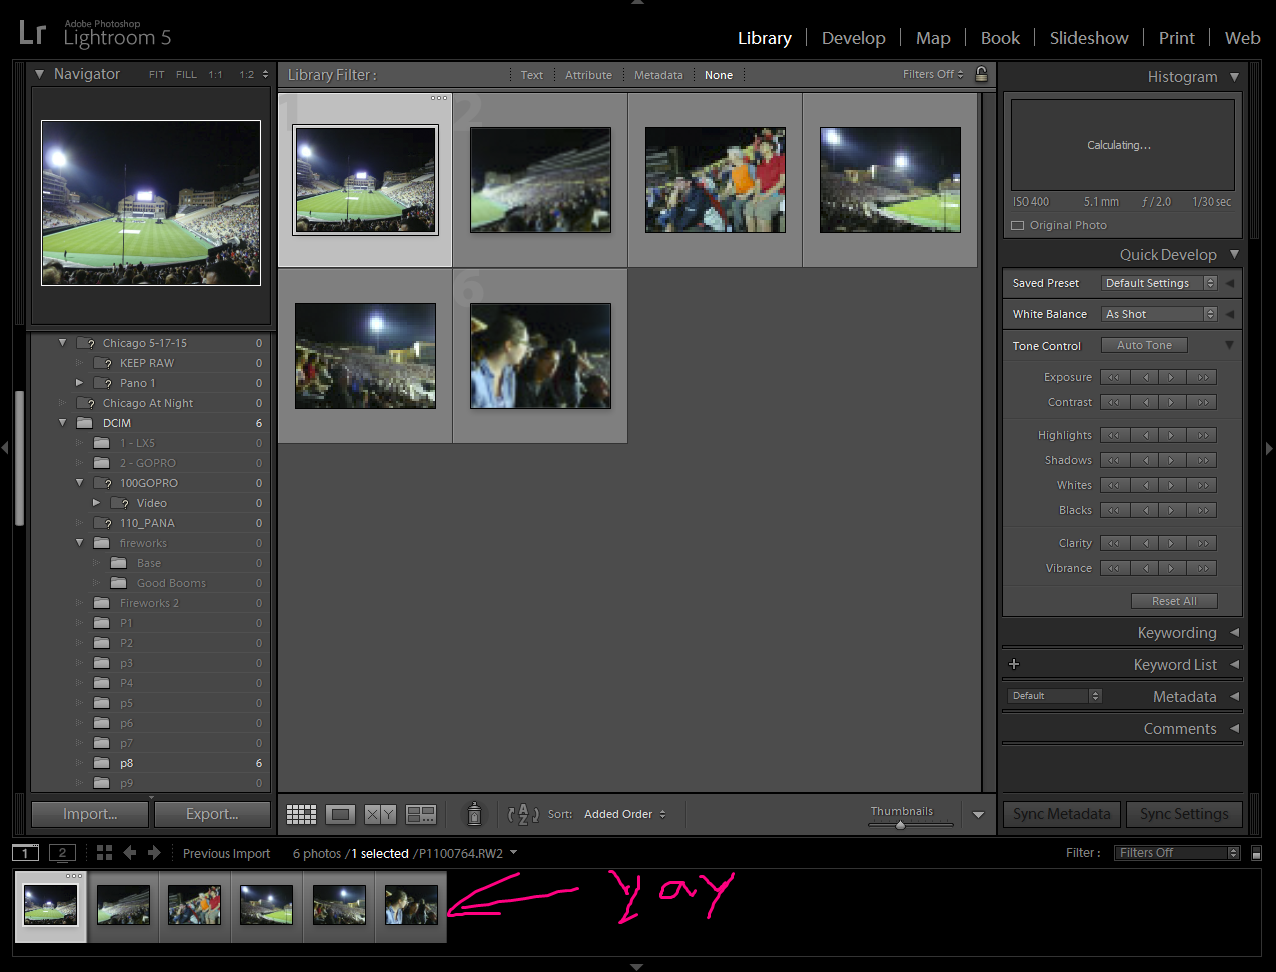
Step 4 (Image 4)
Double check that all your photos are now in the bottom of your workspace. If so, woooo!
Step 5 (Image 5)
Go to the top right and hit "Develop". That'll take you to the development page where you can now mess with your photos.
I'm not going to go through how to edit your photos - you can find guides on that online. However, I'd like to point out that you're going to want to try to keep the colors and lighting consistent through each photo that you're going to merge. Like if one image is super saturated or blown out while the others aren't, you're going to have one funky looking section in your panorama when you merge them.
Optional: Exporting Your Photos From Lightroom to Photoshop
Ok, now that we've finished editing our photos in Lightroom, it's time to send them over to Photoshop!
How do we do that, you ask? Well I'll tell you!
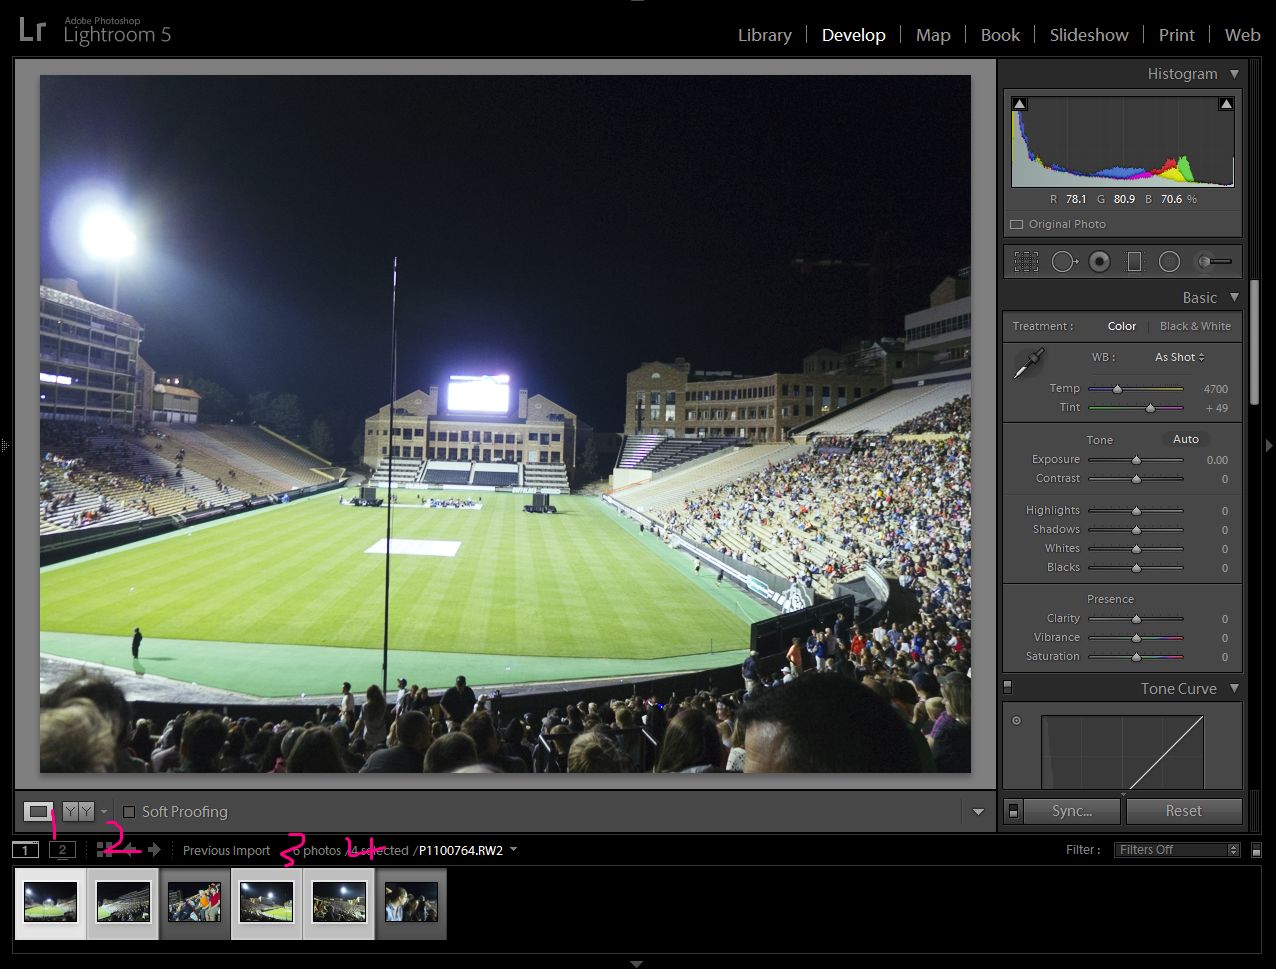
Select your photos (Image 1)
So you remember that bar on the bottom of Lightroom with all your photos? Select the photos you want to merge from there (ctrl + left click to select multiple photos). The lit up photos are the ones that are in the current selection.
As you can see in the first image, I've selected four different shots that I want to merge.
The reason why I chose four instead of all of them was because I've already tried to merge all six at once using Photoshop's automated tool. Instead of giving me a pretty scene, it couldn't figure out how to stitch two of the photos into the panorama. As a result, it just made a panorama with the four it could stitch and just left the other two floating around on the same Photoshop worksheet. But you'll notice later on that this will still give me an error despite me leaving out those two incompatible shots.
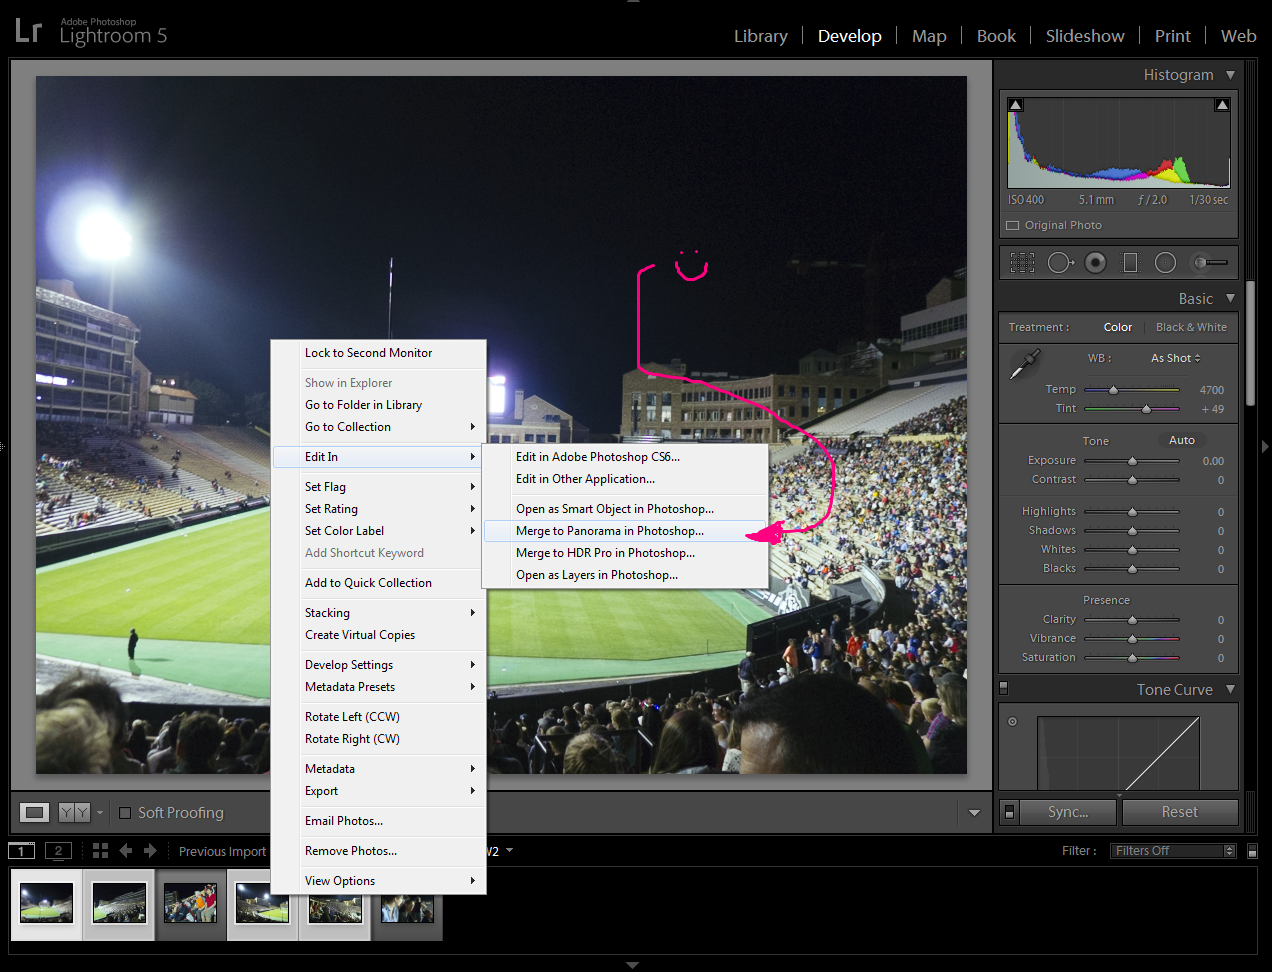
Edit in Photoshop (Image 2 & 3)
NOTE: Make sure you have Photoshop open!
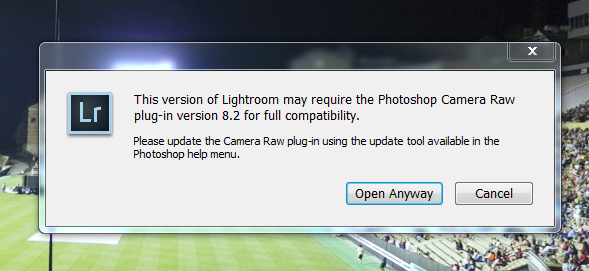
Now right click on any of the highlighted images and go to "Edit in" -> "Merge to Panorama in Photoshop". It might freak out and give you a warning like it did me. Just hit ok and move on with your life. We got people to see! Places to be!
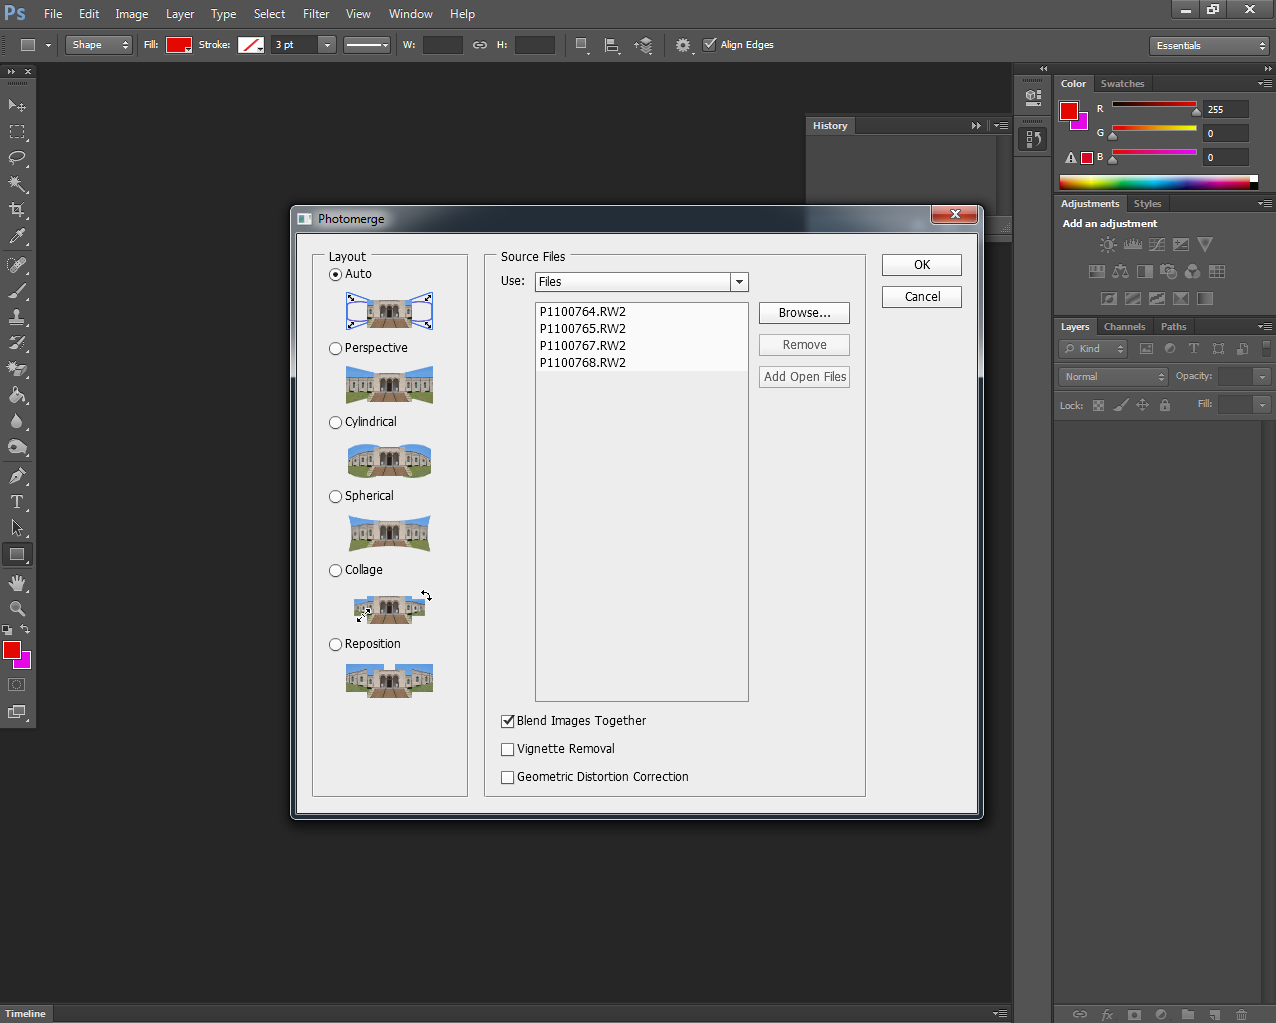
Check that you have all your photos in Photoshop (Image 4)
Photoshop will now have pulled up its Photomerge function. Does it have all of your images? Cool. Let's move.
Open Your Photos in Photoshop
Sweet. You guys are still will me. Let's keep on trucking!
Now with Photoshop open, let's open up your images.
Open Images (Image 1 & 2)
File -> Open
Now navigate to where your photos are. You'll notice that I have selected my RAW files instead of my JPEG files. If you don't know what that means, don't worry about it. If you do, I don't think I need to explain it.
RAW = a file that your camera can shoot in (if it can and you allow it to) that captures a lot more info than the standard JPEG.
Edit Your Photos in Photoshop
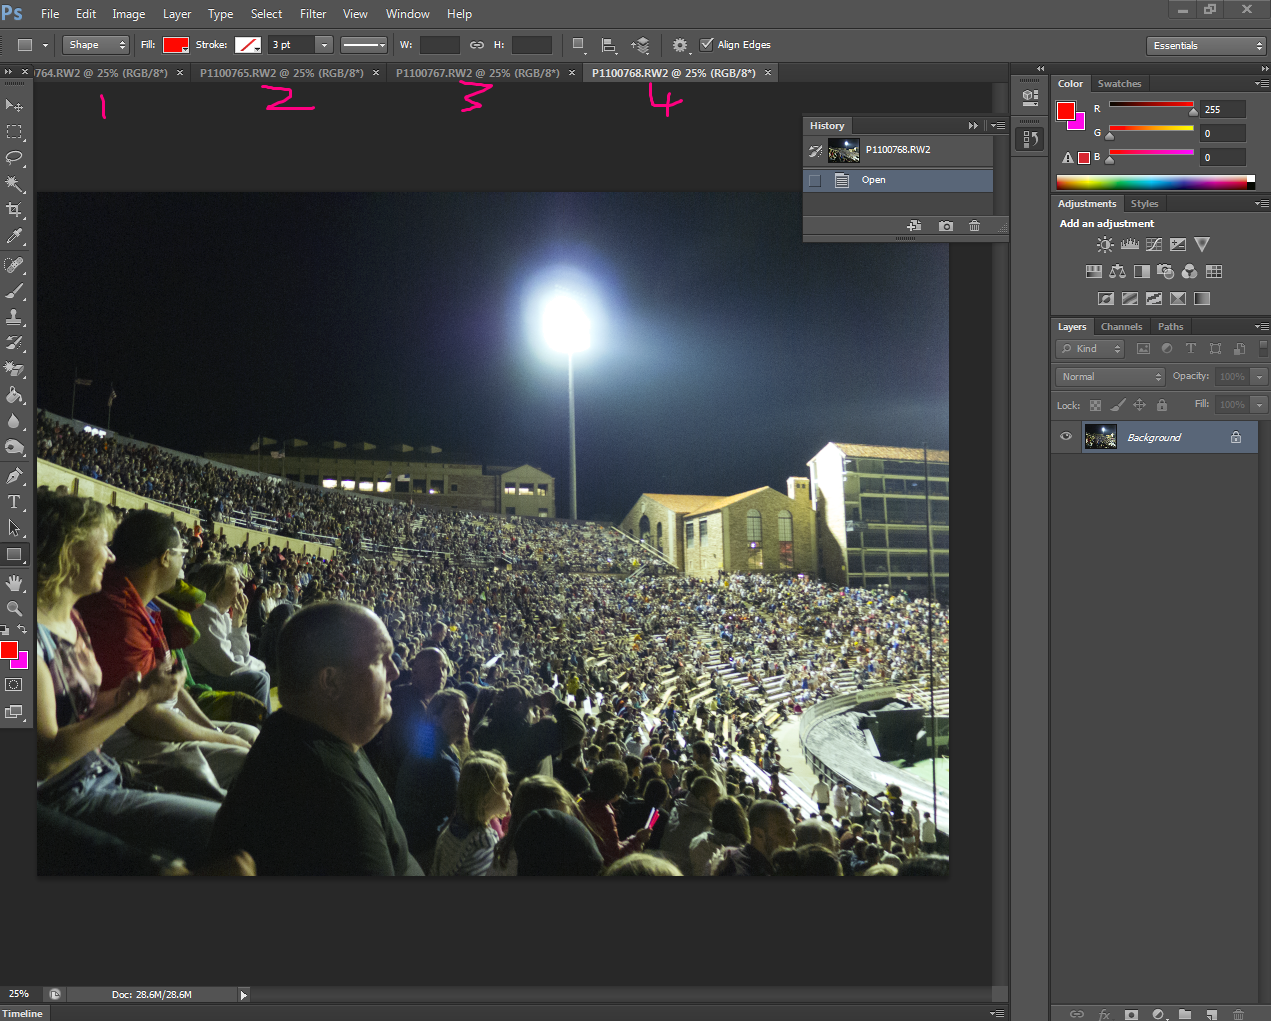
Hopefully your photos opened up! If not, uh.....sorry?
Anyways, you can double check that they've opened up by looking at the number of tabs you got open (Image 1).
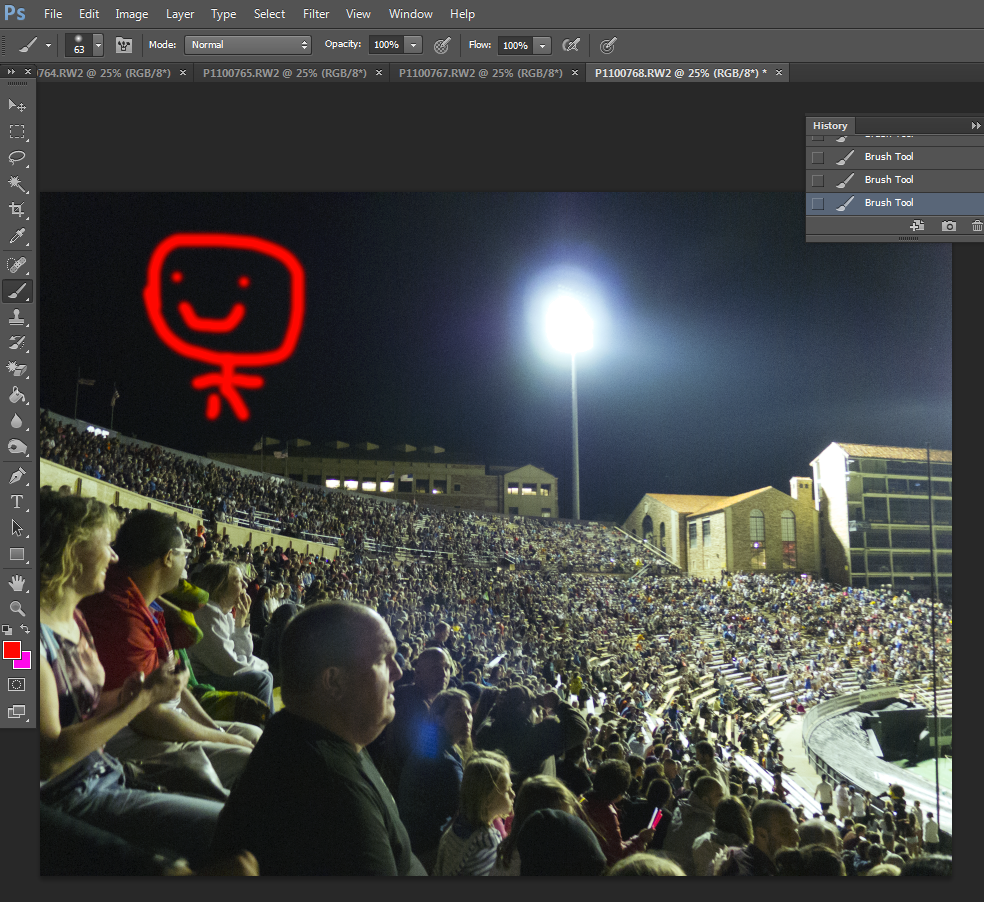
Edit your photos (Image 2)
Now I'm not going to go into photo editing in this guide. You can find that elsewhere. I will show you that you can draw random stick figures into your photos though (Image 2).
Automate!

Now we're going to use Photomerge to merge our shots
Open Photomerge (Image 1)
File -> Automate -> Photomerge
Add your files (Image 2 & 3)
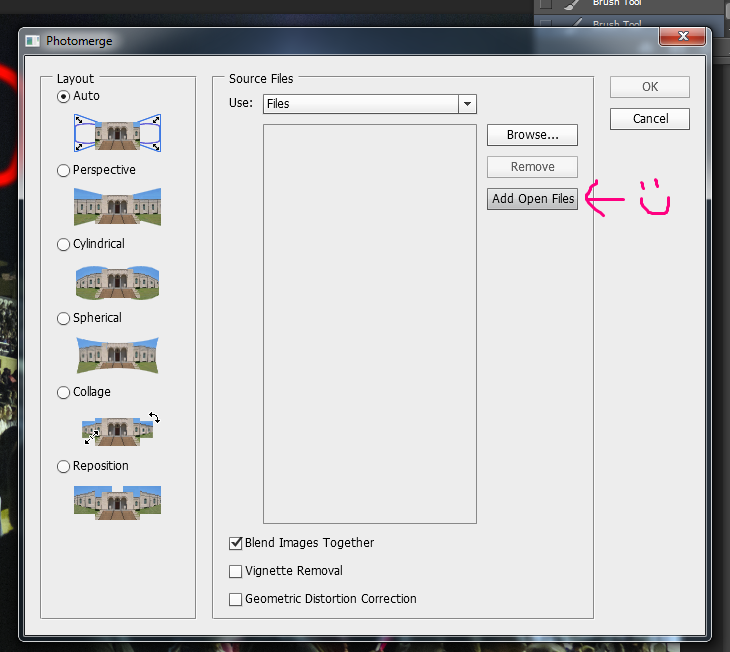
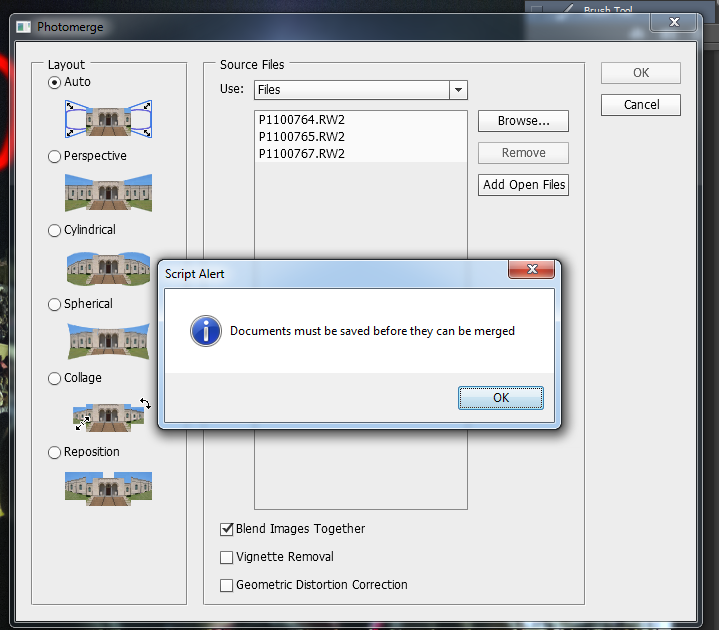
Now since we've already opened our photos to edit them, we can just hit "Add Open Files" (Image 1)
But WAIT! Photoshop will throw an error (Image 3) about the edited photos. It wants you to save them first.
Ok, no big deal. Let's just hit ok, cancel out of photomerge, and save them. Now just reopen Photomerge and hit "Add Open Files". It should just go ahead and add all your open files without a hitch now.
You're going to want to select which way you want Photoshop to merge your photos (Left Side). I usually leave it as Auto until it renders the panoramic. If it doesnt look the way I want it to, then I'll redo the Photomerge with a different option.
Hit ok.
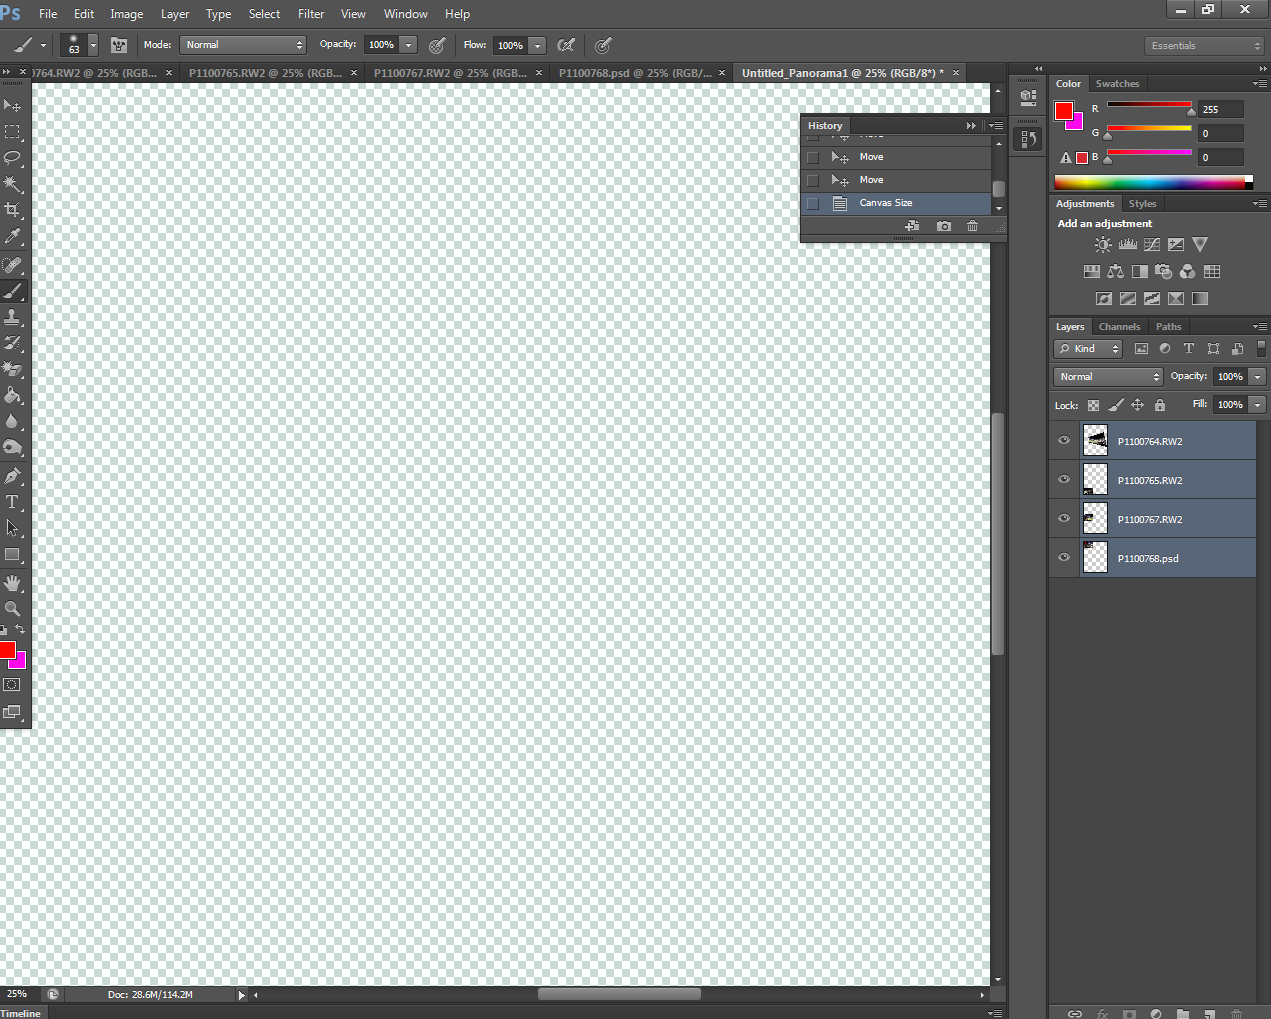
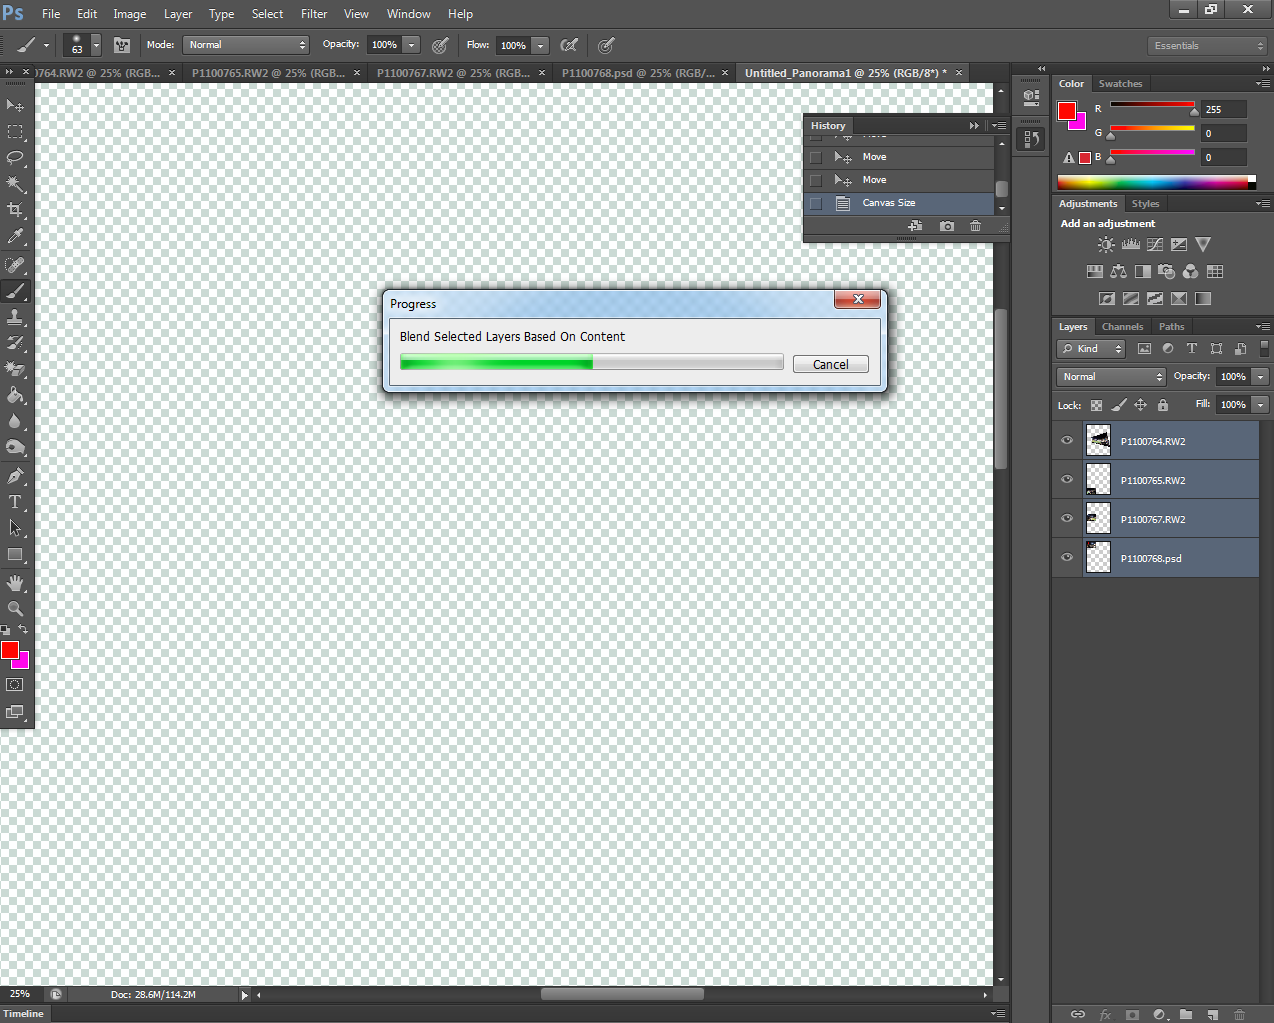
Let It Do Its Thing (Image 4 & 5)
Just chill! Grab a beer or something! It'll take a while depending on your file sizes.
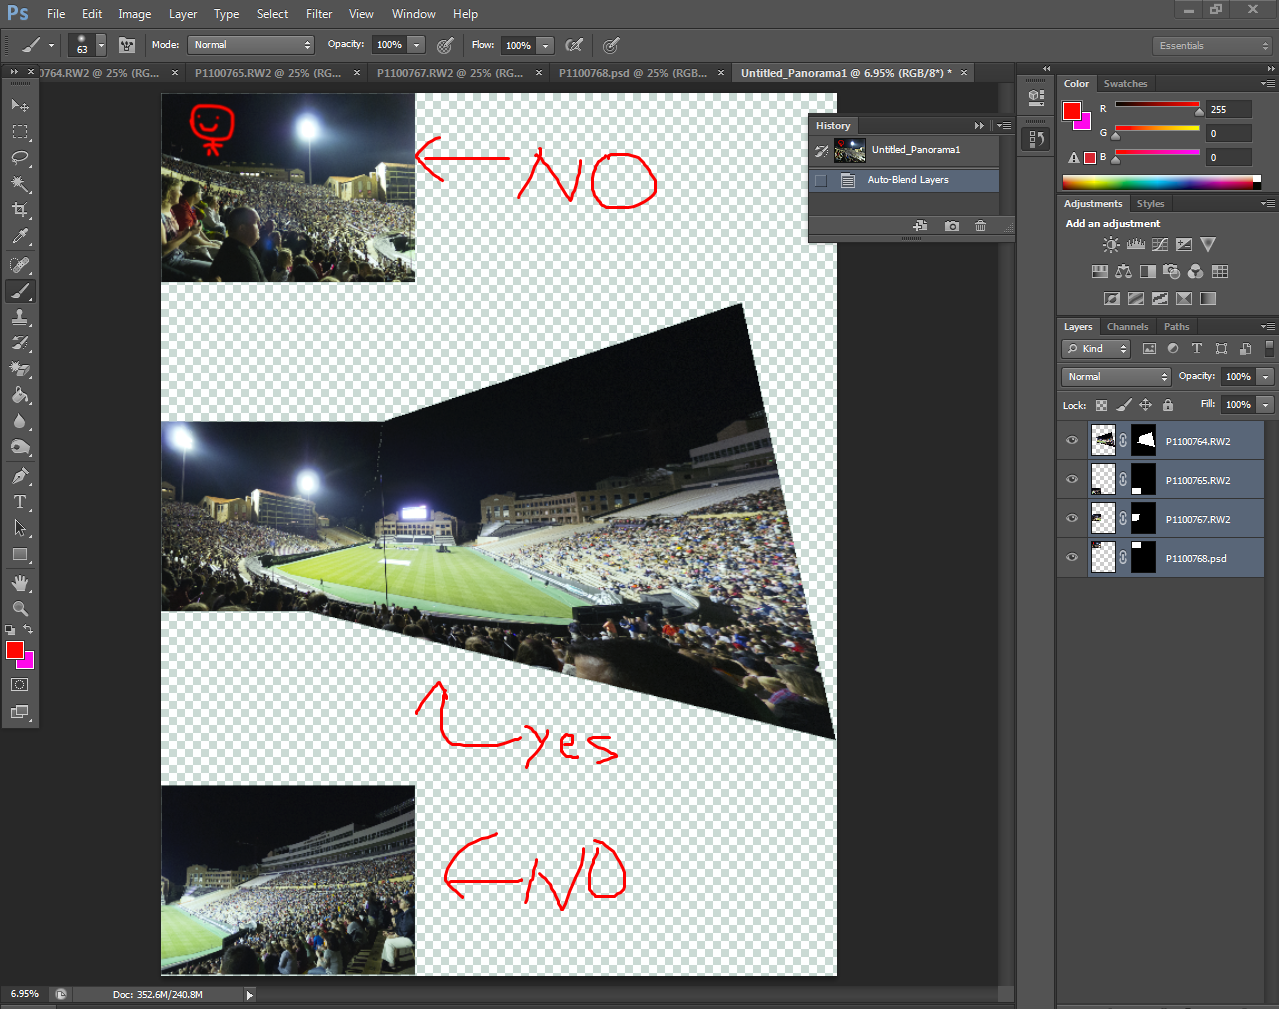
Oh shit. (Image 6 )
Now as you can see, it doesn't terribly like some of my photos.
You have two options now: get rid of the photos that it couldn't automatically figure out how to merge or manually merge your photos. I can make a manual merge instructible later, but for now I'll opt for Option 1: Get rid of those two images.
What we're going to do is just close this tab and the tabs of the photos that didn't merge on the top right. Don't save this tab that you just closed out. We're just going to rebuild the merge anyways.
Note: You can also try different combinations of merges to get photoshop to be smarter and make things merge. For example, if 1+2+3+4 doesn't work and leaves out 1 and 4 as free floaters, you can also try 2+3+4 to see what would happen. I'm not well enough acquainted with Photomerge to know what combos work.
Fill in the Blanks
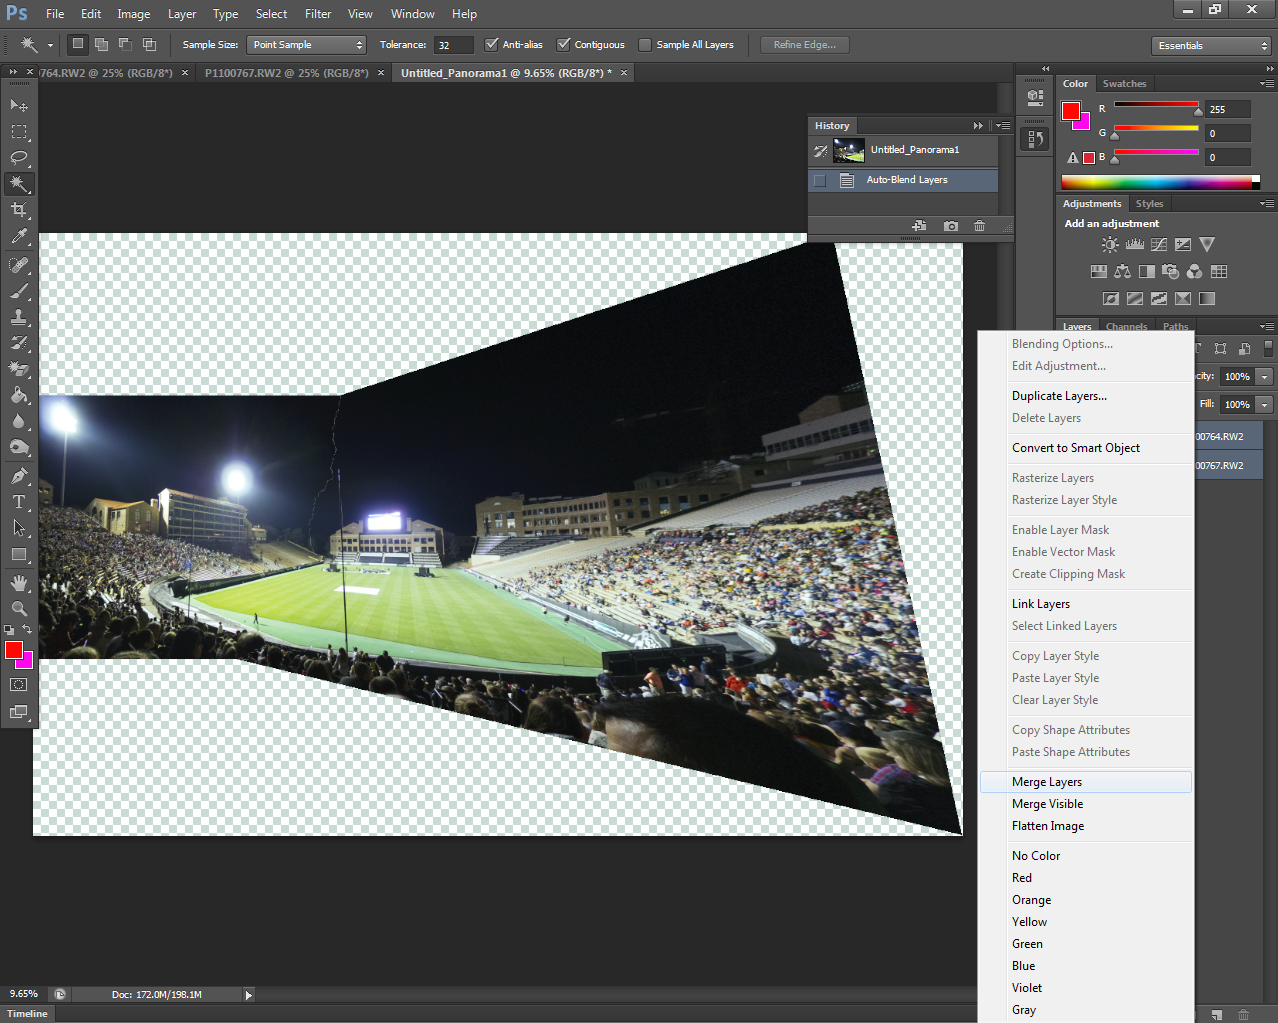


So clearly my photo came out looking funky, huh (Image 1)?
Photomerge has merged the photos, but you can see that it tried to keep the perspective in line and ended up with a lot of empty space.
Now you have three options: Fill the empty space, just warp the picture so that it fills up the entire page, or just crop what you can use. Cropping is straightforward so I won't go over it in this guide. You can also use combinations of each option to make the image you want.
Of course, there are other options but for simplicity's sake we're only concerned with those three.
It's also useful to note that you can not only fill the empty space, but also use the fill tool to remove things from photos (like light posts and stuff). We'll go into both here.
Trimming the spaces you want to fill (Image 2 & 3 & 4 &5)
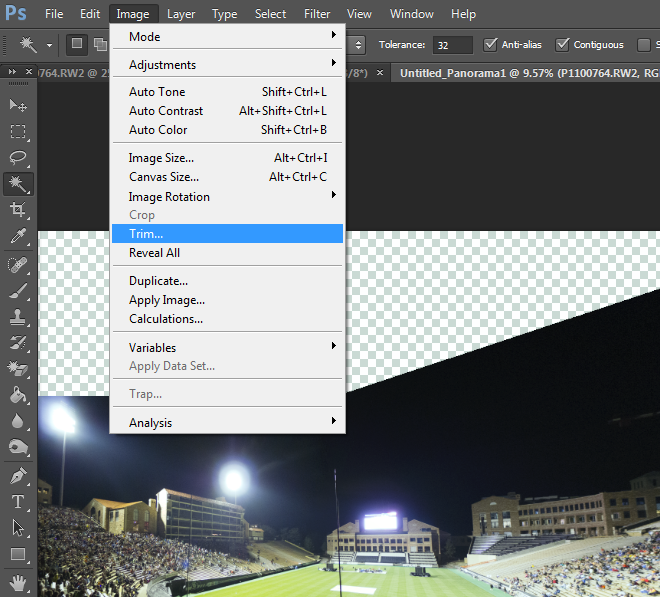
So we're going to use the Magic Wand Tool (Image 2) to select to open space that I want it to Autofill. The problem with this is that the magic wand tool will select any UNBROKEN selection of a certain color. The color in this case is the empty space. So if we use the magic wand right now on the empty space we have, it'll select all of it on the image.
Why is this bad? Because we're going to want to fill sections of the empty space separately in case the Fill ends up filling up the sections with stuff that we don't want (like in this case, filling the bottom stand area will cause absolute mayhem since Photoshop can't randomly generate people in stands.
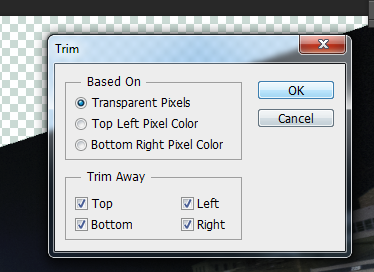
This means we gotta trim the image so that it breaks the empty spaces. Let's go to Image -> Trim (Image 3). Once that dialogue is open, make sure it's trimming by transparent pixels, and hit ok (Image 4).
Now when you use the Magic Wand tool on the top left section, you'll see that it only selects to the top left empty space, not all of it (Image 5).
Filling The Gaps (Image 6 & 7 & 8)
Now we're going to use the Magic Wand Tool (Image 2) to fill in the empty sections. The tool is wonderful for filling in easy things like the sky and water but won't do complicated stuff like the people in the stands. As such, we'll just focus on filling the top left gap in our photo.
With the Magic Wand selected, left click on the top left empty space. It should become Selected (Image 5).
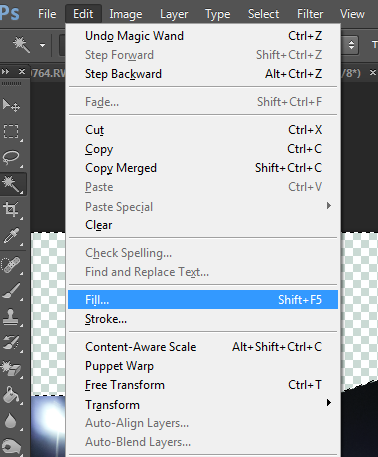
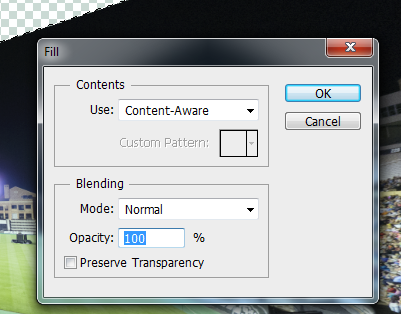
Now go to Edit -> Fill and make sure it fills using the "Content Aware" option then hit ok (Image 6).
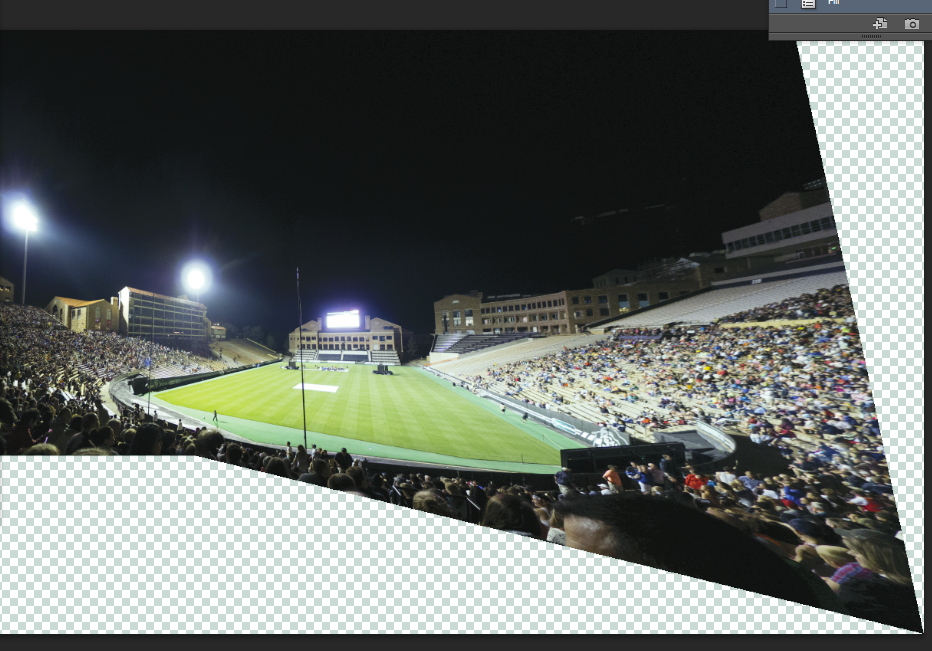
It'll do its thing and fill your selection by looking at what is around it (Image 7).
You can also use this Fill tool to remove things from photos. All you have to do is to make an area selection using the lasso tool or something and use the Fill tool. It usually works in removing lamp posts, people, ect. It might fill the space with something out of place but that's the risk you run!
Now in this case because the photo is too complex for the Fill tool to work on the entire photo, we have to warp it to make it happy.
NOTE: It's useful to know that (ctrl + d = deselect selected space)
If You Can't Fill Them.....BEND THEM TO YOUR WILL

Alright so this is Option 2: Become a PhotoBender. It's like a waterbender but less cool. Anyways...
Merge Visible (Image 1)
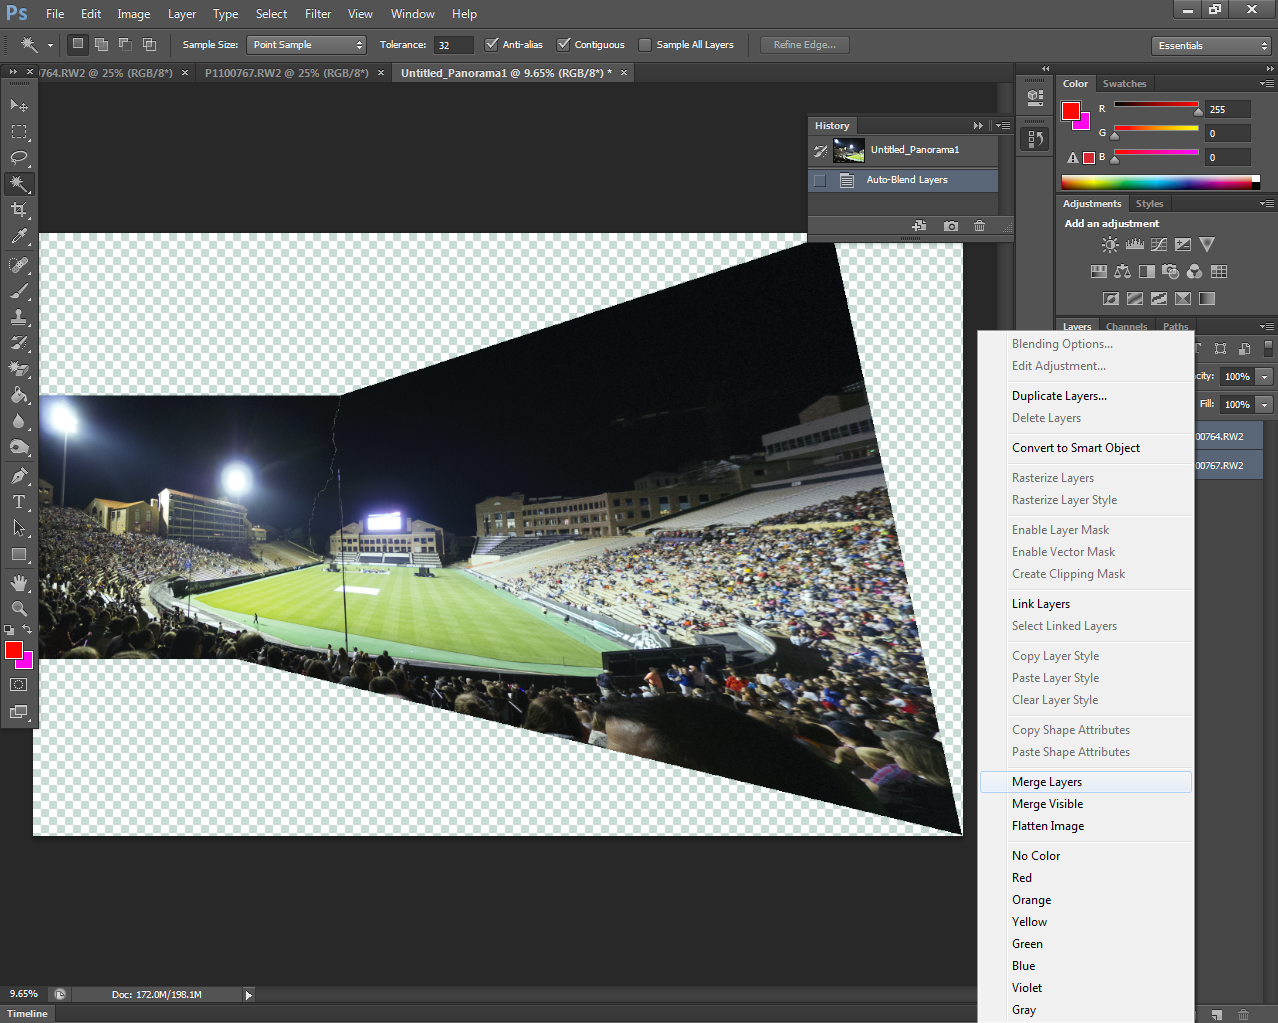
First of all we're going to merge all your layers. Some Photoshop masters will freak out about this, but as far as I'm concerned, it works. If you're scared, just save the file now, make a copy of it. and work on the copy. Boom.
We're going to right click on a layer and hit "merge visible".
Now if you look at the right side, it'll have one background layer instead of a bunch of layers.
Highlighting your working space (Image 2 & 3 & 4)
Disclaimer: I don't really know if this step is required but I do it!
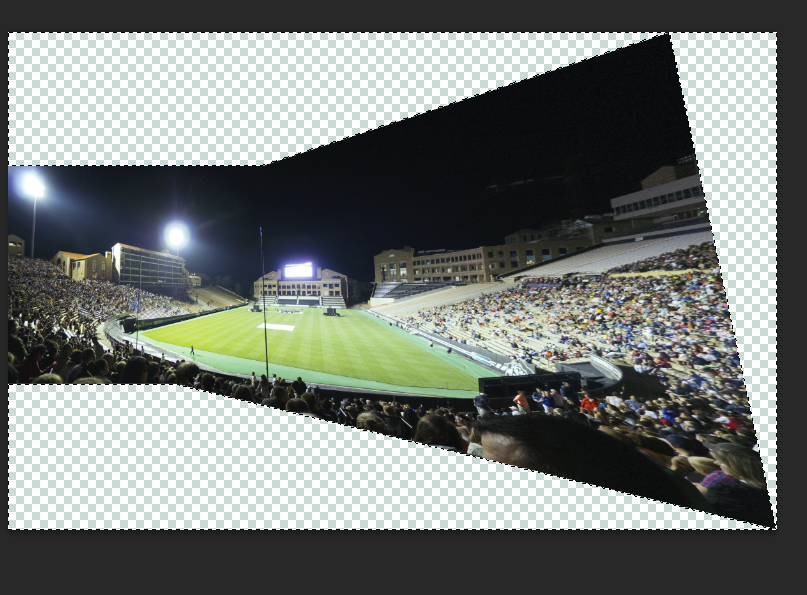
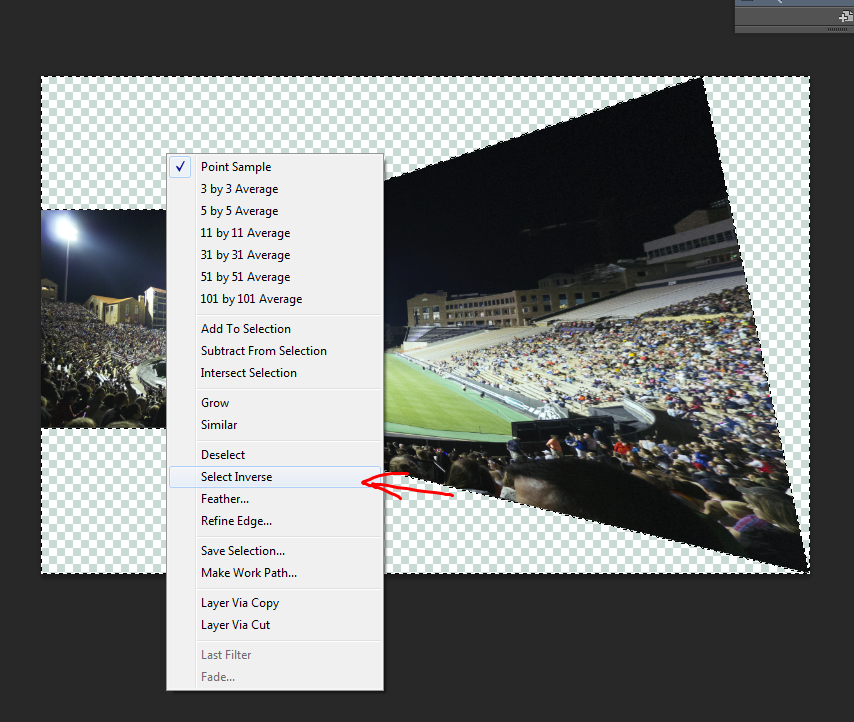
Ok let's highlight your working image now. We're going to select the "Magic Wand" tool (Image 2) and select any of that checkered part. If it doesn't highlight all of the checkered space, you're going to hold "Shift" and left click on all the other checkered empty space until it's all selected (Image 3).
We're now going to right click on any checked space and go to "Select Inverse" (Image 4). This will hopefully highlight the image. If it doesn't and you can't figure out how to make it do so, forget this step and move on.
Time for WARP SPEEEEED (Image 5 & 6 & 7)
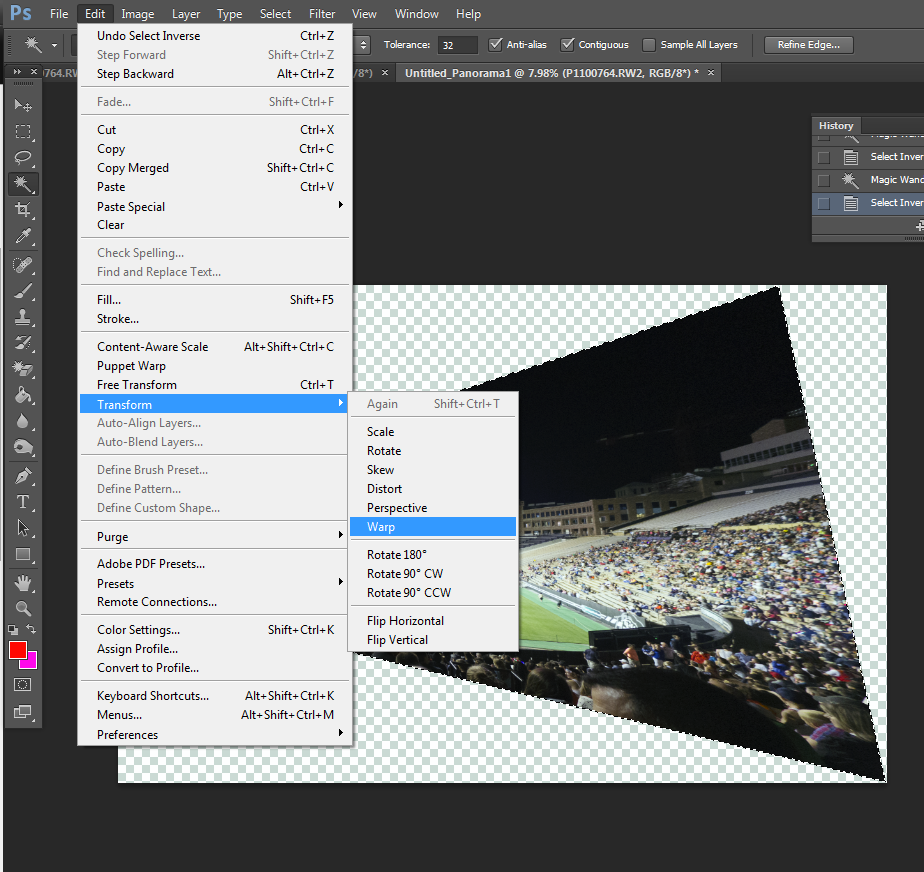
We're now going to go to the top and find the Warp Transform (Image 5).
Edit -> Transform -> Warp
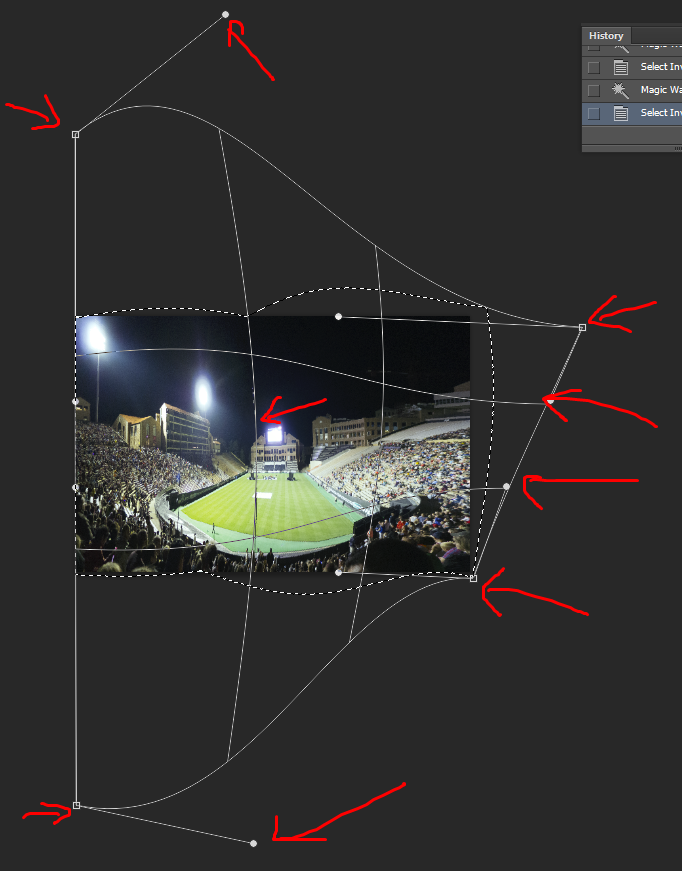
Woo! If you now have the photo divided up into 9 squares, we're in business. Here's where you need to be creative.
You see those squares and circles on each line's endpoint? If you drag those around, the photo will warp. Play with it and you'll see what I mean. The goal is to drag each of those circles to a location where the image takes over the entire working space and ends up not making the photo look too distorted (Image 6).
It's also useful to note that you can drag any of those lines that go across the screen to warp the image along those lines too. Just play with it and you'll see what I mean.
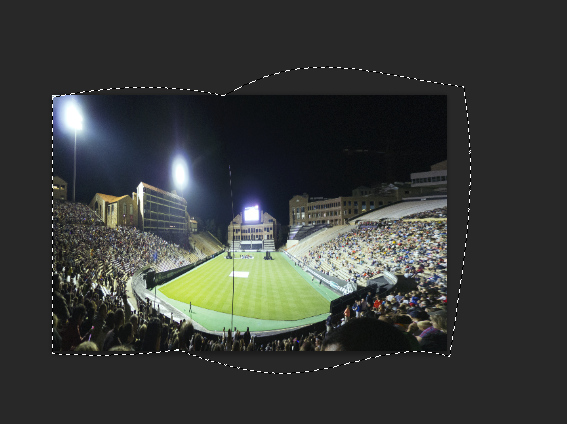
When you're done, hit "enter" on your keyboard for it to save that configuration (Image 7).
NOTE: It's useful to know that (Alt + mouse scroll = zoom in and out)
Double Check for Inconsistencies
Now that we have the photo we want, we're going to want to look for any inconsistencies that were created during the Photomerge.
This is where you're going to want to dodge, burn, smooth, and do whatever trick you want to make any poorly merged sections look ok. What I like to do is use the rectangular marquee or lasso tool to highlight a messed up area and use the Fill tool to try to get it to automatically fix the problem area.
Be creative!
Save!
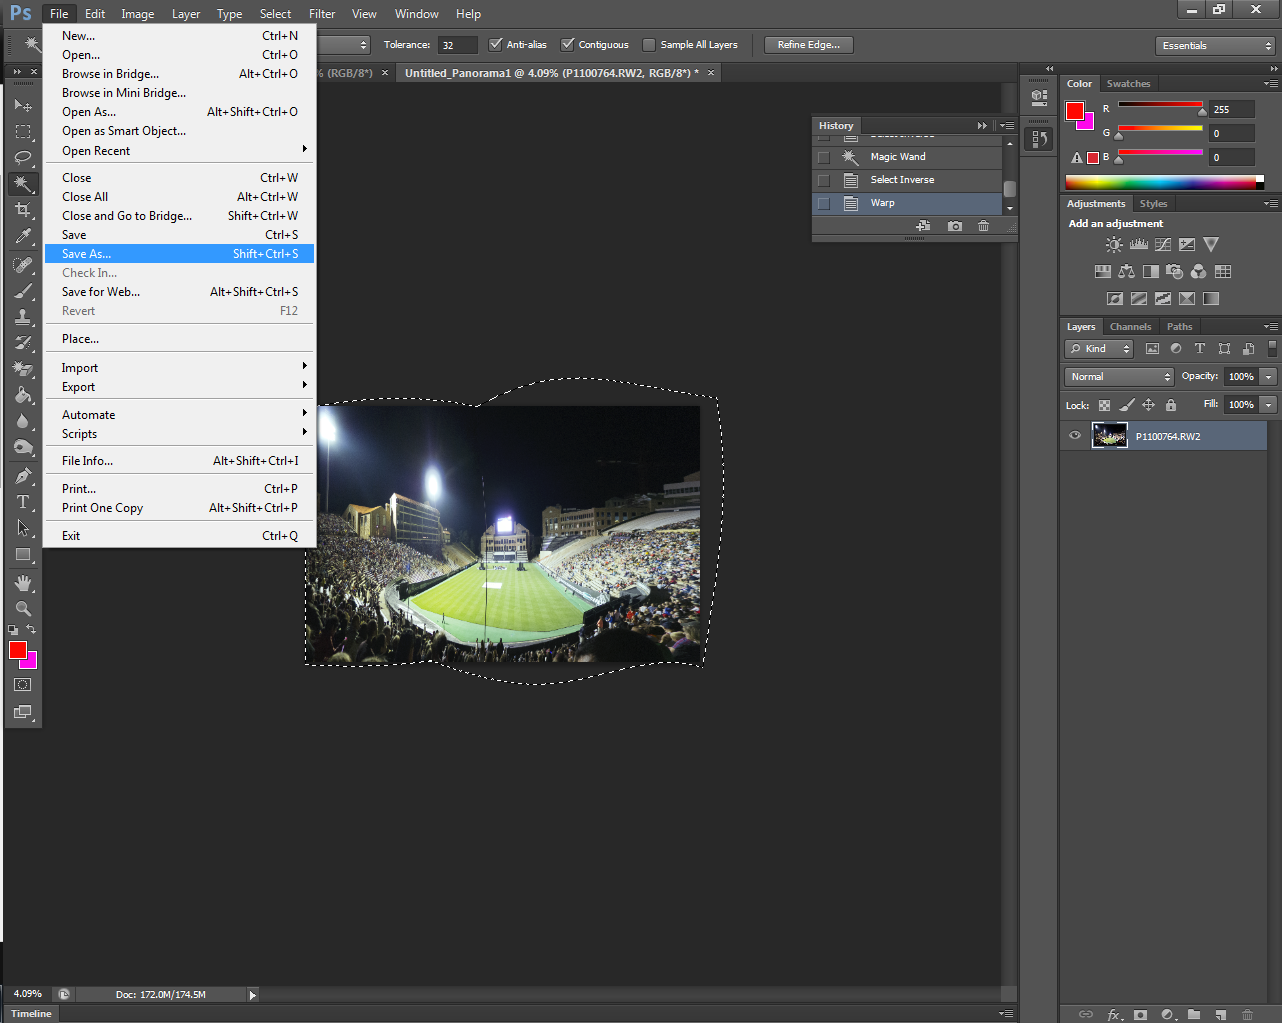
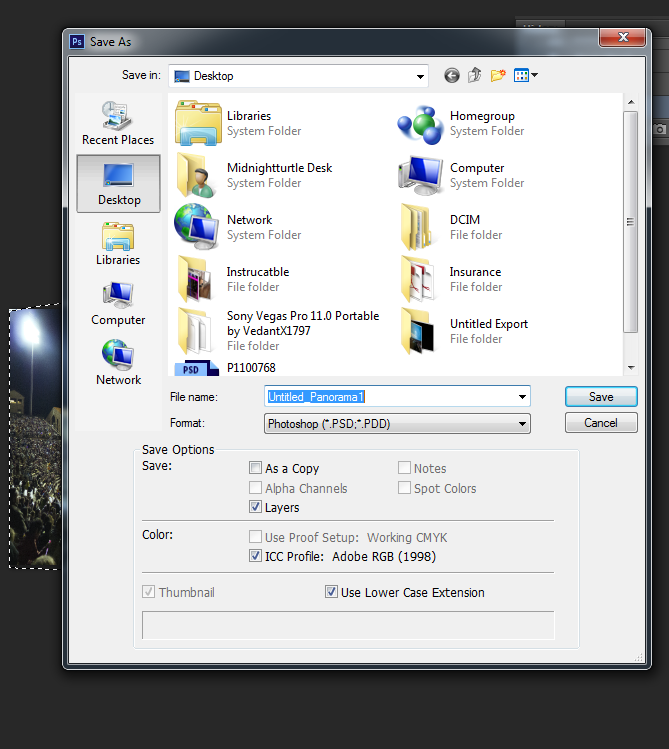
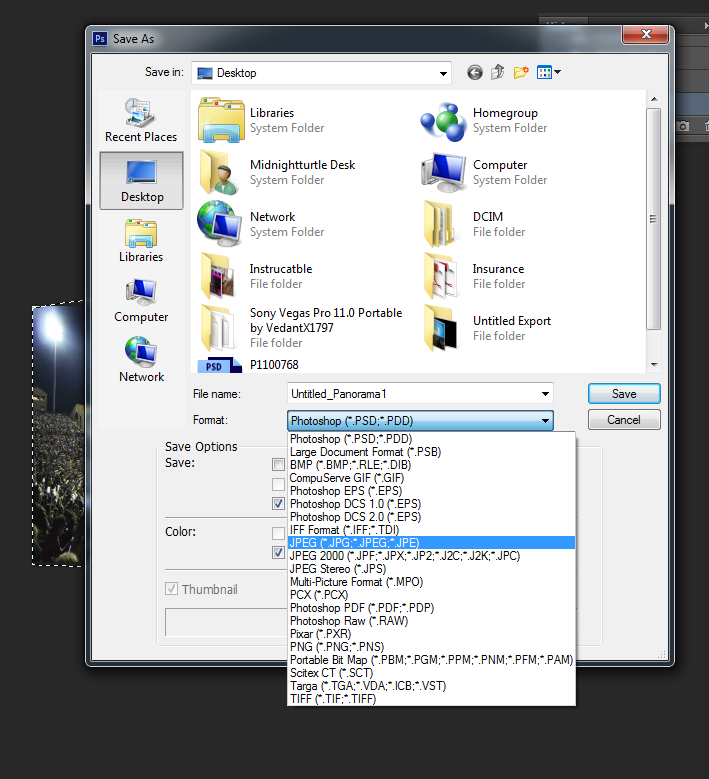
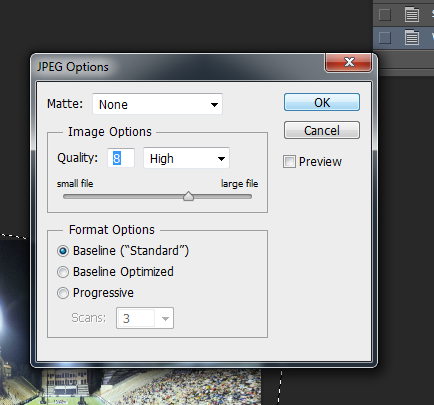
Now it's time to save our work of art (HAHAHAHAHHAHAHAHA man this doesn't look good at all, does it?)
Save (Image 1 & 2 & 3 & 4)
File -> Save As (Image 1)
Now save it as a .PSD Photoshop document if you want to be able to edit it later. Your call. (Image 2)
If you just want it to put on Facebook or whatever, let's save it as a JPEG. We're going to go to the "Format" dropdown and select JPEG (Image 3).
It's going to ask you what quality you want to save it as (Image 4). I just use the default and hit OK.
And that's it folks! Now you have a panorama and have everything merged!
Trick Your Friends Into Thinking You're Interesting!
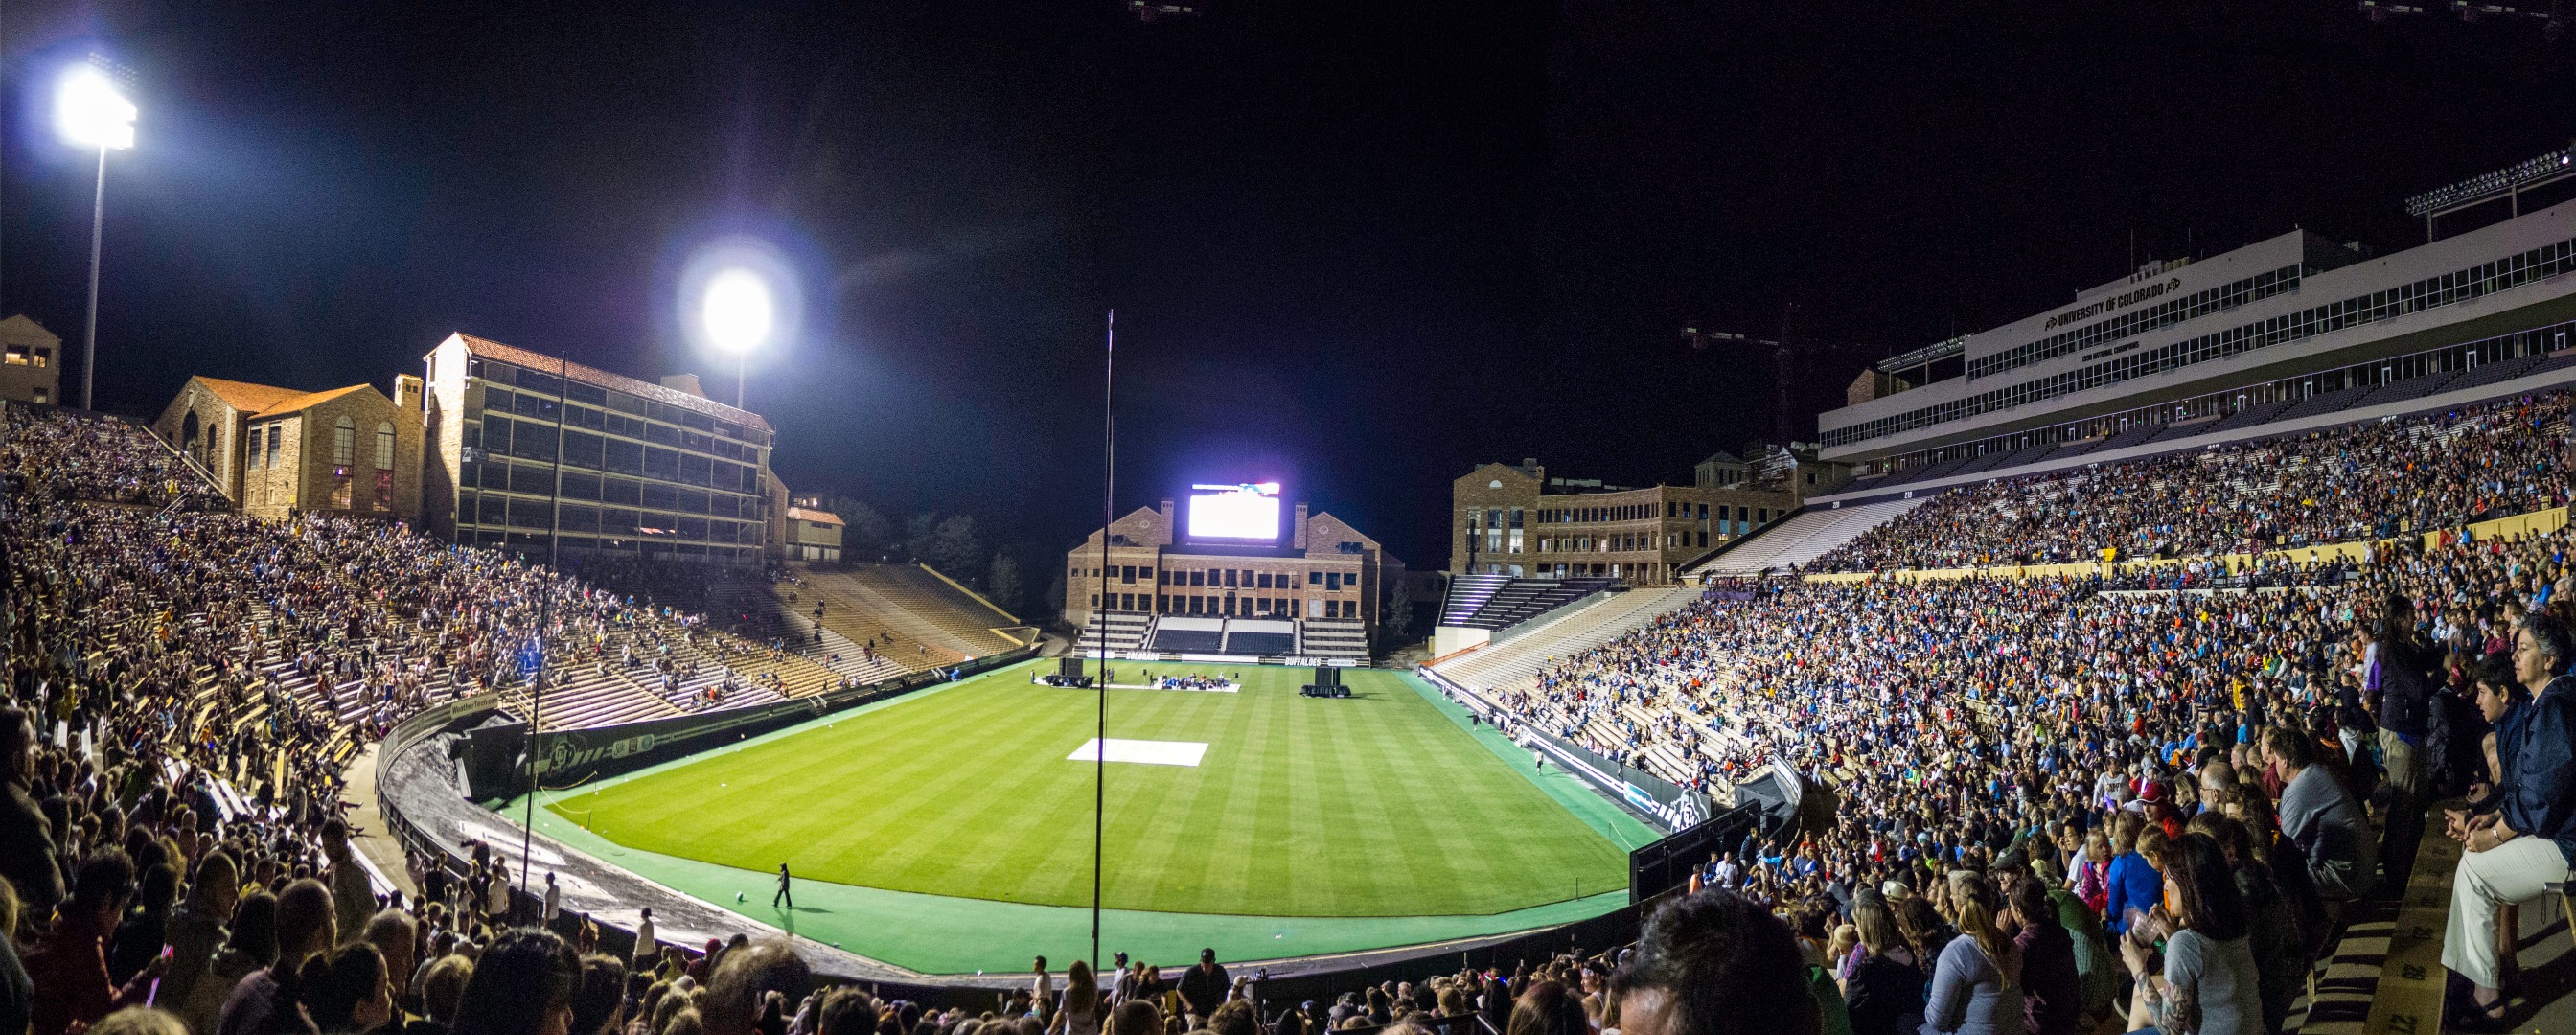
Now you can post these bad boys on Facebook, print them and hang them on your wall, or just send it to your mother so that she knows you're alive. None of that is my business though. But congrats on finishing this tutorial!
You're now armed with the tools to make awesome panoramas. Remember - the images I used were only an example. Depending on what photos you took, you can make even more splendid panoramas! Just gotta get out there, take photos of things, and bring them back home to edit!
Pitfalls
Now it's good to note that not all photos you take will merge well for whatever reason.
I'm not a Photoshop master so I can't tell you all the different reasons as to why they will fail. To combat this, I take a lot of photos. And I mean A LOT. And all from varying angles. This maximizes the chances of an automerge to work and me to be happy.
You can also just manually merge photos that Photoshop refuses to do automatically. That's a different tutorial for a different time.
Most notable pitfalls I've found have been as follows:
1. Lots of movement - I've have buddies/people constantly walking through my panorama frames, thus making a lot of it unusable until I hit the individual photos in Photoshop before merging them.
2. Photoshop just can't figure out too complicated of images. I just don't attempt to make panoramic images of super artsy geometric shots. It usually makes Photoshop freak out so I just merge them manually.
3. You didn't take enough overlapping photos. Photoshop just didn't know what to do with the info it has.
4. Conversely, you take too many overlapping photos. Sometimes having different angles and too much overlap will make Photoshop freak out. That is bad.
More Examples
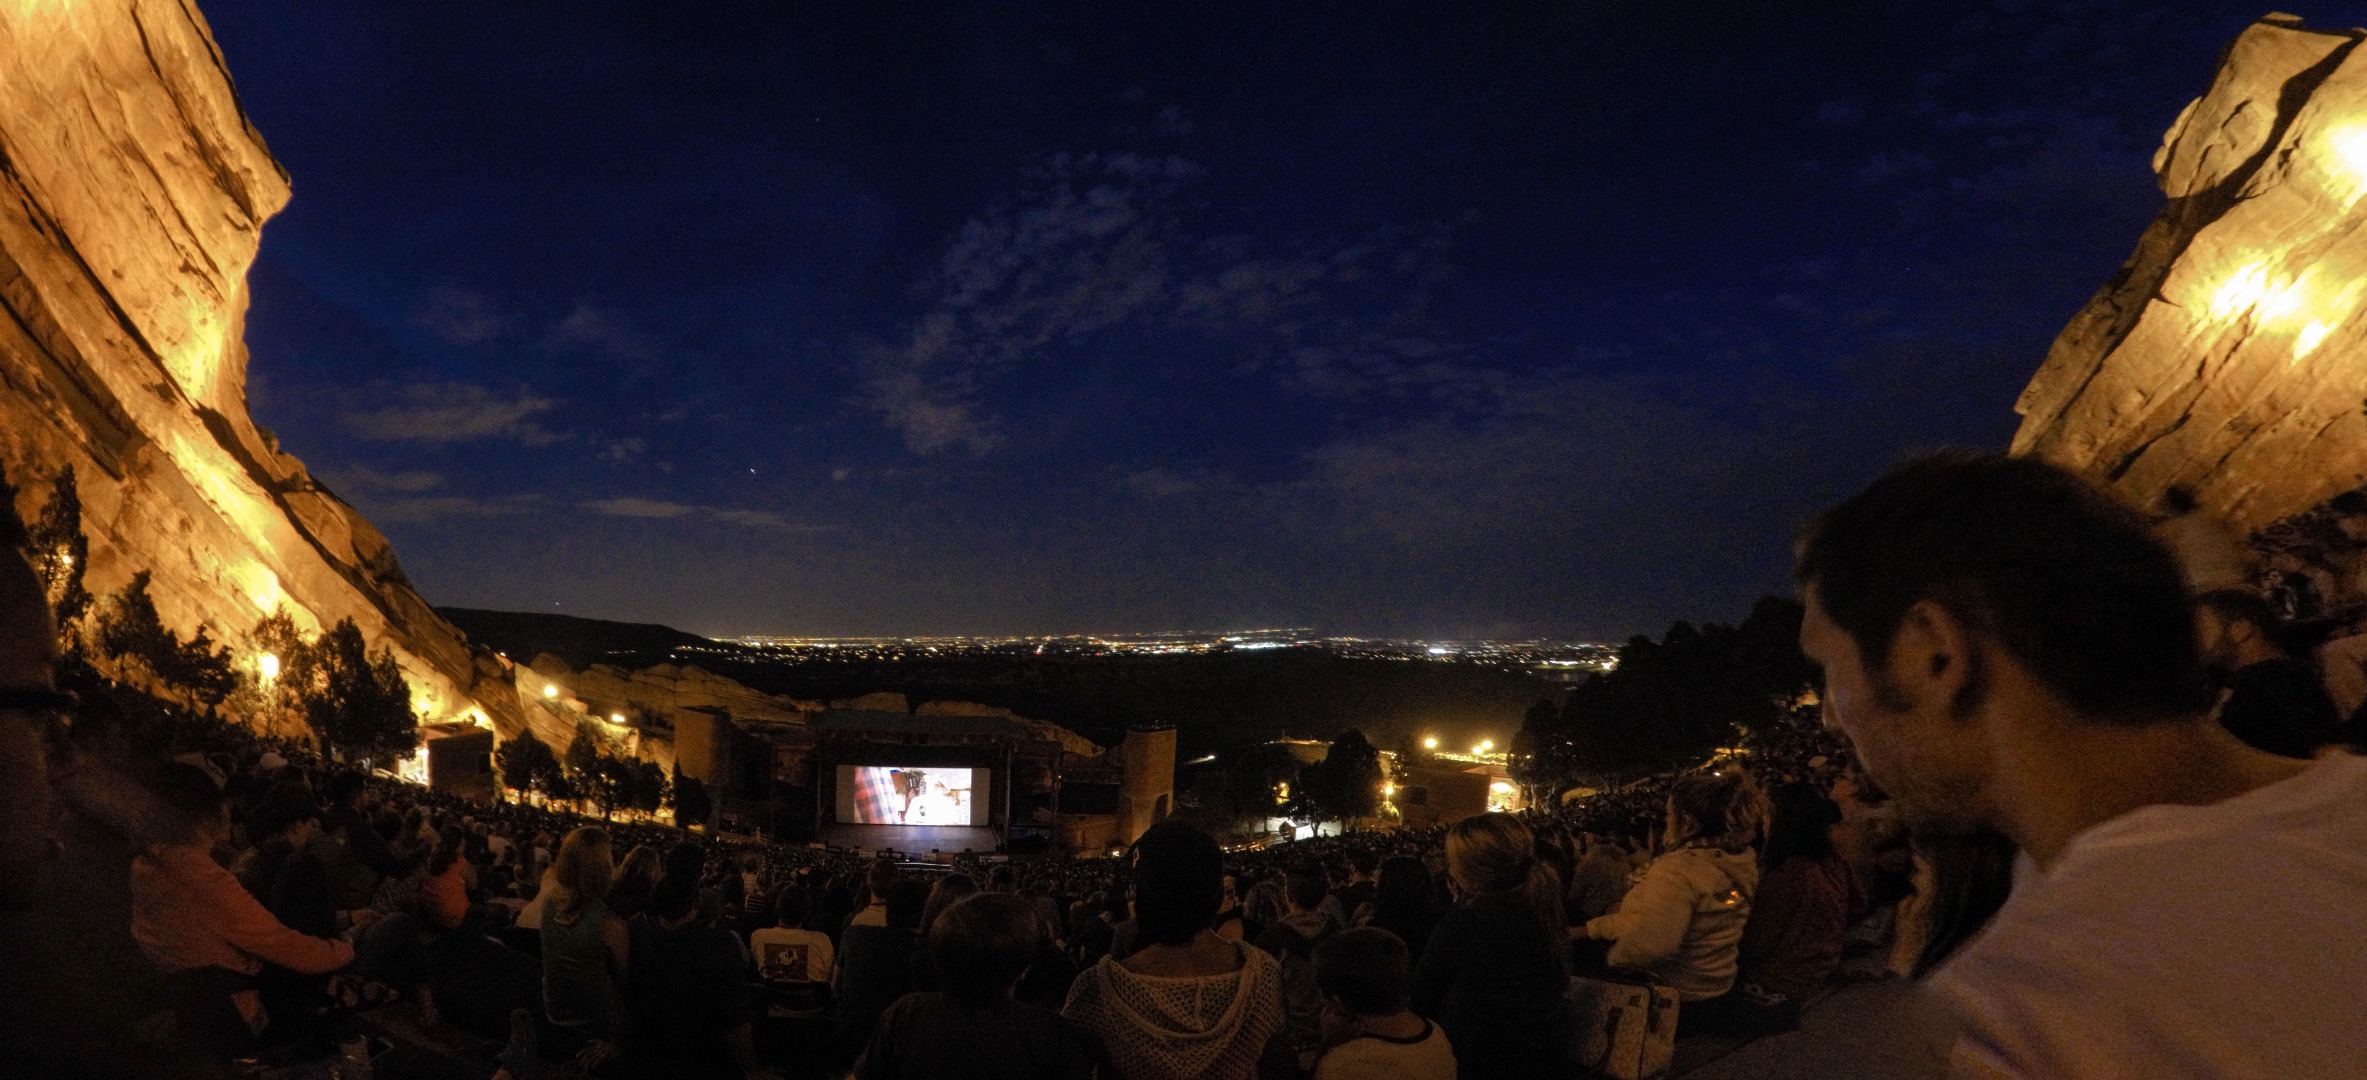

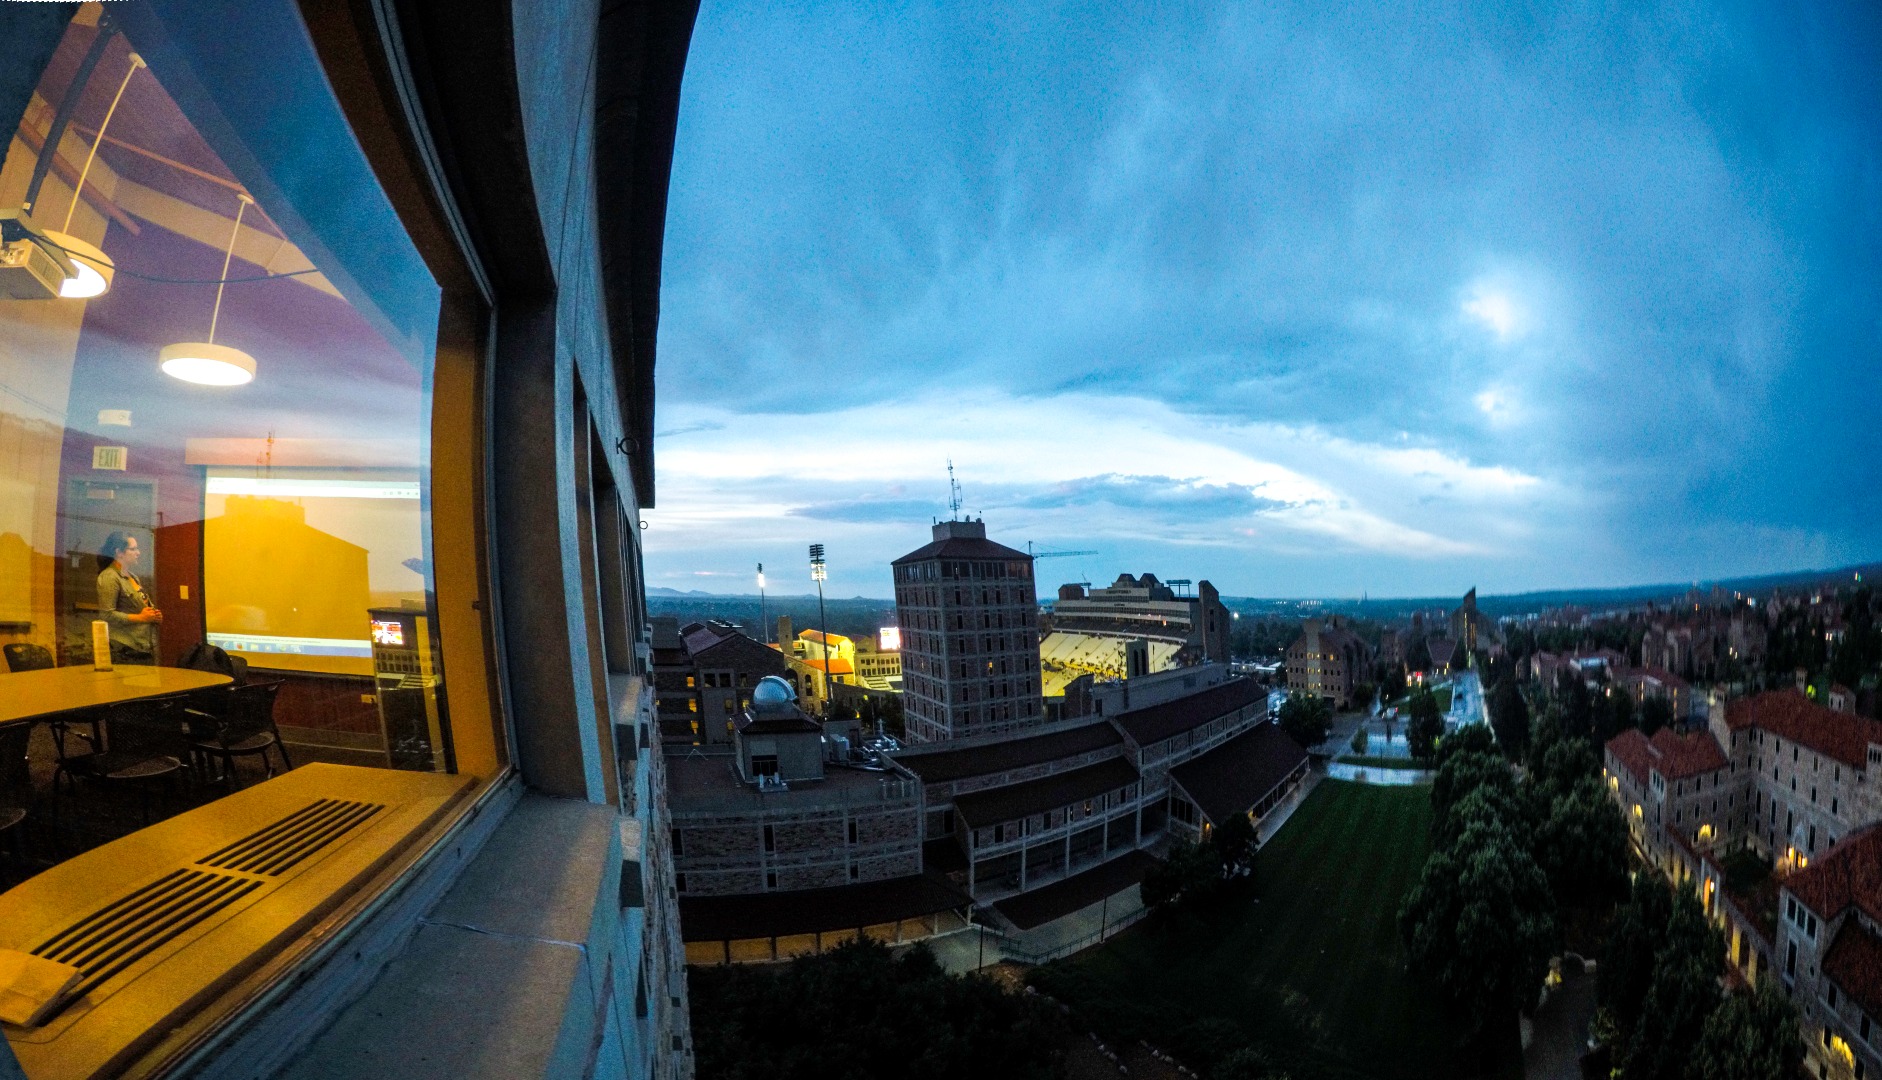
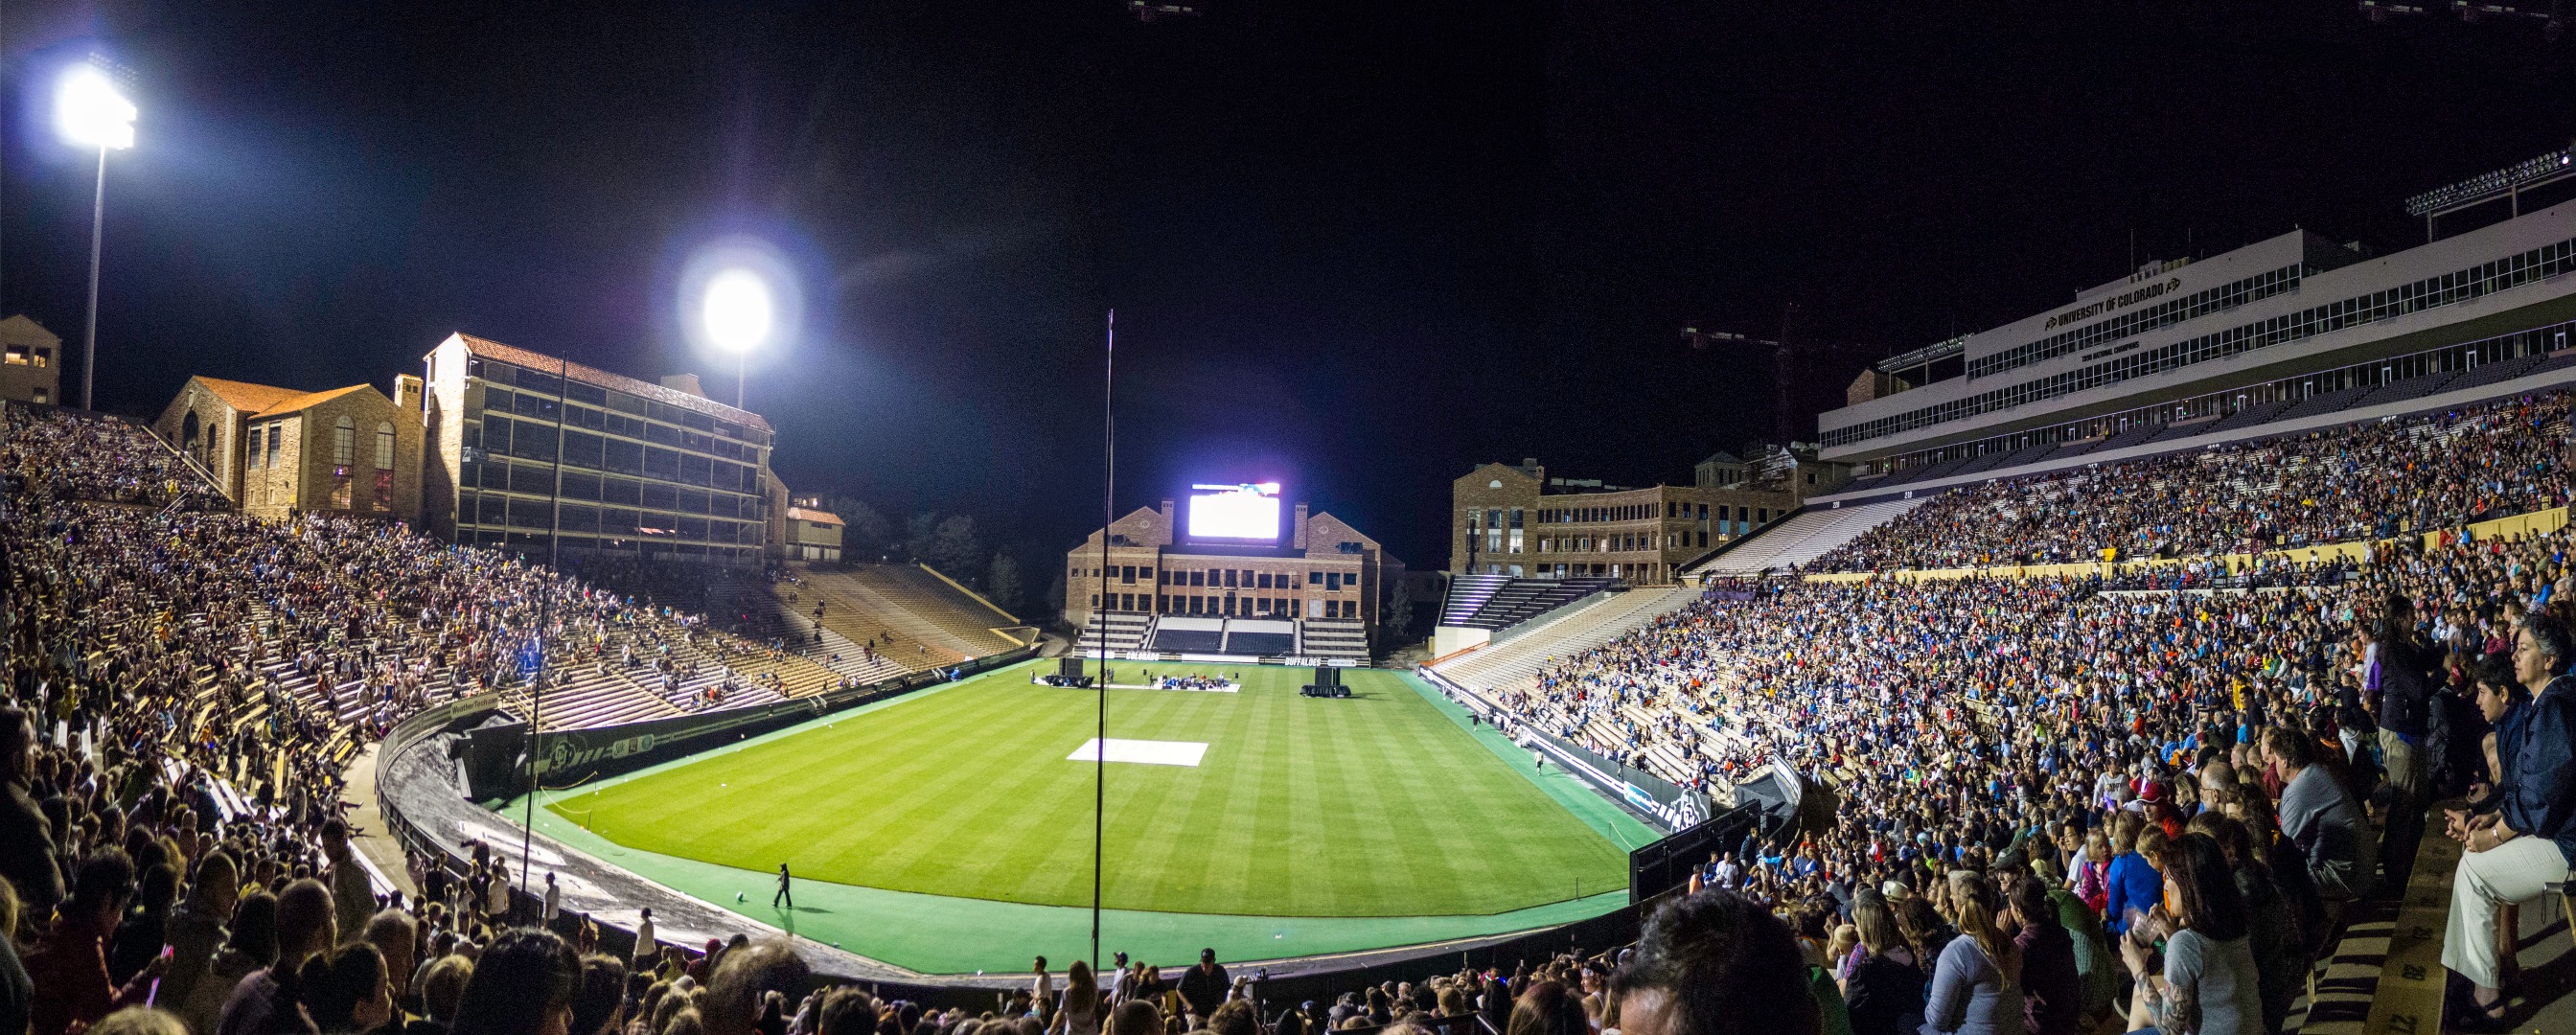
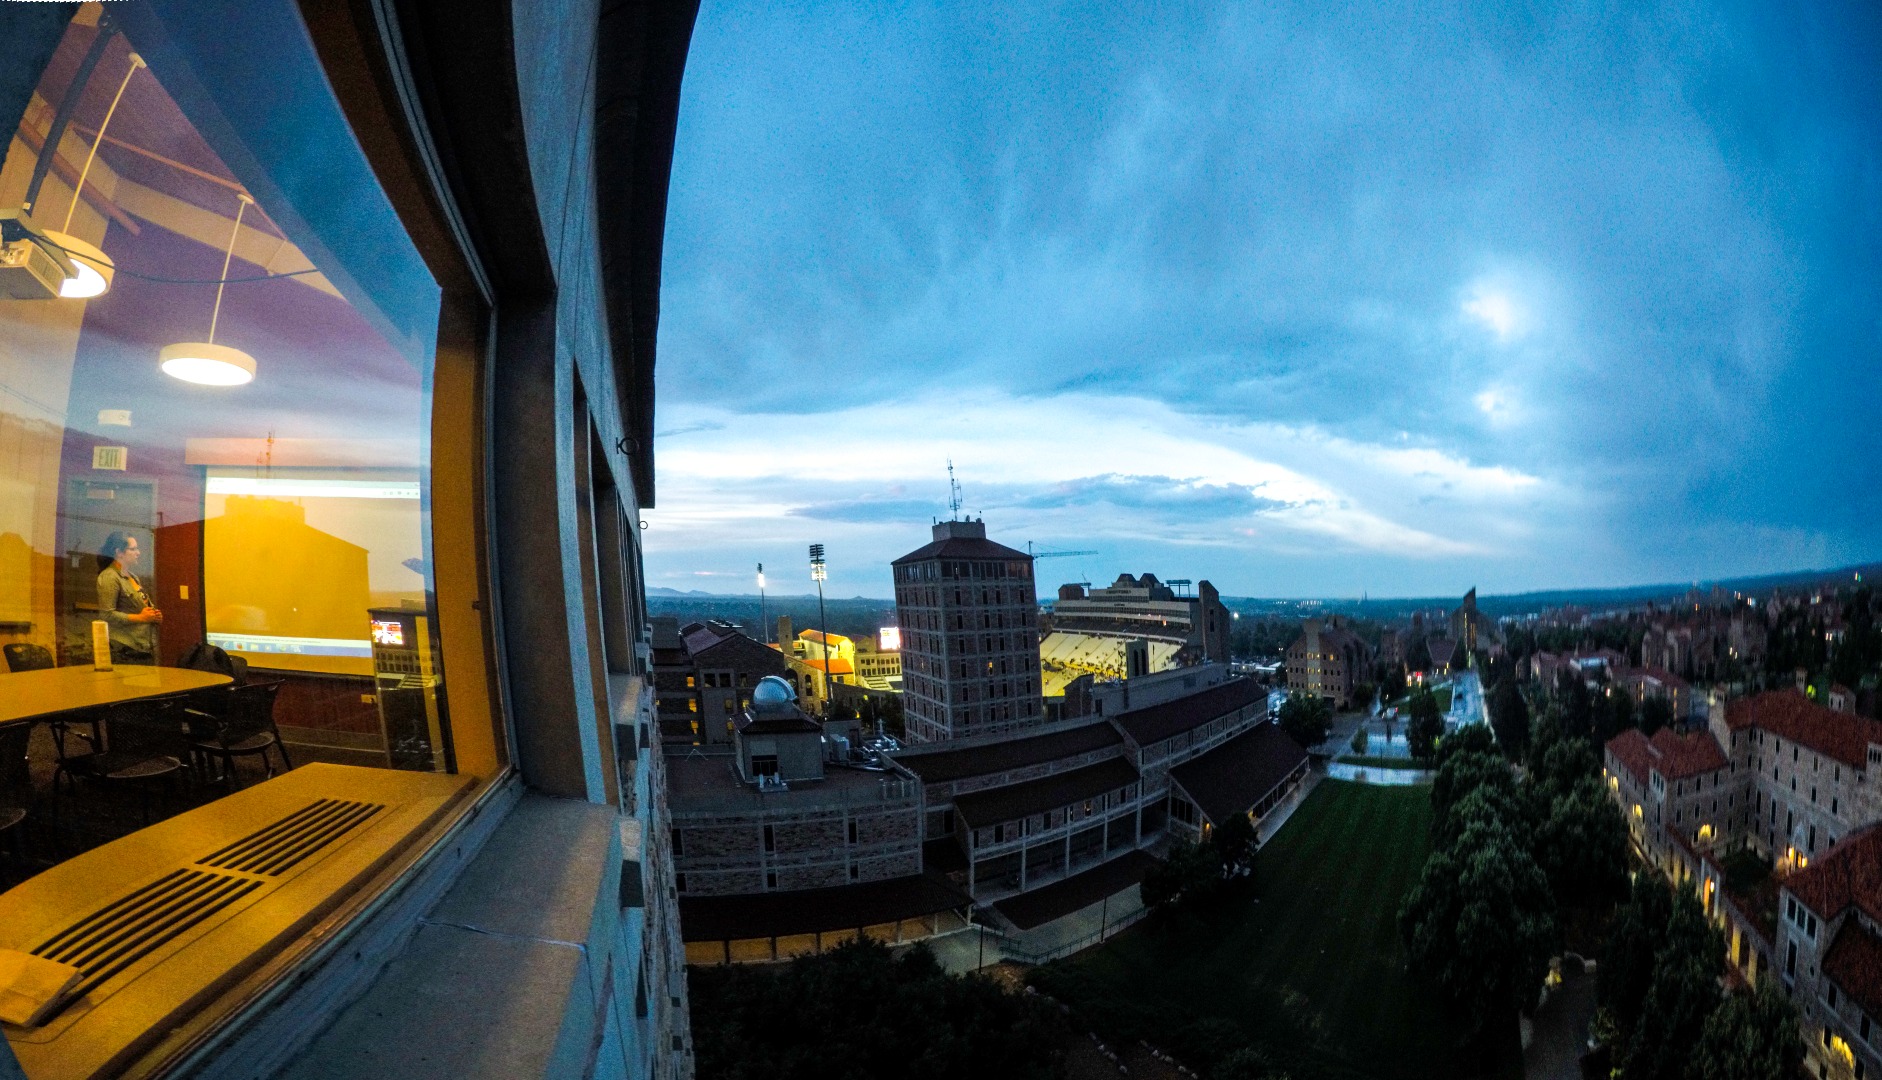
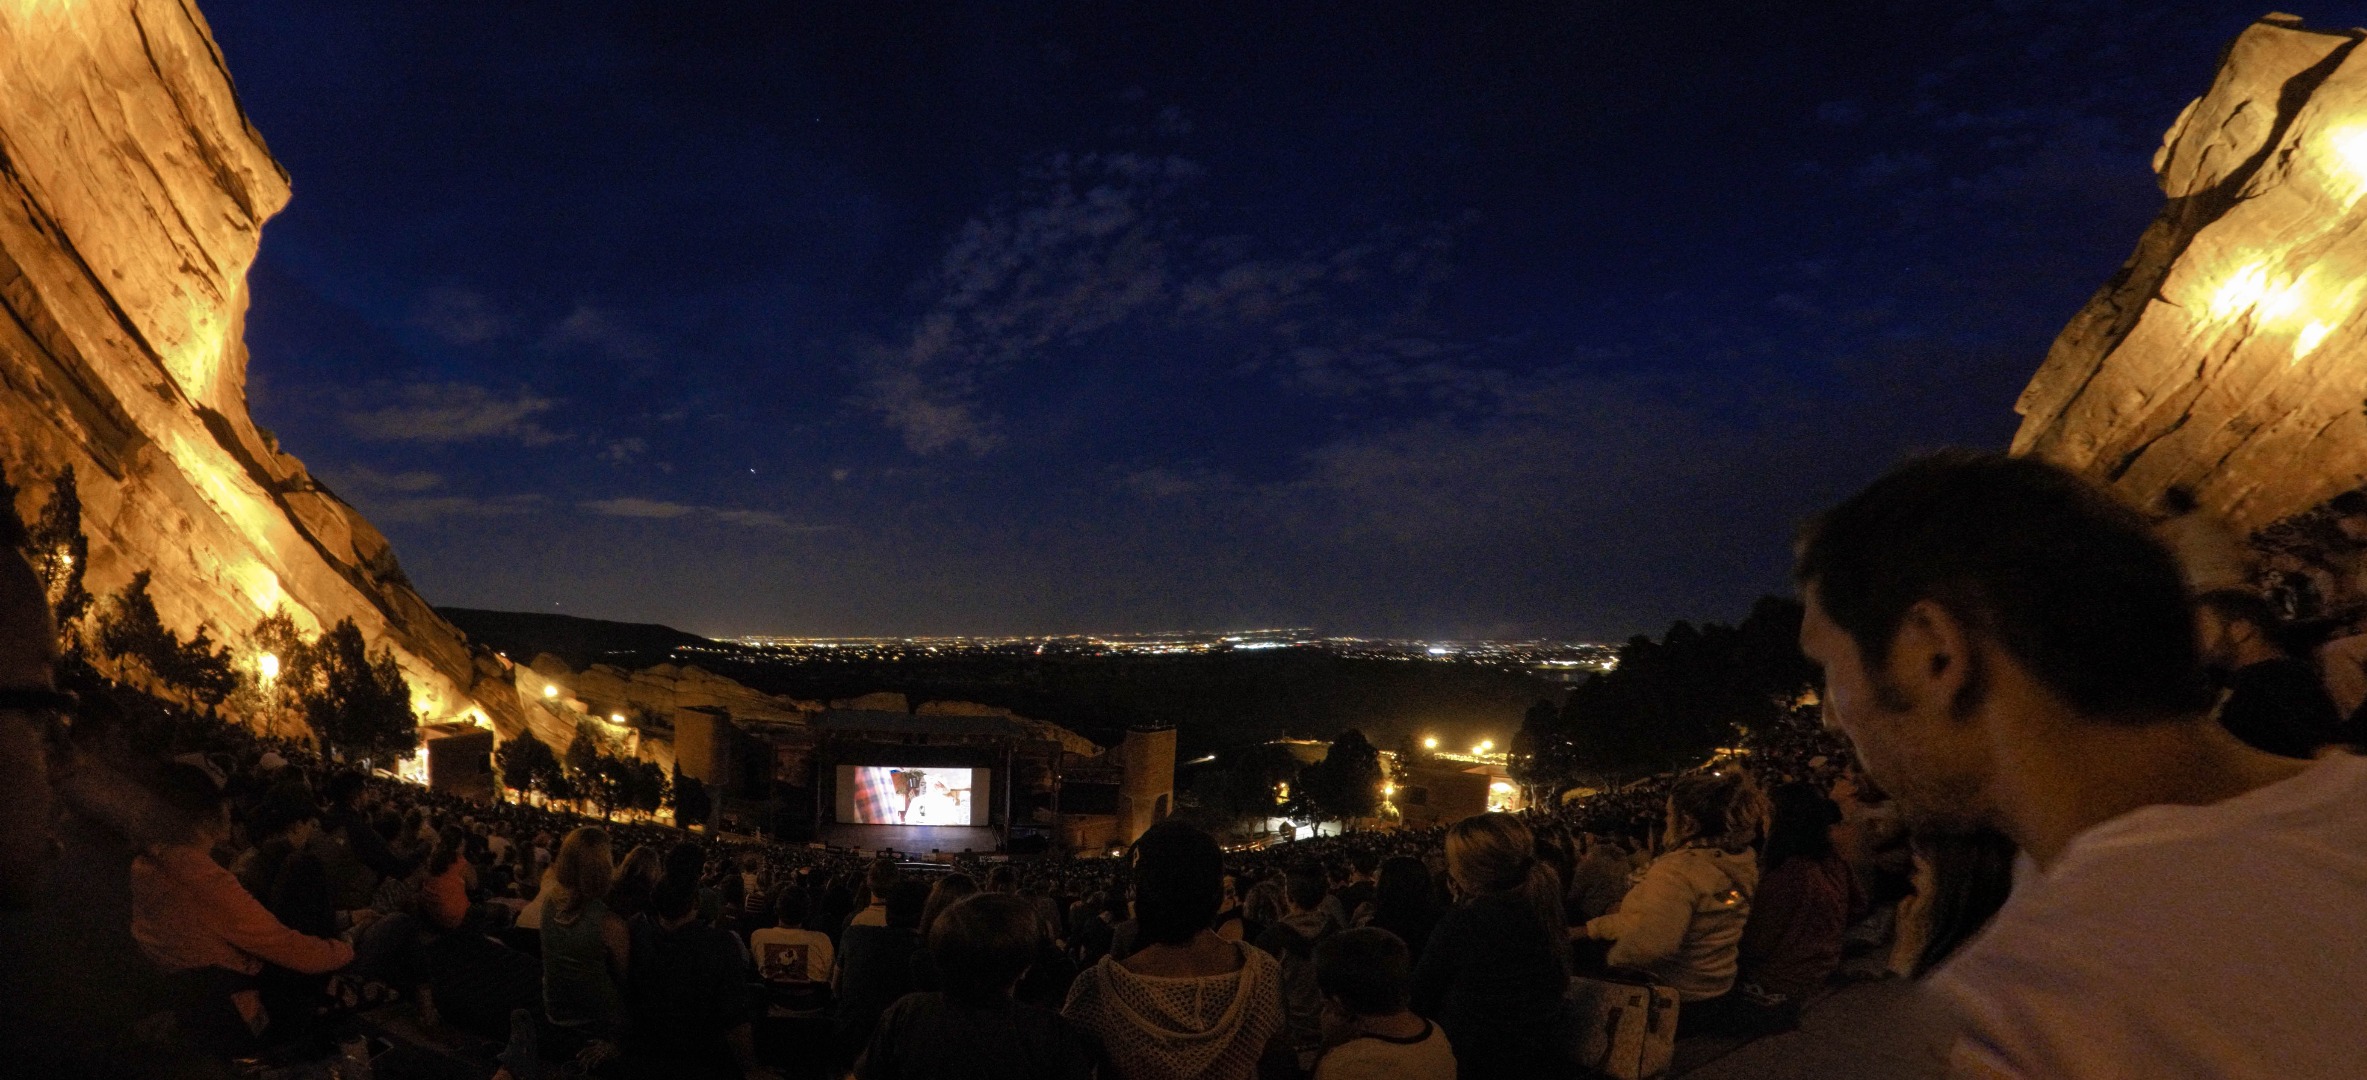
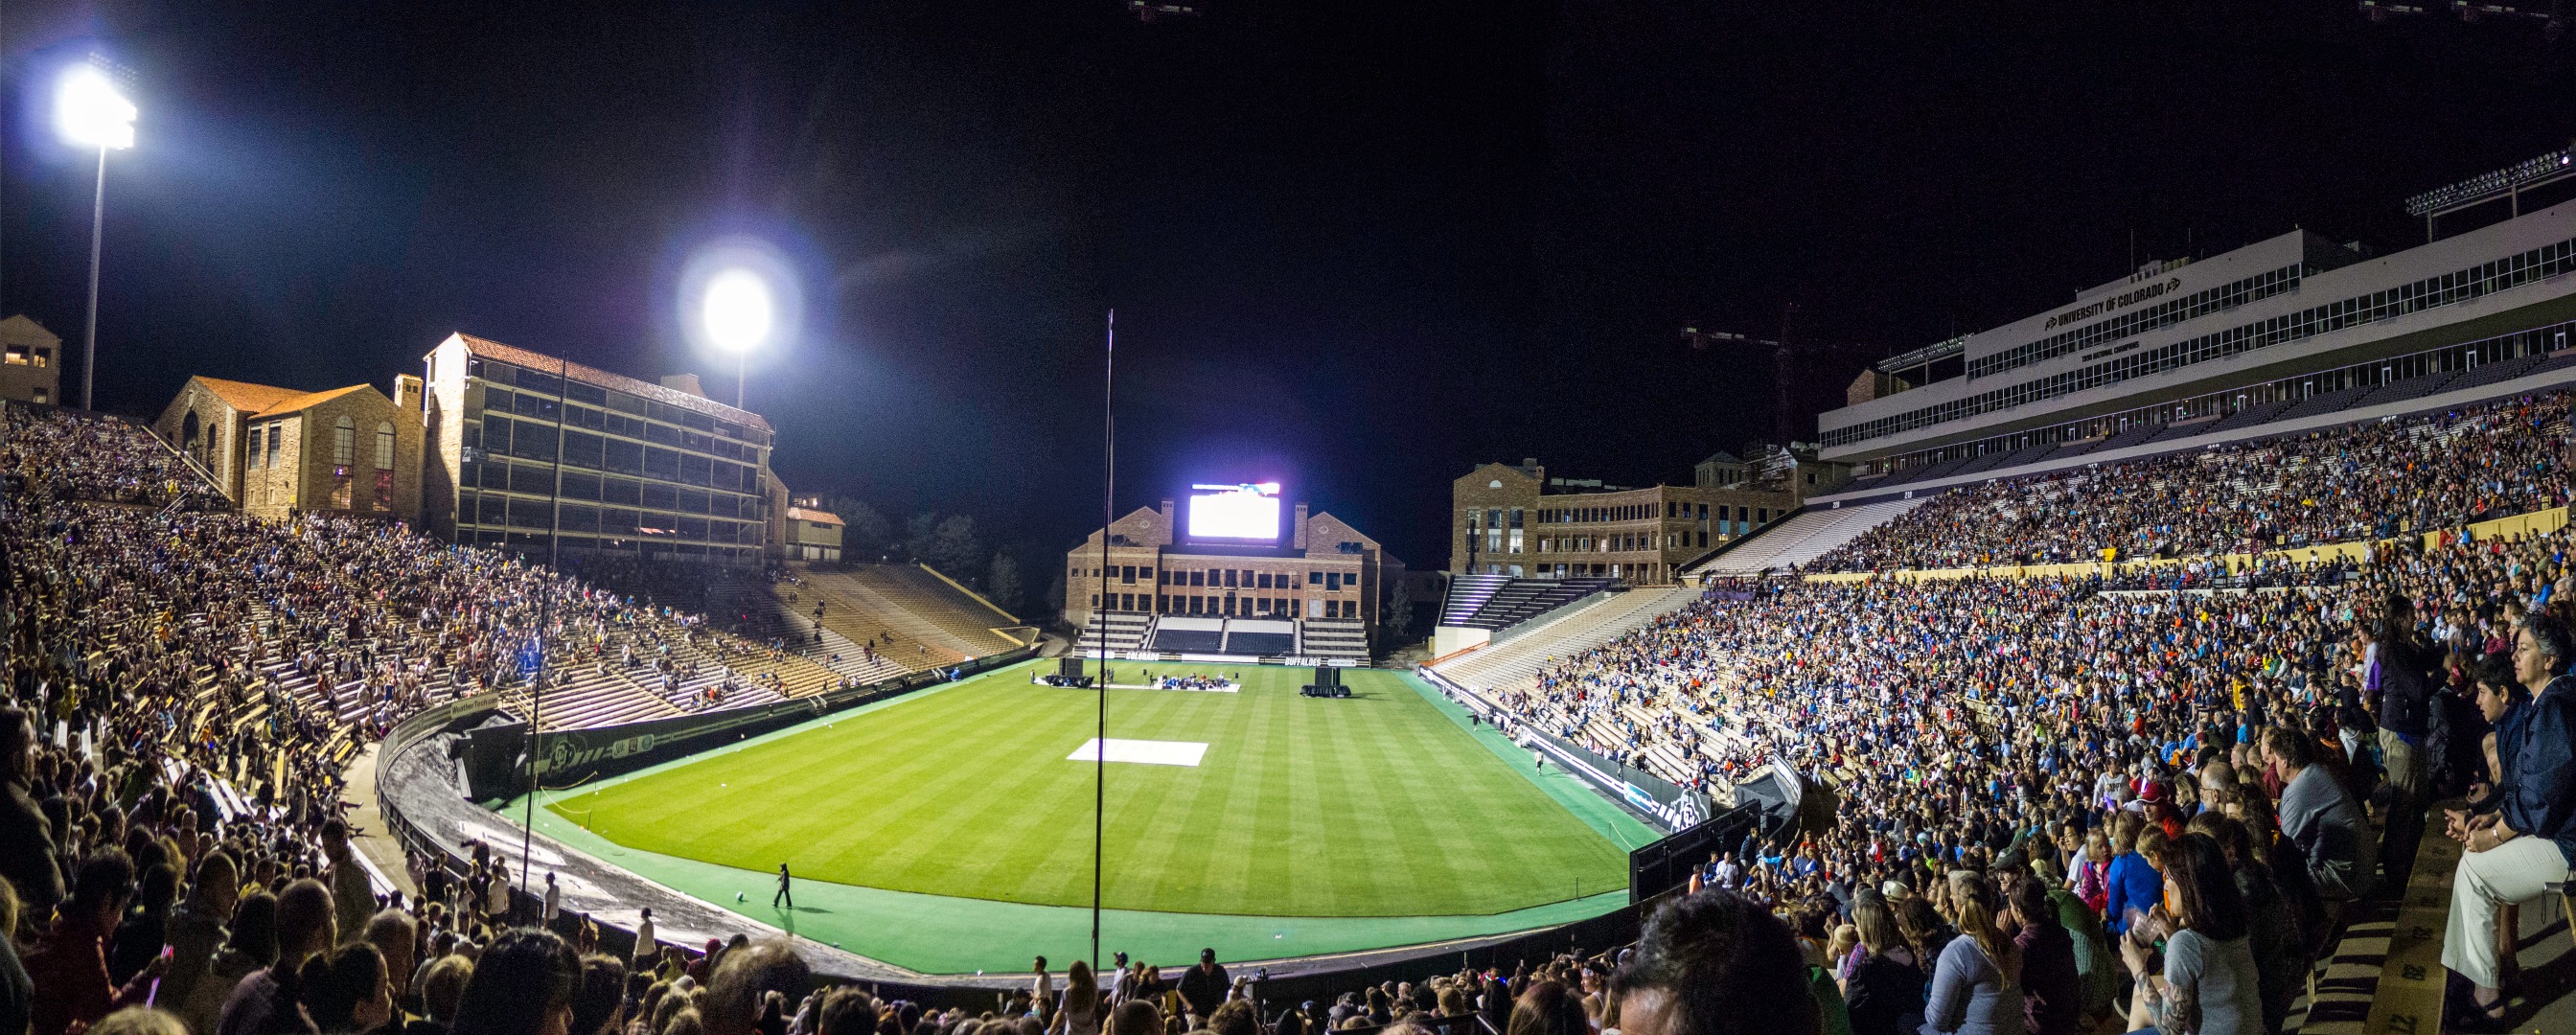
Here are a few examples of panoramas I've made recently from images shot from my LX5 and my GoPro Hero 4 Silver. All have been edited in Lightroom and Photoshop to varying degrees, but you get the idea! Get out there and shoot!
Remember - if you liked this, please go to the Photography Contest and vote for me! Thank you so much!
https://www.instructables.com/contest/photography/