Making Your Instagram Experience Safer
by English249Group3 in Living > Life Hacks
185 Views, 0 Favorites, 0 Comments
Making Your Instagram Experience Safer
Our purpose in drafting these instructions are to educate as well as give others the knowledge to protect themselves online. We provide viewers with step by step visual instructions as to how they should go about completing these steps.
Supplies
Phone/Computer
Instagram Account
Enable Two-factor Authentication

1.
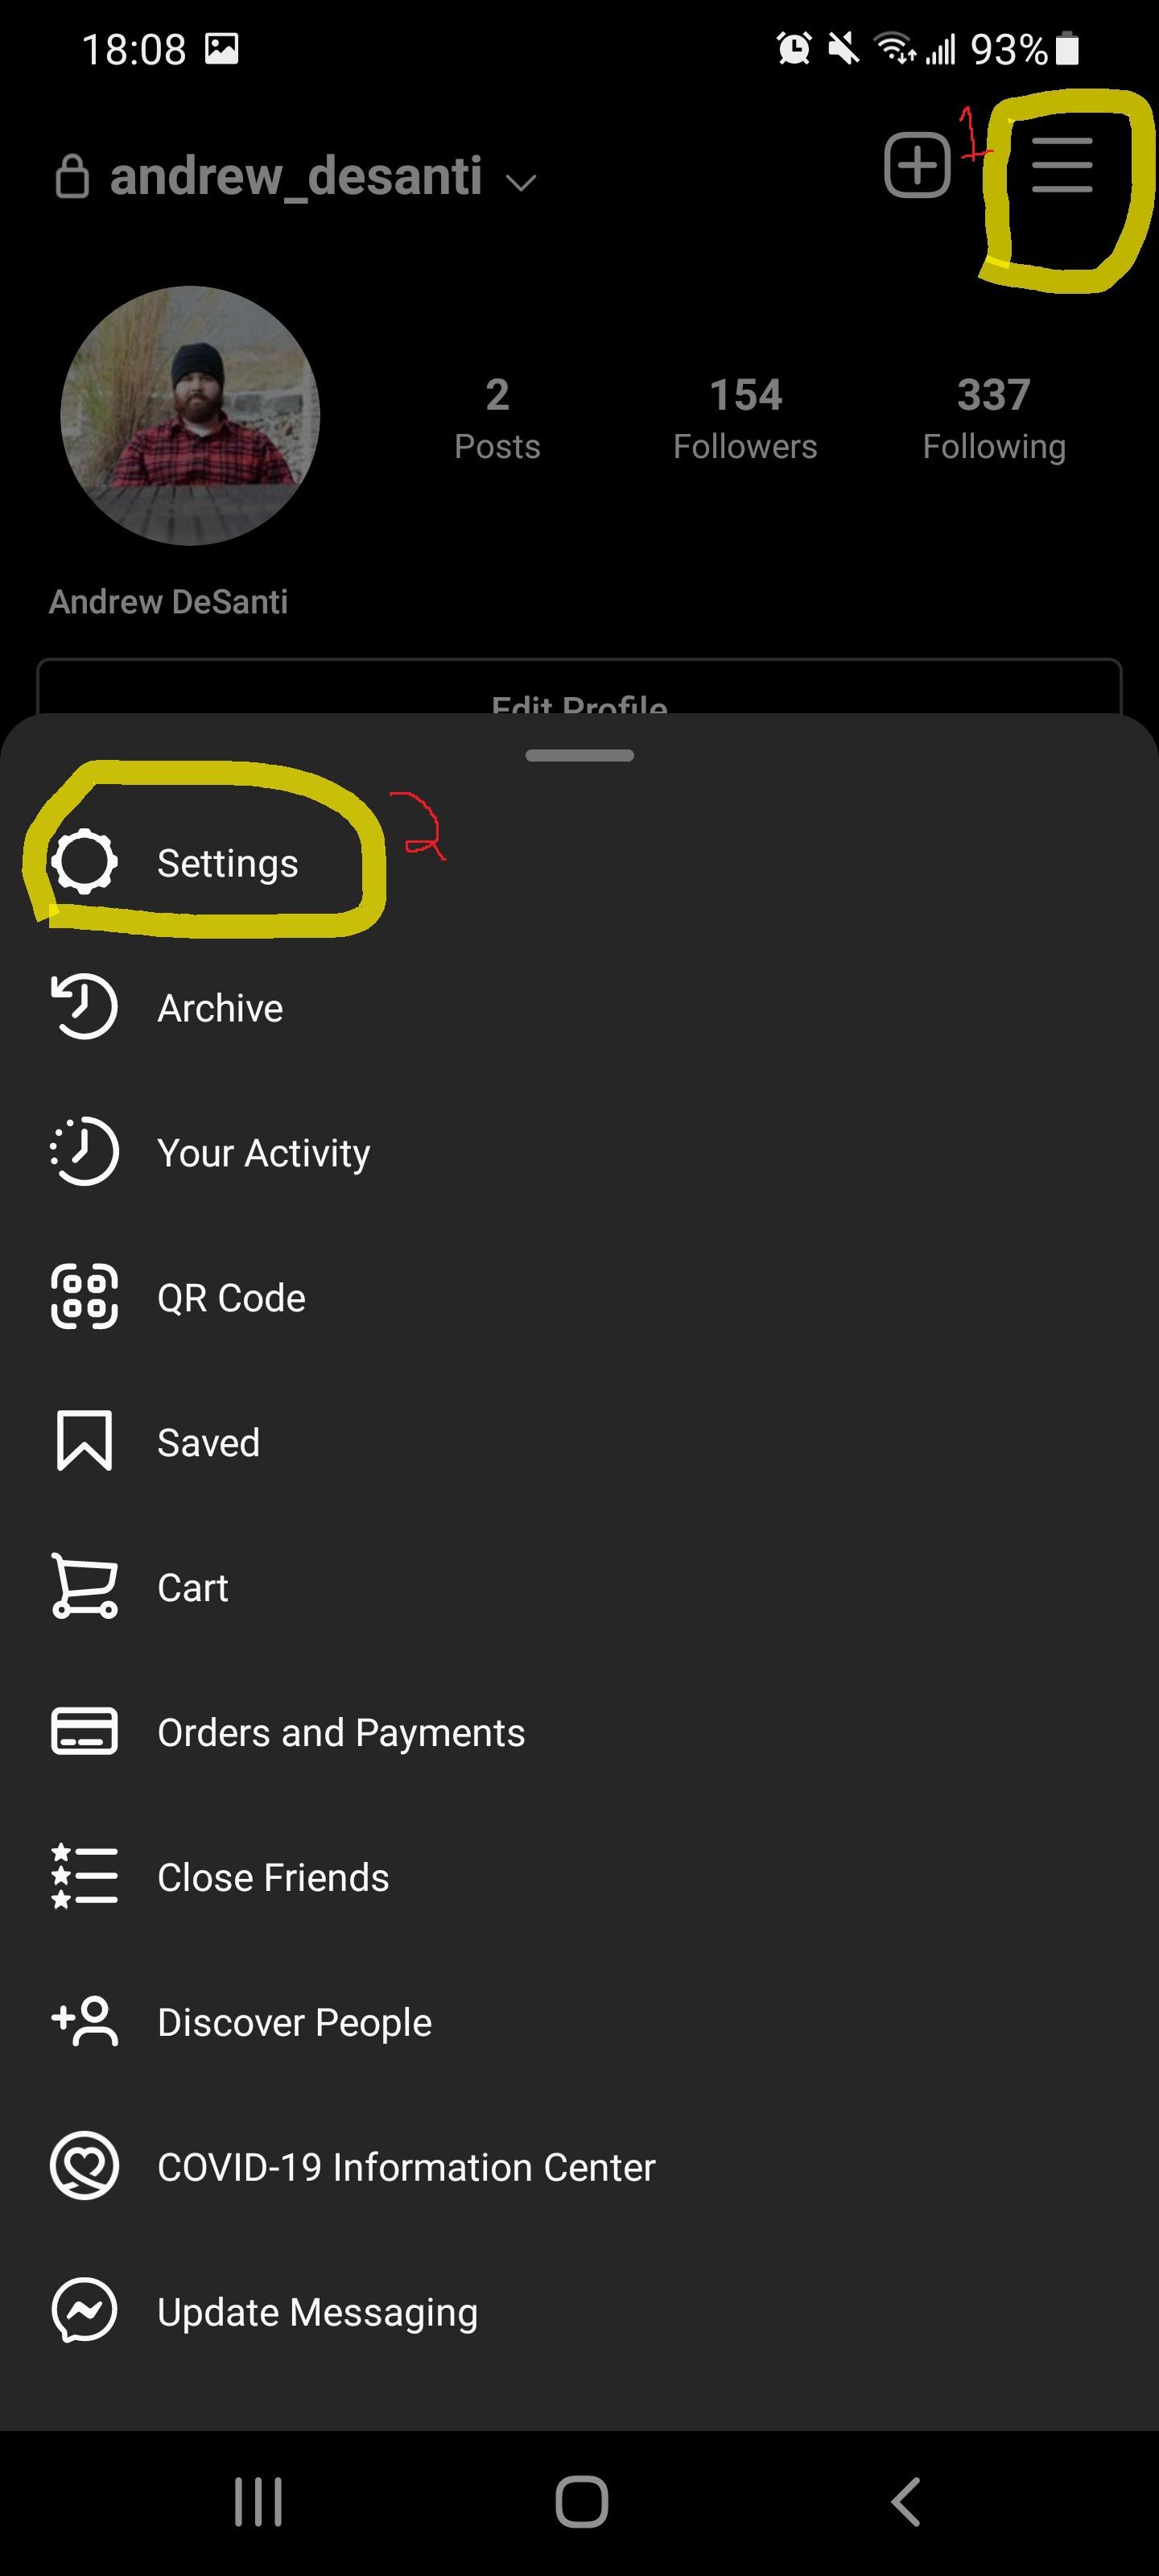
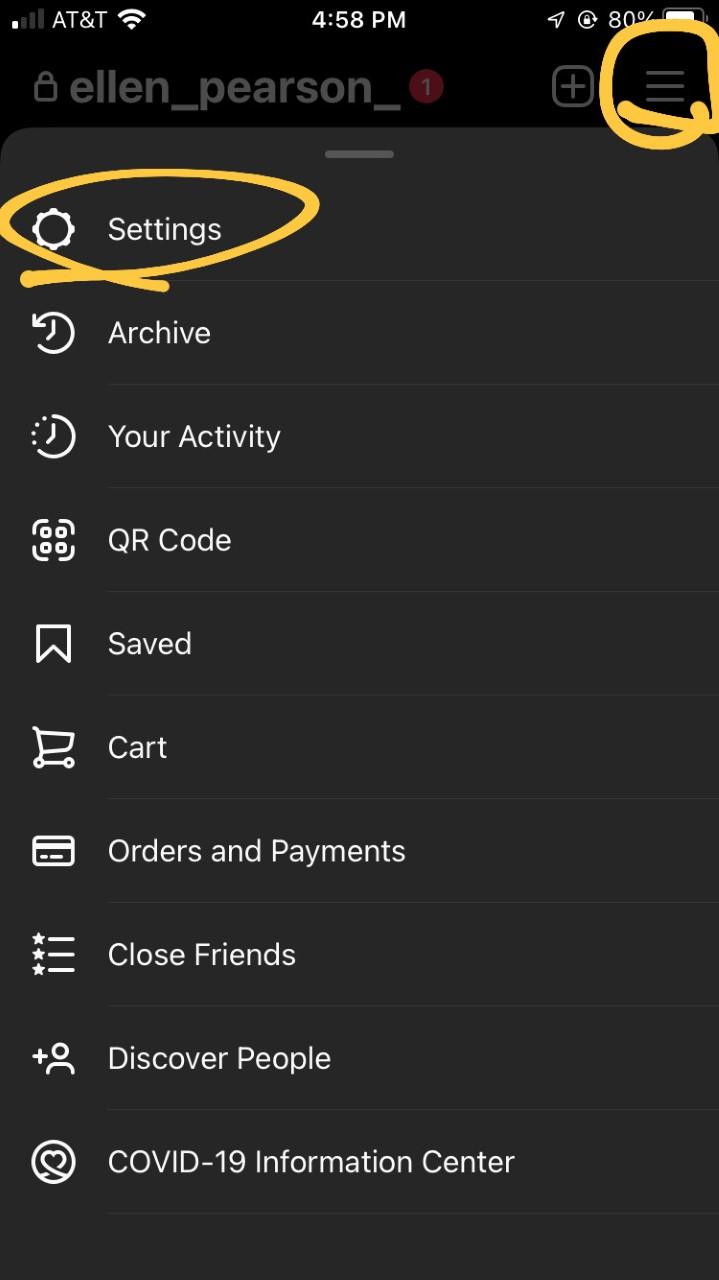
From your account screen, tap the three horizontal lines in the top right corner. They will bring up a menu with a variety of different options, but the one you’ll pick is “Settings.”
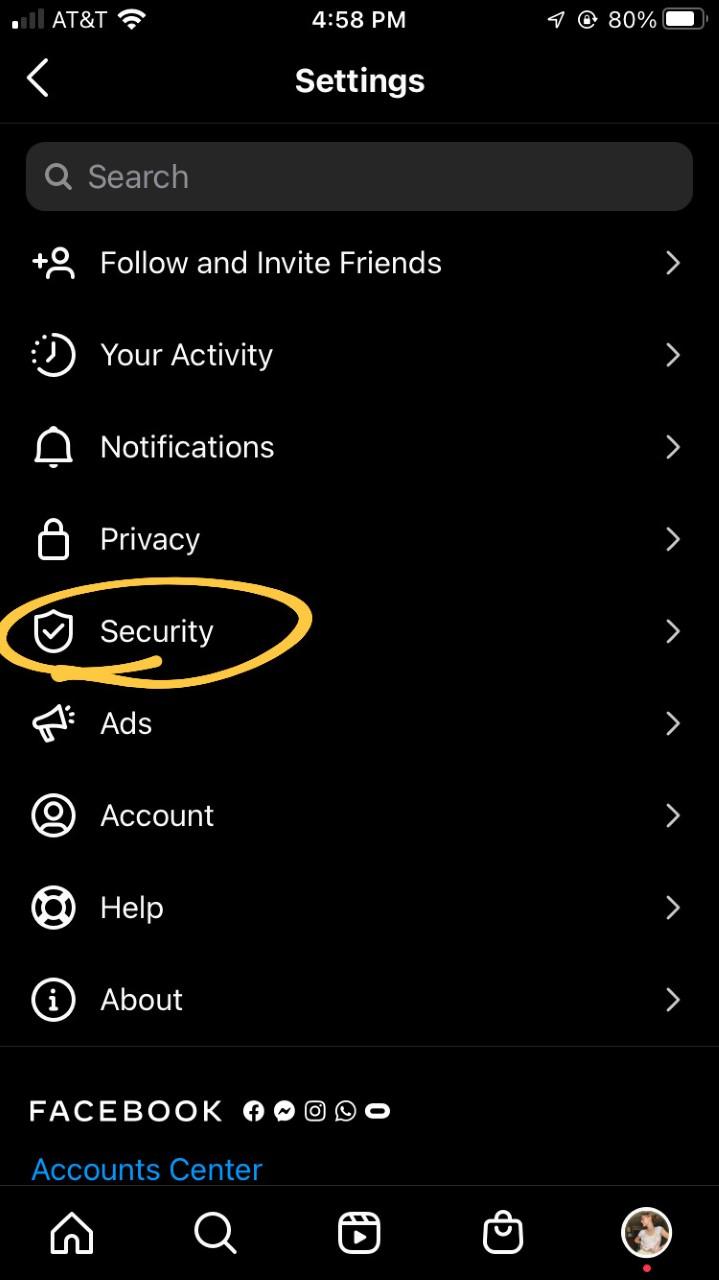
2.
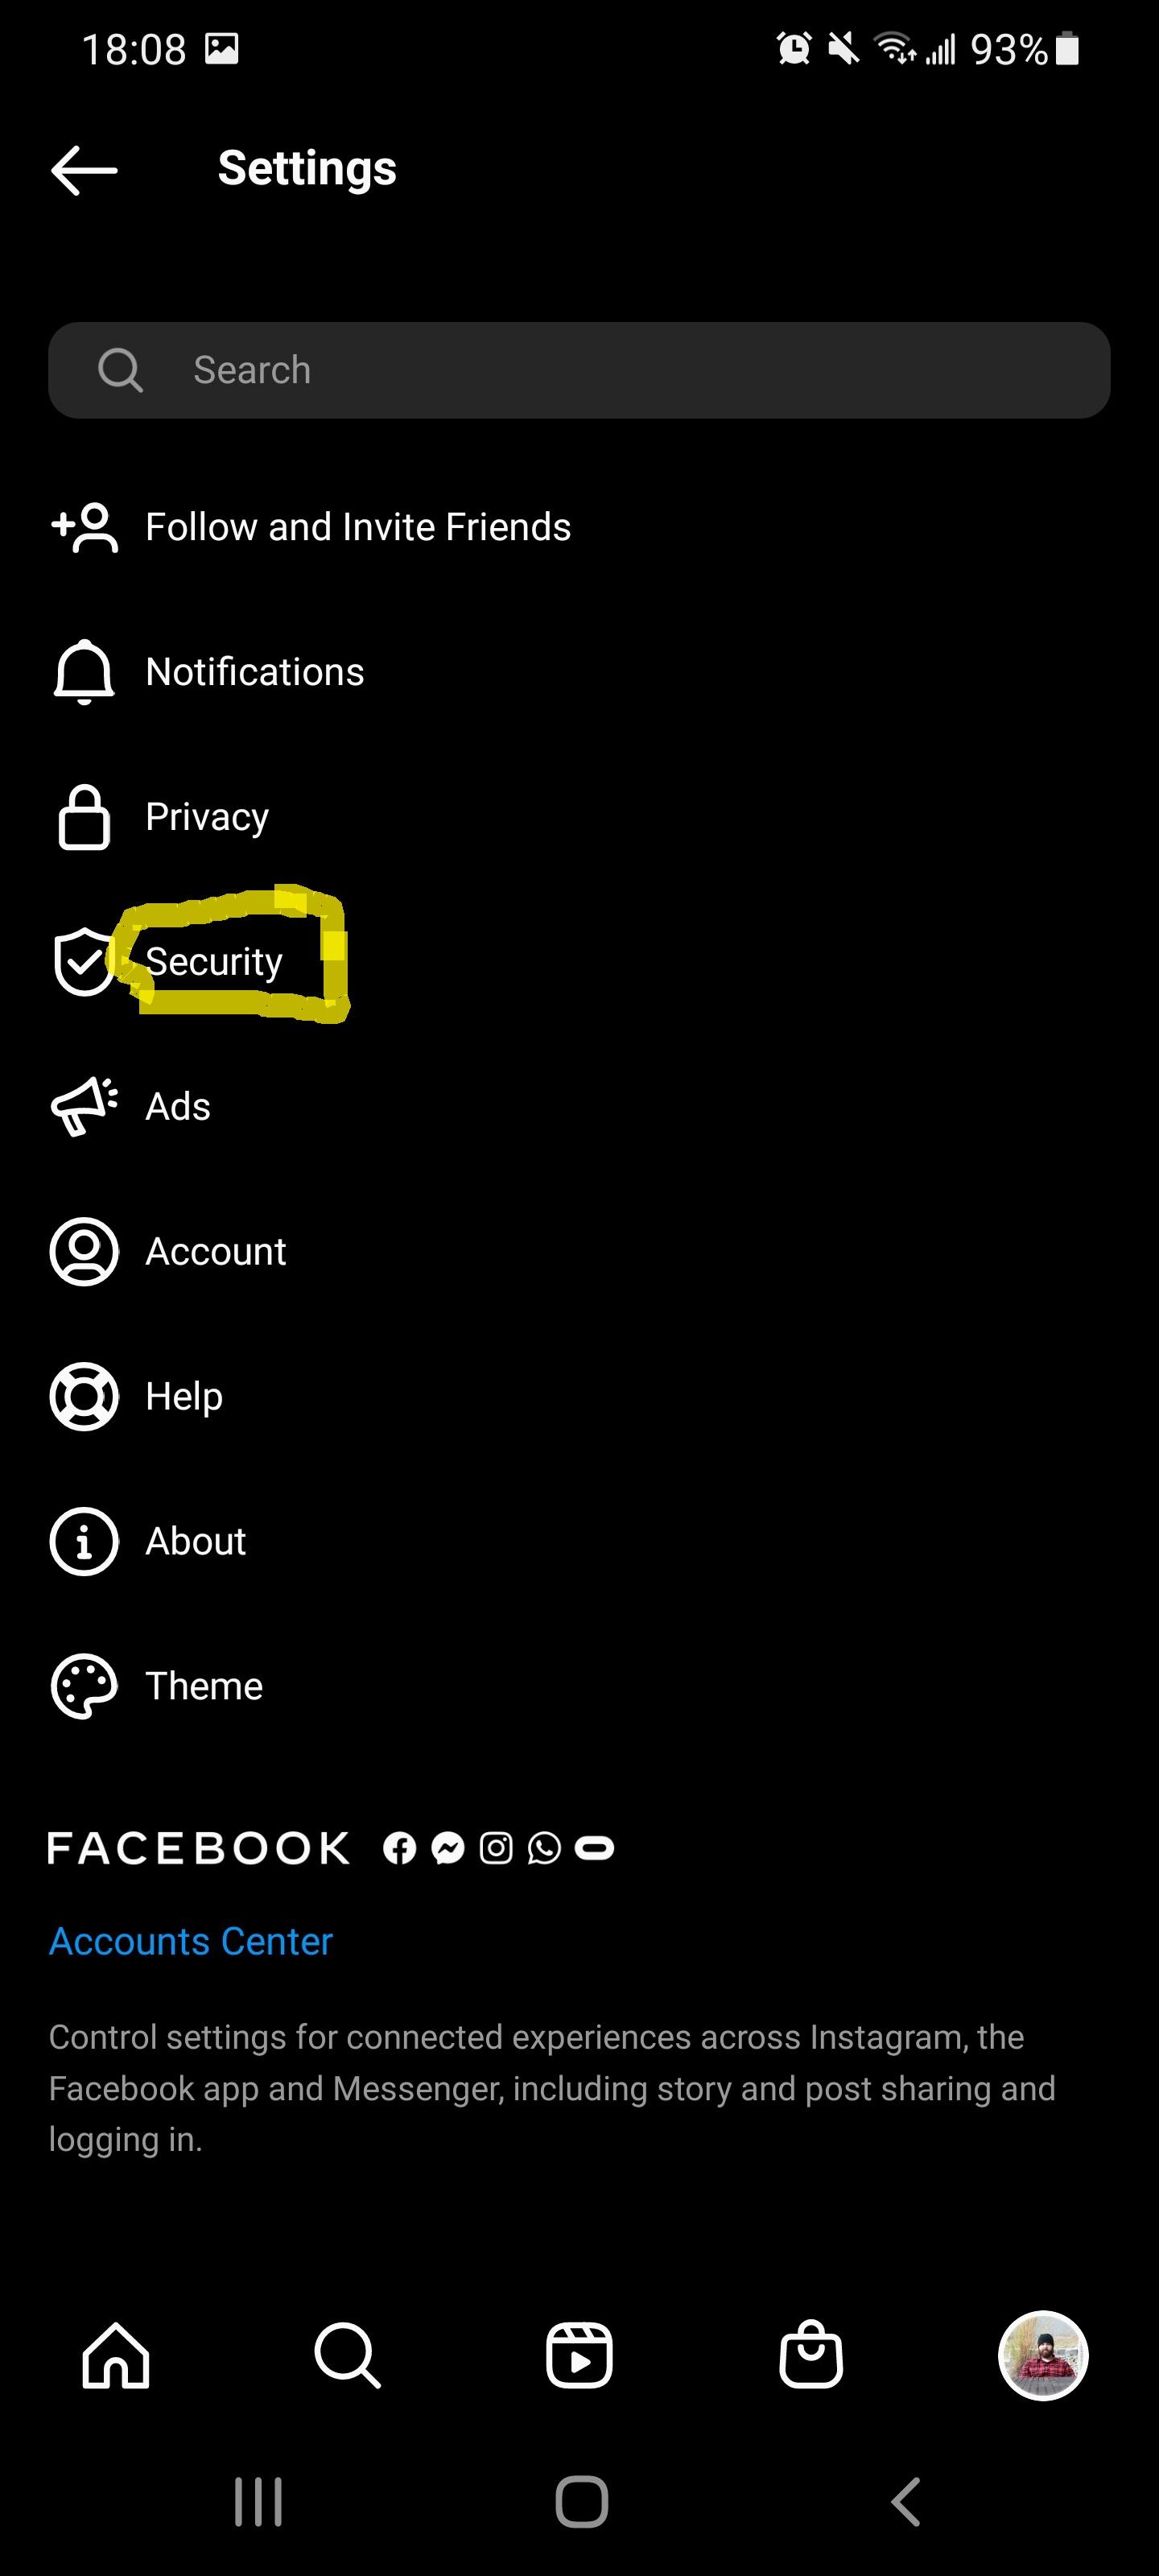
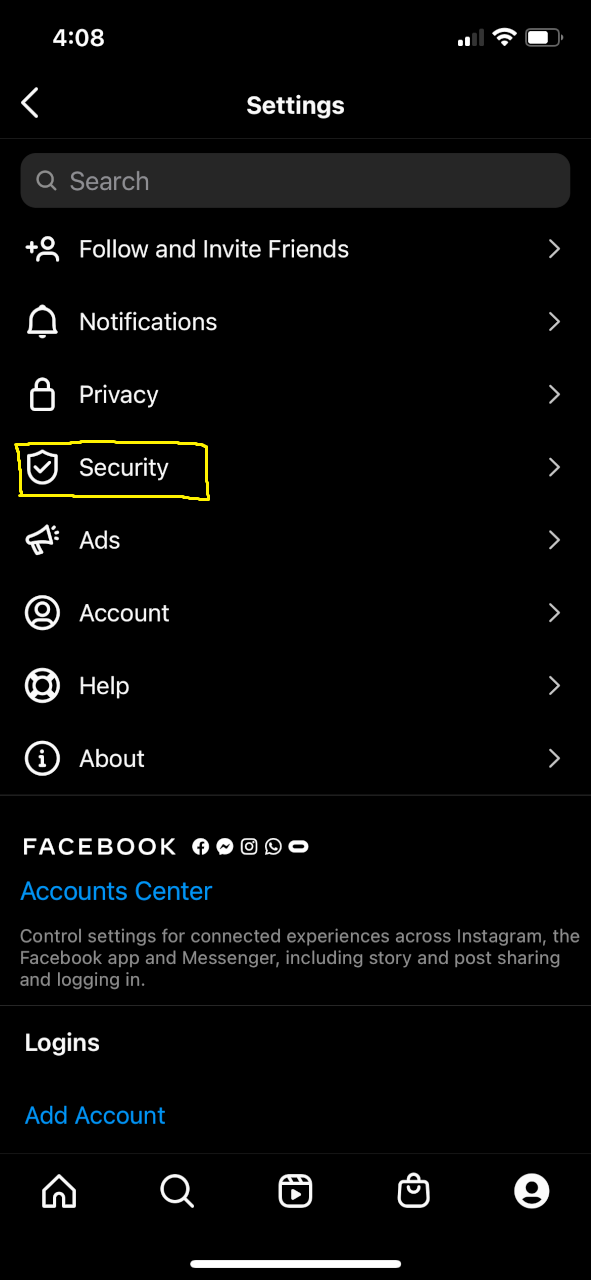
Once you’re in the settings menu, you’ll see more options, and from there, you will navigate to “Security.”
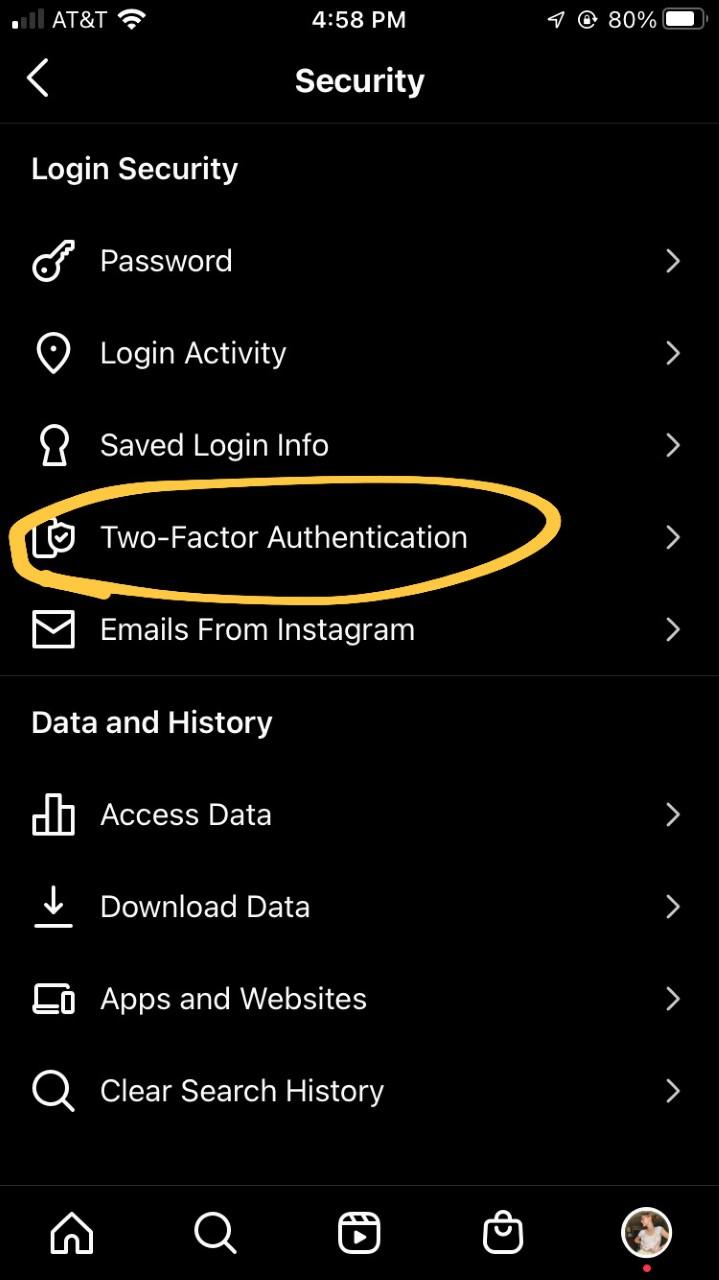
3.
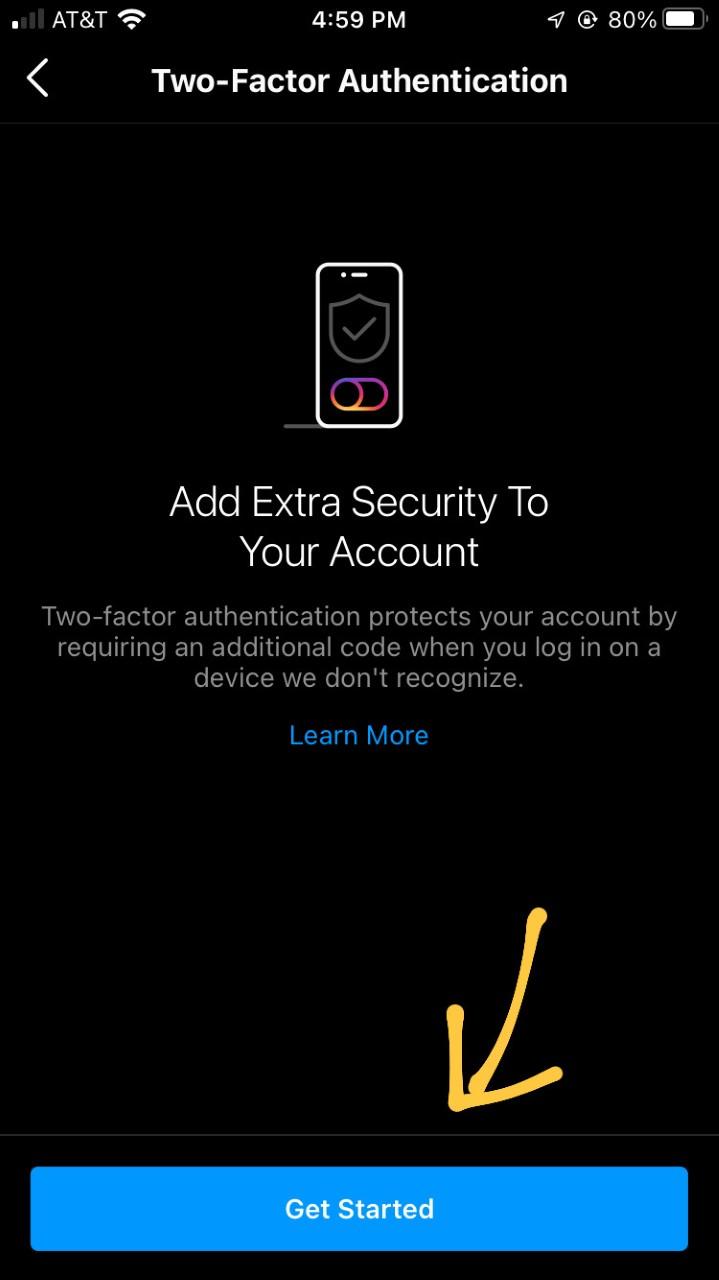
In the security menu, you’ll see an option that says “Two-Factor Authentication.” When you click on it, Instagram will bring up a screen asking you to Get Started, as well as giving you more information on the setting.
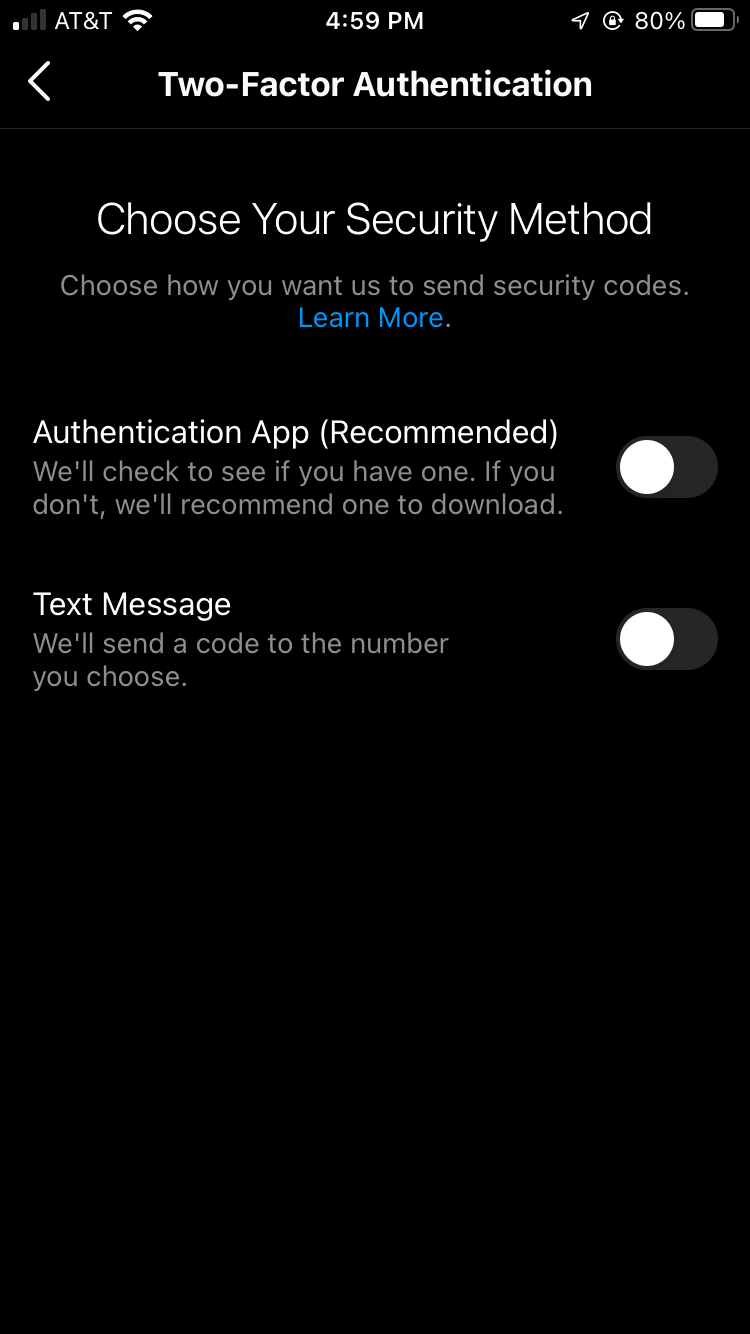
4.
From here, you have two options of which way you’d like to enable two-factor authentication. You could either download an app such as duo mobile or google authenticator, or receive a text message with a code. However, the better option of the two is the latter. Both authenticator apps are rated below three stars on the app store, with a significant majority of users saying both apps are far more stressful than they’re worth.
5.
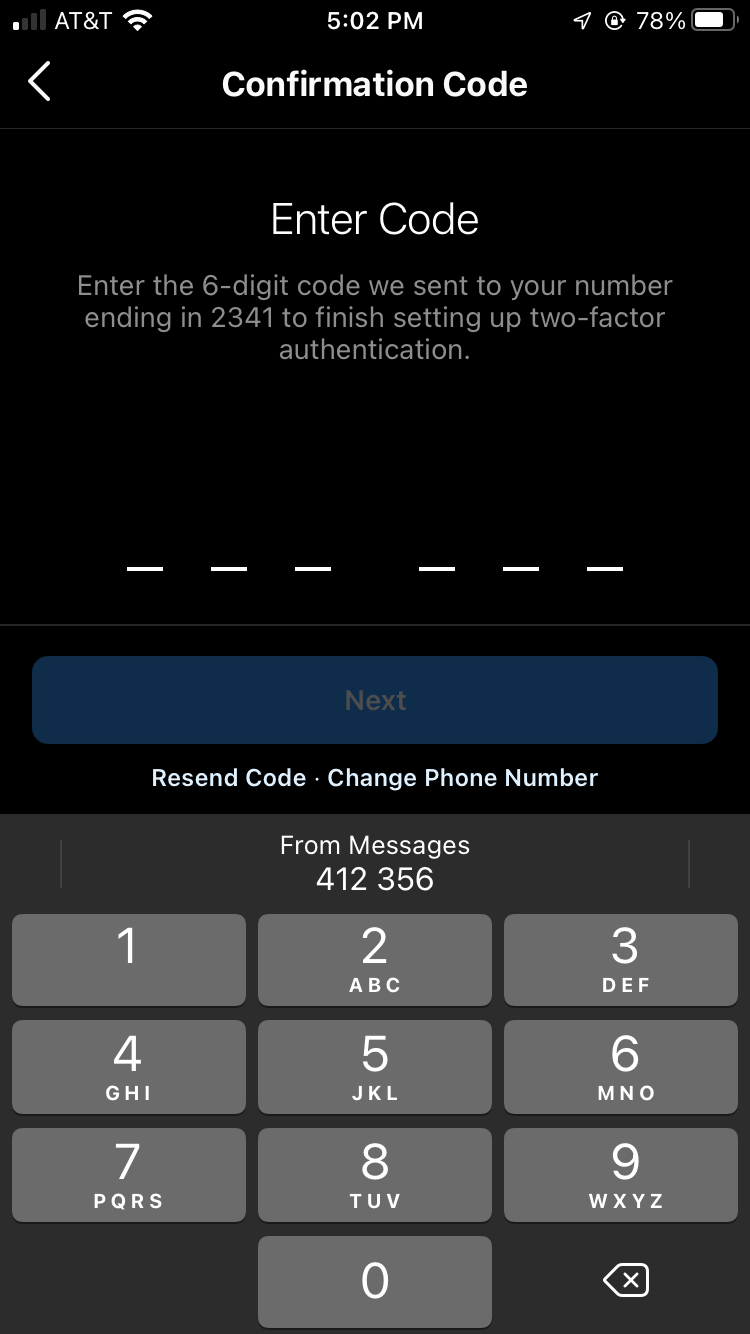
When you choose the “Text Message” option, it will take you to a screen asking for the sent code, and since Instagram already has your number, all you have to do is wait for the code to be sent. Once you type in the number, your two-factor authentication is activated! No hacker will be able to access your account without direct access to your phone itself.
Checking Login Activity
1.
The first step you will perform in order to check your login activity will be selecting the 3 horizontal lines in the top right corner of your screen. This will bring up the many different options to choose from but for this step you will want to select the “Settings” option.
2.
After selecting the “Settings” option you will see another menu with multiple options. Here you will want to select the “Security” option.
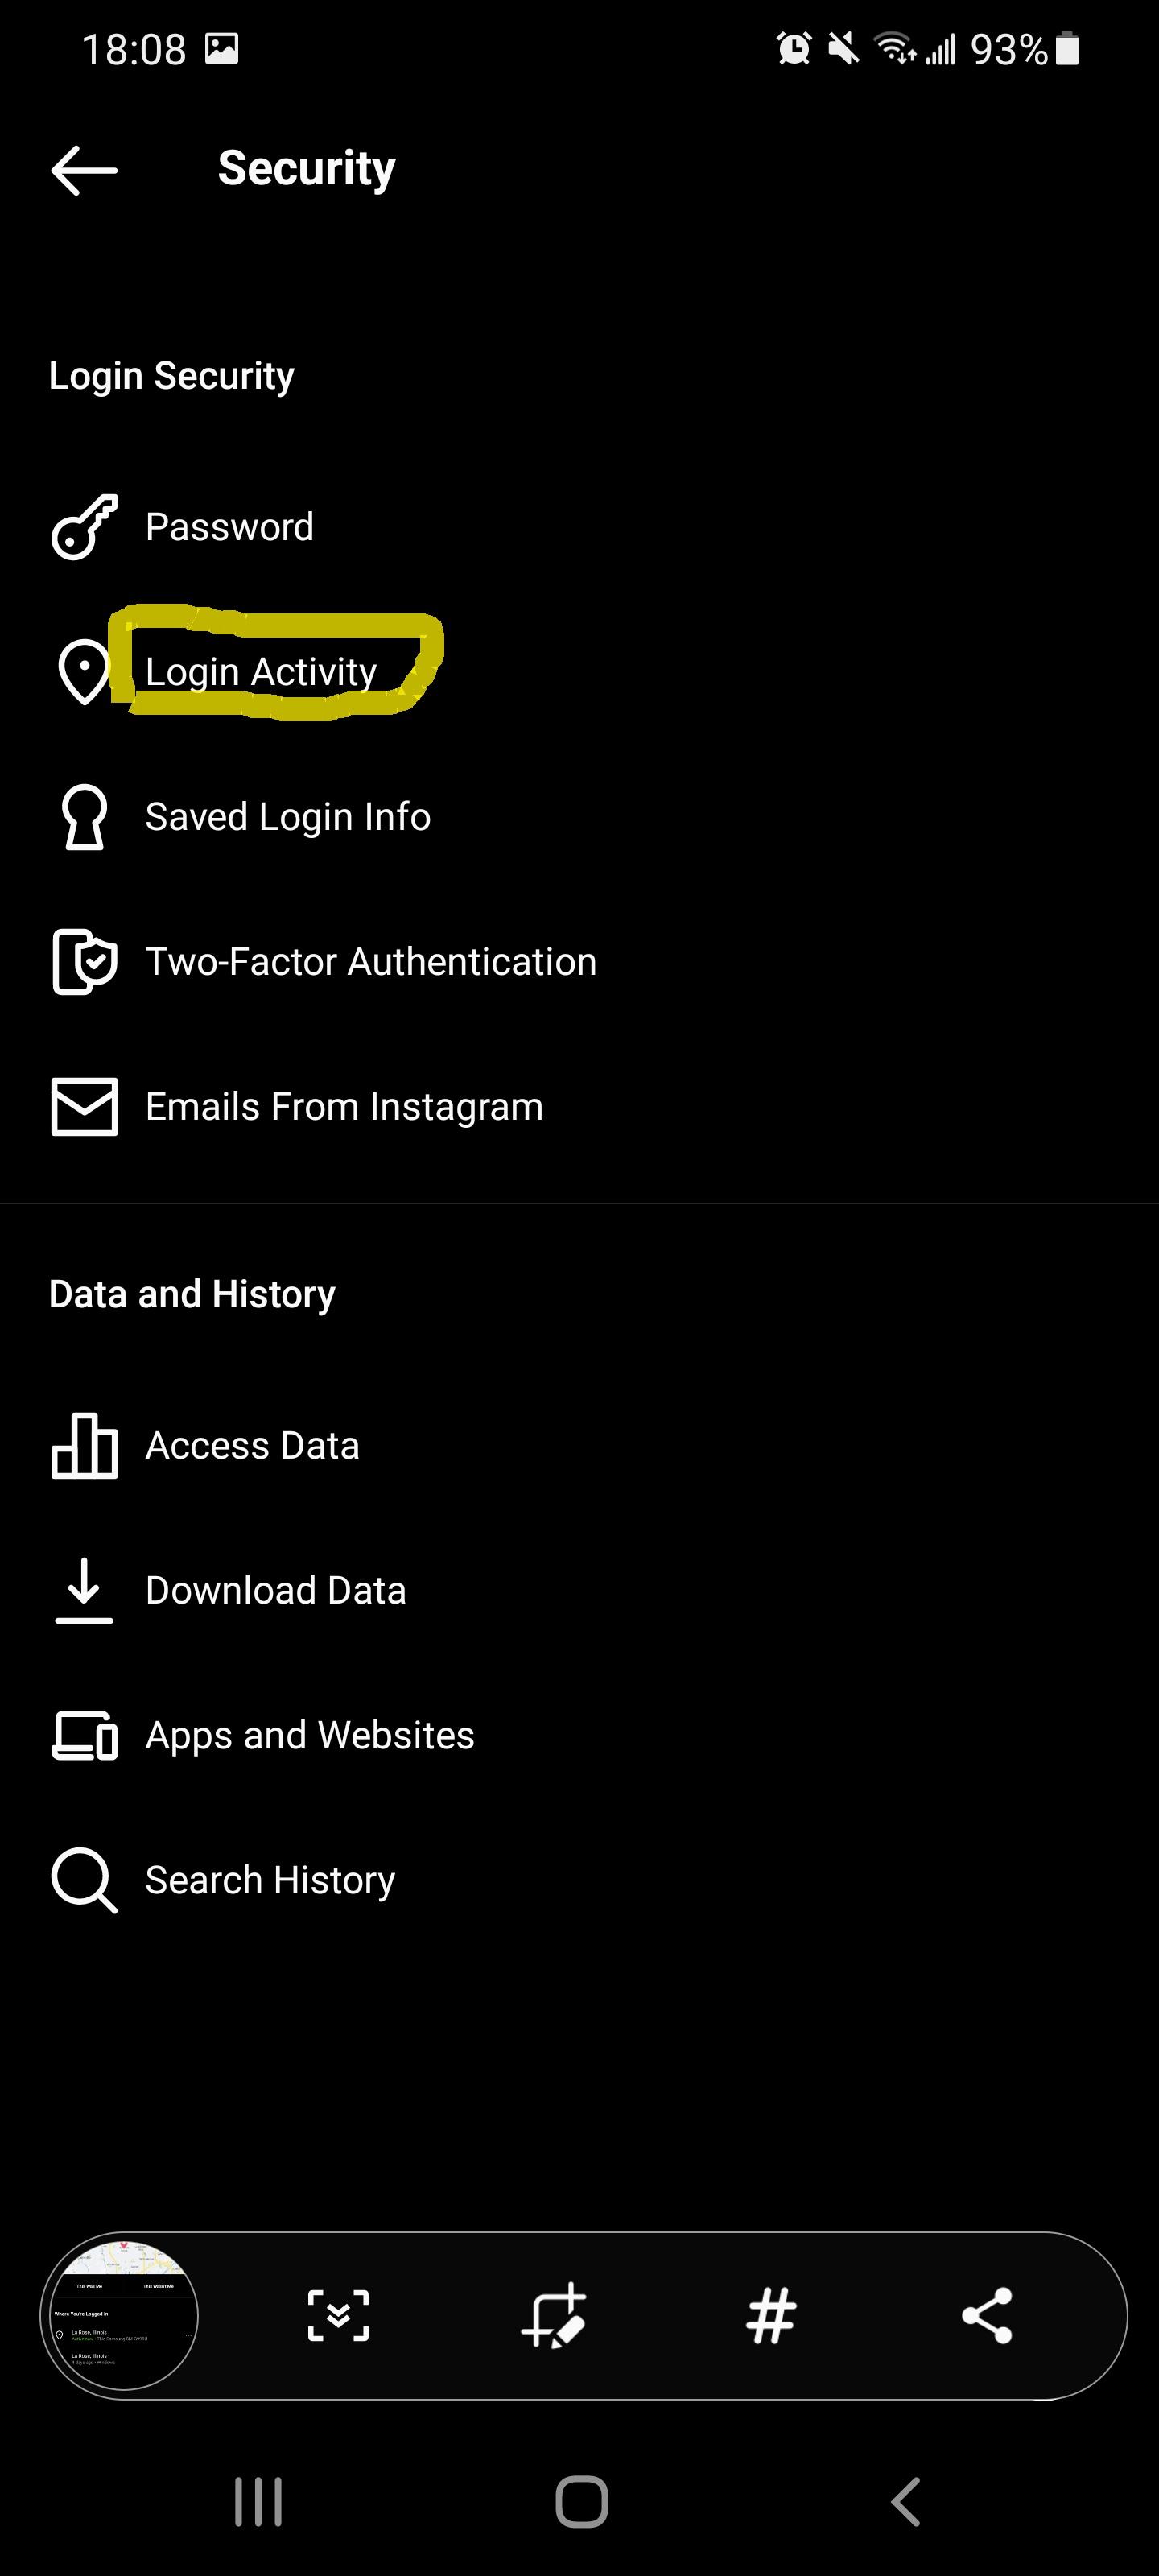
3.
here in the security menu, you will now select the “Login activity” option.
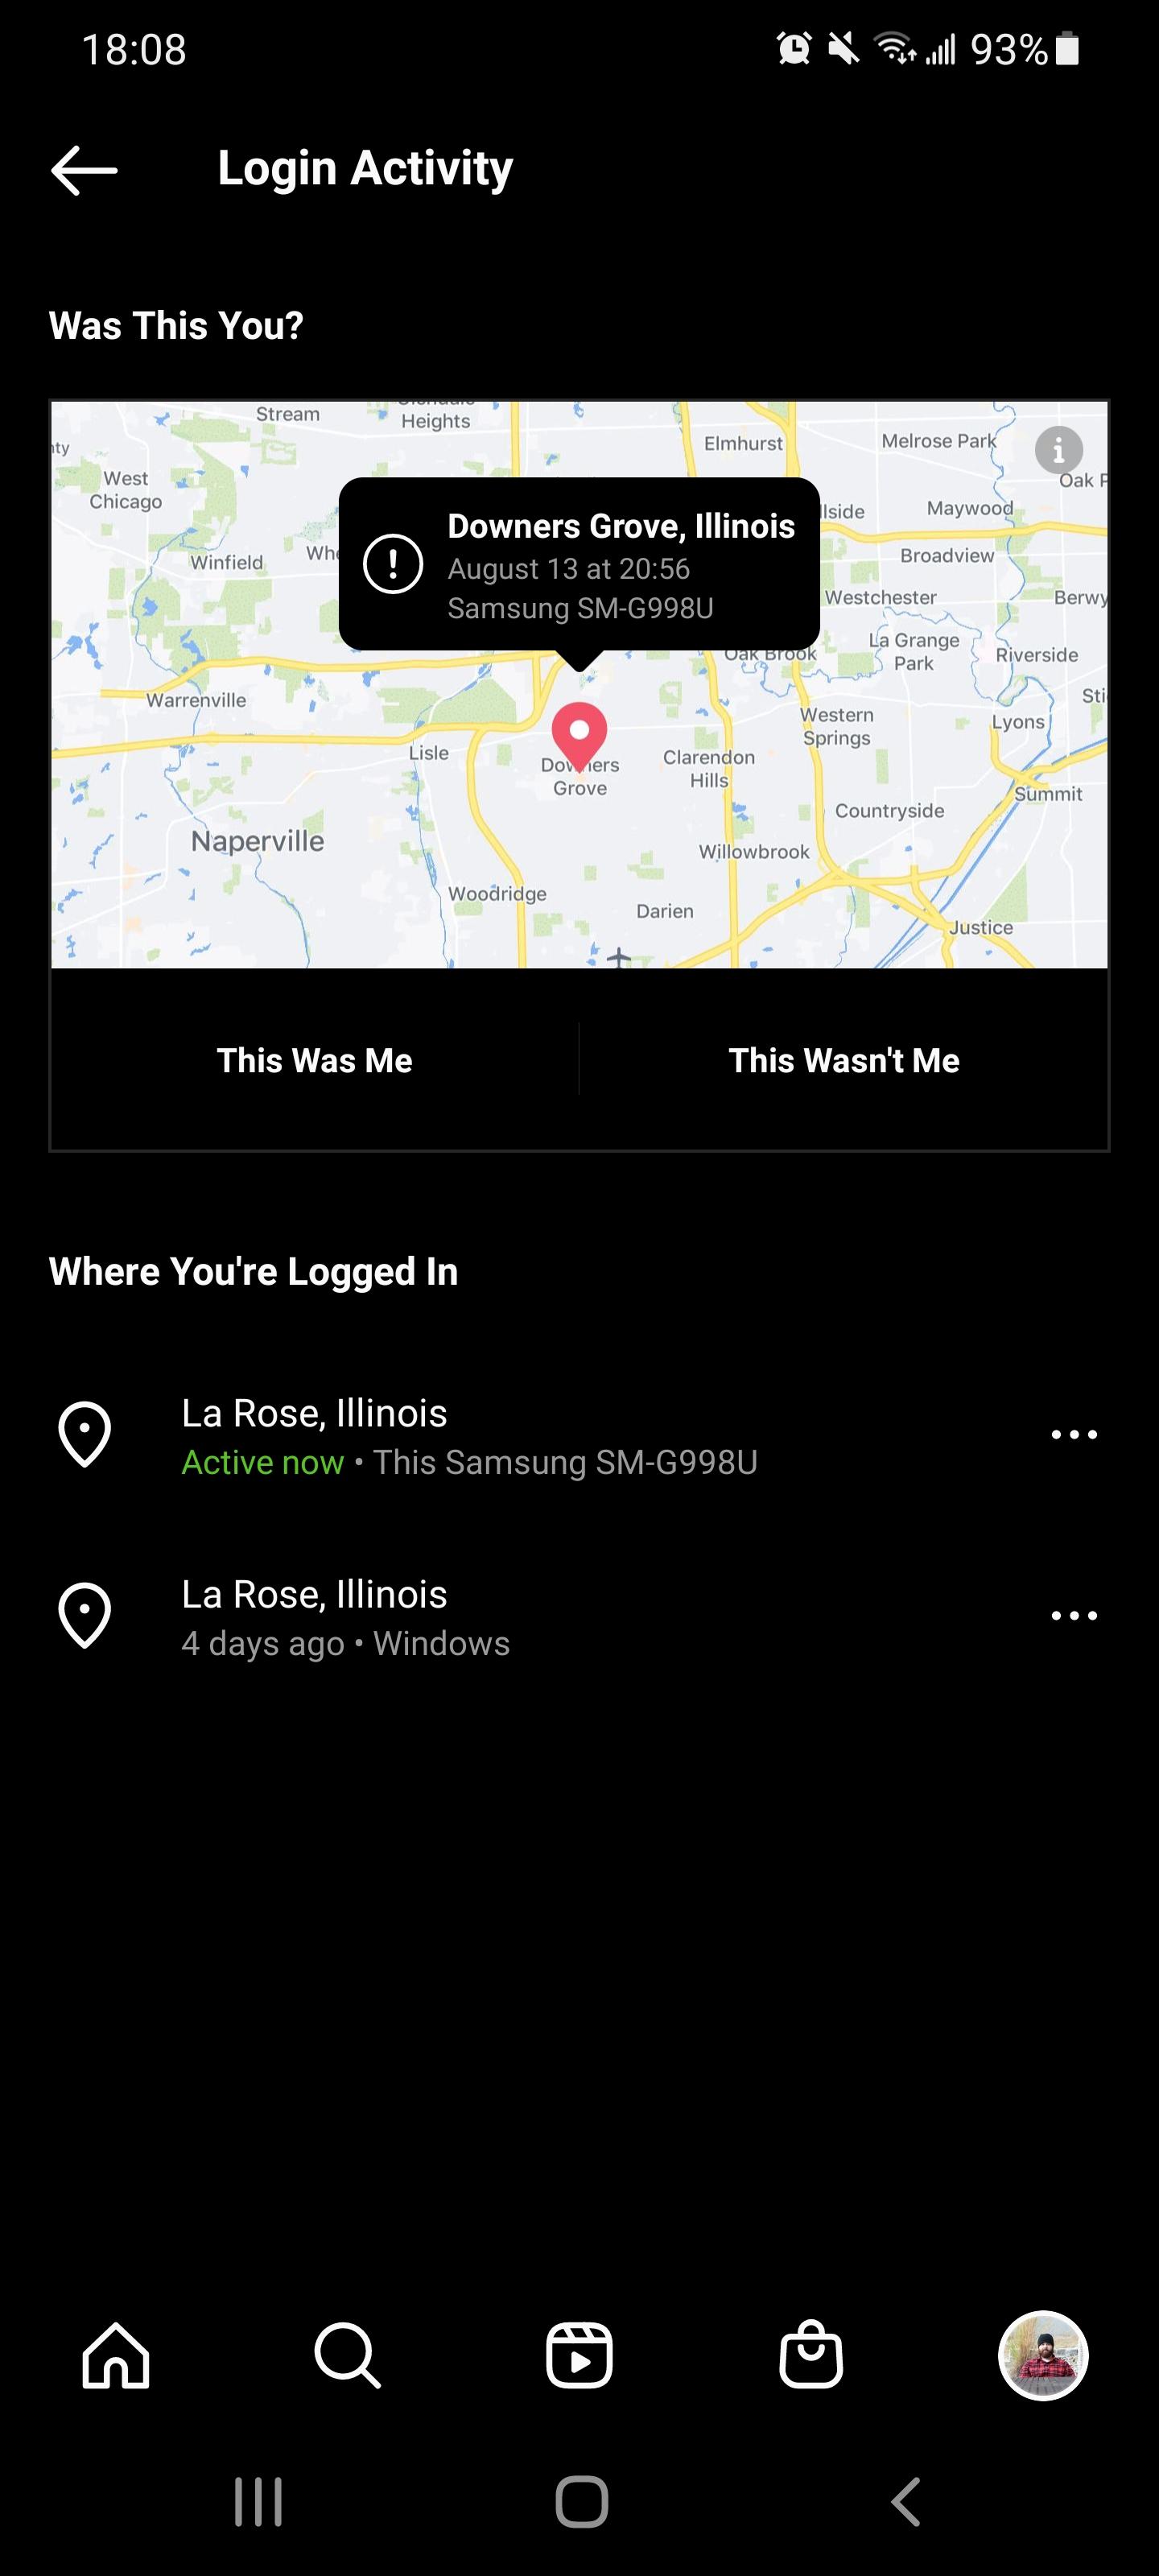
4.
And here you are in the Login activity menu. This option allows you to view where you are currently logged into. It also prompts you to acknowledge past and current unfamiliar logins. If there is a login at a location that you are unfamiliar with, then there is a chance that your account may have been compromised.
Disable Activity Status


1.
The first step you will perform in order to disable your activity status will be selecting the 3 horizontal lines in the top right corner of your screen. This will bring up the many different options to choose from but for this step you will want to select the “Settings” option.
2.
From here you will want to select the “Privacy” option.
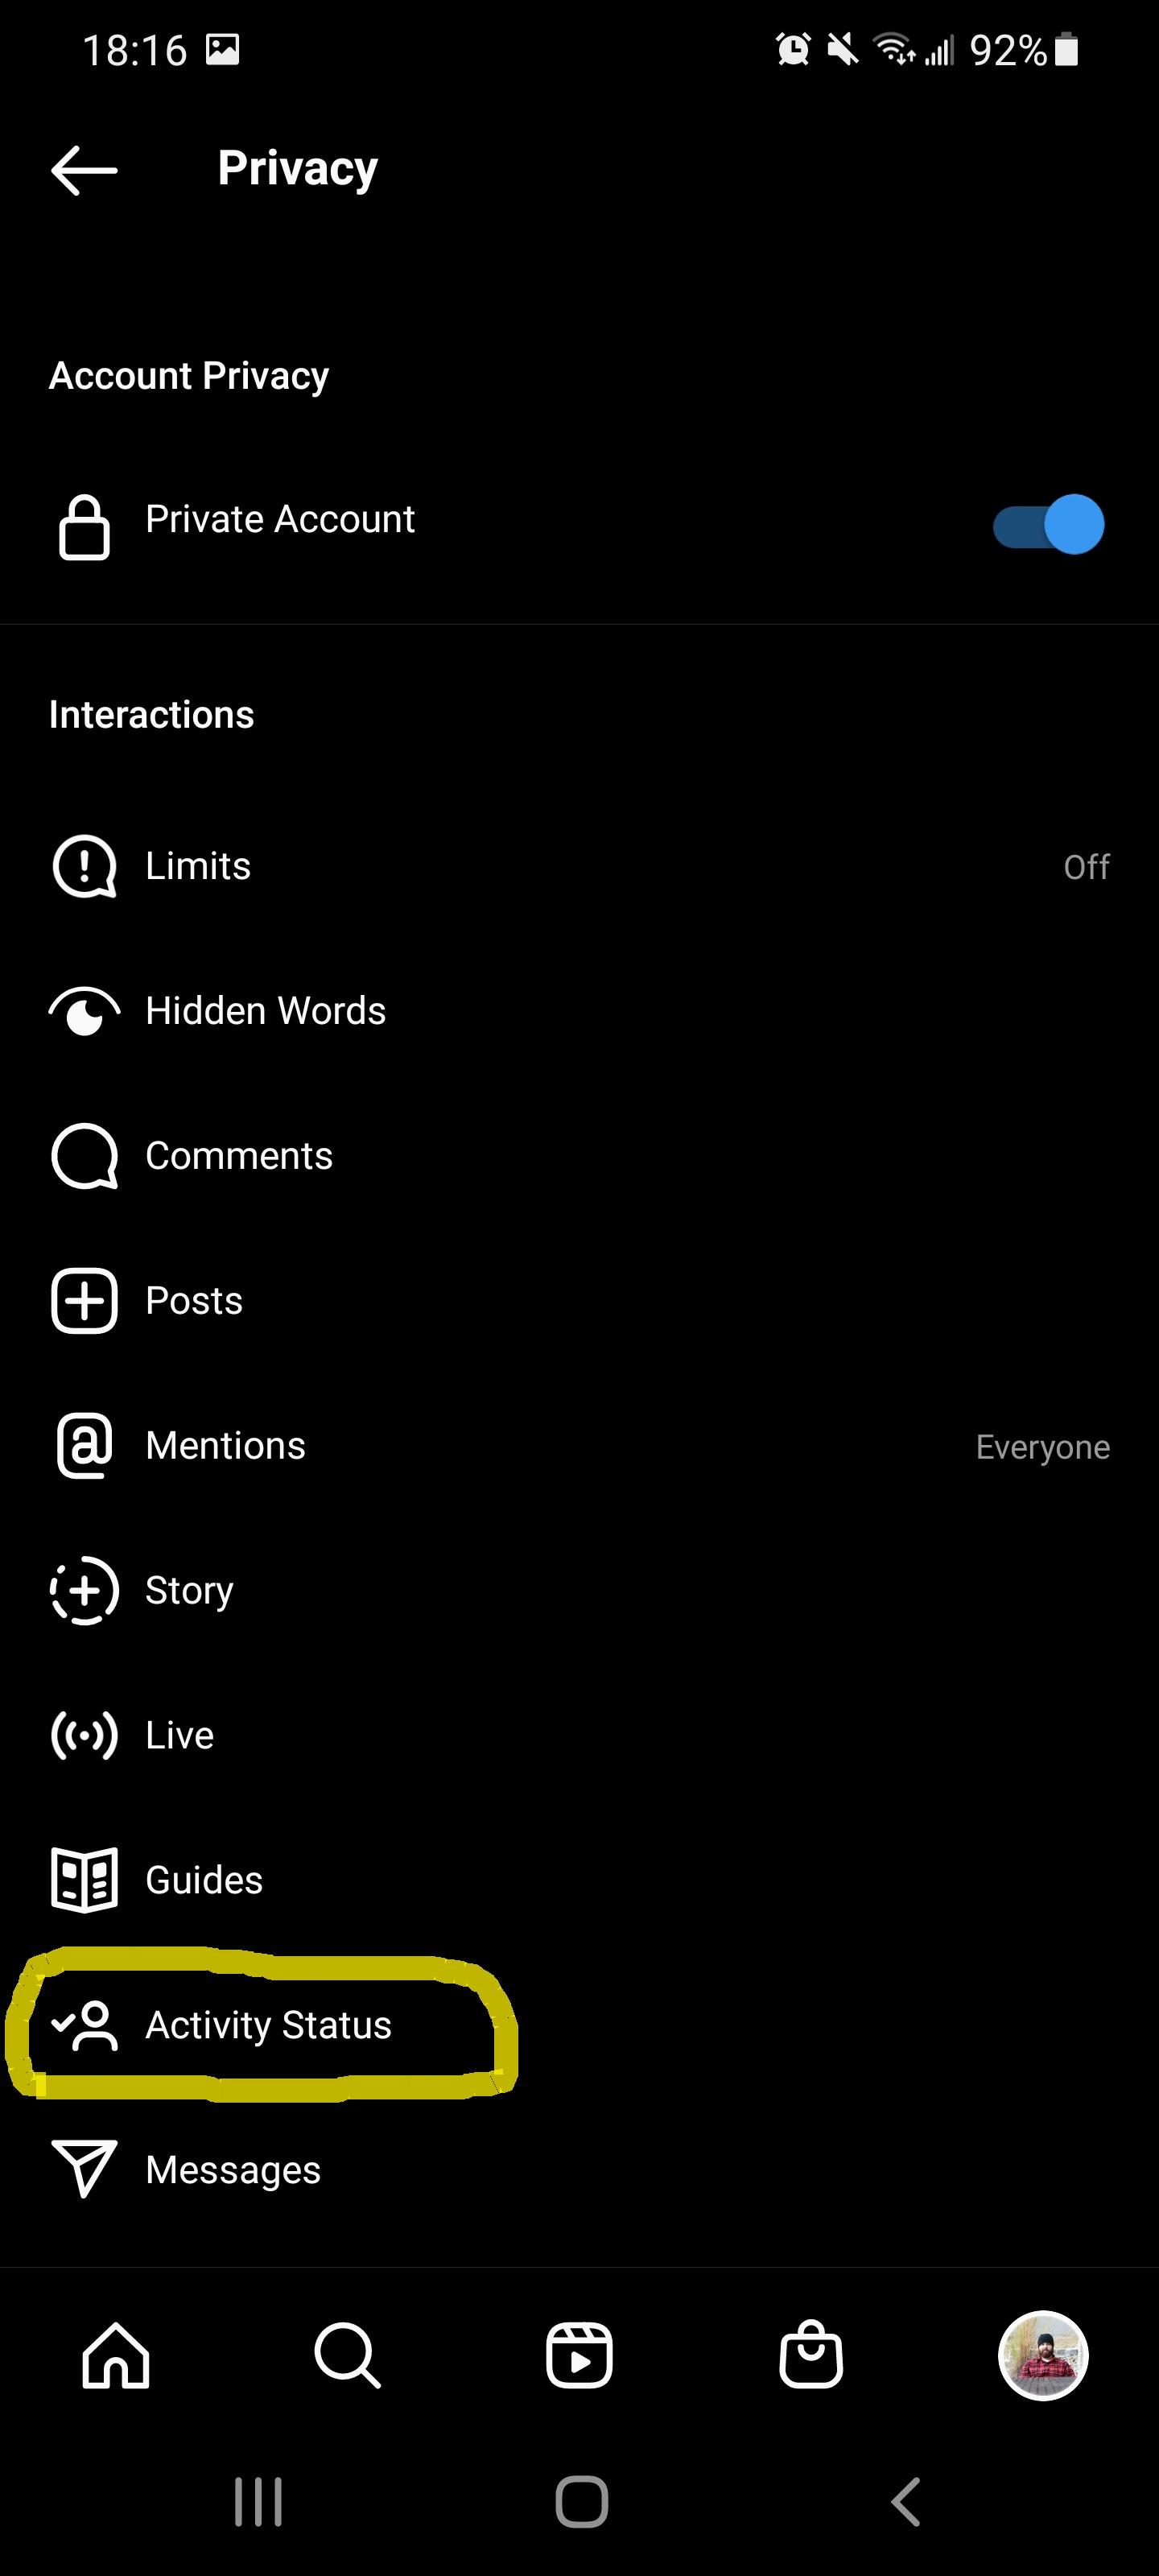
3.
You should now be in the privacy menu, amongst all of the many different options, you will want to select the “Activity Status” option
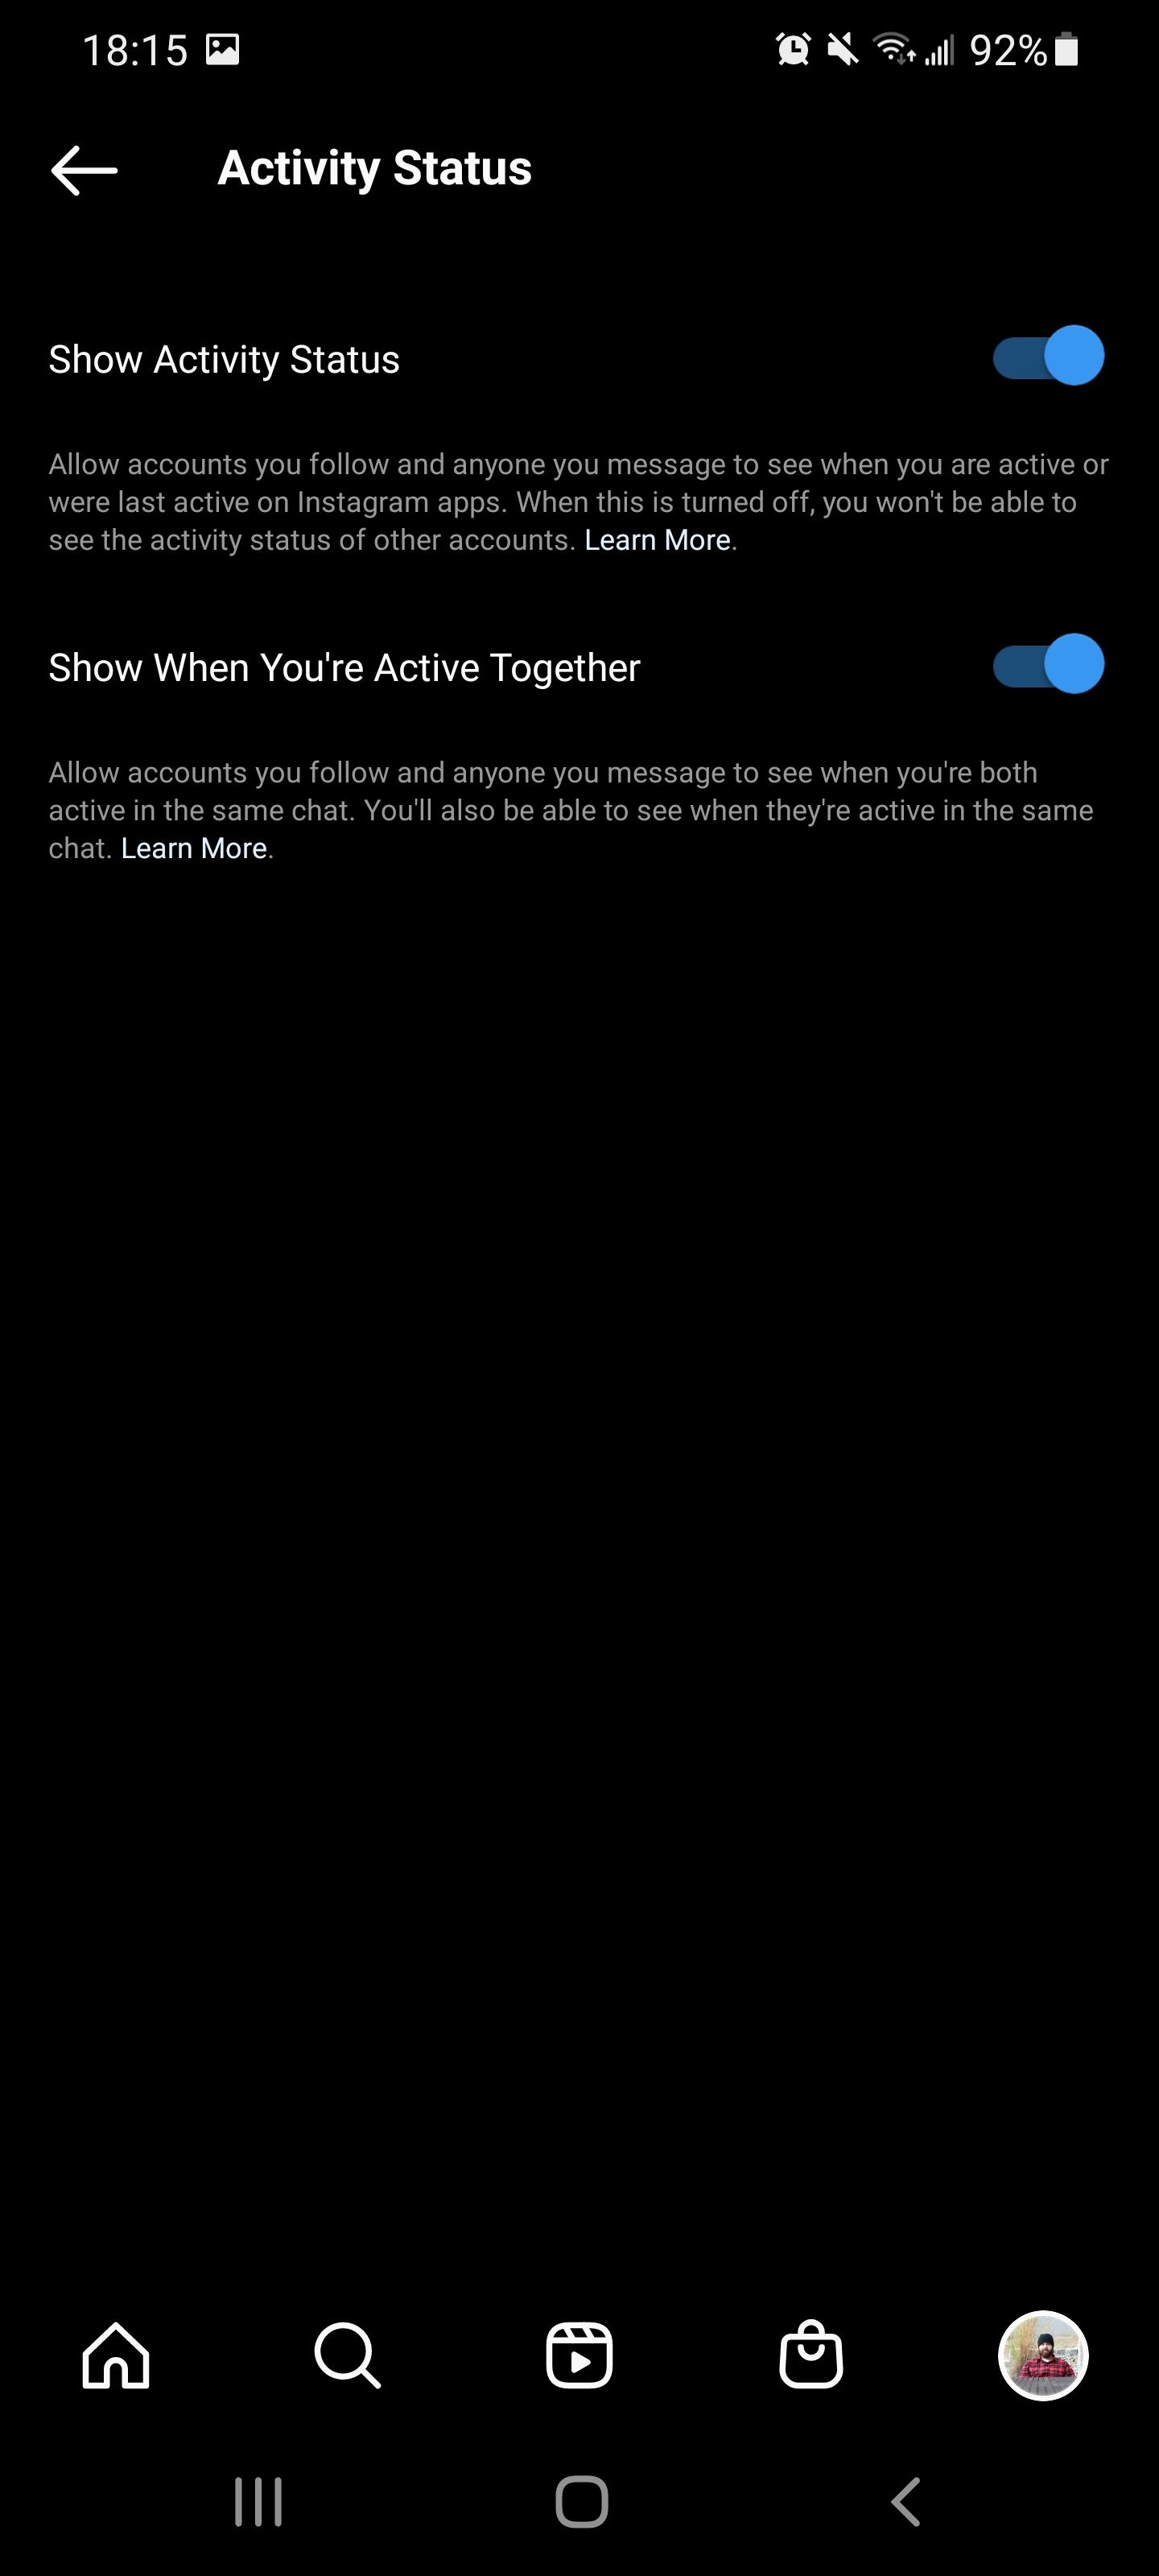
4.
And here you are at the Activity Status menu. This menu will allow users to decide if they wish to show when they are active on Instagram and to show when they are active within the same chats as their followers
Inspect Accounts
1.
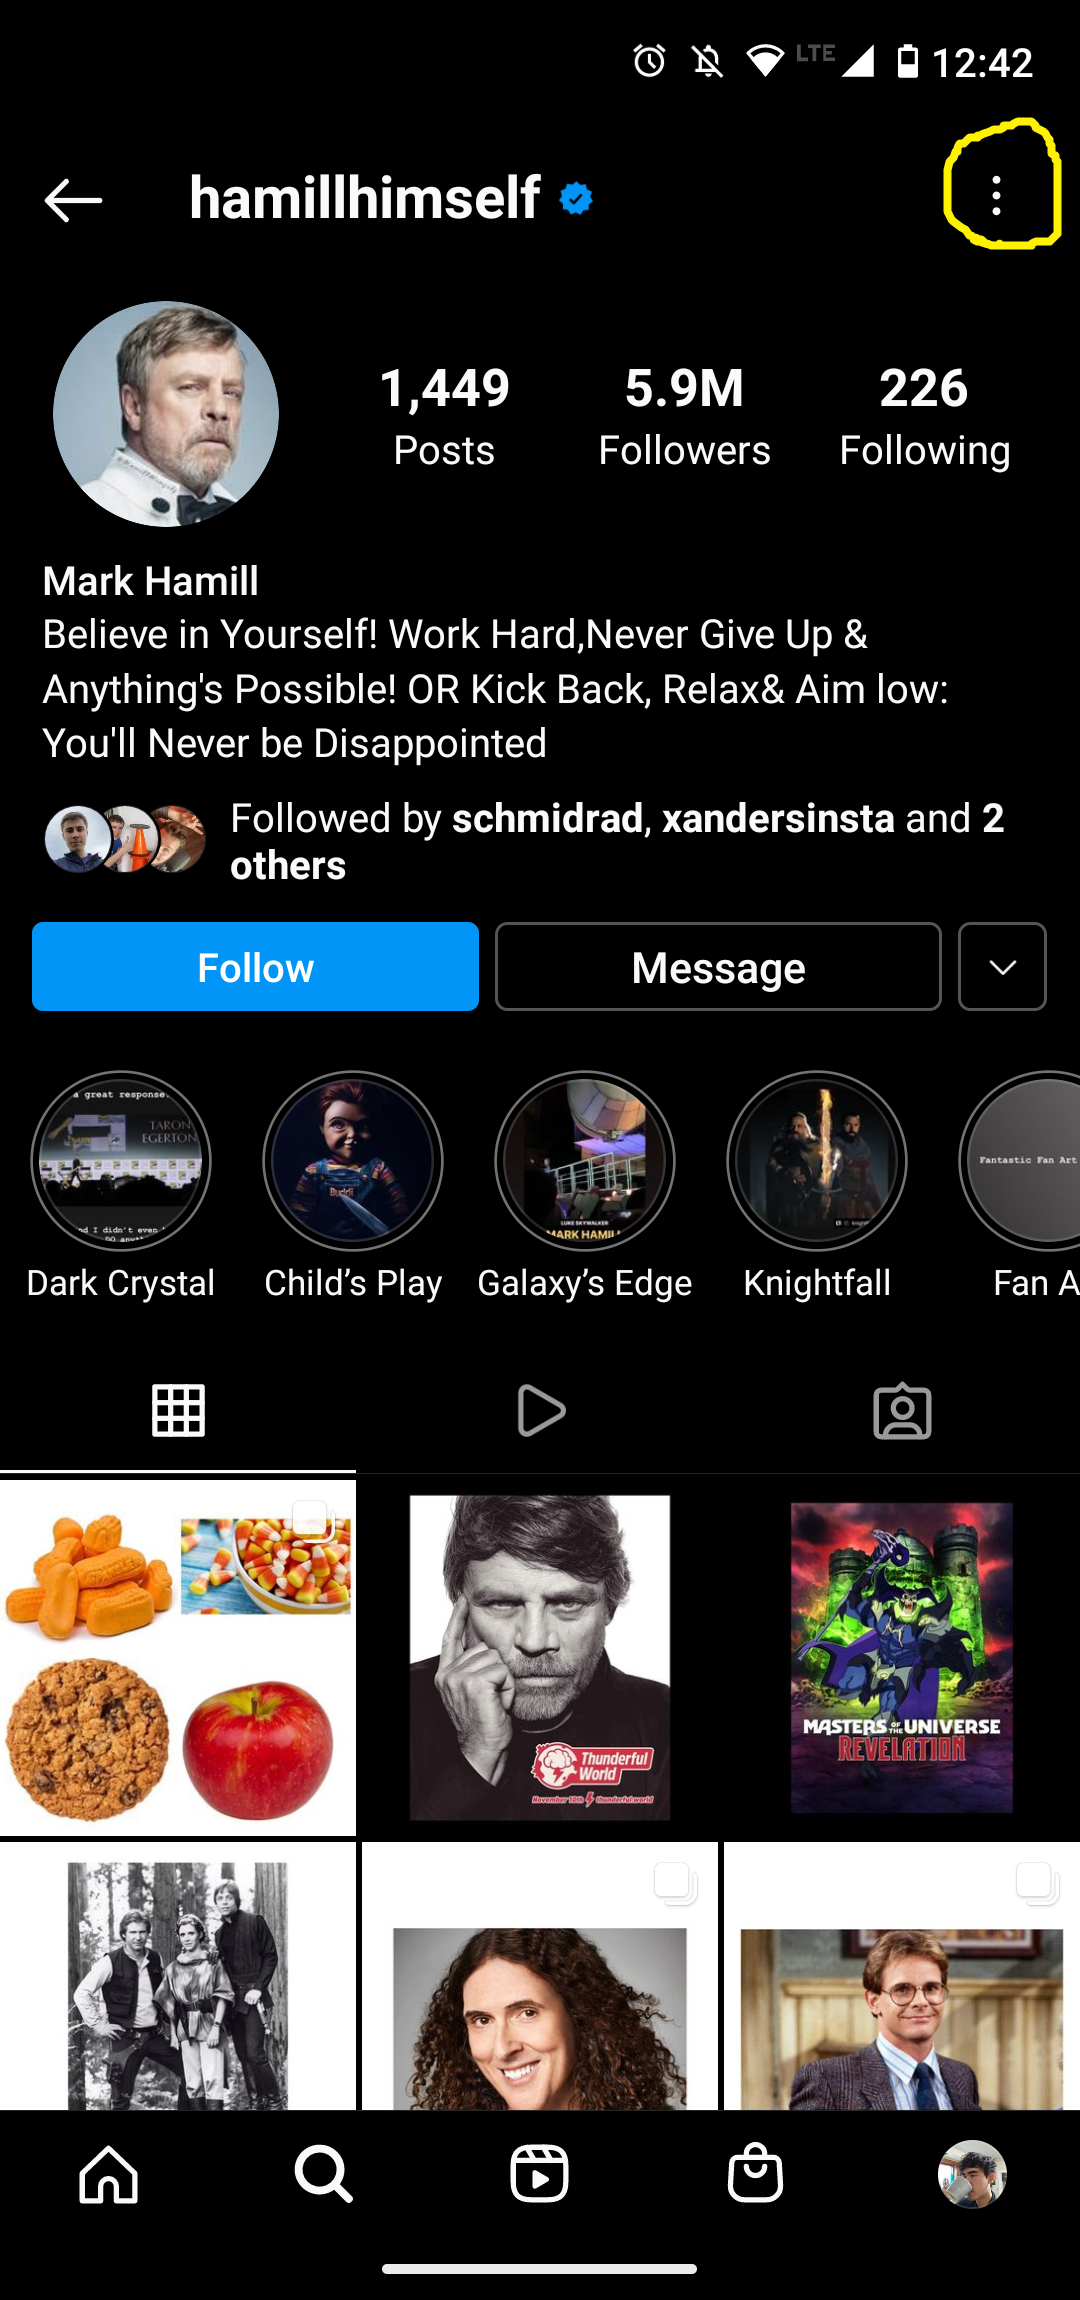
The first step to inspect an account you do not follow that is verified on Instagram is to look it up and click on the three dots in the top right corner.
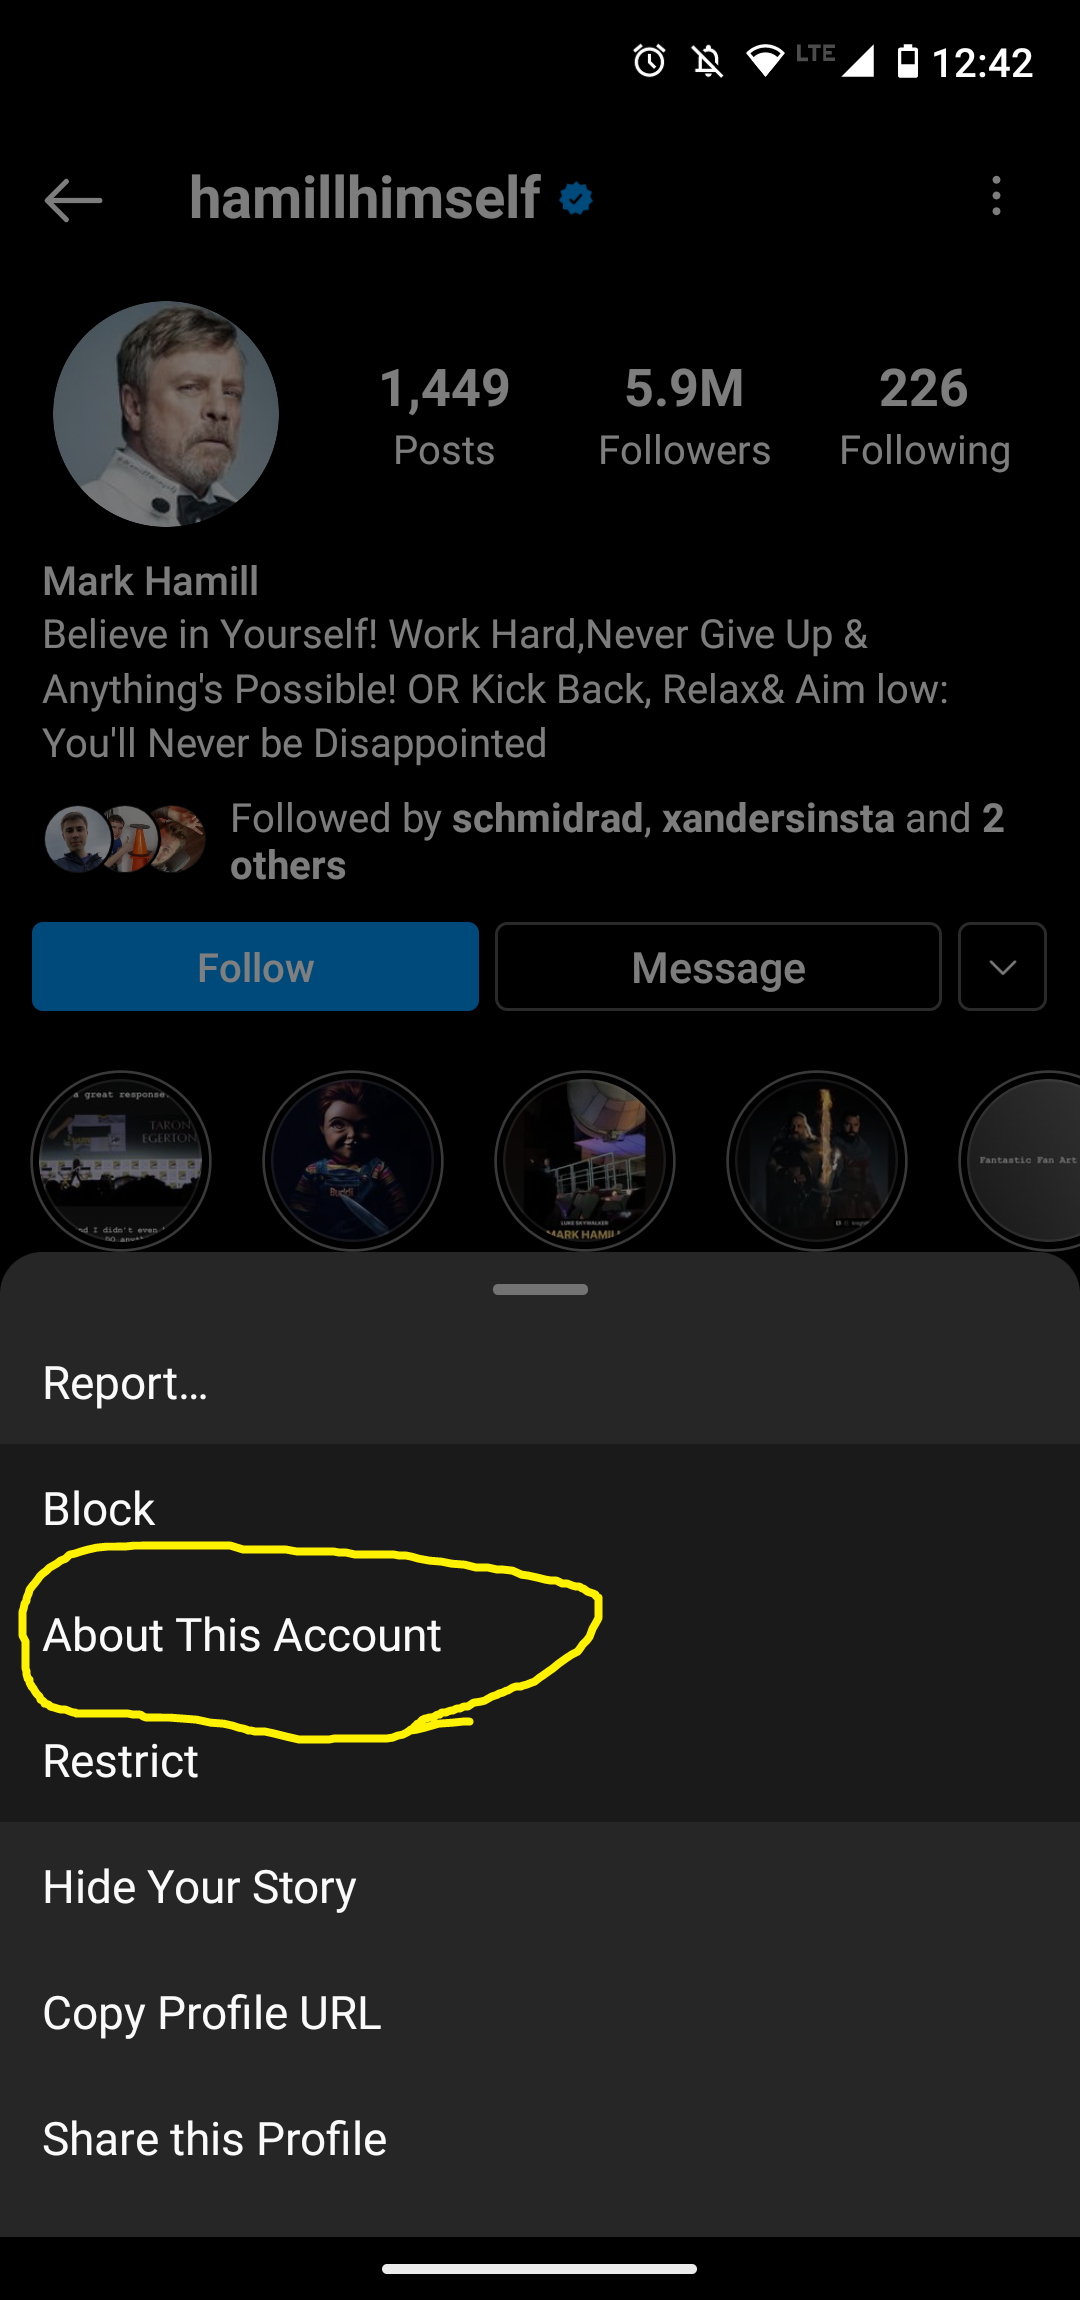
2.
After clicking on the dots it should display a menu with different options. Click on the About This Account option.
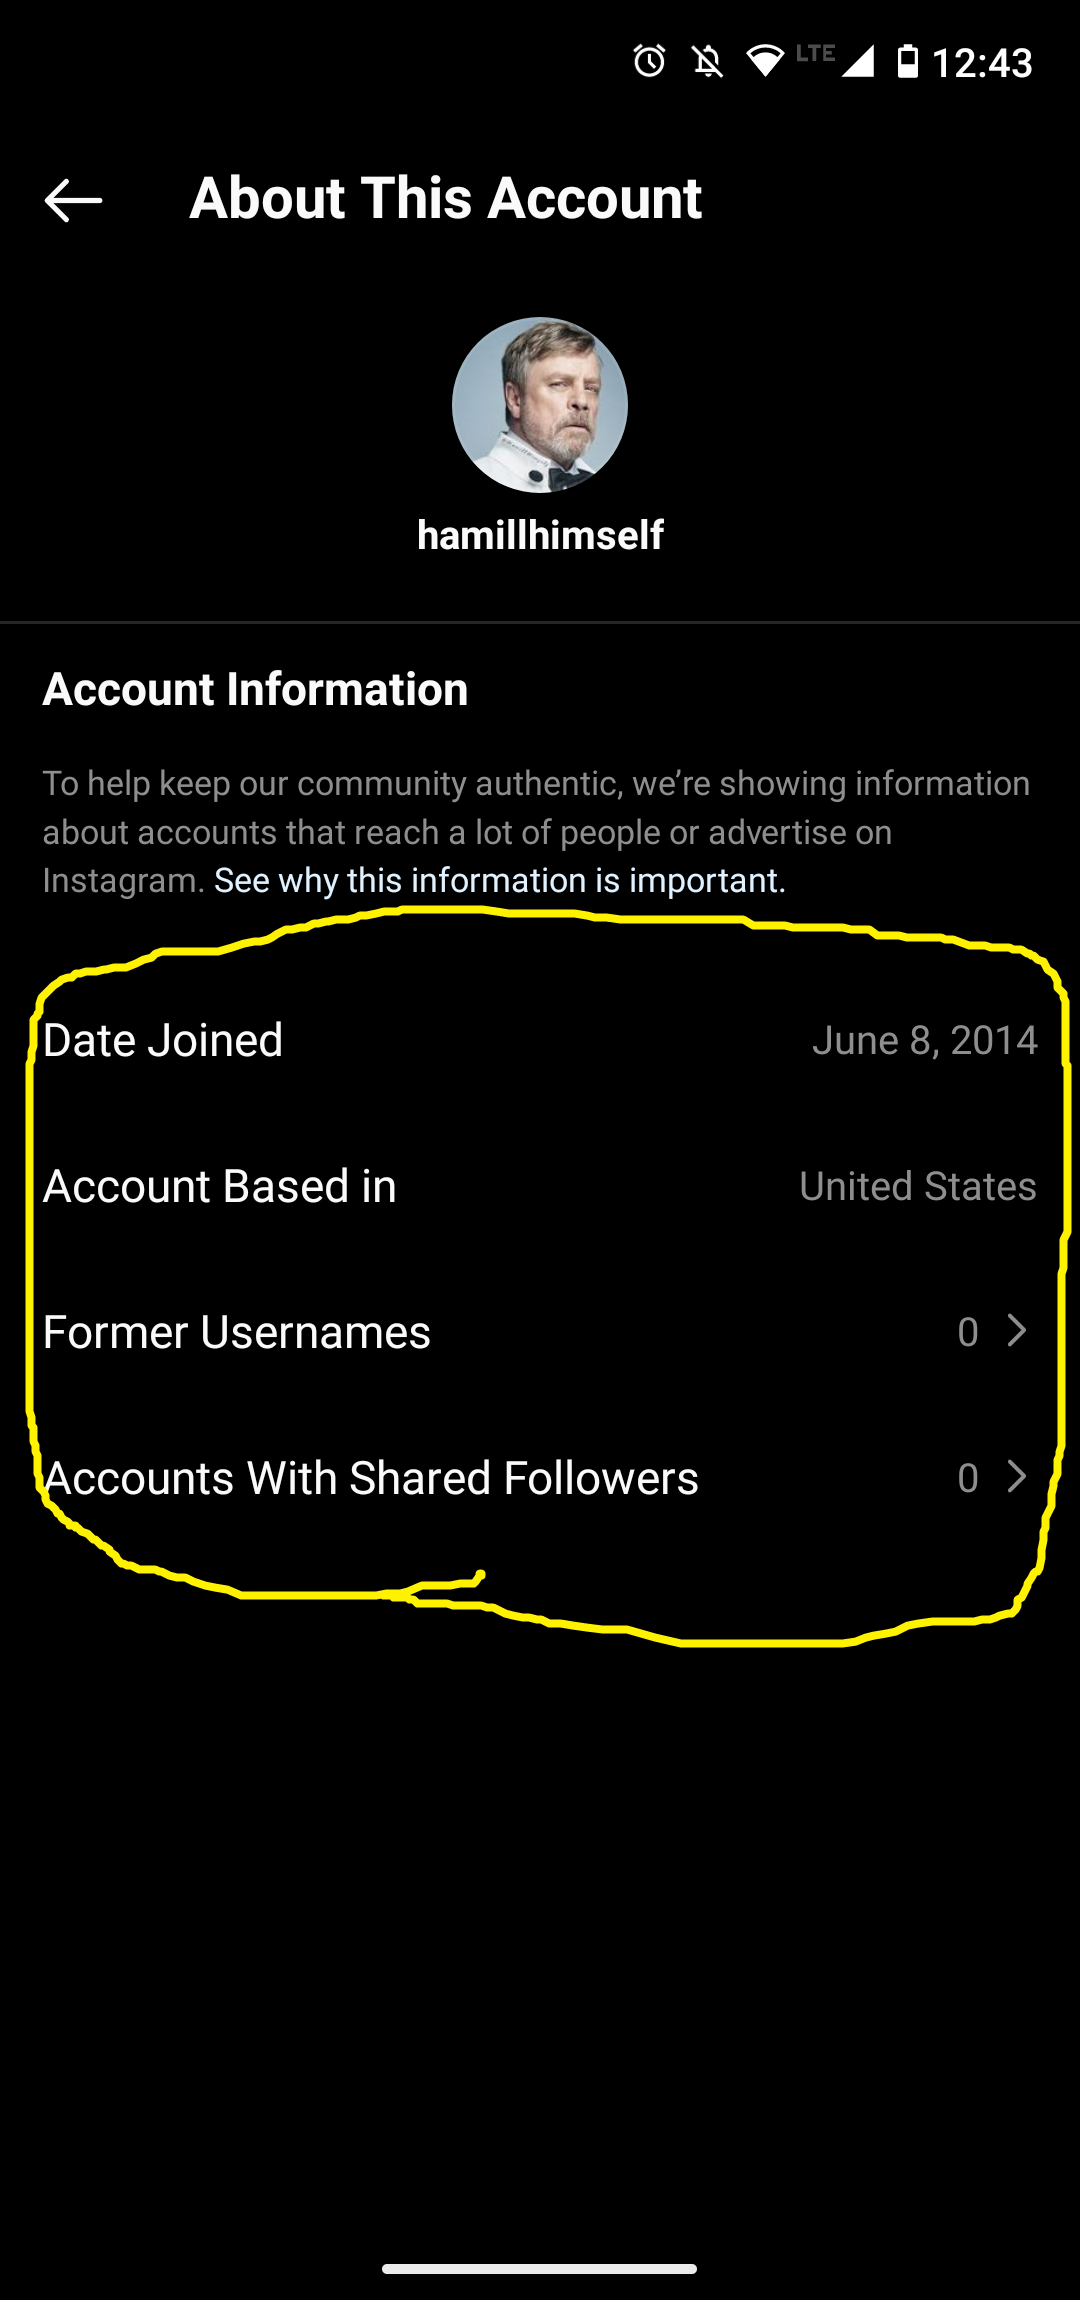
3.
This will show information about the account including the date the account joined Instagram, The country the account is based in, the account’s former usernames, and accounts with a high percentage of shared followers with this account.
Security Pin

1.
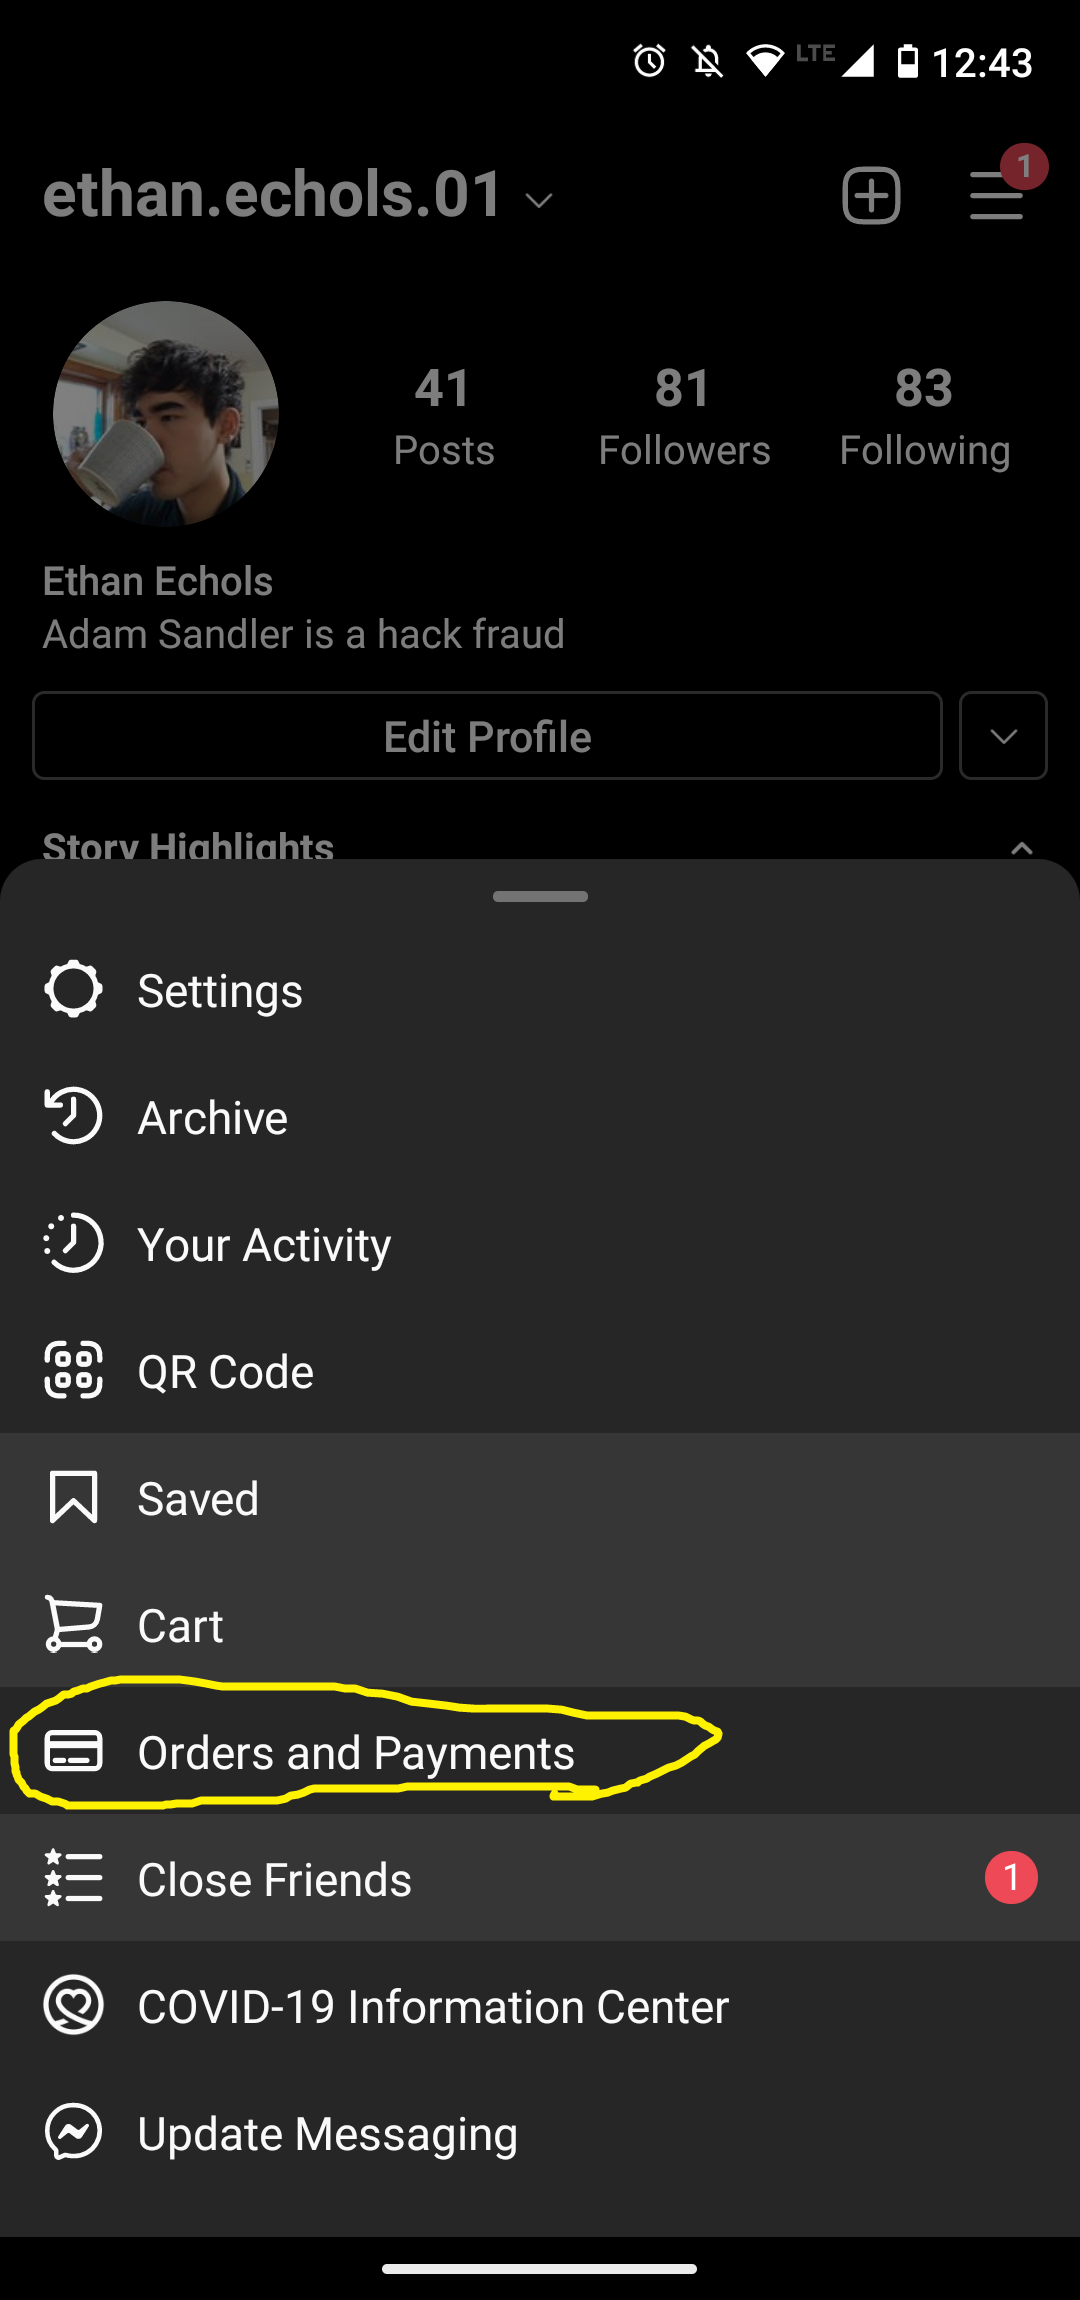
The first step to enable a security pin is to click on the 3 horizontal lines in the
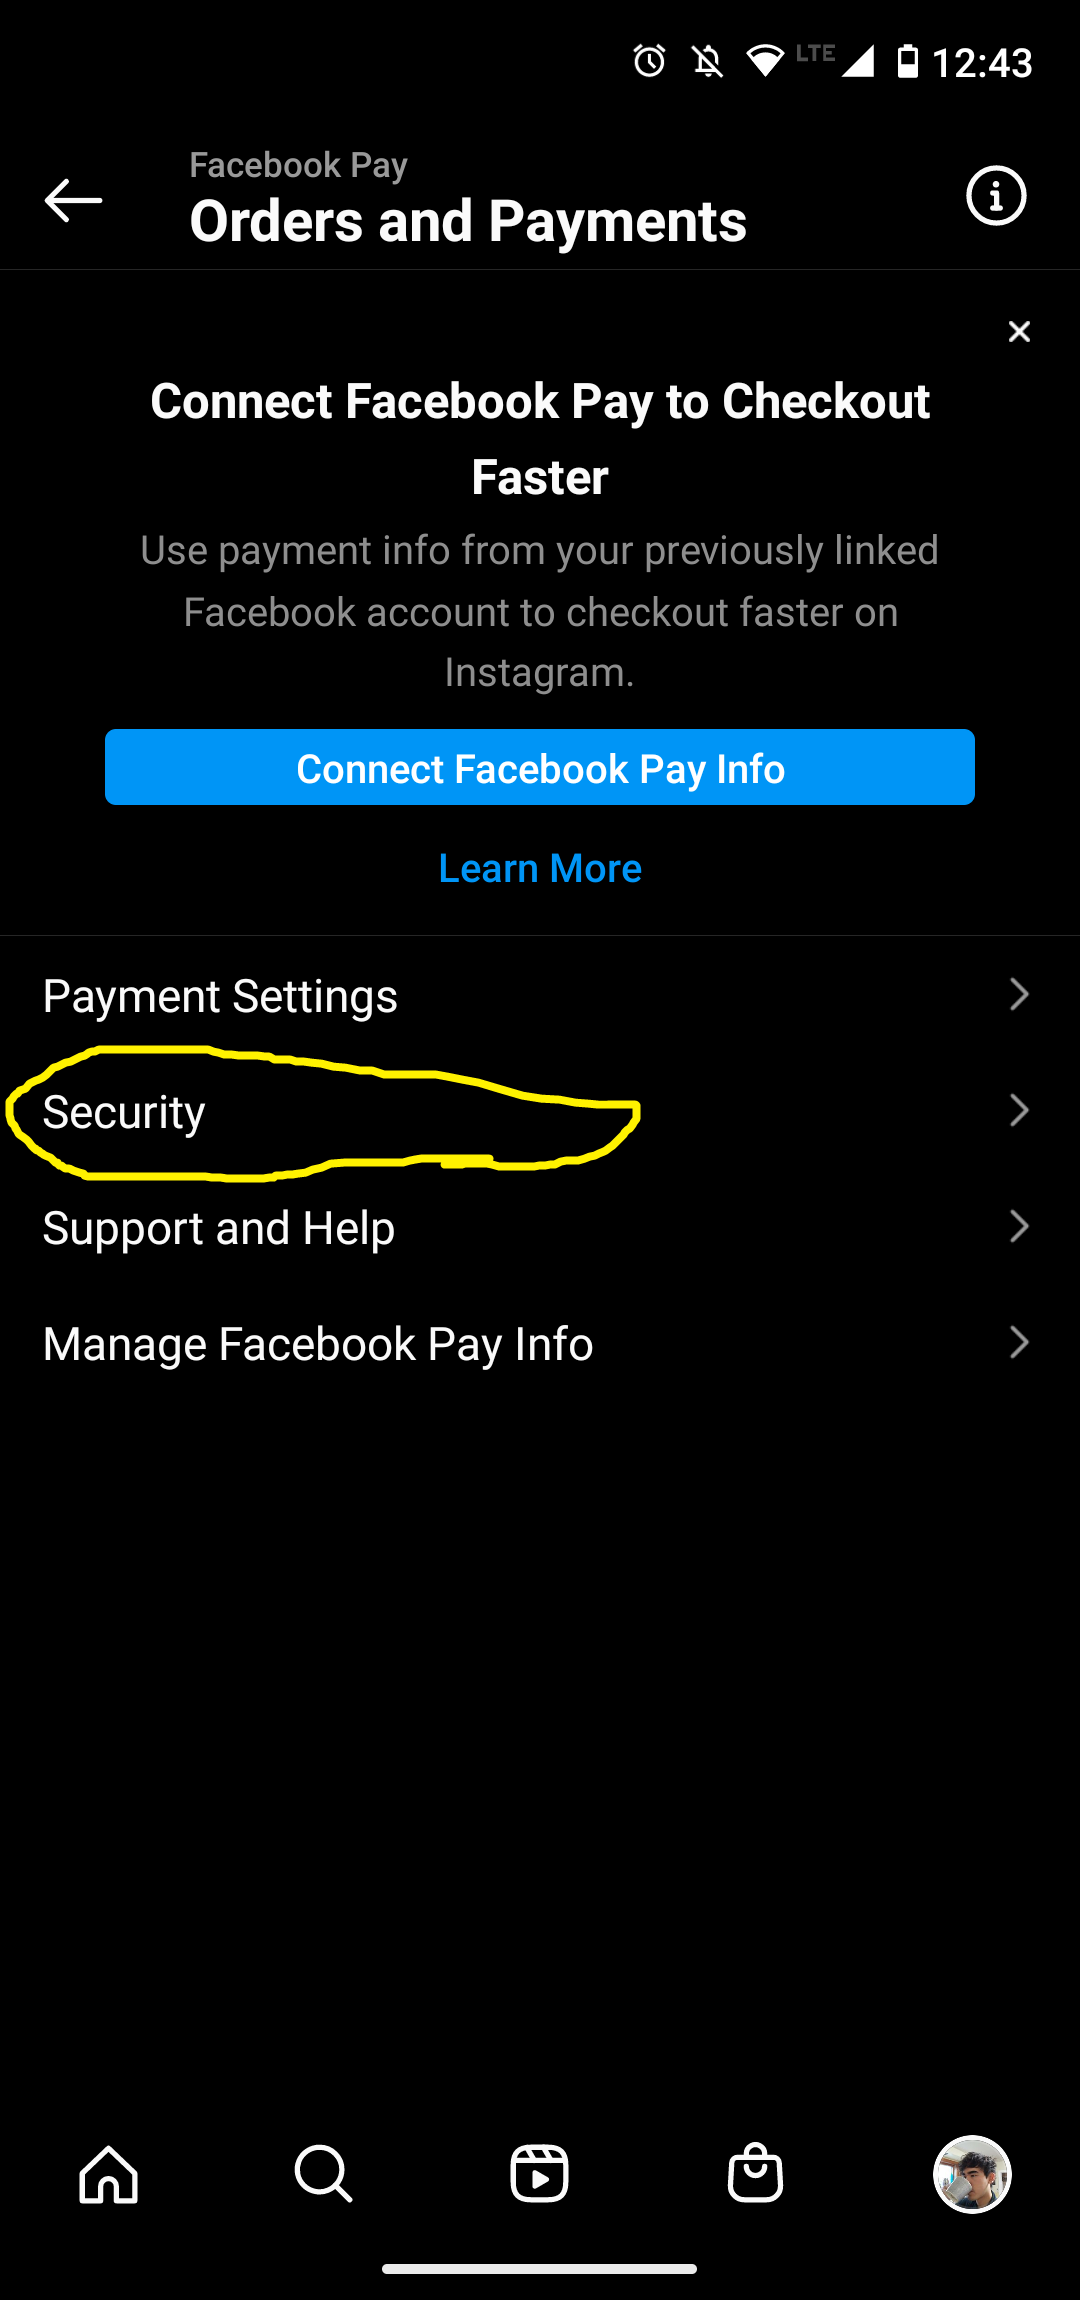
top right of your screen. This should display many different options but the option you should choose should be Orders and Payments
2.
After selecting the Ordered and Payments option it should display a new menu with new options. Select the Security option.
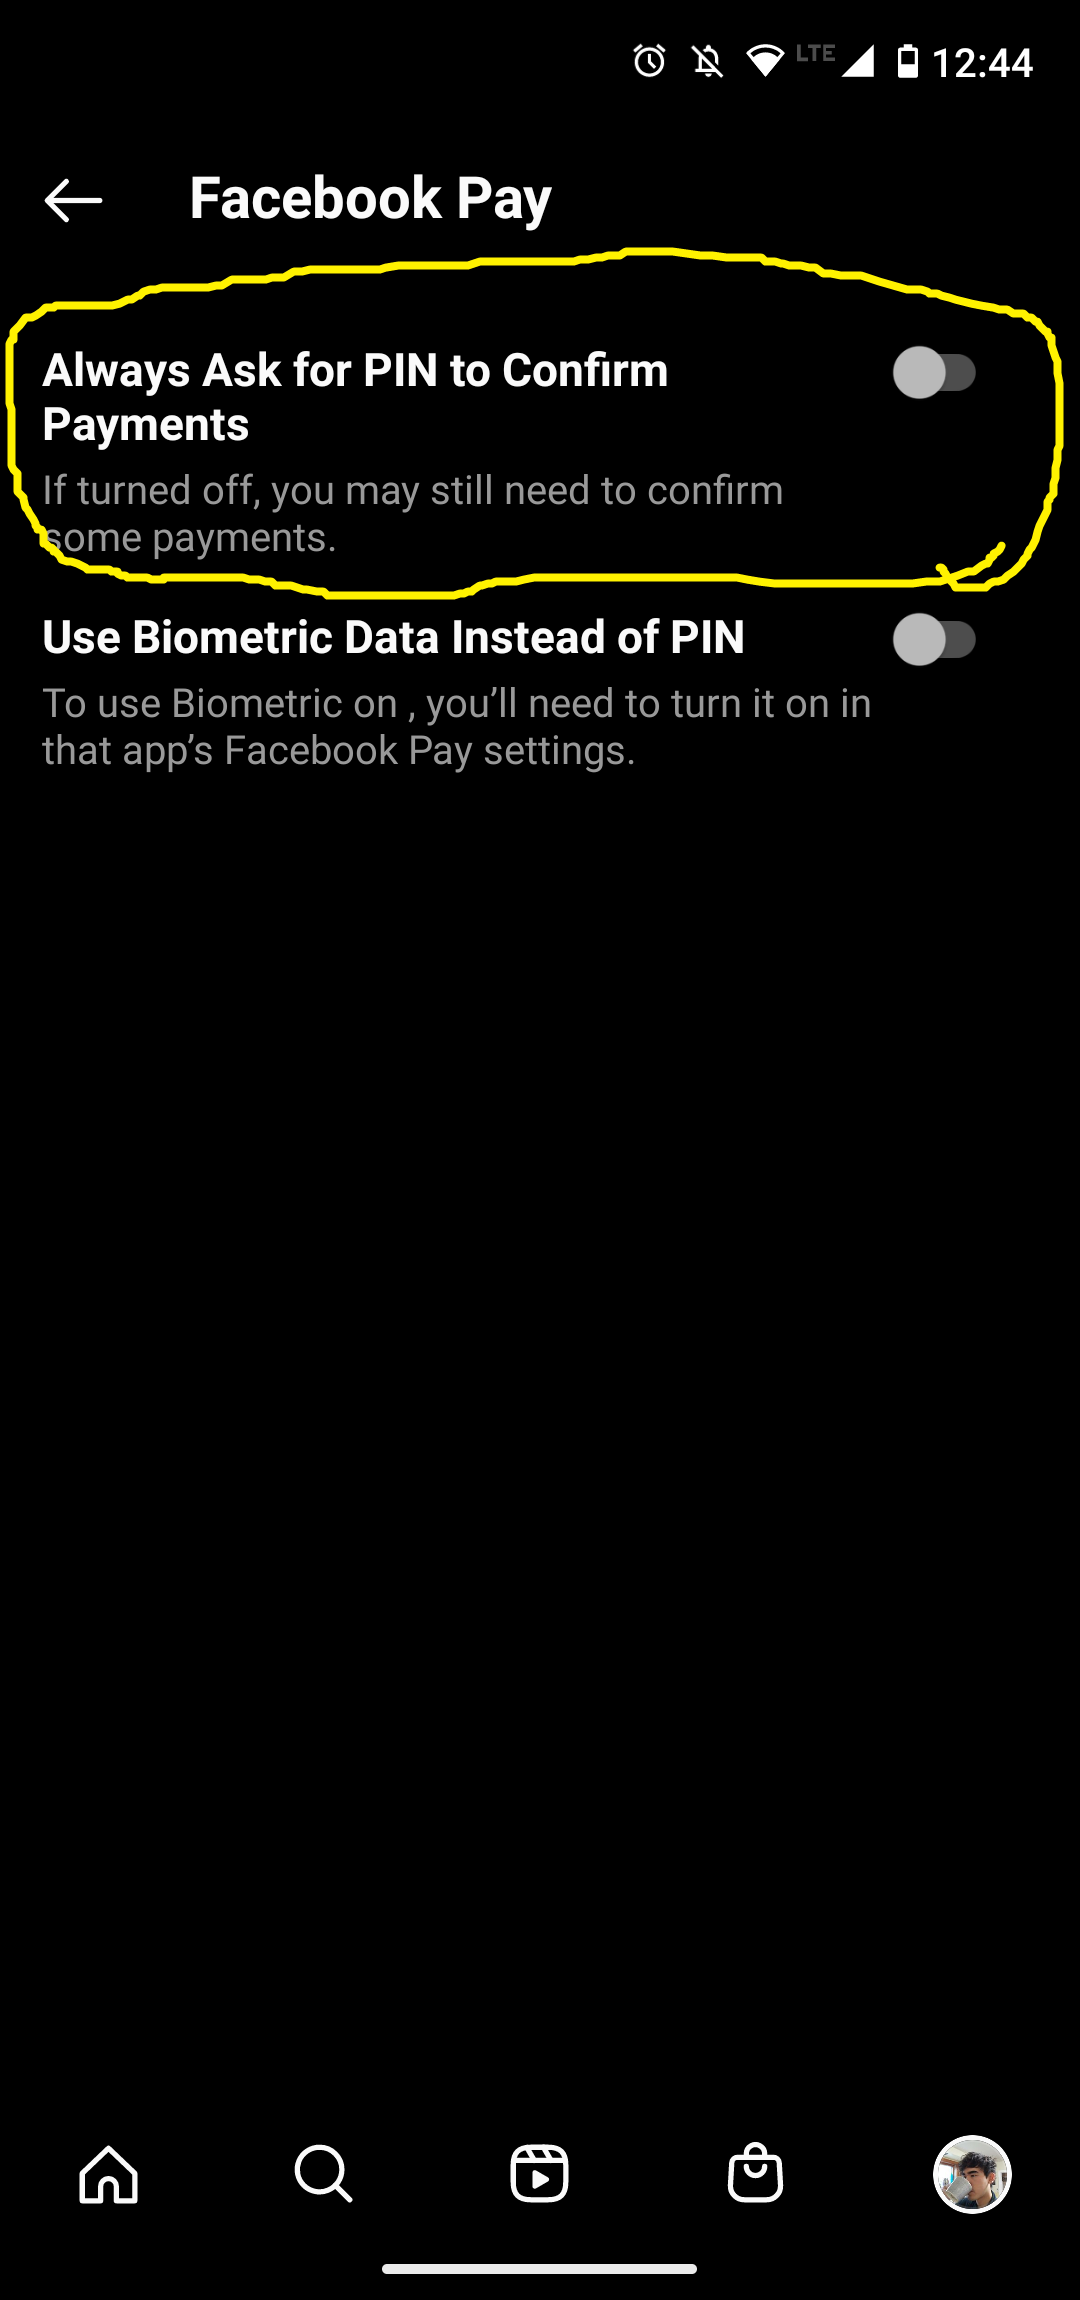
3.
After selecting the security option it should display a menu with two switches. Click on the switch named Always Ask for PIN to Confirm Payments.
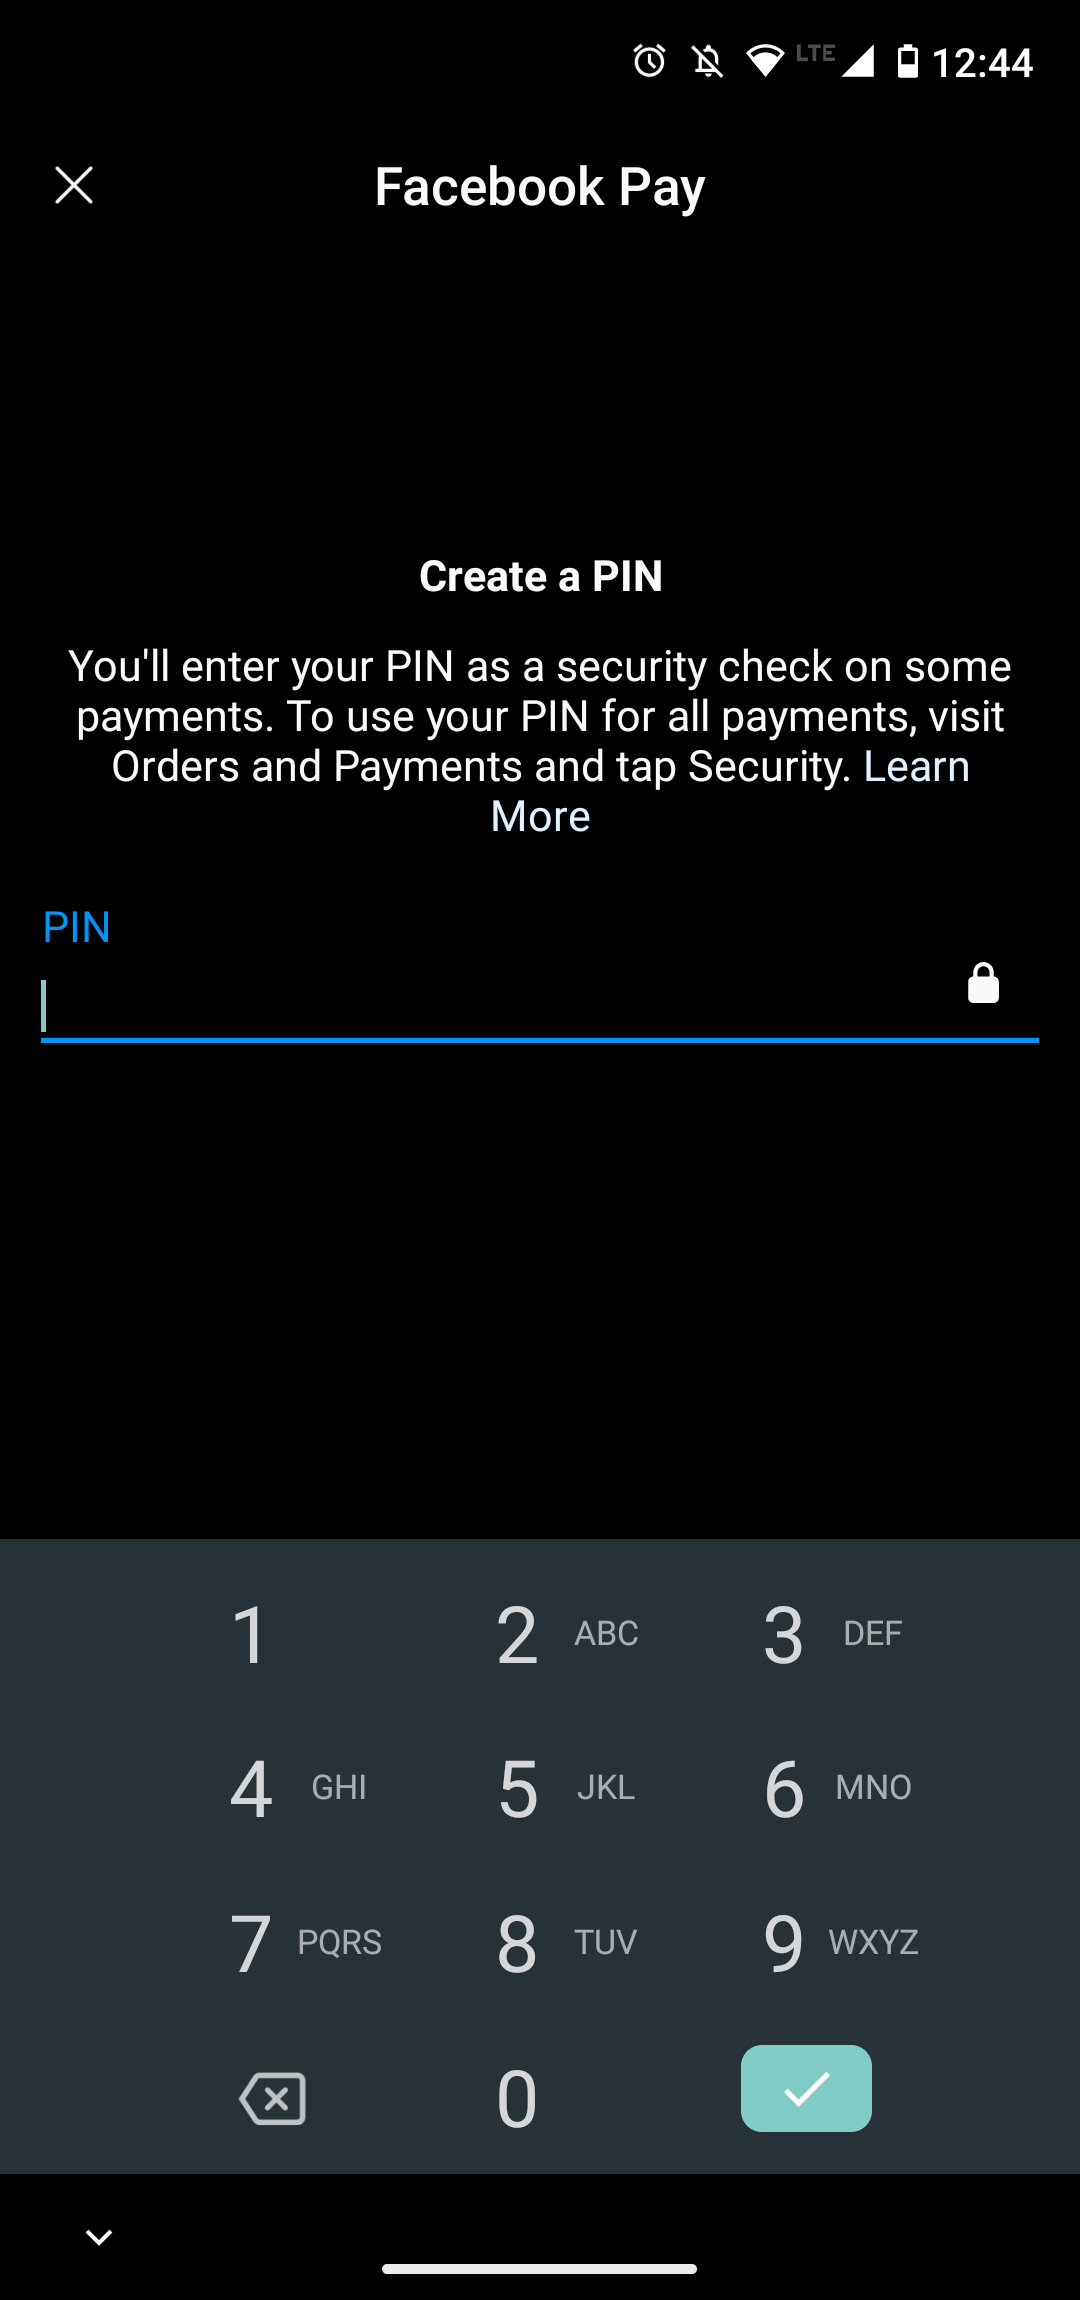
4.
Then it should ask you to type in a four-digit pin and confirm the four-digit pin that you just typed in.
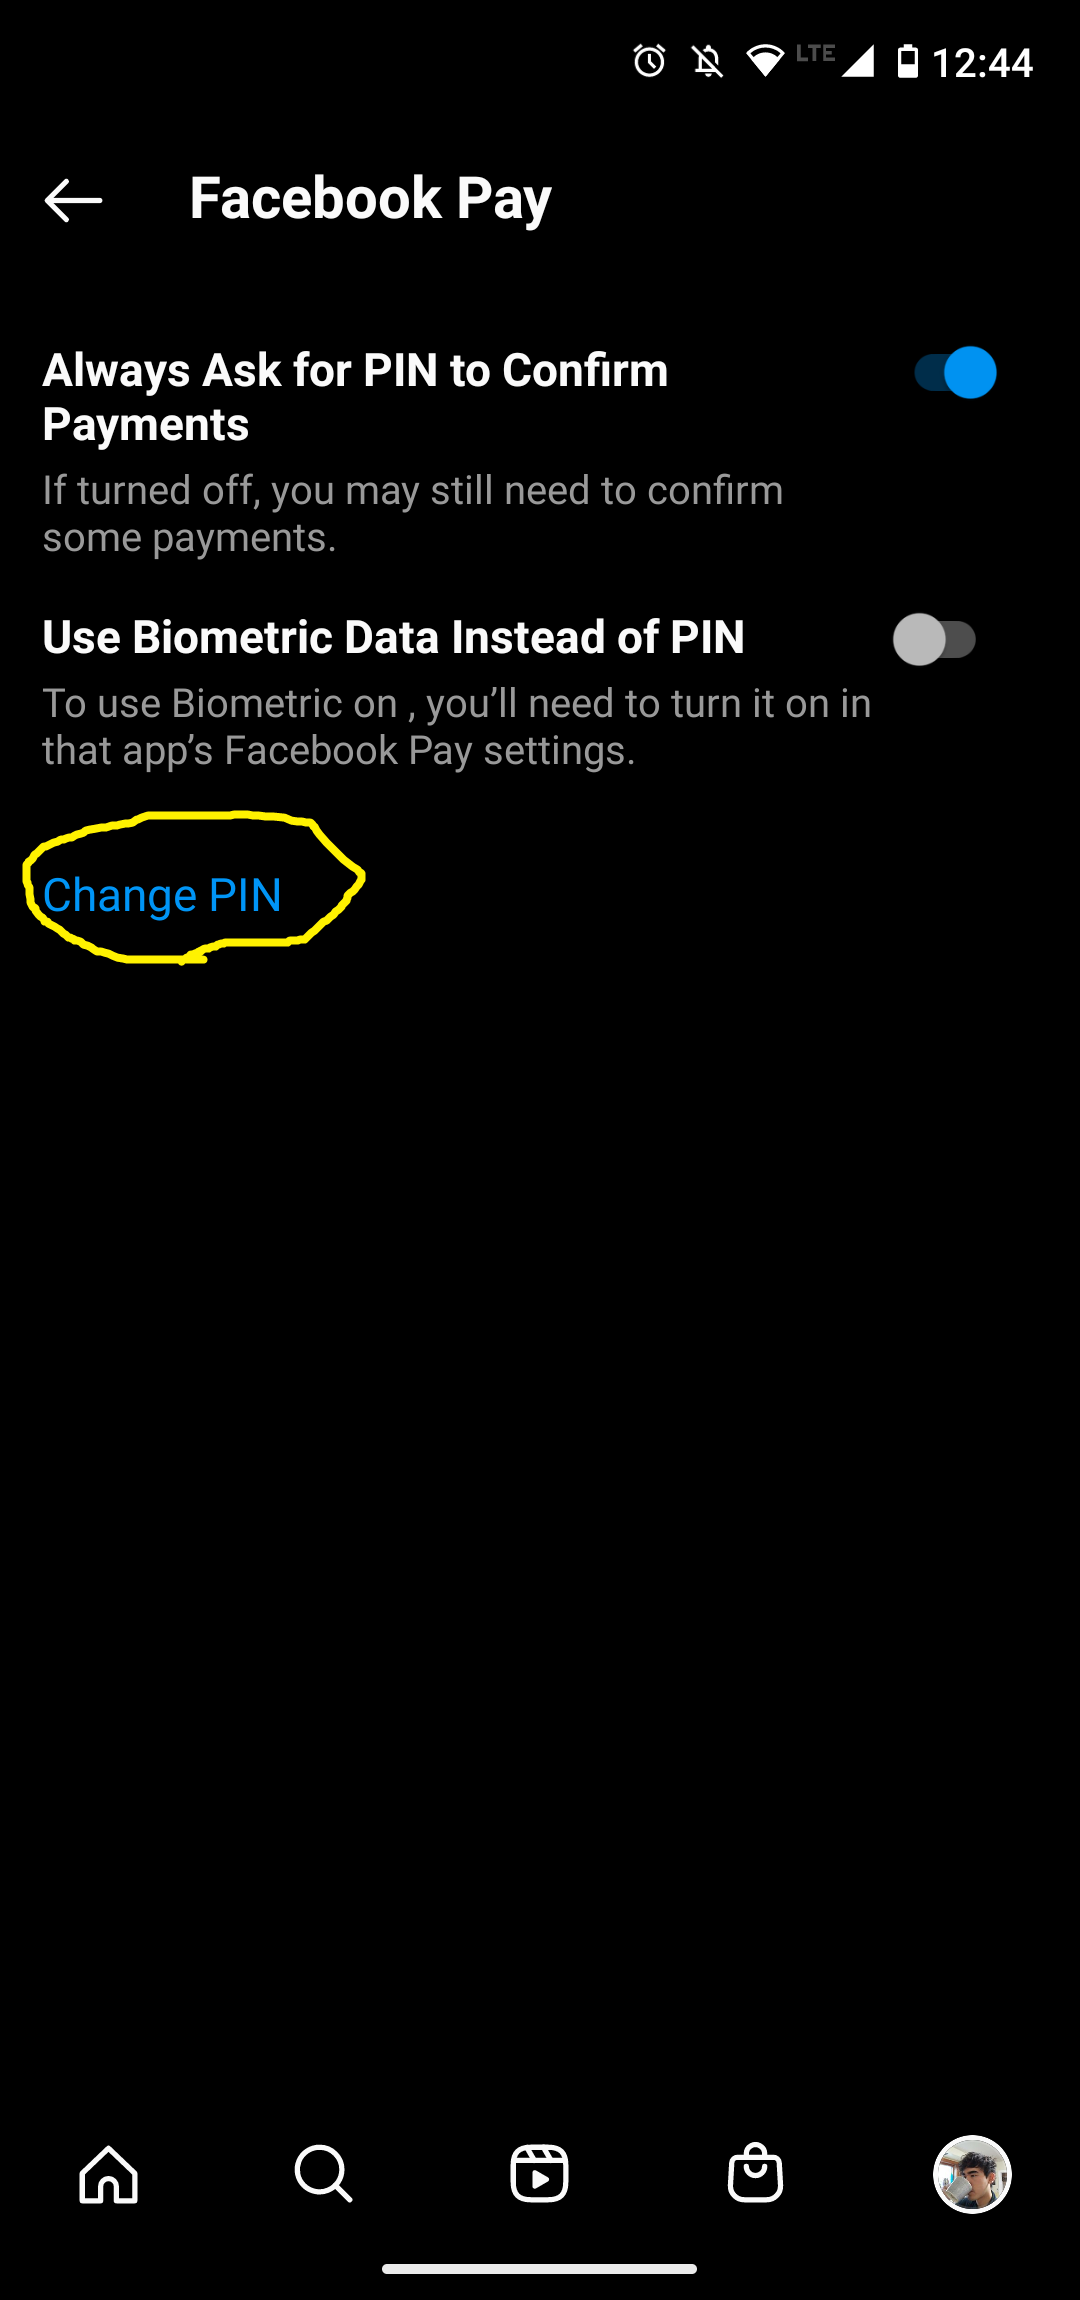
5.
After doing step four it should say that your PIN was created. If you ever want to change your PIN there should be a new button display below the switch that says Change PIN.
6.
If you select Change PIN then you can change the PIN by entering the new PIN for confirmation then enter the new PIN.
Manage Tagged Posts
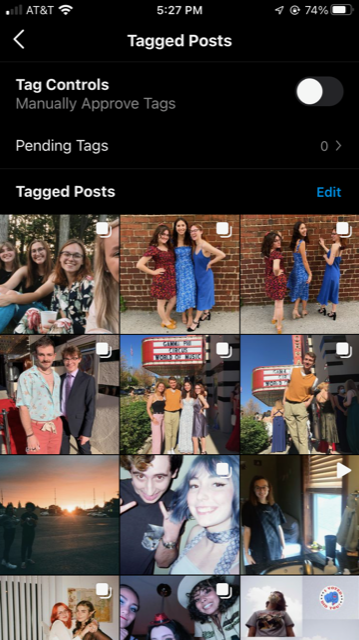
1.
First, navigate to your profile page and click the three horizontal lines in the top right corner to pull up your profile menu. Once there, you should click on the option for “Settings.”
2.
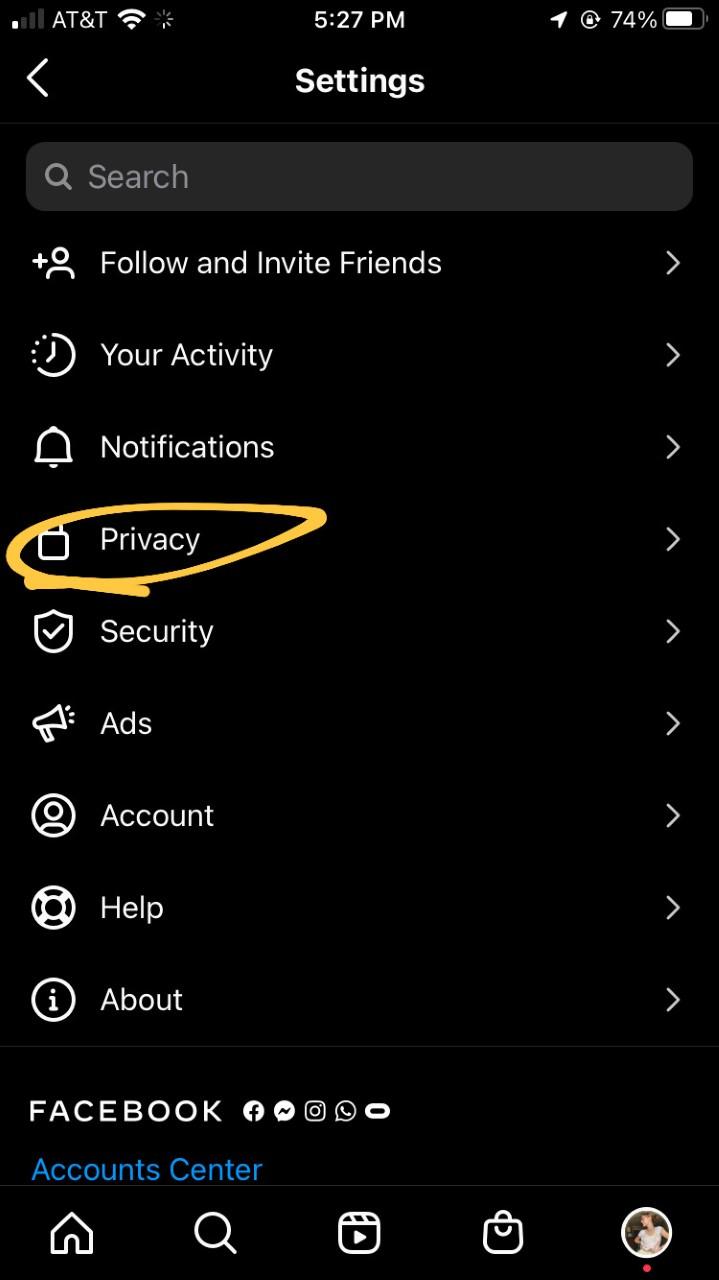
The settings menu has more options, but the one we’re looking for is “Privacy.”
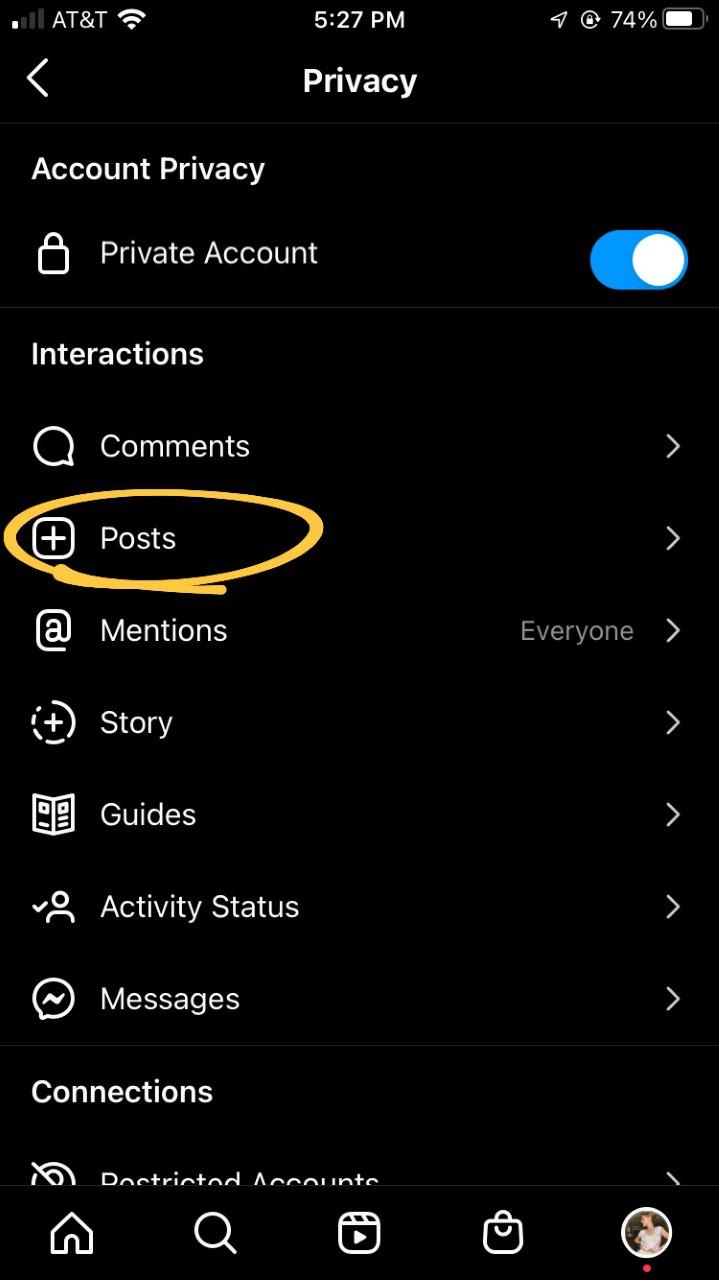
3.
Within privacy, you’ll see several options of things you can control regarding your account, but we’re looking for our tagged photos, so the one you’ll click on is “Posts.”
4.
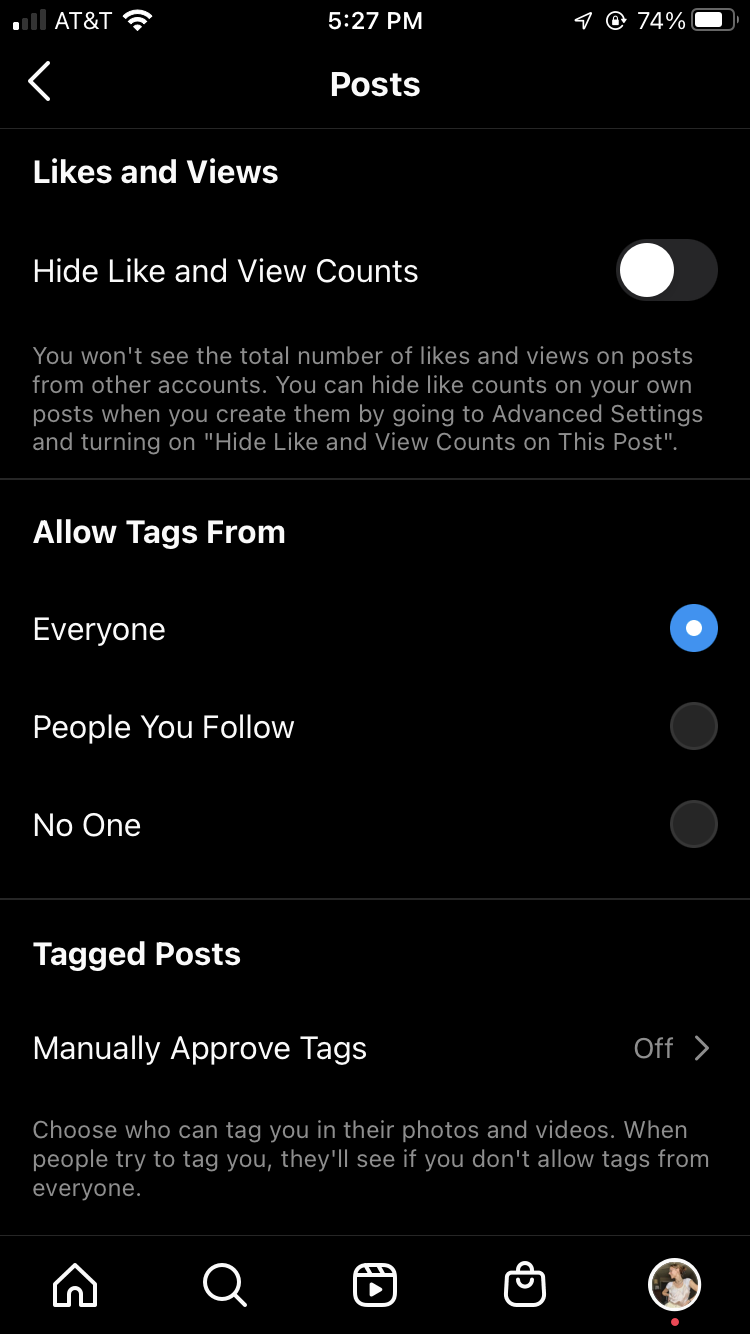
In this window, you can see that you can restrict who’s allowed to tag you in photos generally, but you can also go through and do it manually. If you go into the “Manually Approve Tags” window, you’ll see a switch that if you turn it on, it will force all tagged photos into a “pending” album to be manually approved by you. In this section, you can also look through the posts you’re tagged in, and remove yourself by using the “Edit” button!
Third Party Apps
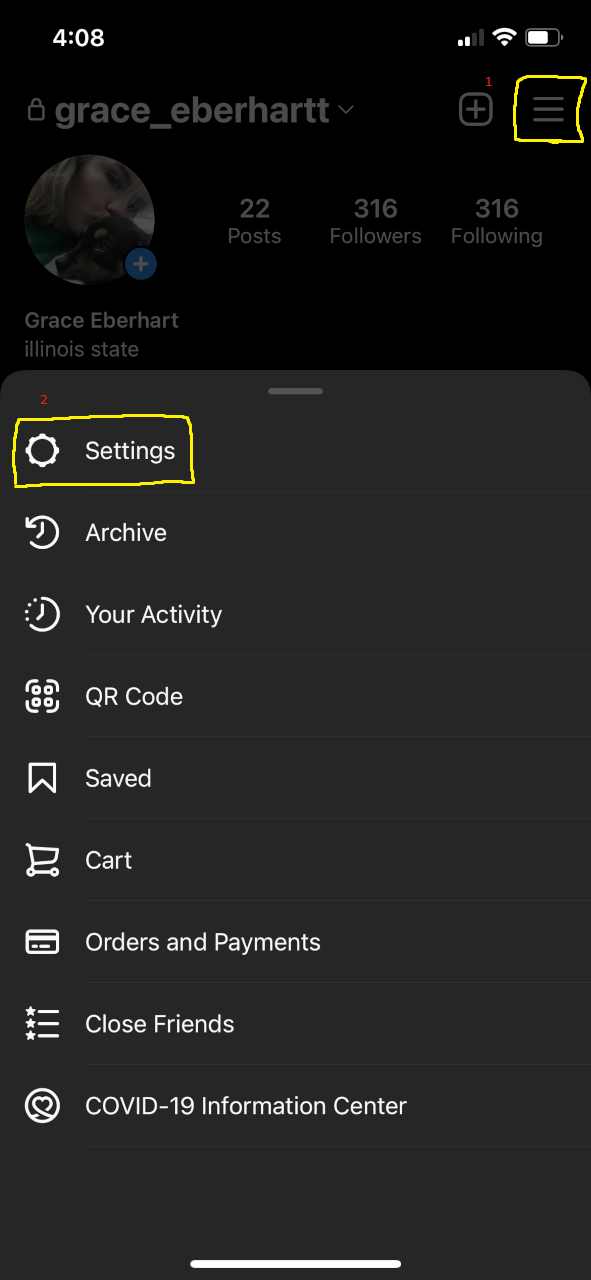
1.
The first step in protecting your data from third party apps is going into your settings from your account.
2.
Next, tap “Security”.
3.
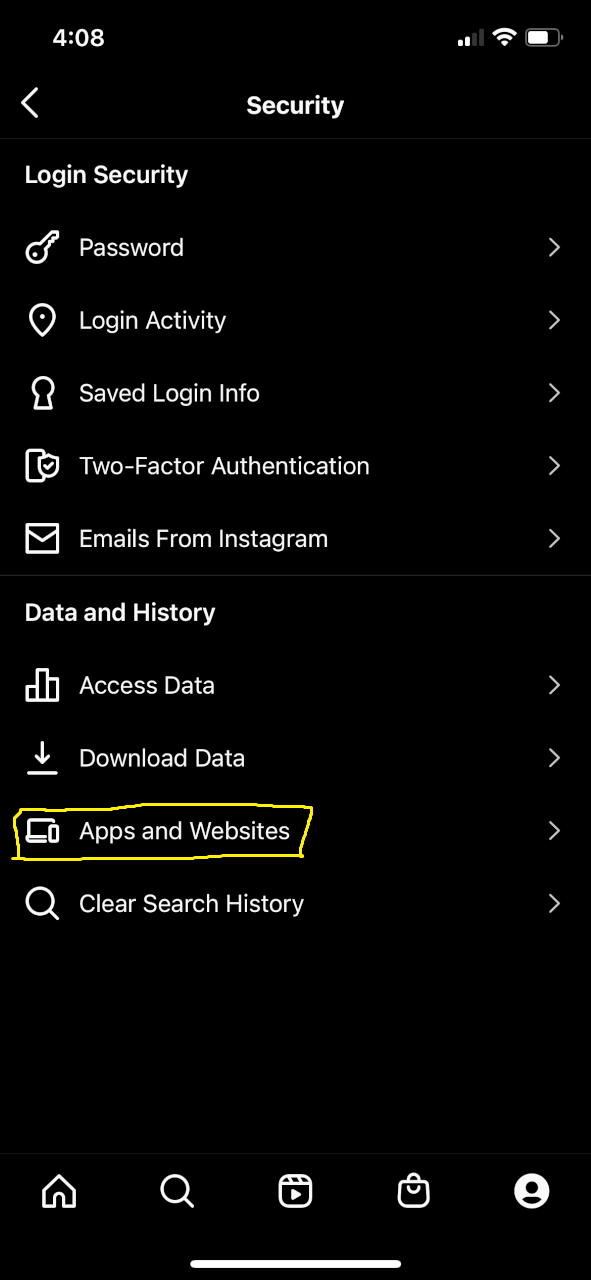
After you tap “Security”, tap “ Apps and Websites”.
4.
From this point, you will now be able to see any apps that have been connected to your account. When you select “Remove”, the app will no longer have access to your data.
Conclusion
In conclusion, we feel that our set of instructions provide clear and concise direction as to how you can protect your Instagram account.