Making Typographical Shapes
by buki521 in Craft > Digital Graphics
4473 Views, 136 Favorites, 0 Comments
Making Typographical Shapes
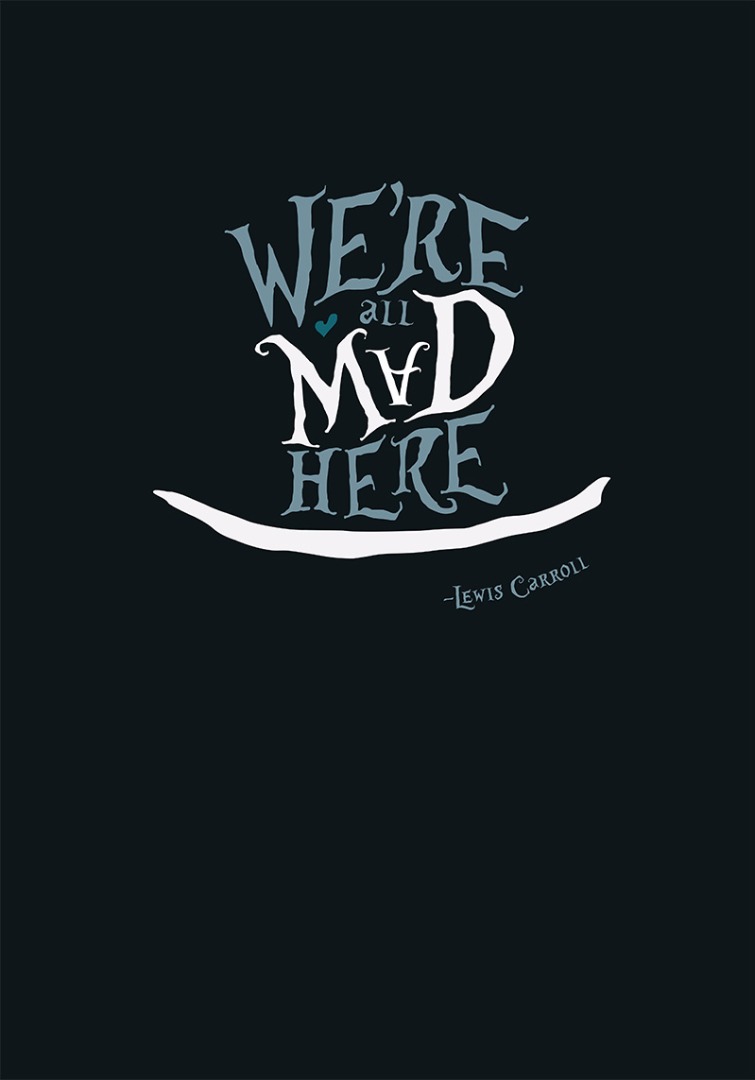
This tutorial will teach you how to create shapes using typographical elements. As we go through Adobe Illustrator, you will learn how to use basic tools to create seemingly complex artwork.
What You Need
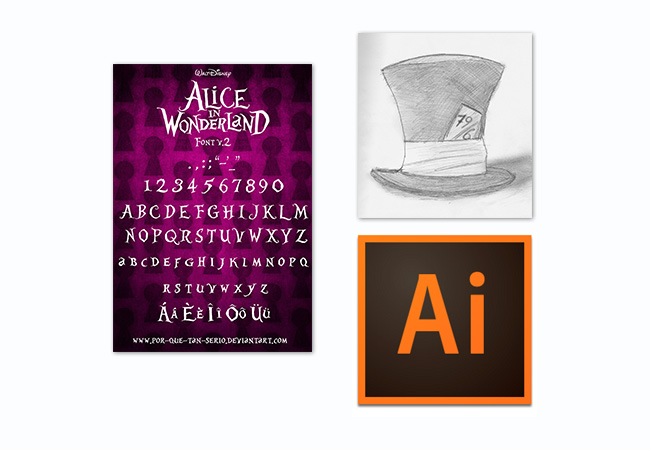
In order to get started with this tutorial, there are a few things you will be needing.
- Adobe Illustrator
- Creative Cloud is preferred here because we will be using a few tools that first came out in CC, however; if you are using an older version this can still be achieved.
- Alice in Wonderland font
- Which can be downloaded here
- Which can be downloaded here
- Image of Mad Hatter Hat, for reference
- Which you can view here
You can also use my color file (Alice.ase) if you would like.
Downloads
Setting Up Your Workspace
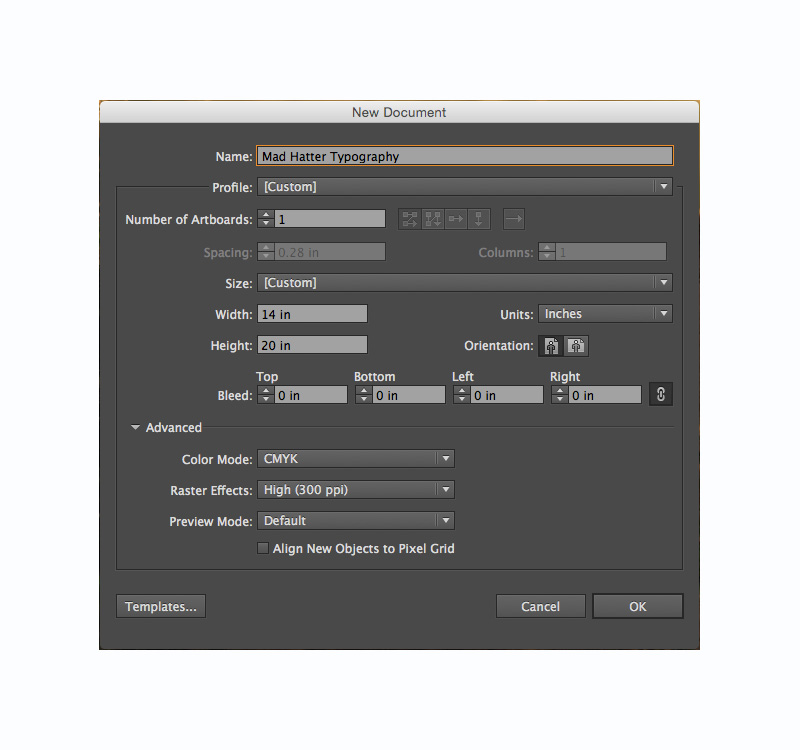
- Open Illustrator
- From the Menu Bar, click File > New
Set up your document as I have done. This step is entirely by preference. I chose CMYK and 300ppi, because I intended to print this. If this image were for web use only, you would want to chose RBG with 72ppi.
Additionally, I wanted to print this as a large poster, so I chose 14" by 20". Again, this is my preference. The good thing about this project is that everything will be vector, so we can always change the size without losing any image quality.
-
When your document is set up to your liking, click OK to move onto the next step.
Side note: CMYK is generally the preferred color option for print, and RBG for web. Also, print typically has a higher resolution (300ppi) than web which usually has a lower resolution (72ppi).
Install the Font
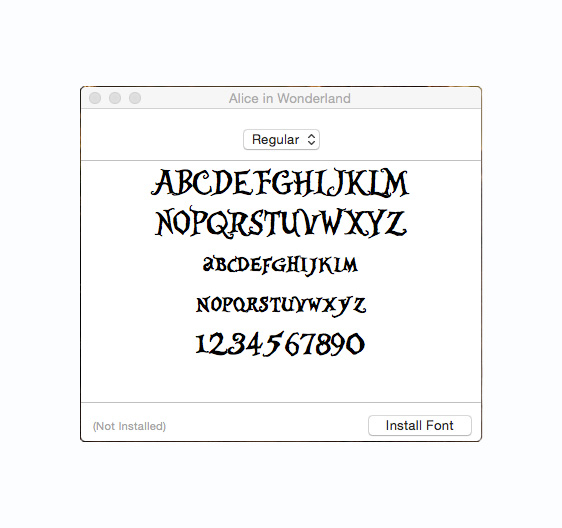
- Unzip the "alice_in_wonderland.zip" file.
- Double click on the "Alice_in_Wonderland_3.ttf" file.
- Click Install Font.
I liked working with this font because it gave me flexibility when editing the letters. Had I been working with a more standard font, it would have looked odd with some of my changes.
Please note this font is not my own, and not for commercial use.
Getting Started
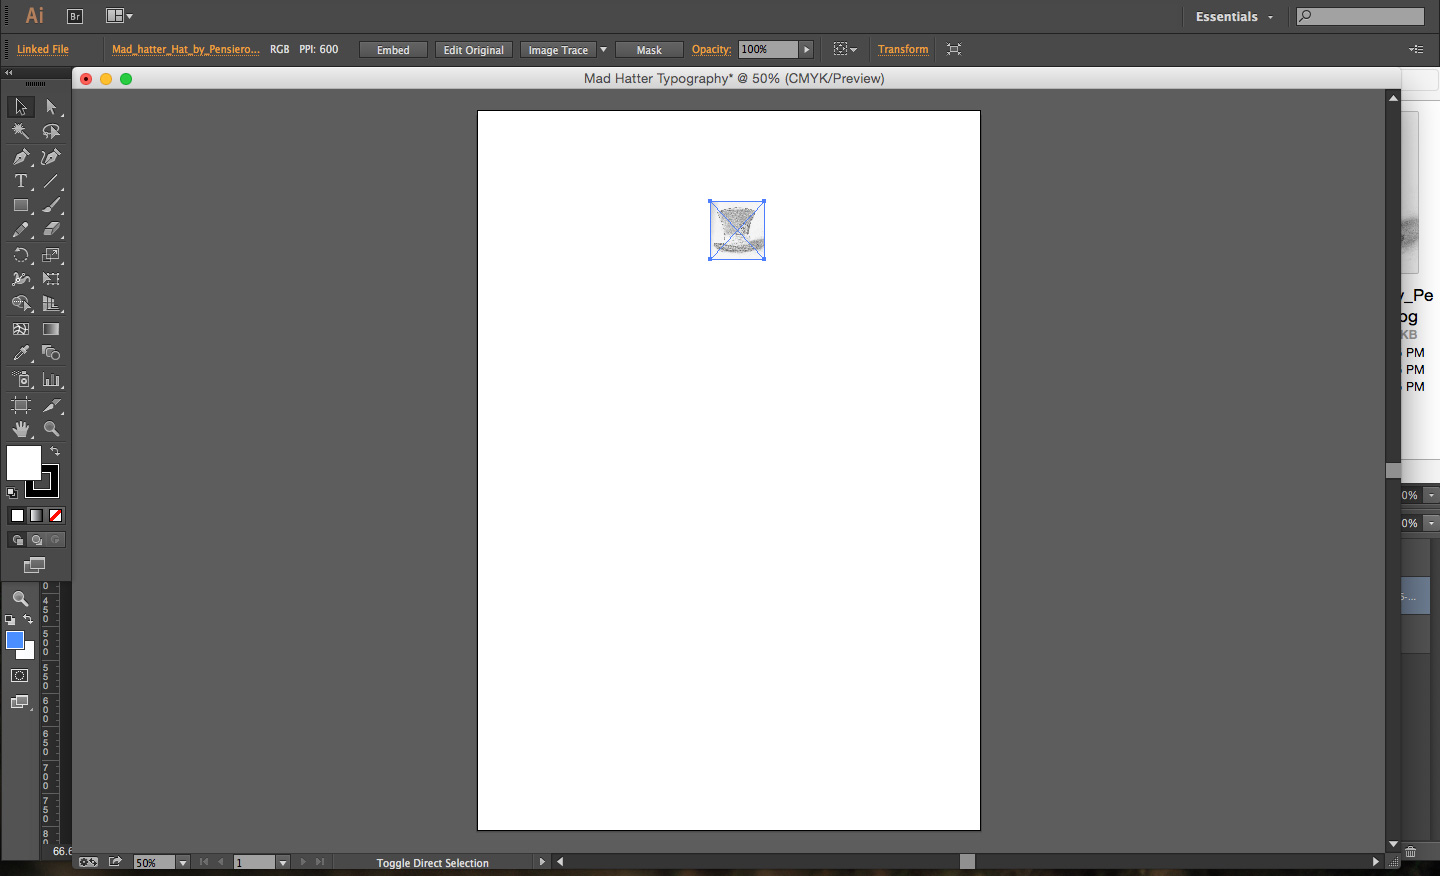
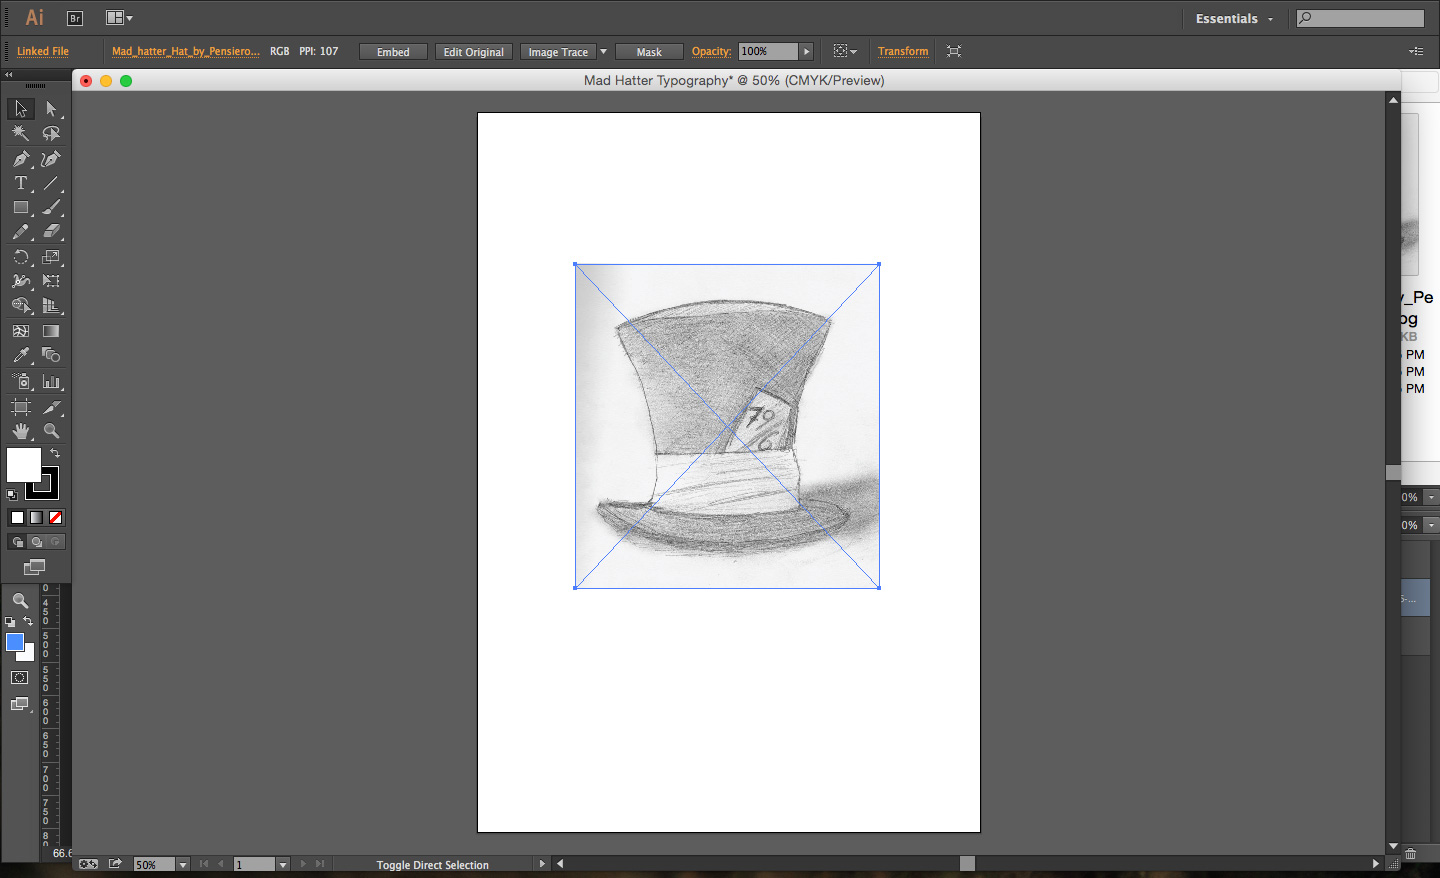
Have your artboard open on your screen.
- Drag the hat image from the webpage directly onto your artboard. You should see a + symbol which will indicate that you have done this correctly.
- Resize the hat so that it is a comfortable size to work with. We will use this as a guide to put the words into a similar shape. Don't worry if the hat gets blurry as you make it bigger. This won't matter because it is just a guide.
Please note this hat drawing is not my own.
Lock the Image
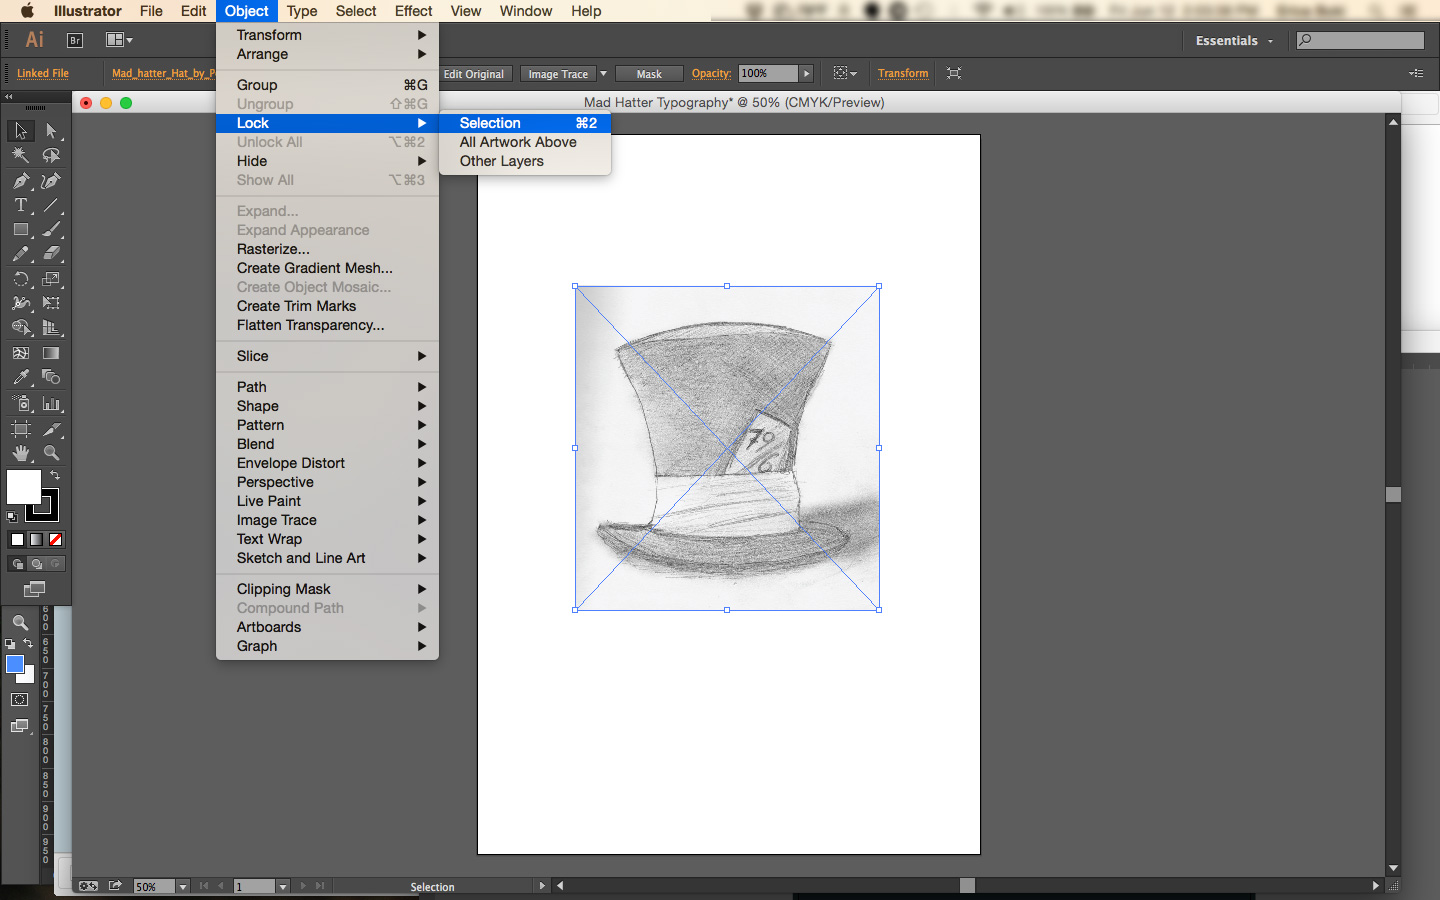
Once the image it set up to your liking, click:
- Object > Lock > Selection
We will be designing on top of this graphic, so we don't want this getting in our way as we work.
Place Letters
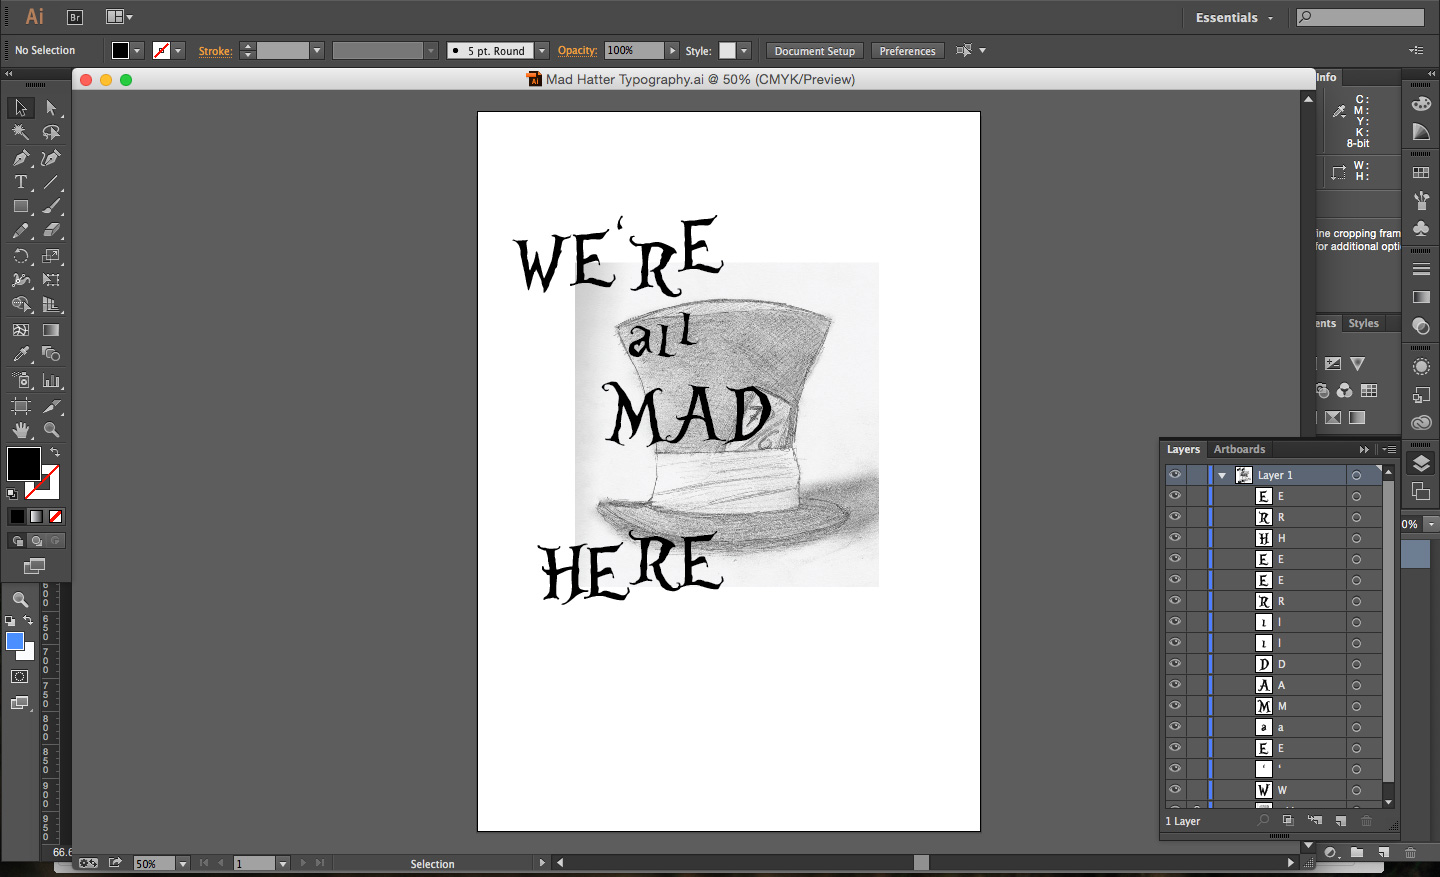
- Click on the Type Tool in the toolbar, or just simply press T.
- Now, type out every letter we will be using. We don't want any of these letters to be connected.
- Once the type tool is active, click onto the artboard. That will activate a text box. Type in the letter, and repeat.
If you're having a hard time separating the letters, press the Black Arrow Tool (or Selection Tool) in between each letter. This will click off your current letter. Then activate the Type Tool again to continue.
Placement
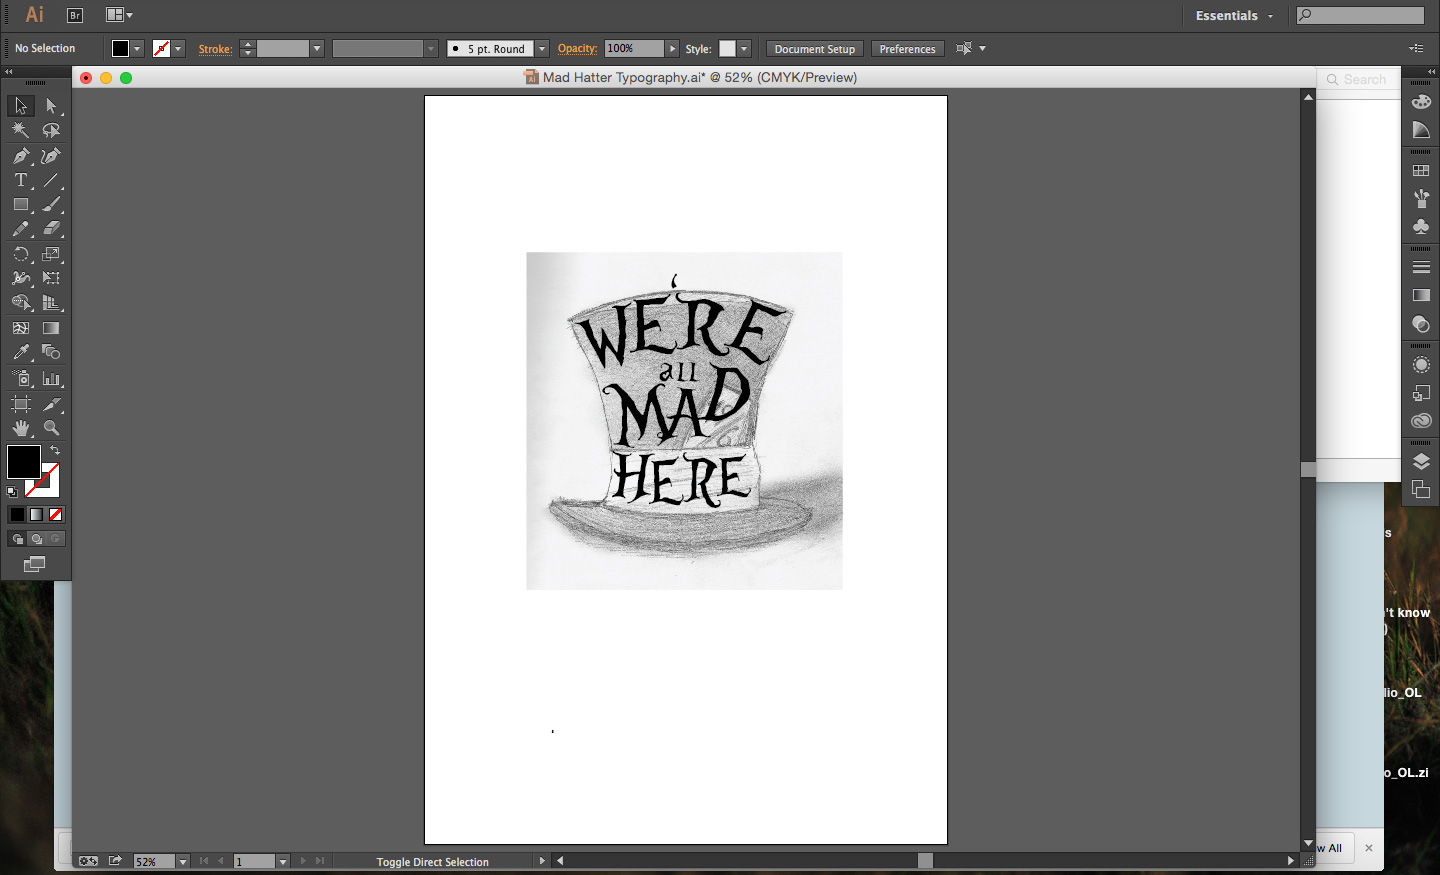
By just using the Black Arrow Tool, we should be able to complete this next step completely.
- Click and drag each letter on top of the hat, where you would ultimately like it to be placed.
- Hover over the corner of the letters to activate rotation, if needed.
Don't worry that it might not look great yet. We will be editing each individual letter in the next step.
Modify the Letters
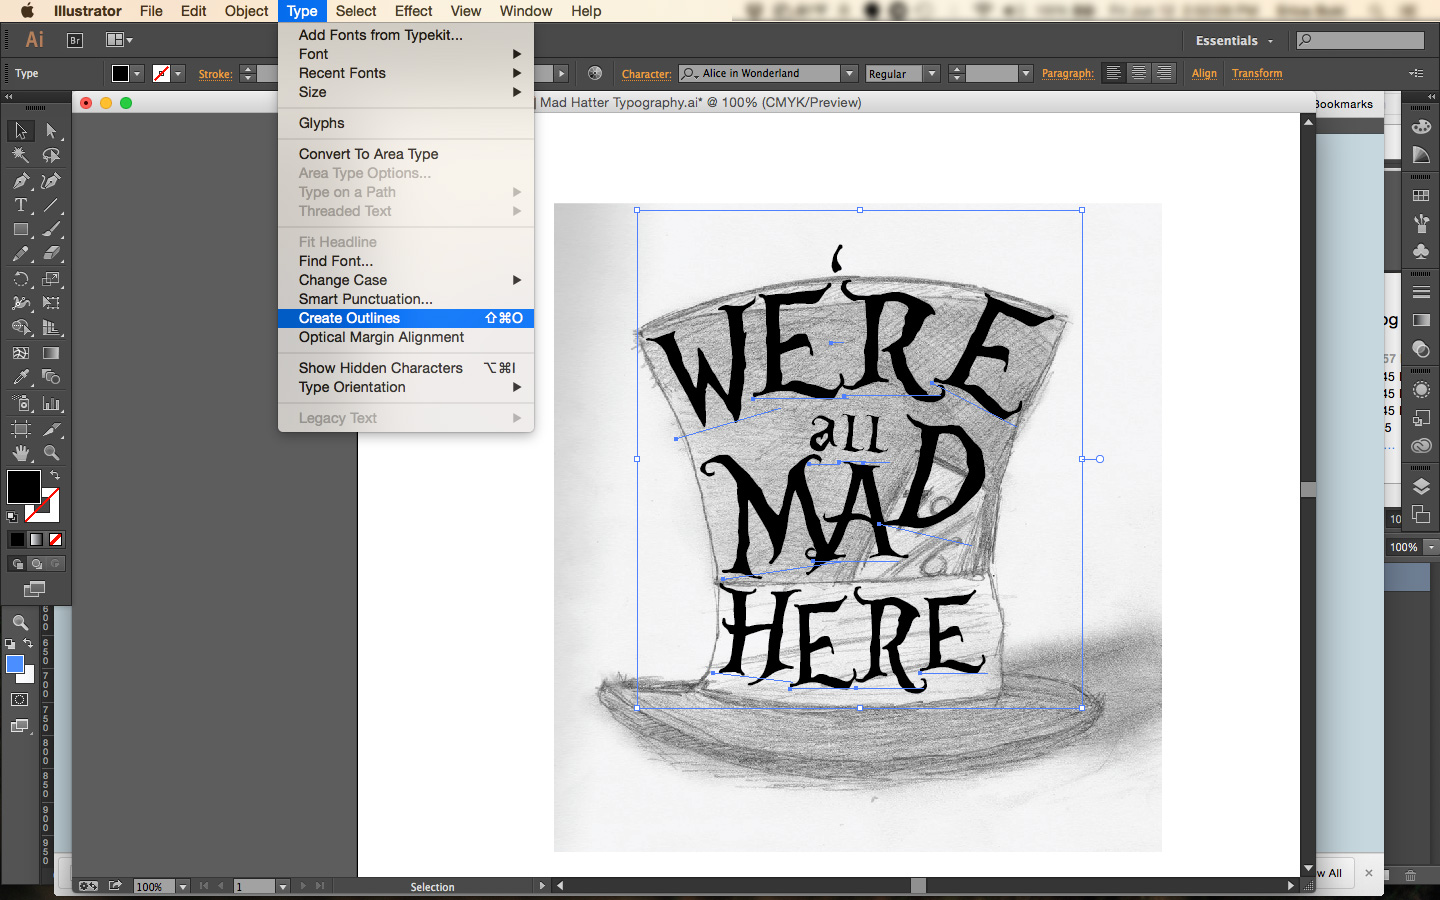
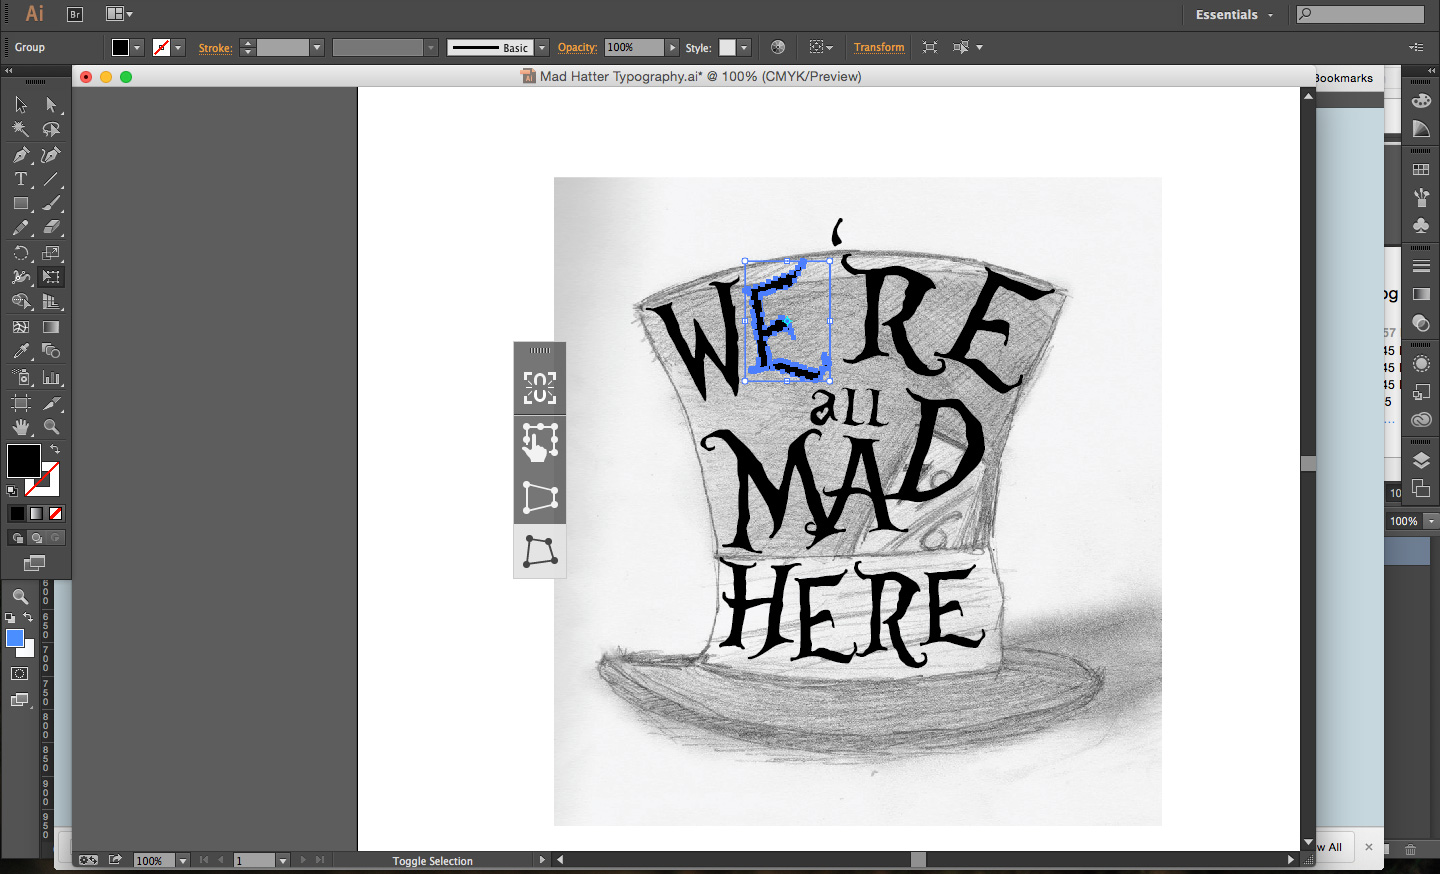
In order to modify the letters, you're going to need to Create Outlines first. To do this, you:
- Hover over all of the letters, or Command + A (or Control + A on a PC) to select all
- In the Menu click Type > Create Outlines
Now we can modify the letters as needed. To do so, use the Black Arrow tool to select a letter, and then switch to the Free Transform tool (or simply press E). I then like to chose the Free Distort option, which is the 4th one down on the window that popped up. By switching between all four options, you will have the most control over each letter.
Now you can click and drag on the corners of each letter, to get your desired shape.
Clean Up Letters
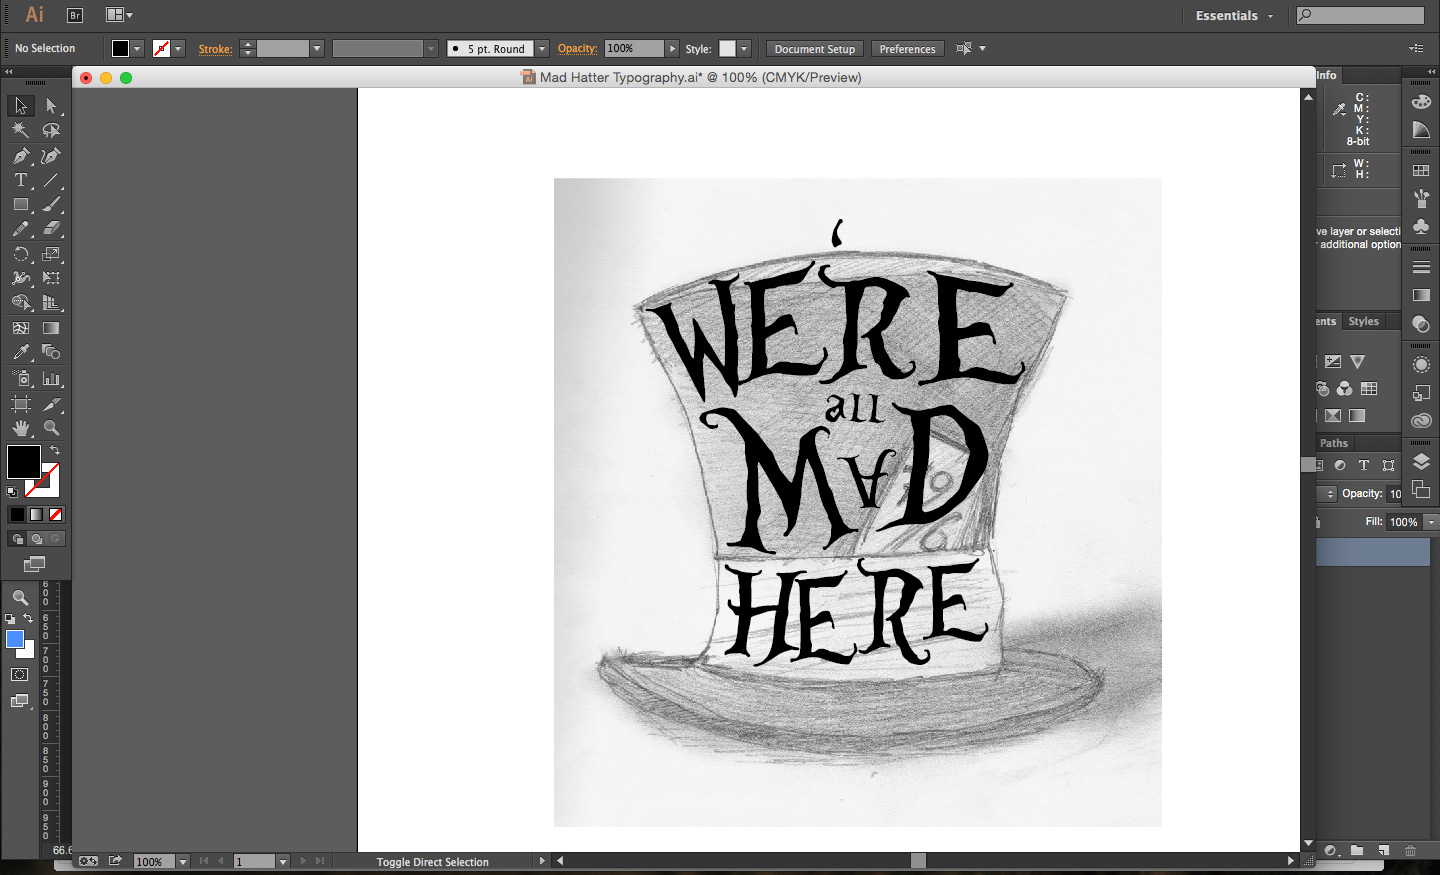
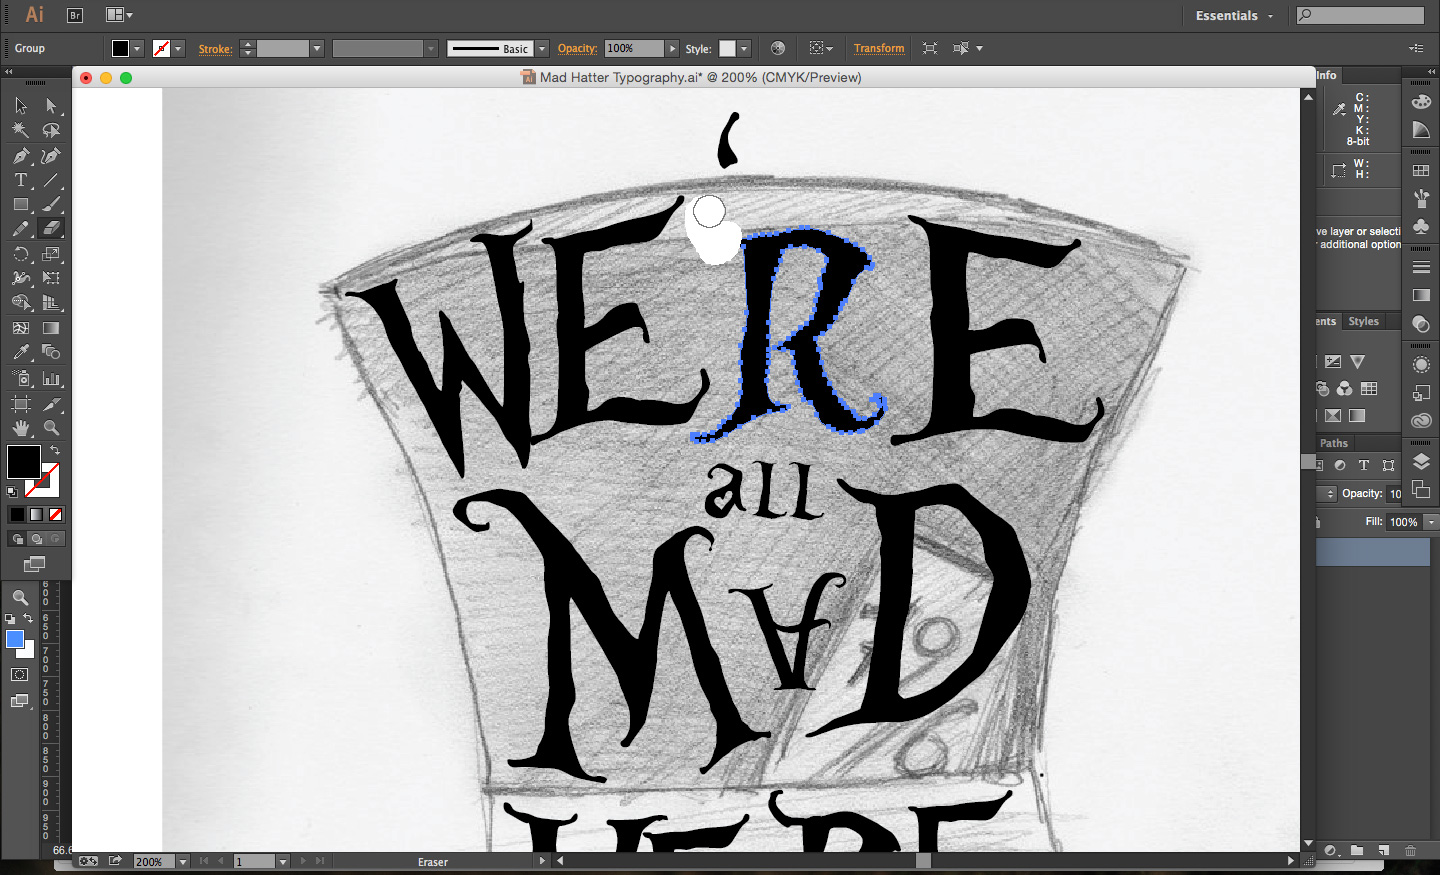
After I placed all of my letters, I decided to flip my A in the middle because it worked with the concept, and because it worked with the space around it.
Now, it's time to clean up some of the letters that have pieces dangling off them, that get in the way of our design. To do that you want to:
- Click on the letter, and then click on the Eraser Tool, or press Shift + E, in the spots you want erased.
Isolation Mode
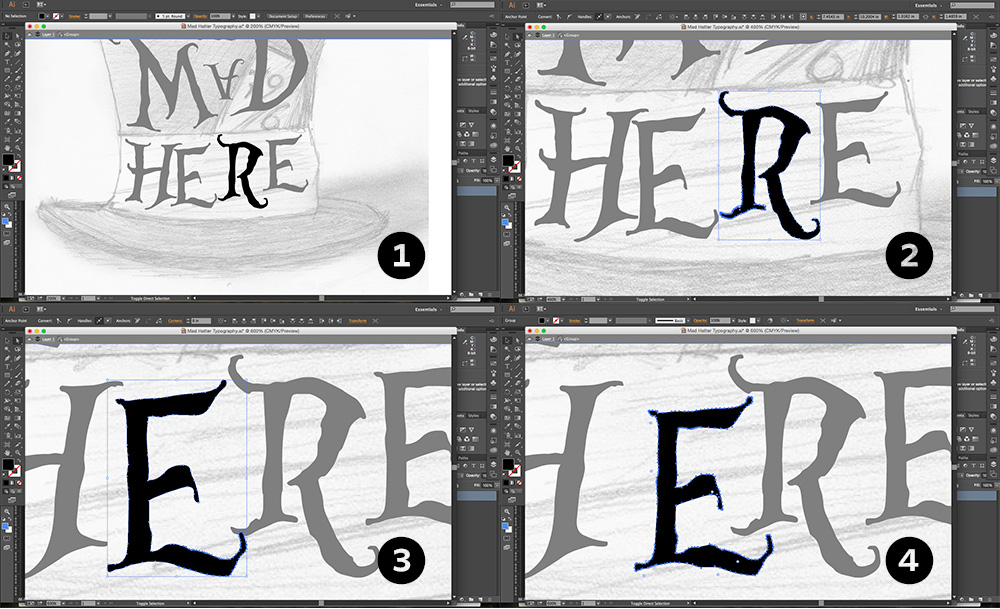
If you'd like, there is a way to modify our letters even more. By double-clicking on an item while the Black Arrow tool is activated, you enter what is called Isolation Mode.
While in Isolation Mode, you can work on whatever is selected, without worrying about touching nearby objects.
By using the White Arrow Tool, or the Direct Selection Tool, you can select and drag specific pieces of the letter to the exact spot that you want.
Then, using the Black Arrow tool again, click outside of your area to leave Isolation Mode.
Next, I used a parenthesis character to outline the bottom of the hat, which helps define the shape a bit more.
Live Paint
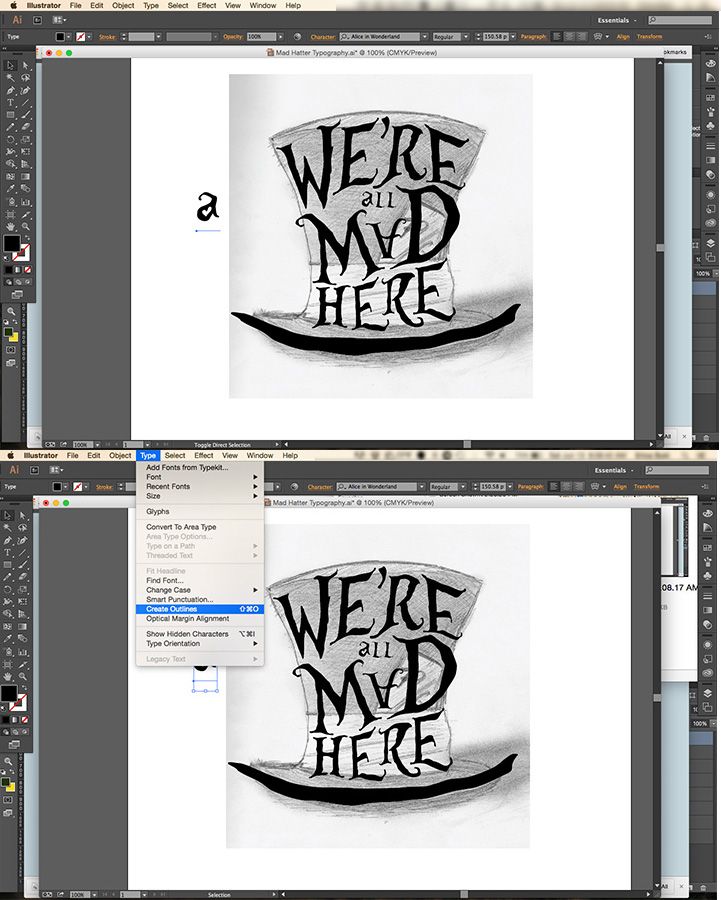
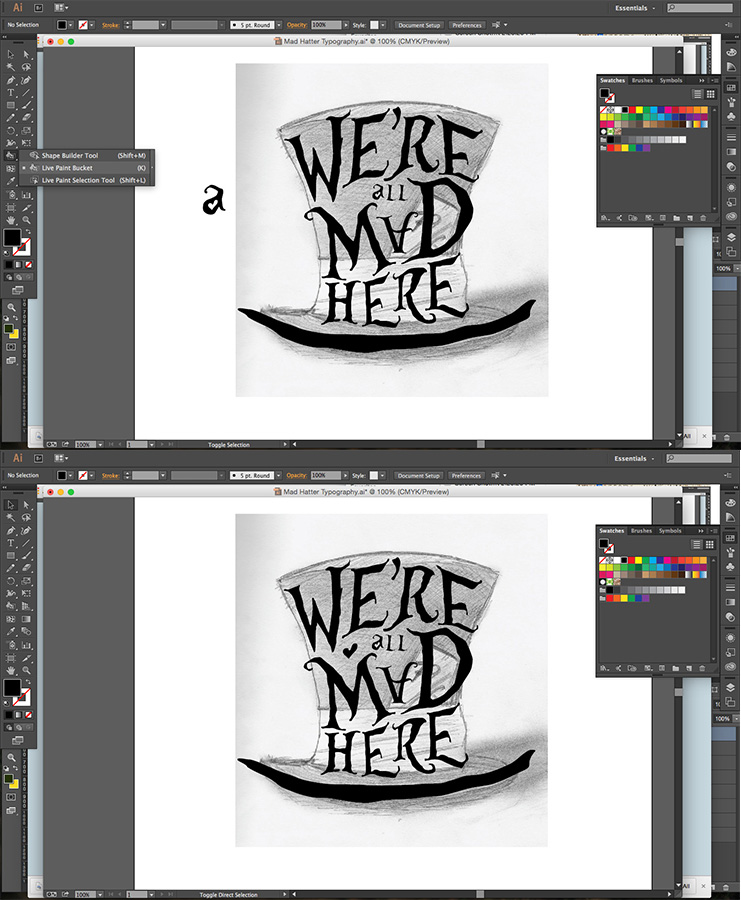
There was a small gap in between the W and M, and so I decided I wanted to put something in there. If you look closely at the lowercase a, you'll notice there is a small heart that would be perfect.
So to do this you want to:
- Type out another lowercase 'a'.
- Select the 'a'.
- In the menu bar: Type > Create Outlines.
- While it's still selected, in the menu bar: Object > Live Paint > Make.
- Now, on the left toolbar, you want to click the Live Paint Bucket tool (or press K).
- It may be hidden behind the Shape Builder tool. Right click that tool to access the ones behind it.
- Go to your swatches panel, which should be located on the right side of your screen, and pick a color you would like to use.
- If it is not on the screen already, in the menu bar click Window > Swatches.
- I chose the 'no color' option (white block with a red stripe through it) and colored the 'a' that color, and then colored the heart black so I could see it.
- Next, drag it to the spot on the canvas you would like, and you're all set!
Lewis Carroll
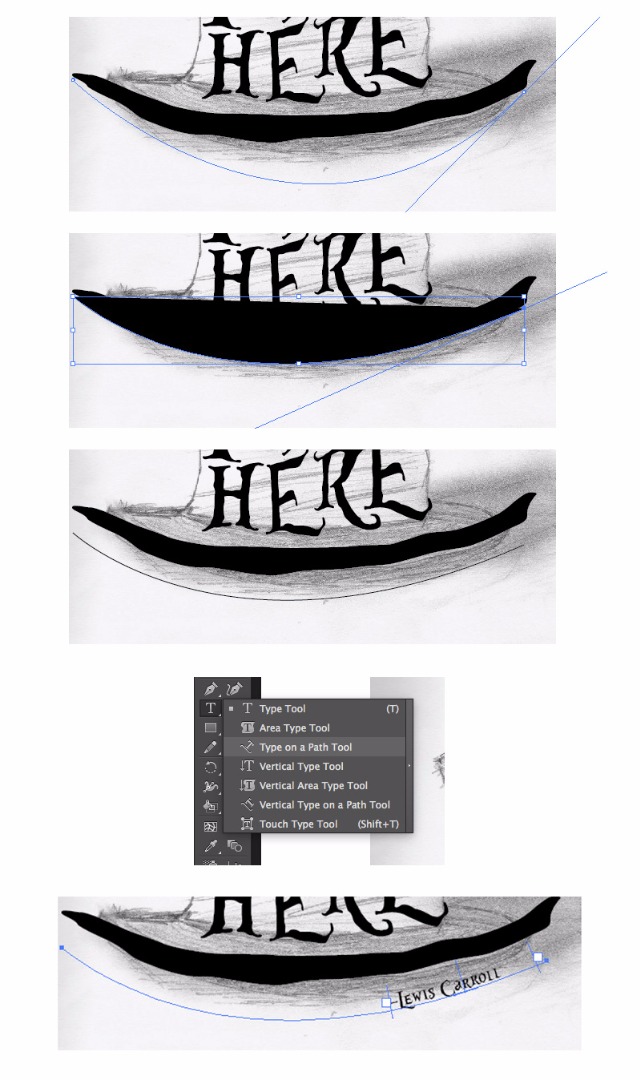
In order to sign "Lewis Carroll" onto this, we are going to want to use the Pen Tool. If you have never used this tool before, it can be pretty tricky - but we will keep it simple!
- Click the Pen Tool in the left toolbar, or press P.
- Click underneath the left side of the bottom-most shape (parenthesis).
- Click again, but on the right side this time.
- Don't let go! Drag until the desired shape is completed.
- We want to mimic the shape of the parenthesis.
- Click the Black Arrow Tool to stop editing the line, once completed.
- You can make the outline black, and in the inside colorless- so that it'll be easier to work with, but color won't really matter.
- Next, we want to use the Type on a Path tool.
- To access this
- Right click on the Type Tool (in the left toolbar) > Type on a Path.
- Click on the line, where you want to right Lewis Carroll, and type it out.
- Be sure to select the correct font
Color!

Now it's time to add color, and we're all set! If you would like, you can upload my ase file to your Illustrator, so that you can use the same colors that I chose.
To upload it, in the Swatches panel:
- Click for more options, the top right icon
- Open Swatch Library > Other Library...
- Chose the file
Once you're ready, just select pieces from the artboard (with the Black Arrow tool), and then click the color you want it to be from the swatches panel.
You can choose the Rectangle Tool (on the left toolbar, or U) and cover the whole background with it. That is how to make a background color.
You'll also want to make sure you delete the background hat.
In the menu bar:
- Object > Unlock All
- Then select the hat and click Delete
Export
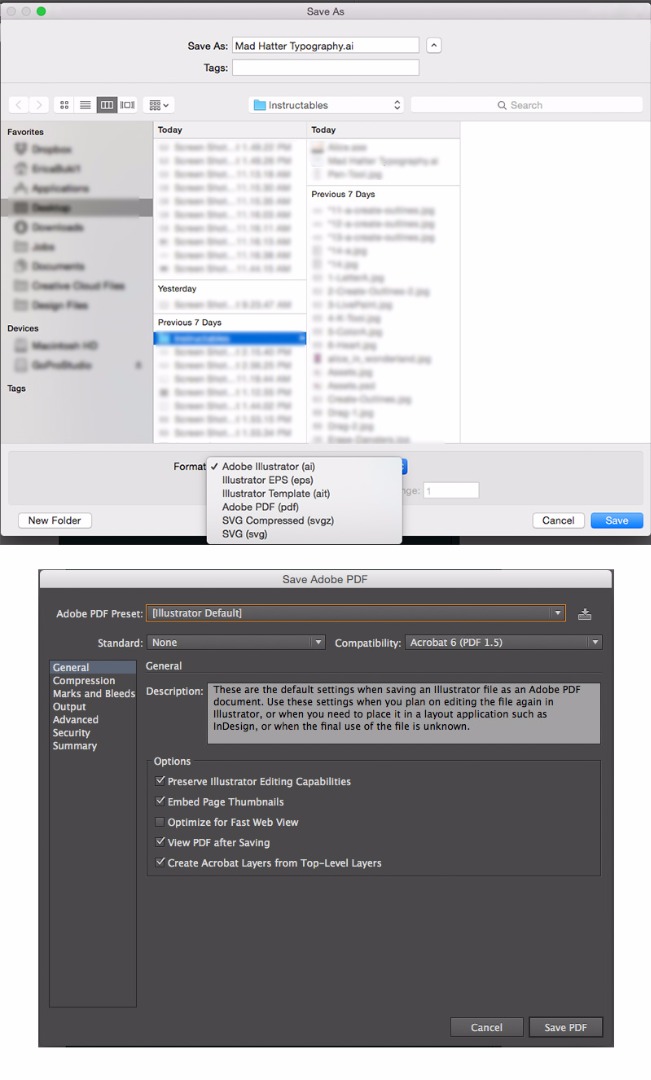
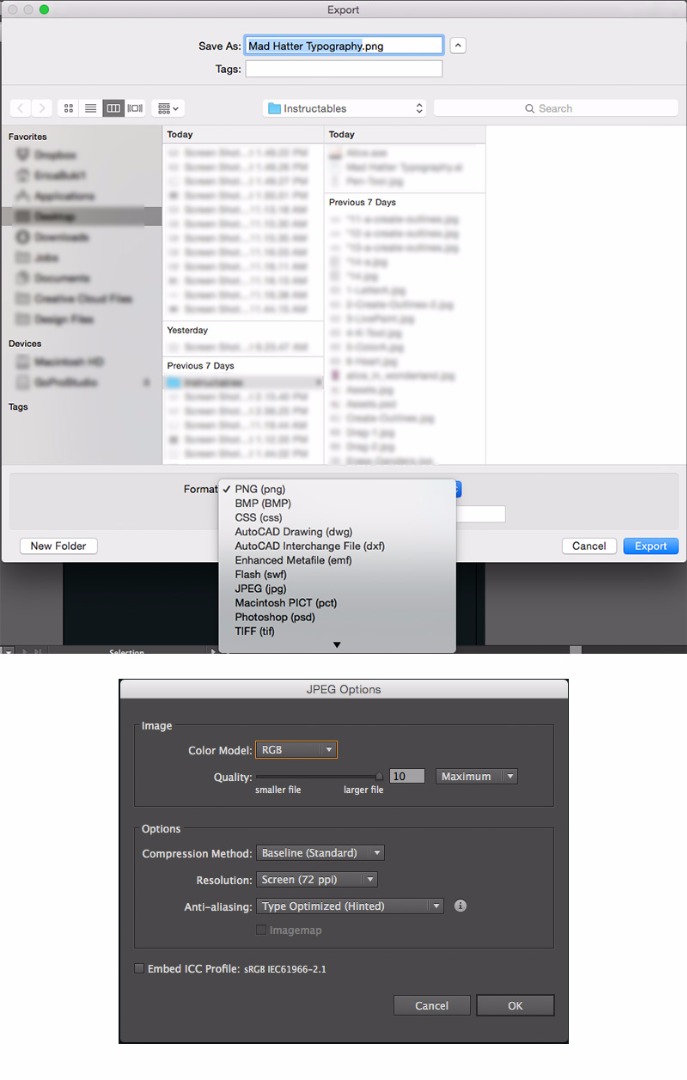
Now you're done and it's time to export! You should definitely always have an ai file saved. This is the file you would go back to, to make any future edits.
In Illustrator, there are many different types of files you can save as. I personally like to save as PDF or JPG.
For PDF:
- File > Save As
- In the Format dropdown choose PDF
- In the second pop-up box, you can mess around with the settings, but most importantly, click Save PDF
For JPG:
- File > Export
- In the Format dropdown choose JPG
- In the second pop-up box, you can mess around with the settings, but most importantly, click Save