Making Turbine Blades on Solid Works
by blossomsPDE in Workshop > 3D Printing
13973 Views, 16 Favorites, 0 Comments
Making Turbine Blades on Solid Works
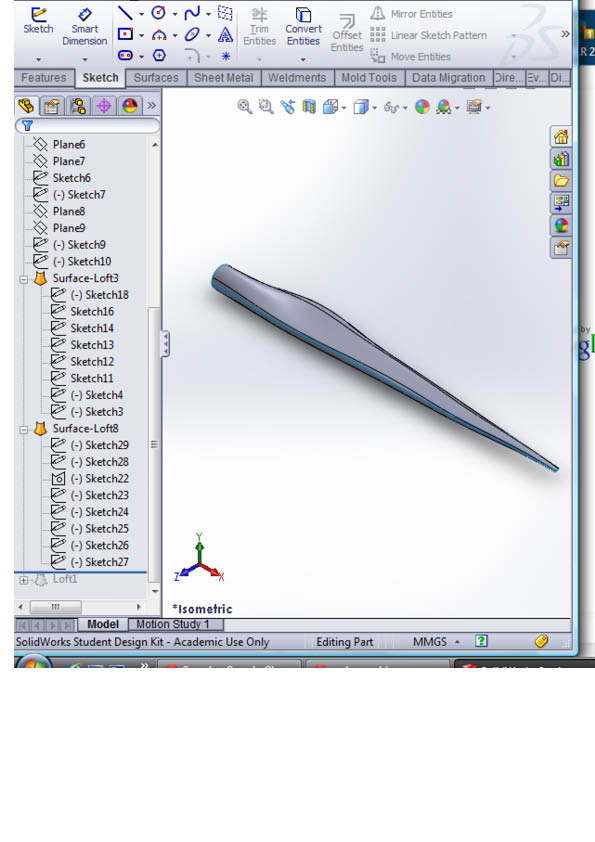
In the .instructables i will show you how to make the turbine blades for a wind turbine on solid works
the skills from the .instructable can be used for making many different things on Solid Works.
the skills from the .instructable can be used for making many different things on Solid Works.
Step 1 - Outline

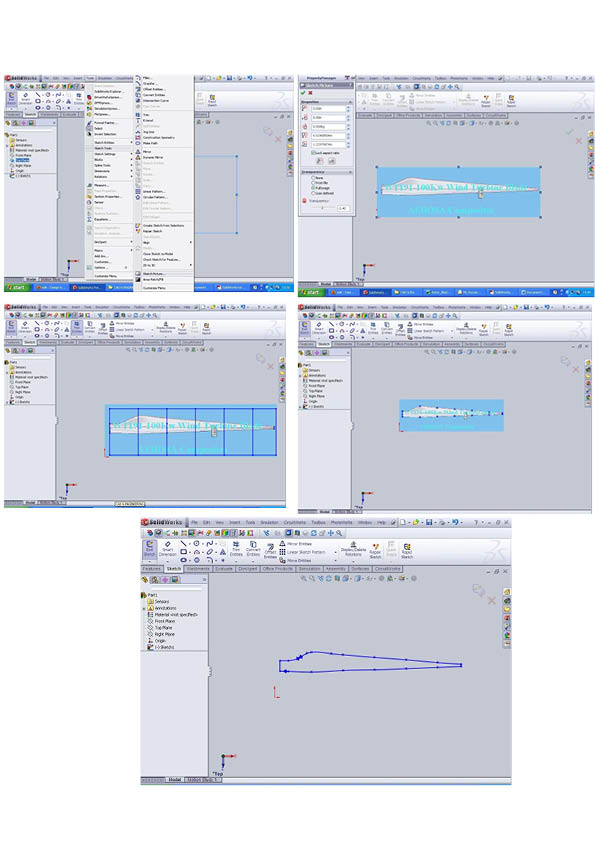
Open a new part on Solid Works. To achieve an accurate outline shape of a turbine blade a good cheat is to import a profile drawing of one into the Solid Works sketch then sketch over it tracing its curves using splines and lines.
Use the image attached or another image or the desired blade.
Resize the image to the size of blade yo want
To make it easier to draw round the shape of the blade it is a good idea to split it into 6 sections using the linear sketch pattern.
Where the vertical lines cross the outline of the blade insert sketch points.
You can then delete the lines leaving only the sketch points
Using the spline tool you can draw round the outline of the shape
Use the arrows to adjust the lines to fit the outline of the picture
once you have done this you can delete the picture leaving only the outline
Step 2 - New Drawing Planes
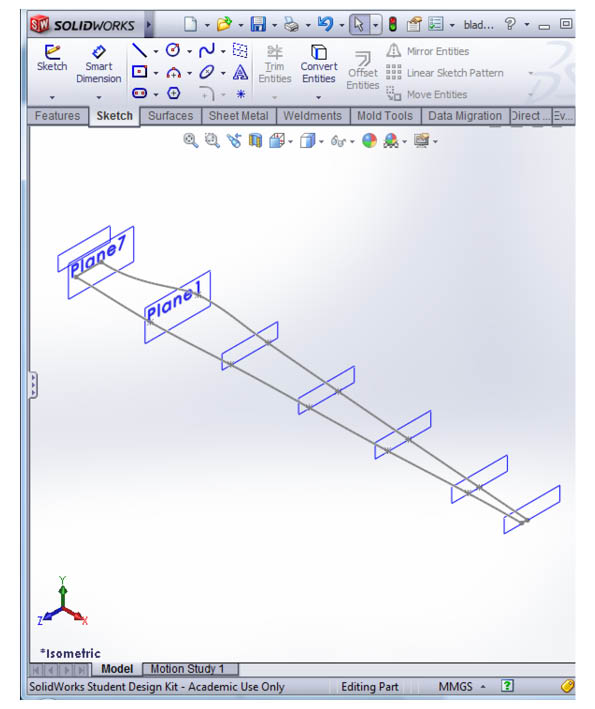
Using the sketch points as reference add a new drawing plane. To add a new drawing plane go to “reference geometry” and click “plane” then select the plane that is at a cross section across the blade
Step 3 - drawing the top curve
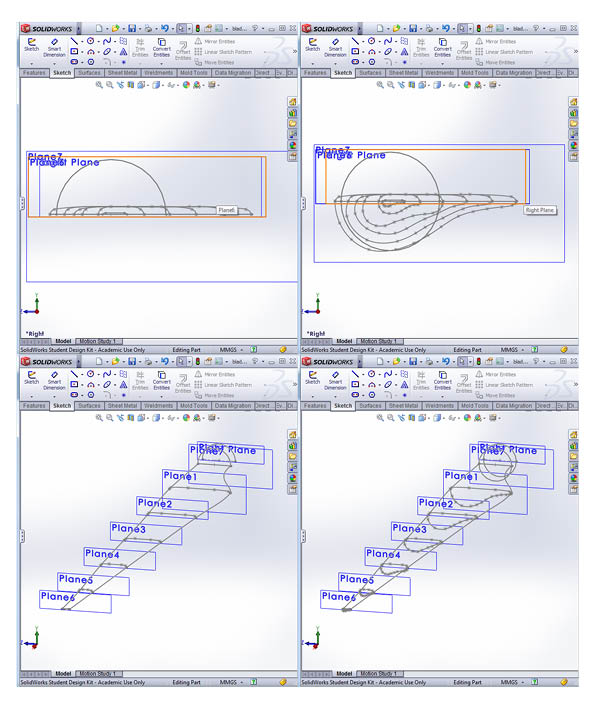
Select each plane individually and draw on the cross section of the blade at this point. Some times it is useful to insert a picture to draw around.
For mine sketch on plane 1 simply consist of a semi-circle to reflect it being the end of the blade that is attaches to the turbine Hub./Nose
The other sketches along planes 2 - 7 will have one side flat and the other curved similar to an aeroplane wing reflecting the required shape for the aerodynamics, if you were standing in front of a turbine watching it turn it is this front face of the turbine you would be looking at.
I used spline lines with around 4 points to each, making them easier to manipulate to the desired shape and curve.
You can either do the top section and bottom section as different sketches or do them as one sketch. I would recommend yo do them as one sketch as it makes it easier when it comes to filling in the rest of the shape
Step 4 - the Filling in Shape and Finish
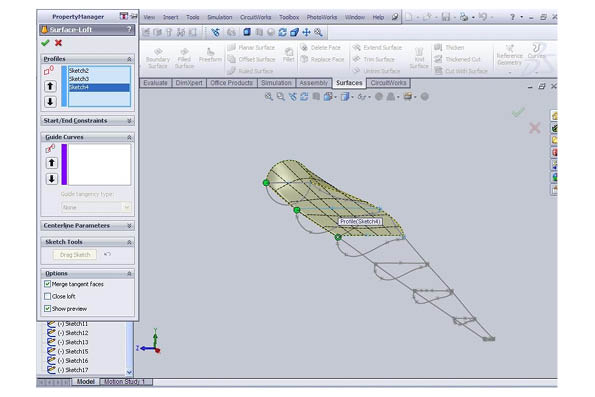
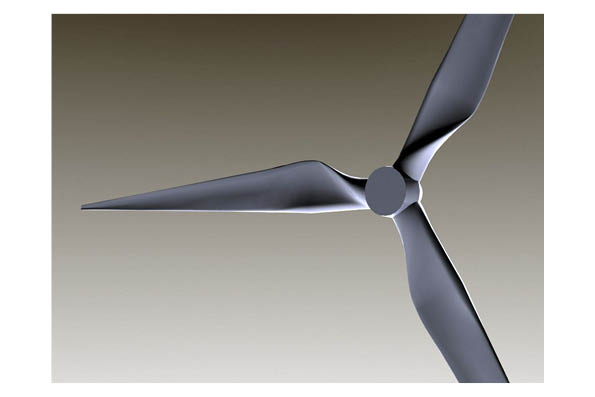
There are 2 ways to do the next step and it depends on what type of 3D printer you are using.
The 3D printer we used could only handle solid shapes so I used the
“Lofted Boss/Base” tool and selected the different cross sections creating one shape
Some 3D printers can print surfaced so for those you can just select ‘Surfaces’ select ‘Surface Loft’
For both in ‘Profiles’ select the splines starting with the semi circle at the root moving out towards the tip making sure to select them in order
you will have to save it in the format required by the 3D printer or you can simply use it to create a drawing.
by david brooks and team Blosom