Making Trick Photos Using Gimp for Windows Software
by HBSkirmit in Circuits > Cameras
1894 Views, 13 Favorites, 0 Comments
Making Trick Photos Using Gimp for Windows Software
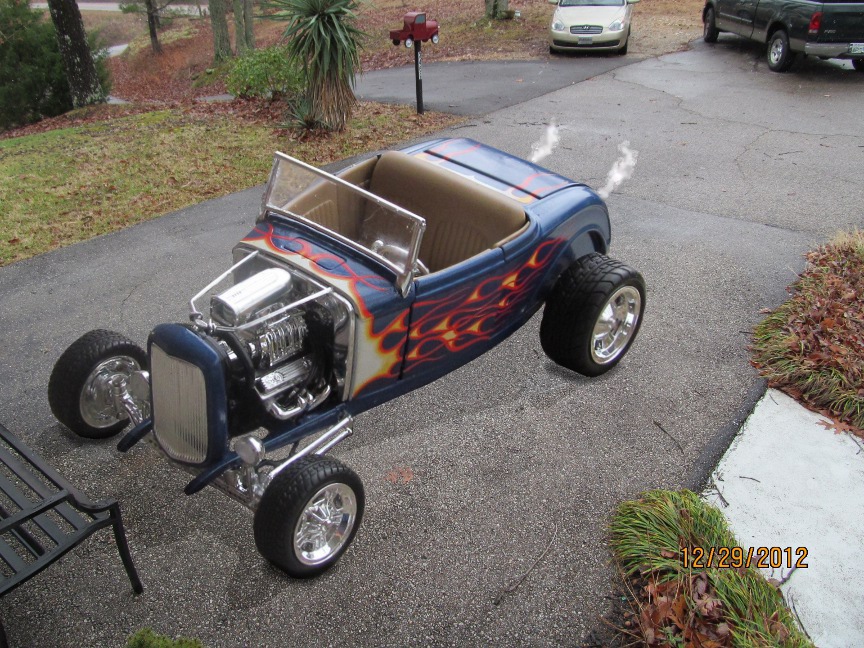
In the photo above, it appears that I have a 32 Ford coupe in my driveway with engine running and exhaust vapors coming out of the twin exhaust pipes. This is actually a 1/24 scale model, which I enlarged to fit the scene. While some objects can simply be copied and pasted to other photos, the areas between frame and engine and engine and radiator support require the use of transparency.
The following steps explain in detail how I completed this photo.
The following steps explain in detail how I completed this photo.
Tools Required
Digital Camera
Laptop or PC with Windows software
Gimp for Windows Software
(Gimp for Windows is a free software download available at the following website:) http://gimp-win.sourceforge.net/stable.html#help
My personal preference of Gimp is version 2.6 and that is the version I will be using in this instruction.
Photoshop could also be used for this application.
Taking the Photos
The first photo I took was the image of my vacant driveway. I then placed the 1/24 scale model car in the center of the driveway and took the second photo from the exact same angle and height as the first photo. This is important to maintain the realism and perspective. Both photos should also have the same weather conditions, ie, cloudy or sunny to maintain the realism.
Both photos were uploaded to my computer.
Both photos were uploaded to my computer.
Using Gimp Software
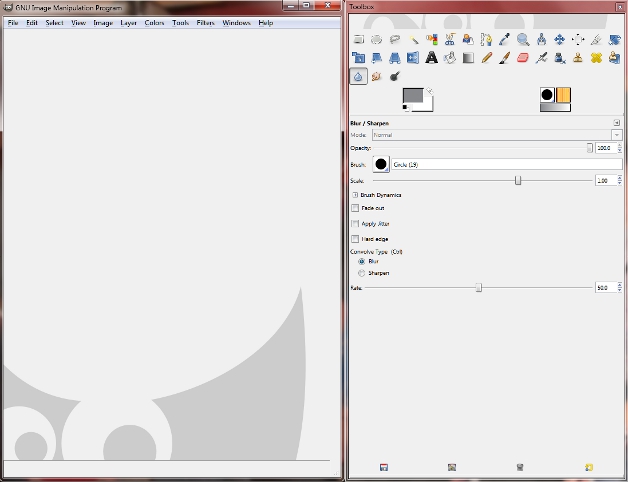
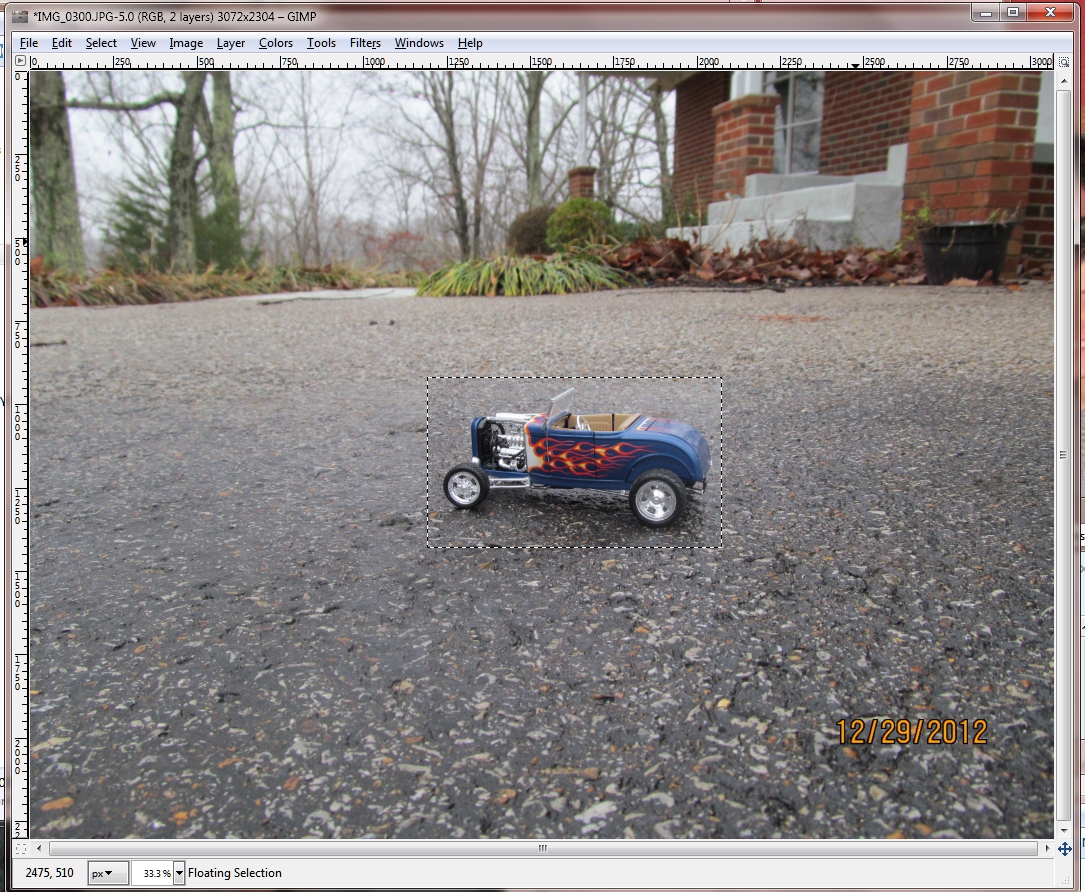
Once you have downloaded the Gimp software, open the program. With Gimp 2.6 you will see two gray boxes with the one on the left the image box and the one on the right, the Tool Box. The image box has the File option to open an image file, or you can simply drag the image into the image box. I would suggest moving the mouse around the Toolbox area to become familiar with each tool required. As you move from one tool to another, a yellow highlight box will appear to explain the tool operation. We want to leave the vacant driveway image alone for now and drag, or open the image of the car into the Gimp image box. Using the rectangular select tool, place a rectangle around the image of the car being careful to include the entire car. In the image box, click on "Image", then select "Crop to selection" A smaller photo should now be visible with just the vehicle in the square. (This is not the photo I used, just an example)
You may need to click on the Magnifying glass in the Tool Box area, then click on the photo to enlarge to a suitable size.
Now would be a good time to save this cropped image as an .XCF file. I saved my car photo as 32 Ford.XCF. This type photo file allows you to save in the middle of a modification and then open later to finish.
Using Gimp Software Continued
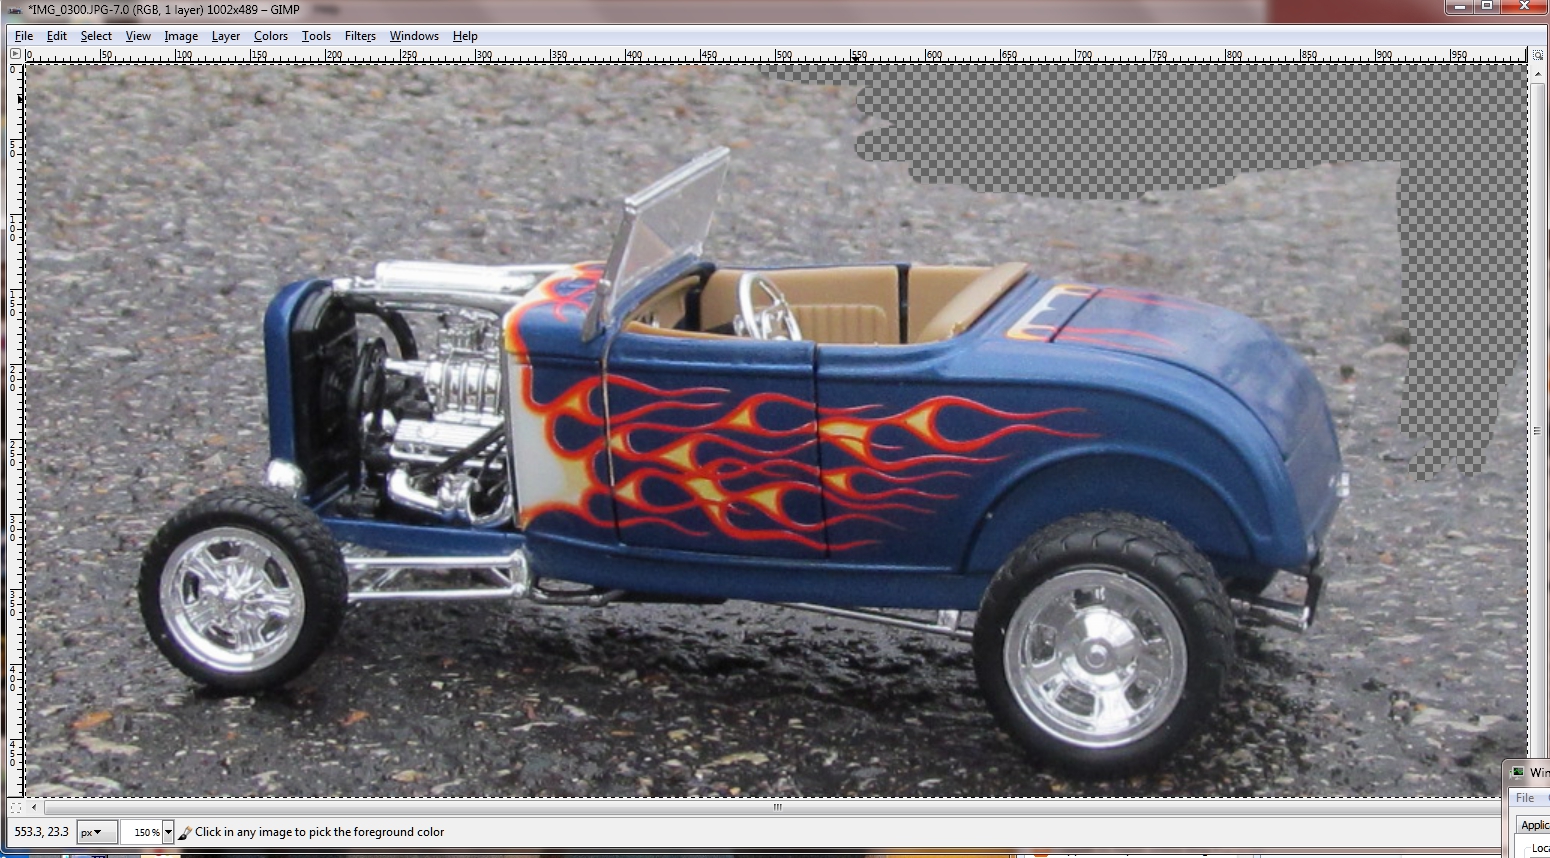
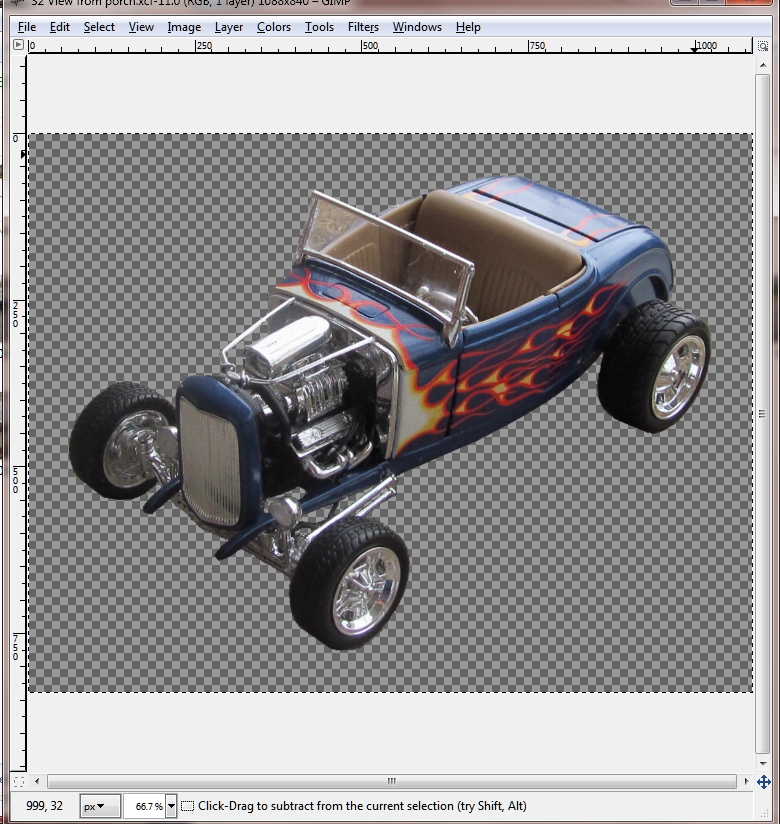
Now that you have your image saved as an XCF file we are ready to add transparency around the image.
At the top of the Gimp image box, click on Layer, then click on the dropdown lable "Mask", then click on "Add Layer Mask". A small box should appear labeled "Add a Mask to the Layer". Click on "White (full opacity)".
In the Toolbox area, you should see a black box indicating foreground color and a white box indicating background color. If any colors are present besides black and white, click on the smaller black and white boxes to reset. Be sure that Black is the Left box color. The arrows to the right of the boxes allow for toggling the colors.
Now select the paint brush tool and be sure the paintbrush mode is "normal" in the toolbox. The brush size is also selectable by clicking on the black circle labeled brush. First we want a large brush to start filling in transparency around the vehicle. As you use the brush, you should see checks of light gray and dark gray being placed in the photo. Go around the outer edges first and began moving in toward the vehicle. You will need to select smaller brush sizes and you get into smaller areas of detail. No problem if you make a mistake and place transparency in the wrong area. Simply toggle the color boxes so that white is in the foregtround and brush out the transparency. Toggle the color boxes again, for black to be the foreground to continue. I show two different photos in this step, one with the start of brushing transparancy and the second with transparency completed. I'm showing two different angles for examples only.
Because this file is .XCF, you can save at any time and start later. Once you believe you have completed the transparency, it's a good idea to enlarge the photo and look for any streaks where the brush missed areas. If you are satisfied you have completed transparency, click on "Layer" in the image box, then click on "Mask" in the drop down, then click "Apply Layer Mask".
Save the XCF file at this time, but do not close.
Copying the Xcf File to the Main Image
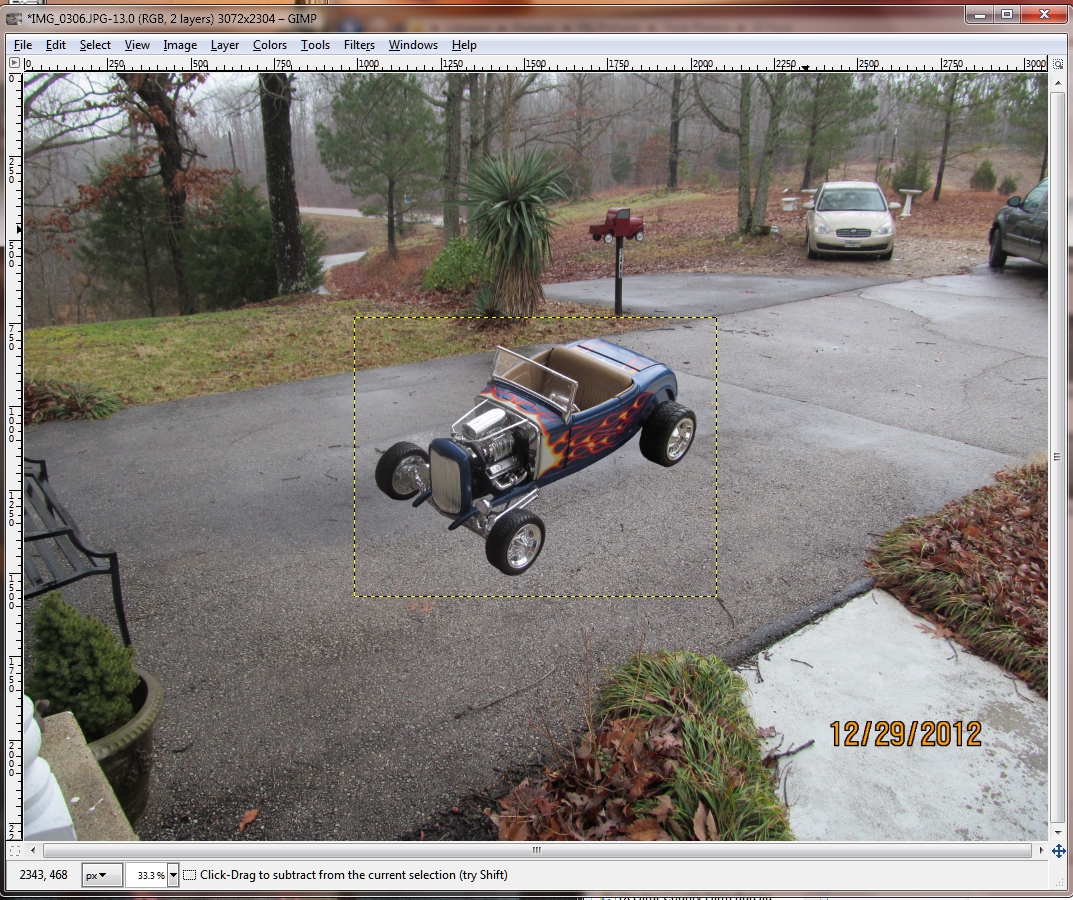
With the XCF file photo open, select "Edit" on the image box, then select "Copy Visible" on the drop down. Now select "File" on the image box and select "Close' on the drop down.
Select "File" to open the vacant driveway image, or drag the image into the image box. Select "Edit" on the image box, the select "Paste" on the dropdown. The image of the car should now appear in the driveway photo. Because the checkered gray background in the pasted image was transparency, it will disappear. In the Gimp toolbox, select the "Move Tool" and moved the pasted image near the center of the driveway. Now click on the "Scale Tool" in the Tool Box, then click on the pasted image. A small Scale box should appear. If the chain links appear broken between "Width" and "Height", click in the center of the chain links to connect them together. This will allow for equal width and height scaling. Click on the dropdown arrow in the scale box to select "Percent" as the method of scaling.. Now click on the "Up" arrow in either the "Width" or "Height" box and hold. The pasted image should start enlarging. Once it appears to be "lifesized" you may have to reuse the "Move Tool" to reposition the car.
Select "File" to open the vacant driveway image, or drag the image into the image box. Select "Edit" on the image box, the select "Paste" on the dropdown. The image of the car should now appear in the driveway photo. Because the checkered gray background in the pasted image was transparency, it will disappear. In the Gimp toolbox, select the "Move Tool" and moved the pasted image near the center of the driveway. Now click on the "Scale Tool" in the Tool Box, then click on the pasted image. A small Scale box should appear. If the chain links appear broken between "Width" and "Height", click in the center of the chain links to connect them together. This will allow for equal width and height scaling. Click on the dropdown arrow in the scale box to select "Percent" as the method of scaling.. Now click on the "Up" arrow in either the "Width" or "Height" box and hold. The pasted image should start enlarging. Once it appears to be "lifesized" you may have to reuse the "Move Tool" to reposition the car.
Adding More Realism to Your Photo
I added exhaust pipe vapor by clicking on the "Dodge/Burn Tool" in the Toolbox Below the Brush size in the Toolbox, select type as "Dodge" and select range as "Highlights". Select a small brush and make "wispy" looking exhaust trails at the rear of the car.
There are a couple of ways to add shadows for realism. One method is to use the "Free Select tool" in the Tool box. Click on the "Free Select Tool" and outline an area in front of the vehicle tires. Once you have "boxed" in an area to shade, click on "Colors' in the Image Box, then select "Curves" in the dropdown. A small box labeled "Adjust Color Curves should appear with a graph and black line running from bottom left to upper right. Click on the center of this black line and hold the mouse button down while pulling down on the line.
Once you have reached the desired level of shadow, click on "OK. in the Adjust Color Curves Box. Repeat this procedure in other areas that need shadows.
The second method of adding shadows it to select the "Dodge/Burn Tool" in the Toolbox. Below the brush size in the Toolbox, select type as "Burn" and select range as "Shadows". Just under the "Range" box, you will see an "Exposure slide bar". You may have to experiment with adjustment of the "Exposure" to get the shadows to look real. I prefer the "Adjust Color Curves" method.
Using the "Blur/Sharpen" tool can help to eliminate any edges that appear pasted in the photo. Select the "Blur/Sharpen Tool" and below the brush size, select "Blur" Select a brush and go around the edges of the pasted object to smooth it out.
Once you are satisfied with the photo, save it as a "JPG" file, so it can be viewed by others.