Make Your Old Jeans Into a Quilt!

by cschwick in Craft > Sewing

59983 Views, 71 Favorites, 0 Comments

Make Your Old Jeans Into a Quilt!
Unit 2 064 Possible Main.jpg

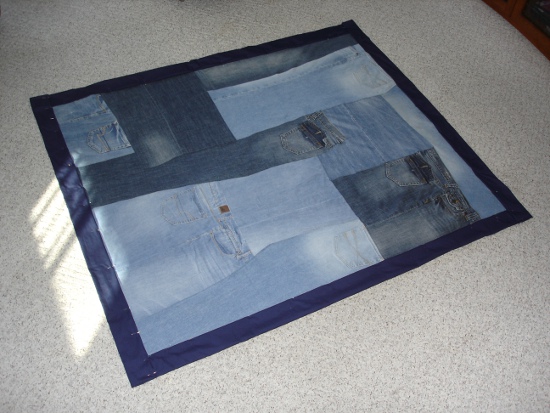
Many times your old, worn out jeans just sit around taking up space while never being used.  This is an easy way to save all of your favorite pockets, zippers, grass stains, and rips and make them into a warm and very heavy blanket.  This quilt is a fairly easy to make.   Even as a very unexperienced sewer, I was able to complete this project in only a few afternoons.  

What you need:
-Roughly 3-5 pairs of jeans
-A pair of scissors
-A flat bed sheet
-Many stick pins
-A sewing machine with thread

Split Your Jeans Right Down the Middle.

Unit 2 002.jpg
Unit 2 007.jpg
Unit 2 006.jpg
Unit 2 008.jpg
Unit 2 010.jpg

The number of pairs of jeans you need for your quilt really depends on size you wish the blanket to be.  This time, I am making a smaller lap blanket that is roughly 4.5 ft by 5.5 ft.  I was able to complete this blanket with three pairs of adult jeans.

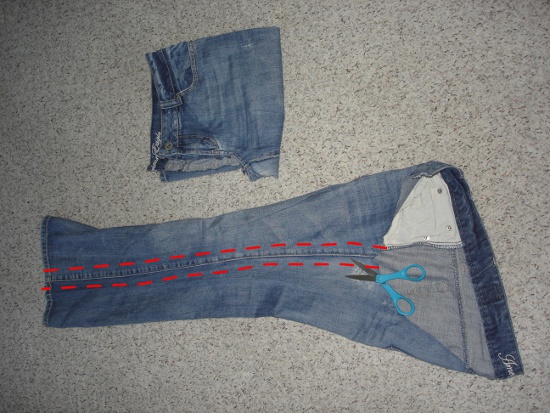
The first step to readying your jeans is opening them all up.  The easiest way to do this is to cut out the middle seam that runs down the crotch.  This seam includes the zipper in the front and then runs down and around to the back, right between the two back pockets.  From the second and third image, you can see how I cut right now one side of the seam, all the way around, until the two sides (left leg and right leg) are separated.  Once this first cut is made, simply cut the seam off of the other side.  Now, open up the two legs by cutting out the seam that runs down the inside of the leg.  You can see this in the final image.

If at any time in this process you find a particular part of a pair of jeans you wish to use in your quilt, it is quite easy to improvise.  Each quilt will be incredibly unique and each piece can have special memories and meaning.  I really enjoy pockets and try to save any pieces with hammer loops to use for my quilts.

Cut Jean Halves Into Workable Pieces.

Unit 2 022.jpg
Unit 2 023.jpg
Unit 2 025.jpg
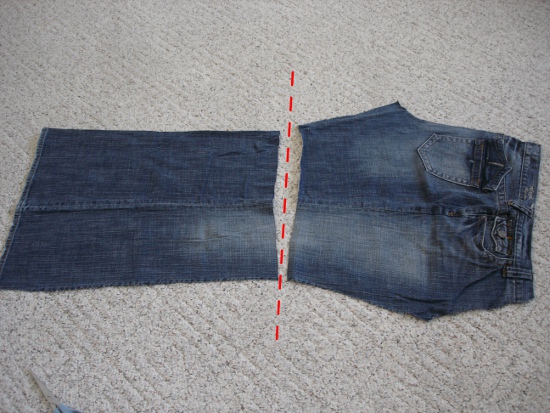
All styles of jeans are different.  They all stretch in different places and fit different.  One general trend exists however.  All appear be stretched out slightly in the knees, and this bump may cause you some problems when sewing.  There are two ways to eliminate this problem.  Each opened up leg can be cut in half either vertically or horizontally.  I suggest making an even number of pieces of both cuts.  These shapes are very easy to fit together when forming the quilt.

Fit the Pieces Together.

Unit 2 029.jpg
Unit 2 030.jpg
Unit 2 031.jpg
Unit 2 032.jpg
While it is not necessary, I normally opt to place a blanket on the floor to serve as a guide.  This helps me create a more squared shape and allows me to judge the size of my quilt.  Then begin arranging the pieces as you like.  This is normally the part that I spend the most time, relative to the other tasks.  Arrange and rearrange the pieces until you have the exact pattern that you like.

With this process there are three important things to remember:

1.       All pieces should over lap at least an inch.  Doing so will increase the ease of sewing later.

2.       All edges will be squared off later.  If you have a pocket that you particularly like, make sure you give some space between the edge of the quilt and the pocket.

3.       Some parts of a pair of jeans are thicker than others.  Waist bands and other seams are thicker and will be harder to sew through later. Sometimes it is easier just to cut these parts off of each piece.

Pin Pieces Together.

Unit 2 039.jpg
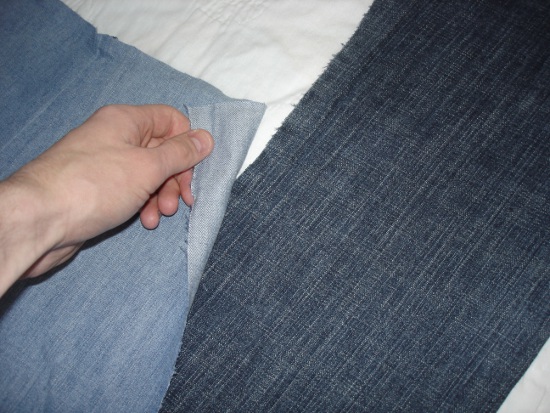
Now, once you have all of your pieces laid out, you can start pinning the pieces together.  All of your pieces should be over lapping an inch or more.  Starting with two touching pieces, fold over the overlapping section, about a half inch (or more, depending on the overlap), and pin the two pieces together.  While you can continue on and pin the rest of the quit, I suggest you start with only two or three pieces, and then move onto the next step.  As more pieces become hooked together, the blanket becomes heavier and harder to work with.

Sew Chunks Together.

Unit 2 046.jpg
Unit 2 041.jpg
Unit 2 047.jpg
After you have pinned a few pieces together, you can now start the sewing.  For my quilts, I sew right on top of the denim; for that reason, I use a dark blue thread.  After you have sewn your few pieces together, go back to the pattern laid out on the floor and add an addition piece or two.  Continue these steps of pinning and sewing until all of your pieces are sewn together.

Ready the Backing.

Unit 2 058.jpg
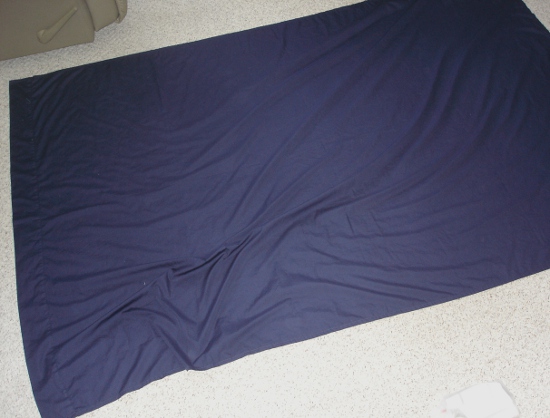
For the back of the quilt I use just a regular flat bed sheet.  I normally use a dark blue or navy colored one that I you can pick up at Wal-Mart for $3-5.  Choosing to use a different color sheet is the perfect way to customize your quilt!

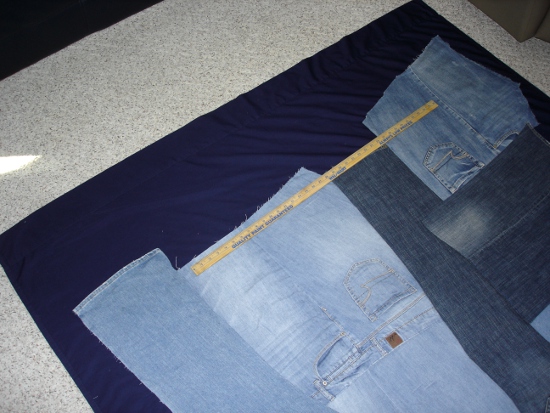
The sheet needs to be large enough to have at least 6-8 inches on all four sides of the jean quilt.  Lay the sheet on the ground and smooth out all of the wrinkles.  In order to have a flat and well fit backing, the sheet needs to lay flat on the ground.  Once the sheet is smooth, lay the jeans in the center of the sheet.  Smooth any wrinkles out of the jeans as well.

Square Off the Quilt.
Unit 2 061.jpg
Unit 2 062.jpg
While the blanket served as a solid guide to gauge size and help make the quilt more squared, now is the time to cut off chunks that fall out of bounds.  It is not important to make all the edges perfectly straight, being roughly straight will do just fine.

Add the Backing.

Unit 2 066.jpg
Unit 2 063.jpg
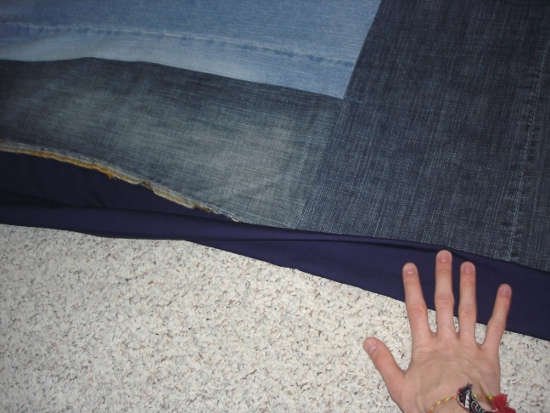
Now you can fold the edges of the sheet up and over the edges of the quilt.  Some edges of the sheet may need to be cut and shortened to better meet the jeans.  Since I like a thicker and more puffy edging, I tend to fold the sheet twice before lining it up with the edge of the quilt.  Then, pin the sheet to the jean quilt.  I recommend pinning all four sides before you begin sewing.  Once you have finished pinning, sew the sheet to the jeans, and you have completed your quilt!

Personalize Your Finished Quilt!

DSC05887.JPG
0224002245.jpg
I like to add a final personalization to one corner of the backing.  Sometimes this includes the date of completion or a short phrase.  The photos show two examples of simple embroidery that I have done.