Make a Mobile Fighter Jet Game With Scratch and Tinkercad.
by Harintsifa Randriantsizafy in Teachers > 6
1320 Views, 4 Favorites, 0 Comments
Make a Mobile Fighter Jet Game With Scratch and Tinkercad.
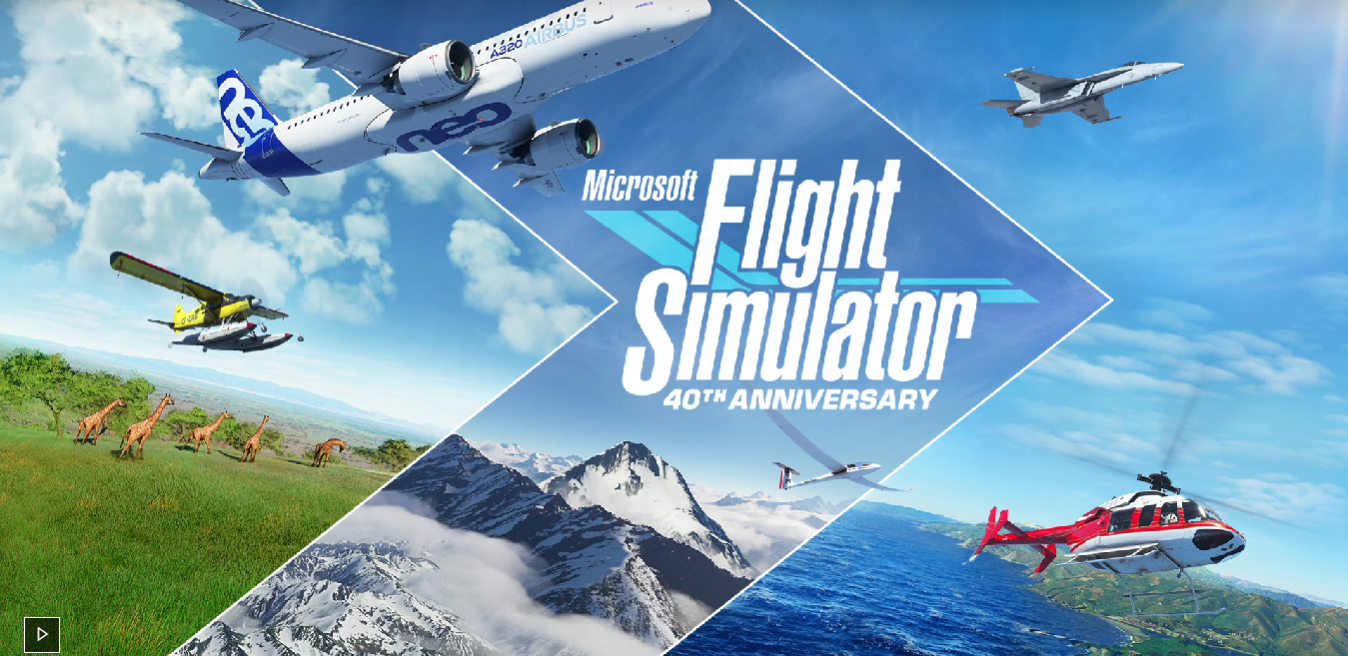
English is not my first language so if you find a syntax error, do not hesitate to ask me. Now let's start! Airplanes are a very pratical means of transport for long trips. It's also became a combat weapon. Many aircraft game are so good and so realistic but many of them are only playable on computers, as flight simulator or war thunder. Today i'm going to teach you how to make a fighter jet game. I am going to put this instructable in the contest Big and Small because the designing of the fighter jet is something smaller than usual and to stay in the big and small spirit, i am going to make it playable on mobile because almost all scratch games and plane games are playable on computer only. If you like it, don't hesitate to like it. You can also play to the game here. We are going to divide this instructable into 2 main parts: Design of the fighter jet, then coding.
Supplies
Tools
- Just a computer to coding and the design
- wifi
- A mobile device to play.
Software
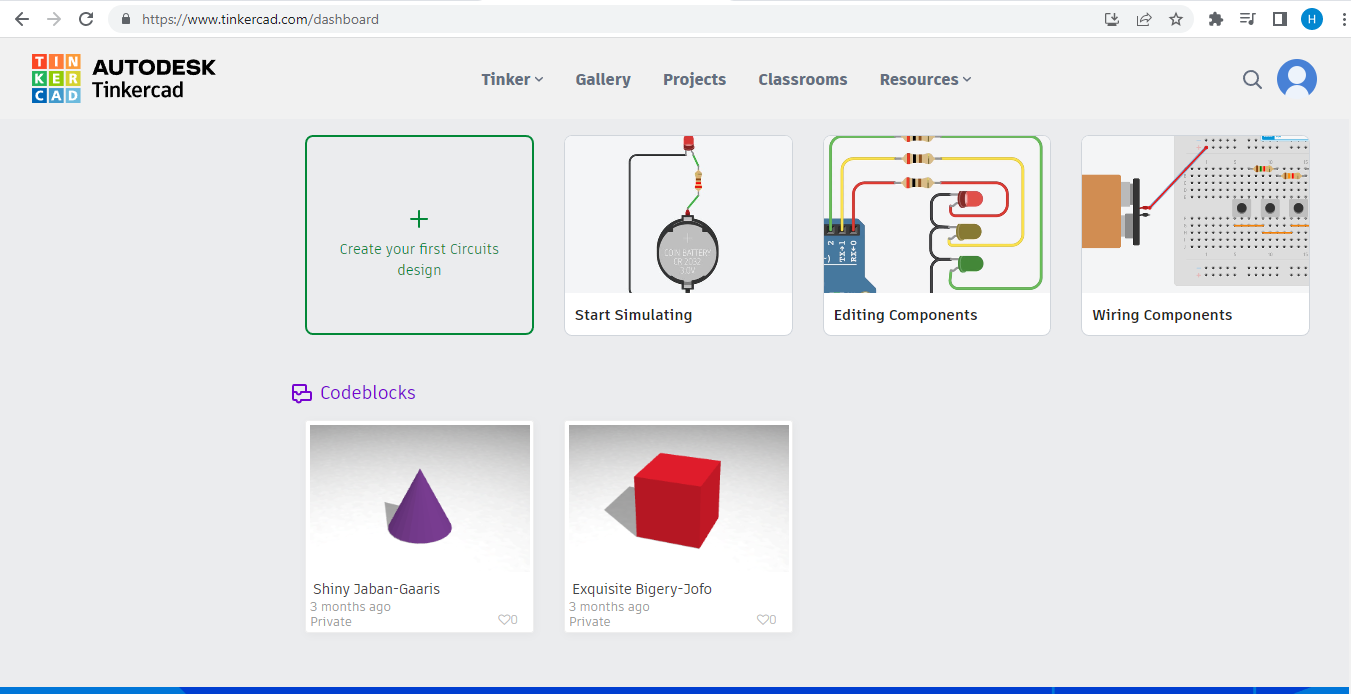
- Tinkercad: just tap tinkercad.com in your browser.
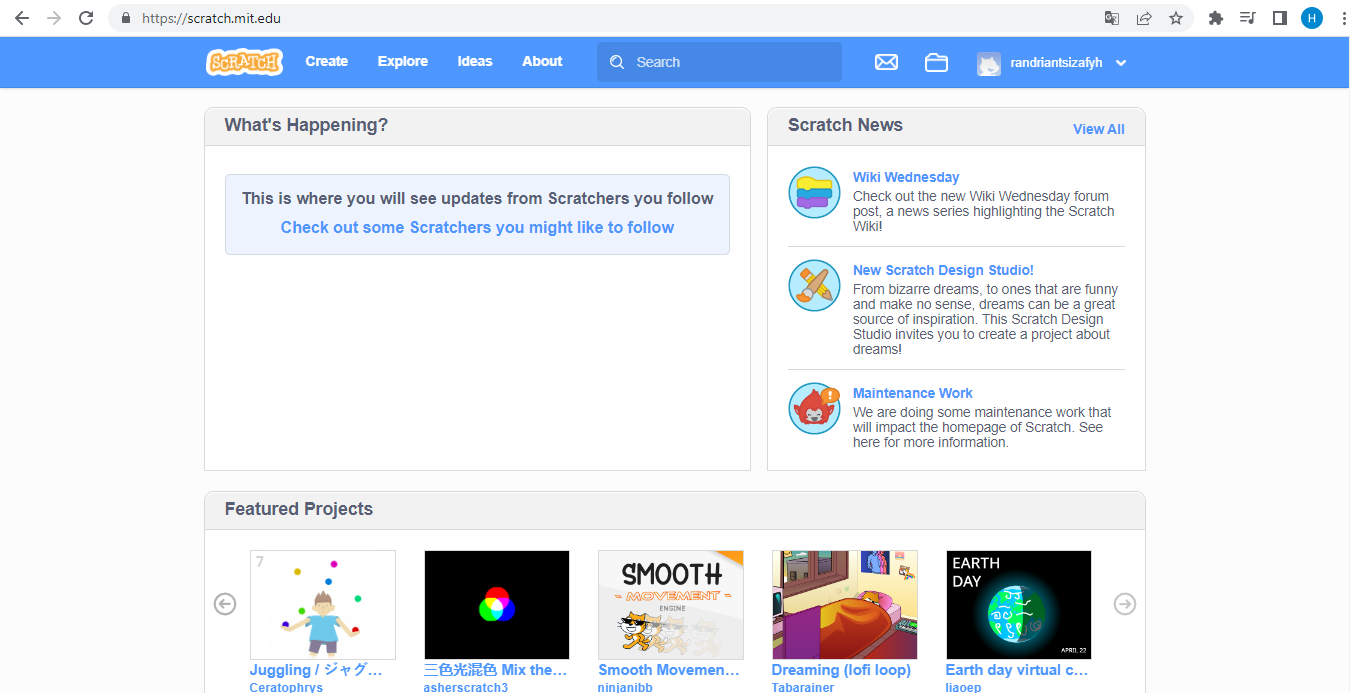
- Scratch: Also tap scratch.mit.edu in your browser.
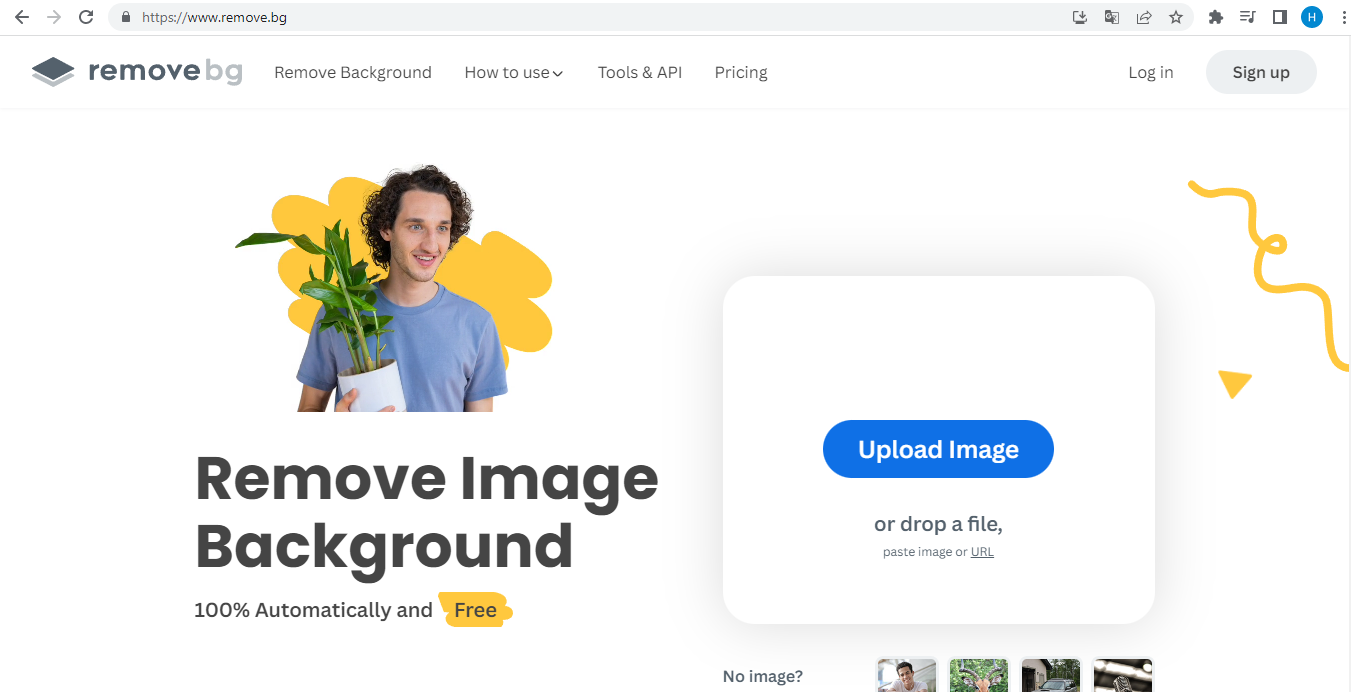
- A software to remove the backgroung, I use remove.bg but you can use other software, so also tap remove.bg in your browser.
Design of the Fighter Jet
The fighter jet is the main piece of the game, we are going to design it with tinkercad, so first open tinkercad.com in your browser.
Then you have to login or create an account.
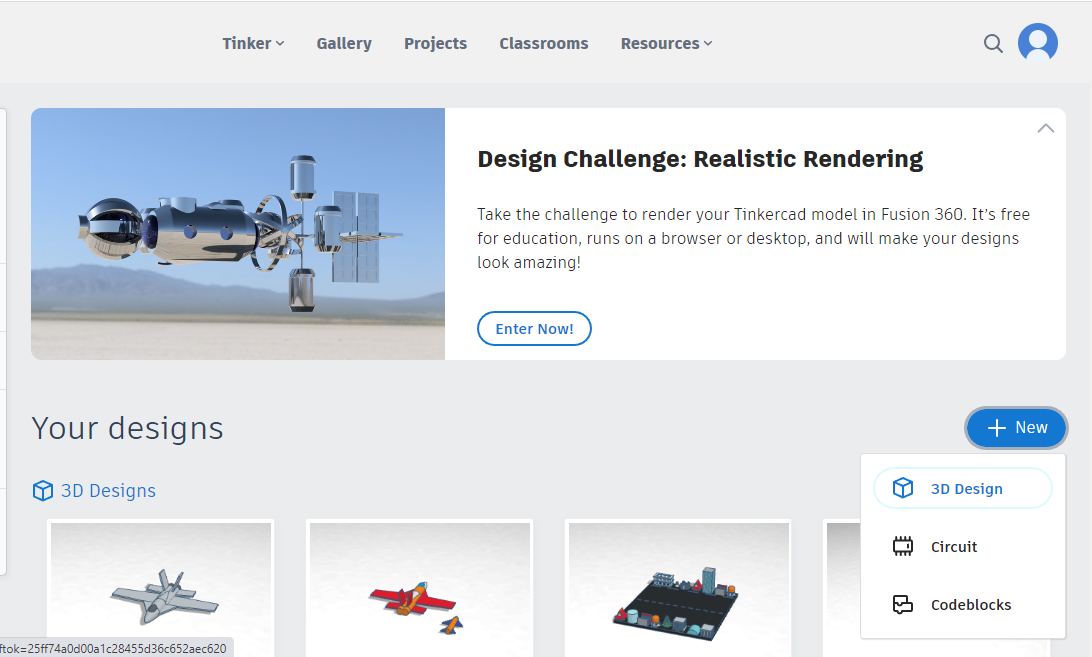
Finally, click in "+New", in the top right and "3D design".
I am going to guard the original color of shapes before finishing a part of the plane to avoid getting lost in the shapes.
Reactor
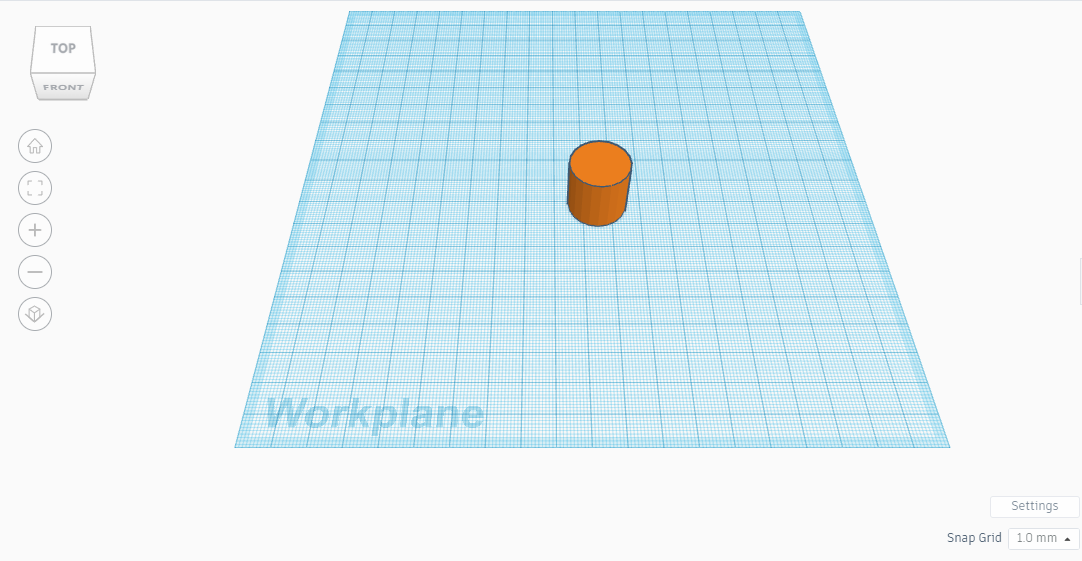
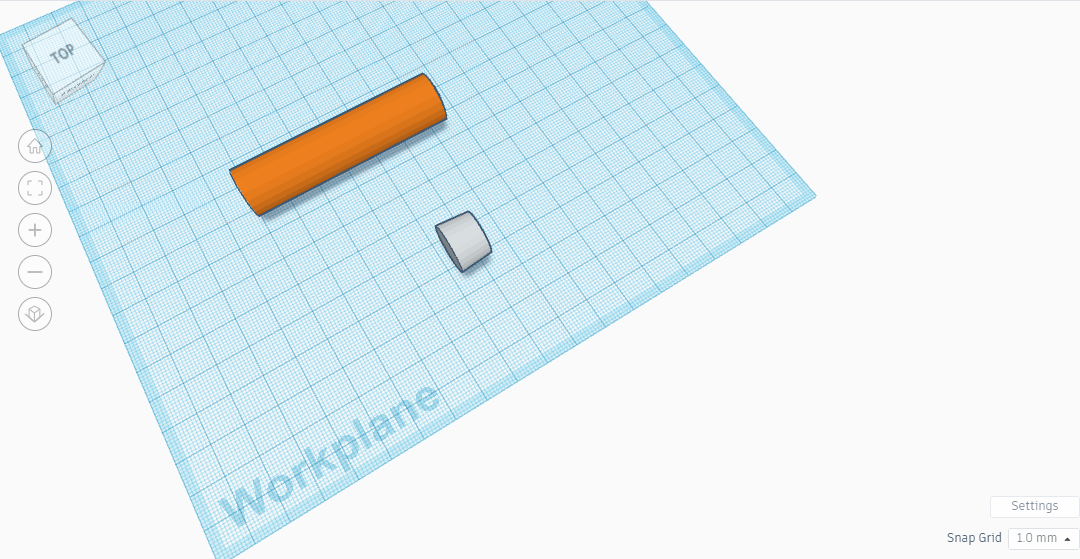

We are going to start with the reactor. According to pictures:
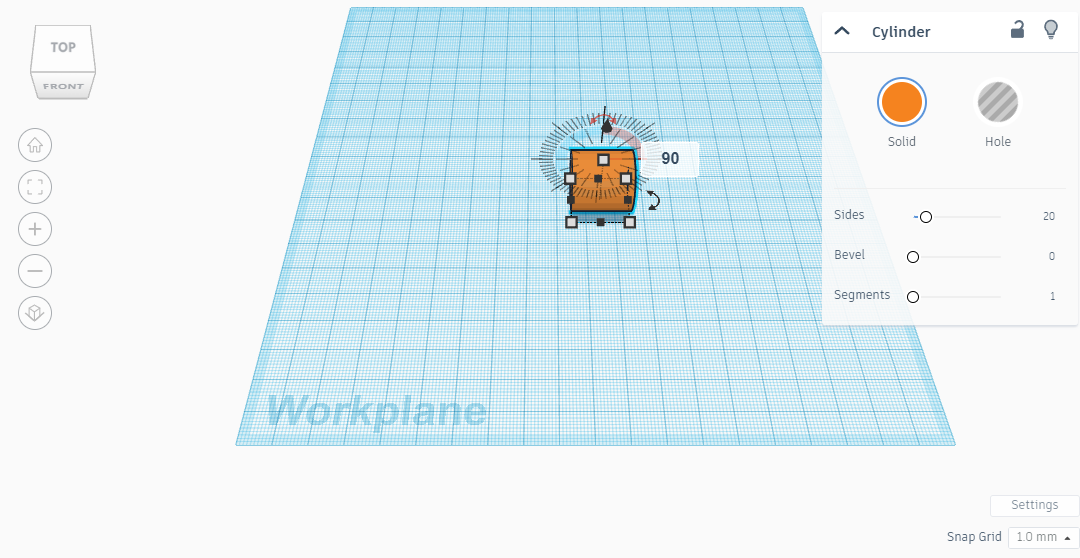
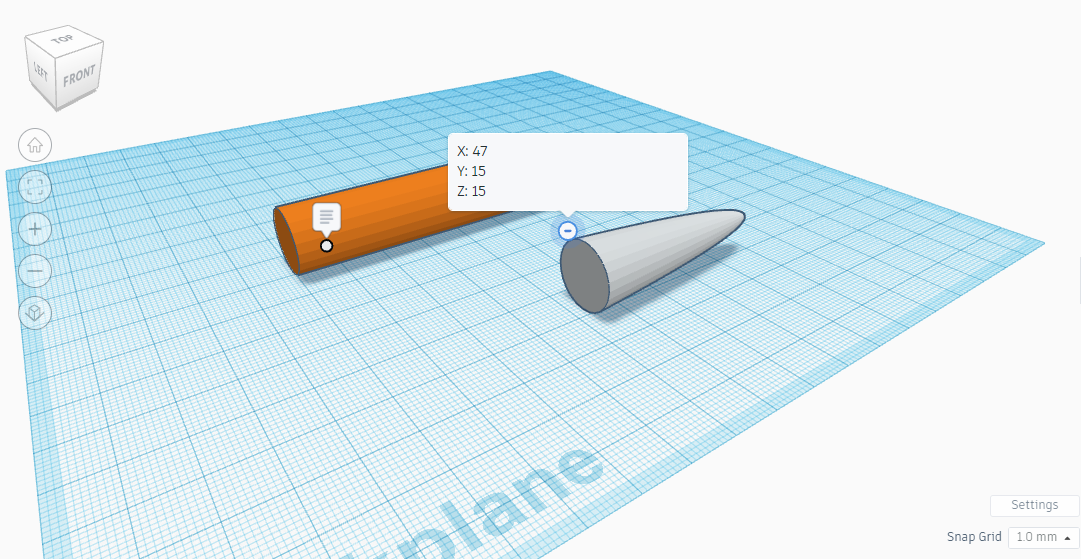
- Add a cylinder in the workplane.
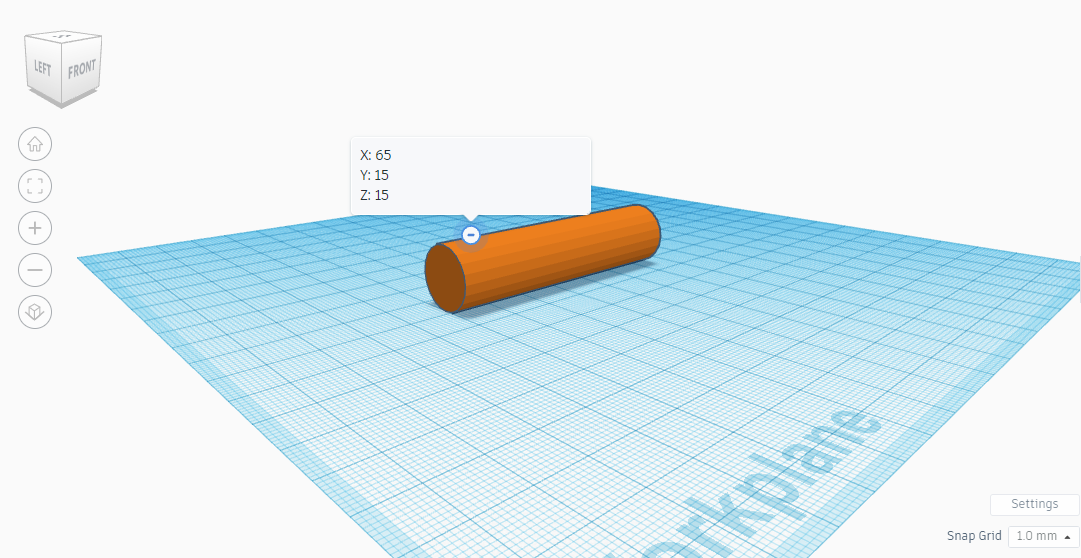
- Then rotate it 90°;
- Put X to 65, Y to 15 and Z to 15.
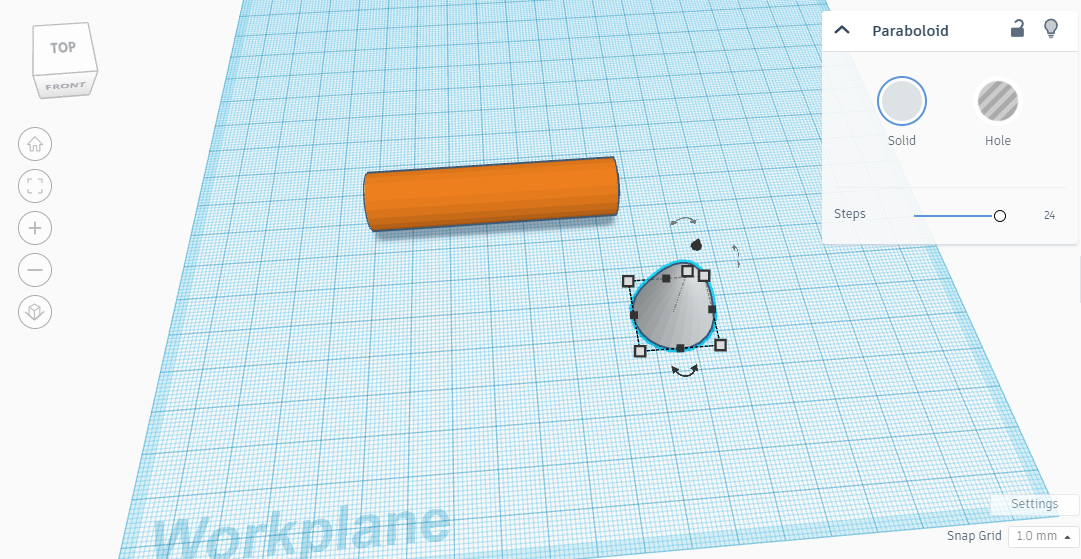
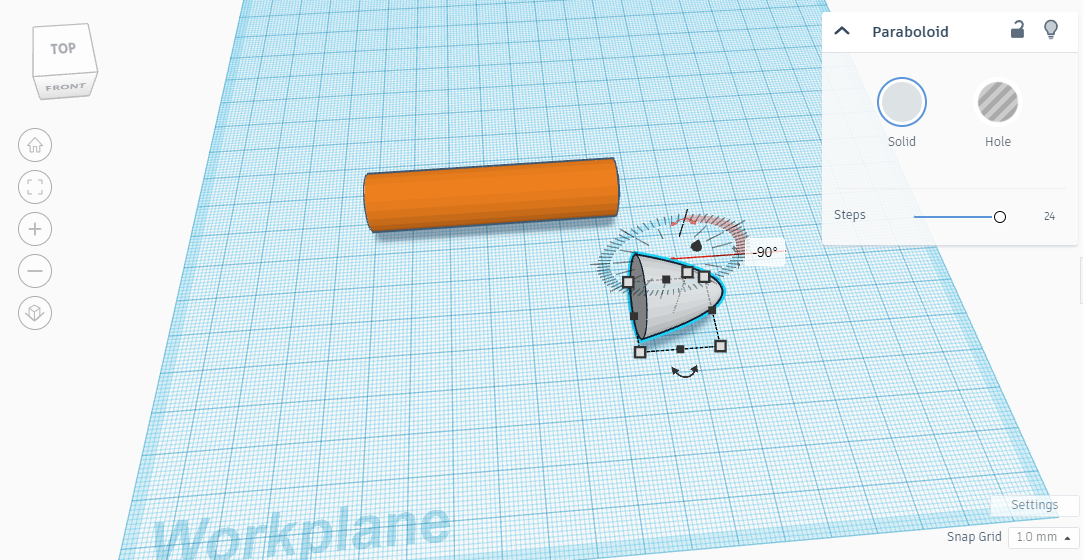
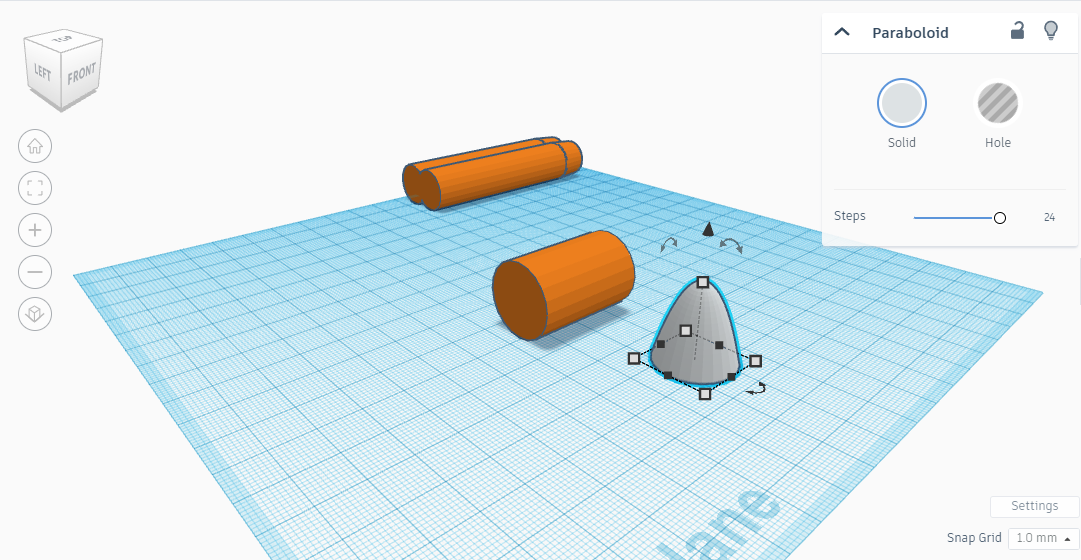
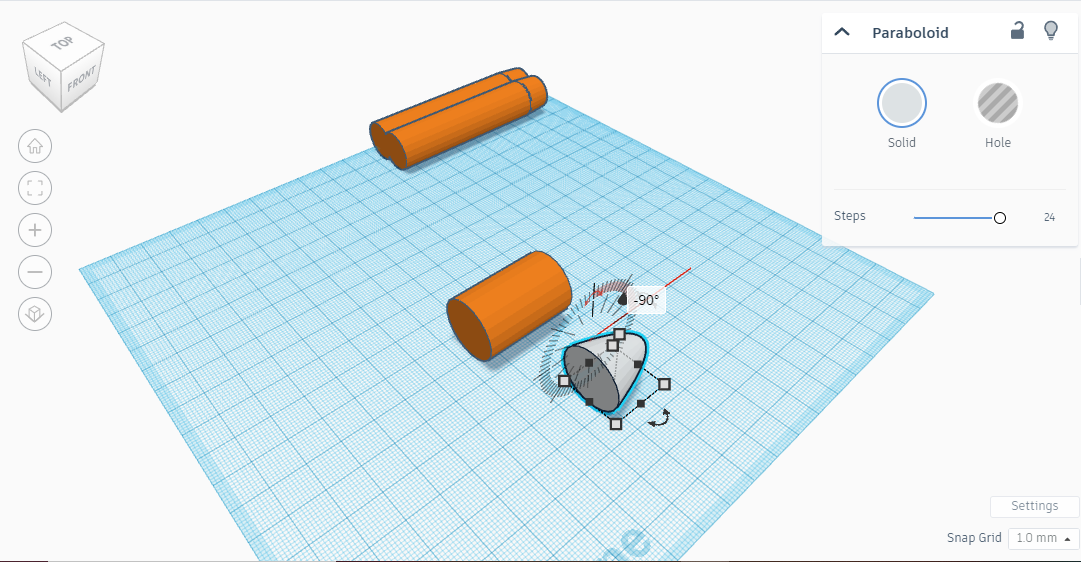
- Add a paraboloid.
- Rotate it -90°.
- Put X to 47, Y to 15 and Z to 15.
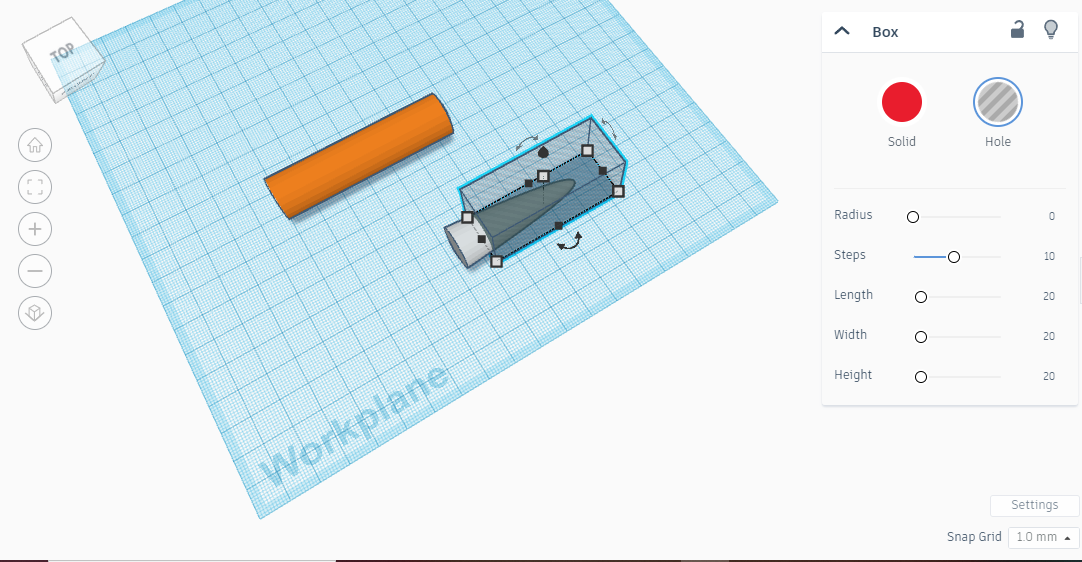
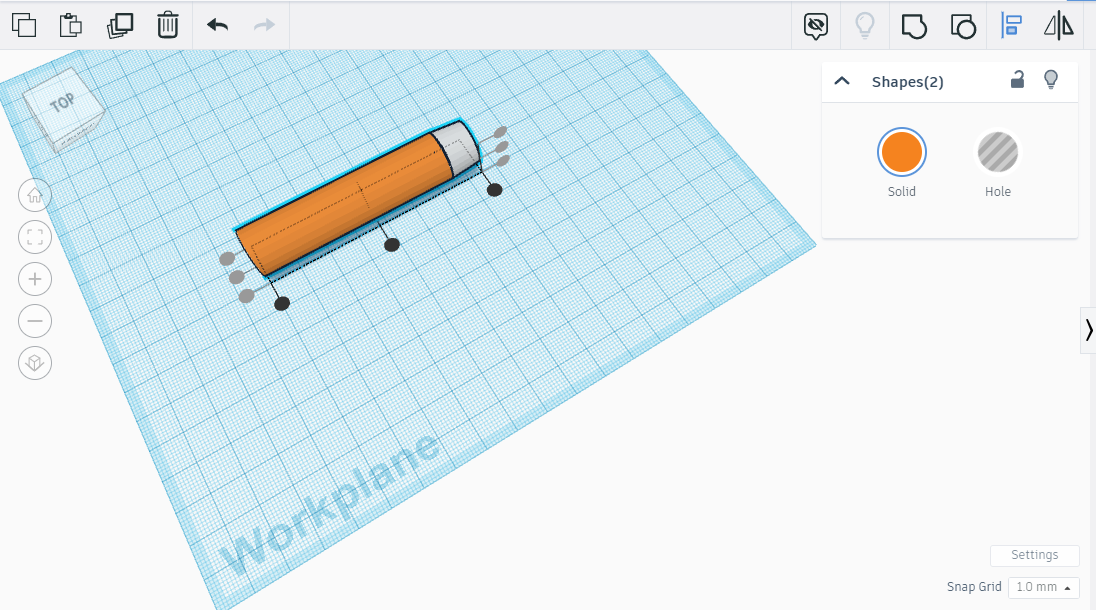
- Add a hole box as in the picture and group.
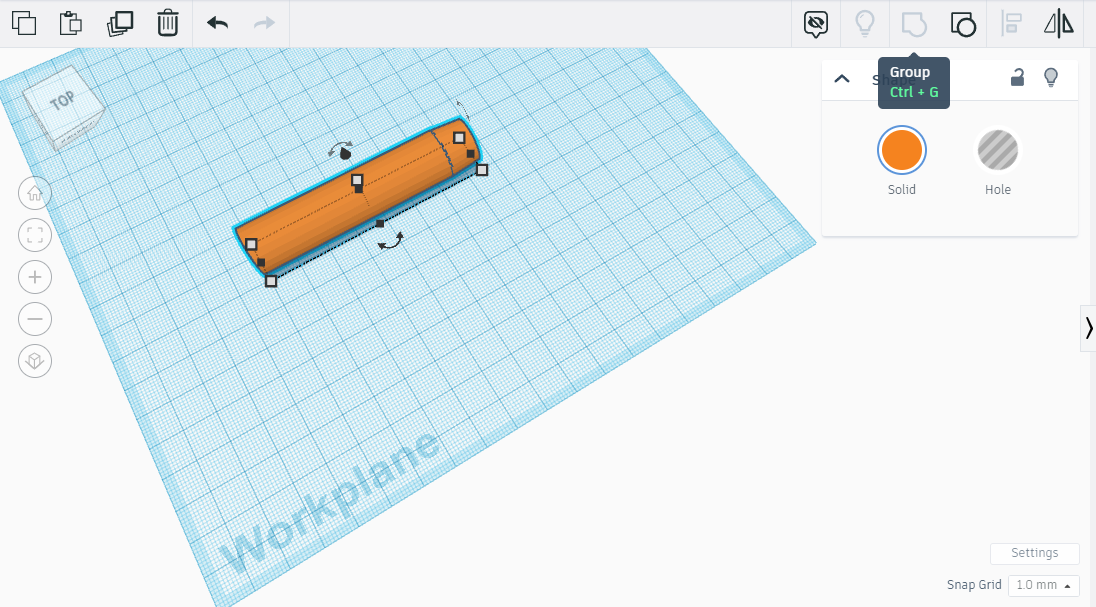
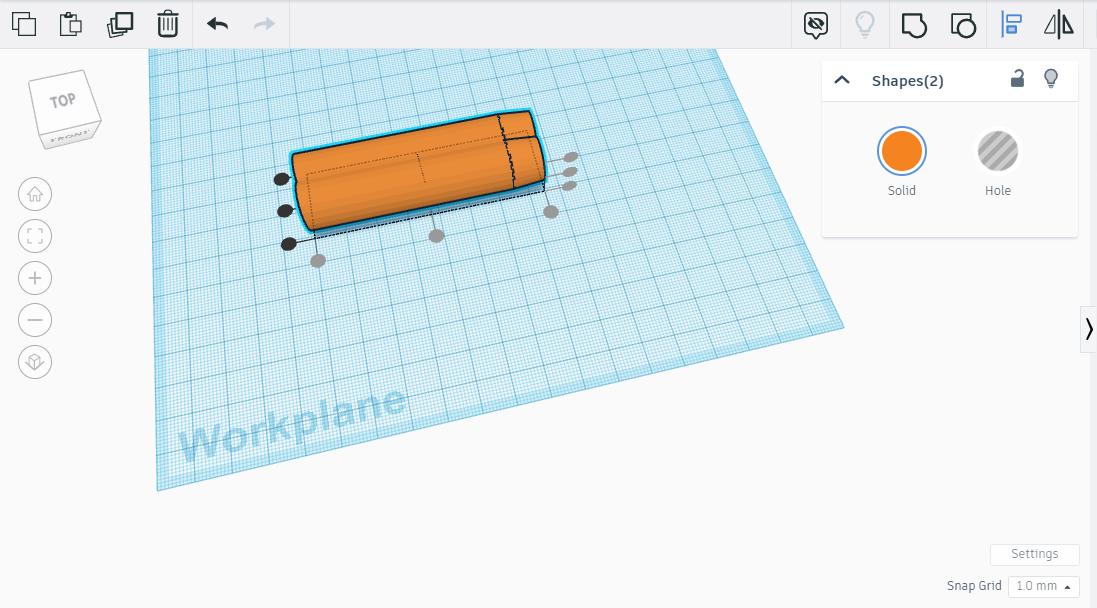
- Then align the 2 shapes as in the picture and group.
- Duplicate the shape and align the 2 shapes.
- Finally group and the reactor is finished.
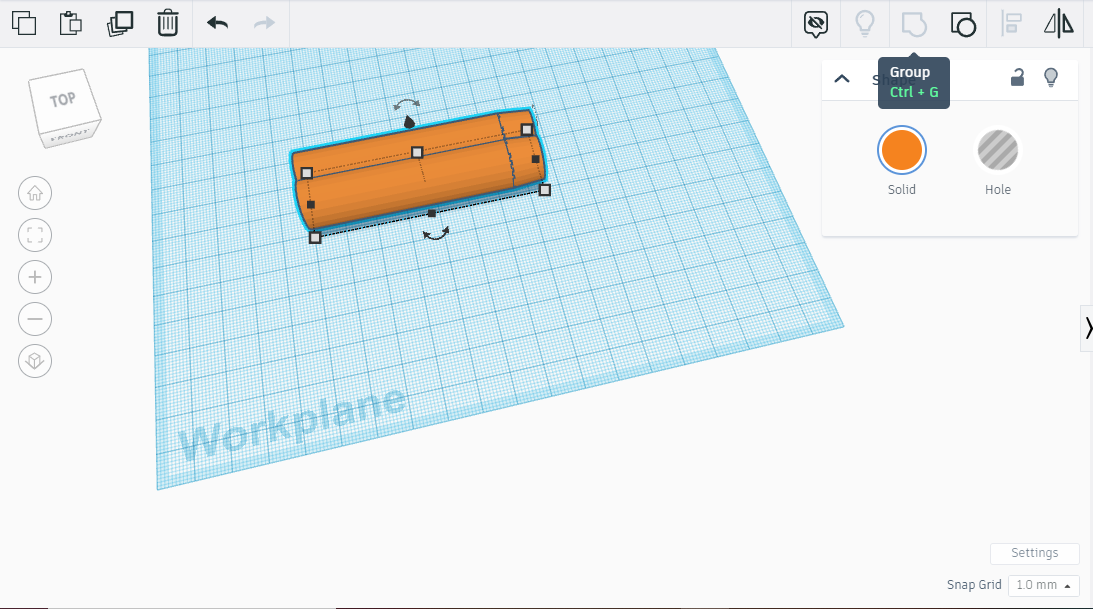
Body
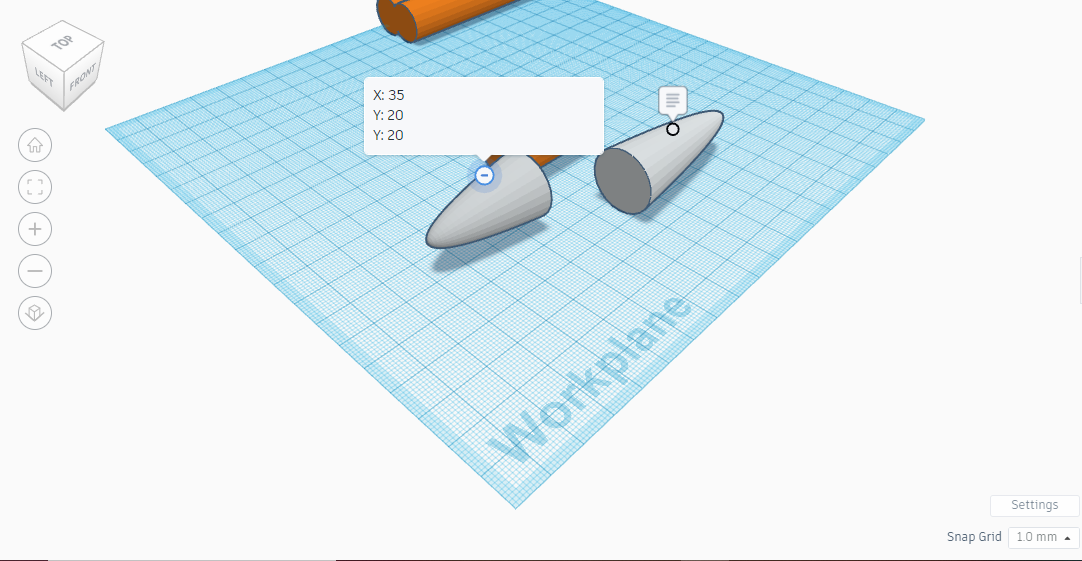
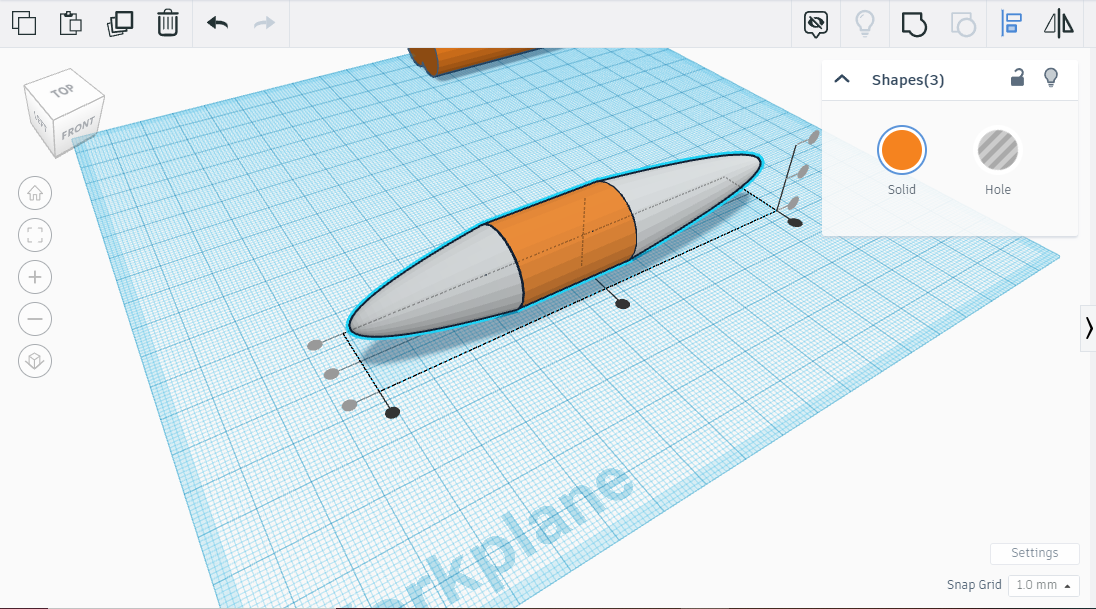
Now we are going to make the body of the fighter jet. According to pictures again:
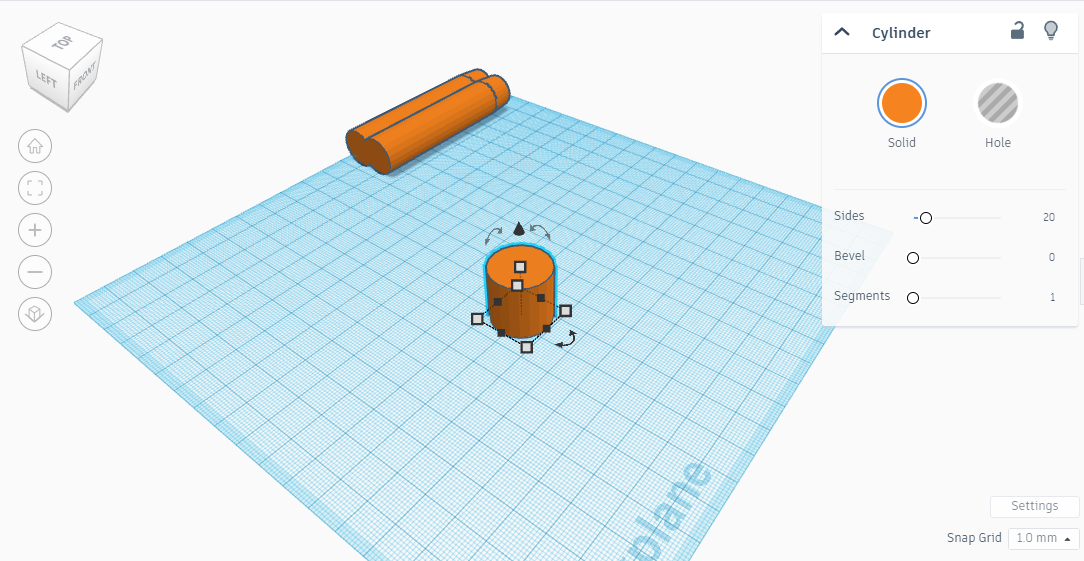
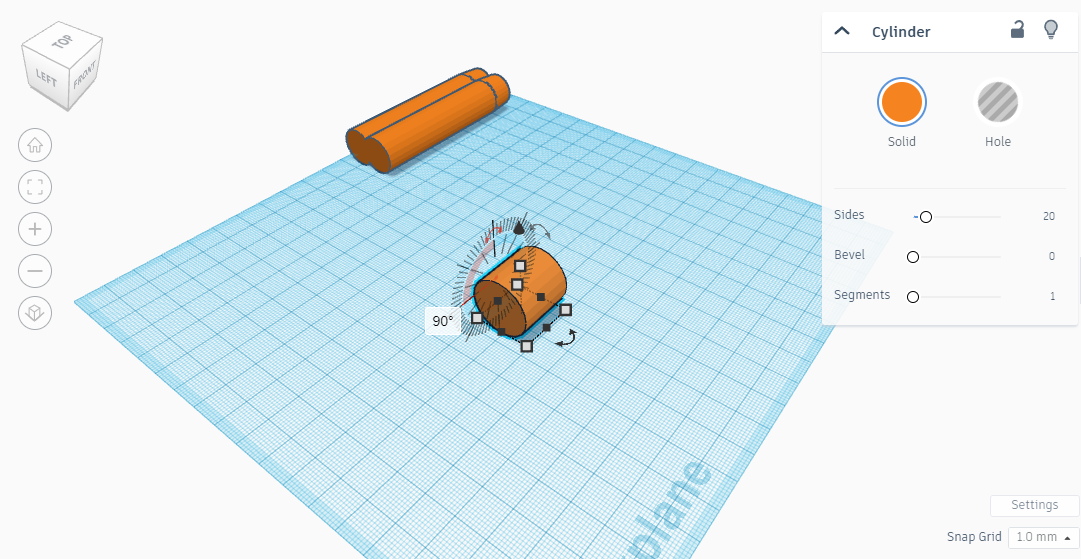
- Add a cylinder.
- Rotate it 90°.
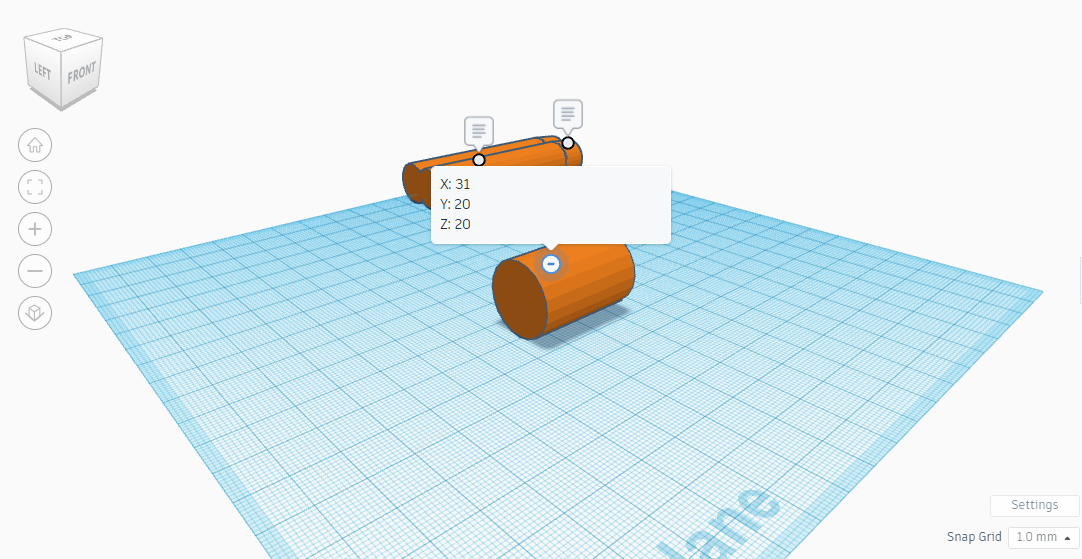
- Put X to 31, Y to 20 and Z to 20.
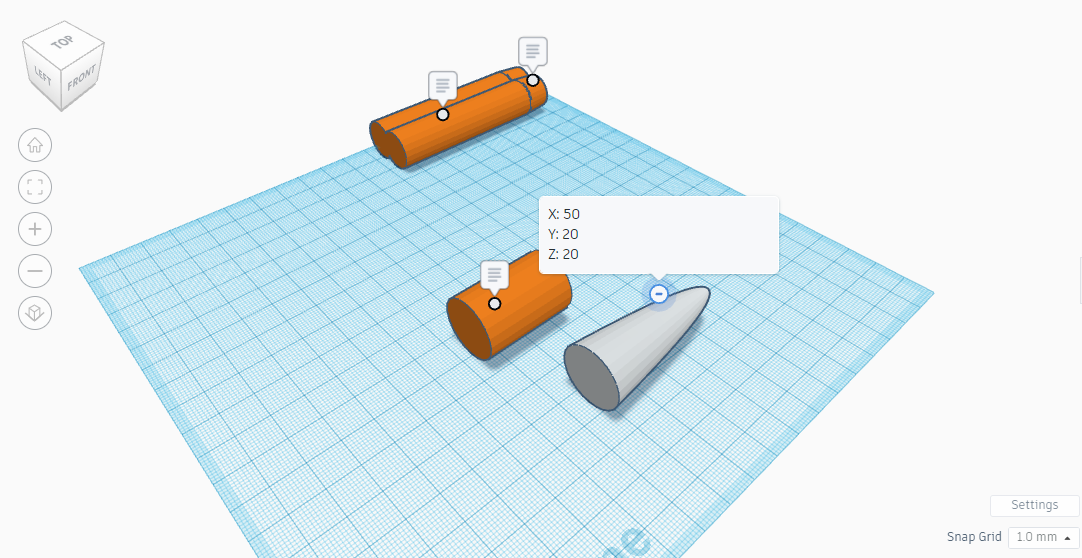
- Add a paraboloid.
- Rotate it -90°.
- Put X to 50, Y to 20 and Z to 20;
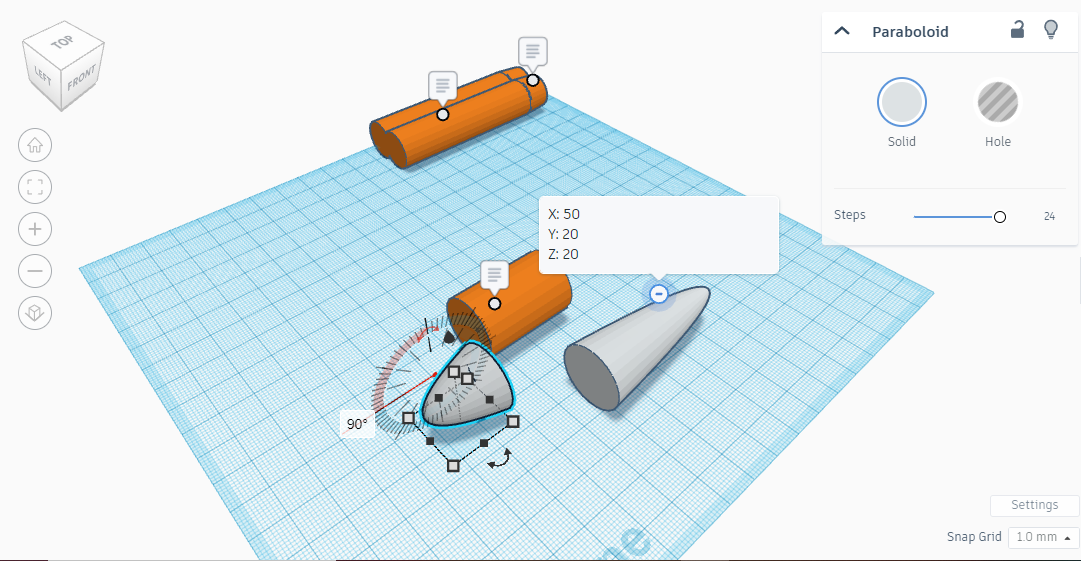
- Add an another paraboloid and rotate it 90°.
- Put X to 35, Y to 20 and Z to 20.
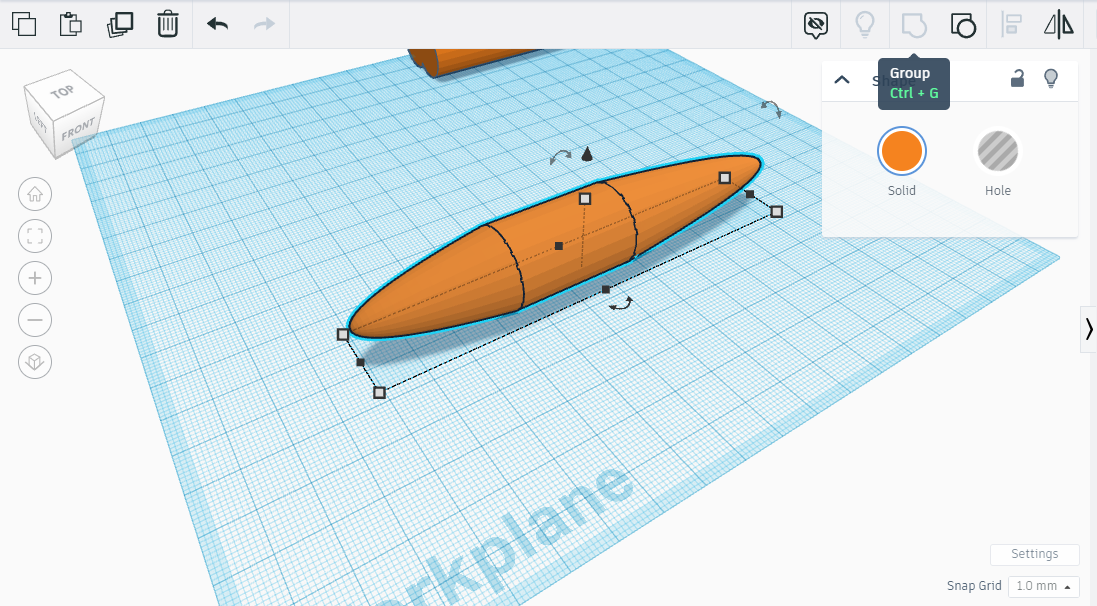
- Then align all as in the picture and group.
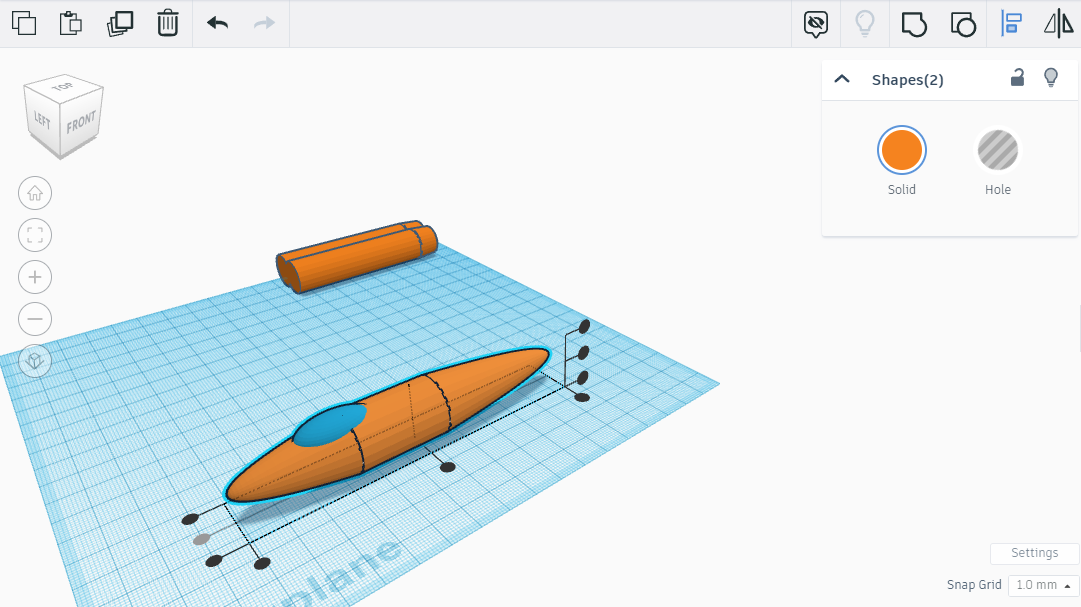
Cockpit
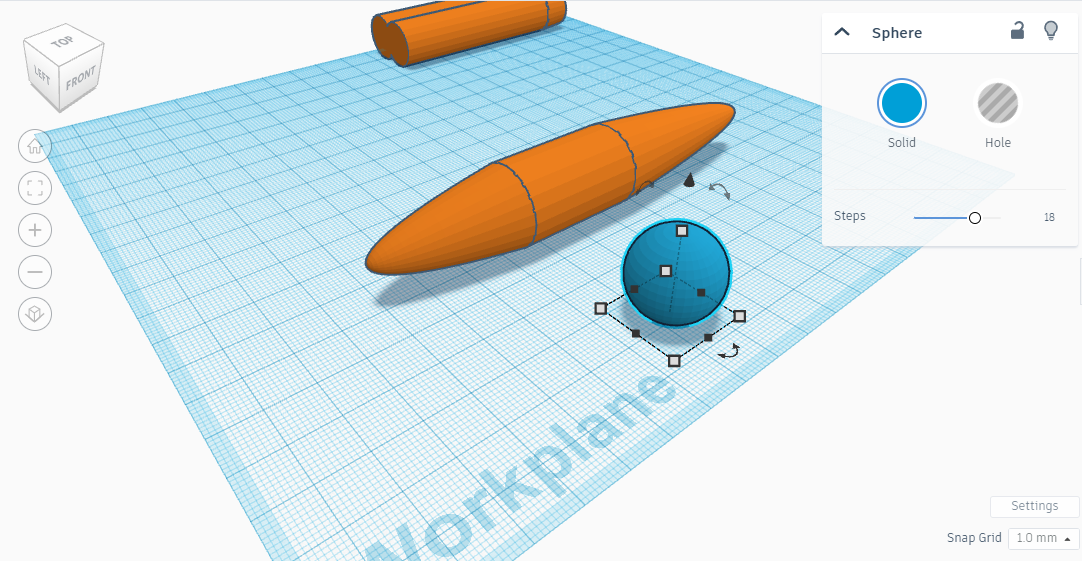
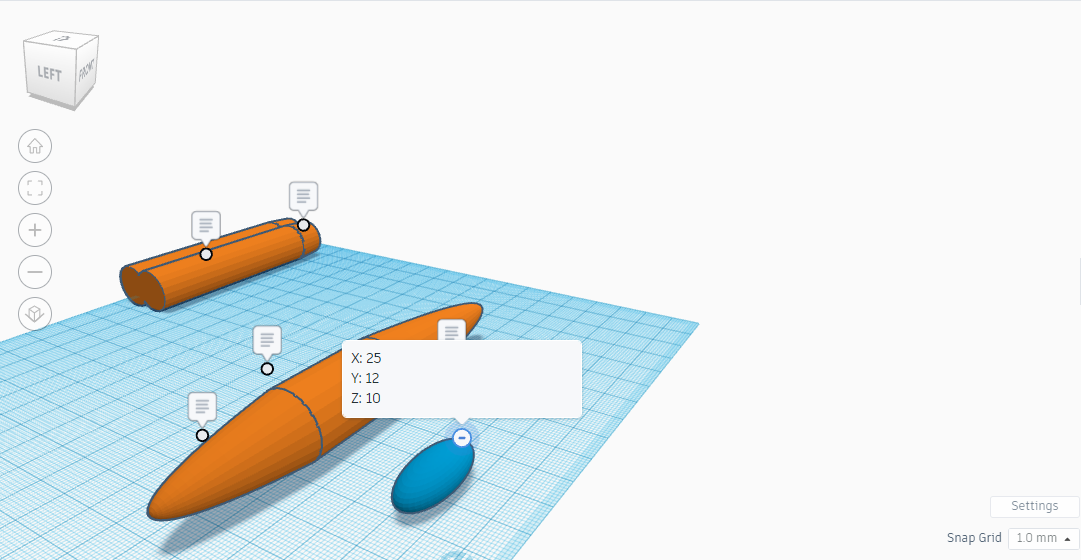
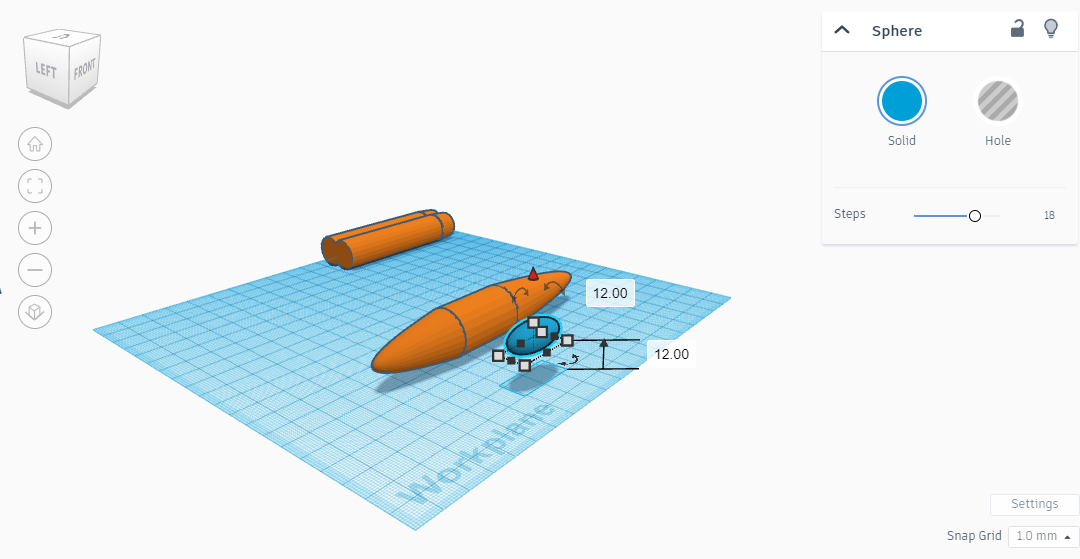
We are going to place the cockpit. According to pictures:
- Add a sphere,
- Put X to 25, Y to 12 and Z to 10.
- Then pull up the sphere by 12.
- Align with the body as in the picture,
- Group the sphere and the body.
Wing
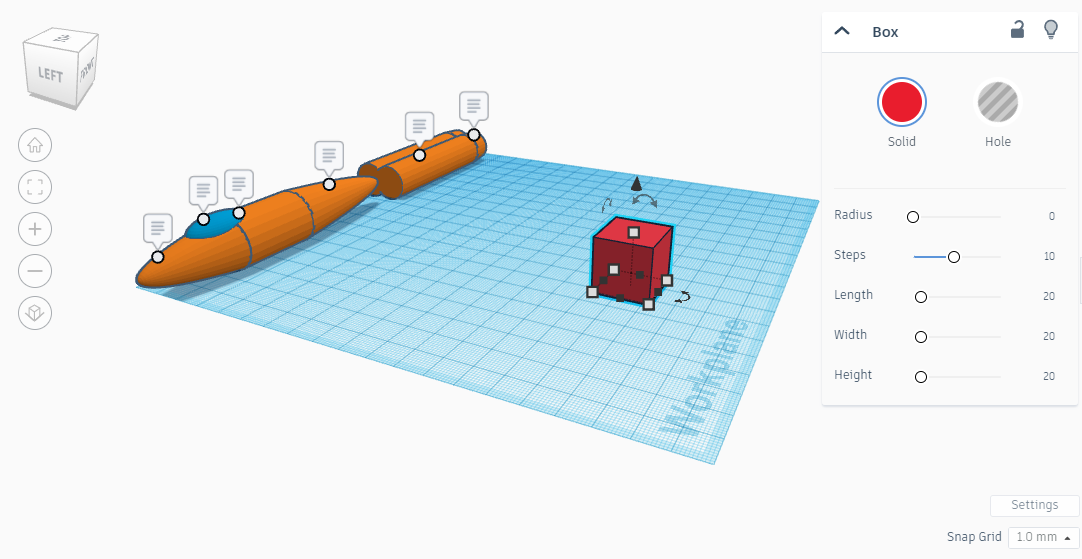
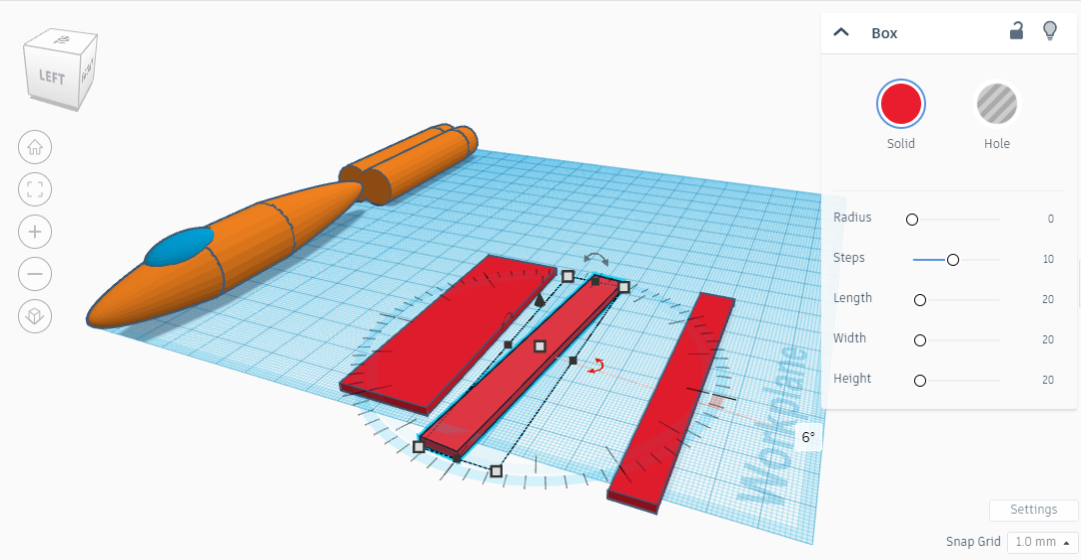
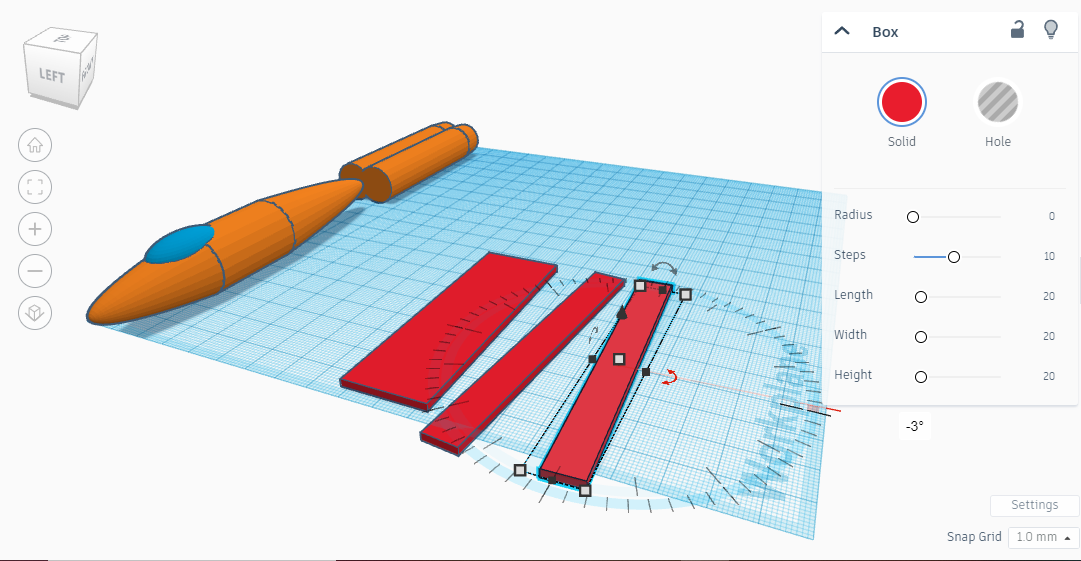
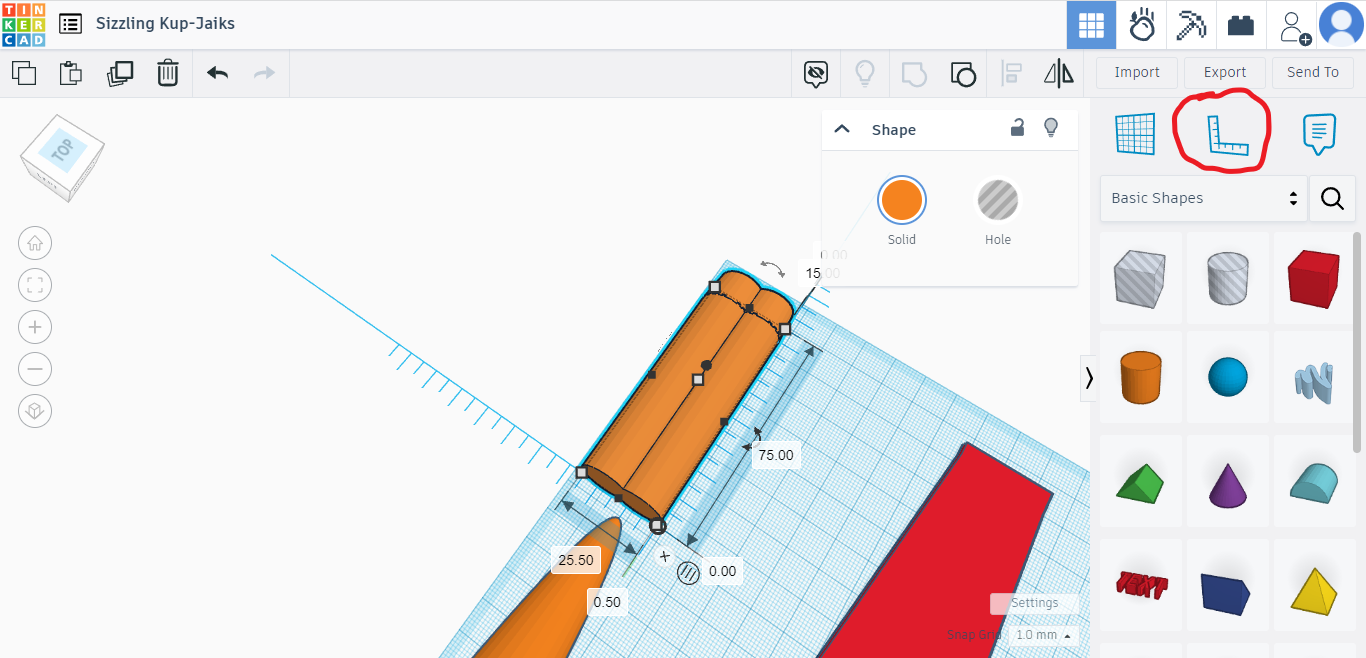
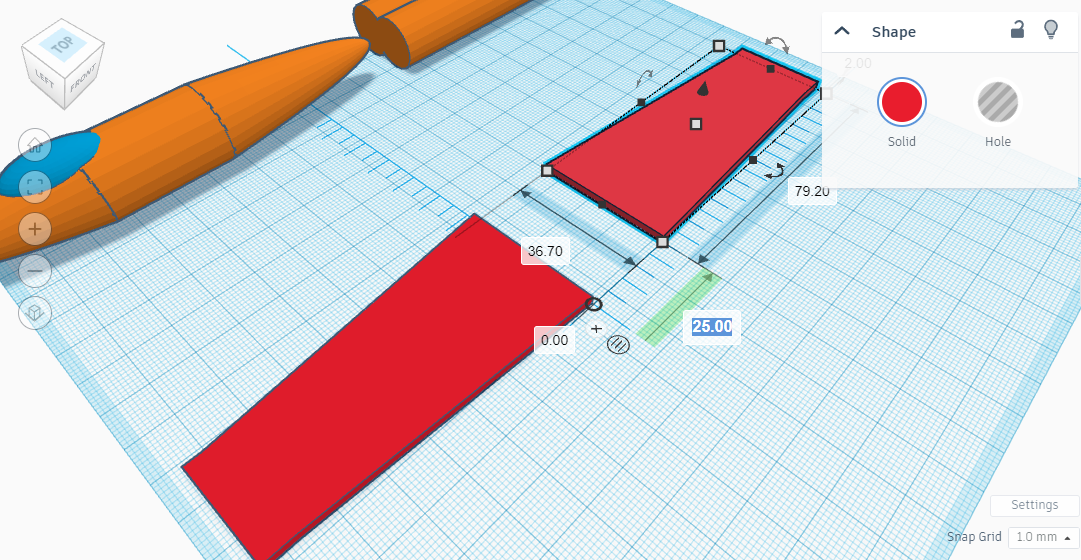
Now, we are going to design the wings. Acoording to pictures:
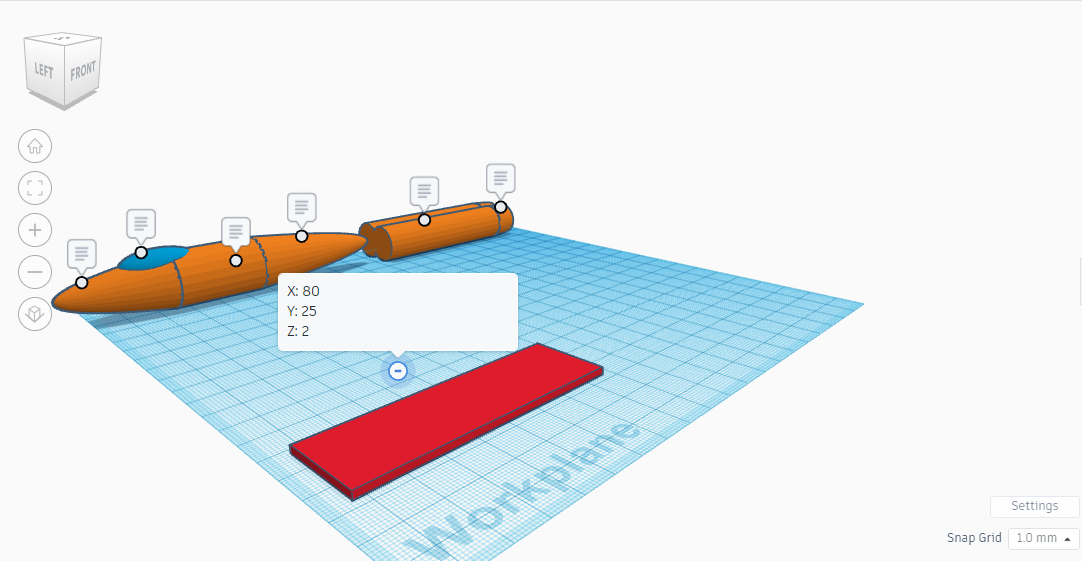
- Add a box,
- Put X to 80, Y to 25 and Z to 2.
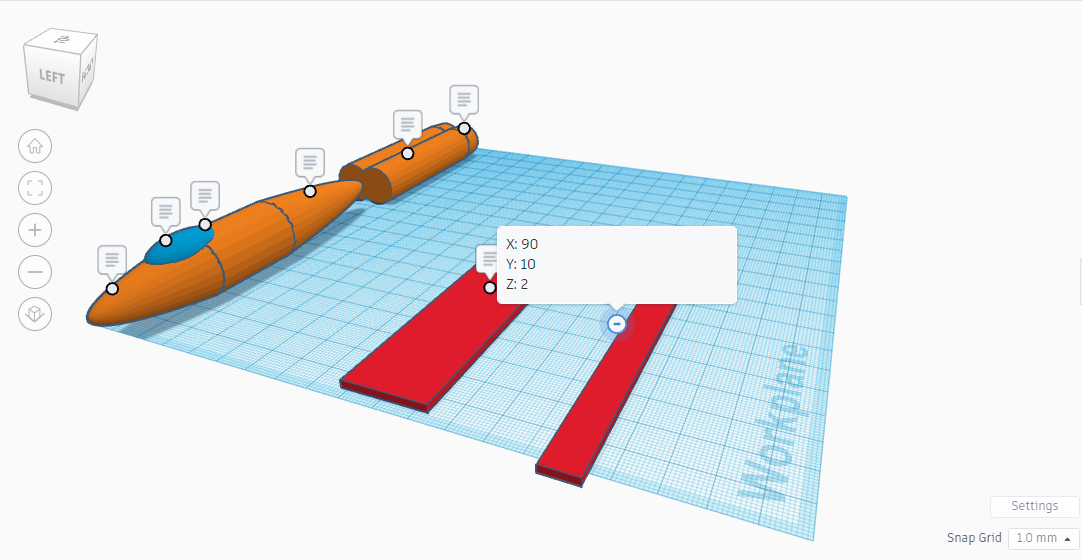
- Add an another box,
- And put X to 90, Y to 10 and Z to 2.
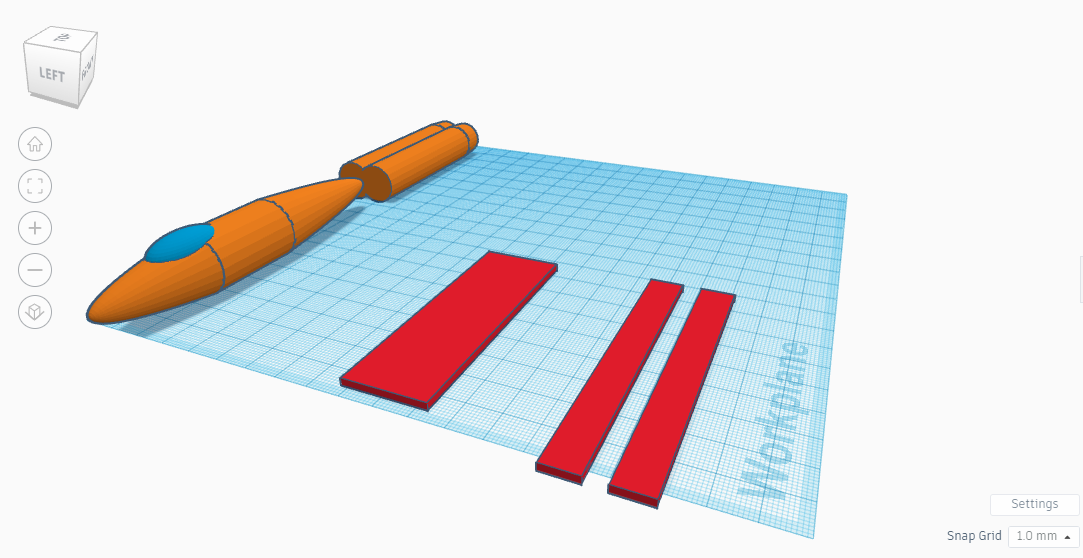
- Then duplicate the 2nd box.
- Rotate one of the box 6°, and the other -3°.
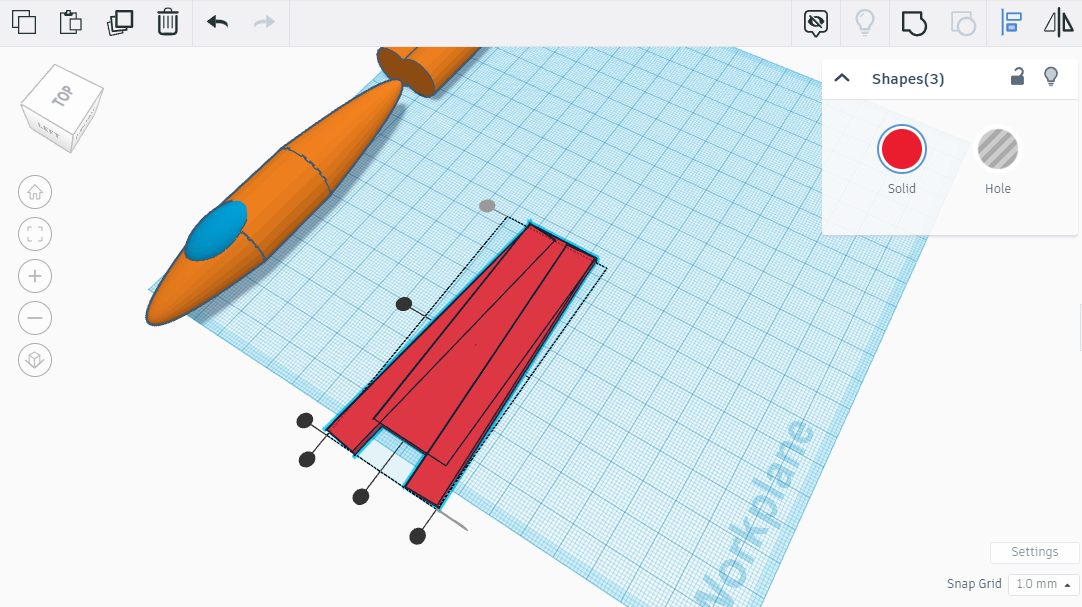
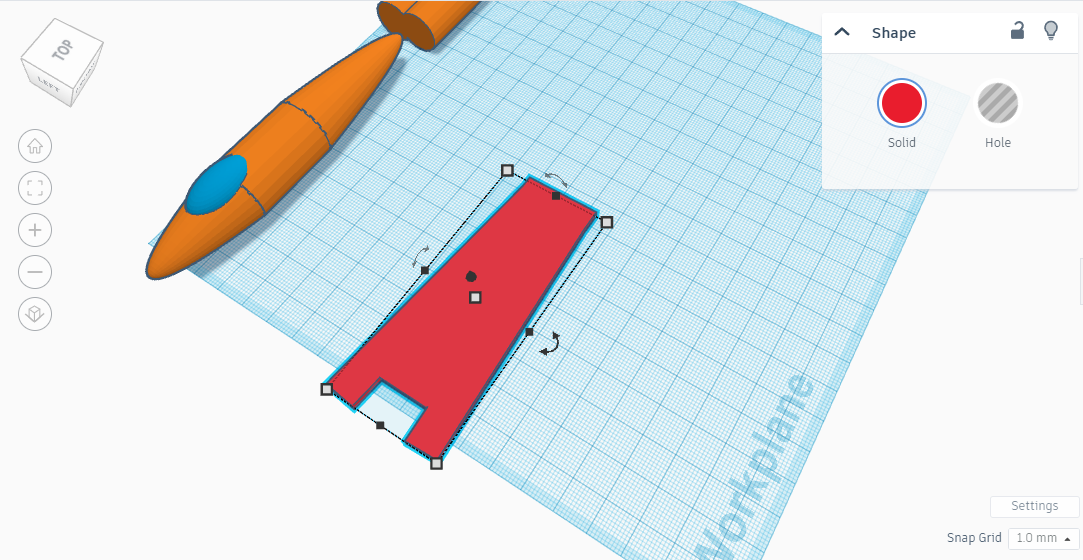
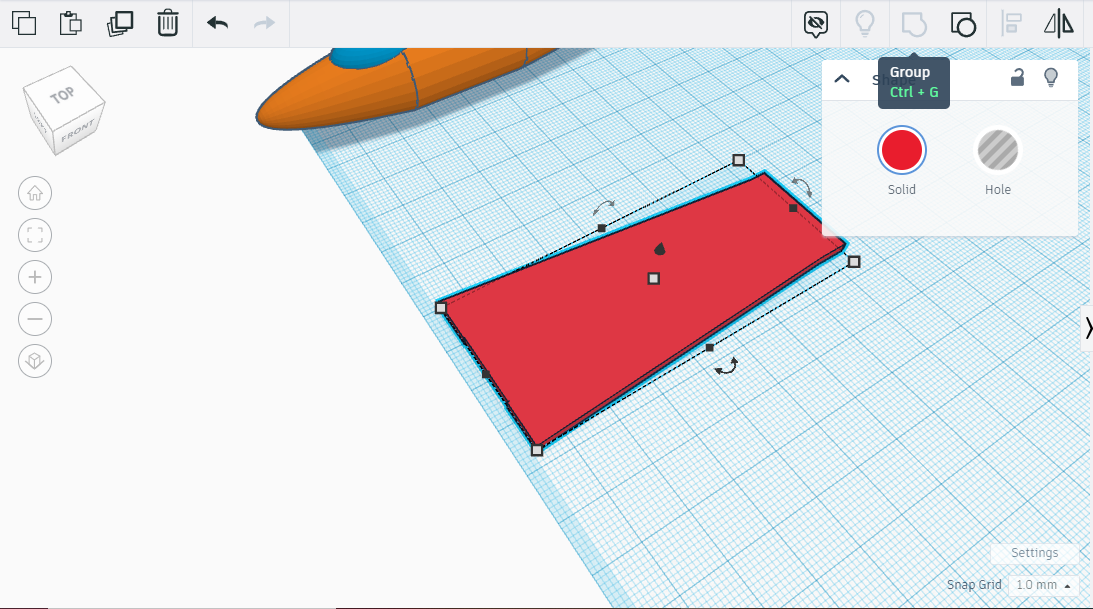
- Align the 3 shapes as in the picture, and group.
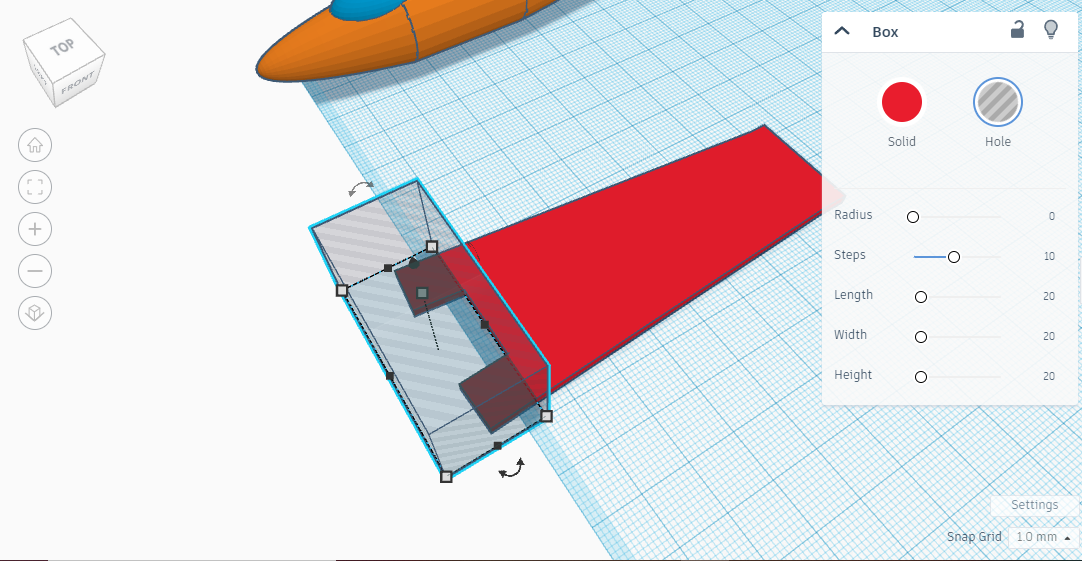
- Then add a hole box as in the picture and group.
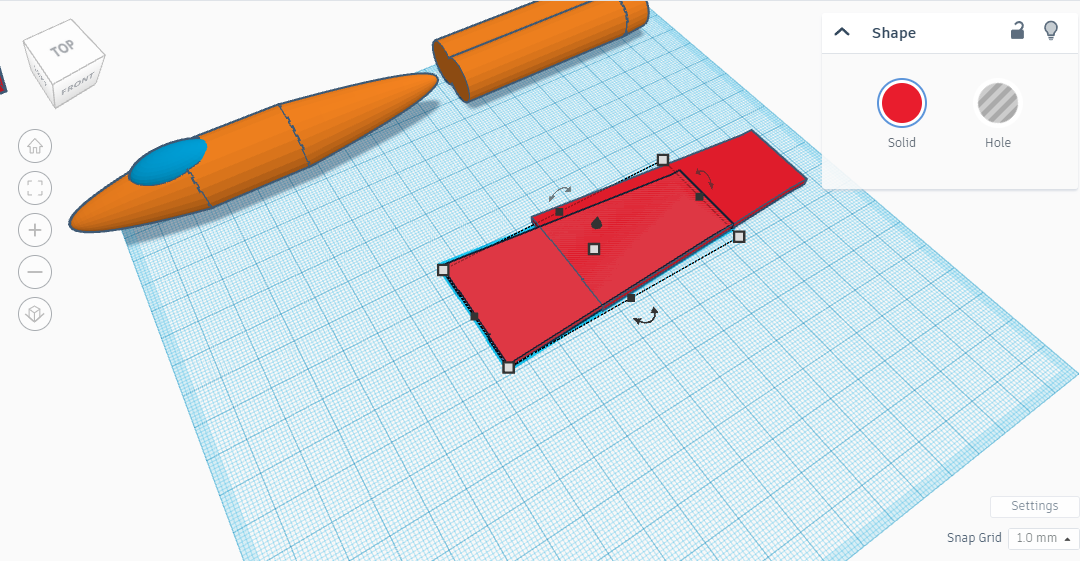
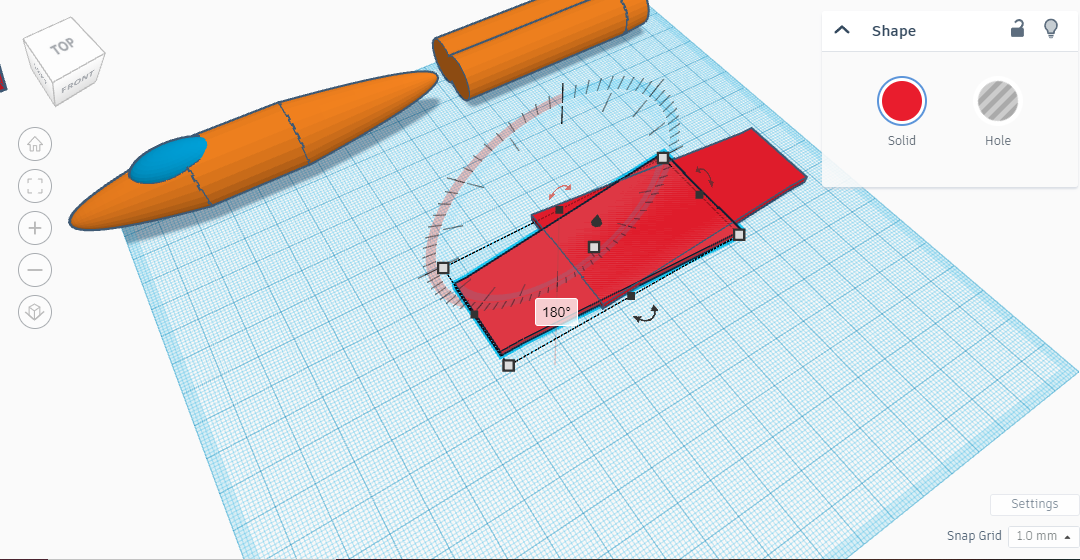
- Duplicate the shape,
- Rotate one 180°.
- Using the rule, measure the distance between the edges of the reactor, like in the picture, then reproduce this distance between the 2 wings as in the image and group the 2 wings.
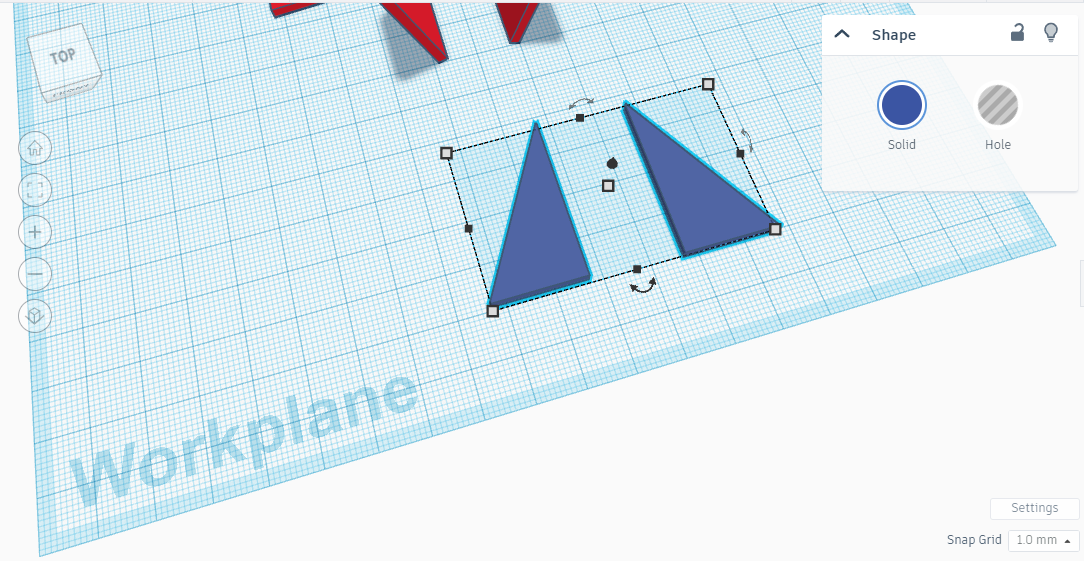
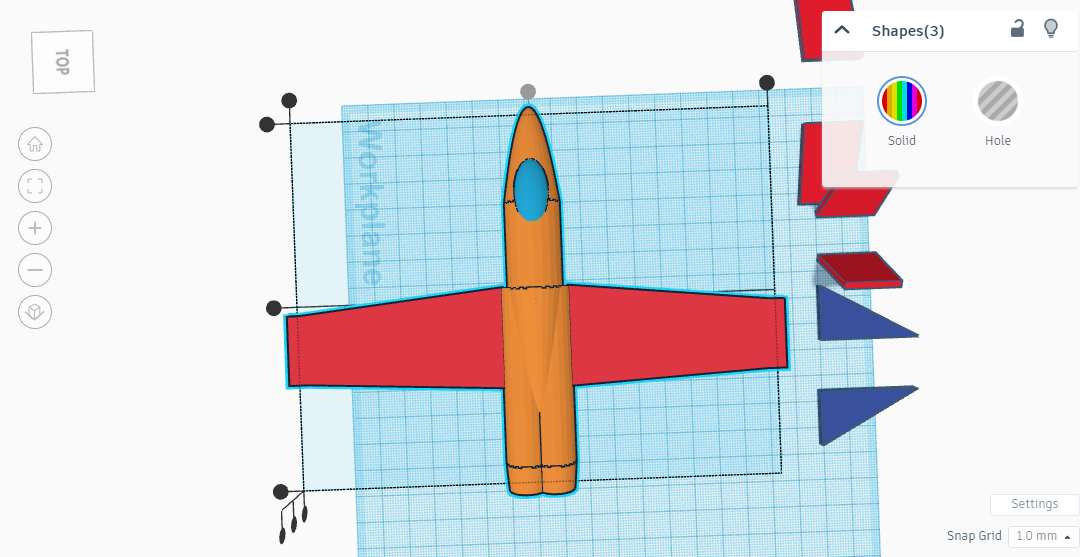
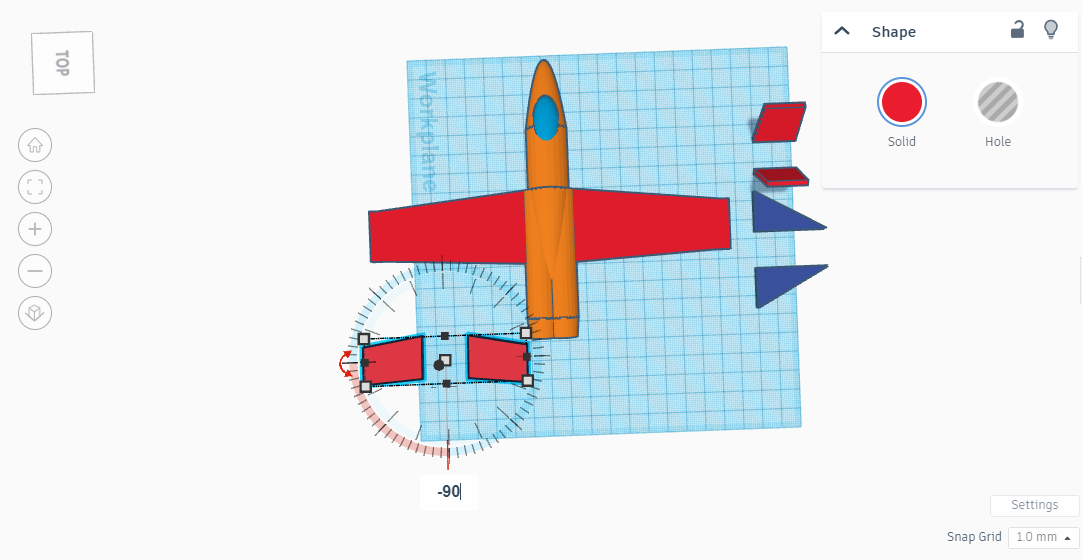
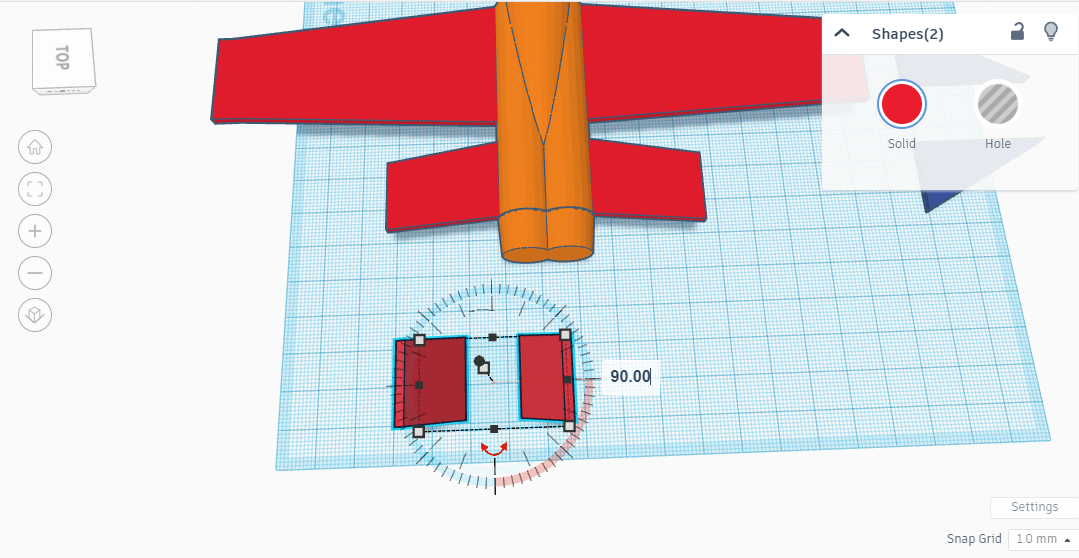
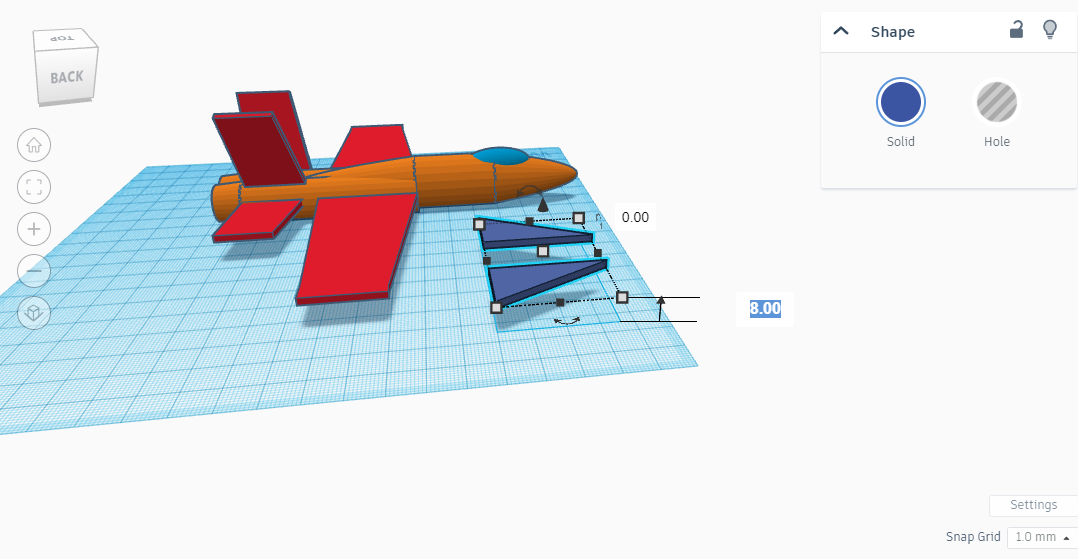
Rudder, Elevator
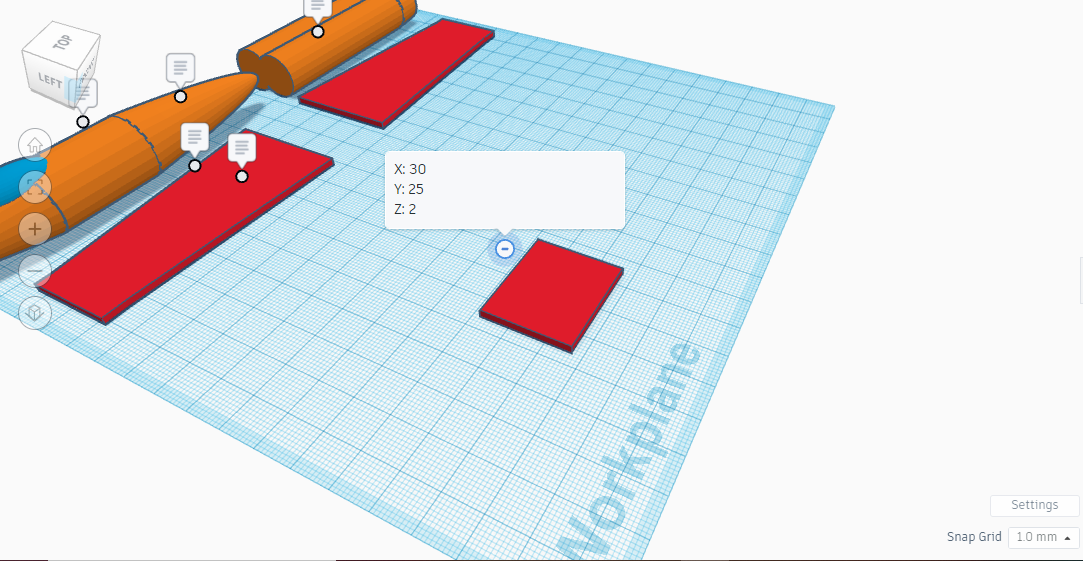
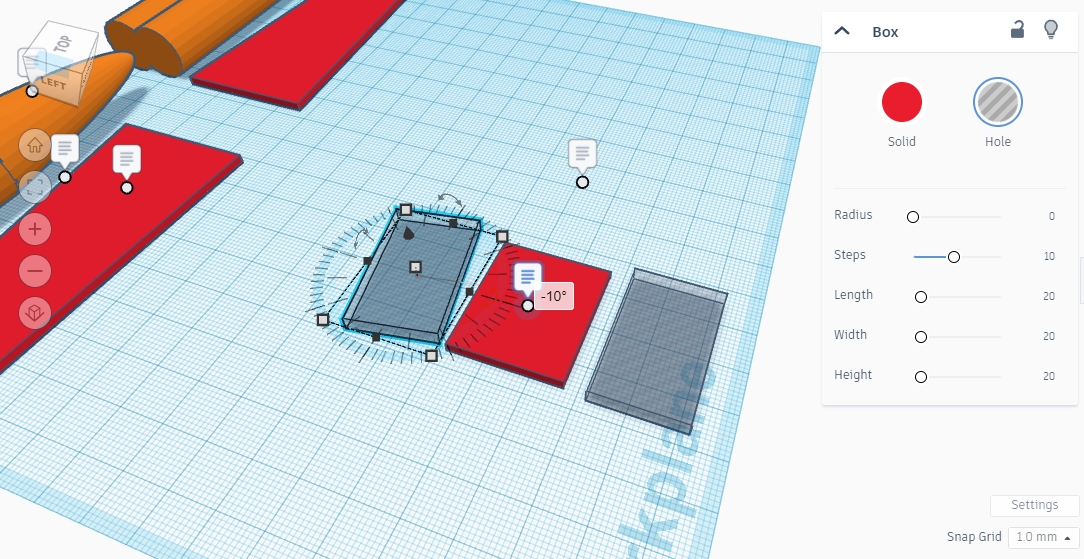
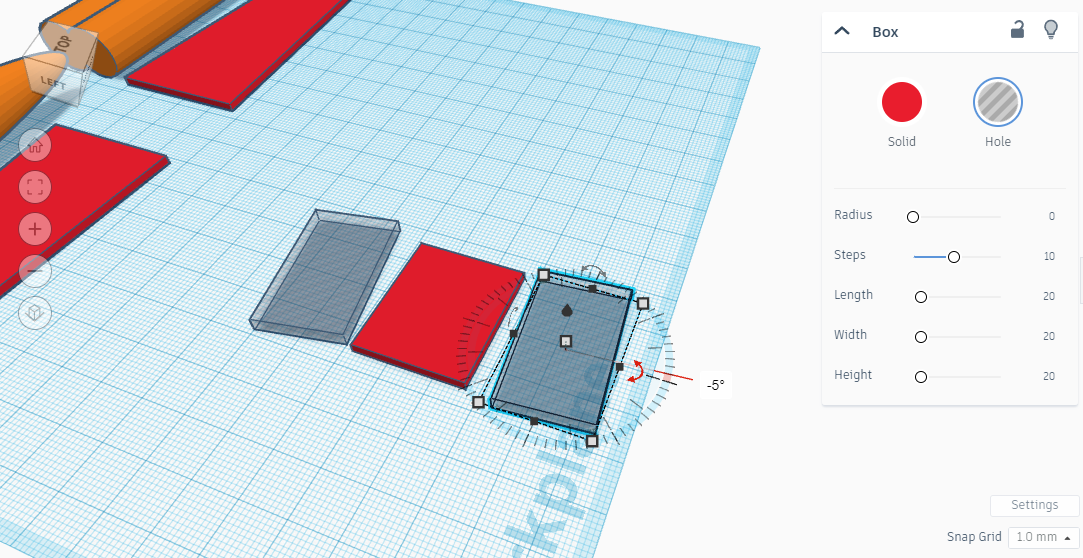
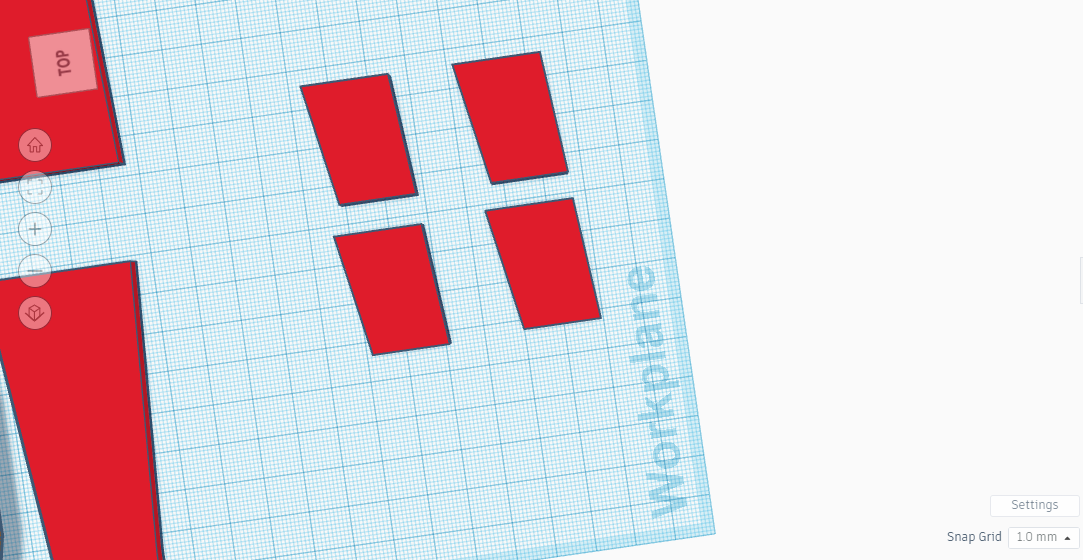
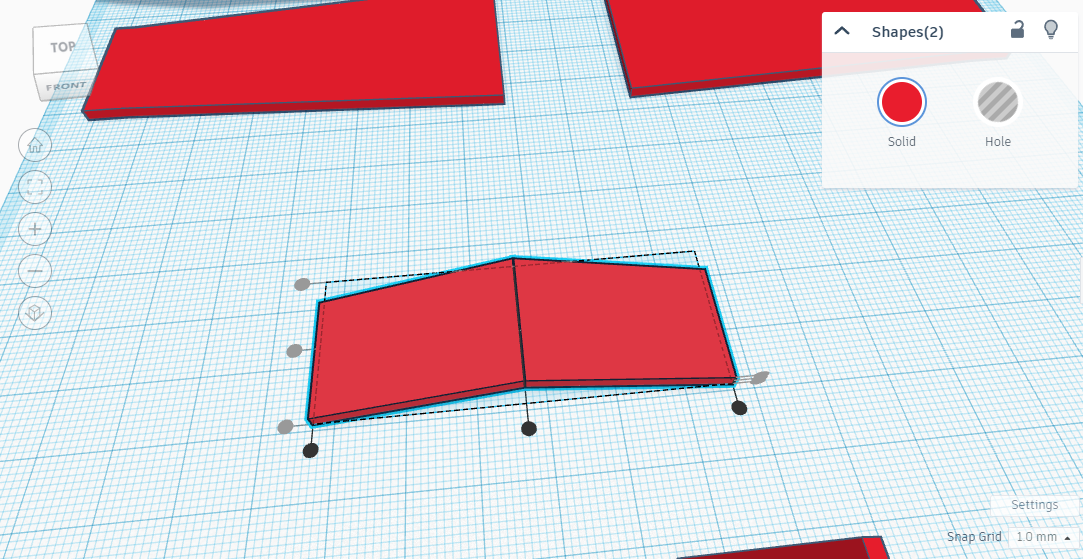
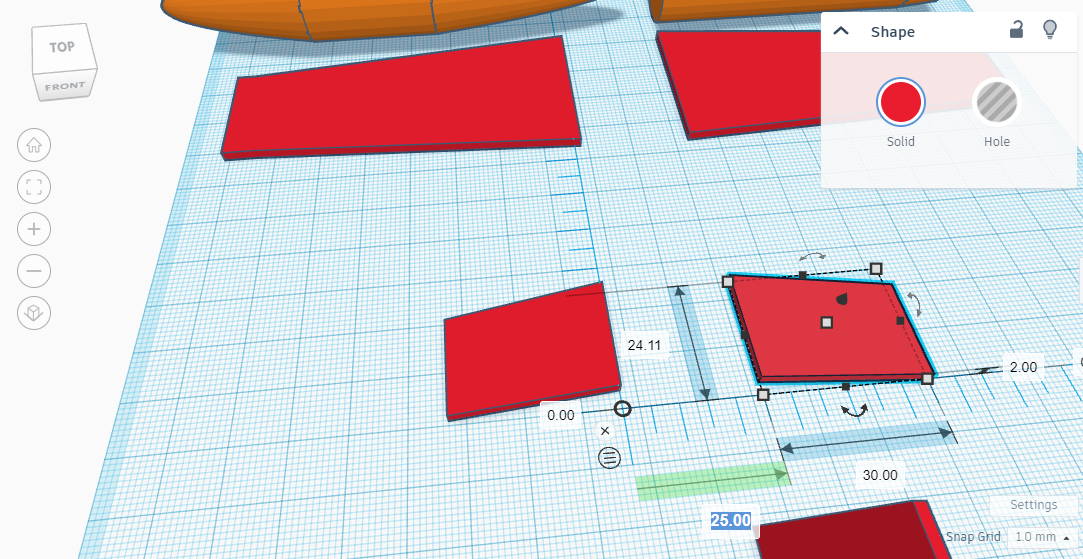

Were are going to design the rudder and the elevator now, both have the same basic shape. According to the pictures:
- Add a box.
- Put X to 30, Y to 25 and Z to 2.
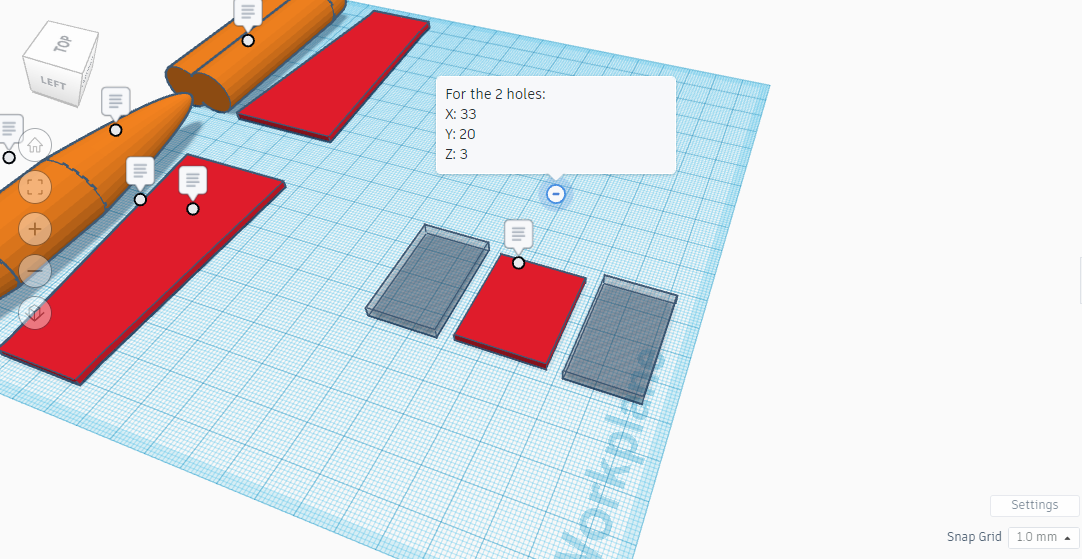
- Then add 2 hole boxes, and for both, put X to 33,Y to 20 and Z to 3.
- Rotate the first hole -10° and the second -5°.
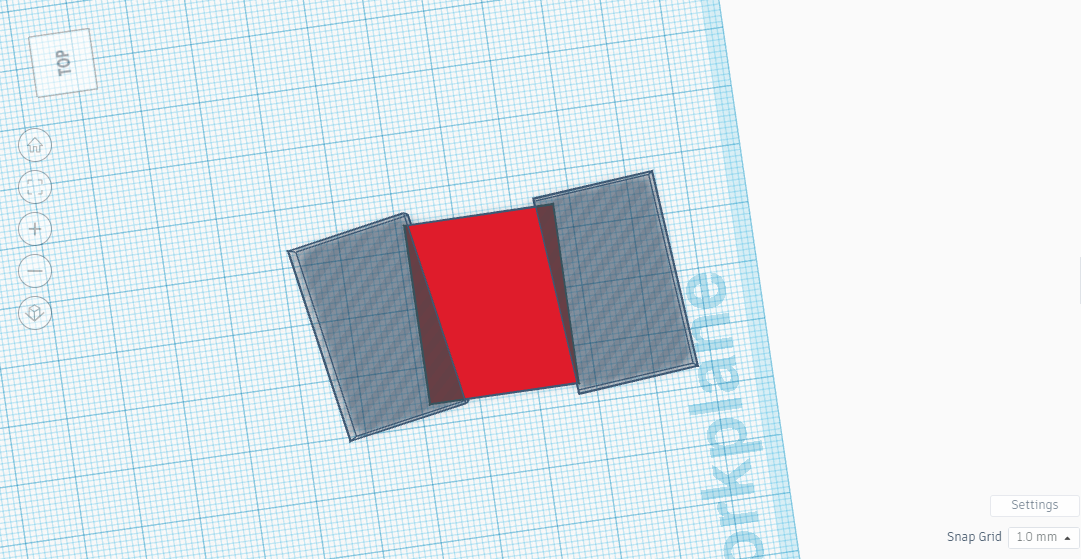
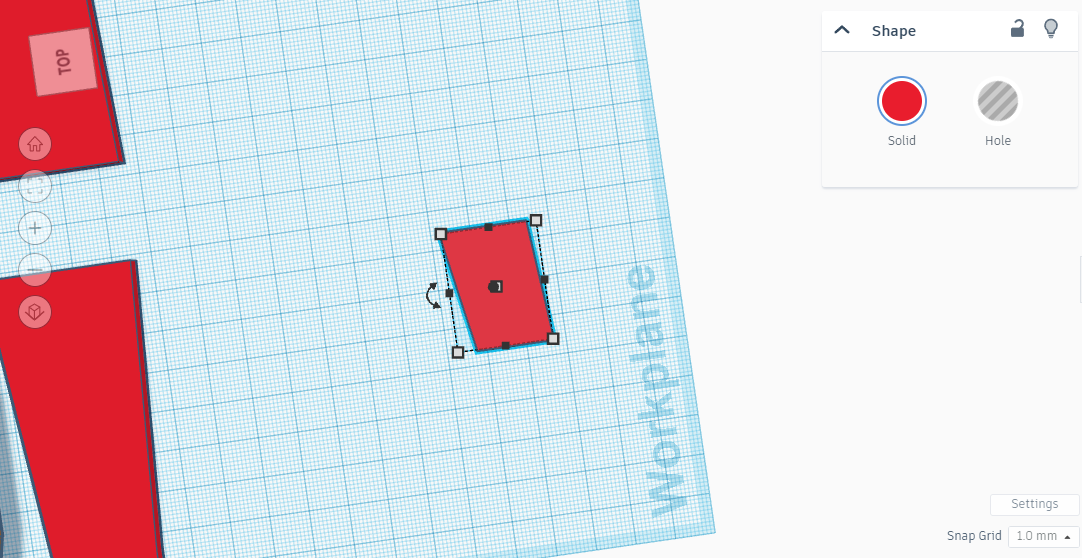
- Make it like in the picture, then group.
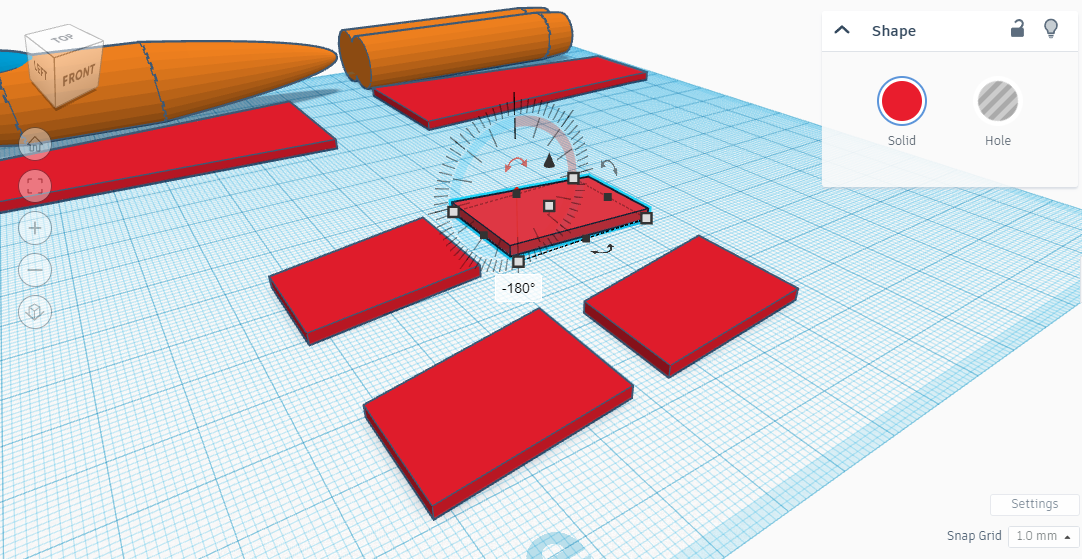
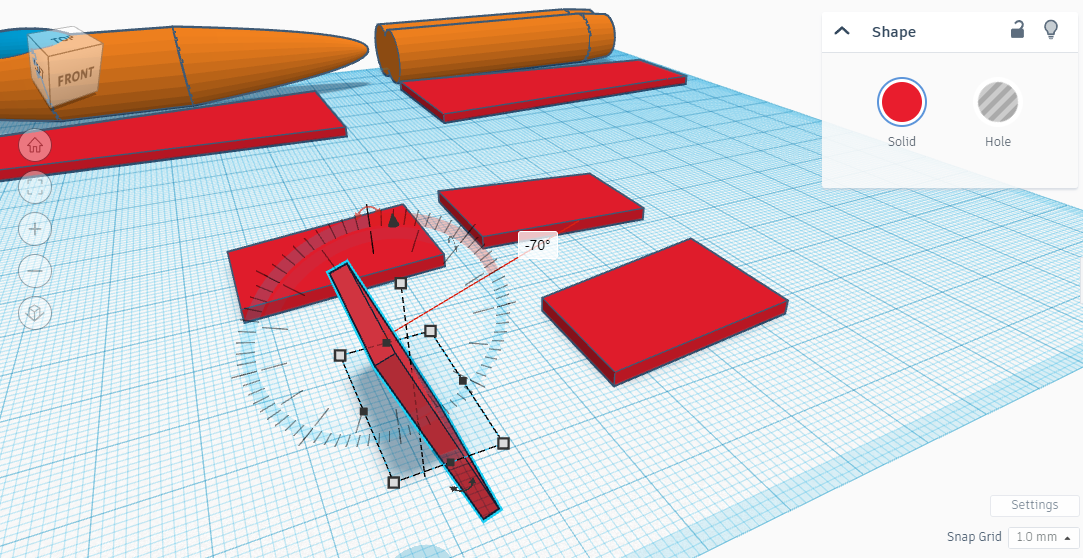
- Duplicate it in four.
- Rotate one -180°.
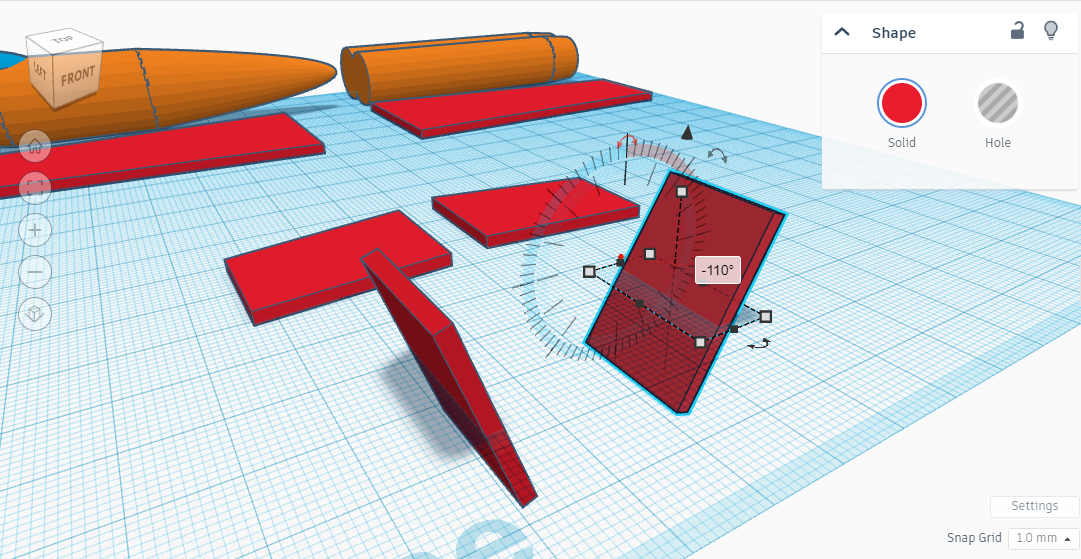
- Rotate one -70°.
- Rotate one -110°.
- Then align the 2 first shapes as in the picture.
- Keep them away from 25 with the rule, then group.
- Pull up the 2 others shapes to 0 as in the picture.
- Align them as in the picture.
- Keep them away from 15, and group.
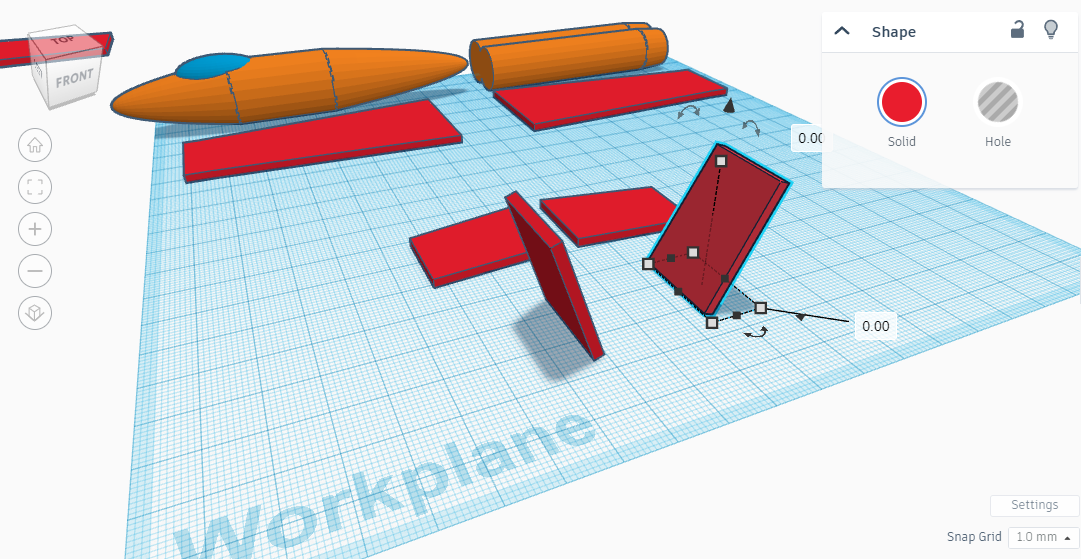
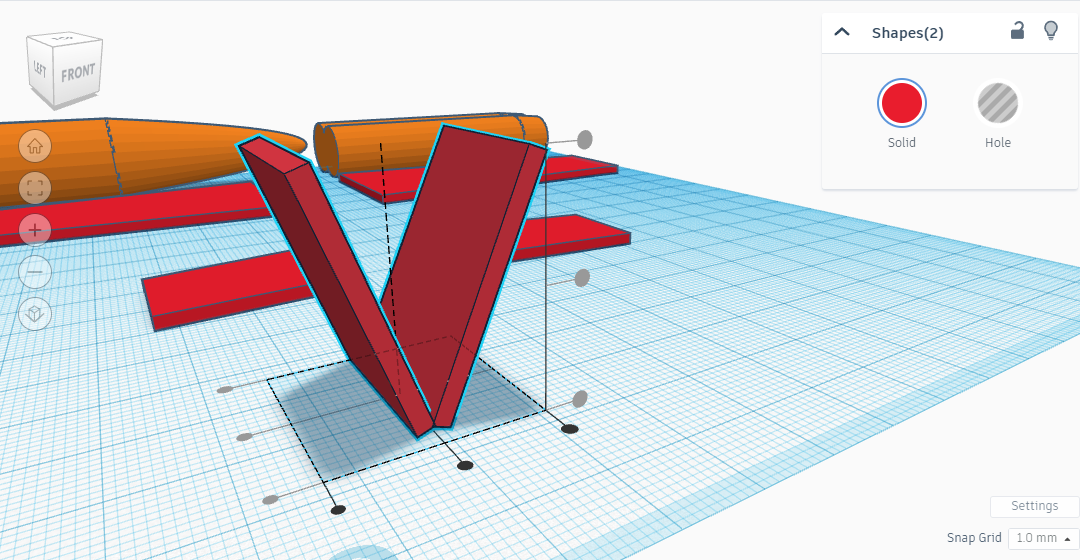
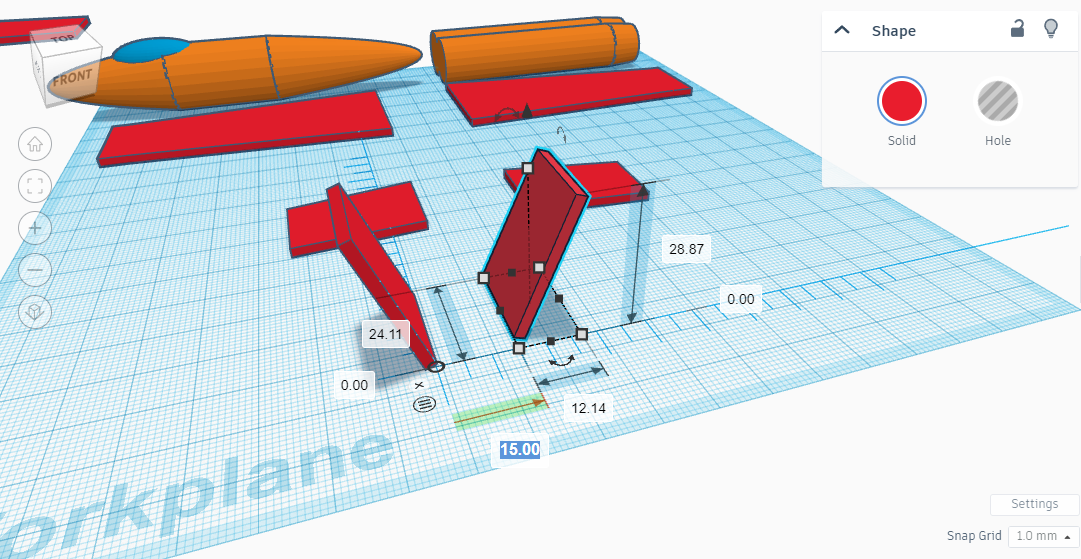
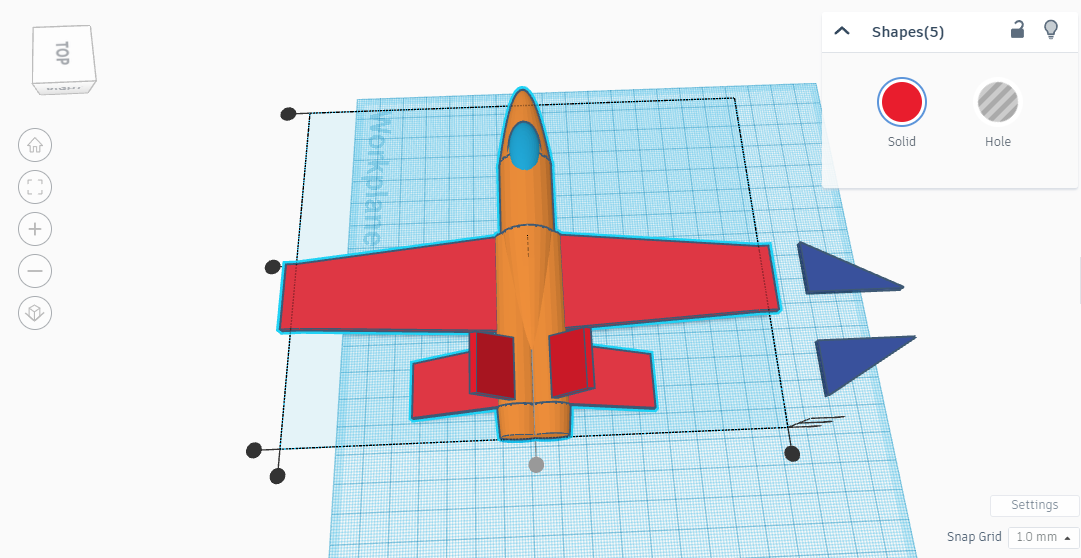
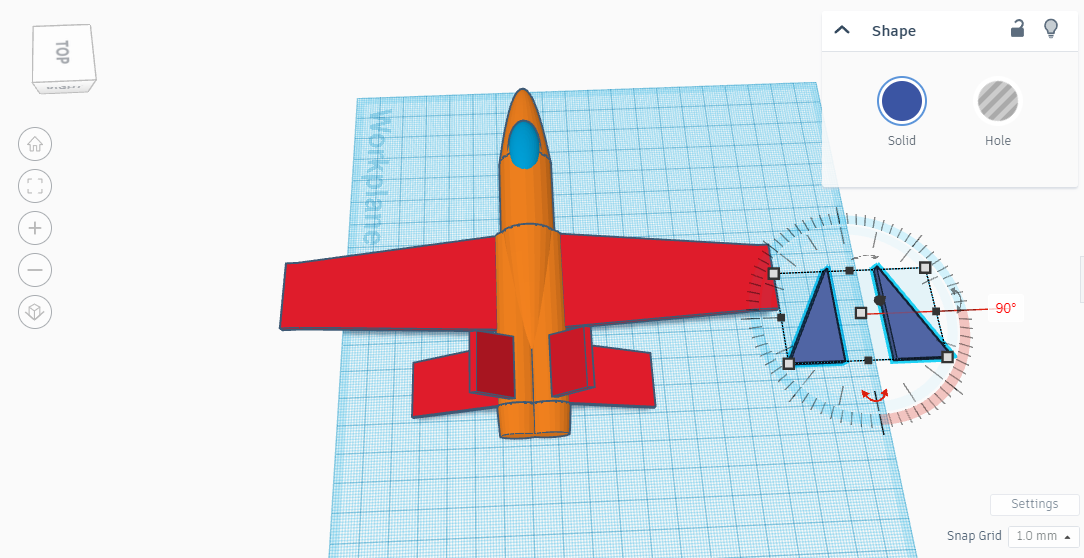
Edge
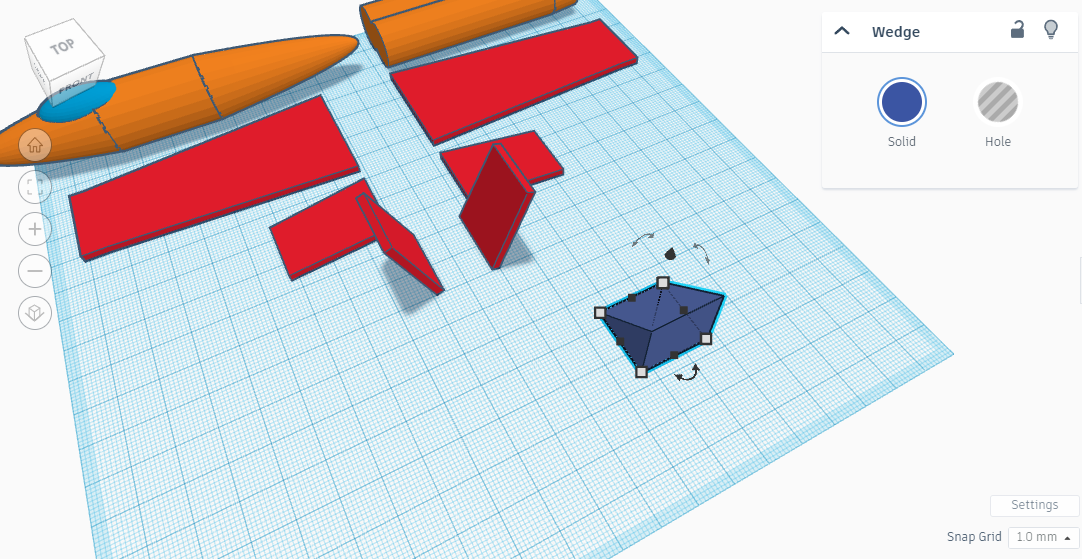

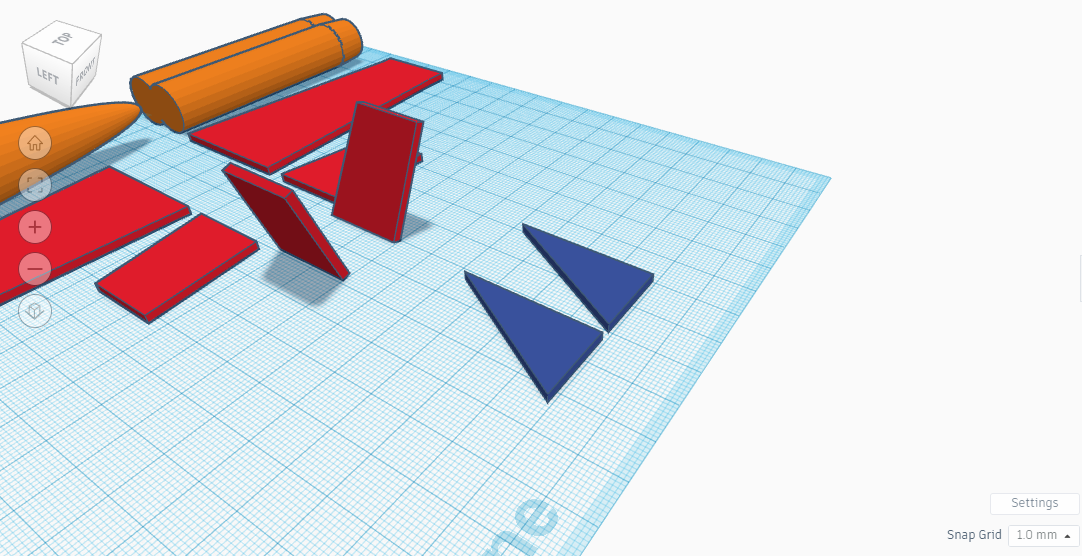
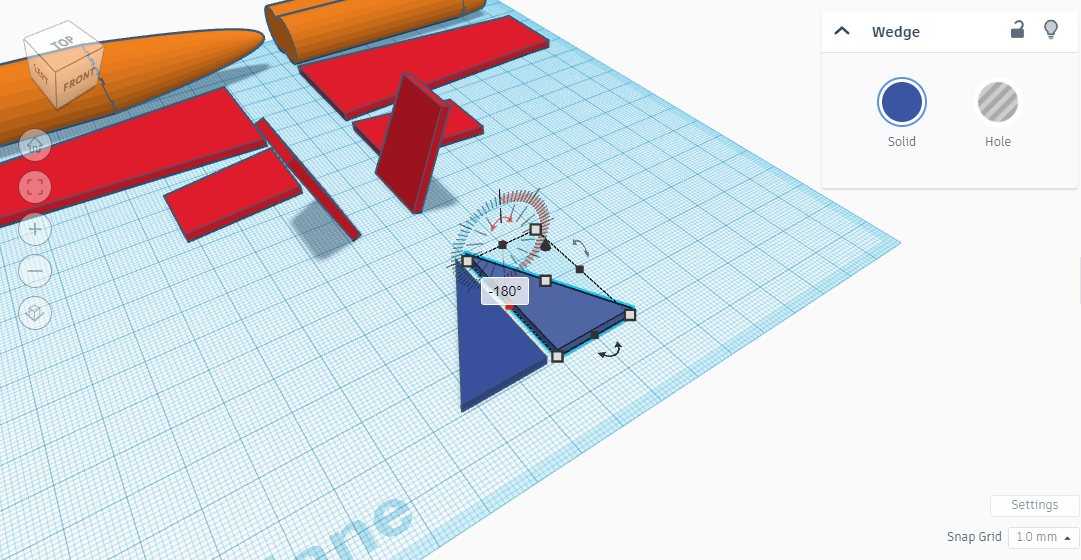
Now we are going to design the edge. According to pictures:
- Add a wedge.
- Rotate it 90°.
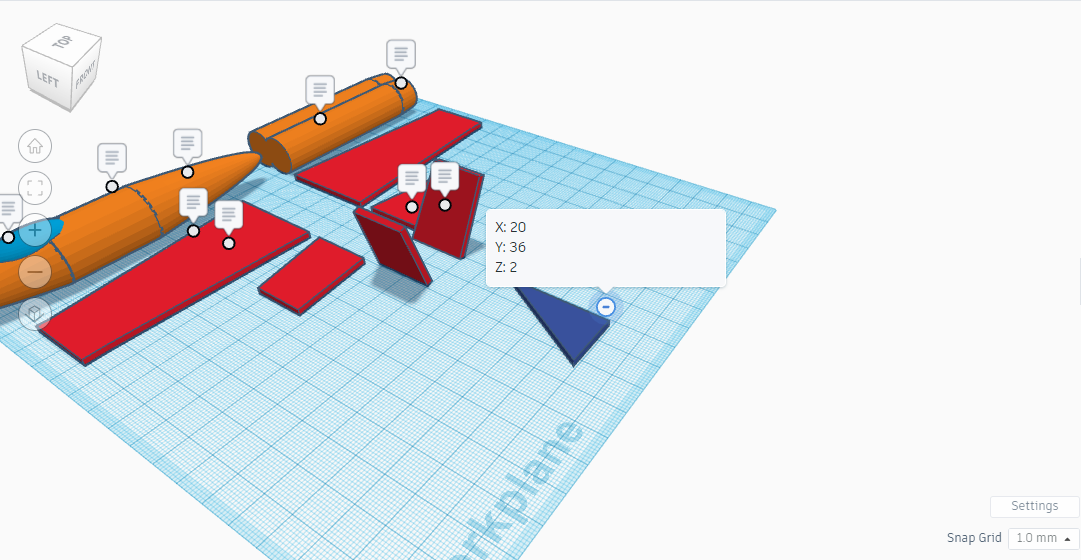
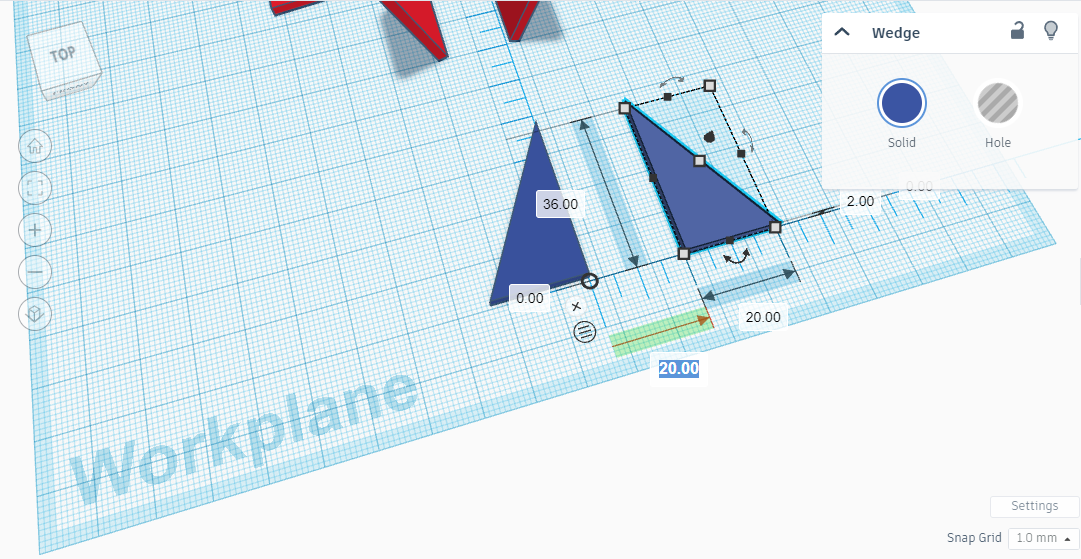
- Put X to 20, Y to 36 and Z to 2.
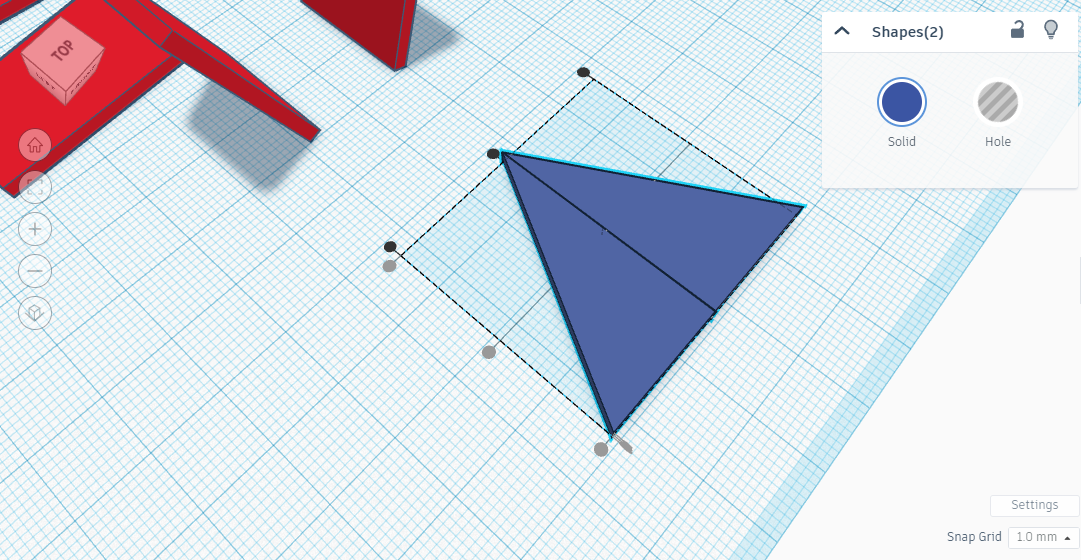
- Duplicate it.
- Rotate one -180°.
- Align as in the picture.
- Keep them away from 20 and group.
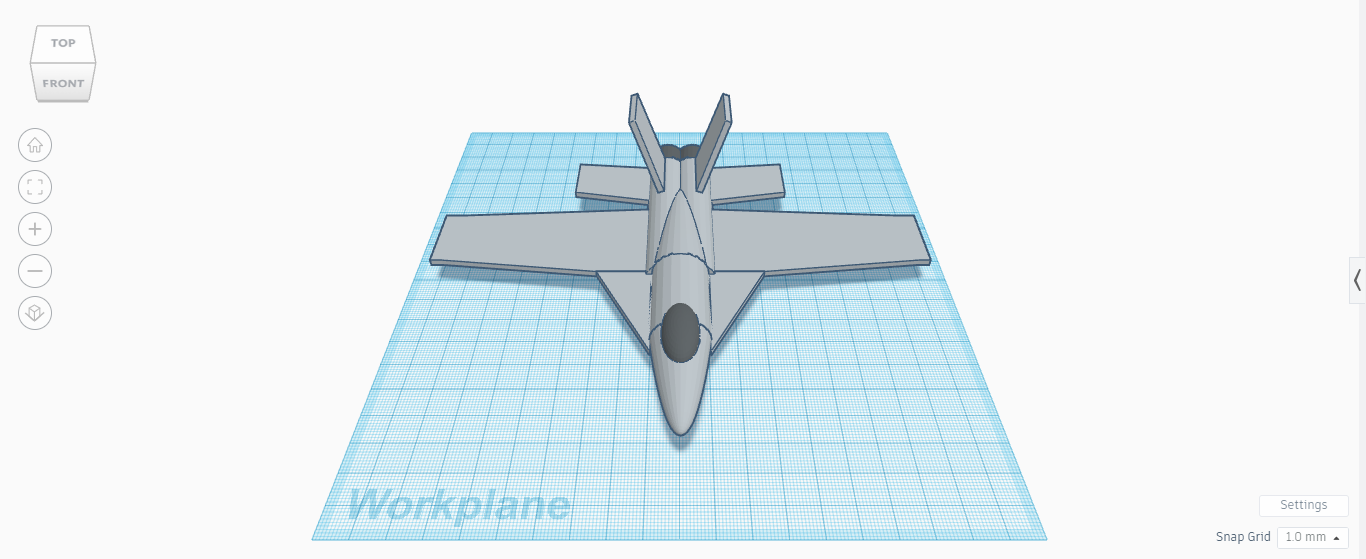
Assembling
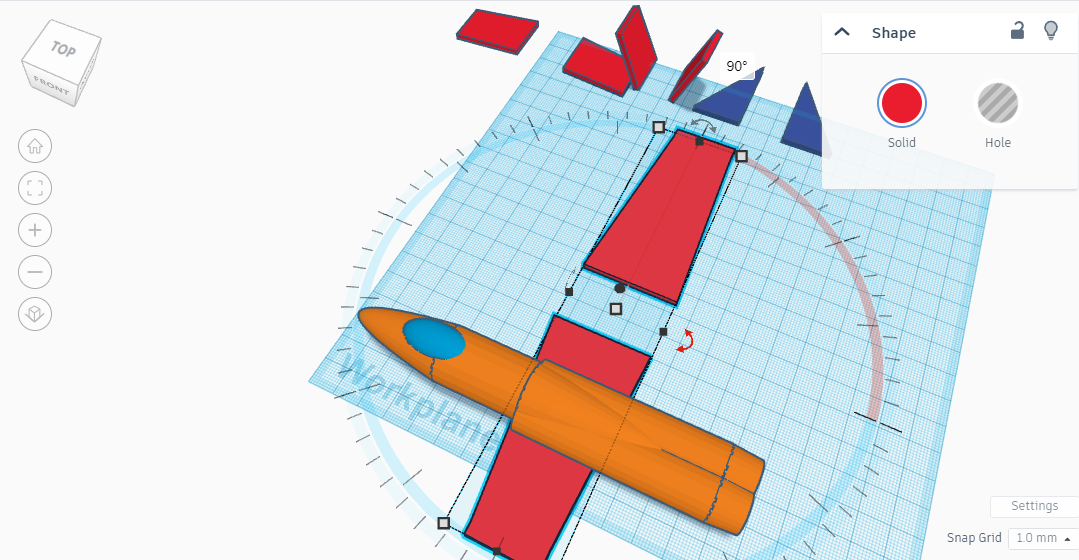
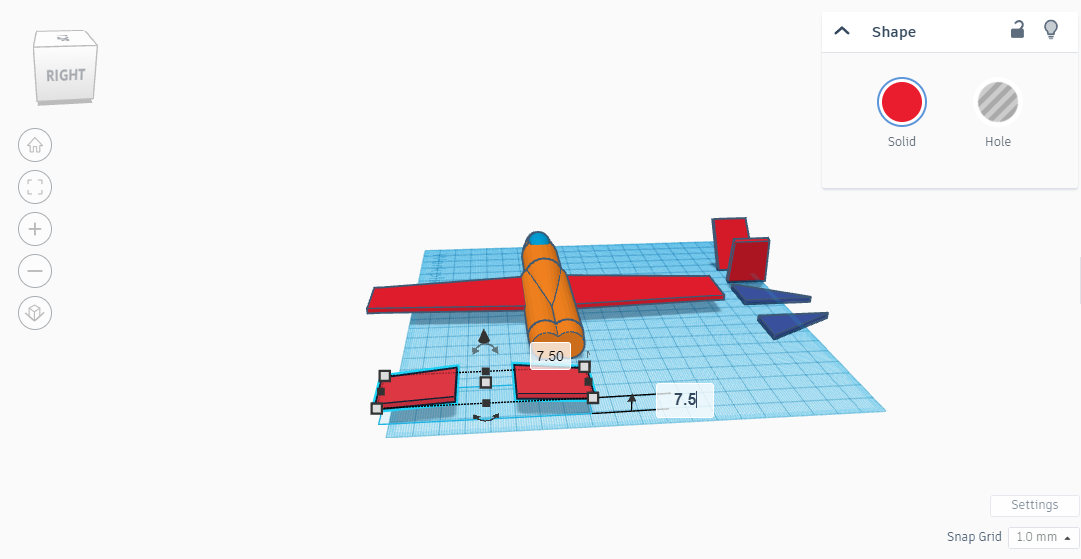
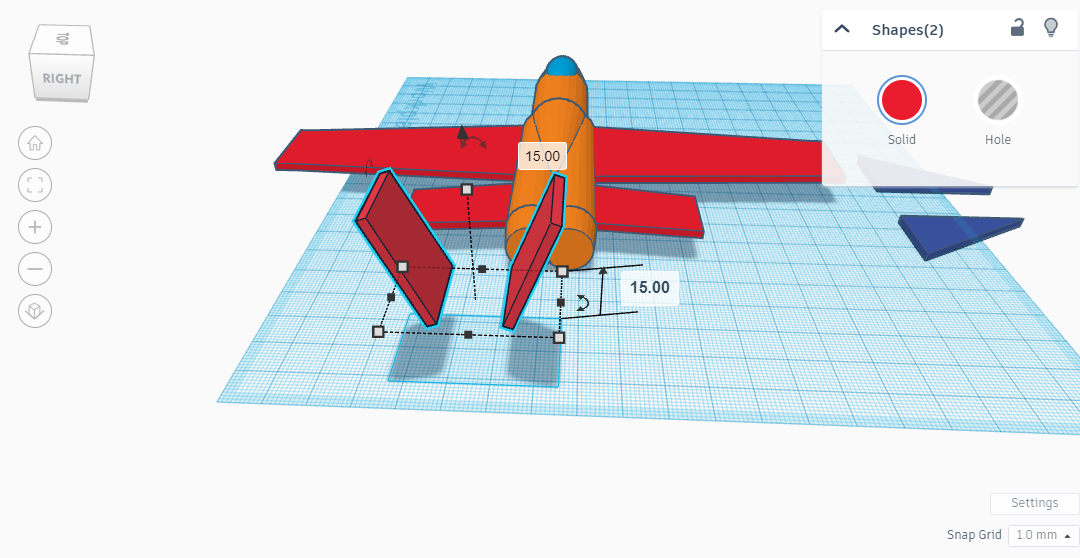
Now we are going to assemble all. According to pictures:
- Align the "body" with the "reactor" as in the picture and group.
- Rotate the wing 90°.
- Pull the wing up to 7.5,
- Align with the first shape as in the picture and group.
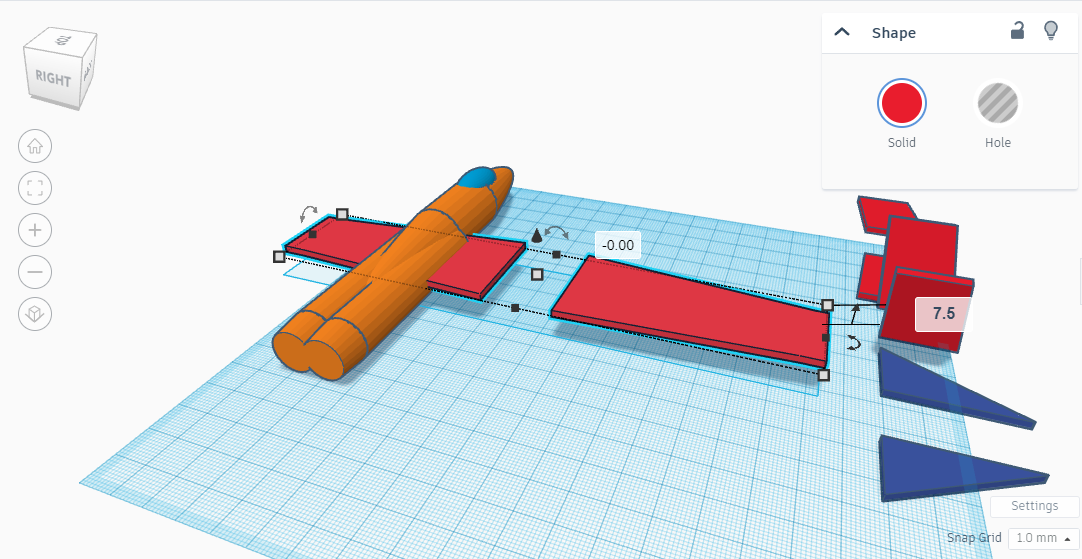
- Rotate the elevator -90°.
- Pull it up to 7.5 too.
- Align with the principal shape as you can see in the picture and group.
- Rotate the rudder 90°, then pull it up to 15.
- Align it with the principal shape like in the picture and group.
- Rotate the edge 90° and pull up to 8.
- Finally, align as in the picture and group.
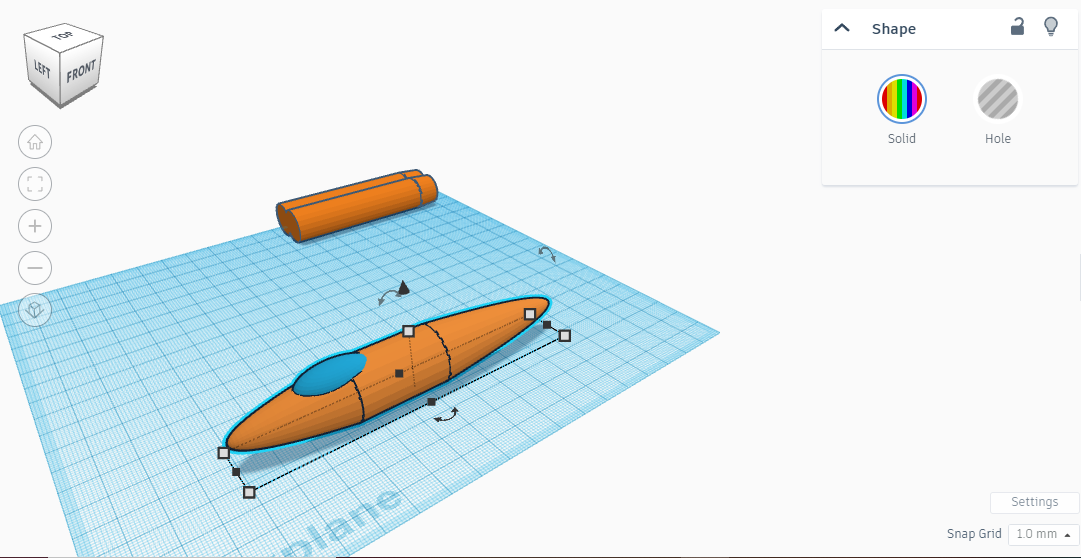
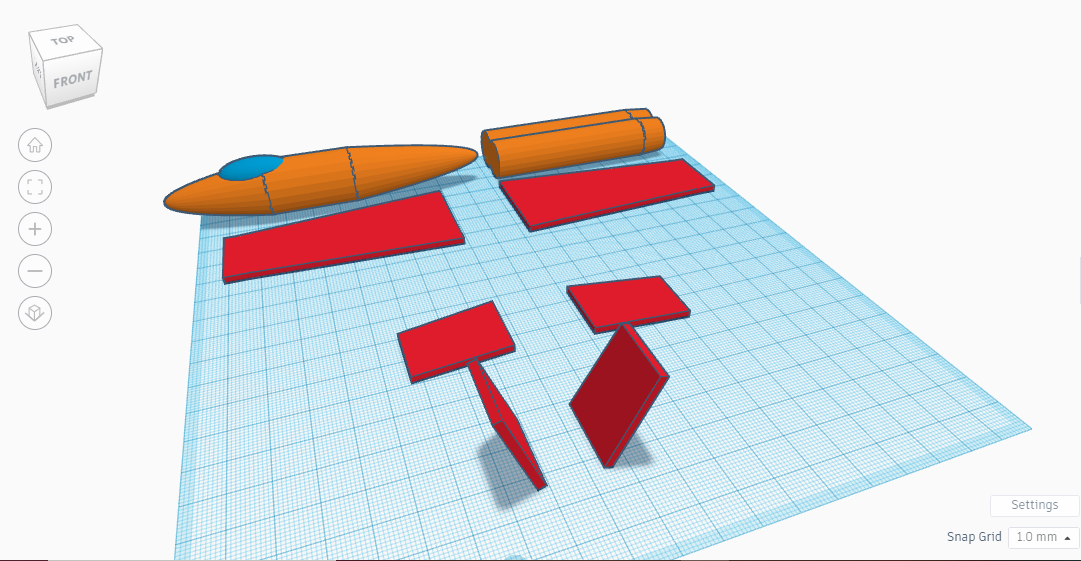
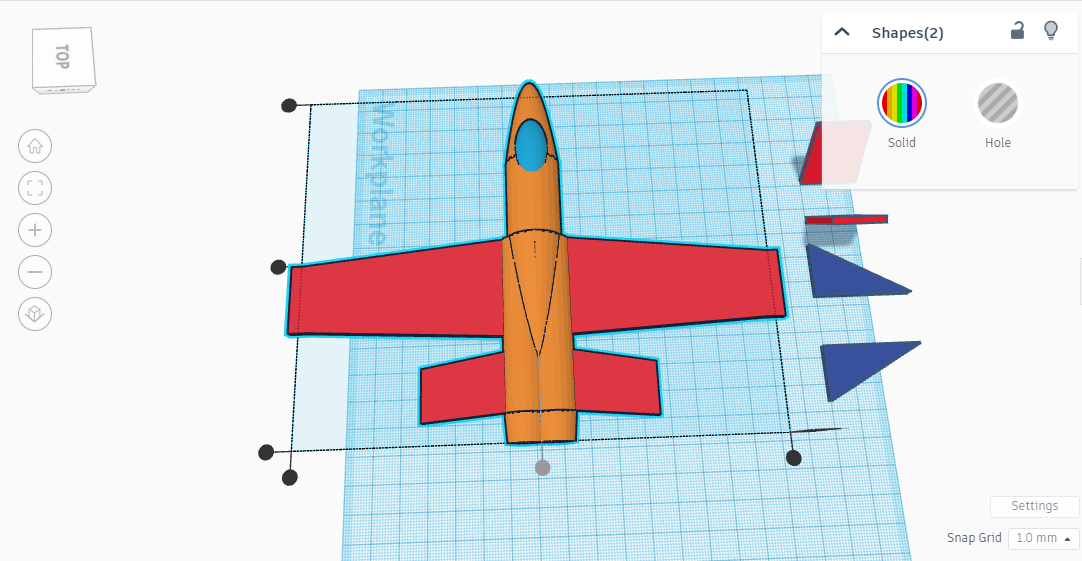
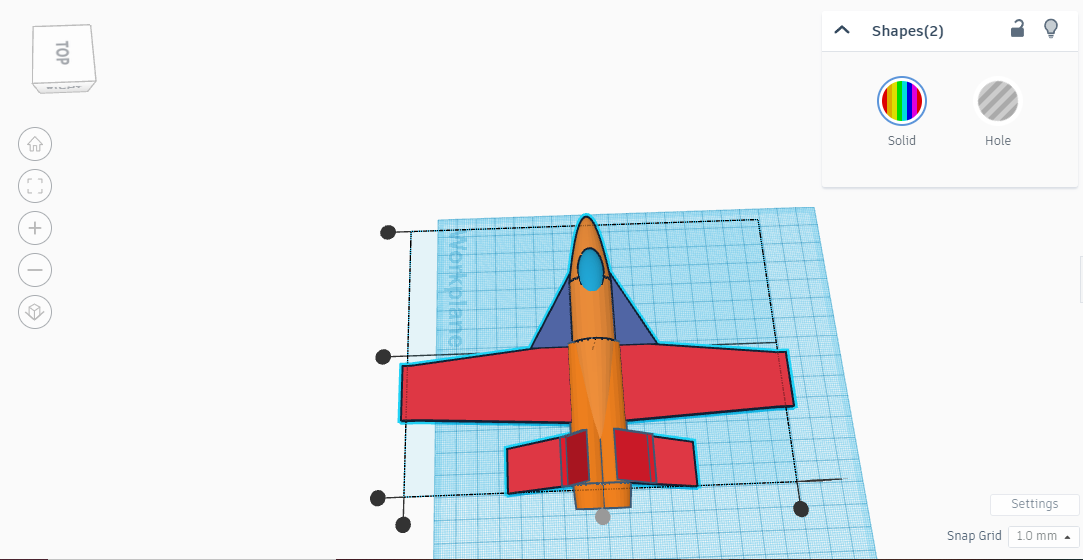
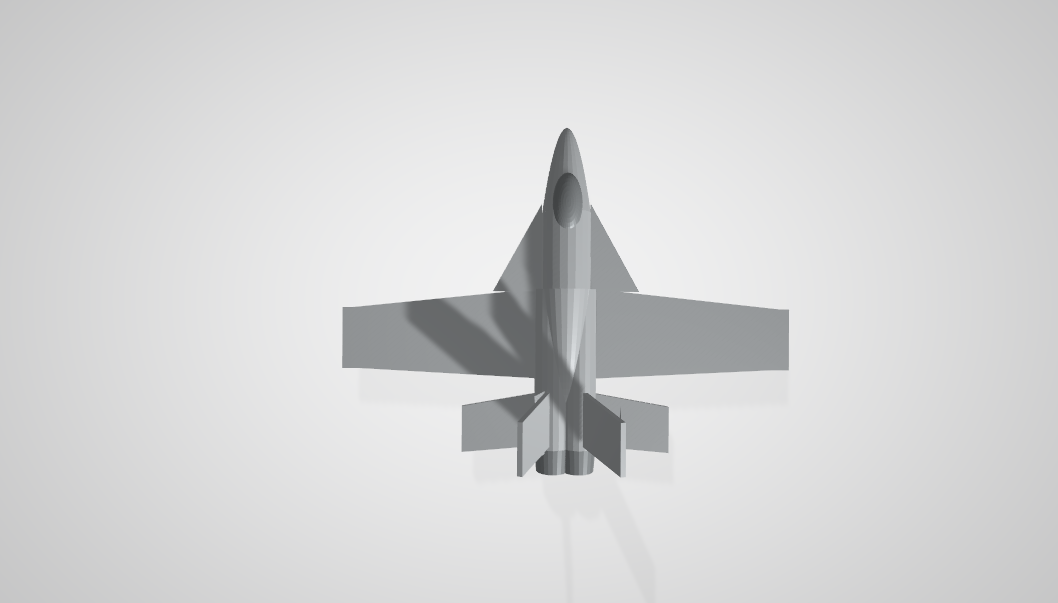
Color
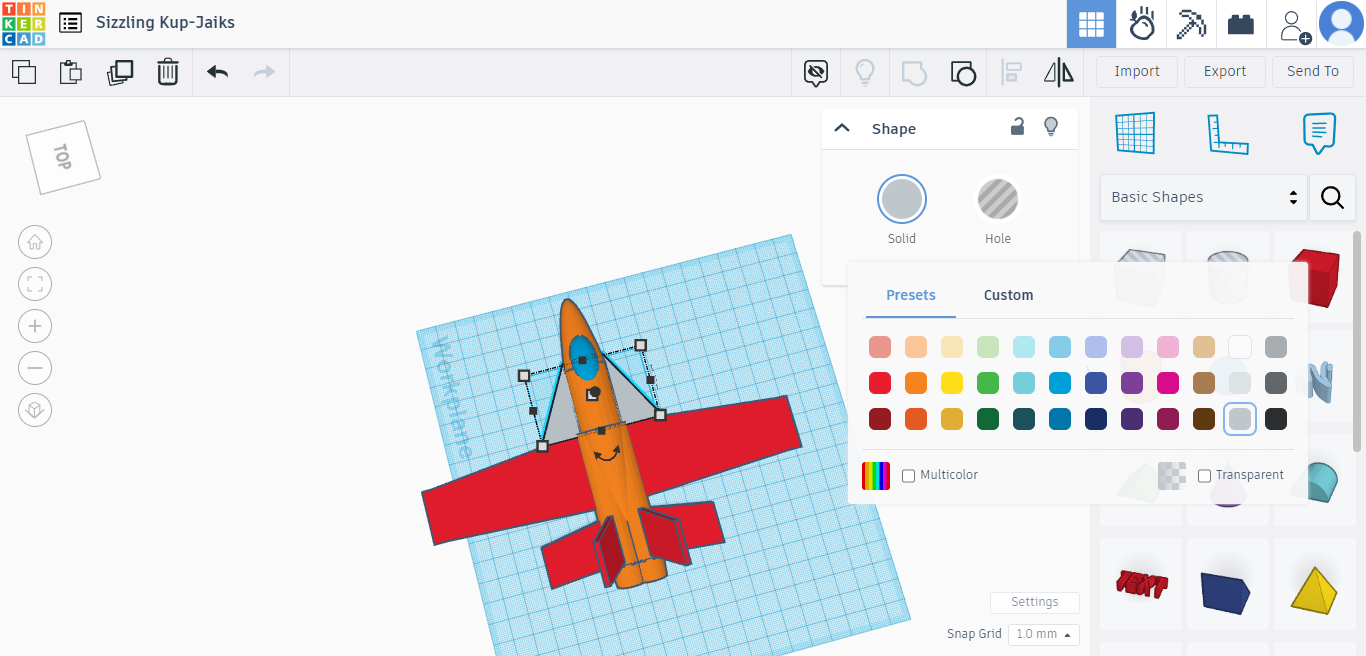
So to change the color, you have just to click the shape, then "solid", and you choose the color you want. For me, at the end, it gives like the 2nd picture.
My Design
I put my design below.
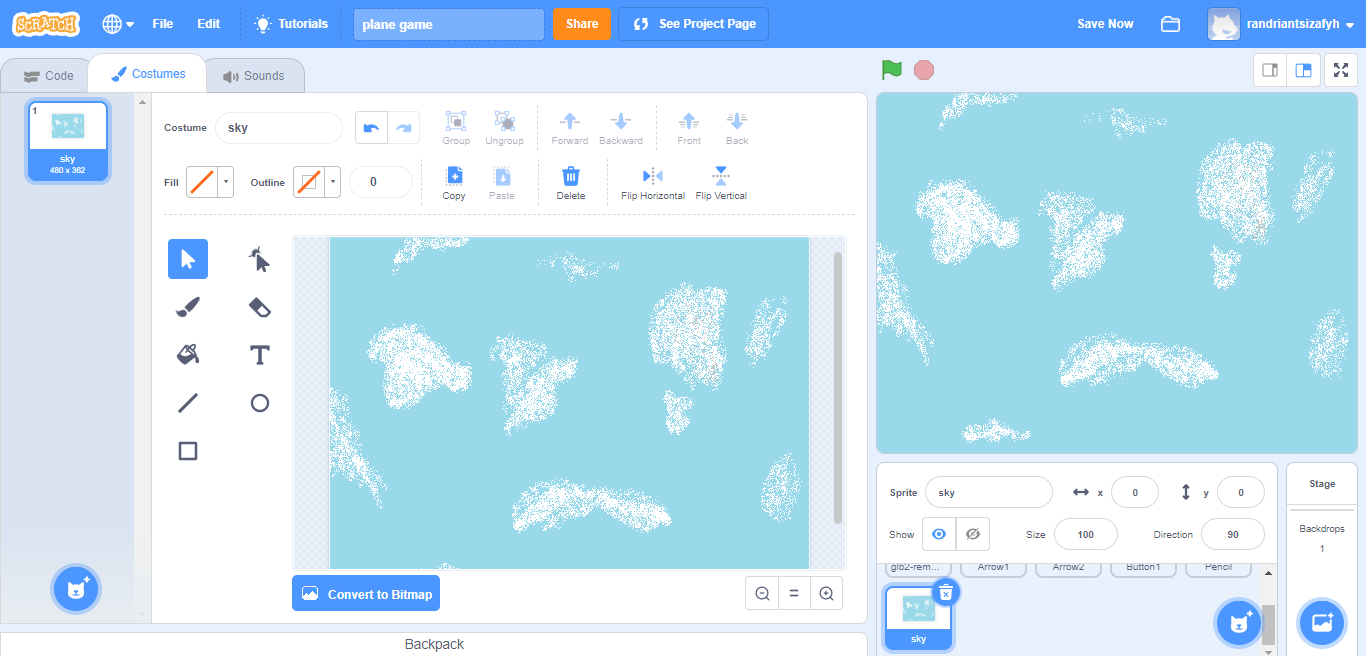
Backgroung
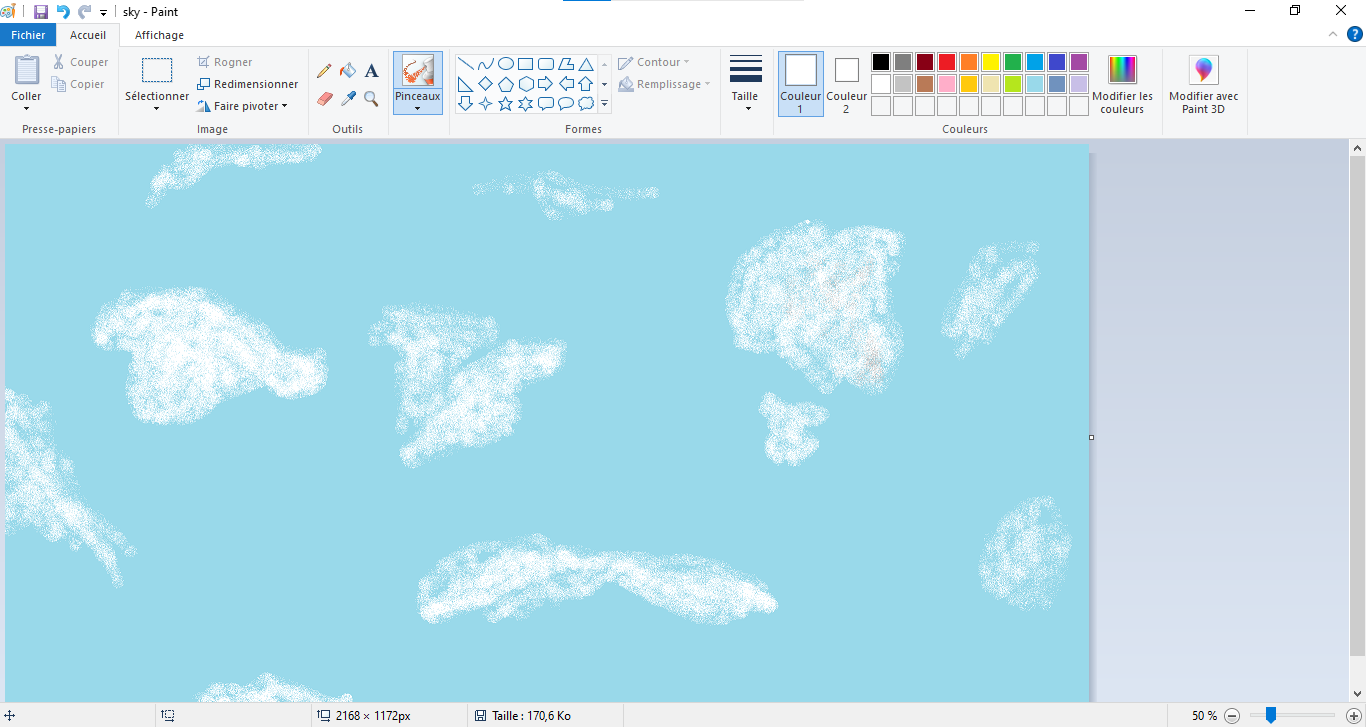
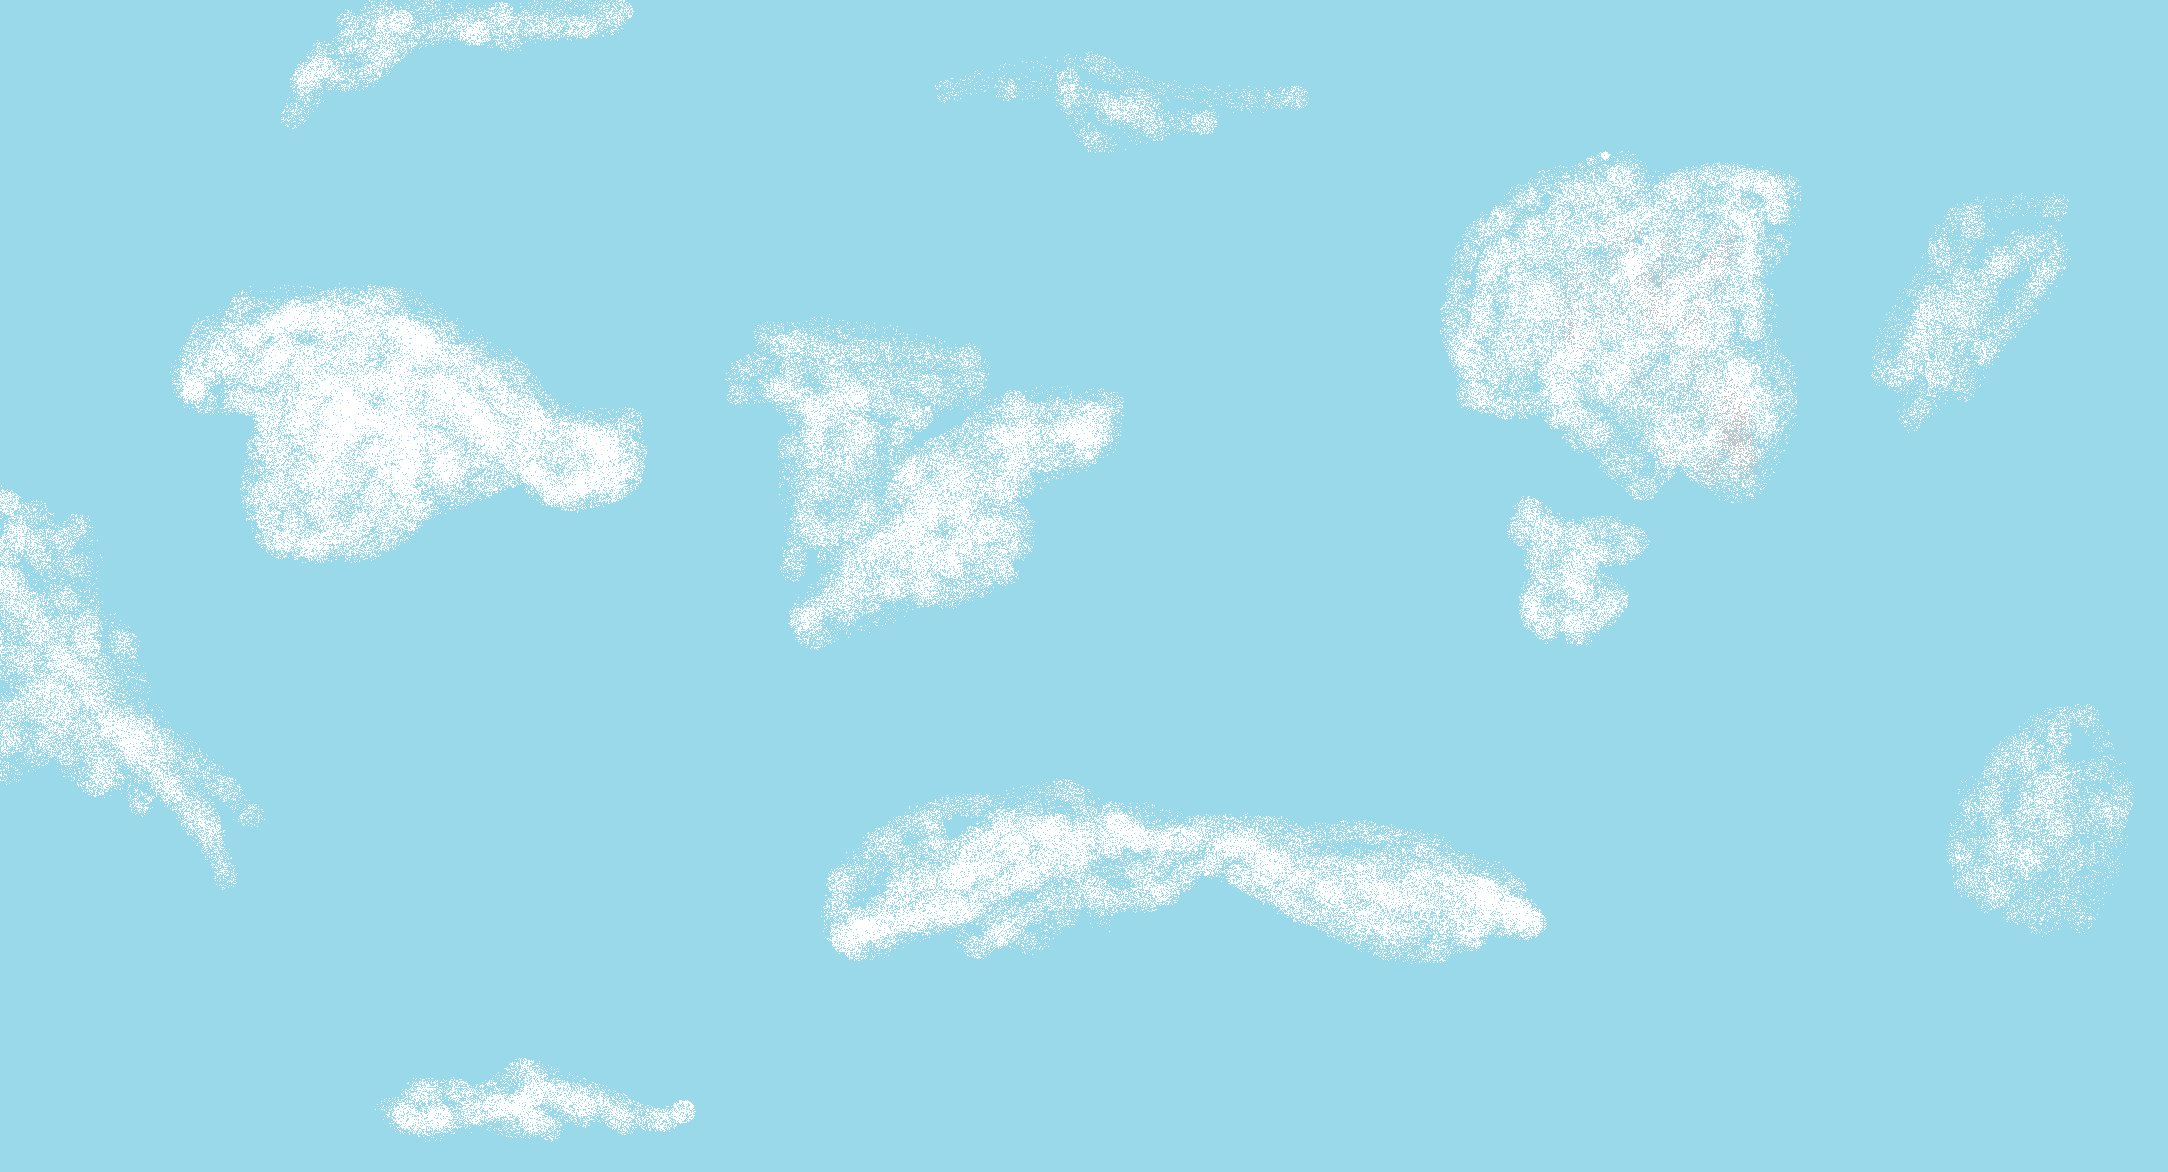
So you need to design a background. Personnaly, i draw a sky with paint, so you can do like me:
- Fill all the screen with blue color.
- Add white color using the spray to make a cloud effect.
And you have your sky.
Coding
Finally, we are going to start coding.
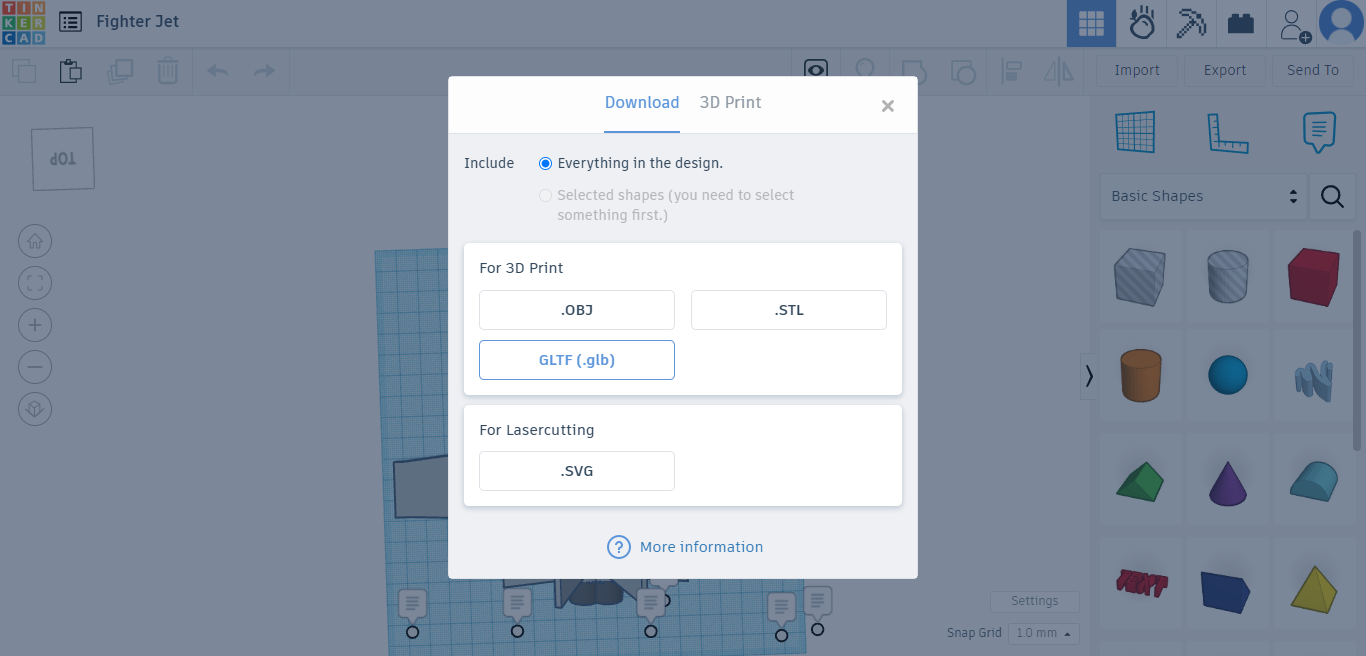
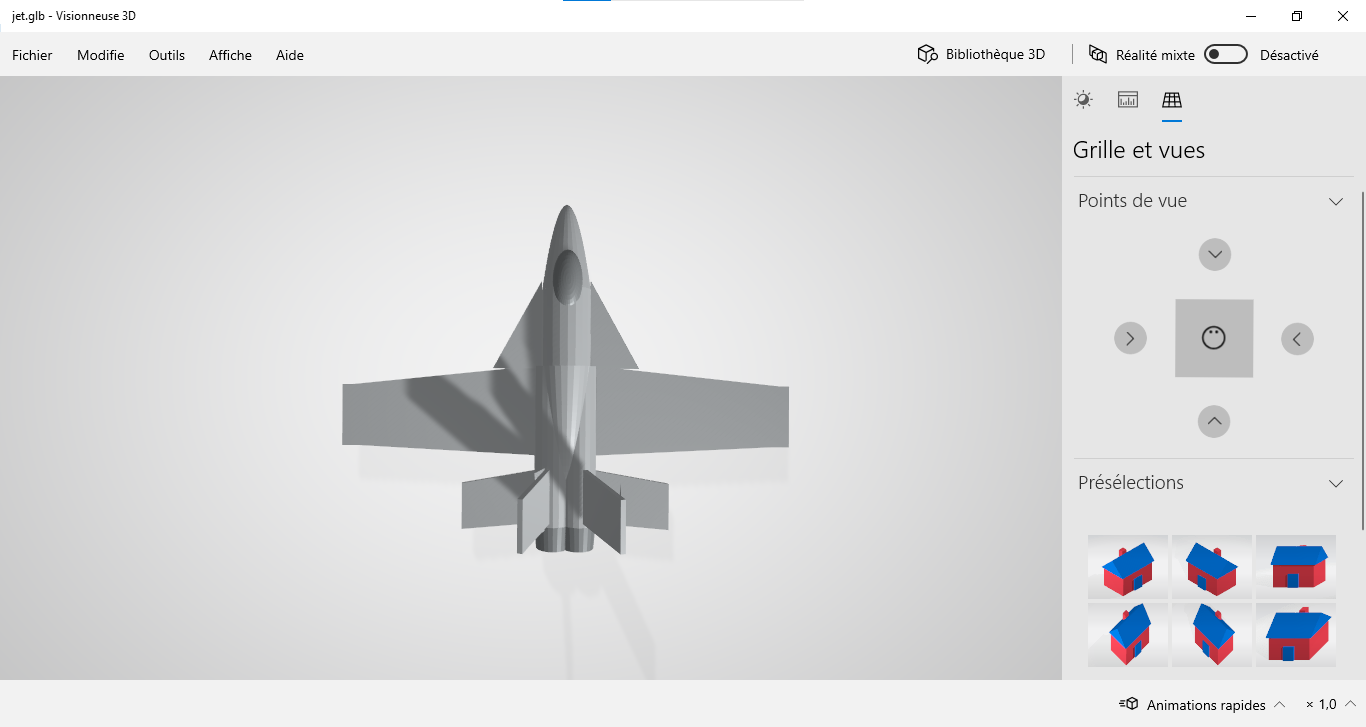
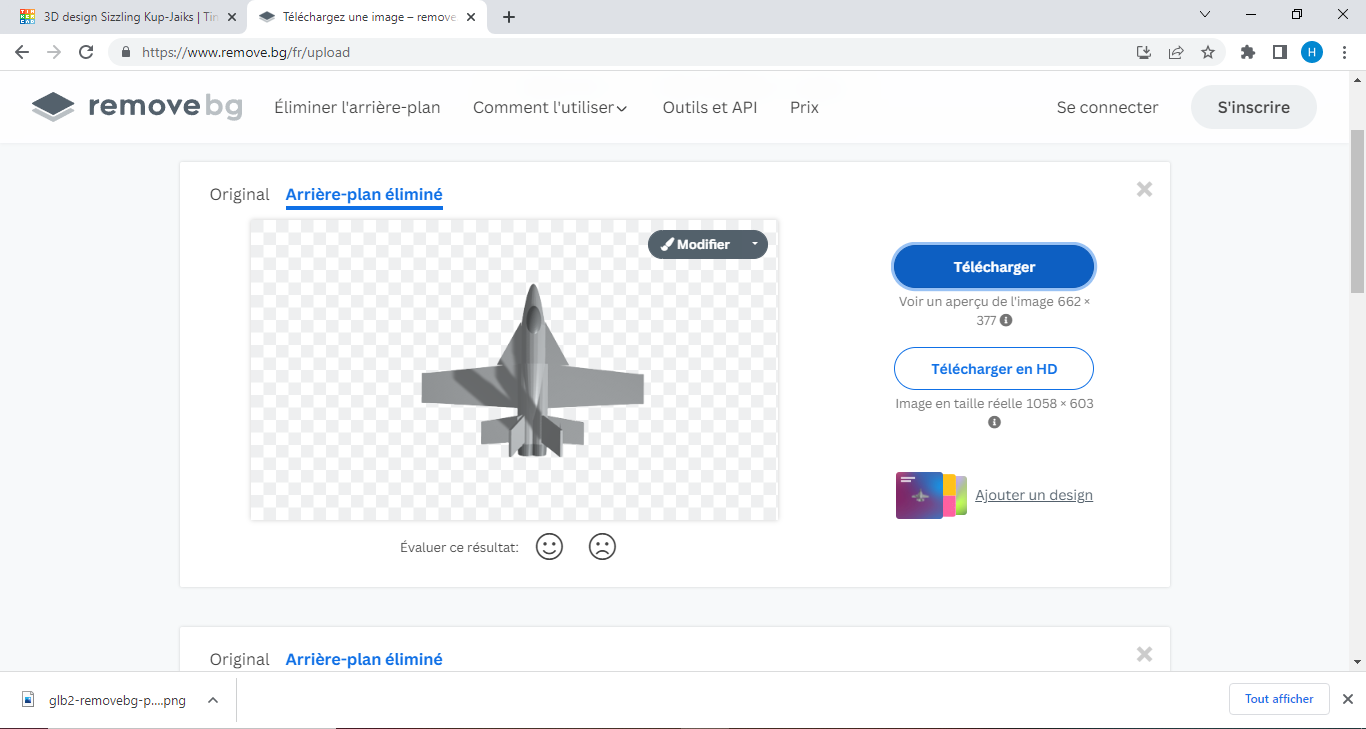
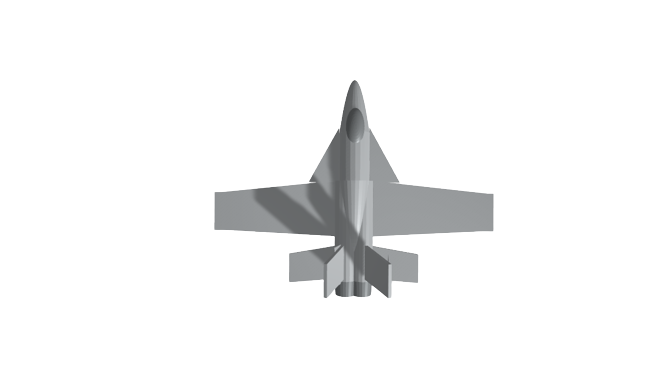
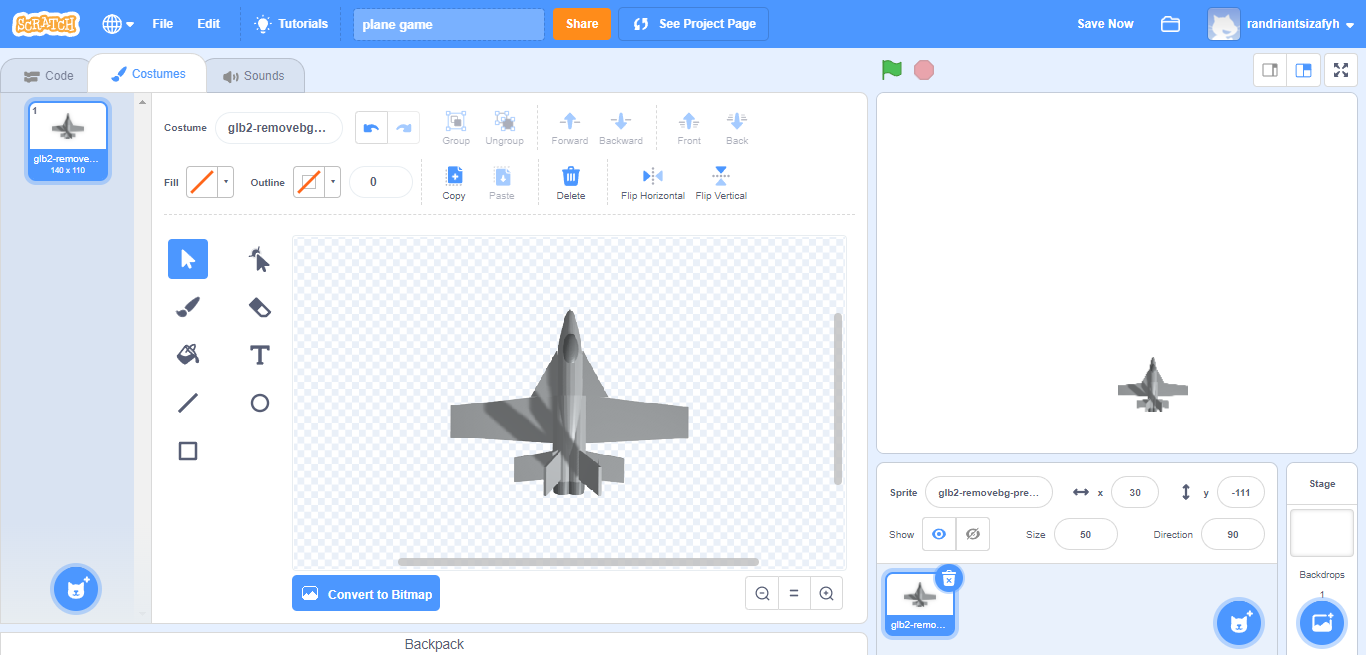
But we need to remove the background of the plane first. So for that: click in export in tinkercad, then choose GLTF or .glb. Put the view as in the photo and take a screenshot. Then open remove.bg in your browser and remove the background. And download the result.
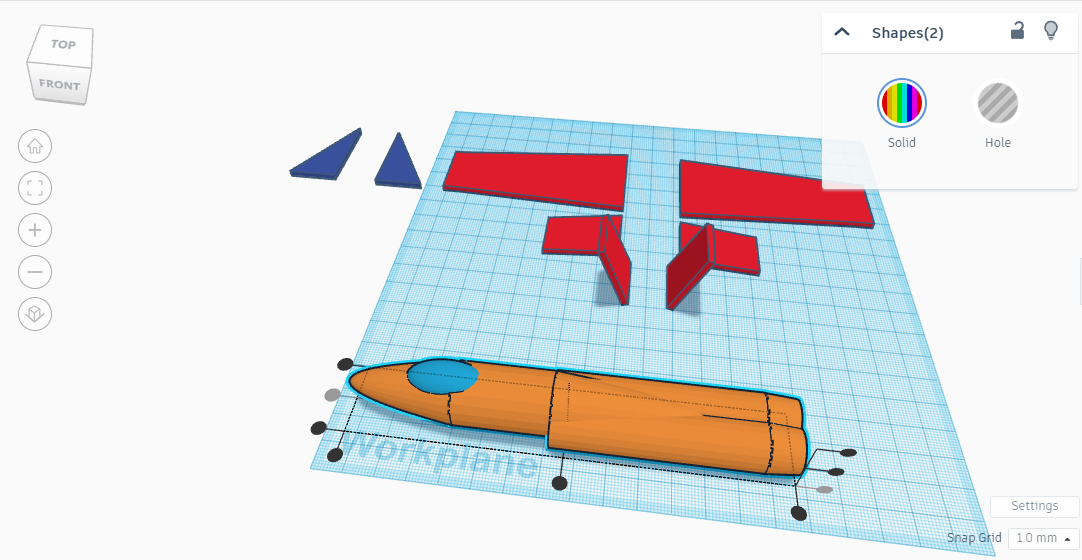
Sprites
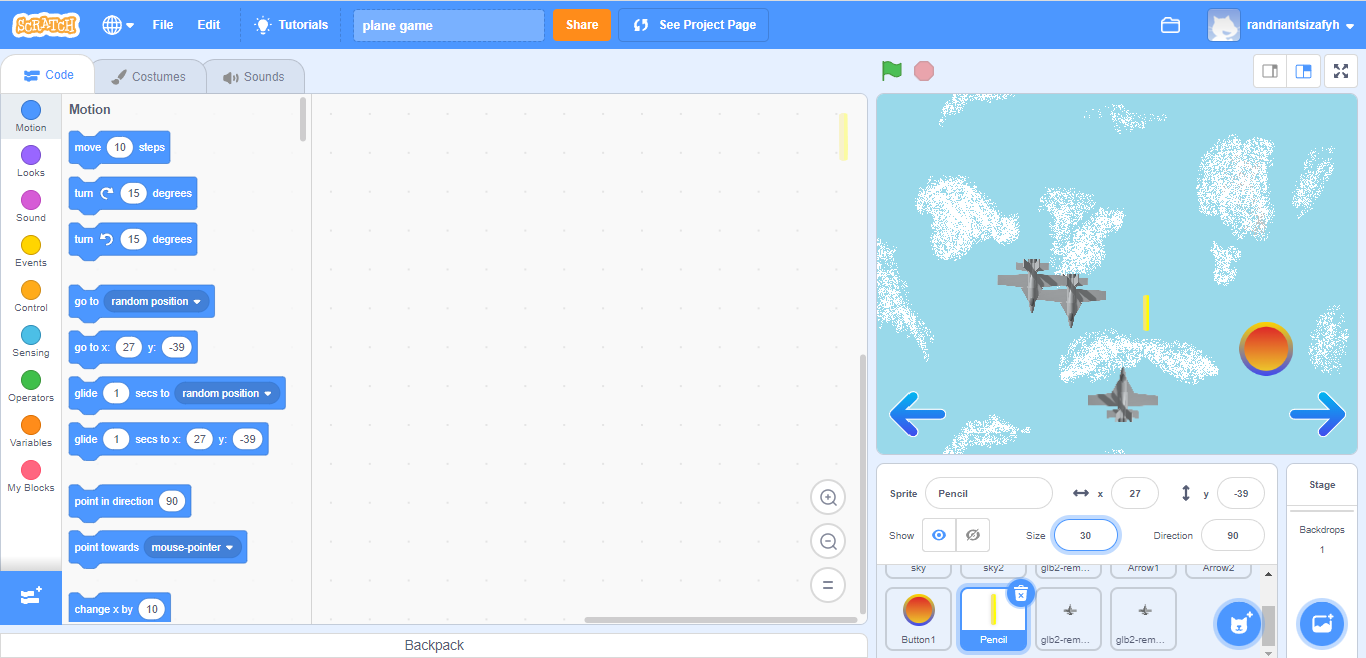
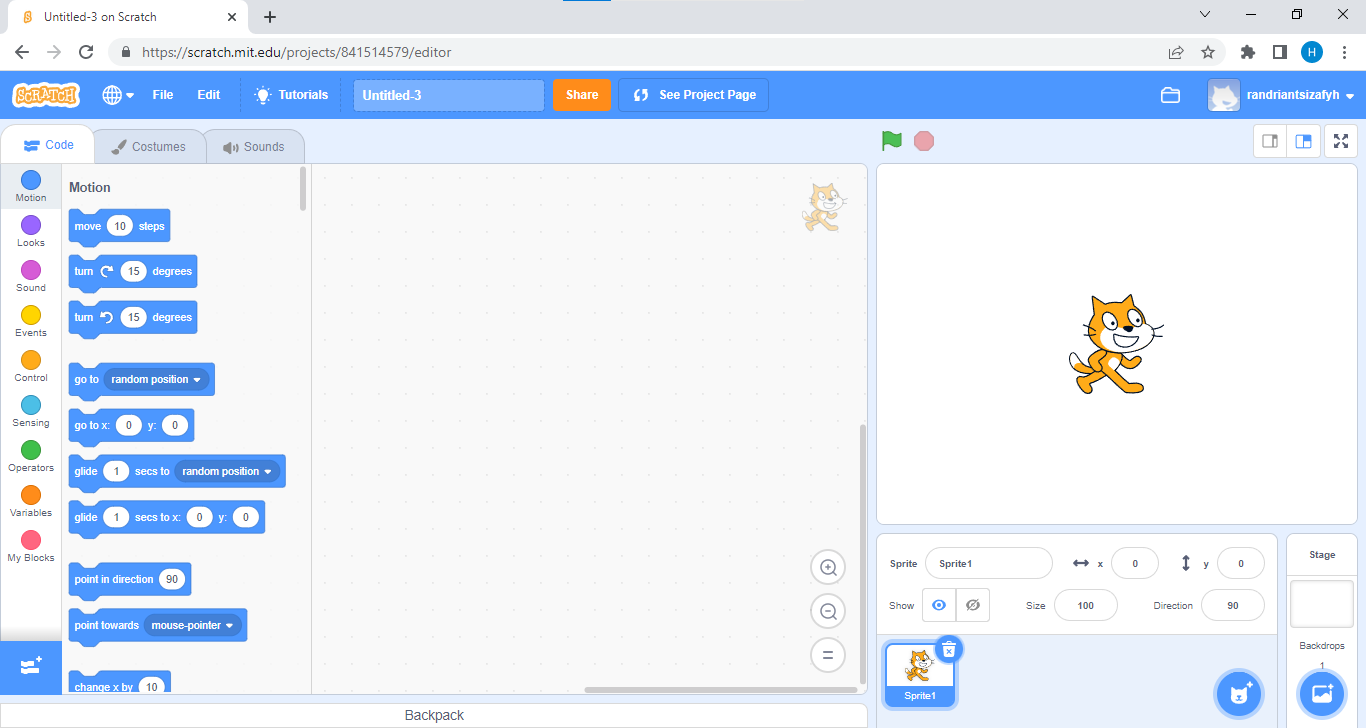
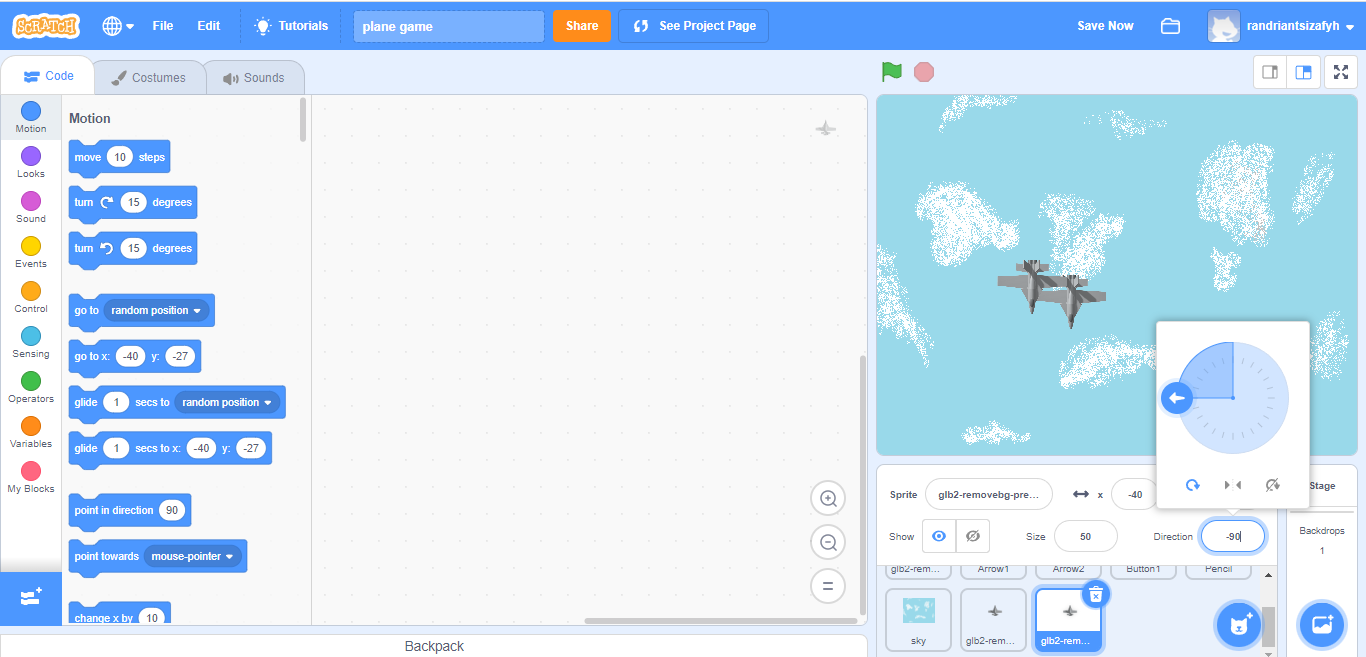
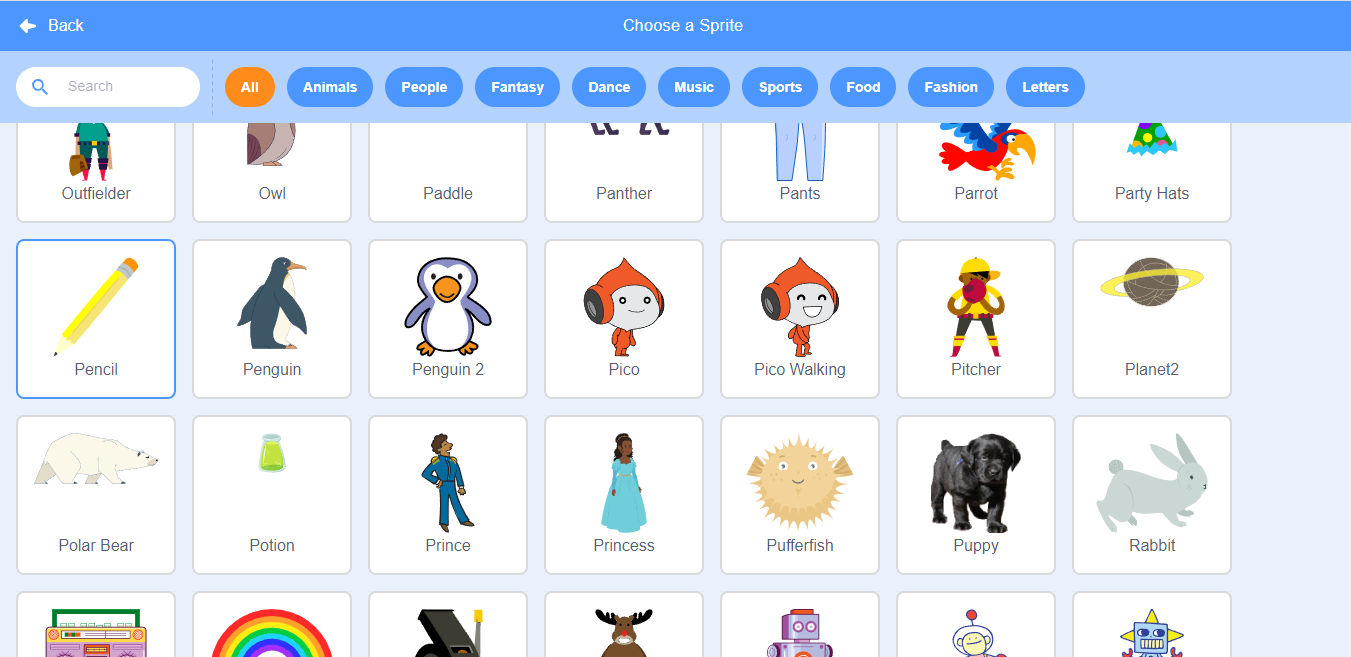
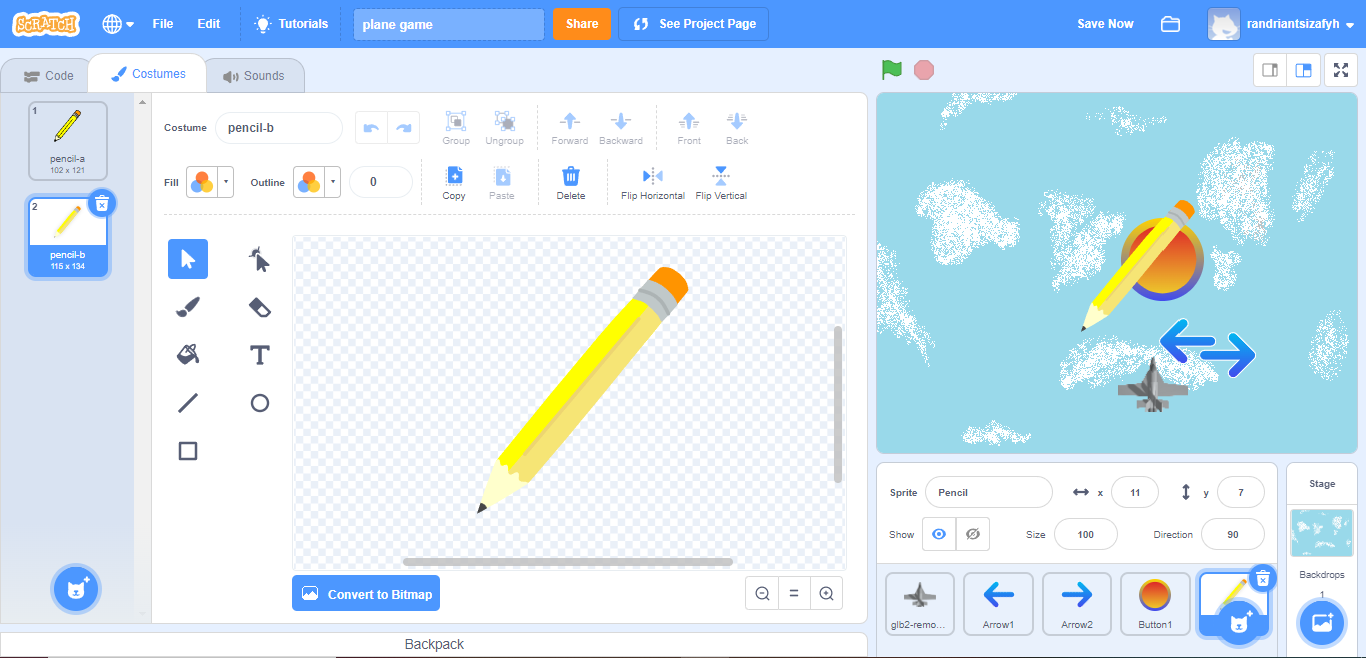
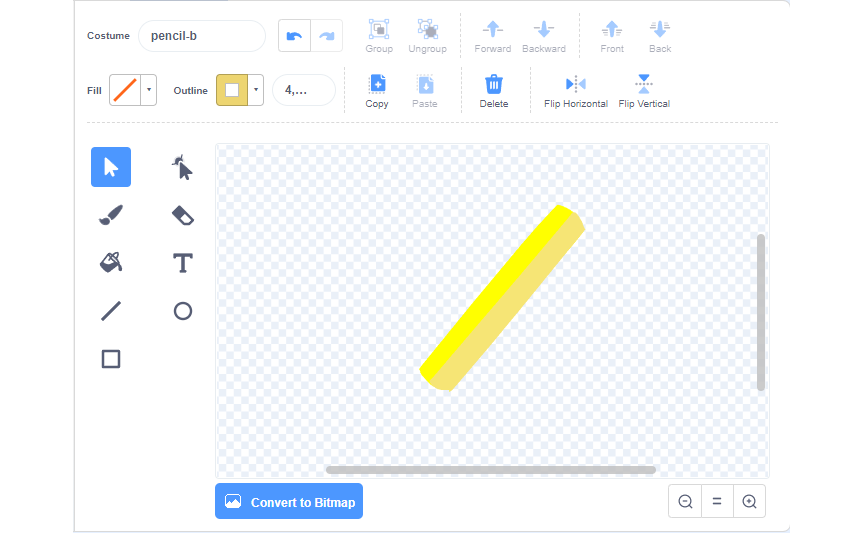
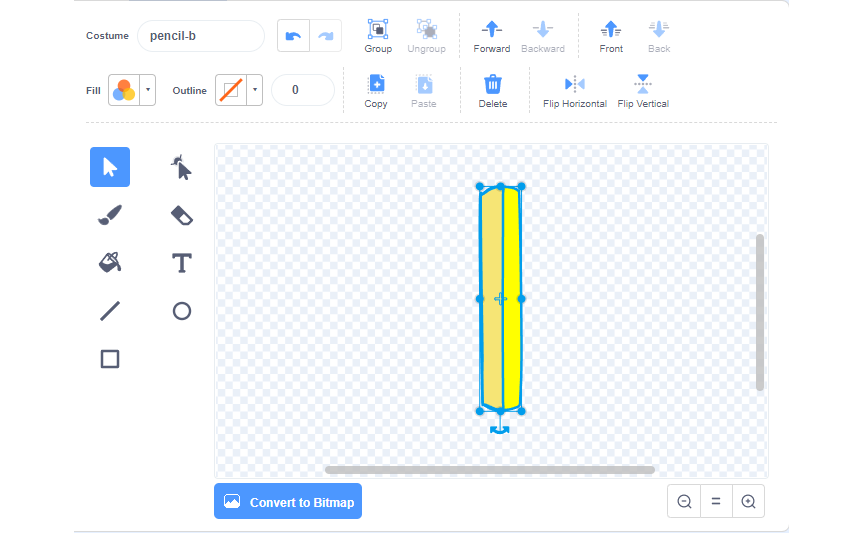
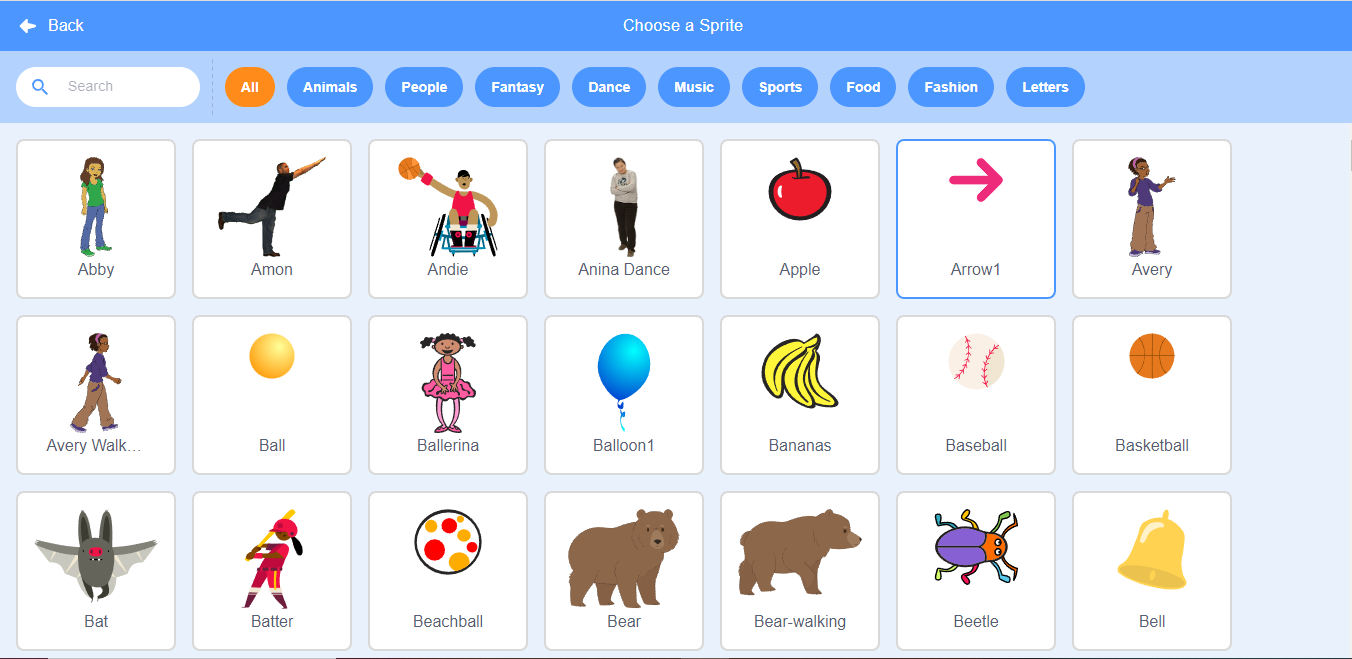
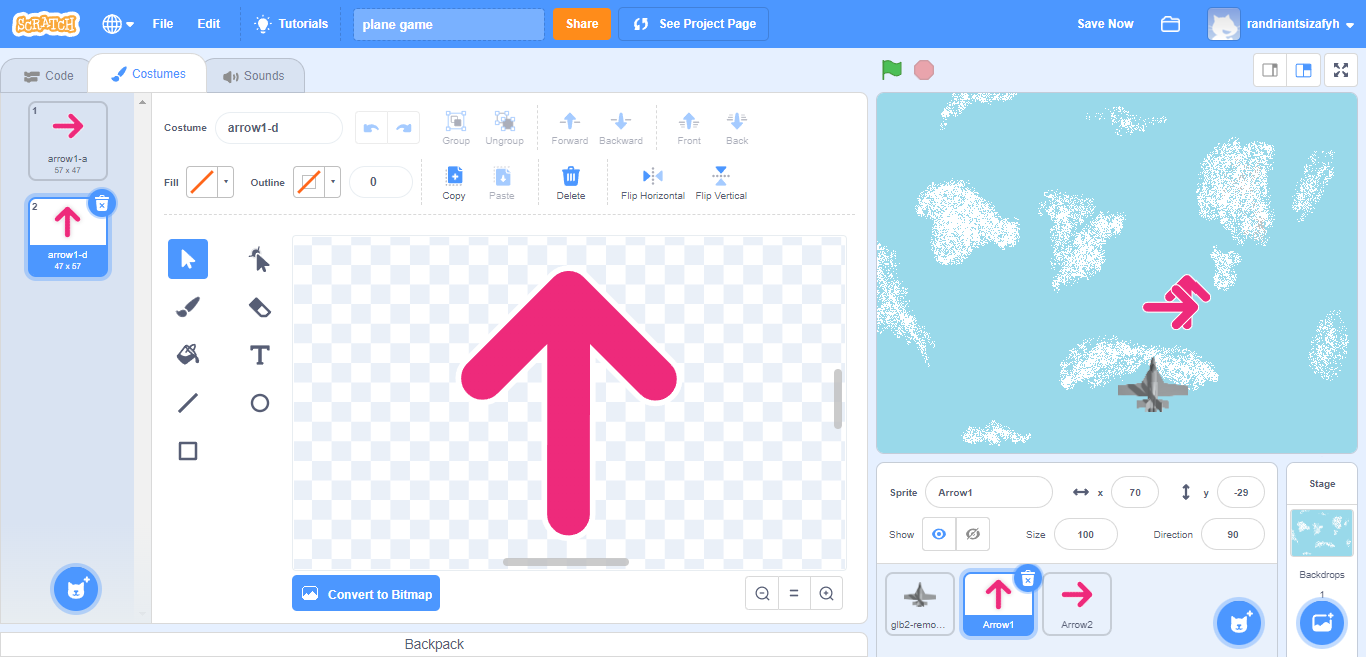
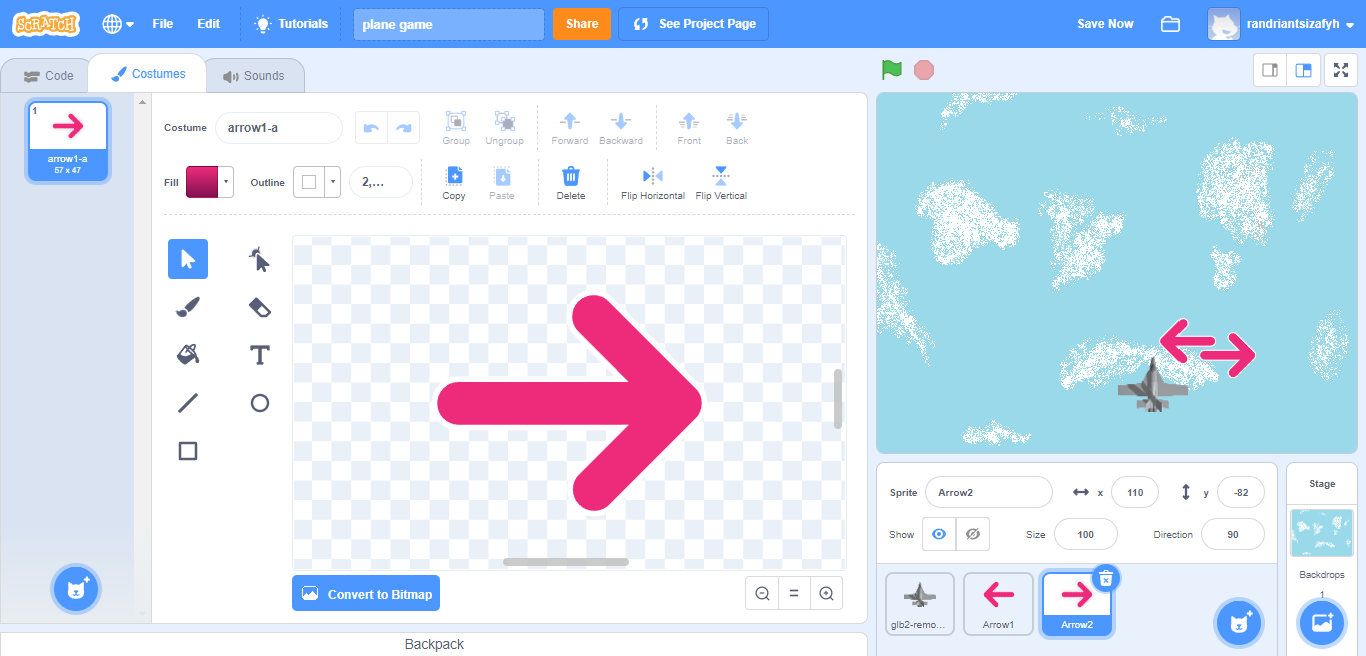
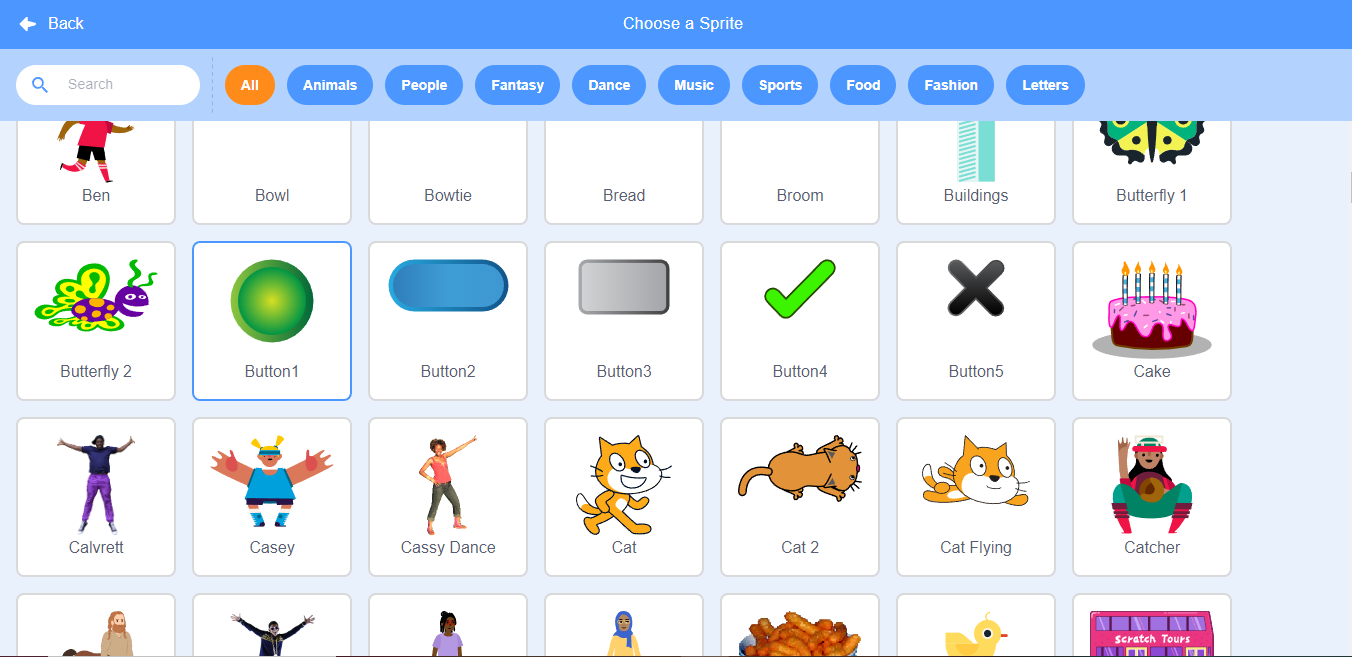
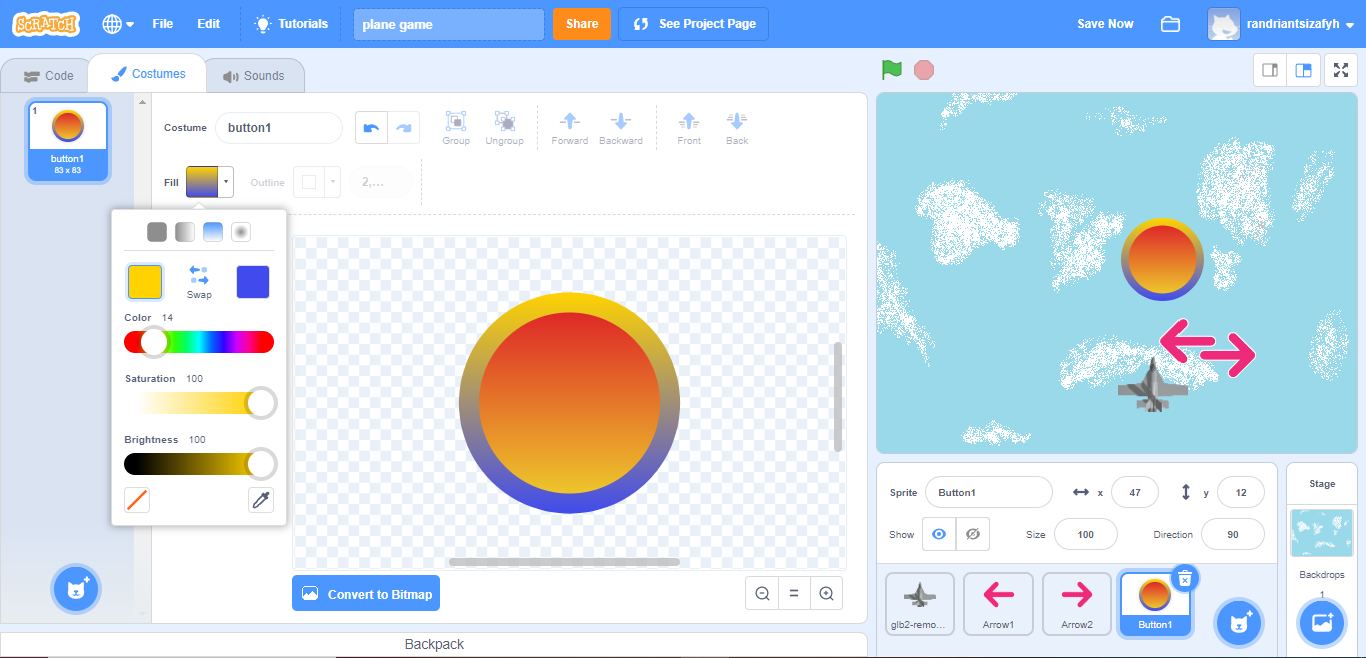
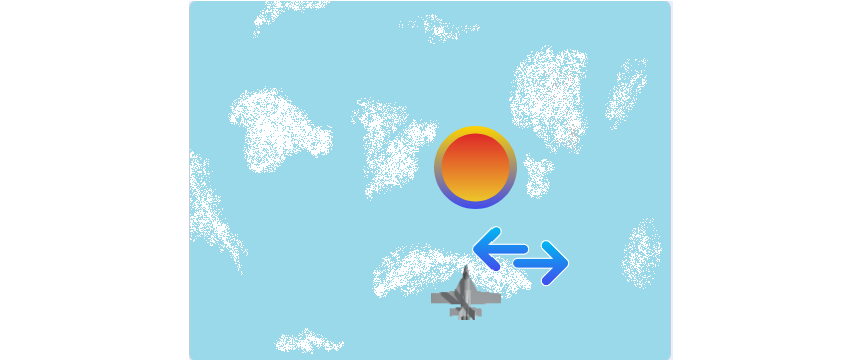
Now we are going to add sprites, so first open scratch.mit.edu in your browser. Then import the plane and copy it to give 3 planes, and rotate two planes to -90° and put size to 50. Then import the sky as a sprite but not as background. Then search in sprite pencil for the missile, remove all the things in the pencil except the thing yellow and put it right. Search in sprite again the arrow and add it 2 times, go in costumes and remove costumes except the right arrow for the once, and the left arrow for the other. Finally, search button on sprite. And you can change the color by pressing in fill and choose the color you want, then click your sprite. At the end, it gives like the last picture for me.
Background


First, we are going to animate the background.
First code:
- When you click in the green flag, the sky go to background and go to the middle of the screen. Then, it goes down step by step. When it hit the lowest part of the screen, it mount on the highest place of the screen and come down again.
Then duplicate the sky and the code is also duplicate, you have just to change one information and it give the 2nd code, so you have just to copy it.
Second code:
- Contrary to the first code, the second sky start at the most high, but works exactly as the first code, and now you have the impression that the sky is moving and there is no hole.
Arrow
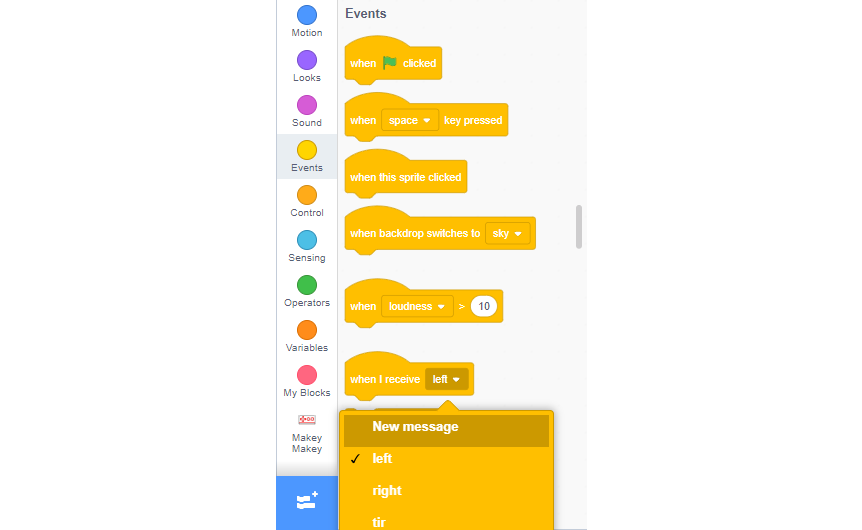
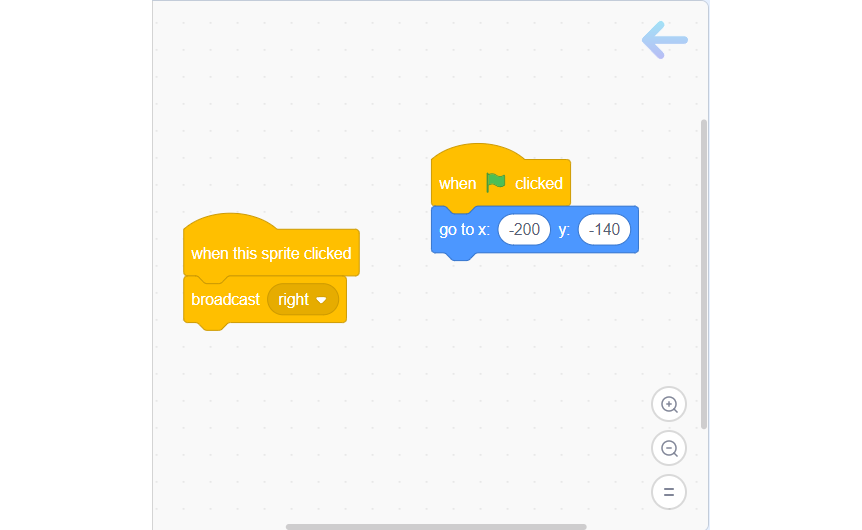
Now we are going to see the code of both arrow. But before we start, as we can see in the first picture, you need to know how to create a message because it is very important for the future: click in the same code as the first picture and create a new message.
First code:
- The first code is to the left arrow, here, i got a little confused between the right and the left, but that is not so bad. When you click the left arrow, it broadcast the message "right" and when you click in the green flag, it sits on the left.
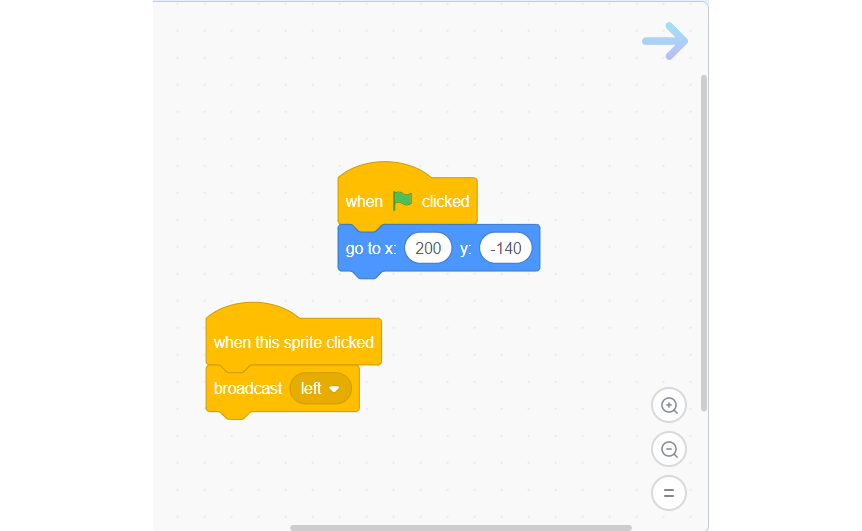
Second code:
- Now it is for the second arrow, here, when you click the right arrow, it broadcast the message "left" and when you click in the green flag, it sits on the right.
Code Button
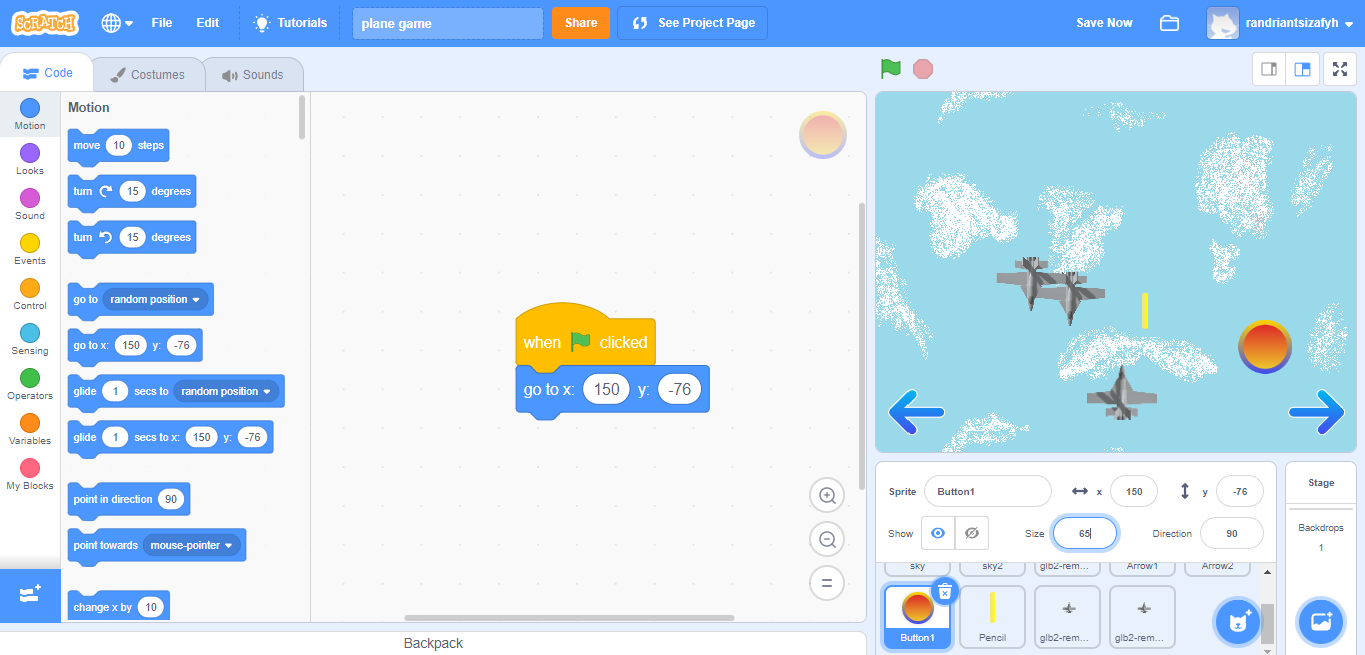

Now it is for the button:
- When you click on the green flag, the arrow sits on the right. When you click the button, it broadcast the message "tir". I choose "tir" because it means shot in french.
Code Plane
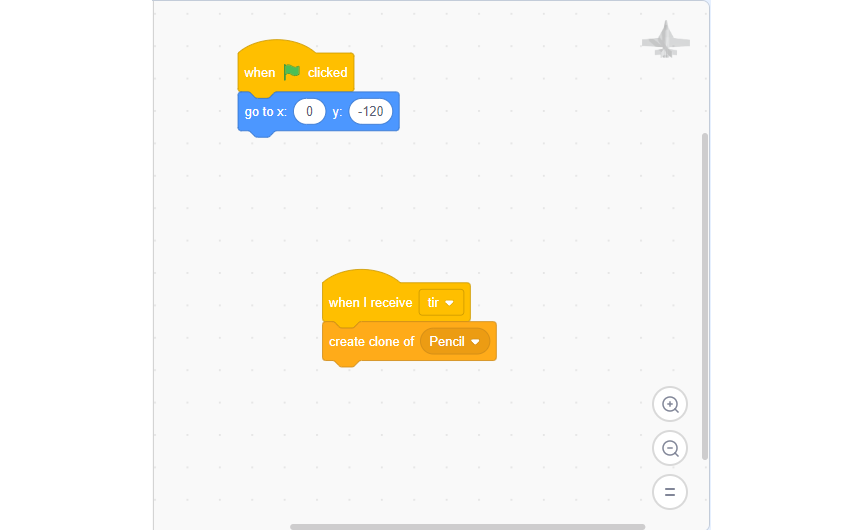
We are going to code the plane here:
First code:
- When you click the green flag, the plane sits in the middle, a little lower. And when we receives the message "tir", he create a clone of the missile, it is not very important here but it is for later.
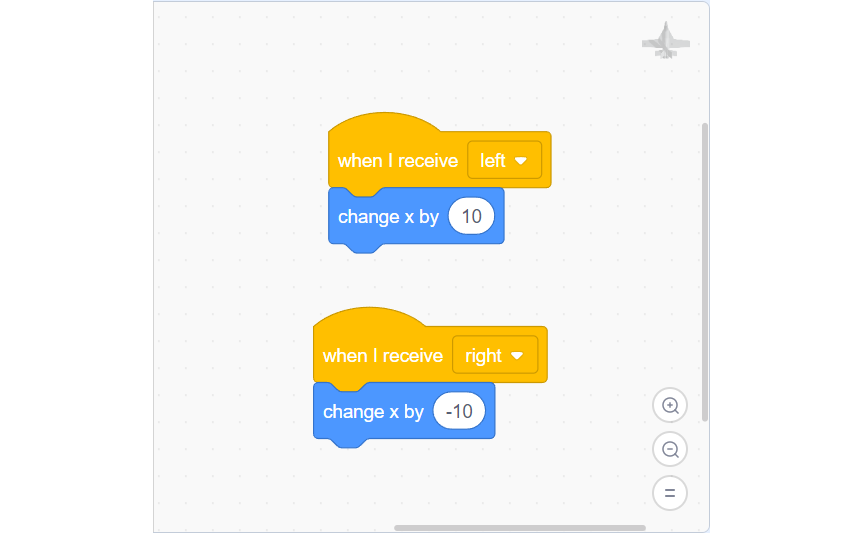
Second code:
- When he receives the message "left", he moved to the right. When he receives the message "right", he moved to the left.
Missile

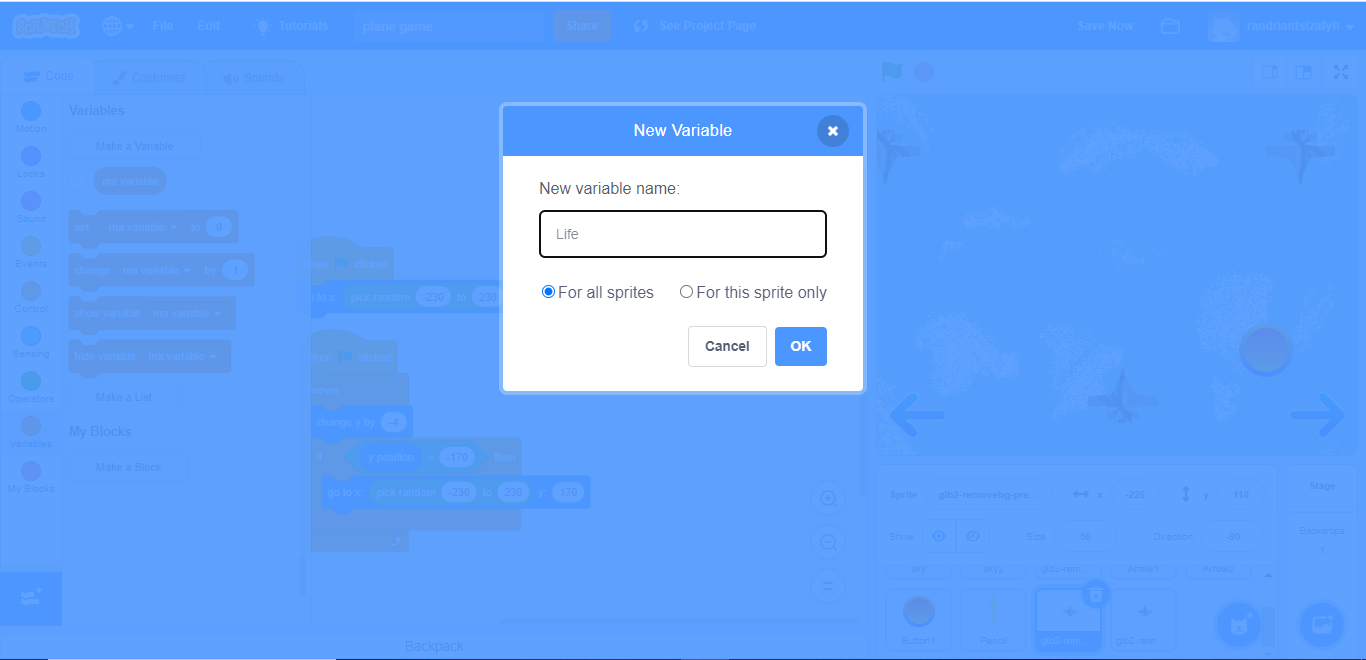
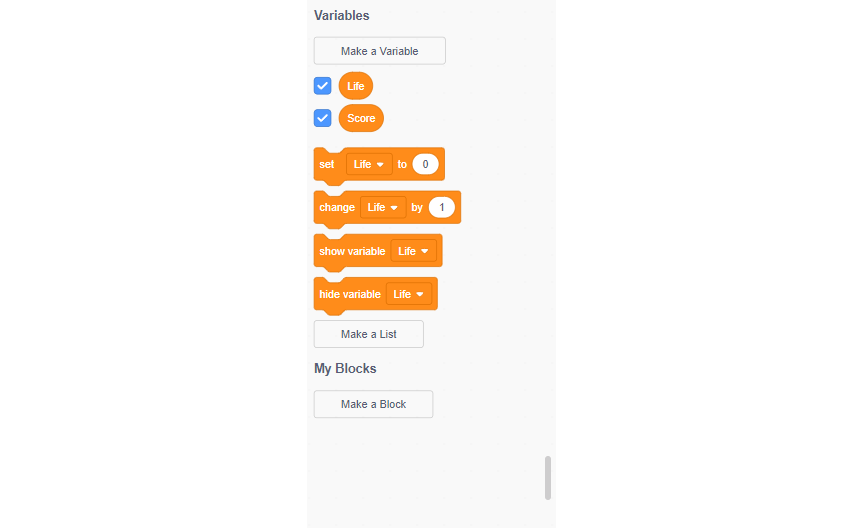
We are going to code the missile, the missile is the "pencil" here. First upload a sound: click in sounds and then "Choose a Sound", and you have the choice. Also you have to create 2 variables: "life" and "score". Here "glb2-removebg-preview3" and "glb2-removebg-preview2" in the 2nd code are the two other plane that we rotate to -90° before. And "glb2-removebg-preview" in the 3rd code is the main plane. Remember these 4 sprites because they are important.
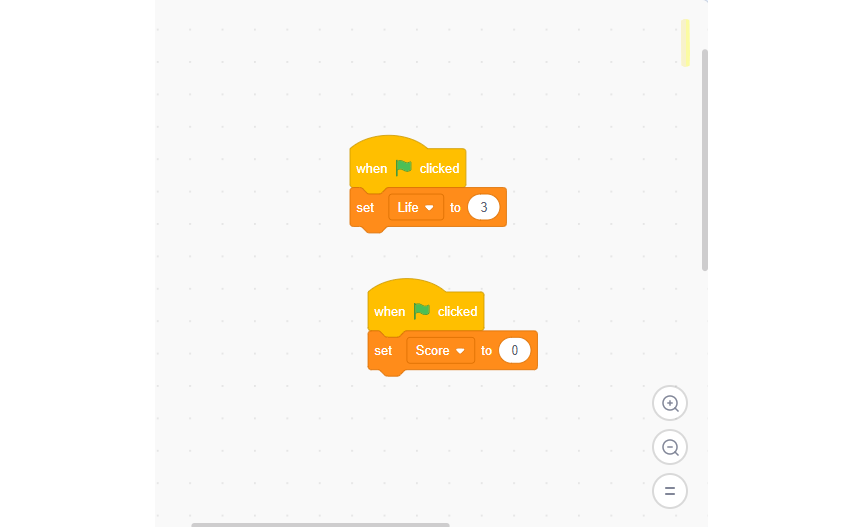
First code:
- When you click on the green flag, it set life to 3 and set score to 0.
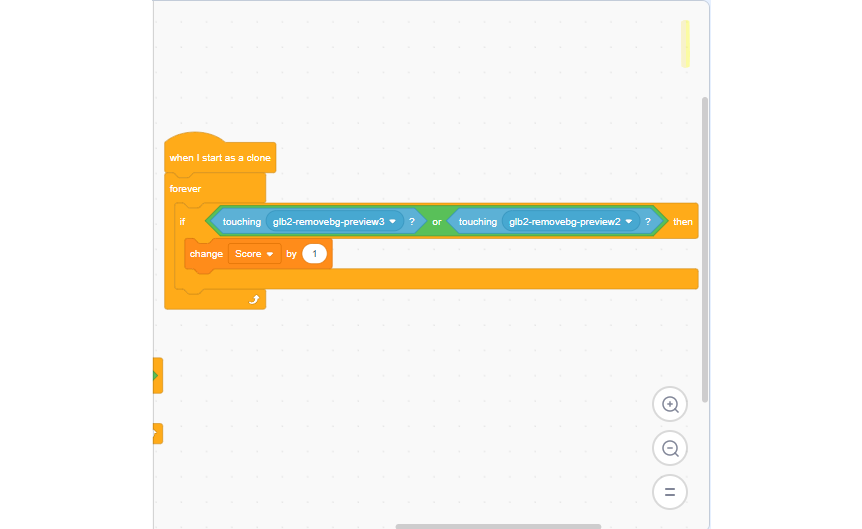
Second code:
- If the missile touch one of the two other plane, it add to score 1.
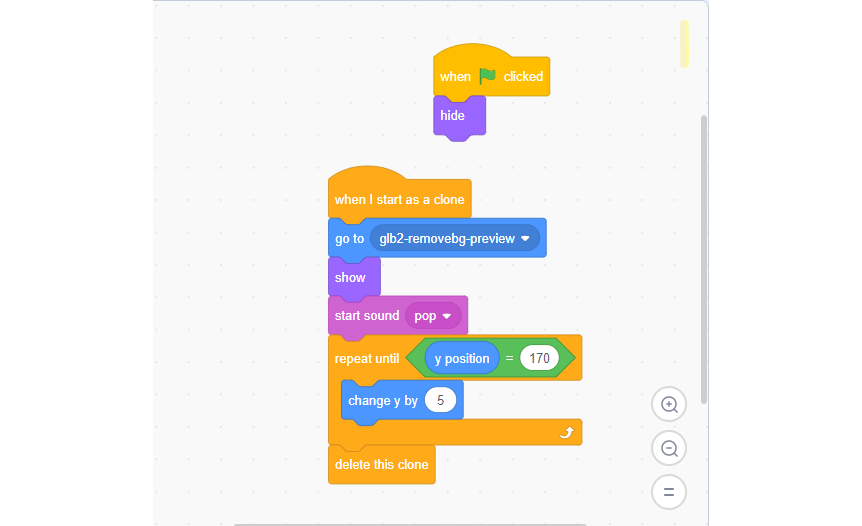
Third code:
- When you click the green flag, it is hiding. When a clone appears, he goes on the main plane and shows up, then he play the sound "pop", and he go up before disappear upper.
Code for the 2 Planes
Now, we are going to code the 2 other planes, it is the same code for the two planes:
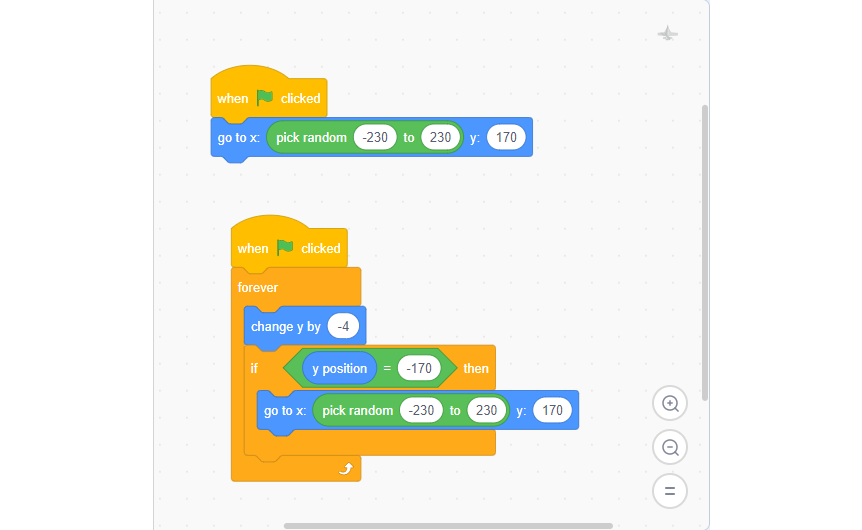
First code:
- When you click on the green flag, it go in random position at the top, then he goes down, and when he hit the most down, he goes up in the highest.
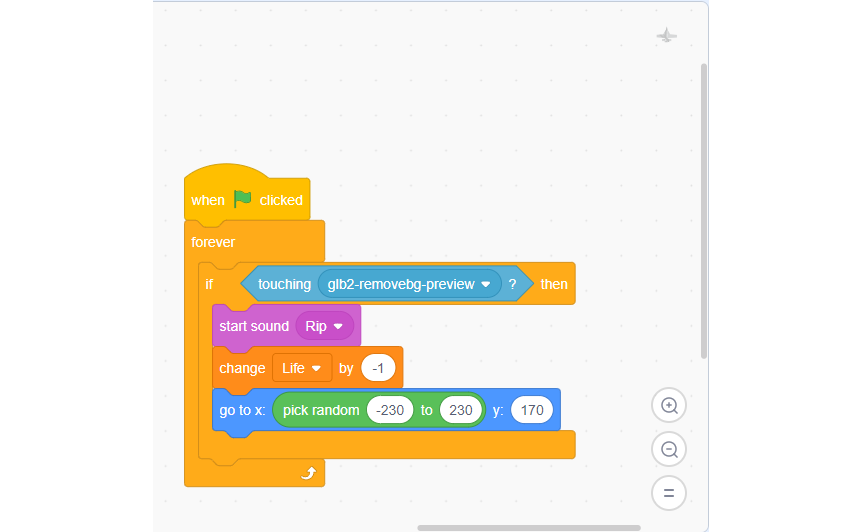
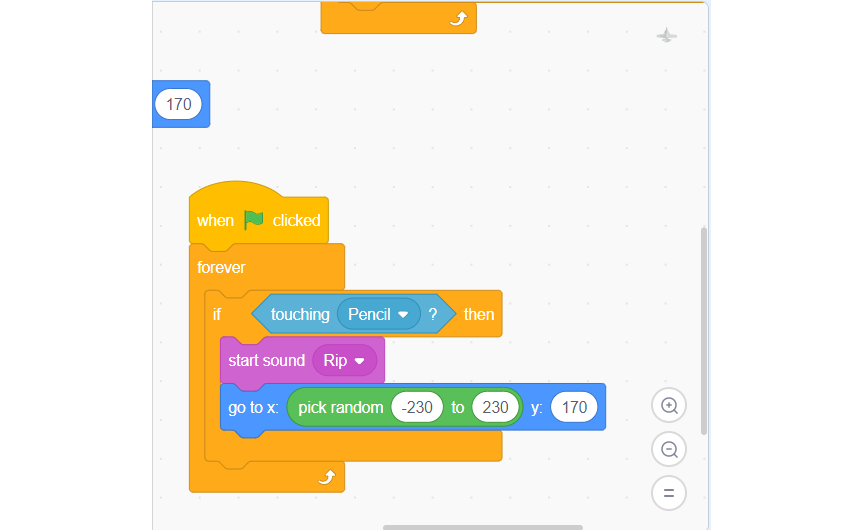
Second code:
- If it touch the main plane, he start the sound "rip" and set -1 to life, then he goes up in the highest.
Third code:
- If it touch the missile, he start the sound "rip" and goes up in the highest.
Sound
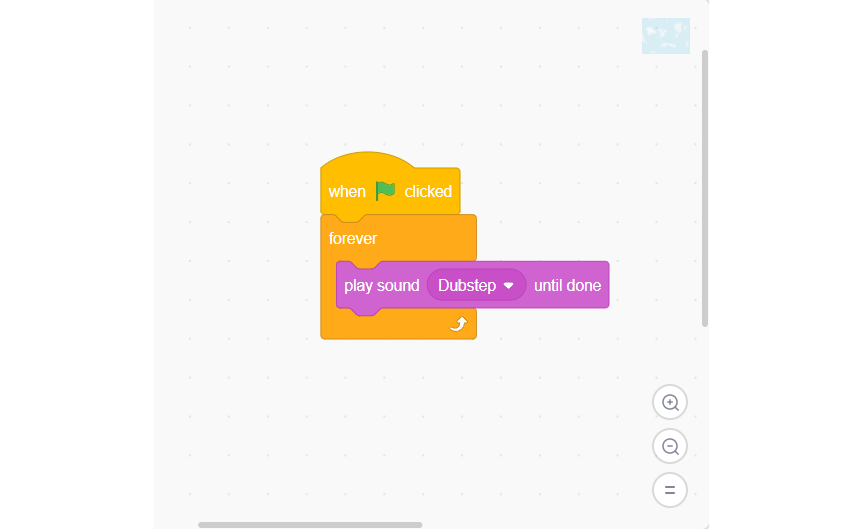
Here when you click the green flag, he play the song "Dubstep" forever. So it is the main music of the game.
Game Ending
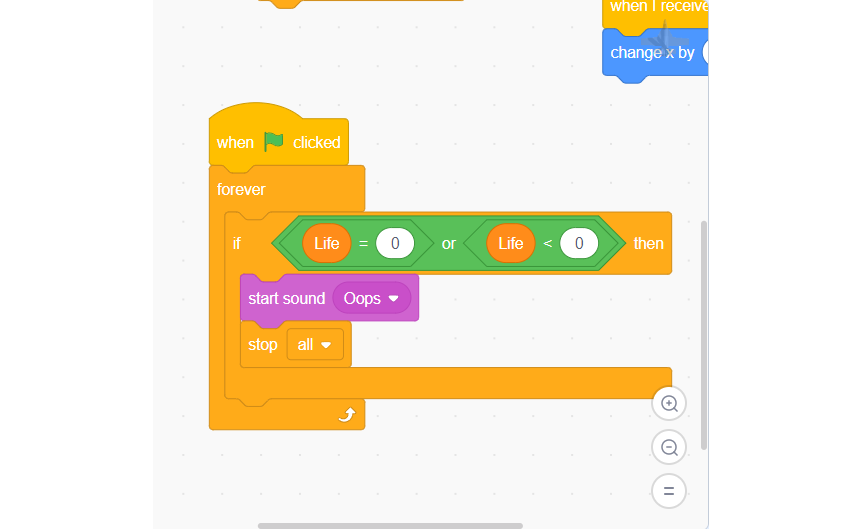
Finally, this code allow a end of the game:
- When "life" hit zero, he start the sound "oops" and stop all.
So i hope you finish the game and enjoy it, and I hope seeing you later, in an another instructable. Bye☺.
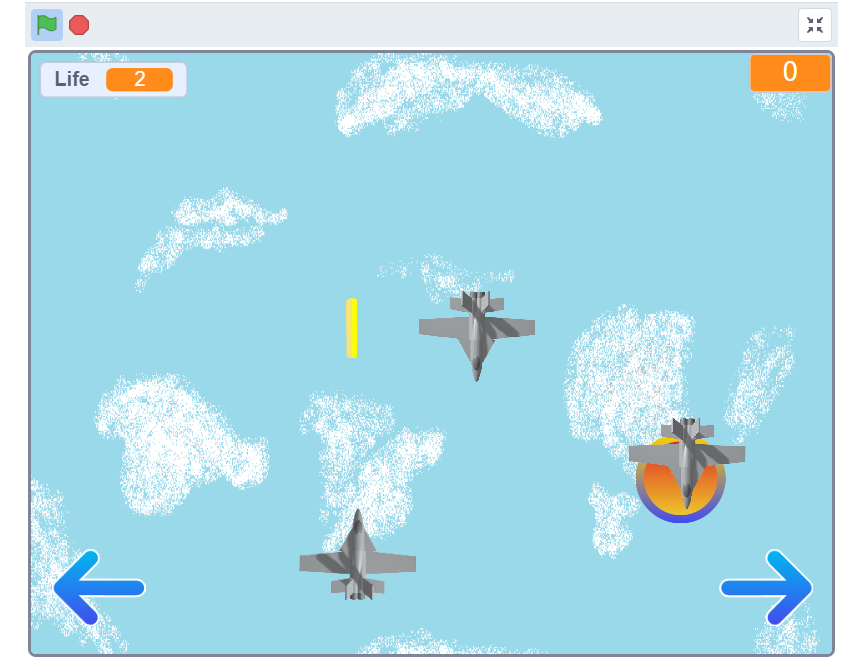
I add some gameplays below.
Gameplay 1
Gameplay1
Gameplay2
Gameplay2