Make a Cookie Cutter With Tinkercad
by Penolopy Bulnick in Workshop > 3D Printing
9661 Views, 78 Favorites, 0 Comments
Make a Cookie Cutter With Tinkercad
The winter holidays are a great time of year to make cookies and it's even more fun to make whatever cookie shapes you want! You can find quite the variety of shapes at the stores, but it's fun to create your own, especially if you want something that is one of a kind or customized.
For this tutorial, I'll walk through how easy it is to create custom cookie cutters using Tinkercad and the special options you get with SVG imports.
Instructable 364
Supplies
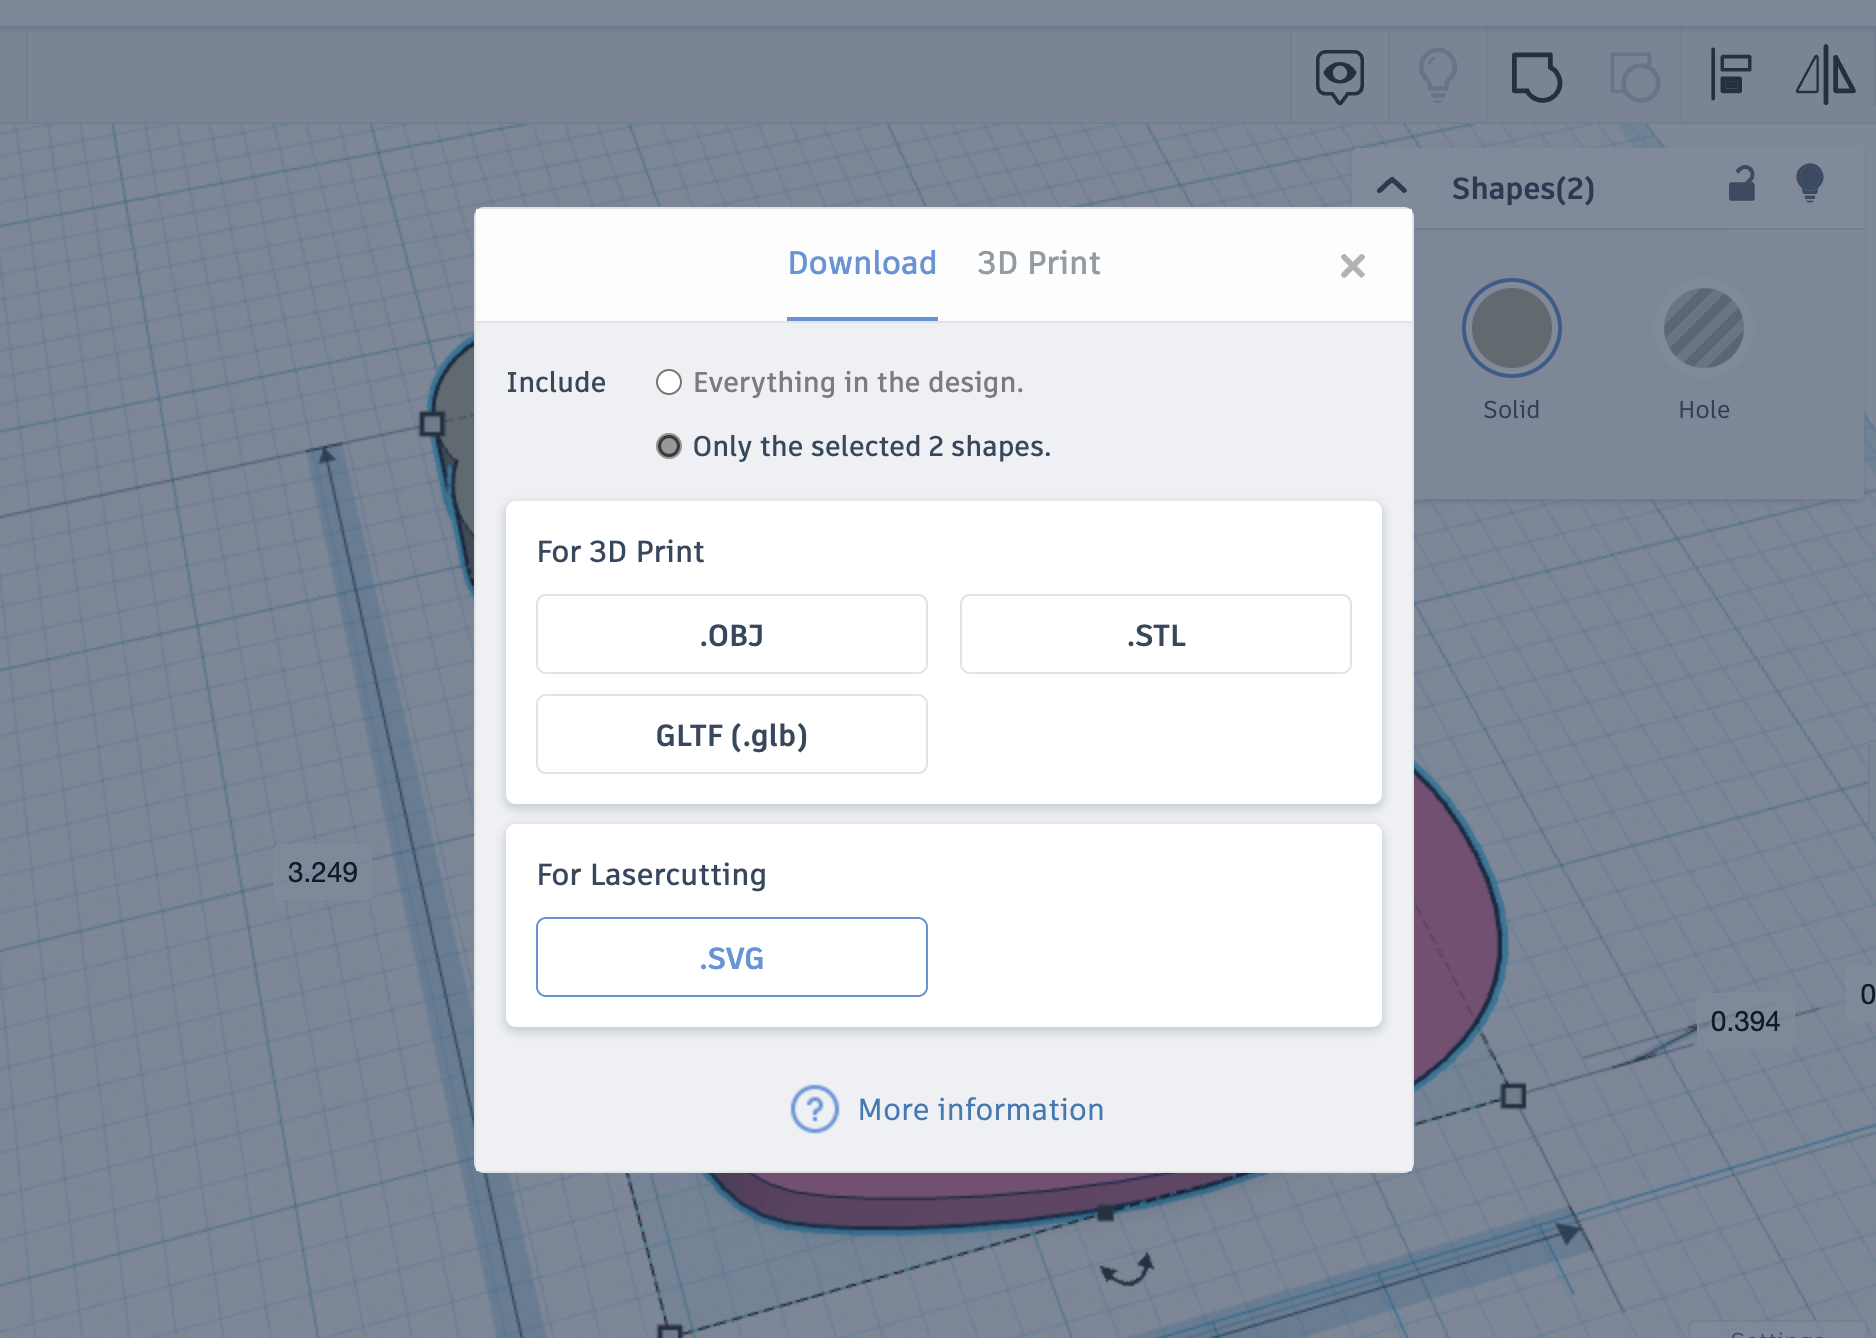
We'll be using Tinkercad to make our designs. You can, of course, use whatever program you want, but these directions are for Tinkercad specifically and the SVG import options.
You'll also need a Printer, PLA (food safe) filament, and cookie dough.
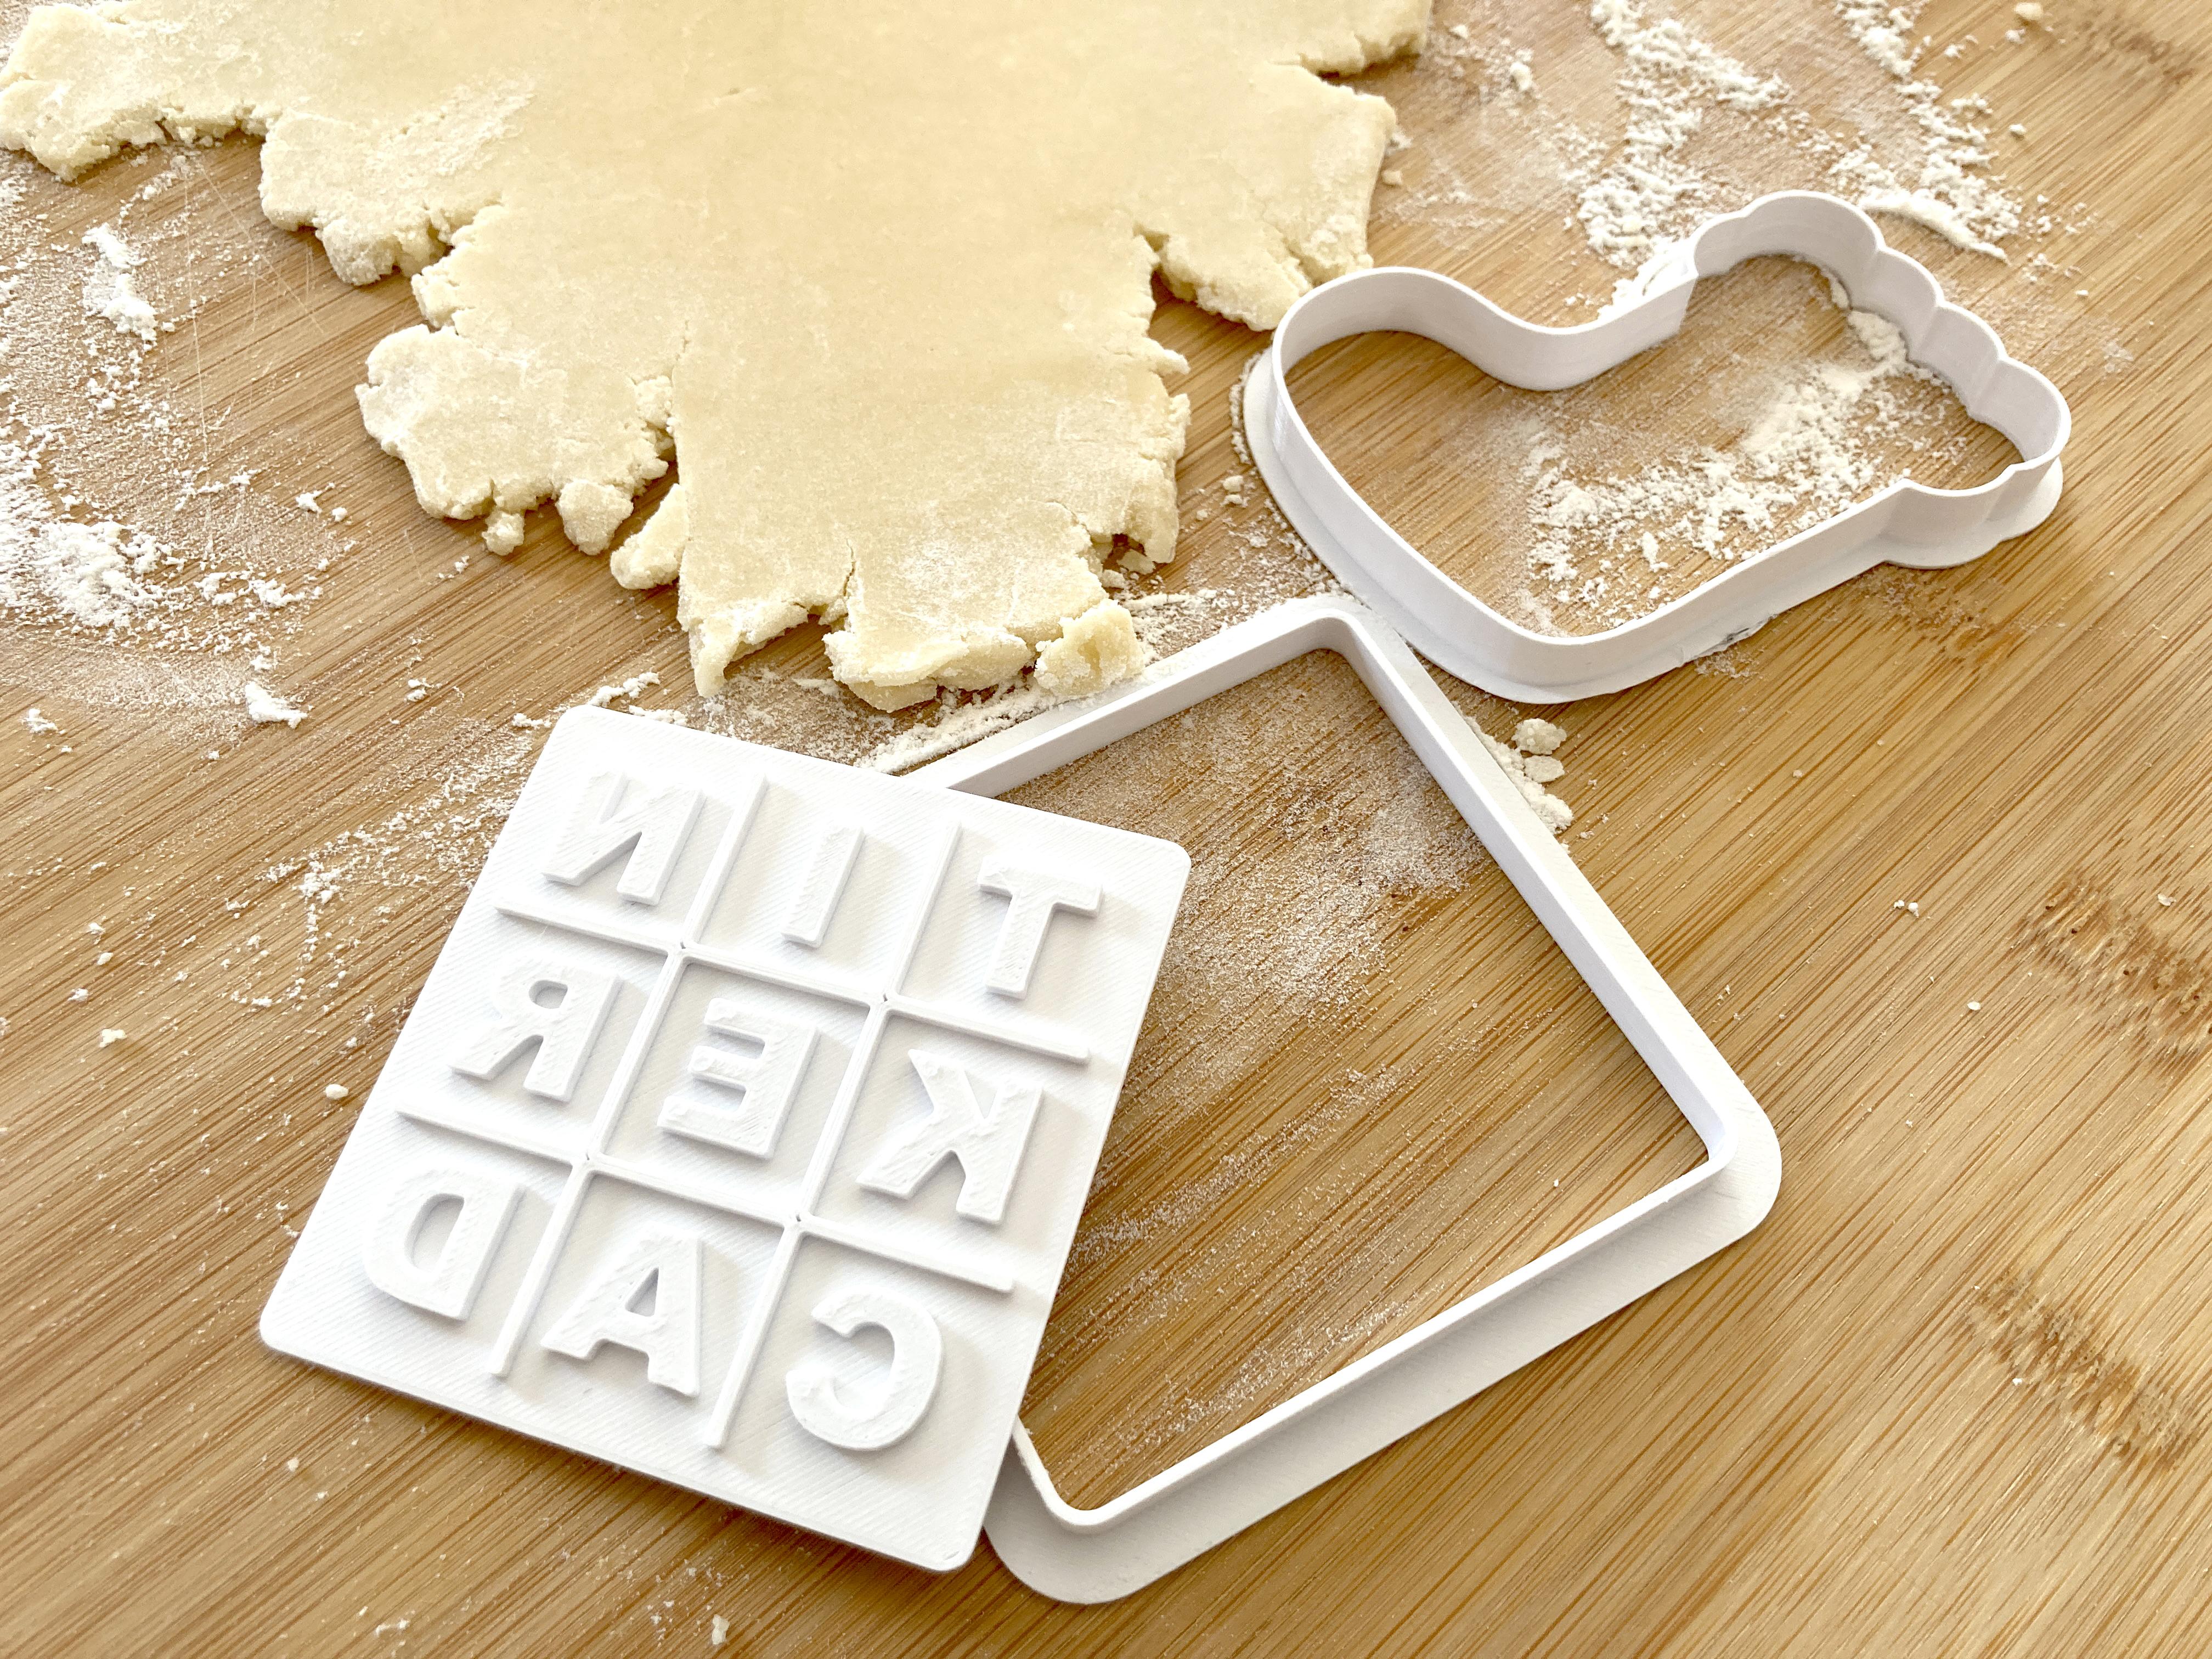
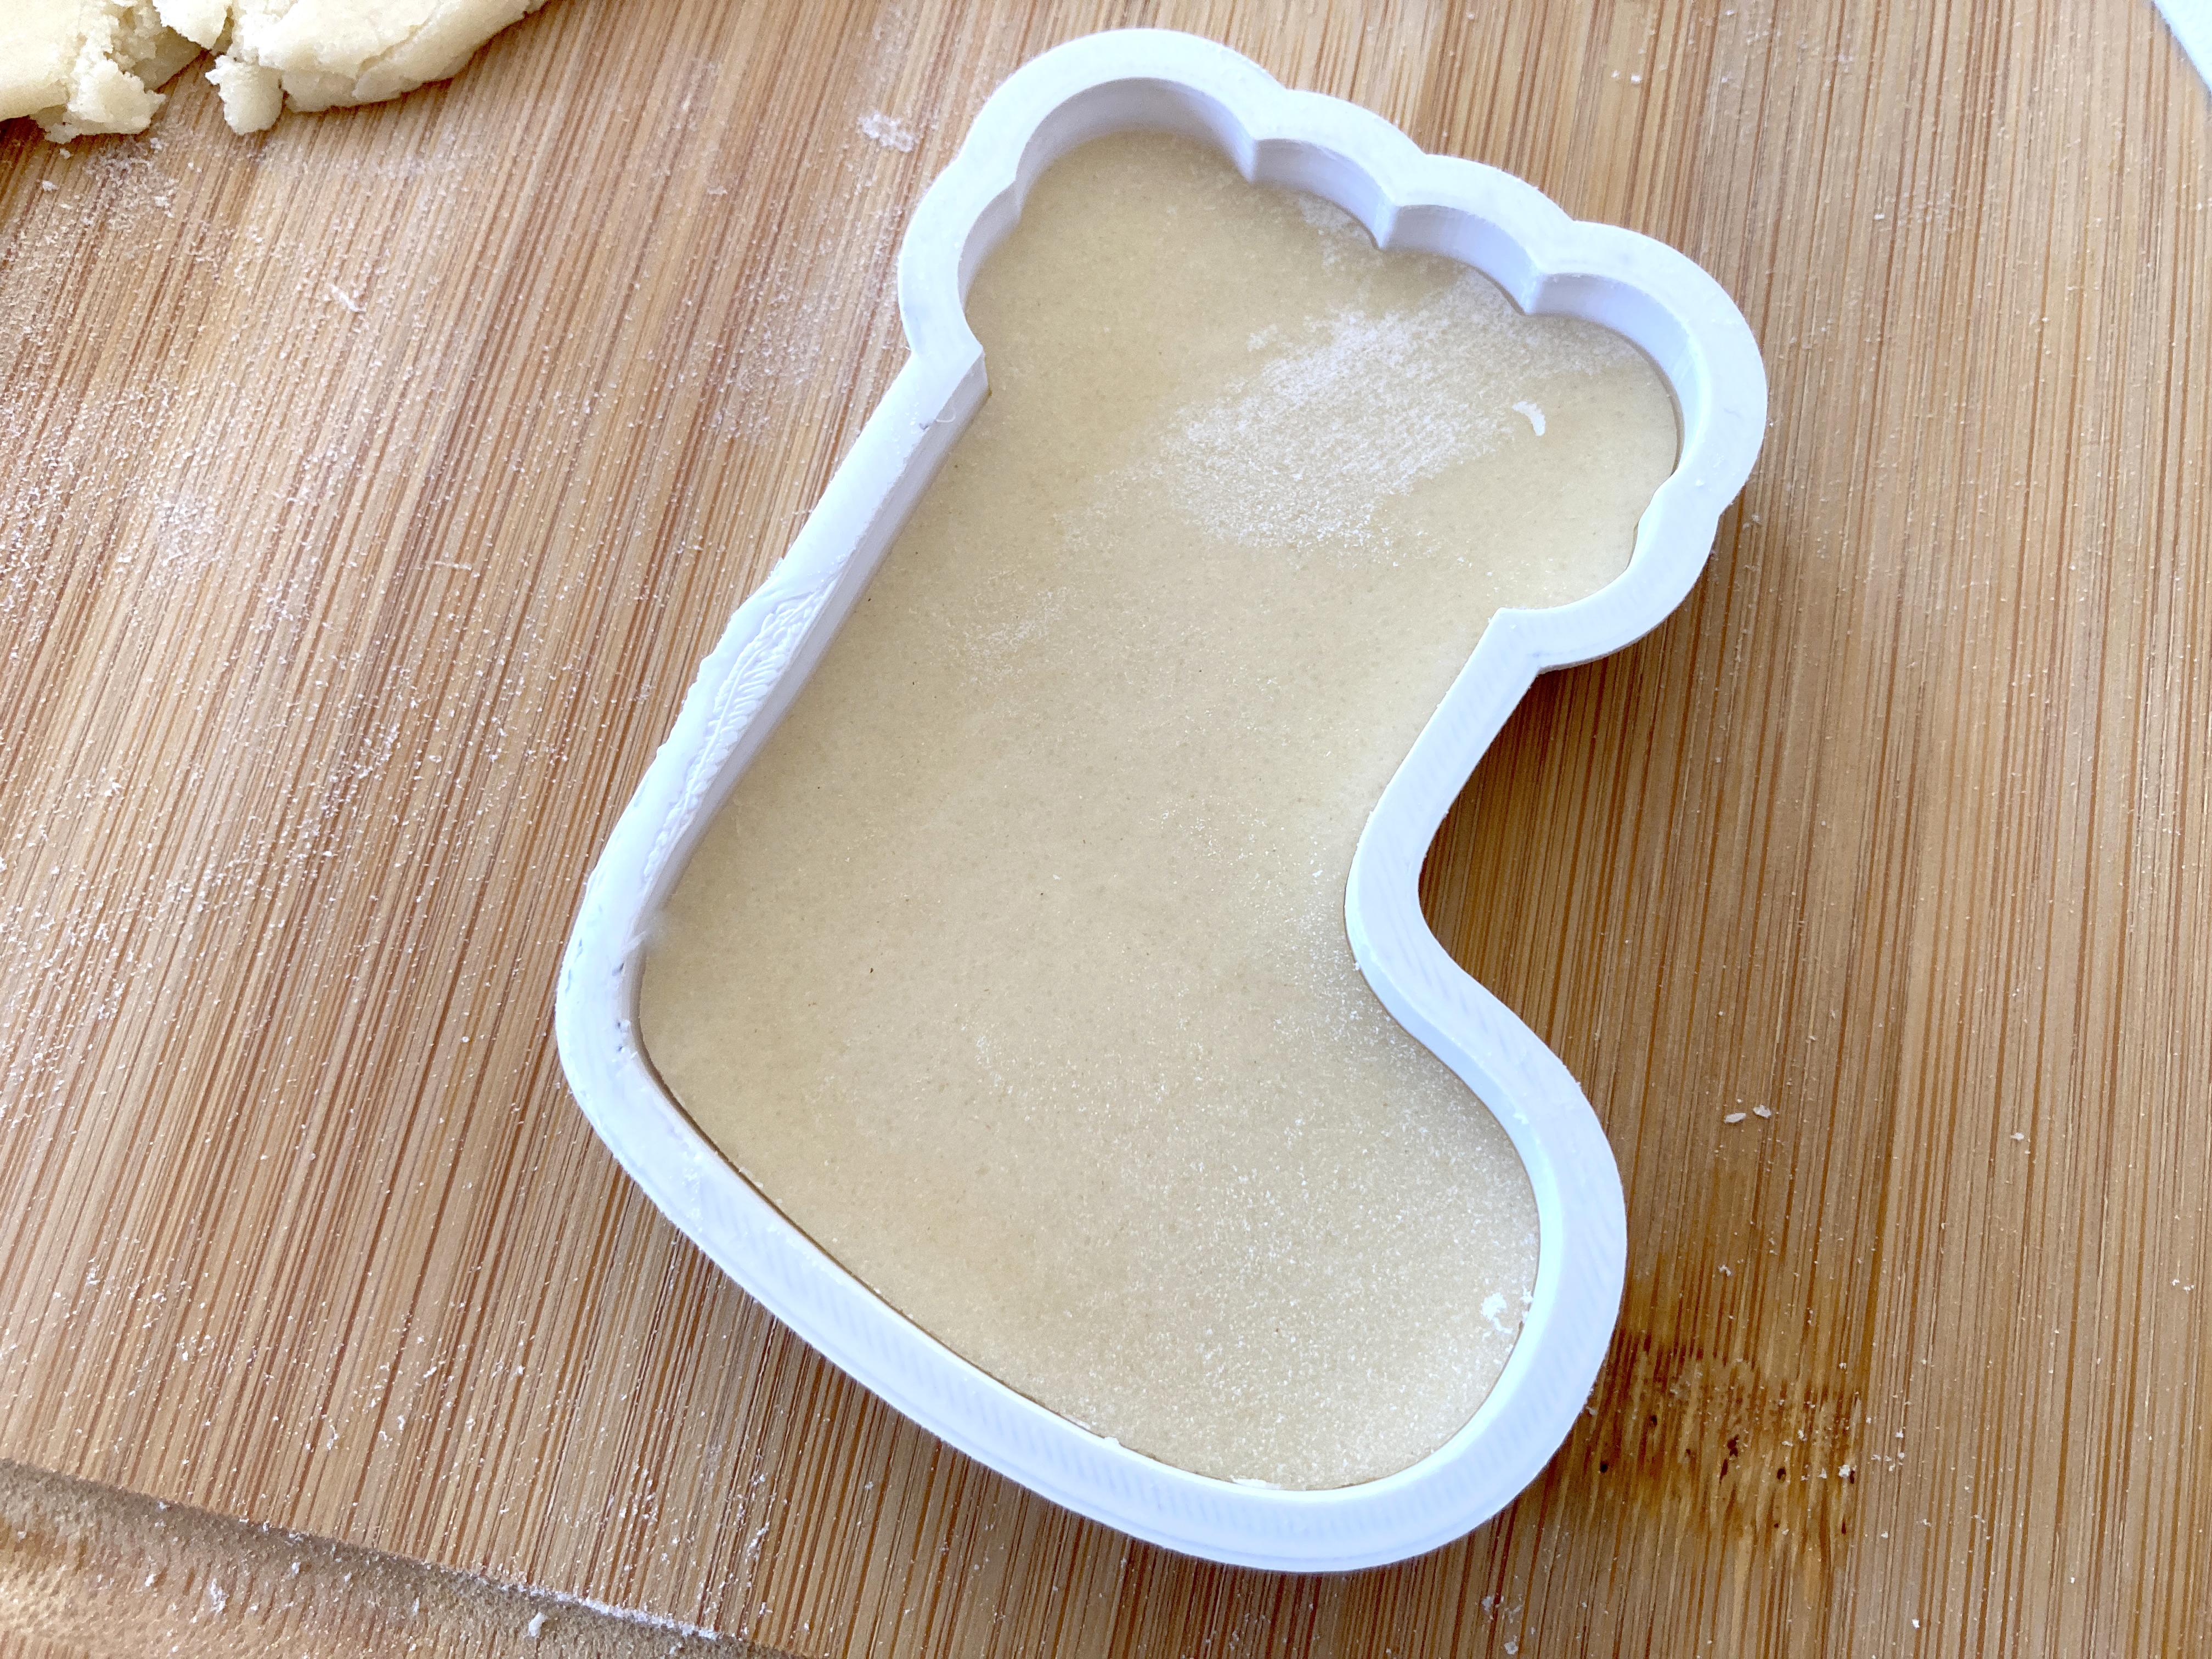
Single Piece Cookie Cutter - Silhouette

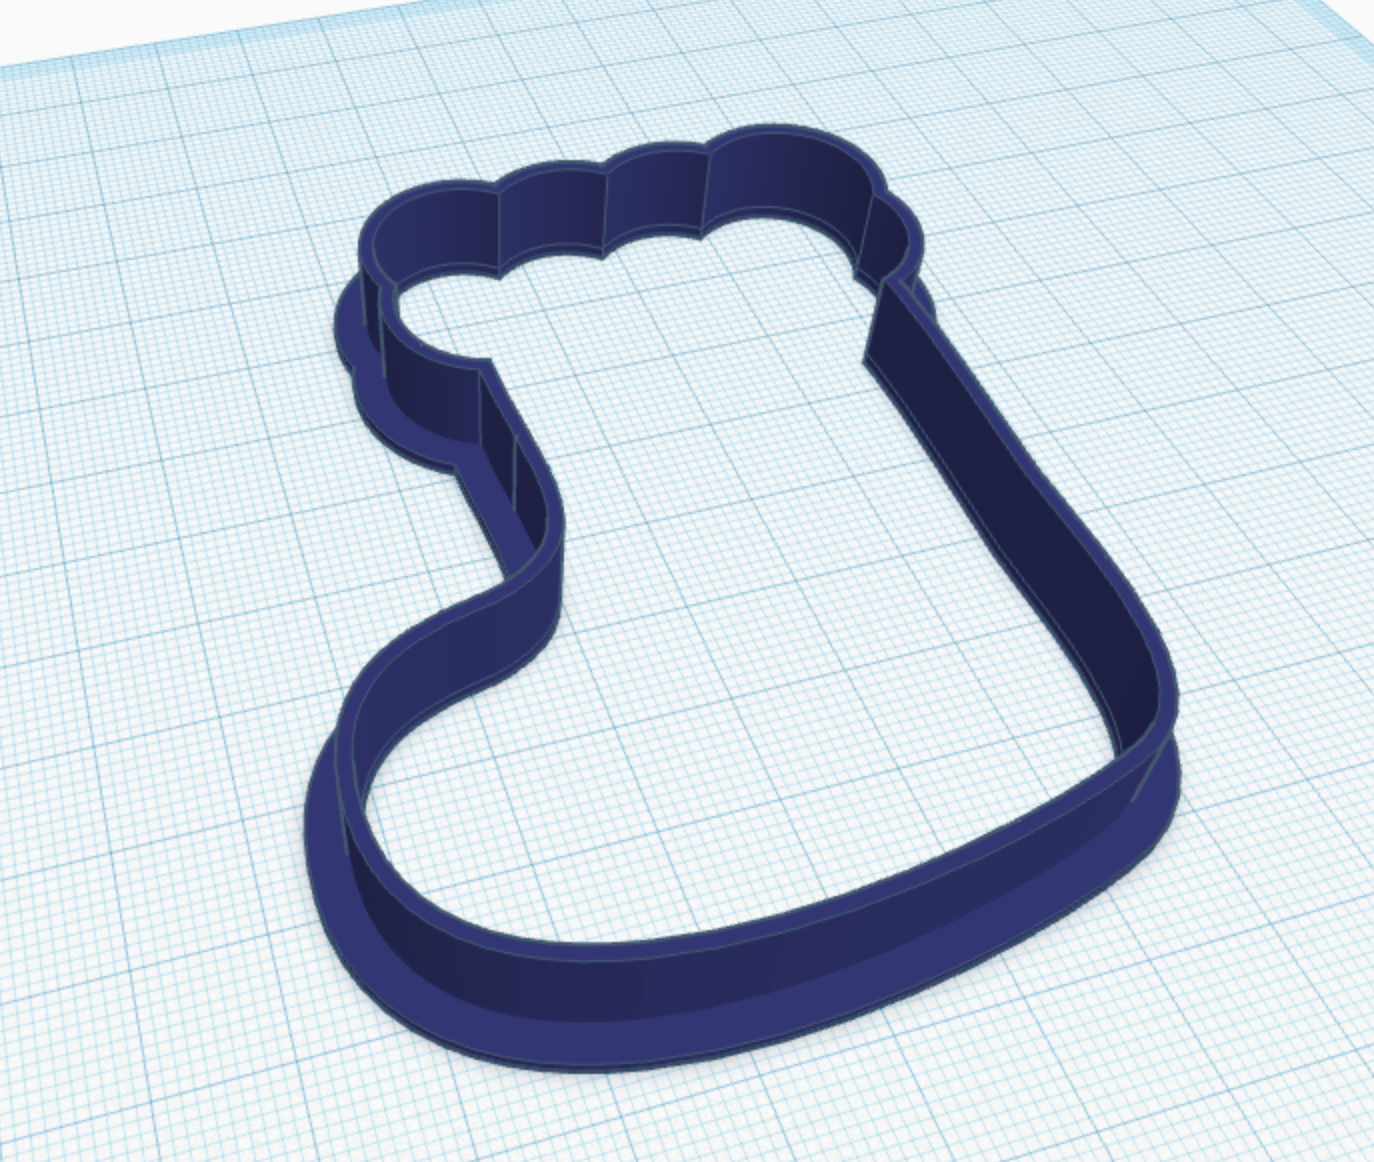
To make these cookie cutters, we are going to take advantage of the neat options you get when you import an SVG.
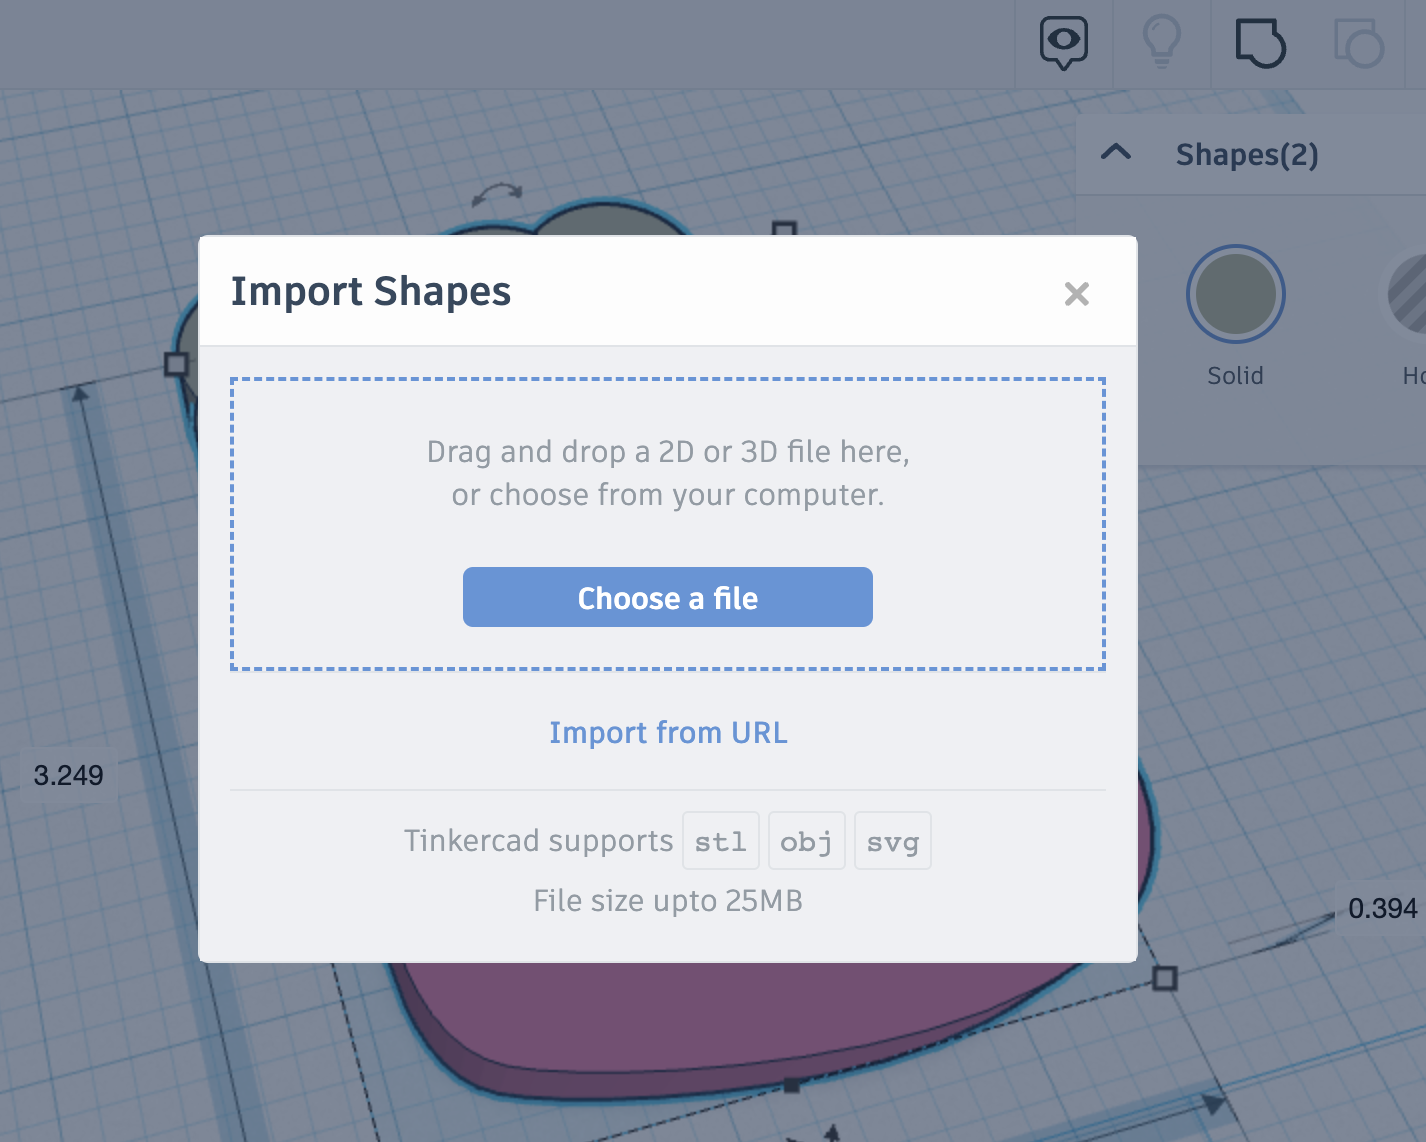
To start, you either need to bring in an SVG file of a design you want OR just work on your design in Tinkercad, export as an SVG, and import it right back as an SVG.
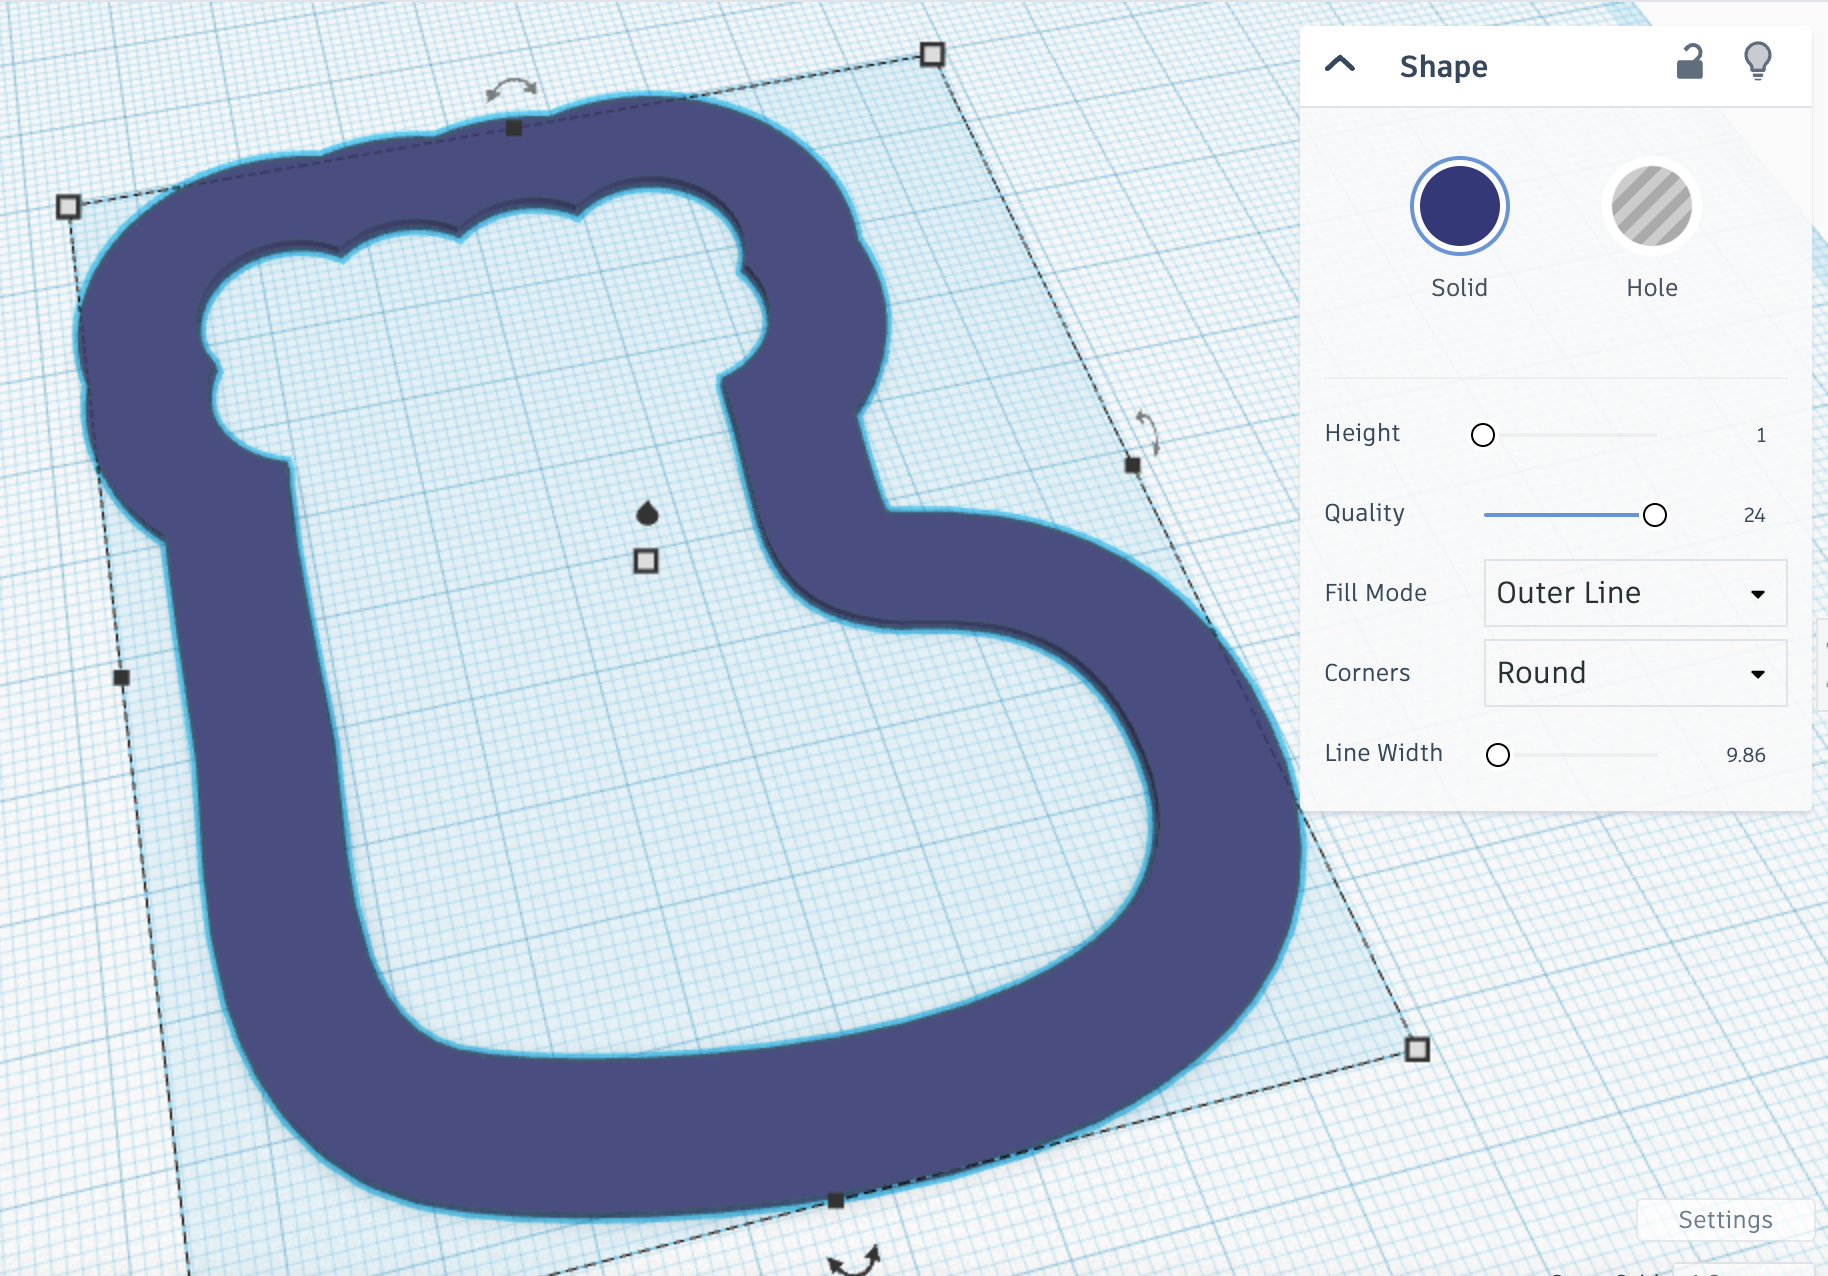
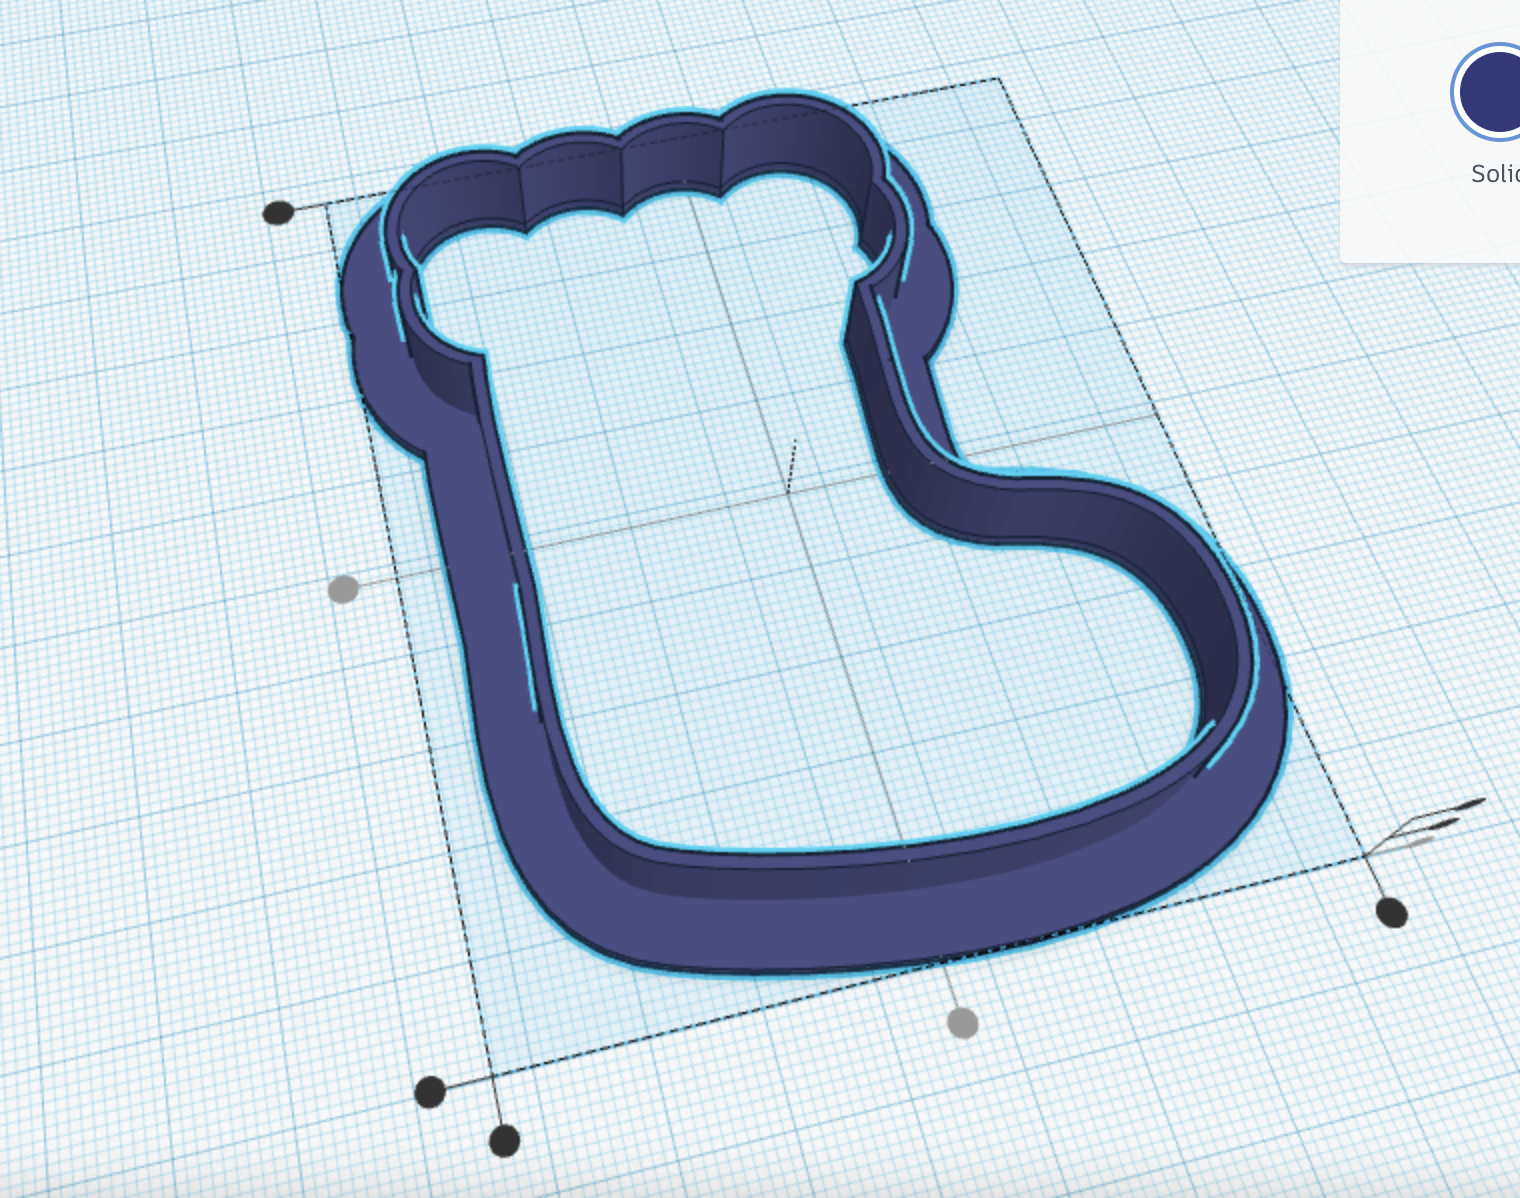
Now, with your SVG design, you'll be able to set it as Default, Outer Line, or Inner Line.
To make a simple hollow cookie cutter:
- Duplicate your design so you have 2
- make the first Outline line with 1 mm Height and 10 mm Line Width
- make the second Outline with 10 mm Height and 1 mm Line Width
- line up your two shapes
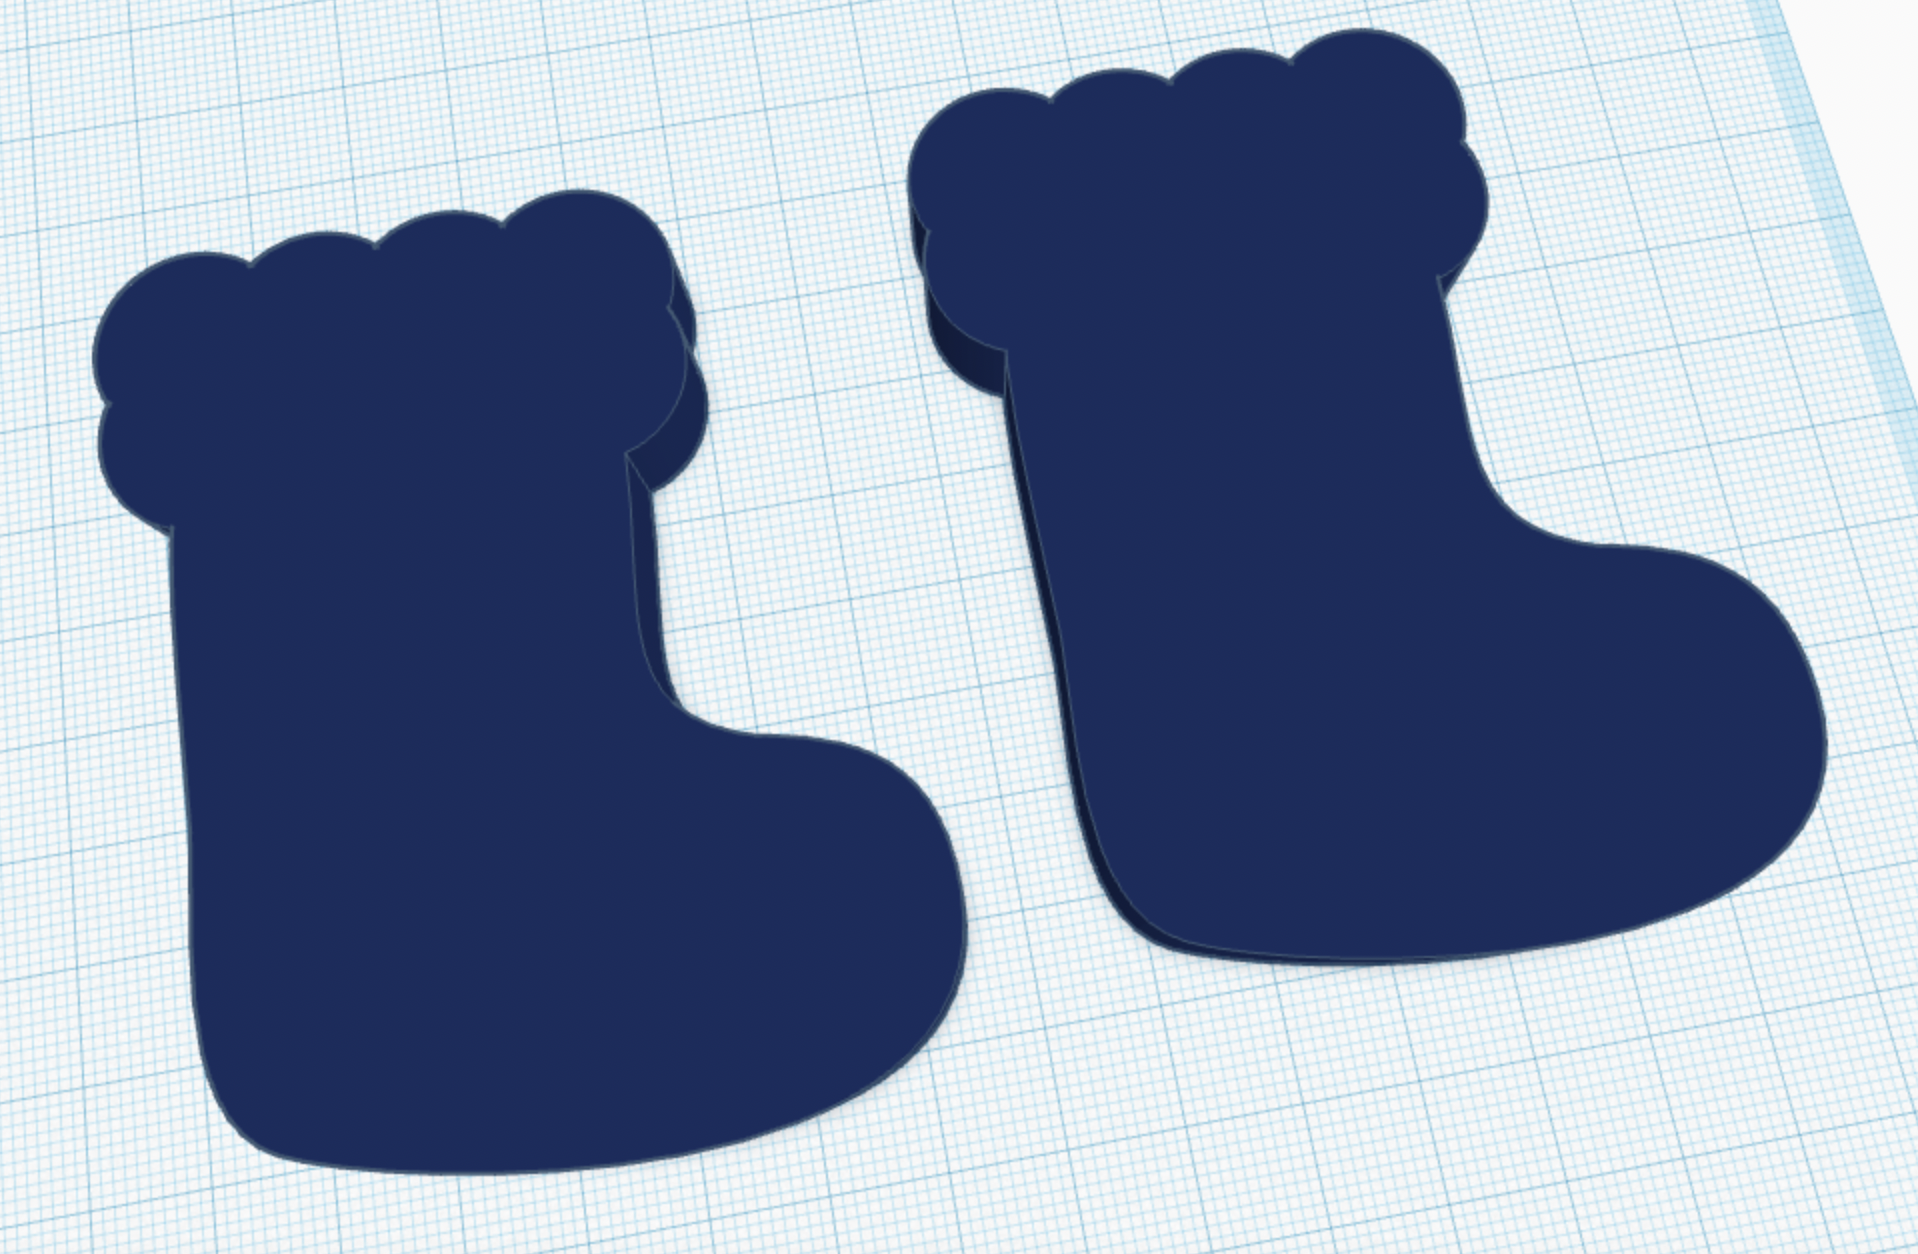
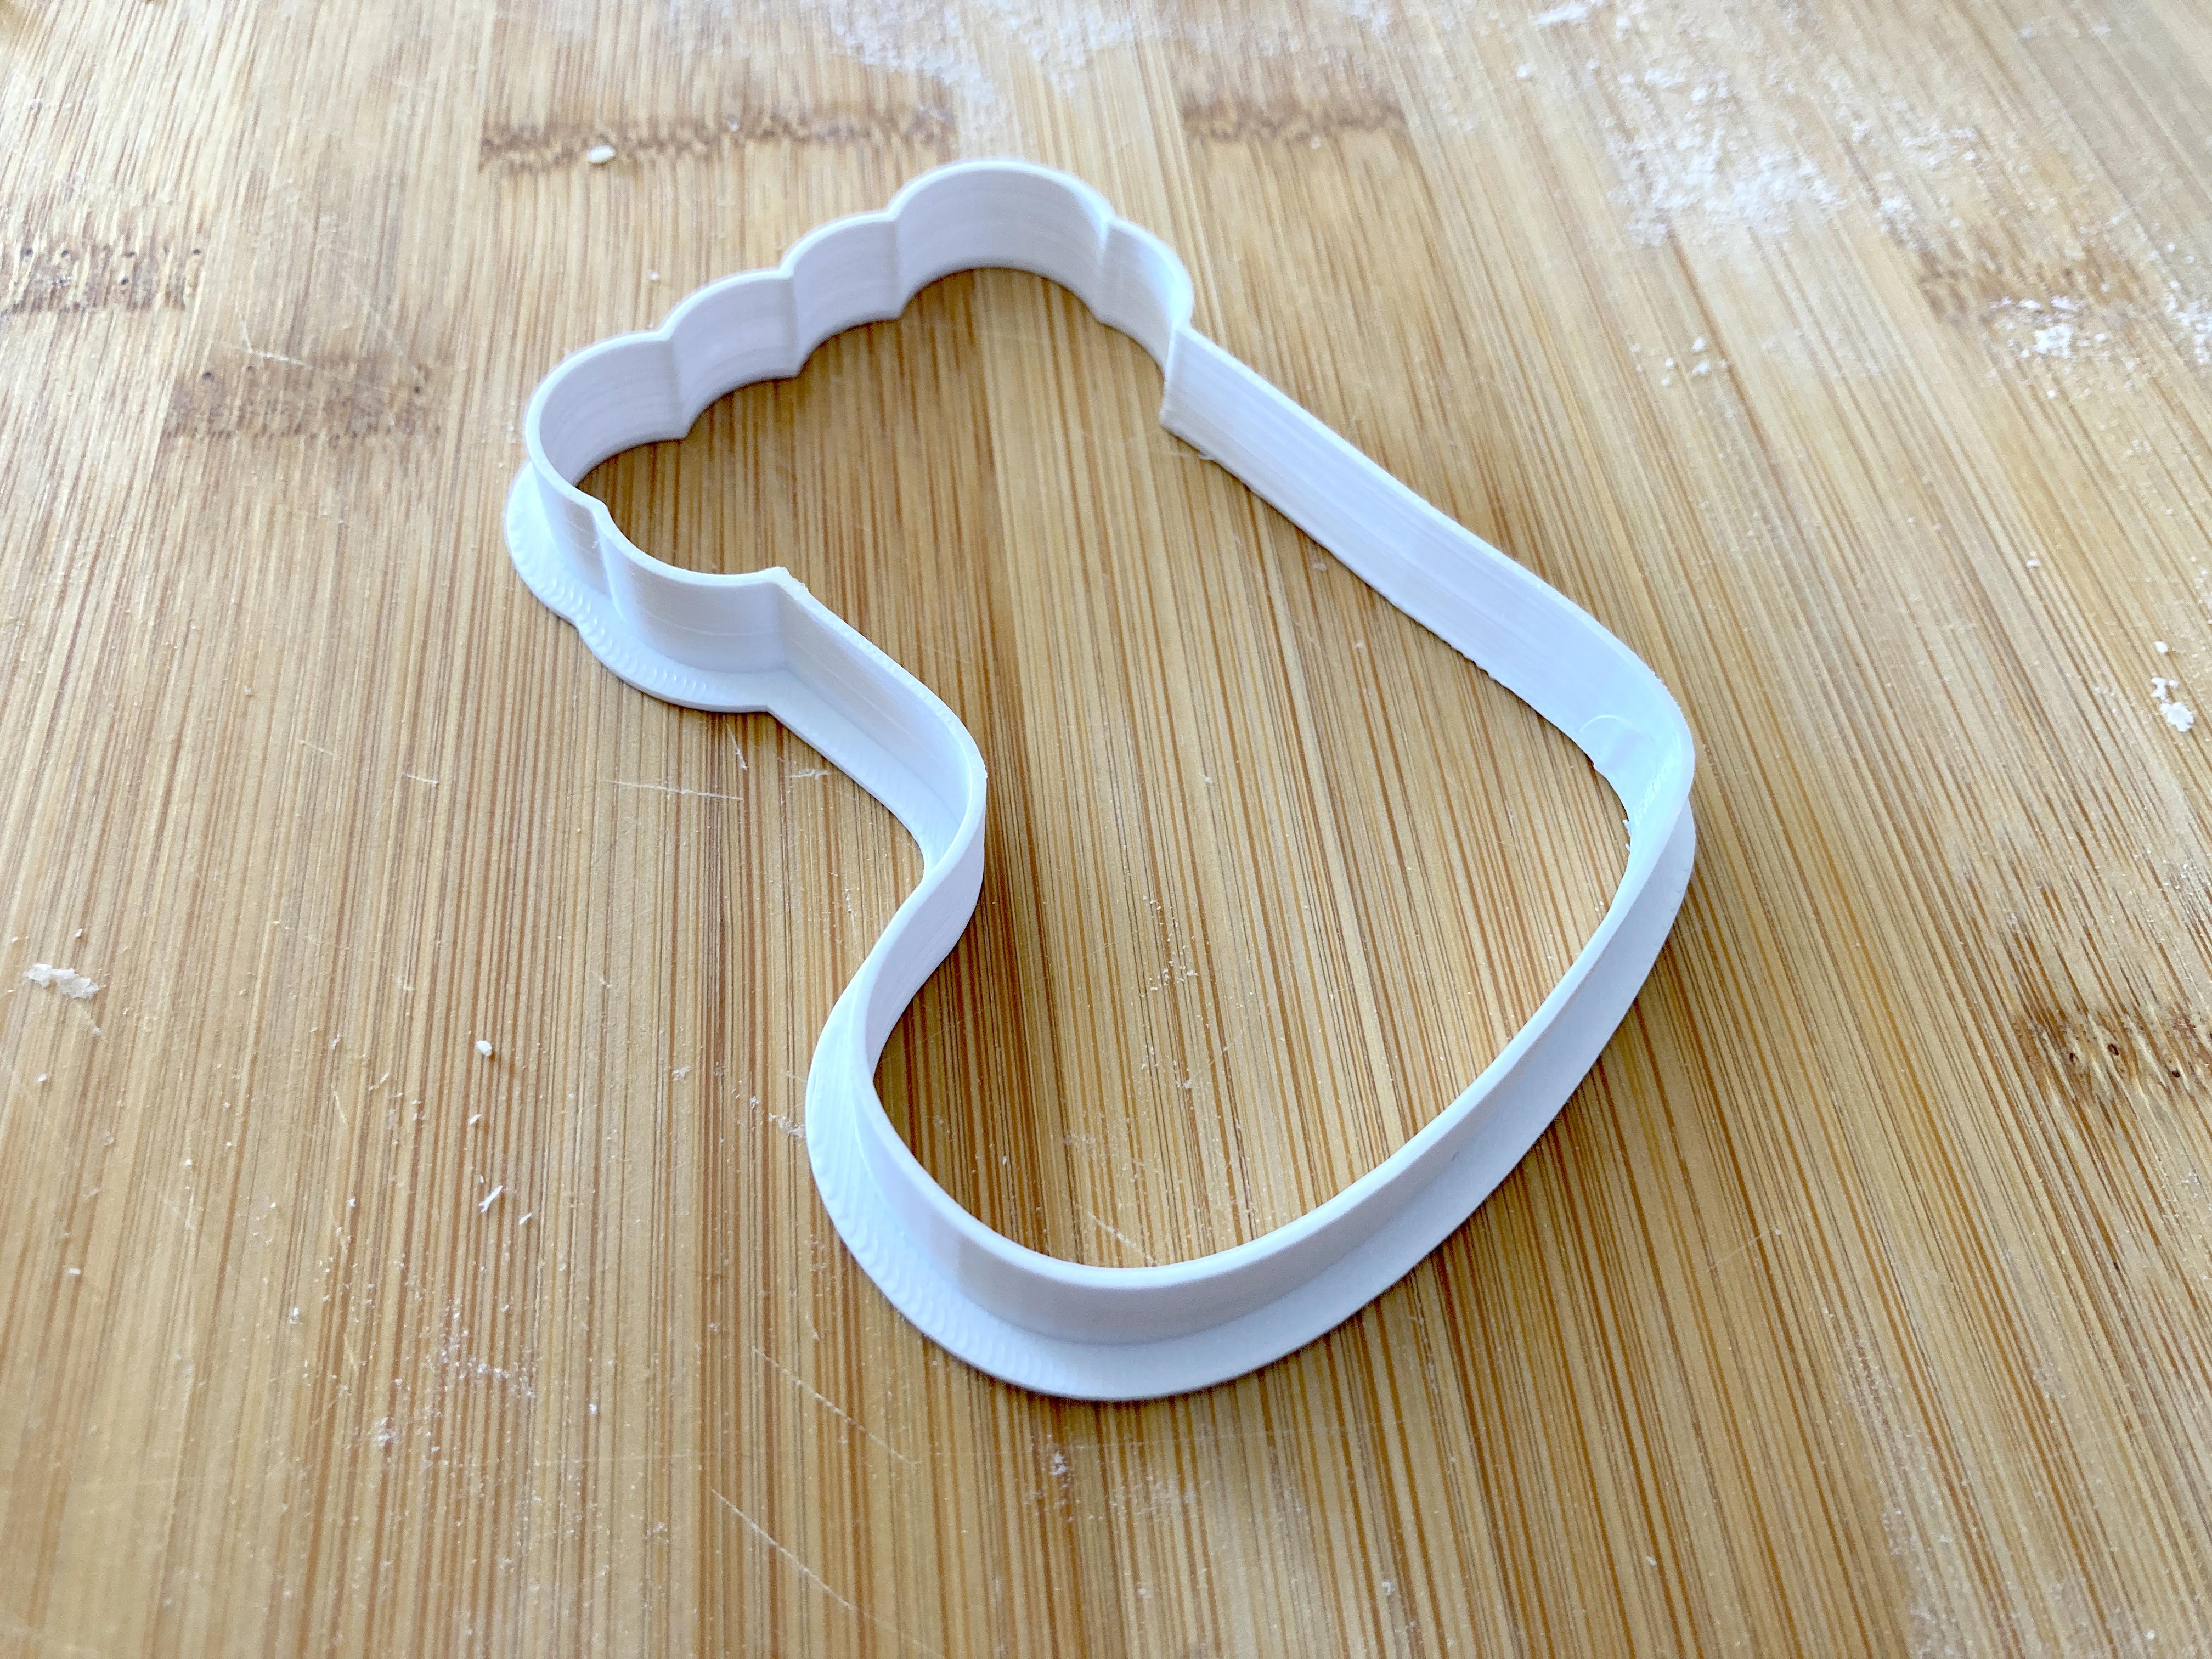
You now have a simple silhouette cookie cutter.
Remember to flip it if you want what you are looking at now to be the final cookie.
* A stocking cutter like this could pair well with individual name imprints. Then you could cut out a bunch of stockings and imprint custom names on them.
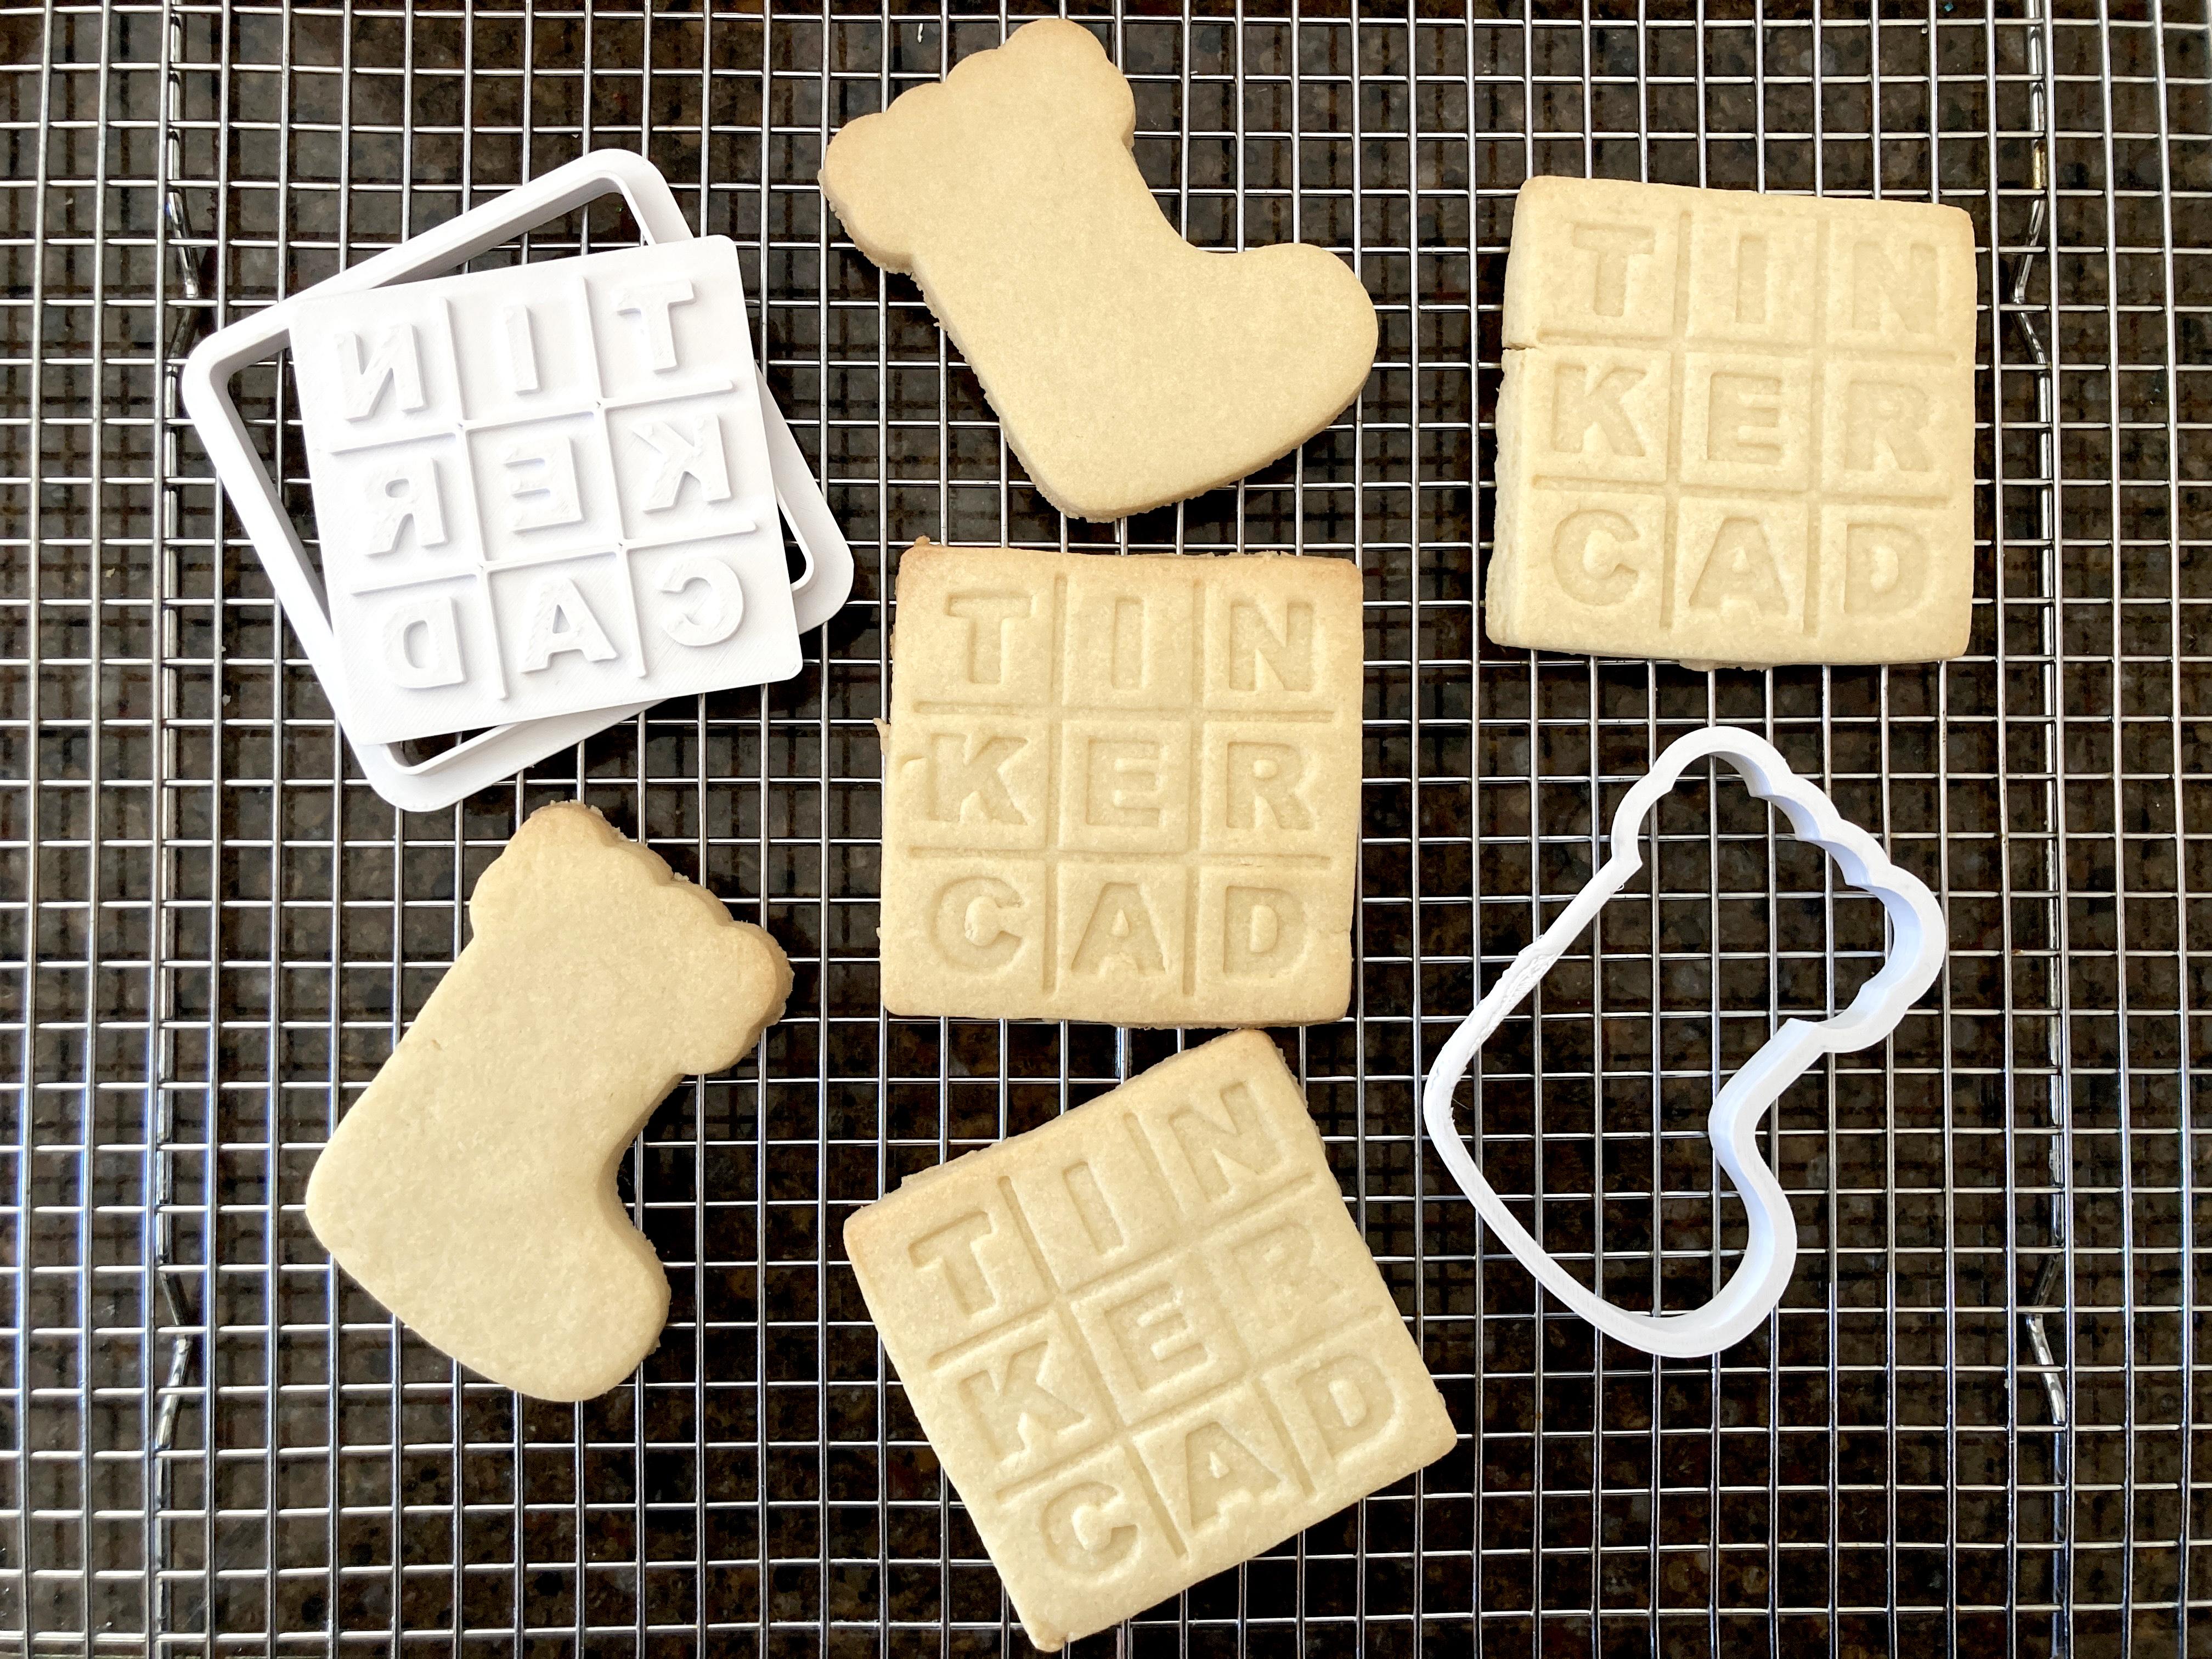
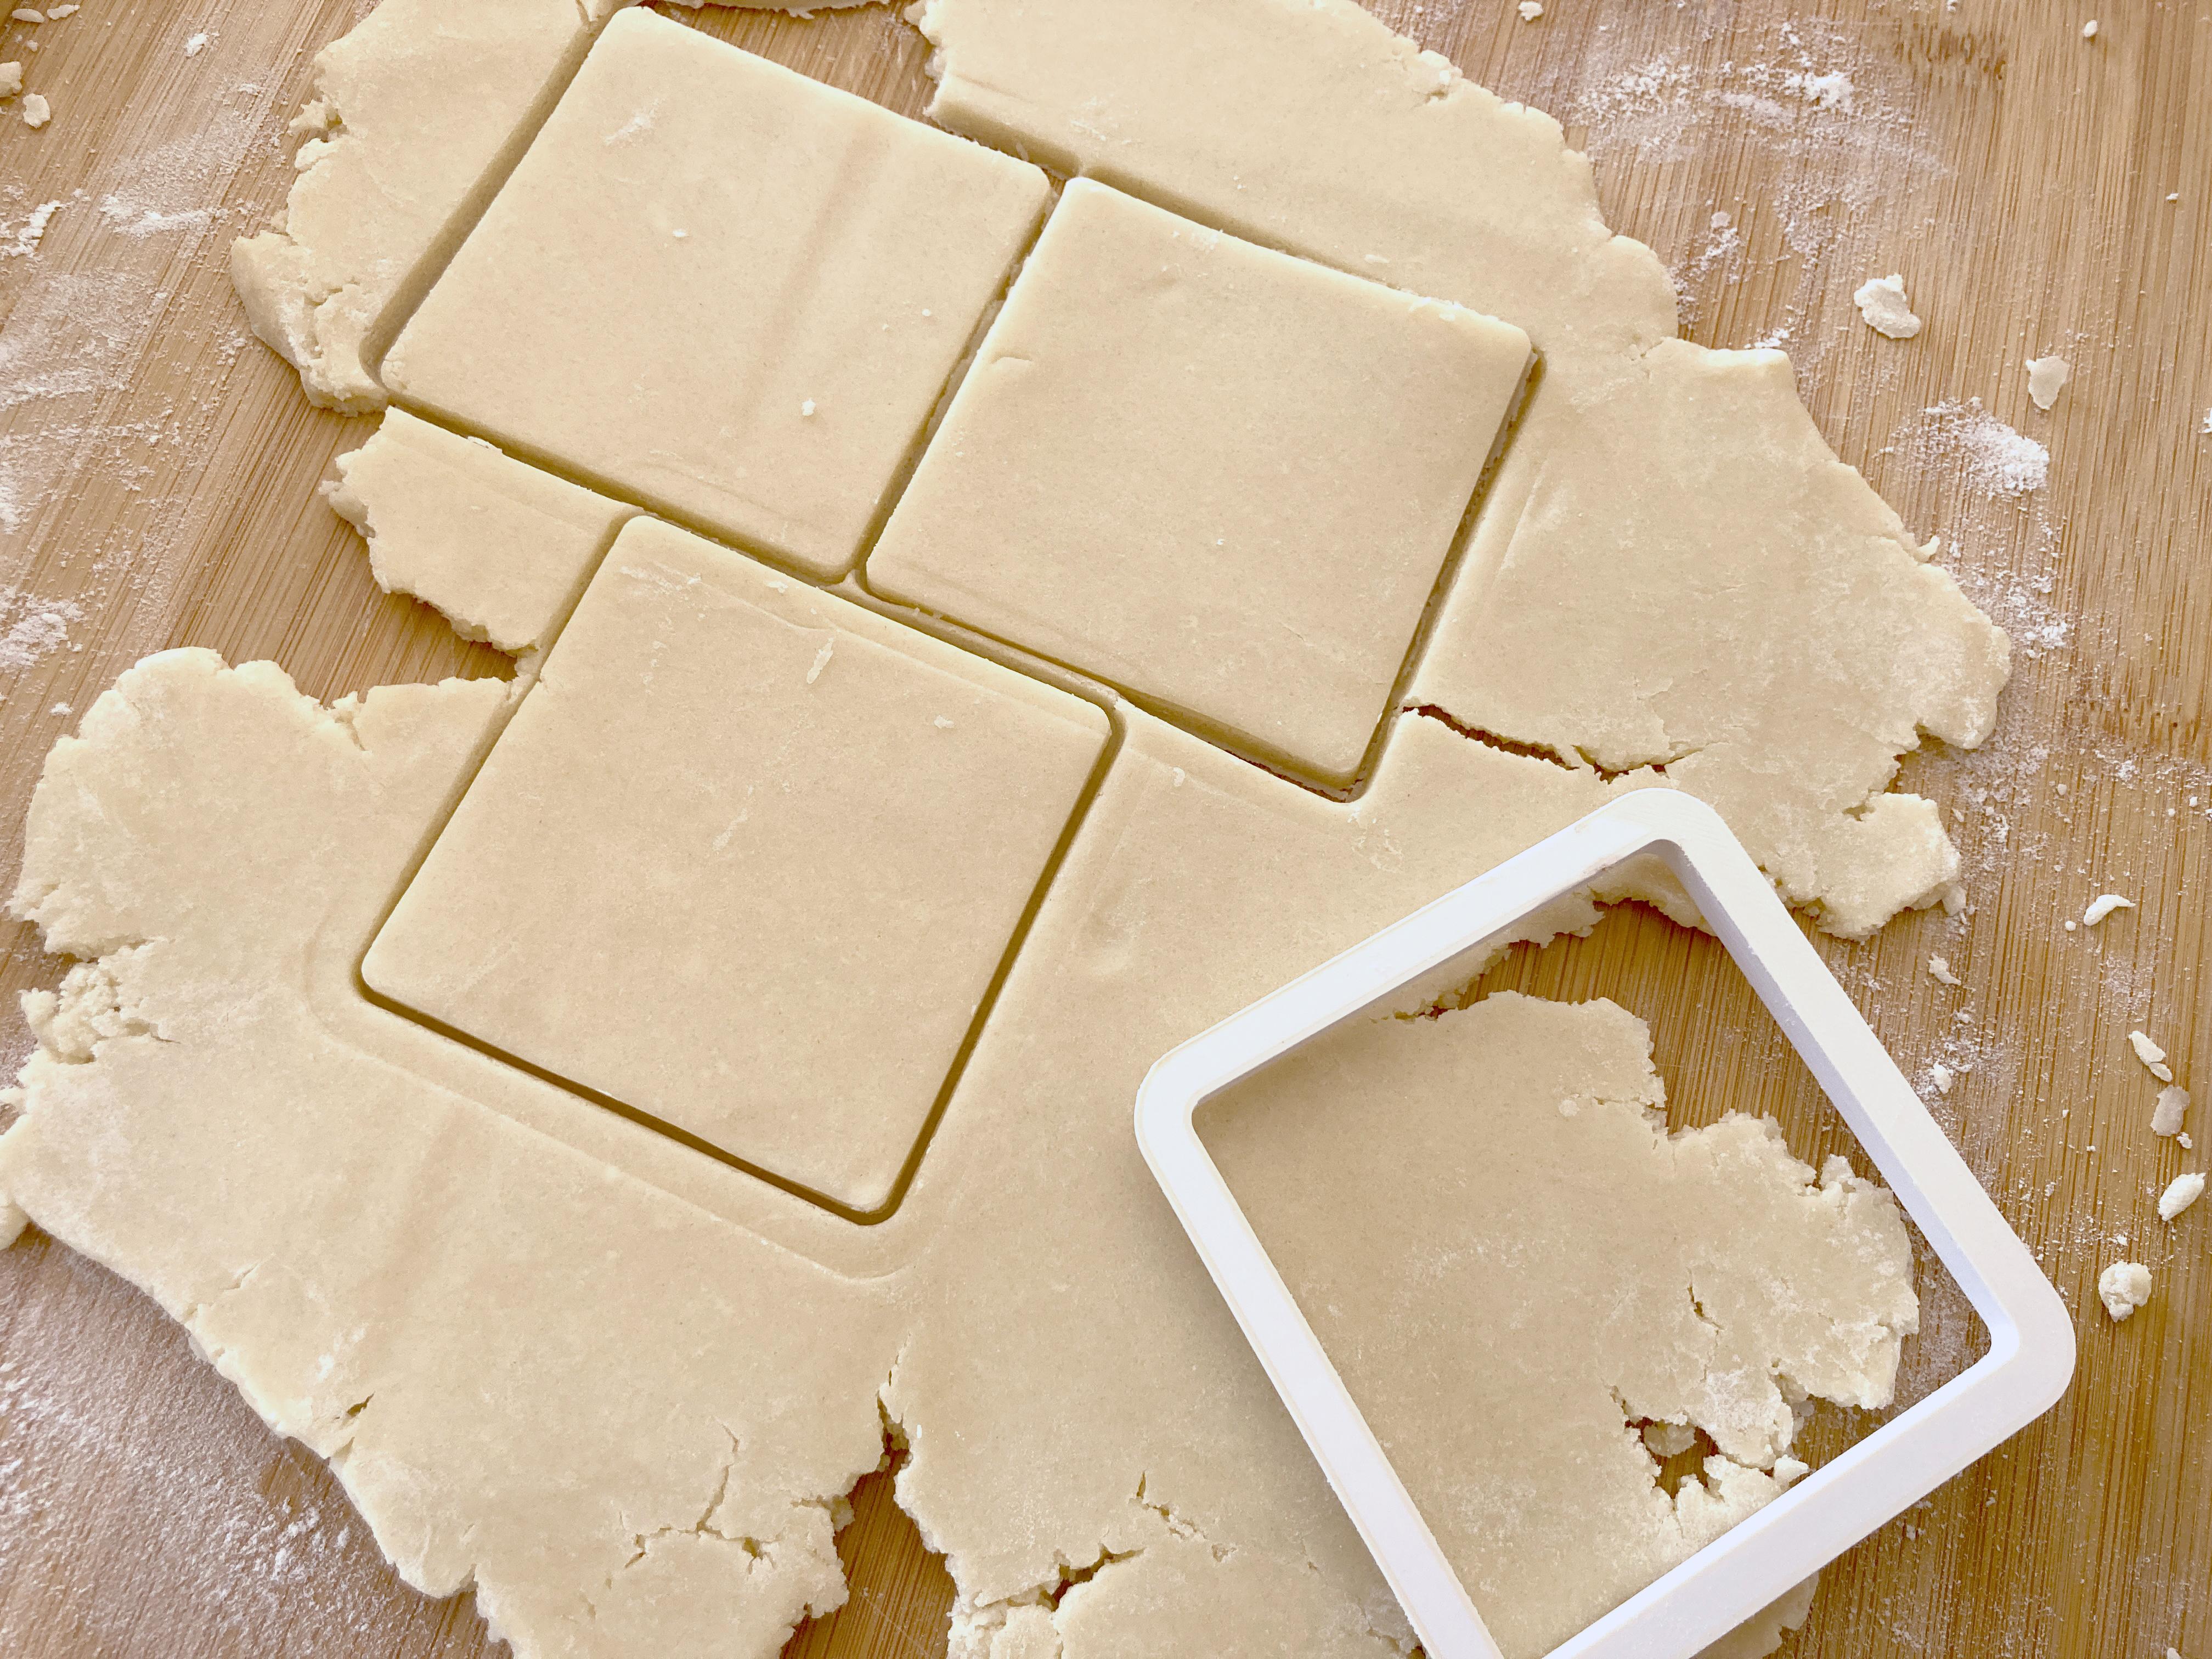
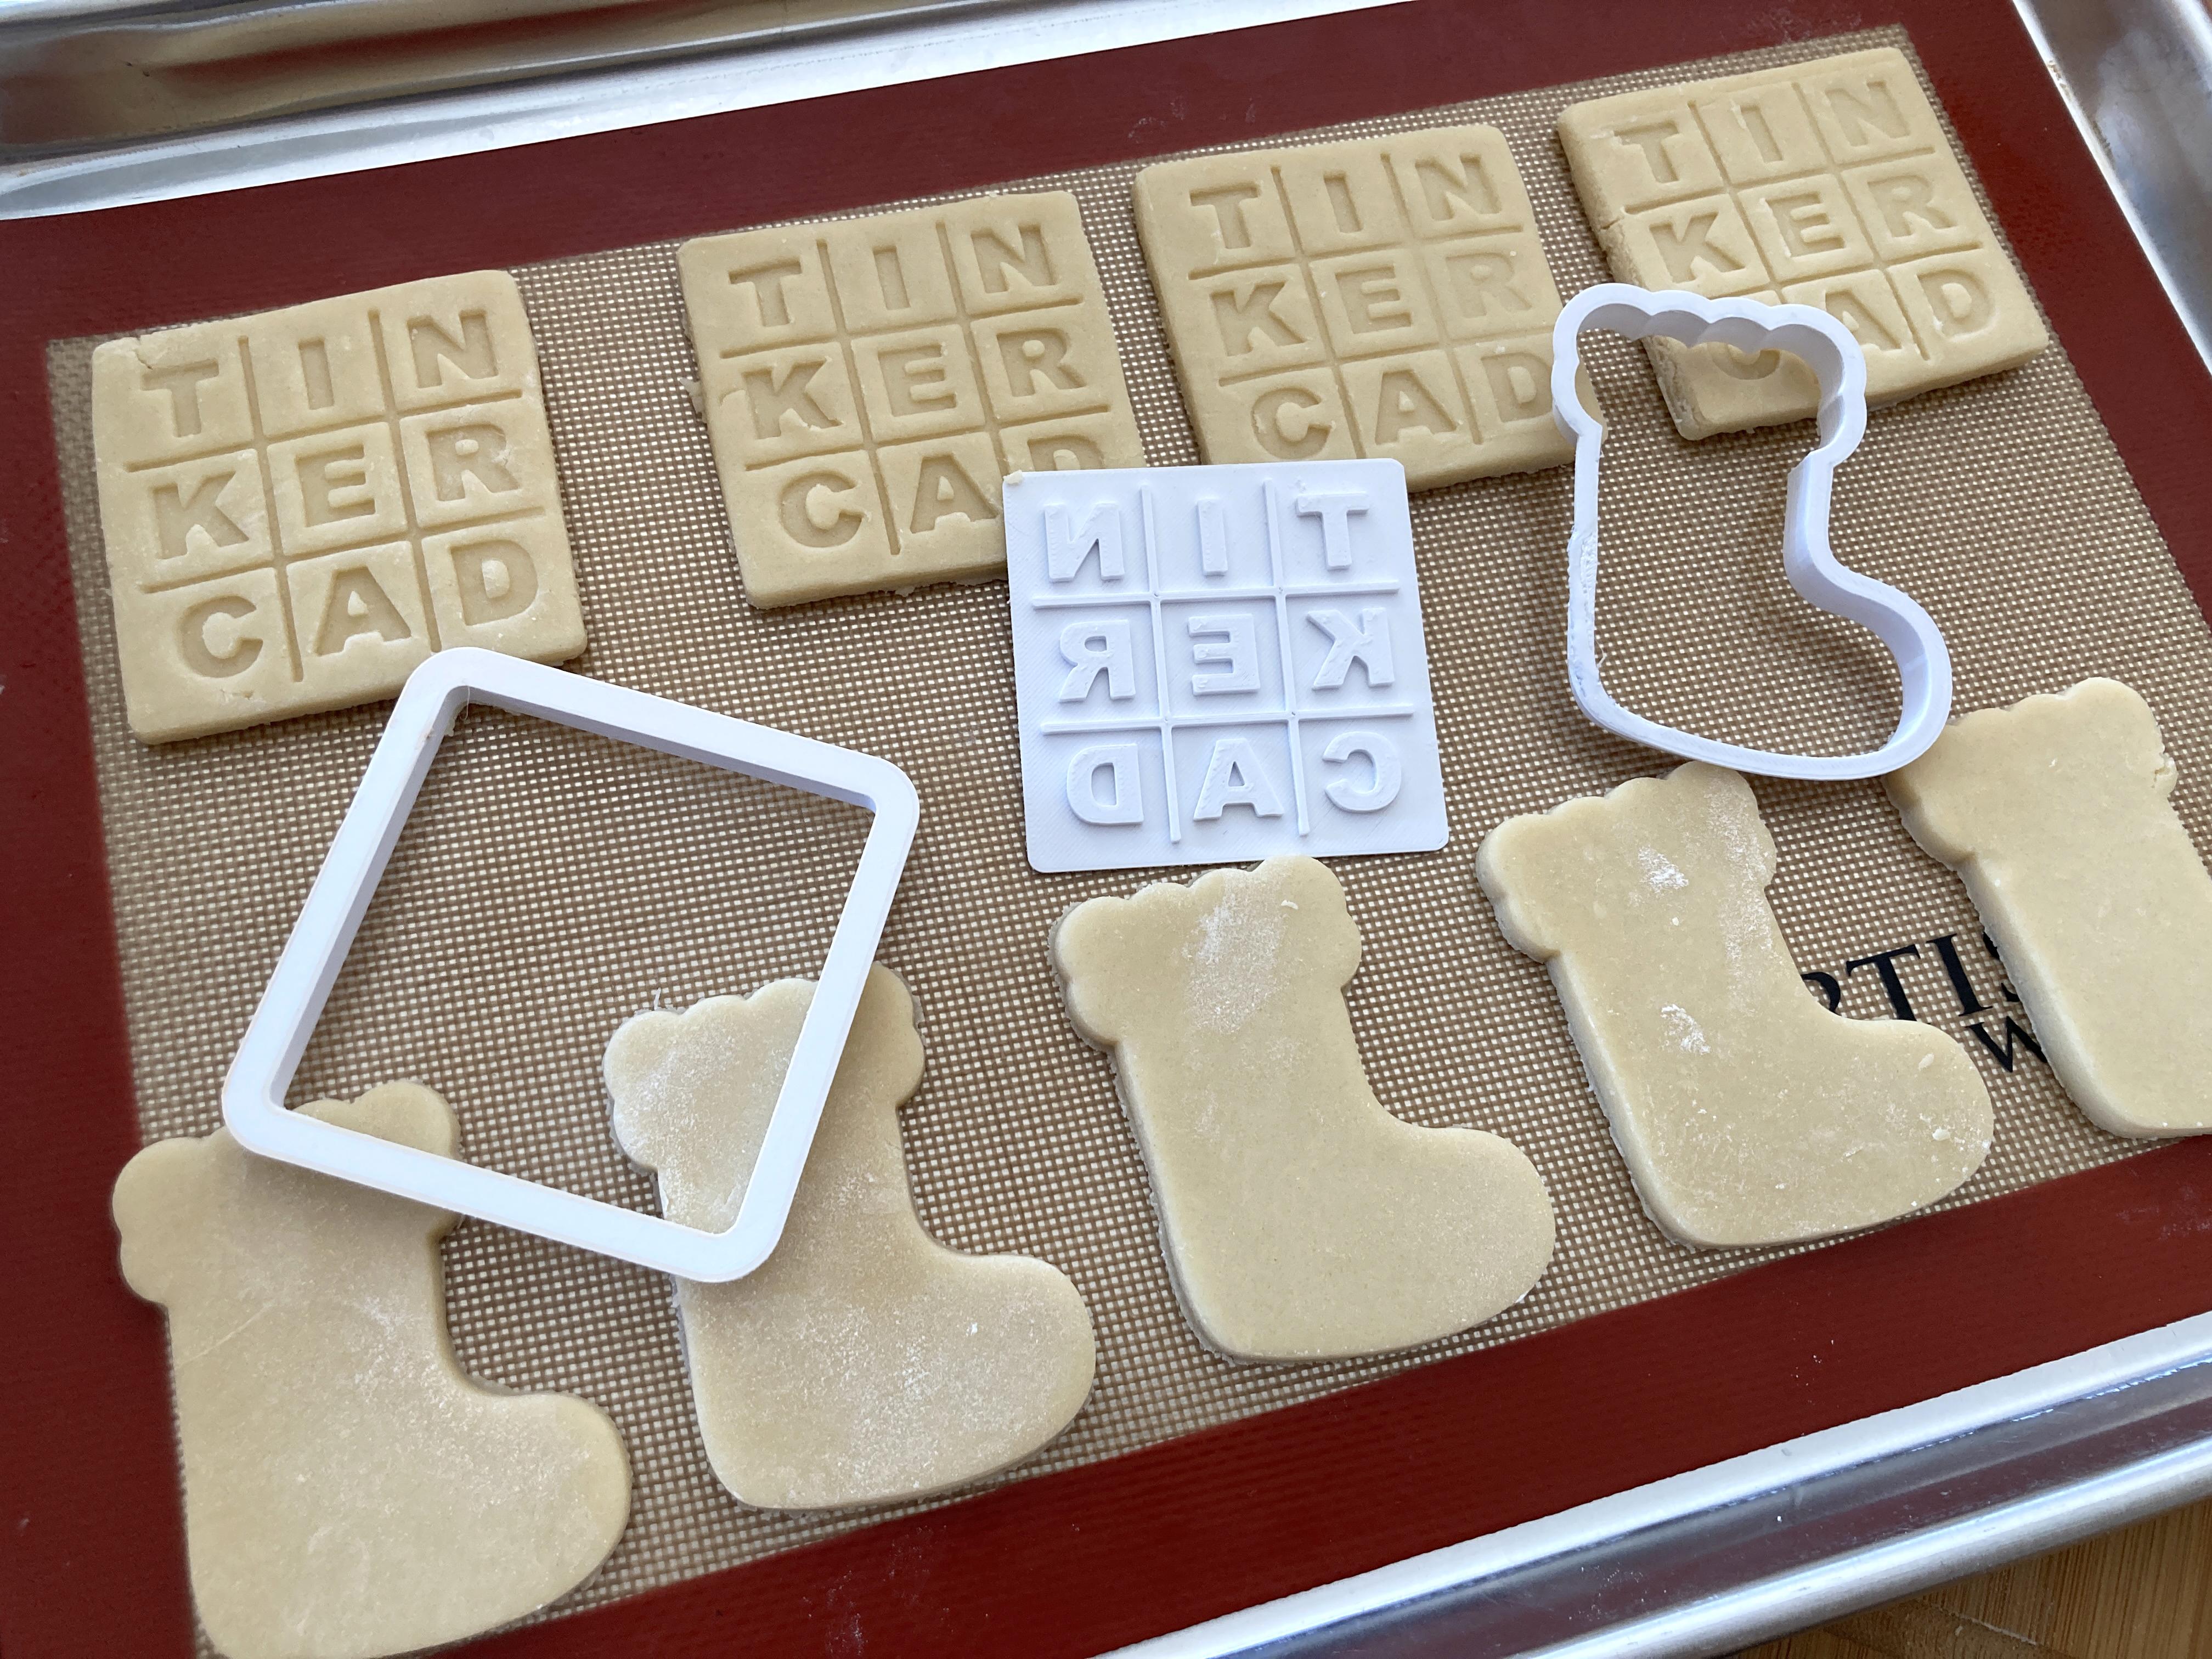
2 Part Cookie Cutter
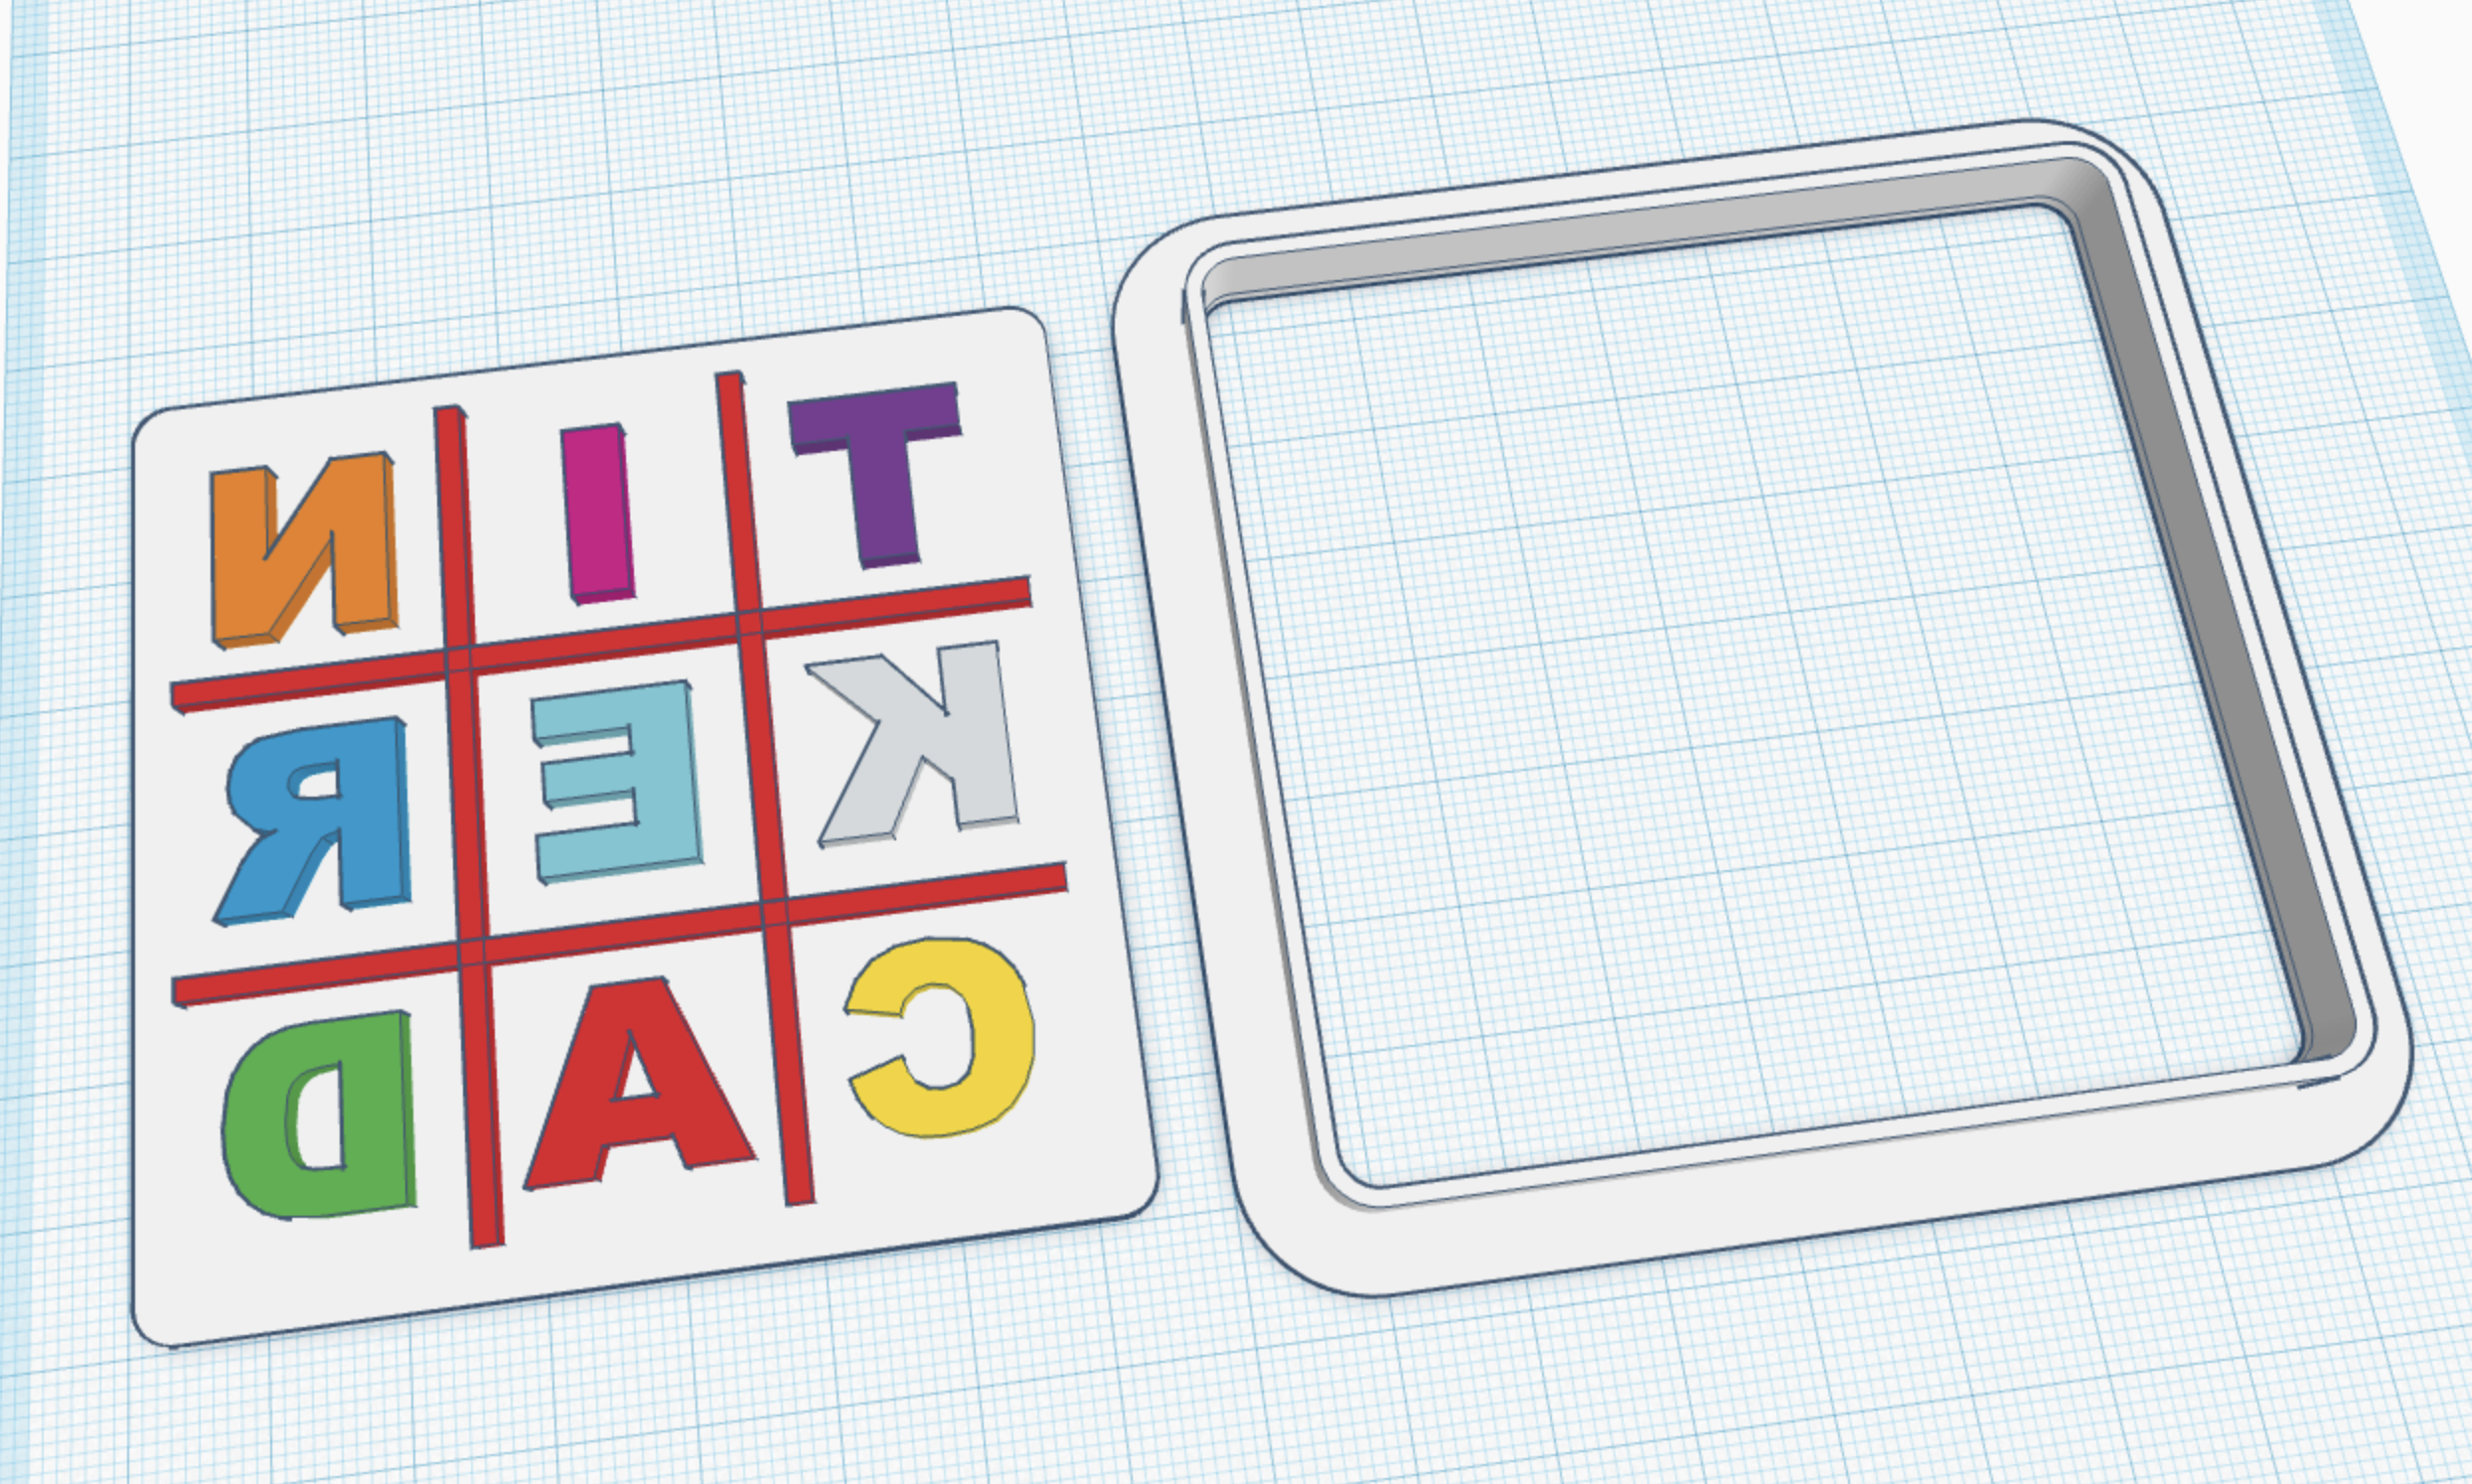
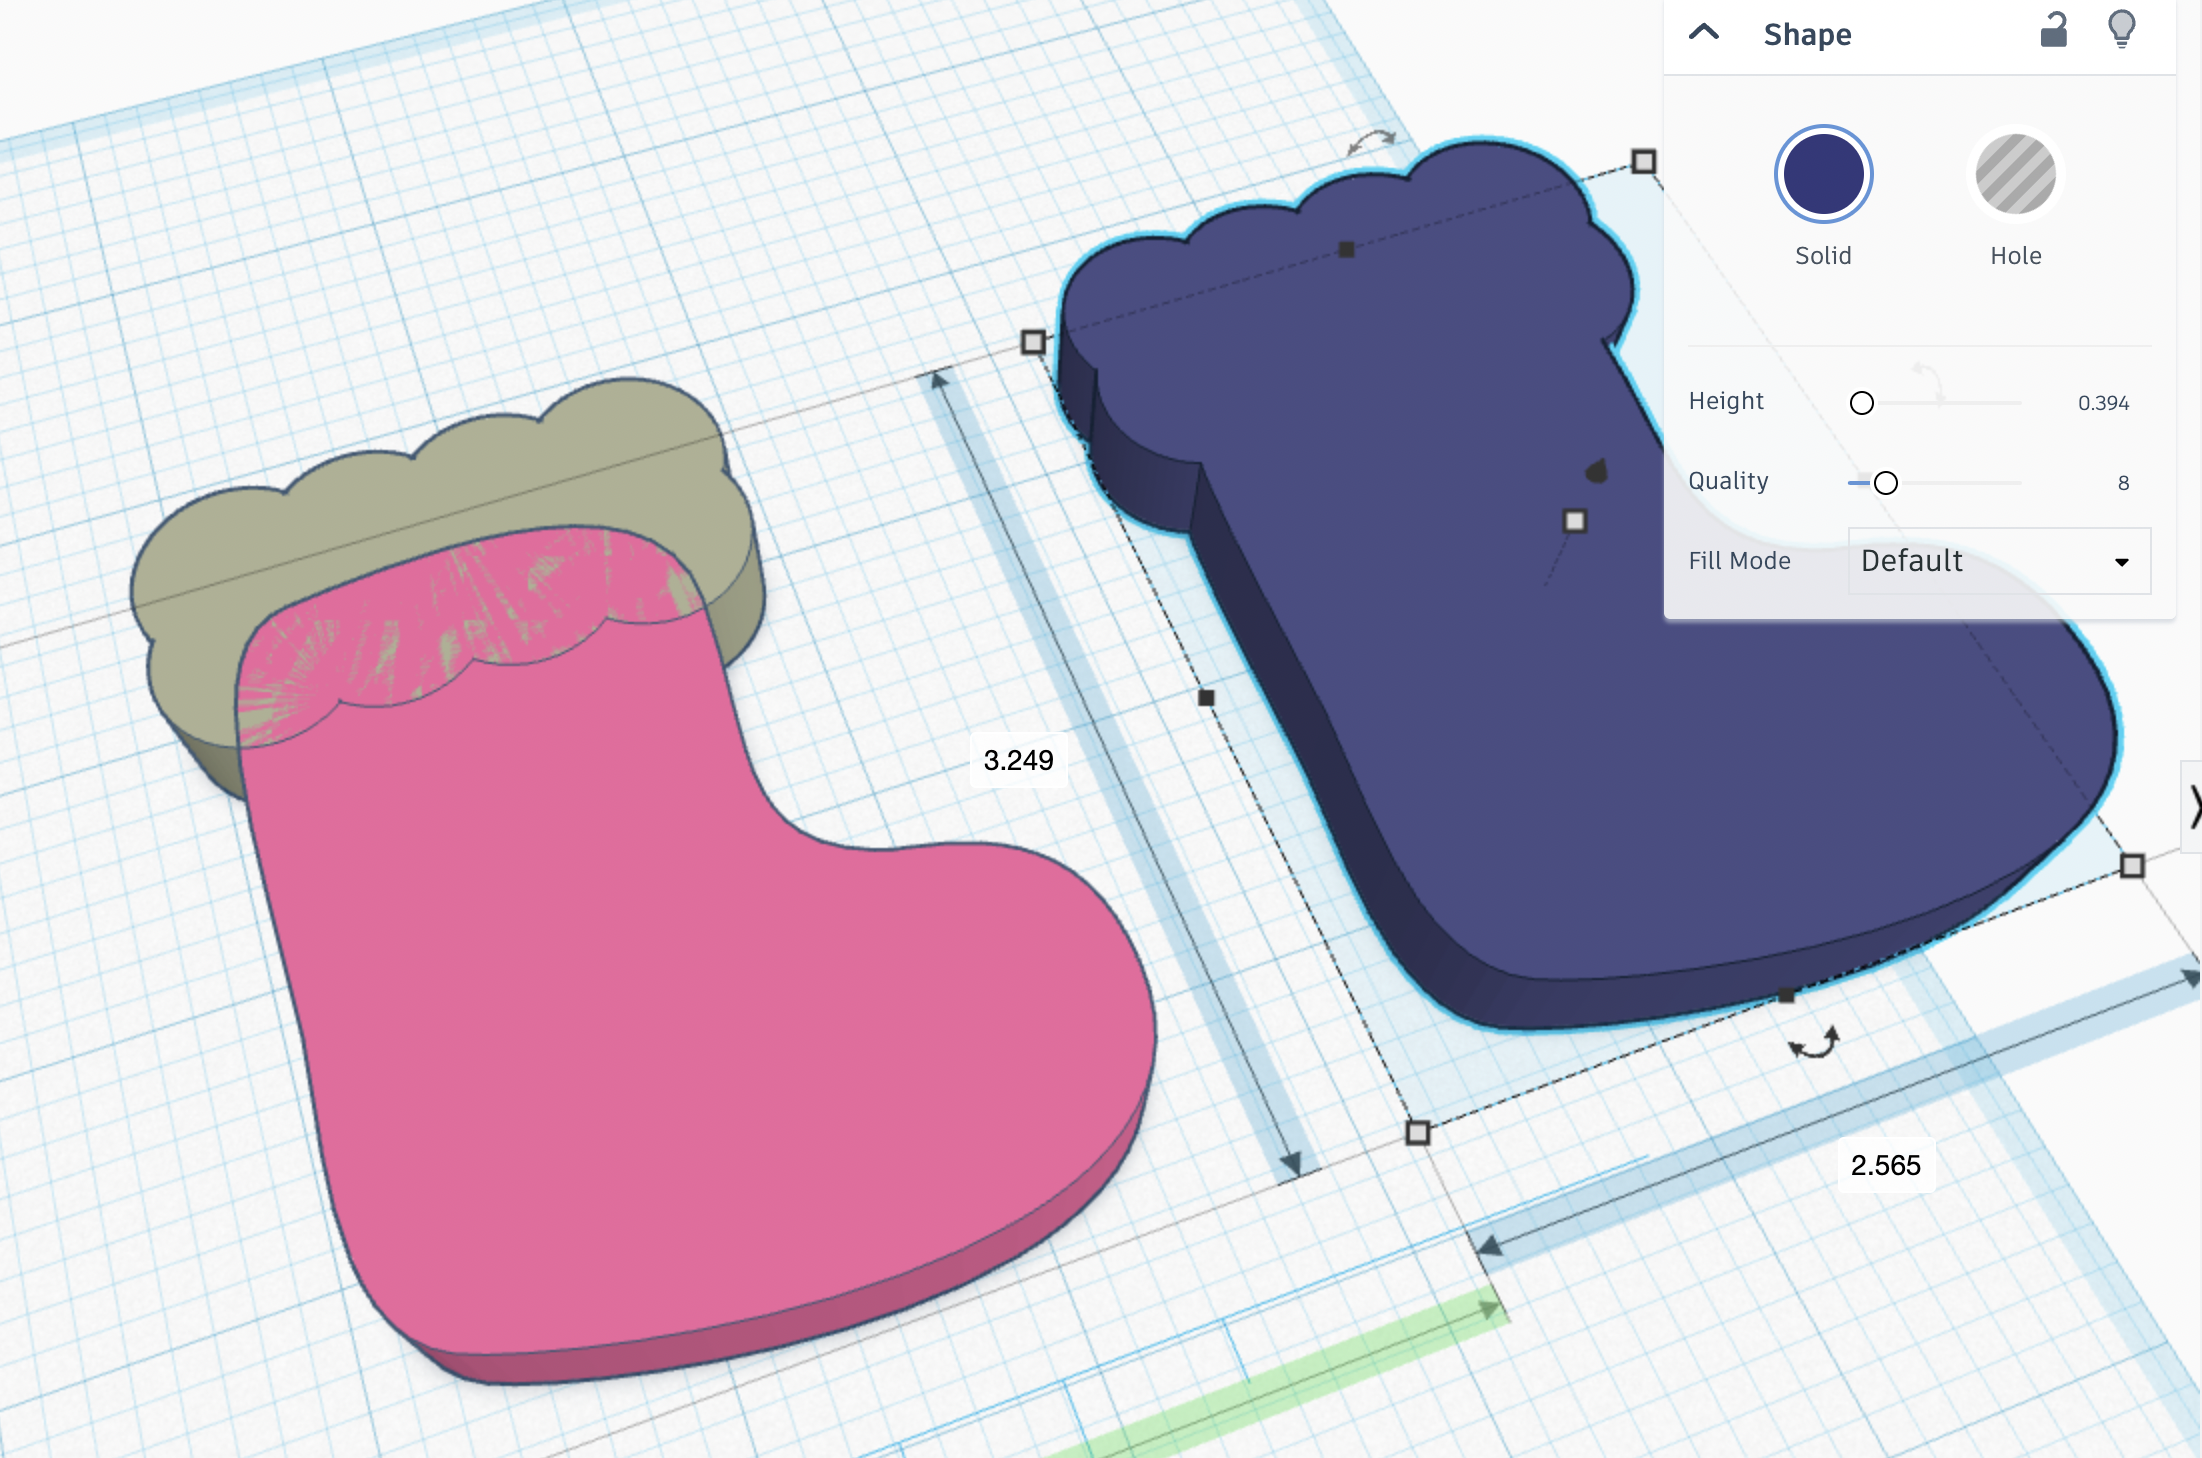
If you want to add imprinted details to your cookie you can consider doing a 2 part cookie cutter. I found it easier to cut out and then stamp the design with the details rather than do one cookie cutter that does both. It is just too hard to get the dough out of the cutter without tearing it.
Design the silhouette as you just did in the last step.
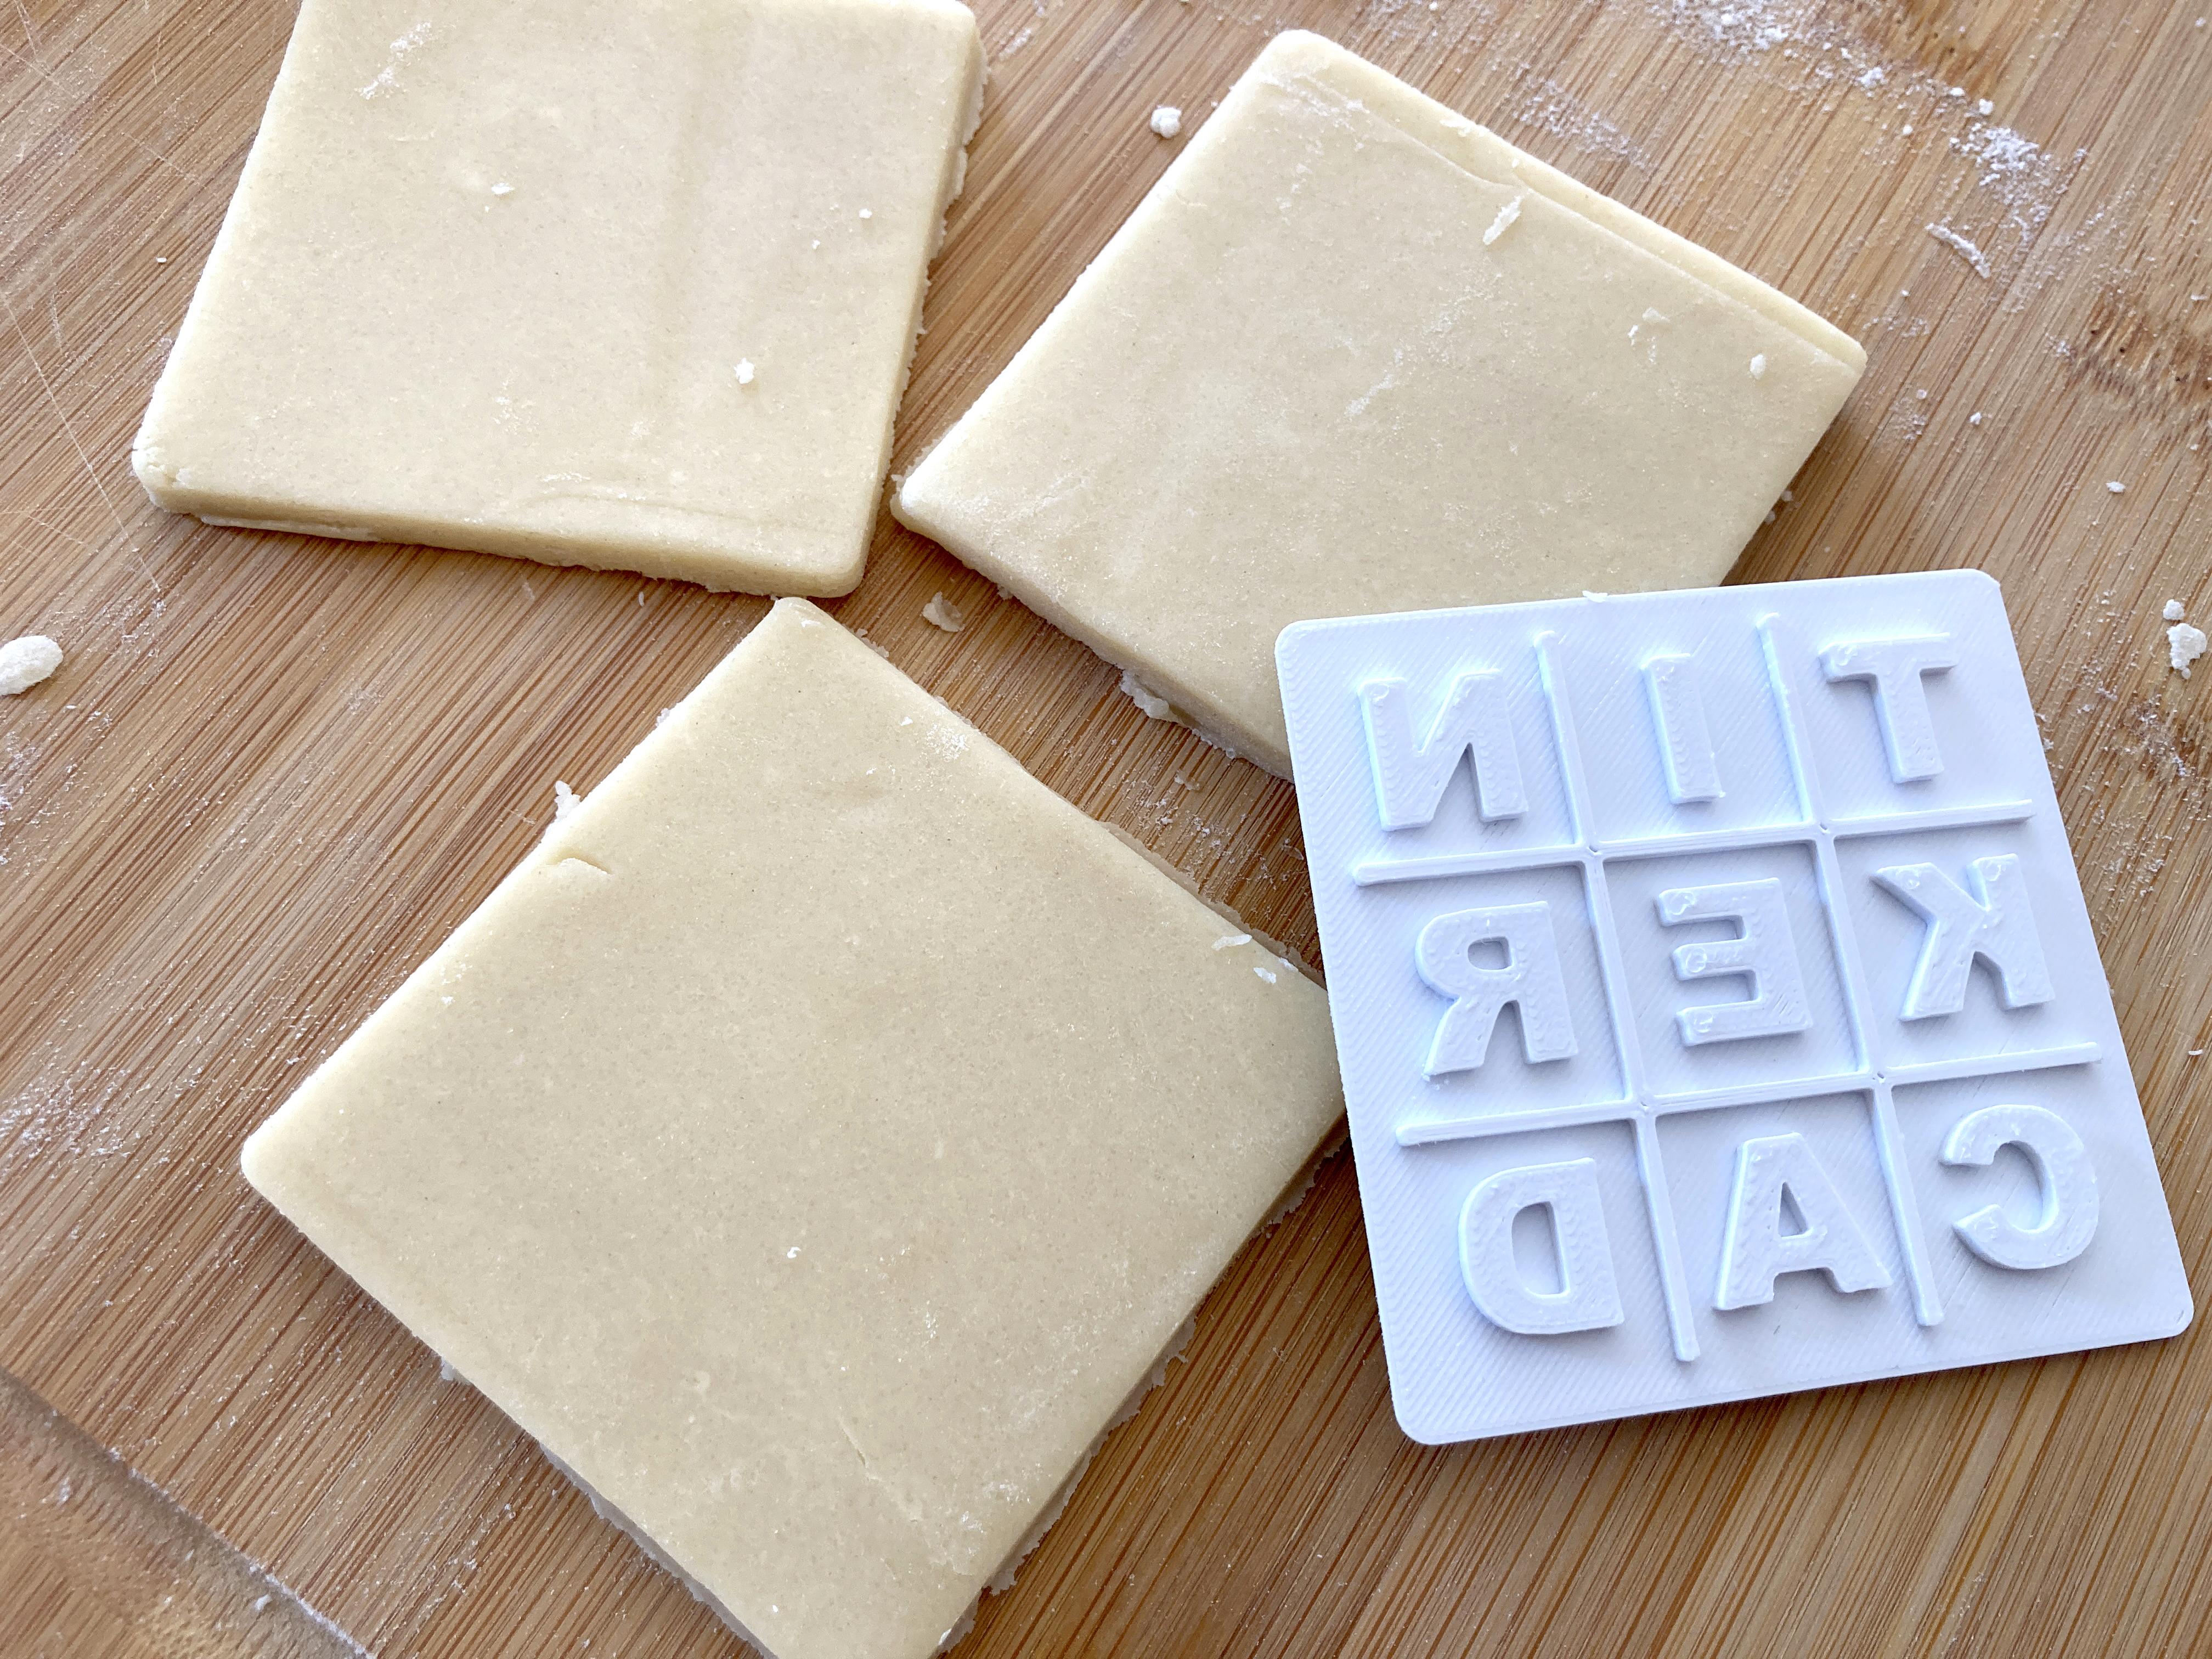
To design the imprint, make a base the same shape as the cutter (this can be the Default setting - about 1mm thick). Put your design on top of the base and make it at least 3 mm height total (including the 1mm base).
Don't forget to flip your designs when you are ready.
Printing


The only thing to keep in mind when printing is the top layer. You can consider putting on the Iron setting for the topmost layer only so that you don't have any holes/gaps. These can collect dough and grow mold if you plan on reusing them a lot.
You could really iron all top layers if you really want these to last a long time and stay clean.
Make Cookies

When making cookies with cookie cutters, the important thing is you don't want cookie dough that is going to spread when baked, like chocolate chip cookies. Common recipes include shortbread cookies, gingerbread, and specific sugar cookie dough. I'm using jessyratfink's No Chill Sugar Cookie recipe and it worked great!
Other things to keep in mind are cool dough and using a parchment paper or silpat type sheet helps the cookie dough grip and not slip.
The outline cookies are easy. Cut, pop them out, and bake them!
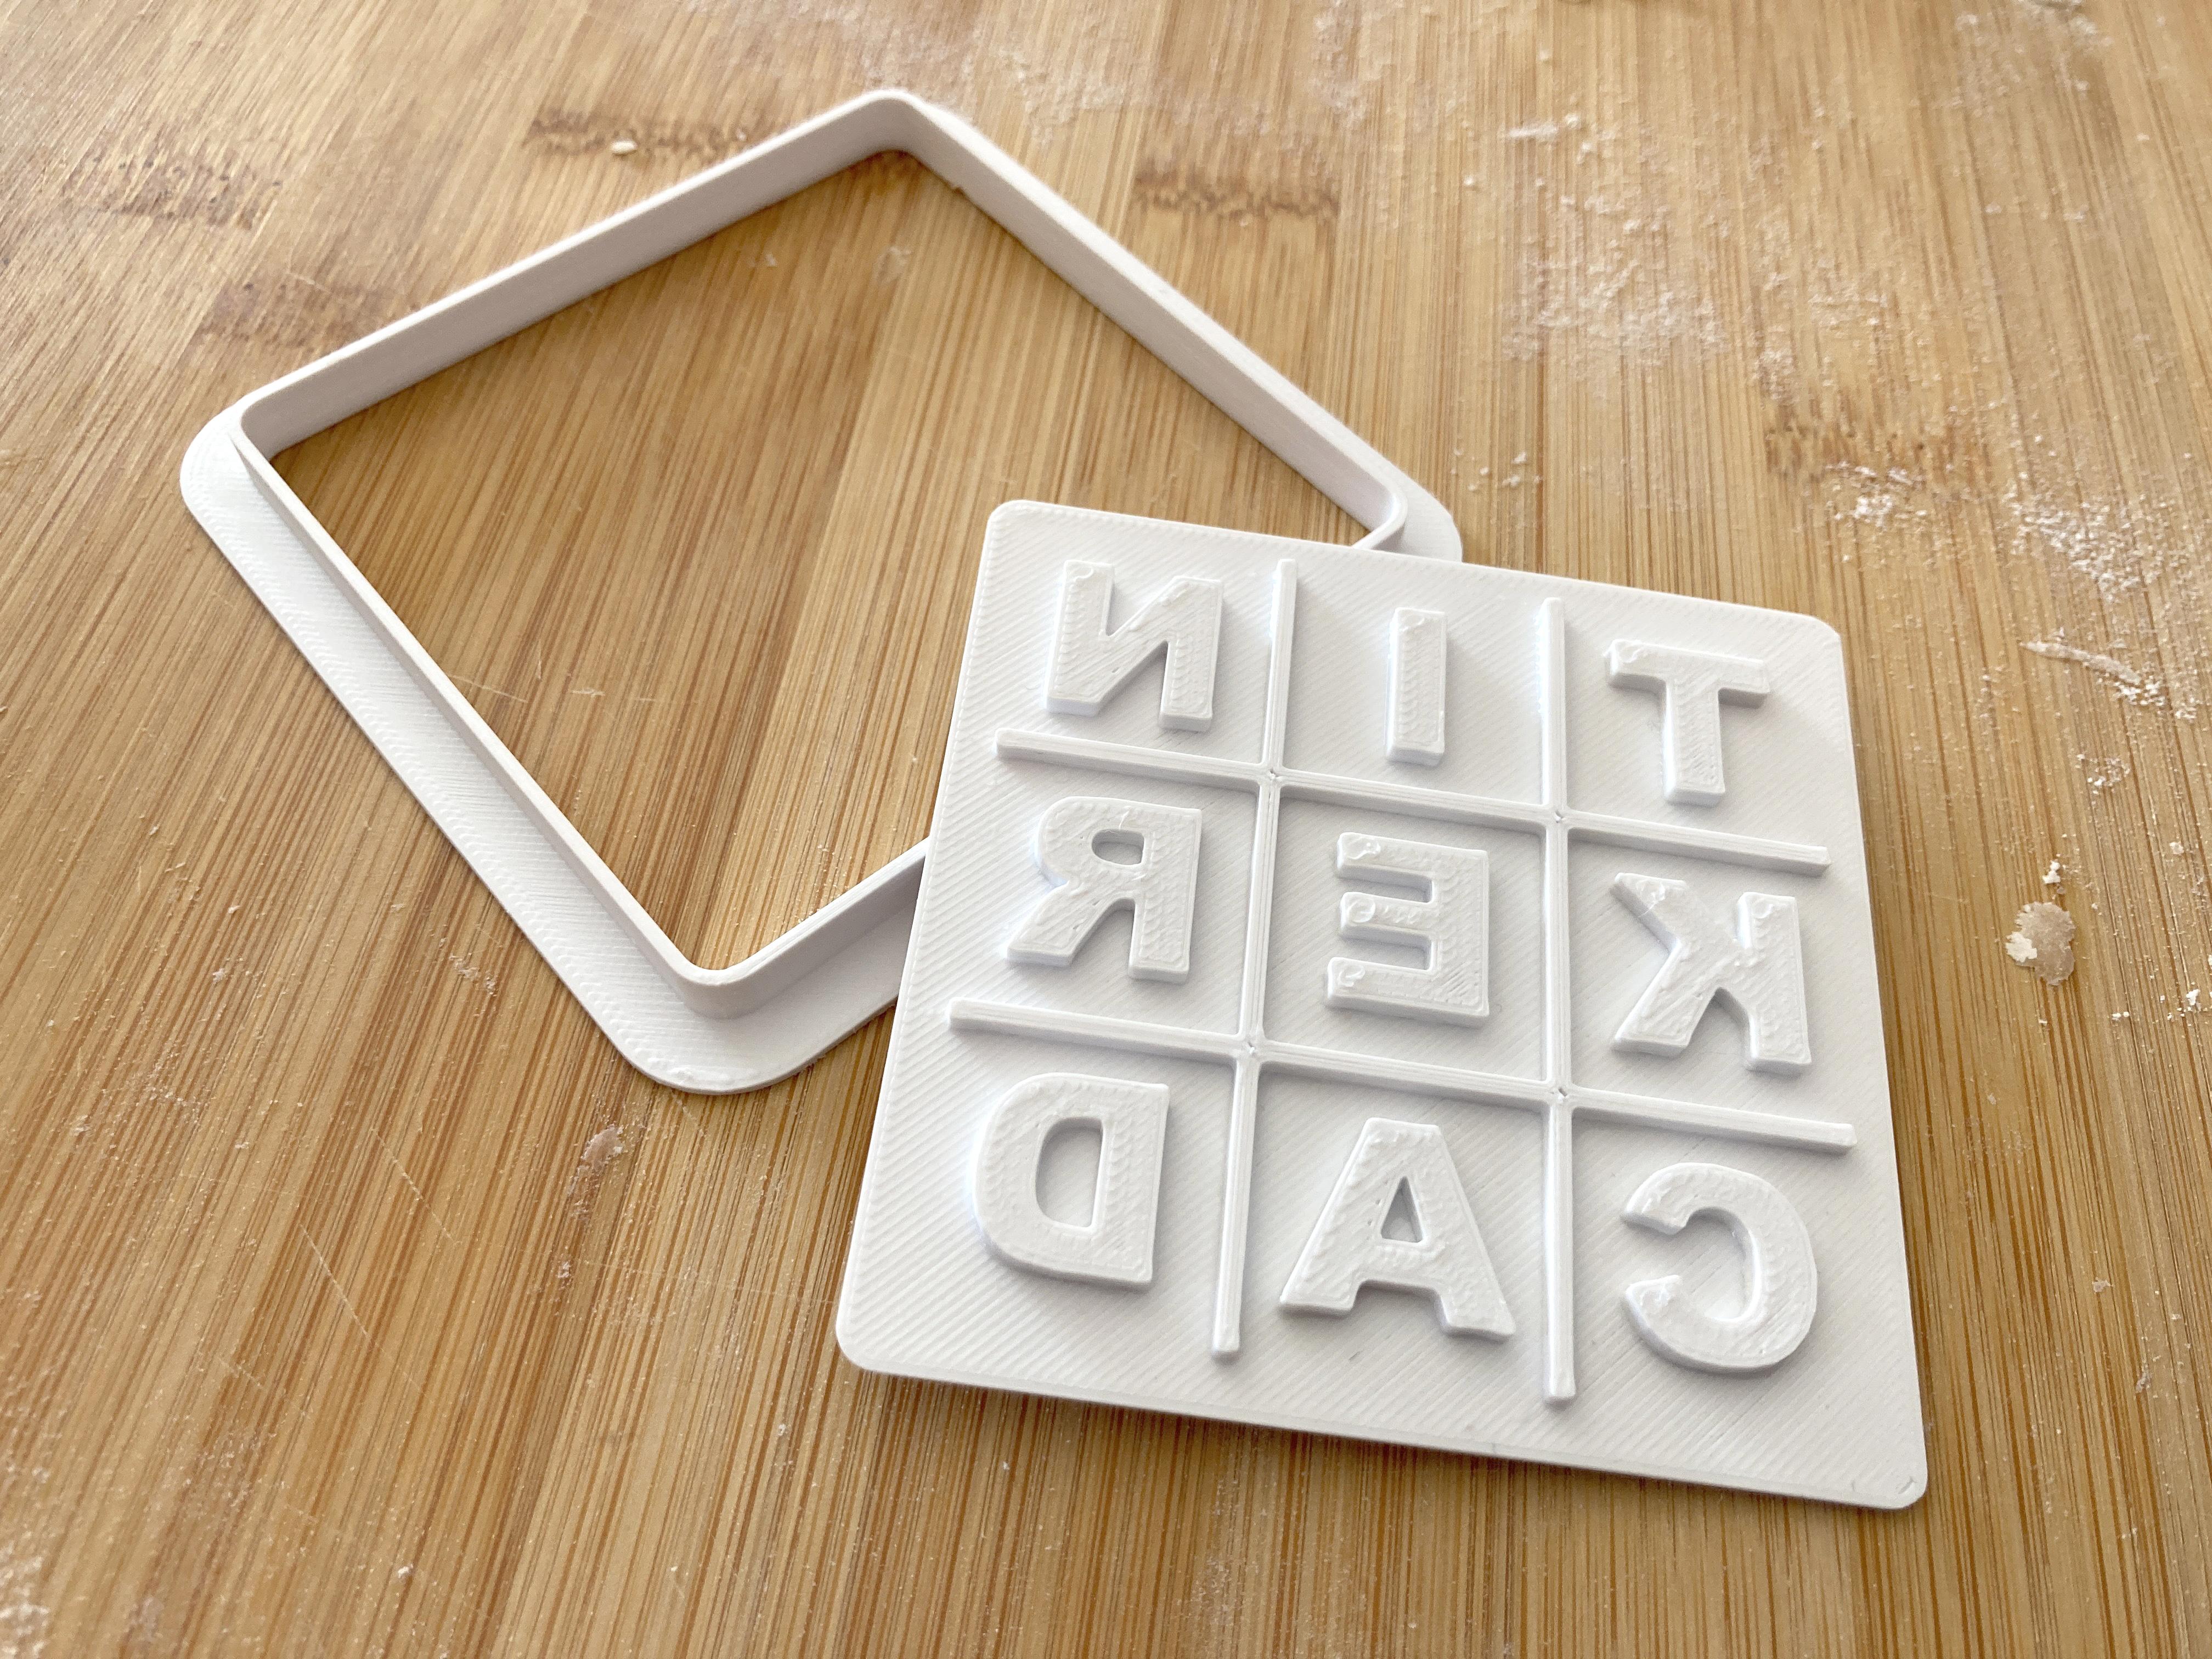
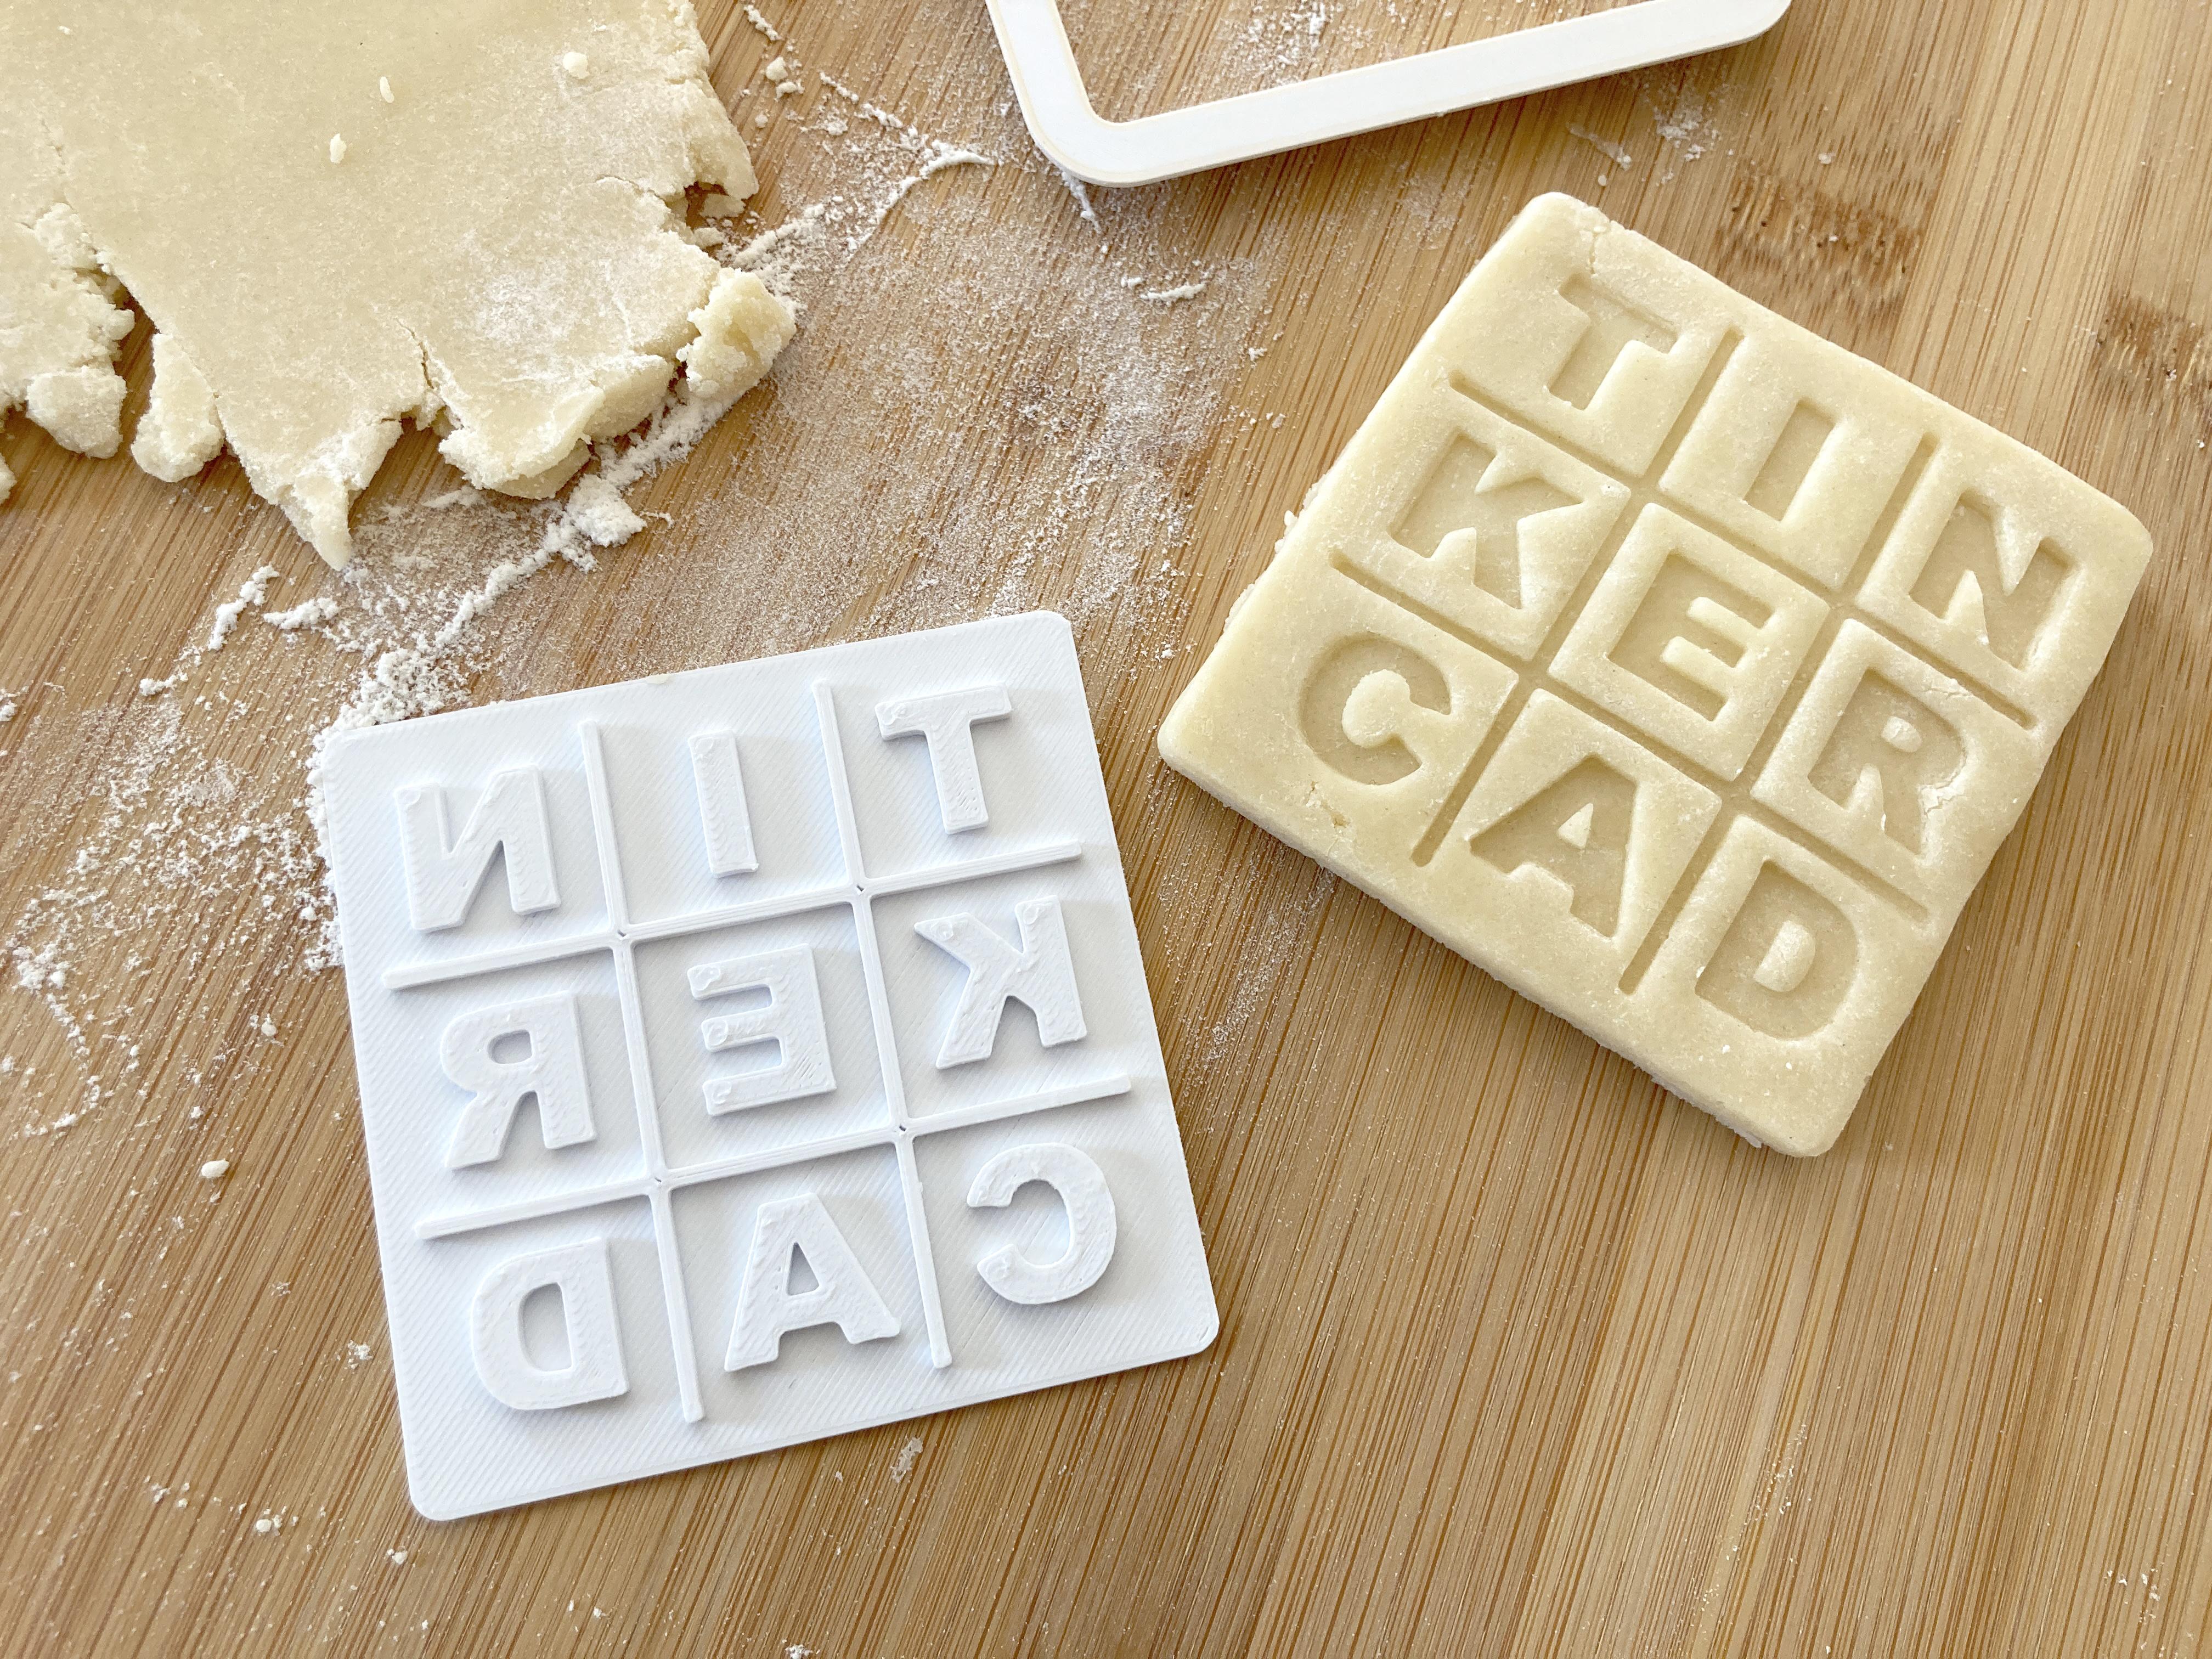
For the 2 part cookie cutters, I cut out a bunch of them and then imprinted them one at a time.
Make sure to push down firmly all around and then peel it off from one side to the other slowly so you don't tear it. Little bits (like inside the A, D, and R) will try to stick. The cooler the dough is, the harder it might be to imprint, but the easier to pull off the imprint without tearing the cookie dough.
Bake and enjoy!
I did about 12 minutes for these sizes at 350 degrees F for these.
Cookies!

Have fun decorating and eating cookies.
Remember, that while these cookie cutters are food safe, you have to be care about them not getting clean and growing mold.