Make a 3D Printable Pumpkin With Codeblocks!
by ArKay894 in Workshop > 3D Printing
4619 Views, 28 Favorites, 0 Comments
Make a 3D Printable Pumpkin With Codeblocks!
.gif)
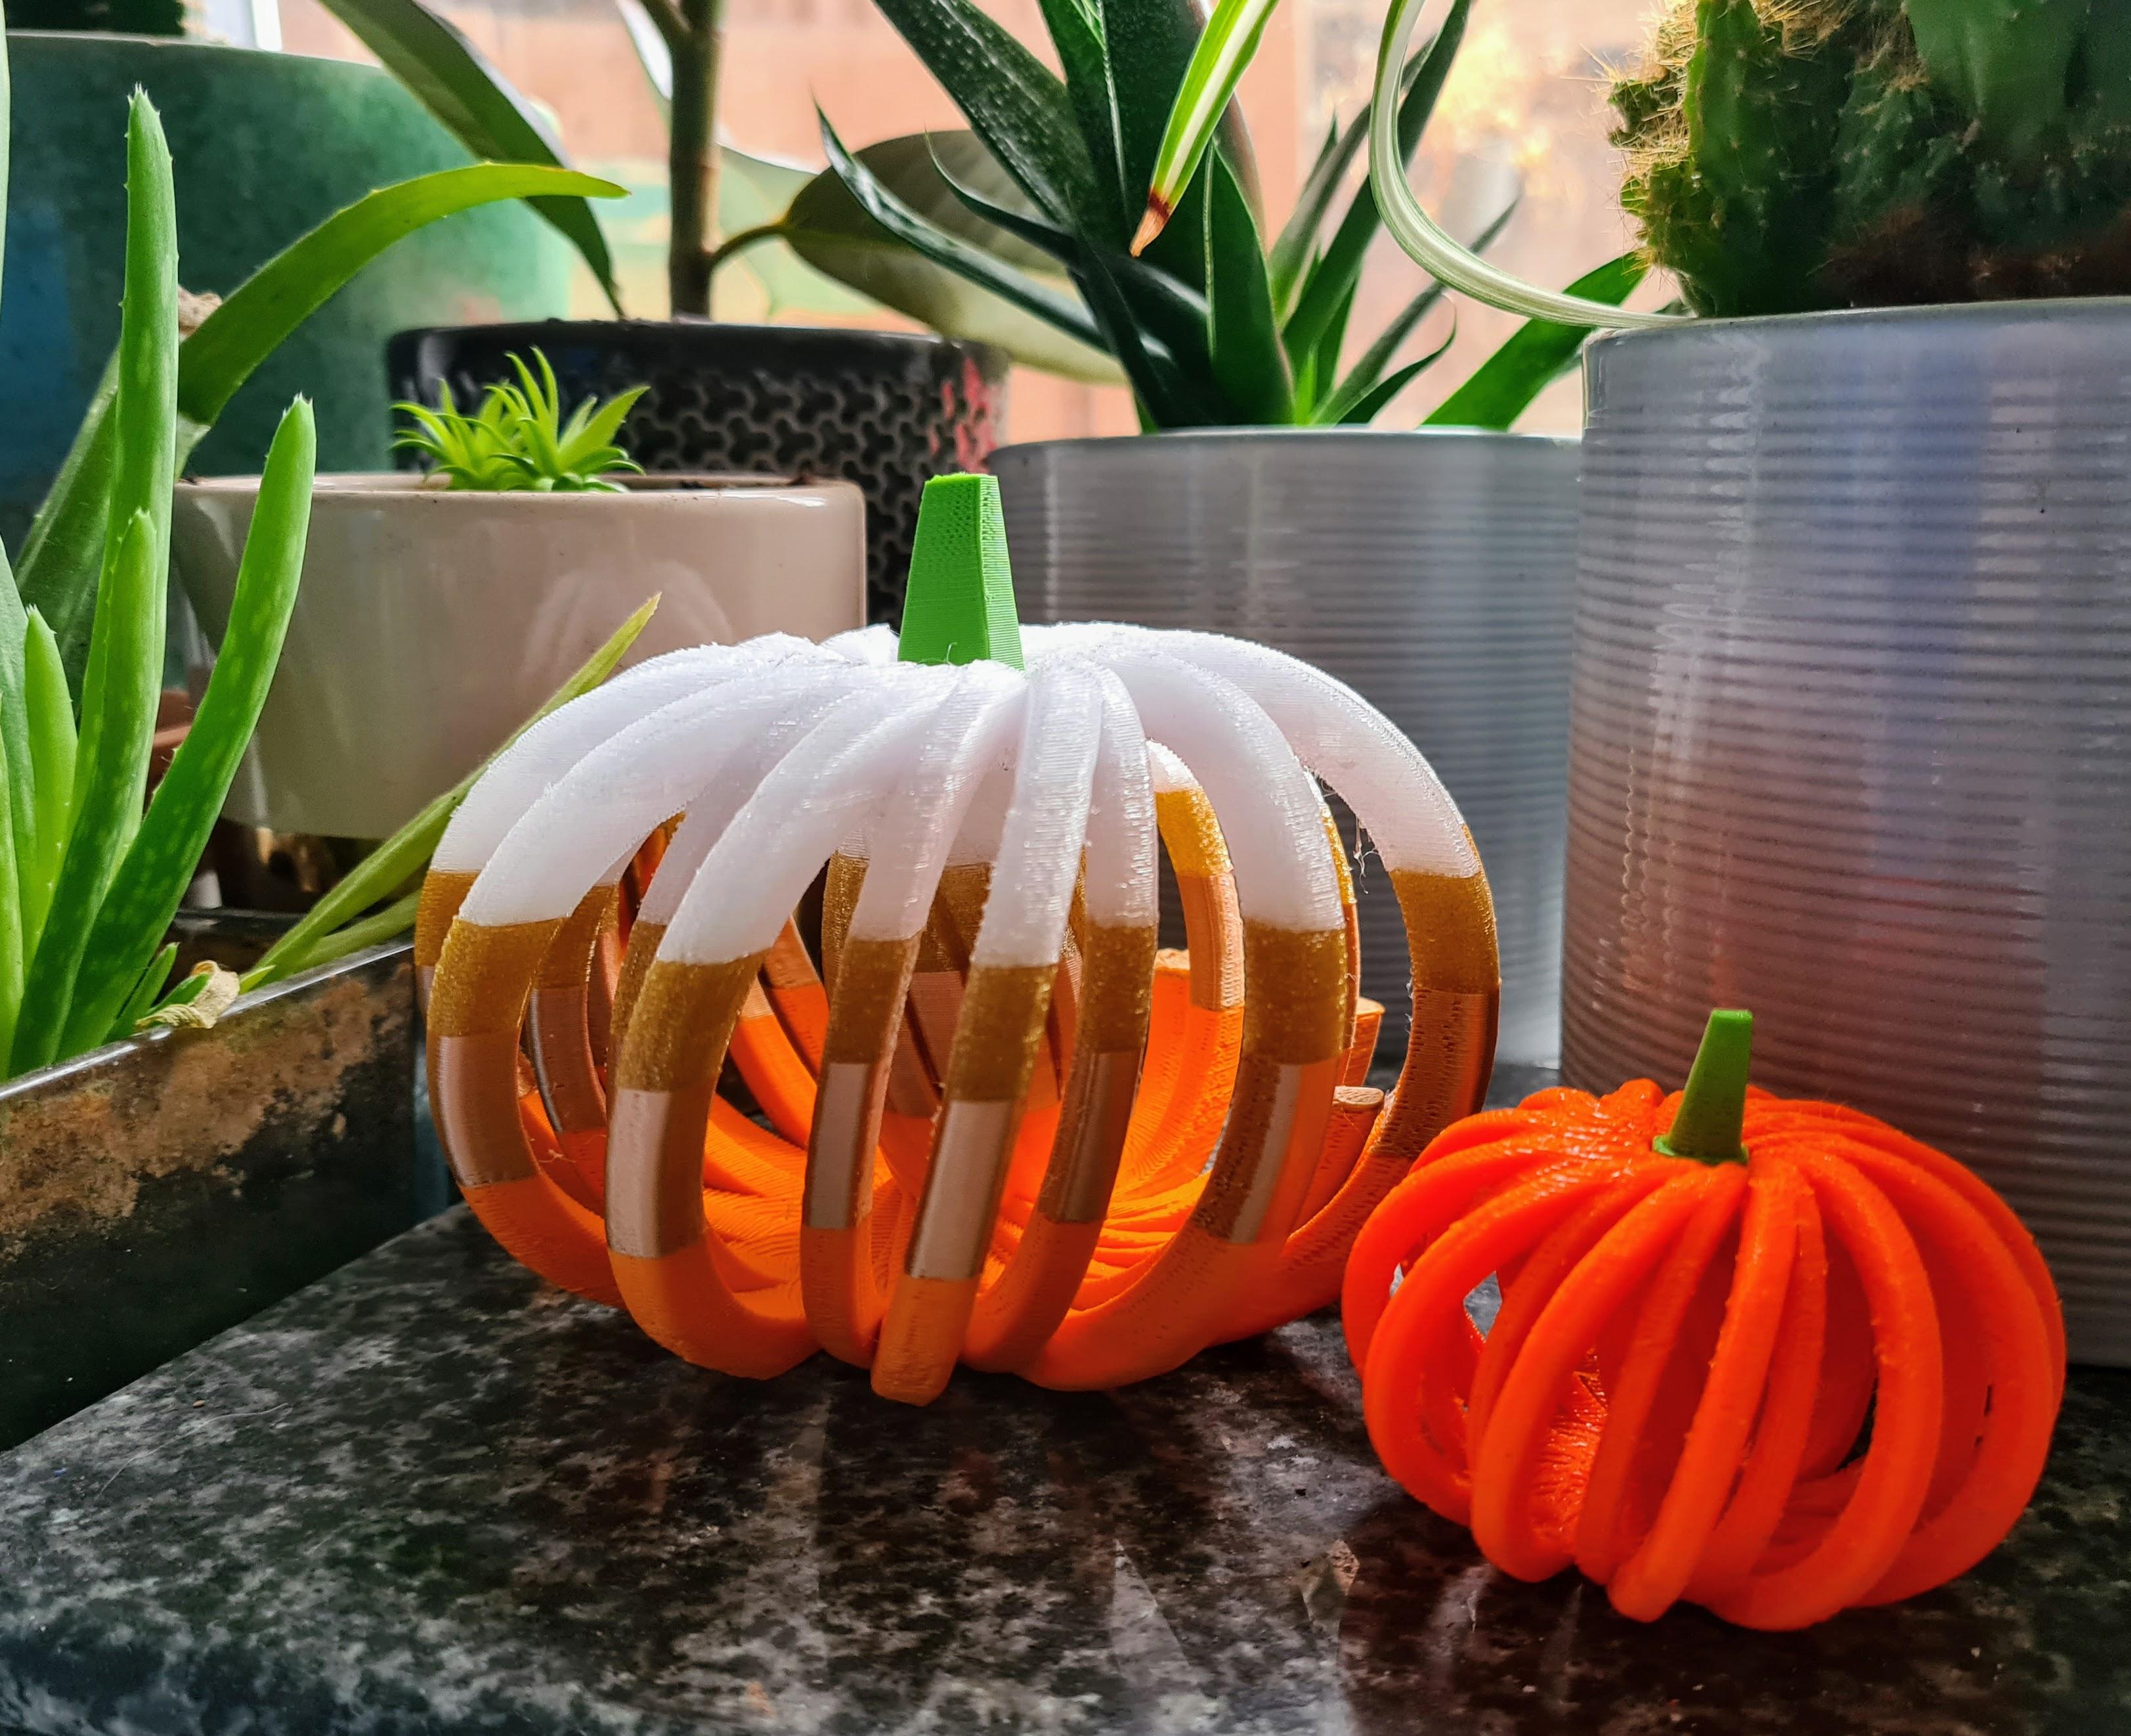
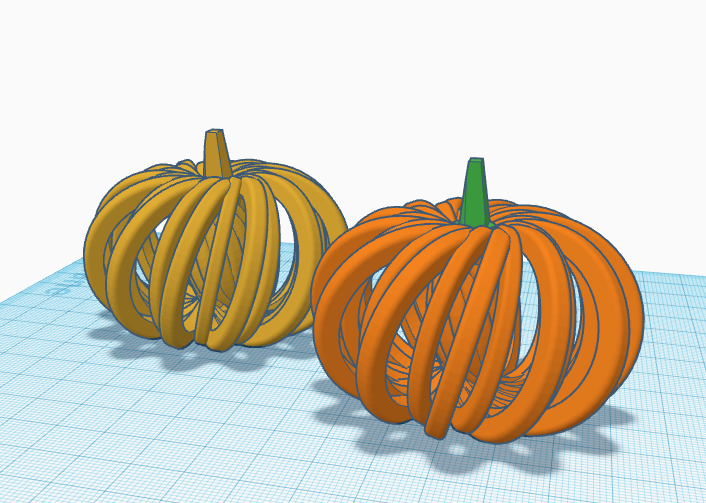
I absolutely love Autumn and Halloween is just the cherry on the cake!
I always go all out with the decorations but in recent years I've been hyper aware of just how much of this stuff is single use and non-recyclable or maybe lasts a couple of uses before falling to bits!
I hate that idea so I decided to make myself some decorations that'll last and I couldn't not make myself a pumpkin of course!
It might seem counterproductive to print in plastic when trying to be more eco friendly but 3D printing actually has a much lower environmental impact than traditional manufacturing. I also try to stick to locally made and recycled/recyclable filaments so when you compare that to something that was manufactured in one country with materials gathered from another, shipped all over the place, stored, packaged and then shipped again etc. etc. it really isn't such a bad option by comparison!
I decided to use Codeblocks for this project but don't worry if you've never used it before or even seen code before - I'll walk through everything 😊
I'm a software developer by trade so thought it'd be neat to combine my interests by using Tinkercad Codeblocks as part of my process - the perfect, mathematically generated patterns are super satisfying and give the decorations a bit of a stylised and mature look - helps it look less like something you could buy in a pound shop too which is always a danger with 3D printed ornaments!!
For those who want to just get on with printing - my stls are here on thangs for free and for those who want them, my Codeblocks project is here and the Tinkercad project is here 😊
Supplies
- Tinkercad
- Filament(s)
- 3D Printer
- (Optional) Glue
What Is Codeblocks?
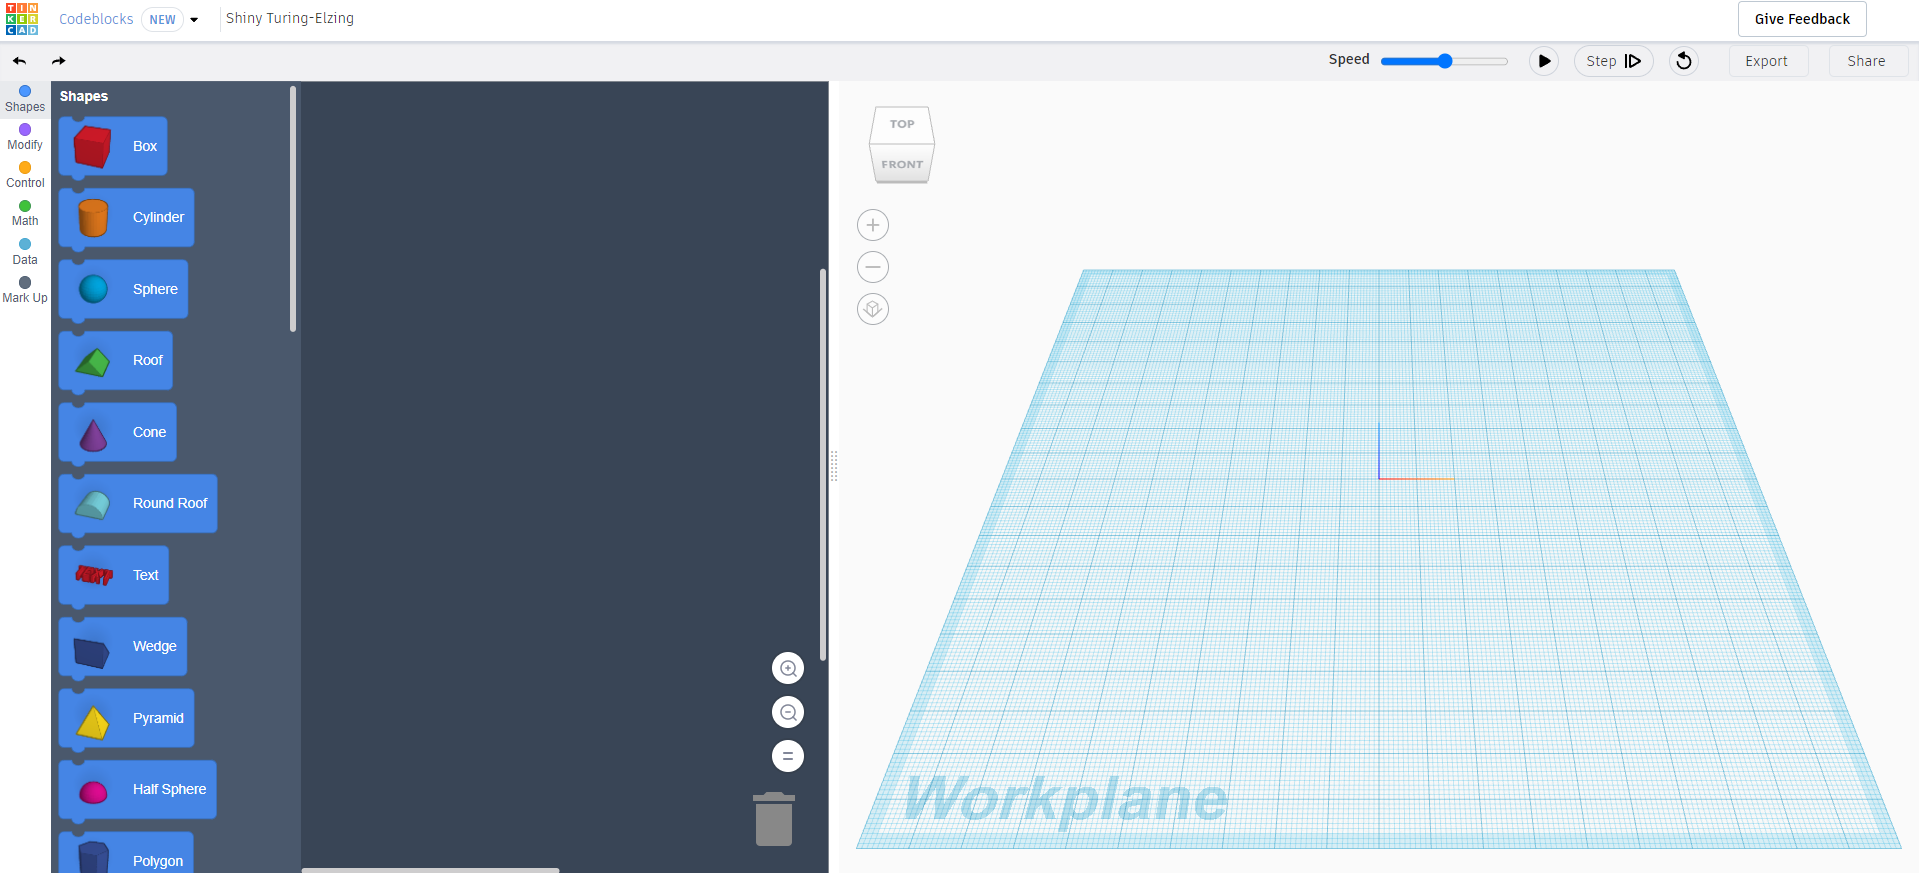
Just in case you’ve never used codeblocks before, I wanted to give a brief explanation as to what it is!
Codeblocks is essentially a visual coding language - kind of like Scratch if you've ever come across that before!
It allows you to use traditional coding concepts such as variables and loops to make the creative process much quicker and more accurate.
Another advantage is that, like code, it can be easily modified and reused too!
I can simply change the value of one of my variables and instantly create a new shape, rather than having to build something new from scratch.
With it being an inbuilt part of Tinkercad, once we’ve made our shape, we can simply export it and further build on it using traditional Tinkercad tools too!
If you'd like to have a bit of a nosy around Codeblocks before we get into this tutorial, check out Tinkercad's quick-start guide here
Creating the Frame

.gif)
What I’ll do here is I’ll first provide the link to the “code” for those who want to jump straight in or those who want to just have a play around with my design before jumping in! - I’ve added some comments to that to explain what each step is doing too
For those who want to go through it step-by-step, we’ll be splitting this into a few steps so I can fits lots of screenshots in 😊
We’ll start with the “frame” shape that will be used to create the pumpkin.
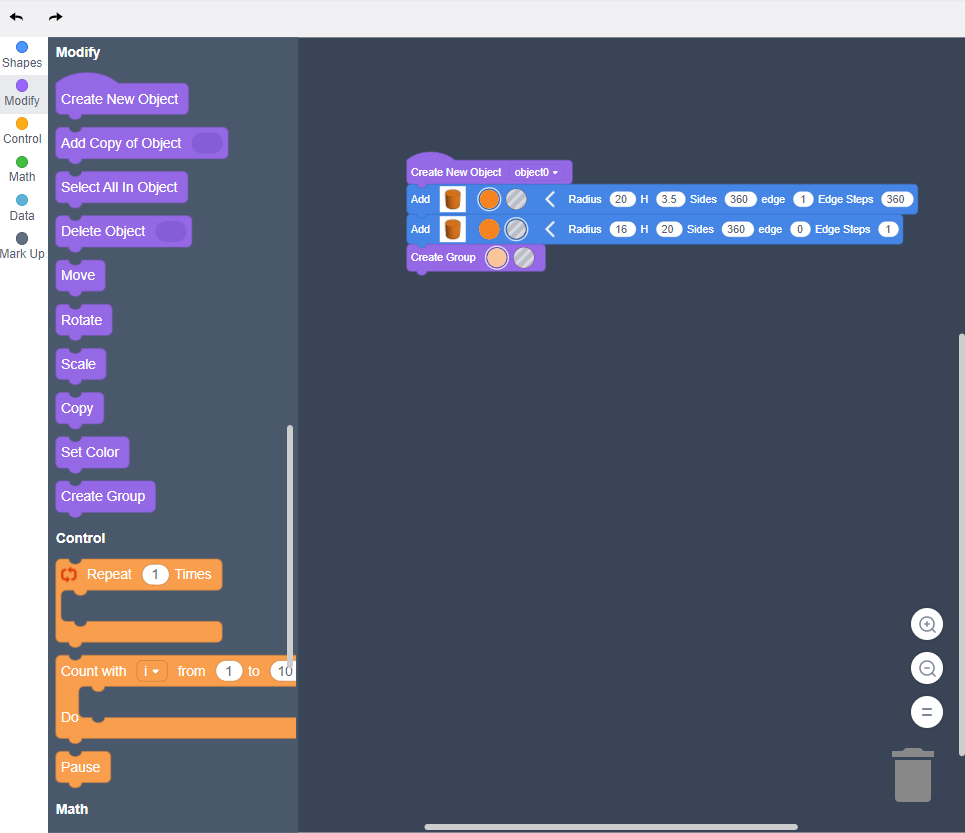
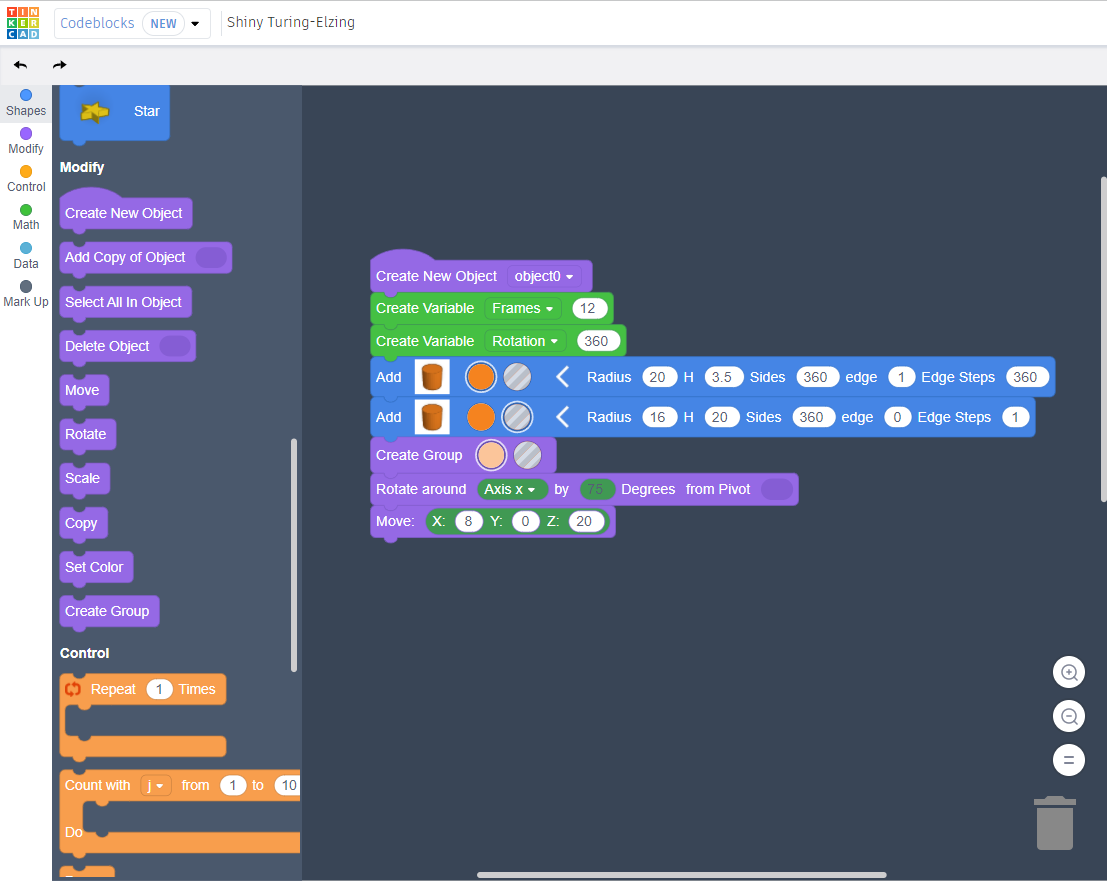
- First thing I always like to do is grab a Create New Object block from the Modify (purple) section of the left hand menu - this allows you to use the object we’ll create in other bits of code etc. but also is just a neat and tidy way of doing things!
- Next, in the Shapes section (blue), click and drag a cylinder until it’s just touching the Create New Object Block - when you let go there should be a little popping noise and it should attach itself to the previous block.
- To change the size of this block and to make it a smooth circle, click the arrow on the right of the block then we’ll set the radius to 20mm, the height to 3.5mm and the sides to 360 - to round the edges, we’ll set edge to 1 and edge steps again to 360.
- Next, we’ll add another cylinder below that one but this one we’ll make into a hole by clicking the grey button on the block.
- This will be used to cut out the centre of our first cylinder, so it needs to be smaller in width but at least as tall as it - I’ve set radius to 16 and height to 20. I left edge as 0 as we don’t want this edge to be rounded.
- Now, let’s group those two shapes using the Create Group block form the Modify section (purple)
- This will cut the centre out of the original cylinder leaving a ring shape
If you ever want to check and see what your current code is producing, just click the play button in the top right - at this point your code should look like the first pic and you should find it looks something like the first gif above when you click play!
Before we move on to the next step, we're going to position our ring shape!
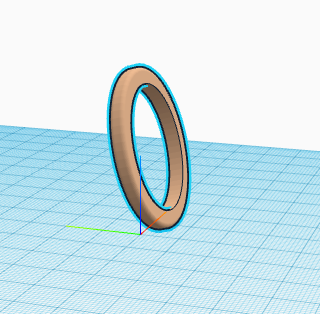
- Using a Rotate block from the Modify section (purple), set it to rotate around the X axis by 75 degrees - you can leave the pivot box blank. This stands the ring up at an angle - this will make sense when you see how the loop works in the next steps 😊
- Finally, add a Move block, again from the Modify section (purple), and set it to X:8 Y:0 Z:20 - this offsets your part from the origin point (the centre of the workplane) and raises it up above the workplane as well.
Your code should now look like the second pic and you should see something like the 2nd gif when you click play! Your final shape should match the last pic 😊
A Variable and a Loop!
Until now you may be wondering why we’re using Codeblocks at all as all this would have probably been quicker and easier to do in Tinkercad - and you’re probably right!
This is the step where we start getting a little more ‘codey’ with things!
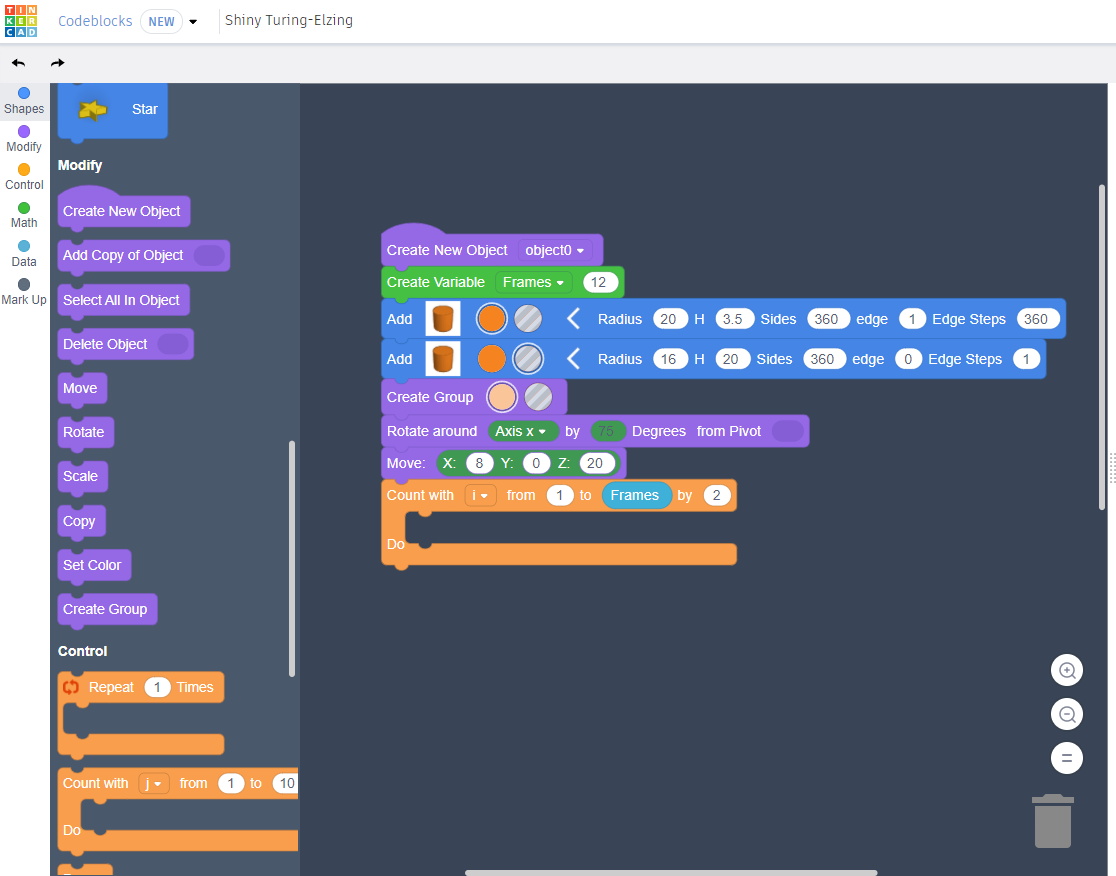
- First thing we’re going to do is grab a Count With block from the Control section (orange).
- This block lets us create a loop - whatever code is within the loop will be repeated over and over until certain conditions are met.
- To set our conditions we’re going to use a variable
You could just type a number in but by using a variable instead it means that if you change the value of the variable later, it will be changed everywhere that that variable is used throughout the code and save you some trouble!- By default the Count With block uses ‘i’ as a value - you can rename it if you like but it's fine as is, it just means that the first time we run through the loop i = 1, the second time i = 2 and so on. From, to and by will tell Codeblocks how many times to run the loop.
- Drag in a Create Variable block from the Math section but this time you’ll want to place it just under the Create New Object block at the top (if you just click and drag it to just below the purple block, it should make space for you to place it there)
- This variable is named ‘item’ by default - it’s good practice to name your variables so you know what they do when you come back to it later - I renamed mine ‘frames’ as this variable will decide the number of frames our shape is made up of - I set this to 12.
- Now you’ve created the frames variable, if you look in the Data section (blue) you should see your variable now shows there.
- Click and drag the Frames block and place it over the ‘to’ value in the Count With block - it should replace the number that was in there by default.
Your code should now look like the pic above though it won't yet change what you see when you hit run!
I'm going to split this section into 2 so it's continued in the next step but just to explain what the loop is doing so far:
- i will start from 1 as the from value is 1
- The loop will run over and over until i = frames as the to value is set to Frames
- Frames is equal to 12 as we set this at the top of our code
- i will increase by 1 each time the loop is run as the by value is 1
- Therefore the loop will run 12 times - if by 2 was used instead, i would increase by 2 each time and the loop would only run 6 times.
Another Variable for Our Loop!
.gif)
Now we have our loop ready, we need to put some code into it!
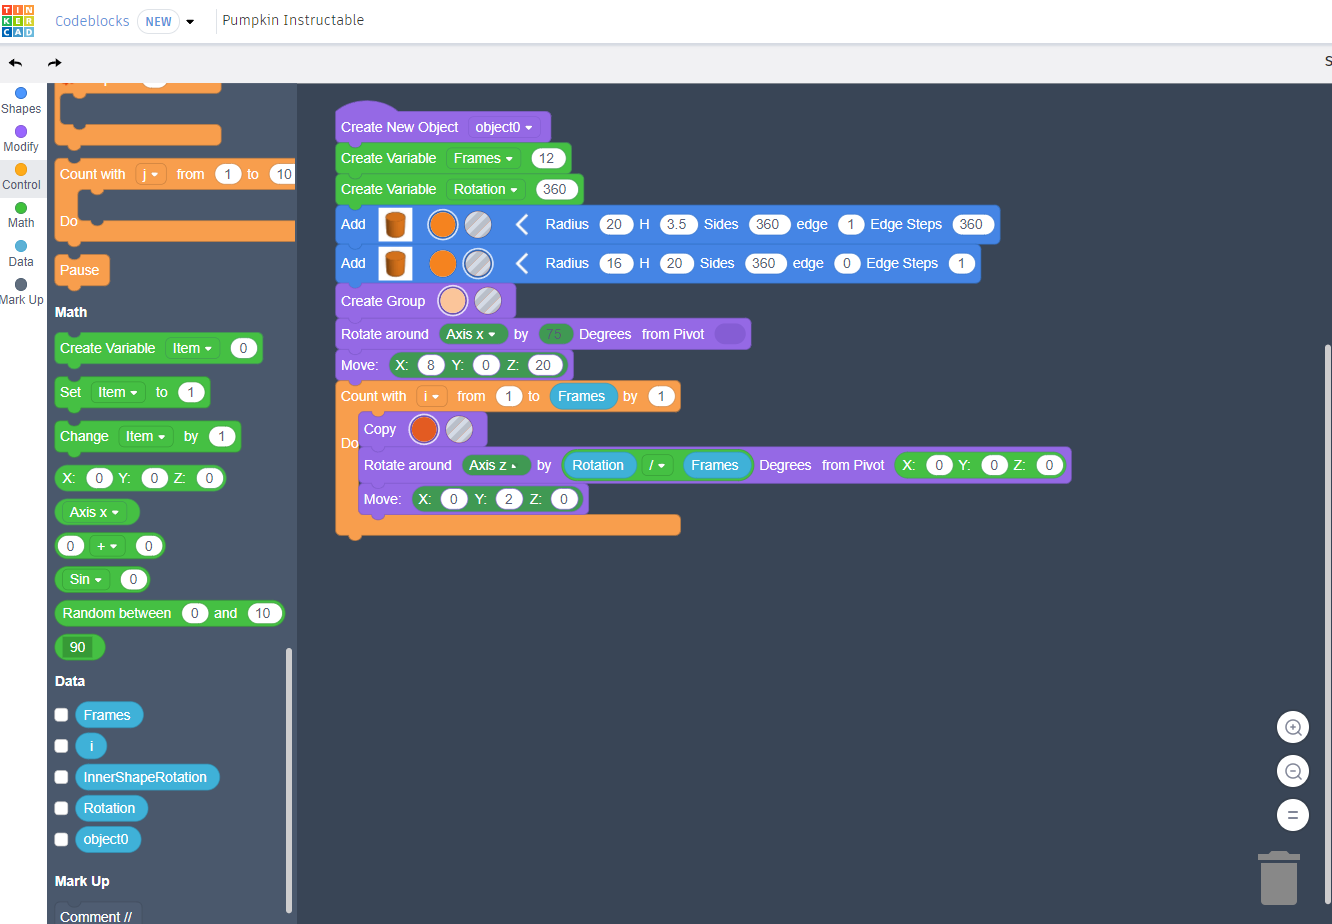
- First thing you’ll need is a Copy block from the Modify section (purple) - this will make a copy of the shape we last created (the ring shape) but if you run your code at this point, you’ll see that it’ll just duplicate the shape 12 times in the same spot so we need to move the copy with each loop.
We’re aiming for a circular shape here so each frame needs to be equally rotated to form a circular shape at the end - we want to use 12 frames so what we really want is for each copy to be rotated by 30 degrees each time because 360 / 12 = 30
Our Frames variable can take the place of 12 in this equation already so we just need a variable to take the place of 360 😊
- Let’s grab another Create Variable block from the Math section (green) and place it underneath our Frames variable at the top - we’ll call this one Rotation and set it to 360.
- To use this variable in our loop, we next need a Rotate block from the Modify section (purple) - this will go within the loop bracket.
- We’ll be rotating around the Z axis.
- In the box for by you’ll need to replace the value with another block - you can find it in the Math section (green) and it’ll say ‘0 + 0’ on it by default.
- From the Data section (blue) grab a Rotation variable block and replace the first ‘0’ with this, change the operator from ‘+’ to ‘/’ and then replace the second ‘0’ with a Frames variable block. - you've now coded our equation from earlier 360/12 or Rotation/Frames!
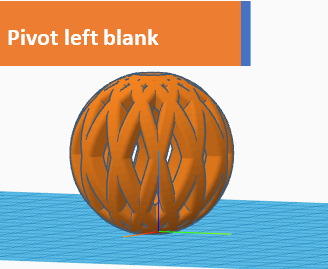
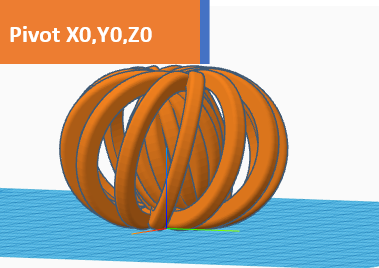
- Finally, you’ll need to change the pivot too - by default, the Rotate block will rotate the block in place which would make a spherical shape - we want more of a squished sphere shape which is why we moved our frame 8mm on the x axis earlier. We want to rotate around the origin point instead - check out the pics above to see the difference 😊
- In the empty space beside Pivot in the Rotate Around block, you’ll need another block from the Math section (green) it should say X:0 Y:0 Z:0 - just pop it straight in, those values are already what we need!
- Now, I still think this is making a shape that’s a little too round for a pumpkin so let’s use another Move block from the Modify section (purple) and set X:0 Y:2 Z:0 - this will move each copy of the frame 2mm in the y direction which should produce a slightly wider, more pumpkin-y shape!
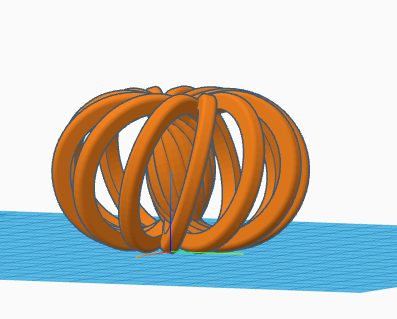
Great! That was definitely the most complex part of the whole make so just double check your work by running your code and making sure you see something like the gif above and the end shape looks like the last pic above too! Your code should look something like the first pic!
Pumpkin-ception?
.gif)
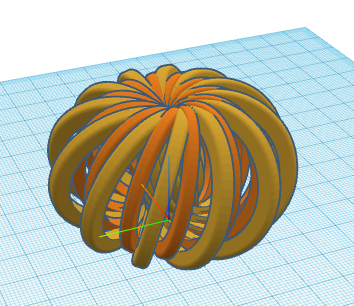
So what we’ve made already is a pretty decent stylised pumpkin but I wanted to give it another level
I thought having another layer of the spiral shape a little smaller inside the original would give it a bit of that in-and-out, bumpy shape that pumpkins have! Plus spirals within spirals is just cool. Fight me.
- To do this, the first thing we’ll do is group all the pieces into one shape - just grab a Create Group block from the Modify section (purple) and pop it underneath your loop
You may have noticed that quite often the blocks have a coloured circle on them - by clicking on this you can choose the colour of the shape that block creates - I’ve been using shades of orange throughout 😊
- Next we need a copy of that shape so just grab a Copy block, again from the Modify section (purple), and place it below the Create Group block you just inserted.
- Now, we want this shape to be a little smaller than the original shape but the same height so we’ll use a Scale block here - this can also be found in the Modify section (purple)
- Set the value of X and Y to .8 - this will make it 80% of its original size. Leave Z at 1 so it maintains the same height though.
- Finally, we need to to offset the frames so they show in the gaps between the bigger shape’s frames!
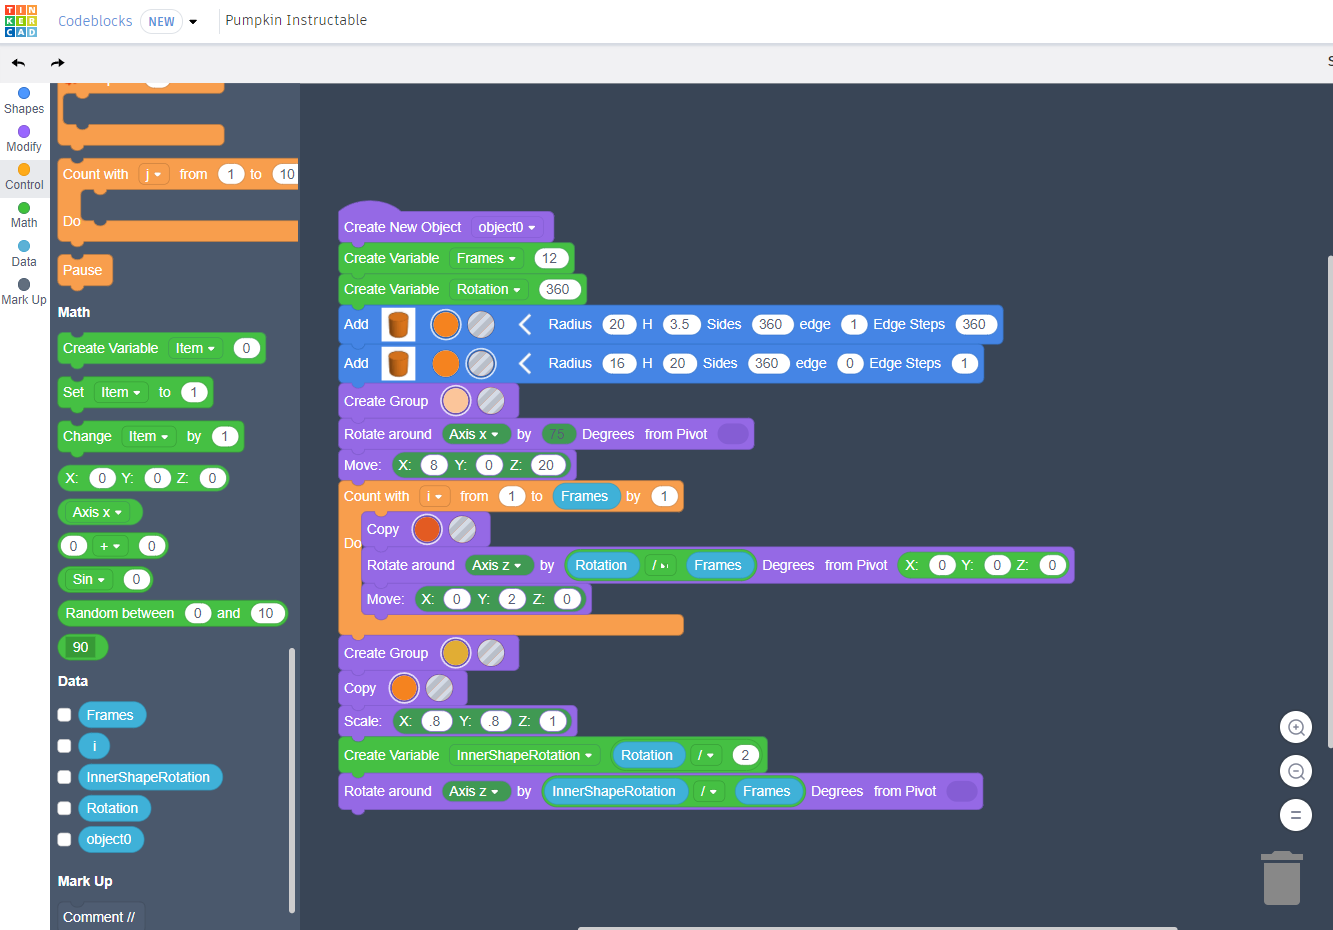
- Seeing as our frames were rotated by 30 degrees when creating the shape, rotating the whole shape by 15 degrees (half of 30) should make it line up just right in the middle of the gaps in the bigger shape - you could just type 15 in the by box but to make use of our variables and ensure it'll line up even if we change the number of frames, let's do this 'properly'
- Start by grabbing another Create Variable block from the Math section - we'll call this InnerShapeRotation
- Using another of those 0+0 blocks, also from the Math section, set InnerShapeRotation to Rotation / 2 (because we want half of Rotation/Frames which is 15)
- Now we need a Rotate block
- Rotate around the Z axis by (you'll need another 0+0 block here) InnerShapeRotation / Frames - you can leave the Pivot box blank this time.
- Seeing as our frames were rotated by 30 degrees when creating the shape, rotating the whole shape by 15 degrees (half of 30) should make it line up just right in the middle of the gaps in the bigger shape - you could just type 15 in the by box but to make use of our variables and ensure it'll line up even if we change the number of frames, let's do this 'properly'
You should find that your code looks like the first pic above and that if you hit play now, you see something like the gif and are left with the shape shown in the last pic!
Perfect! You now have the Codeblocks section of this whole ible done!
Now we just need to do a tiny bit of good old fashioned Tinkercadding to give it a stalk and make it a little easier to print!
Exporting Your Shape and Making It Printable!
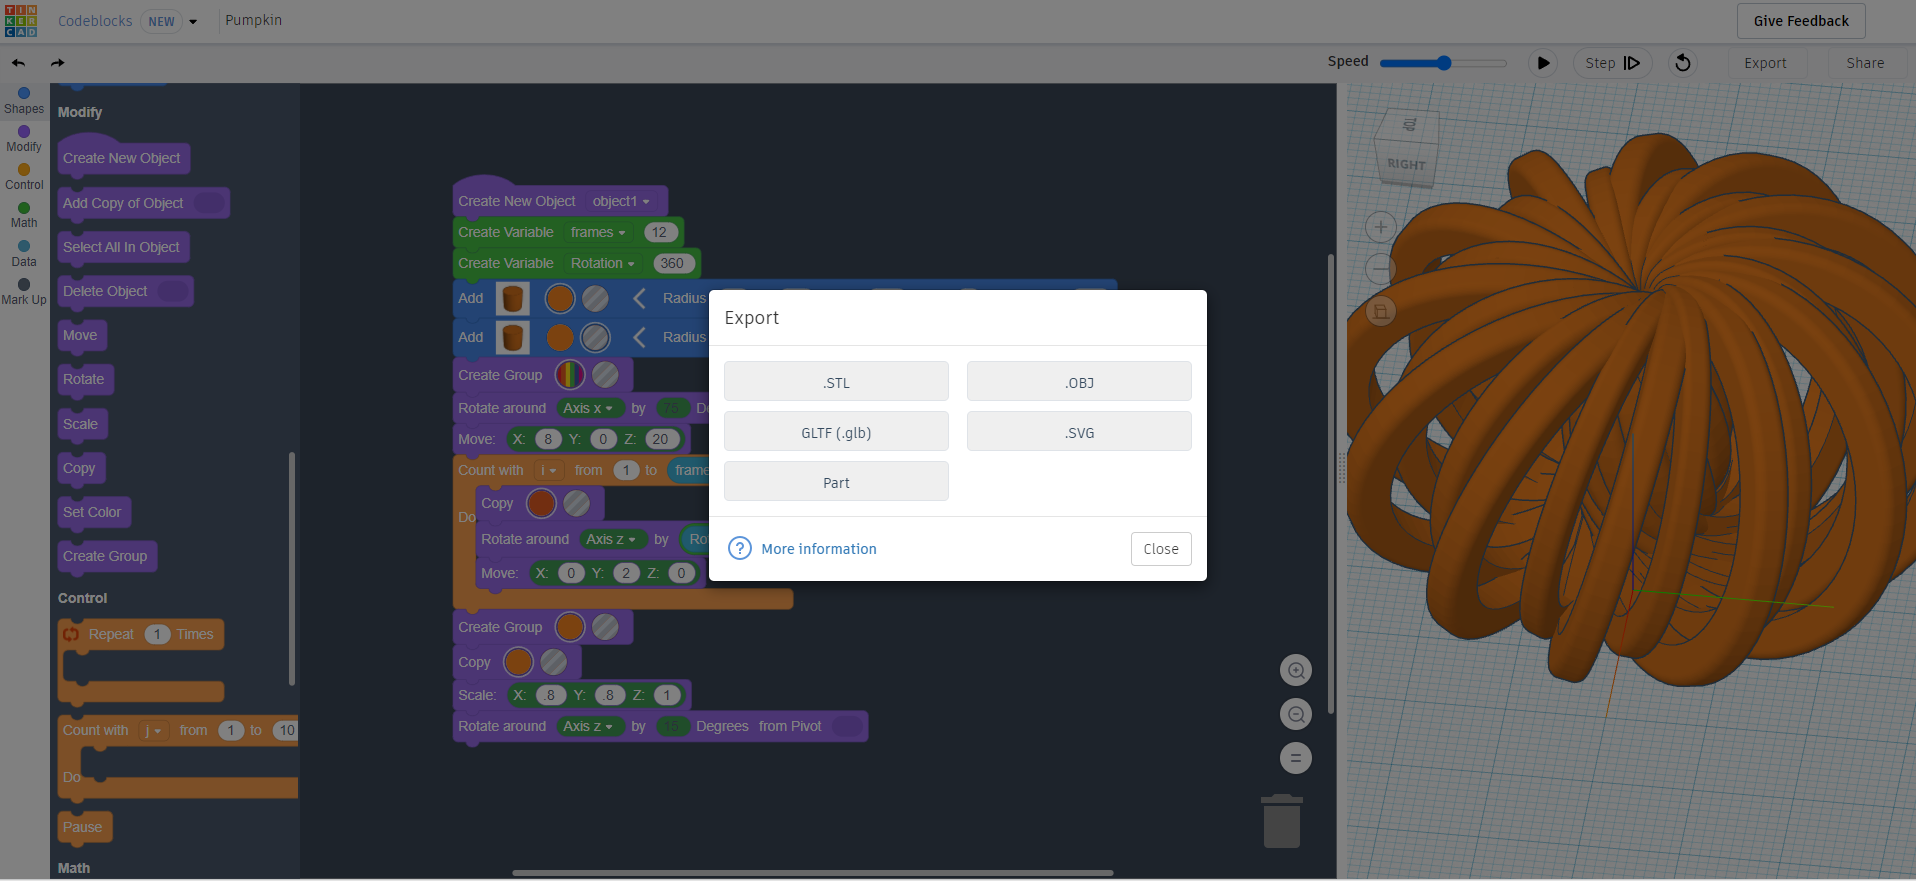
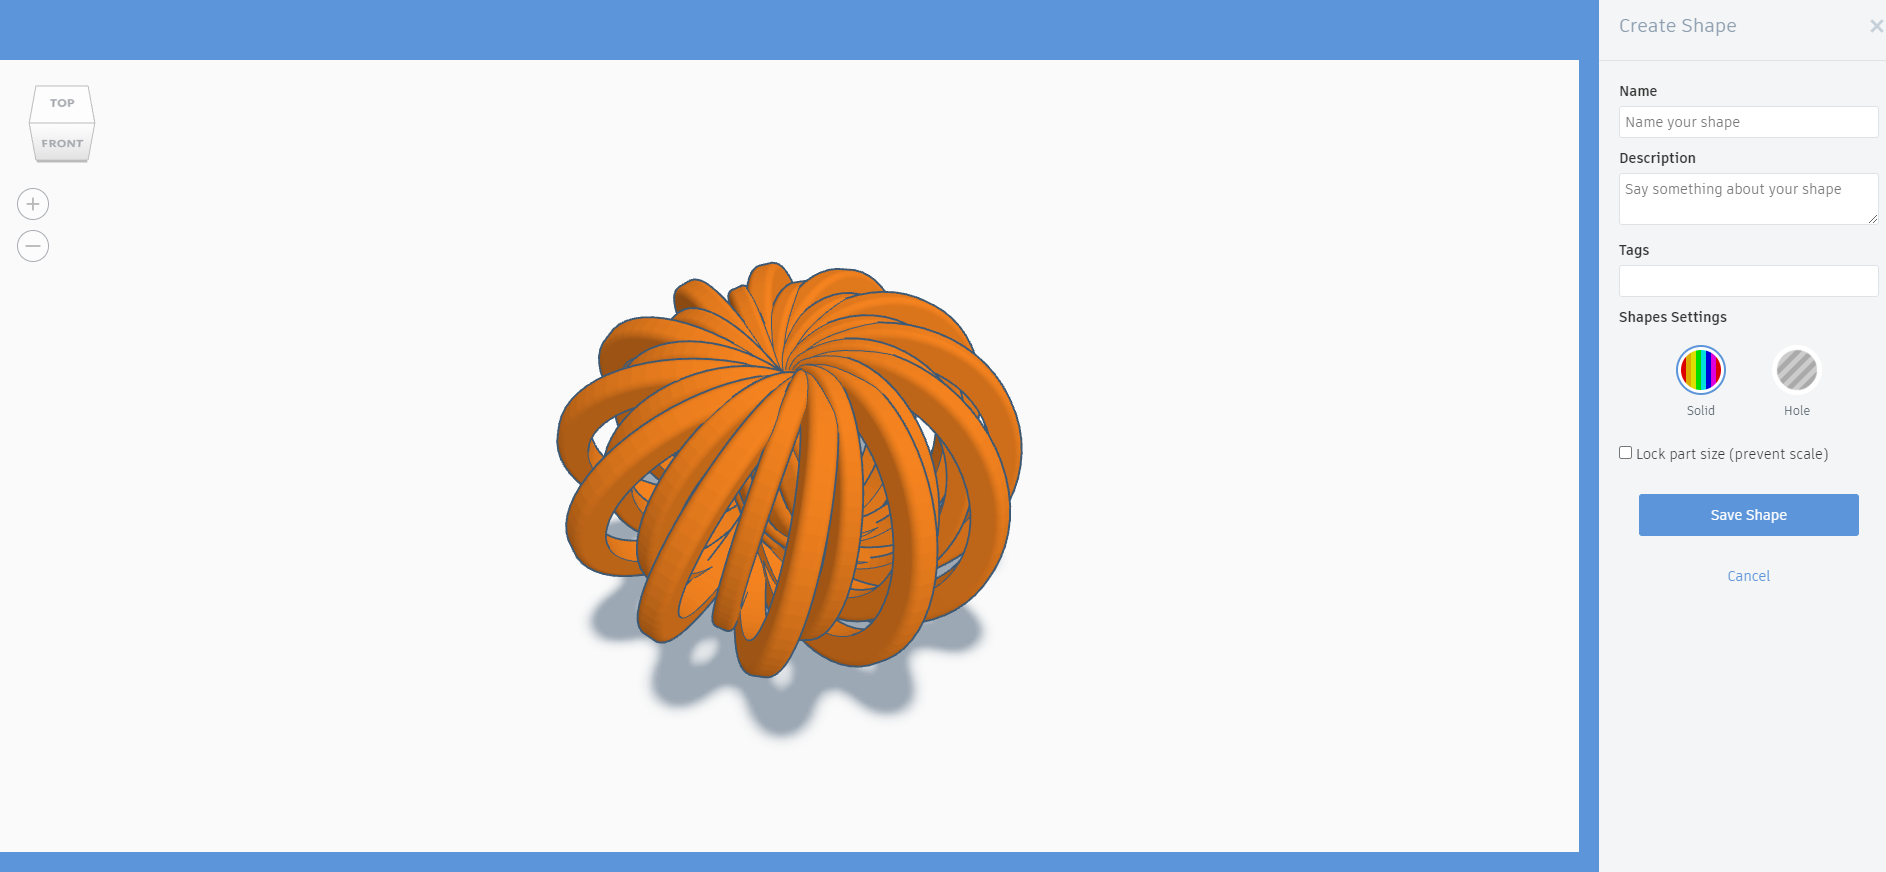
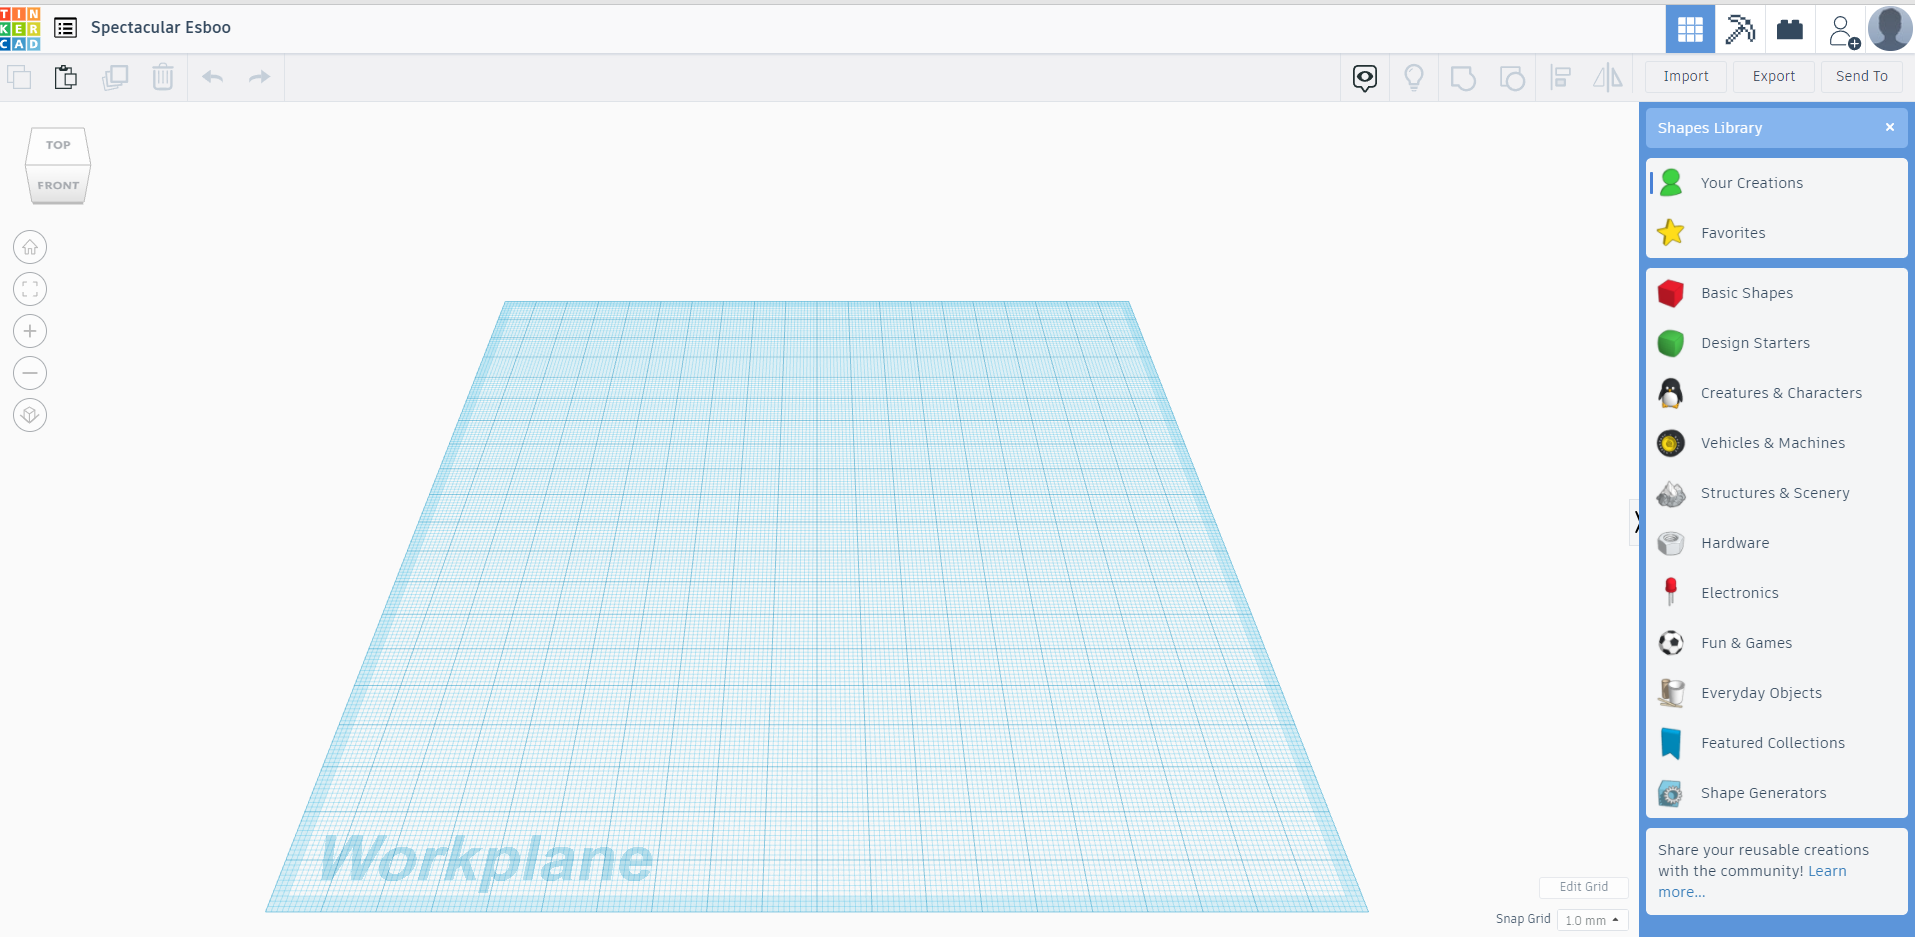
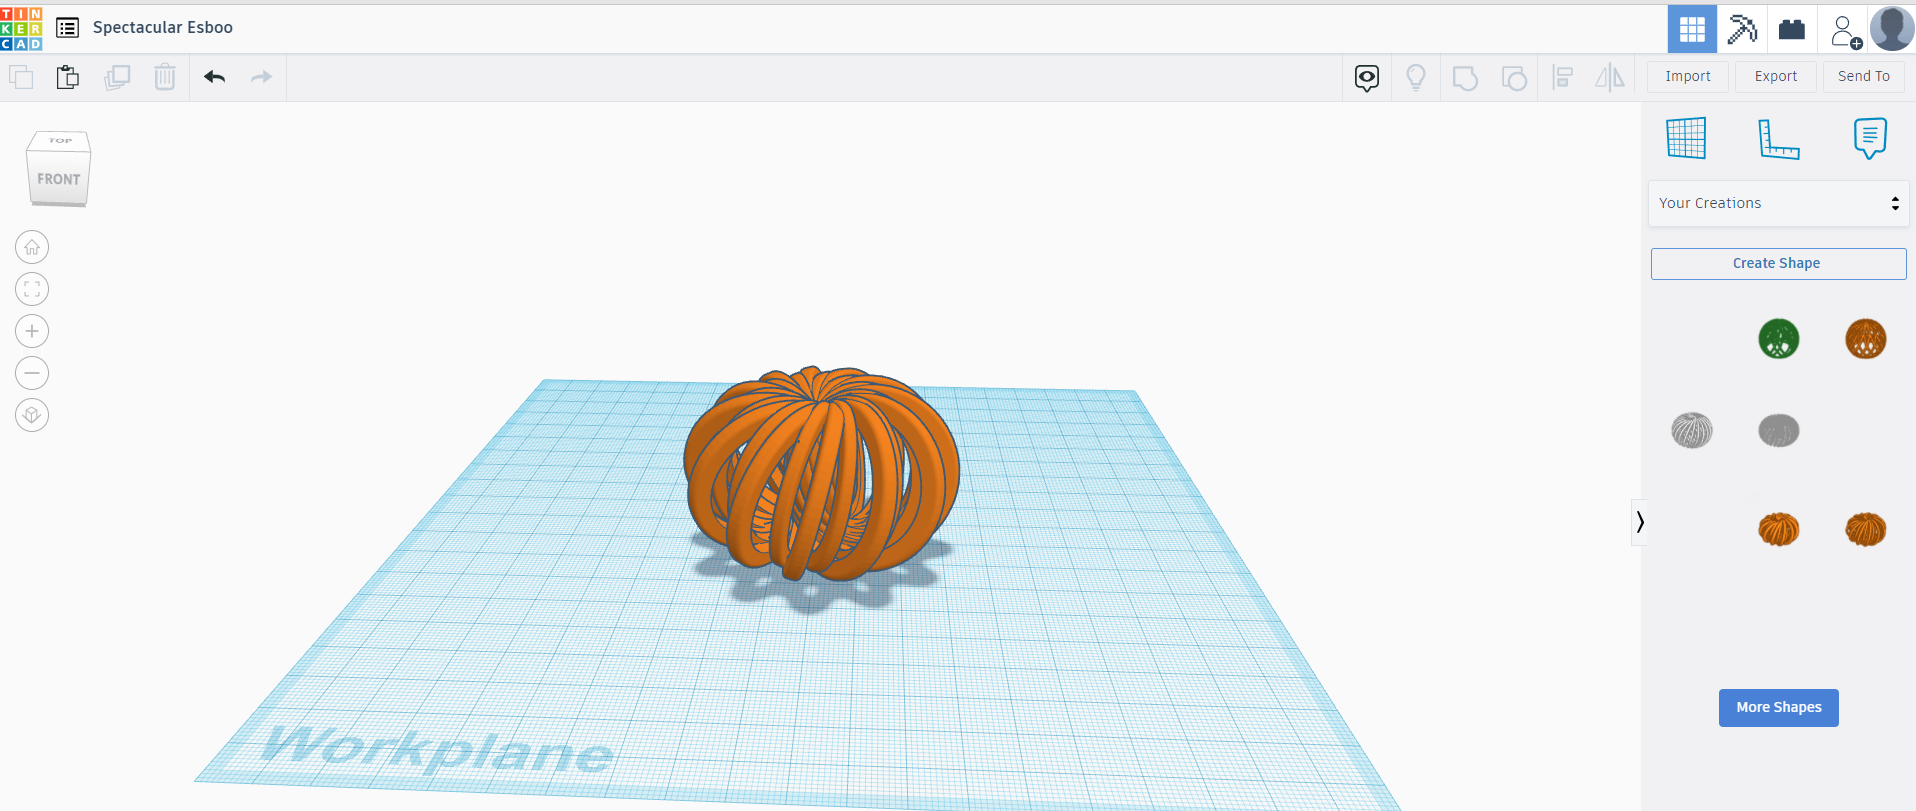
So - how do we get what we just made into Tinkercad?
You actually have a few options - you can just export as an stl or obj file as usual or you can do something a little cooler and export it as a part.
Parts are accessible to you anywhere within Tinkercad so this is a very handy feature - once you’ve exported something as a part, you can use it in any project you like!
- To do this just click the export button in the top right and choose ‘Part’
(There’s also a share button here which will take you to a page where you can make a gif of your Codeblocks shape being created which is pretty neat!)
- You’ll then be taken to a screen where you can name the part and give it a description if you wish - once you’re done, just click Save Shape.
Now you’ve saved your shape you’re ready to start a new project in Tinkercad
- In your new project, in the shapes library on the right, you should have an option for Your Creations - if you click into this, you should see your Codeblocks creation here - you can just click and drag it onto the Workplane like any other shape!!
- I actually think it looks a little better flipped over so just rotated it 180 degrees so it was upside down before anything else!
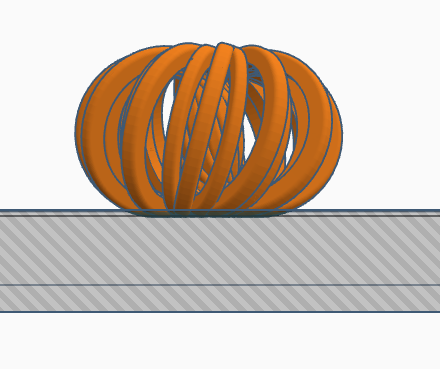
- To make this shape a little easier to print all we need to do is give it a flat base as this will help with bed adhesion.
- To do this we’ll just use a nice big box hole to cut away the bottom 1mm - you can either use a 1mm tall box hole or lower it until it's only 1mm above the workplane before grouping it with your pumpkin shape to do this.
Adding a Stalk
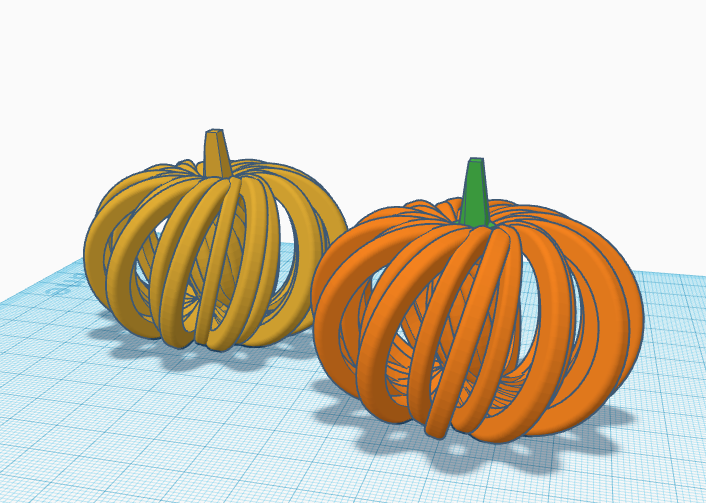
Final touch to make this really scream ‘PUMPKIN’ is to add the stalk
You have a couple of options here - I prefer to print a stalk separately in green and slot it in but I’ll also cover how to make the stalk and pumpkin as one model to print in either one colour or using a filament change for the stalk for those who prefer that or those whose printer tolerances are maybe not so great so slotting printed pieces together might be a struggle.
Either way, we need to start with a stalk shape - I opted for an angular, polygonal shape as I think it works well with the mathematically generated spirals and I was making a series of these designs for Halloween, so it kept them consistent too but, of course, feel free to do something different!
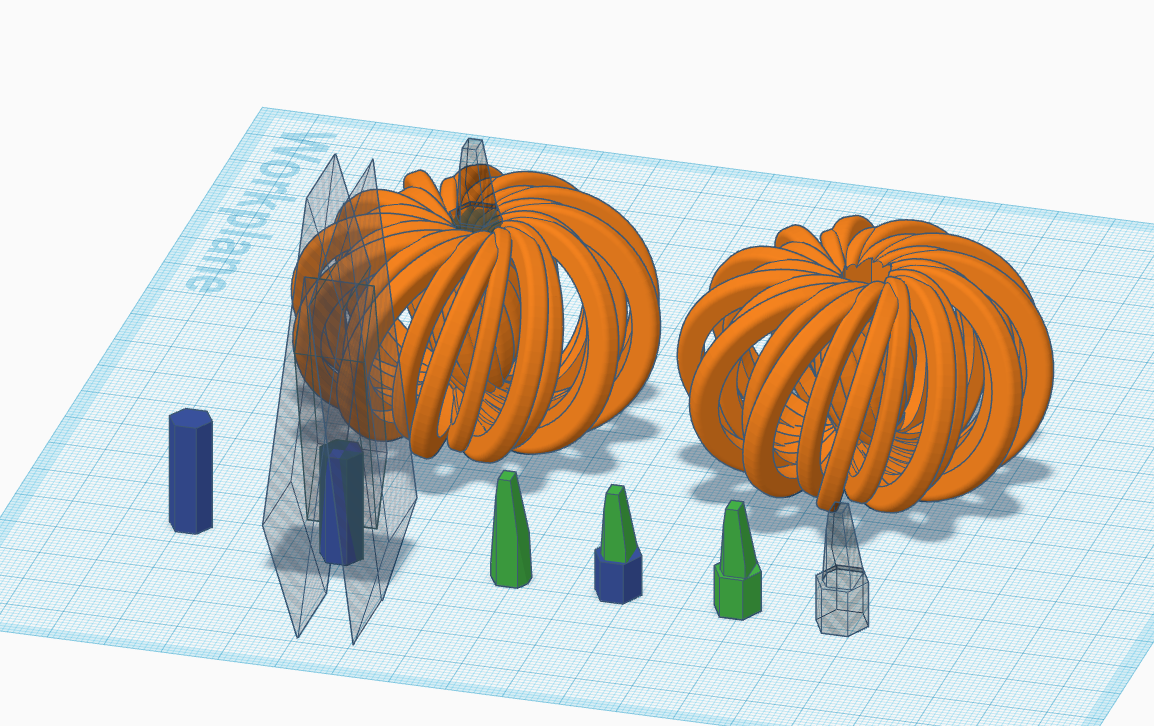
- Fairly straightforward, first step is to grab a 6 sided polygon from the basic shapes library
- Resize it to be 7x6x20mm and then use a few box holes to cut away sections until you have a shape you’re happy with.
- I used 3 box shaped holes and ended up with a shape that kind of tapered towards the top but this is not an exact science so don’t worry if you can’t replicate mine exactly
If you’re wanting to make the model as one piece you can just align the stalk with the pumpkin and raise it up until it sits at 29mm above the Workplane - if you then group the 2 shapes, you have your complete pumpkin model!! Job Done! Feel free to jump to the next step 😊
If you want the stalk as a separate part, we’ll need to work through a few last quick steps.
- Sticking with the polygonal theme, grab another 6 sided polygon (or other shape of your choice) and resize it to be 8x8x7mm.
- Align this piece with your stalk shape and group the 2 pieces - this is your finished stalk.
- Make a duplicate of the finished stalk piece and scale it up to be 9x9x22.5mm.
- Align this with your pumpkin shape and raise it 29mm above the Workplane
- Make the scaled up stalk shape a hole and group it with the pumpkin - this will make a hexagonal slot in the top of your pumpkin which should give plenty of wiggle room in case your printer tolerances aren’t perfect (no-one's are 😉) - If you know your printer well, feel free to make the hole larger or smaller as you see fit!
That’s it!! We have everything we need to start printing!
Print and Assemble!!
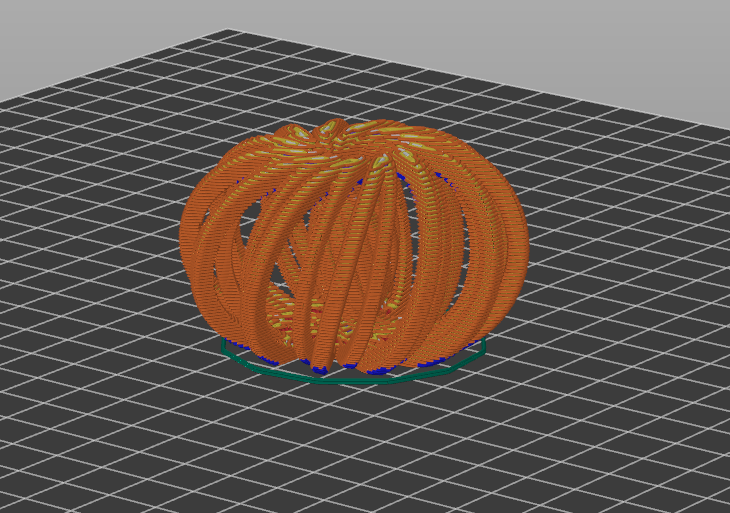
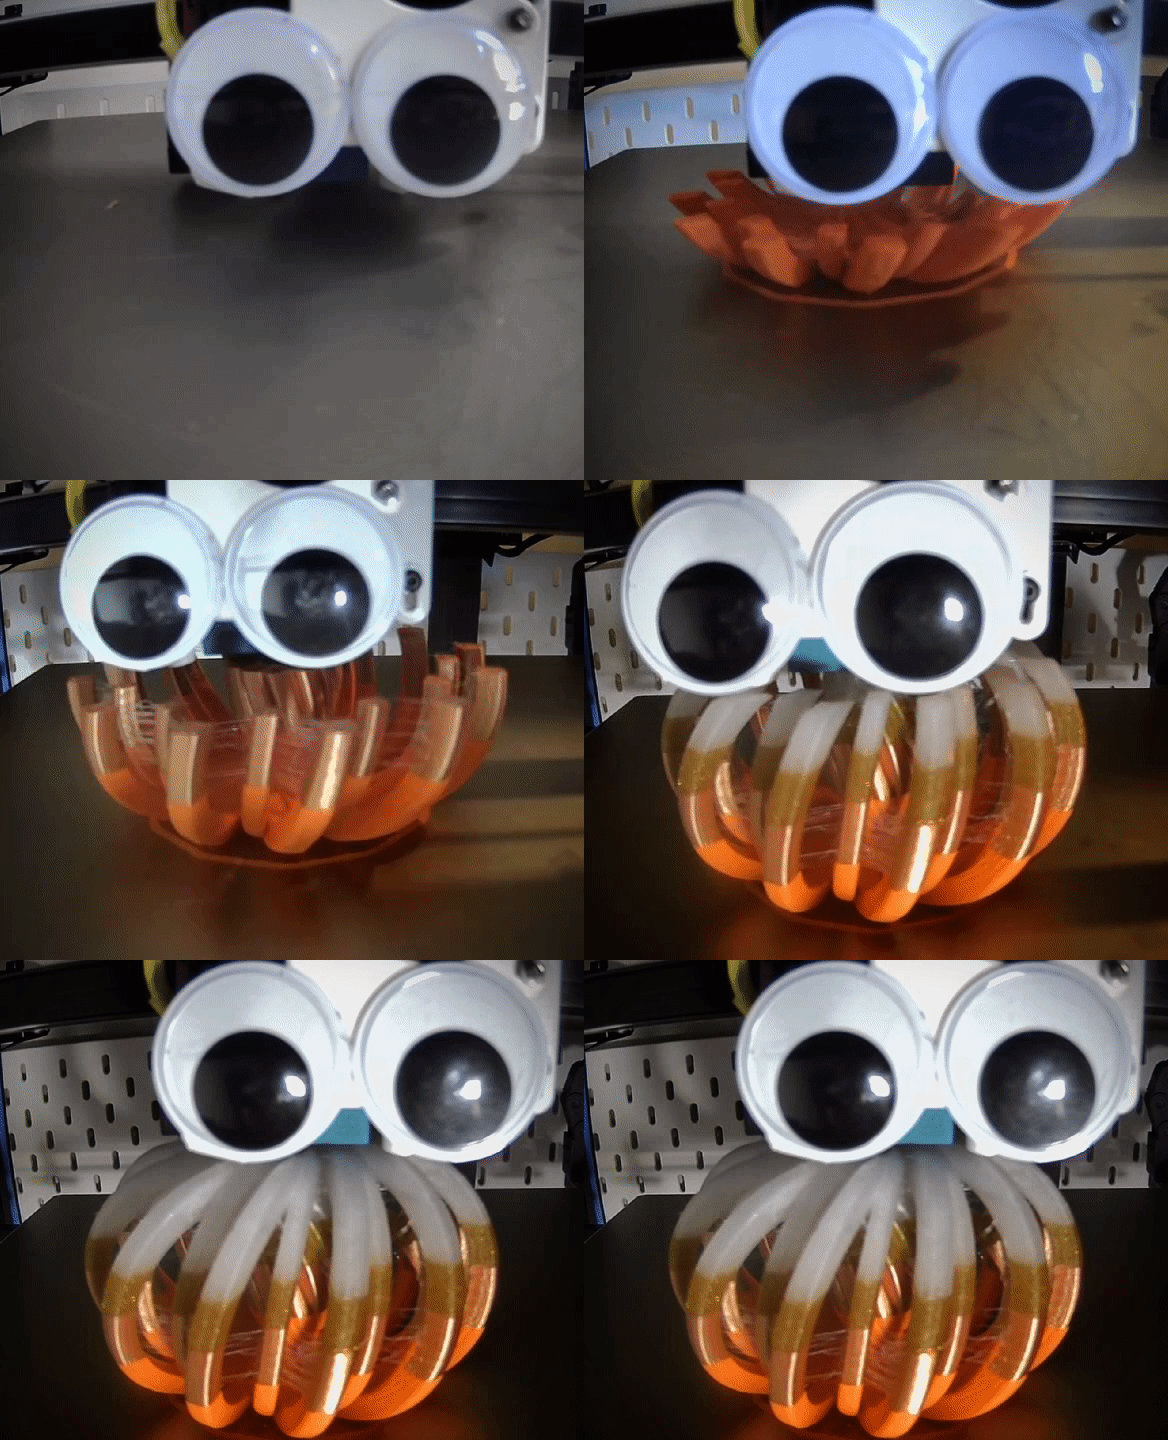.gif)
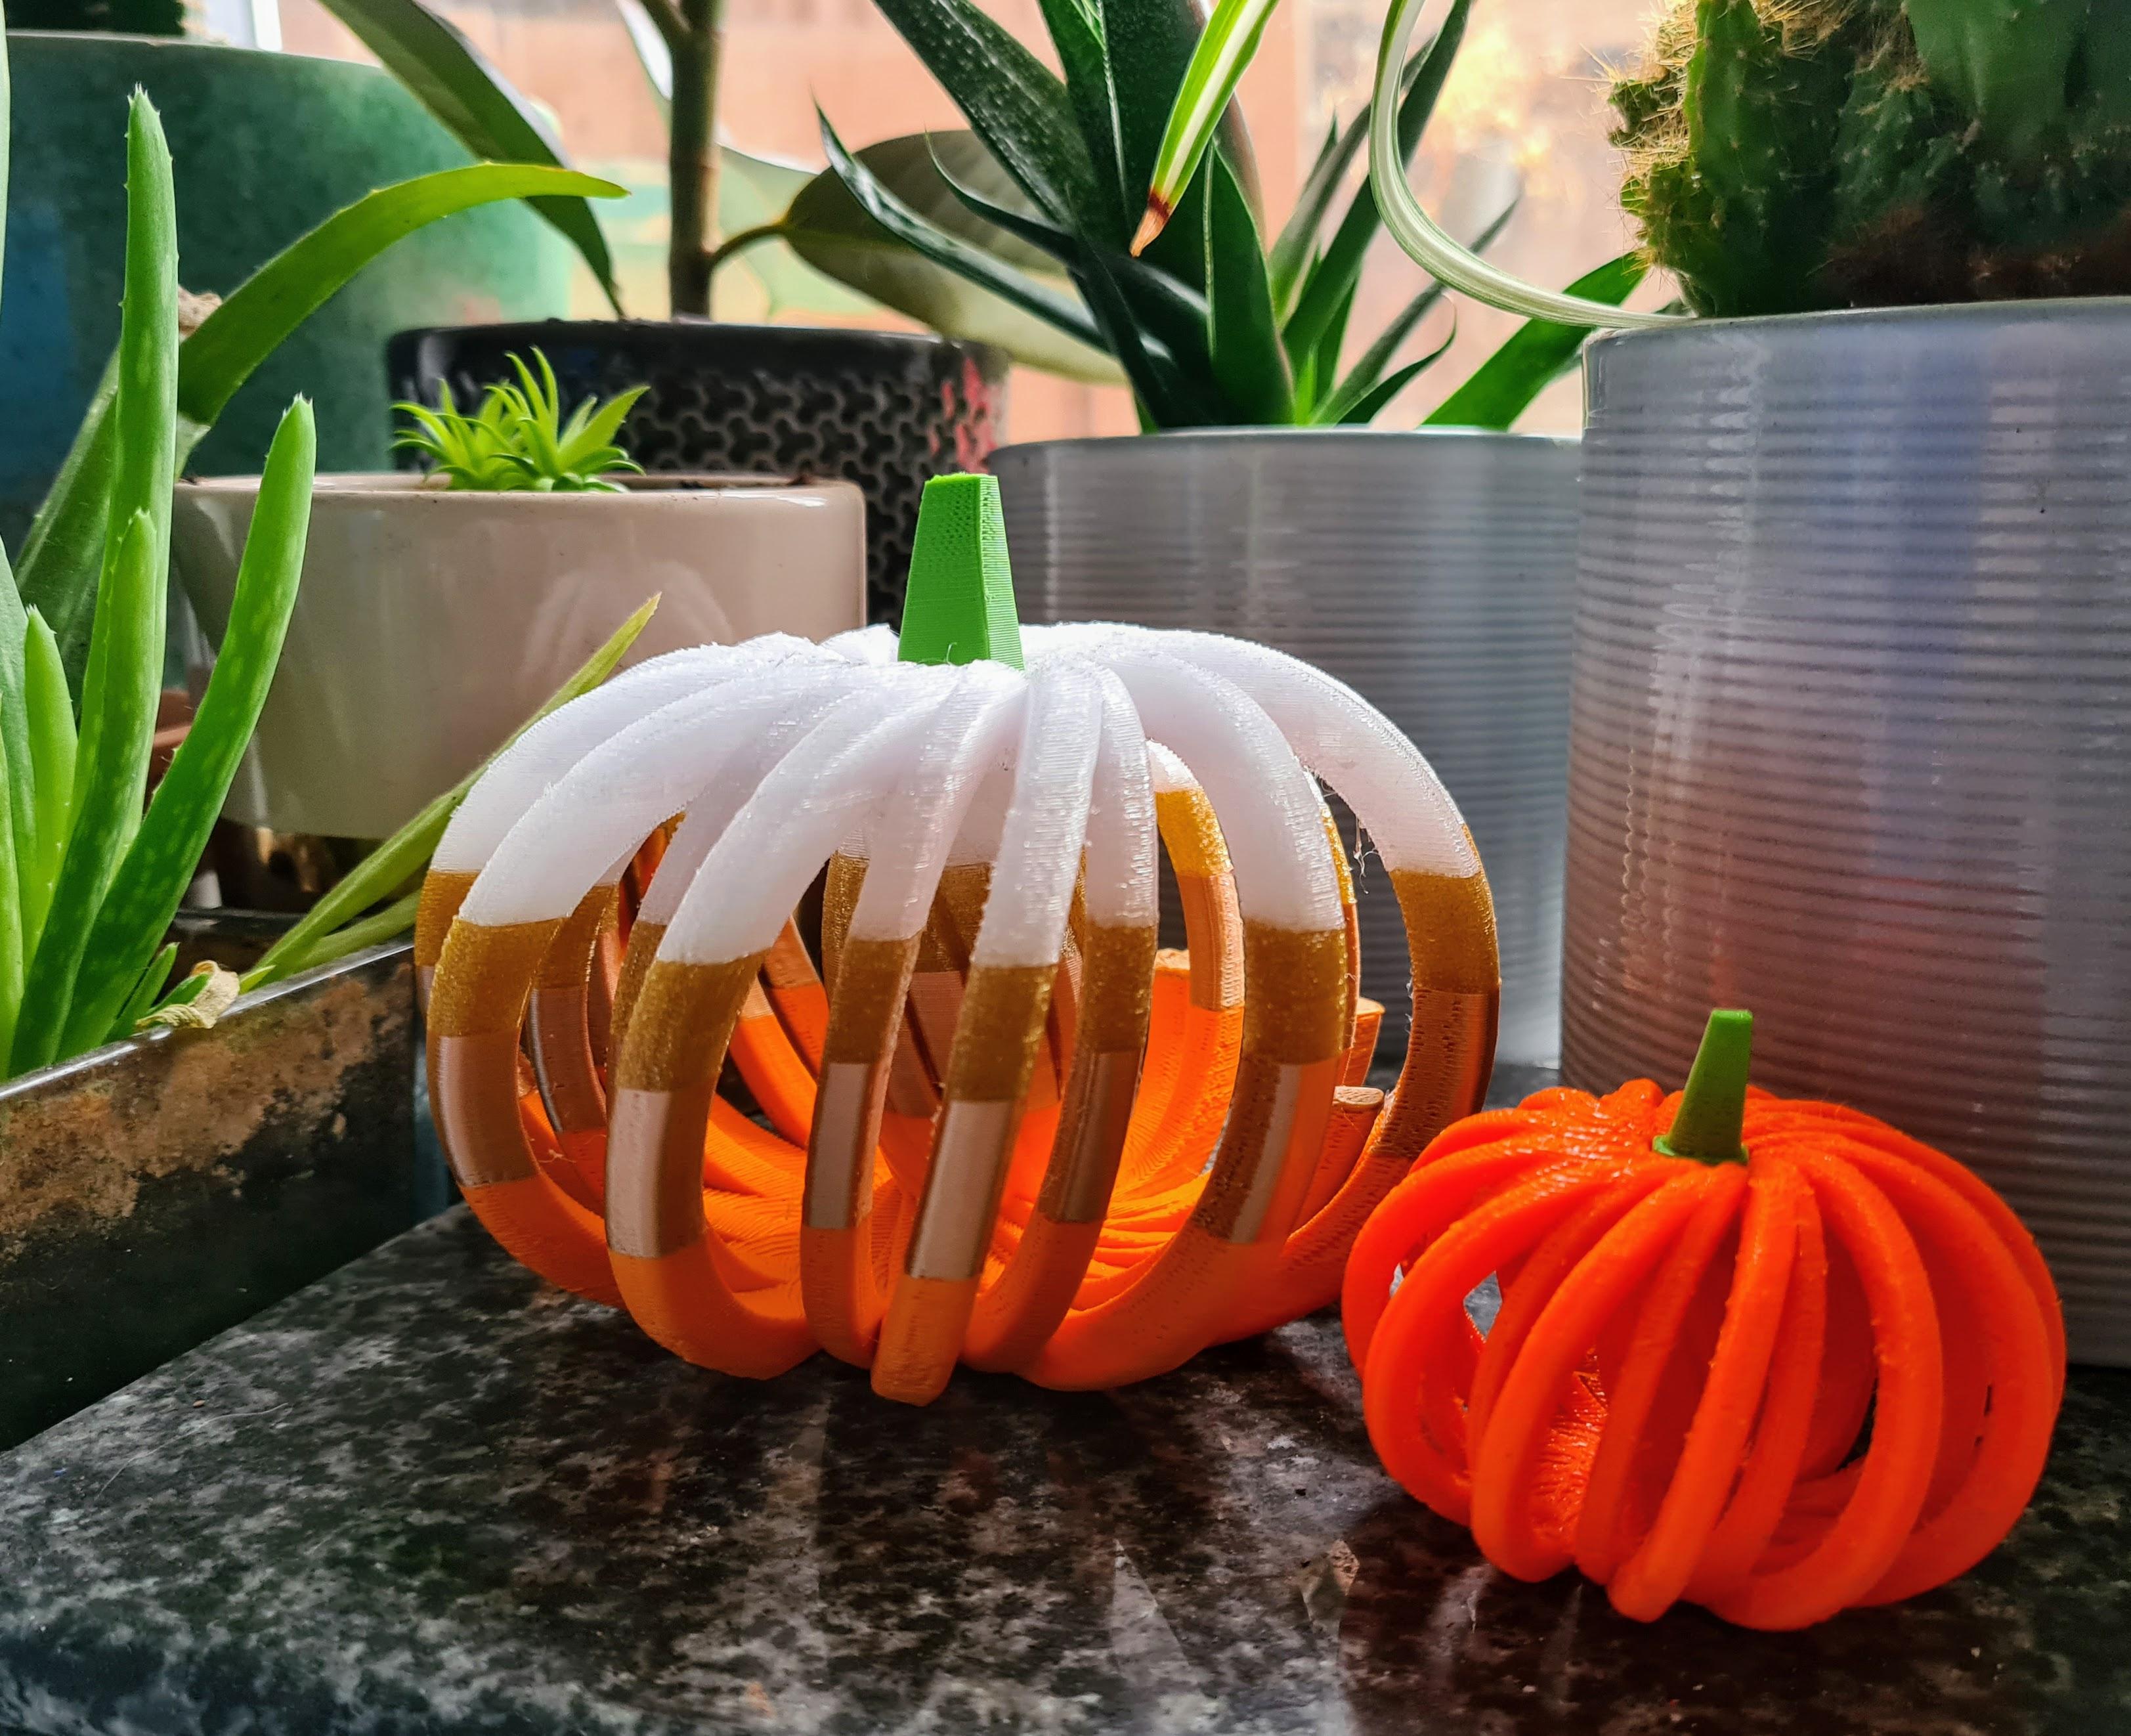
Just export your shapes (or shape if your pumpkin and stalk are all one model) by clicking the export button in the top right and selecting ‘STL’ - my stls are available free on thangs here as well if you just want to print mine!
You can then import the stls into your slicer and slice your model ready for printing.
I’m sure you know your printer and filament better than I do so I’ll leave the slicing to you 😊
A few tips though:
- You should need no supports for this unless you scale it up hugely - I’ve actually printed this at 400% scale and, while there were a couple of slightly droopy areas, it printed well enough still!
- It will also print scaled down but remember that the smaller it is, the thinner each frame is so it’ll be less rigid and more prone to failing - I’d suggest slowing the print down and switching on z hop if you want to print it very small.
- You also shouldn’t require a raft or brim since we gave it a flat base so it should adhere to the bed just fine - if you have any issues you may need to clean and level your bed
- I found that I had quite nice results with a few filament changes throughout the print though it looks pretty neat all in orange too!
Once printed, just clean up anything that needs it such as stringy bits etc. if you have any and pop the stalk into the slot if you printed in 2 parts.
If you have any trouble slotting the stalk in, a quick bit of sanding should do the trick
If sanding doesn’t solve your problem, consider printing a slightly smaller stalk - it’s much quicker than printing another pumpkin with a bigger slot!!
If you do find the stalk is a little loose, a small dab of superglue should secure it nicely!
Enjoy - and Maybe Explore Codeblocks a Little More?

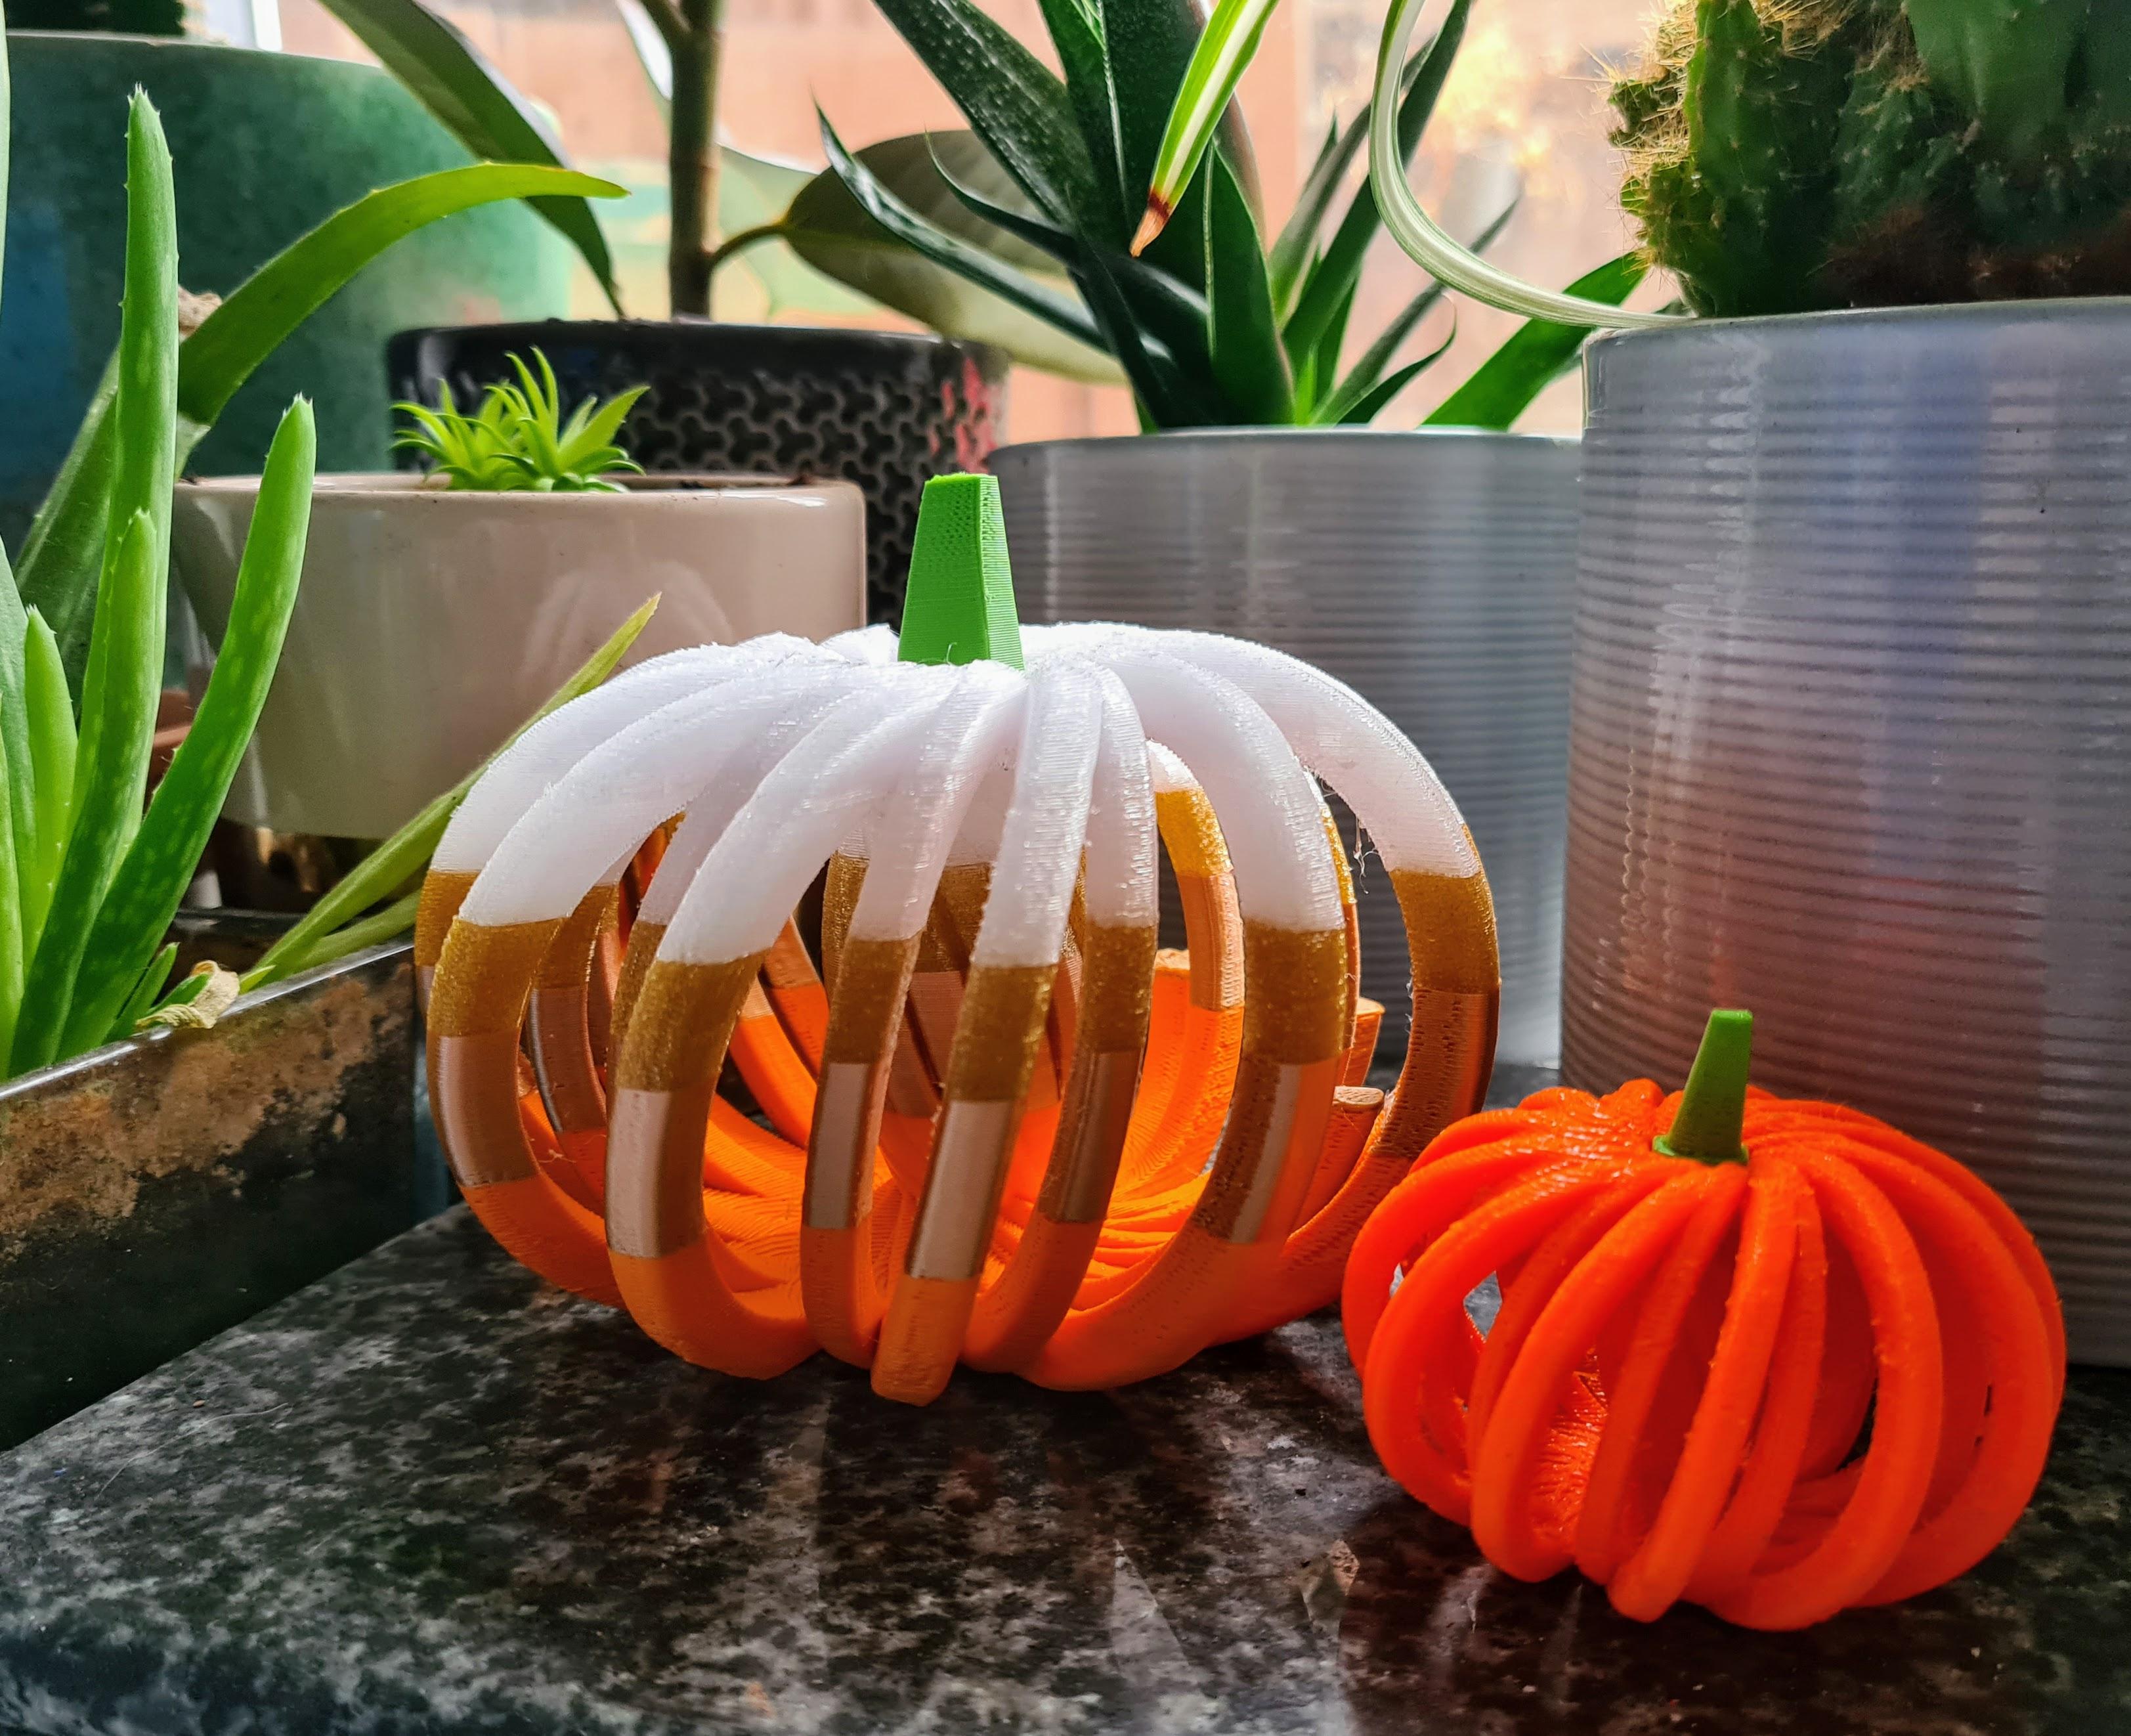
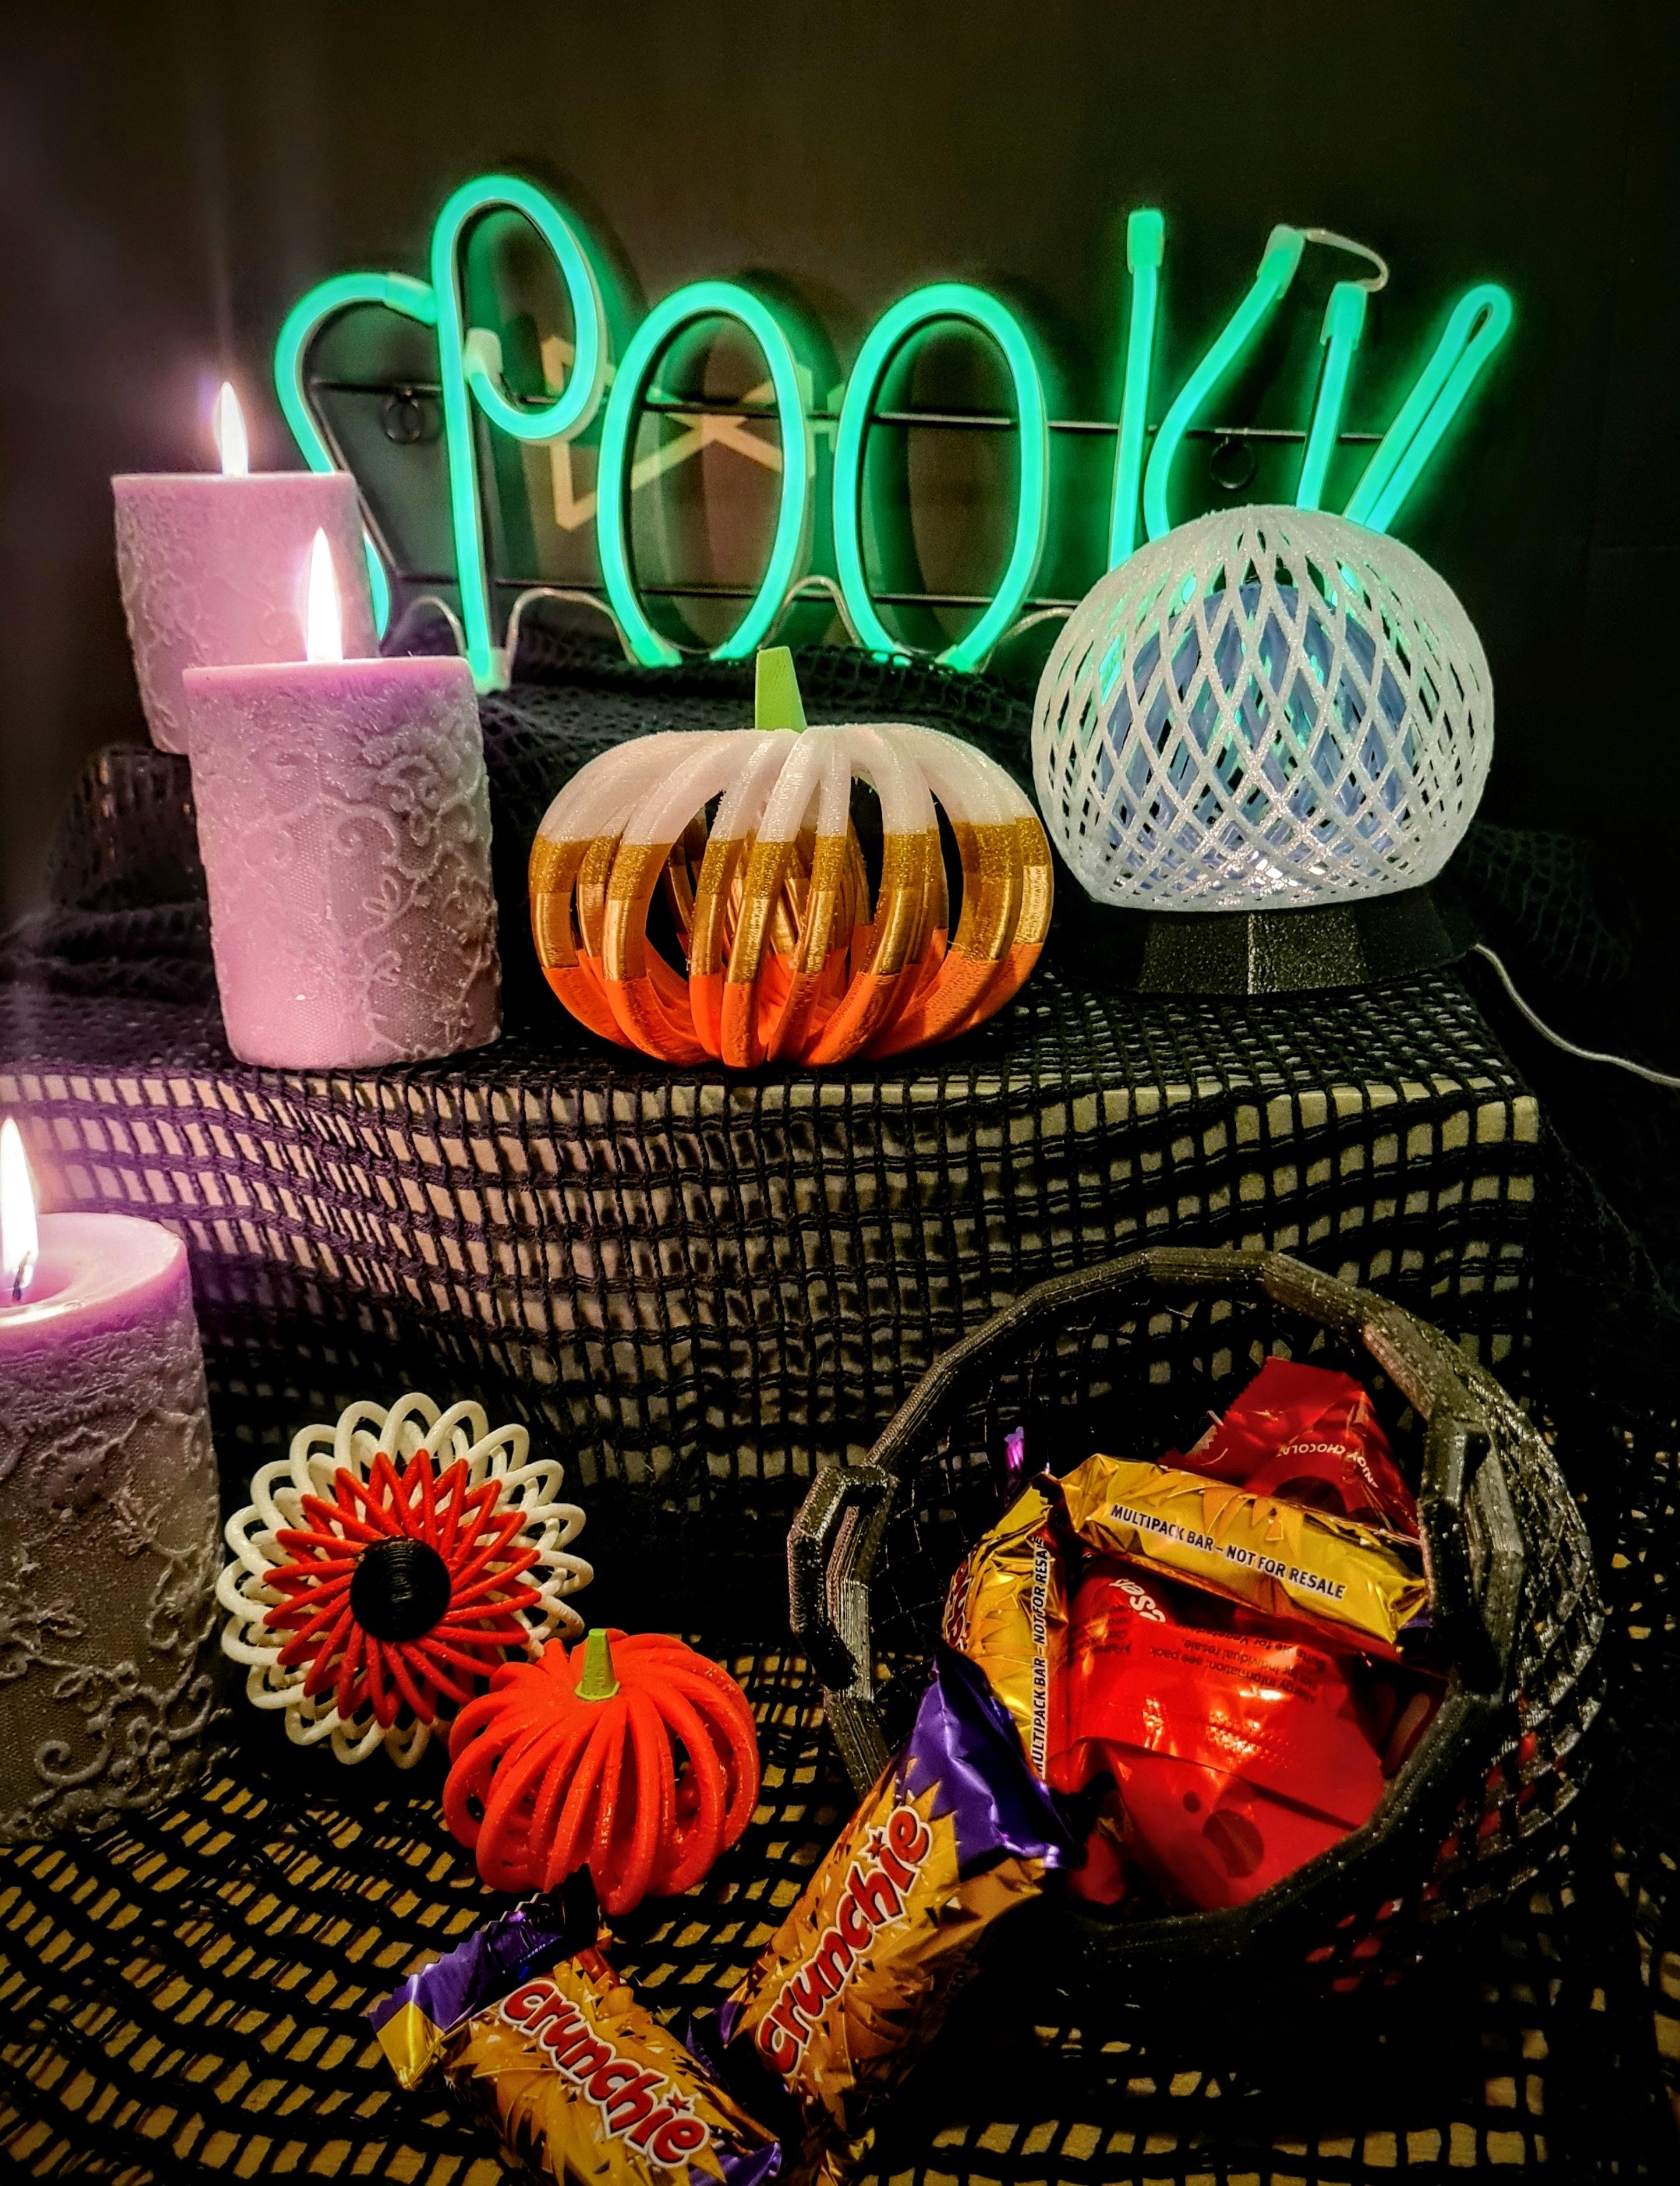
Fab, you’ve made your first pumpkin - I hope you enjoyed it!
I also hope if this was your first time using Codeblocks that you can see how it might be beneficial to your design process and that it can be good fun too!
I made a whole range of Halloweeny Codeblocks based decorations this year - they all use the same basic loop and variables as we used here but I may have changed the number of frames or the shape used or other little bits and pieces to create different shapes and patterns!
If you do have a play around and explore codeblocks a little more, I’d love to see your makes!!
HAPPY HALLOWEEN!!