Make a 3D Customized Wallpaper Using Free Software
by crazy lazy man in Design > Digital Graphics
4219 Views, 8 Favorites, 0 Comments
Make a 3D Customized Wallpaper Using Free Software
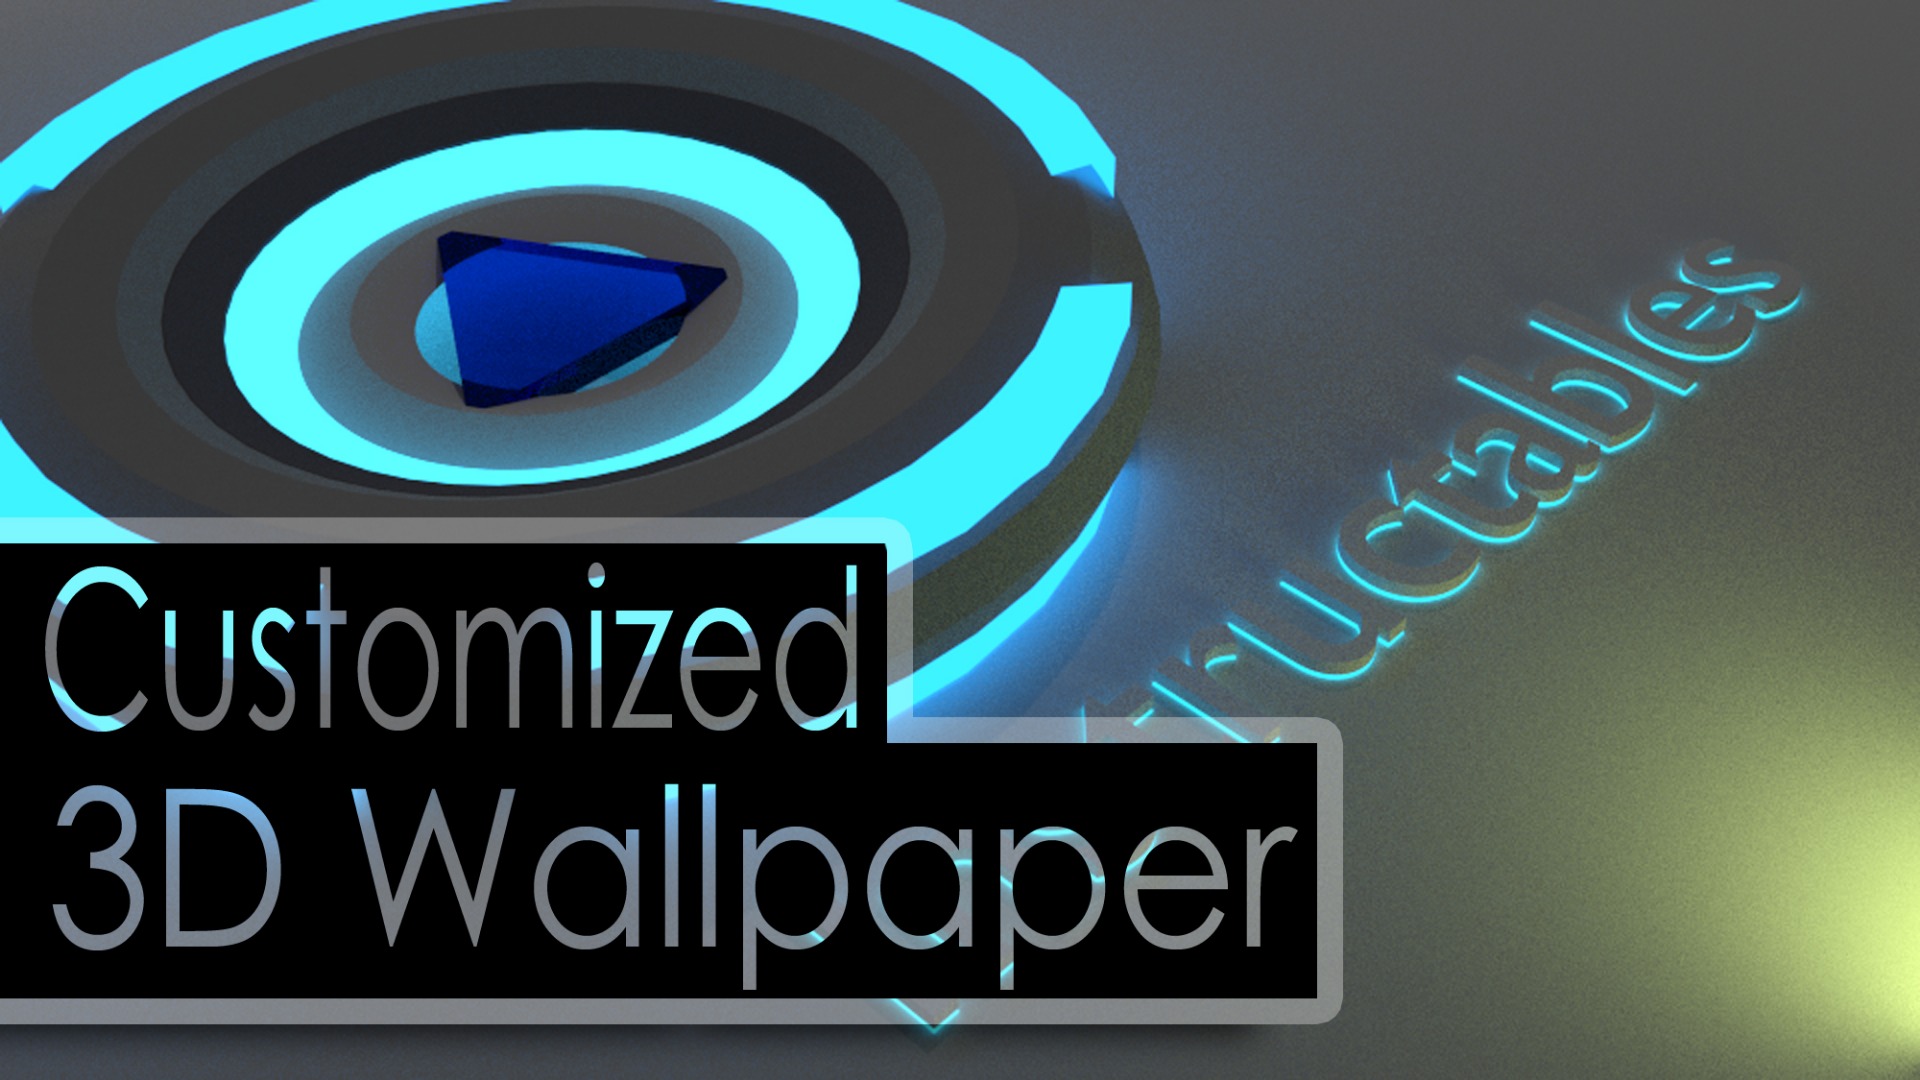
The newest remedy for your lost phone is finally here! (in 3d)
Hi everyone! We are creating a 3d customized wallpaper.
Why use a personalized wallpaper?
I always forget my phone at school (dumb -_-), but thanks for my personalized wallpaper I always get my phone back. Someone will call my mom saying "Hi, I found this phone and ill return this tomorrow" I suggest putting your address or your mom's/ friend's phone number.
Why use Blender?
- Since I (maybe also you?) has no budget for buying expensive 3d modelling software, so I chose blender because its 100% FREE! and it's practical
- It has almost same performance like other 3d modelling softwares
Download blender now: https://www.blender.org/download/
Why use Fork?
-So you can eat easily :P
Note: I made this tutorial fully detailed (i think) for the benefit of both beginners and pros.
Constructing the First Glowing Circle
1. Start off by deleting the default start up object, the cube at the center, do this by right clicking on the cube then pressing the Delete or Del key on you keyboard then press "ok"
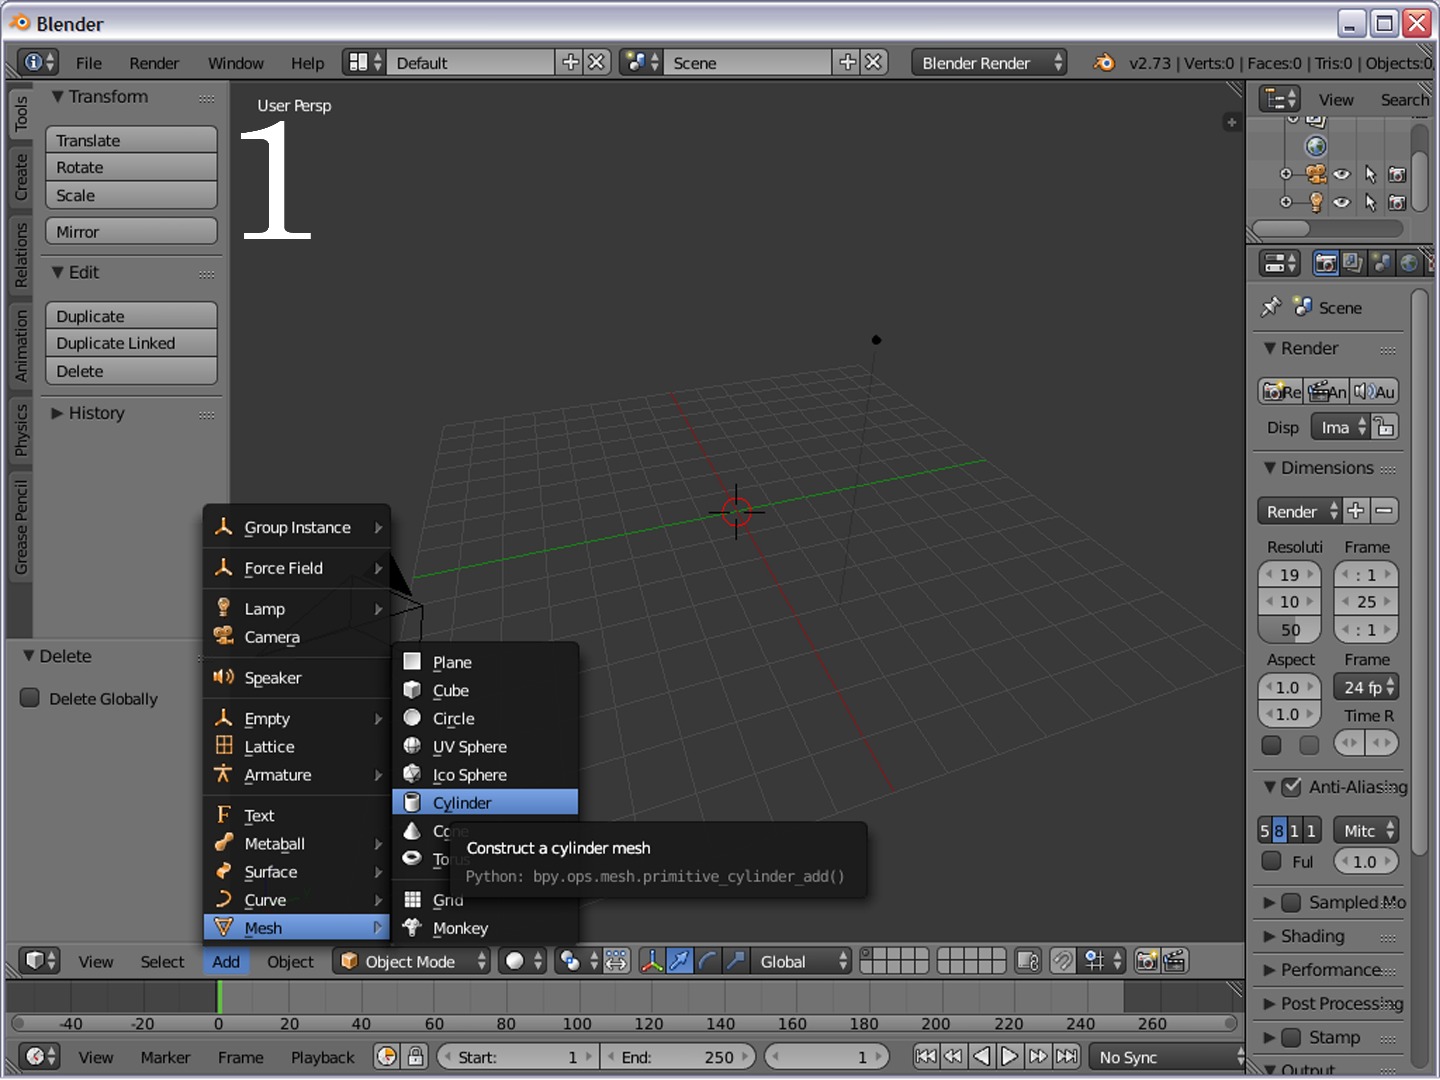
2.Then add a cylinder mesh by pressing Shift + A then a menu will pop up, hover your mouse to "mesh" then select "Cylinder" (Seen on picture no. 1)
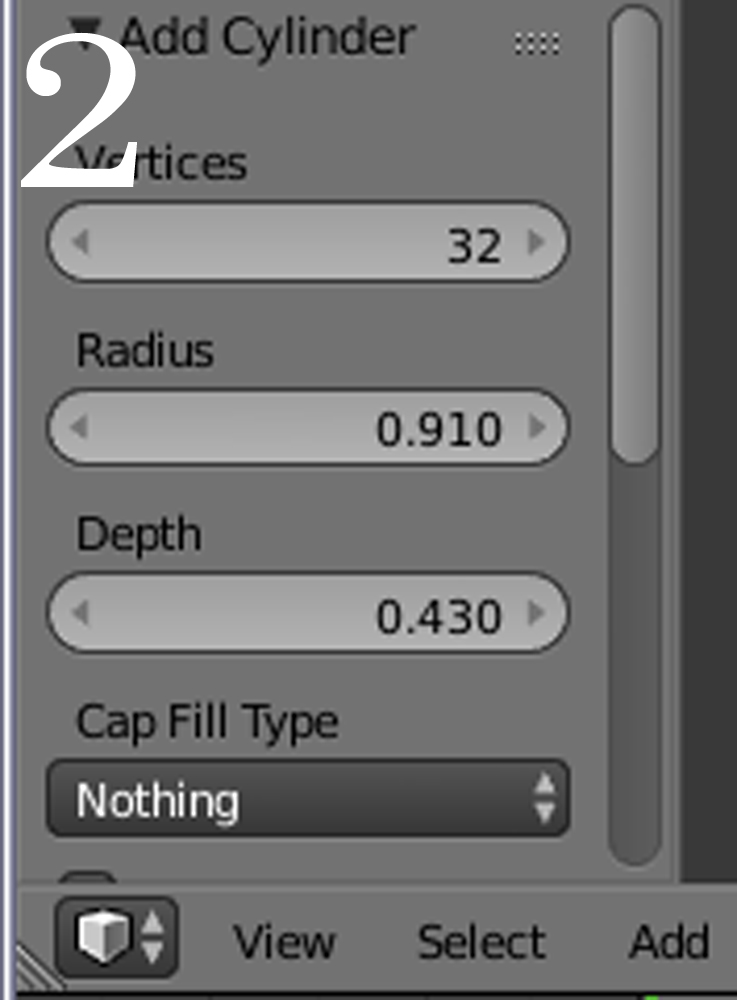
3. After that, apply the settings in picture no.2. note: before doing anything change the Cylinder's settings first or you cant change it anymore, if you cant see the settings here are them: change radius to 0.910, change depth to: 0.430 and the cap fill type: to "nothing" (Seen on picture no. 2)
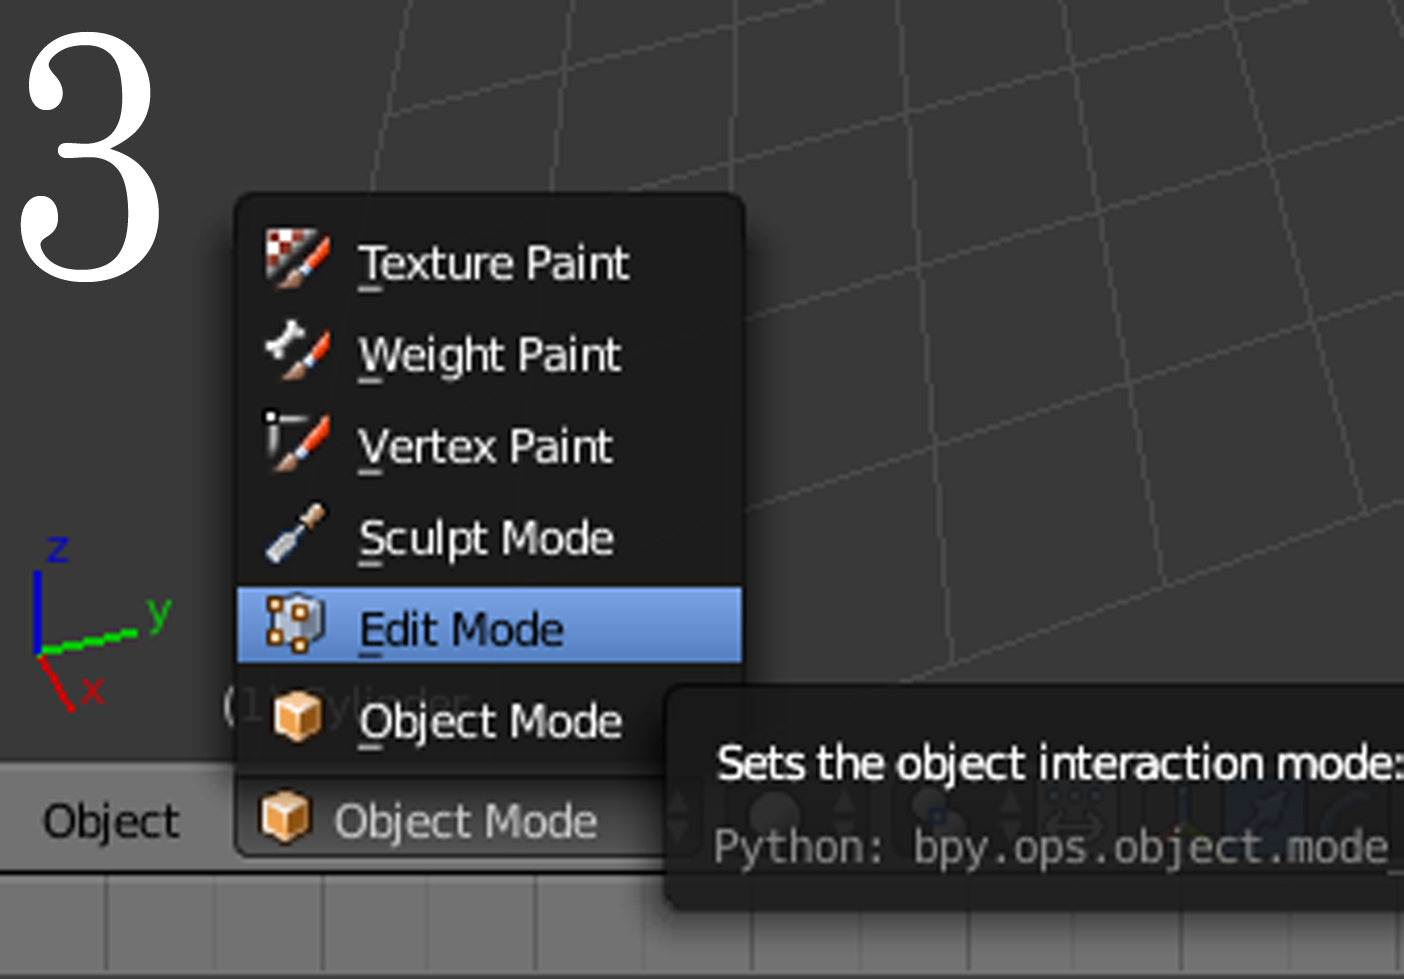
4. Then change the interaction mode from "object mode" to "edit mode" by clicking on the drop down menu with "object mode" then change it to "edit mode" (Seen on picture no. 3)
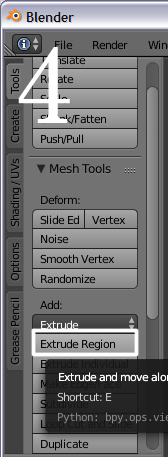
5. Make sure the cylinder is selected, press A until it is highlighted orange. Then on the left panel there is an extrude option and select "extrude region" DON'T MOVE YOUR MOUSE then Right Click (Seen on picture no. 4)
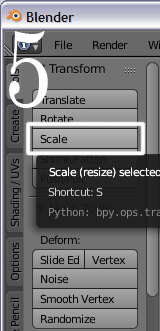
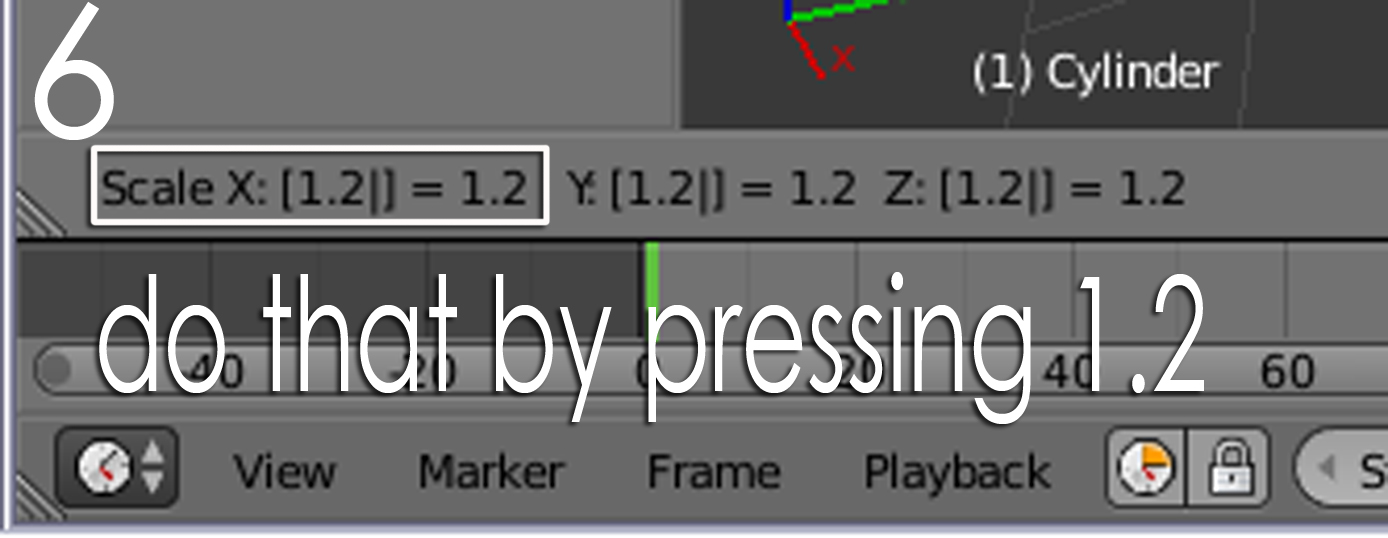
6. Make sure what is selected after doing the last step is still selected, press scale on the left panel or simply press "S" on the keyboard, we need to scale what we extruded (even it looks like nothing has extruded) we do that by pressing "1.21" on the keyboard while scale is active (seen on picture no. 5; details seen on picture no. 6)
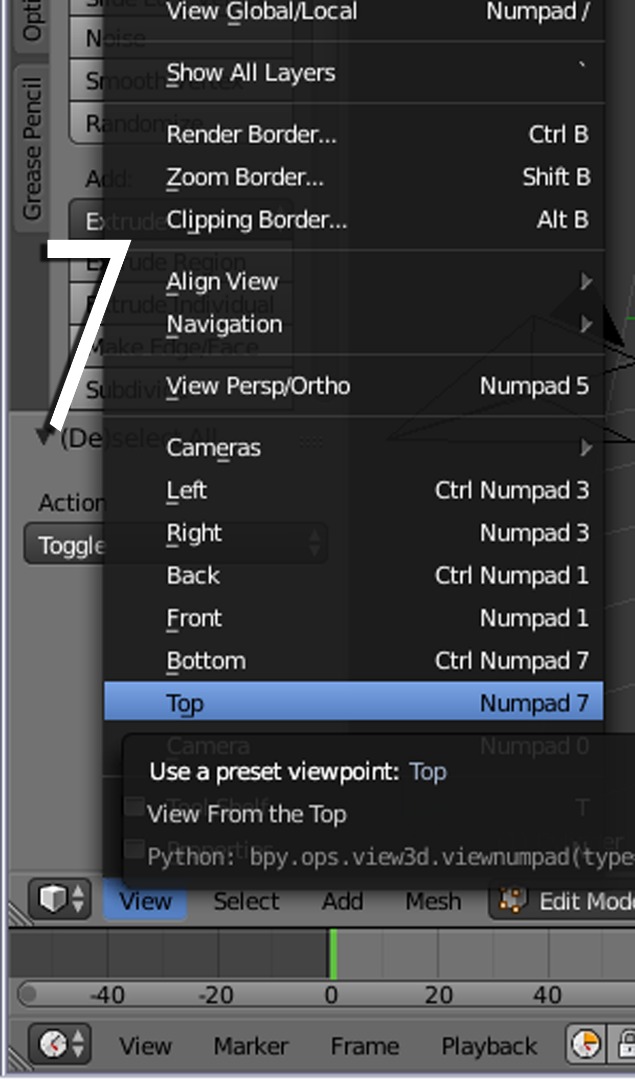
7. Now go to top view, press 7 on the number pad or click the "view" menu near the bottom then press "Top" (On picture 7)
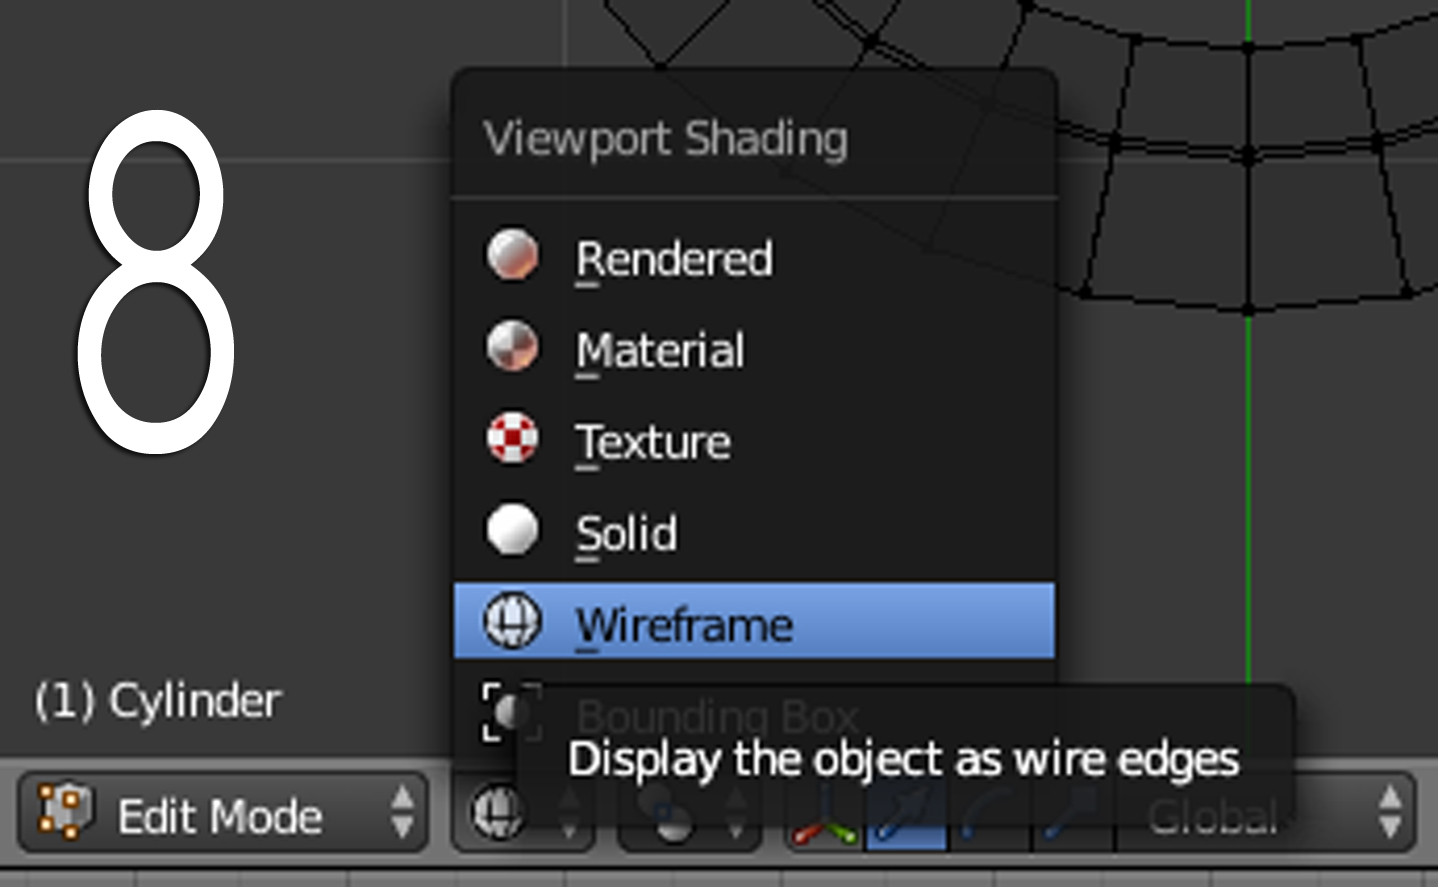
8. We are changing the Shading from solid to Wire frame, To do this go to the menu beside the Edit mode, It looks like a ball, now click that and choose "wireframe"
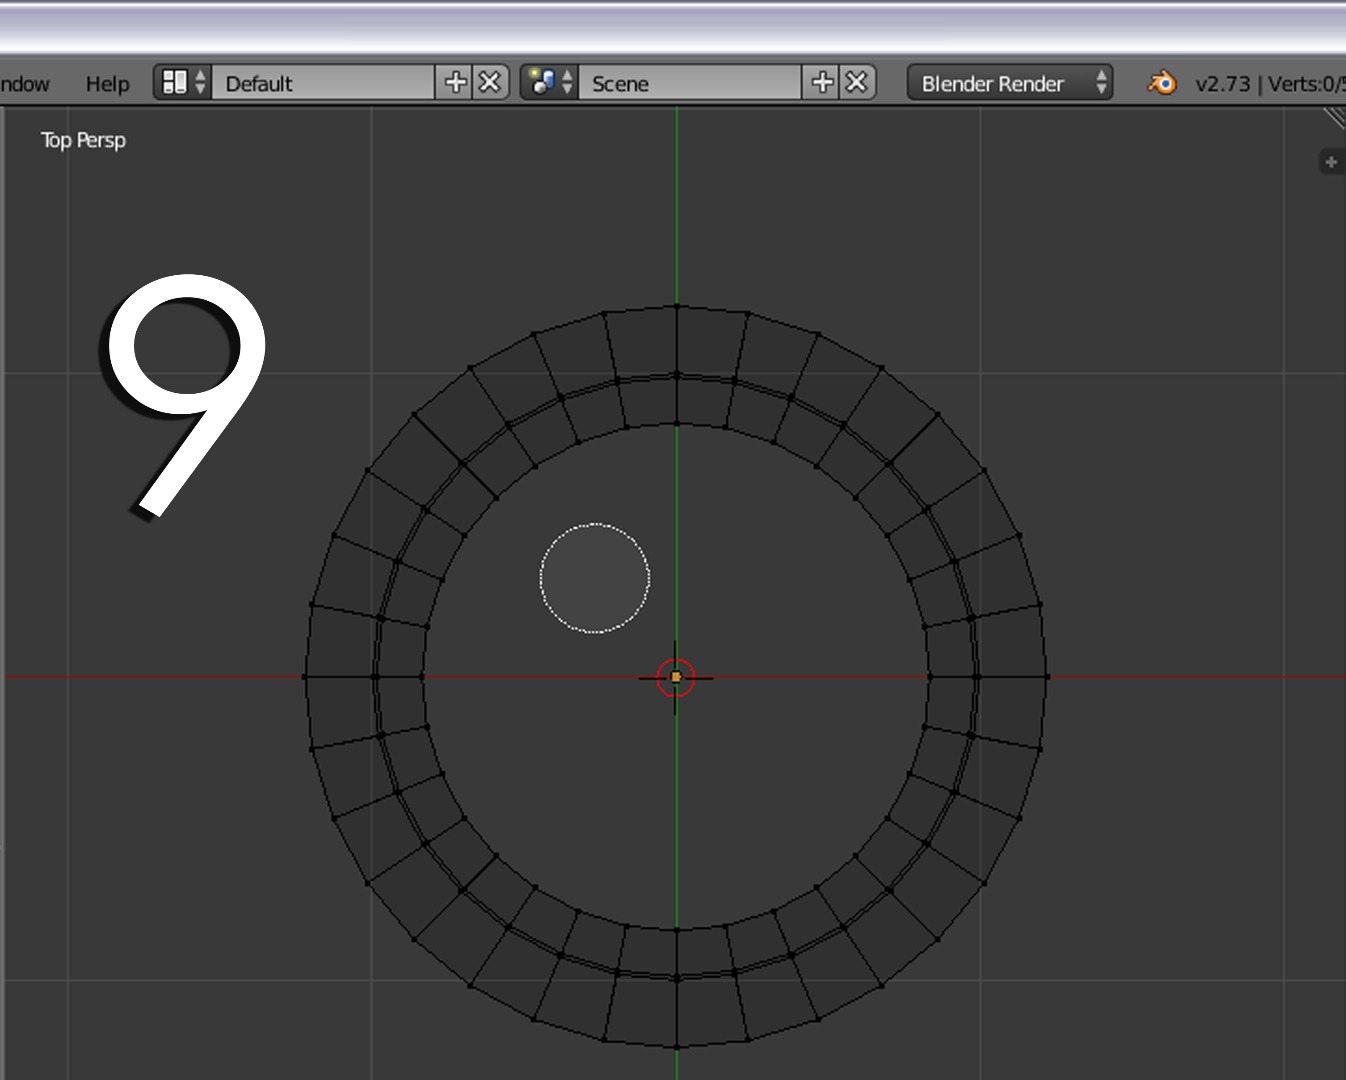
9. Then we will be selecting what should be removed, press "C" on your keyboard, you will see a circle surrounding your mouse pointer (it should look like in picture no. 9)
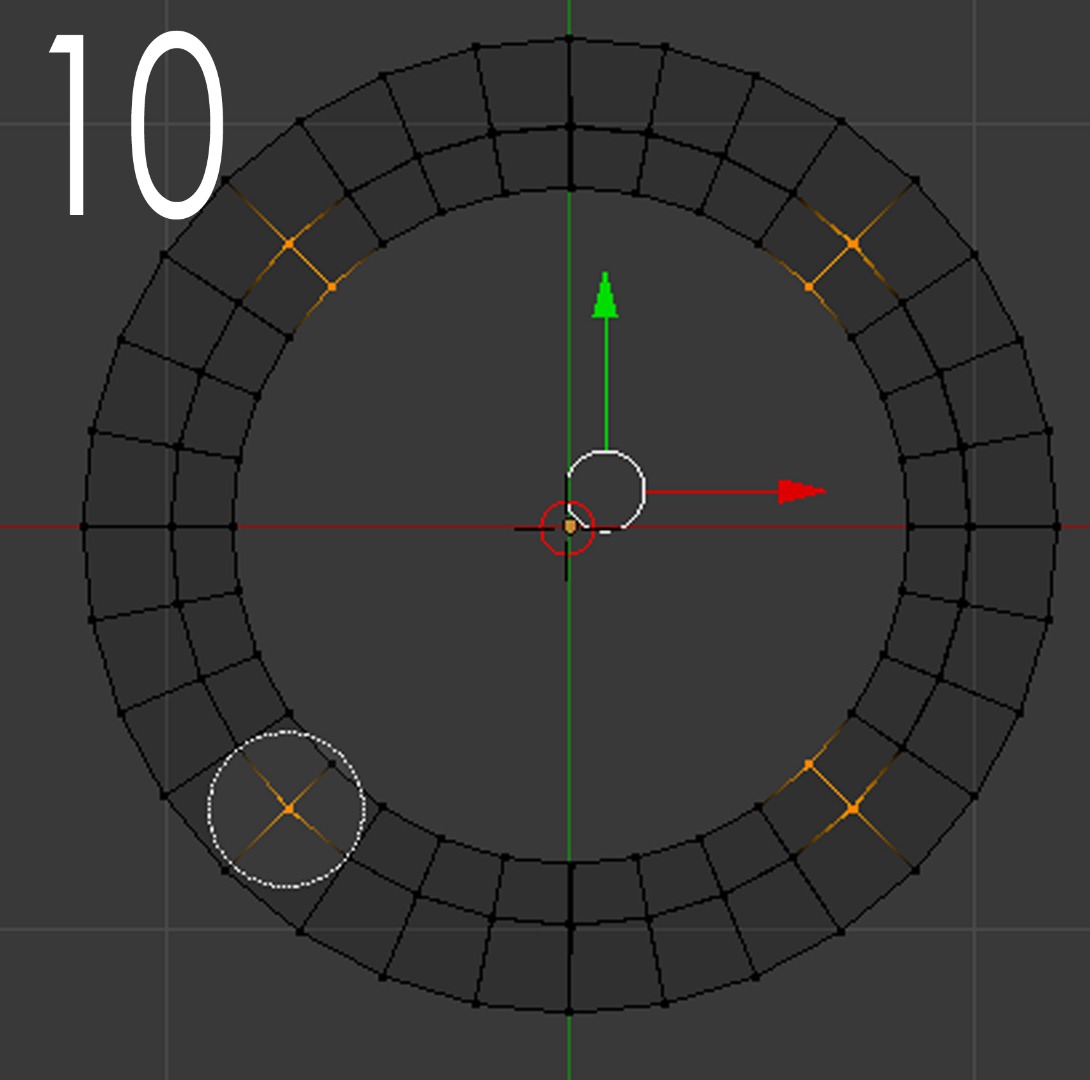
10. Select what I selected on picture 10 as you can see the circle surrounding my pointer is exactly fitted between the gaps on the side re size yours by scrolling and you will see the circle changing its size.
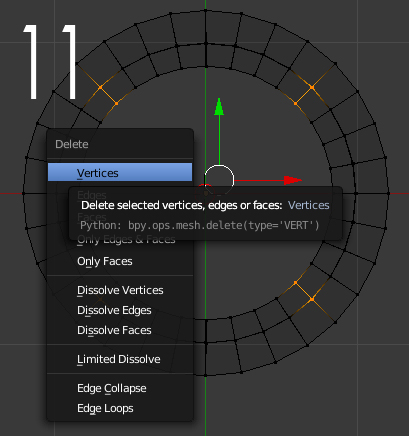
11. Let us delete what we selected do that by pressing X or Delete key on keyboard then a menu will pop up select "vertices"
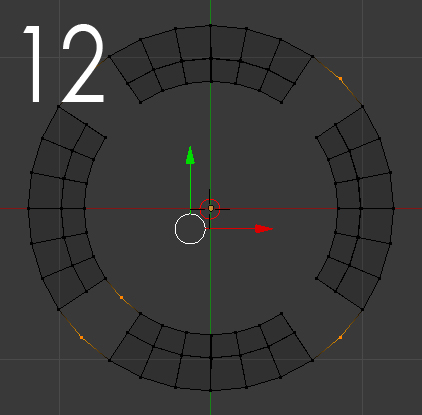
12. Remove the excess segments, you may get excess segments after deleting (see mine on picture 12) I selected it by Shift + right click on the excess segments then pressing the delete key.
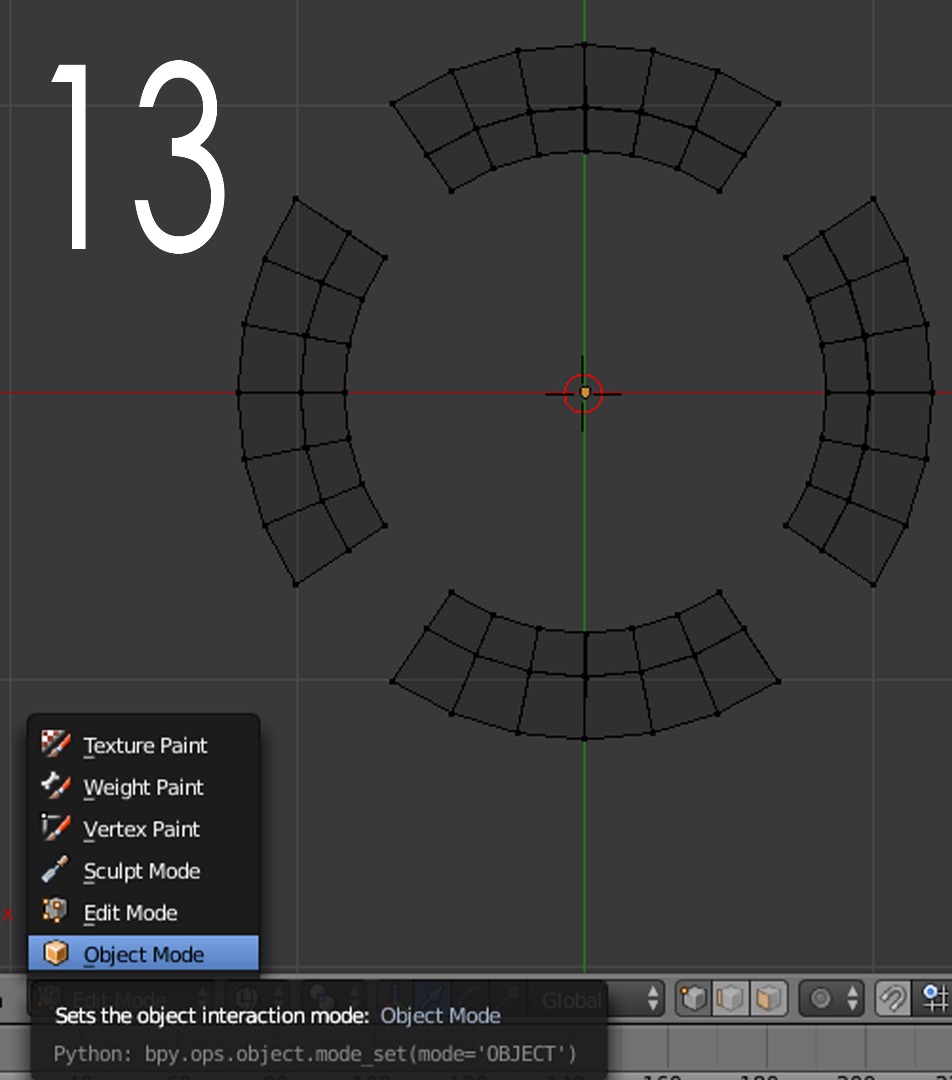
13. Now we're changing our Interaction mode to Object Mode from Edit Mode (see pic 13)
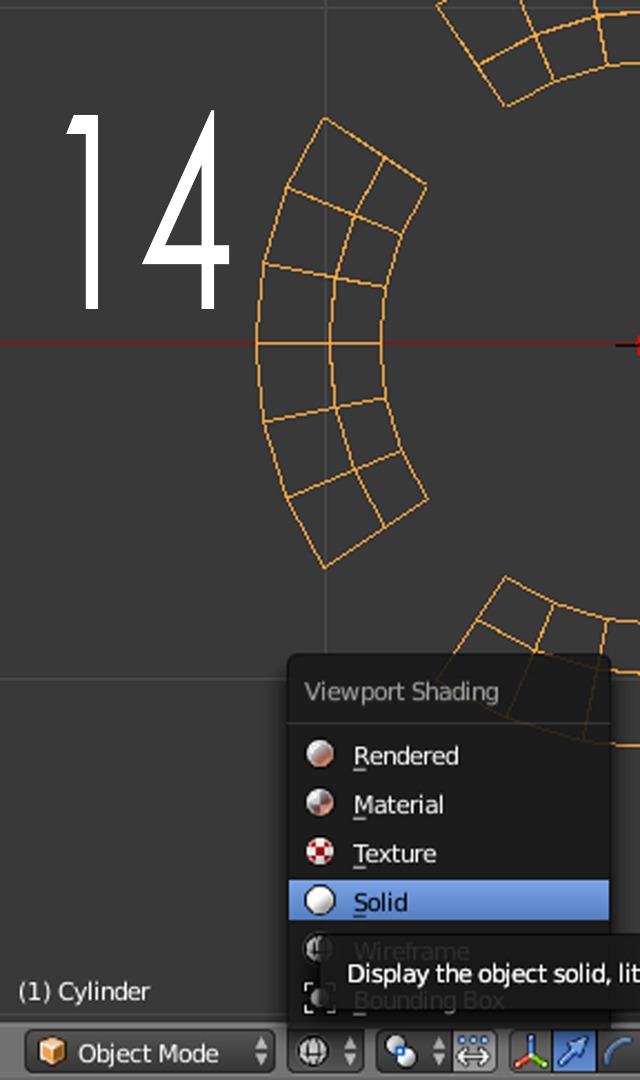
14. We are also changing the shading from Wireframe to Solid (see pic 14)
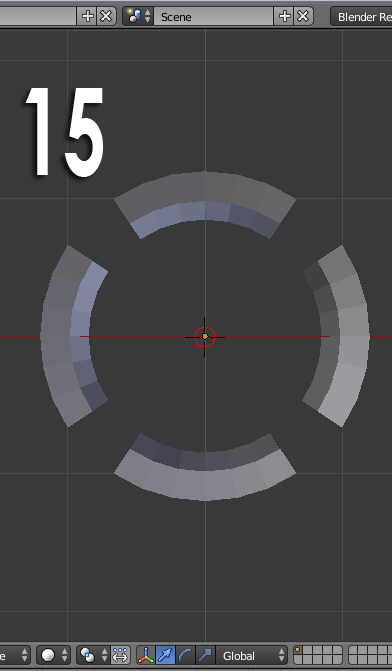
15. Before proceeding to next step, ensure that there is NOTHING selected because you will not change the properties of the next figure we will add when it is selected however, if it is still selected press A until you see nothing is selected or highlighted orange, also make sure that the cursor (red with black circle crosshair) is still at the center if not, press SHIFT + C then Change the view to Top View (No. 7) (See picture 15)
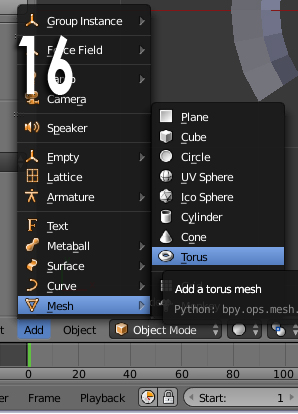
16. Add a "Torus" by pressing SHIFT + A then mesh then select Torus (see Picture 16)
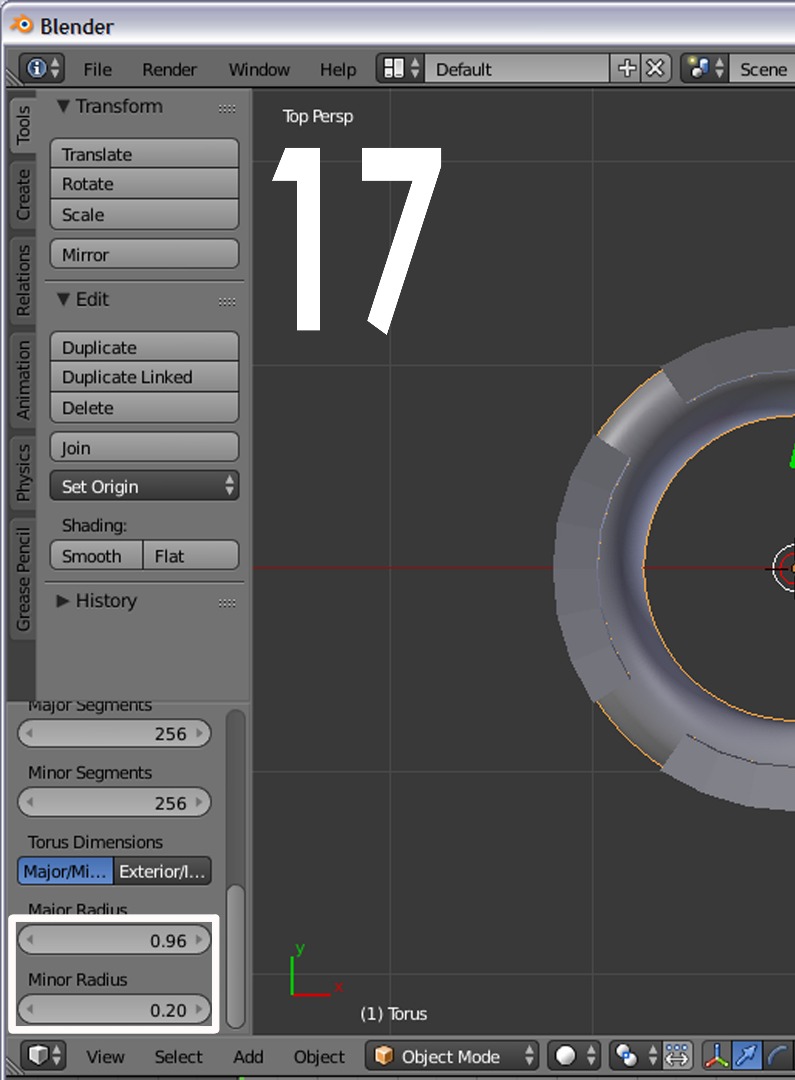
17. Apply my settings for the tourus: Major radius: 0.96 Minor radius: 0.20 Leave the rest unchanged (See picture 17 for details)
We're done! isn't that easy? let us proceed to the next step
Creating the Second Glowing Circle
Now this one will be easier. Before proceeding make sure the red with black crosshair is still at center
press SHIFT + C if not
1. Add a torus mesh by pressing SHIFT + A and again a menu will pop up, hover your mouse to "mesh" then select "torus". Make sure nothing is selected before adding the torus.
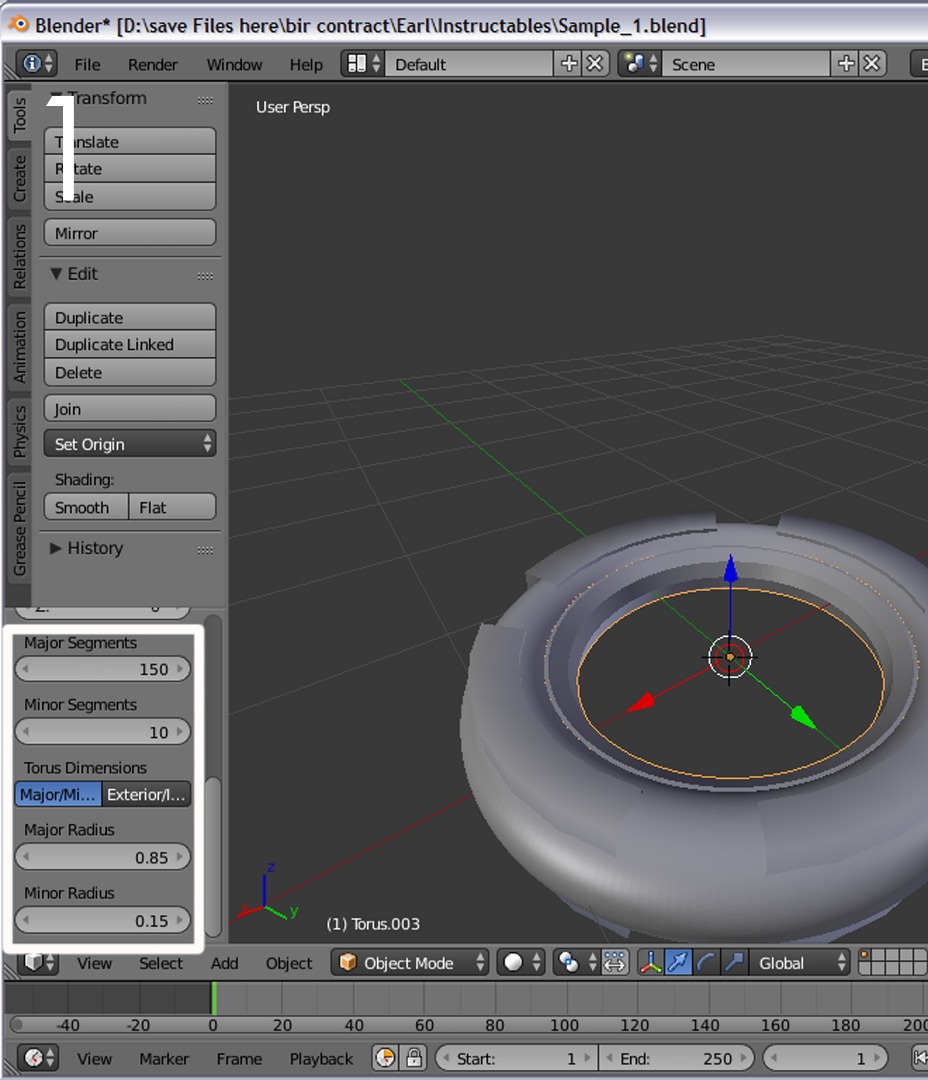
2. Apply my settings. remember, You should change it before doing anything with the torus or you cannot change it later. settings: Major Segments: 150, Minor segments: 10, Major radius: 0.85, Minor radius: 0.15 and leave the rest unchanged. If my settings are not clear, view picture 1
3. Again, Add a torus mesh by pressing SHIFT + A and again a menu will pop up, hover your mouse to "mesh" then select "torus".
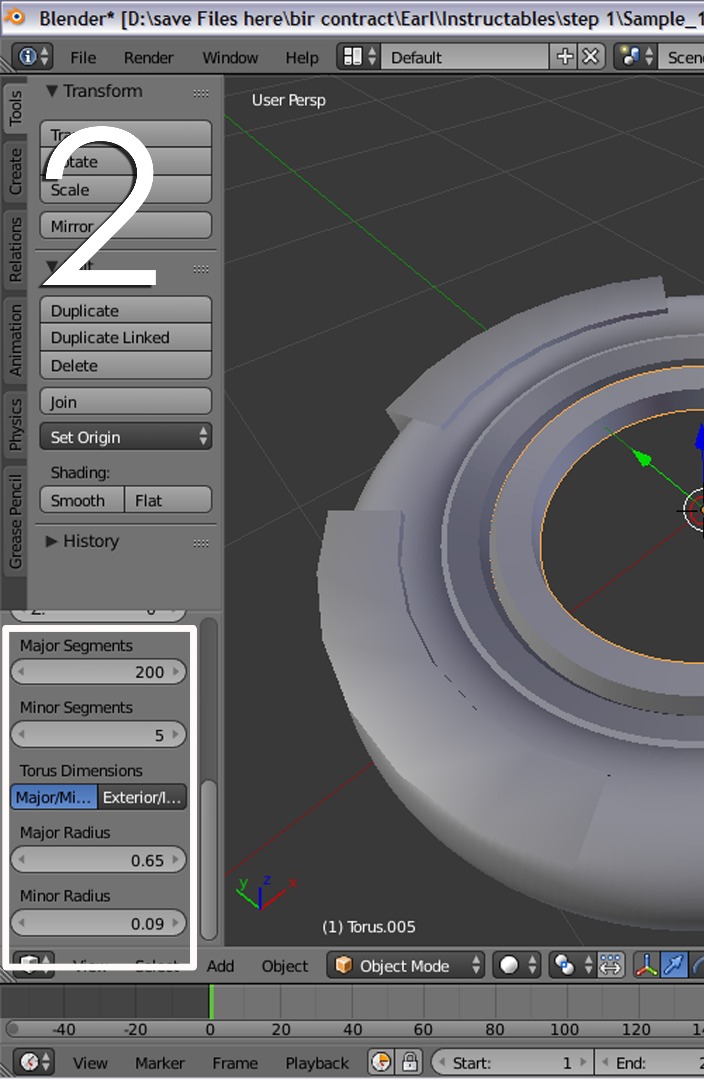
4. Apply these settings: Major segment: 200, Minor segment: 5, Major radius: 0.65 And lastly Minor radius: 0.09
Done! well, Isn't that easy? NEXT STEP!
Creating the "main Core" Thing
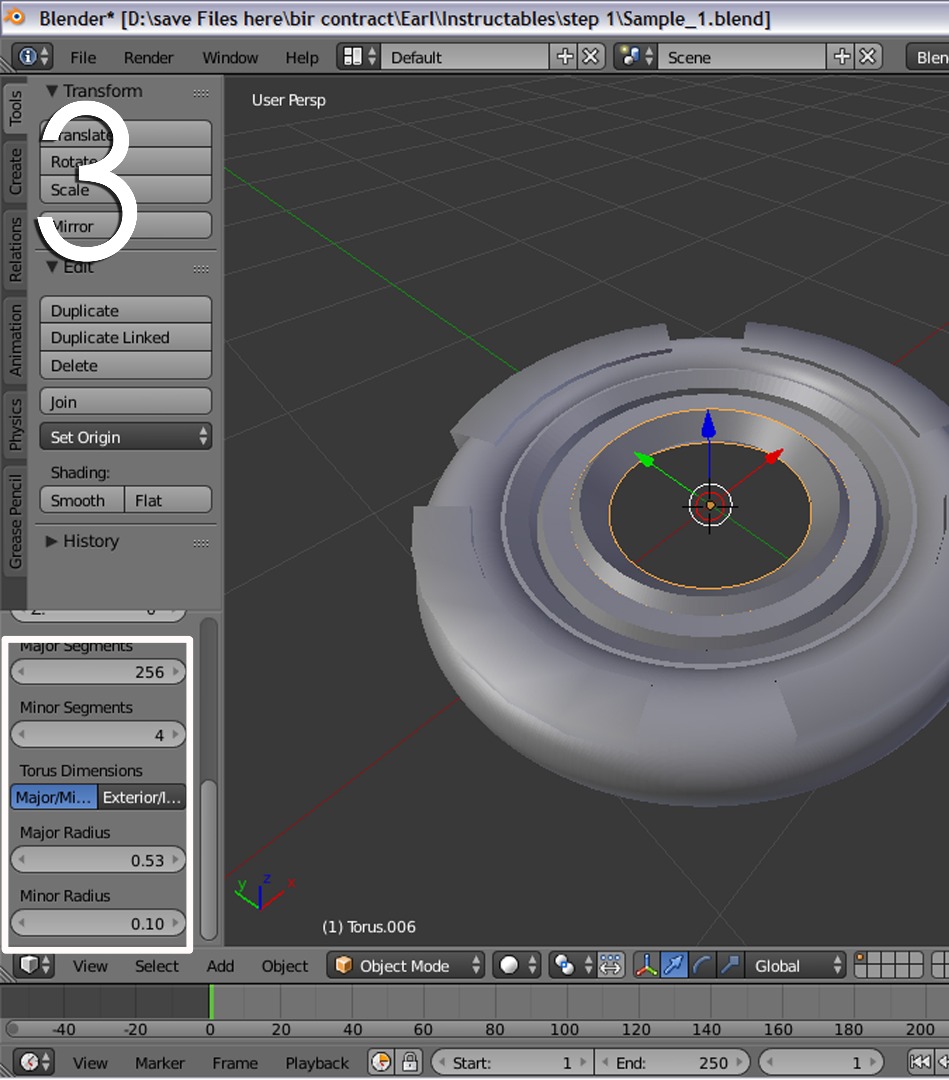
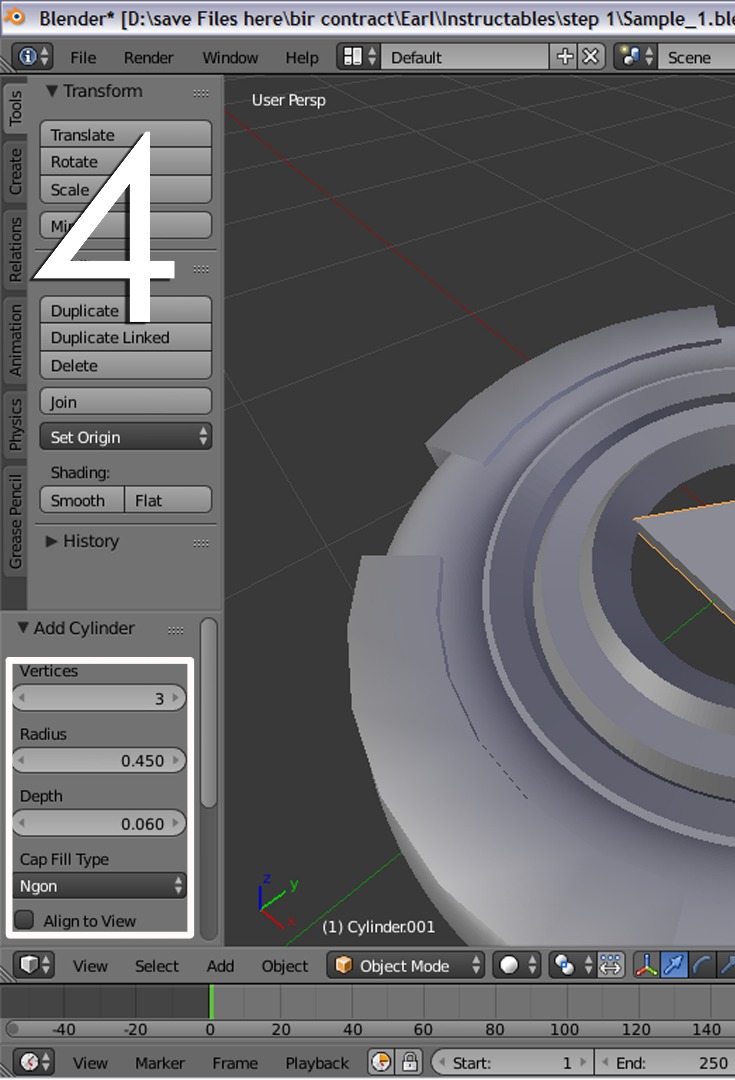
Make nothing is selected and the crosshair is still at the center.
1. Again, add a torus by pressing SHIFT + A then mesh and select "torus". Now, apply these settings: Minor segments: 4 Major radius: 0.53 and Minor radius: 0.10 And leave the rest unchanged.
2. Now, we'll add That triangular glass. Start by adding a cylinder (Yeah! cylinder) Now, apply these settings: Cap Fill type: Ngon, Depth: 0.60, Radius: 0.450 and change the number of vertices to 3 (That will make it Triangular)
We Finished Ironman's arc reactor like object (Actually I really want it to be an arc reactor but a bit of originality would be probably better)
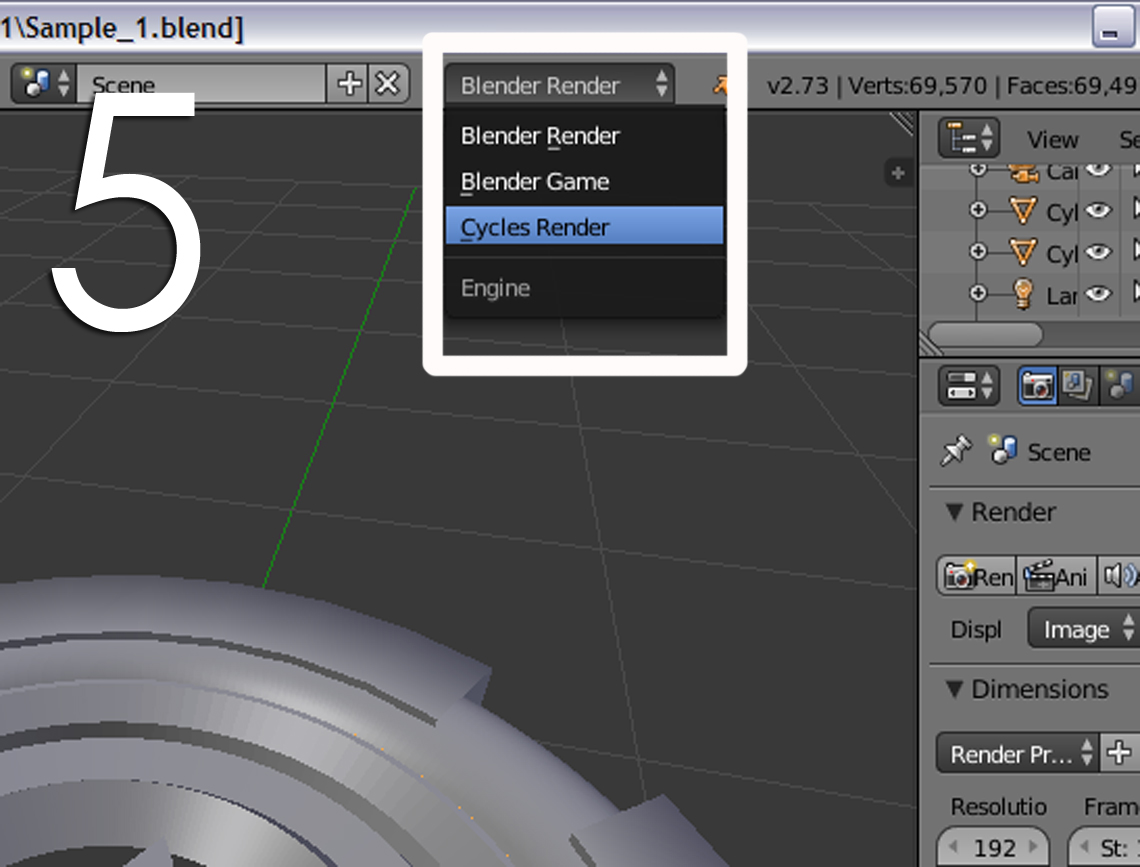
Now let us change the render engine from Blender render to Cycles render, there's a drop down menu on the uppermost part. You'll see a menu with "Blender render" Click that and change to "Cycles render" (See last picture)
DONE!
Making It Glow and Preview
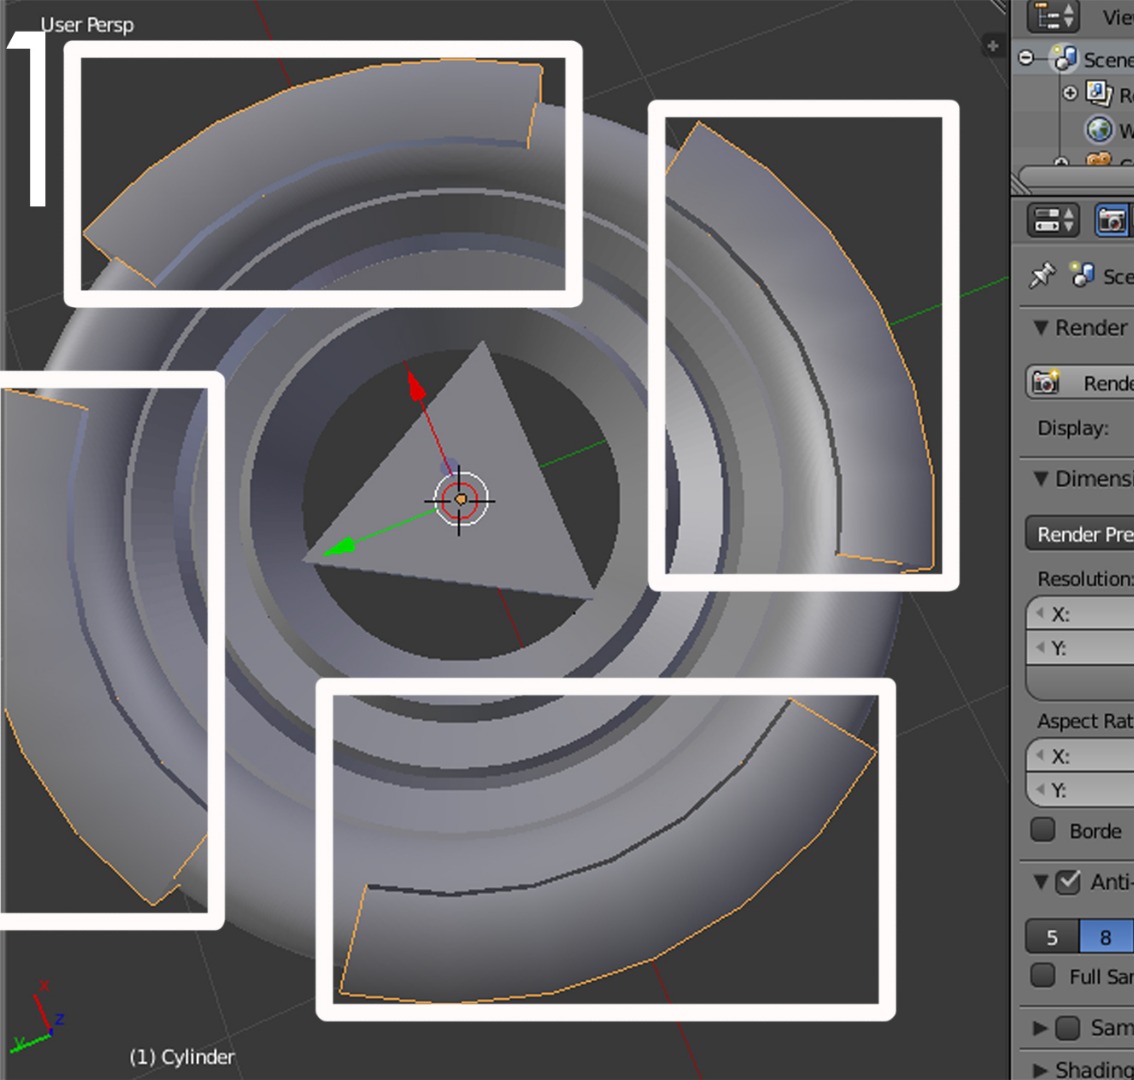
Make sure you switched to cycles render before proceeding or else you may not see options needed to make it glow
1. Start off by changing the viewport shading from "Solid" to "Material" (This will let us see what we applied)
2. Select the First cylinder we created (cylinder with broken parts, The first layer). See picture 1
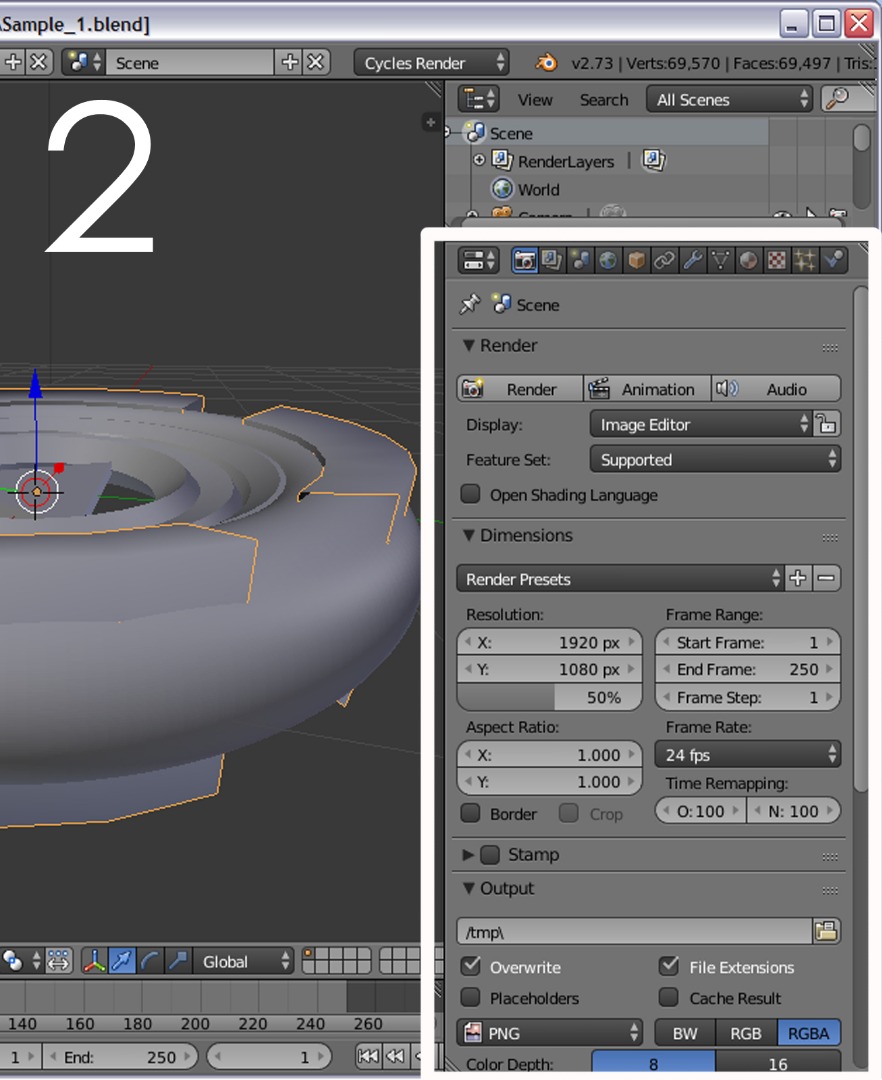
3. Now, you see that toolbar in the right panel with a Camera icon? Expand that. See picture 2
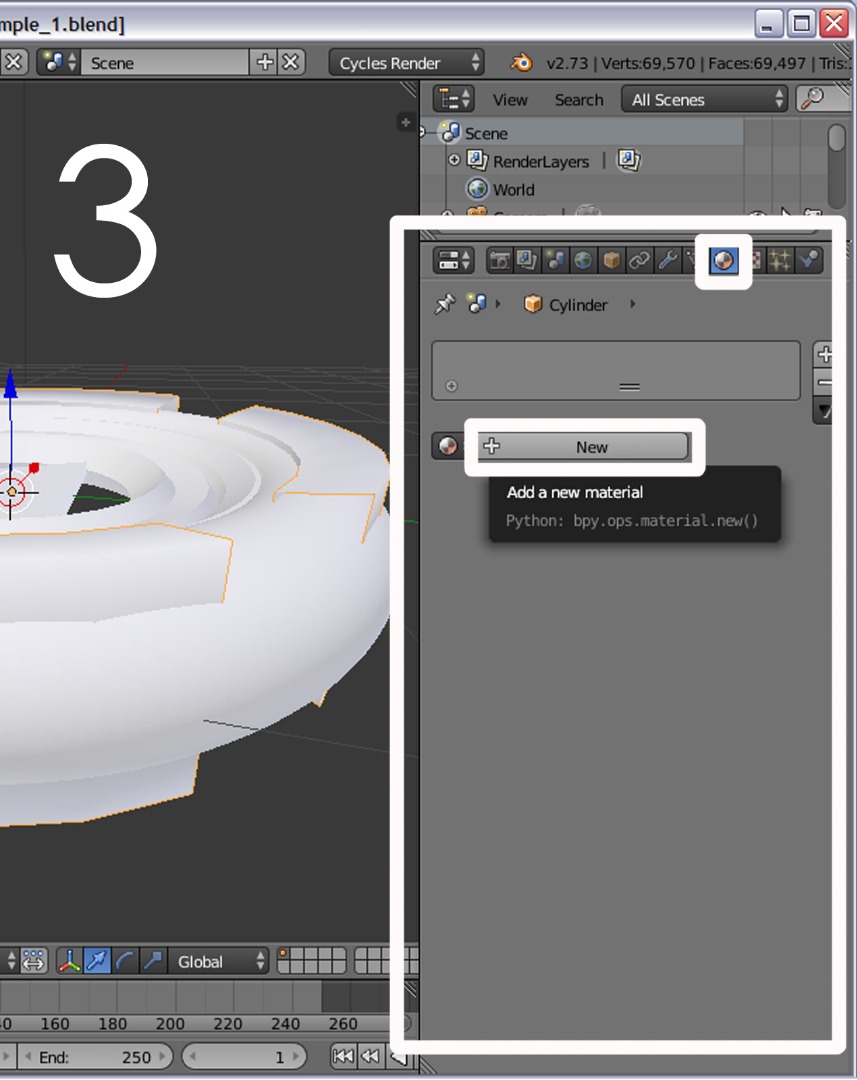
4. You see a crystal ball-like figure? click that and press that "new" button with the "+" sign. See picture 3
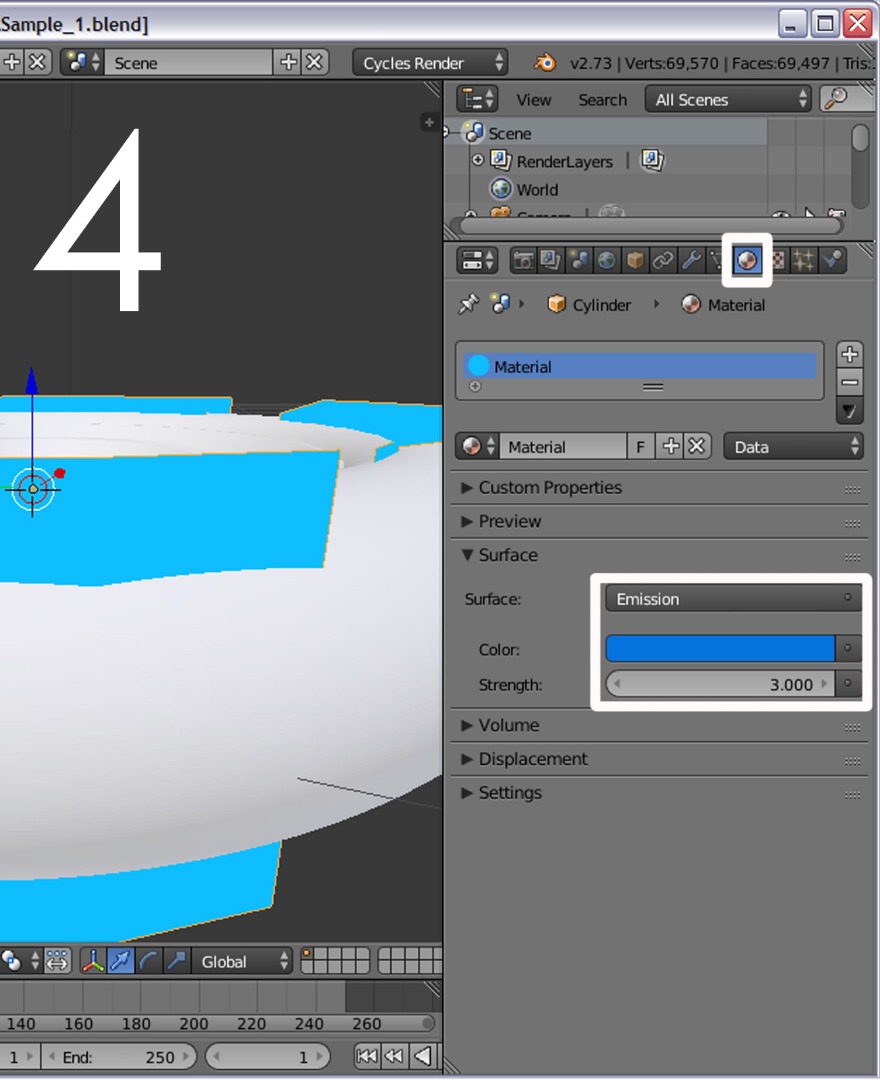
5. Then, change the settings: under surface option, Change the drop down menu from "Diffusion" to "Emission" (emission will let the object glow or emit light ) Change the color to like "mid" deep blue (i guess because going inside the light should be lighter.) Just check my settings at picture number 4
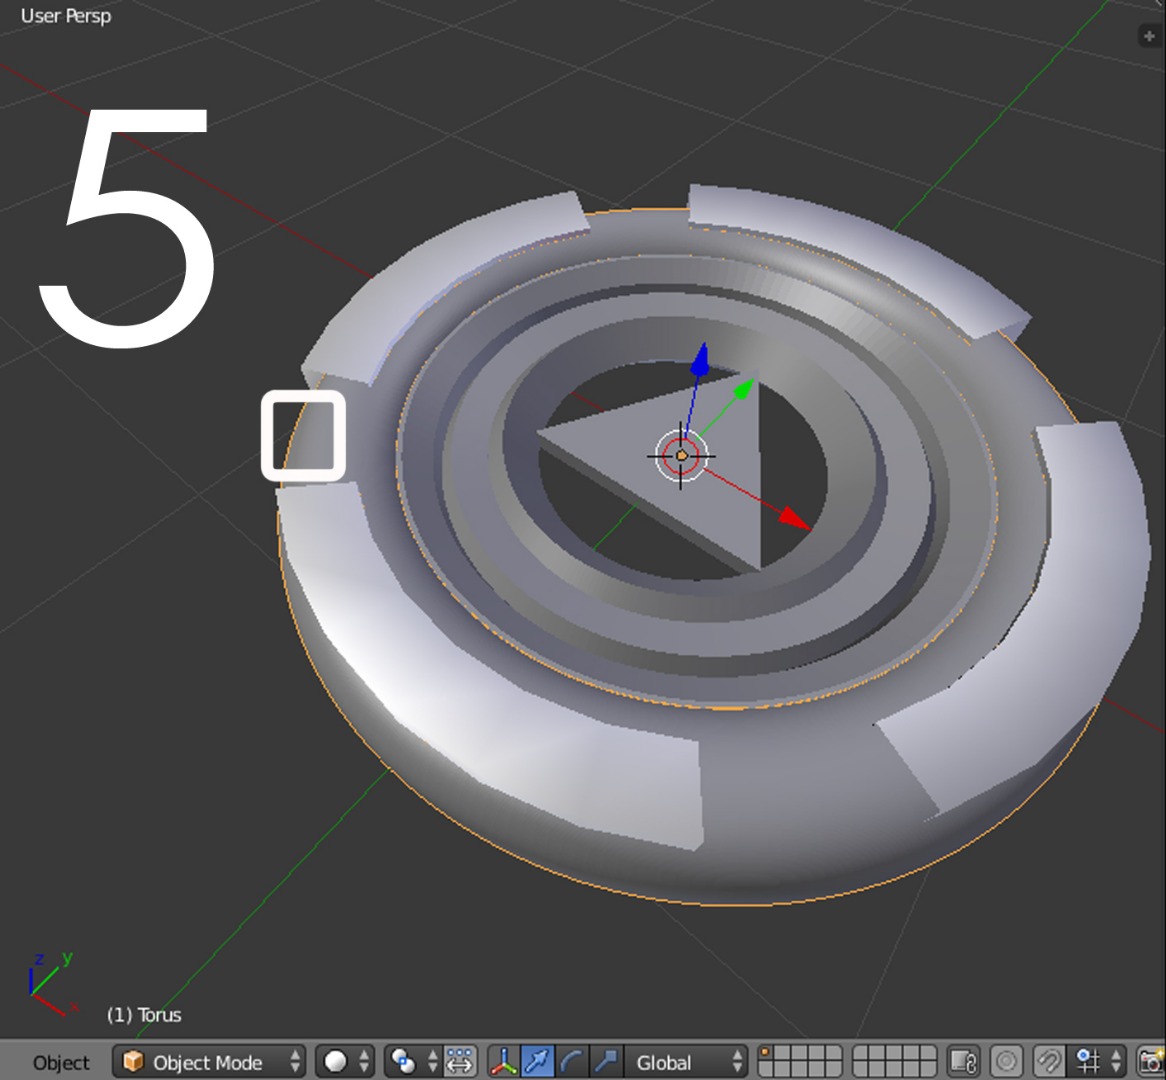
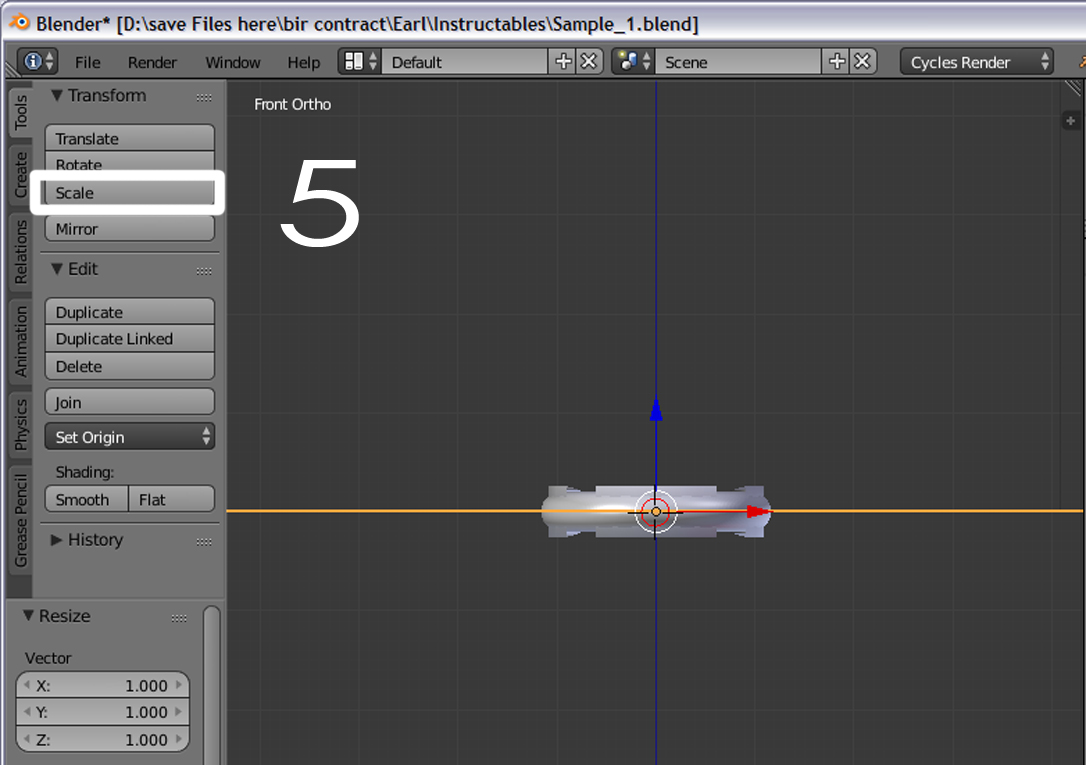
6. Select now the second circle layer, the first and the biggest torus. See picture 5
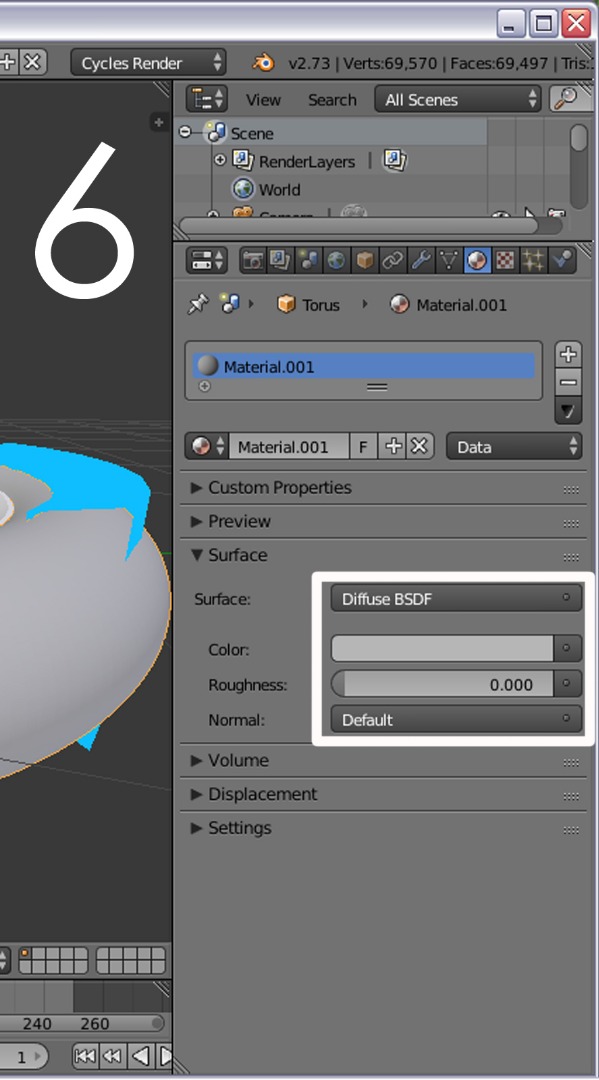
7.Now, apply my settings (picture 6) surface- Diffuse BSDF, Color Change to Light gray.
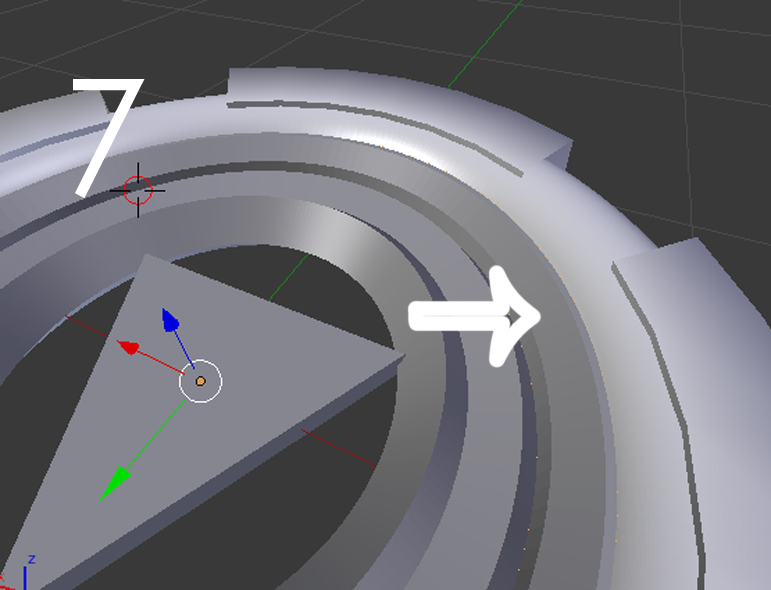
8. We are repeating the process. This time, it will be applied on the second inner torus. Select the second torus we created. (see picture 7)
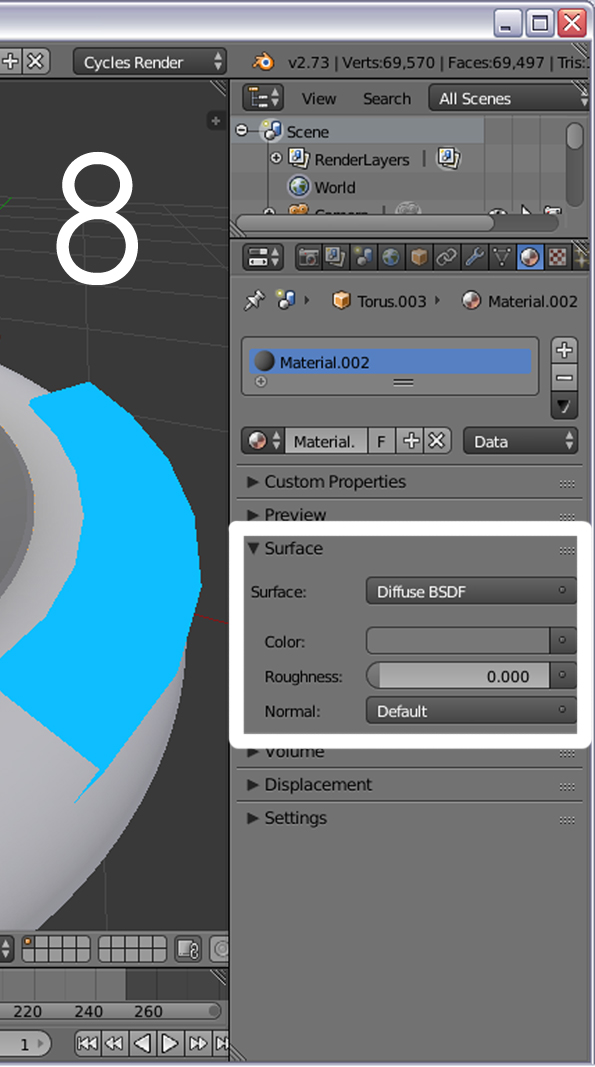
9. Apply my settings: Diffuse BSDF, Color: Change to Dark gray. (see picture 8)
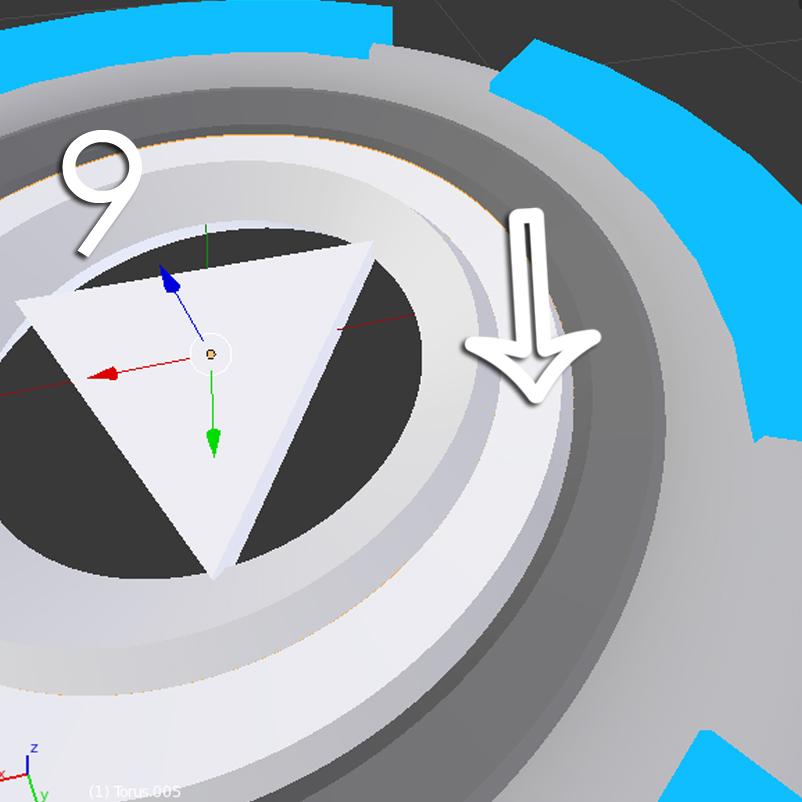
10. So there are 3 parts left without the settings changed, now the next torus will be glowing but lighter than the glowing torus outside, Start by selecting the third torus. (see picture 9)
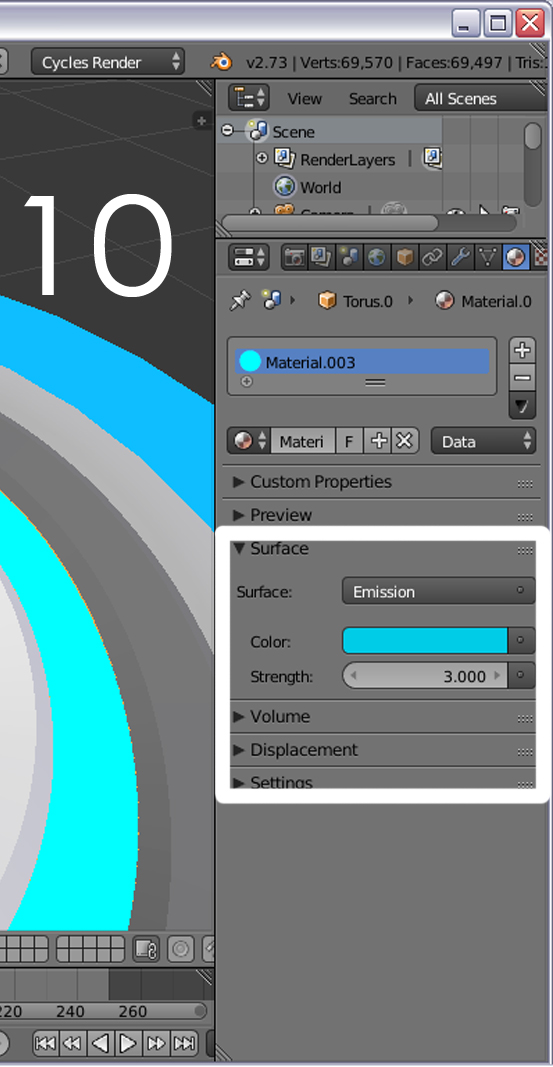
11. Change the settings: surface- from diffuse to emission the color should look like the color of first layer (broken cylinder) but it should be lighter (better check and compare my picture 4 VS. picture 10 )
12. Done? now we are skipping the last torus (we are not changing anything)
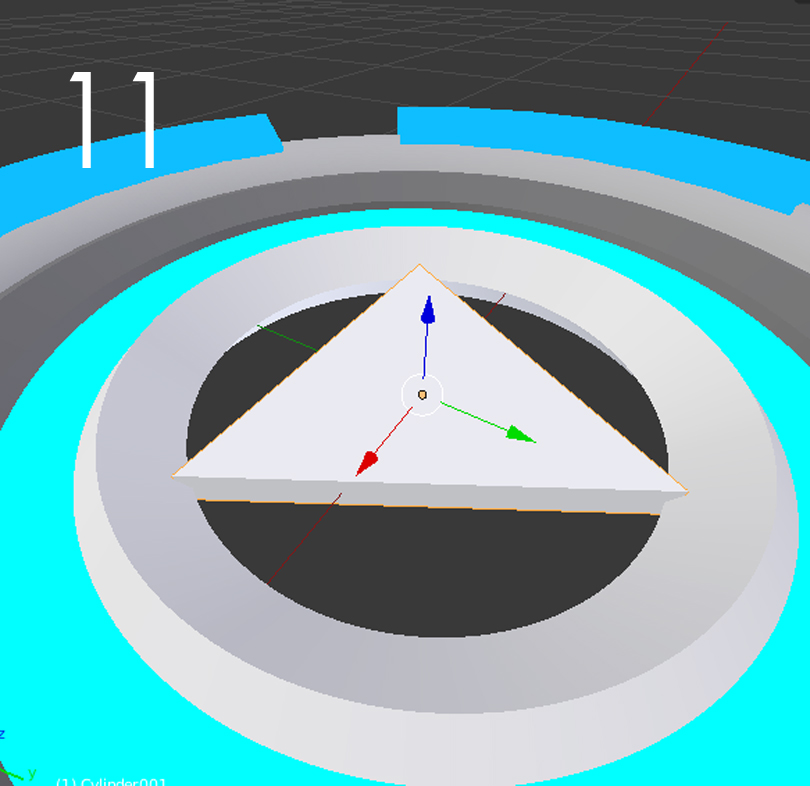
13. Select the Triangle on the middle (picture 11)
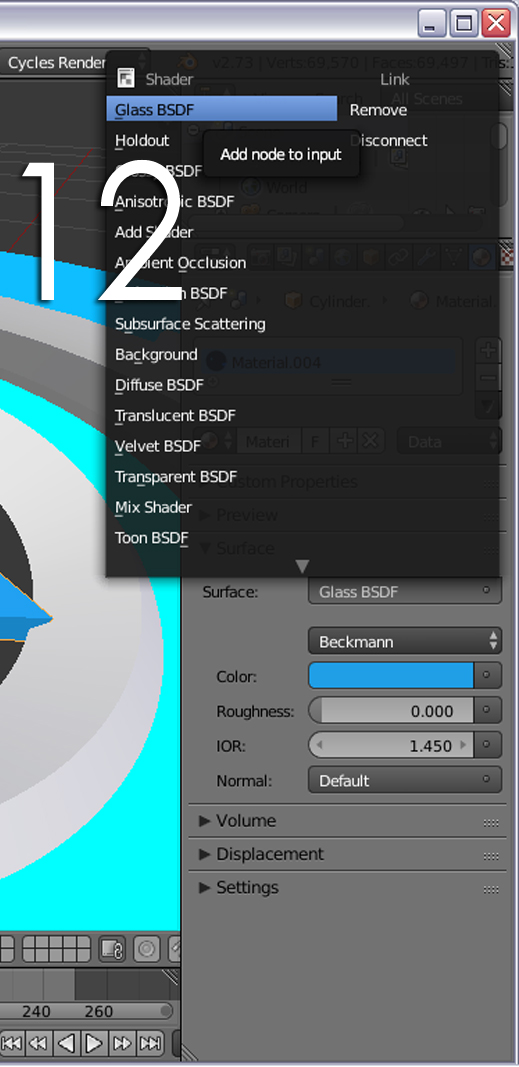
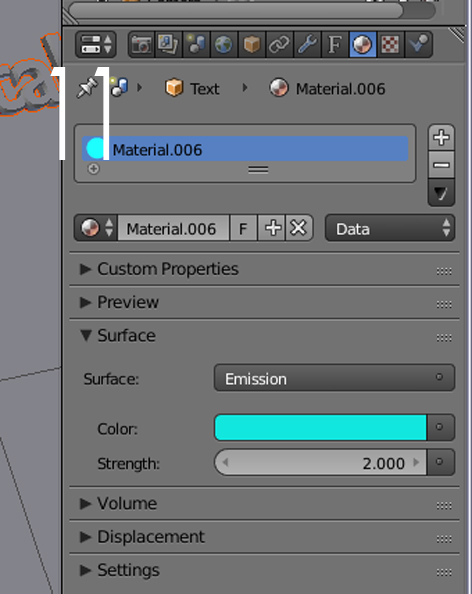
14. Now apply my settings; Surface- Glass BSDF Color; Should be like mid blue (see picture 12 for color) you can just copy the color of the first broken cylinder.
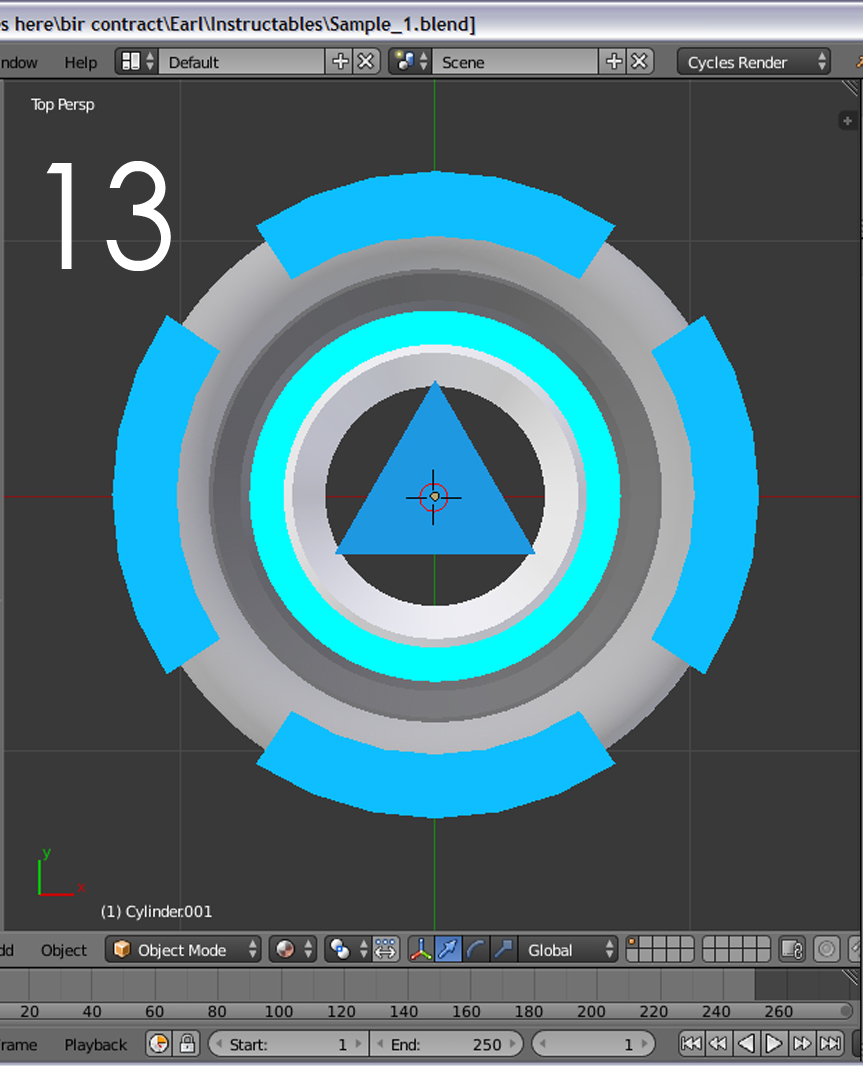
15. Were done! it should look like picture no. 13
Adding Elements 1: Making Its Platform
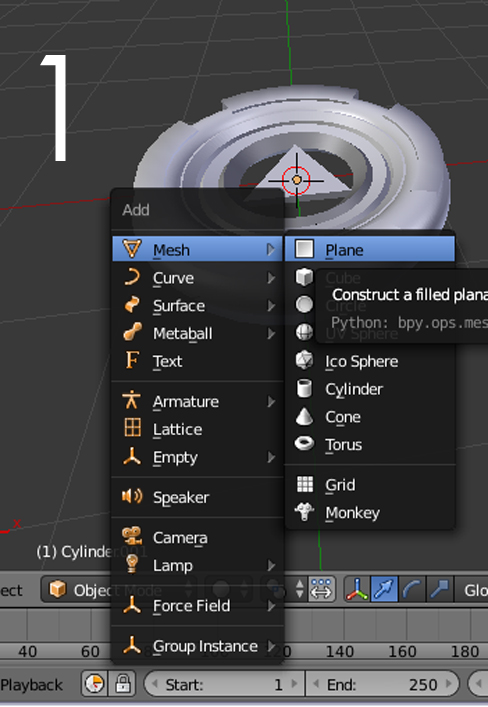
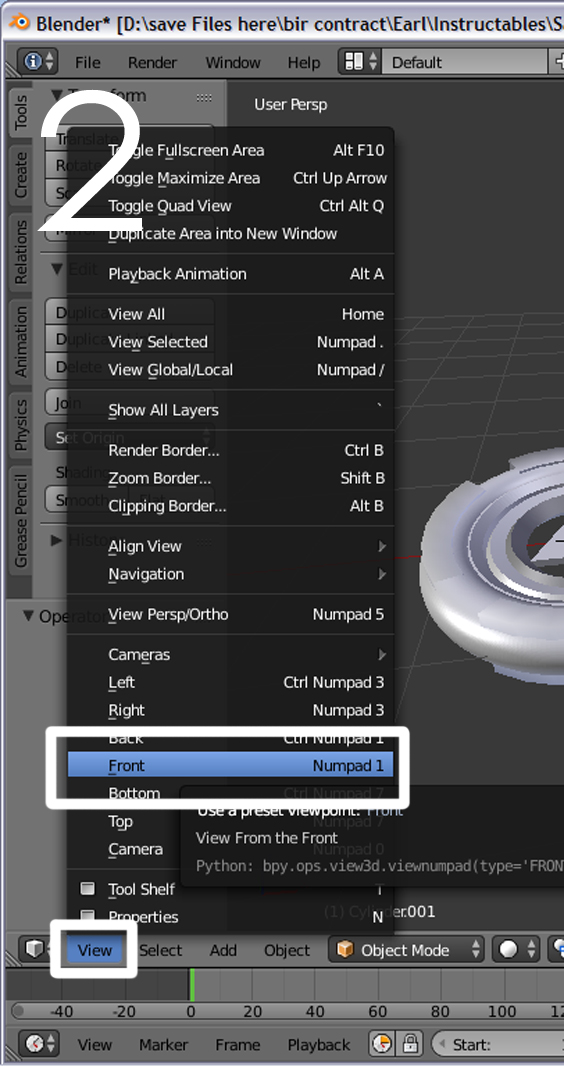
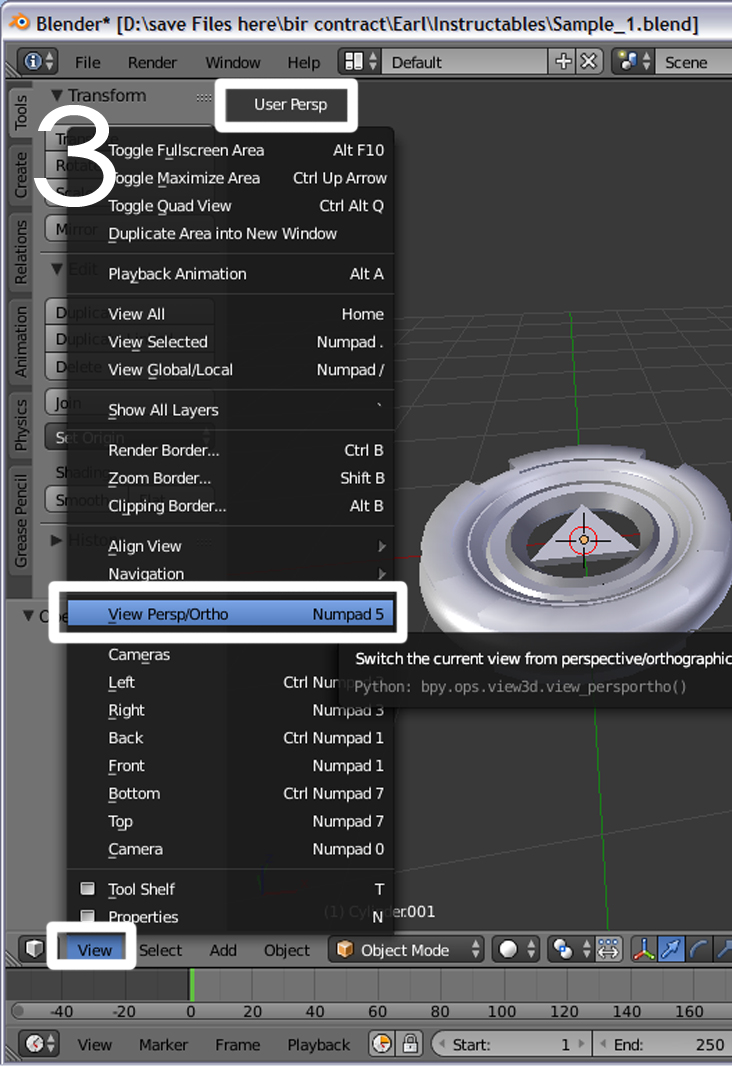
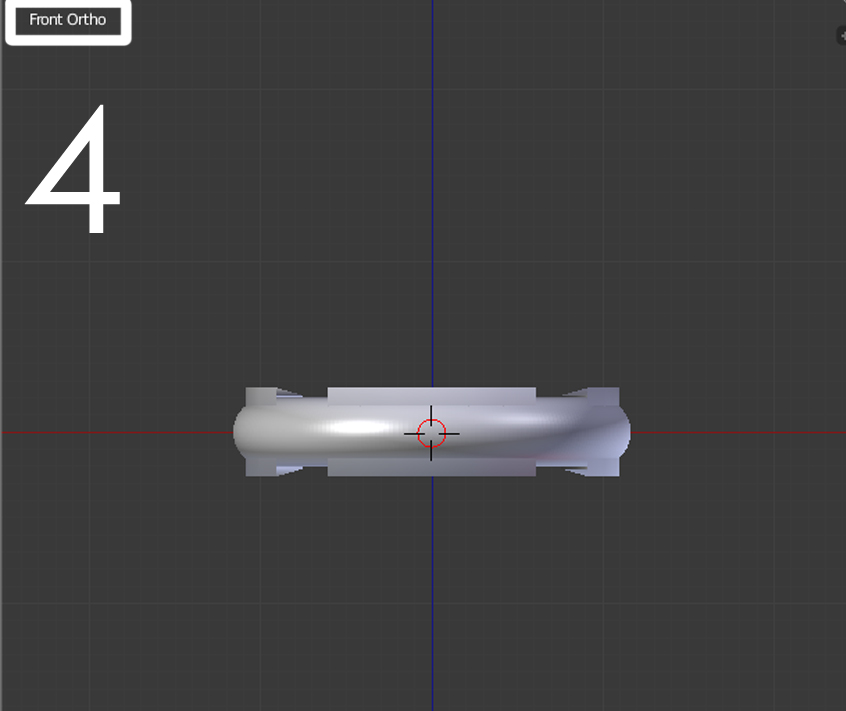
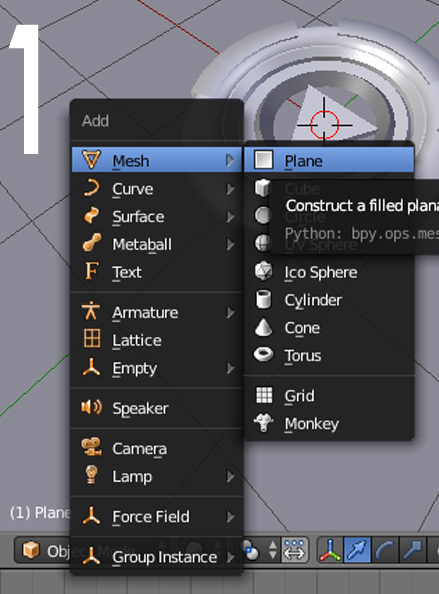
1. Start by adding a plane, Do this by pressing Shift + A or going down then press "add" Then mesh Then Plane (See picture 1)
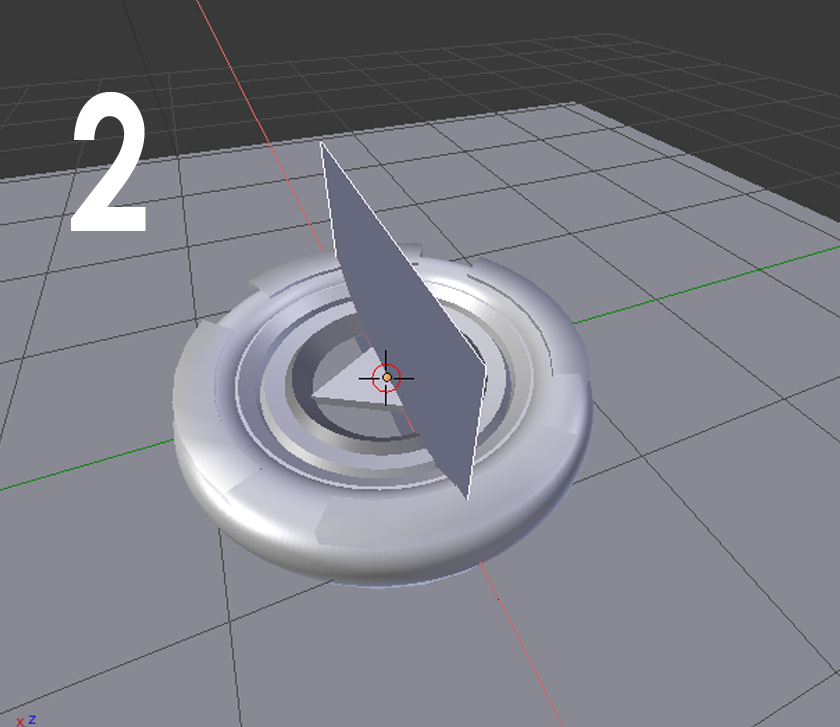
2. Change the view to Front view by going to "View" and select "Front" or simply press number pad 1. (See picture 2)
3. Without moving anything, Change our view projection to "Orthographic" by going to "View" then "View persp/ortho"(See picture 3)
4. After that you will see a straight front view or "real" front view. But make sure the plane we added is still selected(See picture 4)
5. now press scale or "S", While scale is active press "5" on the keyboard and you will see the plane resize .(See picture)
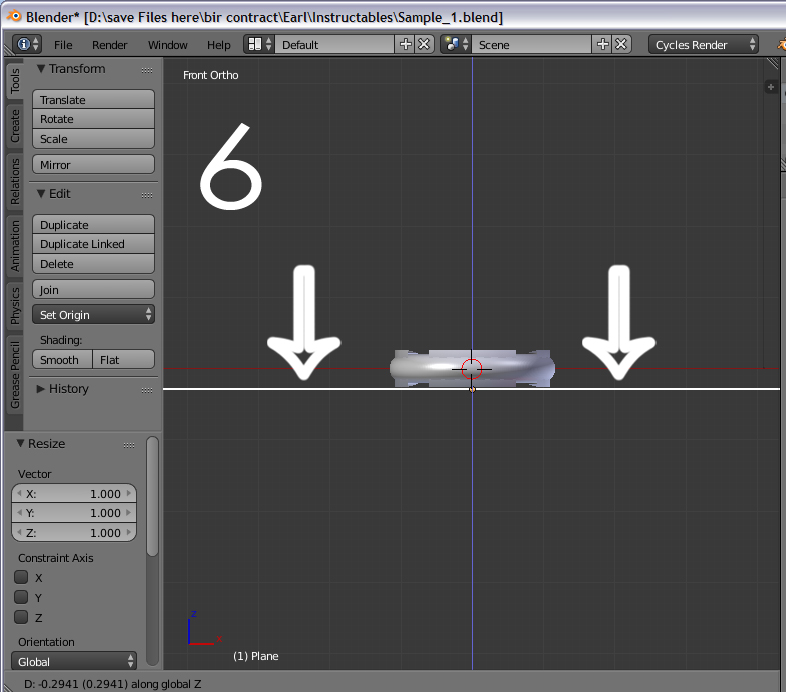
6. Then, press translate while translate is active, press "Z" on the keyboard (so it will translate at Z axis) now move your mouse down and stop until it reaches the bottom of the figure. (See picture)
7.Done! now, you can change from "ortho" to "perspective" so you can navigate and see it better.
Adding Elements 2: Making Lamps and Text
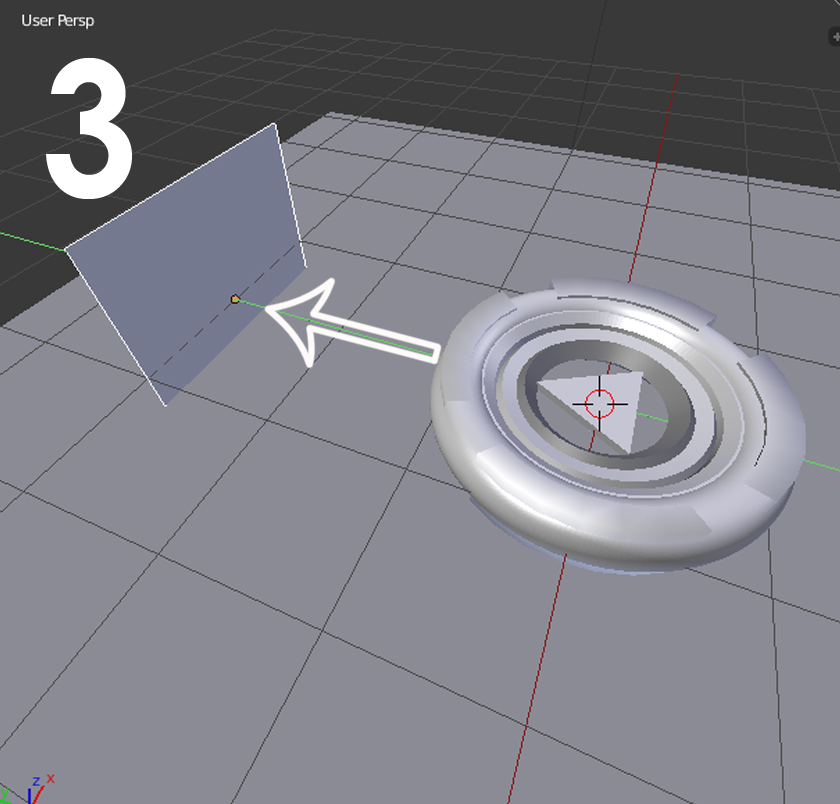
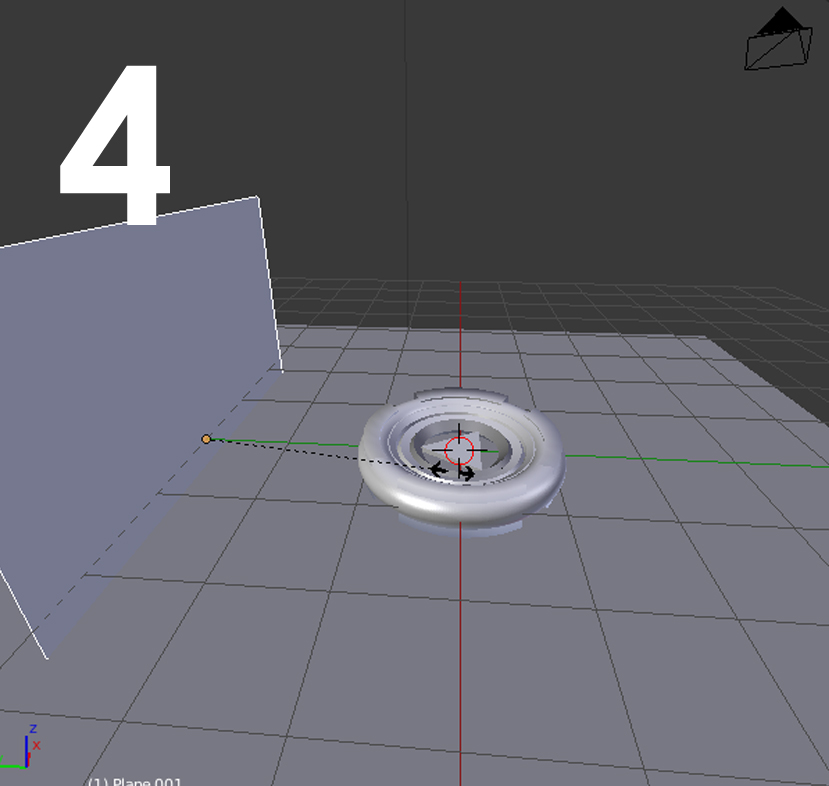
Before we render, we need to use lights so colors will be visible we are adding two lamps for effects
1. start by making a plane. That will serve as our first lamp (see picture )
2. Rotate the plane by 90 degrees by pressing "R" or going to the left panel and press "Rotate" While rotate is active, press "X" so it will rotate on the x-axis then press 90.(see picture
3. Let us move the plane by pressing "Translate" on the left panel.while translate is active press "Y" on the keyboard and press 3.(see picture
4. Scale the plane. now press "scale" on the left panel or simply press "S" on keyboard. While scale is active, press 2.5 (see picture
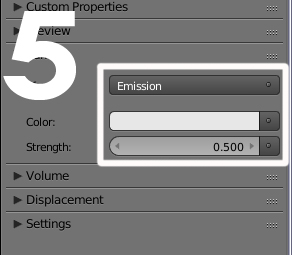
5. Apply these settings: set from "Diffuse" to "Emission", color to White, Strength to 0.500 (see picture
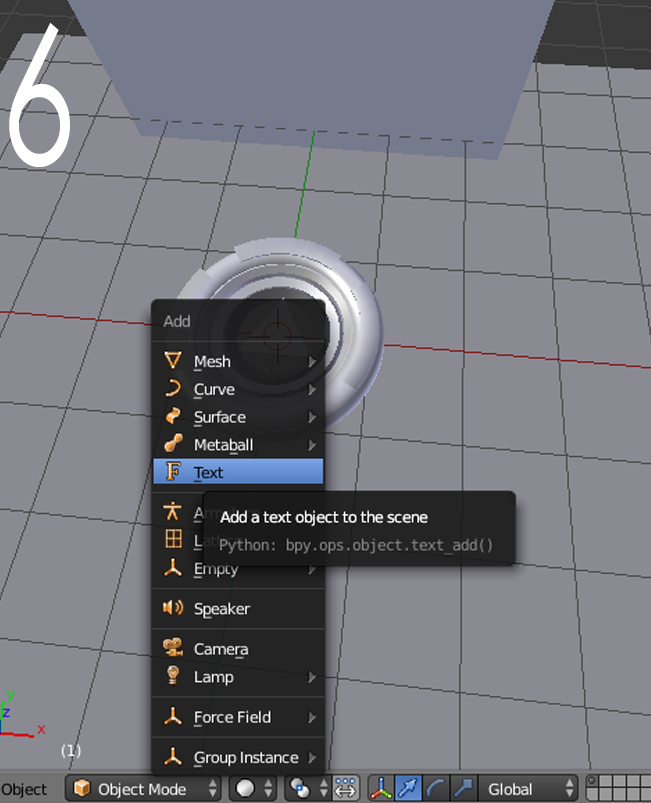
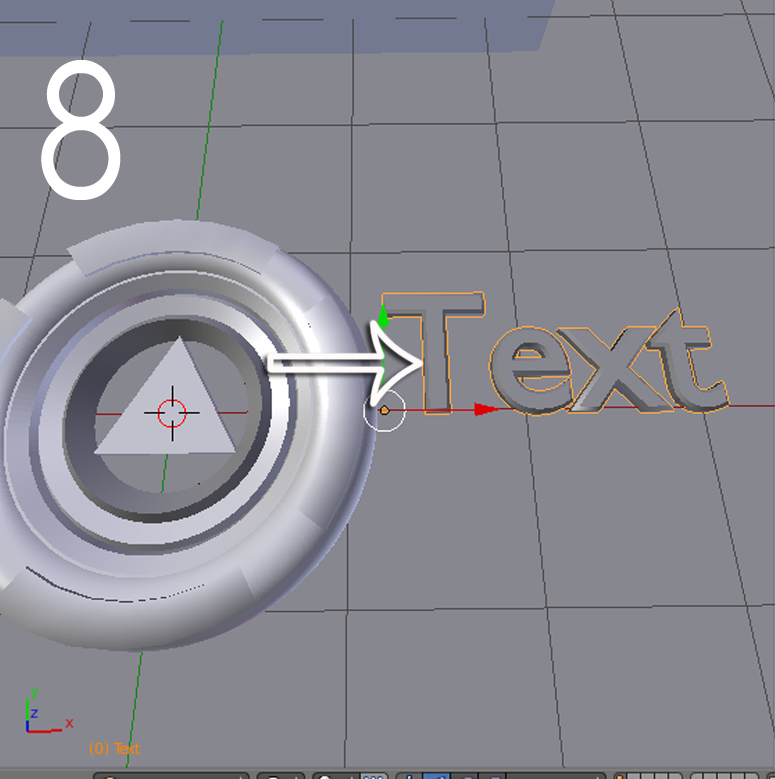
6. Add a text. Press "Shift + A" or Go to "Add" then select "Text" (see picture
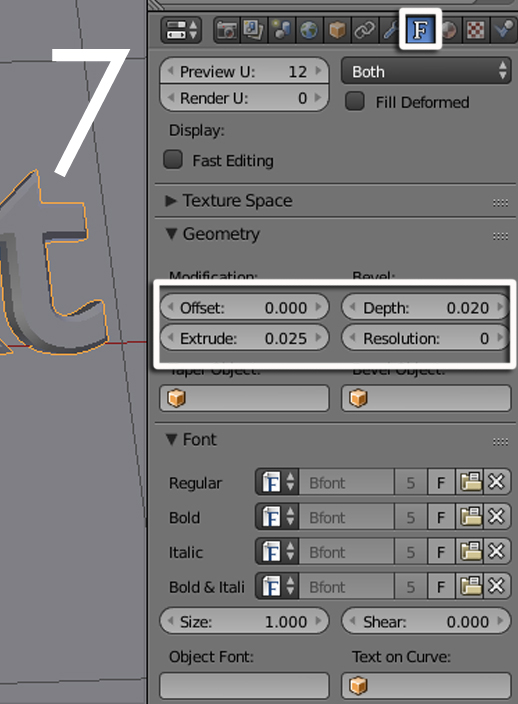
7. Let us "Extrude" or Put thickness on the "Text" By going to the right properties panel and press the "F" near the Crystal ball. That is the properties menu for the text. now scroll down until you see "Geometry" now apply my settings: Modification: Set extrude to 0.025 Bevel's Depth 0.020 (see picture
8. Then, move it by pressing "translate" on the left panel then press "X" and "1.2" while translate is active (see picture
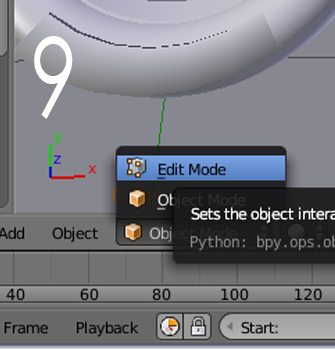
9. Edit text. Press "Tab" To go to edit mode or go down or go down and select object mode and change to edit mode. (see picture
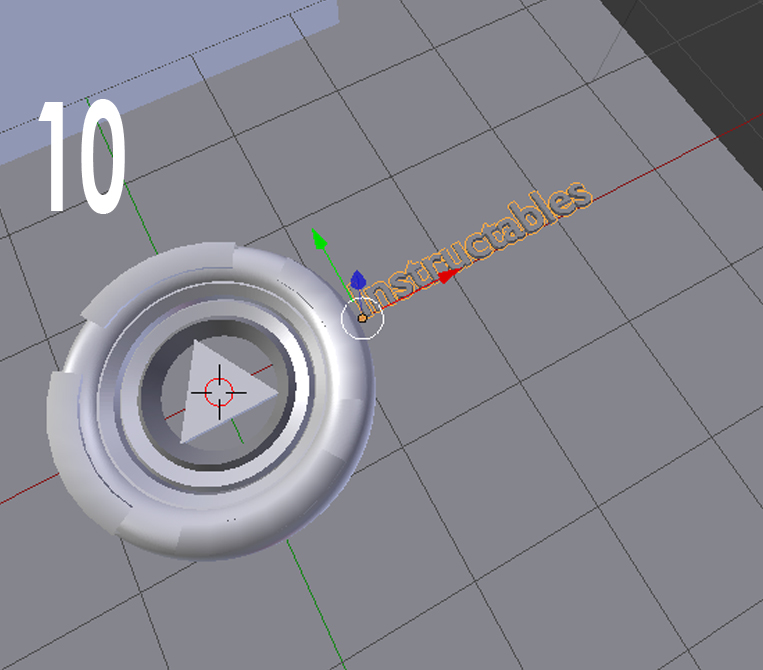
10. After going to "edit mode" you will be able to edit the next, If your text is too big you can scale it or the plane platform. I scaled my platform and the text. (see picture
11. Make the glowing light under the text. First select the text then copy by pressing "CTRL C" and paste by "CTRL V" now while it is still selected, make it glow by applying these settings: Change "Diffuse" to "Emission", Color to Light blue, Strength: 2. (see picture
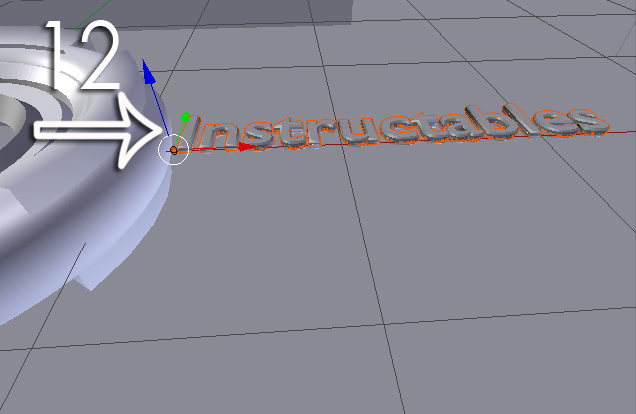
12. Move it. Press Translate and press "Z" while translate is active then press -0.0090 while translate is still active. (see picture
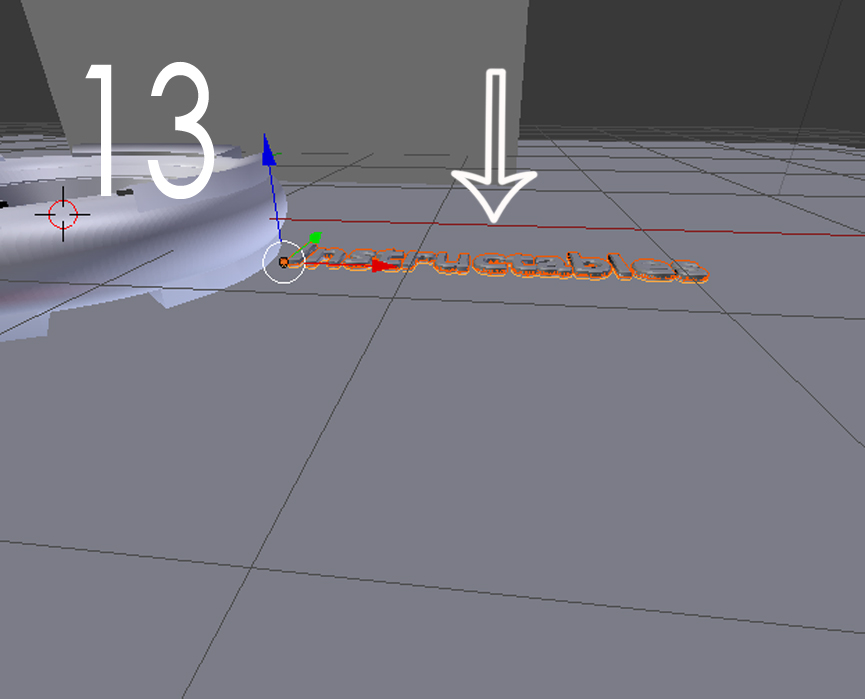
13. Move both. Hold SHIFT and right click to both text then, Translate press Z move the text until it is aligned with the bottom of the "Circle Thing" (see picture
DONE! NEXT- Camera settings and other
How Would I See the Finished Product? -rendering
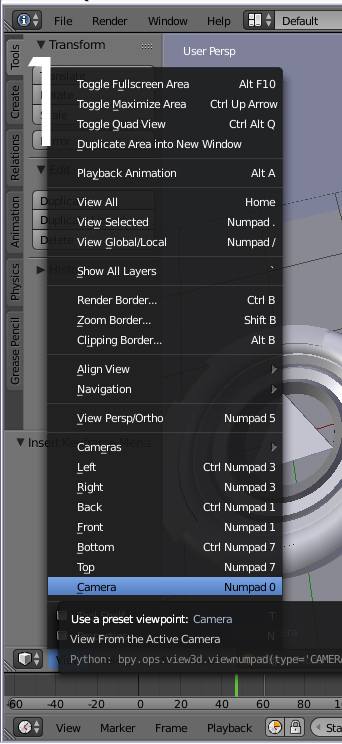
1. Let us use view the camera, by pressing "0" on the number pad or going to "View" then press "Camera"
(See Picture 1)
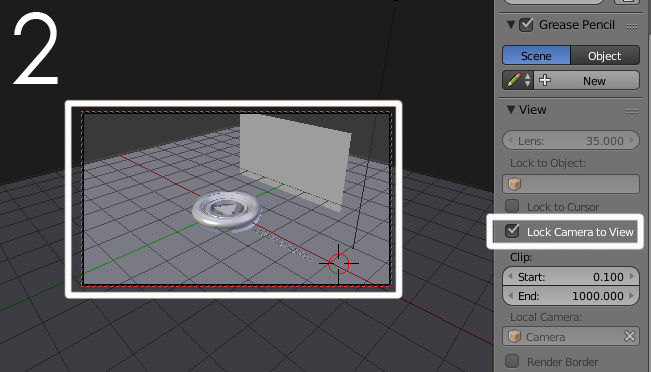
2. now to move the camera we need to "Lock" it to our view so when we pan, the camera will follow. do that by pressing "N" on the keyboard and a menu will pop up, there is a "Lock camera to View" and check the check box (See Picture 2)
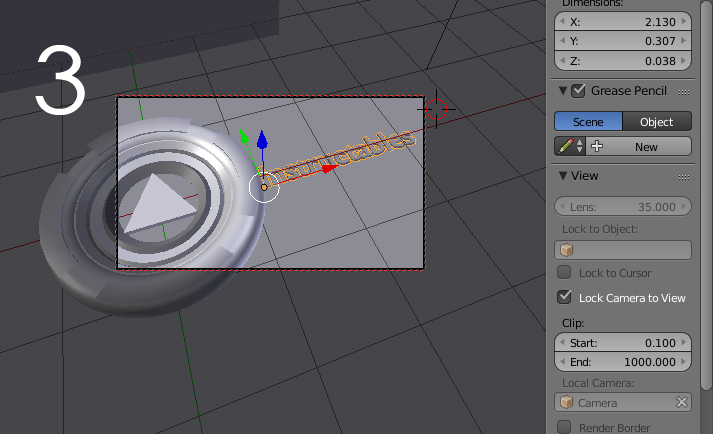
3. now find an angle that looks nice and all elements except the plane lamp fits inside the red with black broken lines. but you do not need to fit the whole "Circle thing" I think it looks better and it will give you more space to put more details (See Picture 3)
4. You can move the plane lamp if it doesn't fit.
5. be sure to adjust settings so you can customize it.
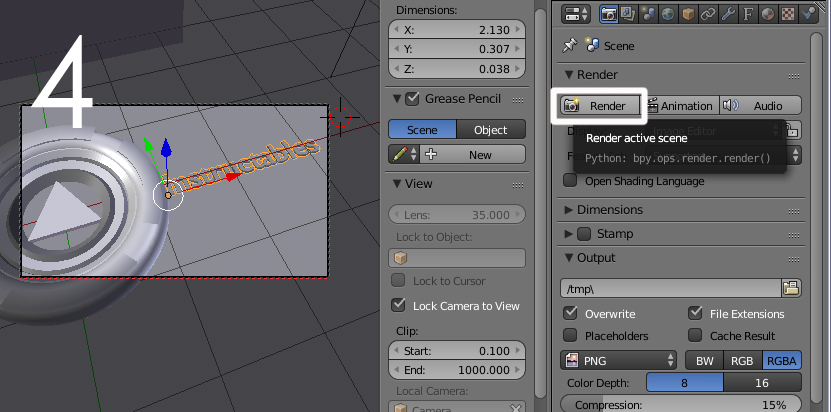
6. Let us render! Do you see a camera icon on the right panel? there is a "Render" button which will construct the final image. NOTE: it will only render what is inside the camera you set. (See Picture 4)
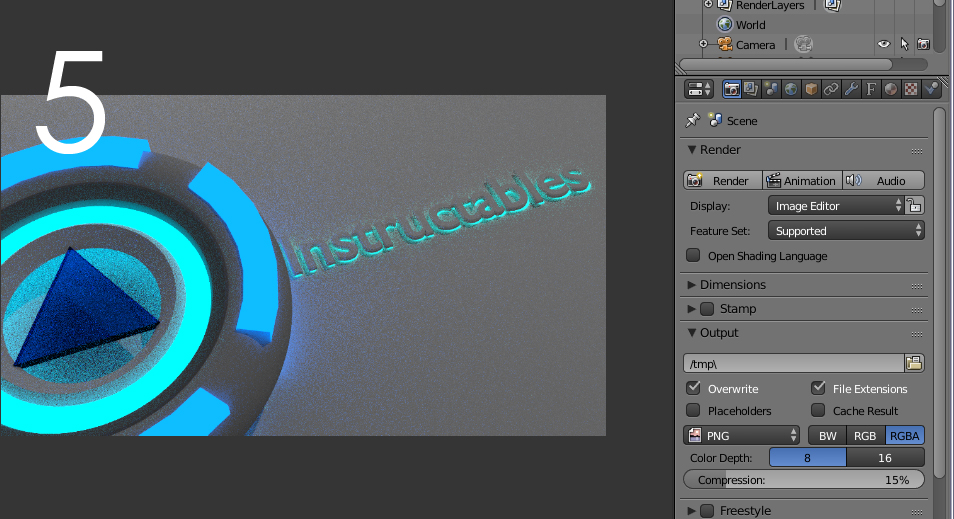
7. after pressing the render button, the final image should look grainy or low quality. (See Picture 5)
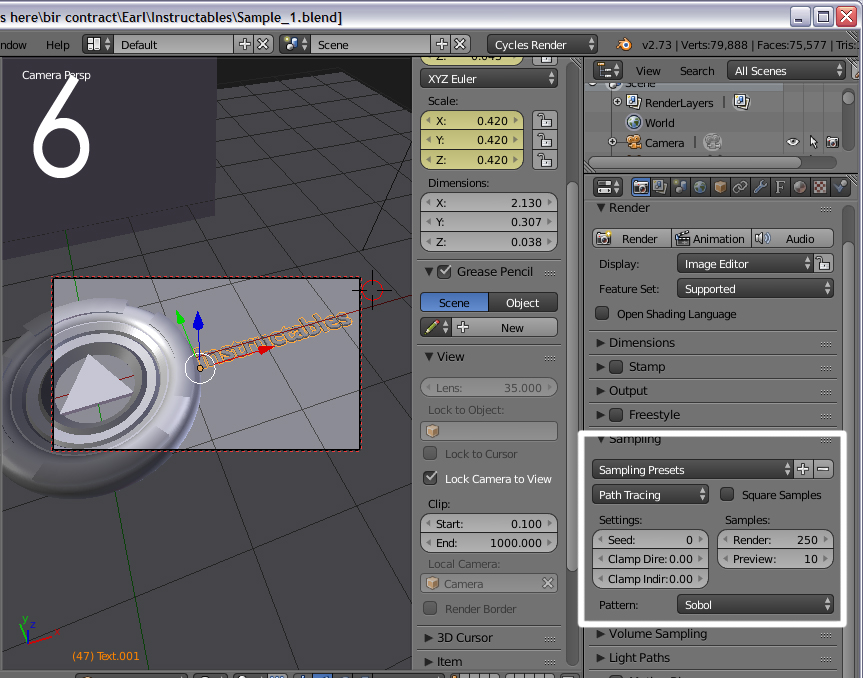
8. So how to make it high quality? scroll down on the render panel until you see "Sampling" maximize that and you will see "Samples" there are two options: "Render" and "Preview" Click render and change it to 250. Now, press render again, it will take long to render but it's worth the wait (Mine took like 15 minutes) (See Picture 6)
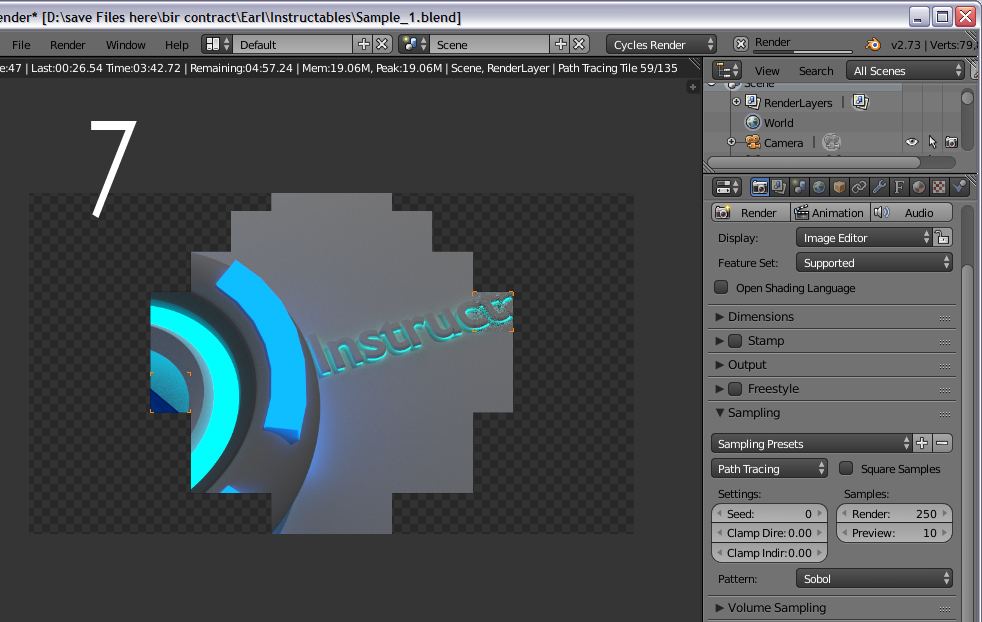
9. See mine while rendering at picture 7
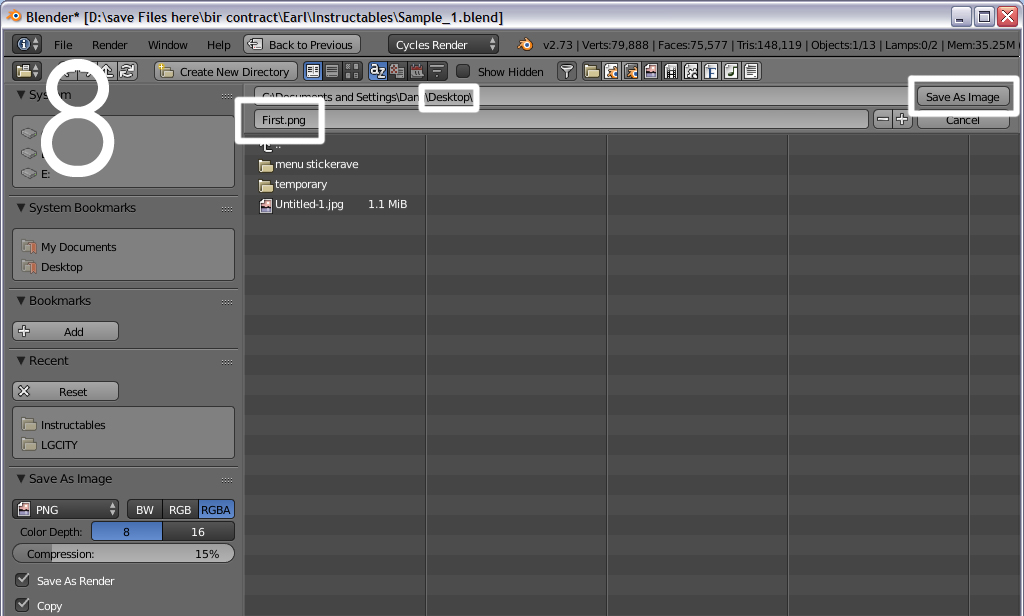
10. How would I save that? I don't really know how to save the image without using a hotkey but for now AFTER blender is done rendering the high quality final image , Press "F3" on the keyboard and a menu will pop up, you can change the Directory and the name. I use .png image format which is the default format in blender. (See Picture 8)
DONE!
KEEP MOVING FORWARD!
What YOU should do next?
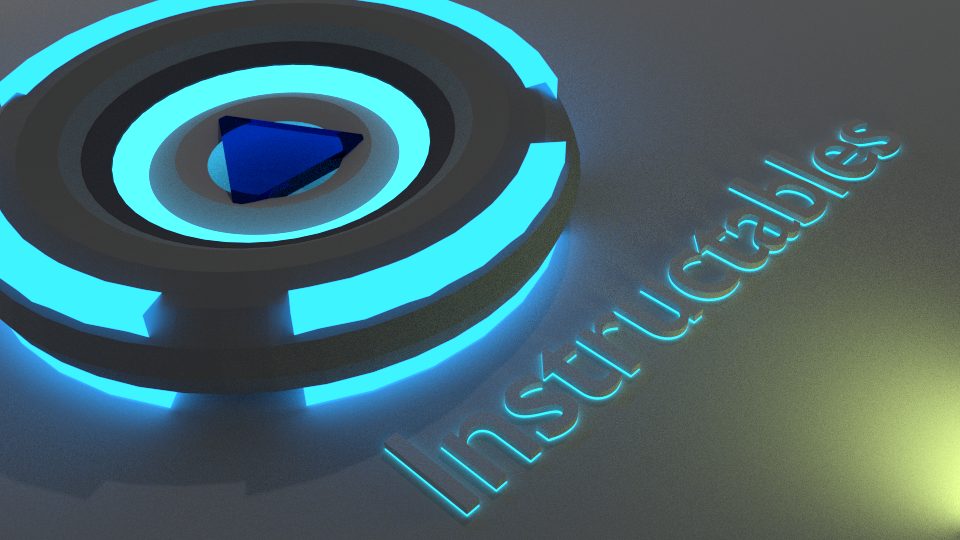
you should KEEP MOVING FORWARD! try to improve what you have made. like; I put a Circle then use it as a lamp with yellow illumination to give more "Drama" to the image. You got no limits !
What YOU should really do next?
VOTE ME! If you think my instructable can teach even the dumbest person in the world, VOTE ME!
VOTE ME! If you think my instructable did a nice job VOTE ME!
VOTE ME! Please spare your time for voting WHY? I really want to make a lot and teach a lot with some computer stuff but my computer (This windows xp machine -_-) Shuts down every 30 minutes whenever I use Photoshop, Blender, Adobe premiere, Sony vegas and sometimes Google Chrome Which is a BIG problem for me as i cannot do what I want to do. I am putting this ible in the Mind for Design Contest so please VOTE ME!
TELL ME! If you did nice job and finished the project.
TELL ME! If you think you made a BETTER job than my samples
TELL ME! some suggestions :D
Want to really improve with blender animations
http://www.littlewebhut.com/ -Then go to blender. This guy taught me a lot with his youtube videos. he has nice tutorials :D