Make Your Face
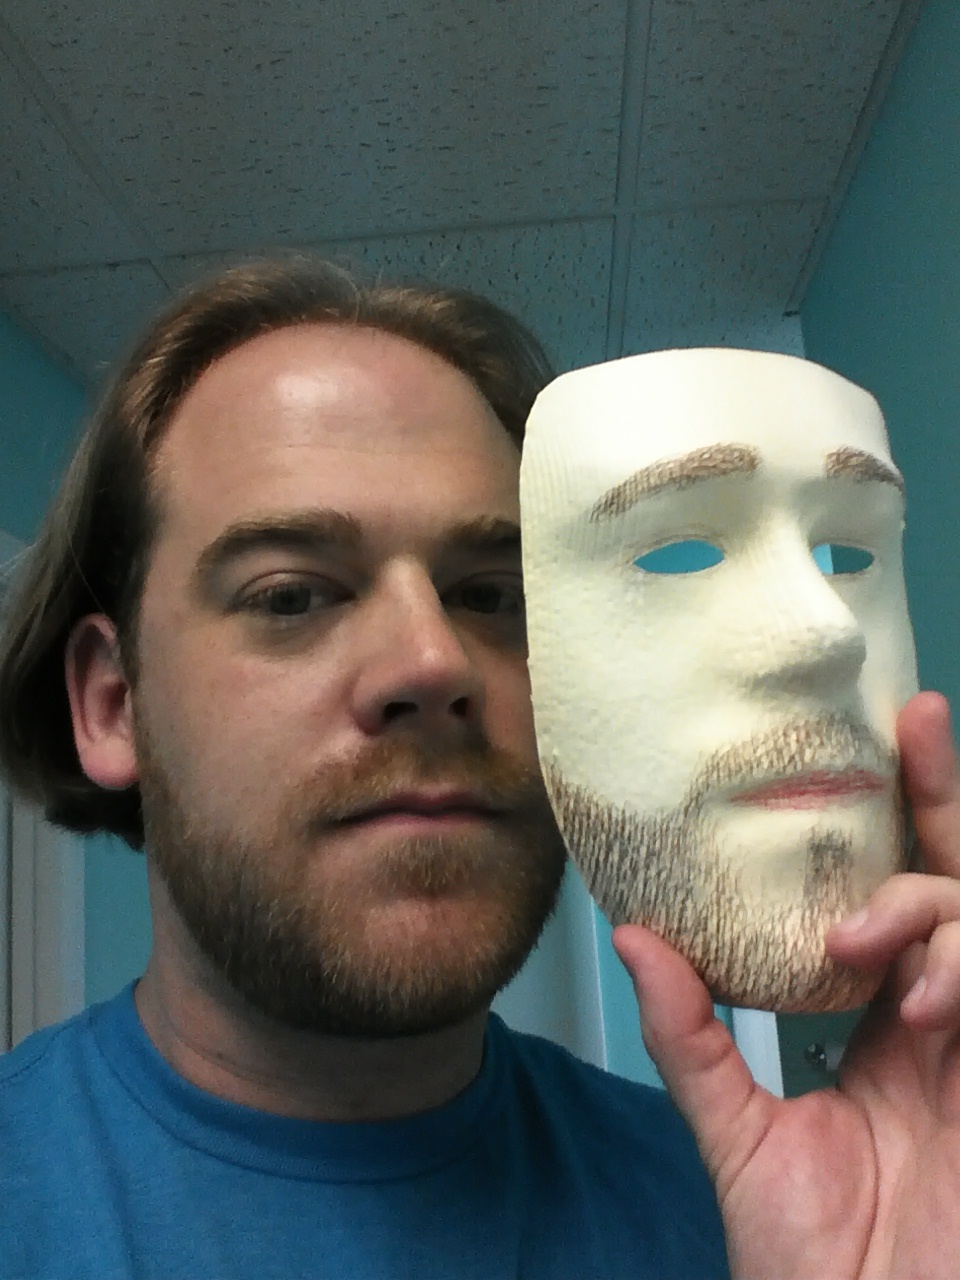
Here is the idea: It is lame when people go to a Halloween party 'as themselves', but what if you had a mask of yourself. Now, that would be awesome.
For a while I've wanted to do this, but I was hesitant to make a mold of my face. it seemed like it would be a big mess. After playing around with 123D Catch I thought, "this will work!". Now we don't have to mess around making a mold of our face, but we can do it digitally with entirely free software.
This flow of this project is as follows:
Pictures -> 123D Catch -> .obj file -> 3D modeling software -> editted .stl file
-> Freemill -> g-code -> Notepad -> CNC Router - > Foam negative mold
-> Plaster Positive mold -> Plastic vacuum forming -> Painting -> Awesomeness.
So as you can see there is a lot to this. We are going to duct tape a lot of software together and get this to work. Lets do it!
123D Catch - Making the Model of Your Face
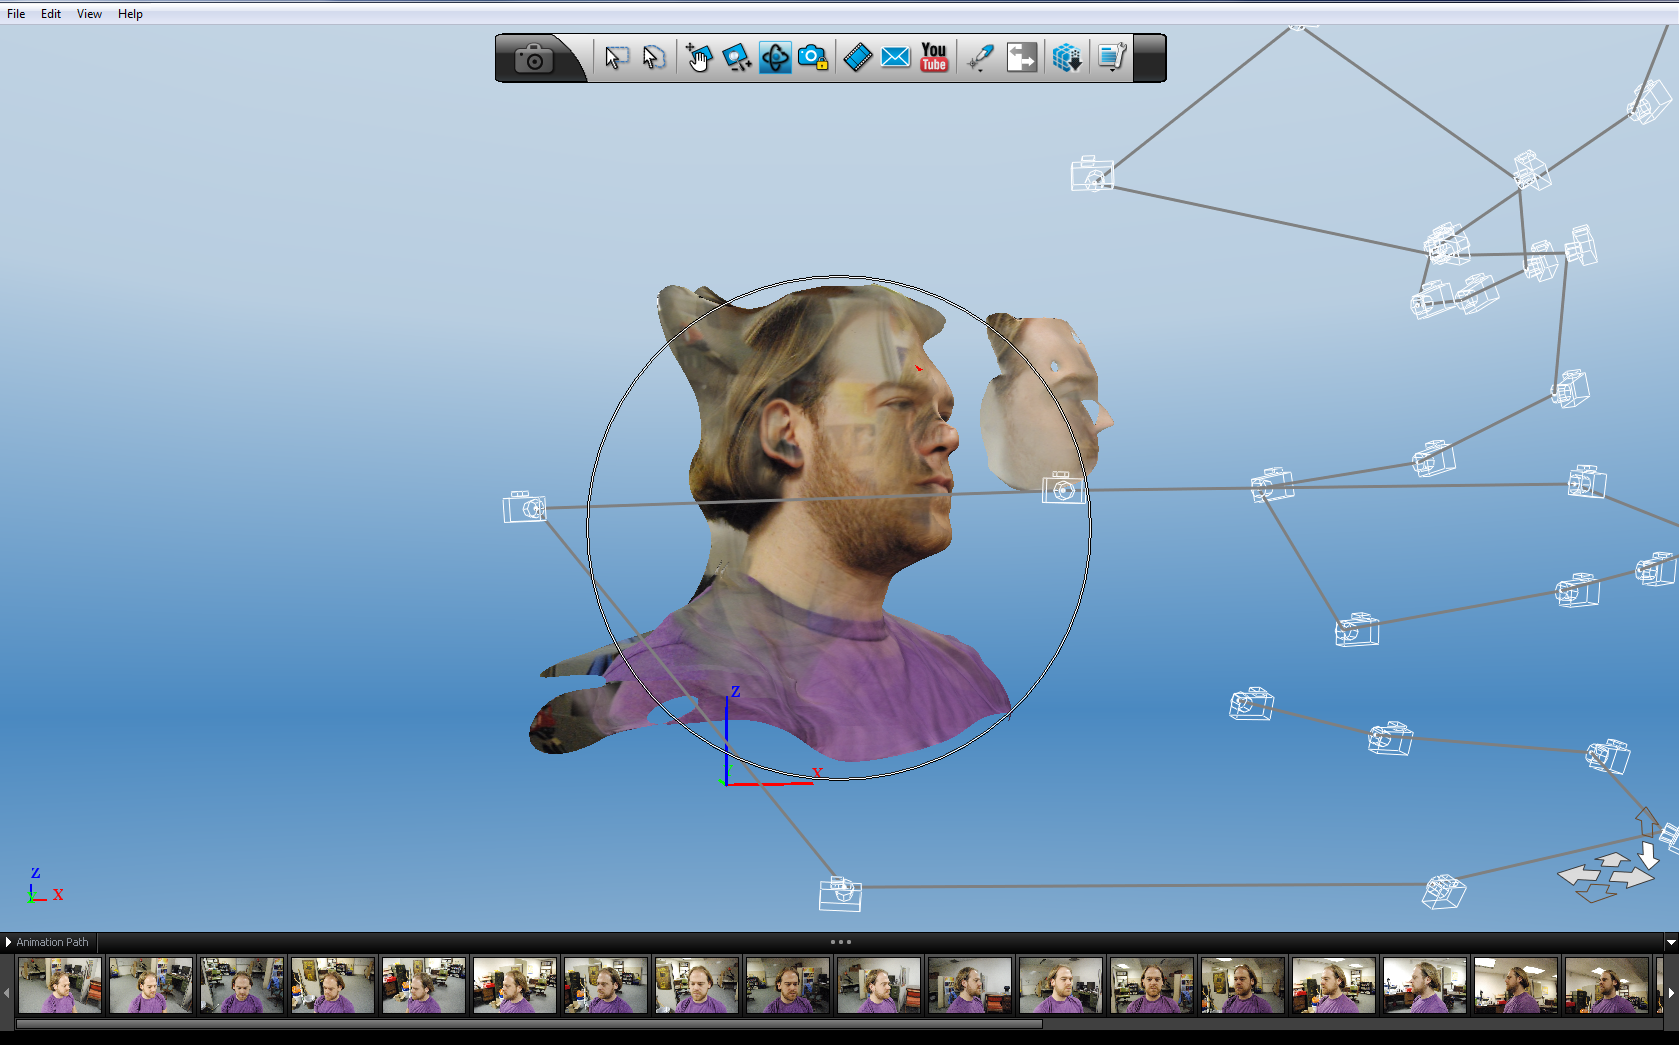
123D Catch is an amazing piece of software. All you need to generate a 3D representation of most anything is to take a bunch of pictures around it and 123D Catch will create a 3D model.
123D Catch prefers that the lighting is even and it requires that nothing moves. We took a series of photos around ourselves in order to resolve our faces. Angular spacing of 5 to 10 degrees is best. 20 or 30 pictures worked here. You'll have to experiment as things like hair and beards will affect the model.
Simply load the pictures into 123D Catch and generate the model. They are loaded into the cloud to do its work.
Once you have a model that looks like it is going to work (this might take a few tries), you'll want to generate a high res version of it and then export that as an .obj file. Don't worry about all the extra stuff, just make sure that the face looks ok.
Now that we have the 3D file we can work on modifying it in order to remove the extra parts and smooth out any bumps. We will use some other free software to accomplish this.
3D Model Manipulation
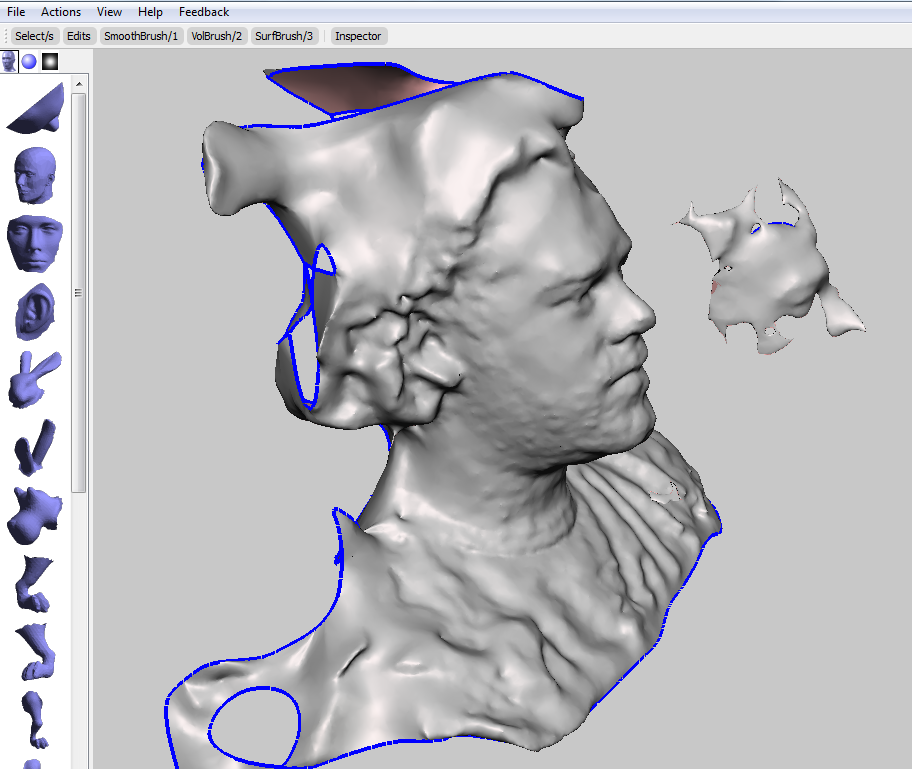
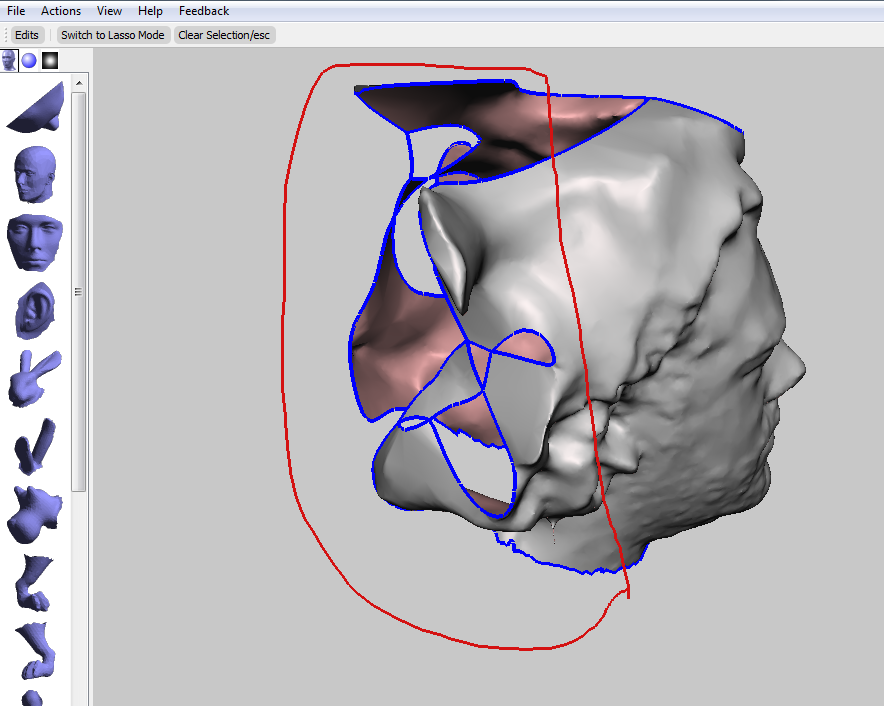
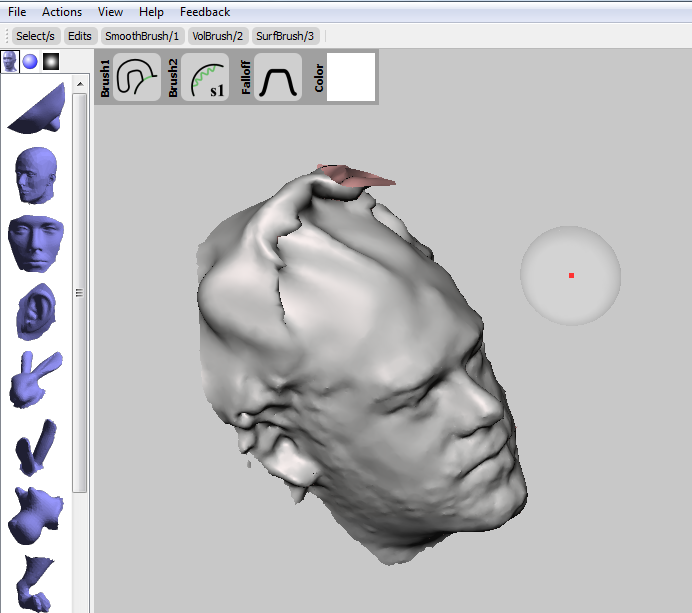
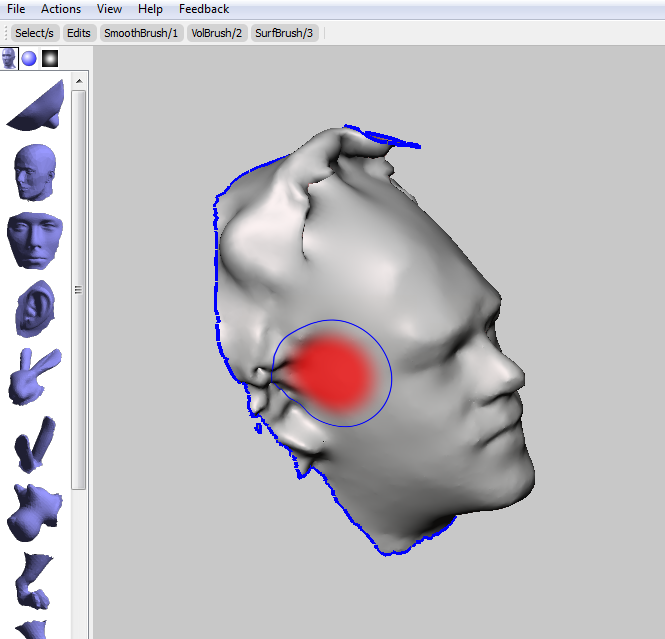
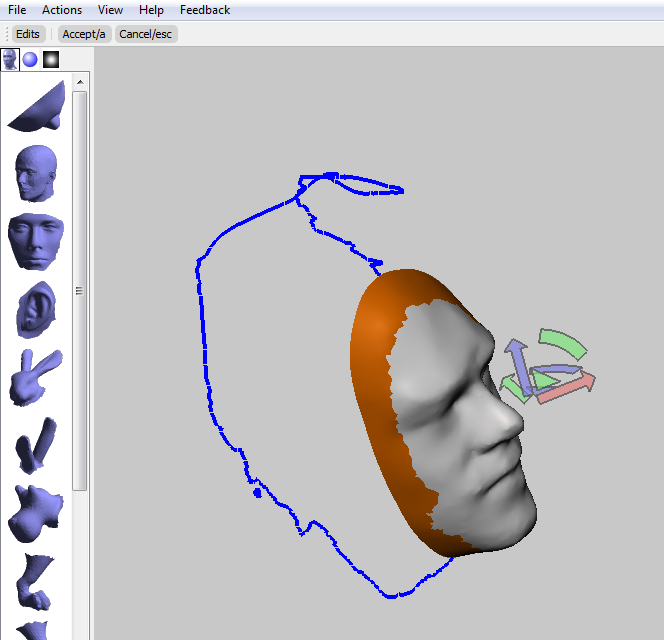
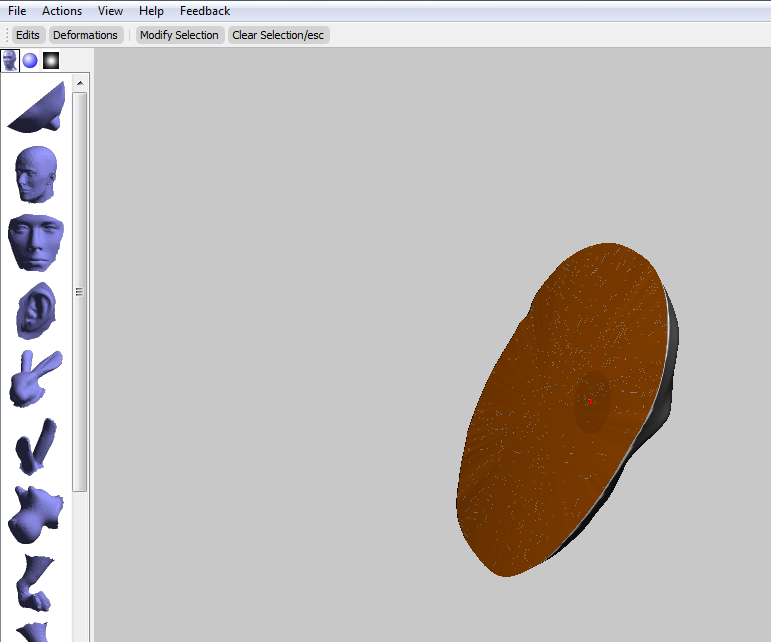
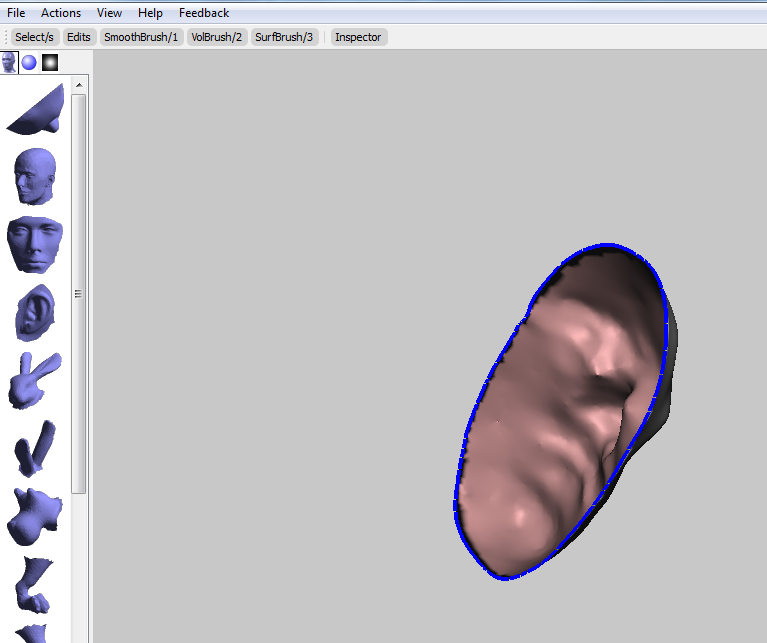
We have several options for modifying the 3D model. It also depends on what we want to accomplish. Here I am going to work towards making an inverted mold so that I can make a plaster positive mold of my face. (I was concerned that the foam would not work well with the plastic vacuum form step later)
After working with this a few times now I would really suggest doing your best to get a good quality 3D model out of 123D Catch, it is hard to shape the face correctly afterwards.
First we will use MeshMixer (I am using meshmixer 07 update 3) to clean up the model and smooth out any surfaces. This program is very easy to use. Hold the ALT key to change your view. Select the extra parts in the model with 's' and draw a loop around them. press x to delete. Once you have the extra stuff deleted we can smooth or modify the face. Check out the pictures below, they will walk through this process too.
Simply choose the smooth function and begin altering the model. You can alter the size and strength of the smoothing pad. Just play with it. I'm not a pro at this, I just messed around until it looked ok. I would suggest using the smoothing function minimally as too much made my face look fake.
You can also add or subtract material. Feel free to give yourself a nose job. The top of my head was messed up in my 3D model, it wasn't an issue since all I needed was the face. I simply leveled off the model in that region. The rest will get chopped off.
Finally, in meshmixer 07 update 3, there is an option for a plane cut. Move it around until just the part you want for the mask remains. The pictures below will make this step clear.
Now we have the 3D model for the mold. Export this as an .stl file so that we can generate the gcode for the CNC mill.
Alternative Method
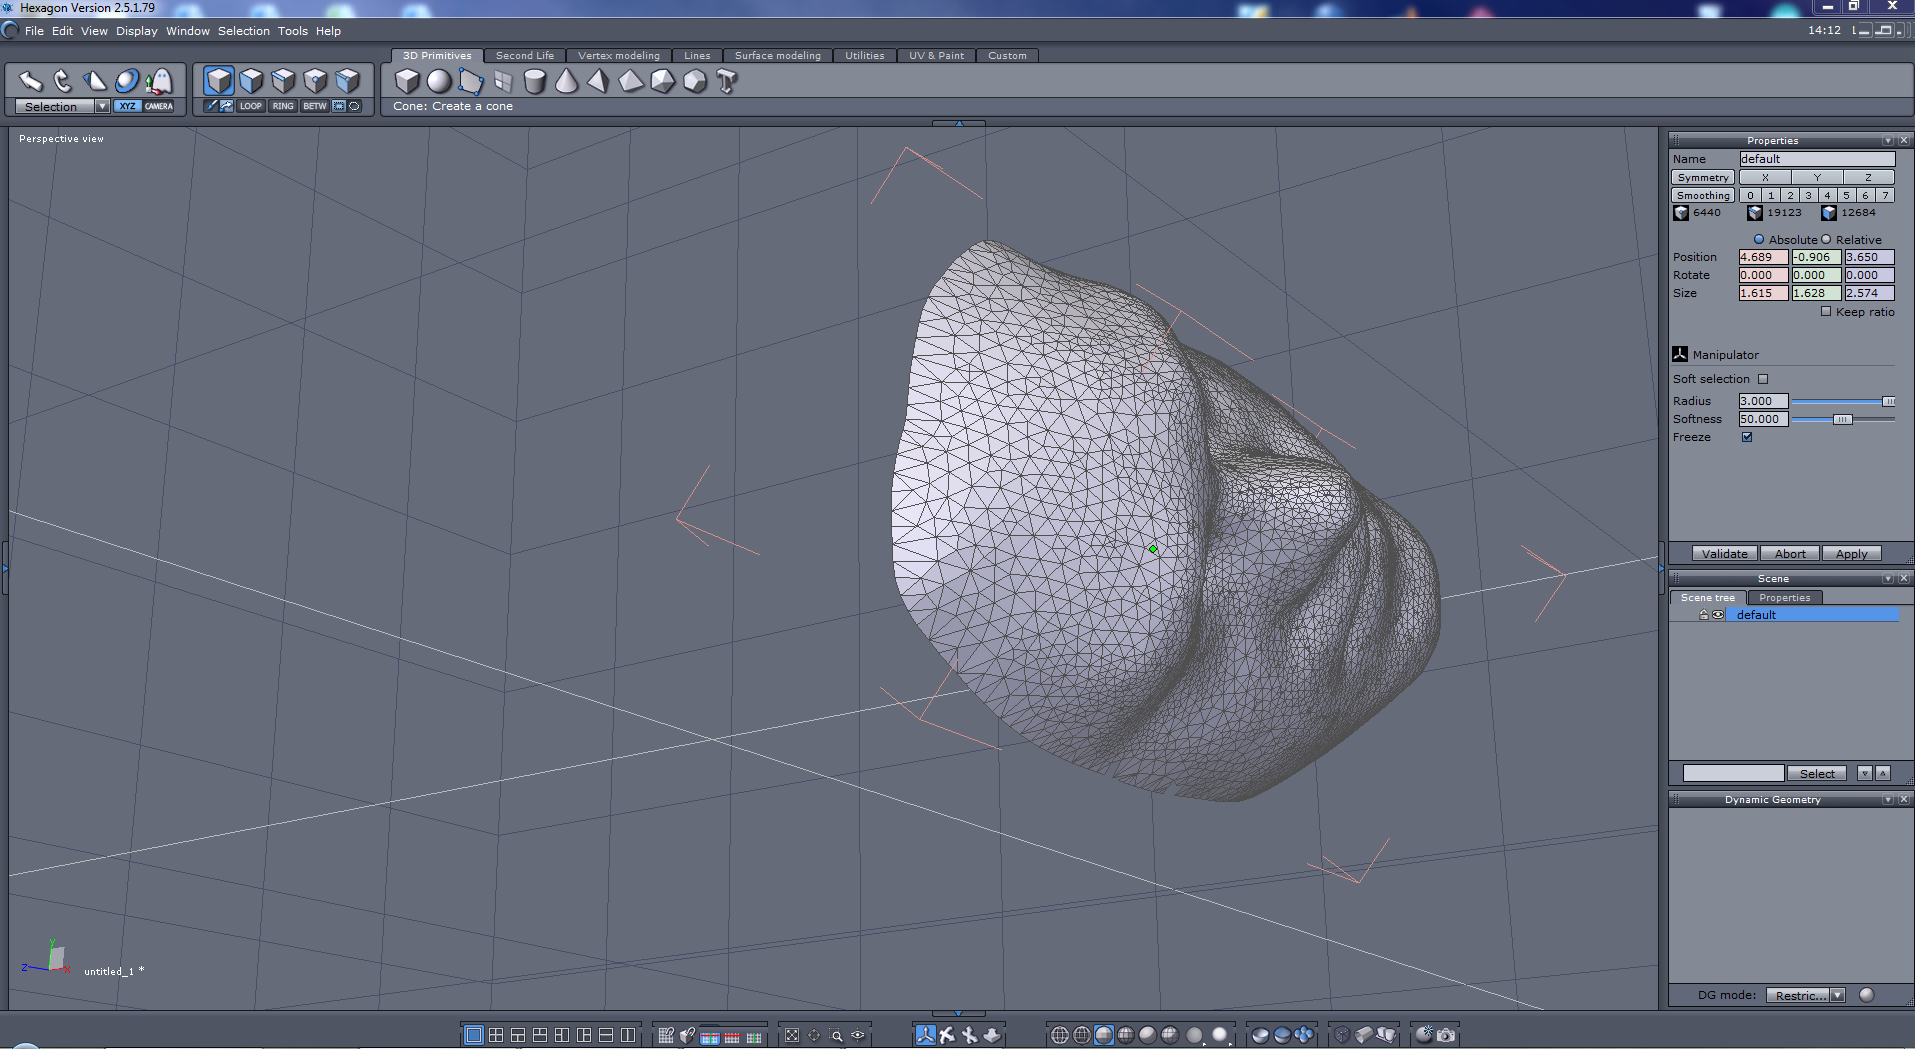
Here we are going to use 'Hexagon 2' which is available for free download from DAZ 3D. Similarly, we can select points and delete out the extra stuff.
Import the .obj file. You can rotate the model with the options at the bottom of the screen. Click on the model and then click on 'select points (F4)' you can now pick out the extra parts of the model and remove them. It is easier to change to the lasso tool (just below the 'auto select' button. Right click with the mouse to draw a lasso. press 'delete' to remove the points.
I deleted most everything but my face (and a little extra). I then added a box (3D primitives -> Cube) and moved it around (click on the cube and modify the properties on the right) until it chopped off the right amount of my face for the mask. The two parts were then added together with a surface Boolean addition (surface modeling -> Boolean operation). Select your object then select the Boolean operation. Now click on the cube. Give it a moment to work. A weird addition may be made, but look in the properties on the right, you'll see a bunch of circle and squares with different blue areas. This represents the different operation options. I chose the normal add function (all blue) so that it keeps everything.
This made a nice flat bottom surface. You can now delete the box parts, or leave them in depending upon your CNC application. Again, export as an .stl file.
Other Software
Any other software (such as Blender or the Autodesk 123D apps) that allows you to manipulate 3D models will probably allow you to do this step as well.
In the next step we will convert the modified 3D model to gcode for CNC'ing.
G-code Generation
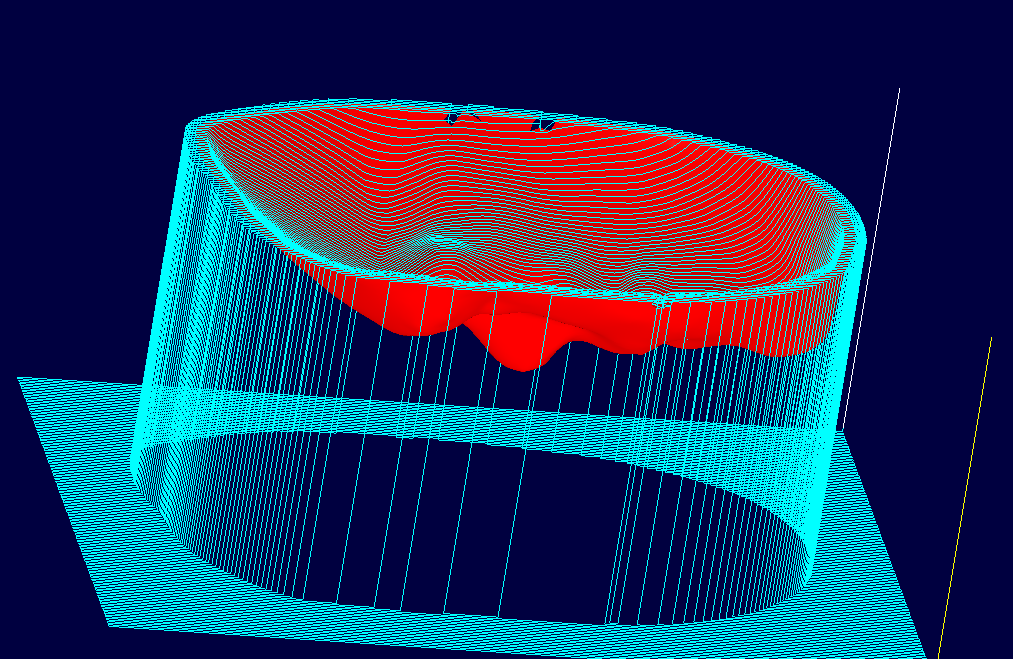
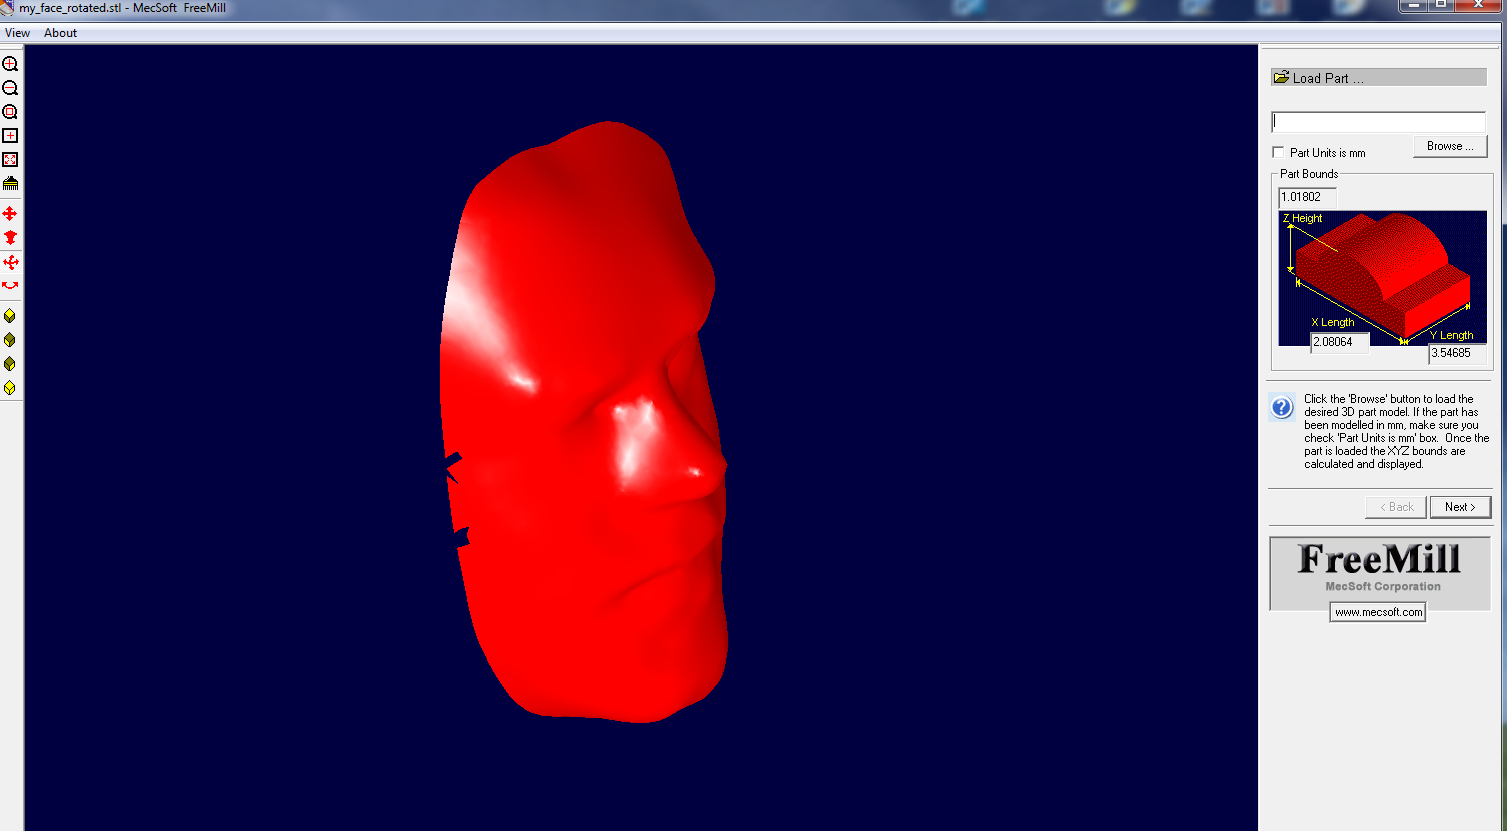
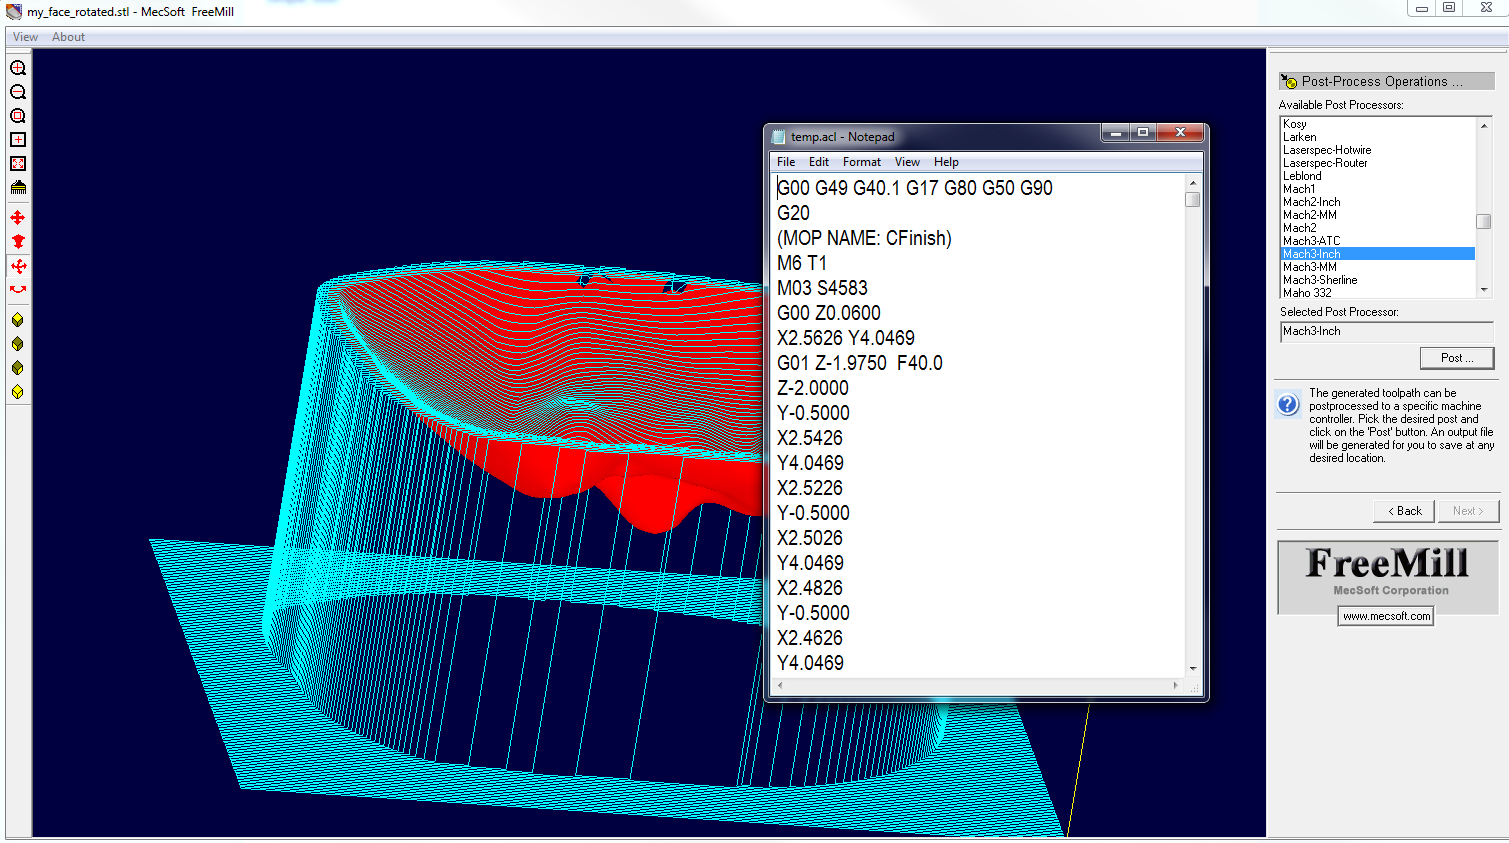
Now we need to generate the g-code which will control the CNC router. G-code is simply a series of commands. Basically it is just a bunch of:
go this fast
goto here
goto here
goto here
...
and so on.
Simple stuff.
Sometimes it is really nice to have a simple program which does the one thing you need it to do perfectly. Freemill allows us to read in a .stl file and generate the gcode to cut out a surface. Perfect. Just follow the wizard.
[Load Part]
Just import the .stl file you just created.
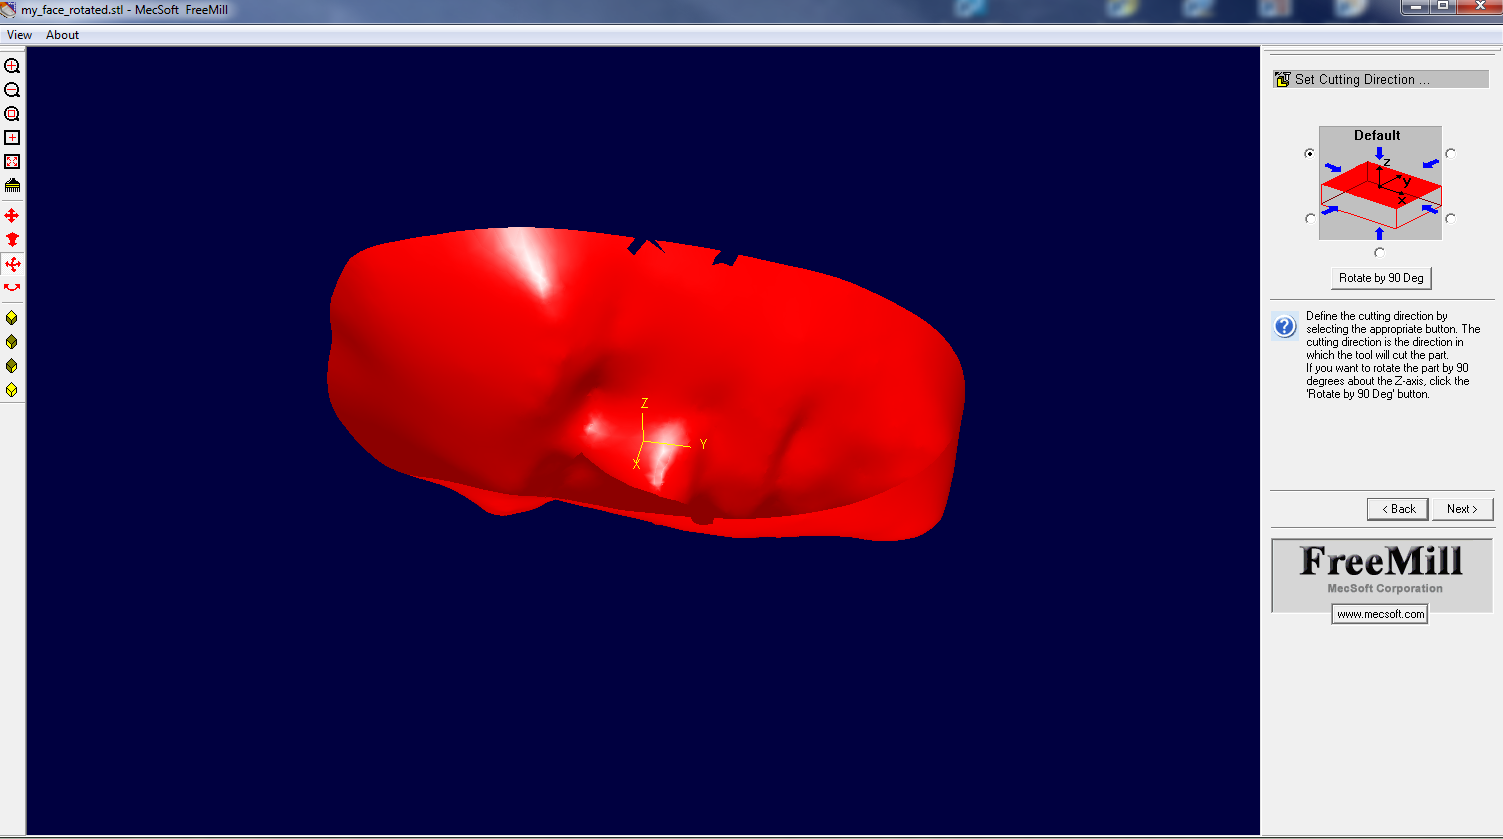
[Set Cutting Direction]
You can cut from the top or the bottom. I wanted to make a mold for plaster so I am choosing to cut from the bottom.
(If your object is tilted oddly you'll have to alter that in the 3D modeling software. In Hexagon 2 you can just load the part and then alter the properties to align it with the axis)
[Create Stock Model]
Add material to the side if you want, I'm not going to.
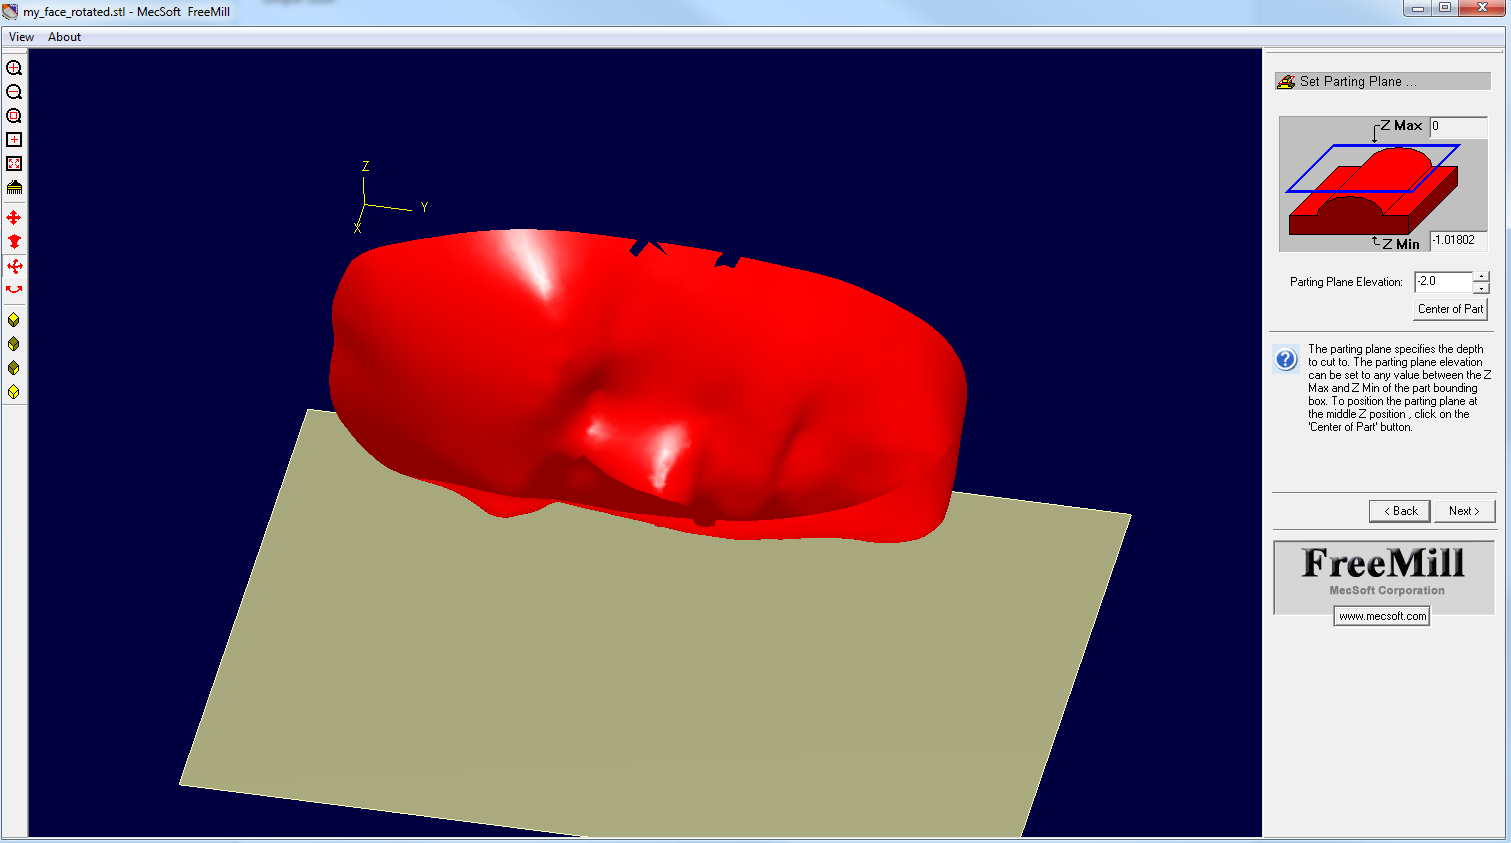
[Set Parting Plane]
Just skip this step for now. We are going to come back to it.
[Set Machine Zero]
I am picking the top. I want the top to be at zero so I can easy scale the g-code later on.
Step Backwards to [Set Parting Plane]
Here I am going to pull a trick. I want to cut all the way down to the parting plane inside the mold, but not outside. We are going to do a little trick in notepad after this step, so for now, set the parting plane to something low and even. It will show Z Max = 0. We want it this way. Change the parting plane elevation to -2.0 (it doesn't like it if you type the - first. Type 2.0 and then add the - sign).
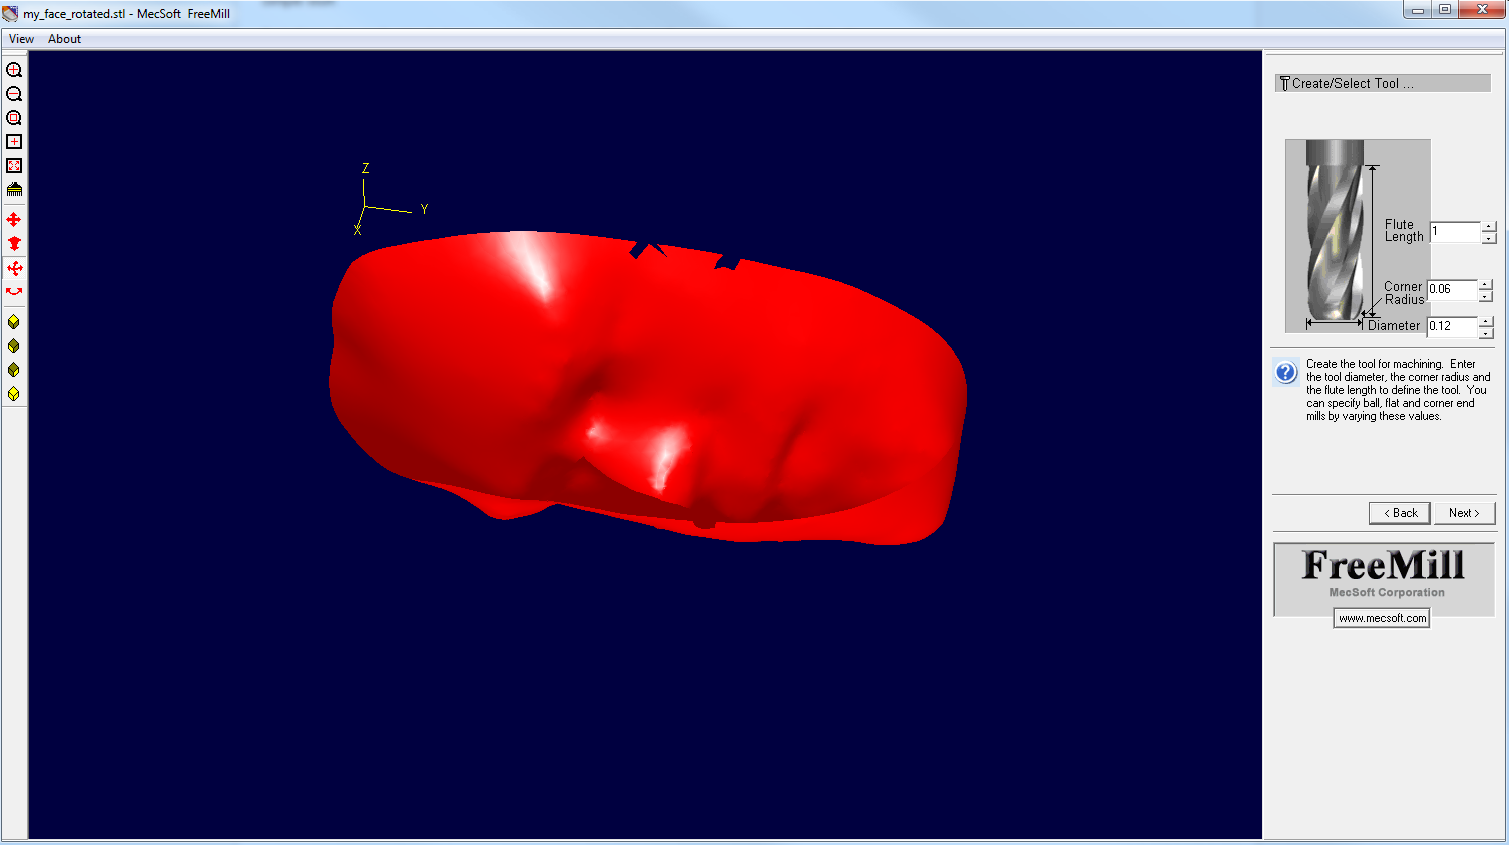
[Create/Select Tool]
Input the dimensions of your cutting tool. Now be careful, I don't think this is checking for bit crashes. We will have to keep this in mind later when cutting.
[Set Feeds & Speeds...]
Input your feed rates.
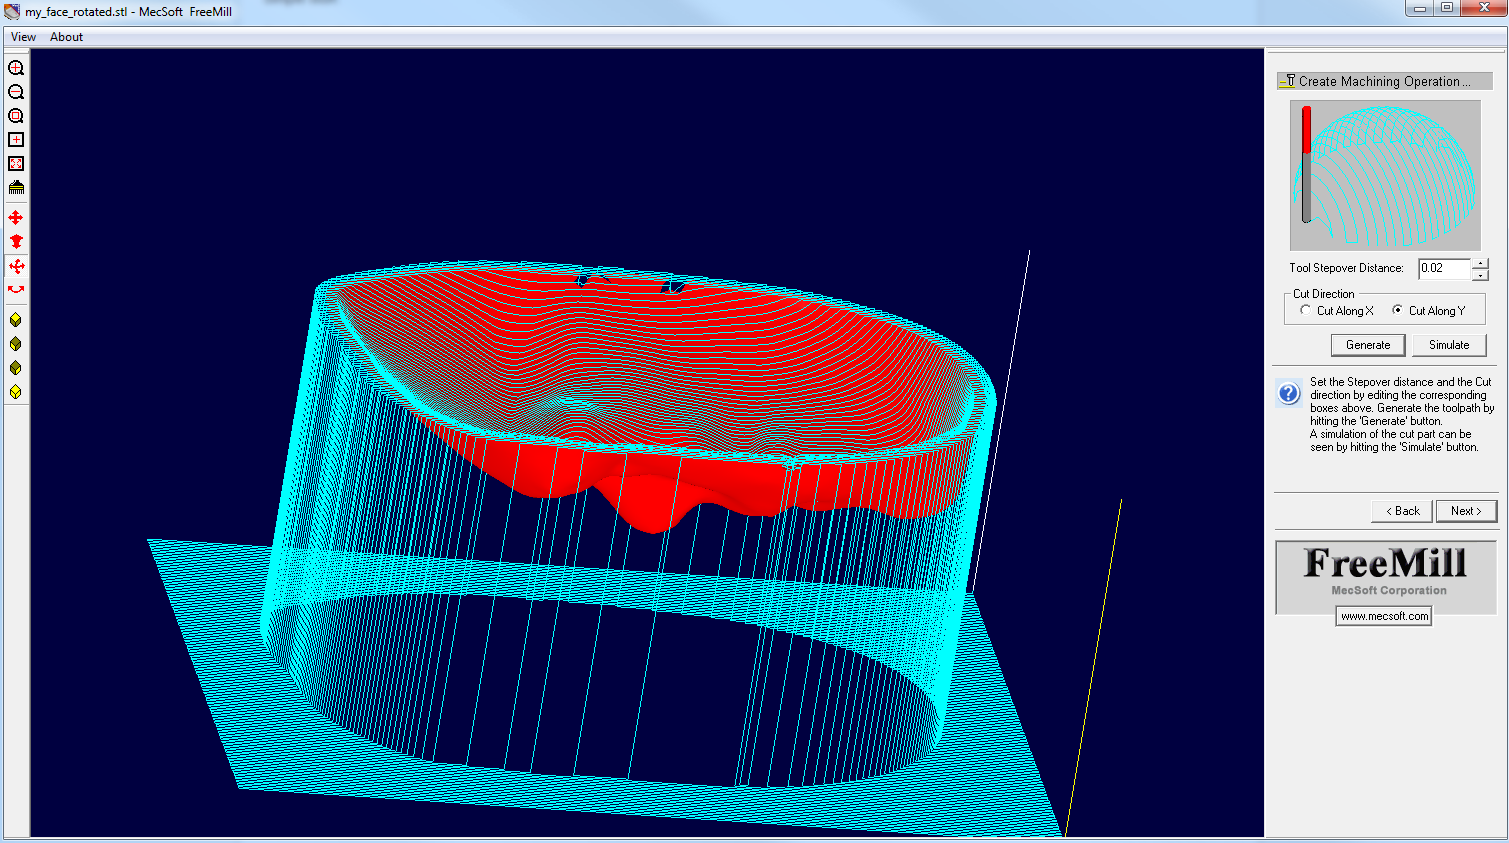
[Create Machining Operation]
I prefer to cut along the Y-axis because my CNC works better that way. You can do that however you'd like to. Set the stepover distance. A smaller distance will give you better resolution, but it will take a long time. Of course that is the nice thing about CNC, you can let it take a long time and take a nap or eat a sandwich.
Also, right now this model isn't scaled properly. I want it to be the same size as my head. I am going to change the scale using a g-code command later, but it is important to note that the cutting spacing will be scaled too.
[Post-Process Operations]
If there is a post-processor that is better suited for you, pick that. I just used Mach3-Inch. Click 'Post' to generate the g-code.
G-Code tweaks
As I mentioned before, we are going to alter this g-code in notepad. First, I deleted out the extra stuff at the beginning. I don't have spindle control or anything like that. All I need are the goto and feed speed commands (G00, G01, F). There are also a few at the bottom, but those wont matter (delete them if you want to).
Now, being sneaky, I set the parting plane below the part at a nice even -2.0. If you open the gcode file in notepad you will see commands like 'Z-2.000'. We are going to change all those to Z0.000 so that it does not cut around the object. go to Edit -> Replace and switch Z-2.000 (or whatever depth you used) to Z0.000 (or whatever you want your top surface to be).
Bingo, we got rid of that extra cutting. There are two other lines that need to be fixed. At the beginning and end the code it is going to a low Z value. Change those to Z0.000 as well.
Now we have the g-code all ready to go. Lets crank up the CNC.
CNC Advice
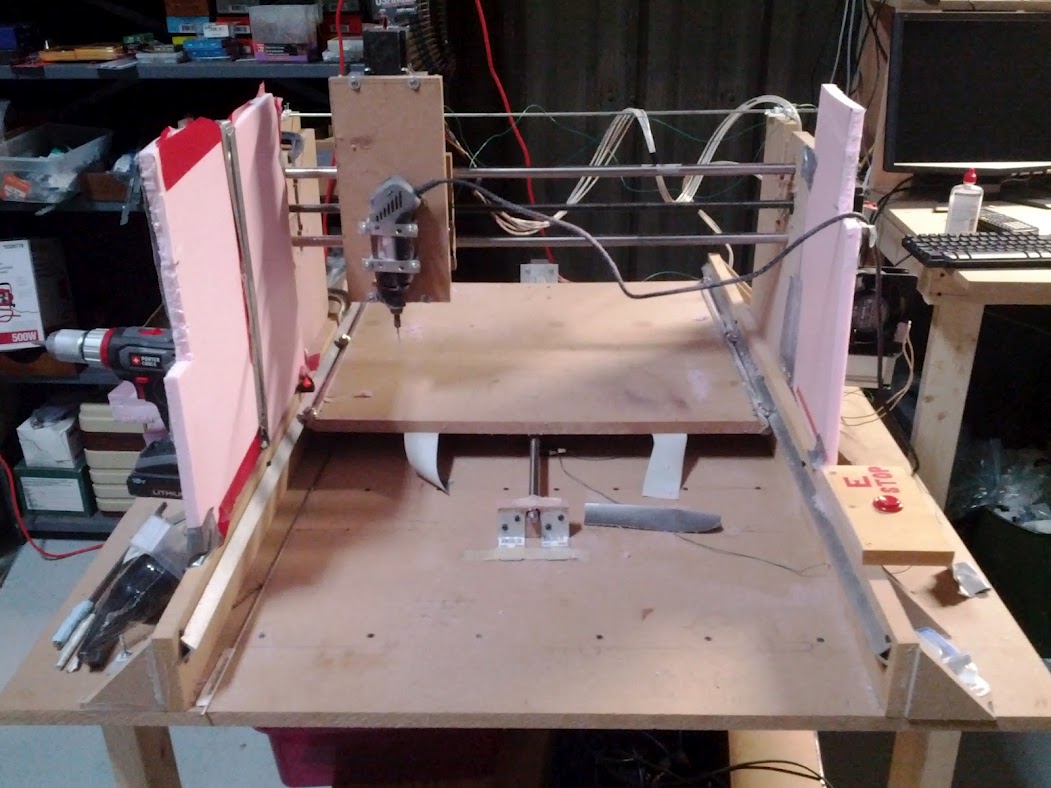
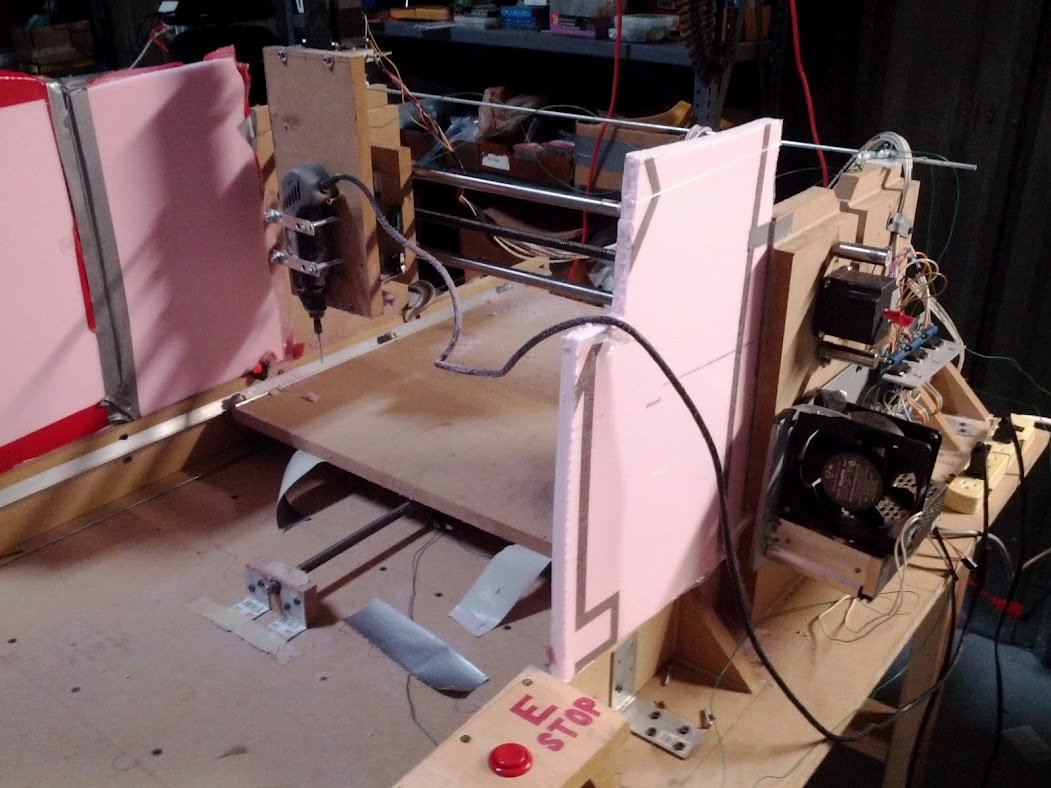
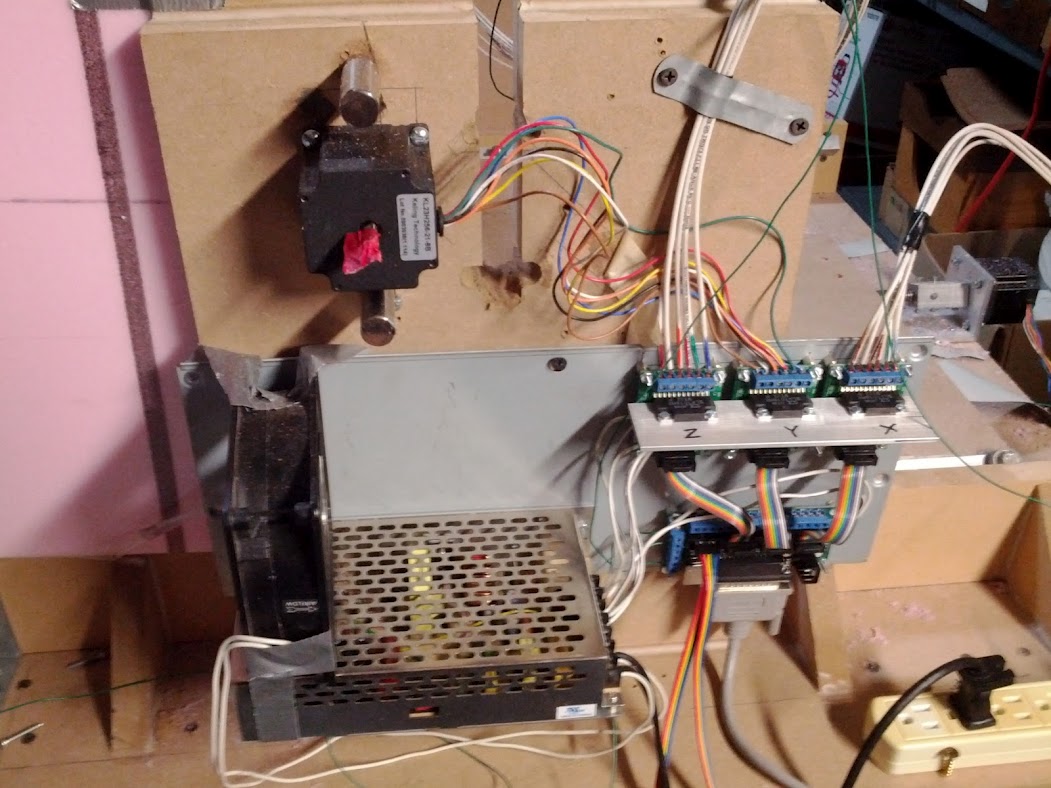
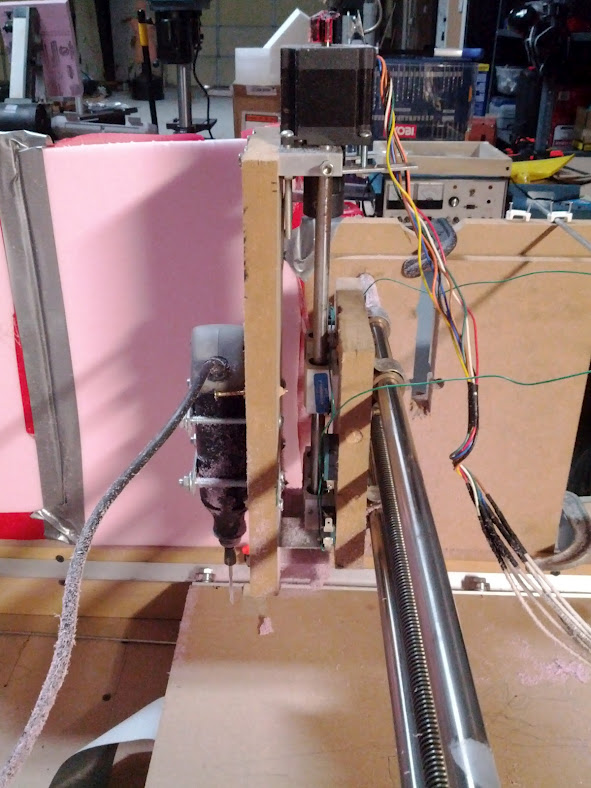
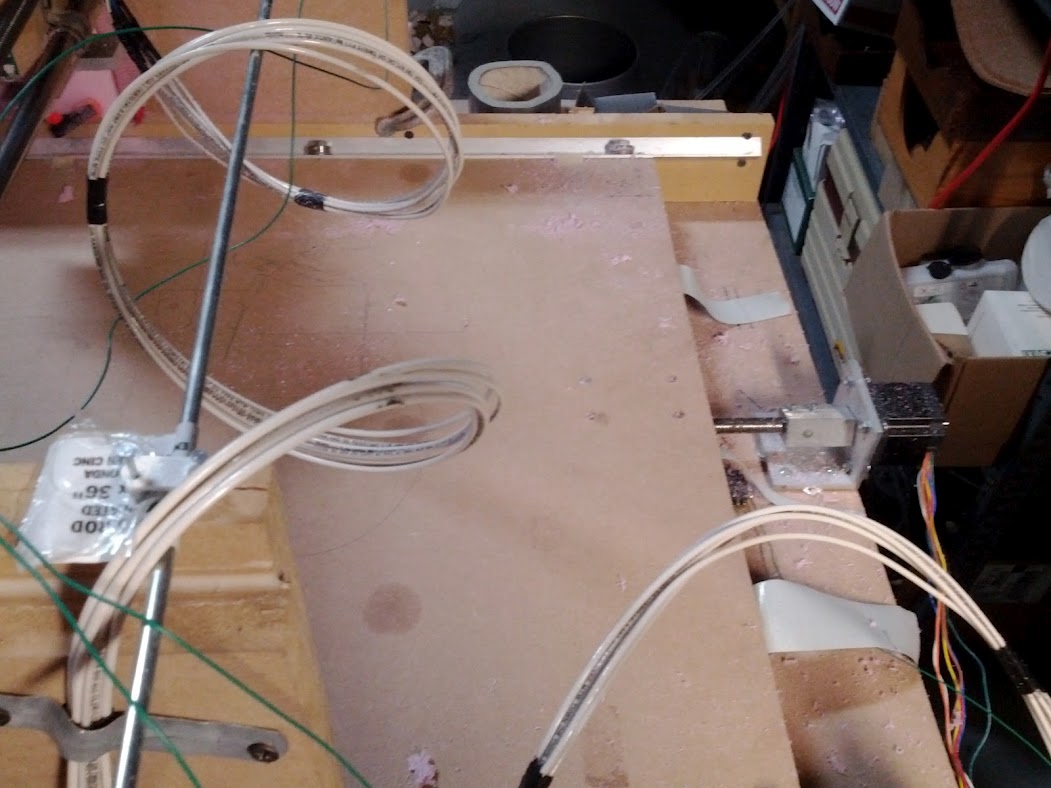
Before we get to cutting, let talk about building a CNC router. My advice would be to keep it simple. It doesn't take much to get an accurate CNC router which will work well for foam, plastic and wood parts. My CNC uses a kit by probotix. My rails are just precision steel rods from mcmaster-carr and bronze bushings. Just mount the rods in some MDF (with hand drilled holes, drill both sets together for alignment). The threaded rod is just ACME threaded rod (again from mcmaster). I used two ACME nuts tightened to each other to minimize backlash. Maybe it will wear out in a while, but that doesn't matter, it was cheap.
I fixed my Y-axis to the table and move the X-axis. This kept things simple because I don't have to worry about moving both sides of the Y axis together. It takes up more space as your object now moves, but for a small scale CNC I think this is the way to go.
With a setup like this you can build the whole thing with a hand drill and a circular saw. Even then, I had most of the MDF cut at the store. Very easy.
I wouldn't recommend using the roller bearing method on my X-axis. The MDF settles, making a mess of it. I am converting the base to the rod and bushing method.
This setup has some flex, but overall it work nicely as my first CNC machine. Now with all the things I have learned I am ready to build a really nice CNC. Keep it simple, get things moving, get some experience, then worry about building a really great machine.
CNC/Mach3 Operation
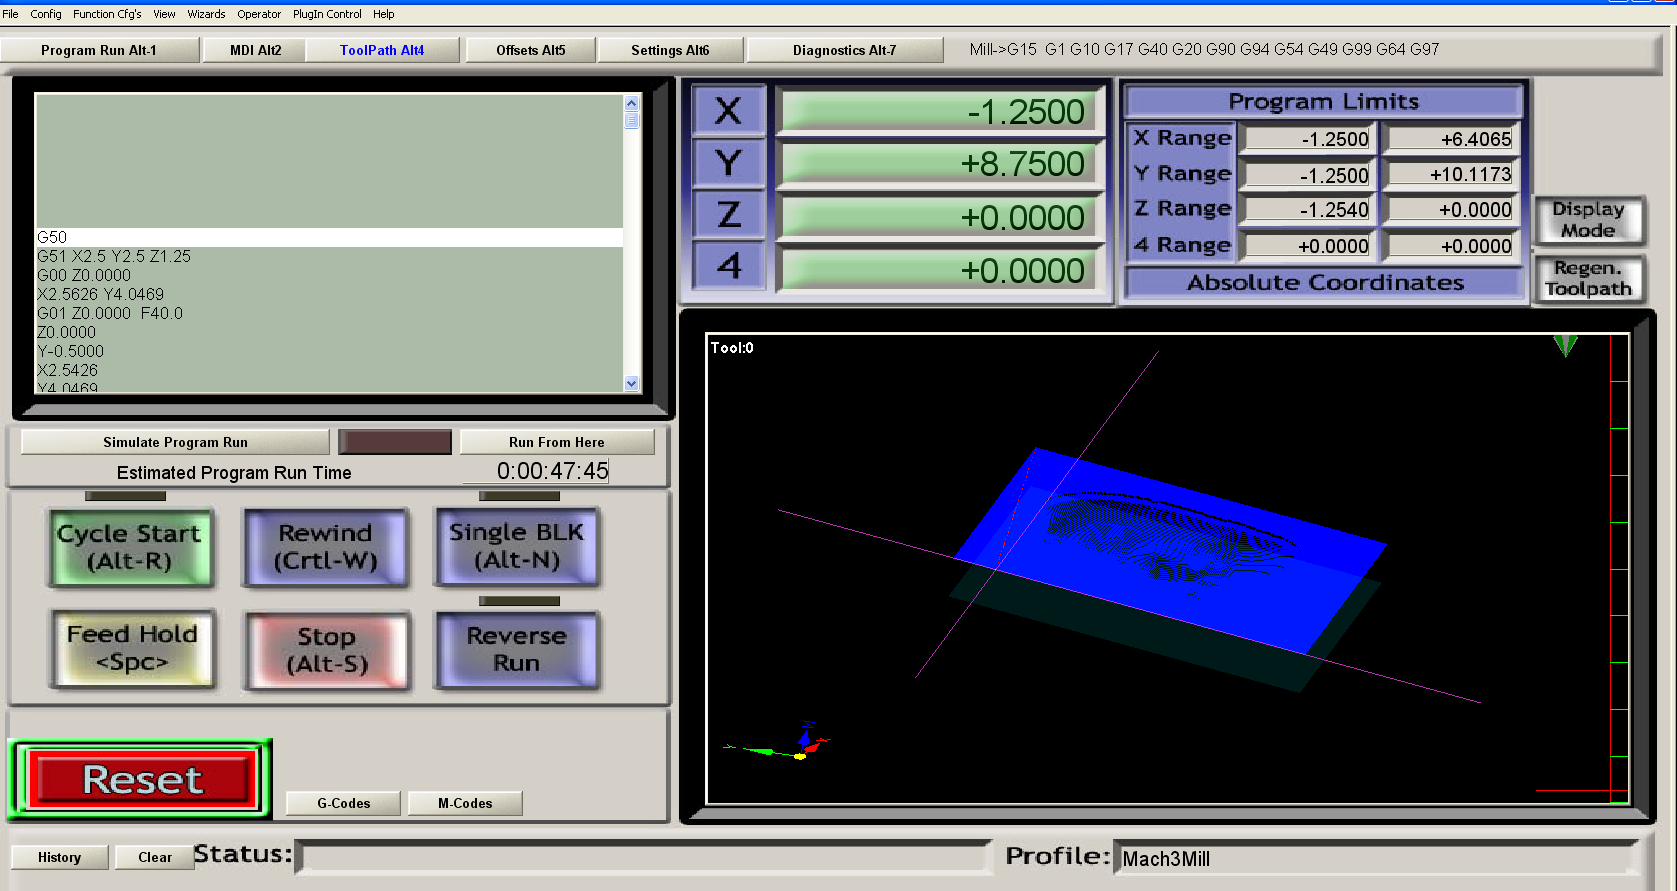
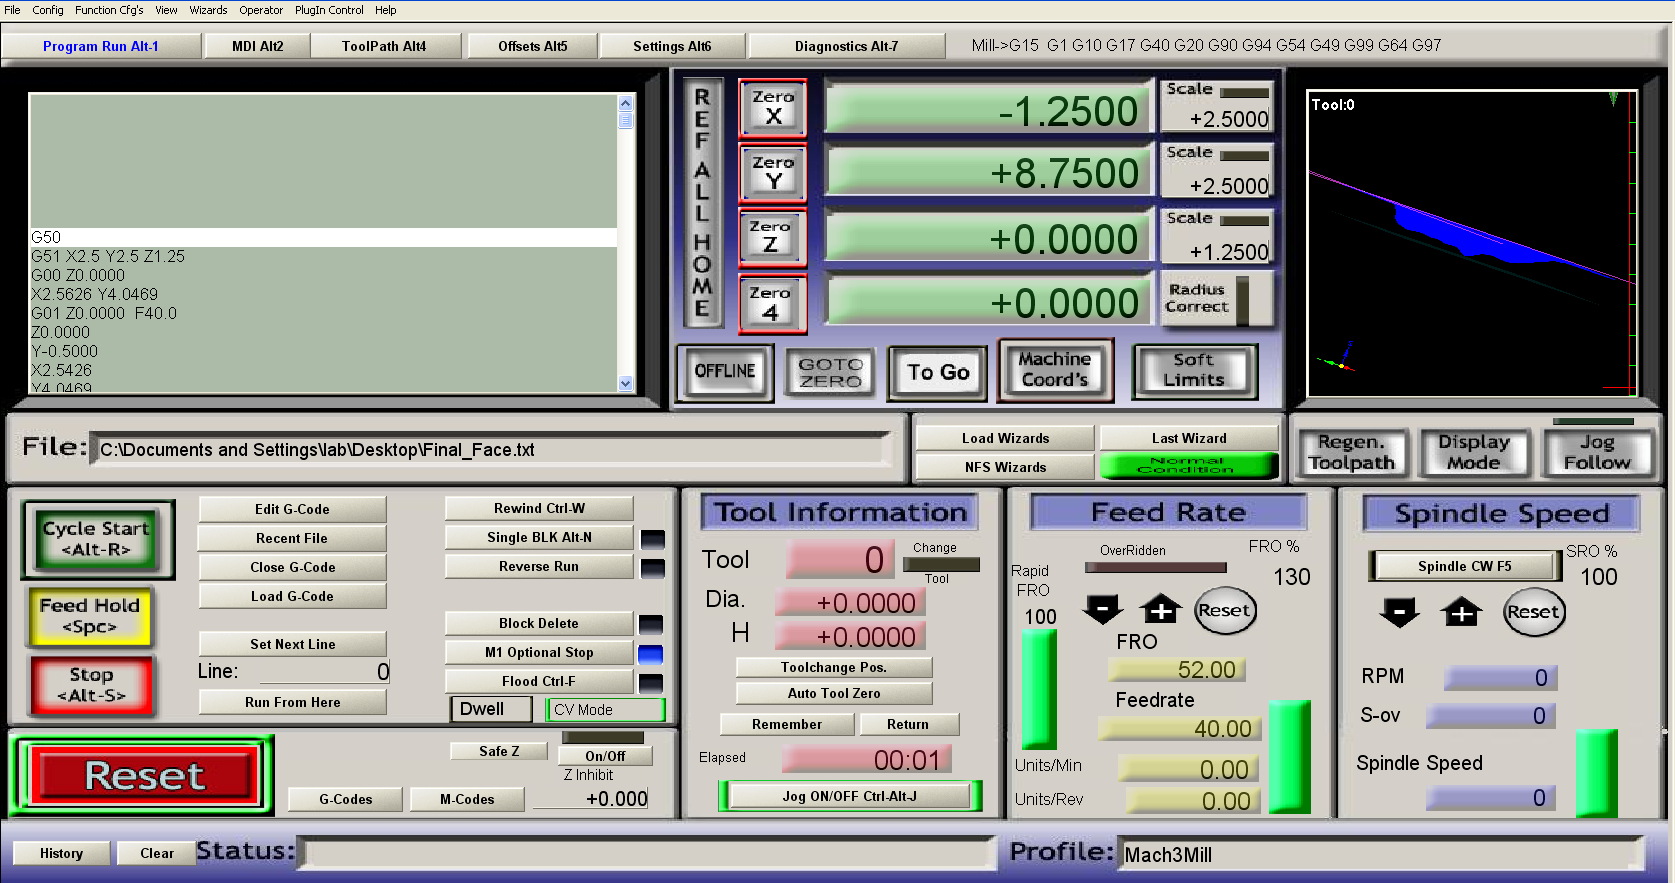
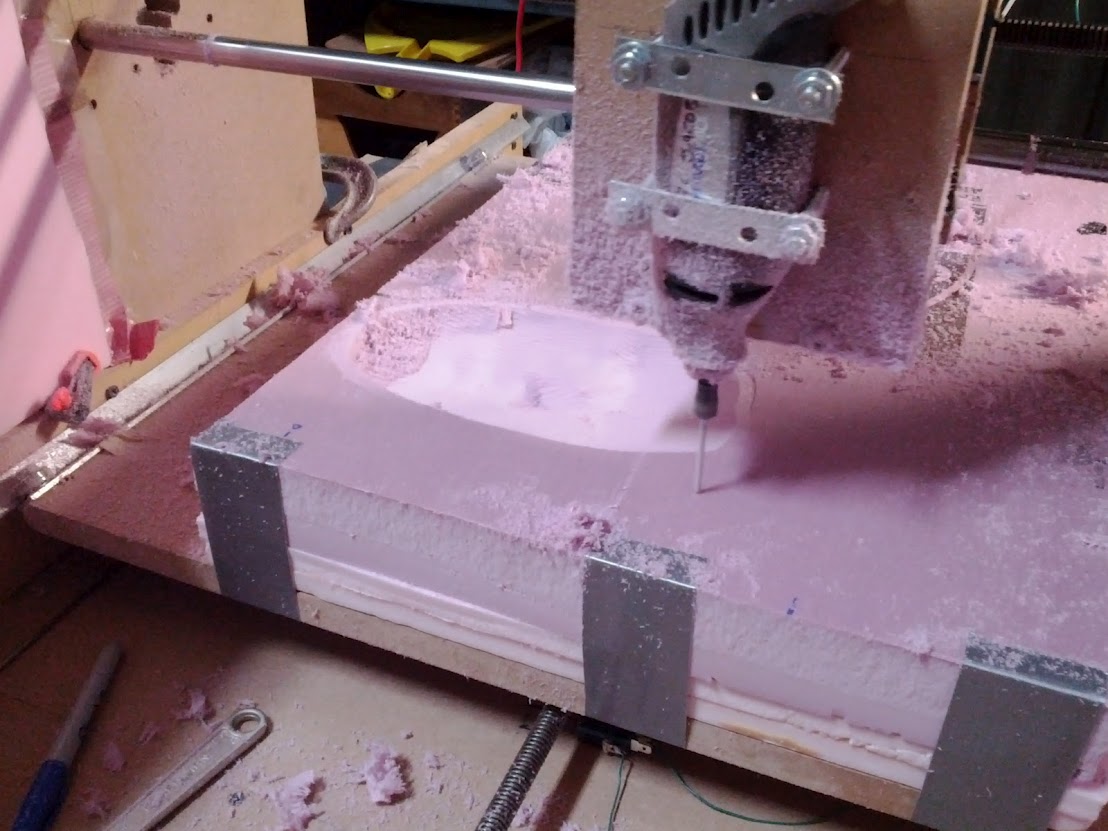
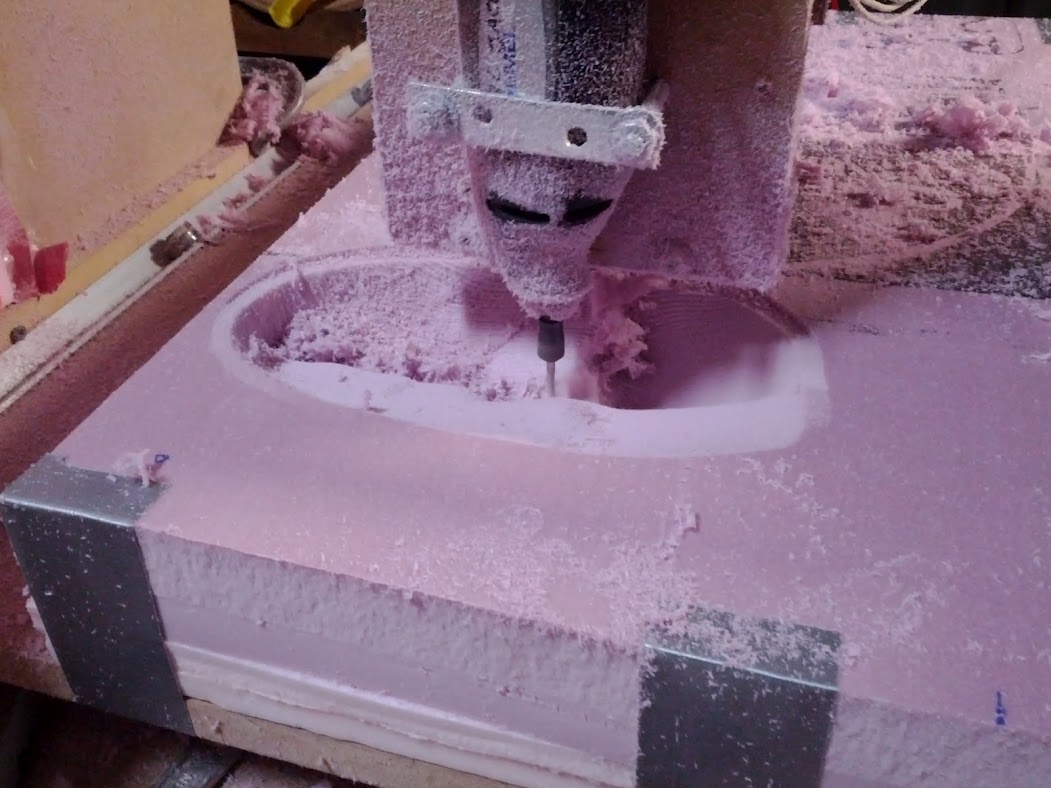
Continuing on, now we can use the g-code and cut out my face. Here I am using Mach3 to operate my homebuilt CNC router.
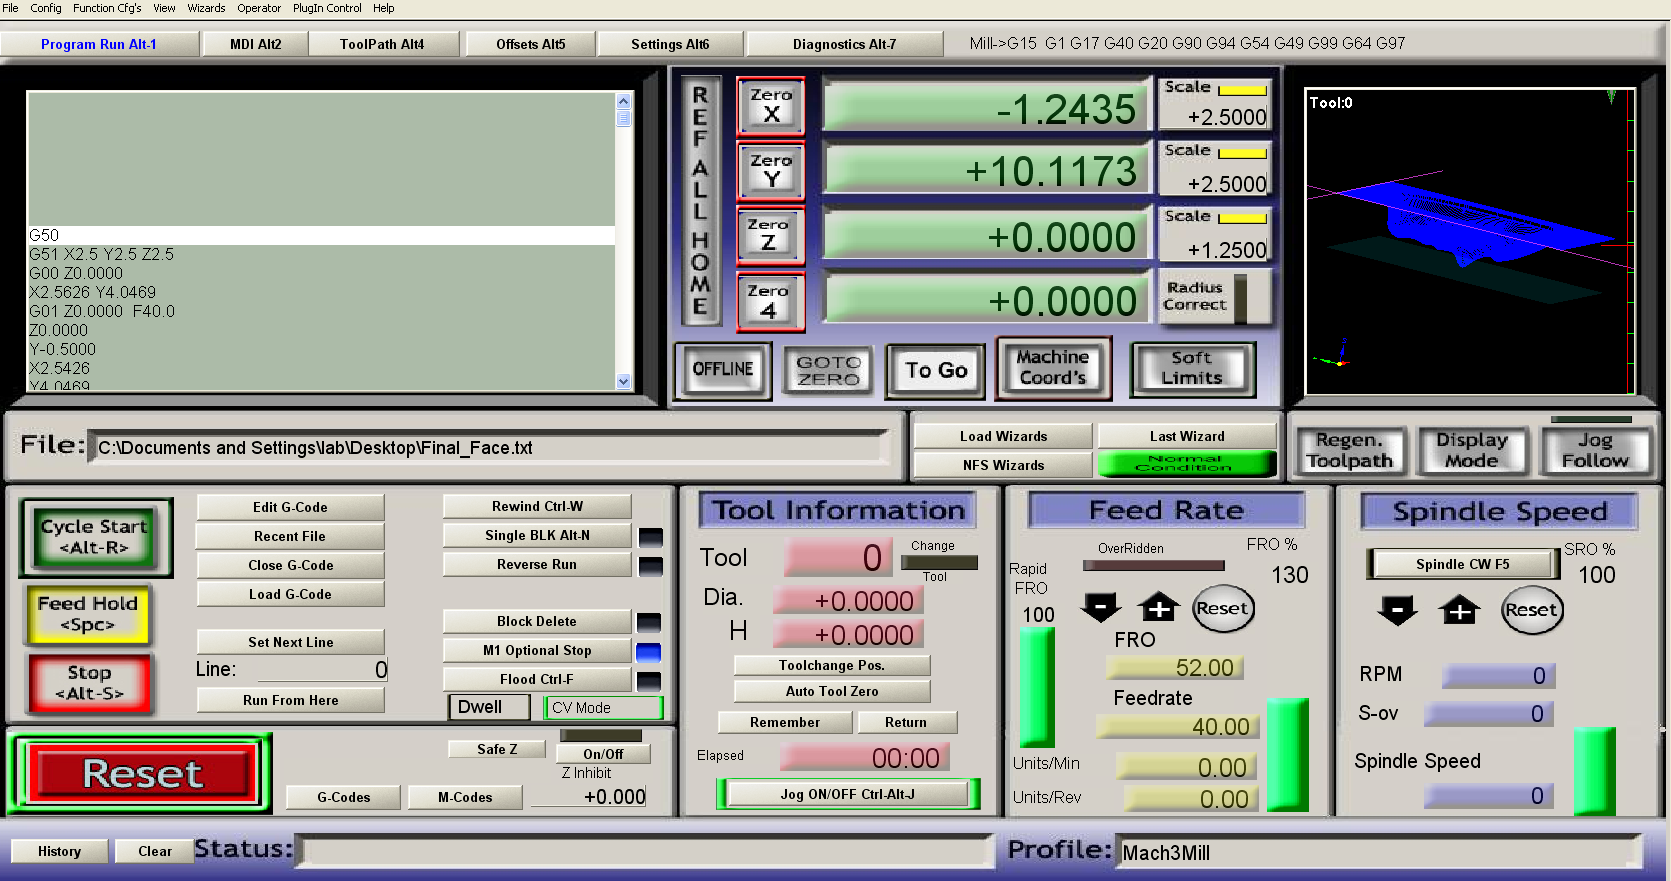
I just line up the tip of the mill bit with the top of the foam. Then I zero all the axes in Mach3. If you want it to cut a little into the foam on the top you can set the z position to 0.1 or something like that. It now thinks that it is 0.1 over the surface and it will cut into the foam.
Up to this point we haven't done anything to set the scale of the mold, it is just whatever the 3D model happens to be. We can see the dimensions now in Mach3 and there are a few ways to proceed.
The way I did it was to use the preview in Mach3 to take some measurements and determine the scale factor I needed. Of course we could also have done that earlier in the 3D modeling step, that probably would have been smarter. Well, that is why we do this, to learn.
Now simply add a scaling command in your gcode. G50 resets the scaling. And for example, if the scale was 2.5 use:
G51 X2.5 Y2.5 Z2.5
Now the mold is scaled to your face.
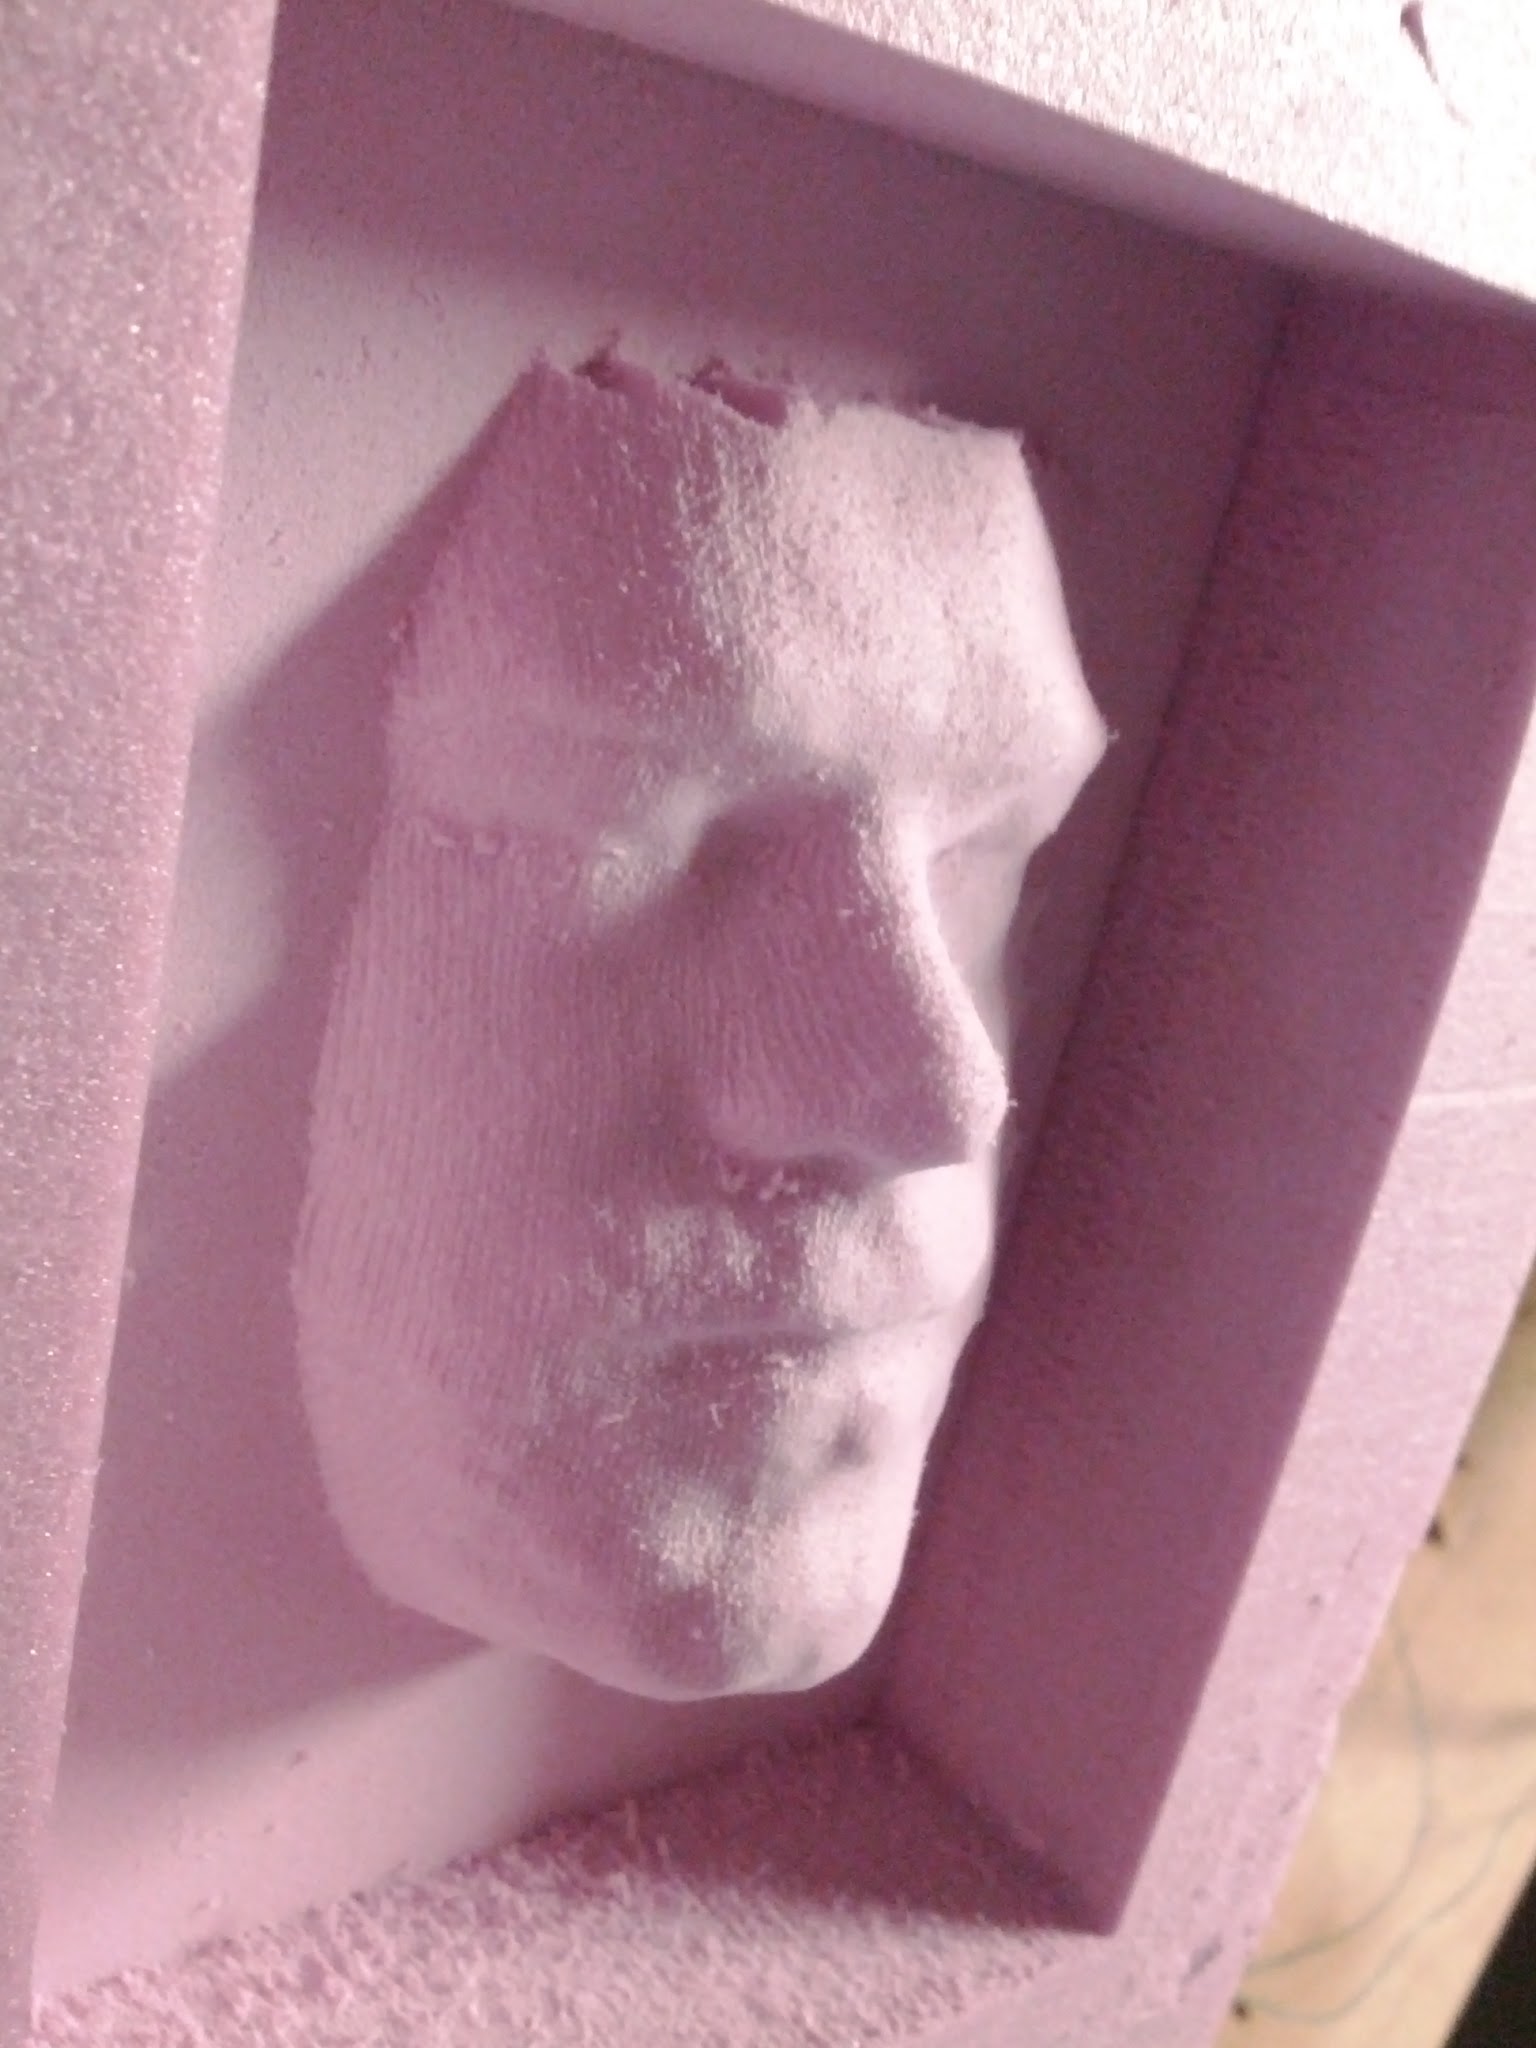
One final trick. Freemill wasn't sophisticated enough to cut the mold out in layers. It just cut all the way down to my nose in one go. This is a problem since I don't have a 3" long bit. I got around this problem by cutting a few times but with different Z scales. This allowed it to slowly carve out the mold. It is important to check that your Z-axis wont hit the top of foam when cutting all the way down. Fortunately the face is a gentle curve, so the dremel itself (my router for foam) wont hit the foam when cutting.
My bit was long enough to cut this out in two steps. So I first set my Z scale to 1.25 and let it run. This was only to remove enough material so that I could cut all the way down on the next pass. You may or may not have to do this.
So now we have the foam mold. Next we will pour the plaster mold.
Plaster of Paris Mold
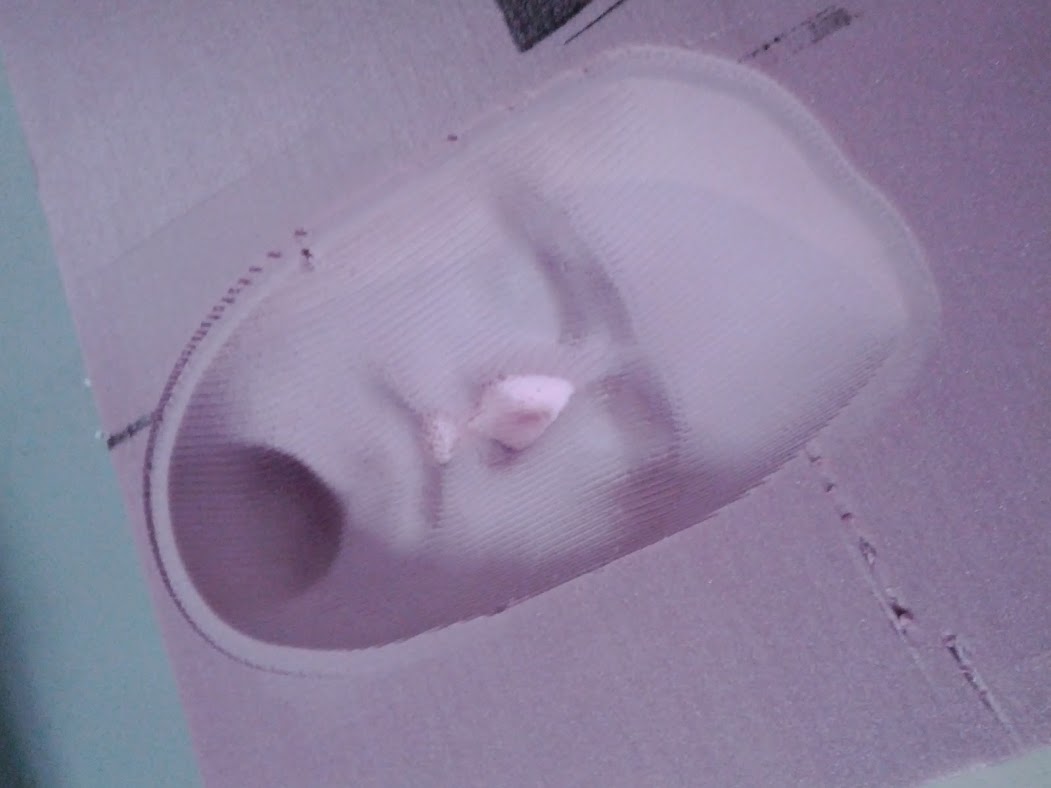
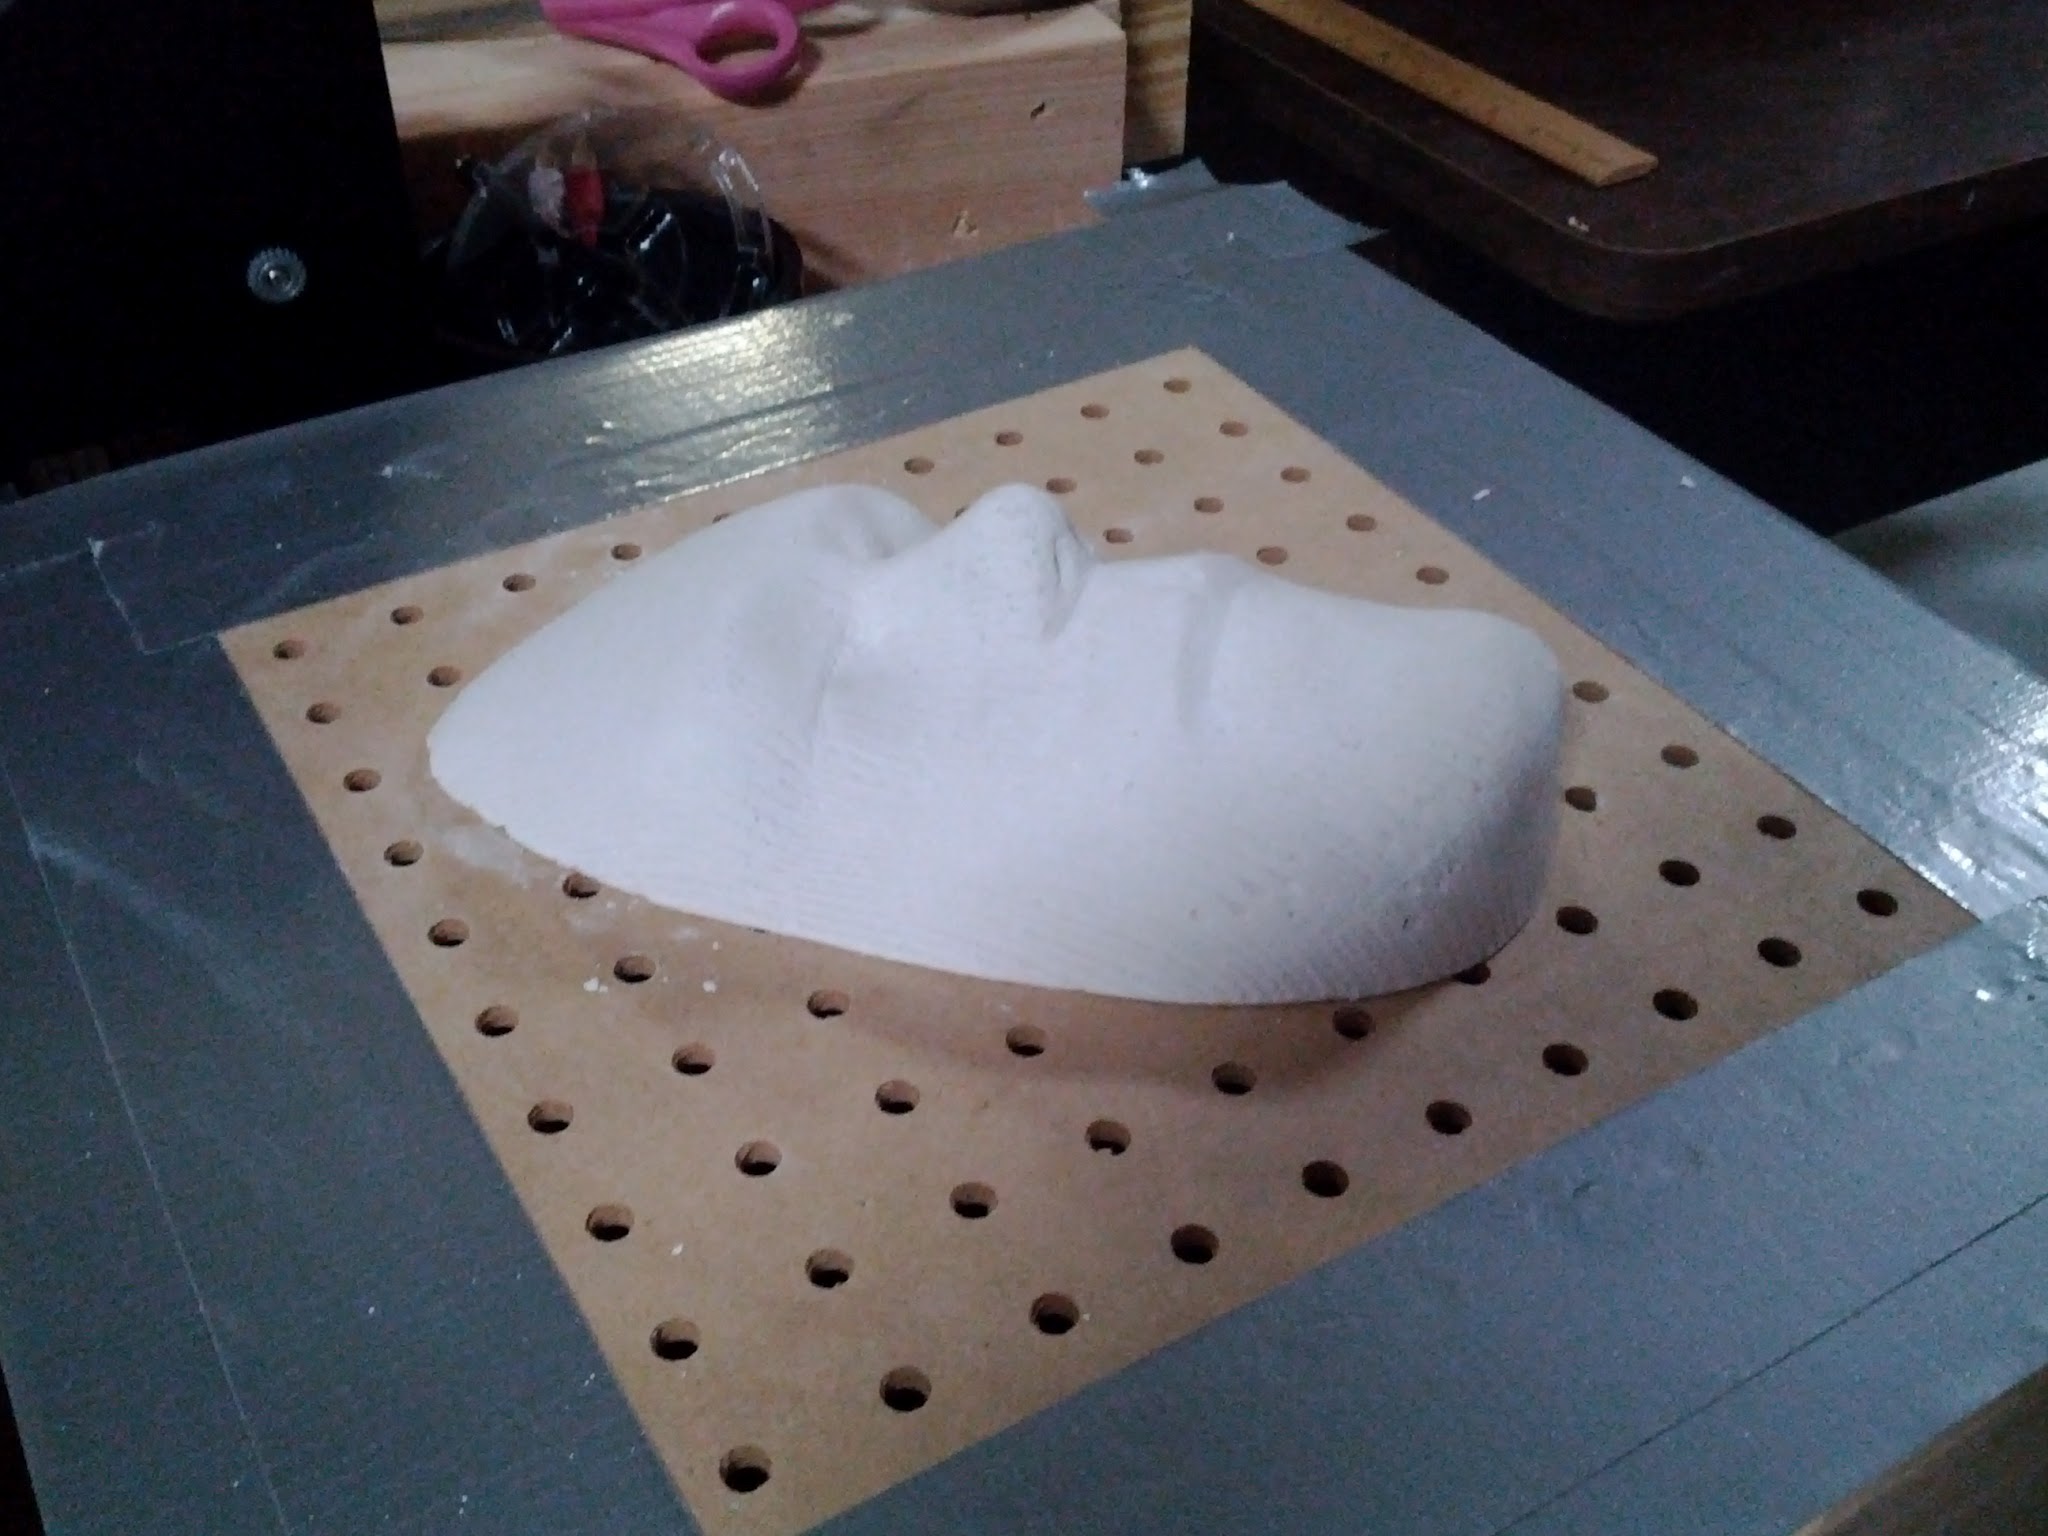
This step is simple. Mix the plaster of paris (cheap and available at local craft stores). You want a decent liquidy solution. The foam is hydrophobic, so it doesn't want to stick. You may need to clean out the foam negative well. The foam dust will affect the plaster mold. This may require some experimentation, but the plaster is cheap, so no worries.
Once it was hardended (after around 30 minutes) I could pop it out by bending the foam slightly. It may help to add a handle to the mold, but you will have to chop it off in order use the mold for vacuum forming parts.
There will be some grooves from the routing, you can sand the mold a bit to fix that.
Vacuum Forming
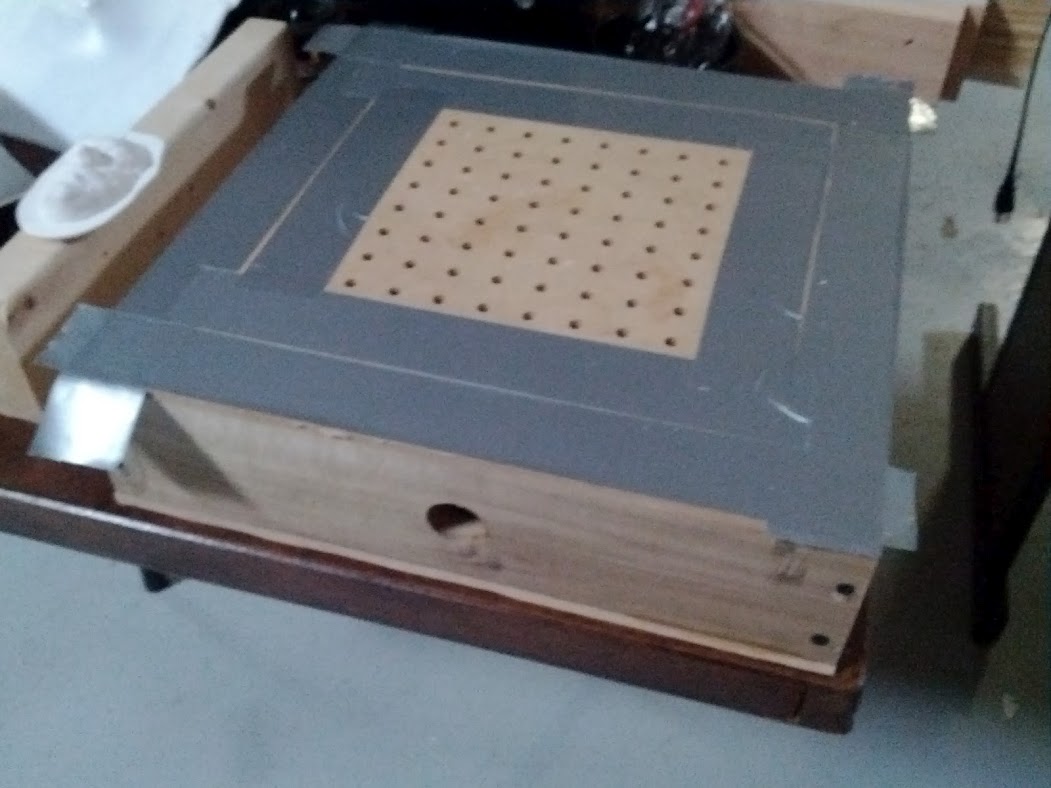
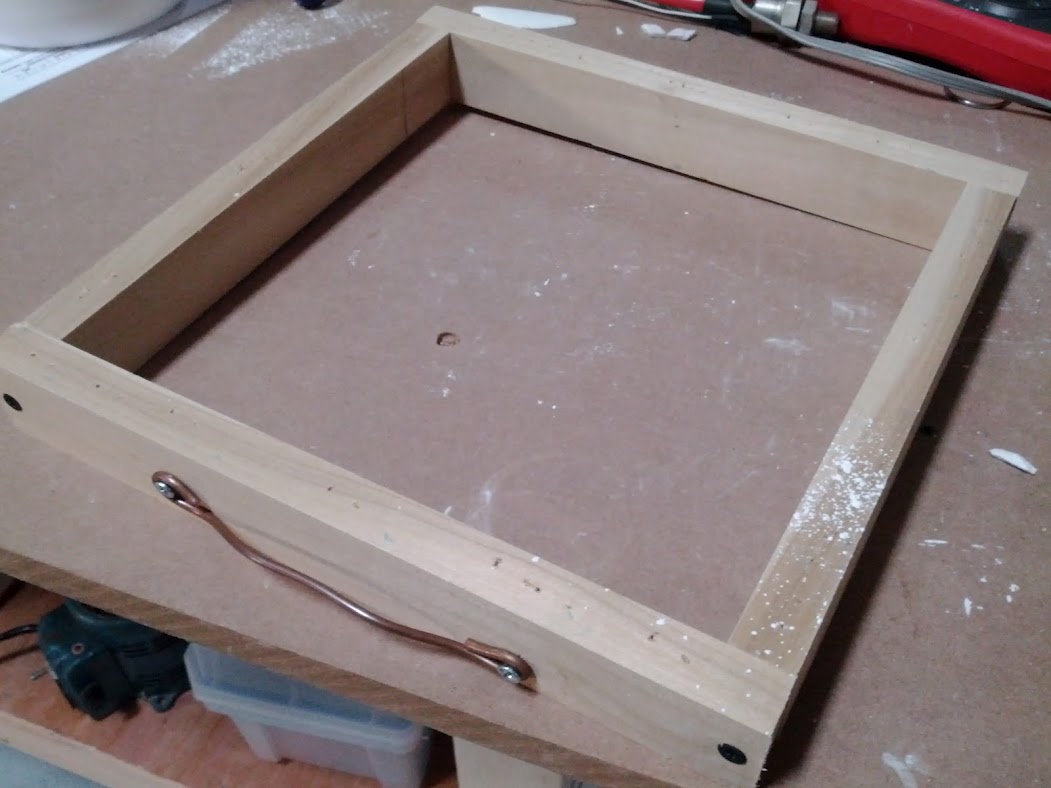
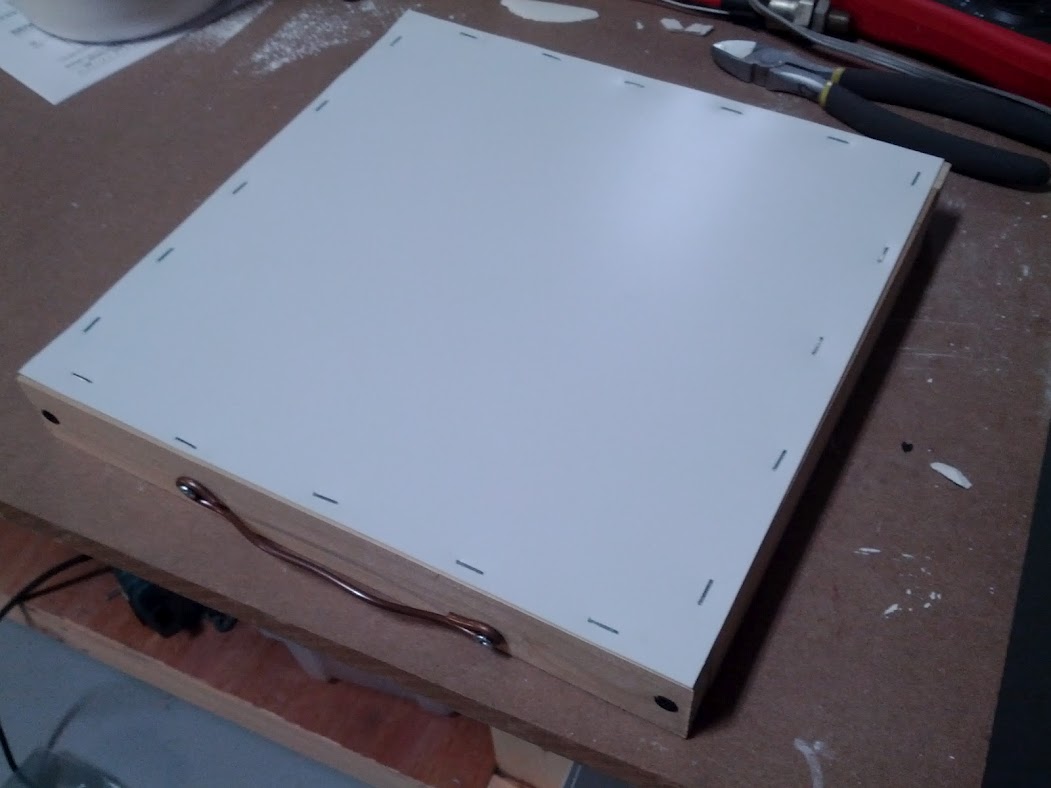
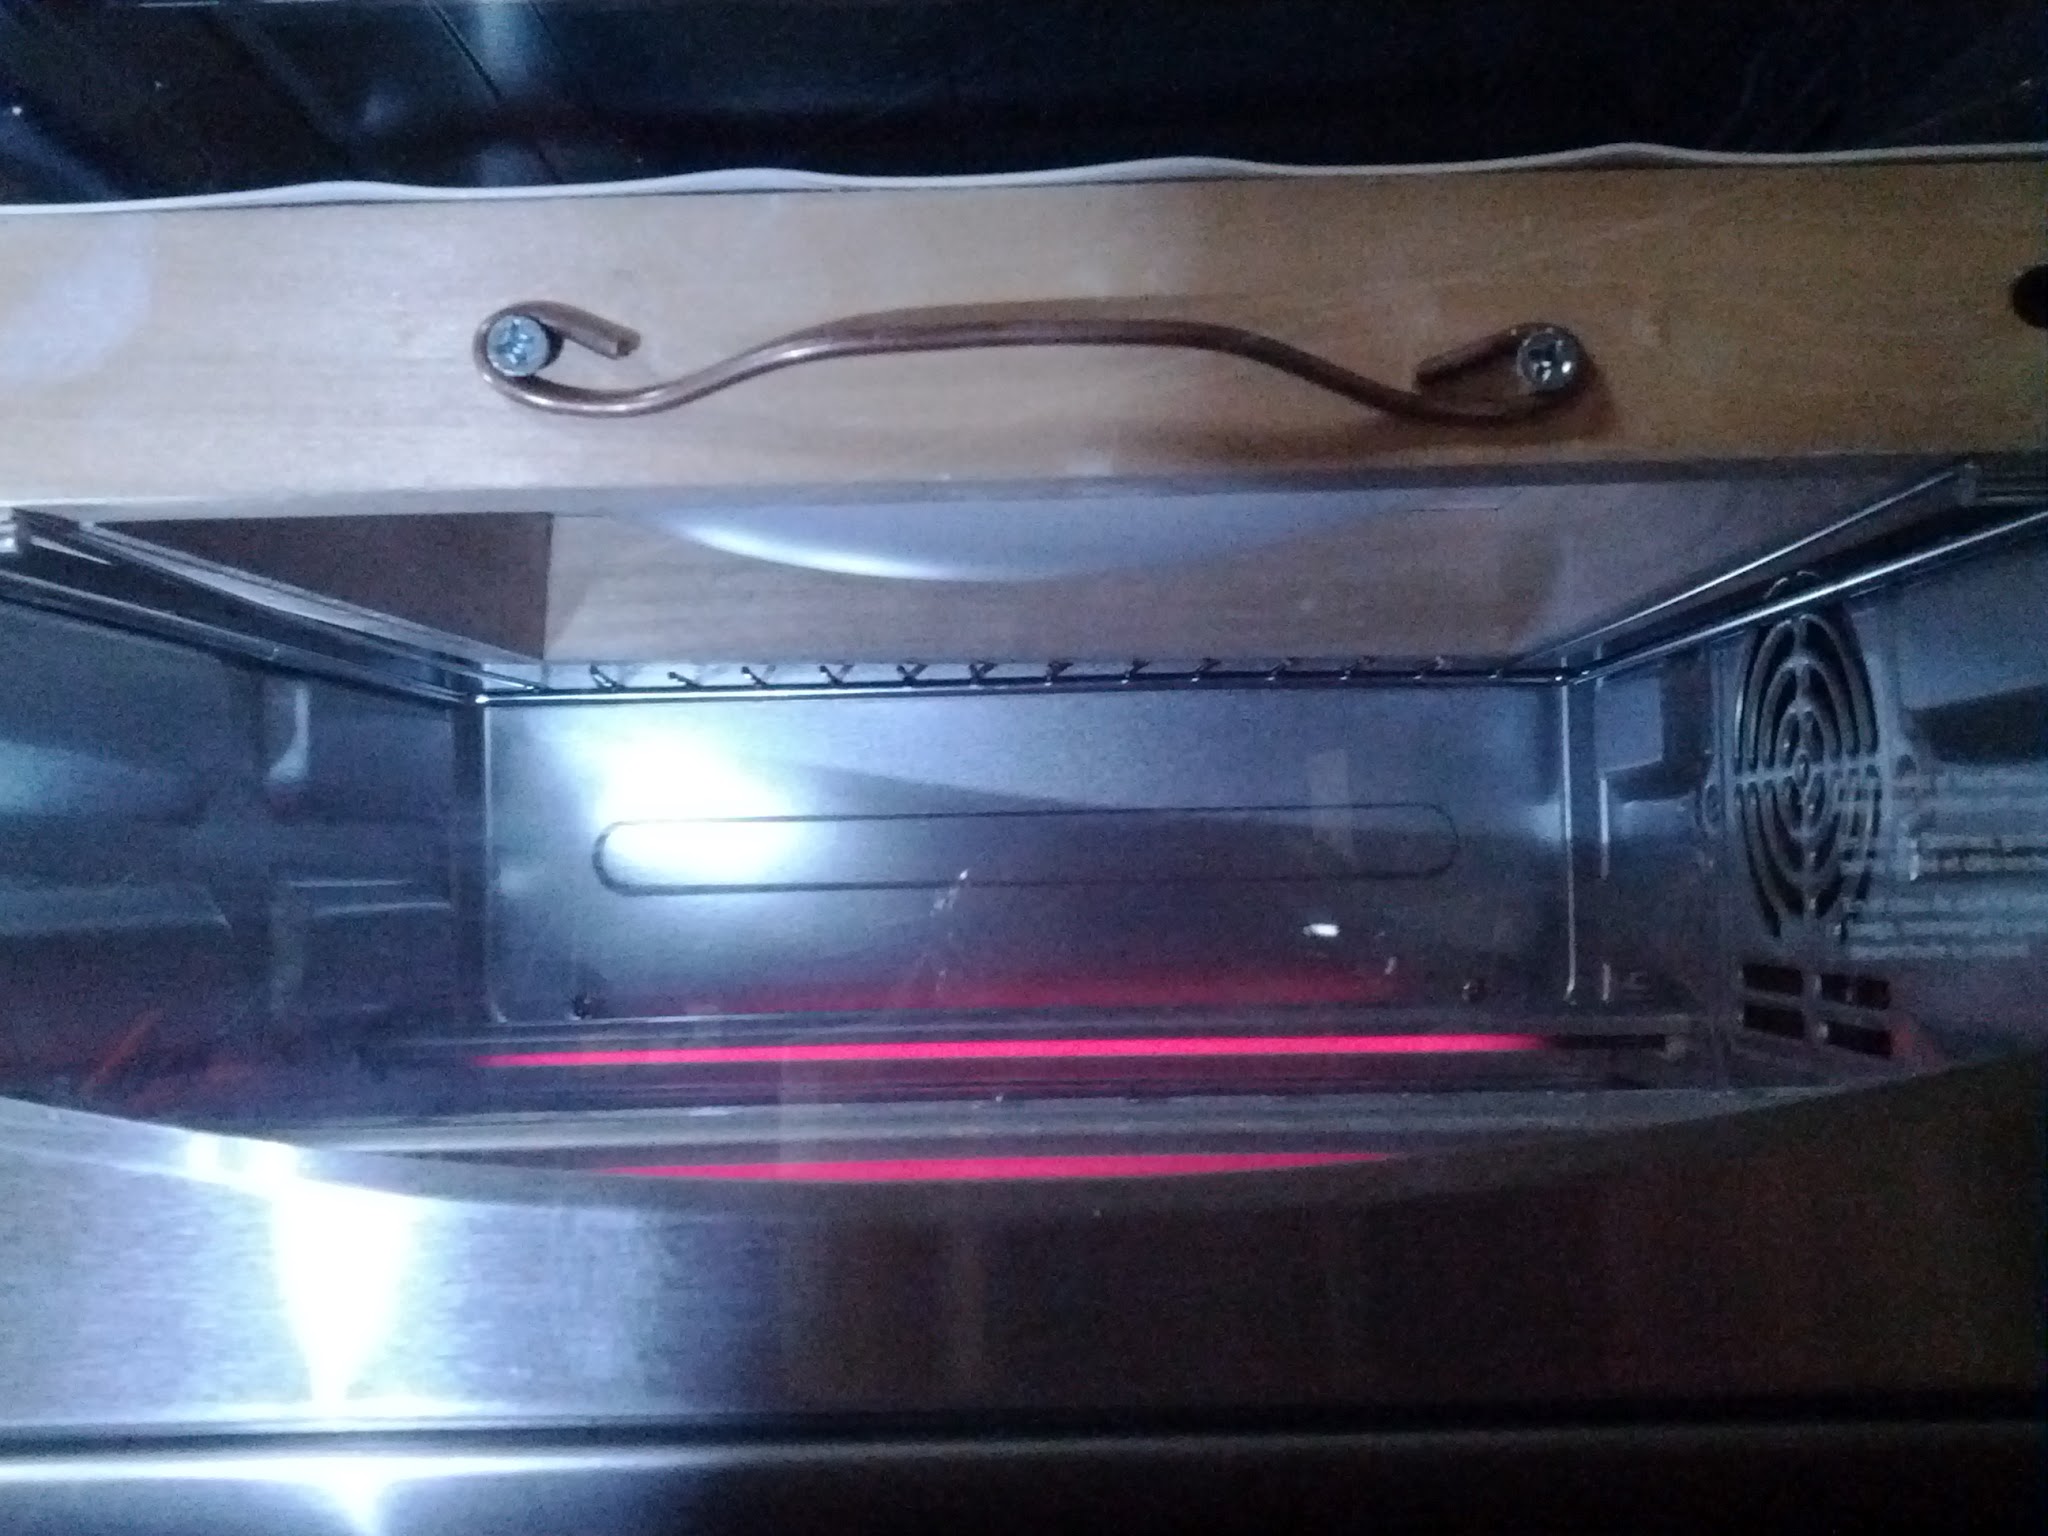
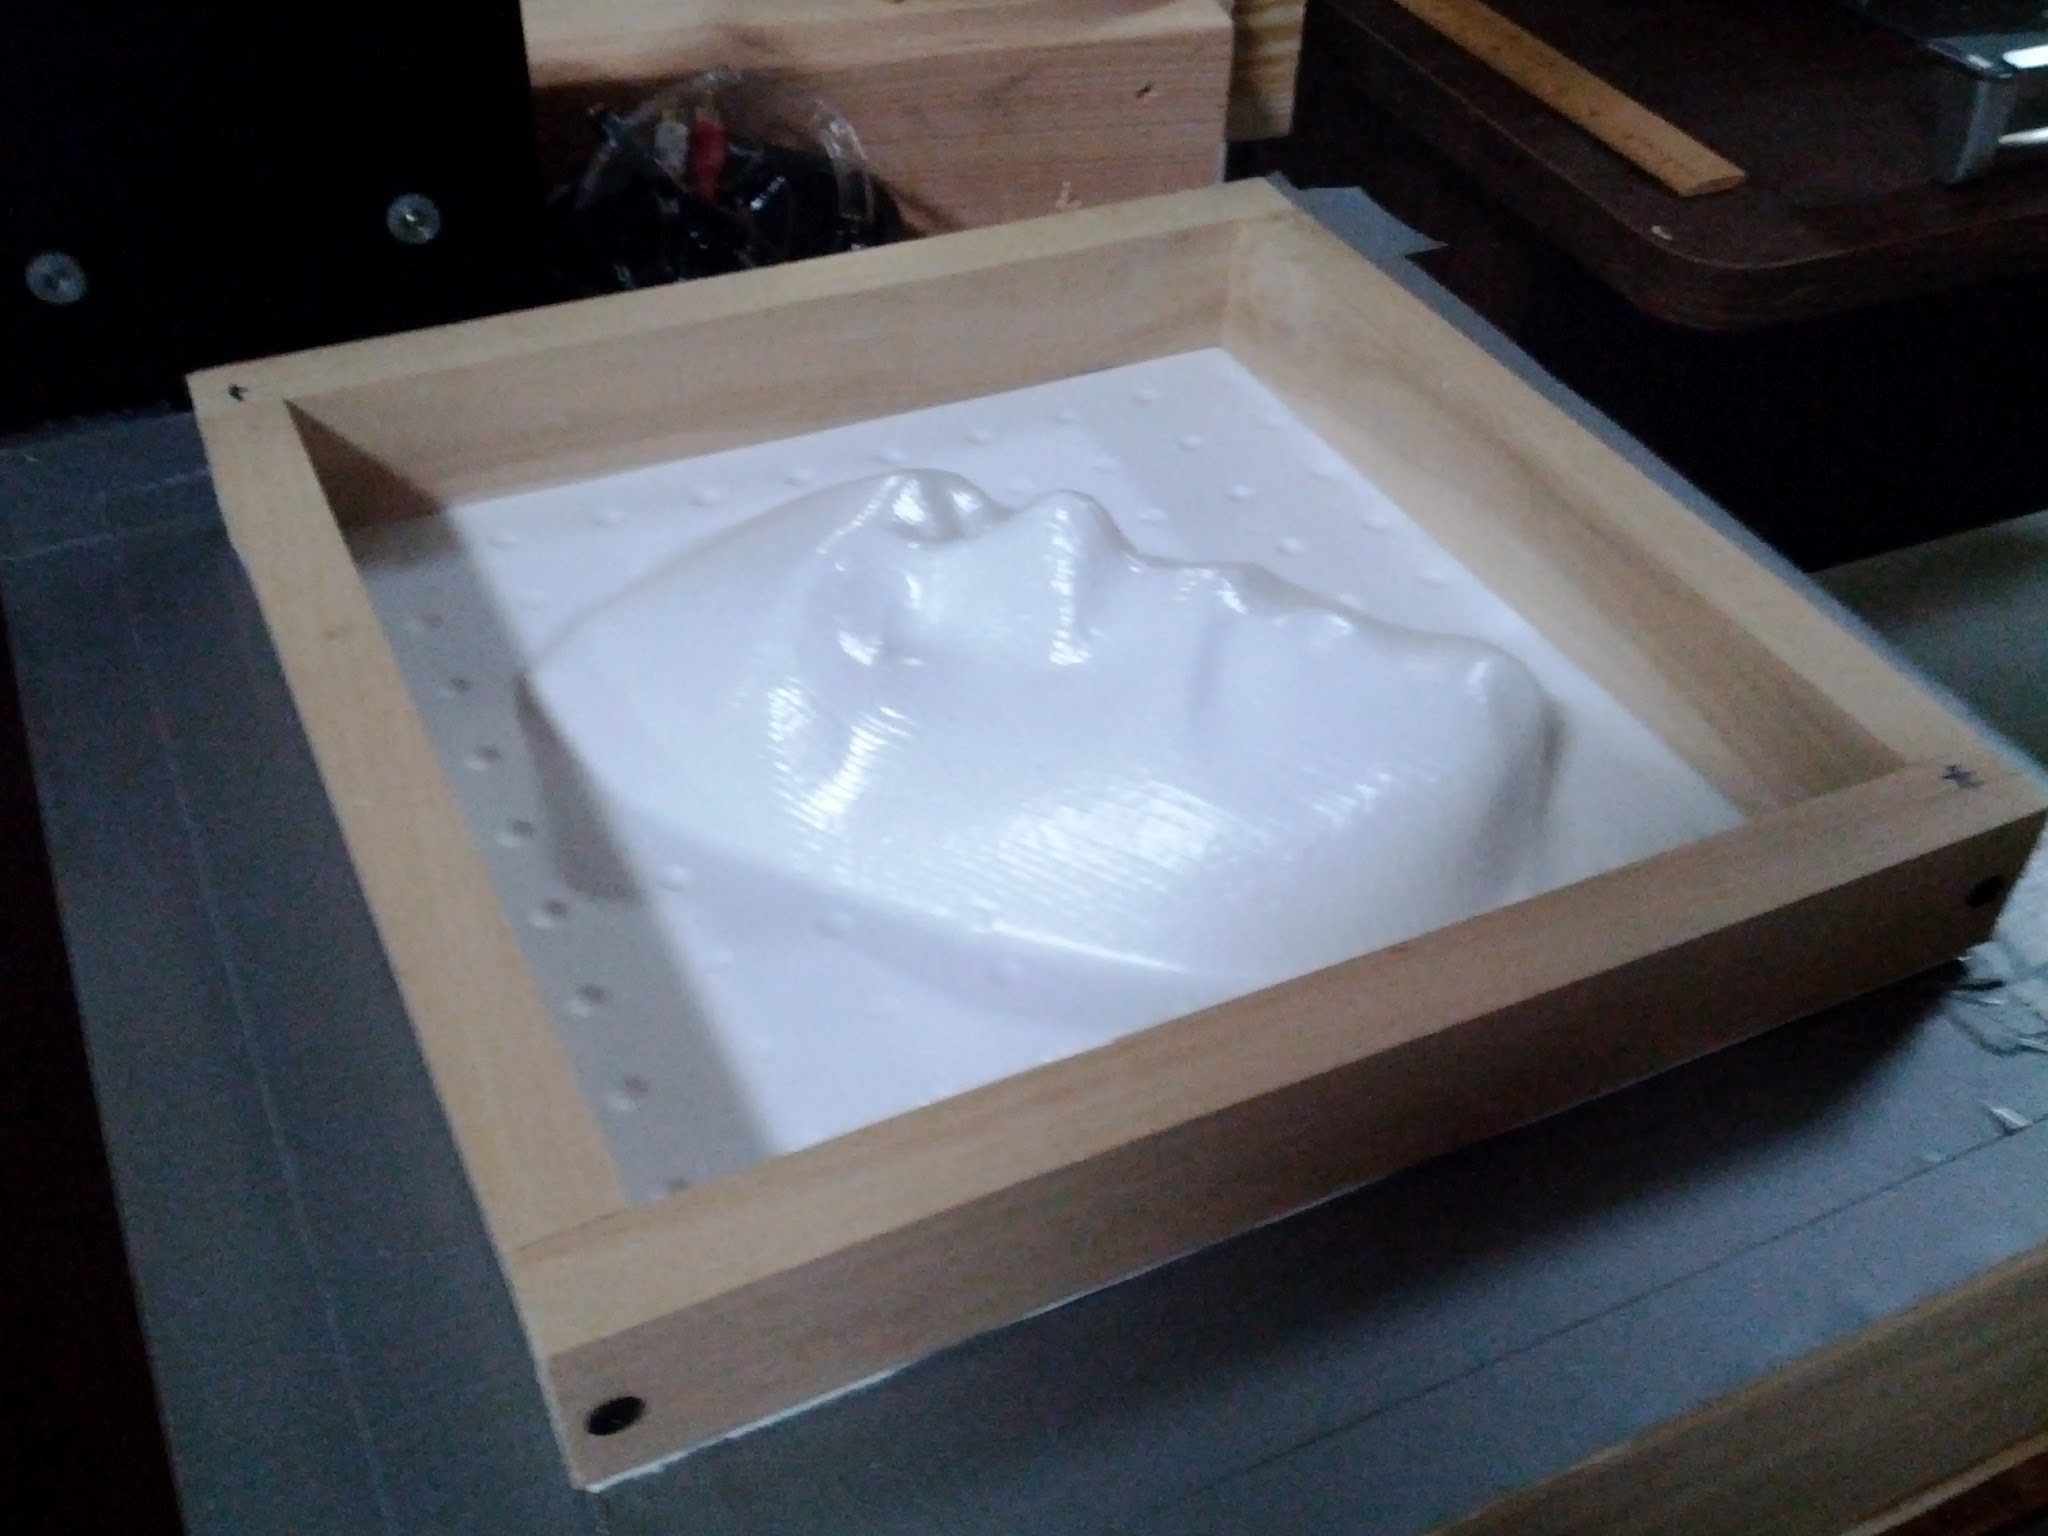
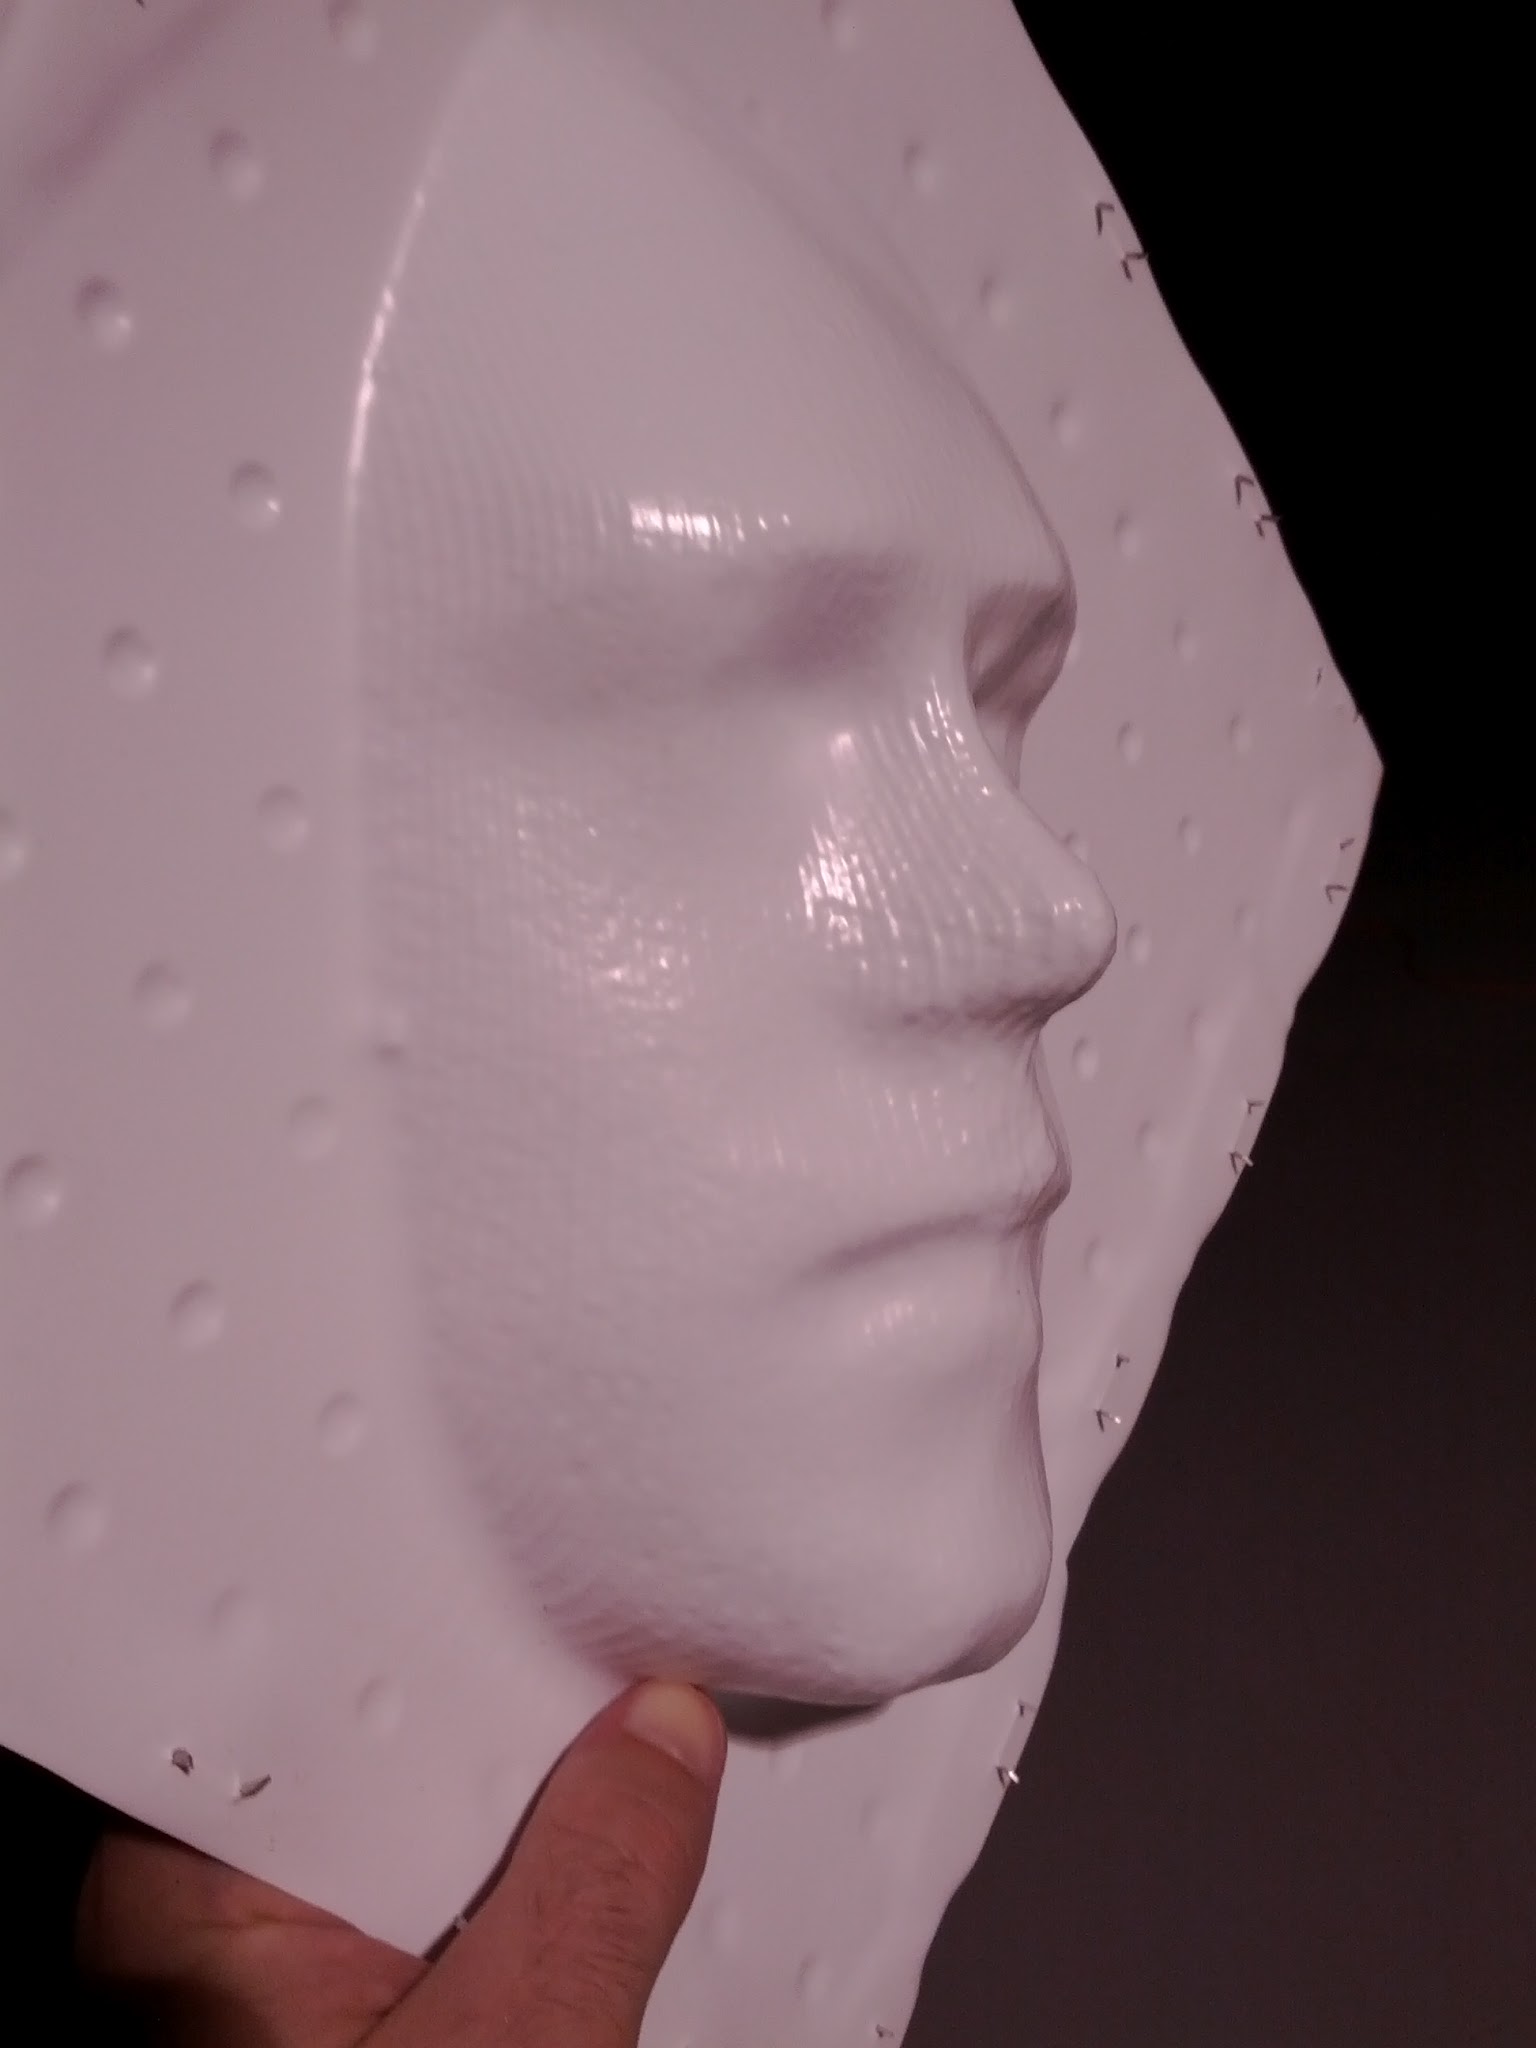
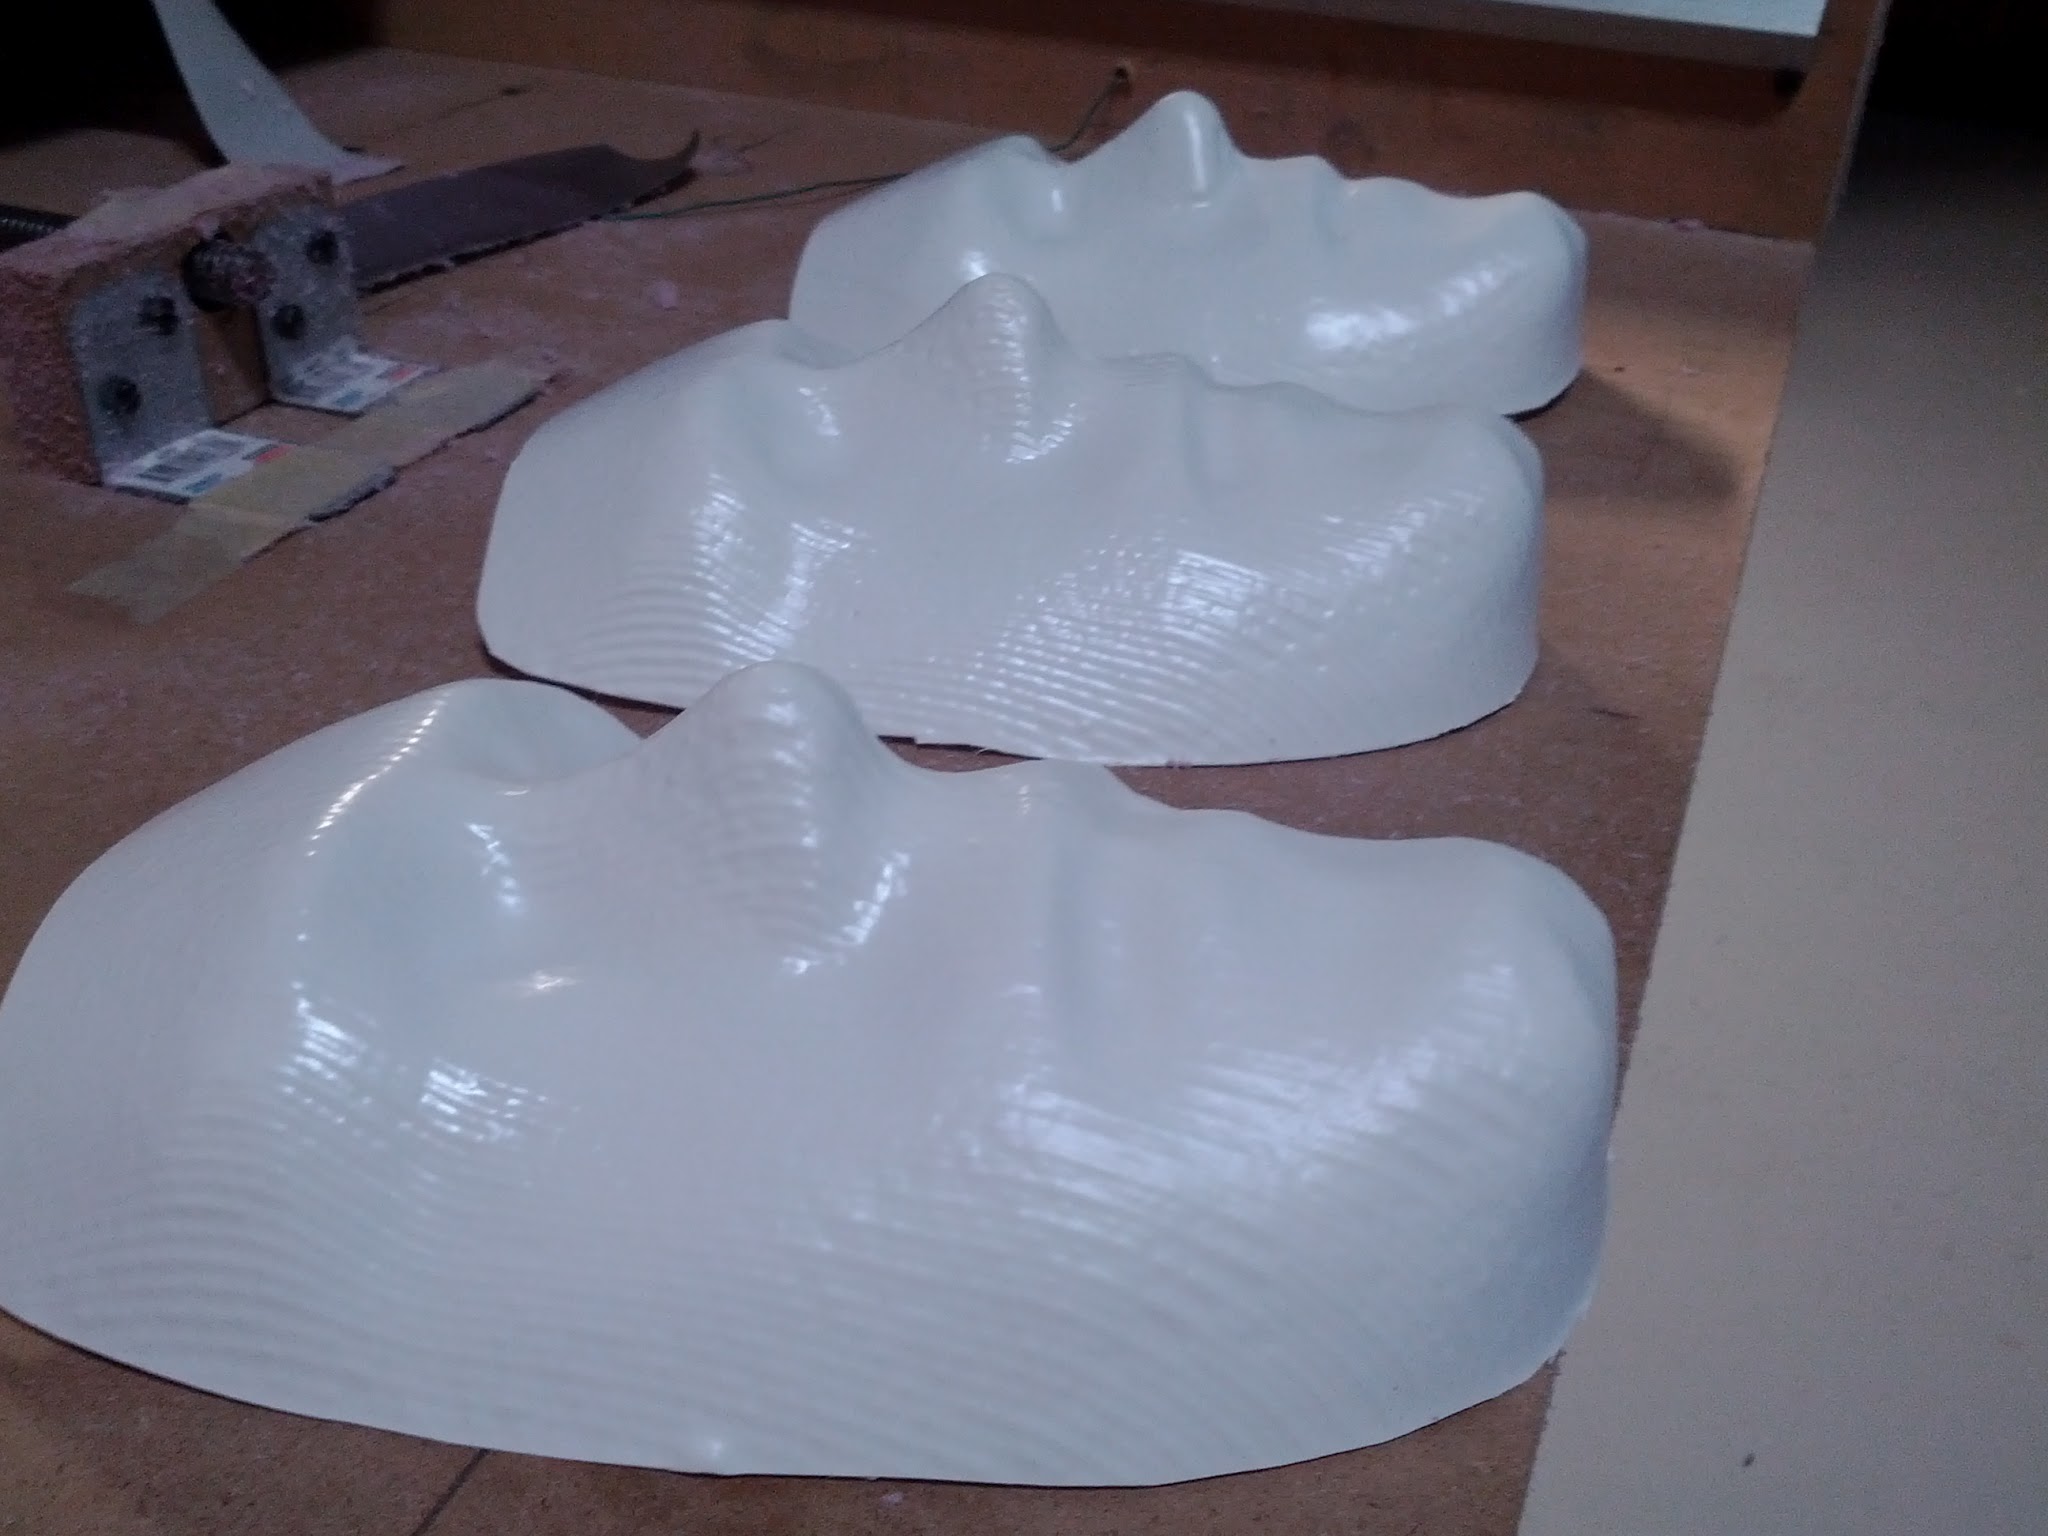
Here I made a simple vacuum forming rig. It is just like everyone else's: peg board with a box under it. A 1 1/4" hole was drilled in the side which fit the vacuum hose well.
The box is a little bigger than the plastic sheets (styrene) I had, so for this use I just taped off the extra holes.
The plastic is heated up until it is soft. I used a toaster oven since I don't have an oven in my lab. A few minutes at 350F worked well. The plastic needs to be very soft. I found that slightly thicker plastic worked better. It appears that the thin plastic cools off too quickly.
Turn the vacuum on, push the plastic onto the mold and you are all set. I hadn't ever done it before, it worked great.
Now take the plastic off the frame and trim it up. All we have left to do is paint it.
Painting


There are many things we can do now. Actually, I think painting the face well is harder than everything else combined.
I started with a base layer that was soft. Everything else was added with colored pencil. Experiment for yourself. This is really the hardest part. Our brains are very used to looking at faces, so any small differences are very noticeable. If I had more time, I would try to airbrush the face on. It clearly takes some skill to do this right, the nice part is that we can make a bunch of masks and practice.
After a few tries I ended up with the mask shown below. Mostly it is just creepy :) Perfect for Halloween!
Future Ideas
Of course, working on this and showing it to others brought up a lot of other ideas.
* The mold is reusable, so you can make many masks and give them all to your friends. Have a "you party", or go 'as yourself' for Halloween.
* A mold of me in 'Carbonite'
* Distort the face mold - adding horns, make it a caricature, etc.
* Could we print the image of the face onto the plastic and then vacuum form it? That would be awesome. Painting it well is hard.
* Lets make a ton of masks of myself and leave them lying around (under bed covers, etc) in order to startle other people.
* Make a bust of yourself.
* Ice cube molds of your face.
...
Add your ideas and comments please! Vote for us and have fun!