Make Wallpapers From Iconic Trip Photos
by SiddharthS141 in Design > Digital Graphics
869 Views, 7 Favorites, 0 Comments
Make Wallpapers From Iconic Trip Photos
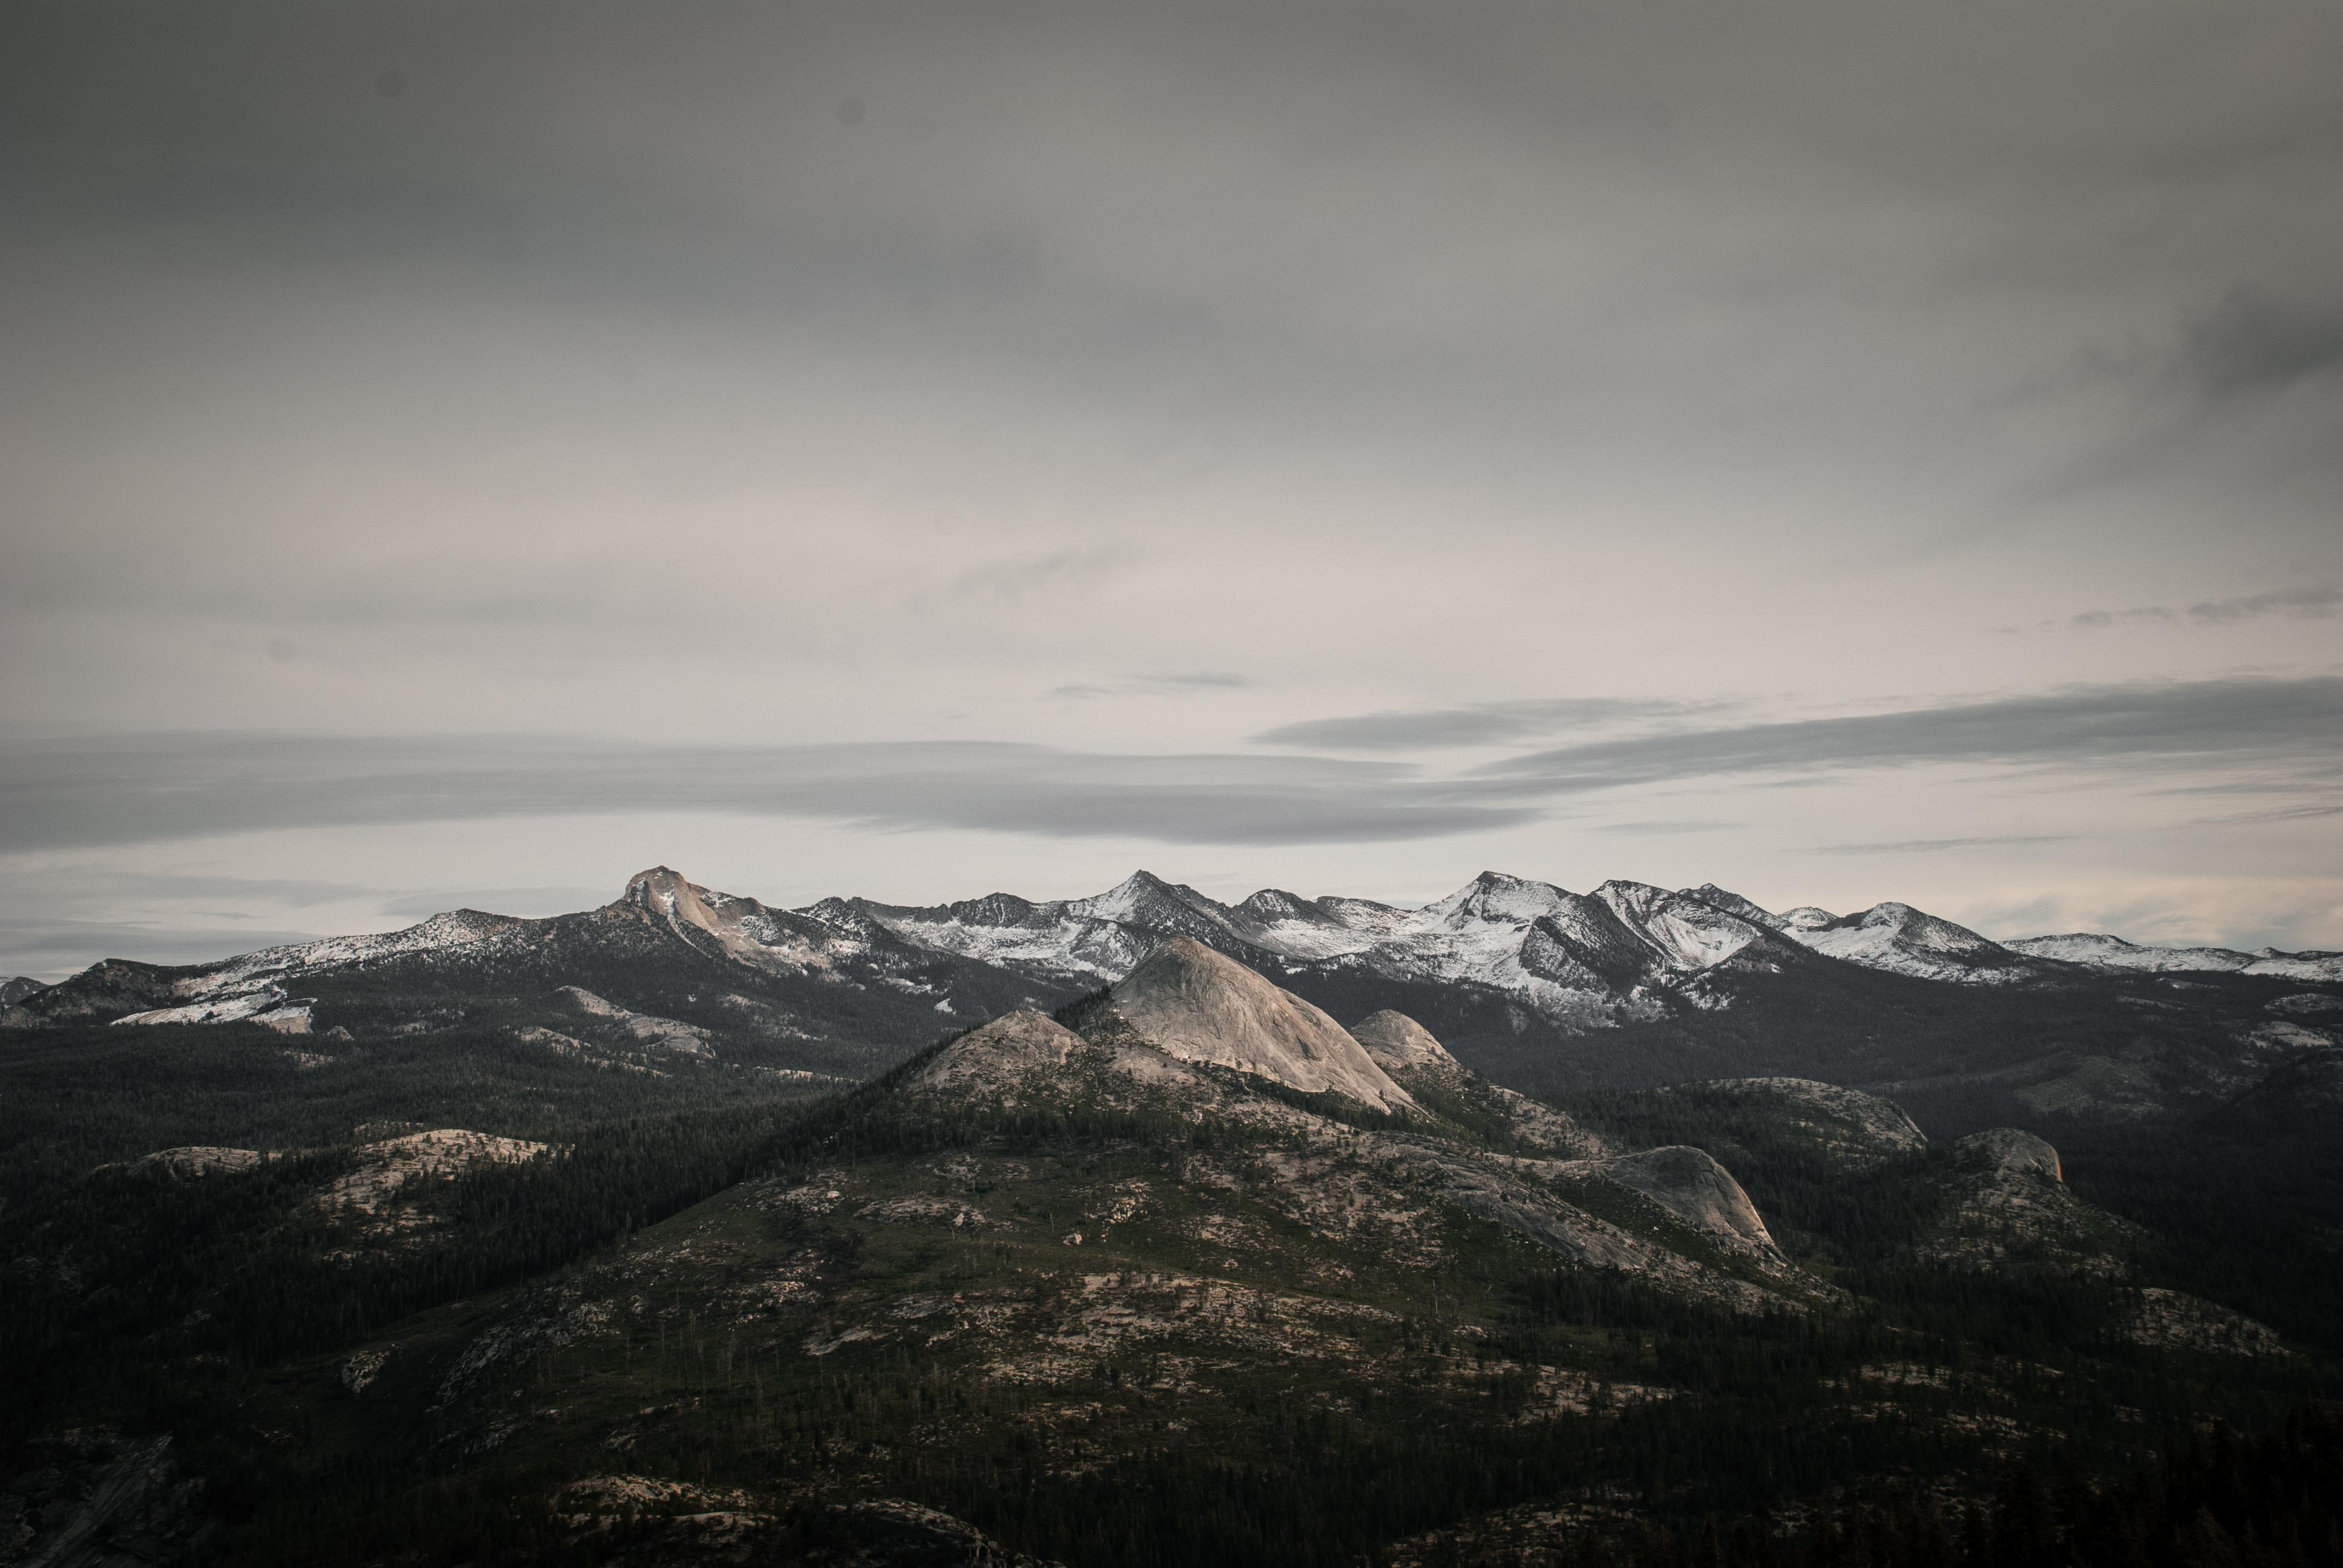
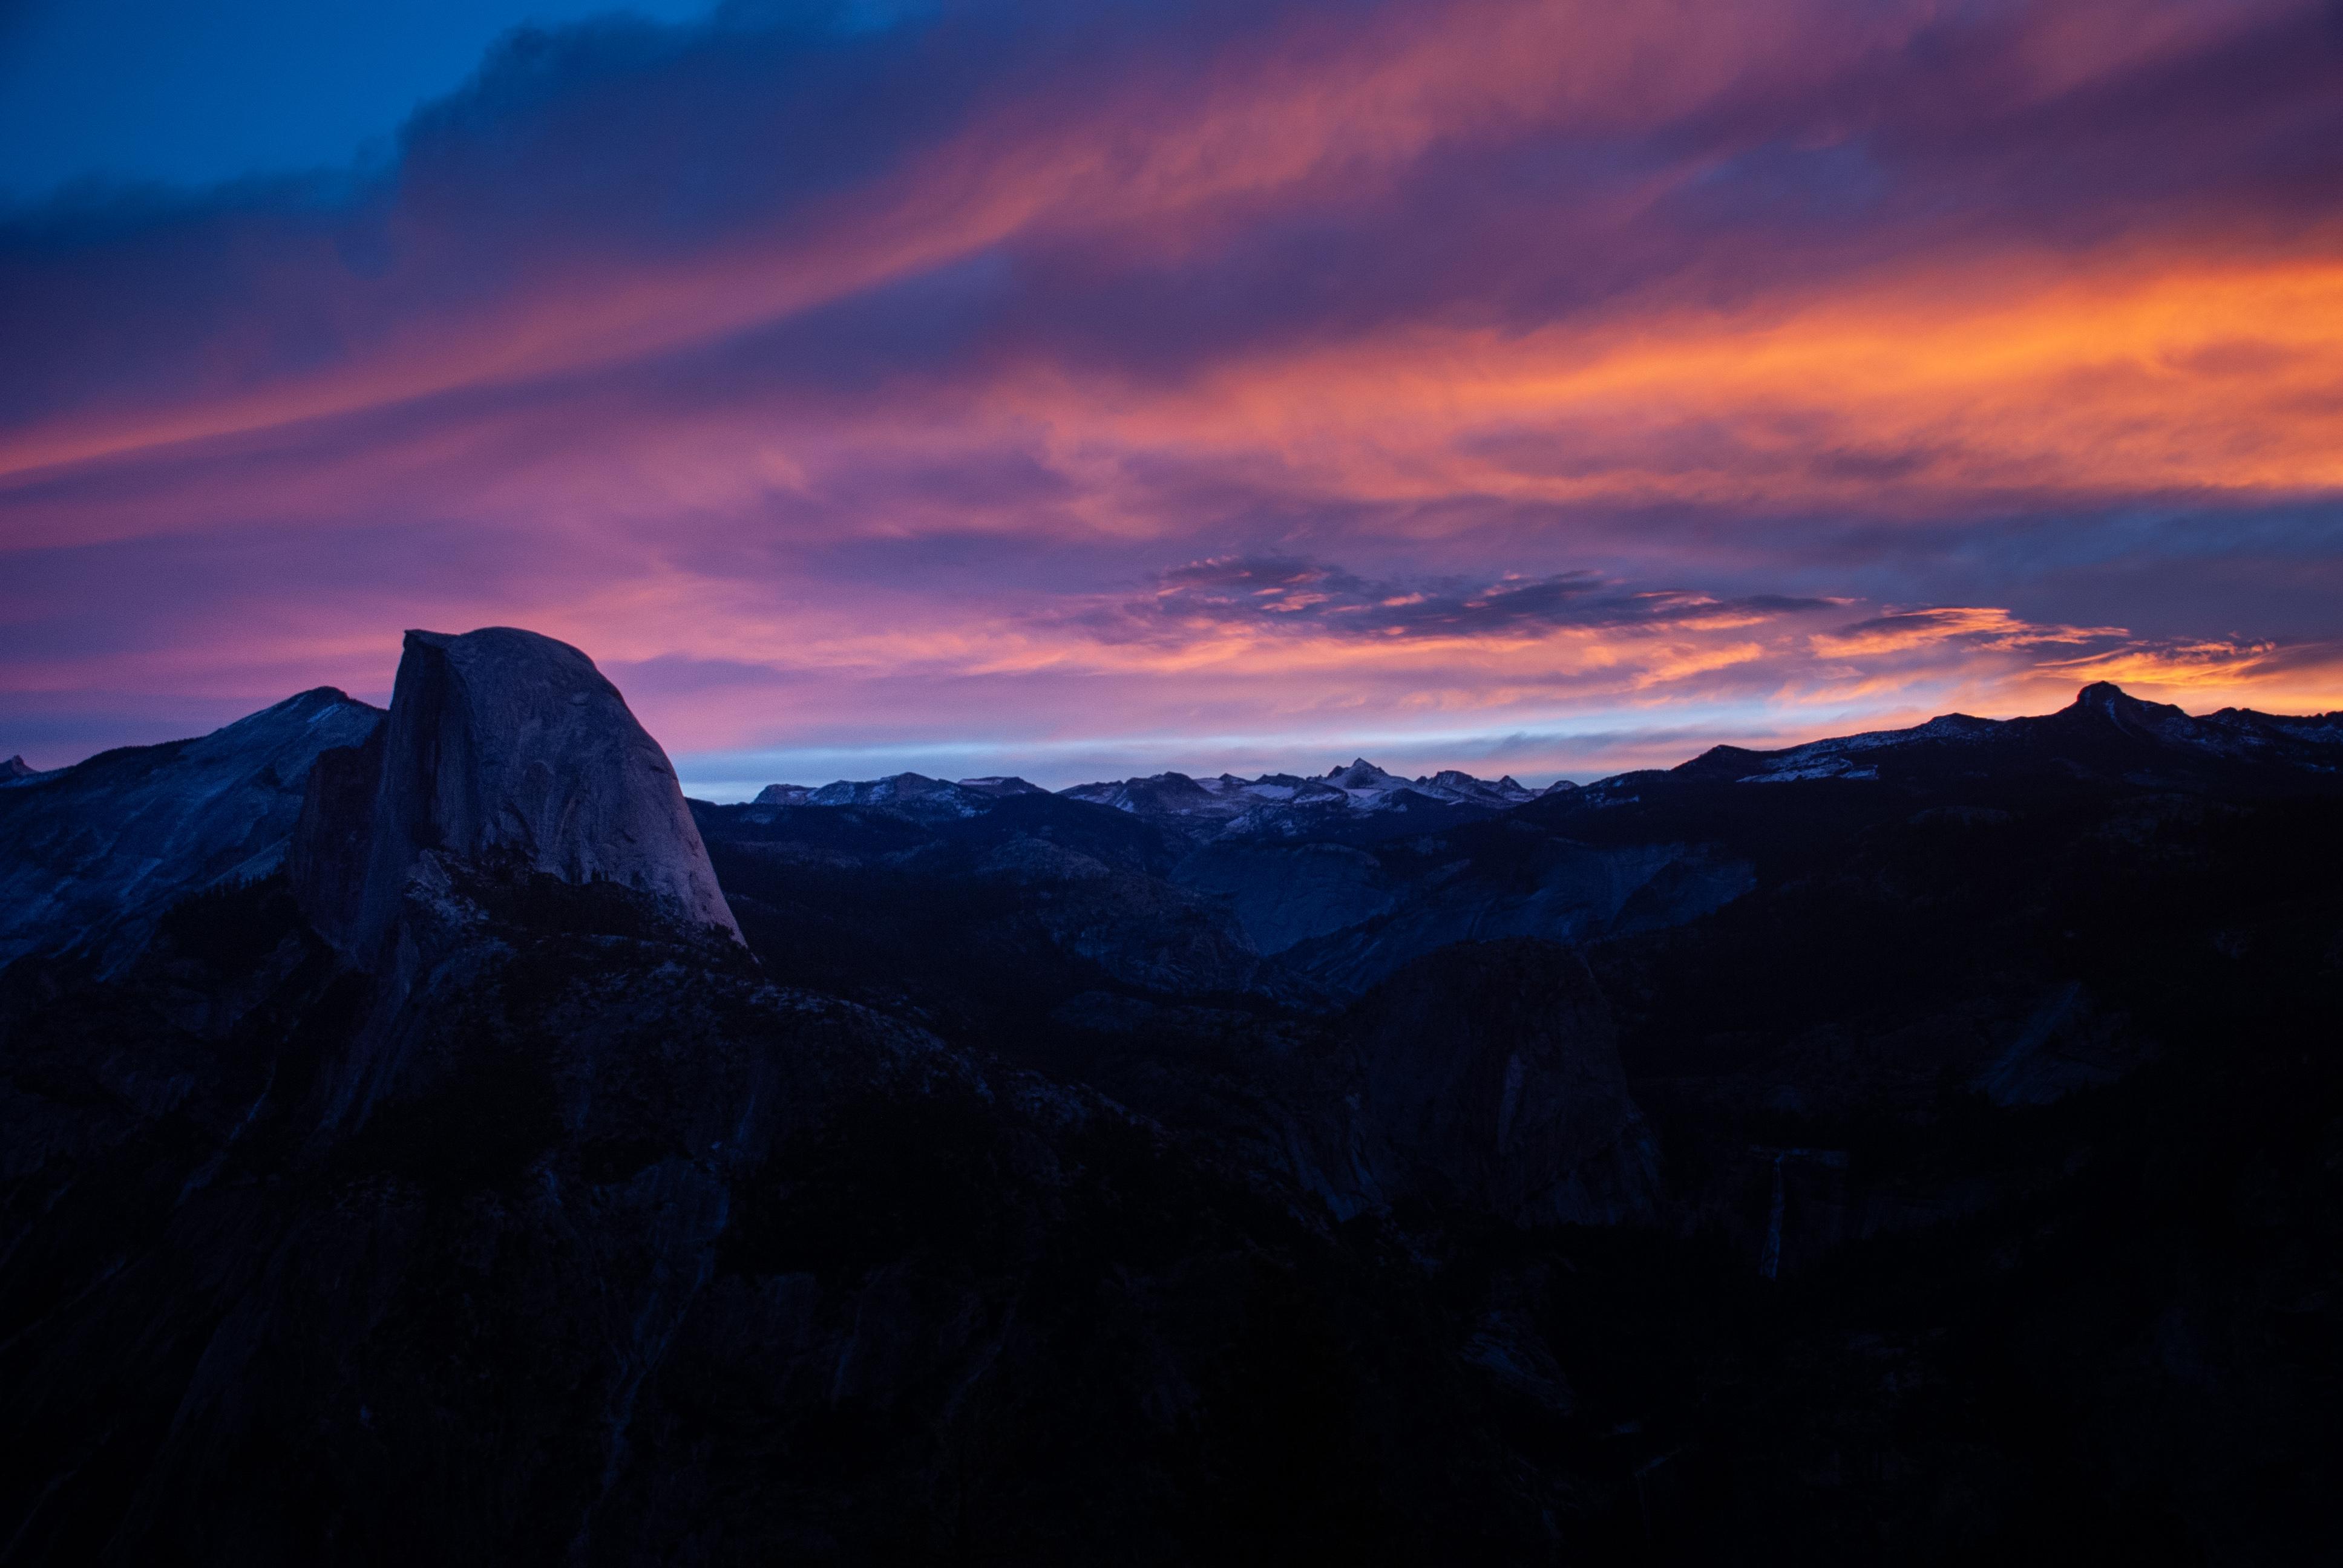
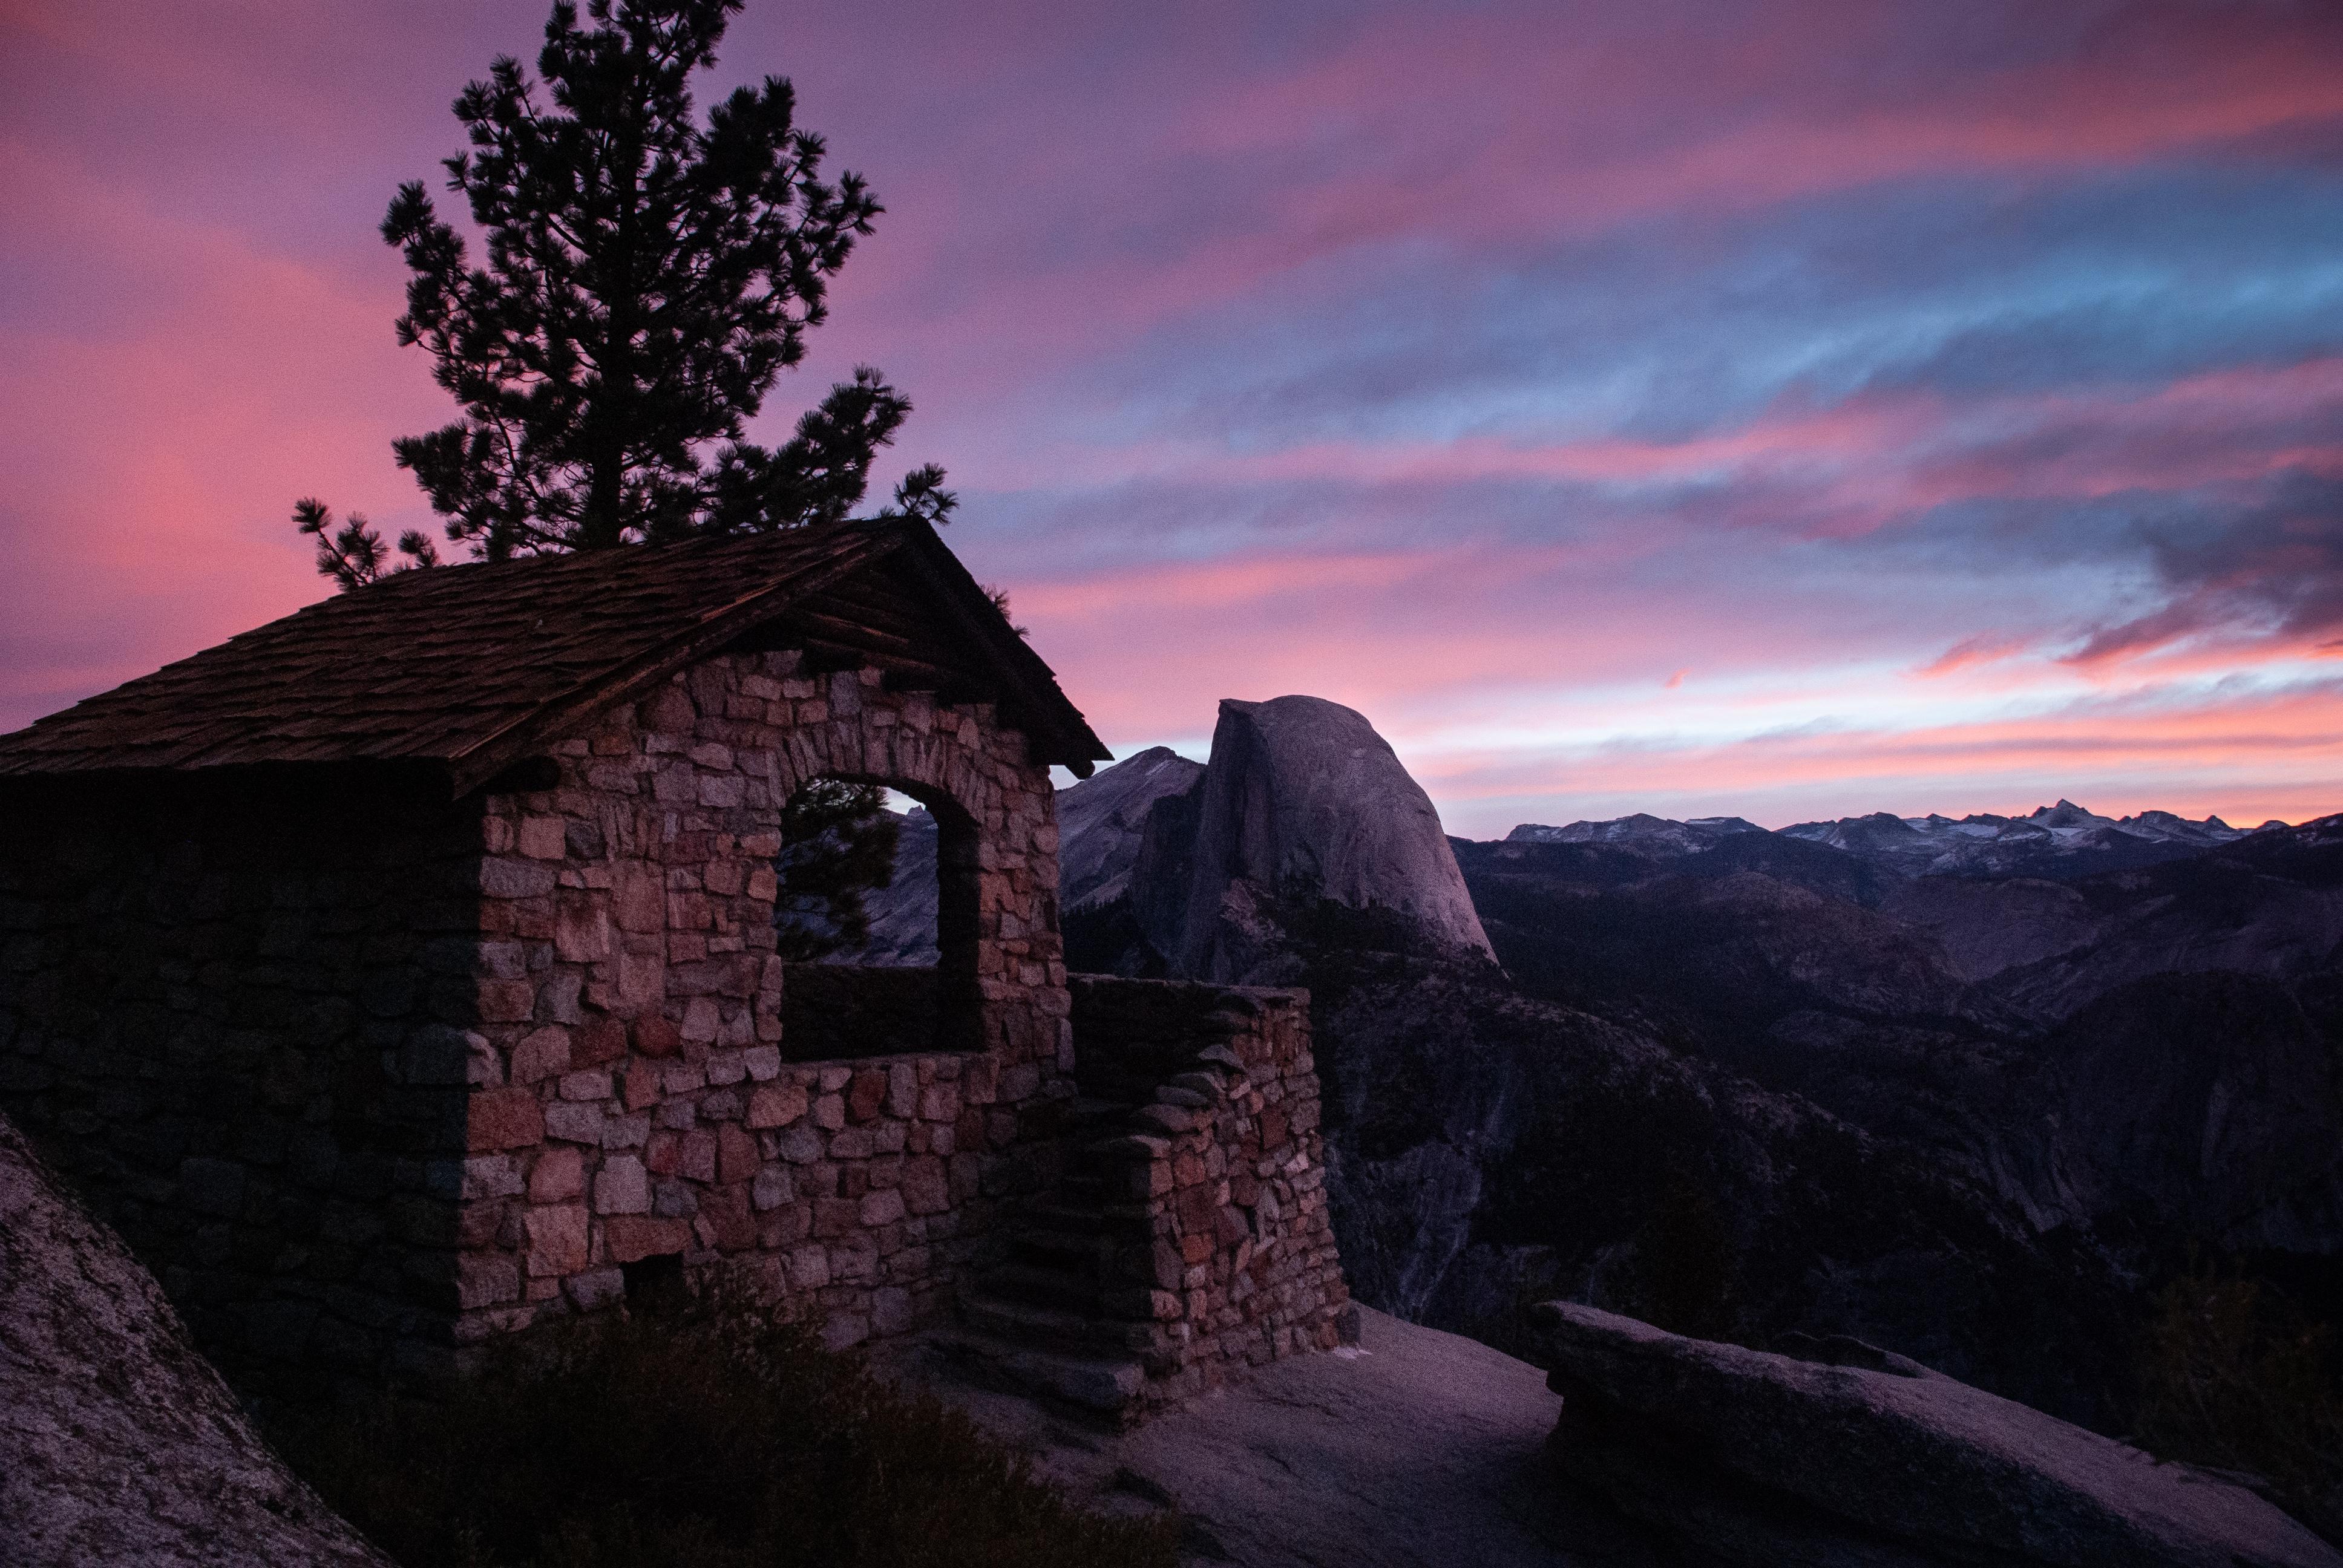
I went on a trip to Yosemite and collected some pretty nifty pictures. I brought a DSLR camera and I captured some beautiful scenery on the hikes. I thought I could turn these into some really cool wallpapers since I got some good pictures of both landscapes and animals. In this instructable, I'll show you how to make two types of wallpapers - the elk landscape cutout with a background and the constellation style elk.
I'd encourage you to use your own pictures, but I have provided mine in case you want to follow along exactly.
Let's jump right in!
Supplies
- Computer with Inkscape (Download the appropriate version for your computer)
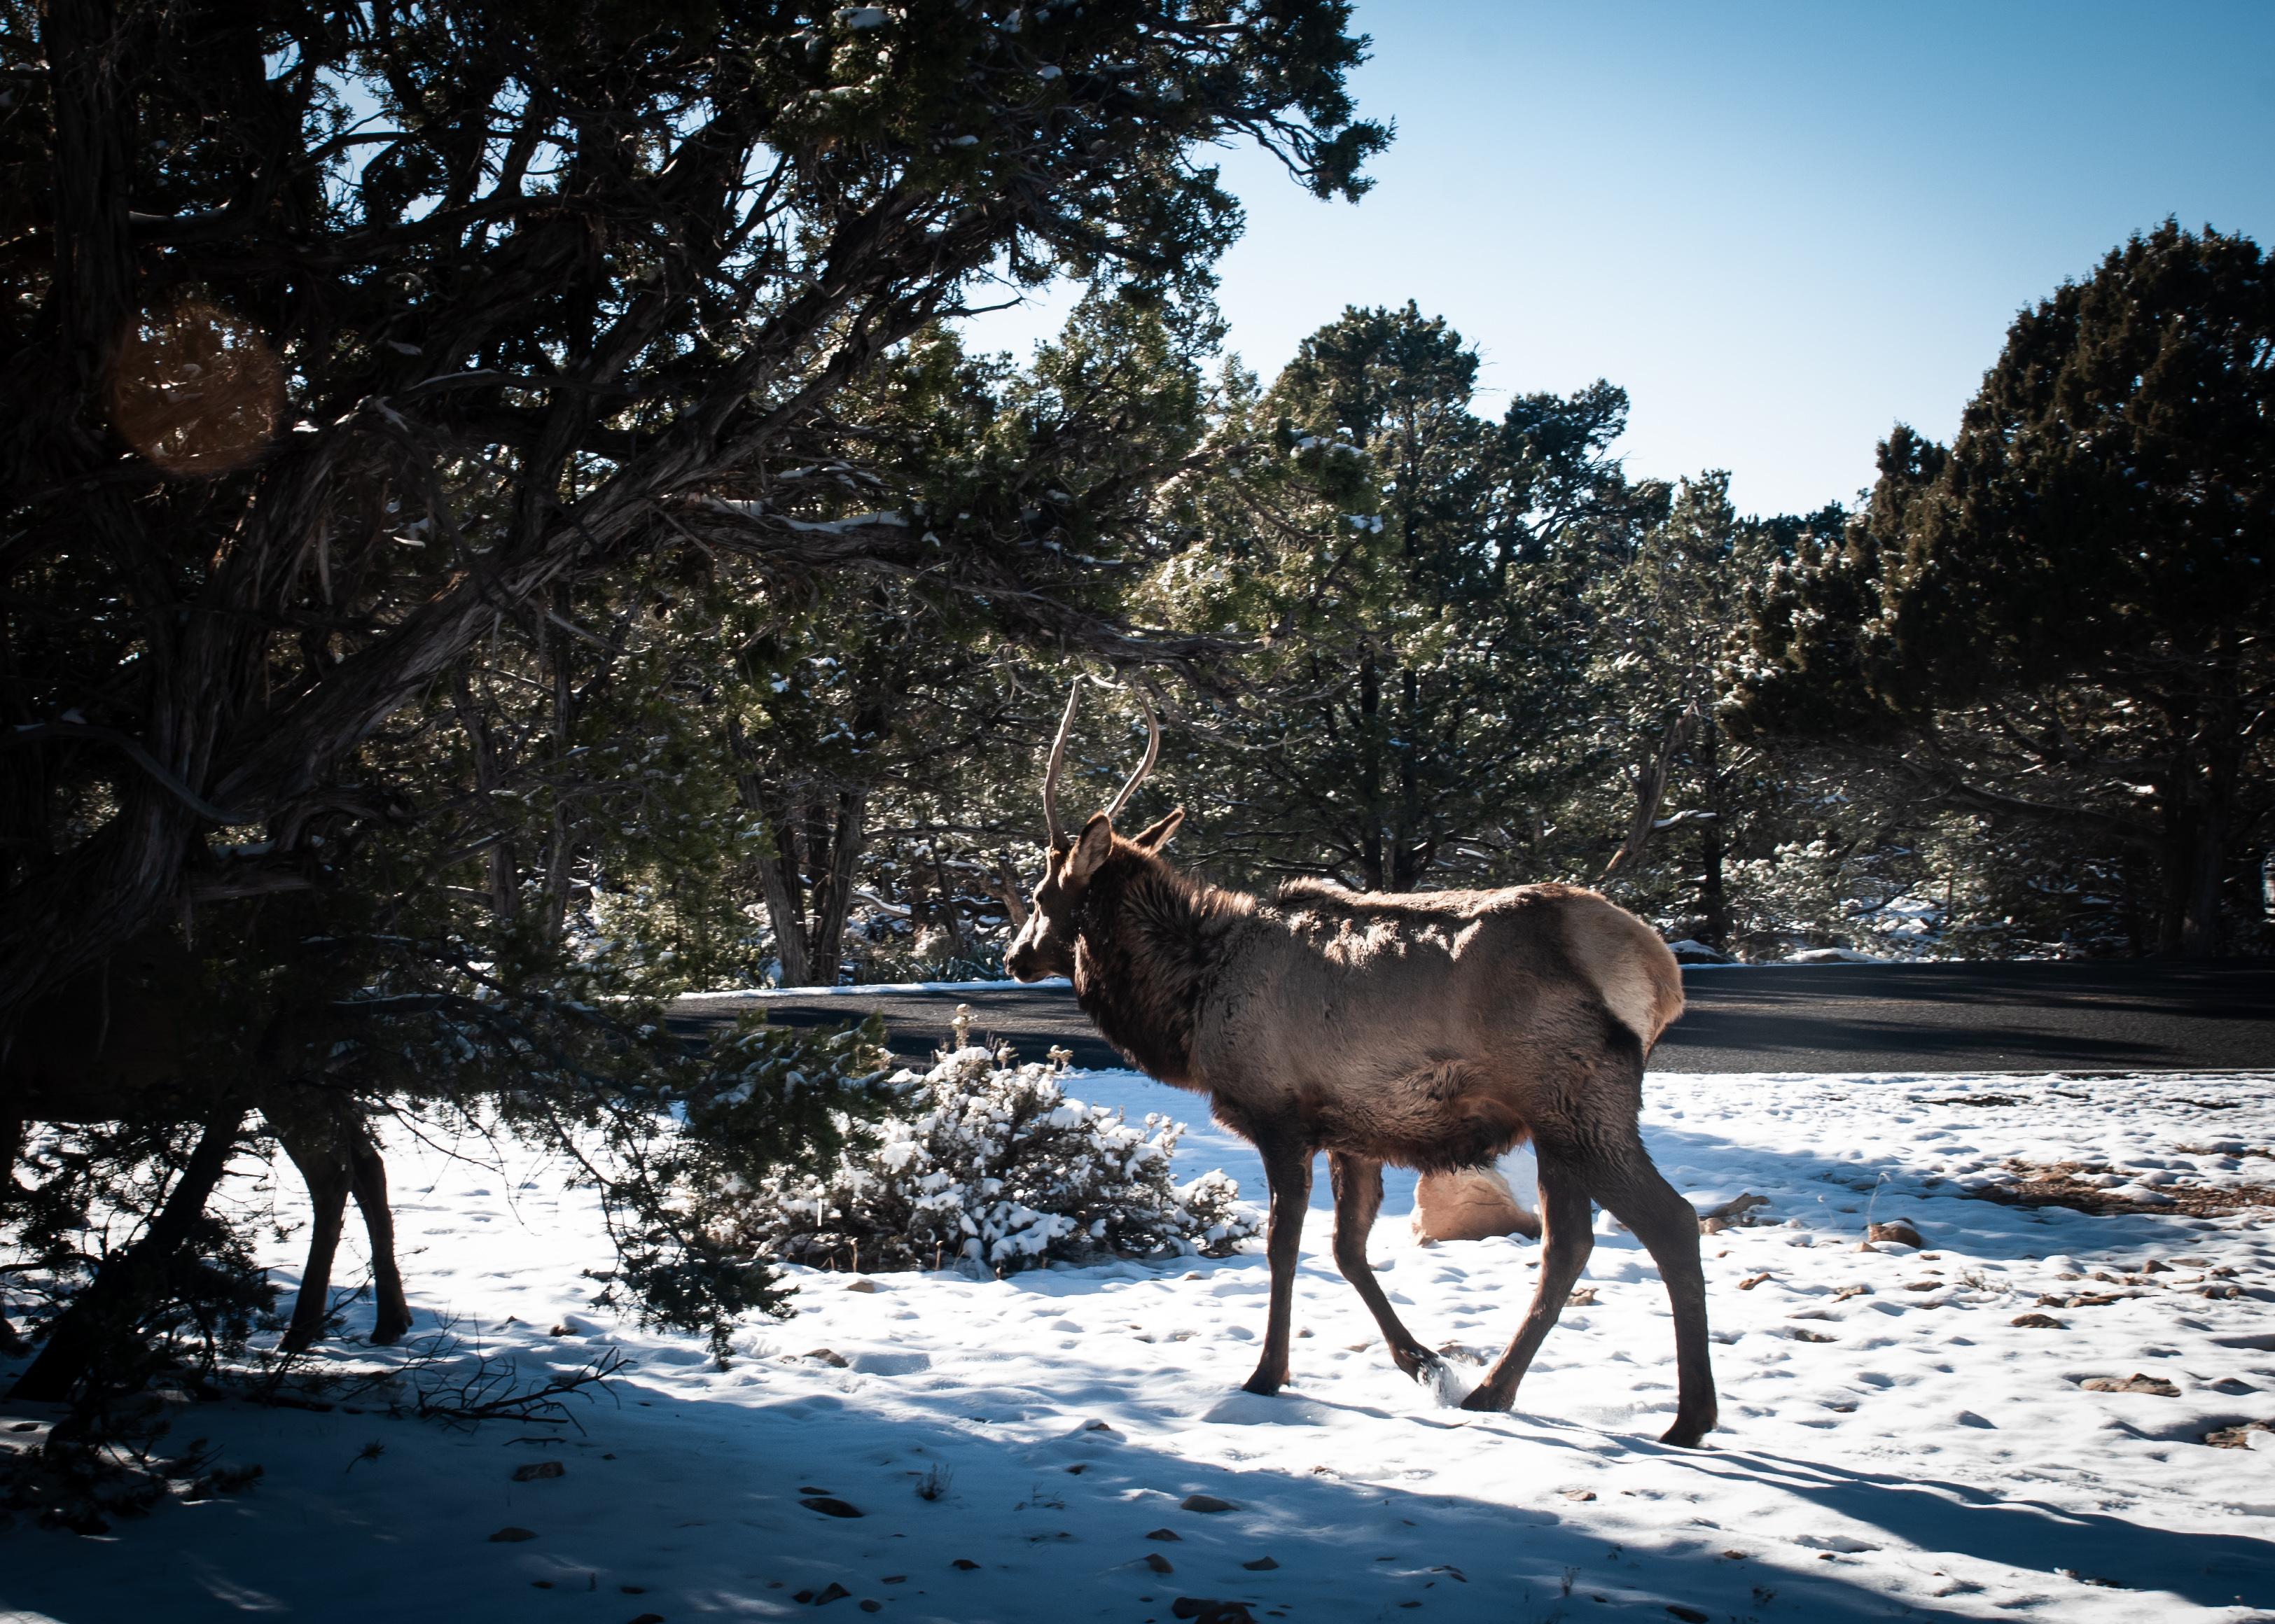
- Photos that you want to turn into wallpapers! One recommendation would be to have a photo with an object that has a distinct silhouette, such as the elk photo I have below. The elk silhouette is sharp and recognizable. If you don't have a picture with a distinct silhouette, you can really use any shape, or you can use a picture from the internet too, if you'd like.
Import Pictures
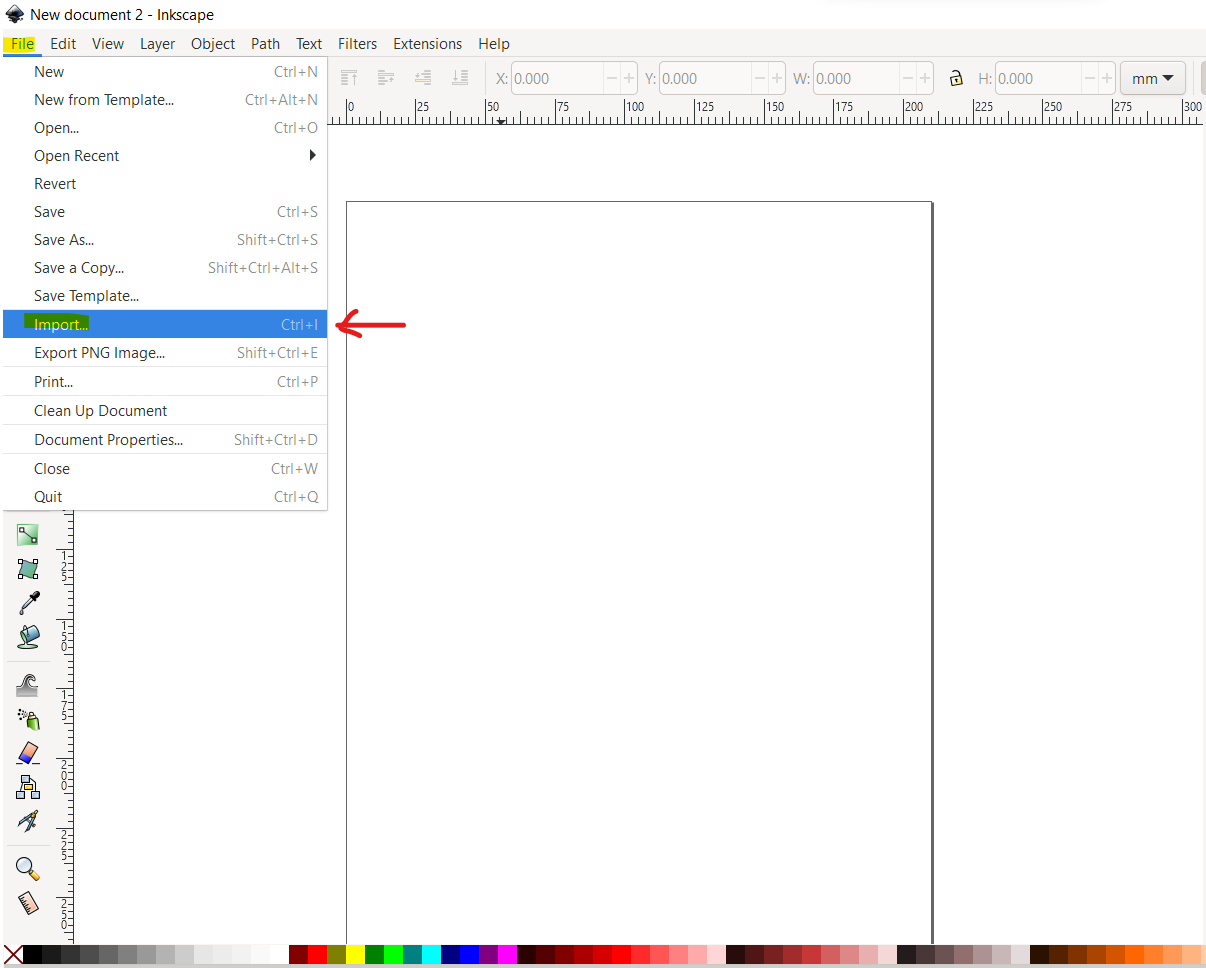
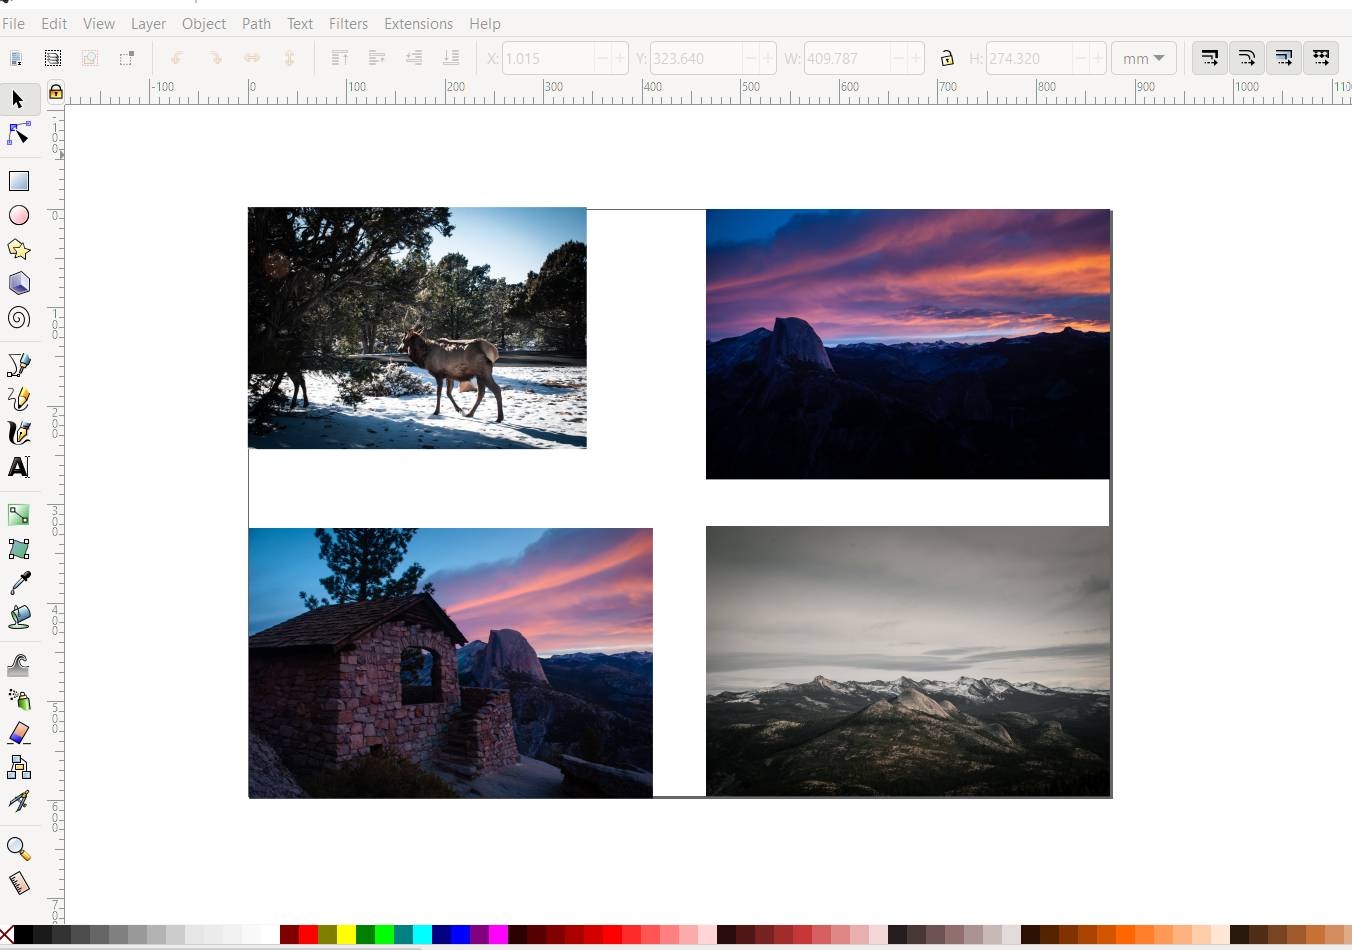
When you have the pictures on your computer, click file>import to bring them into inkscape. You may only be able to import one at a time, so repeat the process for every picture you wish to use.
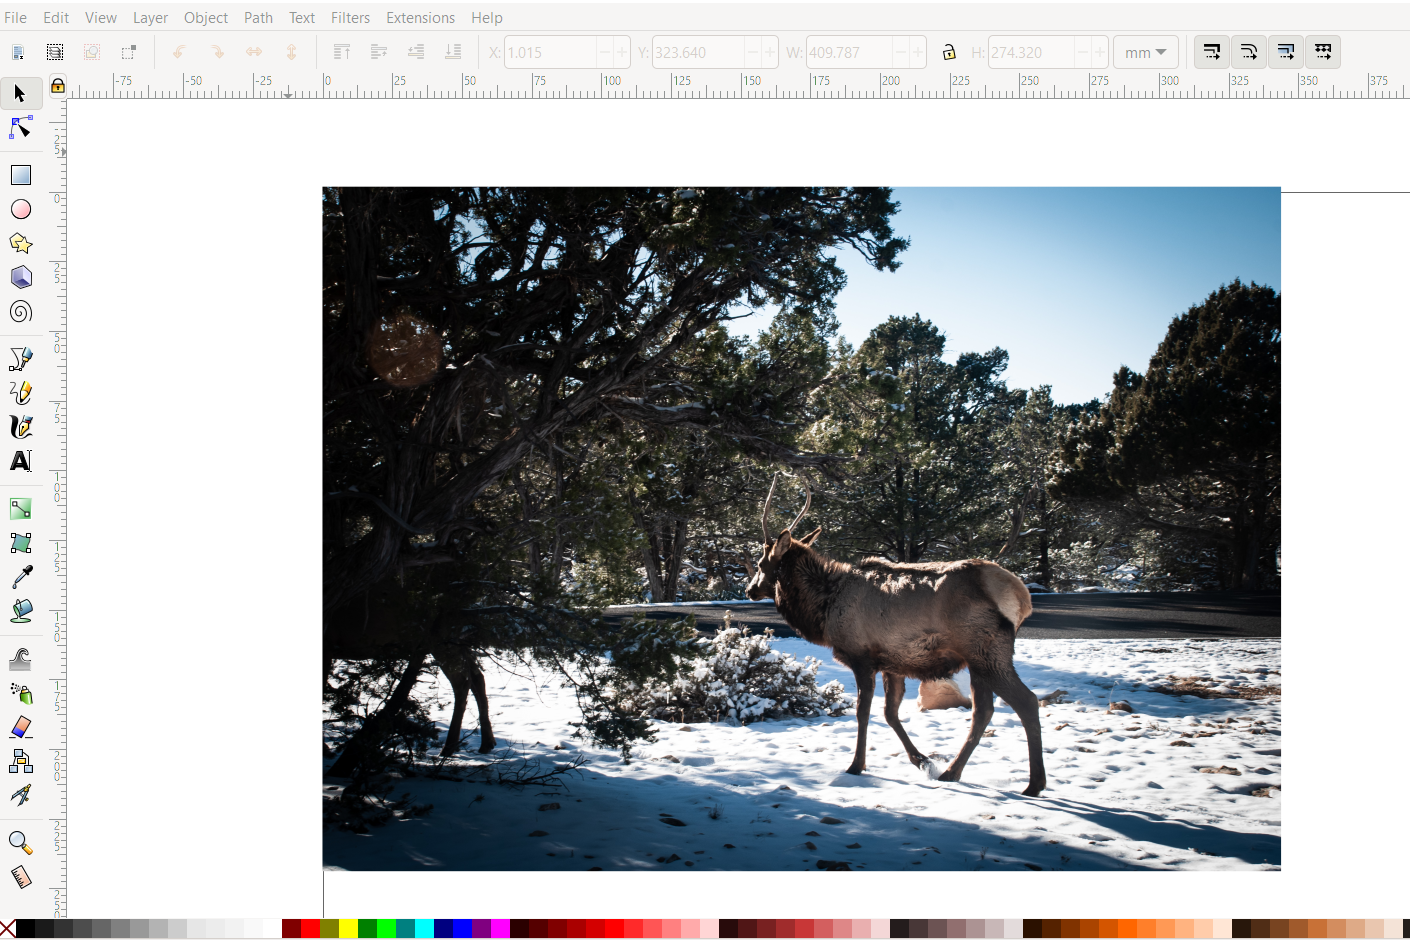
The first picture we are going to focus on is the elk. This is what we are going to use to get our elk silhouette.
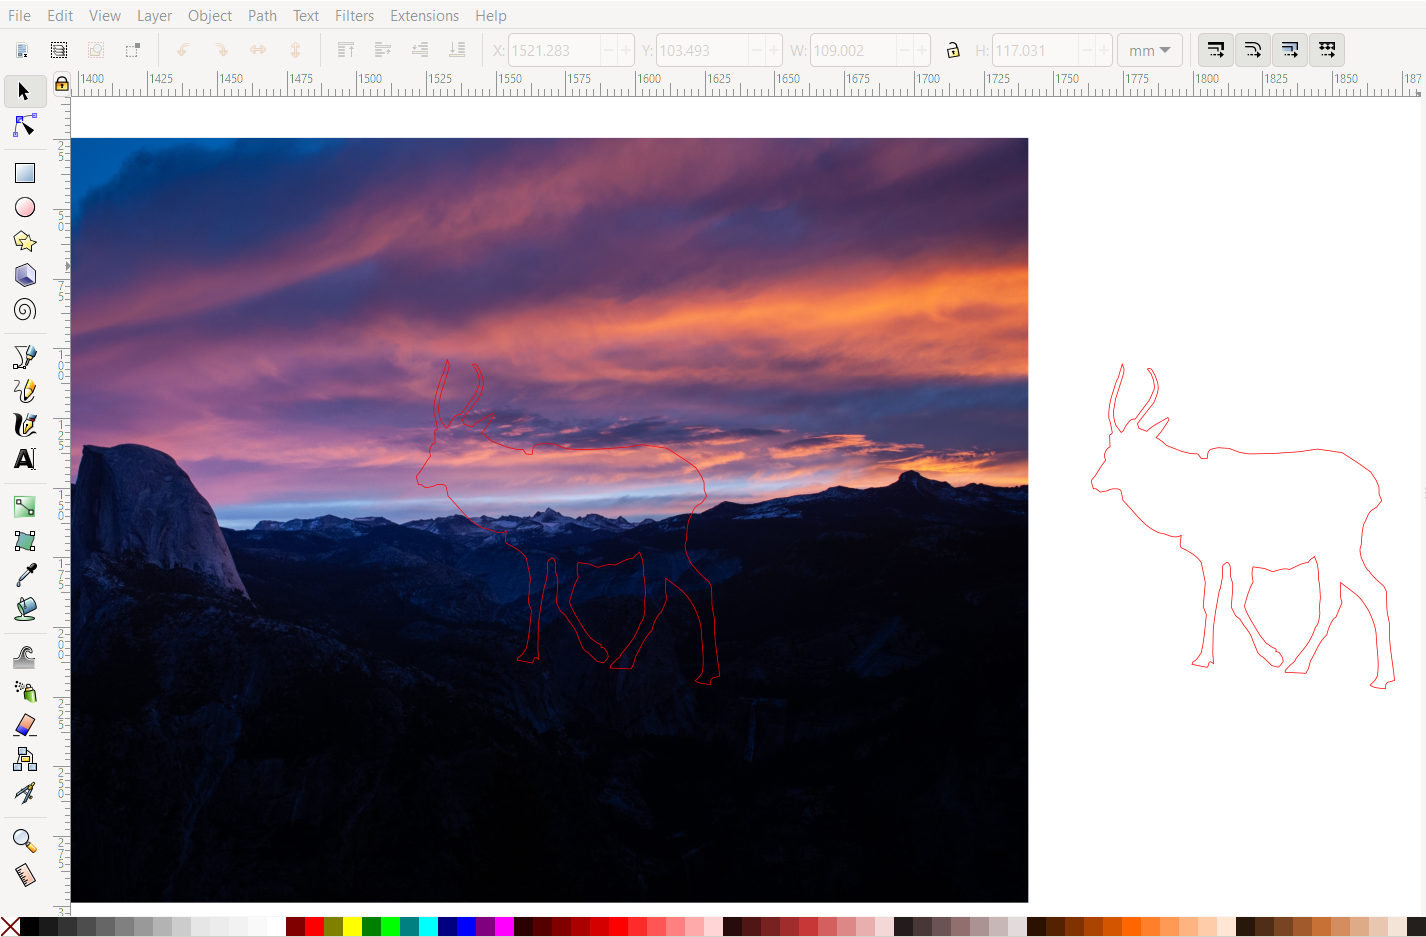
Trace Silhouette
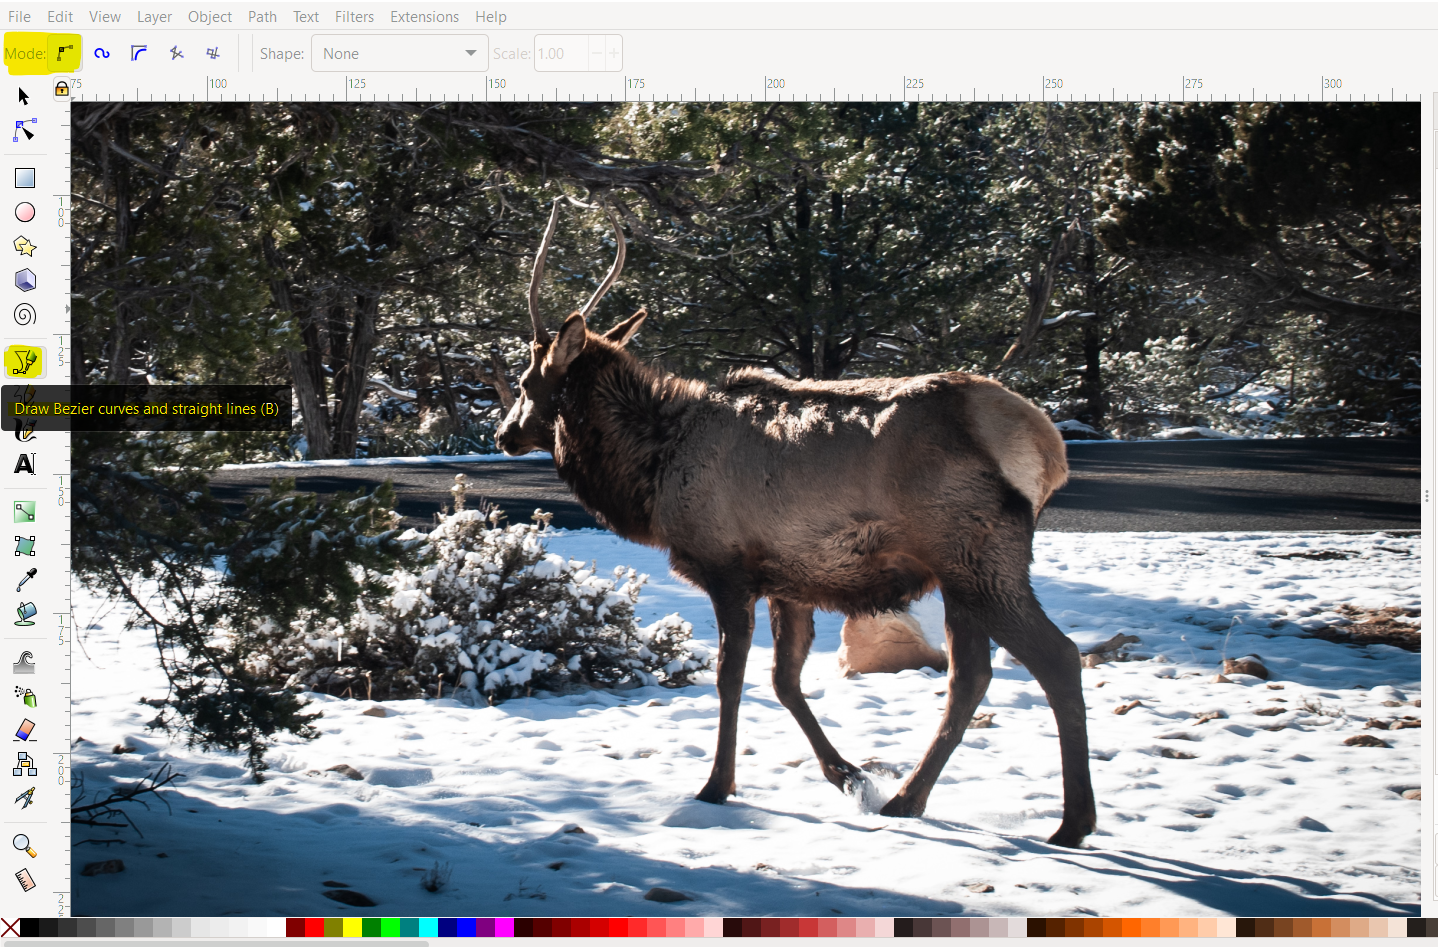

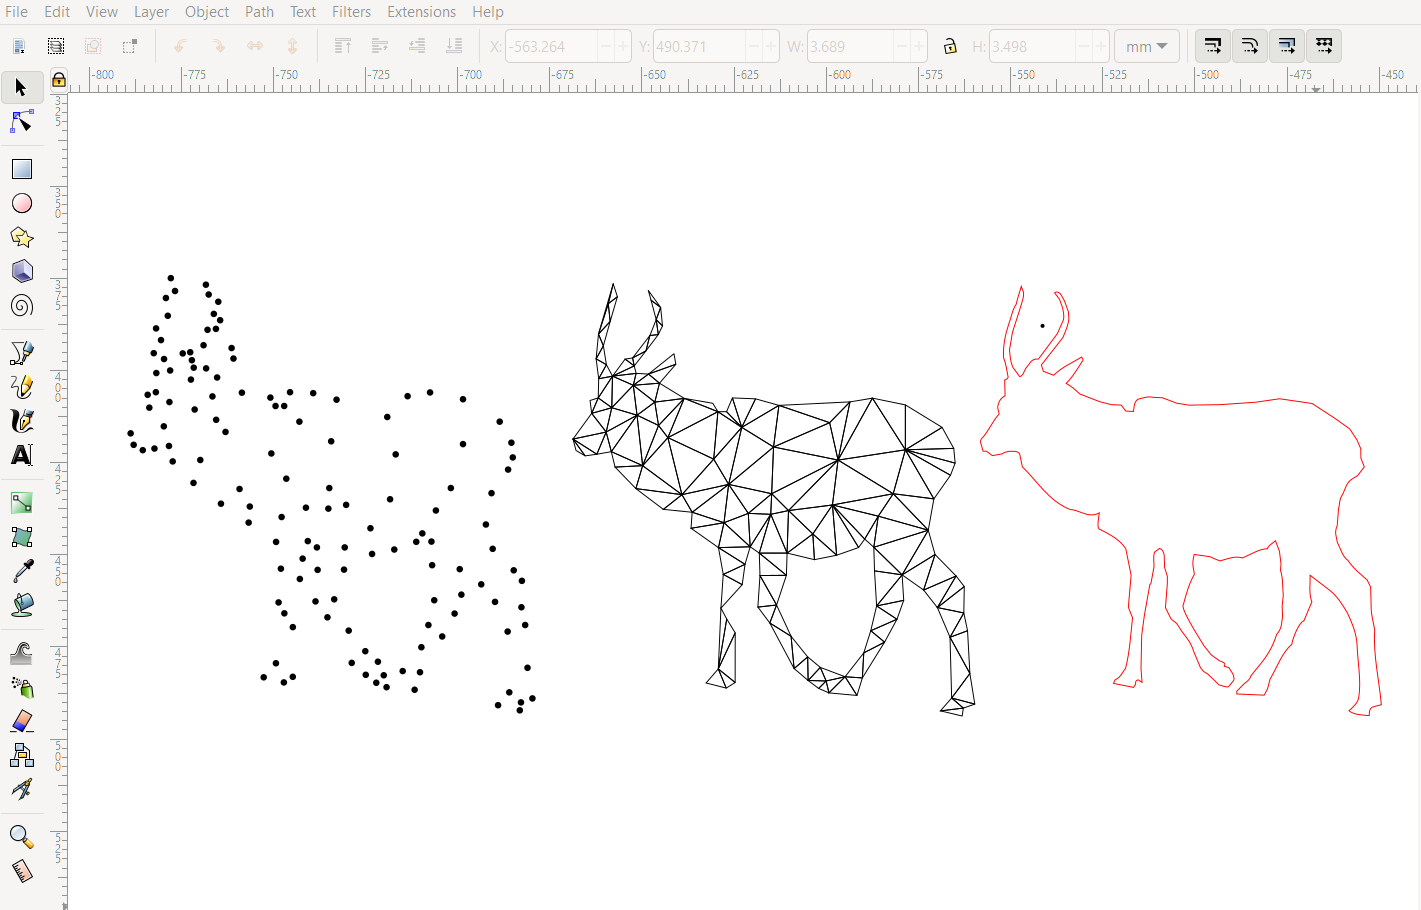
Using the bezier curve tool, with the regular point-to-point line mode active (shown in the first picture), click on points along the outline of the elk. You can see the level of detail I am capturing with these points (shown in the second picture). I have simplified some of the organic curves of the elk's legs into straight lines, but I have captured most of the detail. You finish the outline by clicking on the first node you placed (shown in the third picture). Your outline may be red, black or really any color. It should not matter what color the outline (also called a stroke) is.
Clip Shape From Photo
I can then use ctrl + d (or cmd + d on mac) to duplicate the outline we have created.
TIP: Its always a good idea to have a duplicate of your template shapes in case you use/lose one of the shapes in your process and you need it again. This way, you don't have to undo all your changes just to get the shape back.
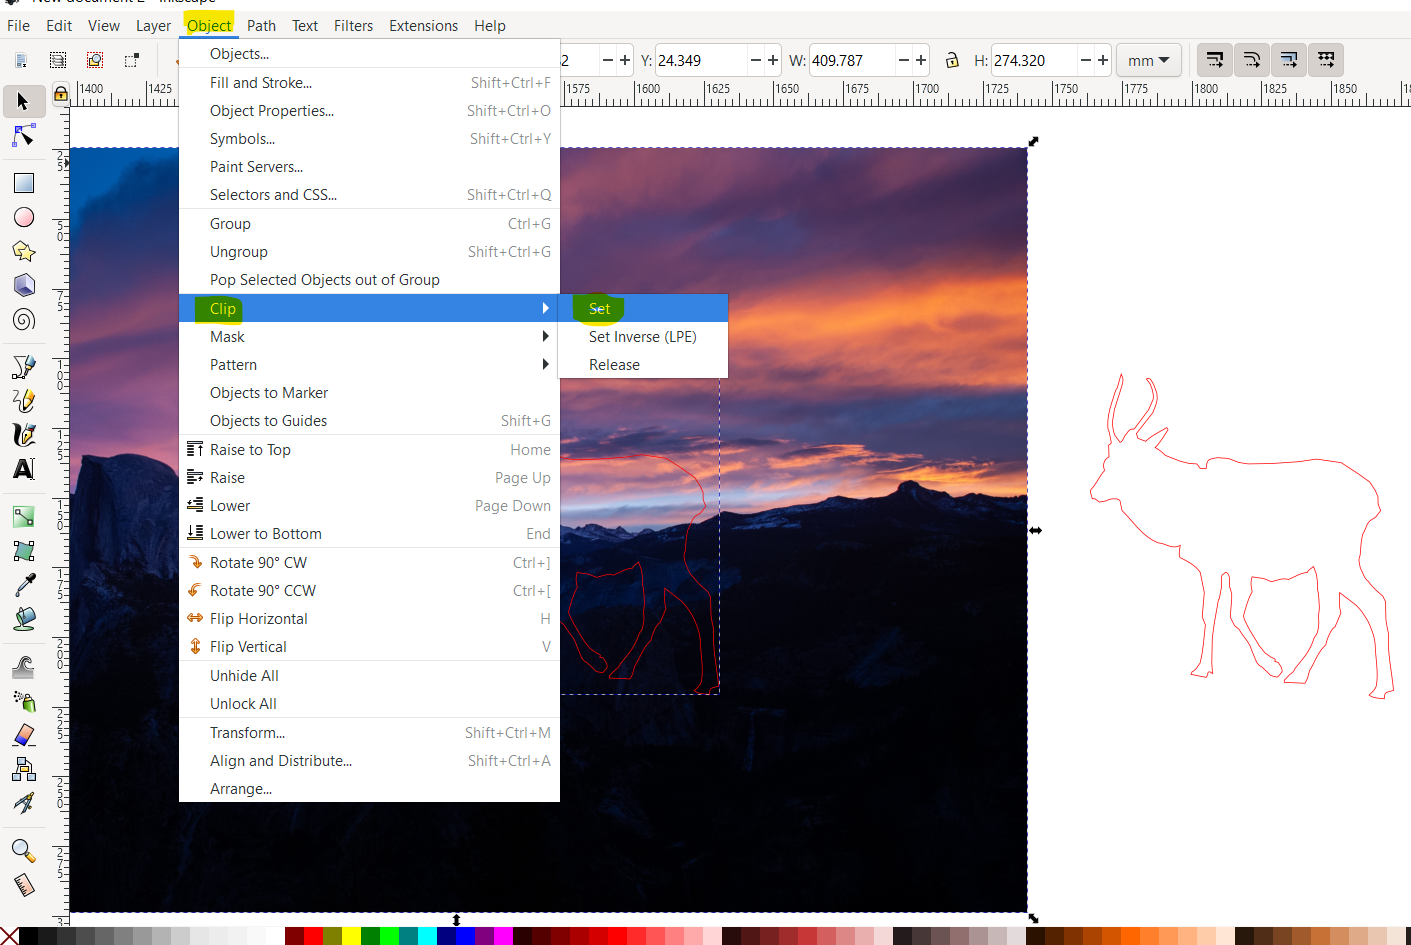
I move the outline over the section of the second picture that I want to cut out, then I select both the elk outline and the image by shift + clicking on both objects.
I then click object>clip>set to get the elk-shaped snip from the picture.
Add Outline and Shadow
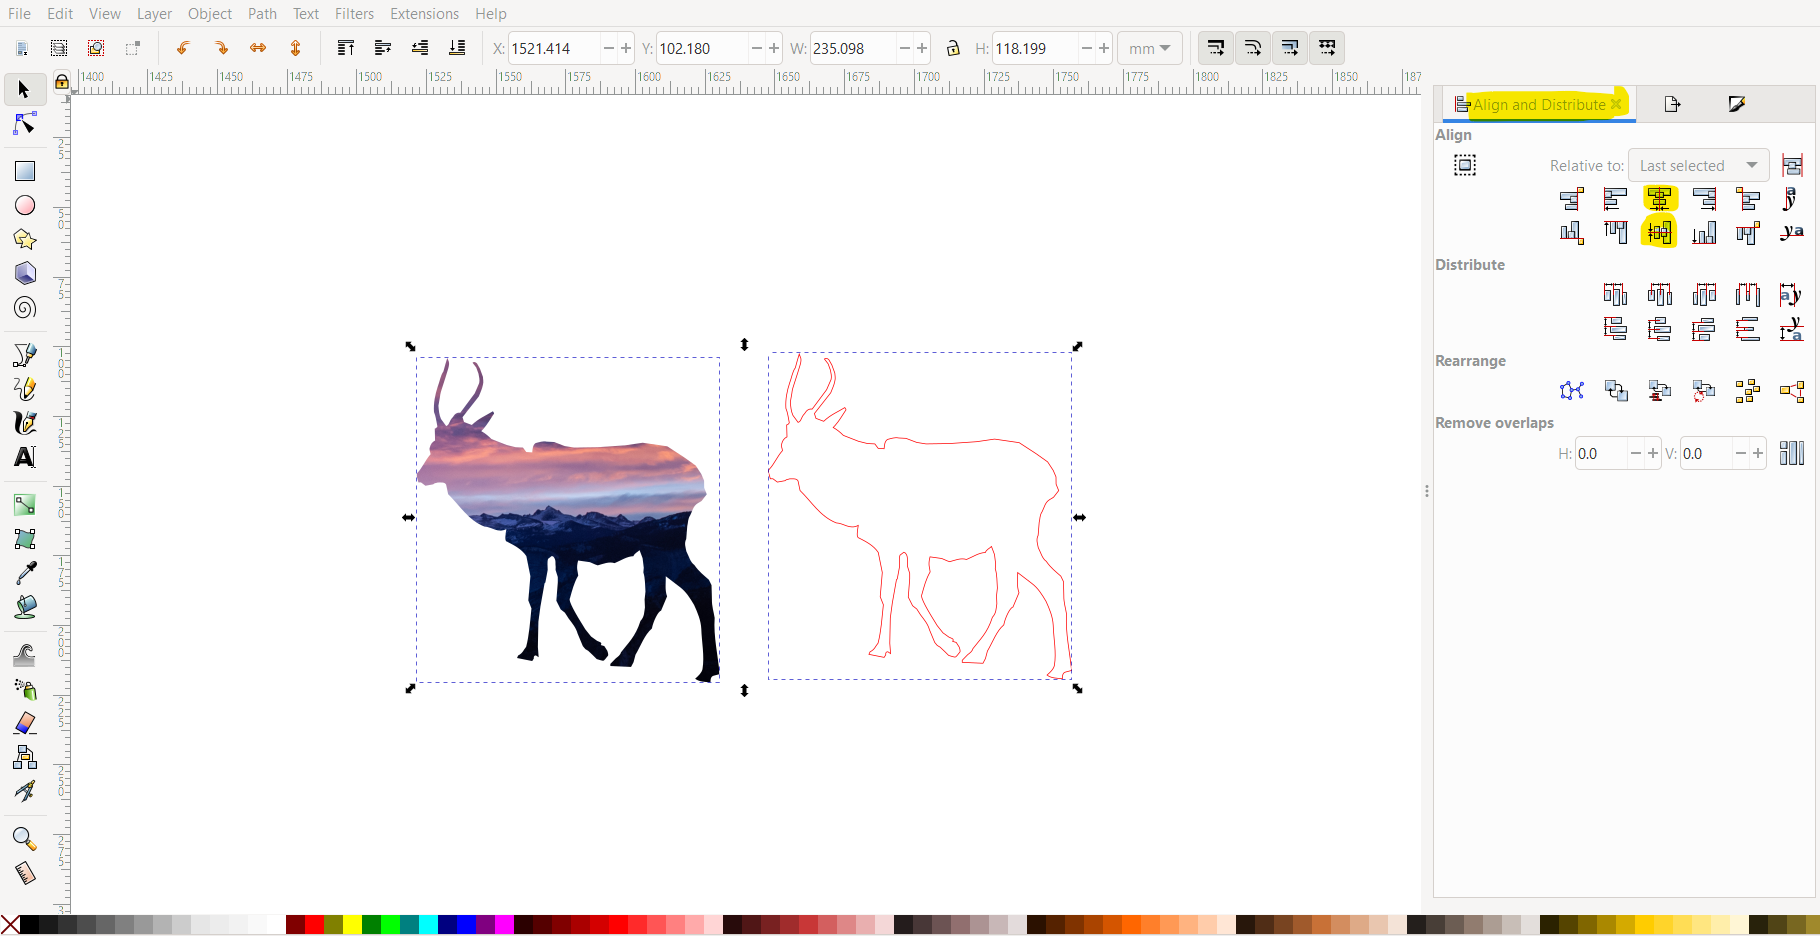
Duplicate the elk outline again and click + drag to move it away.
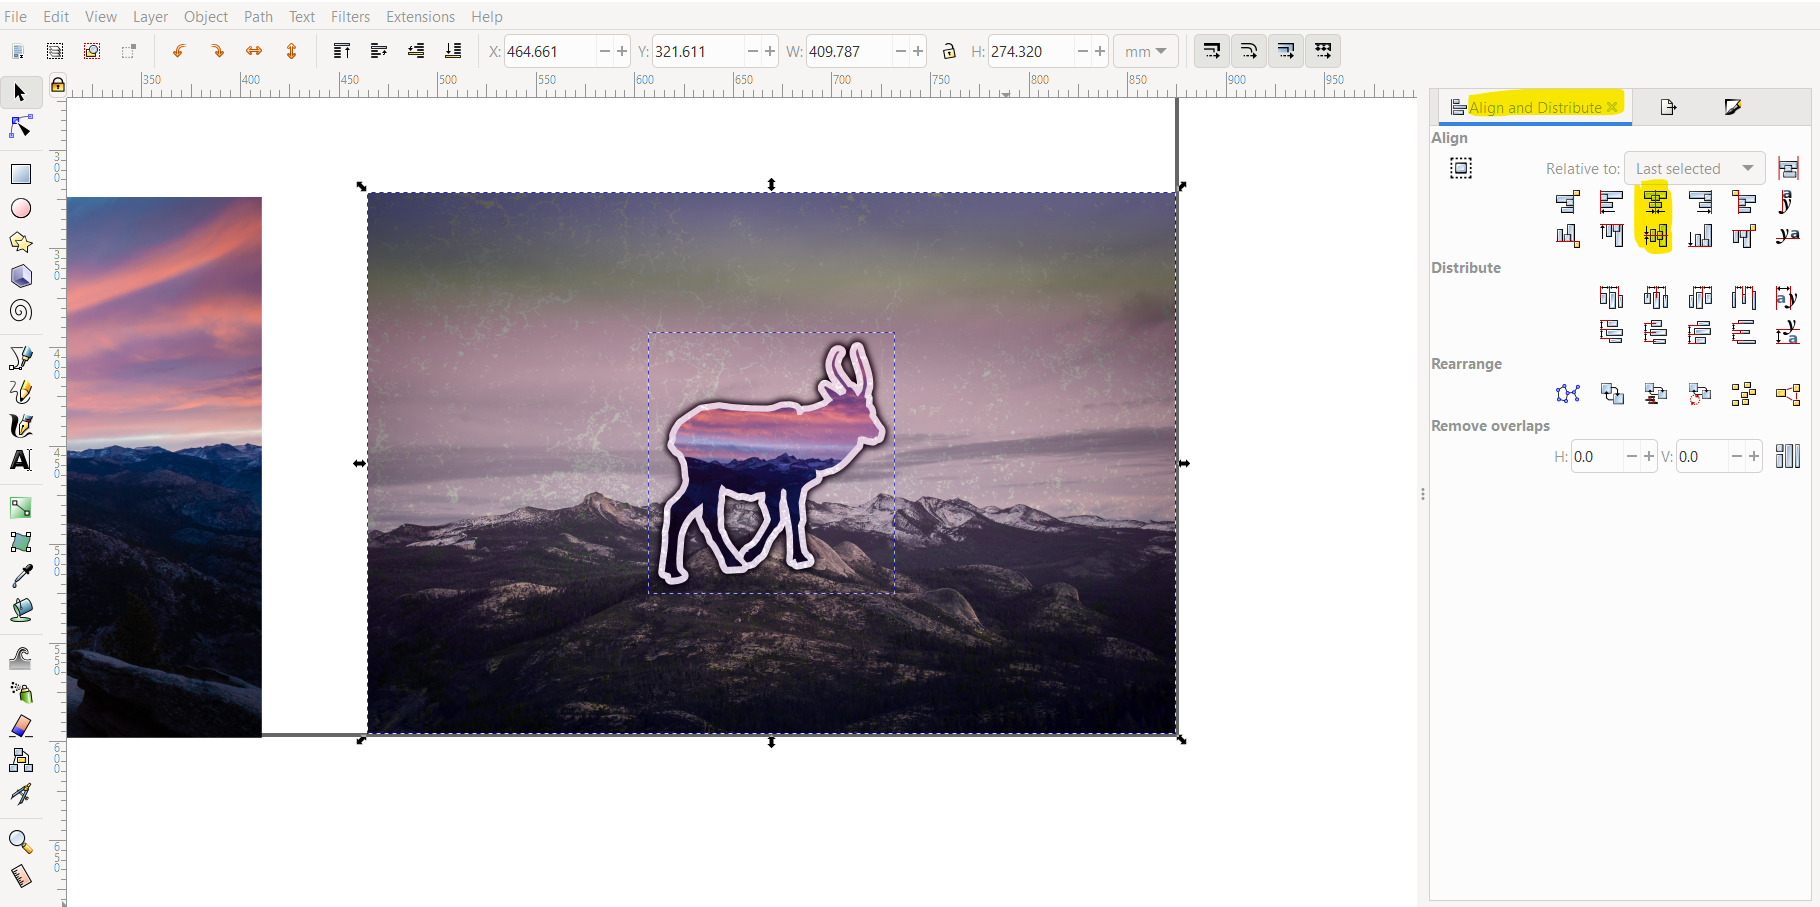
Now select the elk-shaped cropped image and the duplicate elk outline with shift+click, and click object>align and distribute to open the alignment menu. Then use the two highlighted buttons shown in the first picture to align the centers of the two objects.
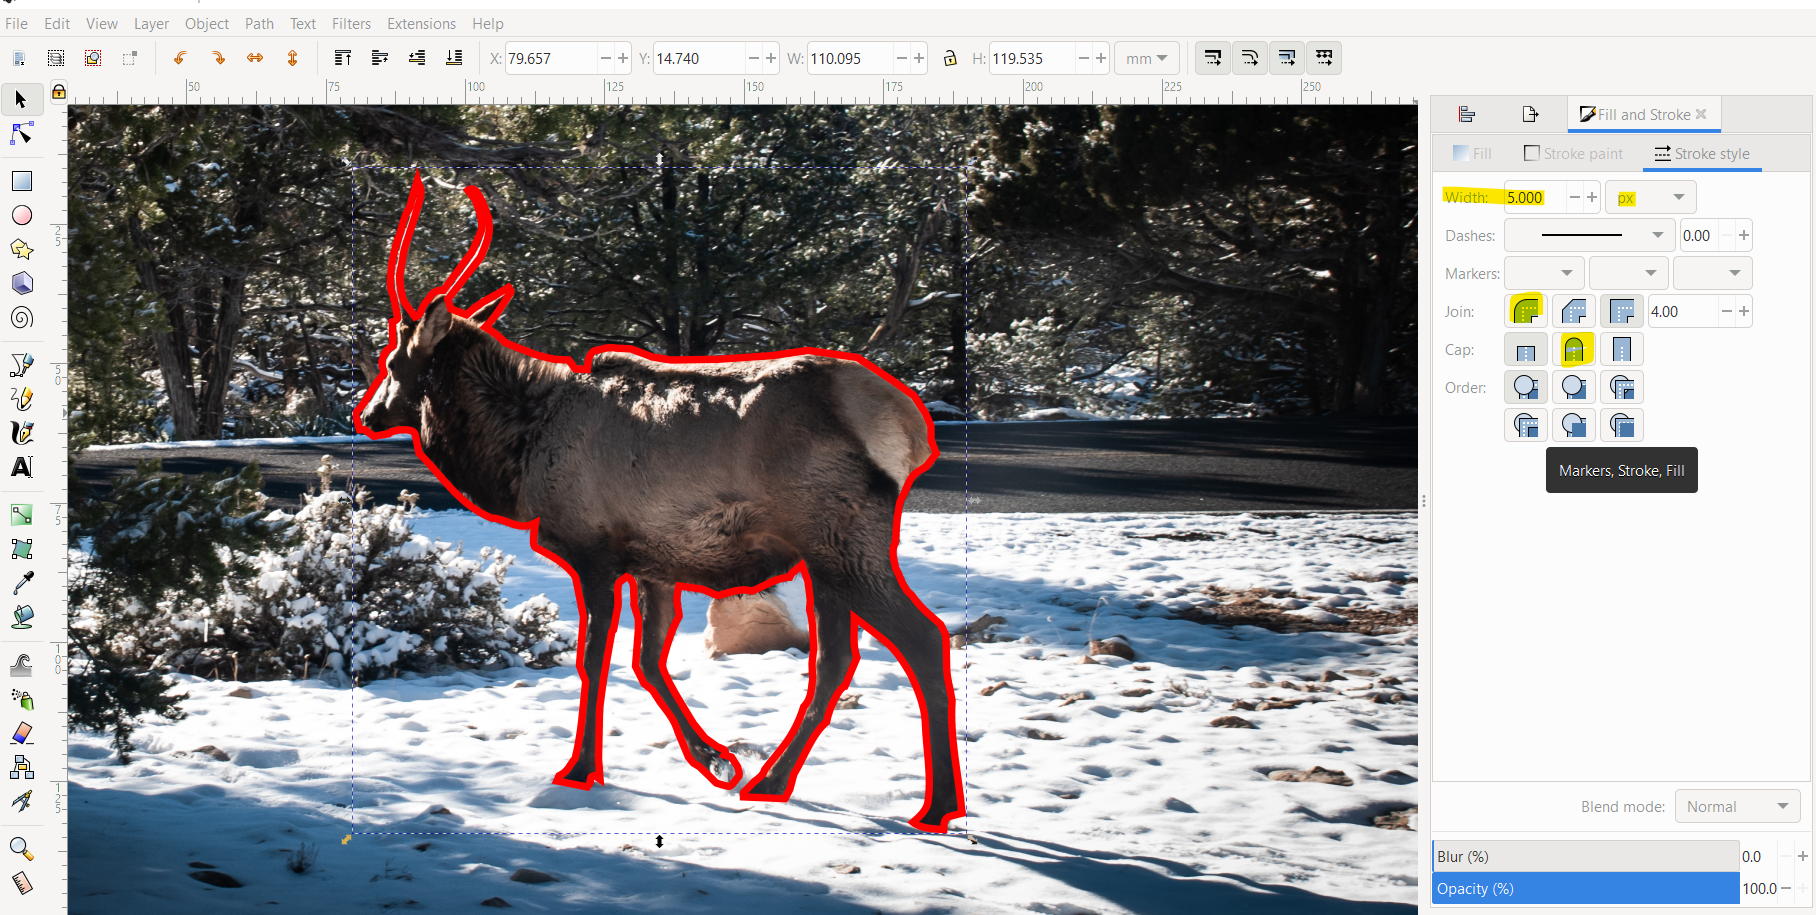
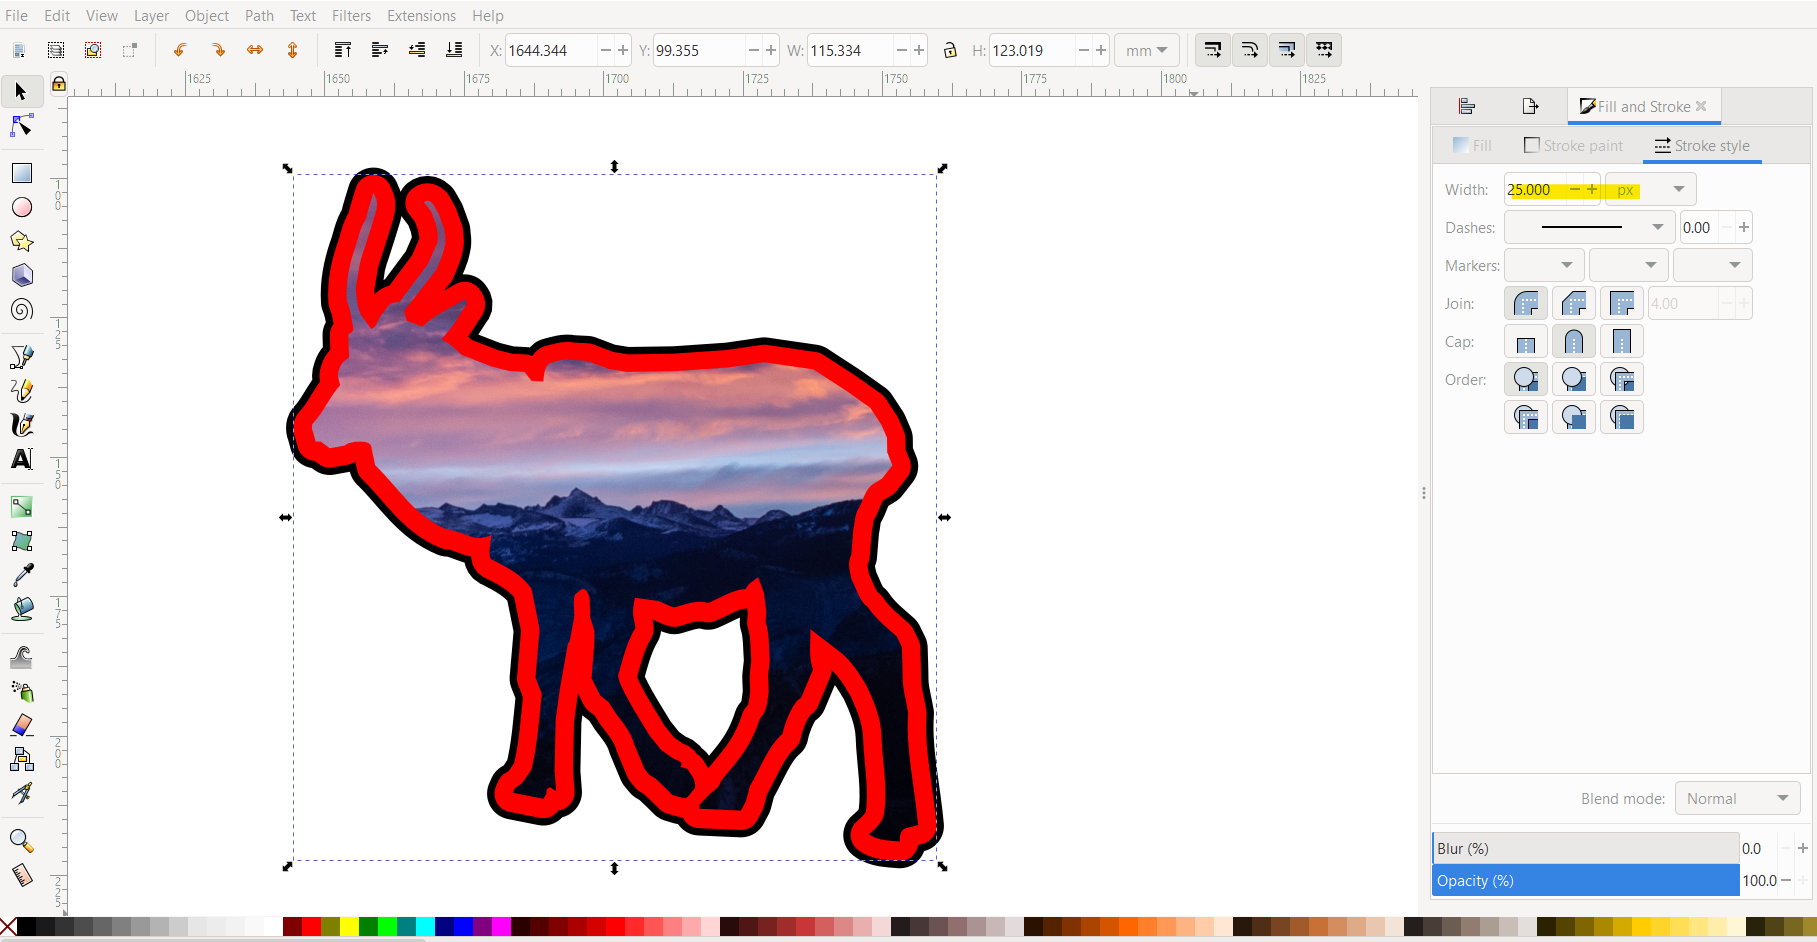
Now duplicate the elk outline again, but do not move it. It should appear right on top of the original. If not, then use the align steps above to align it above the original. Then open object>fill and stroke menu and set the stroke to something large like 25 px (shown in the second picture).
Duplicate the outline again and follow the steps above to set this new outline to something larger like 30 px.
Make the 30px stroke black and the 25 px stroke white as shown in the third picture - you can do this in the stroke color menu. Make sure you have the correct object selected to make changes (though its no big deal if you mess up - ctrl + z is undo).
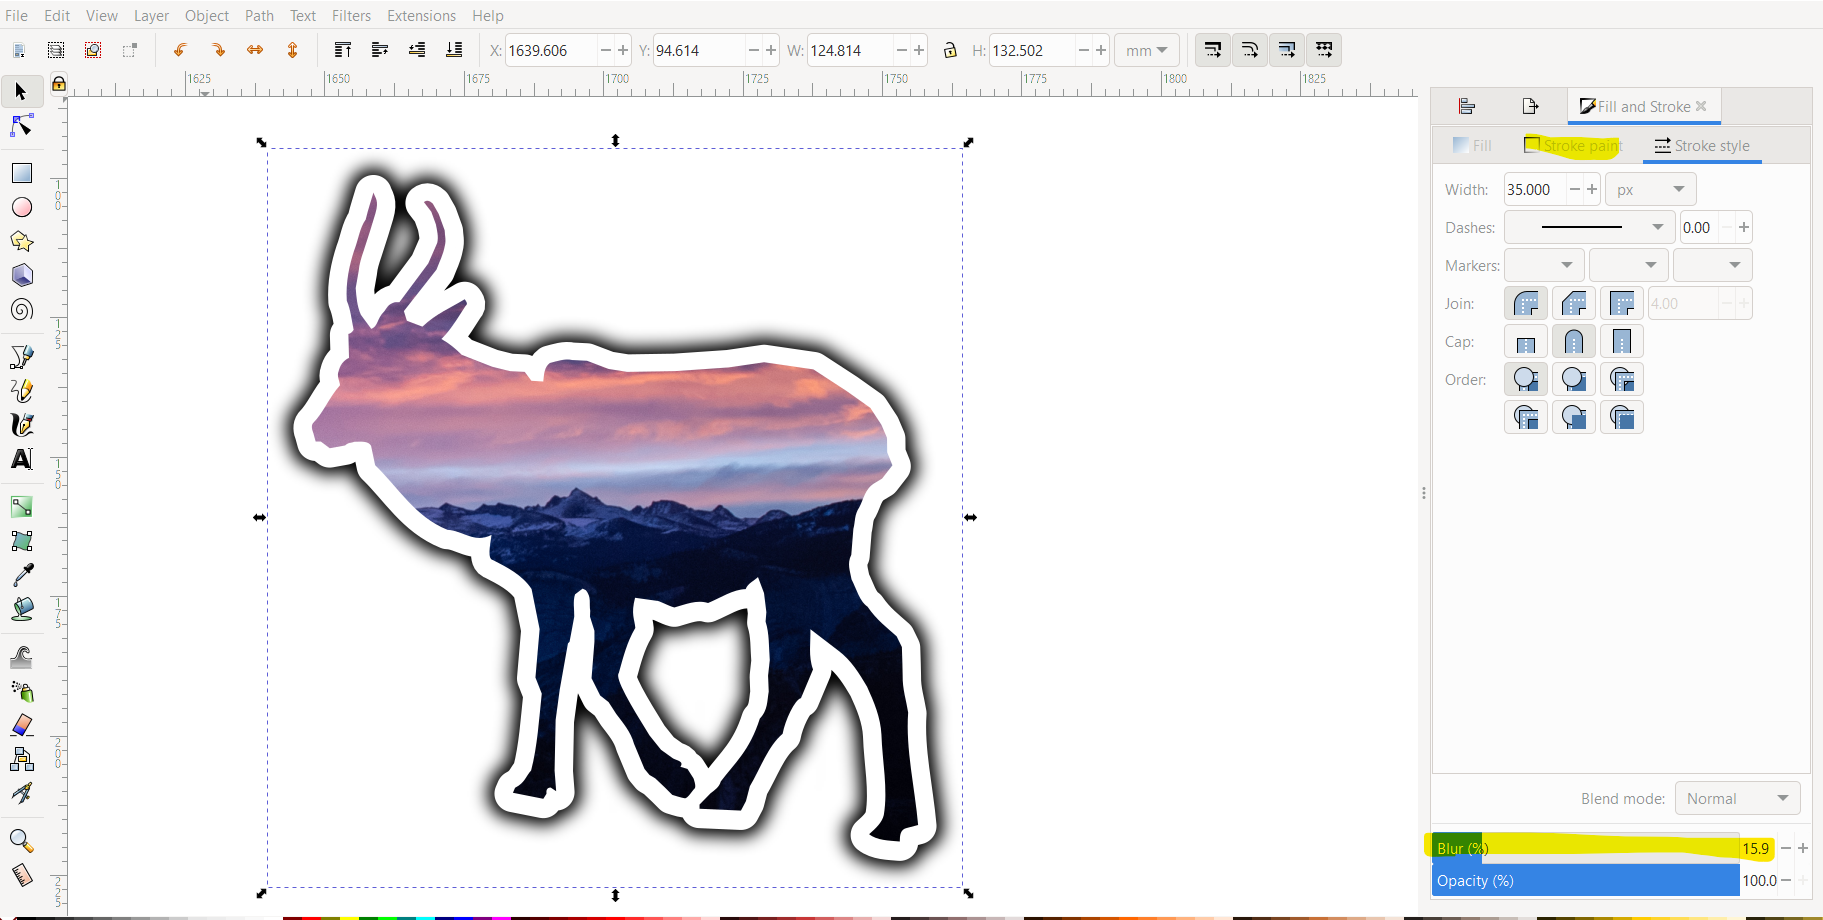
Lastly - change the blur property of the black stroke to make it look like a shadow.
You may have to get the order of the objects in the stack correct - click on the black stroke and click object>raise to top, then repeat for the white stroke, then for the landscape cutout. This should put it in the right order to make it look like the sticker.
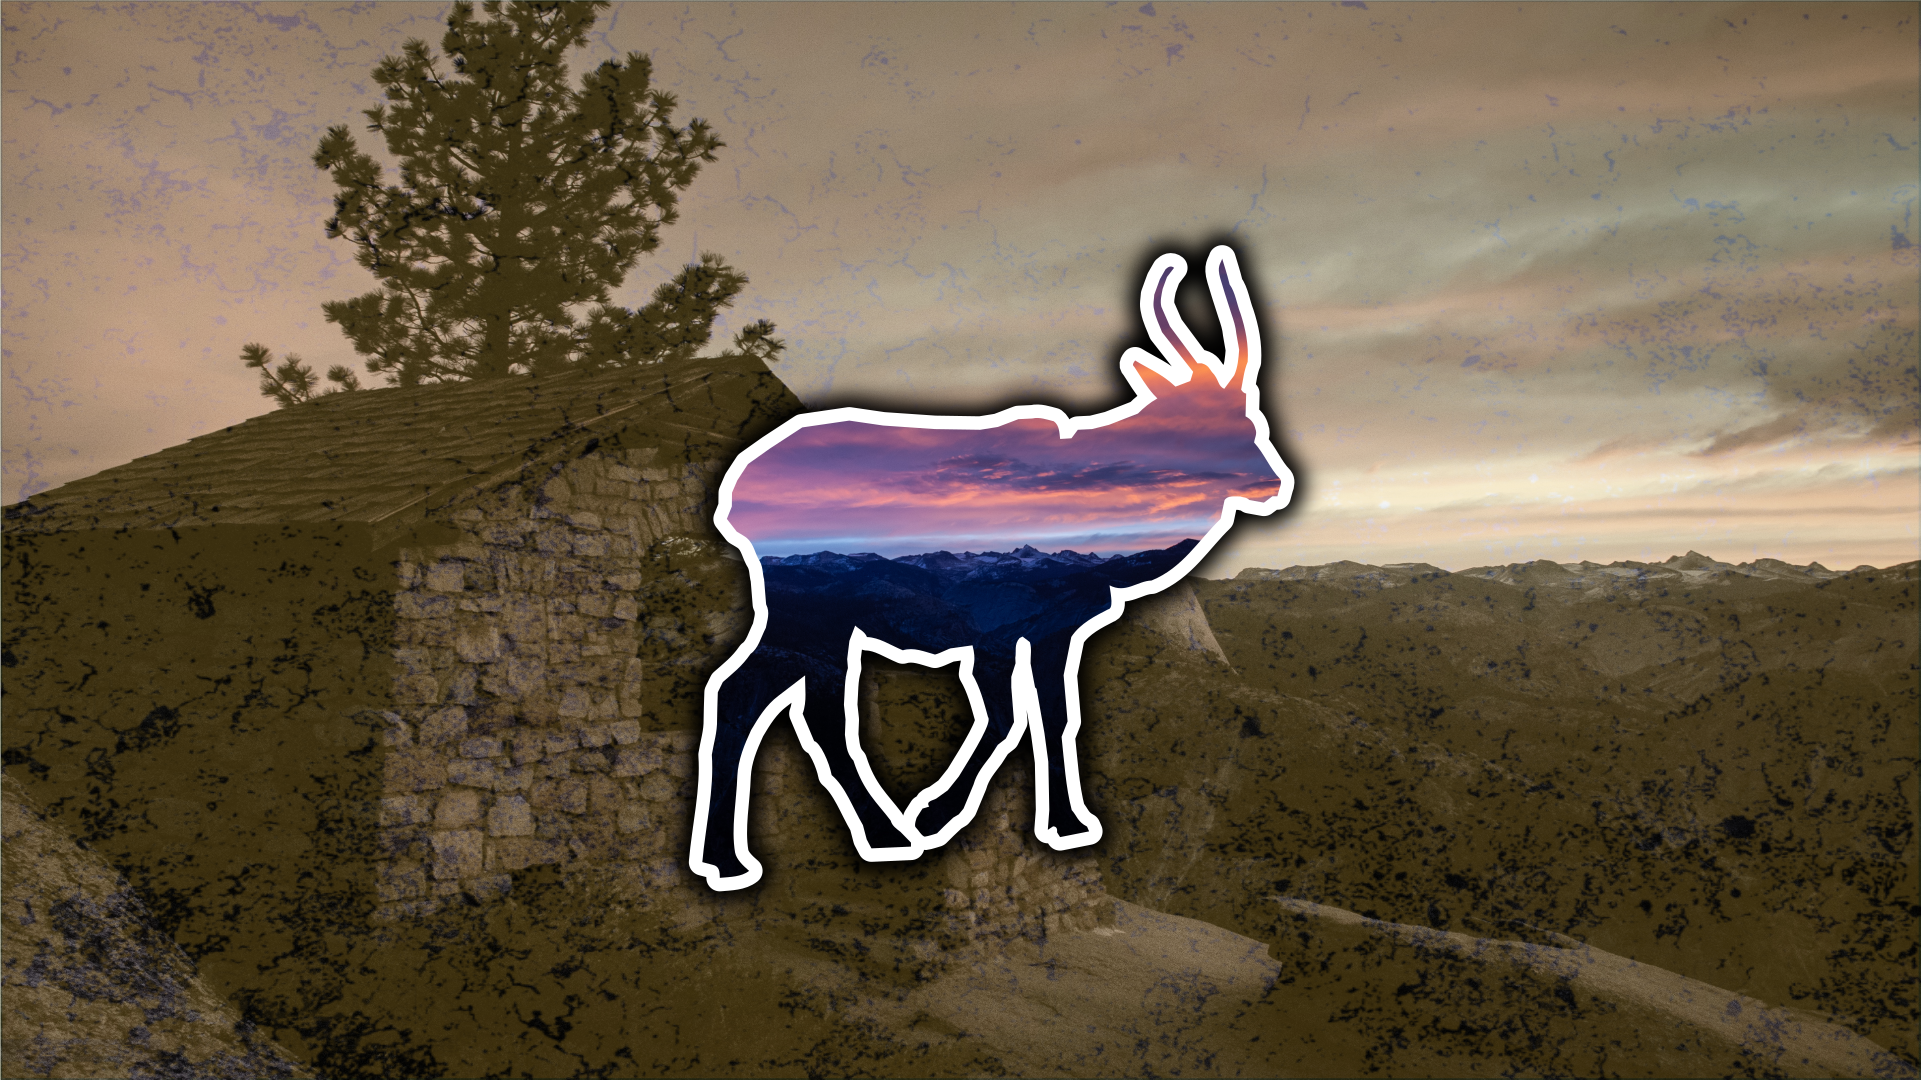
Make Texture Mask for Background
Using the rectangle tool, make a rectangle the size of the background image you wish to use. You can fill it in back by clicking on the black color in the palette at the bottom of the screen, or from the fill and stroke menu from the previous step and setting the fill color.
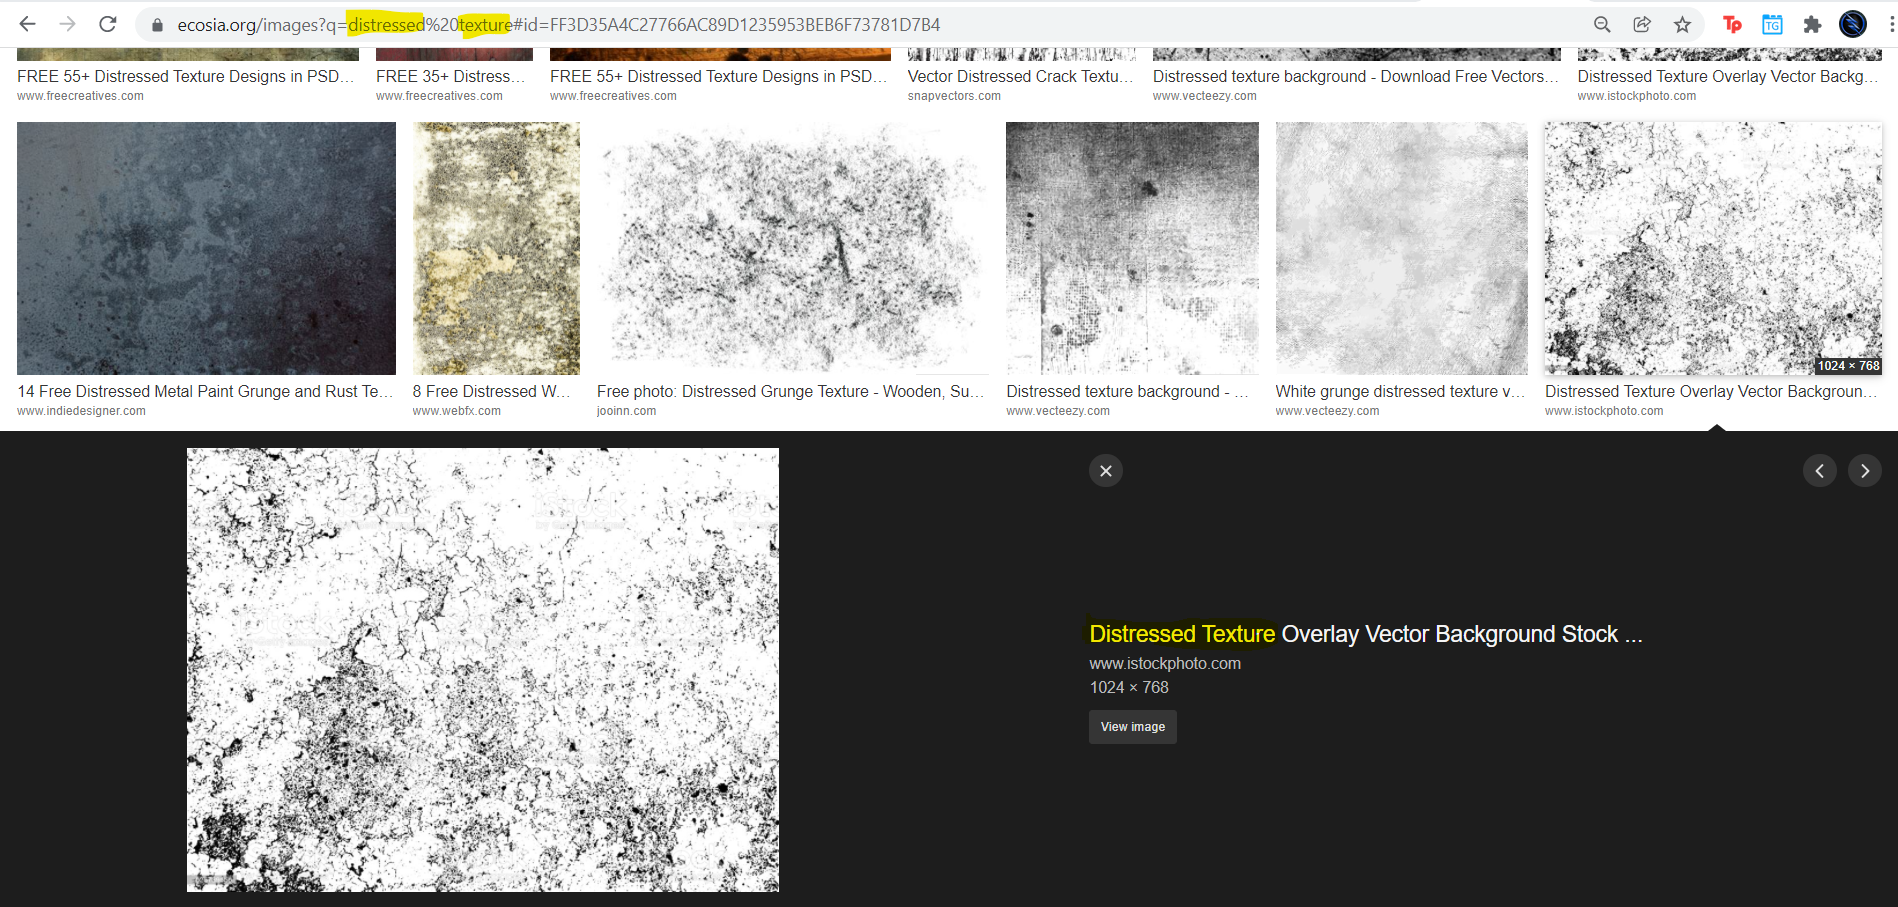
Google distressed texture and copy-paste a cool texture you find into inkscape.
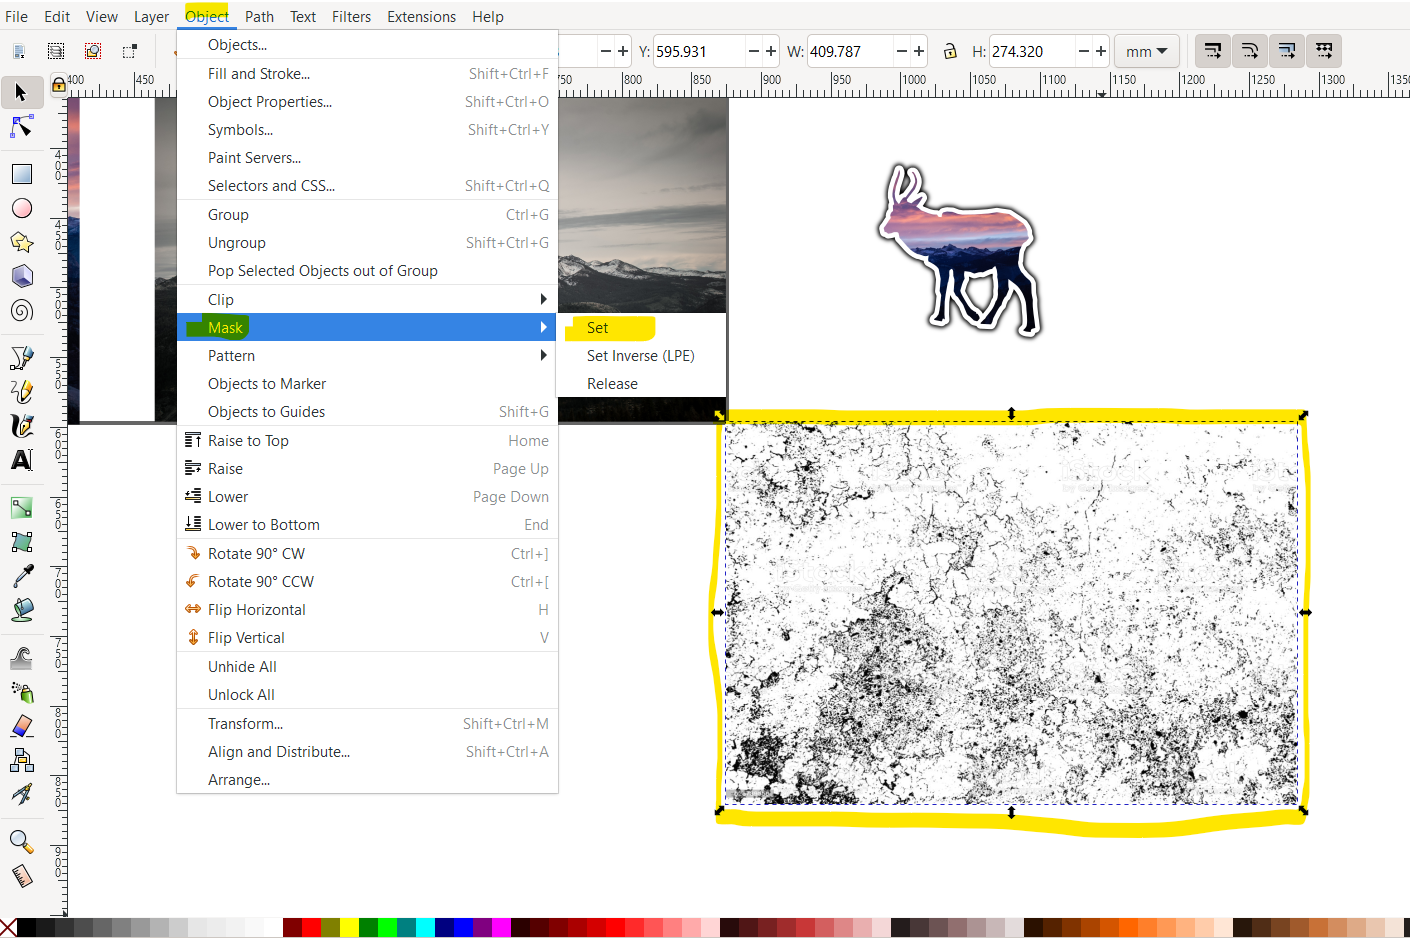
Resize the image to cover the black rectangle and select both objects. Then click object>mask>set to get the rough texture.
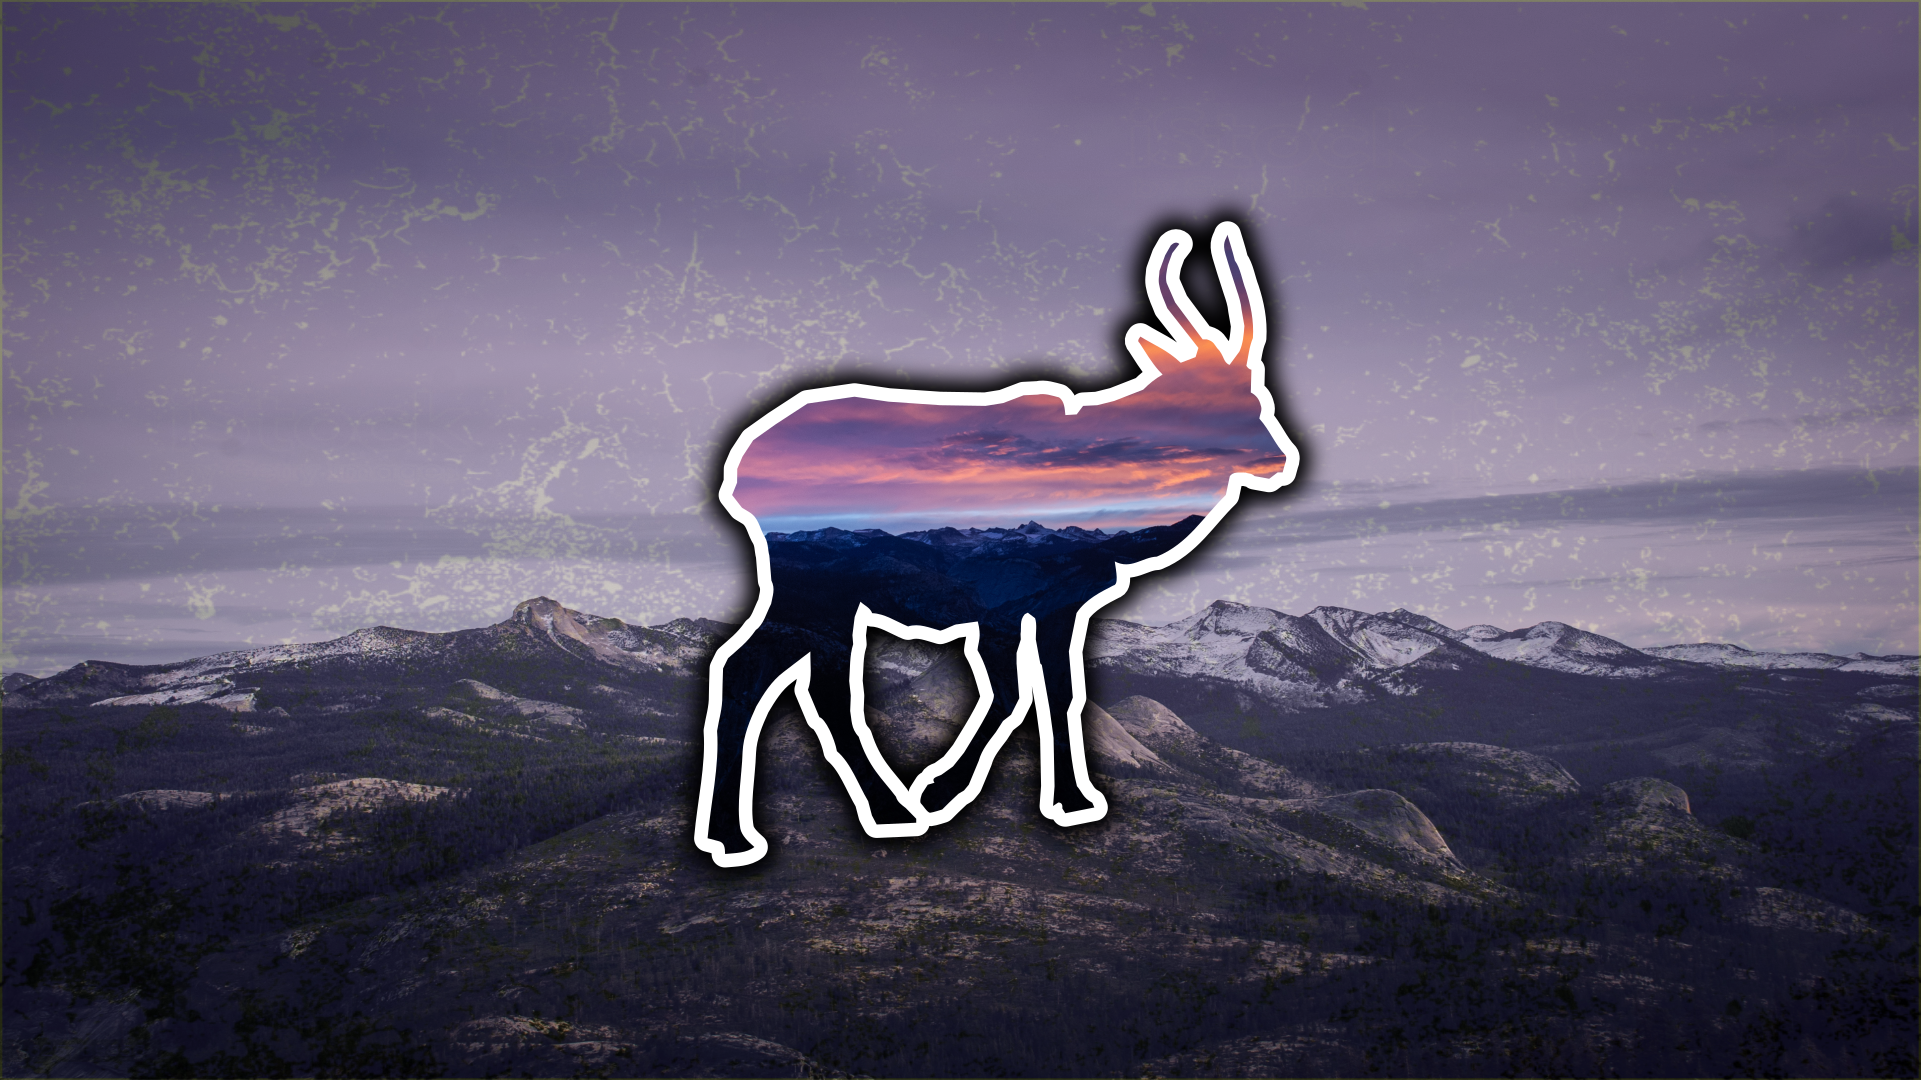
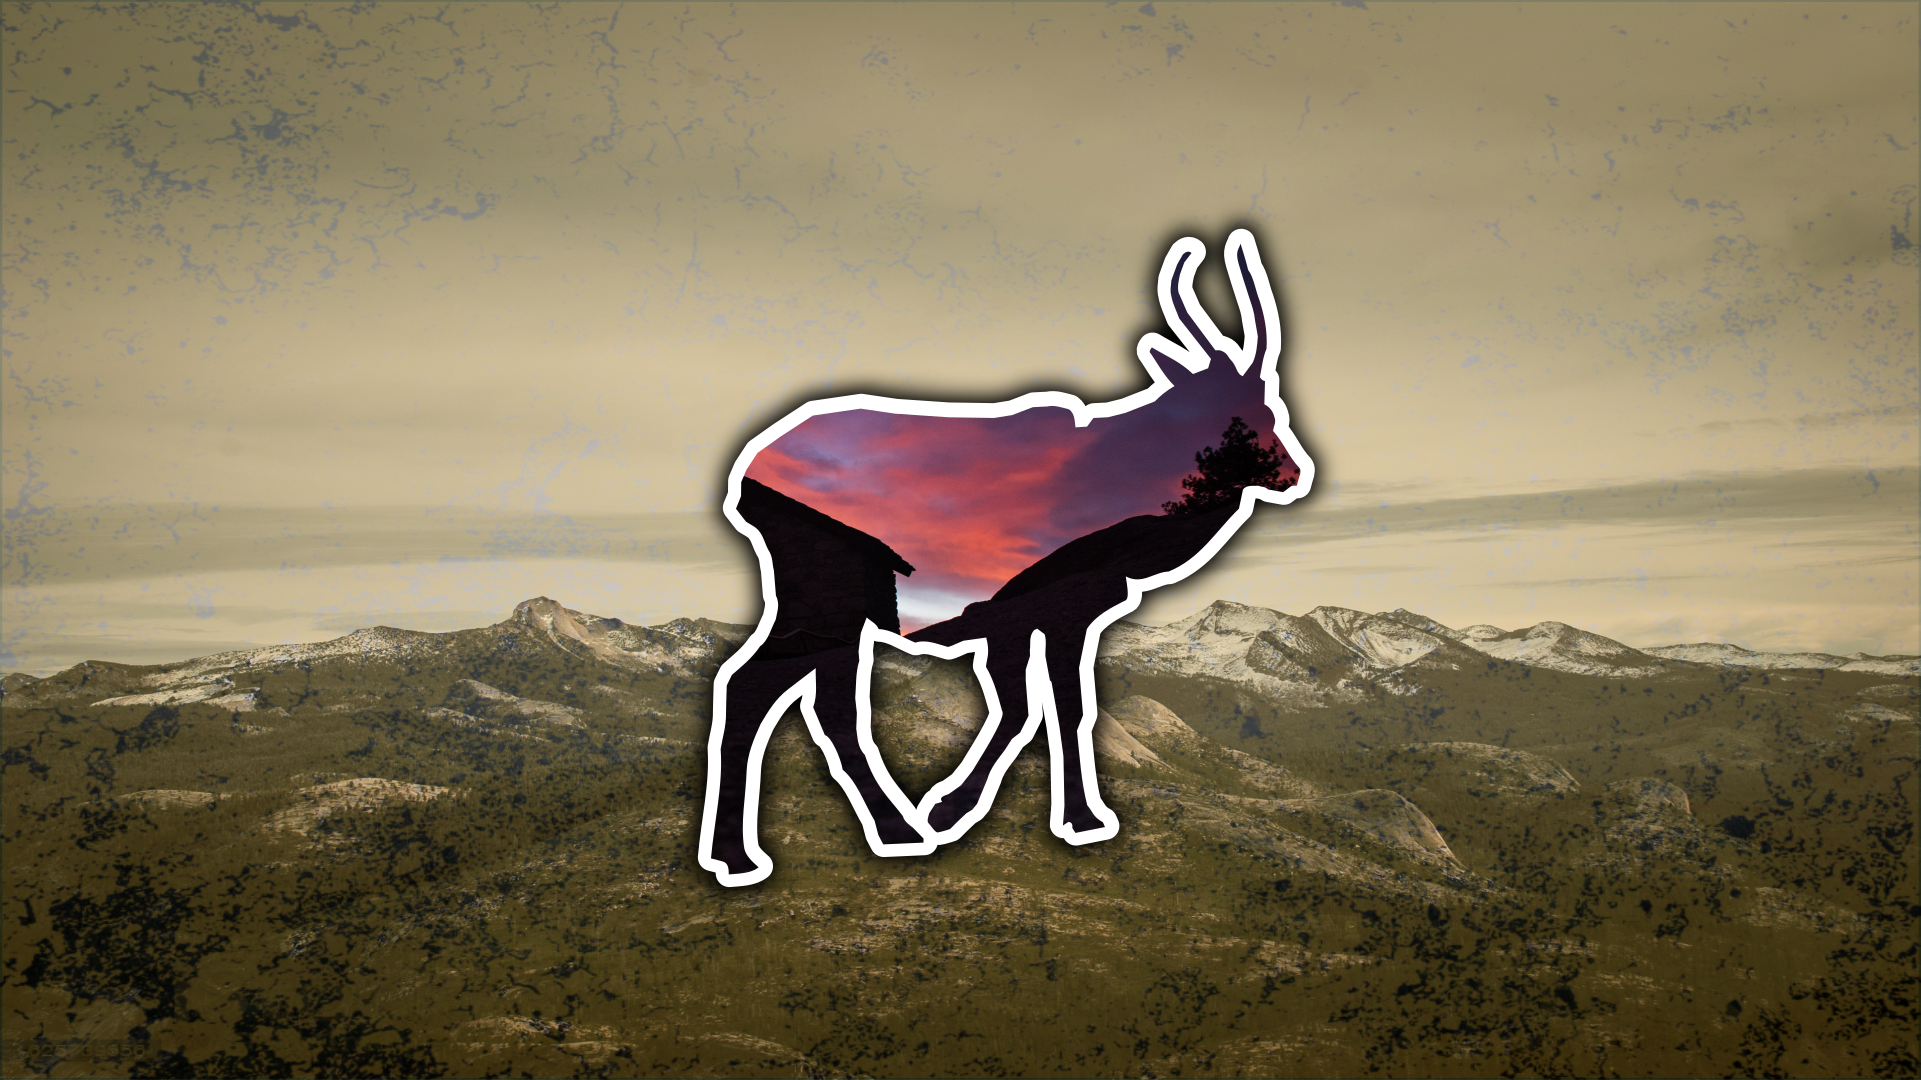
Add Gradient and Place Silhouette
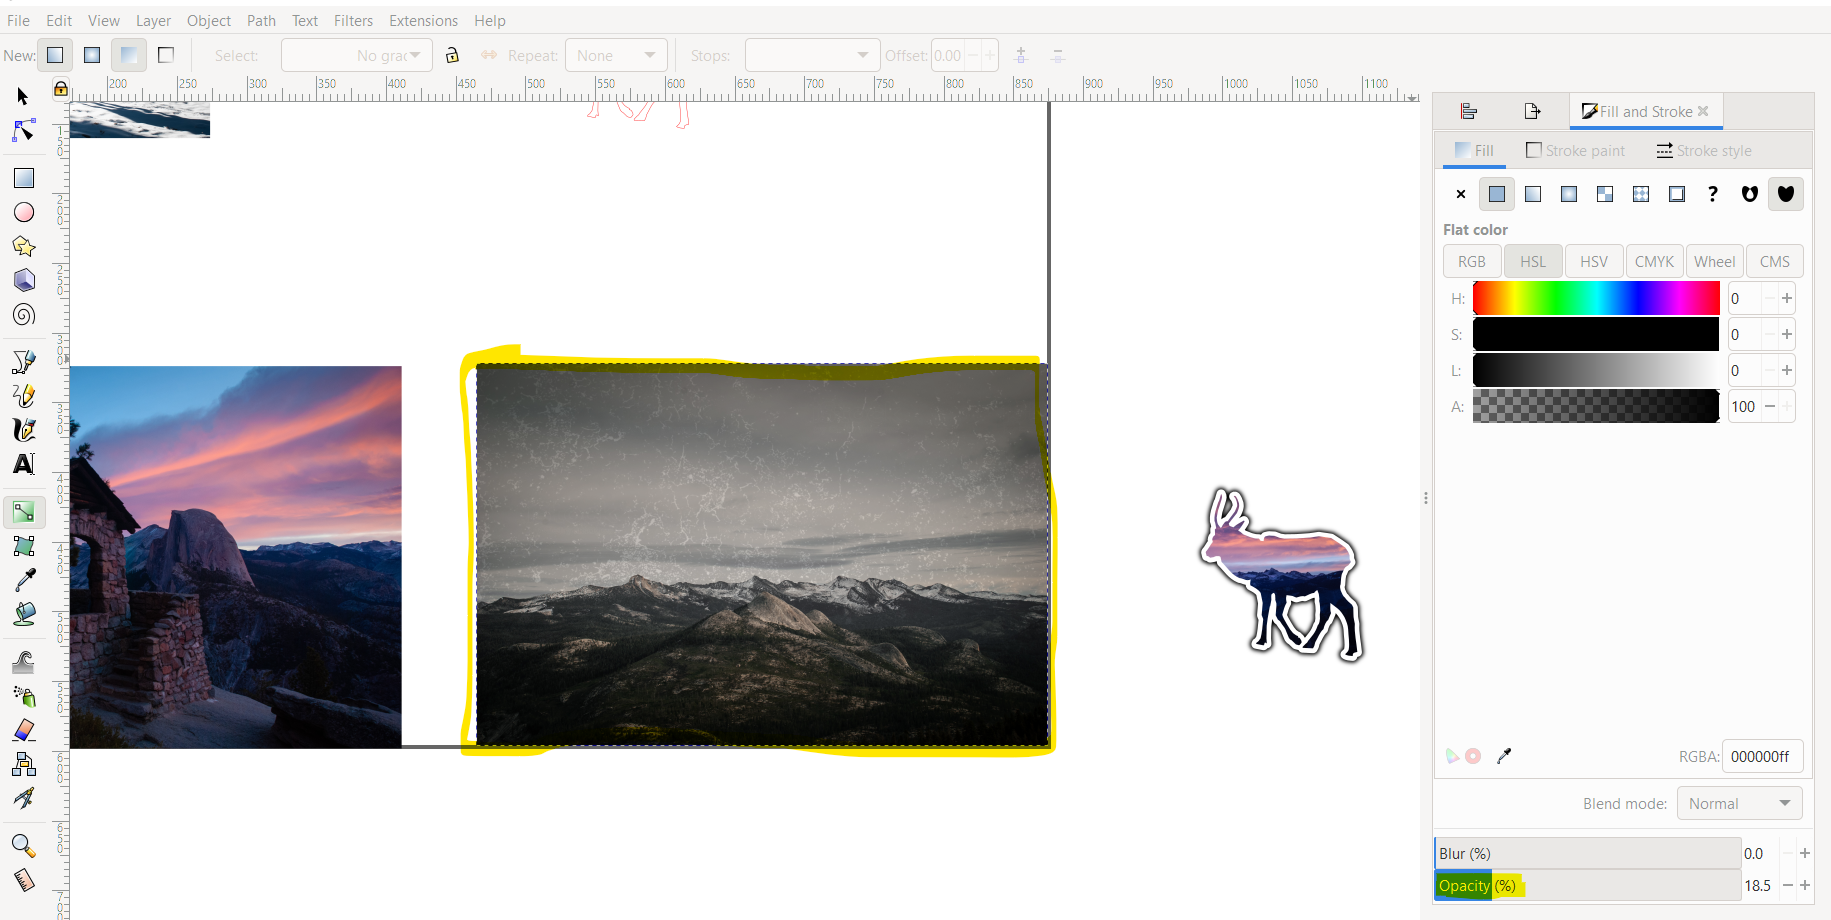
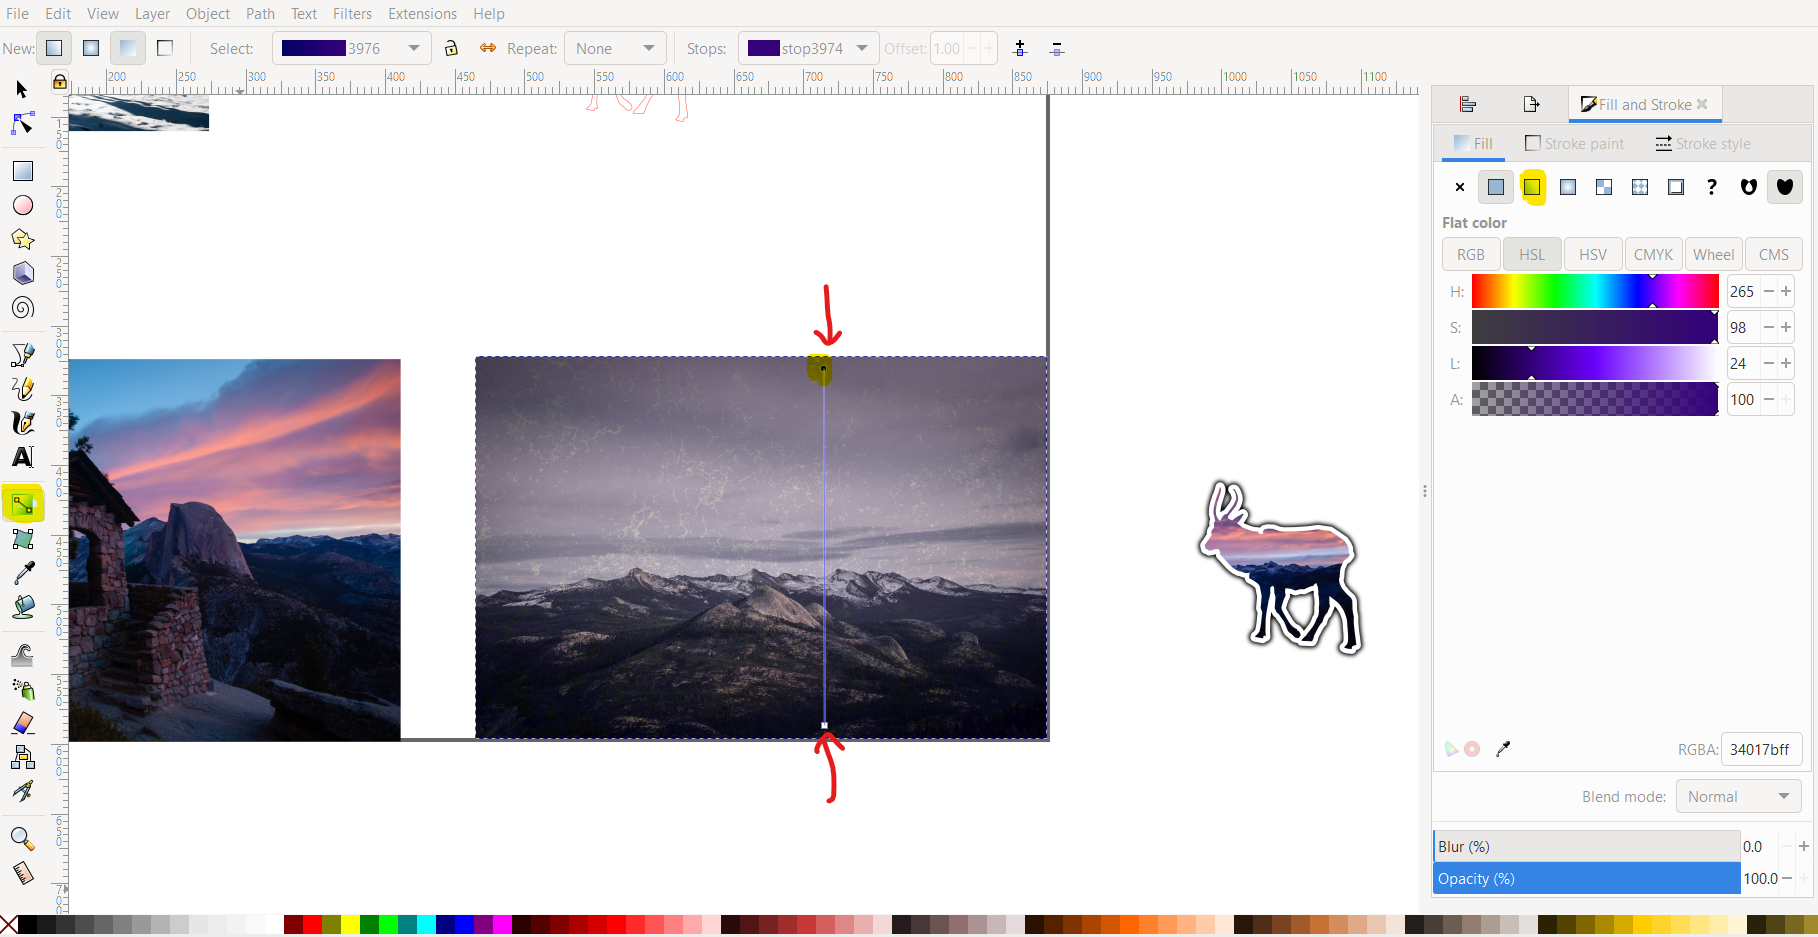
Drag the texture over the background image and open the fill and stroke menu as we have done before. In the fill menu, click the gradient fill button (shown in the second picture) and then press the G key to open the gradient tool (or use the button on in the toolbar). You can then click on the nodes at the end of the gradient line that shows up to change the end colors as shown in picture 2. Make sure to change the opacity as well so that you can see the background clearly enough.
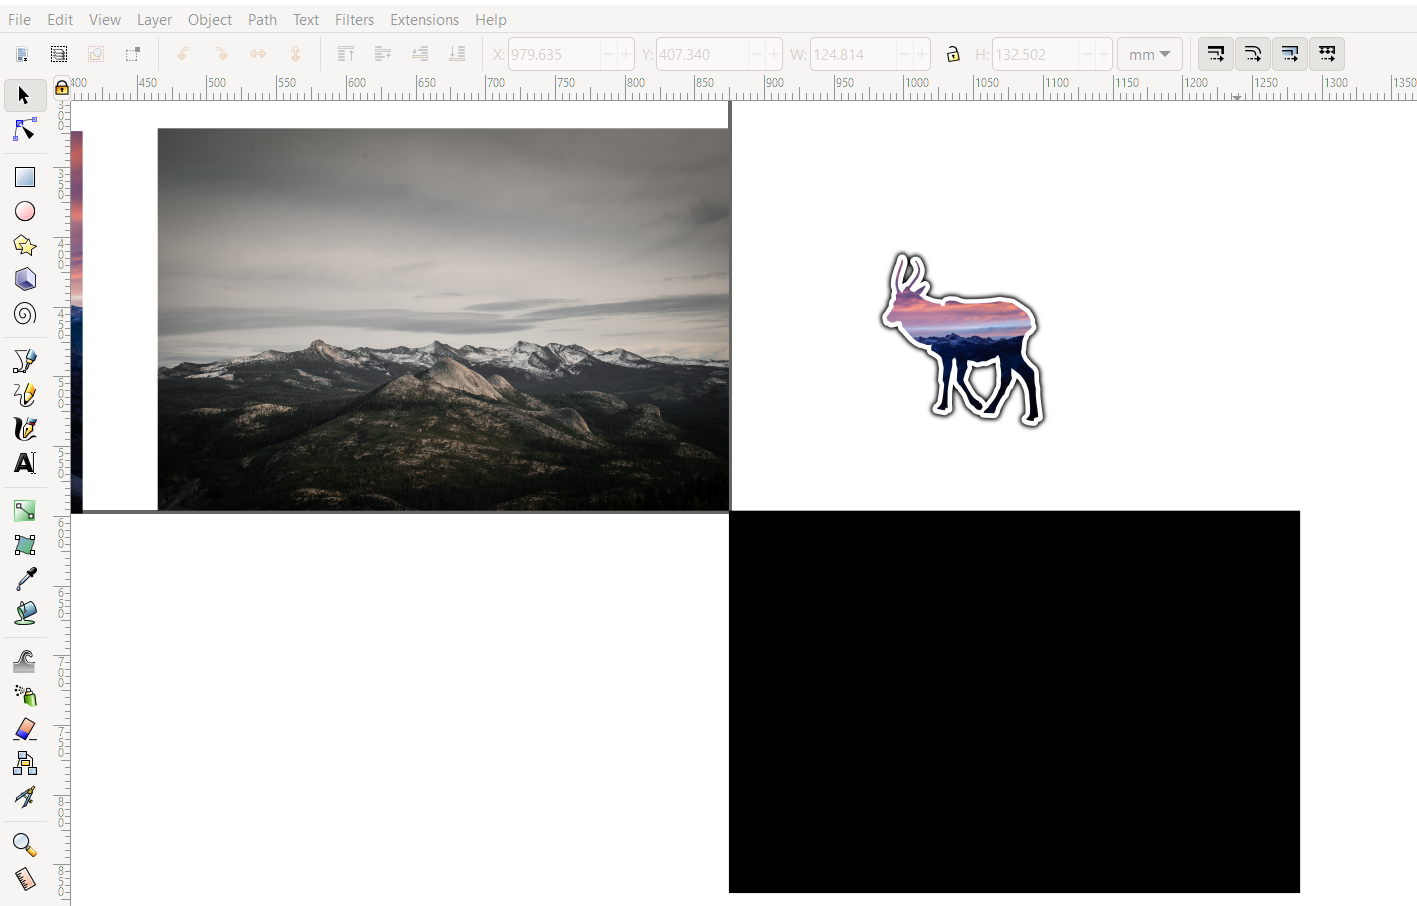
Once you have colors that you like, I flipped the elk using the orange flip buttons at the top of the screen, but you don't have to. I then used the alignment menu from before to select both the background and the elk and centered them.
That's it! That's how I created the first wallpaper!
Wallpaper 2 - Add Circles to Outline

Let's start looking at the second wallpaper now - the constellation style wallpaper.
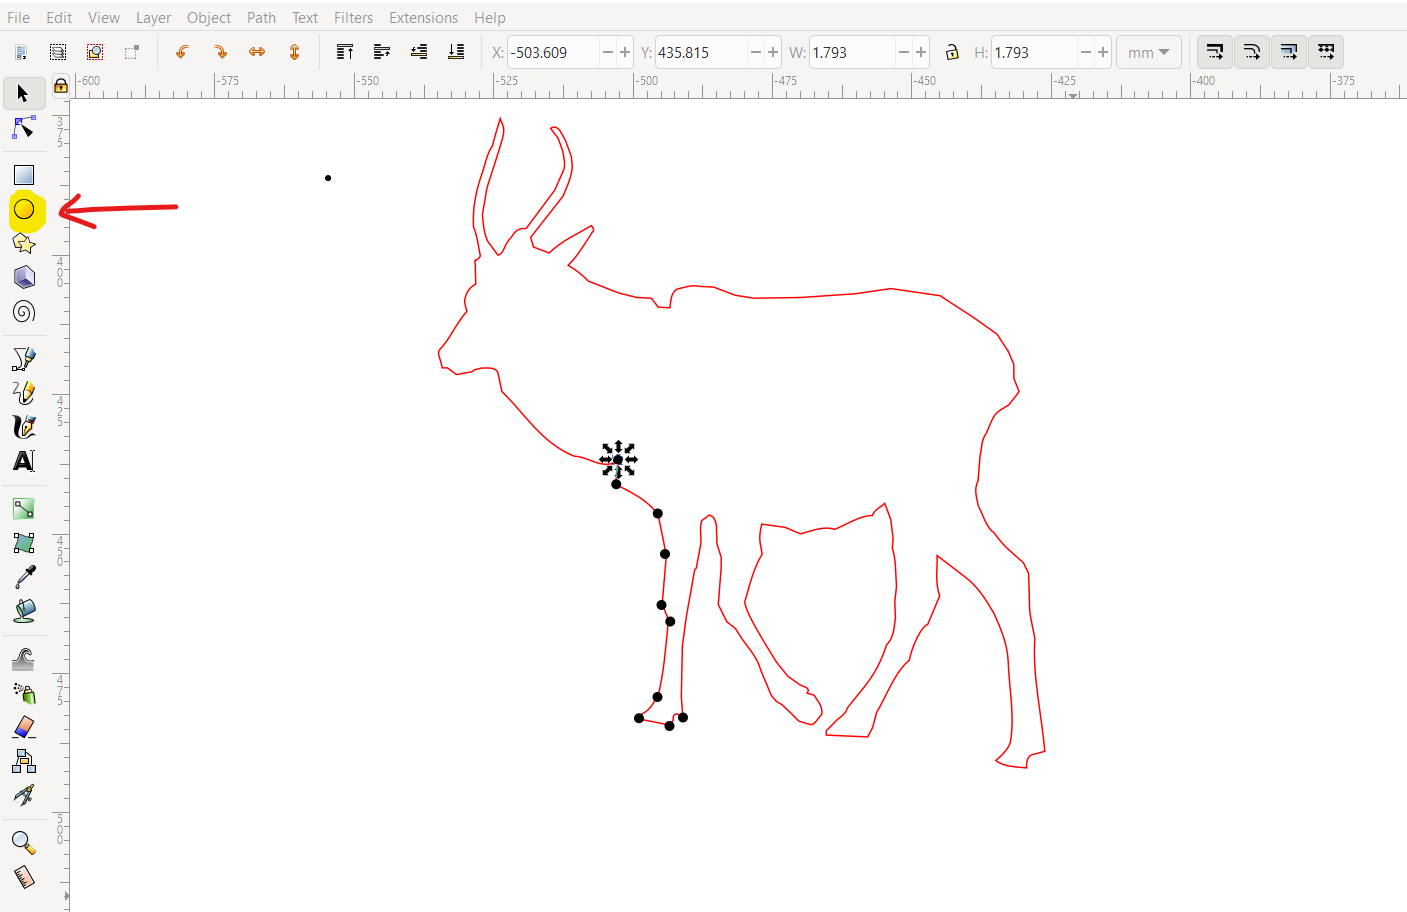
I used the circle tool in the toolbar to make a small circle, then I used ctrl (or cmd on mac) + c and ctrl+v to copy and paste that circle in intervals along the elk outline. Remember to make a duplicate of the outline!!
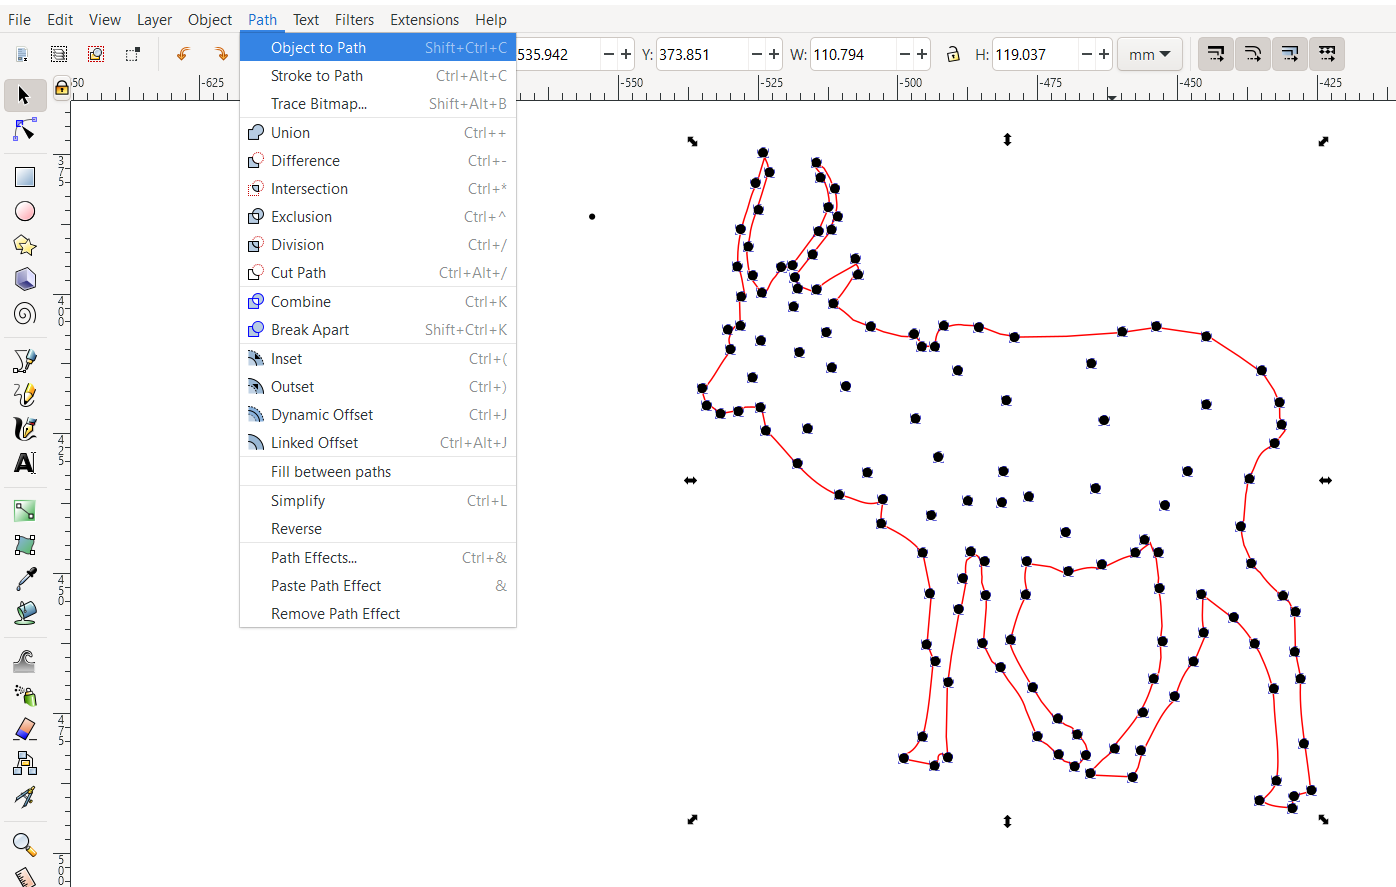
After I had placed circles on the outline, I pasted a bunch on the inside of the elk too. Then I selected just the circles by selecting everything and using shift+click to deselect the elk outline and other objects I did not want to include. I then clicked path>object to path to turn the circles into path objects so I could use the cool next tool.
Right before I moved on to the next tool, I used ctrl+g to group them together.
Create Voronoi Diagram
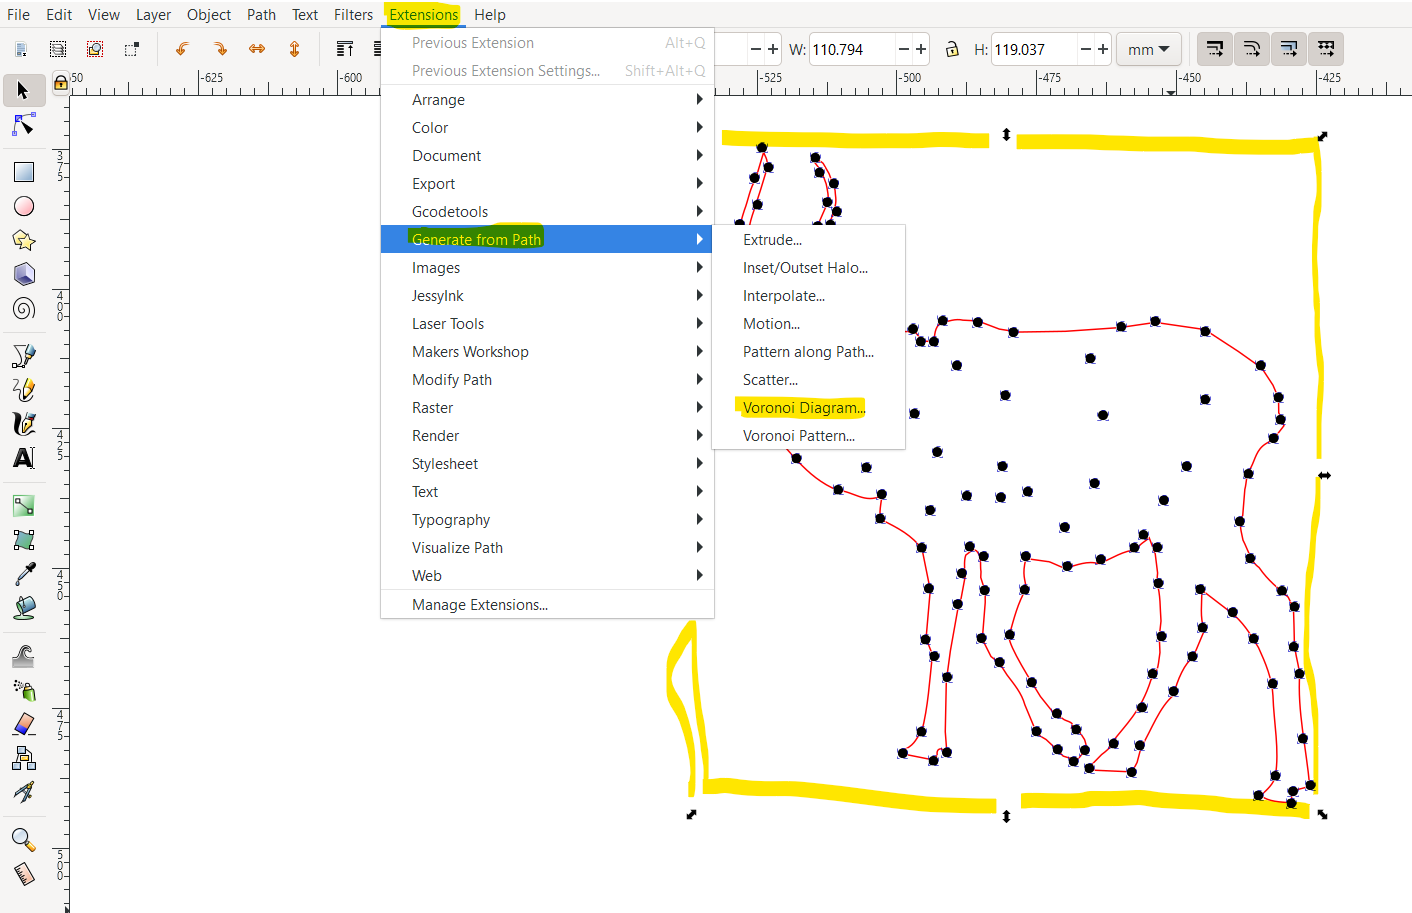
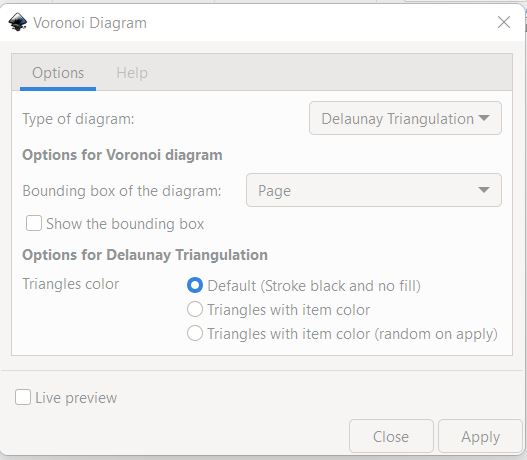
With just the circles selected, I clicked extensions>generate from path>voronoi diagram. Then, using the settings in the second picture, I created the voronoi diagram from those circles.
Clean Voronoi Diagram
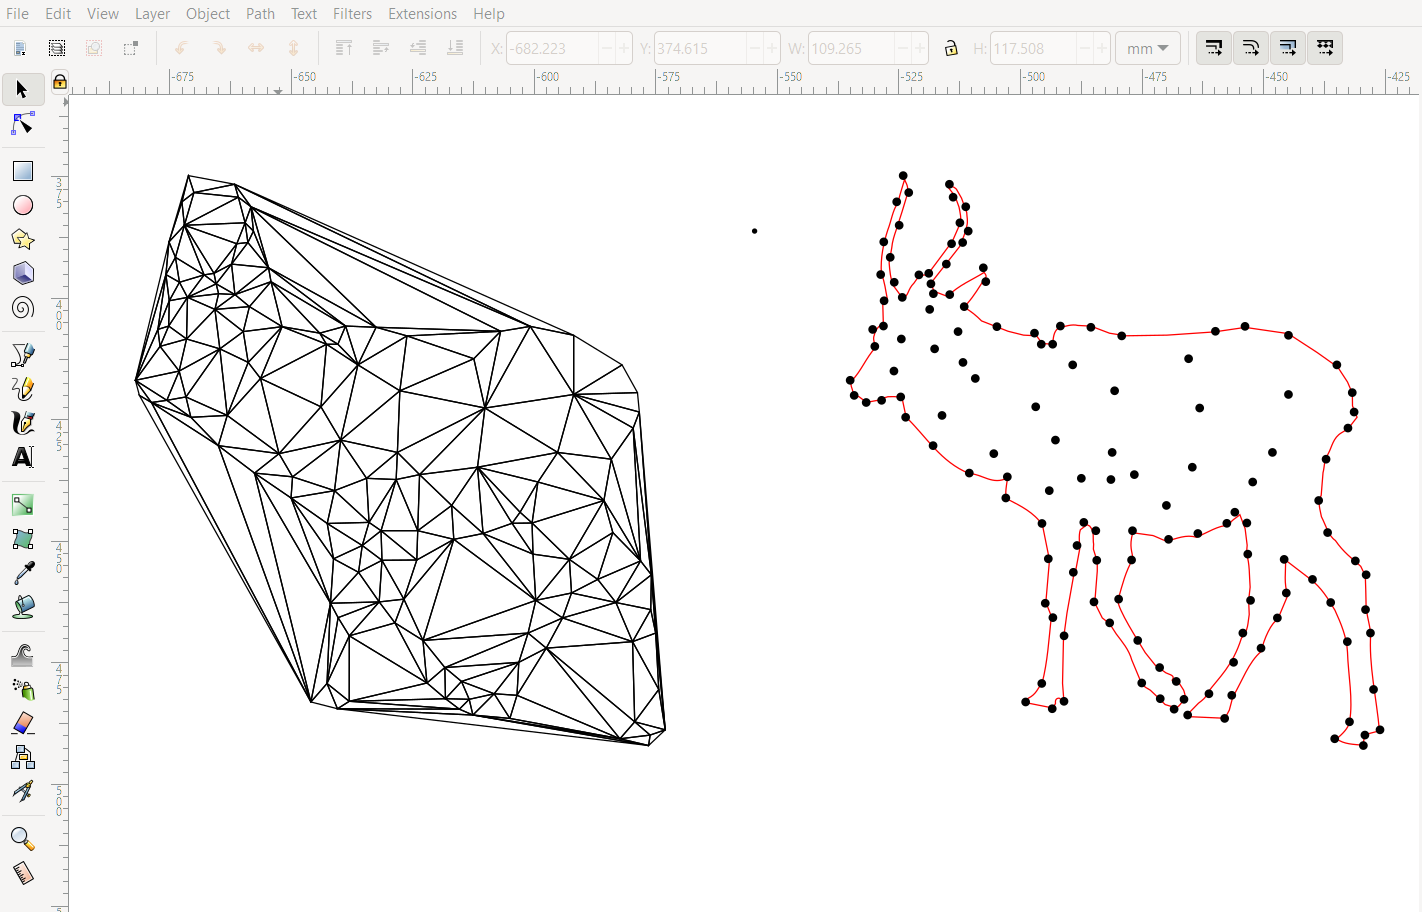
There were a lot of lines I didn't want, so I clicked on the new diagram and clicked ctrl+shift+g to ungroup the objects in the voronoi diagram. Then I clicked on every line I did not want and pressed delete to get rid of them. Finally, I got just the elk remaining.
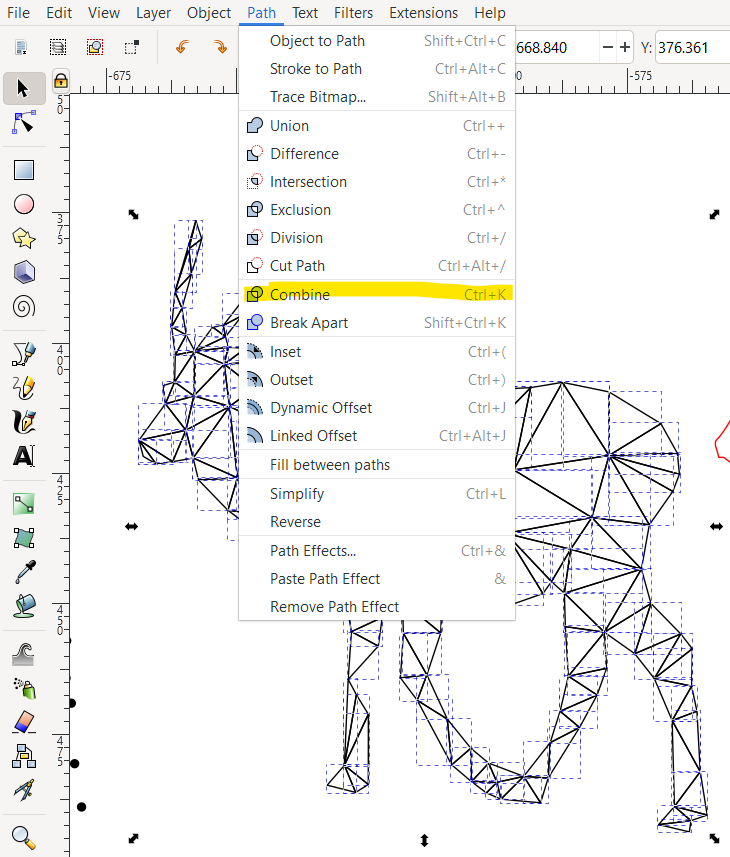
I then select all the triangles of the elk and click path>combine so that all the triangles share their paths and become one shape.
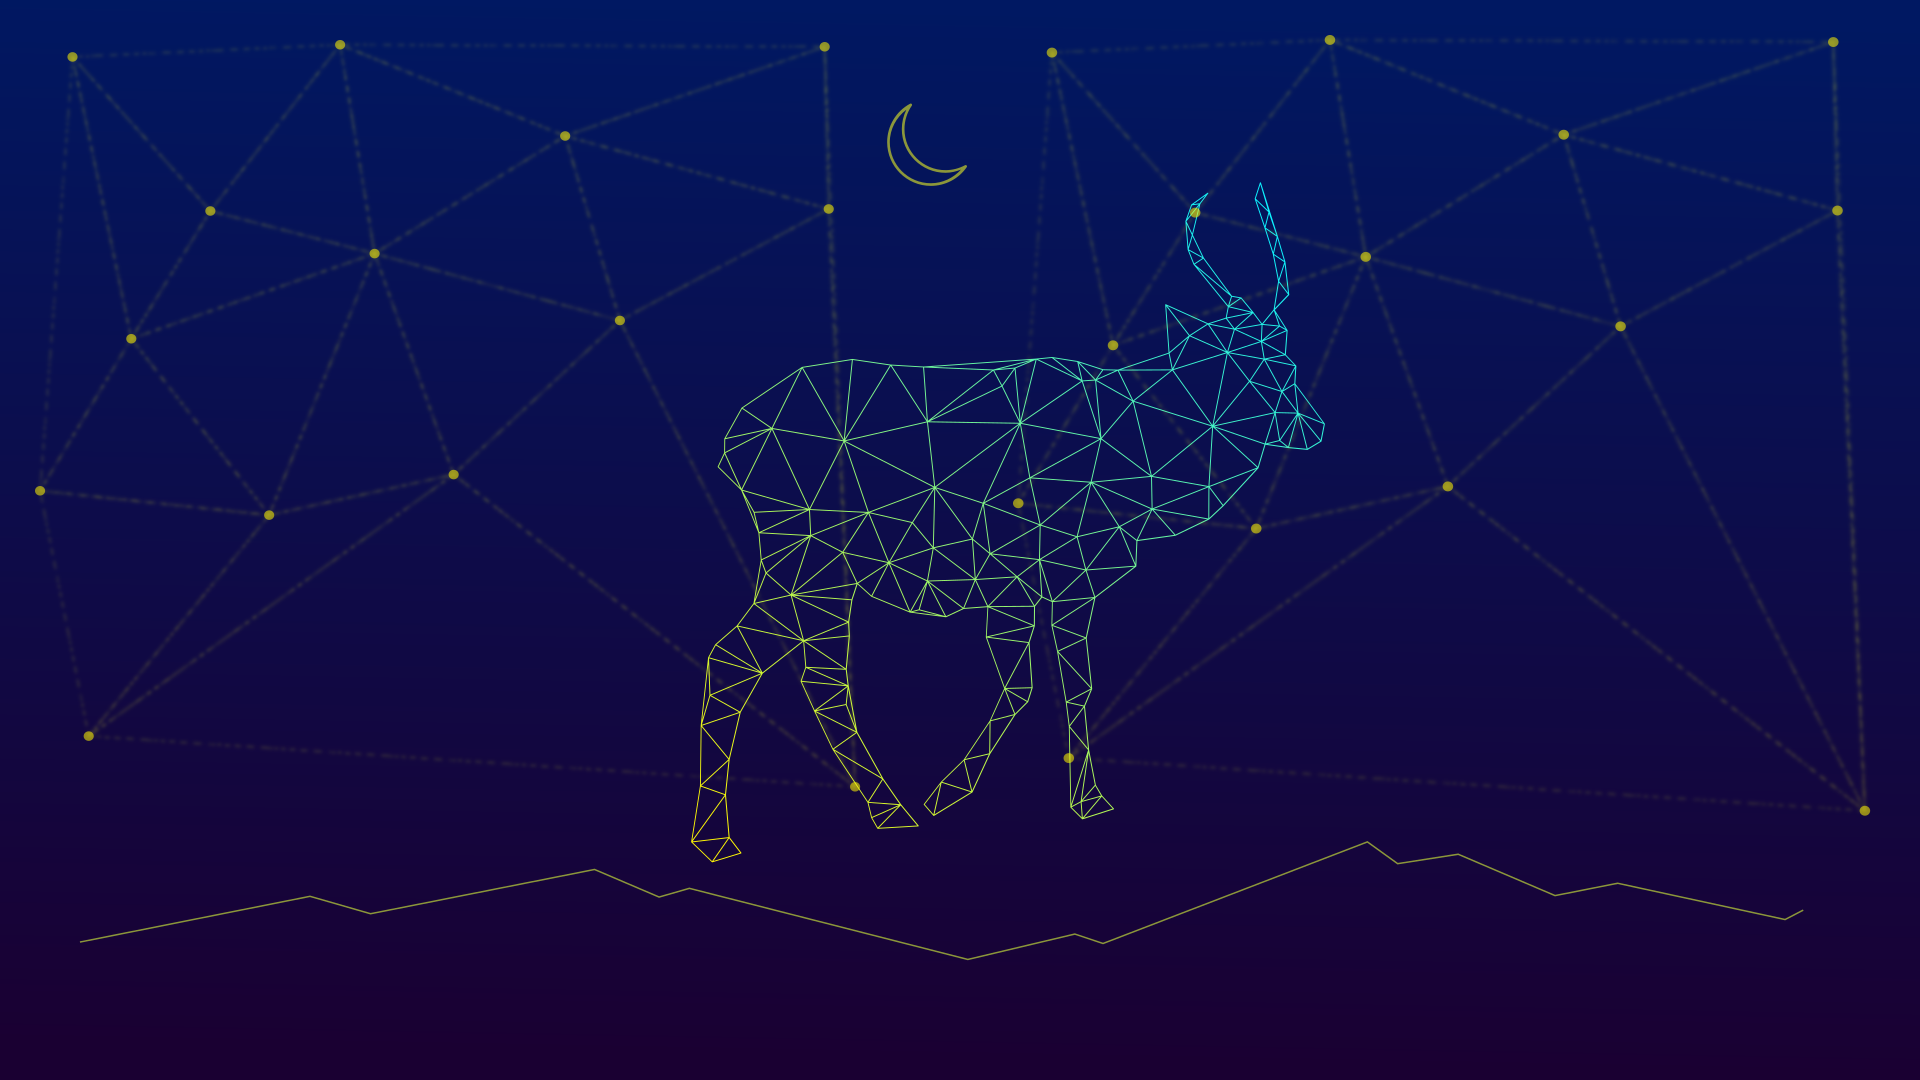
Make Background

I quickly made a background by making a black rectangle as we did before.
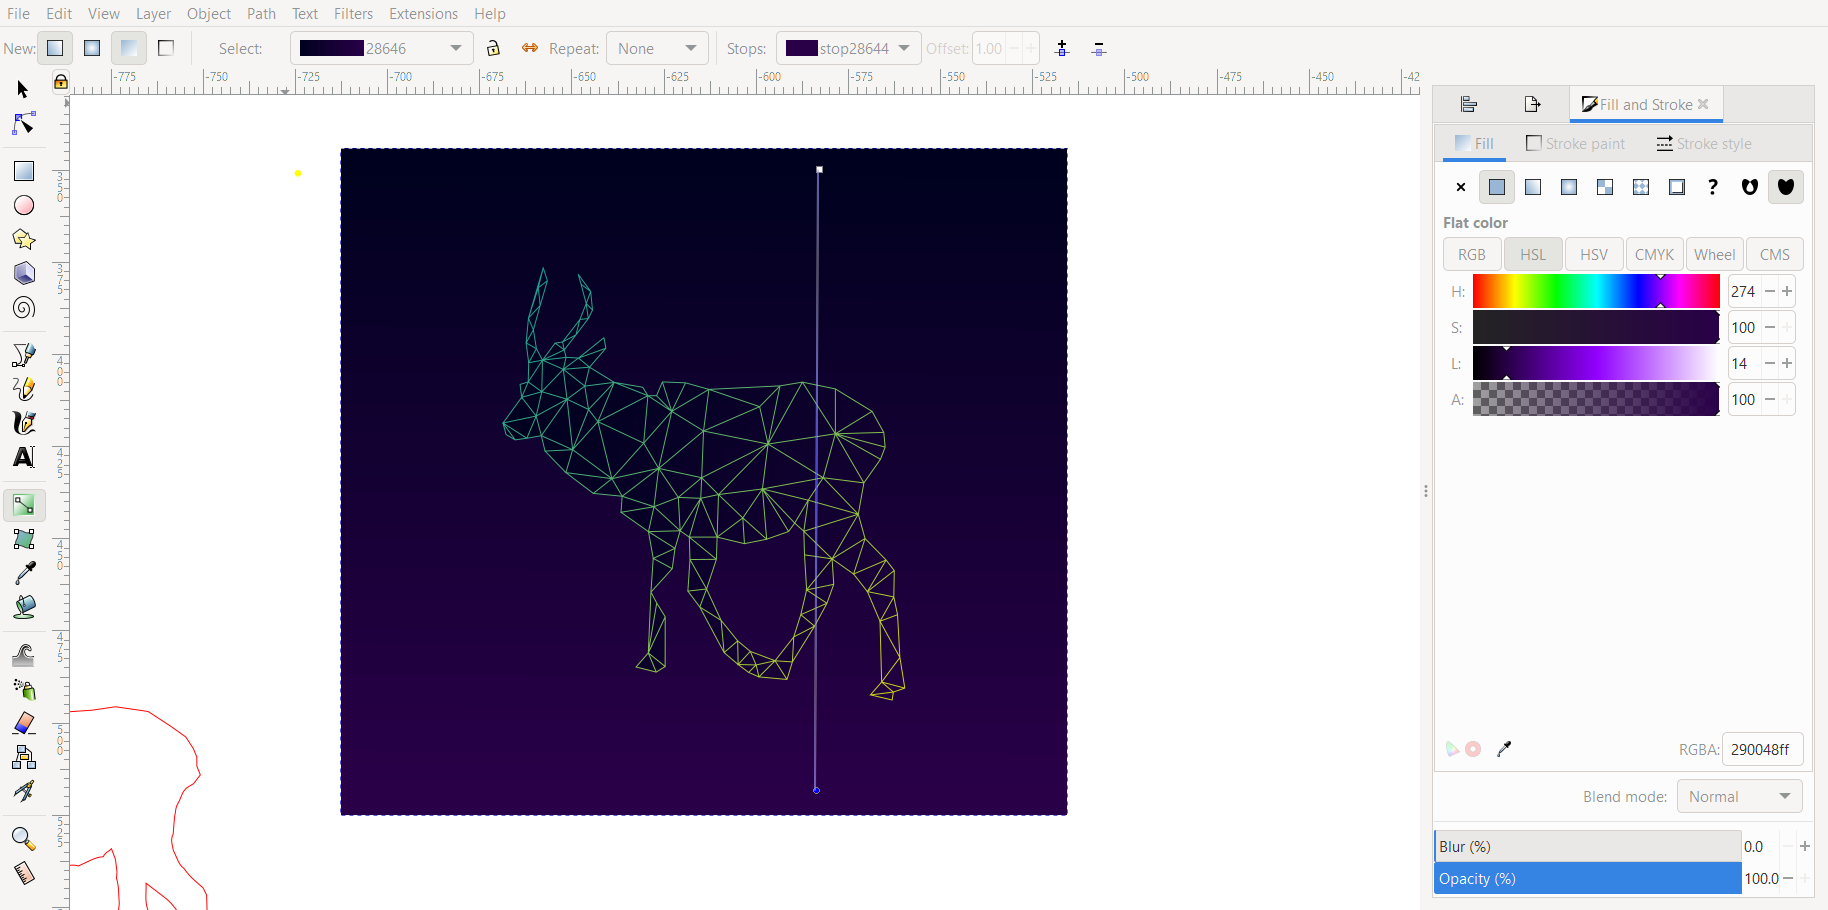
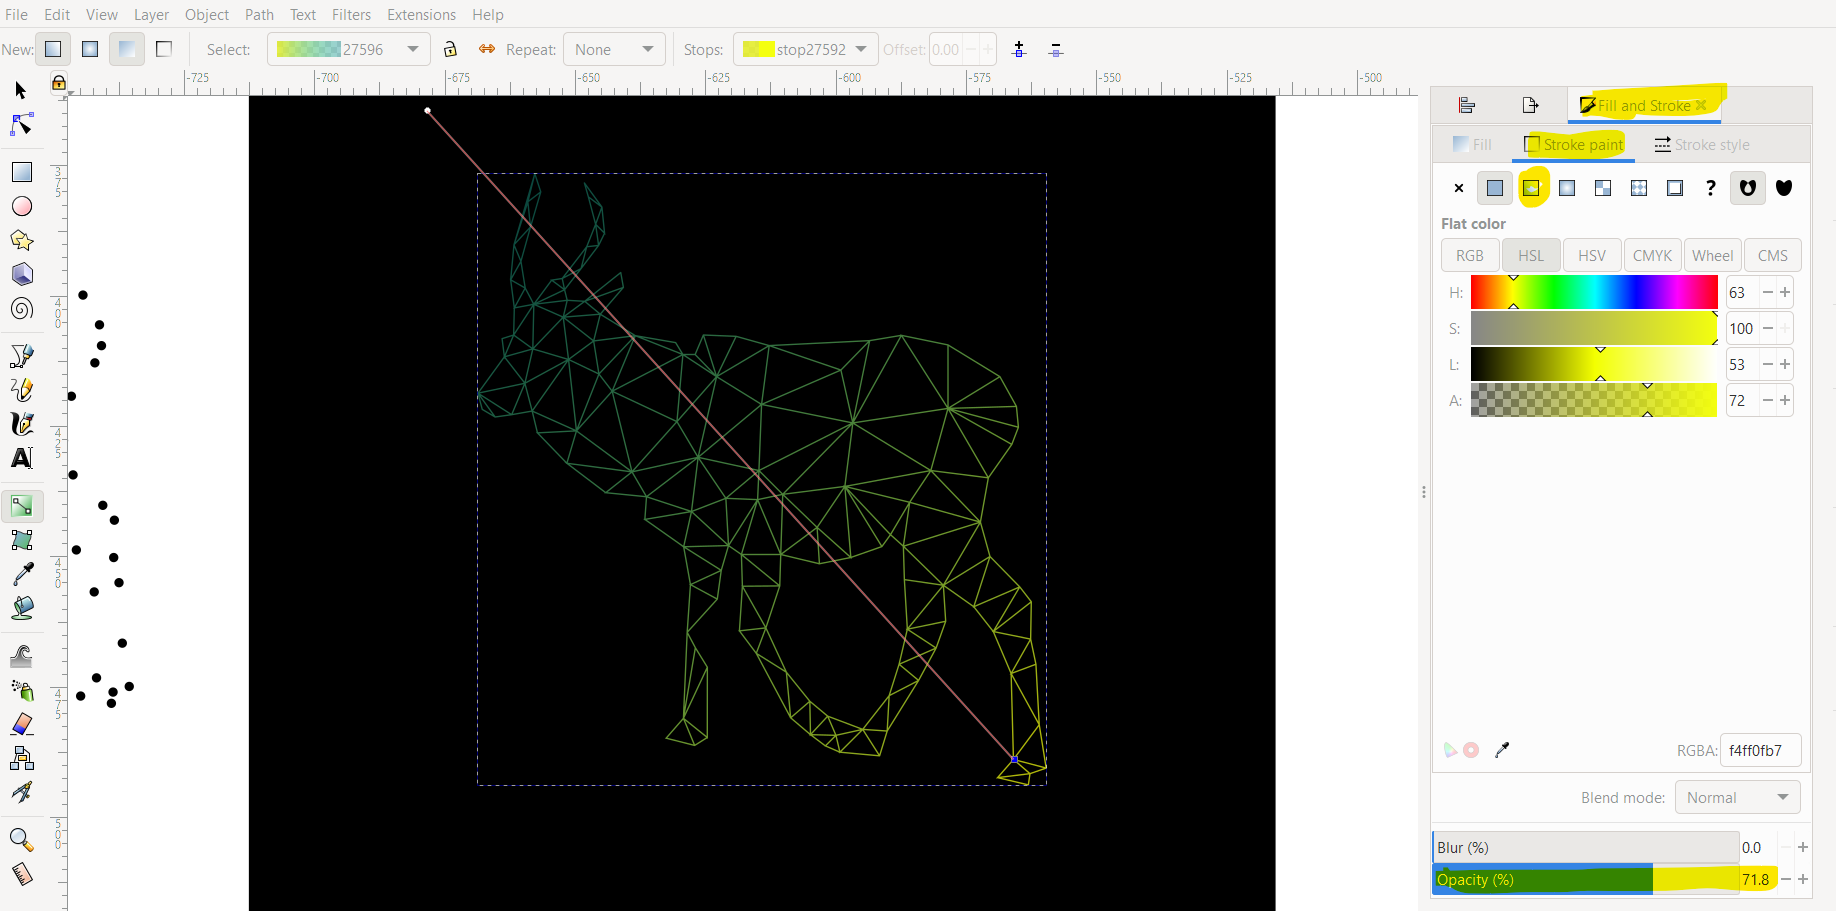
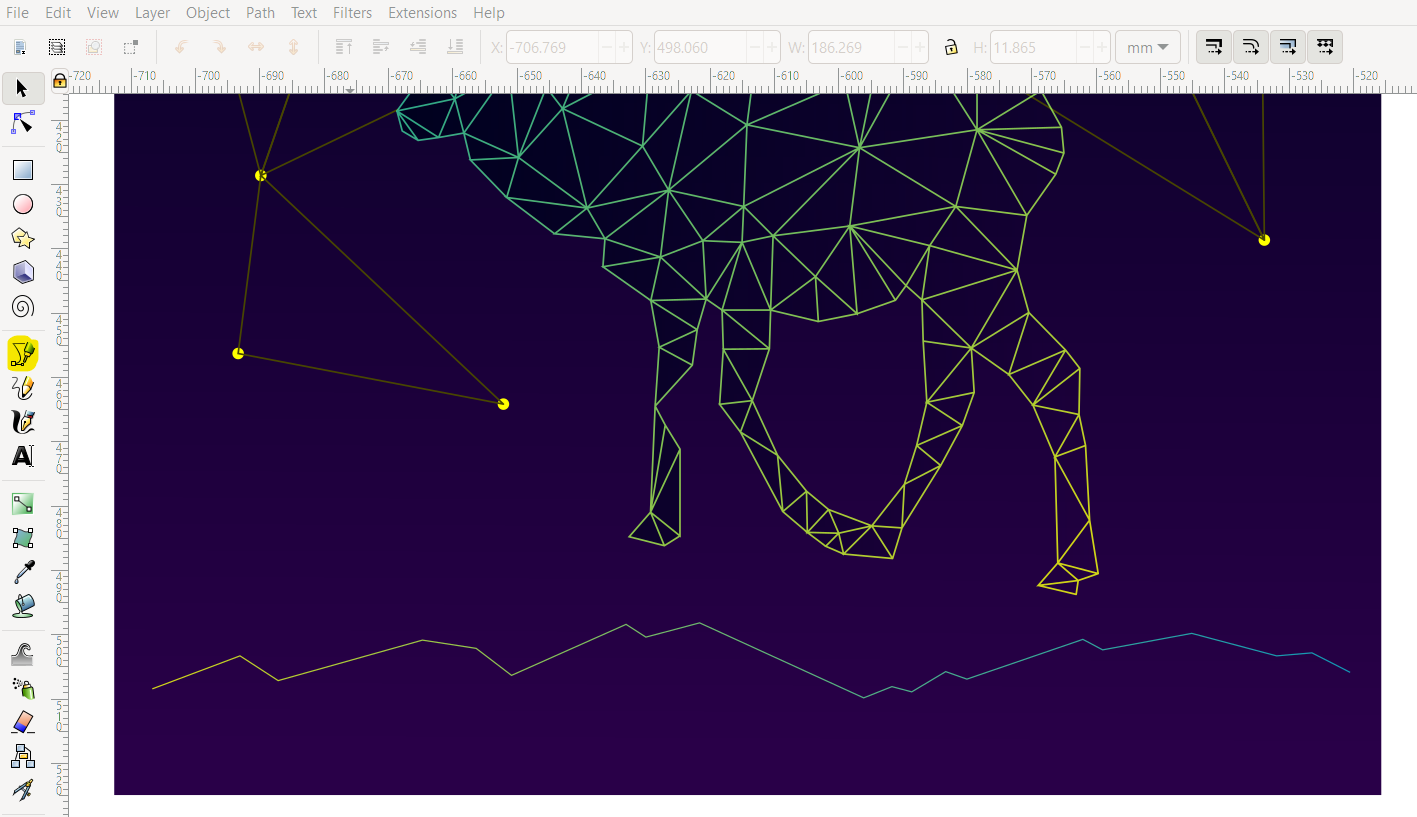
I then used the fill and stroke menu on the elk voronoi diagram and gave it a gradient stroke. Using the gradient tool, opened by pressing g on the keyboard, I made one end yellow and the other light blue to get that cool transition.
I then used the gradient tool on the background rectangle to give it that purple transition, light to dark.
I then pasted some small circles and made another voronoi diagram to get the background star effect. I deleted some random lines to make it look more like a constellation.
I used the bezier tool to draw in some mountains as a base for the background and gave that a yellow-to-blue gradient stroke as well.
Make Moon
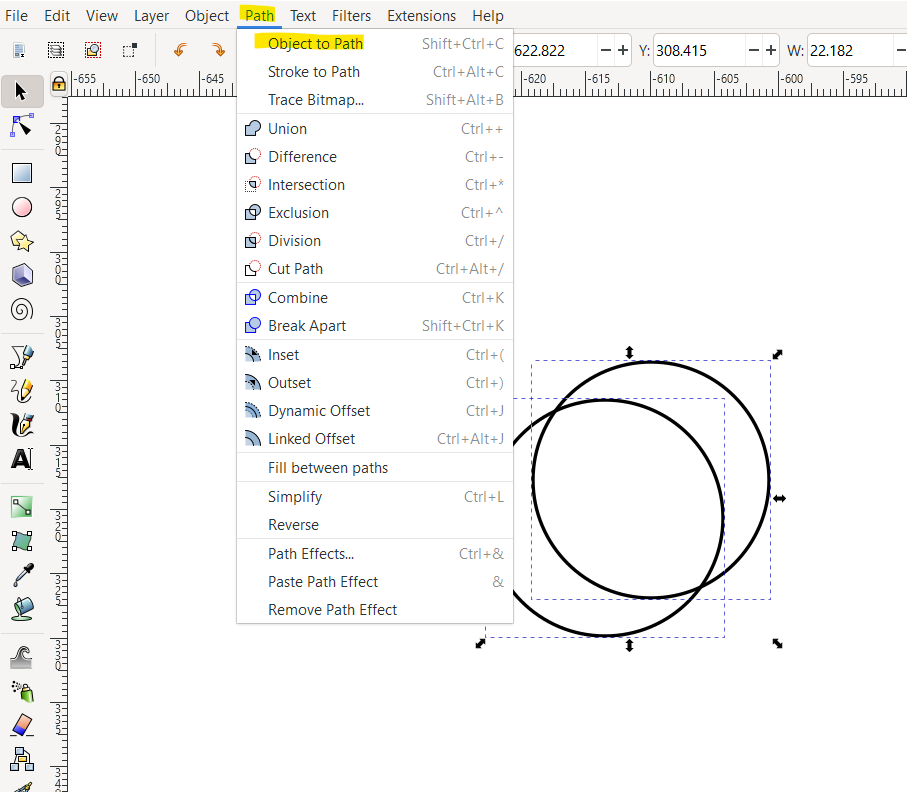
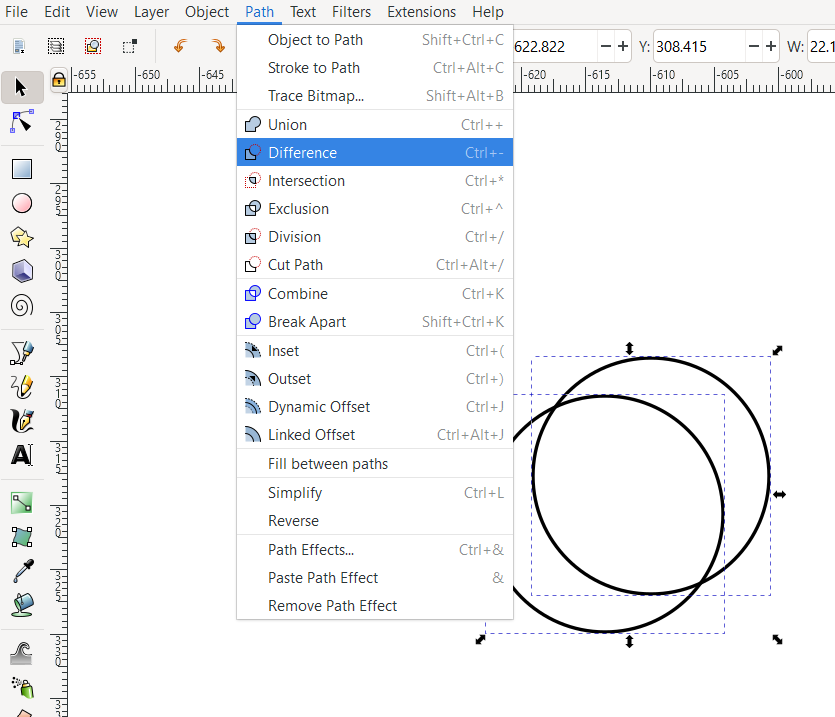
I made a quick moon by drawing two circles, overlapping them slightly, converting them to paths using path>object to path, then clicking path>difference.
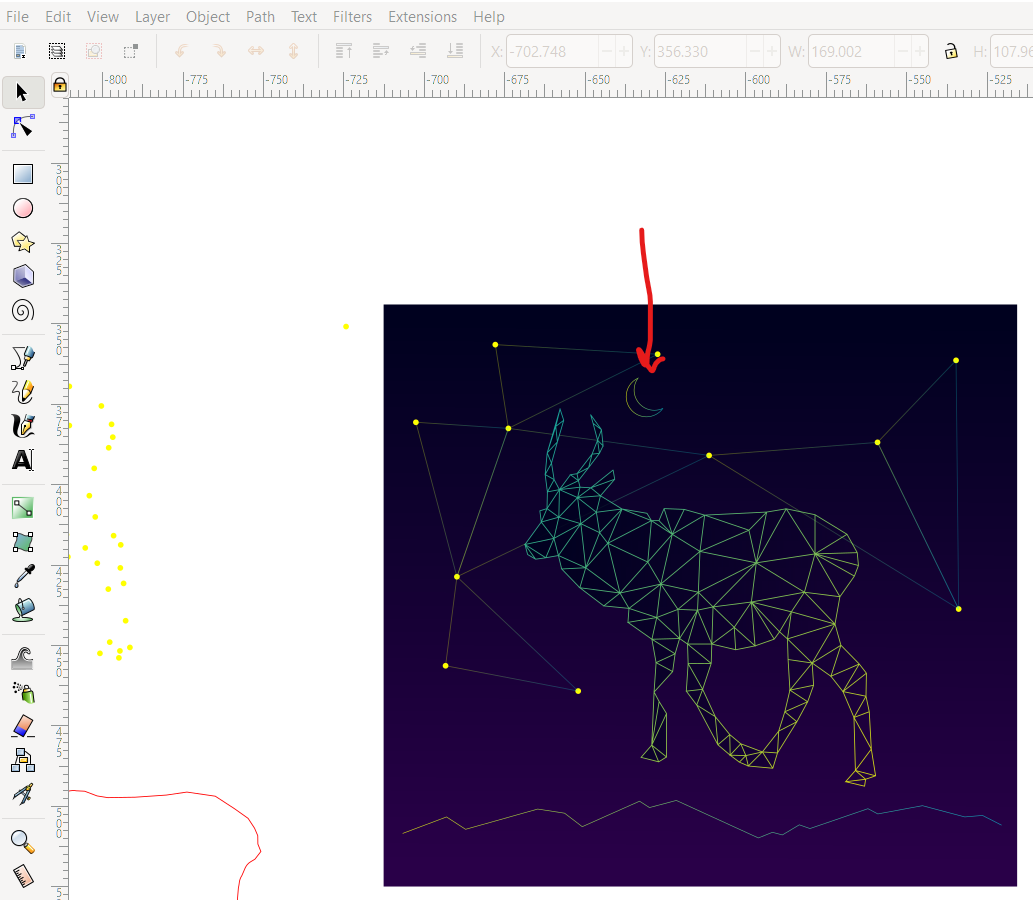
I gave the moon stroke a gradient fill and placed it on the background.
Final
And there you have it! Two wallpapers made from beautiful pictures from your trip!
Hopefully this wasn't too dense to follow. Let me know your thoughts in the comments!
Happy inkscaping!