Make It Real Design Challenge - Reference Guide
by lainealison in Teachers > Engineering
1804 Views, 7 Favorites, 0 Comments
Make It Real Design Challenge - Reference Guide
This Instructable was made as a guide for engineering students who are working on the "Make it Real" design challenge HERE.
This guide's purpose is to help explain and inspire my virtual students' work by giving them some suggestions for how they may want to approach this project.
Understand the Problem
In approaching any design problem, it is important to thoroughly understand the problem before beginning. In order to understand this design challenge, I recommend you do three things.
- Begin by reading through the challenge contest completely to get a good idea of the overall goal and requirements.
- Next, watch the linked webinar to understand James' specific goals for the project, focusing on minutes 7 - 37 of the video.
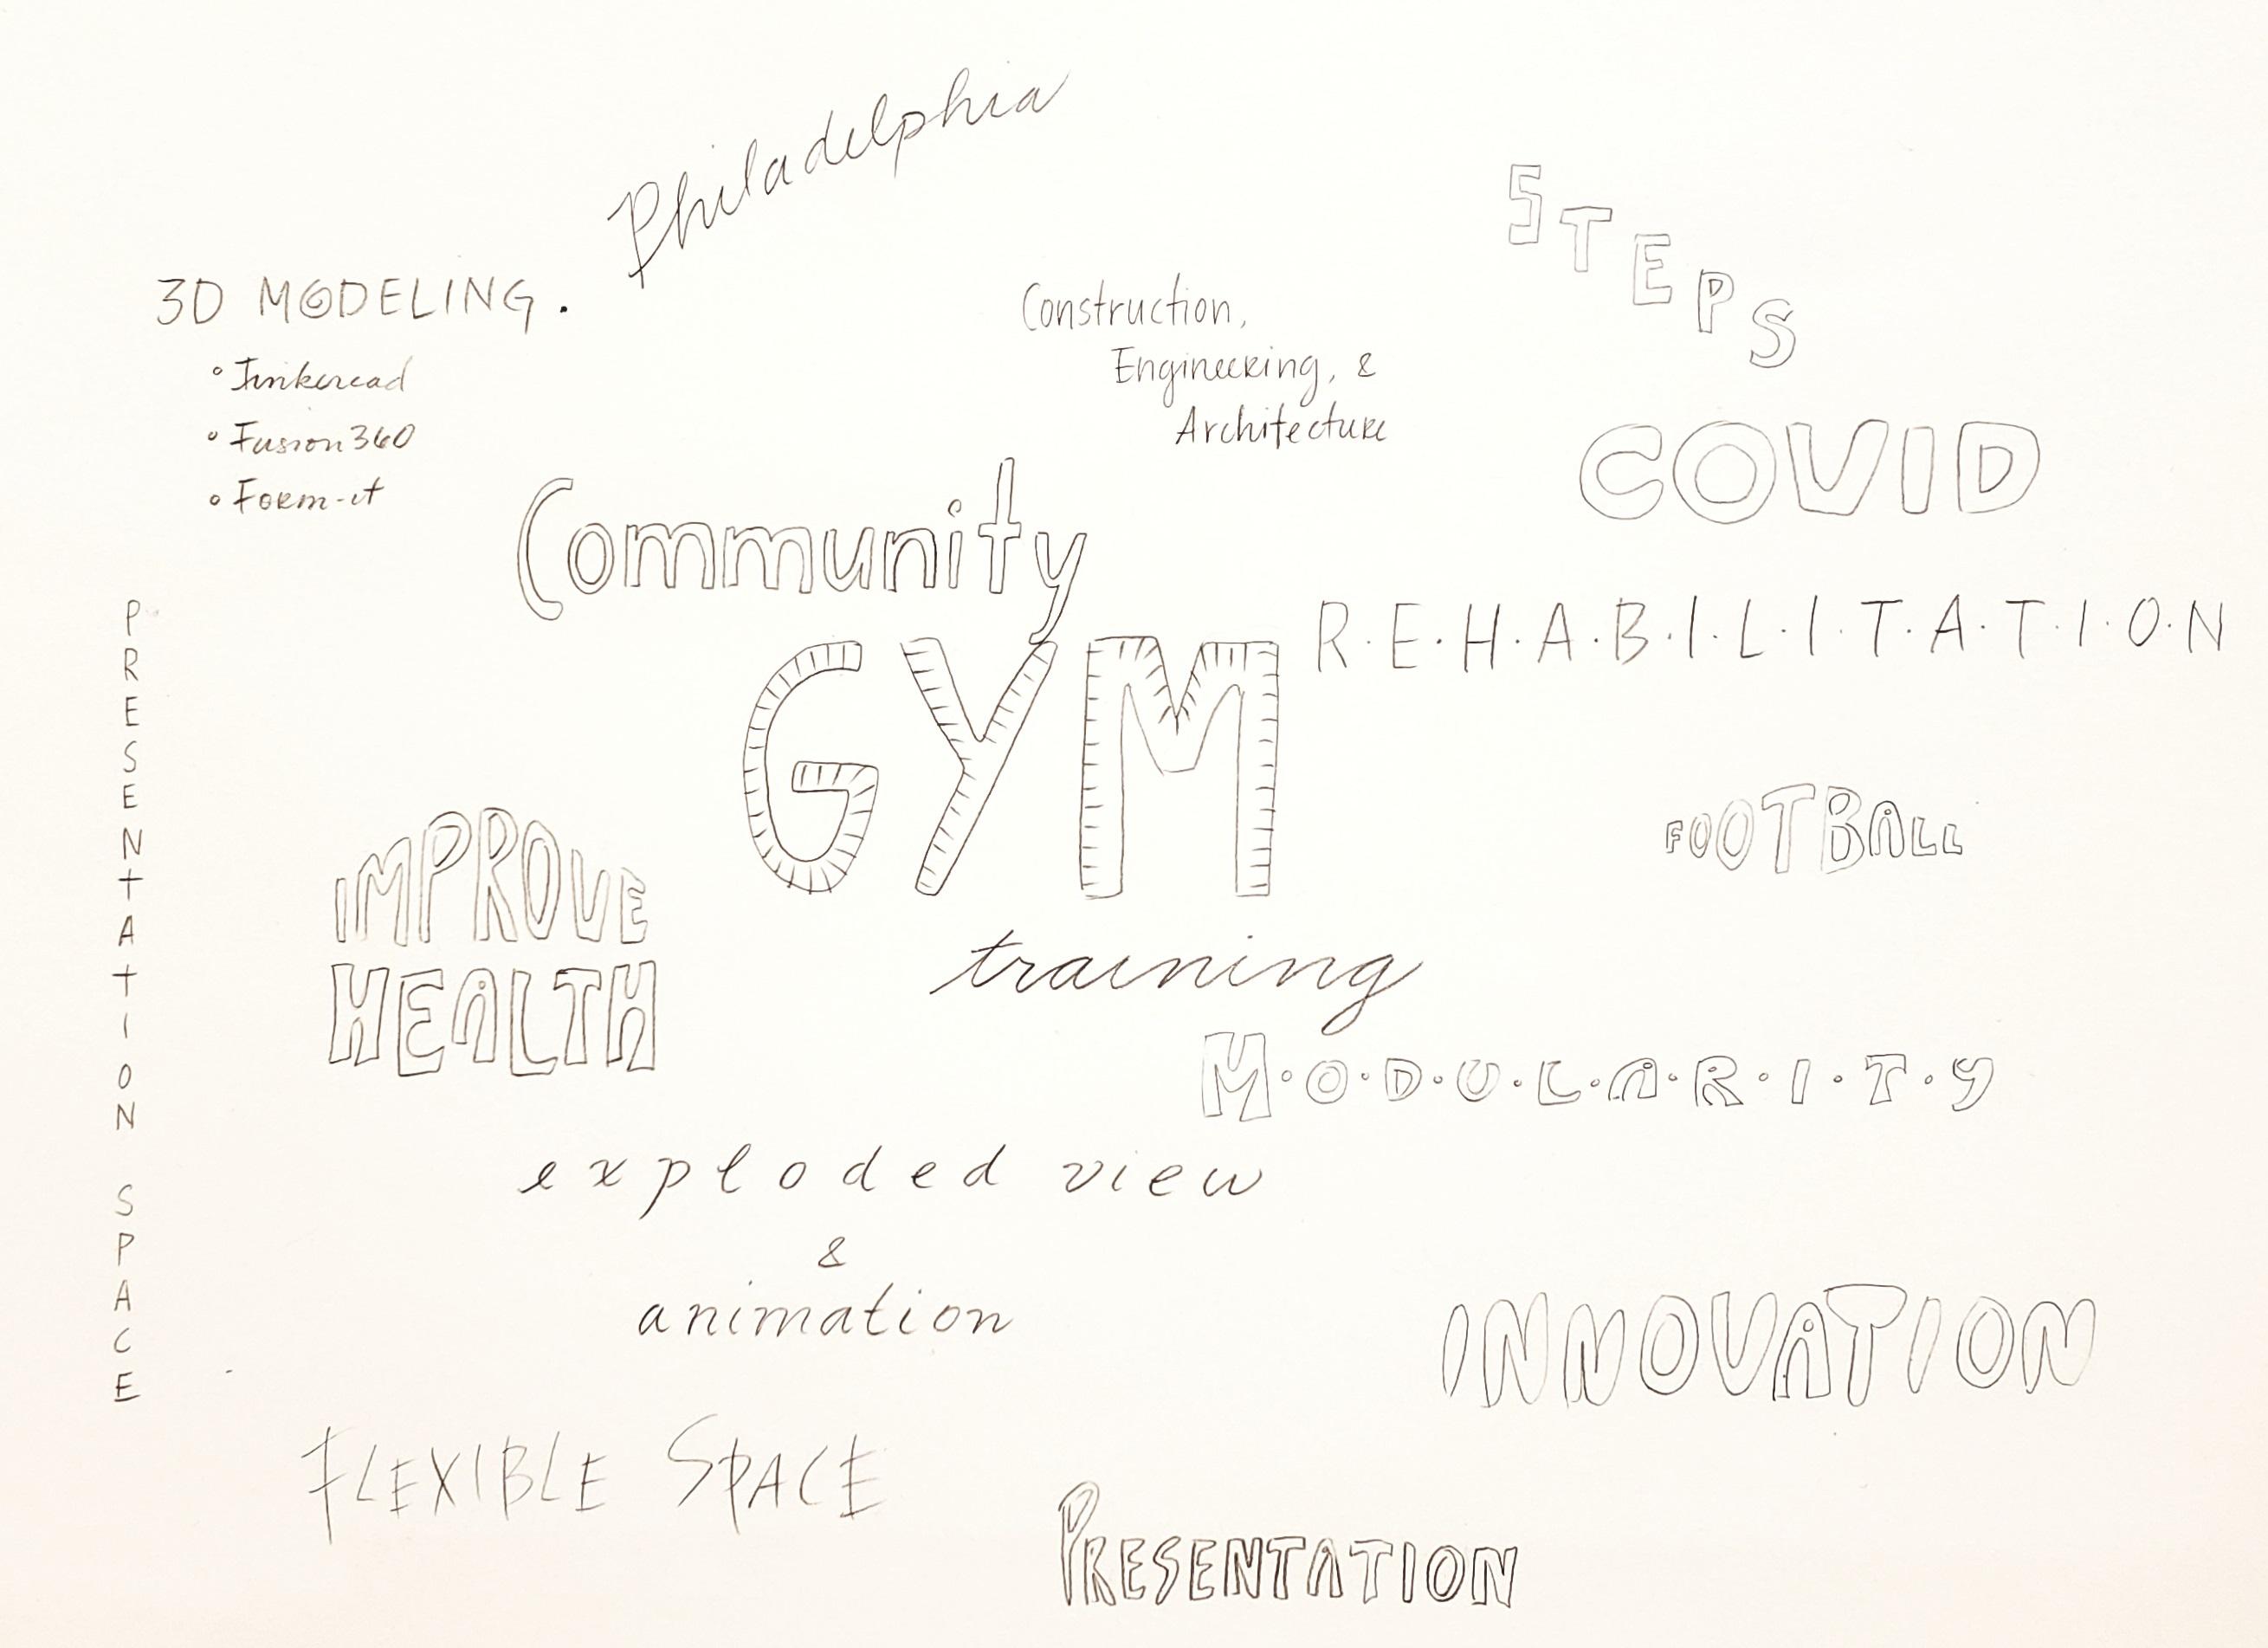
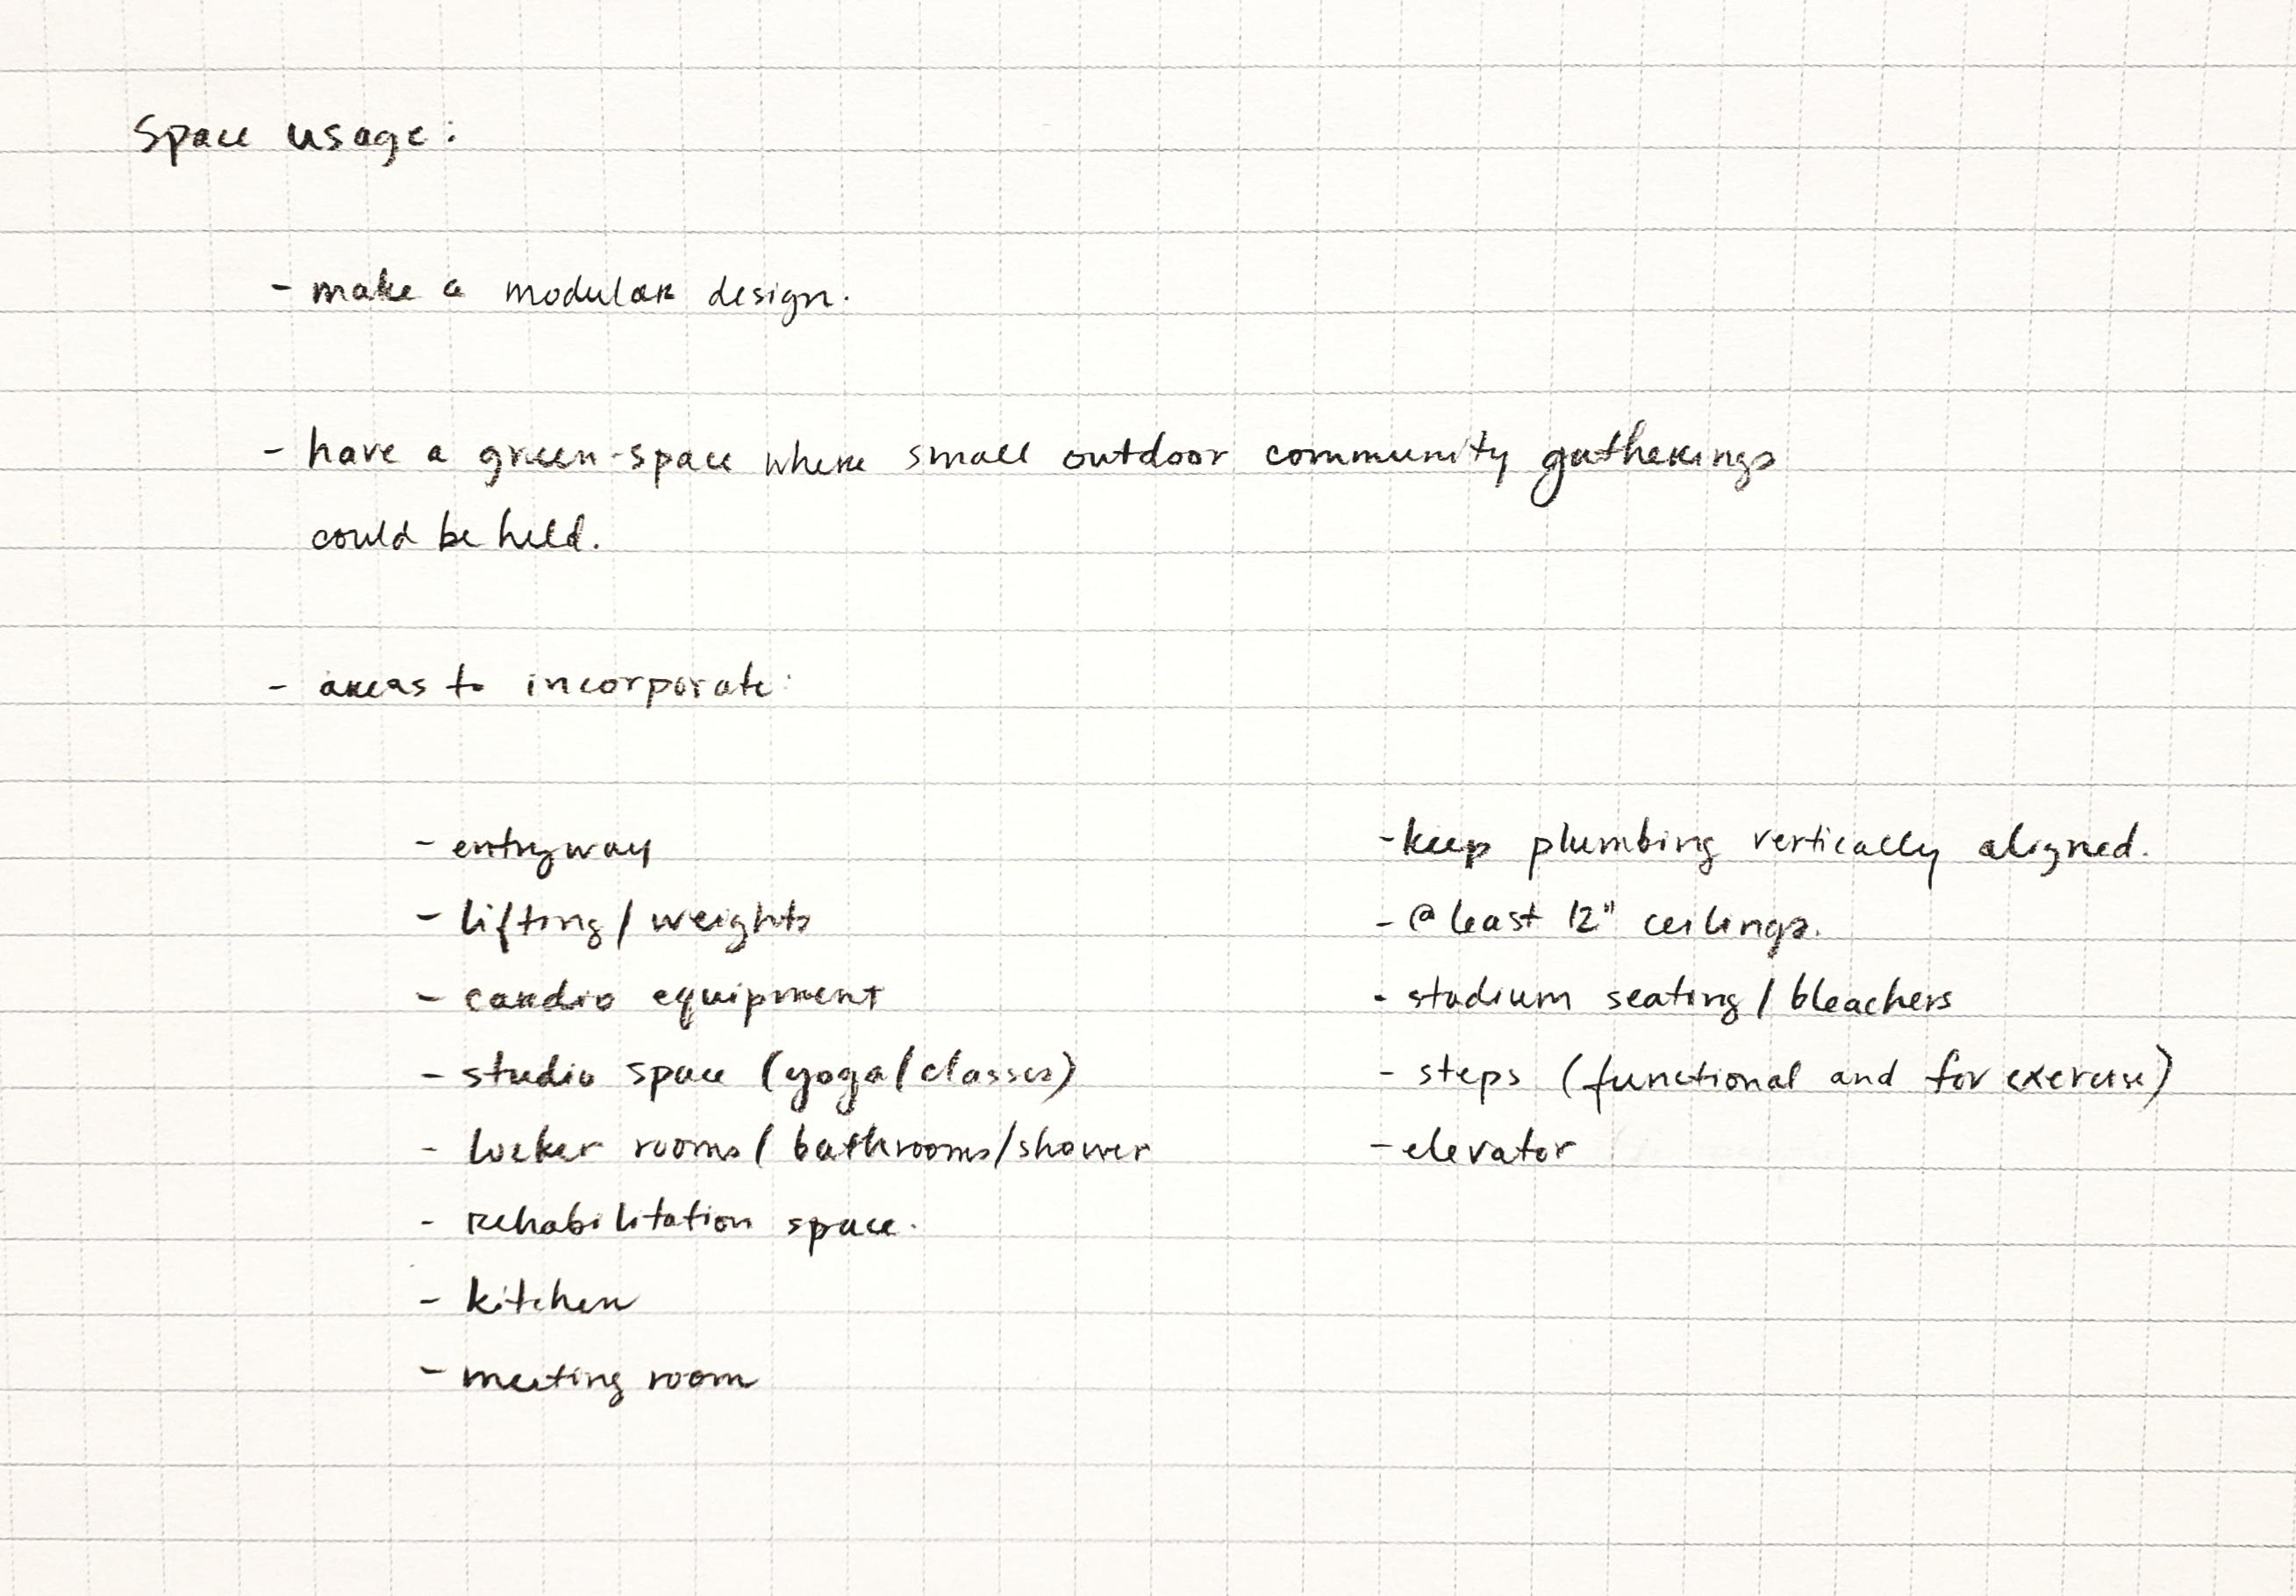
- Finally, create a word map or some sketches/notes that highlight the items I thought best reflected the goals of this project (above).
The goal for this word map is to be able to refer to it as you work through the subsequent steps to ensure you don't lose focus.
As you document your first step in your Instructable, make sure you clearly explain the problem statement as you understand it. For instance, say "The problem posed in this design challenge is to...."
Be specific, clear, and concise in making this problem statement. You'll have opportunities to expand on your ideas much more in the subsequent steps.
Some sort of word art might be a good image to use here, as it is best if you can include an image (or images) that are purposeful for each step of your Instructable.
Research
In your research step, you should clearly explain what you looked into before you began brainstorming and developing your own ideas. For instance:
- What elements should be included in a gym with the goals James described?
- What is a reasonable size for this gym (given the proposed location)?
- What might individuals in this community find valuable?
- What considerations need to be taken into consideration architecturally for gyms (like ceiling height, plumbing location, etc.)
- Is there anything you have learned during the COVID pandemic that should impact your overall design?
This research phase is critical, so feel free to add a lot of solid information here. Everything you do in your brainstorming (and modeling) should be able to be explained based on your research. Nothing should be designed "just because." You may need to iterate/improve your design and do more research later on based on questions you have as you develop your ideas. That's great! Just make sure to come back and update this step then.
An example of some research-based ideas you may want to include here can be seen below:
After watching the Webinar to research James' goals for this new gym space, I started researching the location and determined that I needed to understand the space it could be in.
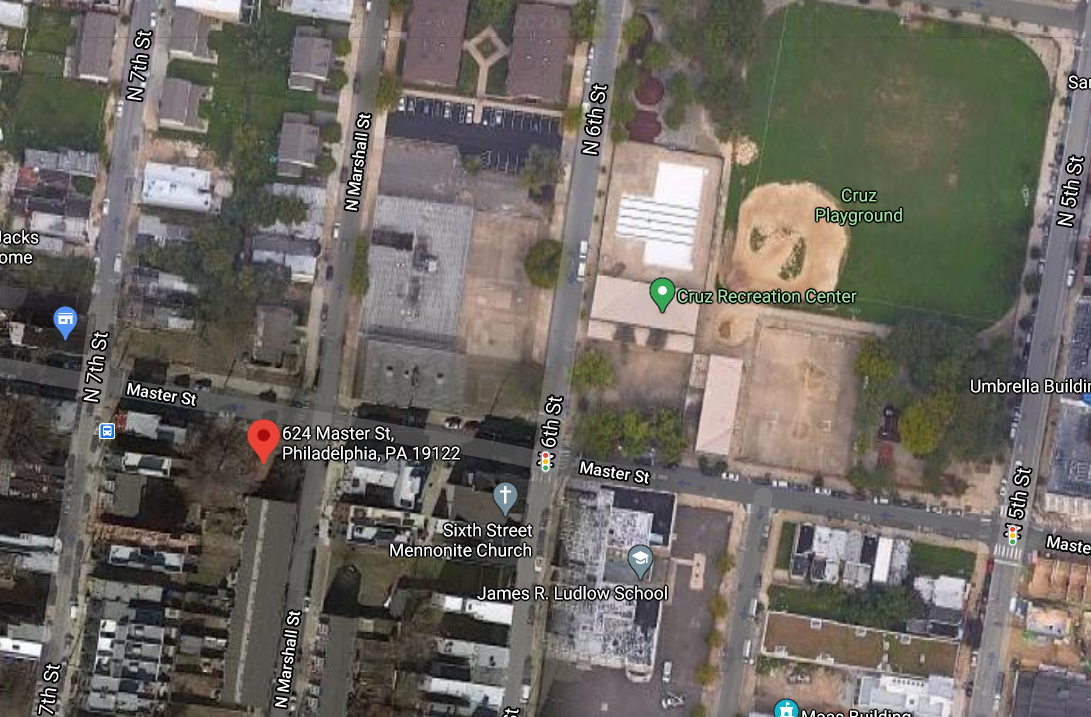
I began by researching available real estate in the Philadelphia area. My criteria for this search was that the property is currently available for purchase, less than $200K, and located in an urban (as opposed to suburban) portion of the city. Once I had narrowed my search by those criteria, I analyzed each property for pros and cons and ultimately selected 624 W Master St, Philadelphia, PA 19122. There are a lot of wonderful features to this property, but the most exciting feature is that it is only a block away from a wonderful park (Cruz Playground) that offers not only a playground for children, but a large lap pool, baseball diamond, and large parking lot (that hopefully could be utilized for people who commute to this gym).
**While this property was used as a basis for the design, the gym created has a modular design (which will be explained later) and should be able to be adjusted to fit a variety of lot sizes.
The lot size is 8712 square feet and, estimating the approximate proportions from the ariel view shown, the lot should be approximately 44 x 198 ft. This was used as the basis for the gym.
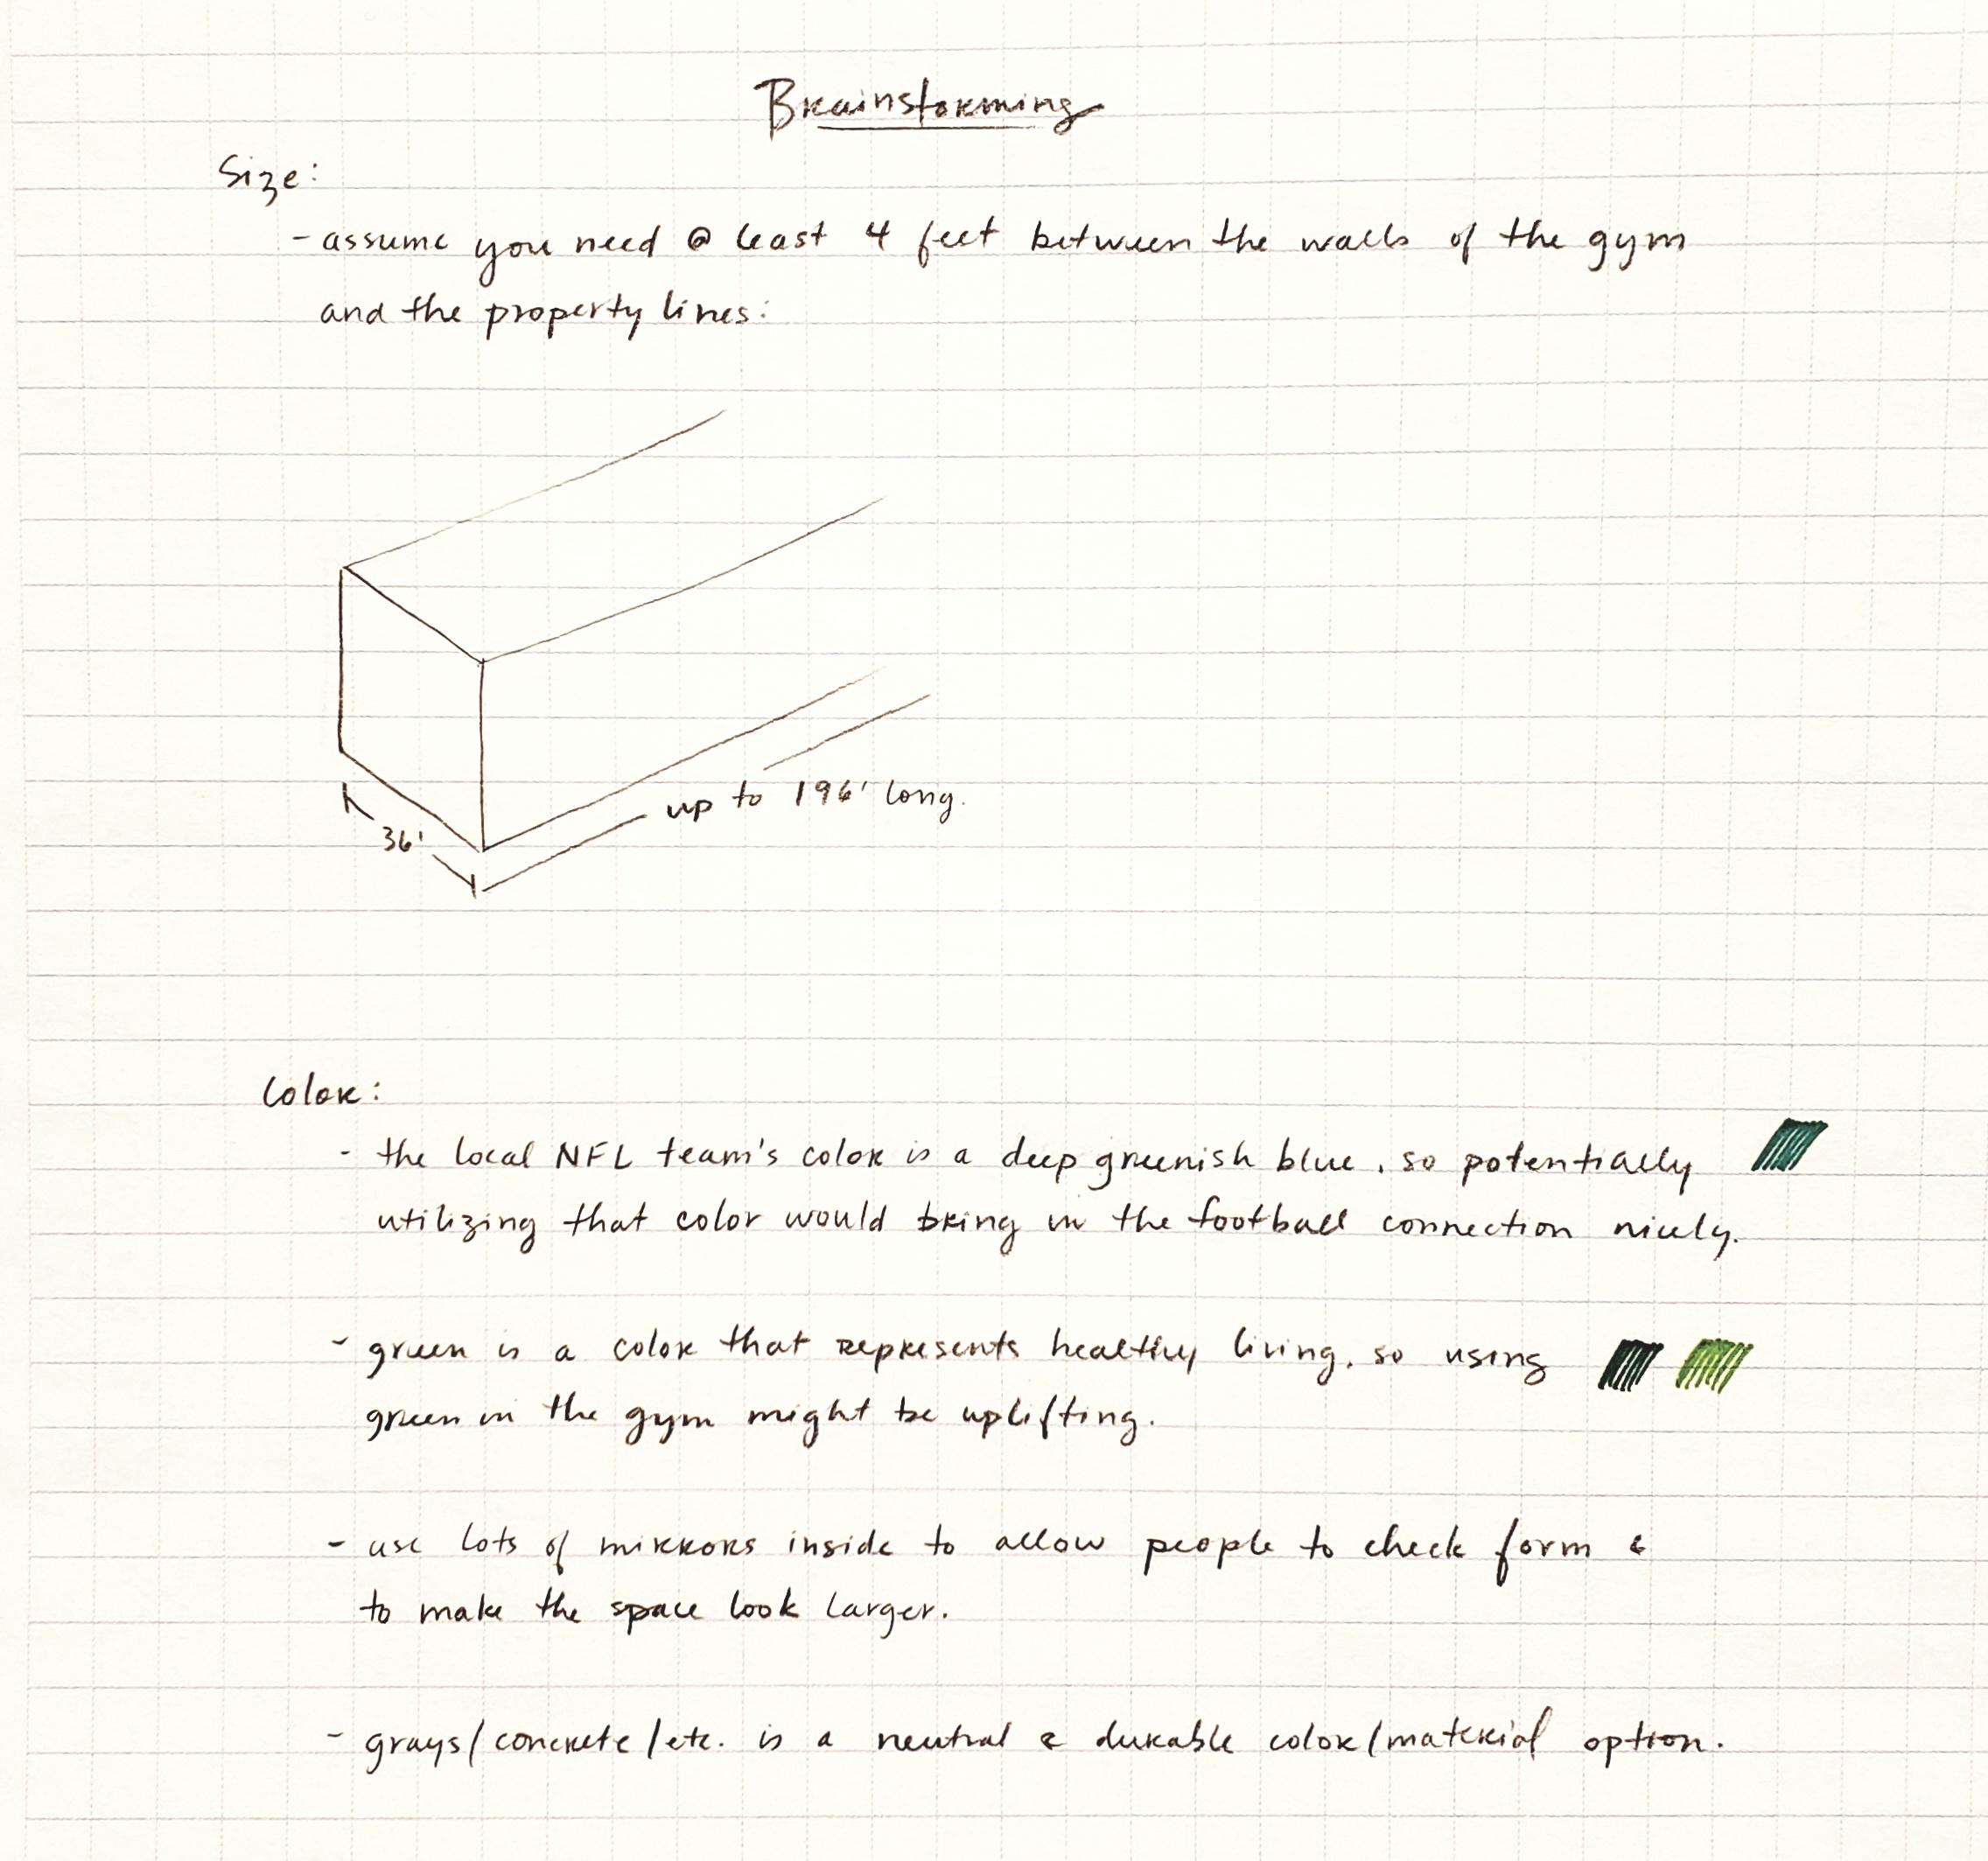
More research was done to investigate what sort of equipment and spaces should be included in a community gym. This research is reflected in the brainstorming sketch shown next.
Brainstorm and Develop a Solution
Now that you have done your initial research, it's time to start putting some ideas together for the gym space you will design. You may end up using these ideas and you may not, but the important thing is to come up with ideas that work to help you achieve the goals of the problem definition based on your research.
For this step, I recommend jotting down your notes and ideas in your engineering notebook and uploading images of your work along with some explanations for each idea.
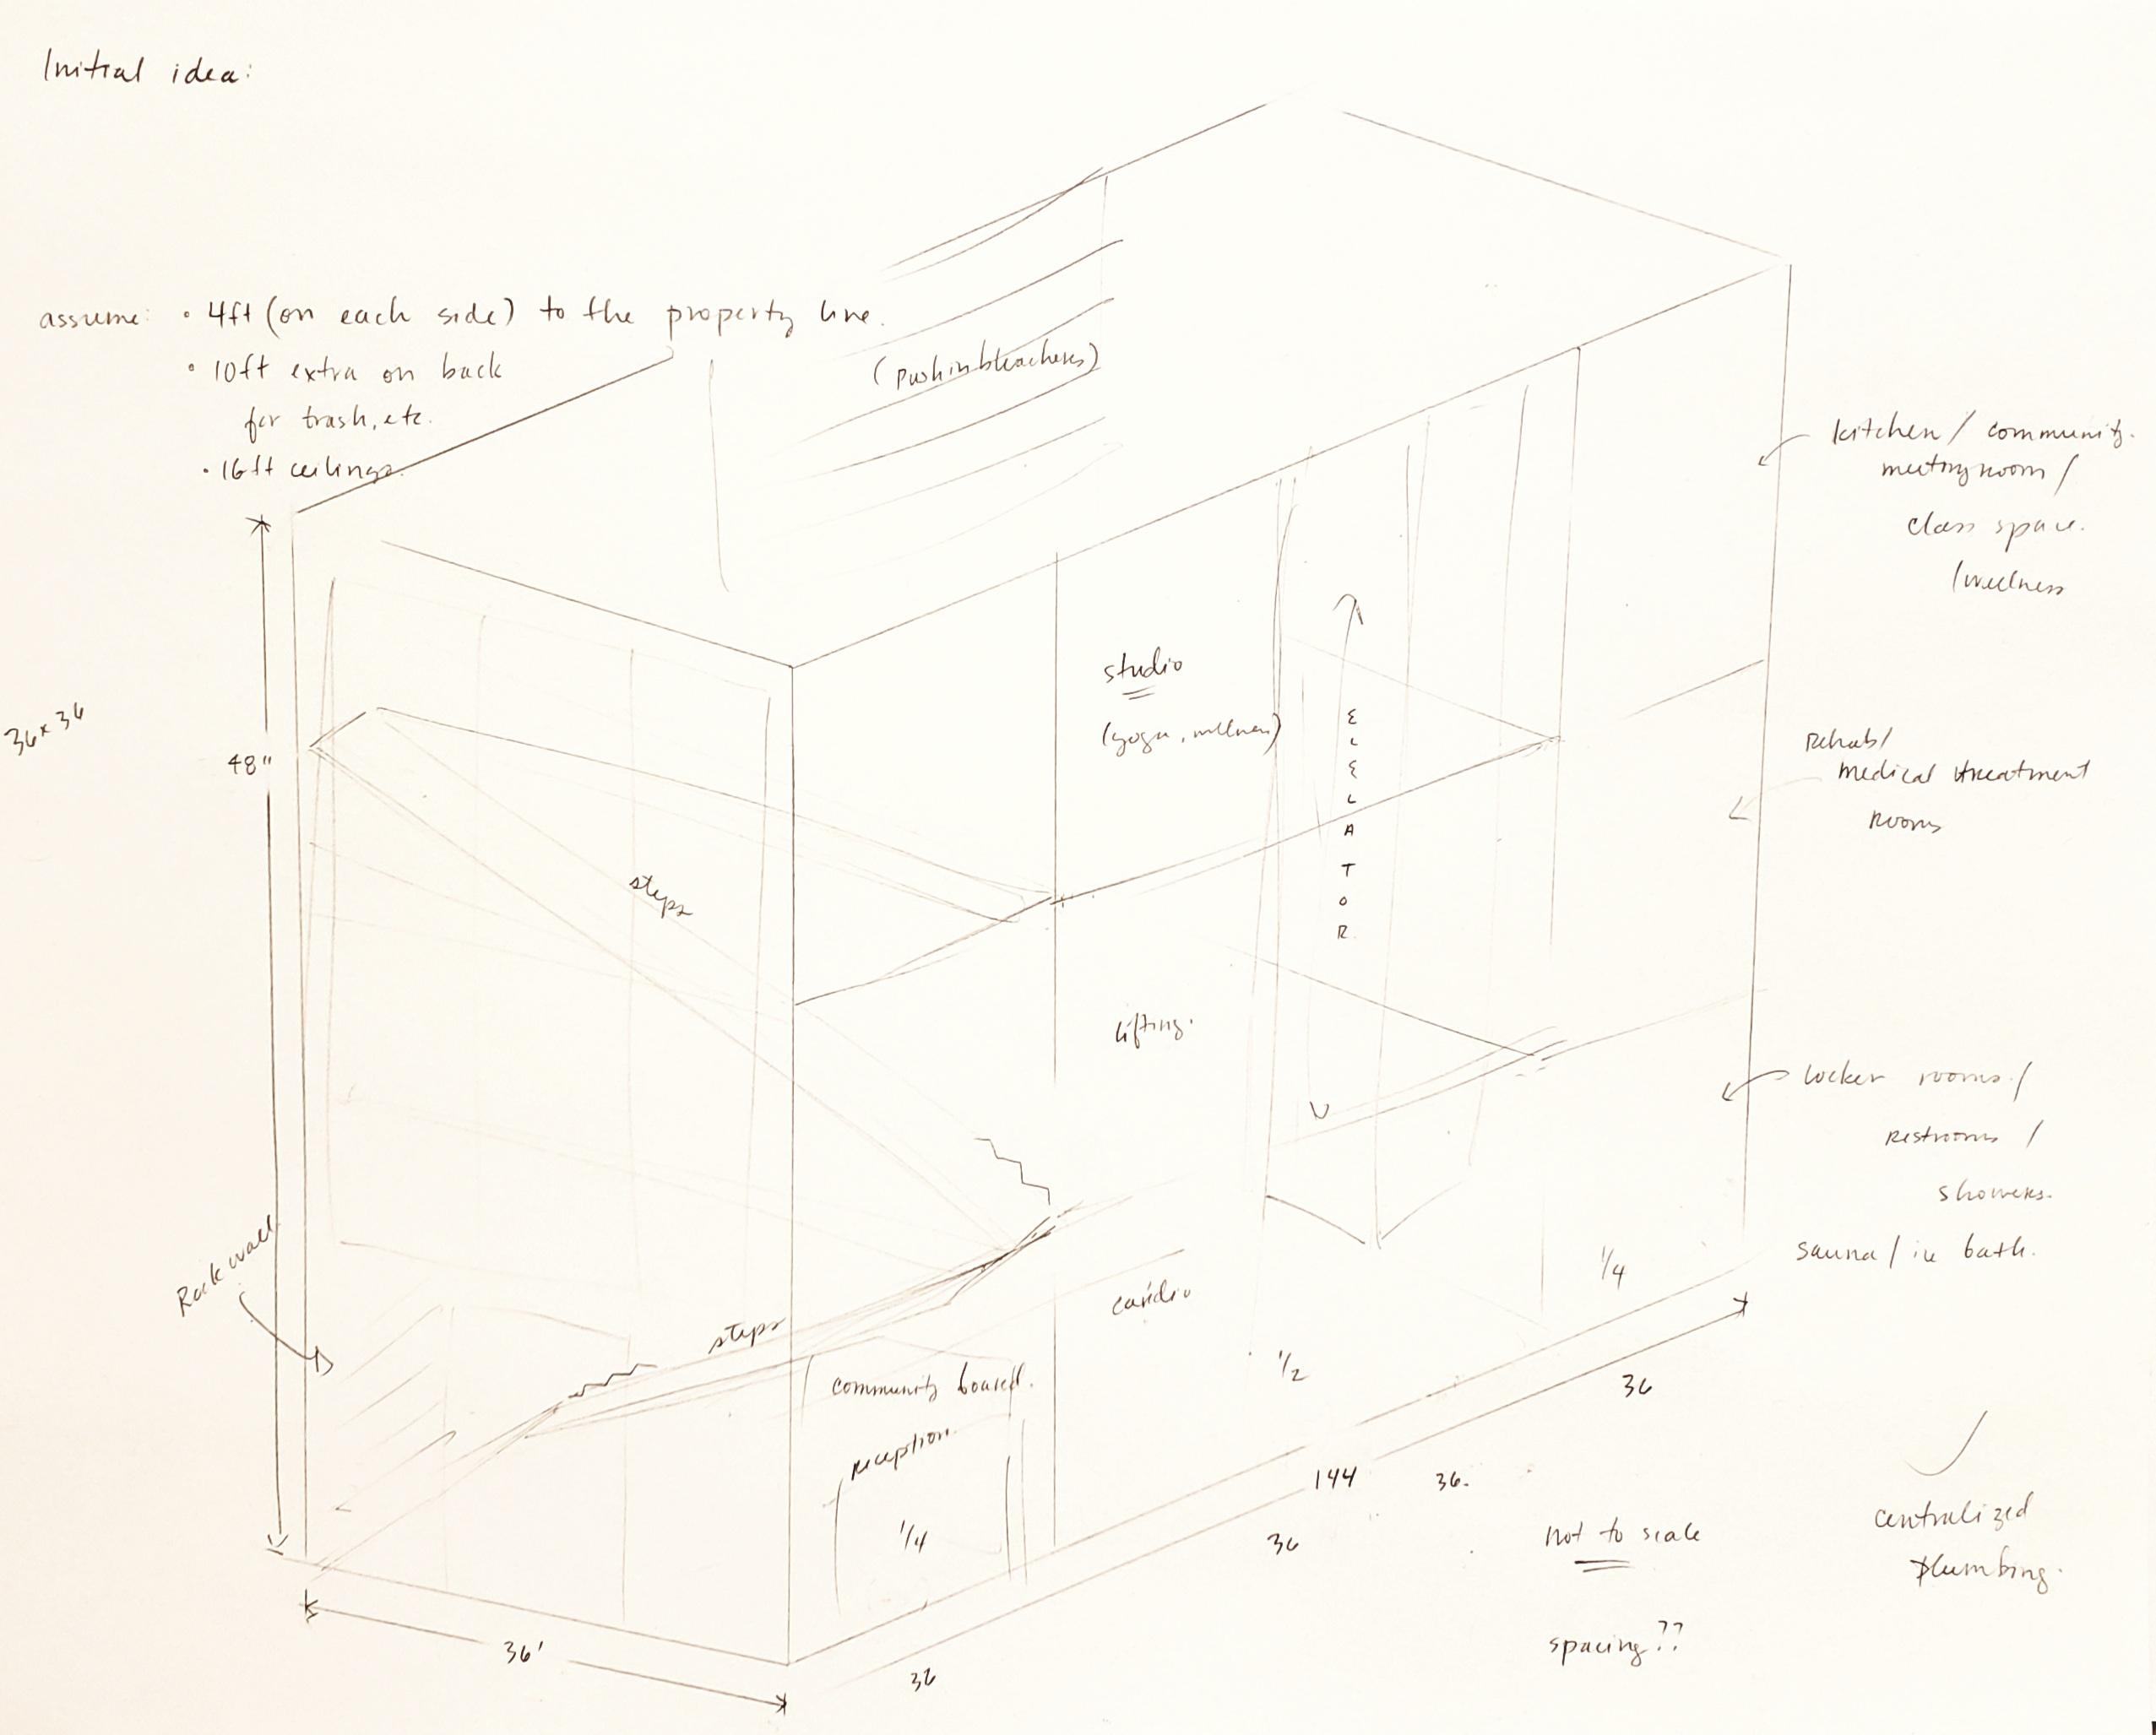
I have attached some examples of the brainstorming I did for my sample design.
Your submission for this step should explain your considerations and ideas and culminate with a sketch (or sketches) of the design you plan to model.
Create a Model
Now comes the fun part!
Once you have decided on a design, select one of AutoDesk's free CAD software platforms and get modeling! I will give you some quick introductory tutorials for a few of these in class, but the second half of the webinar video (specifically from minute 38 - 66) gives a nice, quick demo of several of the different tools you will have access to. Make sure to watch this part of the video to start to get an idea for what tools you may want to use. (Specific tutorials from the video and additional modeling help can be found HERE, courtesy of the contest organizers.)
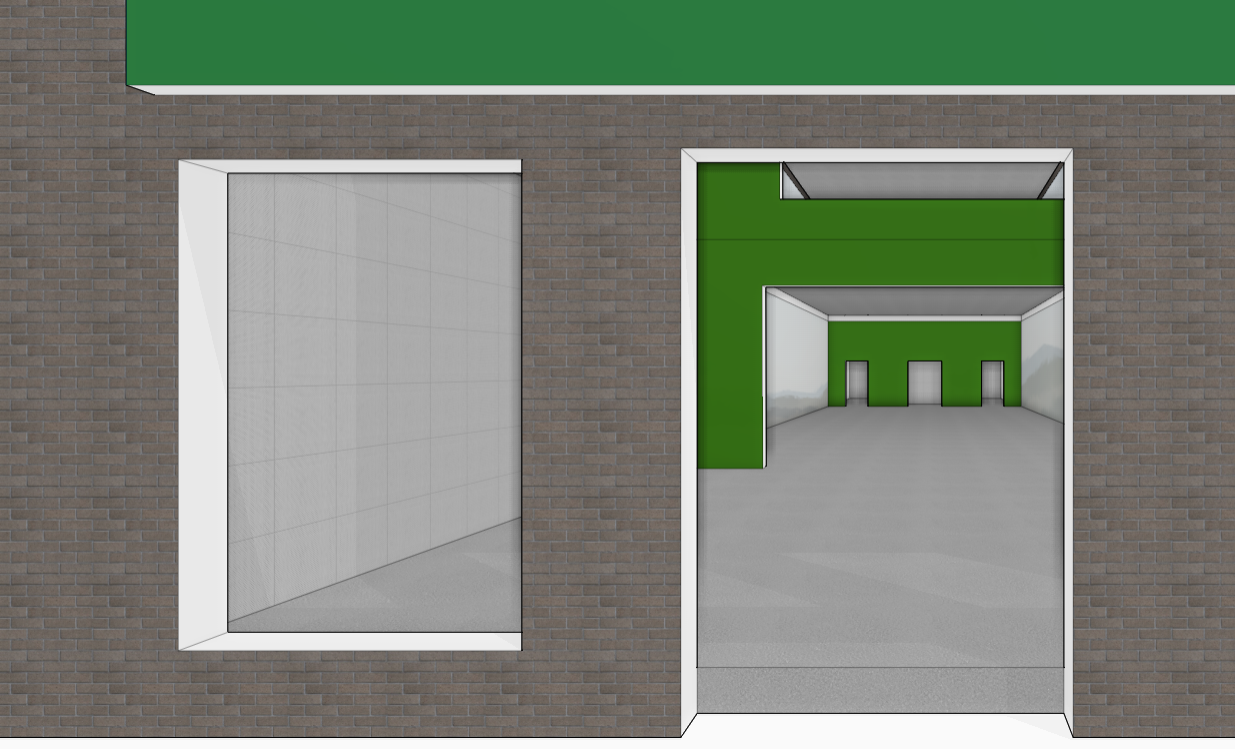
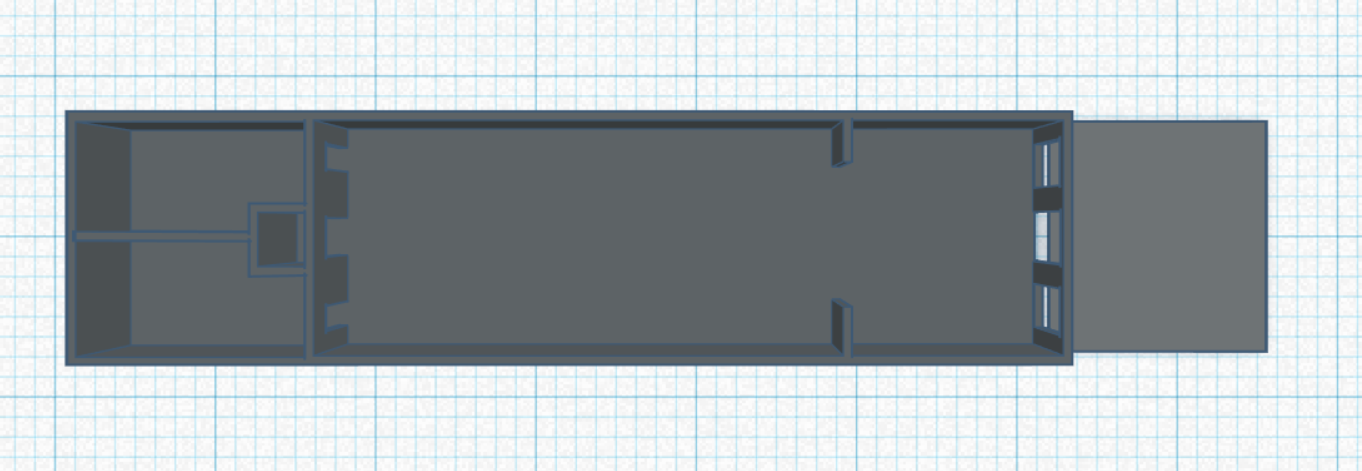
I made a quick example model using Formit (which I had never used before and found to be pretty user friendly), but you are welcome to use any of the software platforms recommended in the project overview. As a quick test, I exported my model into Tinkercad (see the section cut above) pretty seamlessly. If you want to detail out some equipment, etc, this may be a great way to do that.
When you document this step, you'll want to take good pictures of your model and explain the design in detail. For every design decision you make, you should be able to include a technical why? explanation based on your research. This would be a great area to show exploded views and/or animations based on your skill level as well.
See the explanation of my model below for more ideas:
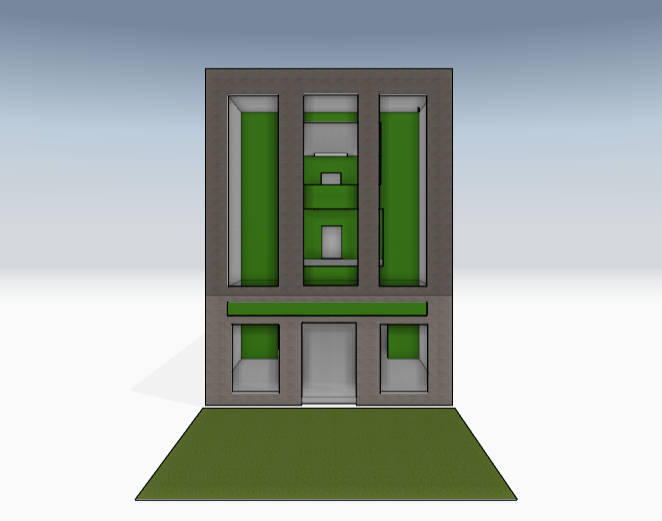
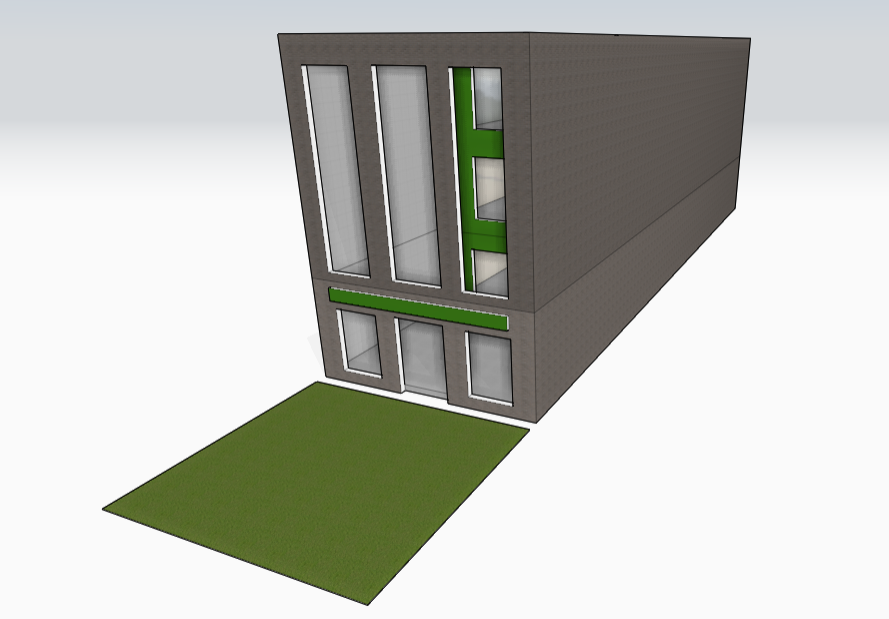
This 3-story modular design features 12 different units that are 36' (length) x 36' (width) x 16' (height). We have assembled them to fit one specific lot's dimensions, but these units could be rearranged to accommodate many different sized spaces. The 12 units (4 per floor) are allocated as explained below:
- 3 units: Front lobby /entry
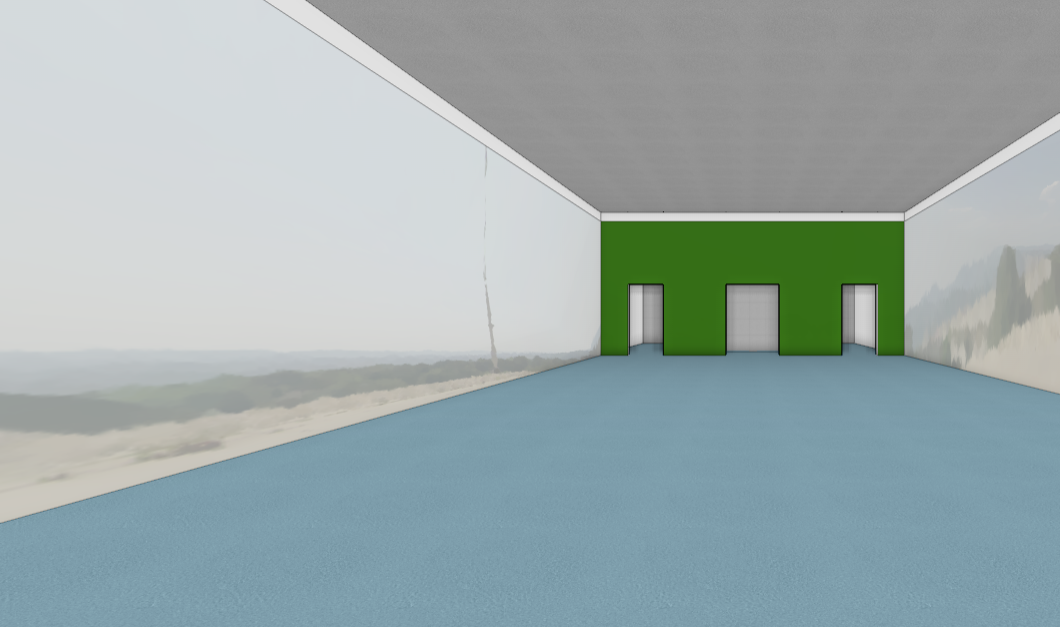
- This 3-story space features 48' ceilings and is the first thing community members will see as they enter the building. There will be two staircases here as well. One will primarily be used to help people move in between the different floors and the other will be primarily used for fitness. There will be a community board and local art throughout this area. A key feature of this area is the large windows which should let in lots of natural light. Since the sides of this building are near other pre-existing structures, the goal throughout this design is to utilize large windows facing the front of the building to bring the natural light into each space.
- 2 units: Cardio equipment
- This 1st-floor central space will be used for fitness and training using machines such as treadmills, elliptical machines, stair machines, bicycles, etc. The machines will be spaced by 6 feet to give users privacy and increased protection from the germs from other guests. Sidewalls will be covered with mirrors with front and rear green accent walls.
- 2 units: Strength training equipment
- This 2nd-floor central space will be used for weight training and will include both weight machines and free weights. Like the cardio space, these machines and weights will be spaced apart by 6 feet. Sidewalls will be covered with mirrors with front and rear green accent walls.
- 2 units: Studio
- This 3rd-floor central space will be open and used for studio classes (such as yoga or group fitness). One wall will also have a push-in bleacher unit so this space could also be used for community events (such as health workshops, etc.).
- 1 unit: Locker Rooms
- This 1st-floor rear unit will have men's and women's locker rooms. Each locker room will include restrooms, showers, lockers, and a changing area. Each space will also be equipped with a small sauna and jacuzzi that can be used by either individuals working out or individuals receiving rehabilitation treatment services.
- 1 unit: Rehabilitation Zone
- This 2nd-floor rear unit is all about rehabilitation. With an onsite therapist, individuals can develop and execute a plan to recovery through the use of this facility.
- 1 unit: Meeting Room
- This 3rd-floor rear unit is separated into a meeting room area (that can be rented by community members), a small kitchenette, and a small laundry area.
- Bonus: In the front of the building, there is also a 36' x 36' greenspace to where small outdoor gatherings could be held.
Iterate the Design
The design process, as you all know, is meant to be iterative. I've never met anyone who designed something perfectly the first time and that is the beauty of this process. Take a moment here to document what you had to change from your original design as you began modeling or as you thought of new things you should be considering as you worked through this process.
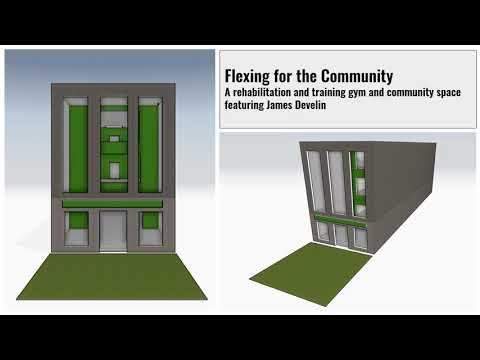
Communicate the Overall Design
You have now created an instructable to explain your design process, but for this final step, you should upload a presentation that clearly and professionally showcases your design. This could be a video you make, a Google slides presentation, or whatever works best for you to share your concept professionally. Imagine this as the final product you would submit to your investors to get their buy-in for the project.
The included presentations are included simply as a reference example of what you should prepare for this final step. Both a .pdf and a Powerpoint file are included here for your reference but are not required. Please do not think of these as templates, but rather as the level of professionalism expected in your submission. You are free to develop any sort of presentation you want here as long as it is professional and thoughtfully explains your design concept.
Good luck! I can't wait to see your designs!