Make Custom Pegboard (3D Jig File Included)
by Paige Russell in Workshop > Home Improvement
22745 Views, 199 Favorites, 0 Comments
Make Custom Pegboard (3D Jig File Included)

Being organized is one of the kindest things you can do for yourself – and learning how to make custom pegboard is the best looking way to be organized!
If you're a visual person like me, keeping things out where you can see them, in a tidy and attractive way, not only helps wrangle all your tools and odds 'n ends, but your thoughts as well. It's hard to be productive if you can't find that thing you need!
The pegboard that they sell at hardware stores is perfectly functional for garages and workshops, but (in my opinion) isn't a nice enough quality to be used inside the home. That's why I made this project! So you can make your own pegboard – with just a hand drill and the jig – using high quality plywood, that can be left natural, stained, painted, or covered in paper, to create an organization system that's more in-line with your personal style.
In full disclosure, this instructable uses a 3D printed jig that I designed. But DON'T PANIC if you don't have access to a 3D printer! In the next step, I'll share a link to an online 3D printing service that will make and ship you one for a super reasonable price.
SO... let's get organized in a cool and totally customizable way!
Supplies & Tools
Here's the list of what you need to make your own custom pegboard:
SUPPLIES
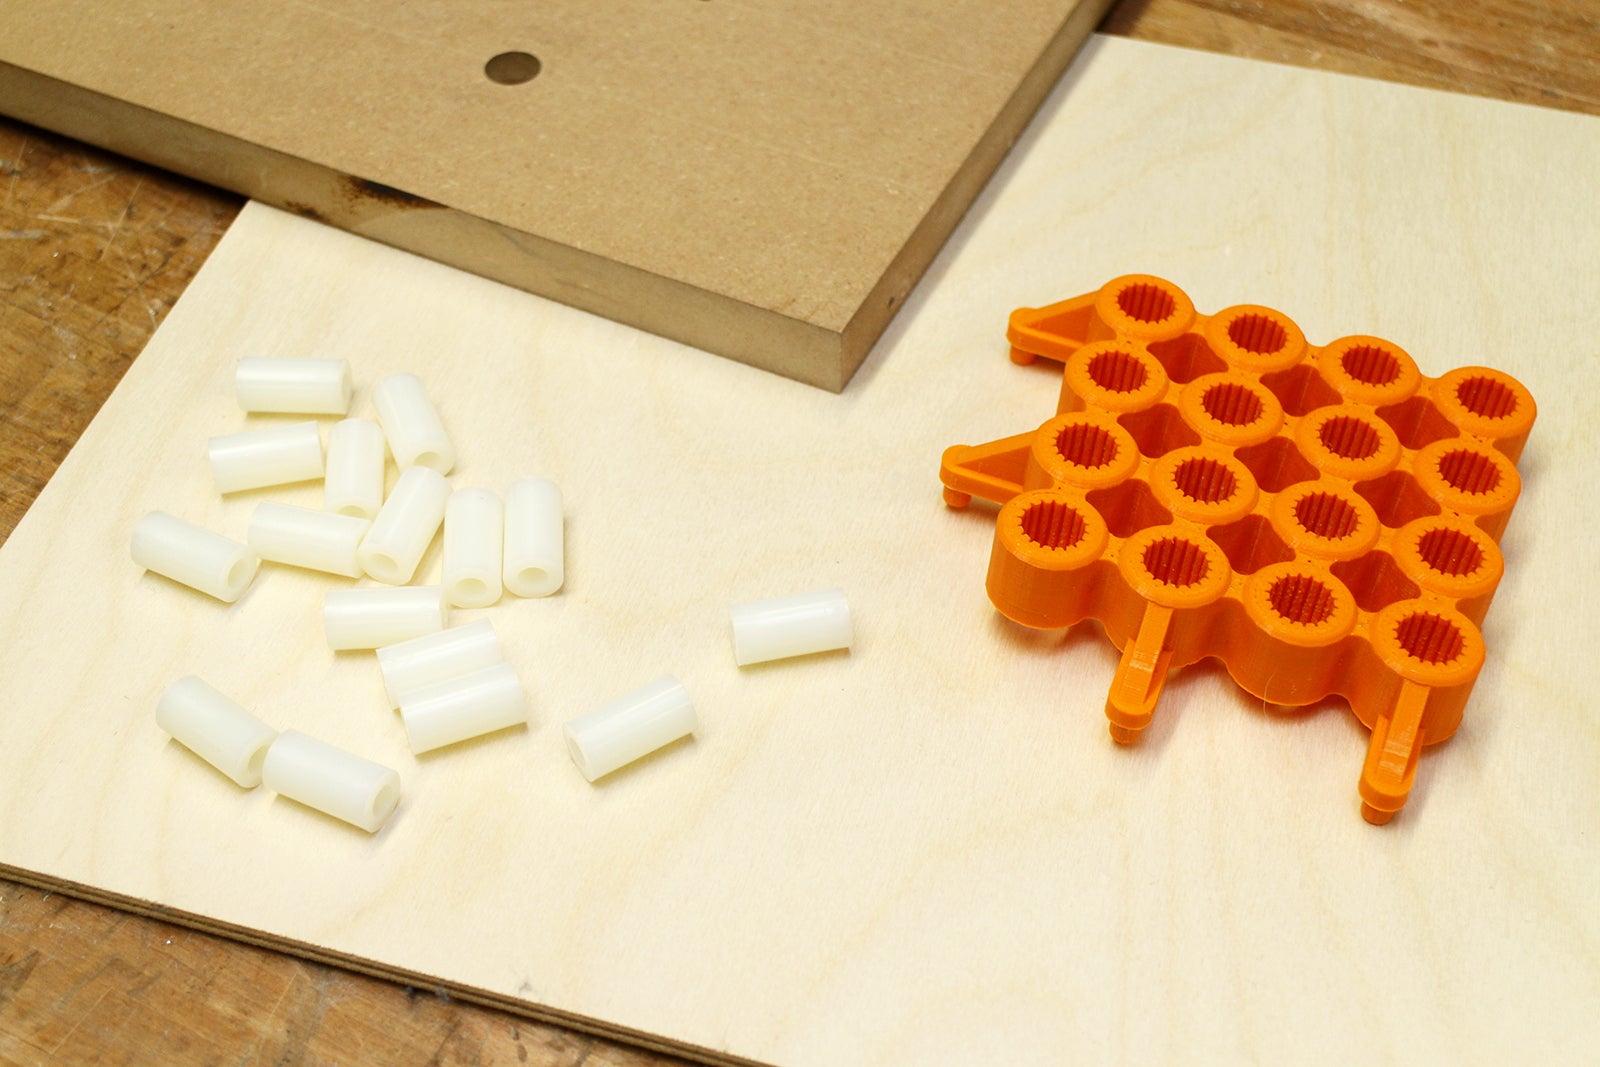
- 1/4" baltic birch plywood (various sizes are available on Amazon)
- 1-2 pieces of scrap 3/4" pressboard or plywood (the same size or larger than your 1/4" pegboard ply)
- 3D printed pegboard jig (see below for details)
- 1 bag of nylon unthreaded spacers
- Sandpaper or sanding block (220 - 400 grit)
NOTES ABOUT PLYWOOD SIZING:
When cutting your plywood to size, you'll want to take 3/16" off each dimension to accommodate for the way the jig works – so that you end up with an equal border all the way around your drilled holes.
Possible board dimensions with the 4x4 hole jig:
- 8 13/16"
- 12 13/16"
- 16 13/16"
- 24 13/16"
- 28 13/16"
For example, the ones I made for this instructable are 12 13/16" x 12 13/16".
MOUNTING MULTIPLE BOARDS TOGETHER:
These custom boards were not designed to be able to 'tile' together, meaning that if you mount two right next to each other, the borders will be too wide to allow for continuous hole use across both boards. If you want to tile them, you'll have to trim the boarders down (after the holes have been drilled) so that they are 1/2" from the center point of the outside holes on the sides that will be touching another board. This will allow for seamless use across the boards.
TOOLS

- Handheld drill*
- Rubber mallet*
- 1/4" drill bit
- (x2) 2 1/2" pieces of 1/4" dowel
- 25/64 drill bit (to clean sawdust out of jig)
- 2 clamps
- Masking tape
*Not pictured.
THE 3D PRINTED JIG
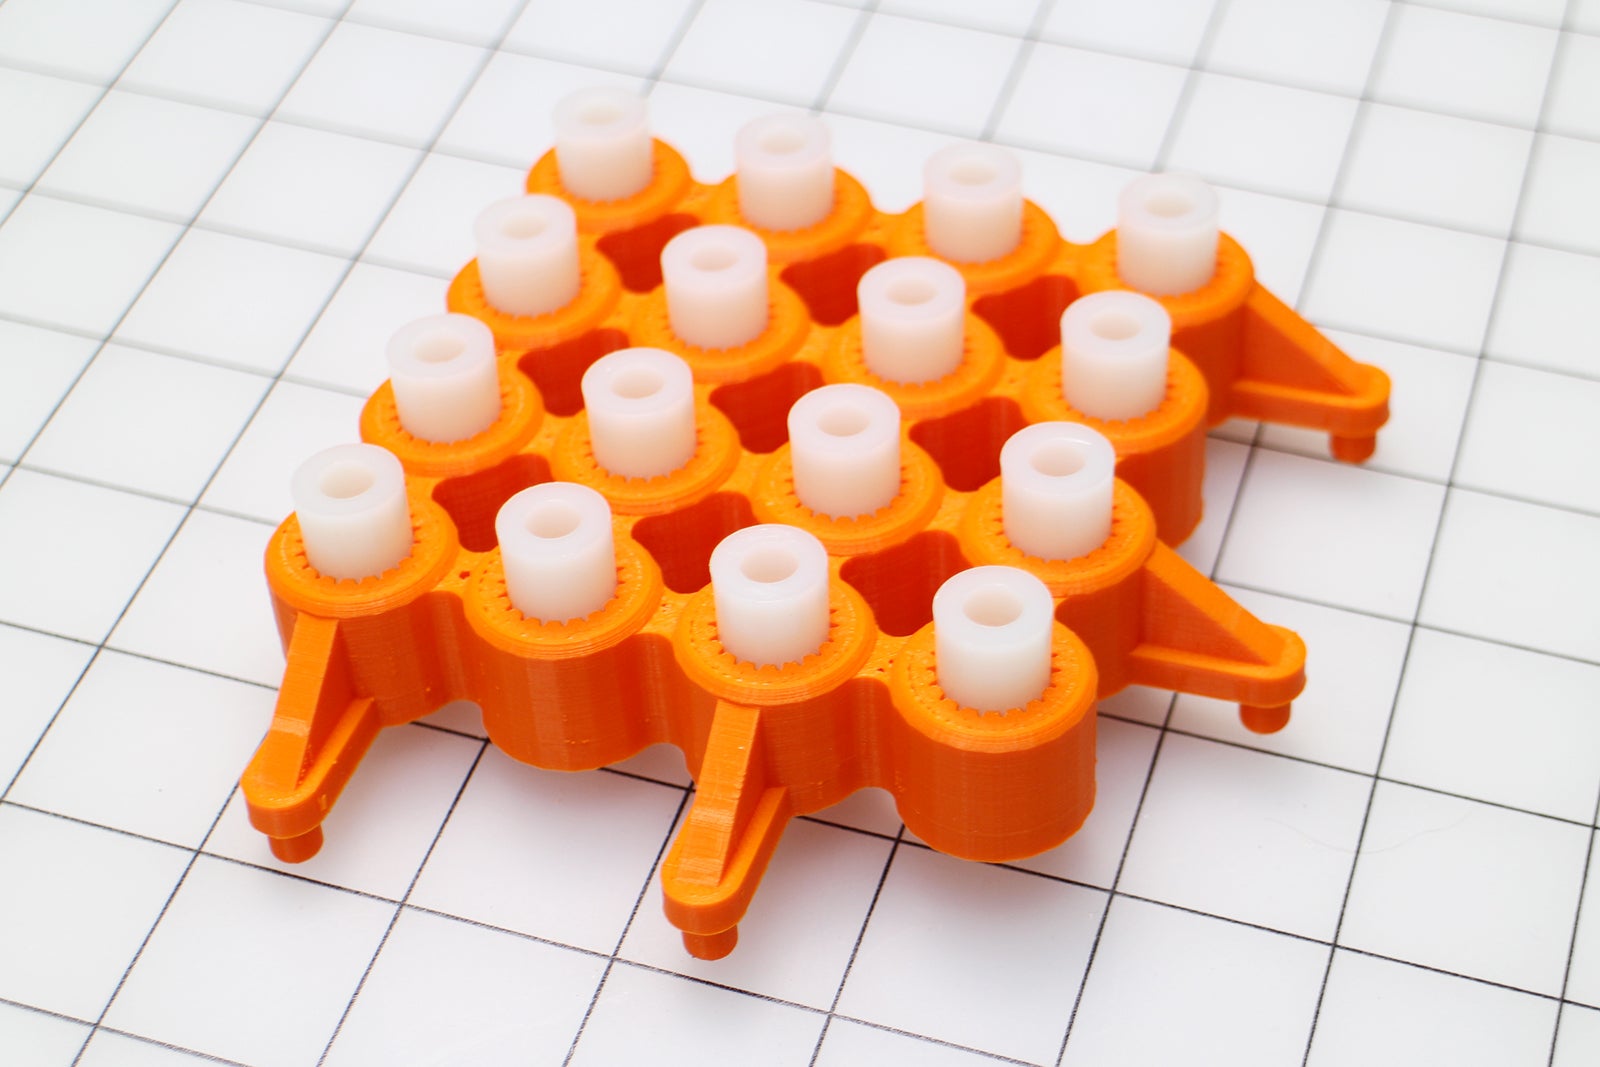

To design/model the jig, I used Tinkercad – a FREE browser-based 3D modeling program by Autodesk. If you've never tried 3D modeling or printing before, but are interested in learning – Tinkercad is a great place to start!
The 3D modeling of the jig was more complicated than I wanted y'all to deal with for this instructable, so I'm just providing you with the STL file (see below) for 3D printing – and will provide assembly instructions in two steps.
If you do have access to a 3D printer, GREAT! Just go ahead and print the thing.
If you DON'T have access to a 3D printer, I recommend downloading and sending the STL file to Voodoo Manufacturing where they will print it for you for $25 (in white PLA) plus shipping.
NOTE: If you have access to a 3D printer, but have never 3D printed anything before and aren't sure how to get started, check out my co-worker JON-A-TRON's Easy 3D Printing Class. It covers everything you need to know to print your own pegboard jig!
STL Jig File for 3D Printing
Downloads
Assembling the Jig
Now that you've printed (or received in the mail) your jig parts, it's time to put them together!

You should have 5 parts total:
- (x1) Main jig body
- (x4) Small pegs

And you'll need 16 of the nylon spacers.


With the bottom (flat) side down on a sturdy work surface, use the rubber mallet to gently force a spacer into each hole of the jig, like pictured above.

Check to make sure that each spacer has been hammered all the way in!
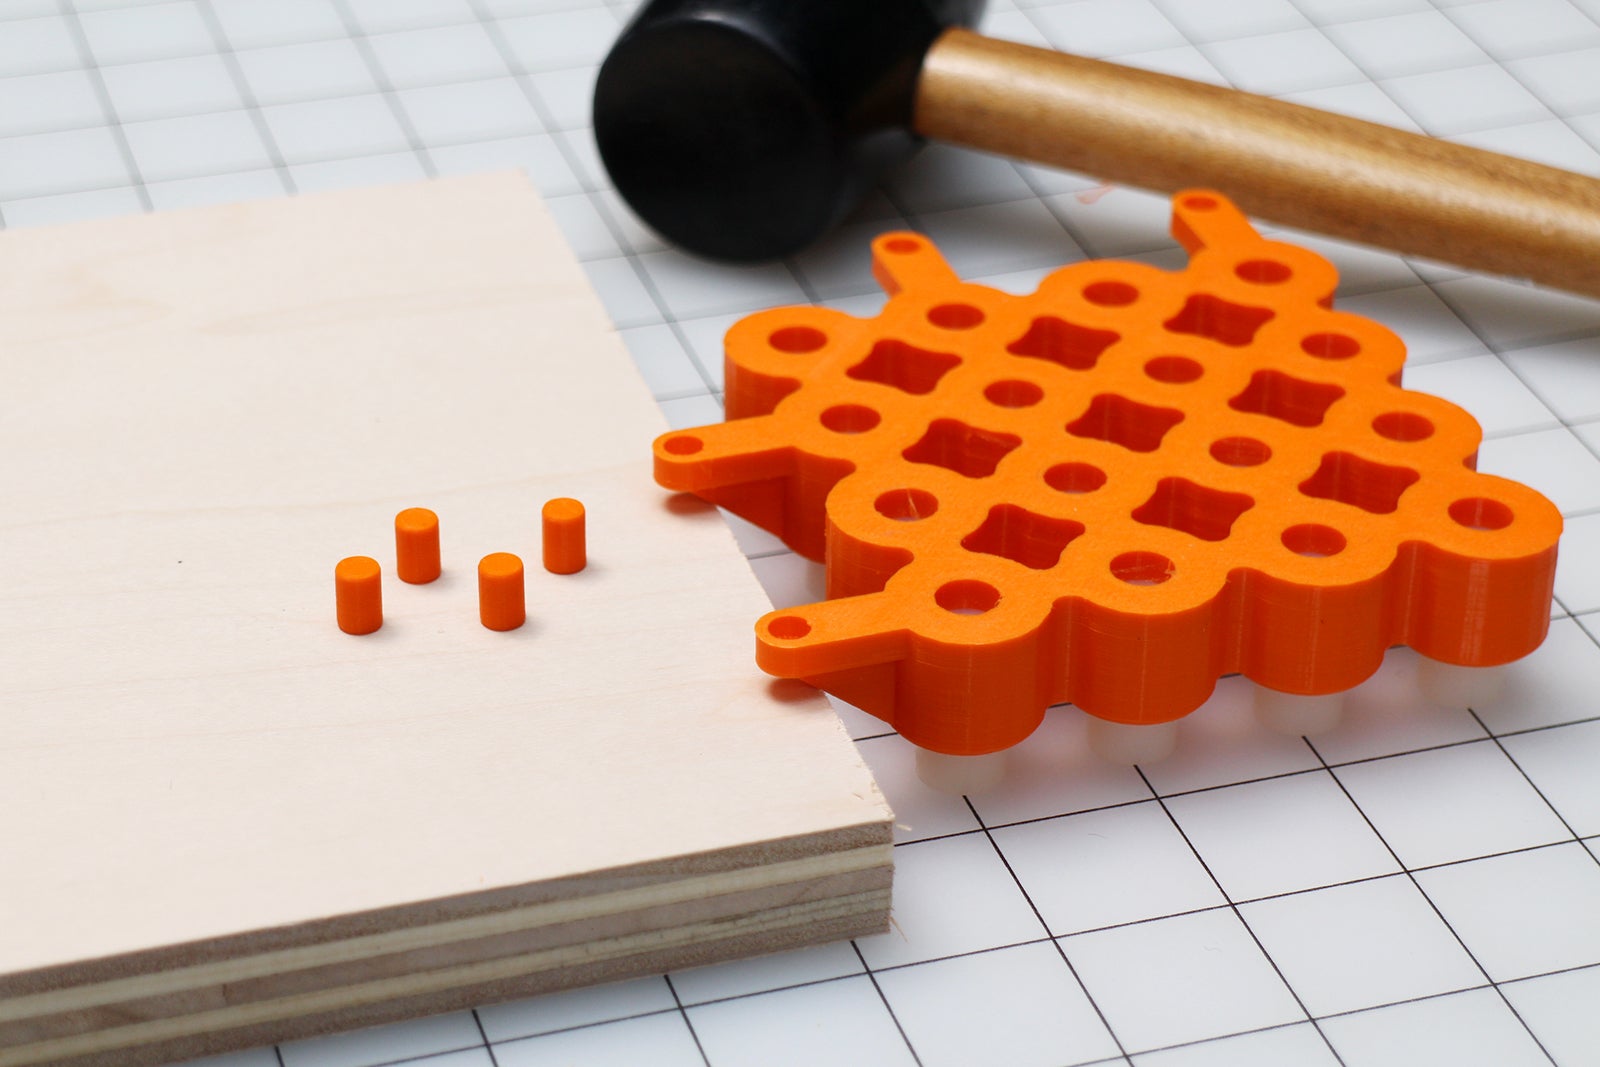
Next, turn the jig upside down so that the 4 holes the pegs will go into are facing upwards.

Rest one side of the jig – with two peg 'wings' – on the edge of the 3/4" scrap wood to support the wings while hammering in the pegs.

Gently hammer a peg into each peg hole.
TIP: The pegs fit pretty snuggly into the holes, but if you have any 5 minute epoxy or e6000, it wouldn't hurt to add a little dab into each hole before hammering in the pegs.

Make sure to check that the pegs are sitting straight up and down, and not at an angle.

Voila! You are now ready to make your custom pegboard!!
REPLACING THE NYLON SPACERS
It's a good idea to replace the spacers after a few uses, as the drill bit will wear down the inside, creating more space, which makes for sloppier, less 'straight up and down' drilling. This affects the accuracy of the hole placements.

To do this, you can either use pliers or channel locks to wiggle the spacers out, OR

You can use a wide flat head screwdriver and hammer to tap out spacers from below.
Using the Jig
Using the jig is the easiest thing!! Here's the goods on how it's done:

- Put down the scrap piece(s) of wood on a sturdy work surface and clamp the 1/4" peg plywood , along with the scrap wood, to the surface. Put both clamps on the right side, like pictured, to start.

- Place the jig in the lower left corner of the 1/4" ply.
- Press it inwards diagonally, until the bottom two pegs are snug up against the edge of the board closest to you and the left two pegs are pressing against the left edge of the board.

- Place the 1/4" drill bit into the handheld drill.
- Use masking tape to mark how deep you should drill. This visual guide will help keep you from drilling through your scrap wood into the work surface.

- Place your left hand on the jig and press it down and diagonally in towards the center of the 1/4" board – so the pegs are firmly pressed up against the sides of the board.
- Drill the top right hole, keeping the drill bit as straight up and down as possible. (The nylon spacer will guide the bit, but it's good to not put too much pressure on the inside of the spacer, as to not drill away the nylon material.)

- Stop drilling when you reach the bottom of the tape guide.

- Remove the drill bit – and while holding the jig in the exact same place – press one of the two 1/4" dowel pieces into the hole that you just drilled. This secures the jig in place.

- Next, drill the bottom left hole.

- Use the second dowel piece to further secure the jig in place .

- Drill the remaining holes.
- Remove the dowel pieces.
- Remove the jig.

- You will get some build up of sawdust in the opening of the holes on the underside of the jig.
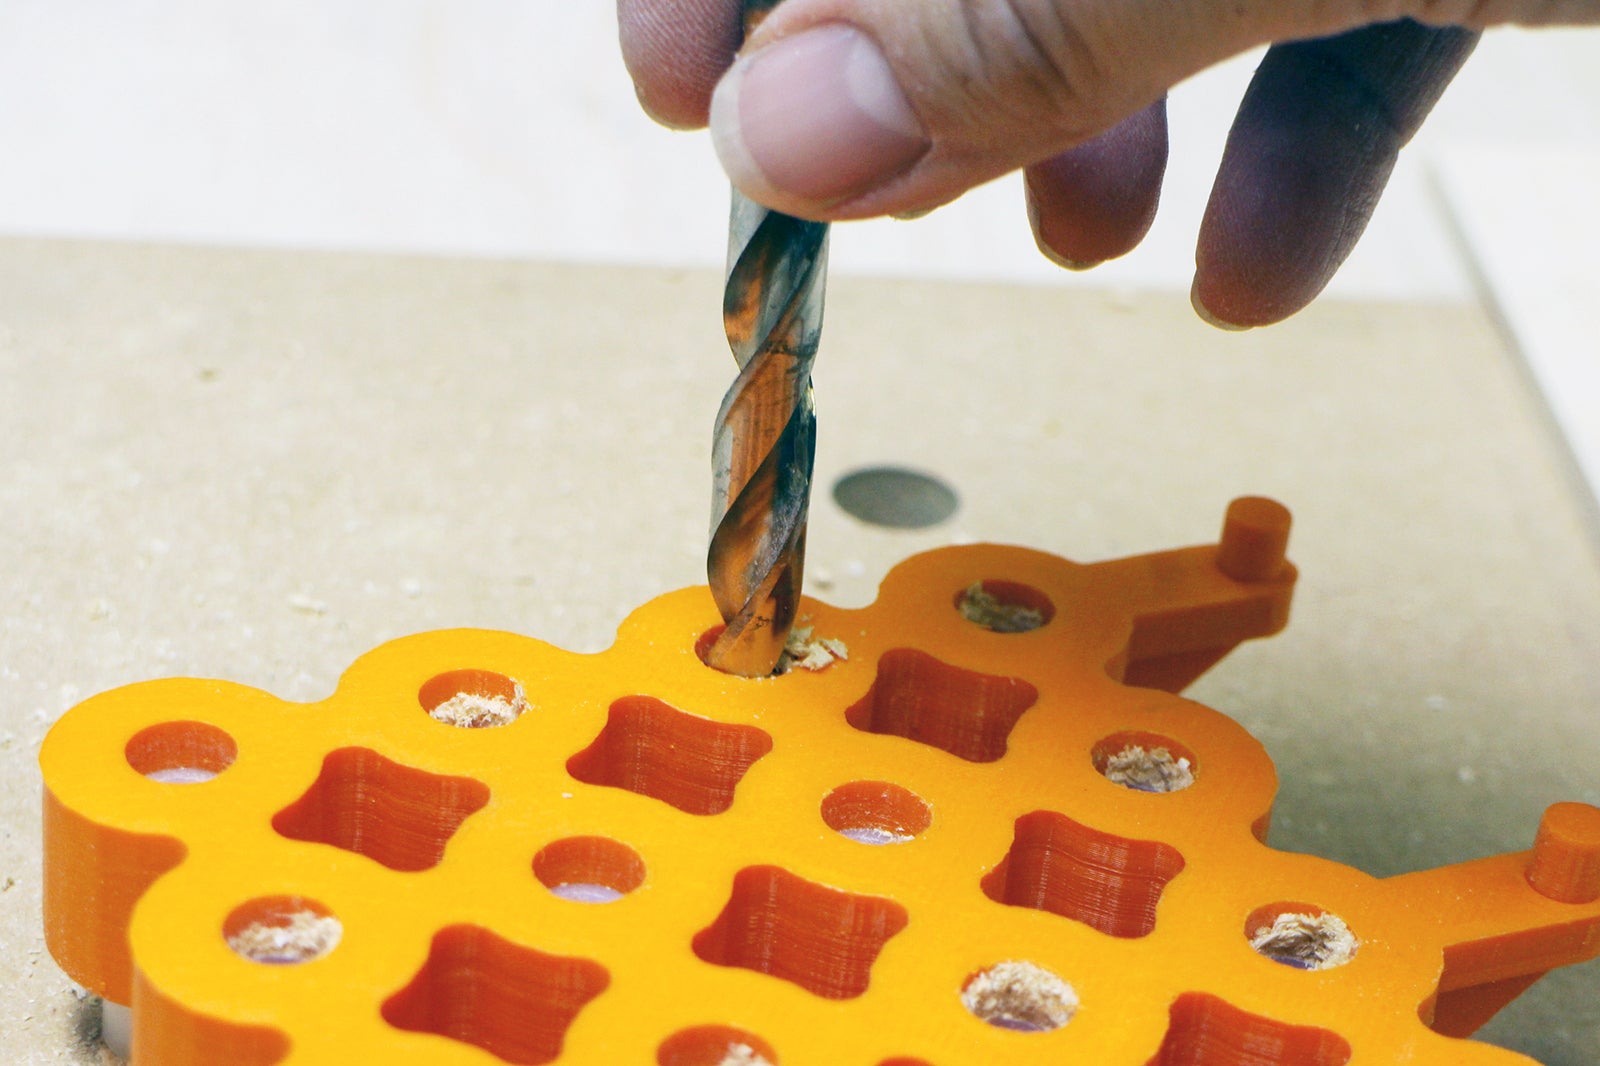
- Use compressed air OR the 25/64" drill bit to remove it so that the build up doesn't become so much that the jig won't sit flat on the plywood.

- Undo the left clamp and move it to the right corner.
- Clamp the right corner down.

- Place the left two pegs of the jig into the top right and third down from top right holes that you just drilled. The bottom two pegs should be pressed up against the bottom edge of the plywood.

- Repeat the above drilling + top right dowel steps. (No need for the bottom left dowel.)

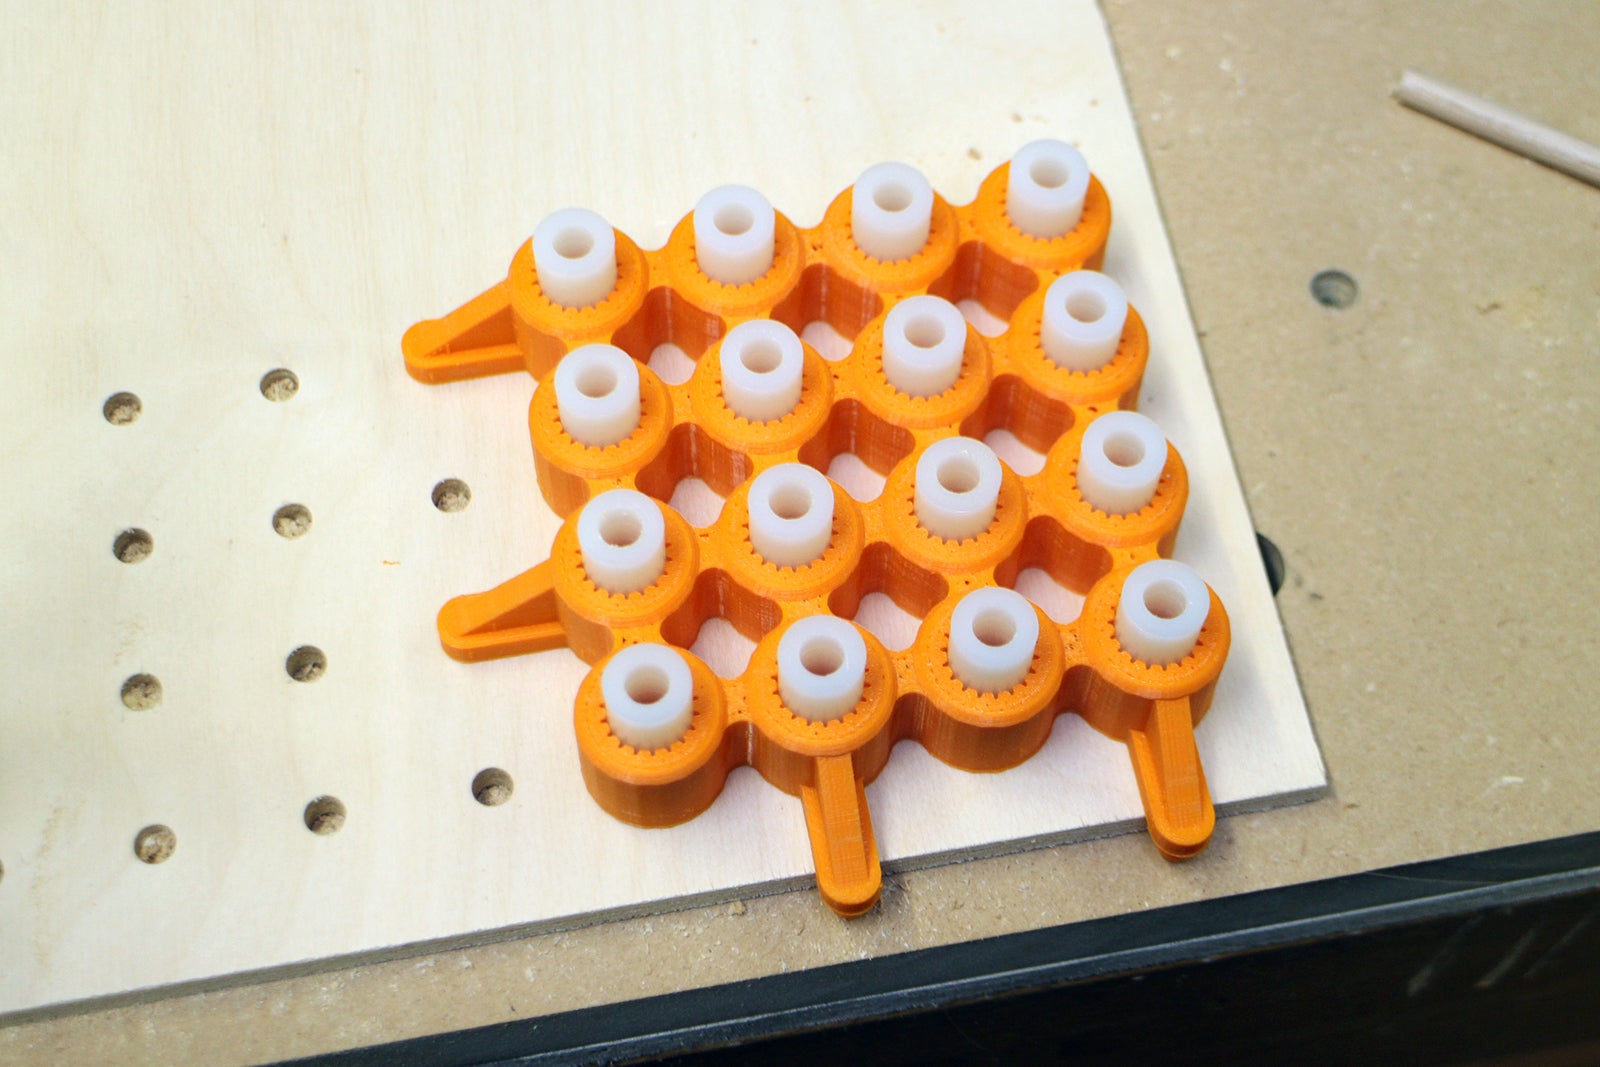
- Move the right corner clamp to the left side and repeat the drilling steps for the bottom left corner.
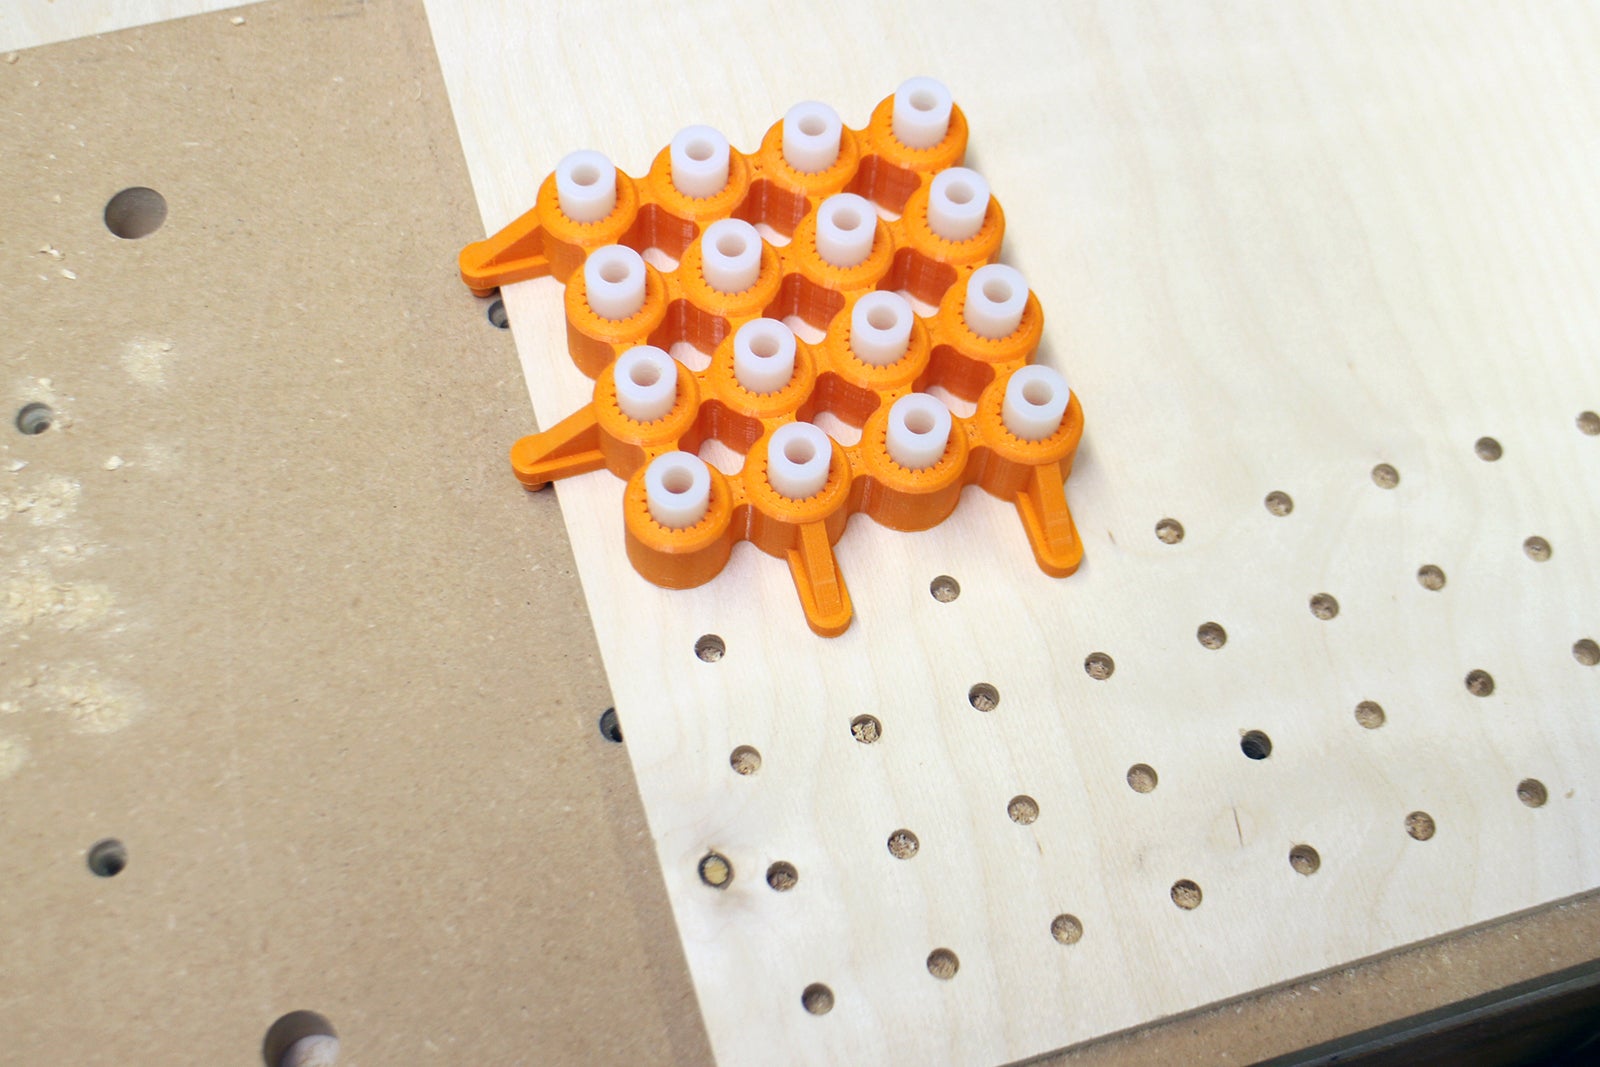

- Next up is the middle row! The left two pegs should press up against the left edge of the plywood while the bottom two pegs go into the 2nd and 4th in holes, like pictured.

- Rinse and repeat for the rest of the board!

And... ta da!! You now have a house-worthy, custom pegboard to organize all the things!!

Oh wait! One last step: use a sanding block with 220 - 400 grit sandpaper to remove any splintery bits from both sides of the board.
Ok, NOW you're ready to hang and use your pegboard!
Customizing the Look of Your Board
There are tons of options for ways to personalize your boards. You can use:
- Paint
- Wood stain
- Paper
- Etc.!
I recommend applying any finish, including paper, BEFORE drilling the holes. Otherwise you may get finish material into the holes and that will make the inside diameters of the holes smaller.
Below I show you how to use paper to cover your pegboard.

You'll need:
- 1/4" plywood, cut to size
- Decorative paper
- Permanent spray adhesive
- Exacto knife or box cutter

In a well ventilated area, and on a scrap piece of newsprint or cardboard, spray the back of the paper with the adhesive.

Place the plywood onto the sprayed paper and press it down into place.
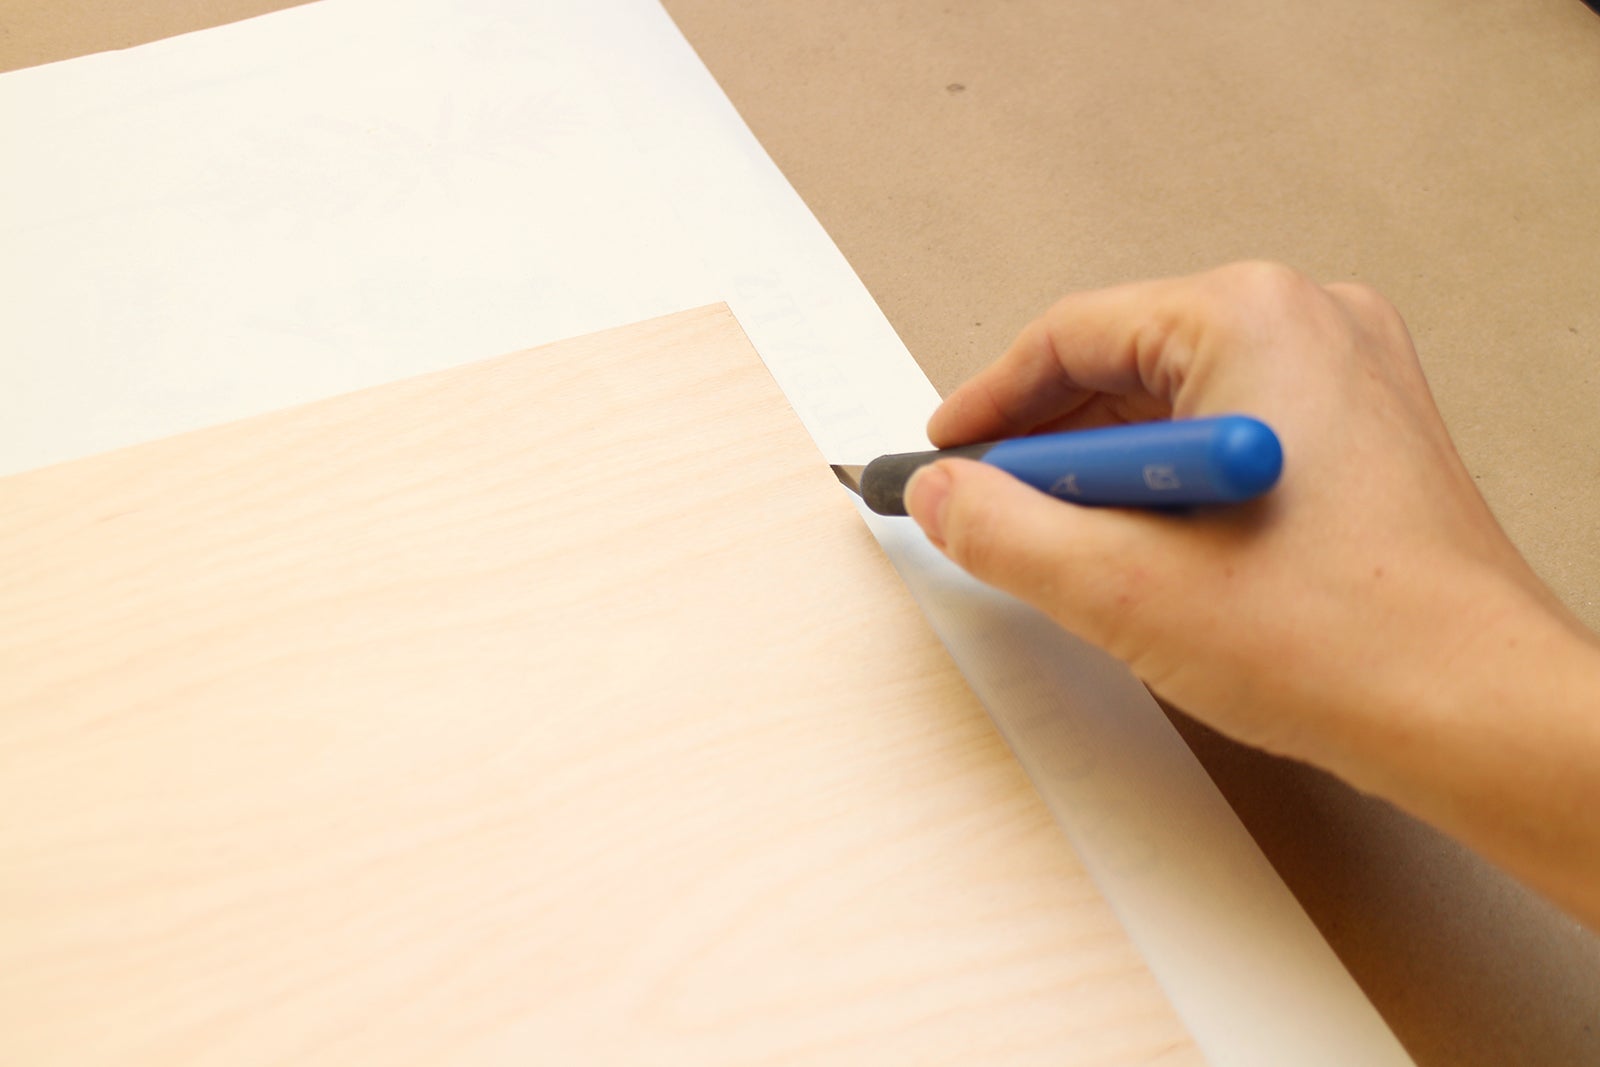
Using the edge of the plywood as a straight edge, use a sharp blade to cut the paper to the size of the wood.

Smooth the paper into place using the edge of a credit card.

That's it! You're now ready to drill holes.

Be sure to clamp gently as to not mar the paper's surface.
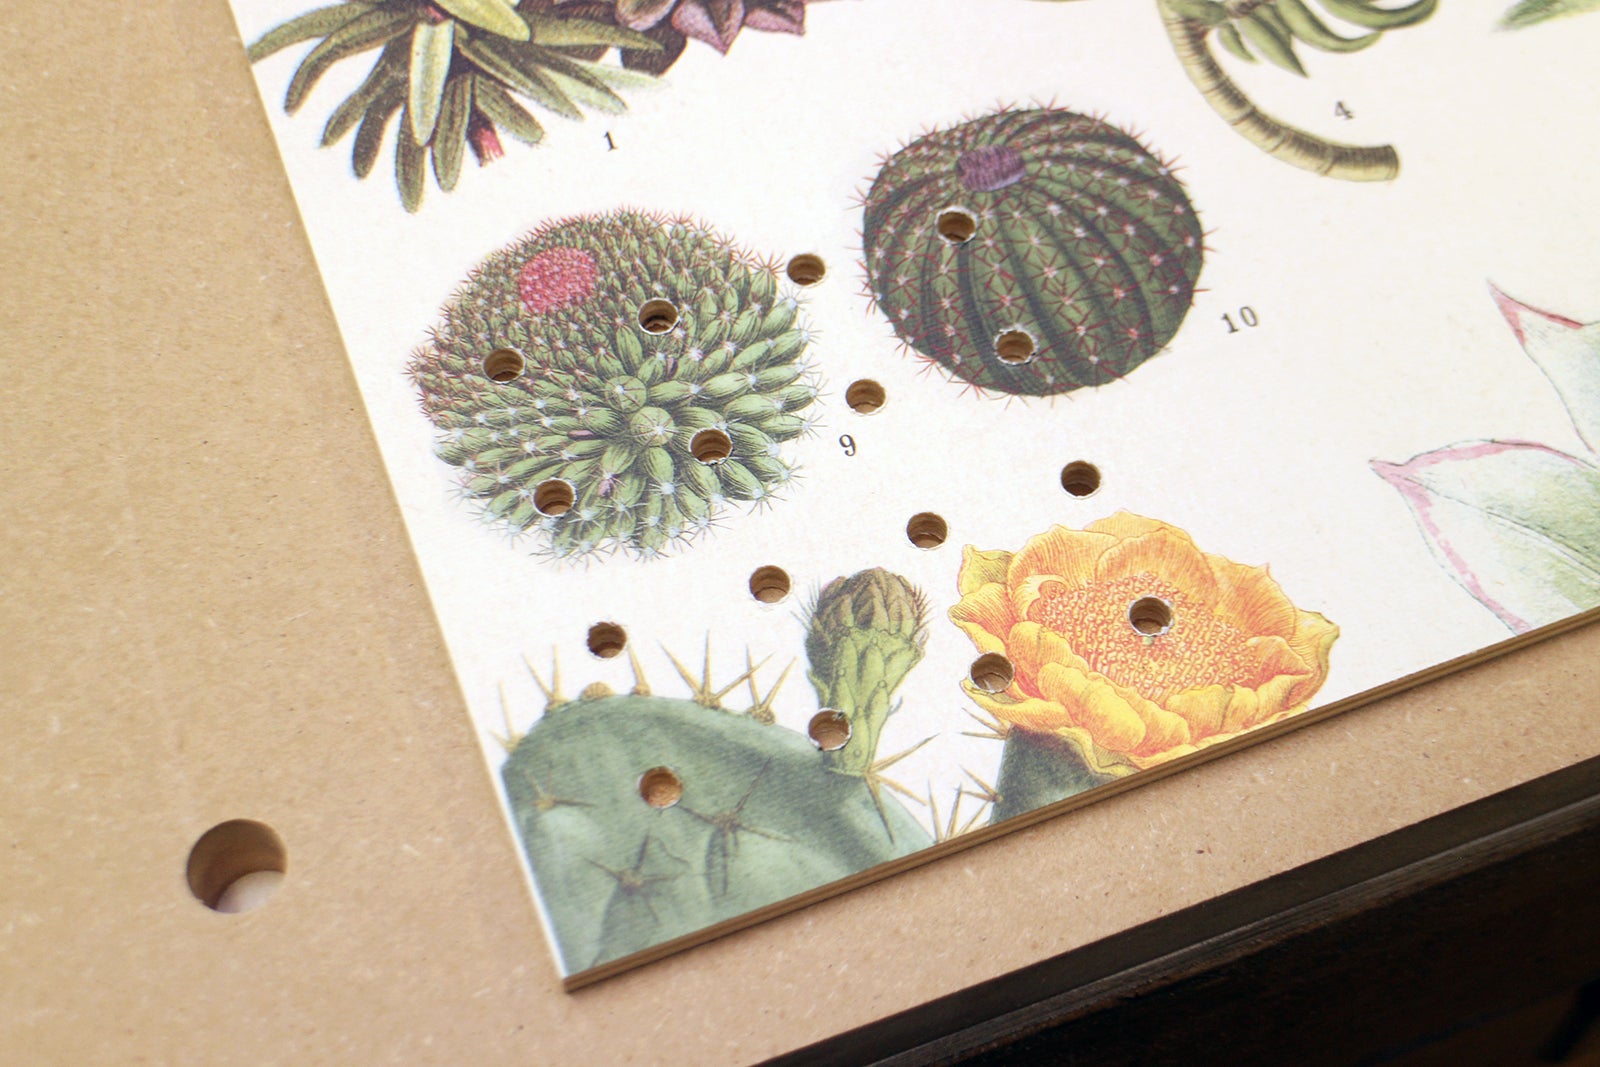
There will be a small edge of 'tear' around the drilled holes. I tried different techniques of removing them, but in the end decided that it didn't look bad enough to worry about.
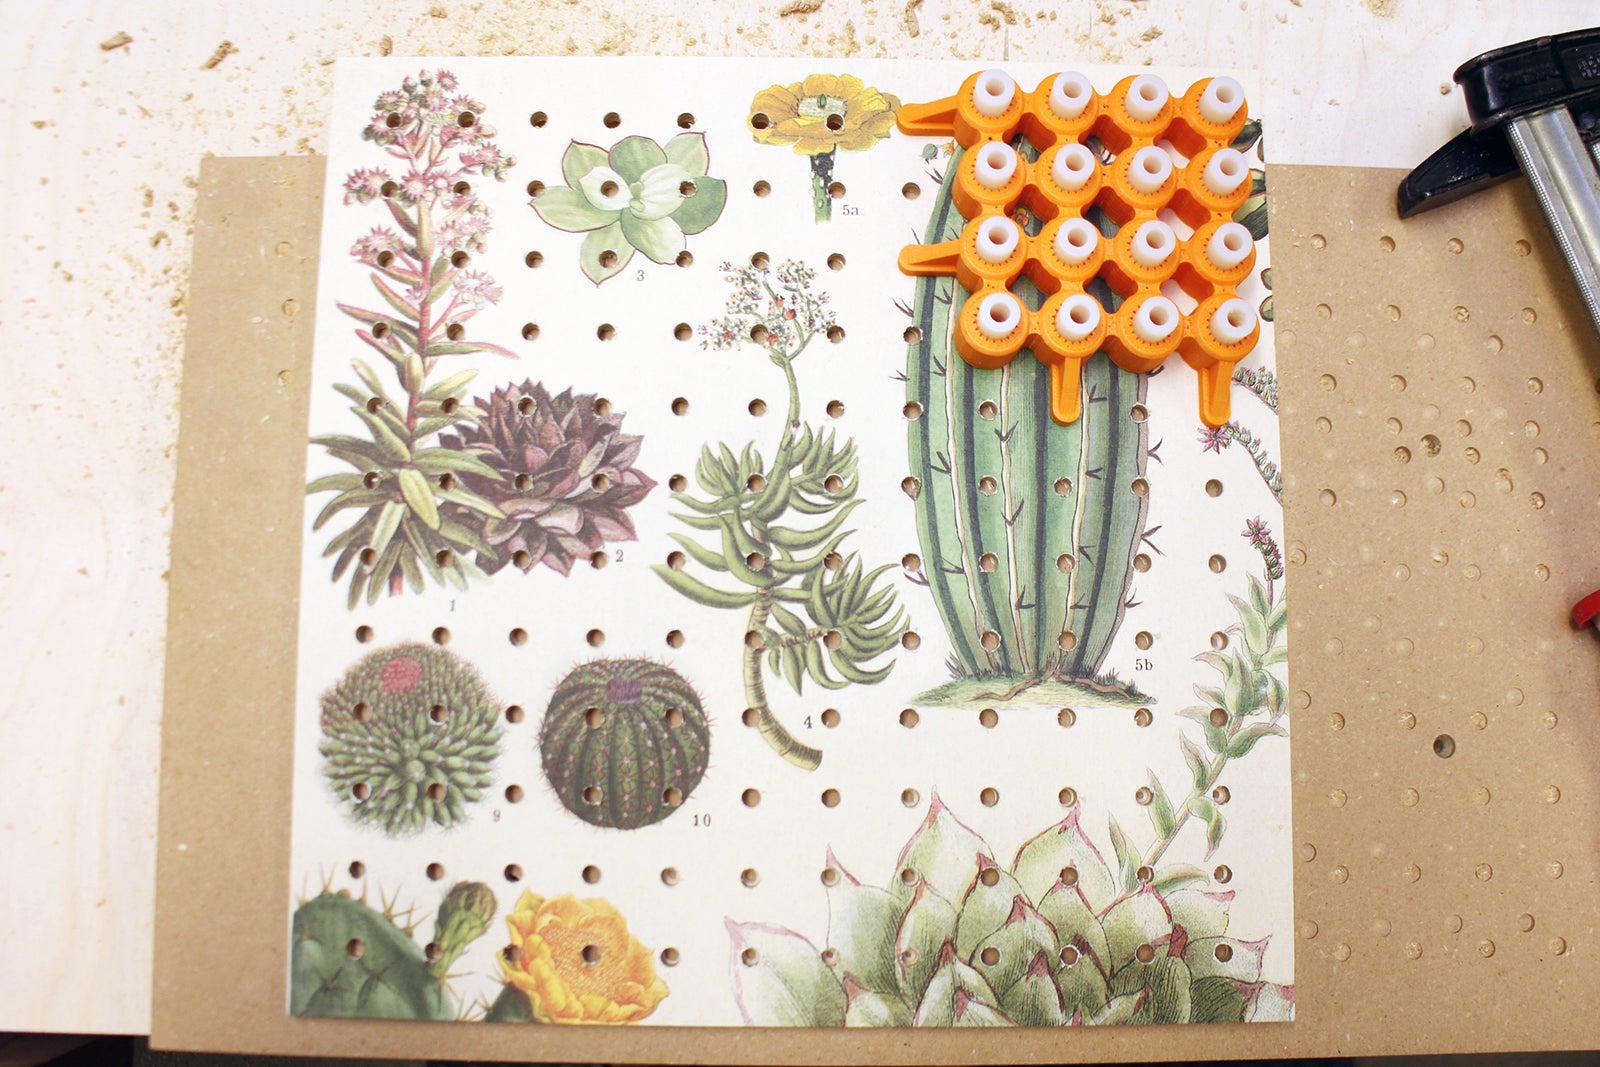
Follow the earlier hole drilling directions to make your pegboard – and you're done and decorated!
Another fun idea: Spray your board with chalk paint and only drill holes in half of the board, so you can use the other half to write notes! The possibilities are endless!!!
Hanging Your Pegboard

To hang your pegboard, you'll need a pegboard hanging kit.
Follow the instructions on the packaging.

FYI: Regular pegboard accessories will work with your new pegboard, BUT I'll be showing you how to make some cool 3D printed accessories so you can COMPLETELY customize your tidy world. Stay tuned for that. I'll post the link here when that 'ible is ready!
Happy making!
Paige