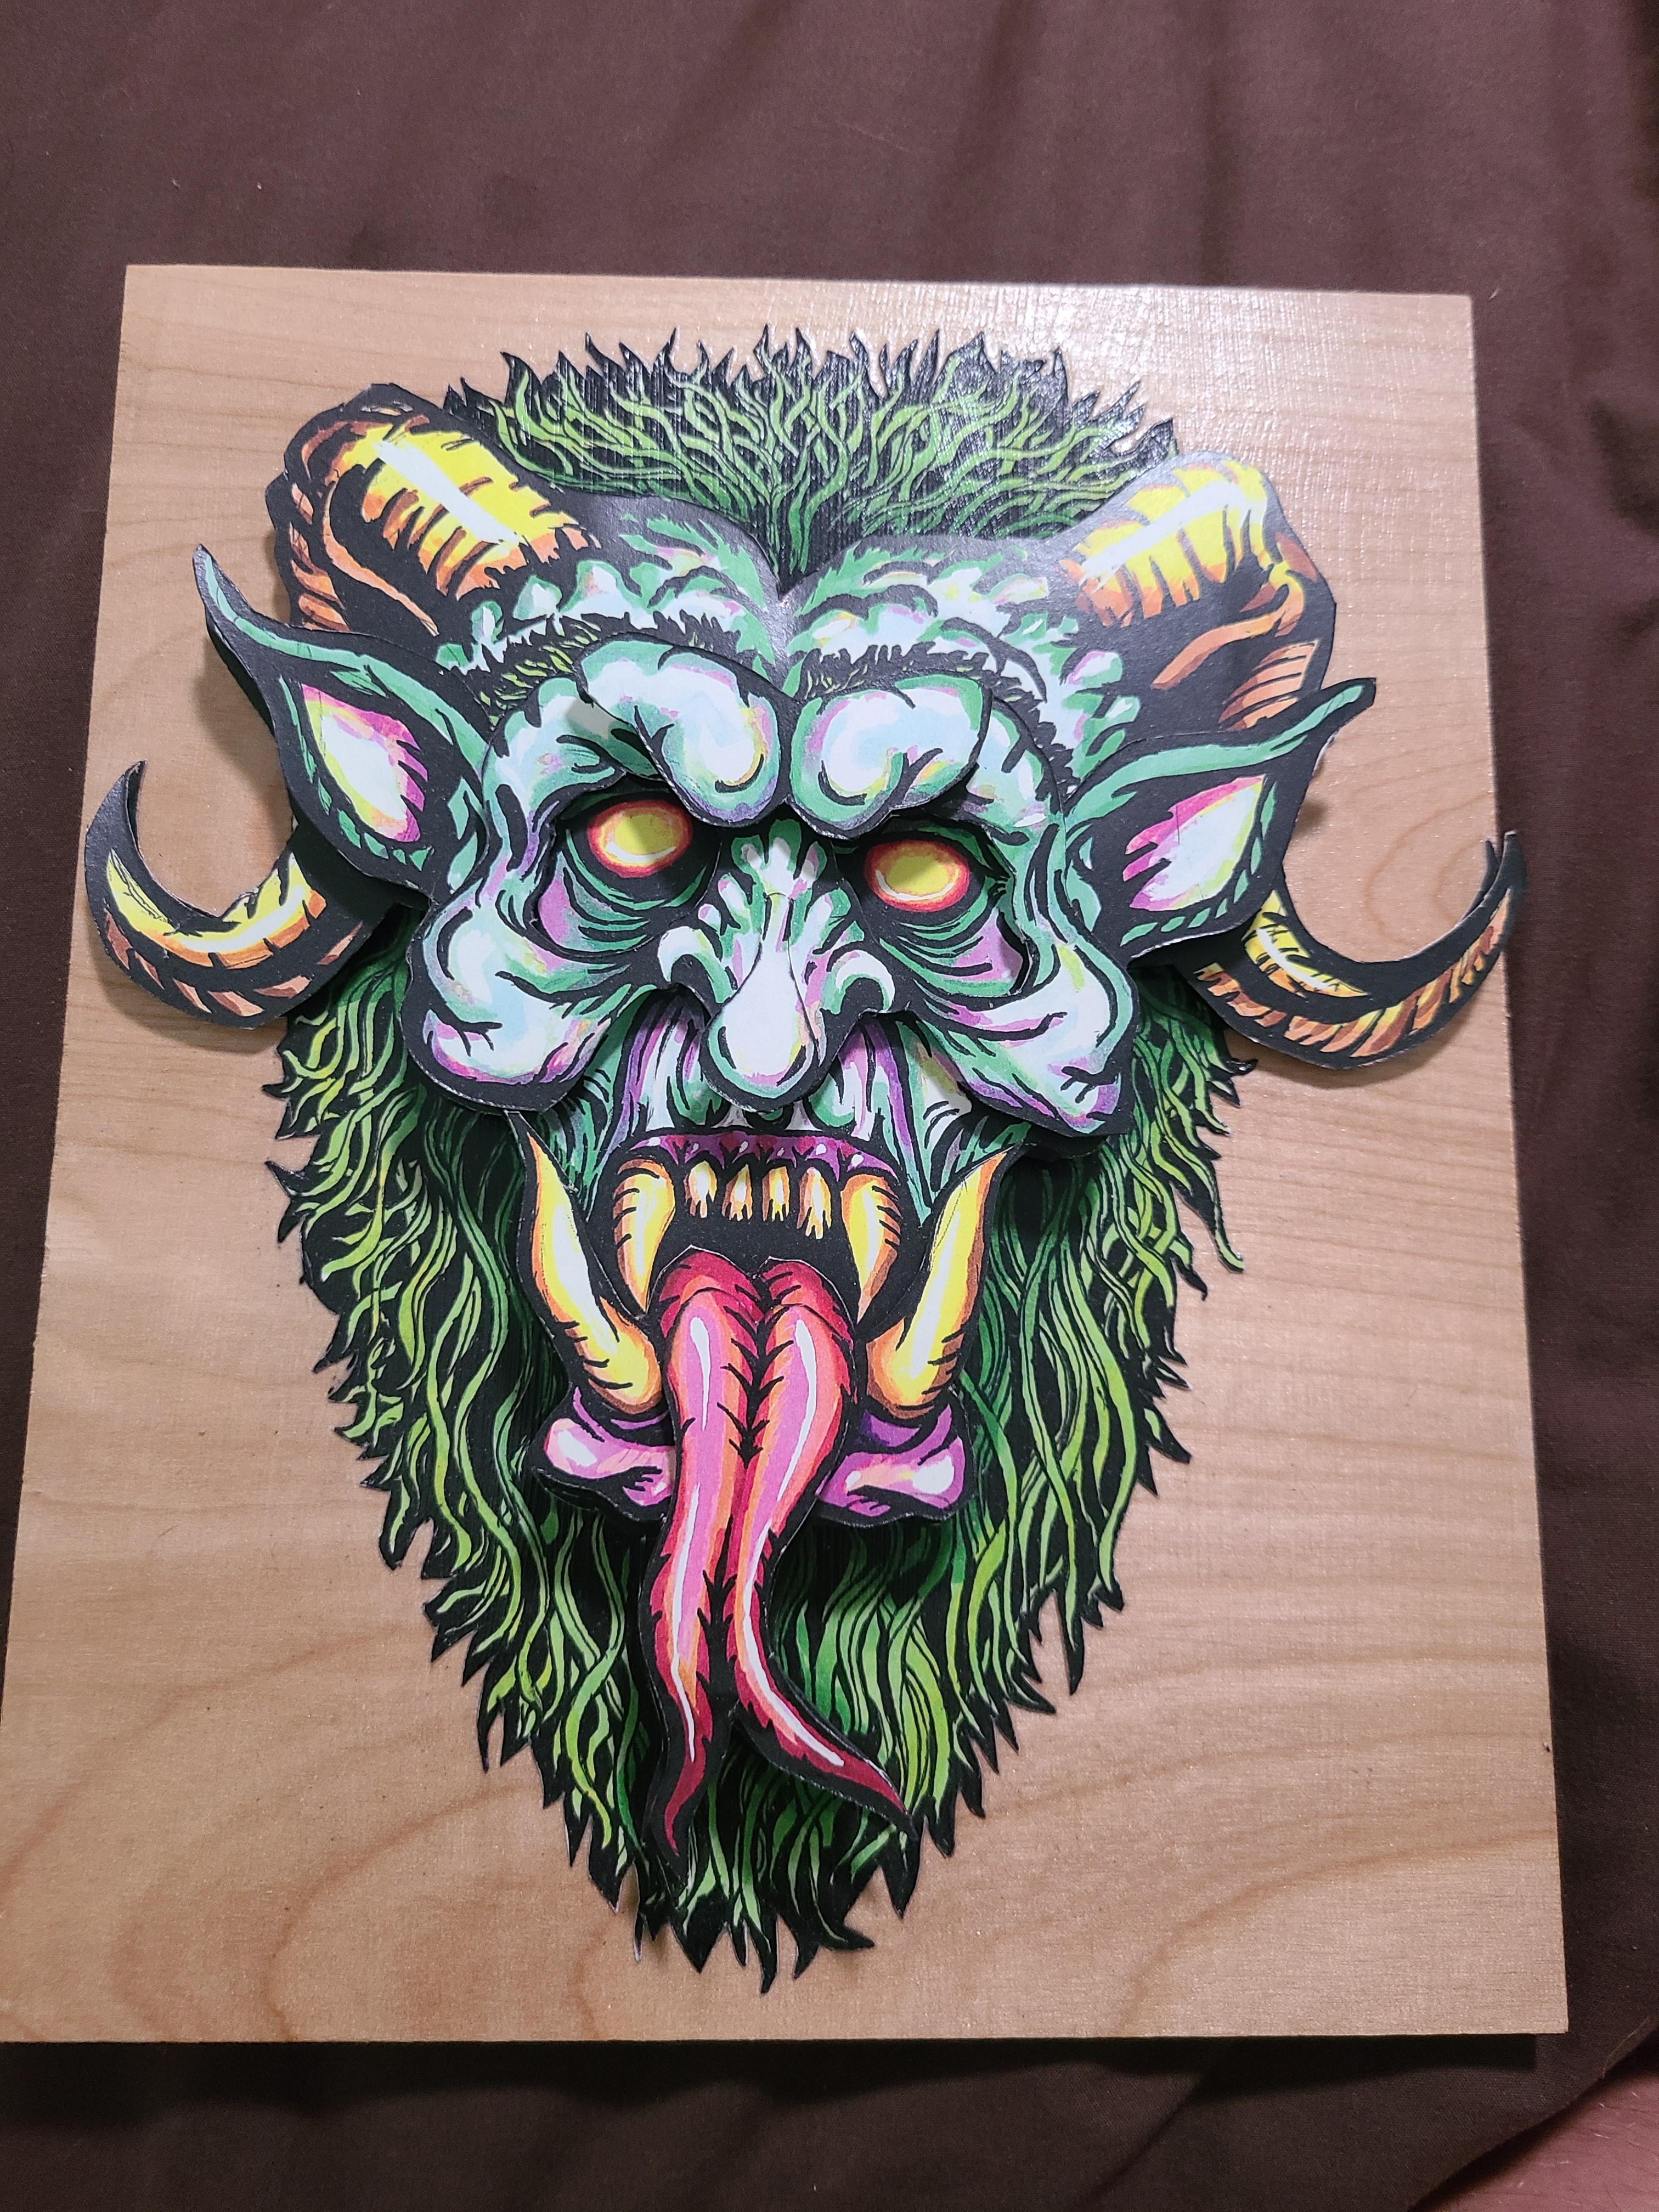
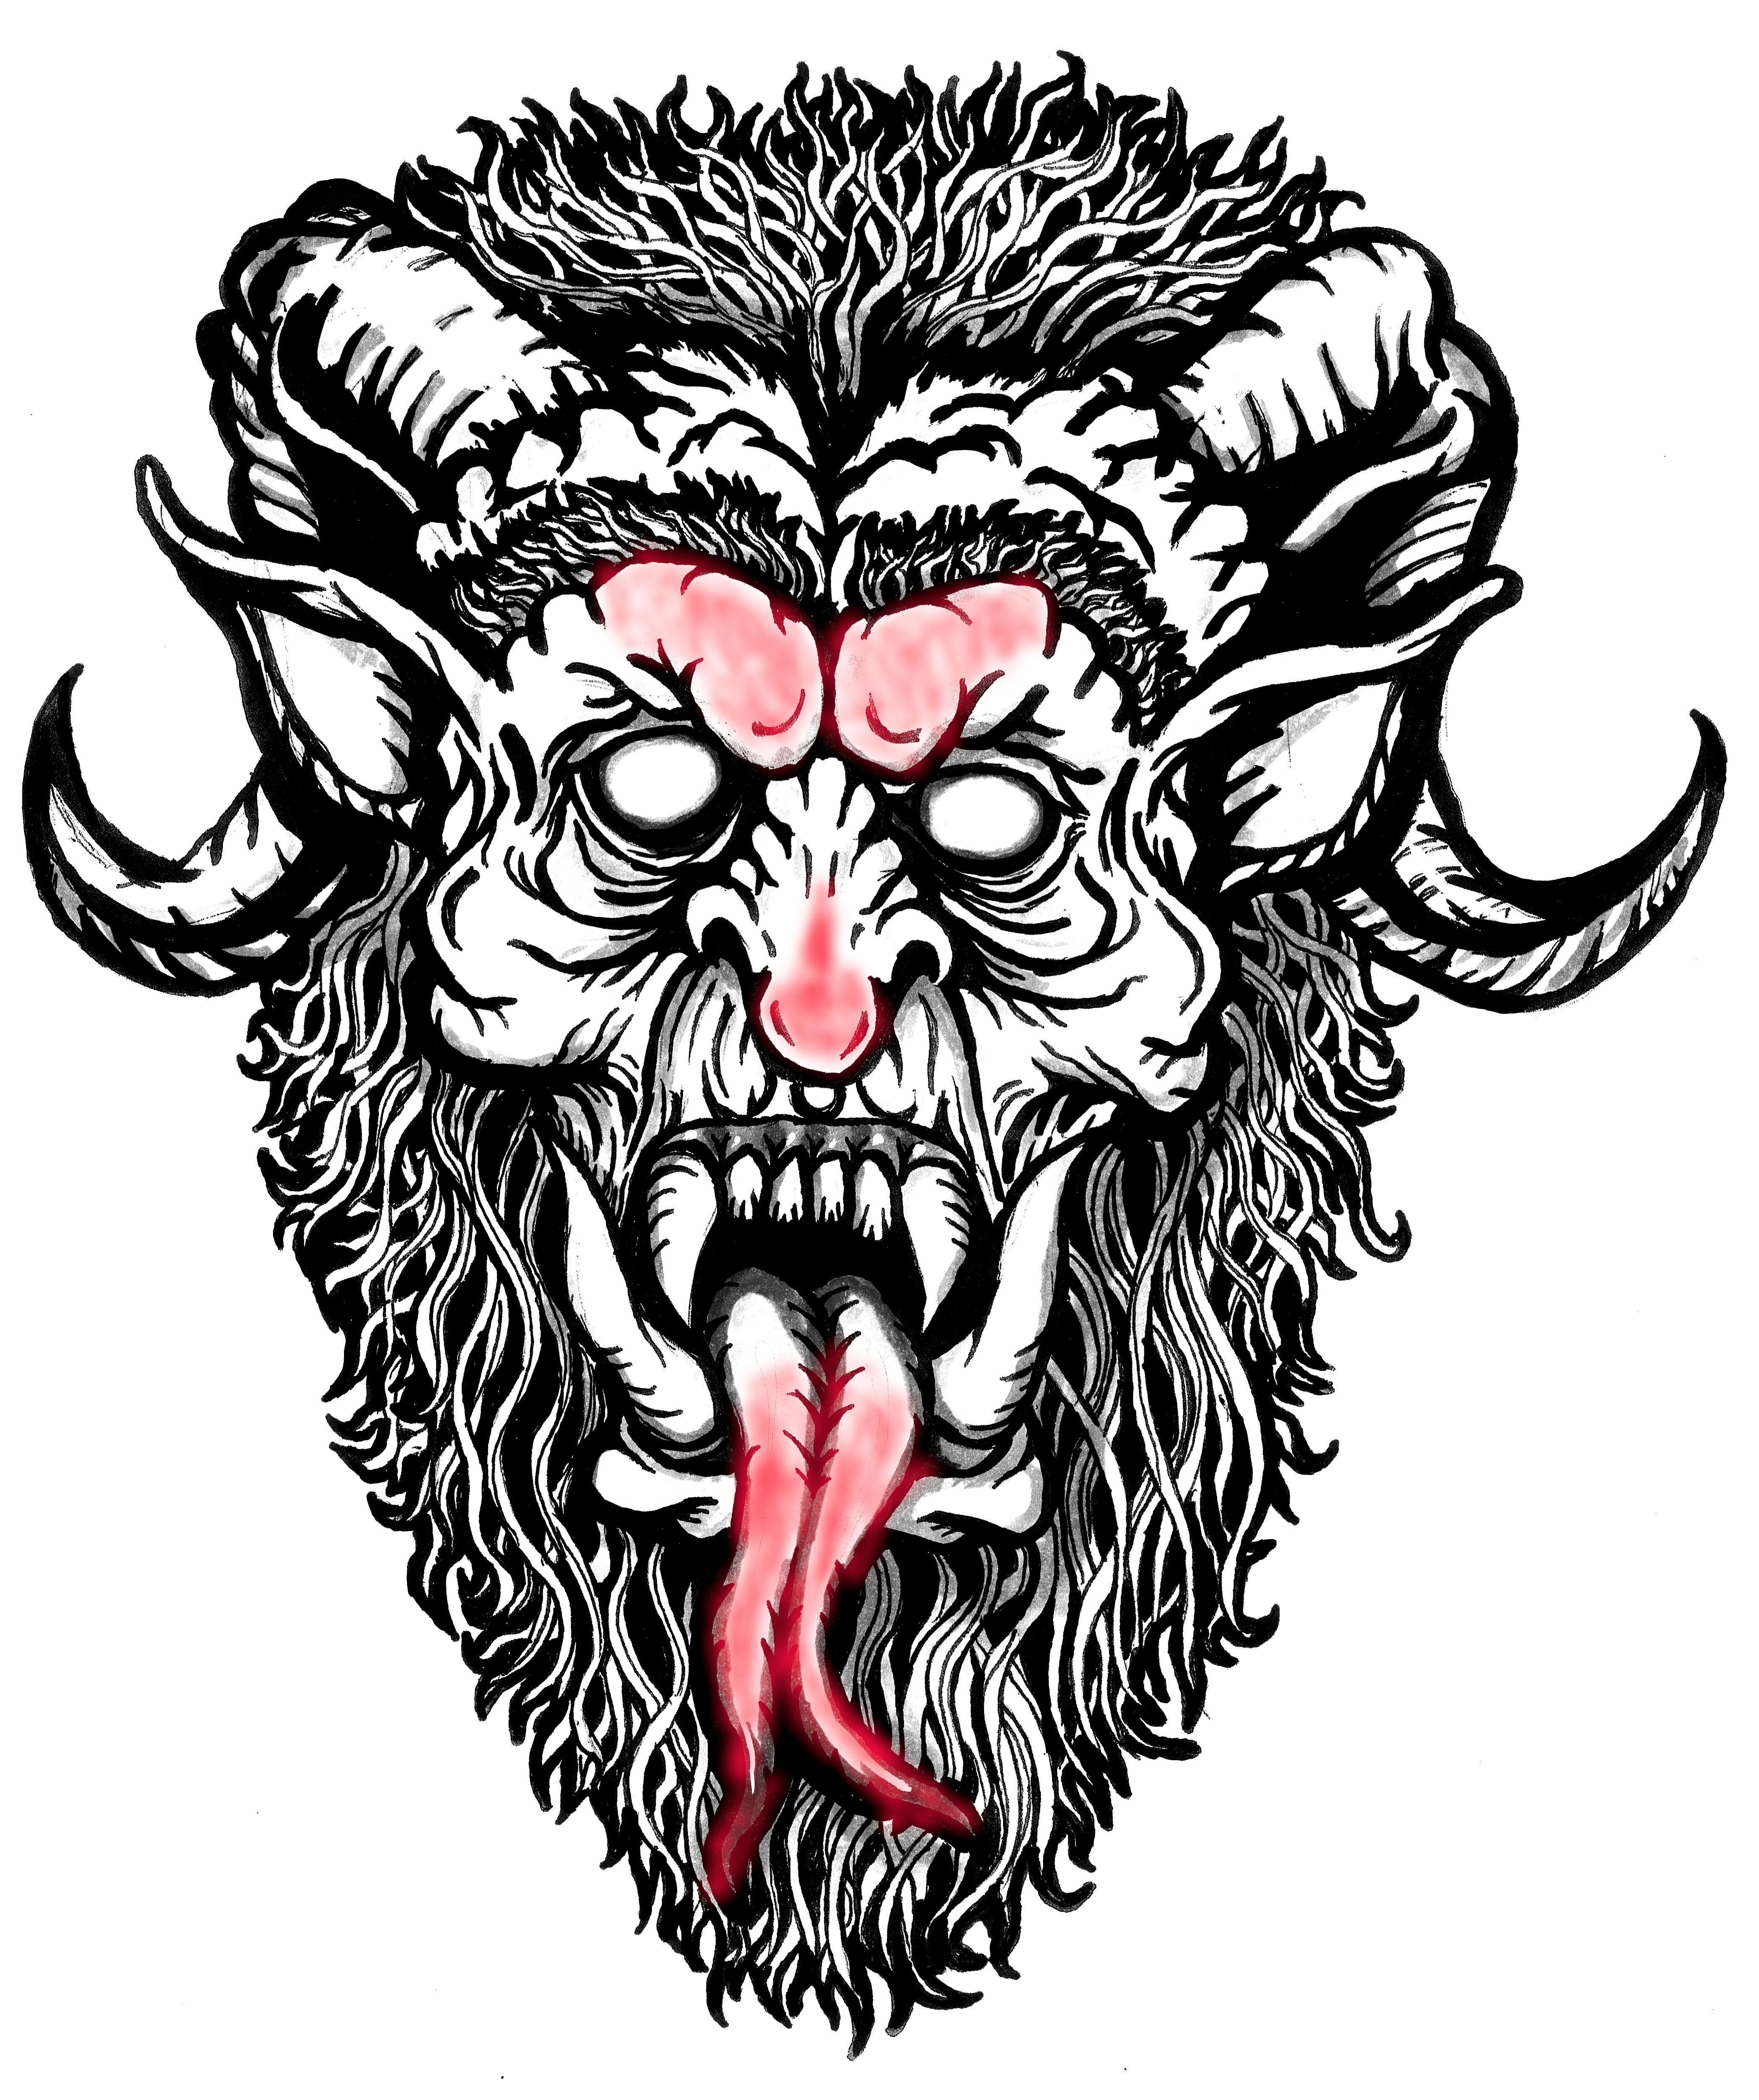
Make 3d Cardstock Picture Art Like This Krampus Face
474 Views, 4 Favorites, 0 Comments
Make 3d Cardstock Picture Art Like This Krampus Face

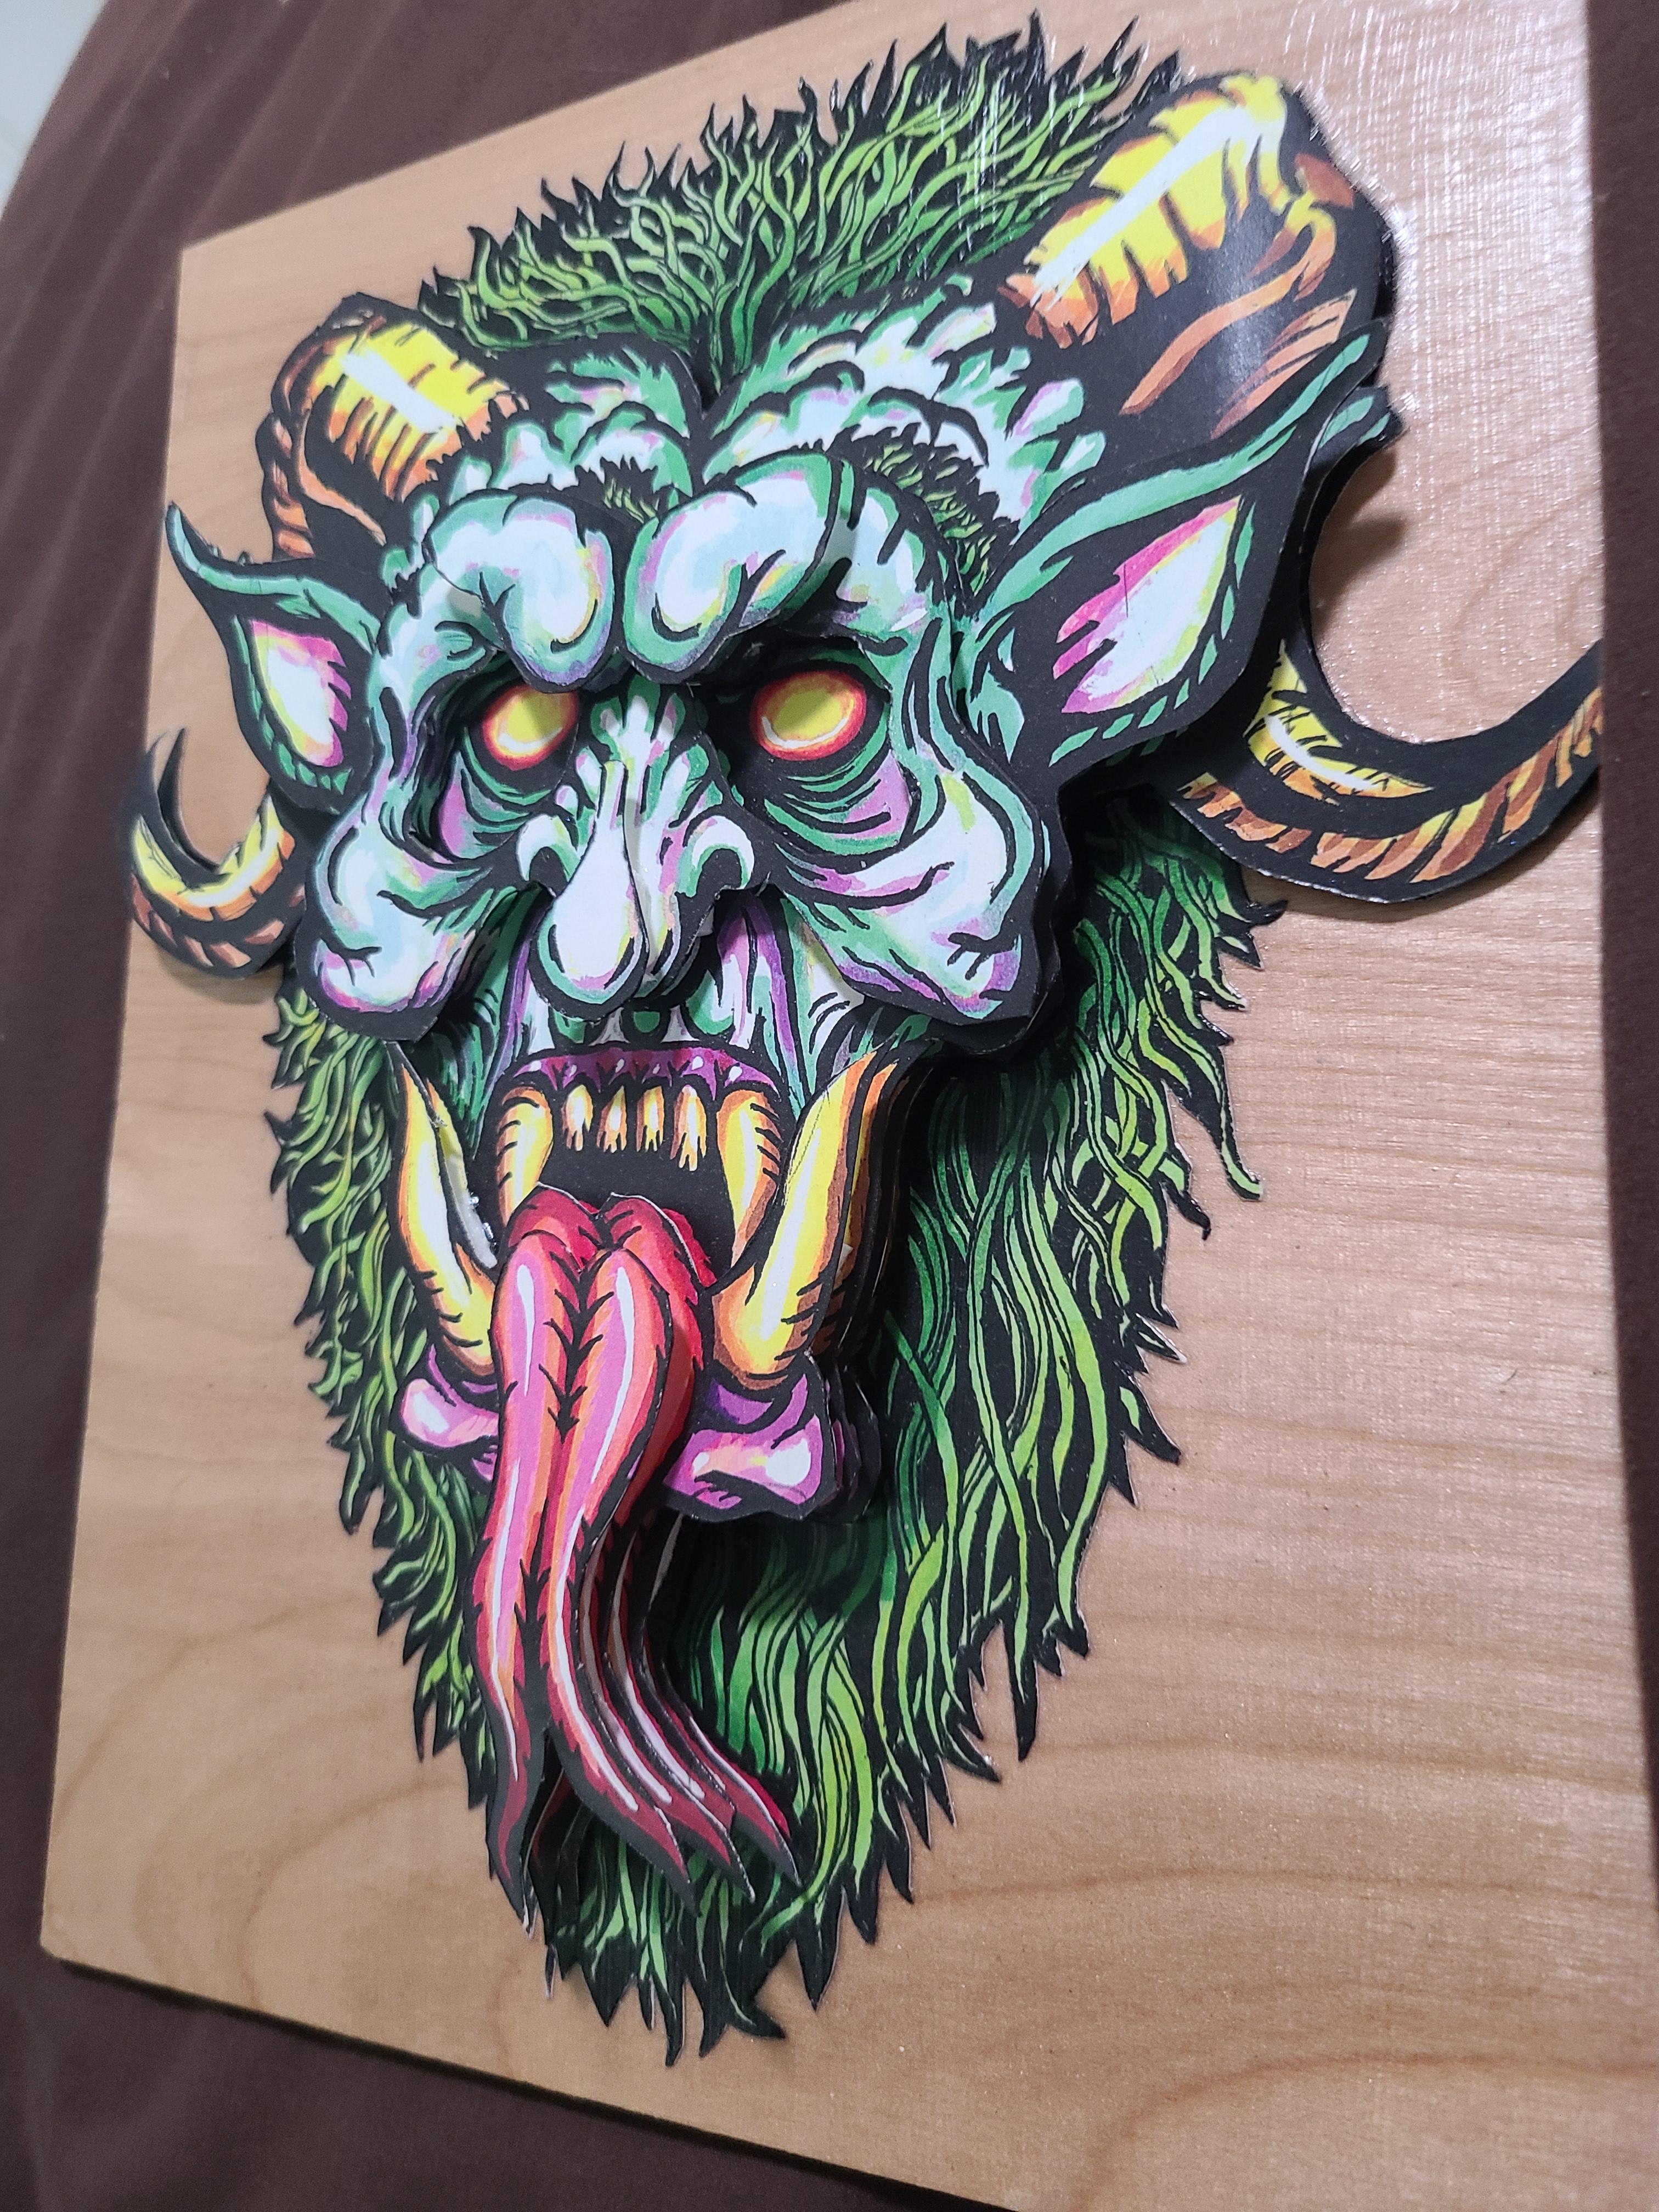
By printing multiple copies of a picture and layering them you can make a 3d looking image
Supplies
something like a piece of wood or foam board to glue everything too
multiple copies of the same picture printed on cardstock the more layers the better. Ensure the picture is something that would look good in a 3d, faces and landscapes work well
xacto knife
cutting surface
glue
foamboard, the type that has paper on both sides
Set a Plan
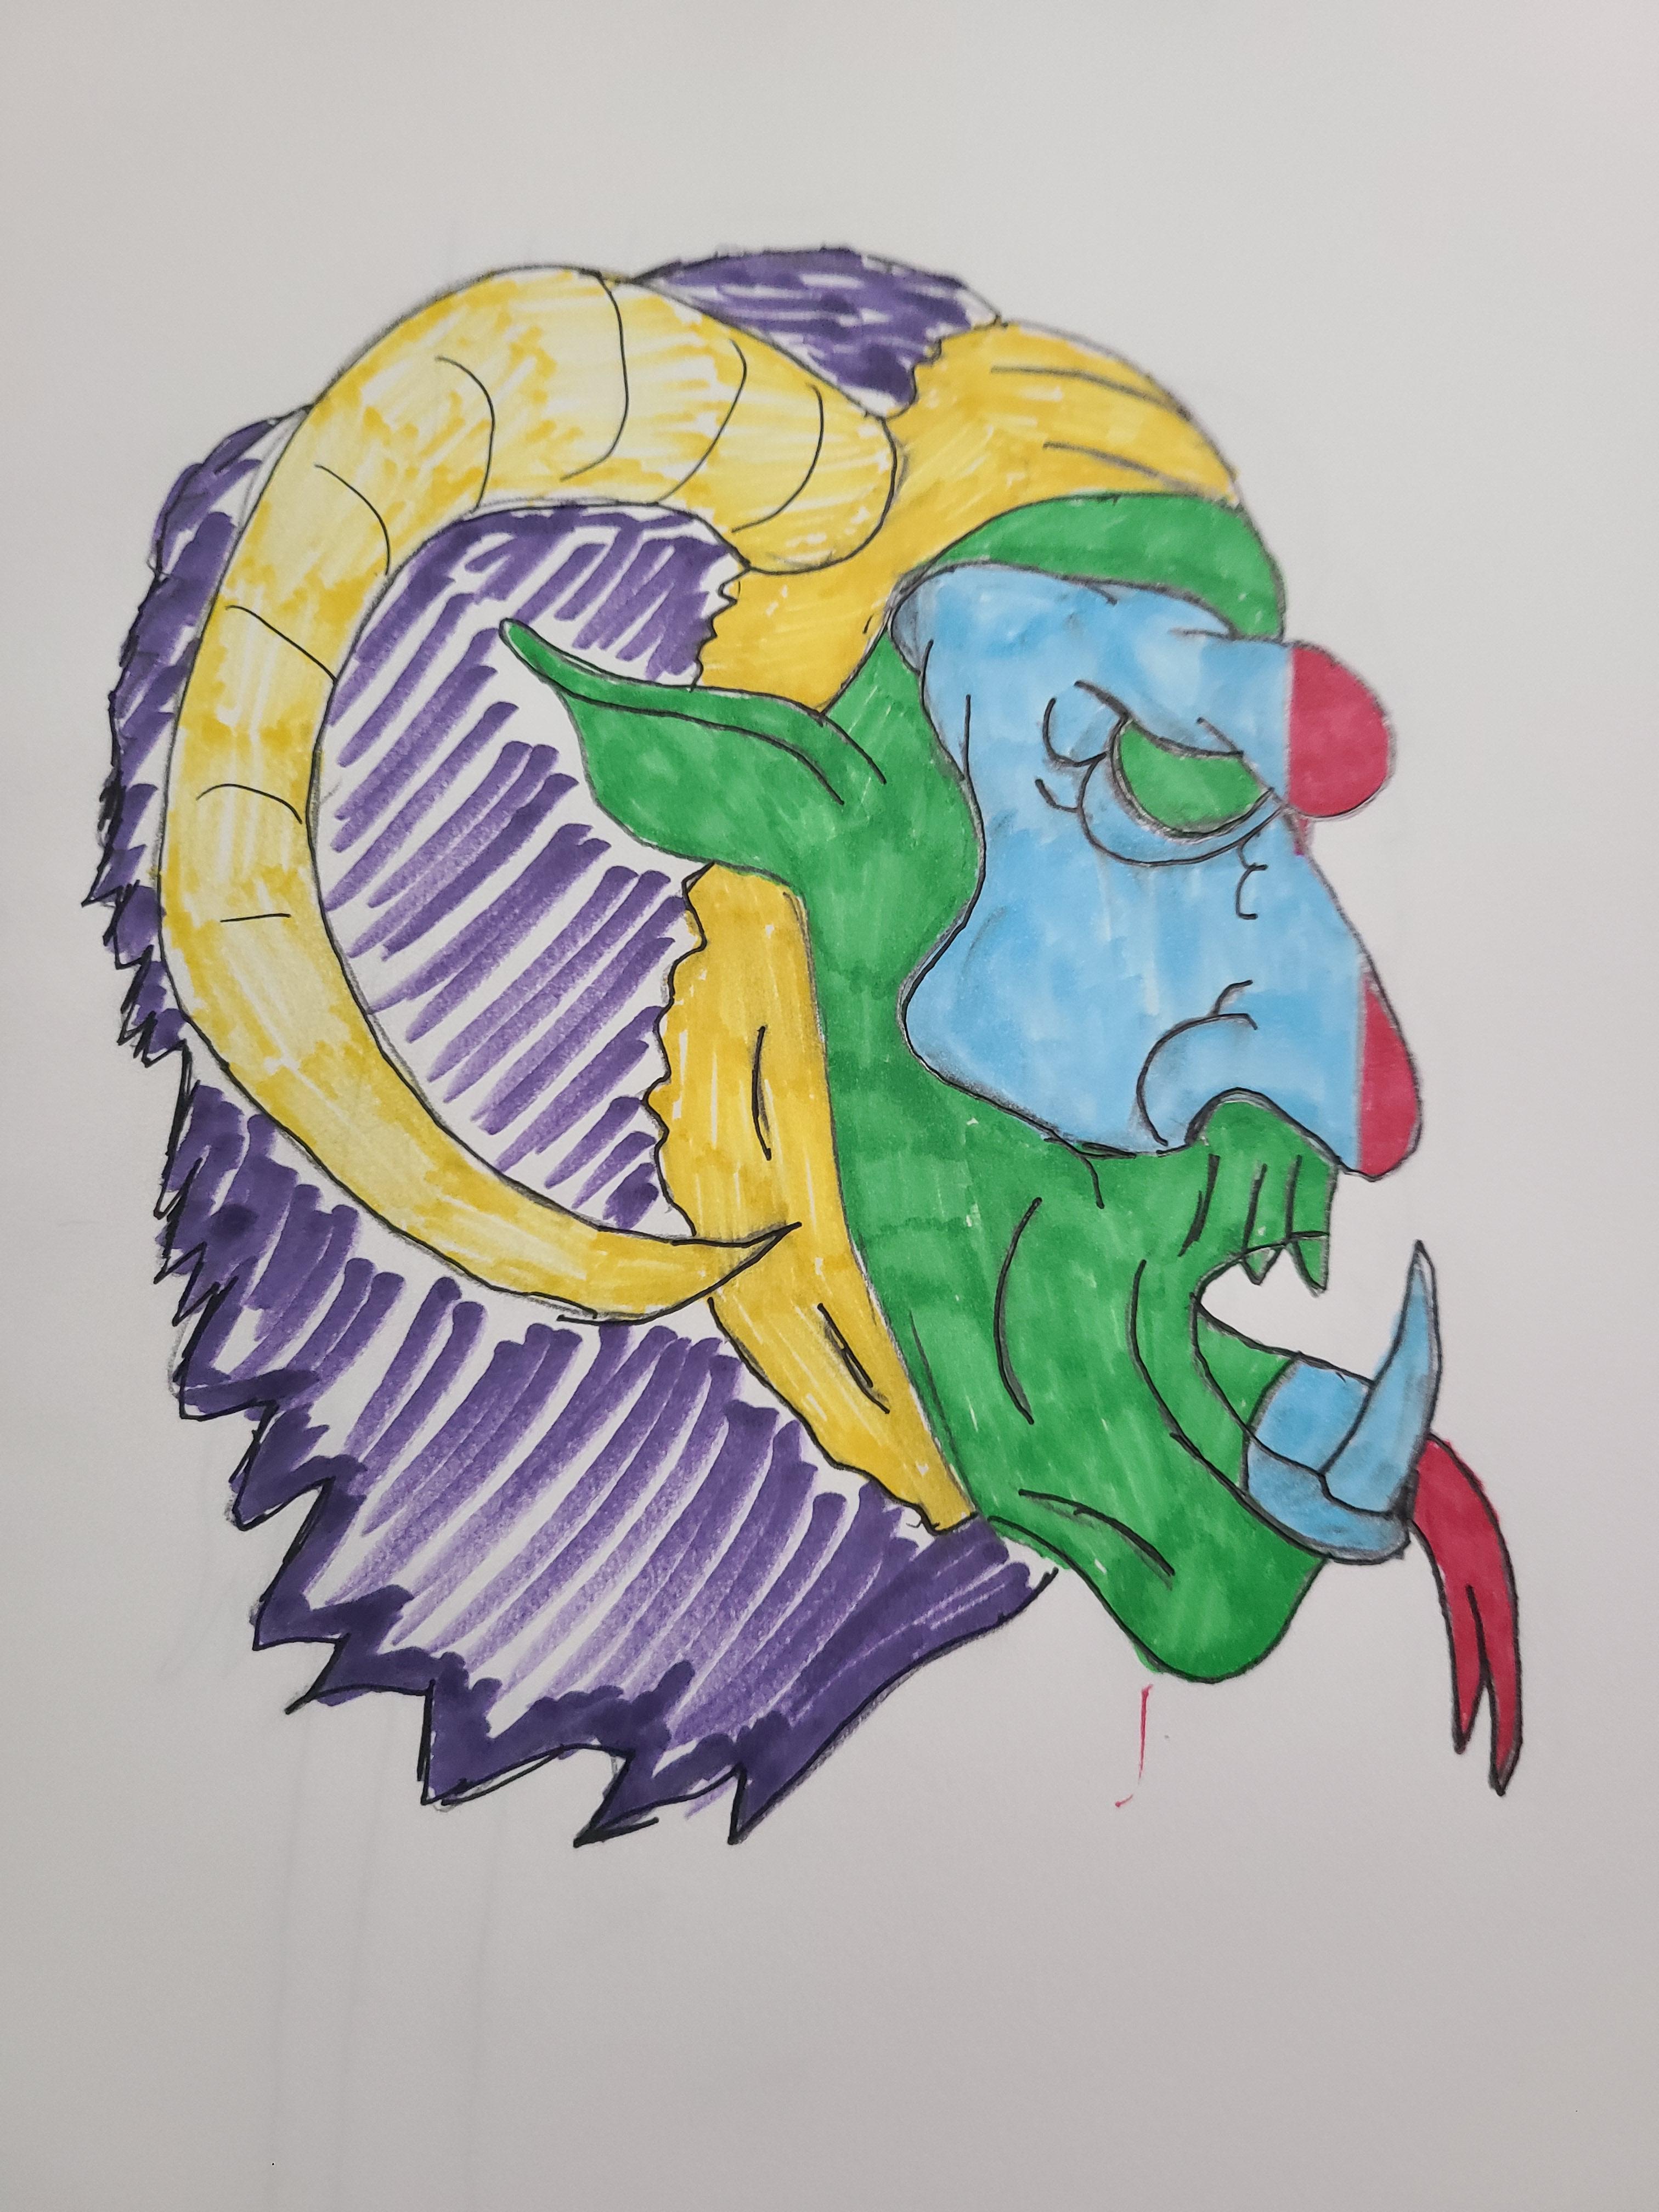
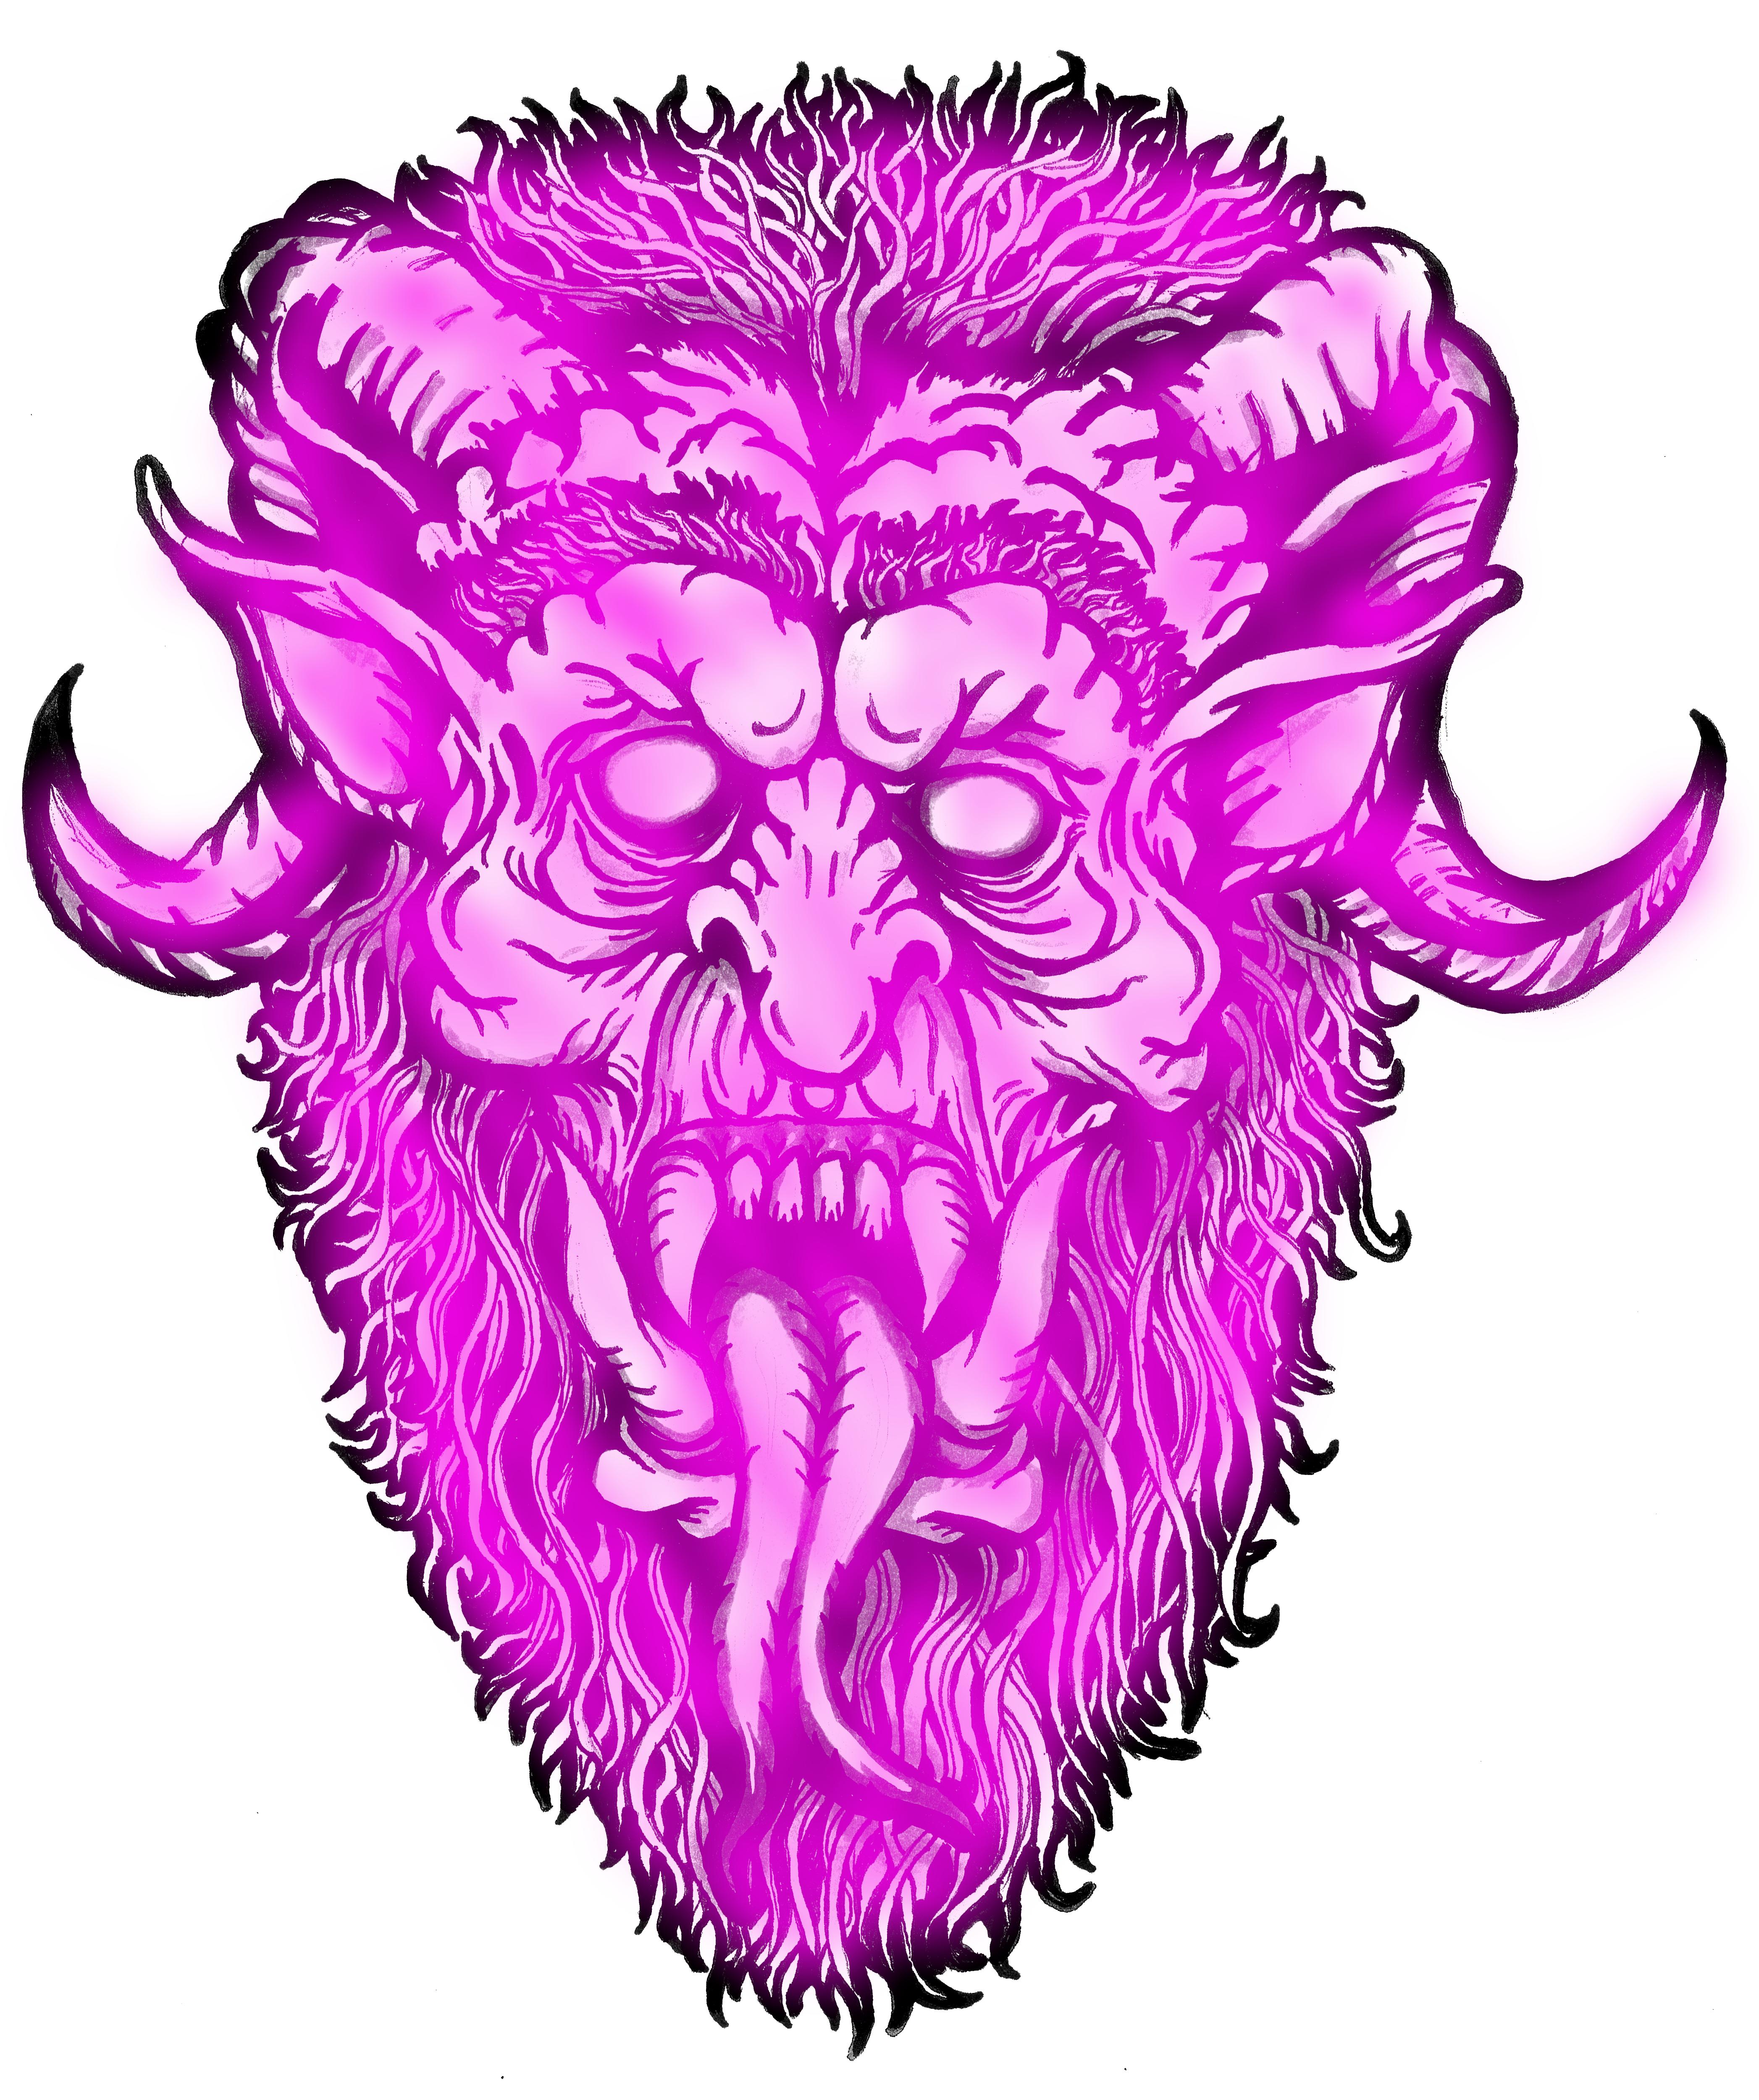
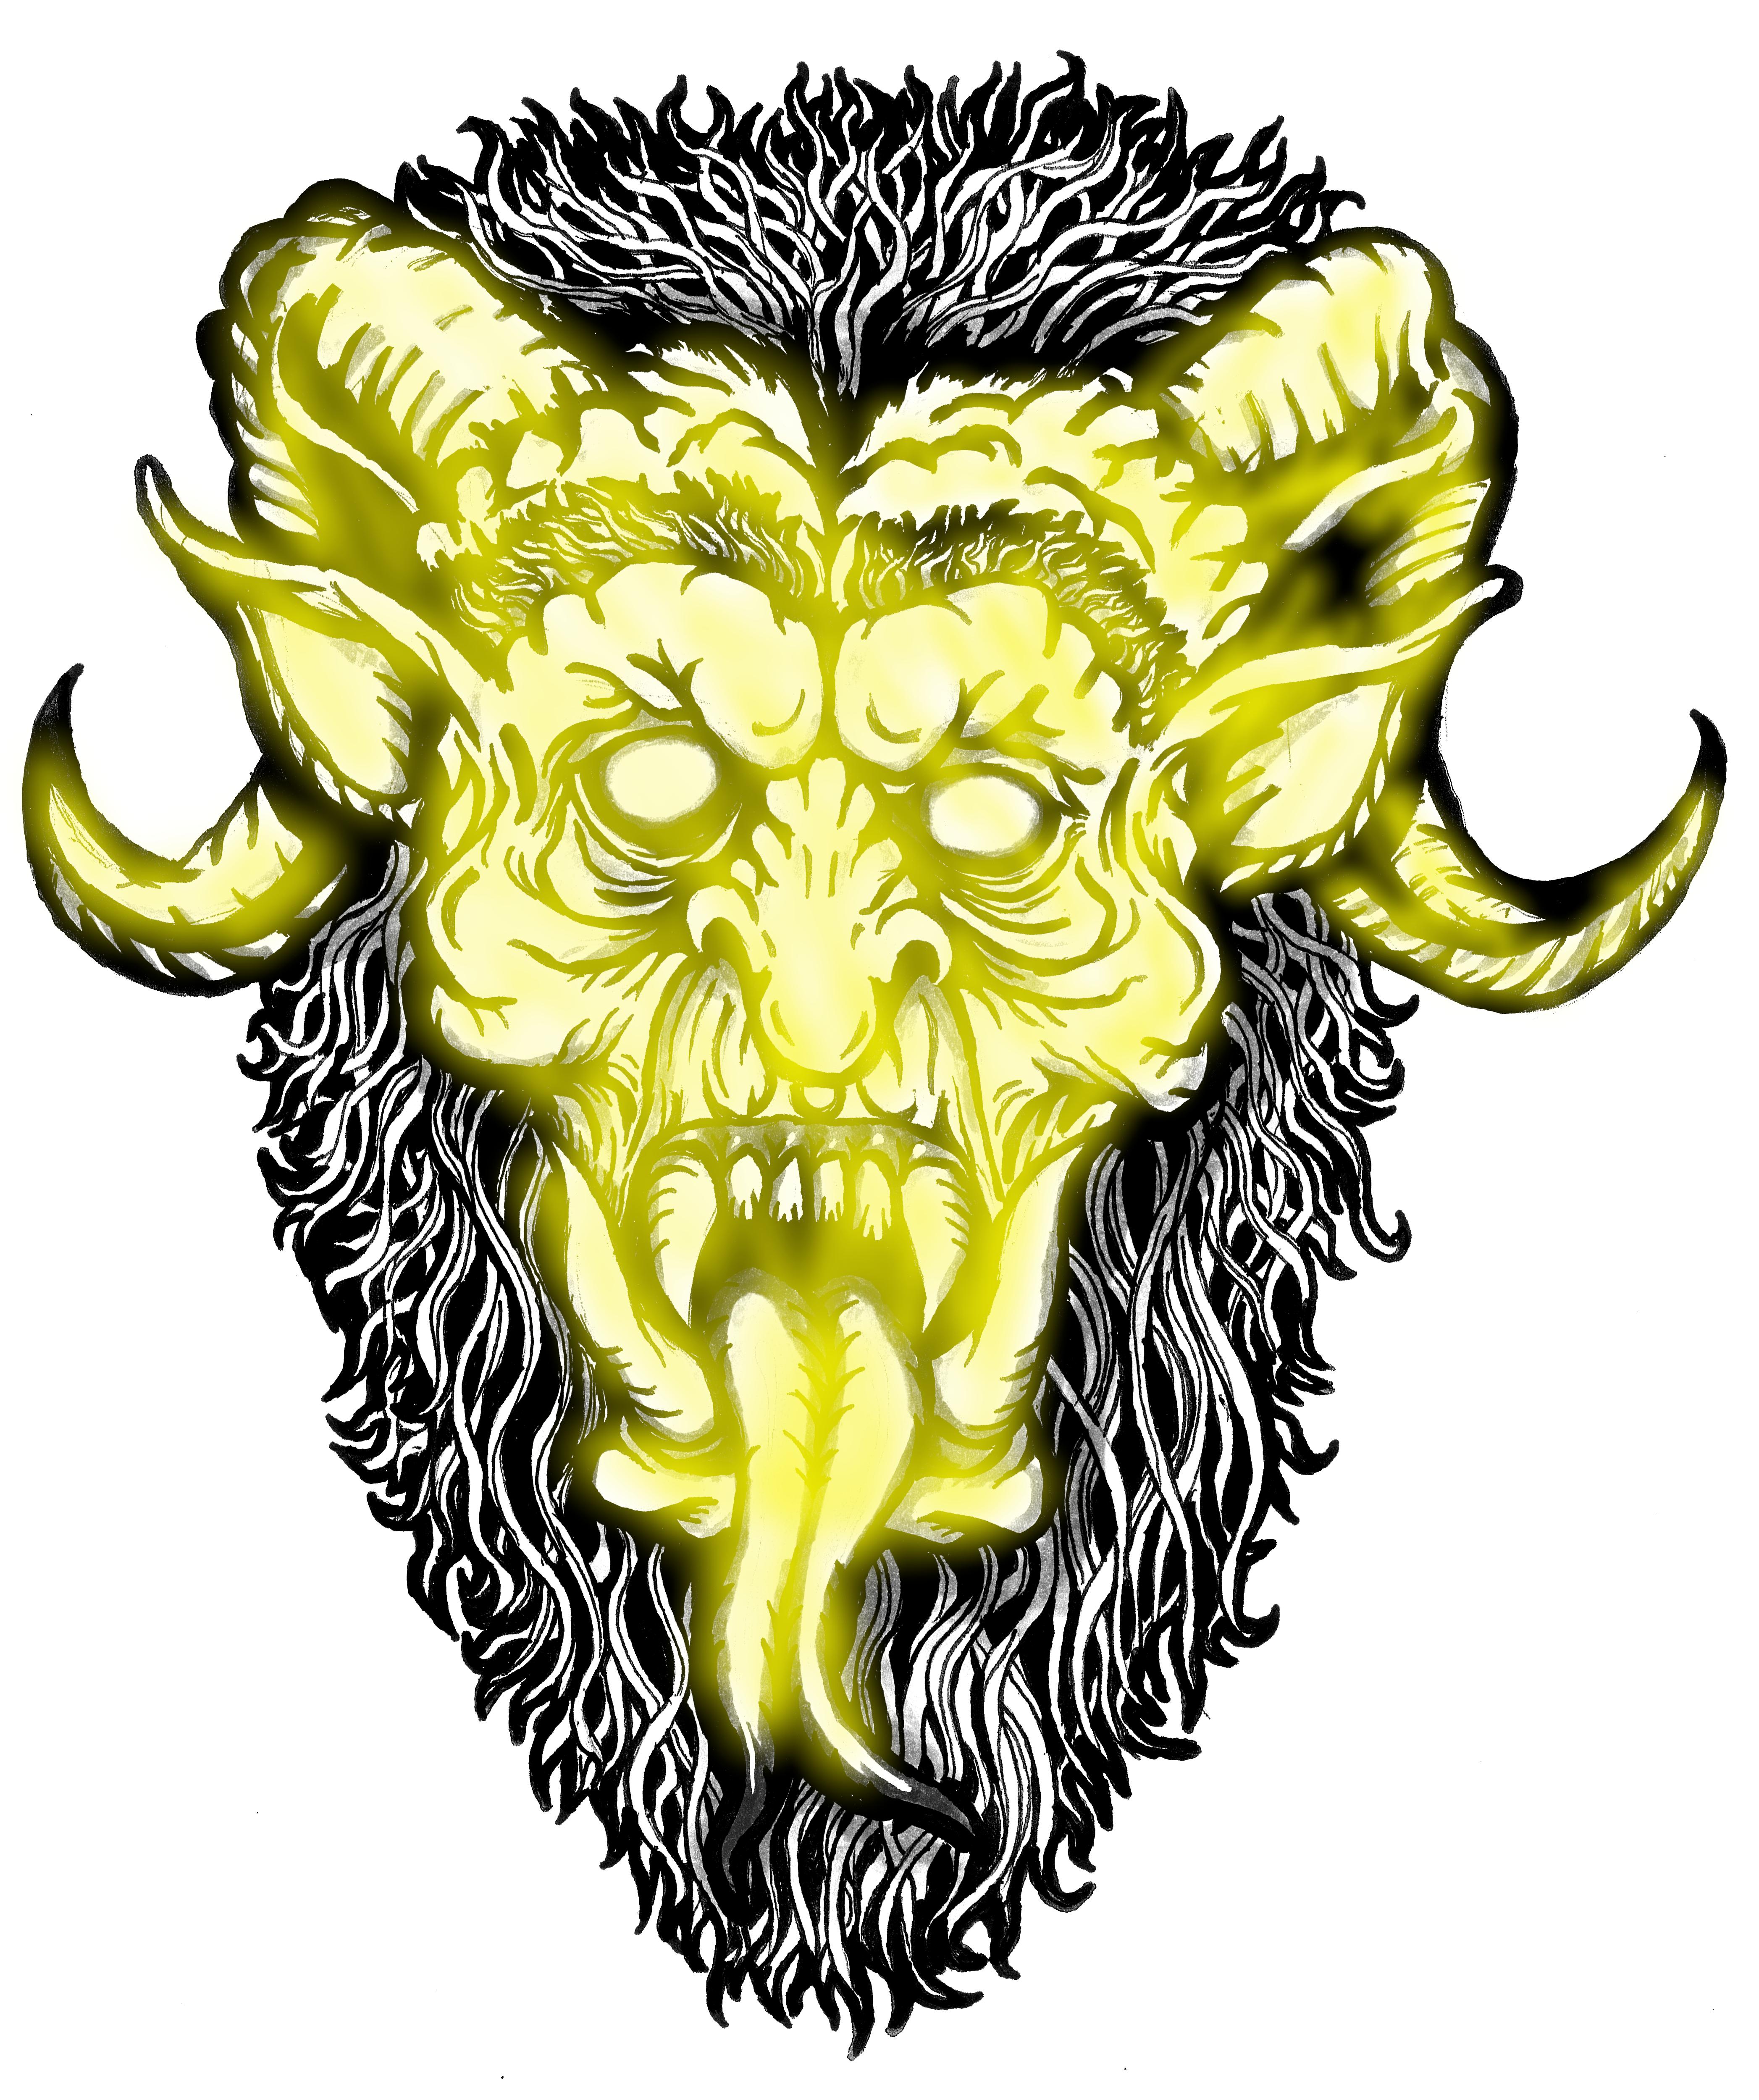
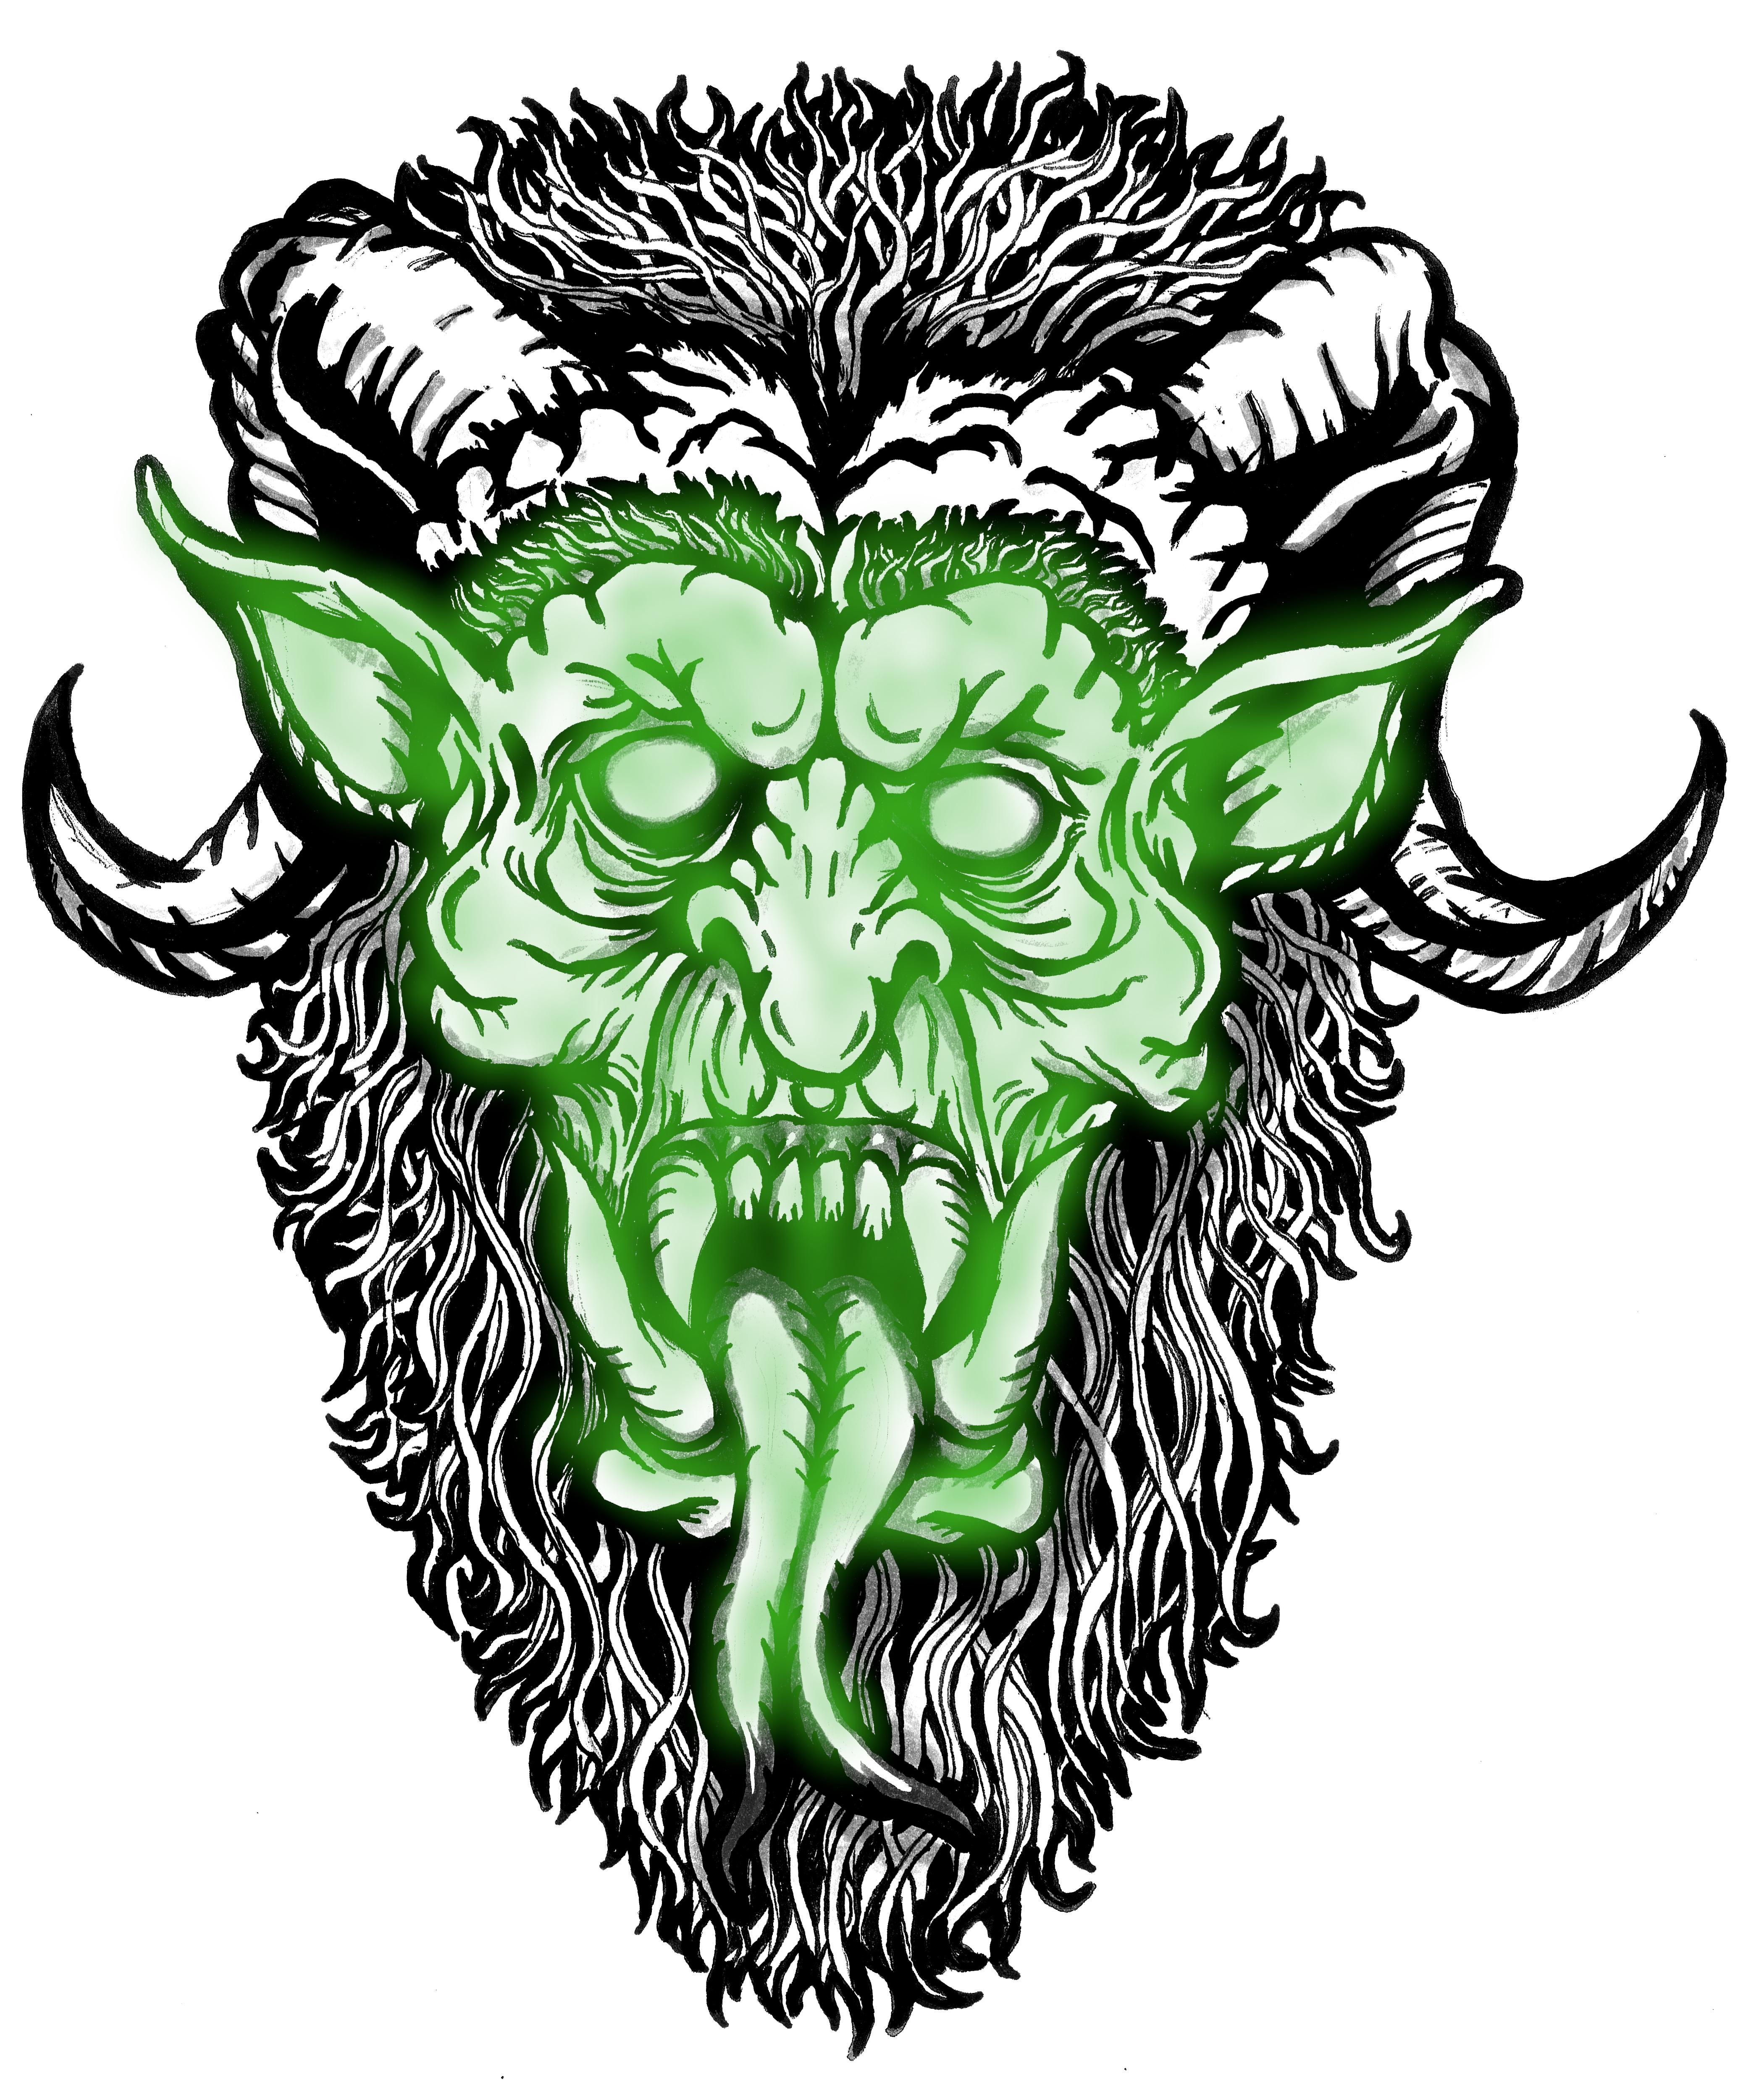
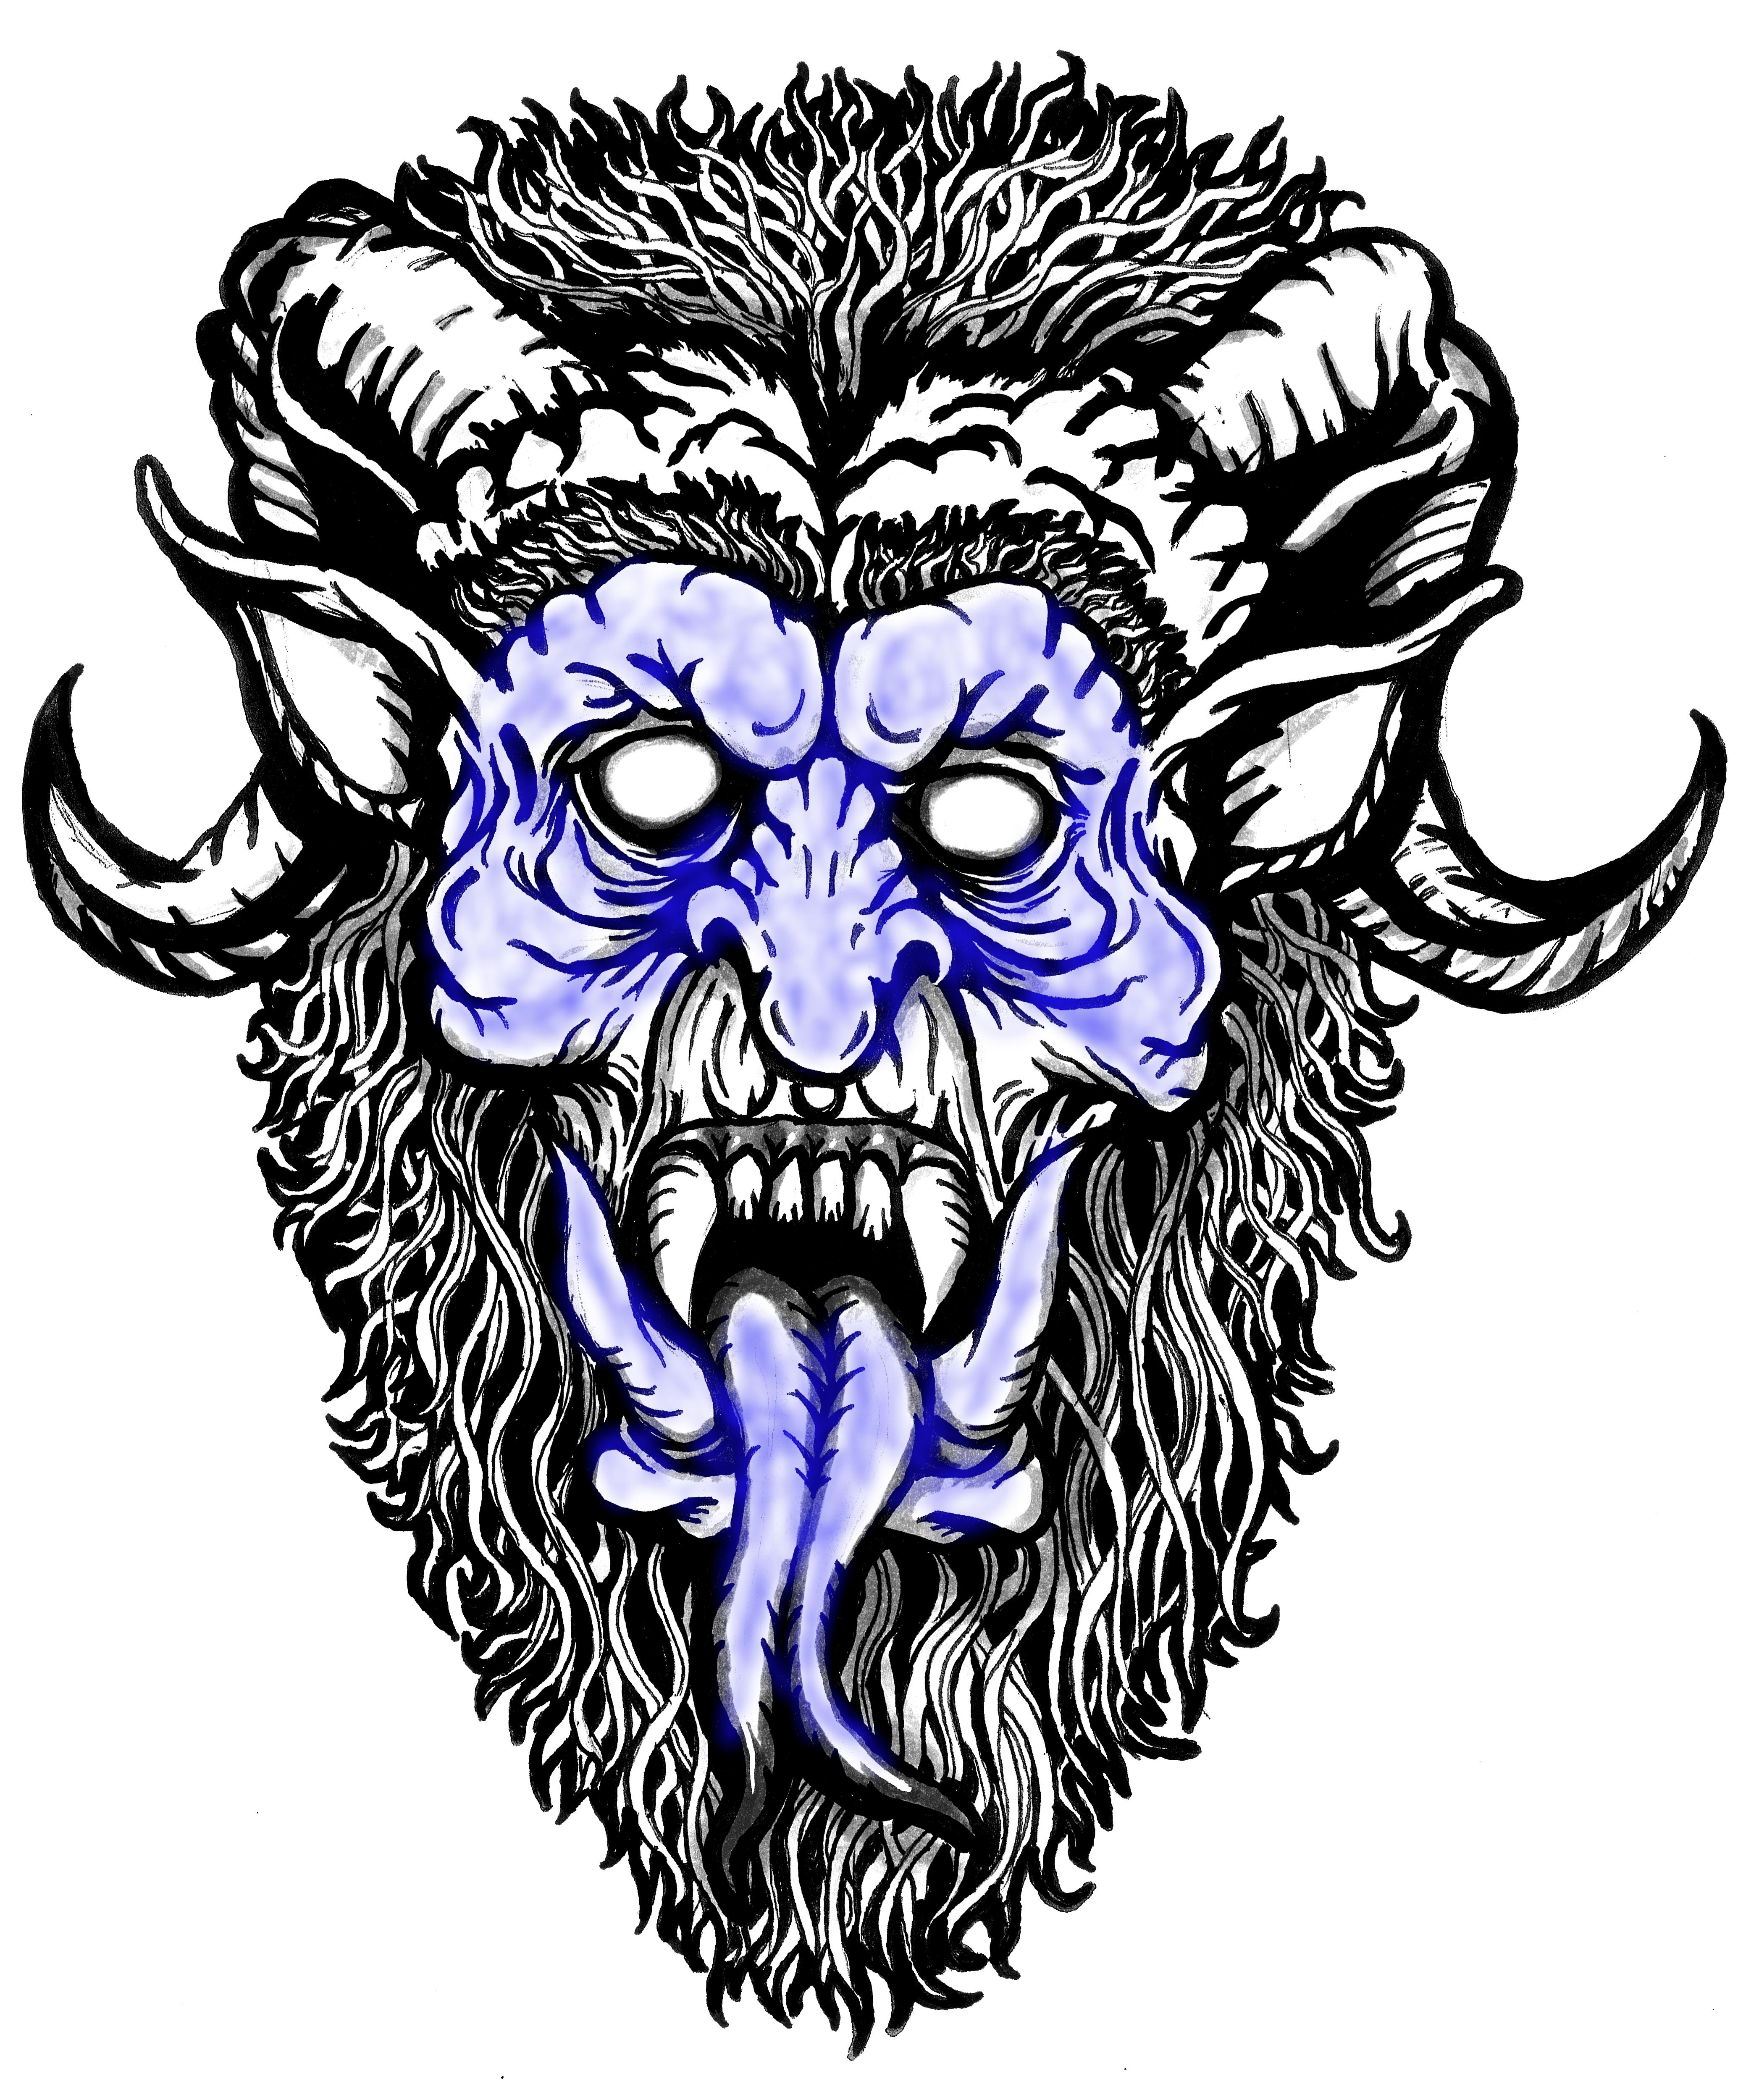
First you need to plan out your design. Im using a Krampus face I drew. I think about what on a face sticks out furthest, in this case in RED the brow, tongue tip and nose tip sticks out furthest. Next parts that stick out are the rest of the nose, teeth, cheek bones, and the rest of the brow in BLUE. The next comes the eyes, rest of the face and ears in GREEN. Then the furthest parts of the head and the horns in YELLOW. Last in PURPLE is the hair on the back of the head. Im now going to take this plan using the same picture and cut out layers with a xacto knife
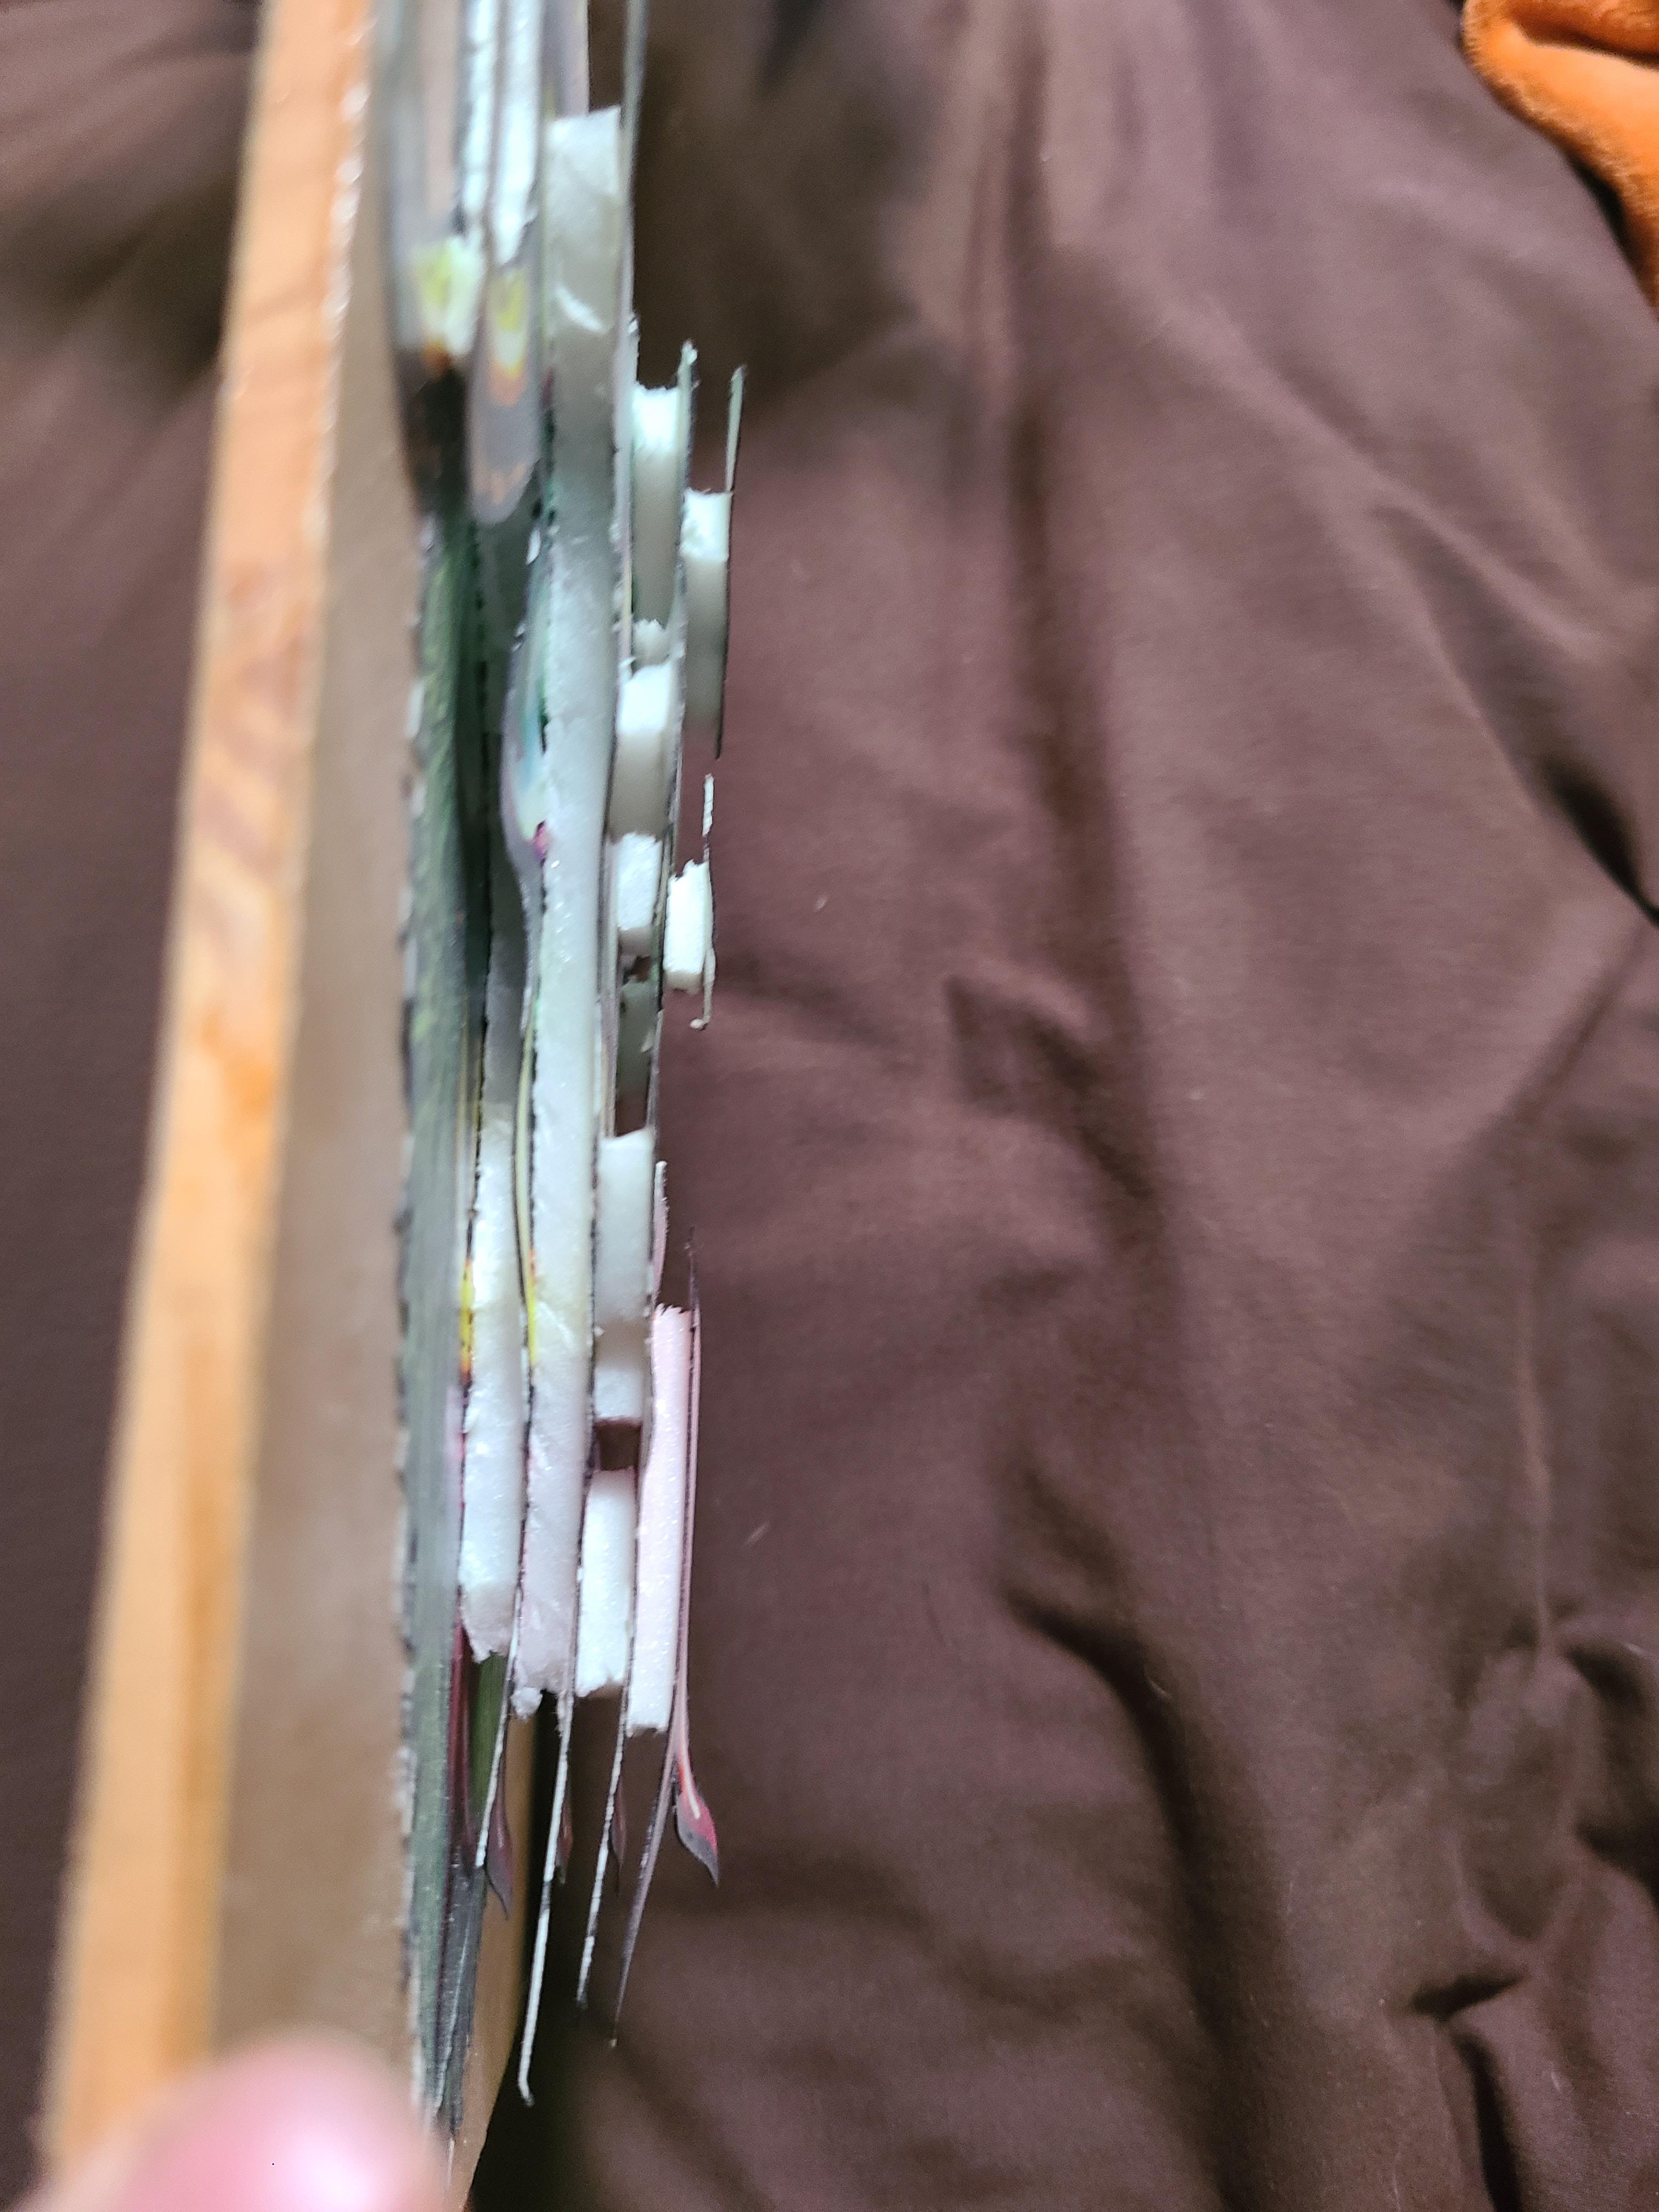
Cut Out Your Layers
In this example I used 5 pictures. For my base in purple I cut out the whole face by tracing the outer most outline. Then for the 2nd layer I cut out the parts in yellow on the 2nd print. Then for the 3rd layer I cut out the areas in green on the third print. For the 4th layer I cut out the areas in blue on the 4th print. Notice on this layer I also cut out the white part of the eyes to sink them in. Lastly on the 5th layer I only cut out the small pieces in red from the 5th print.
Glue It All Together
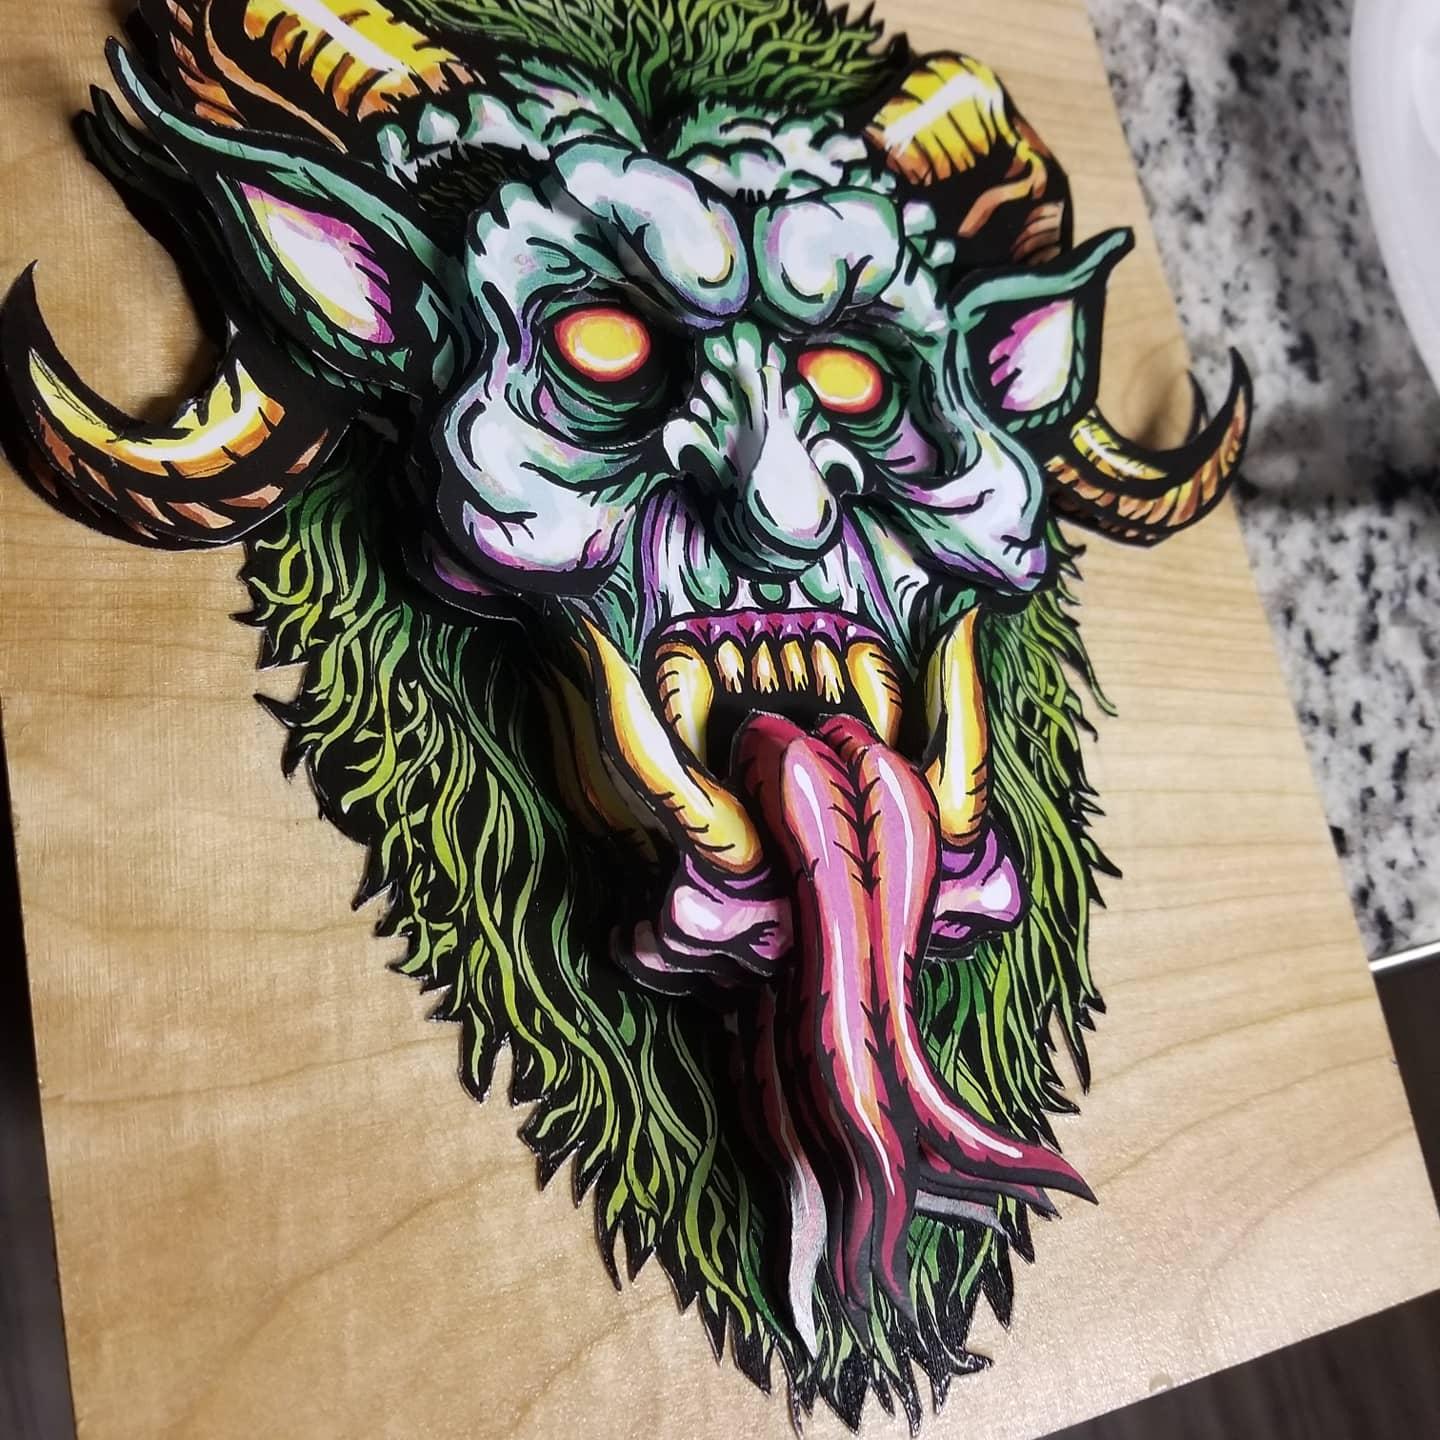
I glued the 1rst print to my base. Then I cut pieces of foam board and attached them all over the back of the 2nd layer. Once it dried I lined the image up with the first layer and glued it down. I repeated the steps for the 3rd, 4th, and 5th layers
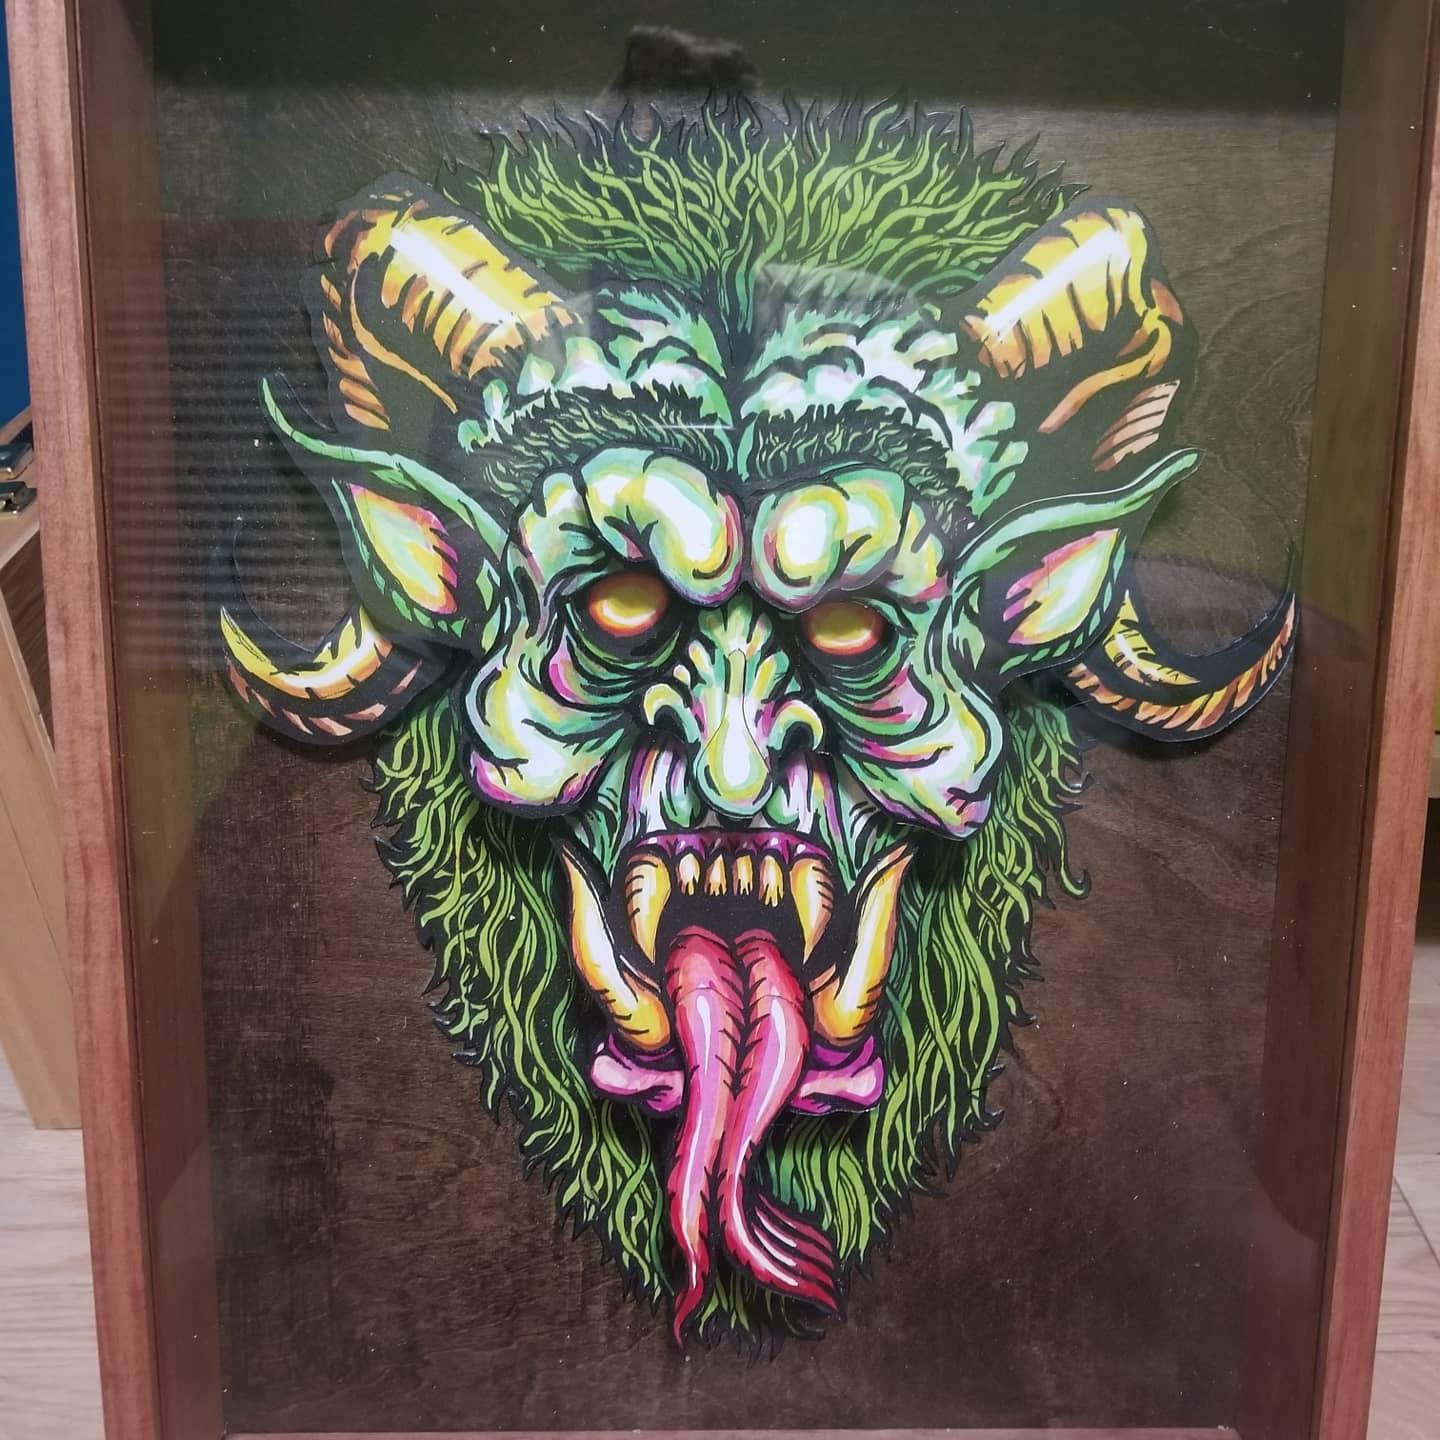
Once Dry You Can Frame It However You Like
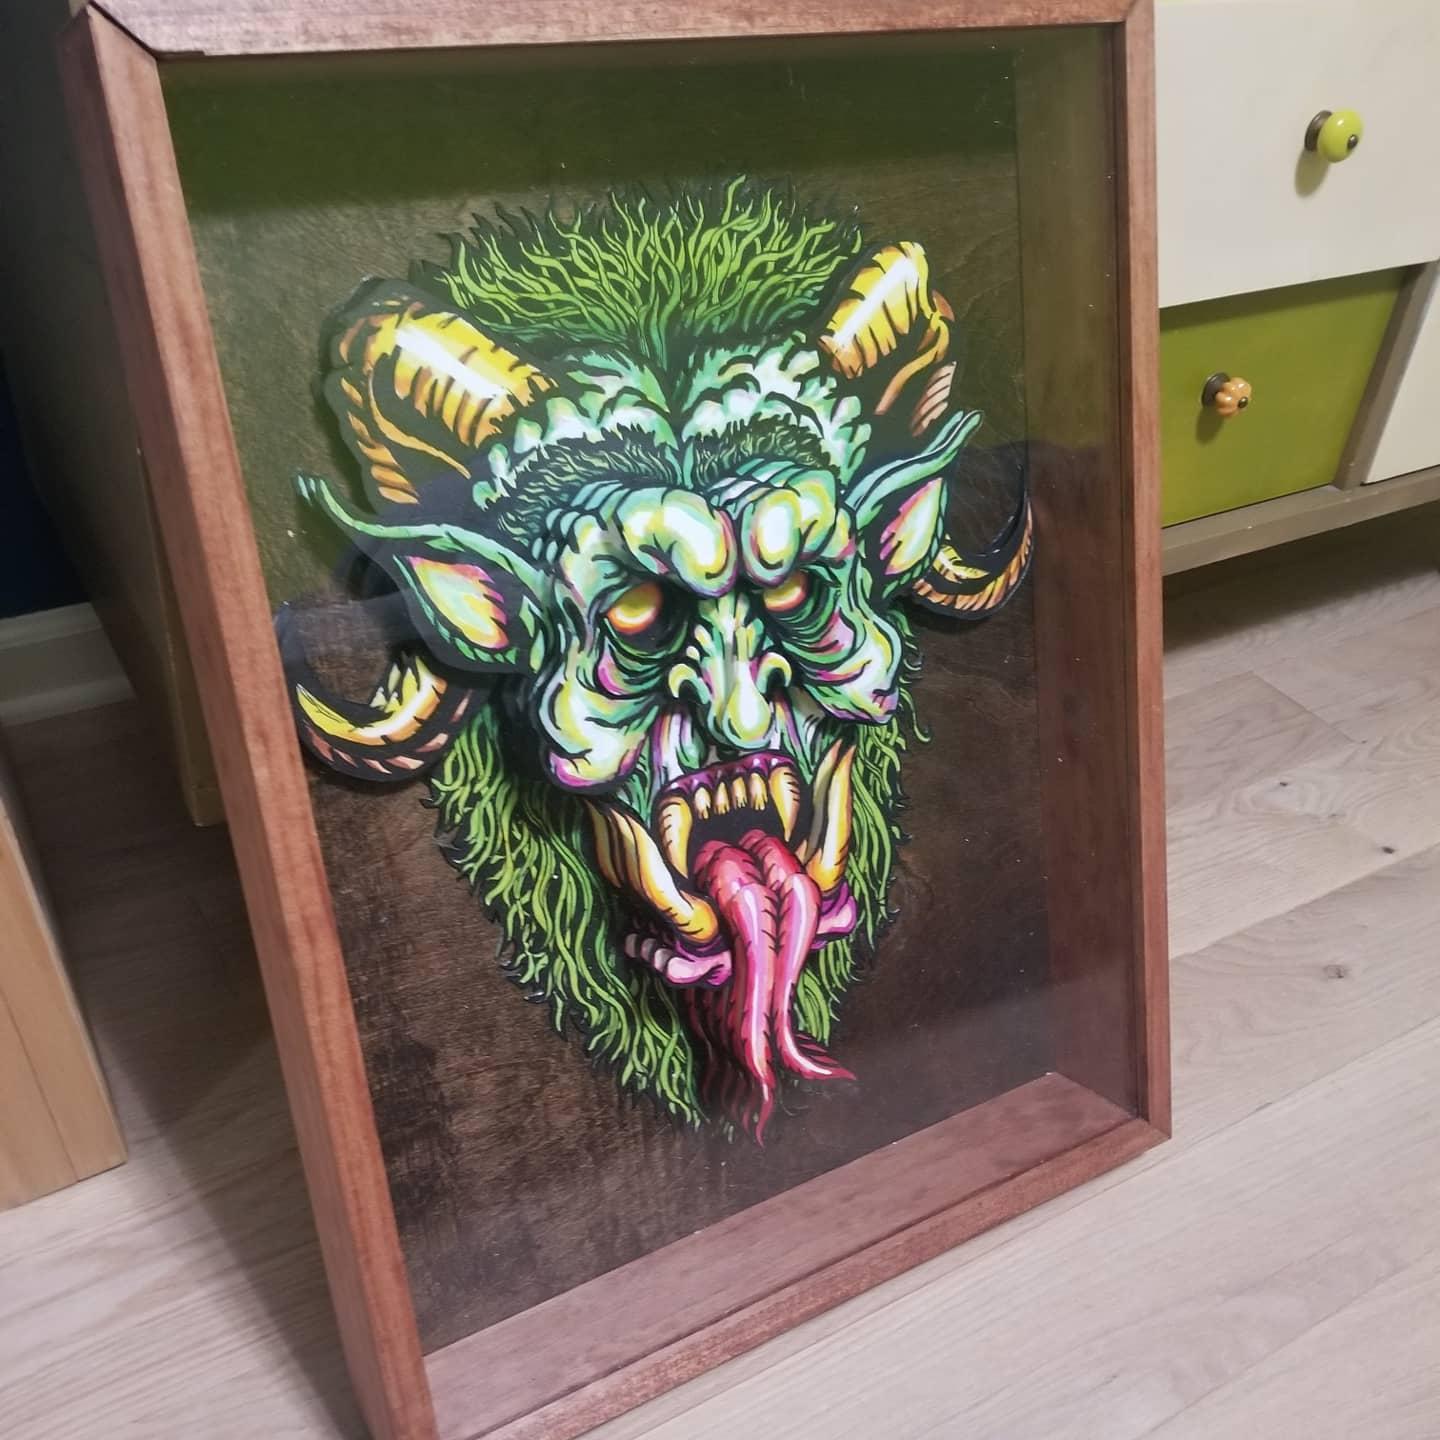
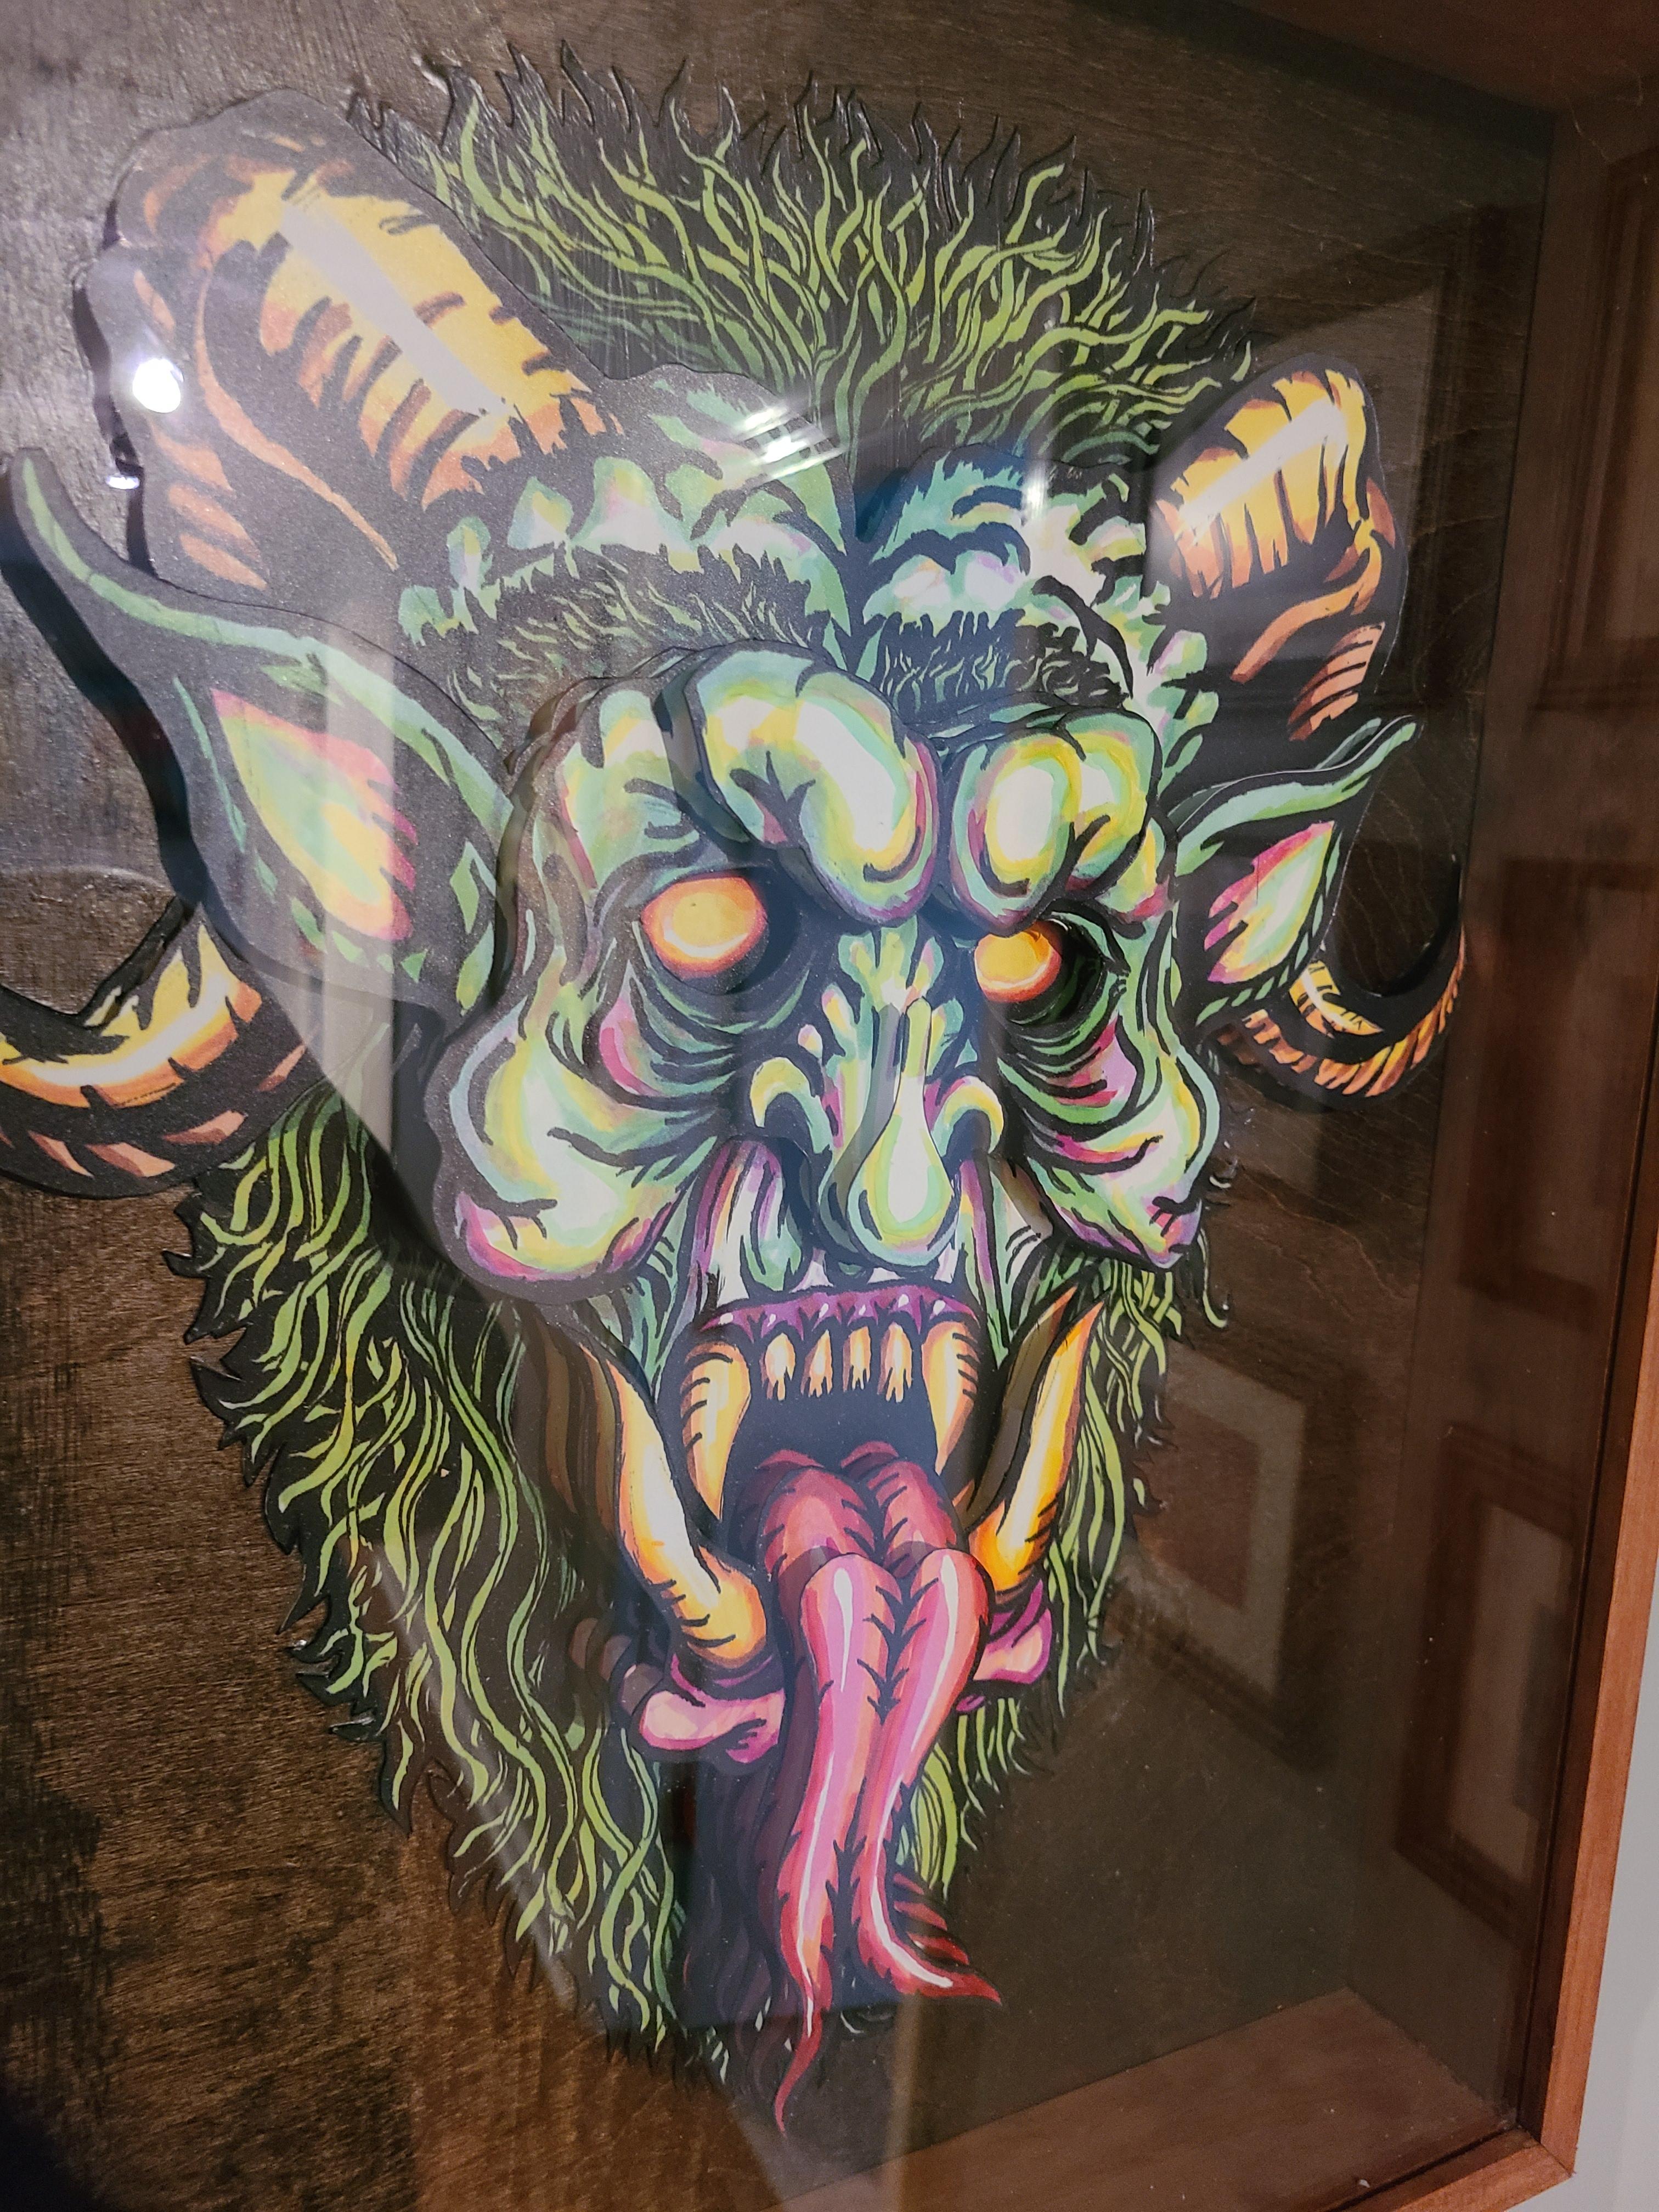
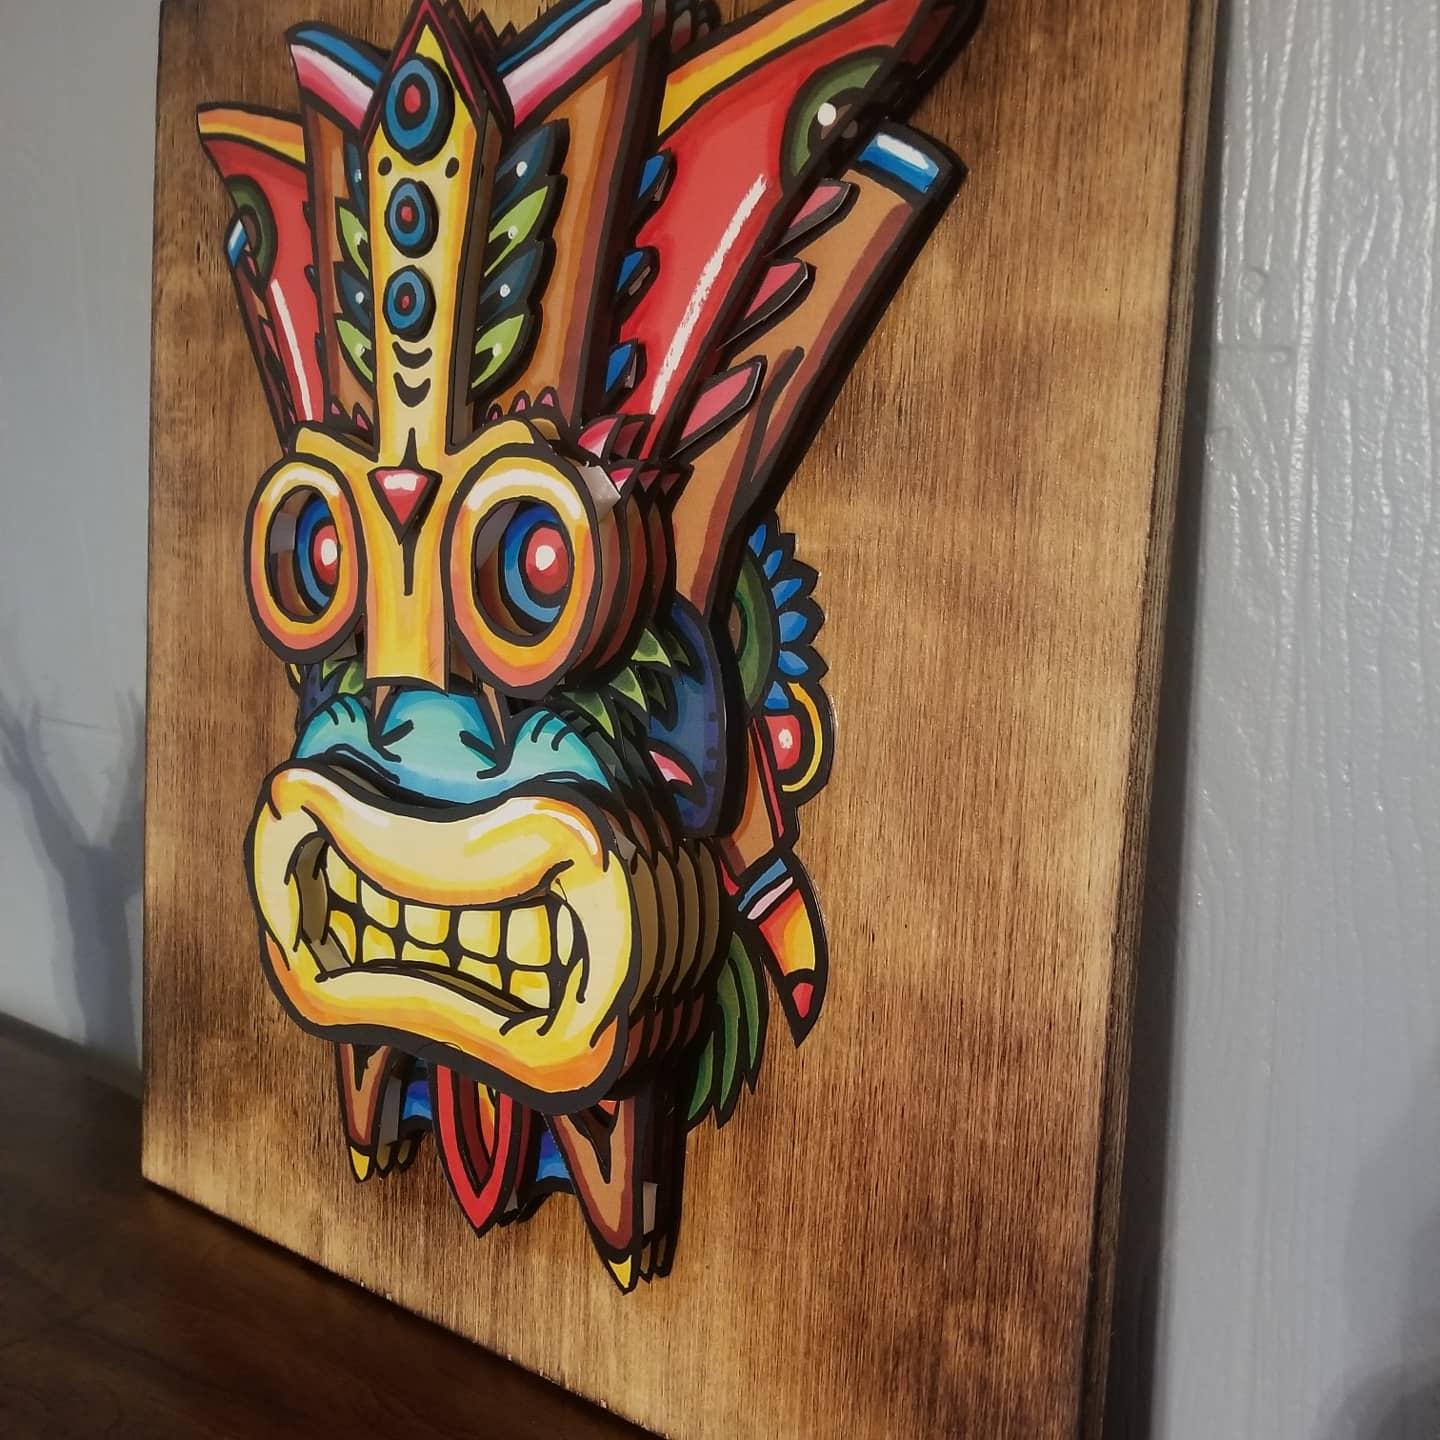
You can do this with all sorts of pictures just think about the layers before you cut them. I like to put mine in plexiglass shadow boxes to keep the art from getting bent.