Magic Mirror With News, Weather, Alarm, Timer and Todolist
by tuurvanhoutte in Circuits > Raspberry Pi
2202 Views, 4 Favorites, 0 Comments
Magic Mirror With News, Weather, Alarm, Timer and Todolist
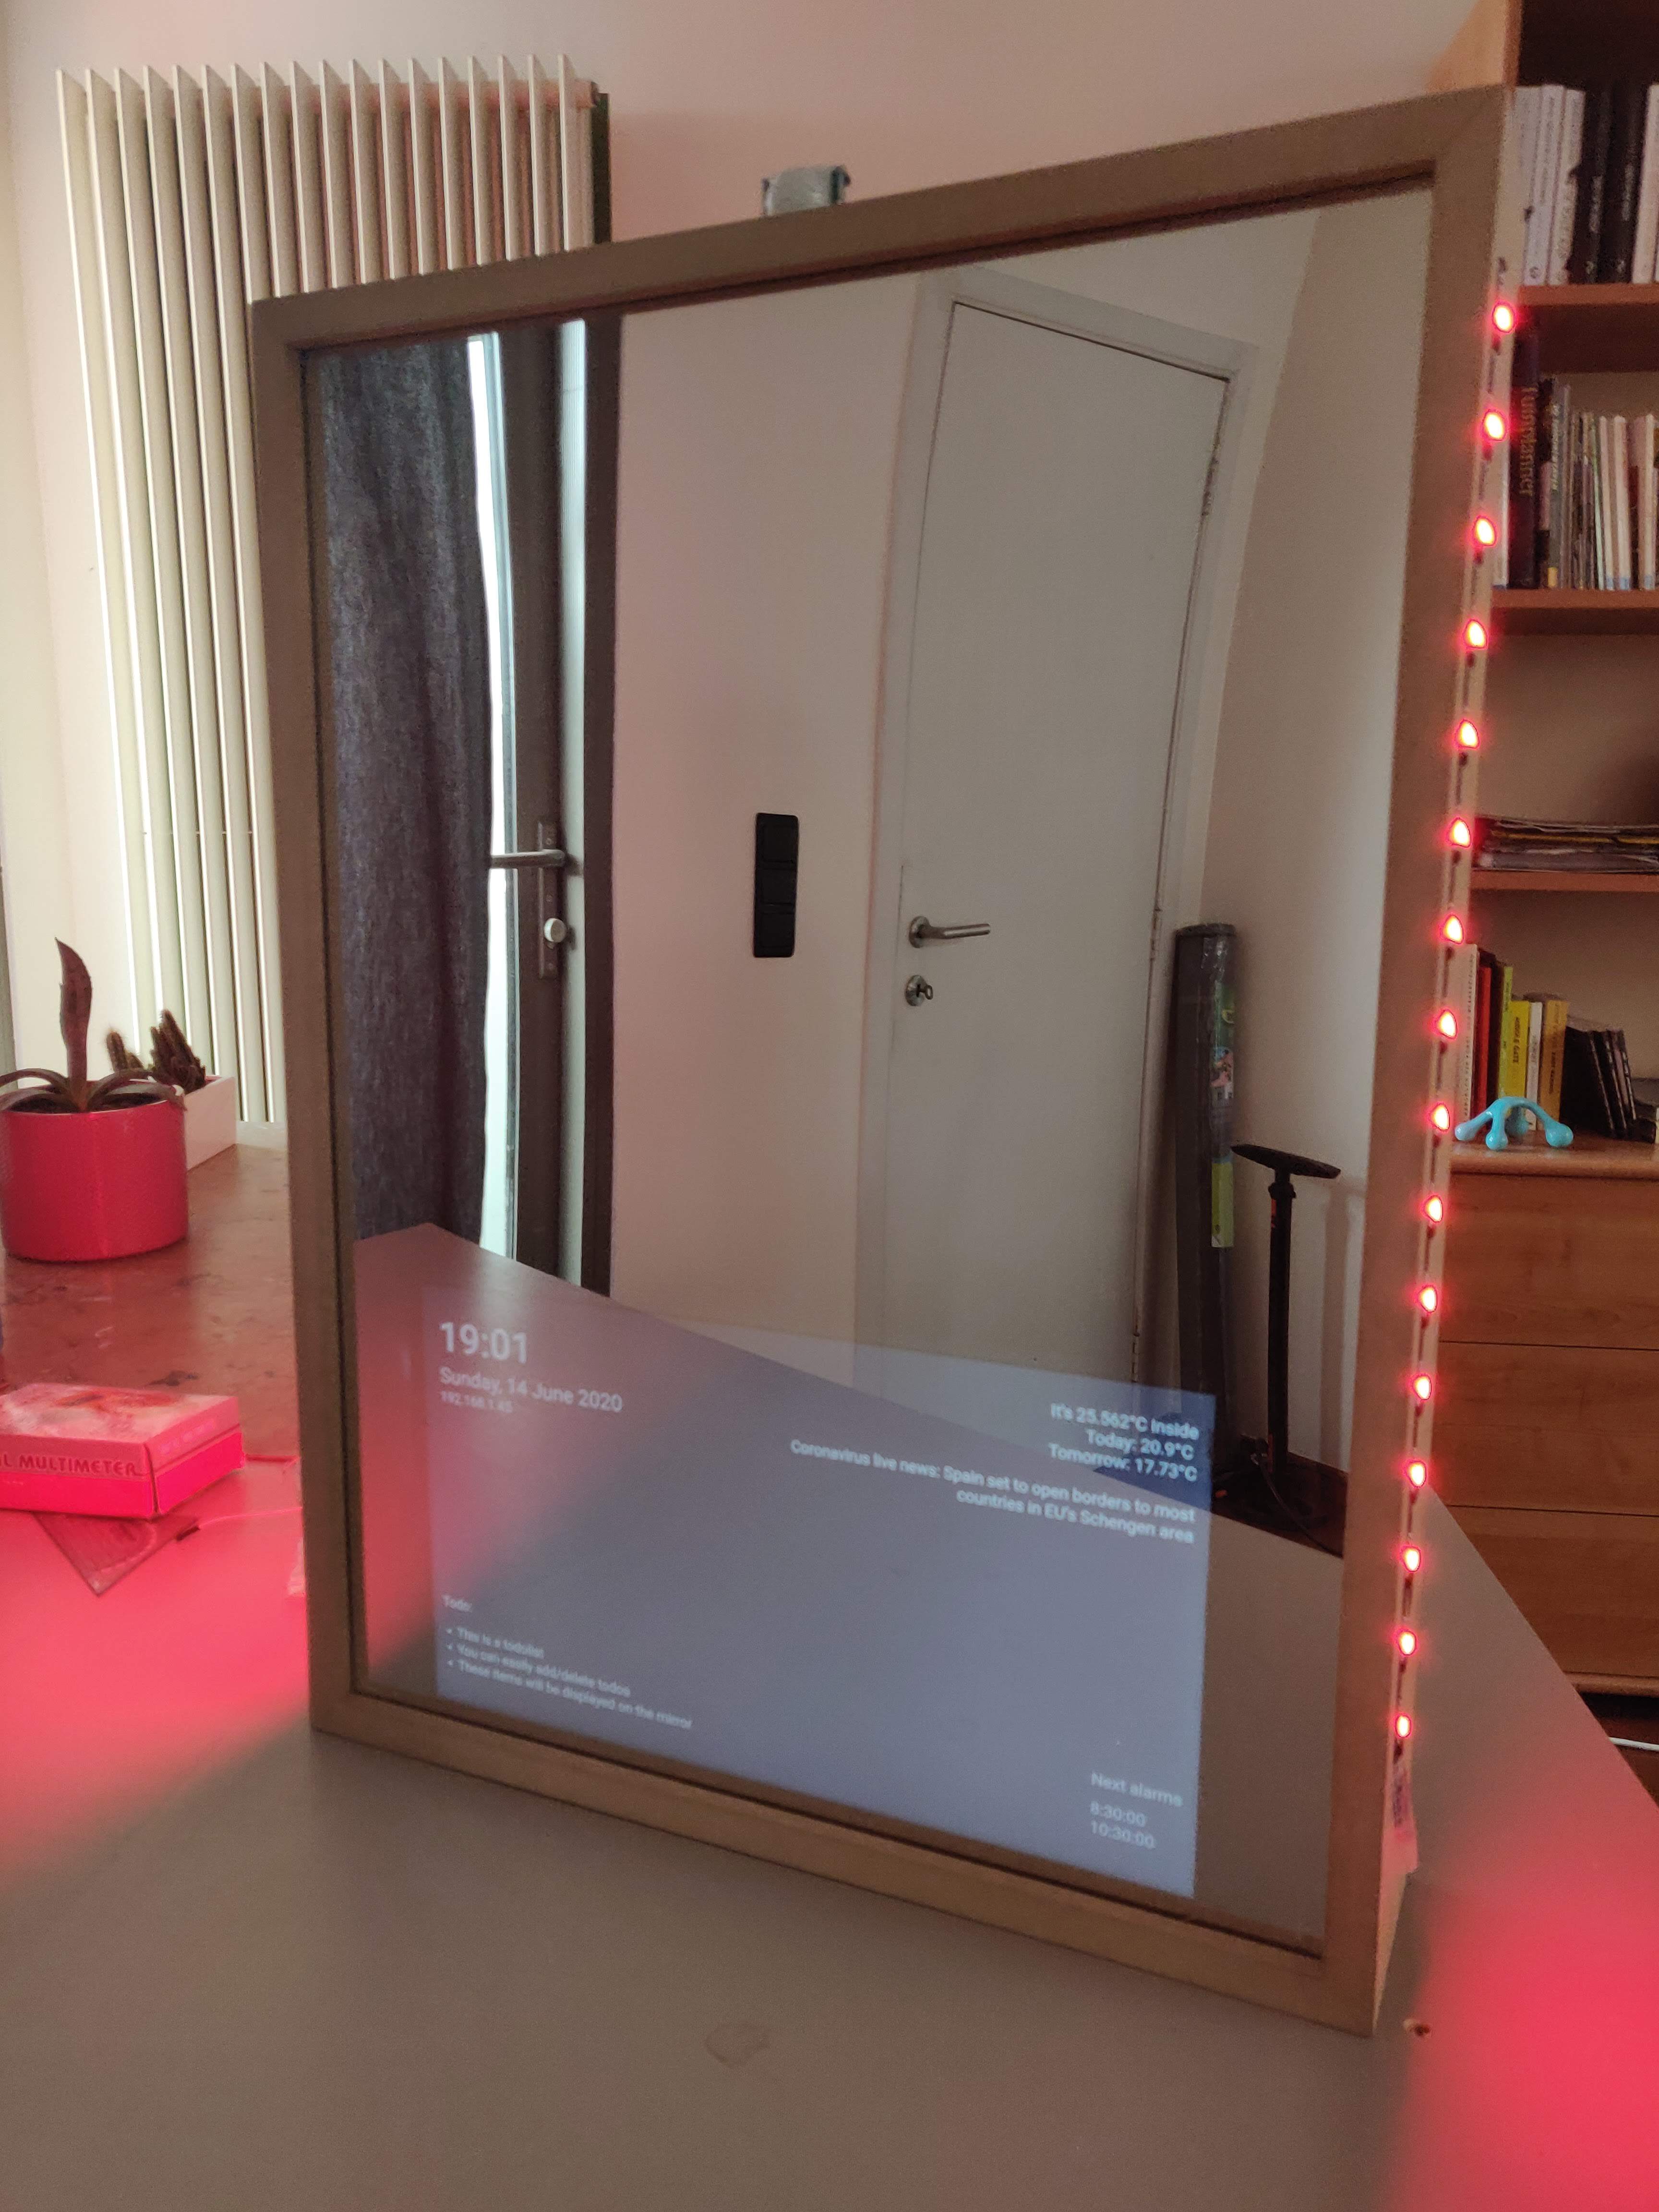
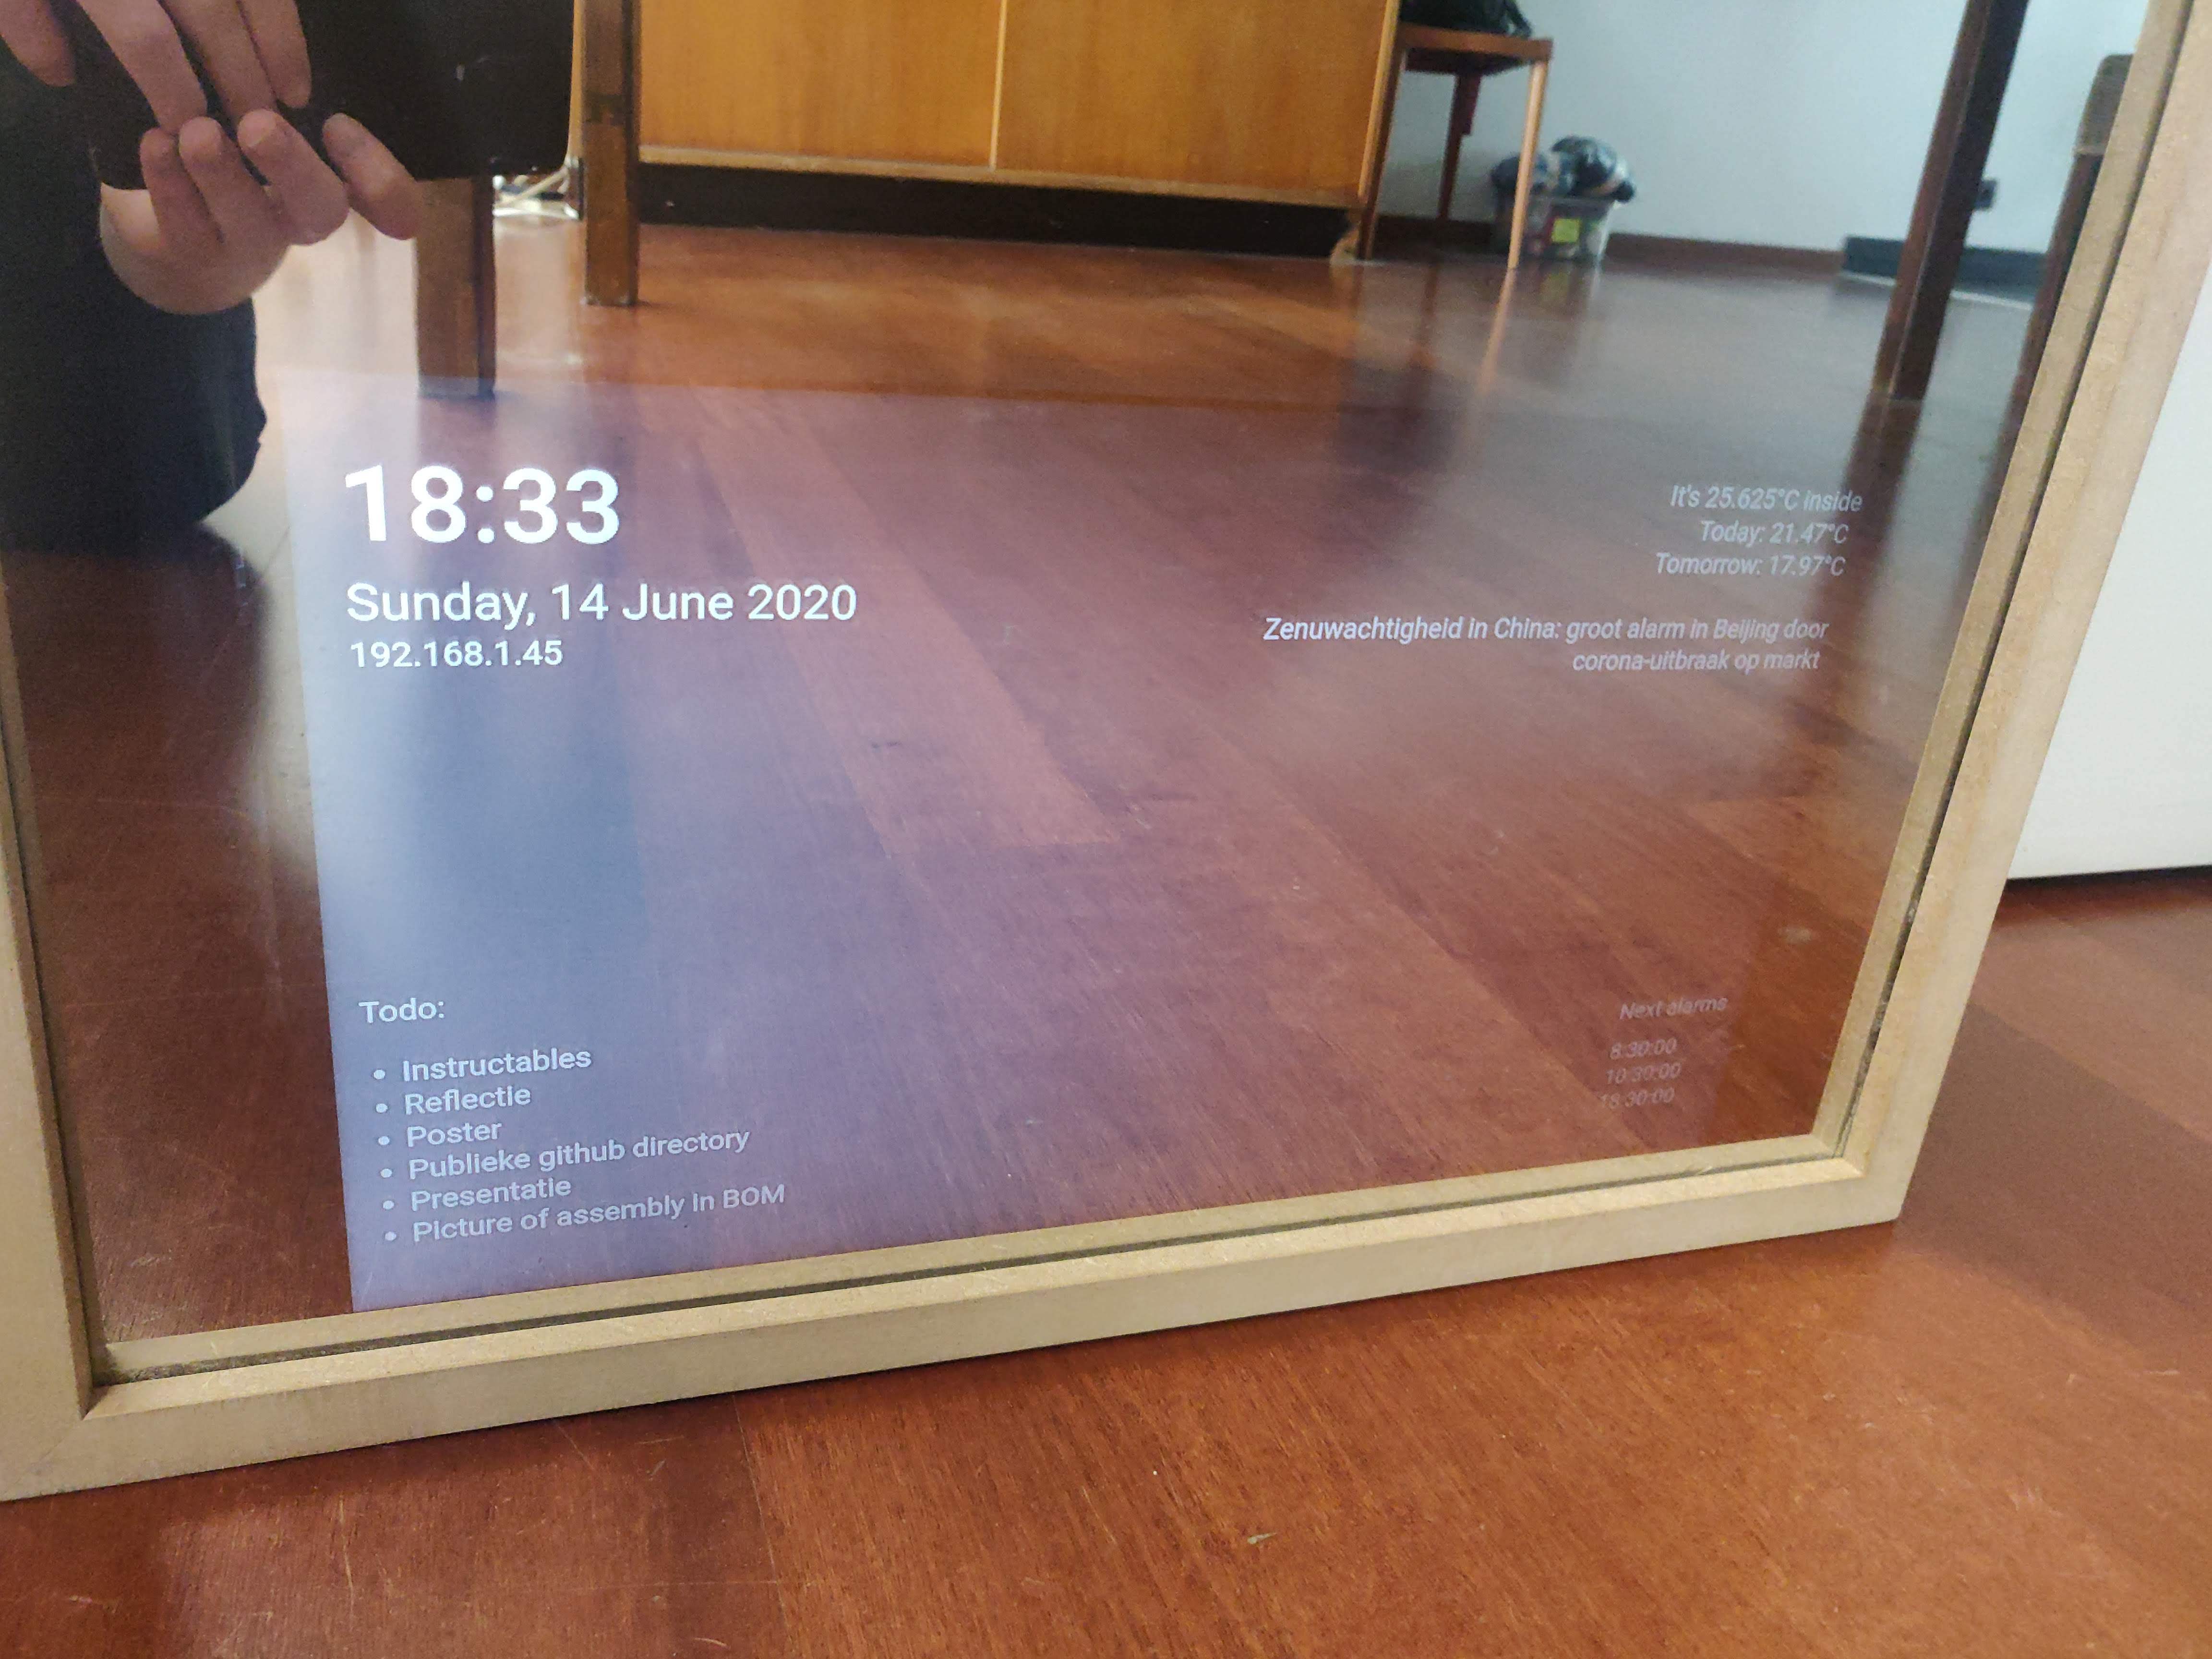
A Magic Mirror is a special one-way mirror with a display behind it. The display, which is connected to a Raspberry Pi, shows information like weather, room temperature, time, date, a todolist and much more. You could even add a microphone and set up a smart assistant. The possiblities are endless.
This project can be quite expensive, one of the most expensive parts you'll need is of course the display. That's why I recycled a display from an old laptop. I do however recommend getting a large, bright, high contrast display to make this project. It's worth it.
The mirror I made has these features:
- News from a user-chosen RSS feed
- Weather
- Inside temperature
- An alarm system
- A timer system
- A todolist
- Multiple users: the ledstrip color and newssource change based on which user is selected.
Downloads
Supplies
To build this Magic Mirror, you'll need:
- A one-way mirror
- Wood
- A Raspberry Pi
- A Micro SD card (8+GB)
- A breadboard
- Two 20W speakers
- MAX9744 20W amplifier to power the speakers
- 1m 30-led WS2801 ledstrip
- DS18B20 1-wire temperature sensor
- HC-SR501 Infrared sensor
- A rotary encoder
- A monitor or old laptop display
- If you're using an old laptop display, you'll need to buy a laptop display adapter. You can get these from AliExpress, Ebay or Amazon. Just search for the serial number of your display.
You'll also need the following small components:
- A diode
- A 4.7k Ohm resistor
- A 470 Ohm resistor
- Wires to connect sensors to the Raspberry Pi
And these power supplies:
- 5V 2A to power the ledstrip
- 12V 2A to power the display
- 12V 2A to power the amplifier
- 5.1V 3A to power the Raspberry Pi (use an official RPi power supply)
Installing Raspbian
The display and all components behind the mirror are powered by the Raspberry Pi. You'll need to install Raspbian, the Pi's default operating system, onto the SD card.
- Download Win32 Disk imager. Linux and MacOS users can use something like Etcher.
- Download the latest Raspbian image from the Raspberry Pi website. Choose the option 'Raspbian Buster with desktop'
- Open Win32 Disk Imager and write the image file to the SD card.
The SD card is now almost ready. We just need to make sure we can connect to the Raspberry Pi remotely:
- Go to the SD card's 'boot' partition using your system's file explorer.
- Add a file called 'ssh' without an extension.
- Add 'ip=169.254.10.1' (without quotes) to the end of the first line of 'cmdline.txt'.
Safely eject the SD card from your computer, put it in your Raspberry Pi and boot it.
WiFi Configuration
To scan WiFi networks, execute the following command:
sudo iw dev wlan0 scan | grep SSID<br>
You'll see the list of all SSIDs your Raspberry Pi can connect to.
Create a network entry with an encrypted password by executing the following command and entering your network's password:
wpa_passphrase "YOUR_NETWORK_SSID_HERE"
Now paste the output of the above command in this file:
sudo nano /etc/wpa_supplicant/wpa_supplicant.conf
Now reboot the Raspberry Pi. You'll be connected to the internet.
Software Installation & Configuration
For this project, you'll need to download these packages to your Raspberry Pi:
pip3 install mysql-connector-python flask-socketio flask-cors gevent gevent-websocket adafruit-circuitpython-ws2801 adafruit-circuitpython-max9744
sudo apt install apache2 mariadb-server
Add this line to the bottom of /boot/config.txt to enable audio through GPIO pins 12 (left) and 13 (right):
dtoverlay=audremap
Use raspi-config to set your display's resolution and to enable i2c, One-wire and SPI. Also set the boot method to 'Desktop Autologin'.
In /etc/xdg/lxsession/LXDE-pi/autostart, add the following:
@xset s off<br>@xset -dpms<br>@xset s noblank<br>@chromium-browser --kiosk 127.0.0.1/mirror.html # load chromium after boot and open the website in full screen mode<br>
This opens the browser on the correct page when LXDE (Raspbian's desktop environment) loads. Also remove or comment the @xscreensaver line to disable the screensaver.
Github repository
Clone my GitHub repository and put the contents of the Frontend folder in /var/www/html. We'll need the Backend folder later.
The Database
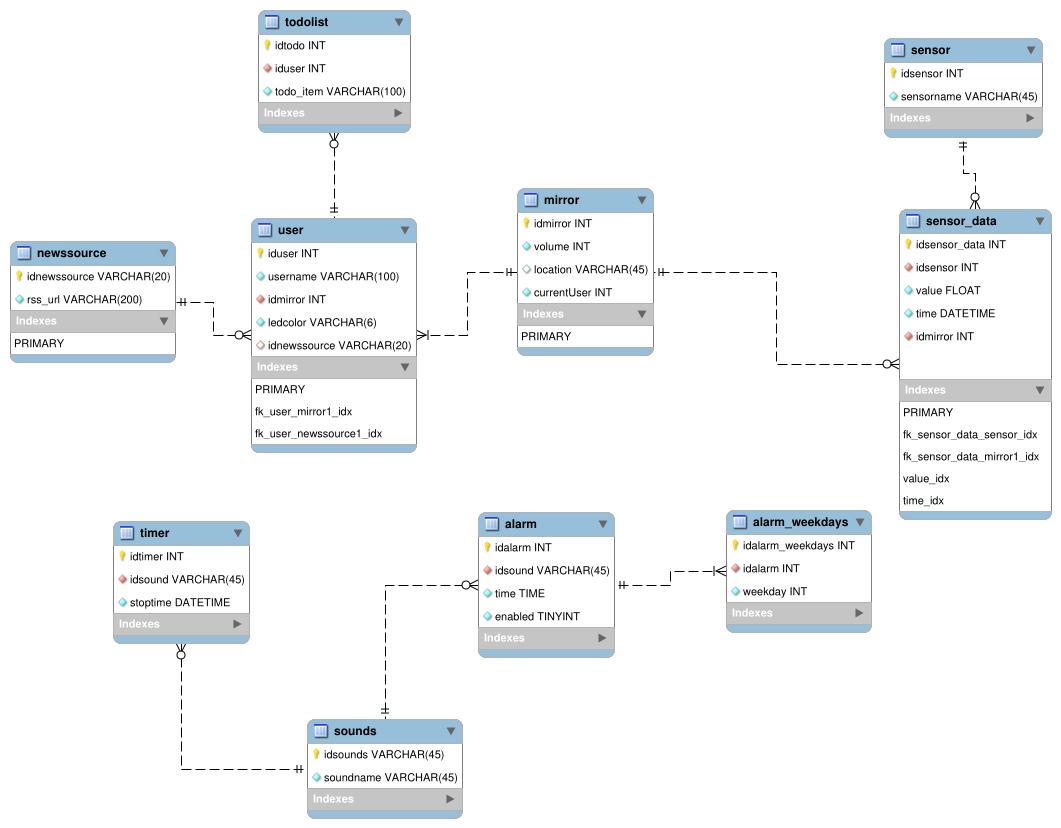
This is the database schema, optimized to 3NF. It stores all the alarms, newssources, users, sensor data, sounds and the todolist.
- Use MySQL Workbench to access your pi's database server (mariadb)
- Create a database using this schema and insert your own data.
- Edit config.py in the Backend folder of my GitHub repository: change the database name, your chosen username, and the password.
- Edit app.py and change the OpenWeatherMap API URL to your own. (Create your own here)
Building the Mirror Frame
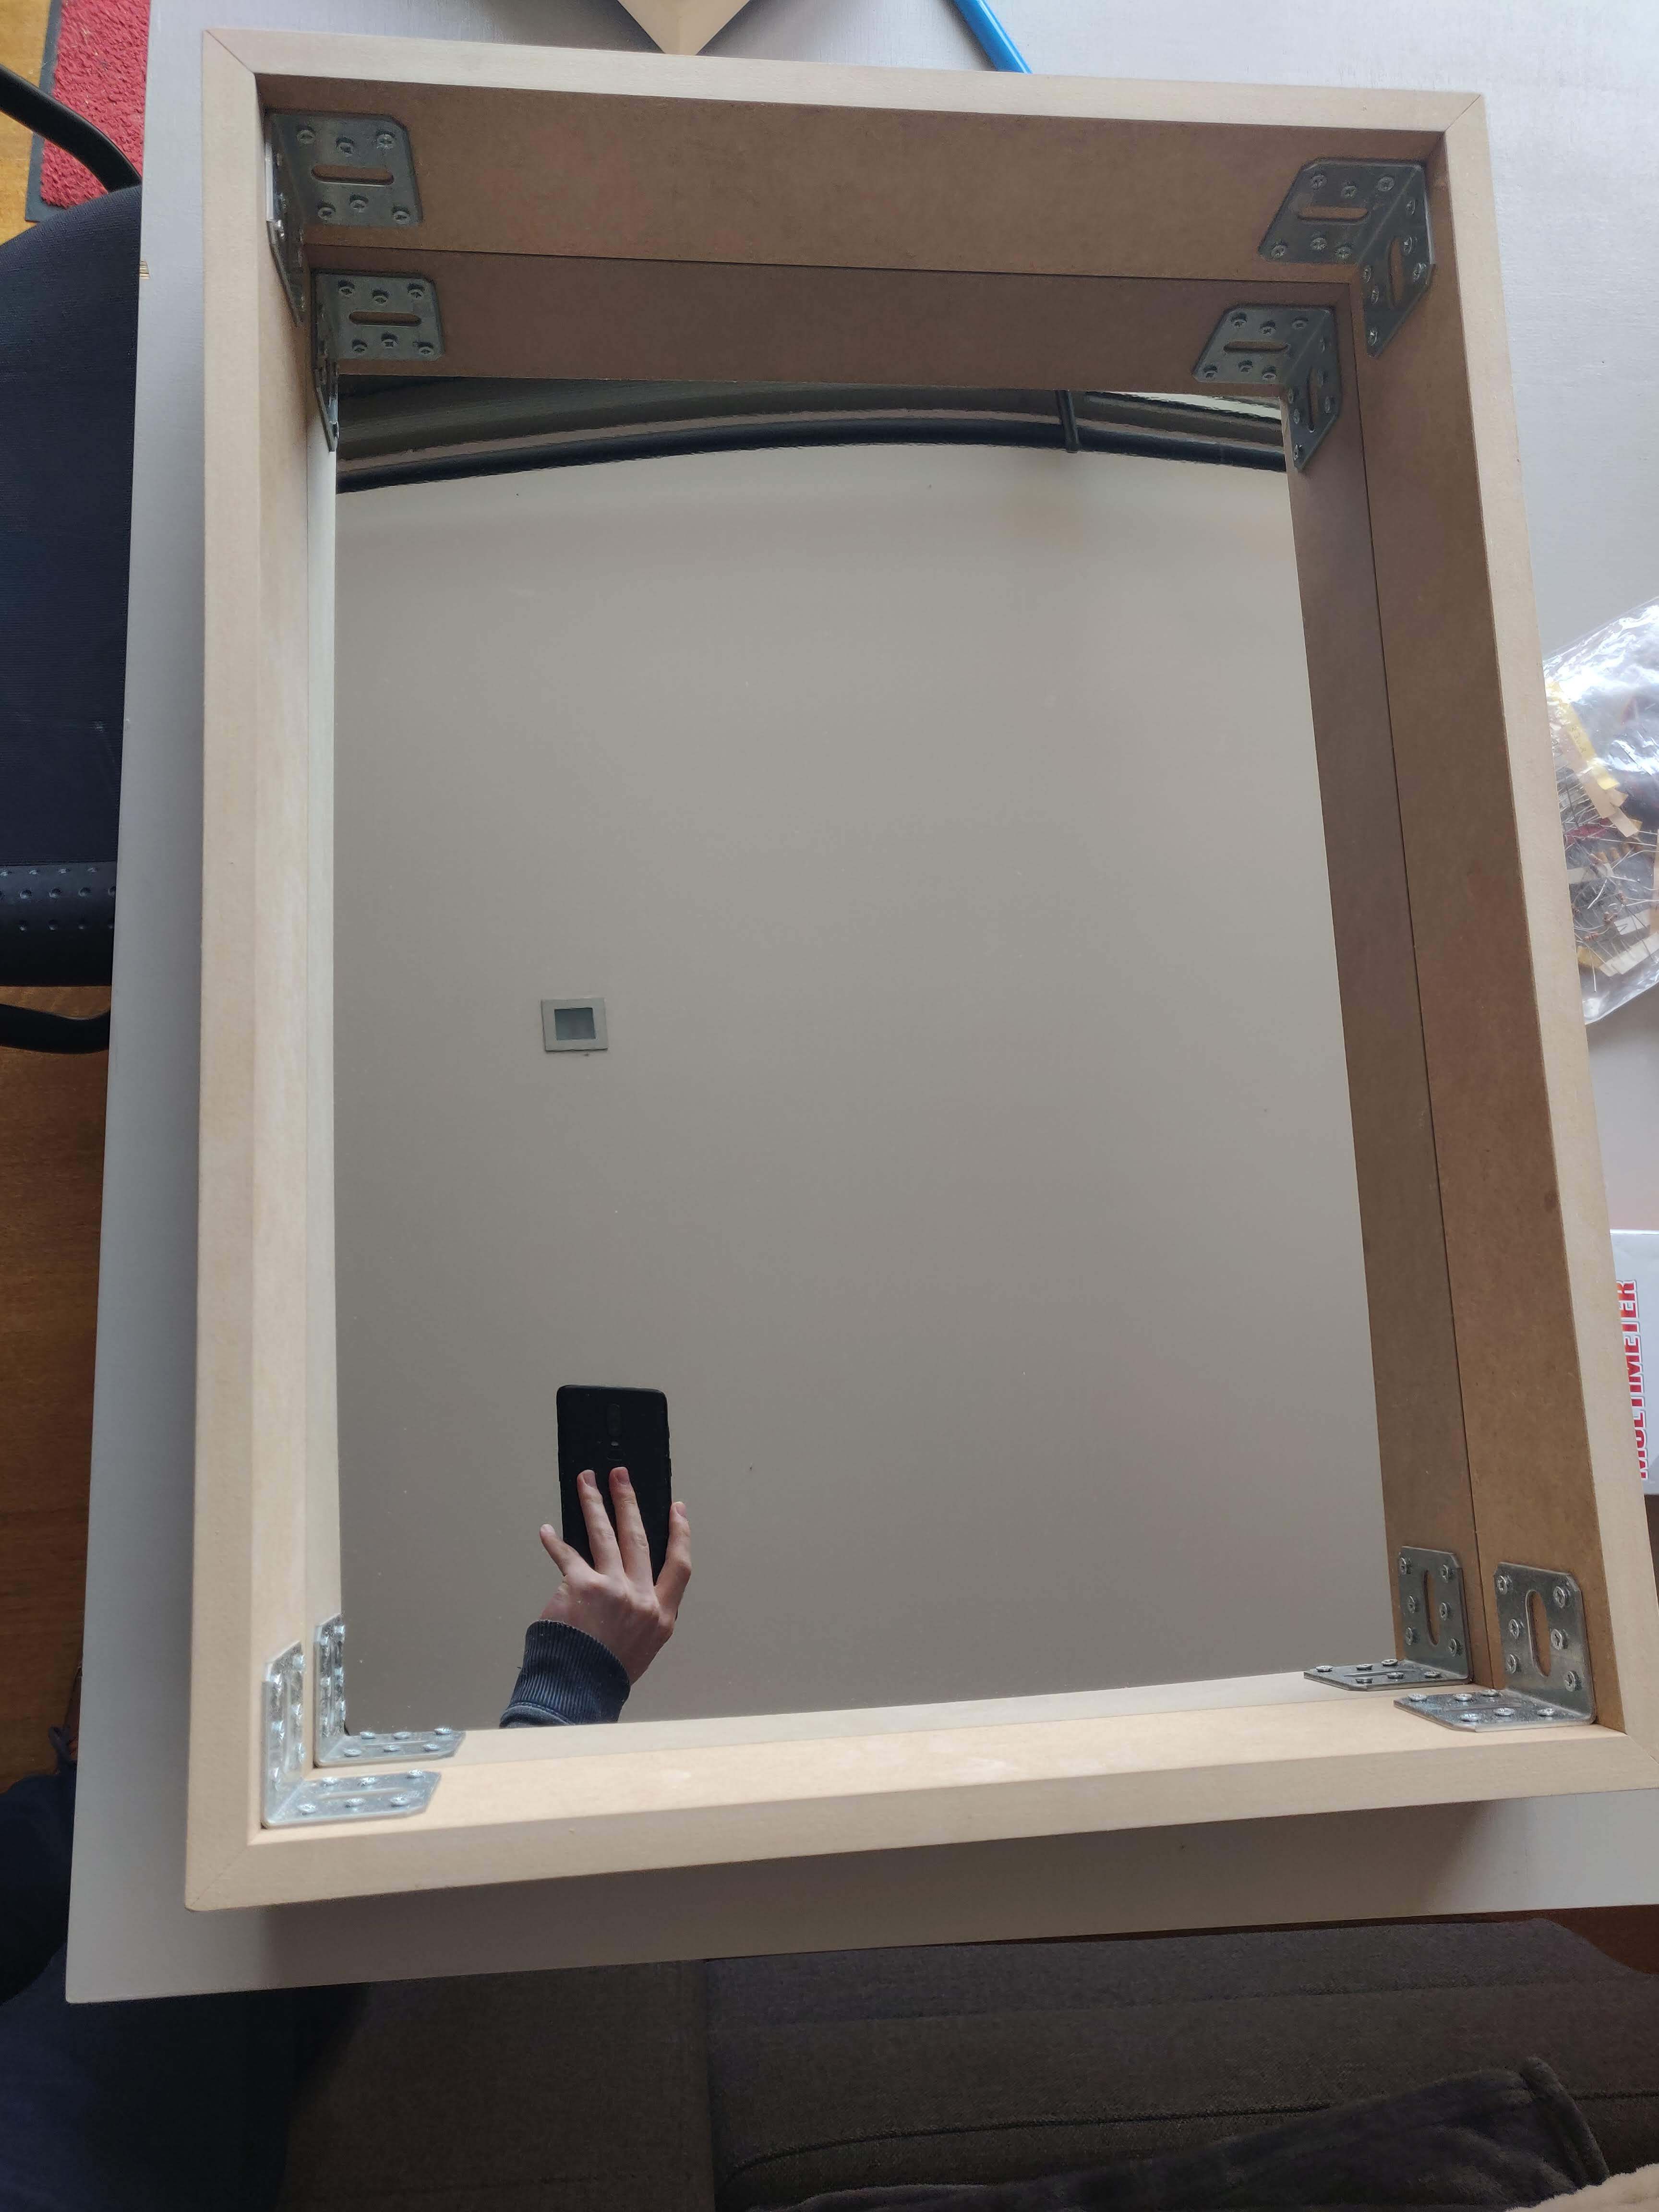
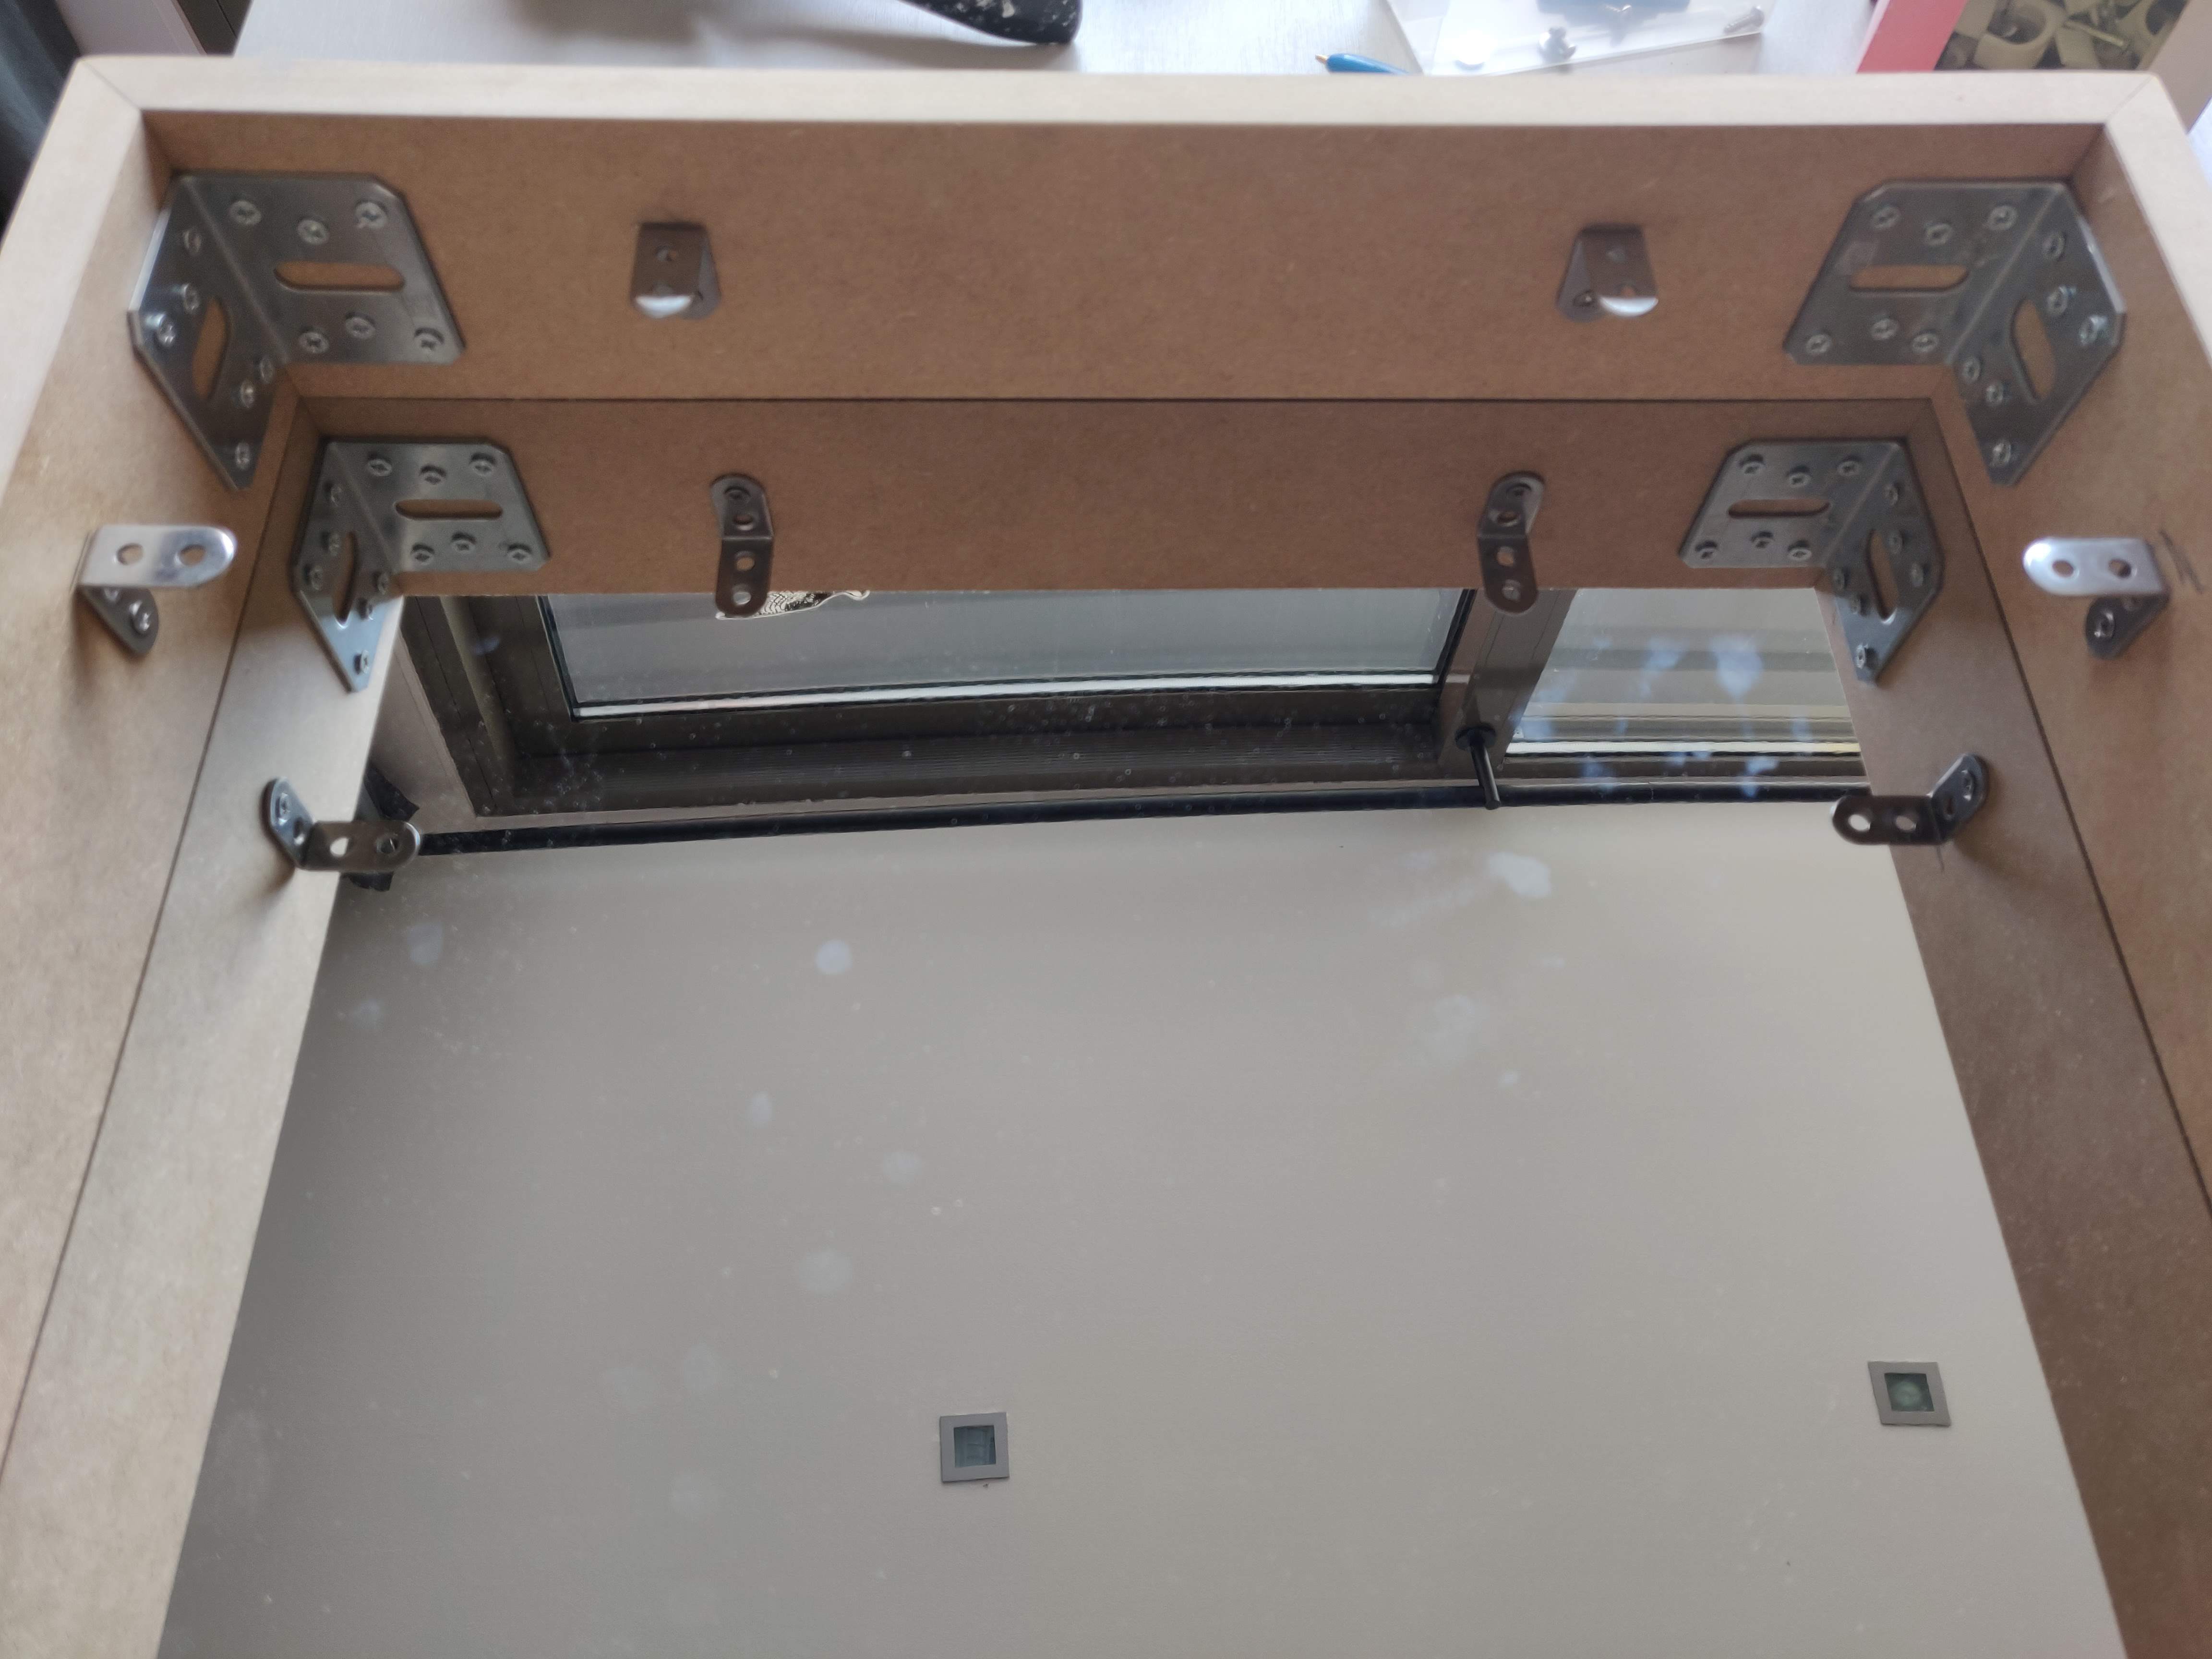
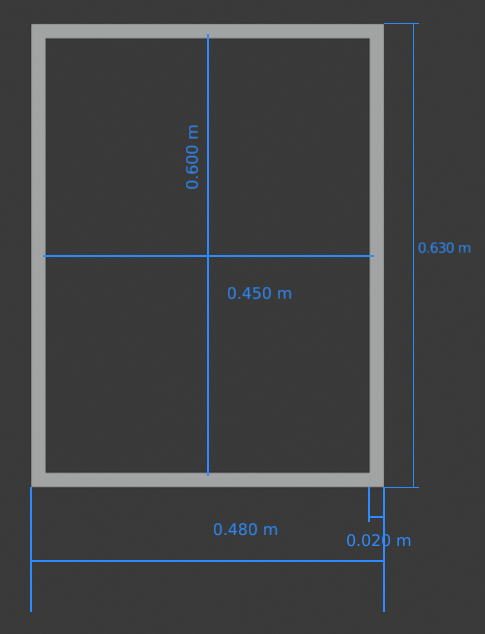

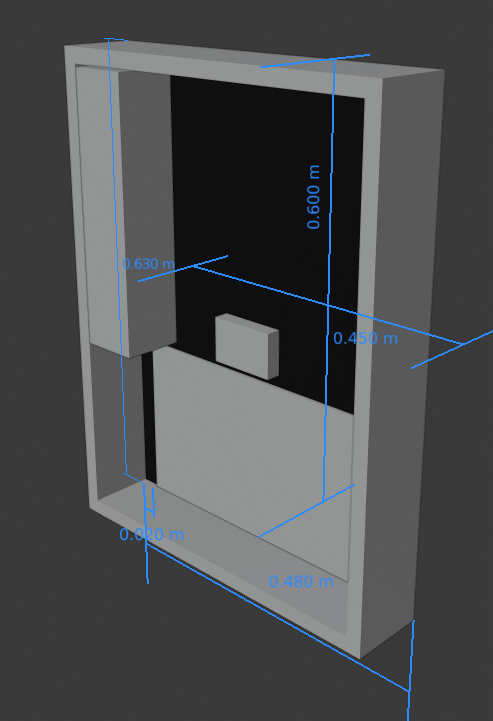
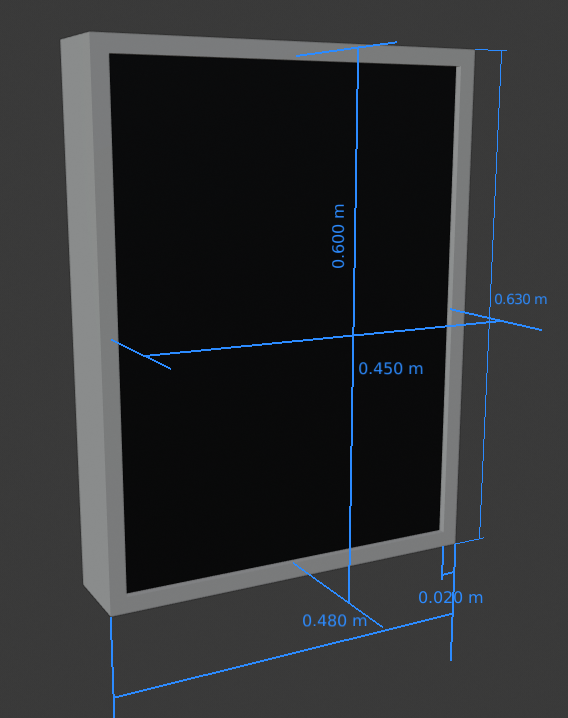
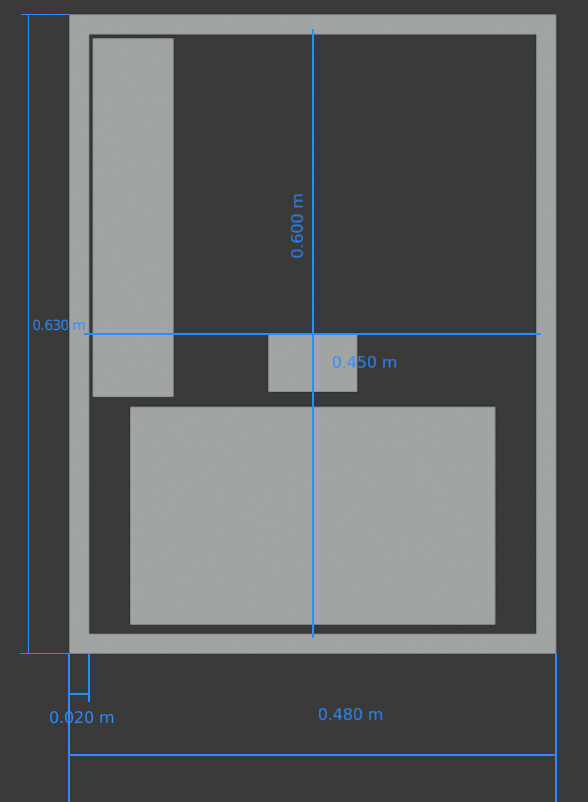
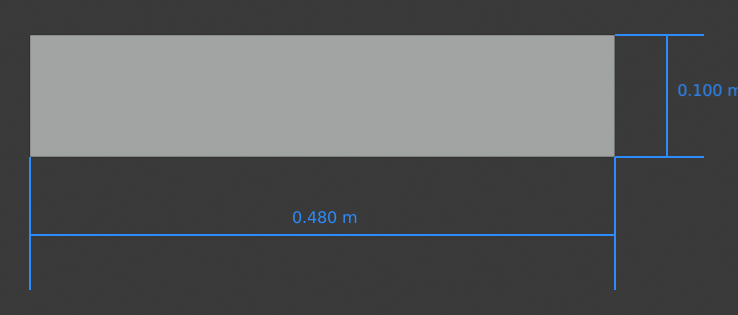
I built the frame around the mirror using Miter joints with metal corners. The wooden planks I used are 18mm thick and 10cm wide. In the images you can see the exact measurements for a 45cm x 60cm mirror. Behind the mirror are all the electronics, so make sure your planks are wide enough to fit them.
I used metal hooks to attach the speakers to the frame. That way they don't rest on the mirror, reducing vibration stress on the glass.
The Electronics
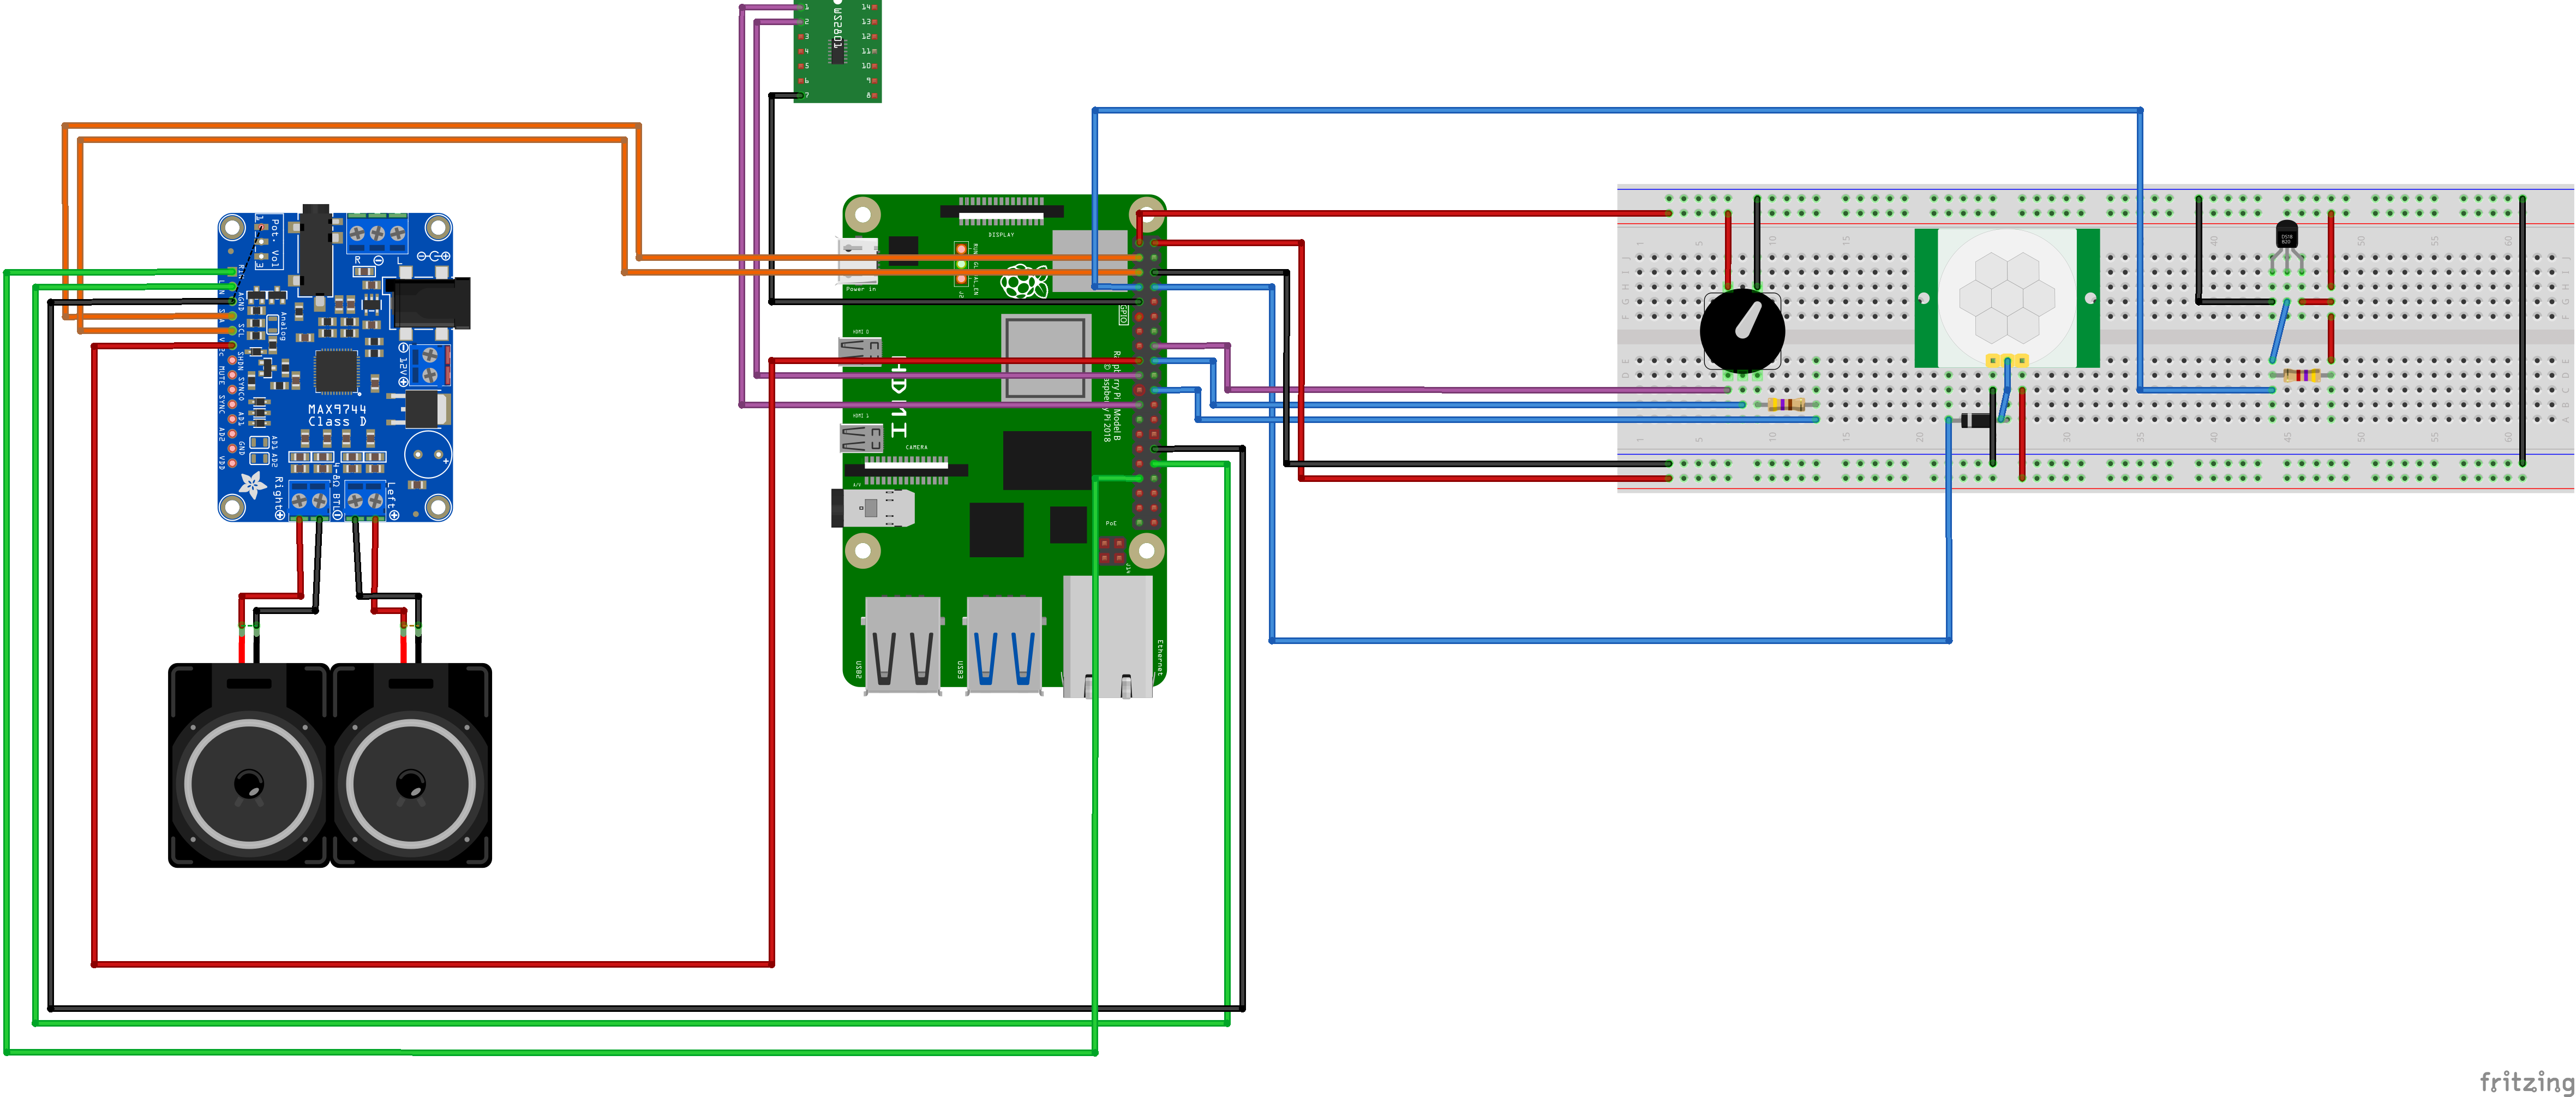
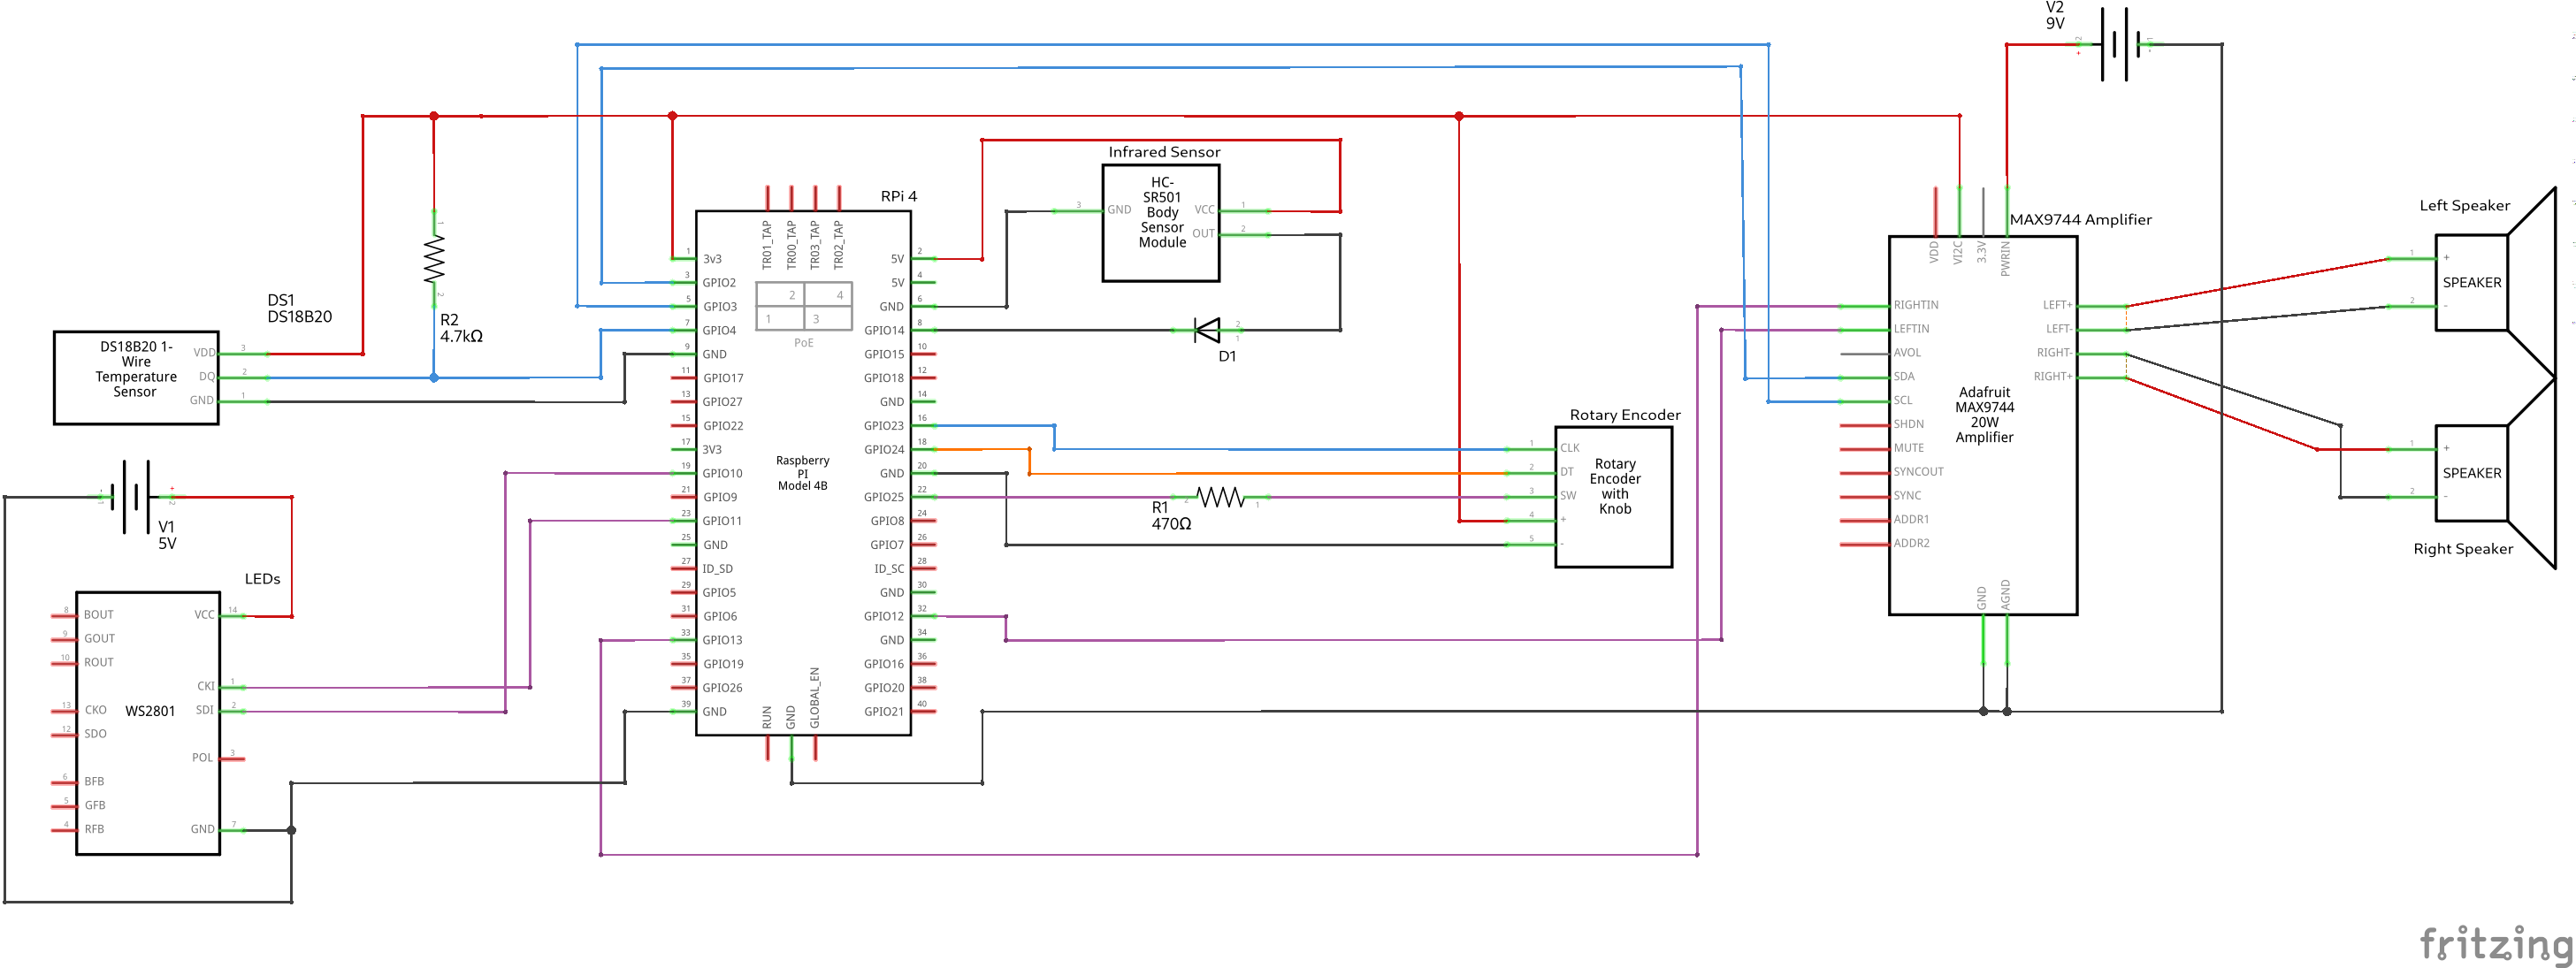
Follow the above schematics to build the circuit. I used tape to fix the electronics to the mirror.
Fitting the Electronics in the Frame
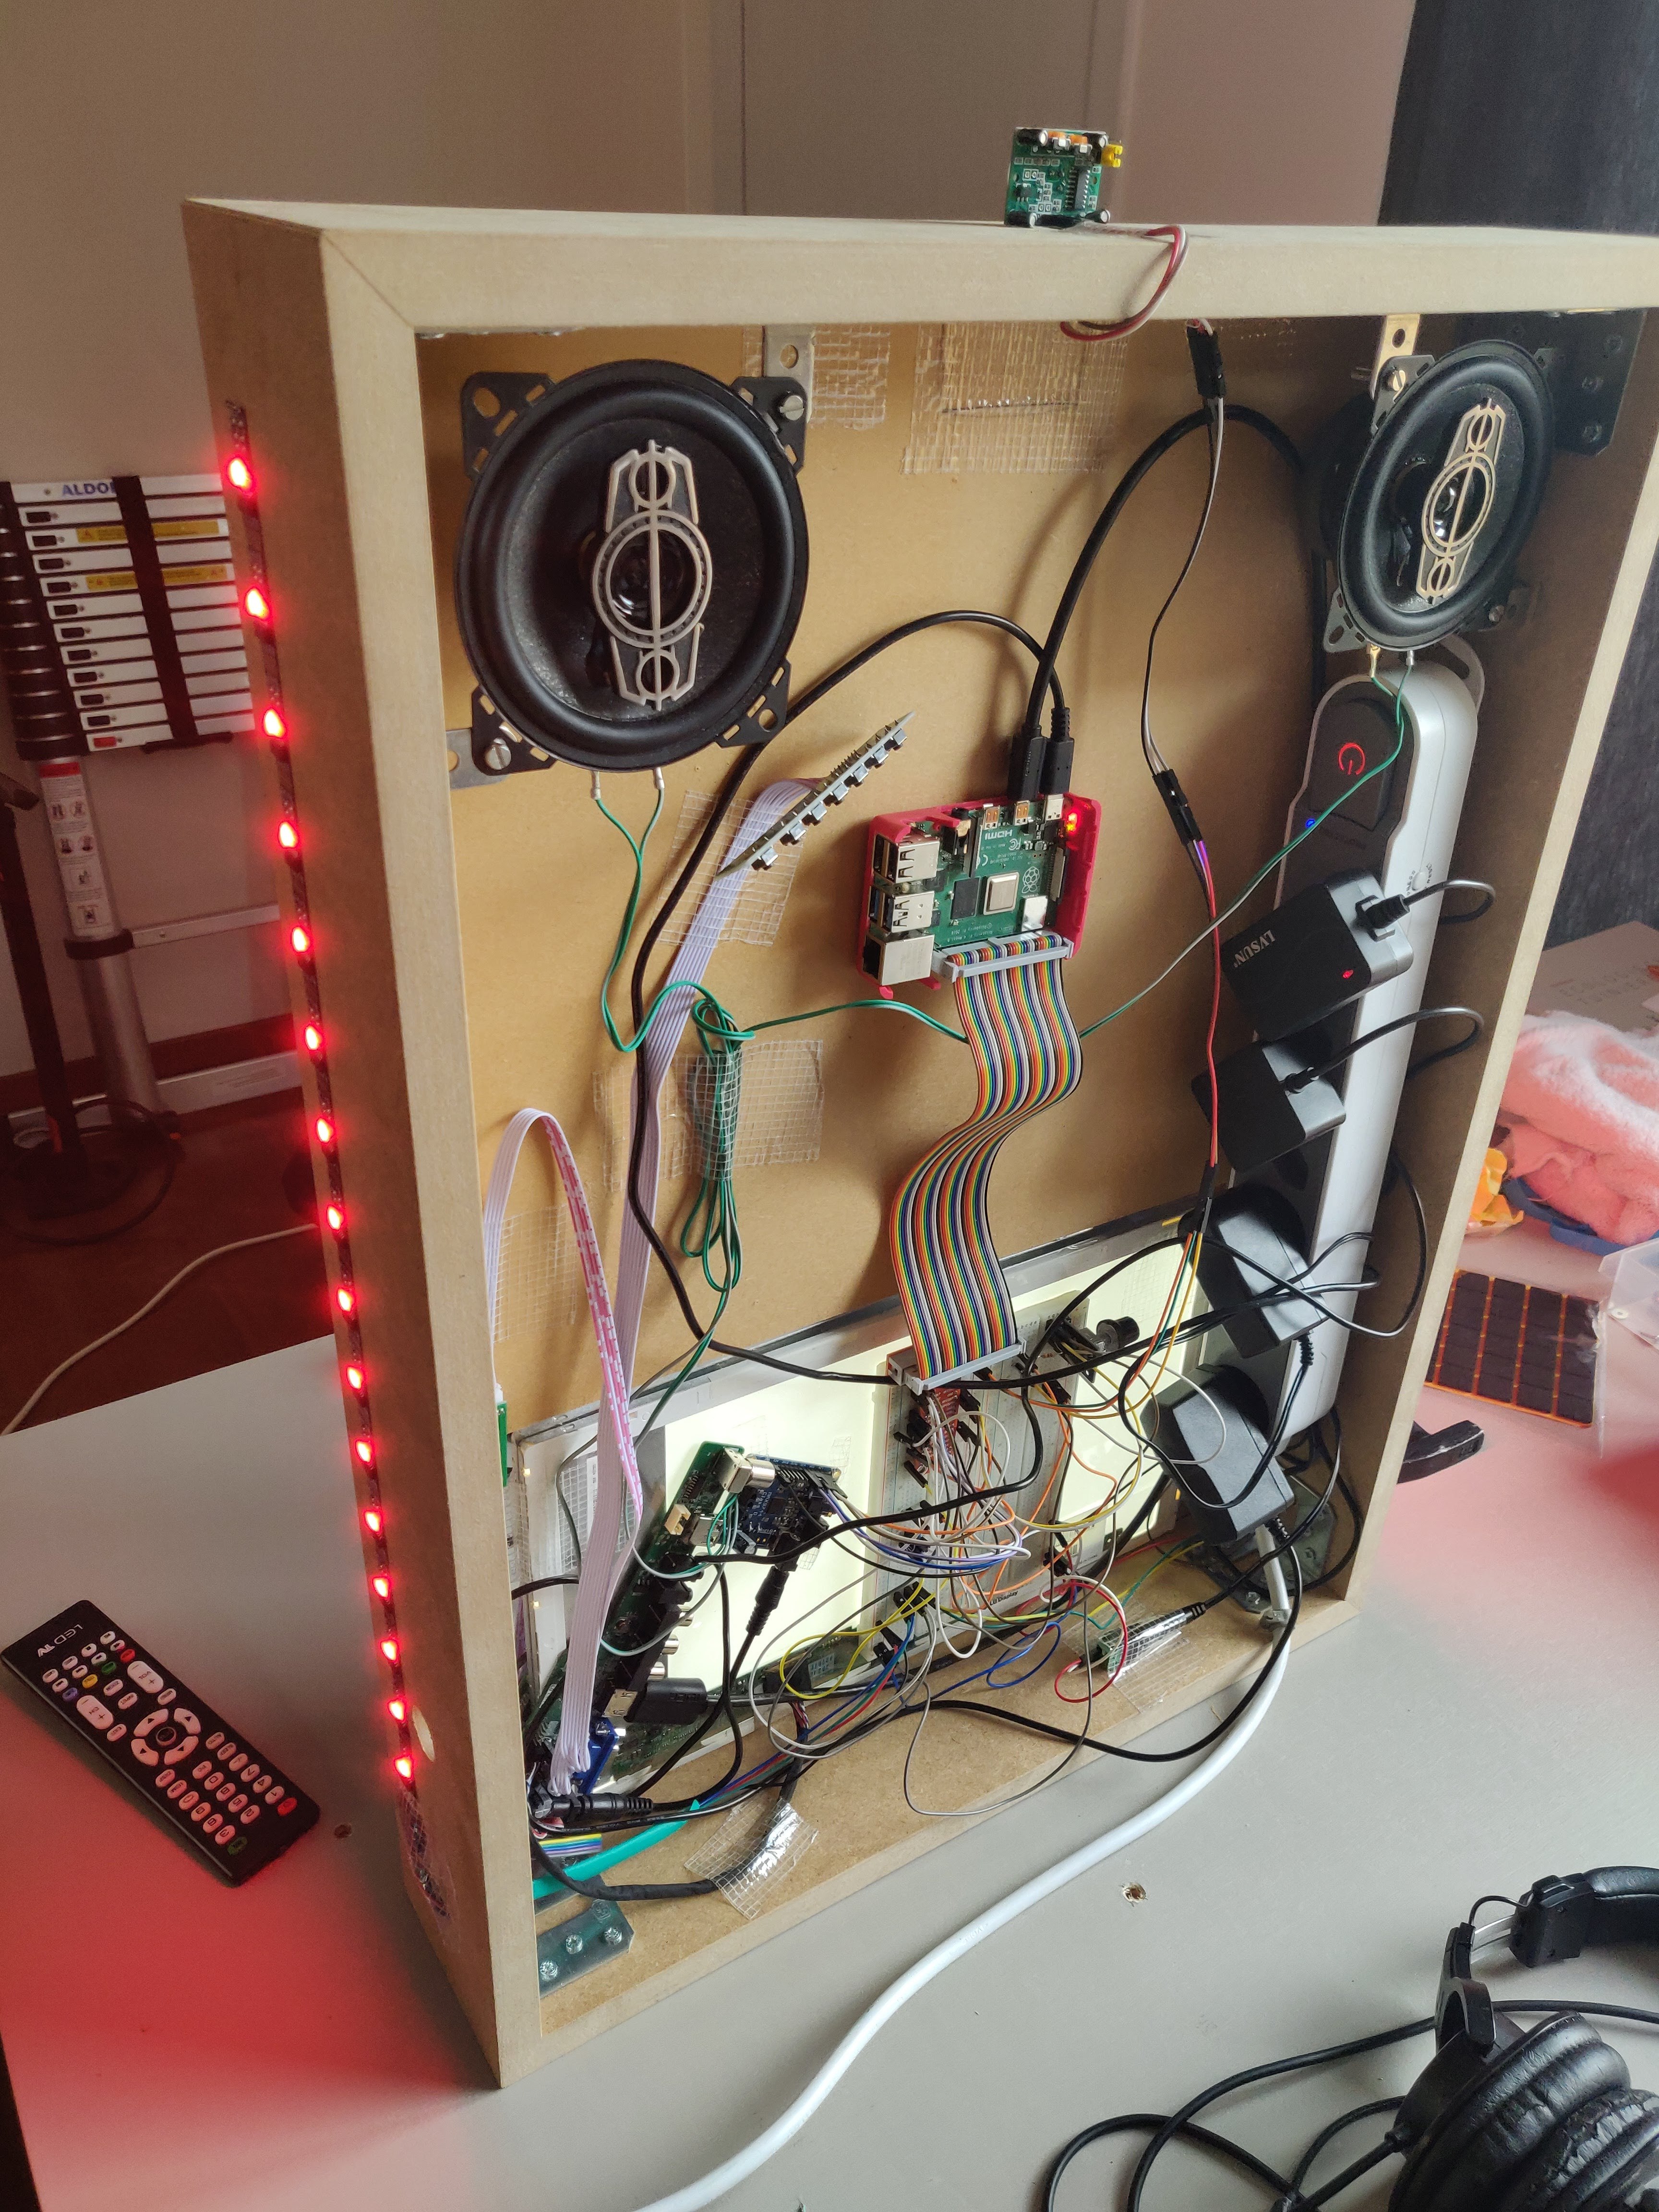
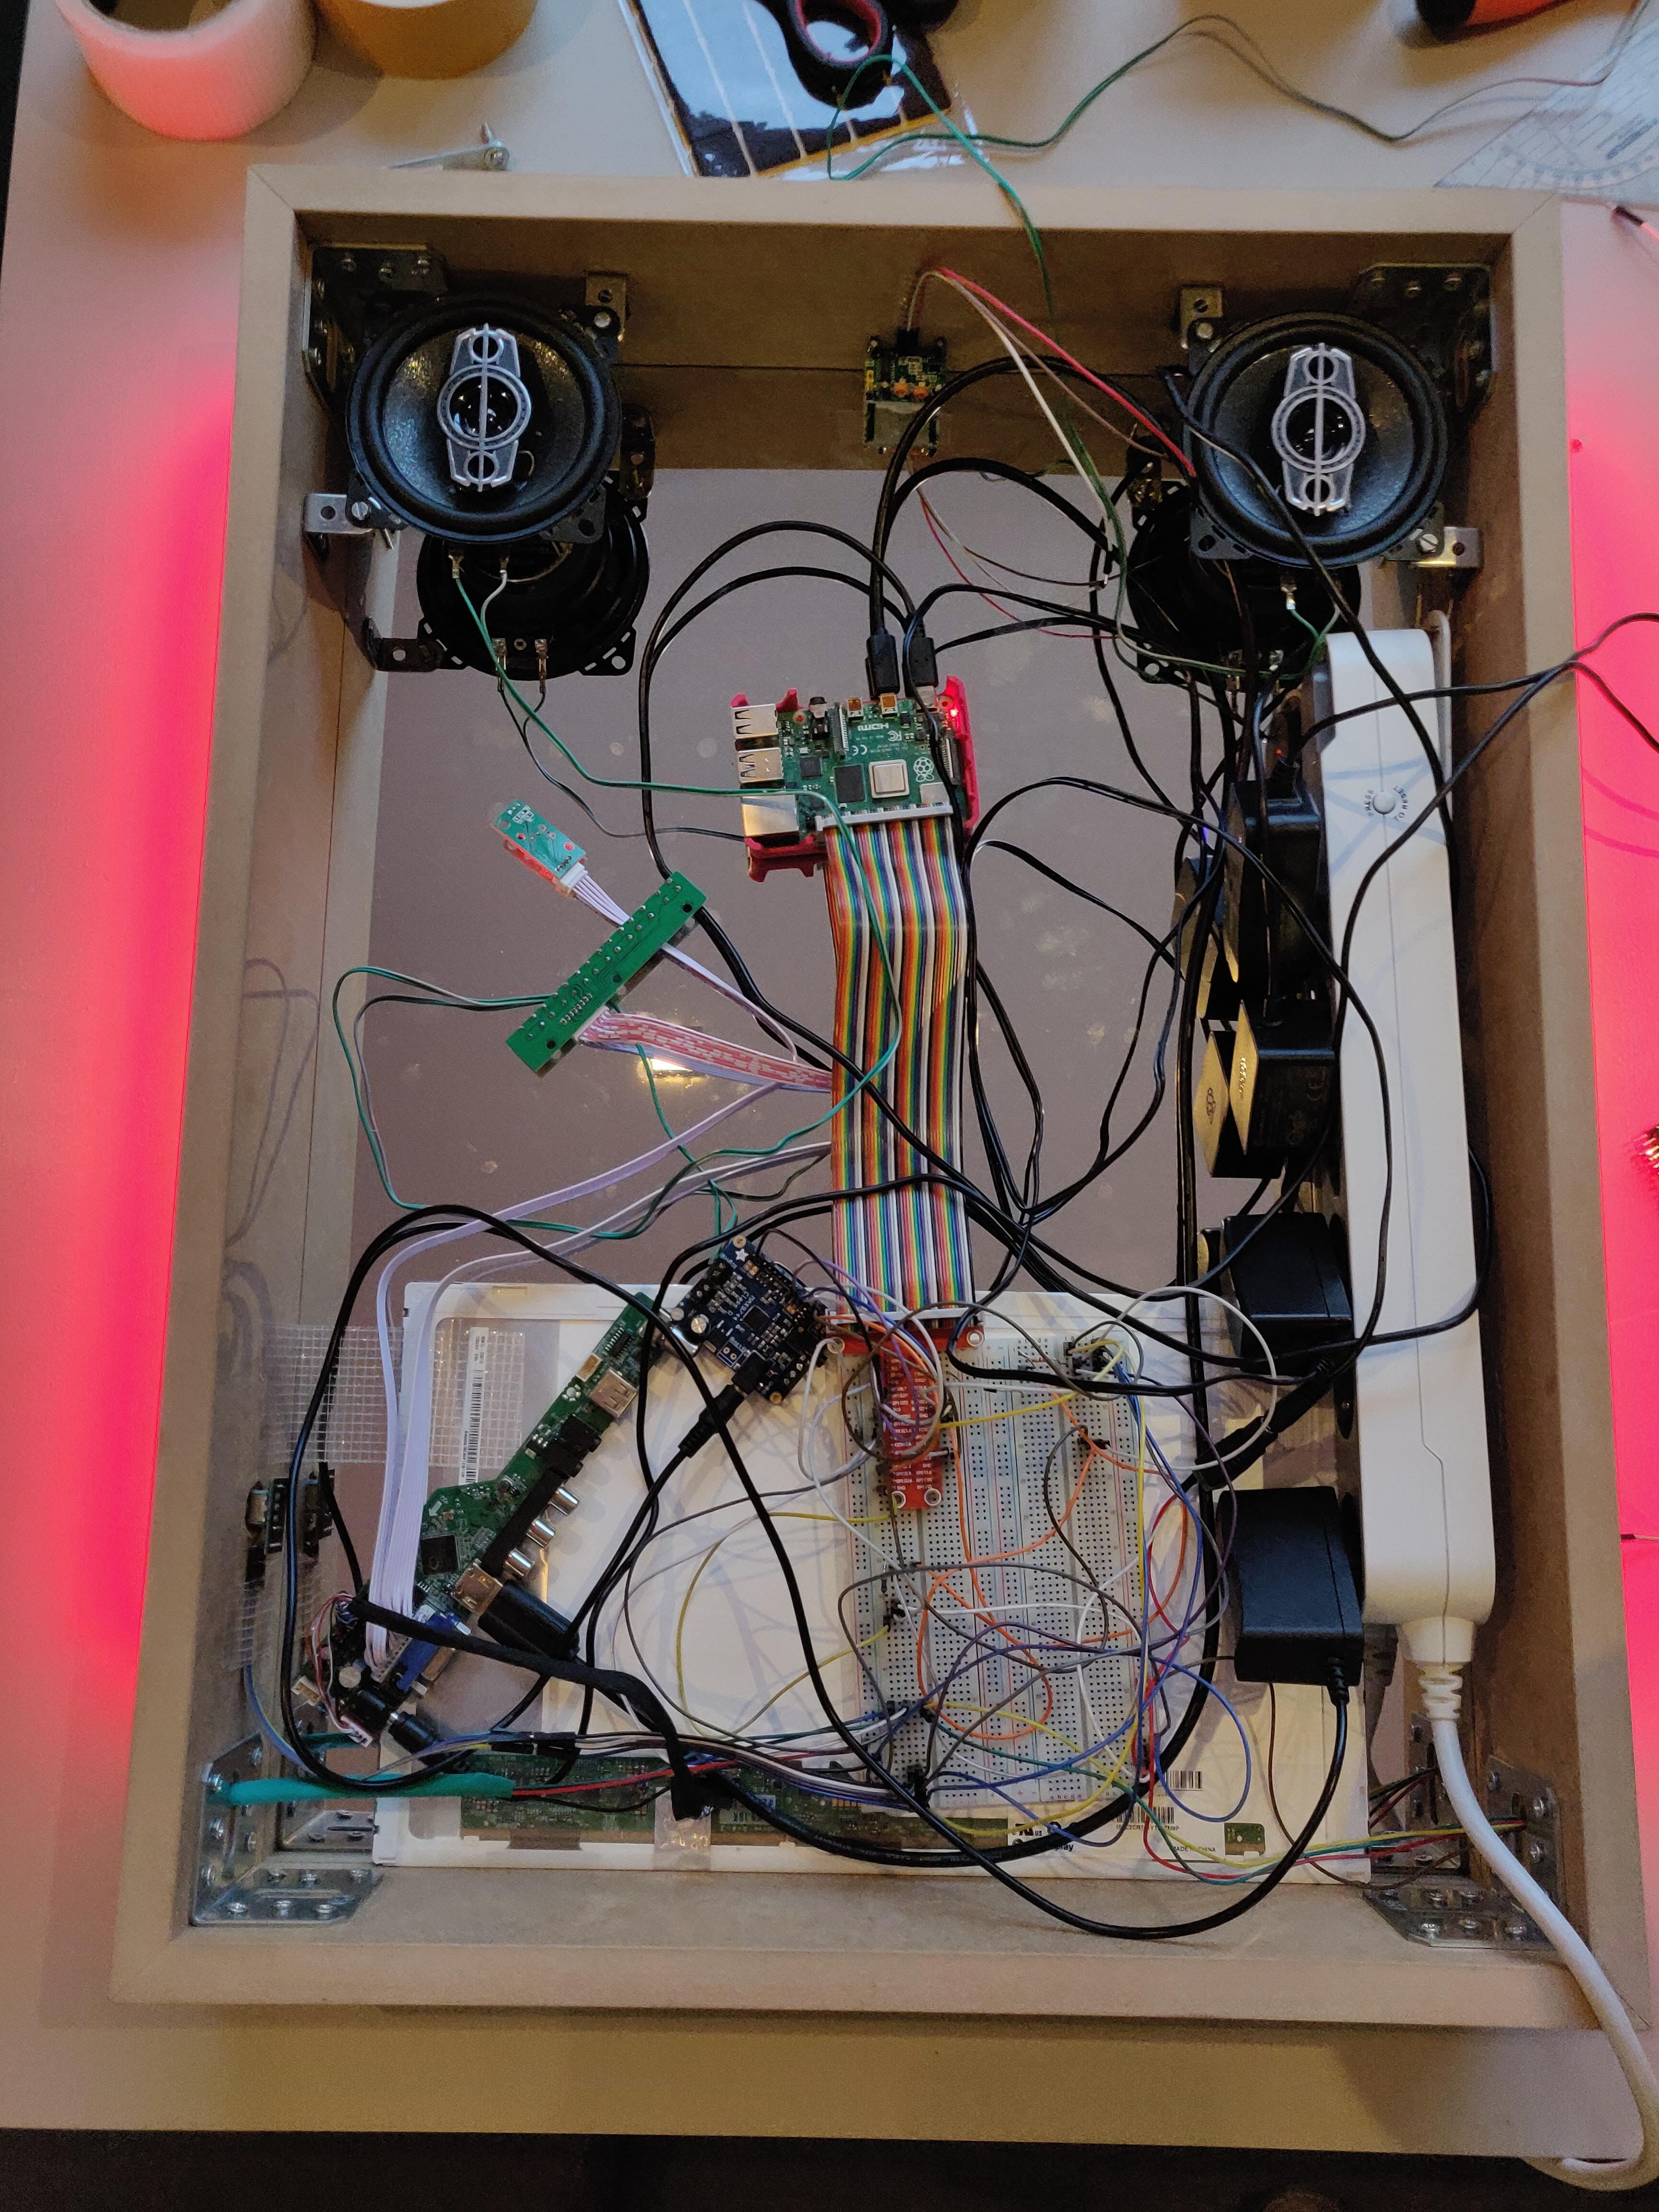
After attaching the speakers to the metal hooks at the top, add the rest of the electronics to the mirror. I also put a thin wooden plank between the mirror and the electronics, so instead of taping the electronics to the mirror, I taped the electronics to the wooden plank. The laptop display is white panel at the bottom of the mirror.
As you can see in the images, I plugged all power adapters inside a multi-socket outlet so there's only one cable leaving the frame. This is why I needed wide enough planks (10cm).
I drilled a 2cm-wide hole in the right side of the mirror for the rotary encoder to fit through. This allows you to easily change volume (turn) or dismiss timers and alarms (push).
I drilled two 8mm holes at either side of the mirror to route the cables for the ledstrips.
Finishing Touches
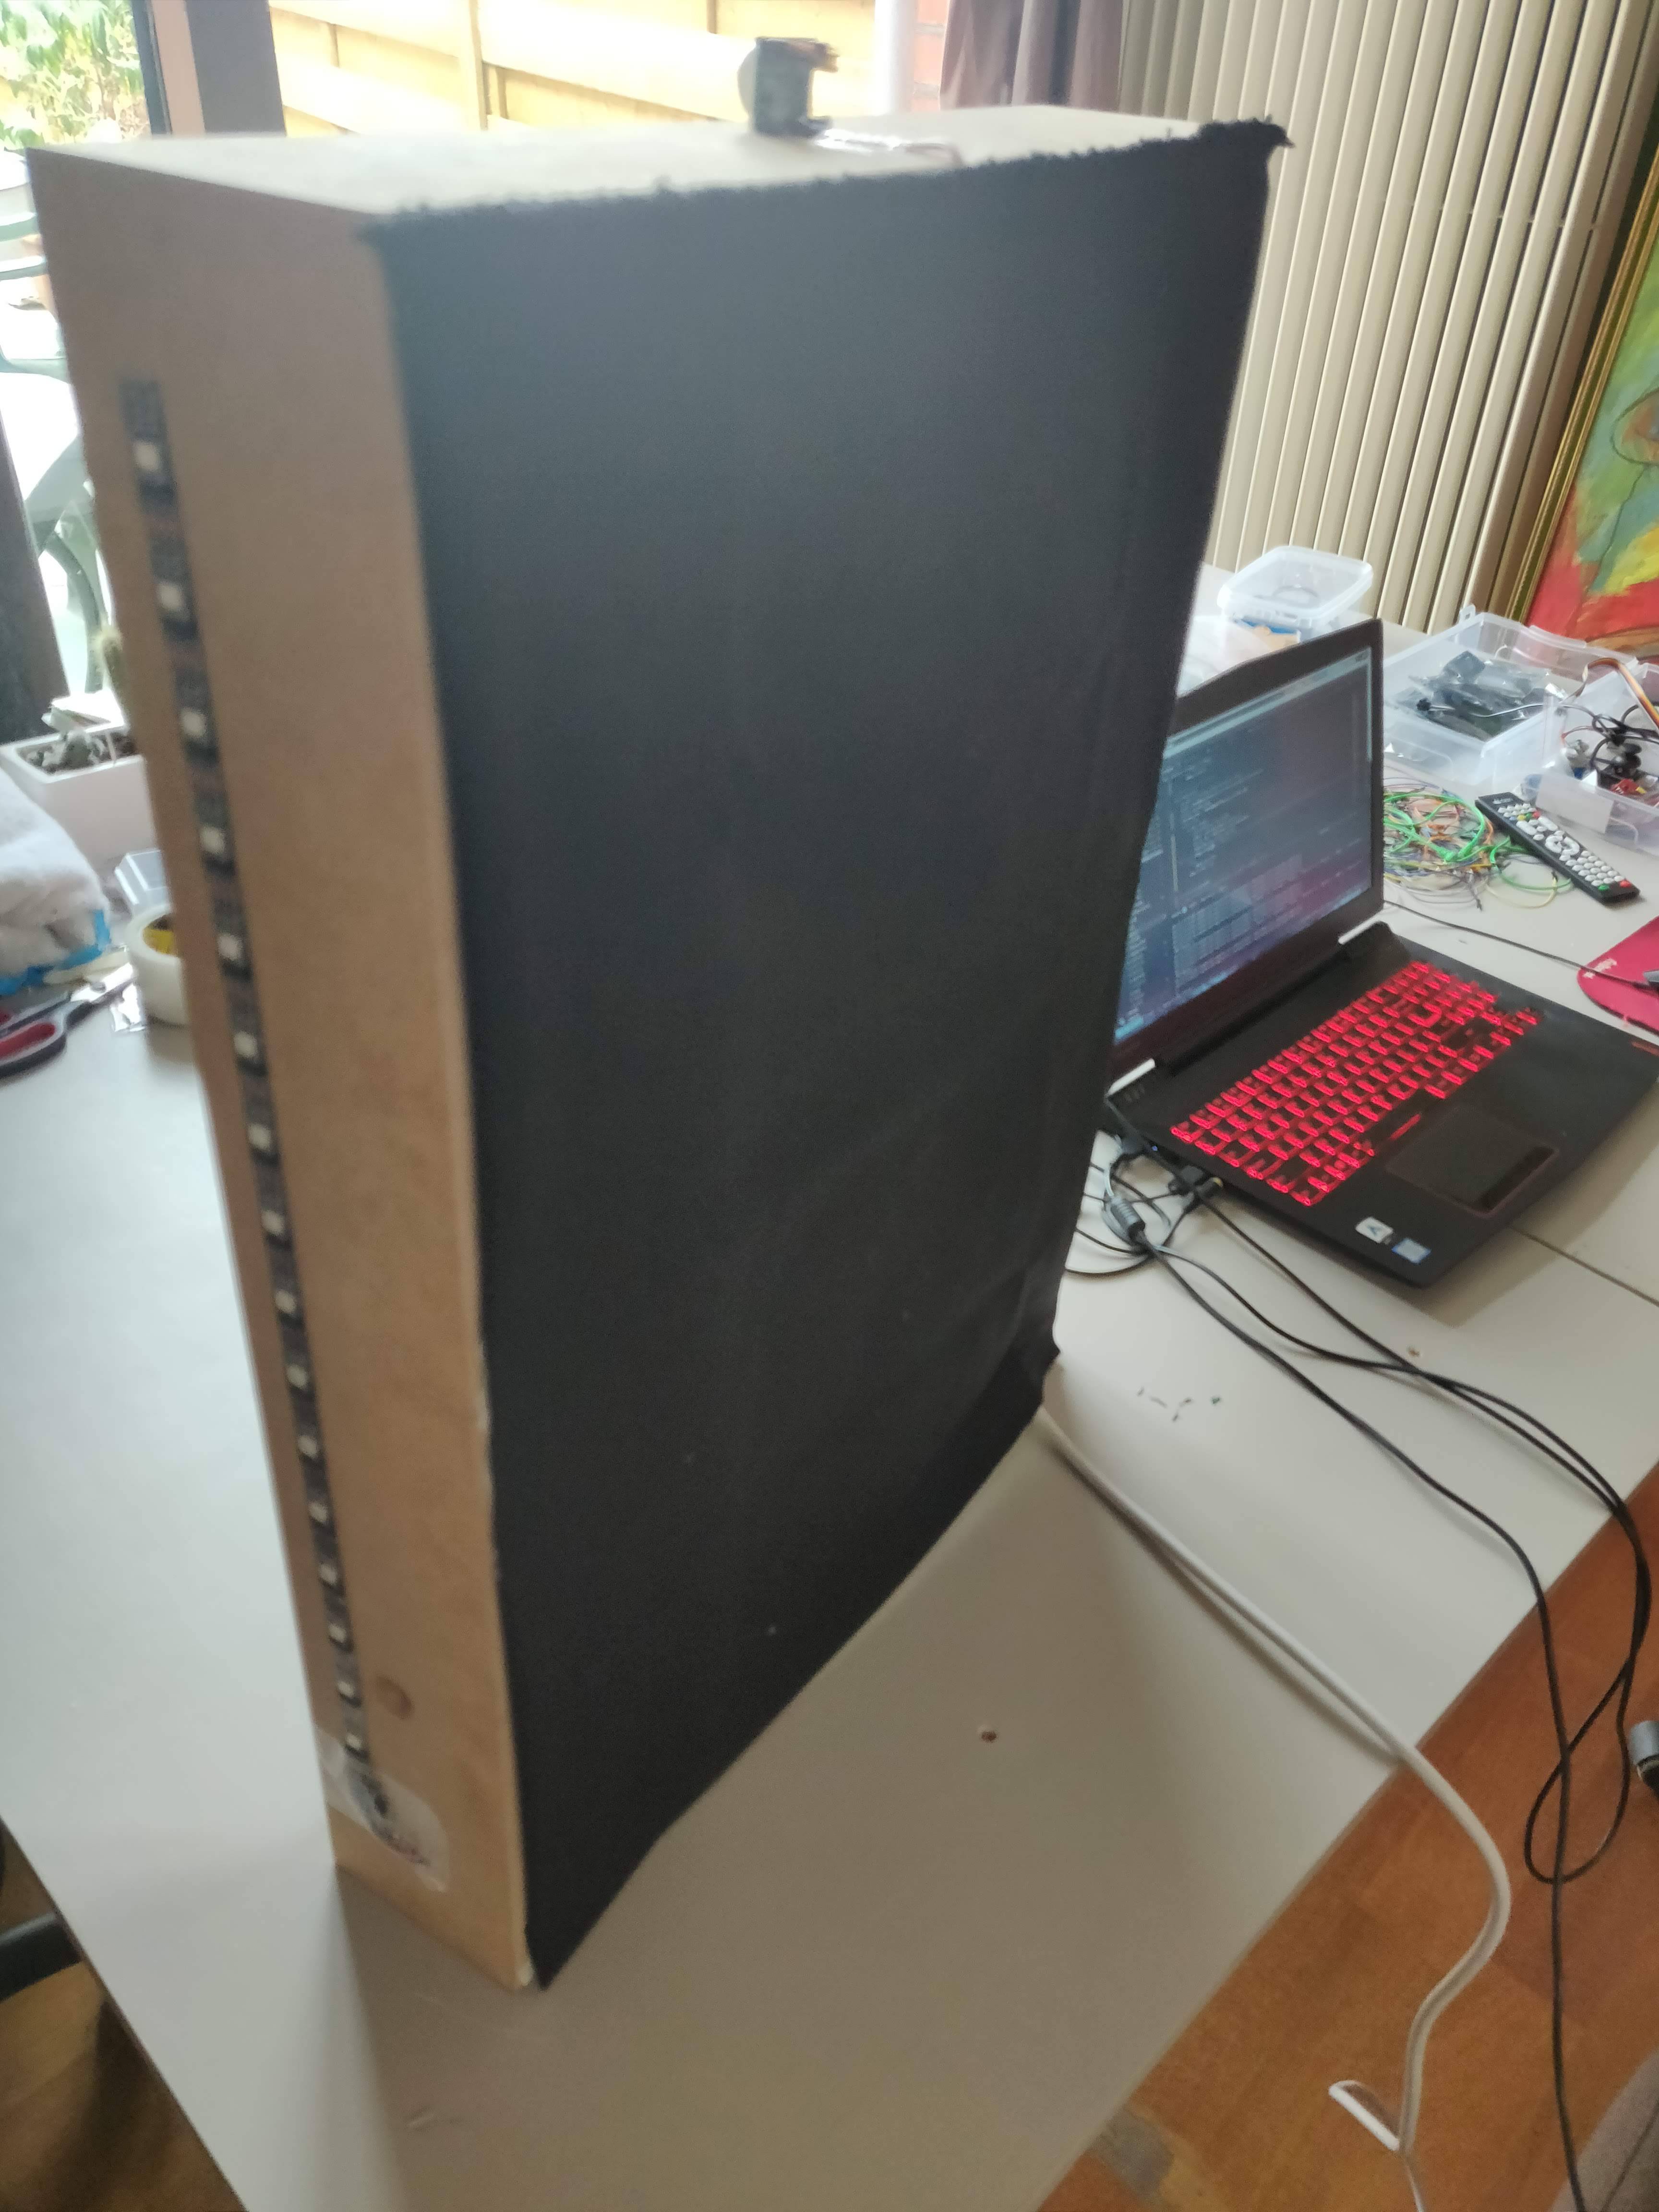
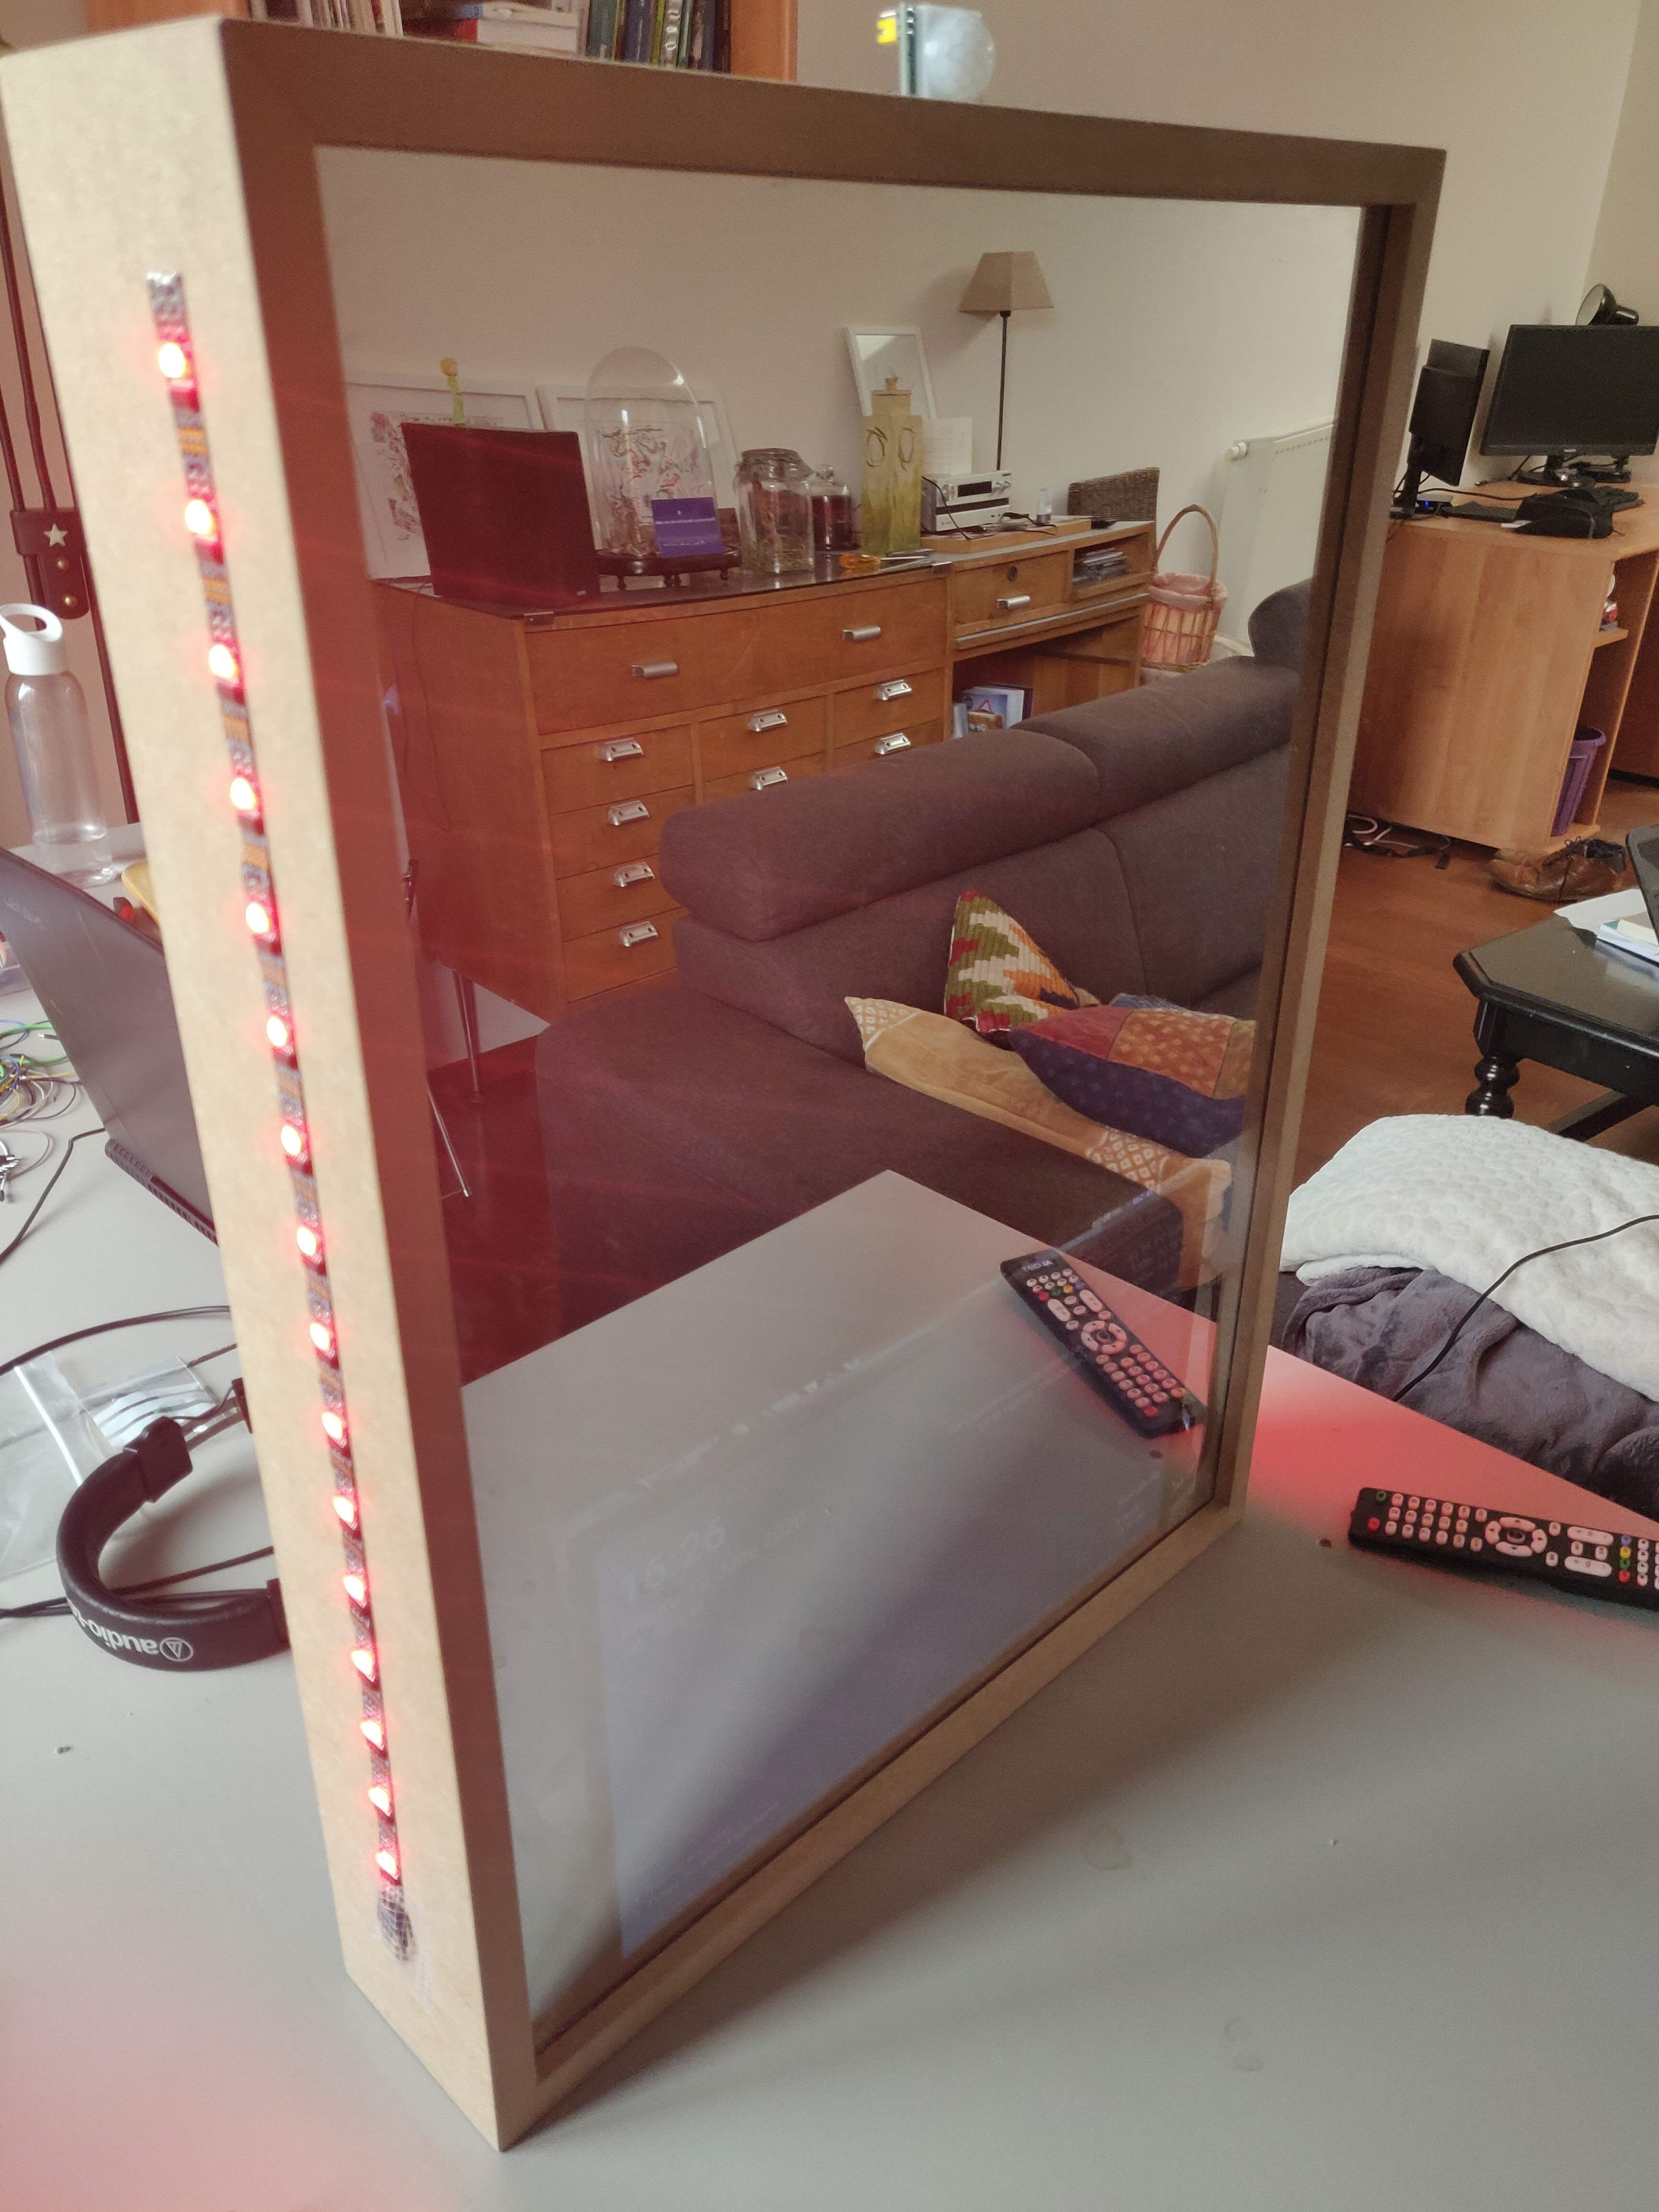
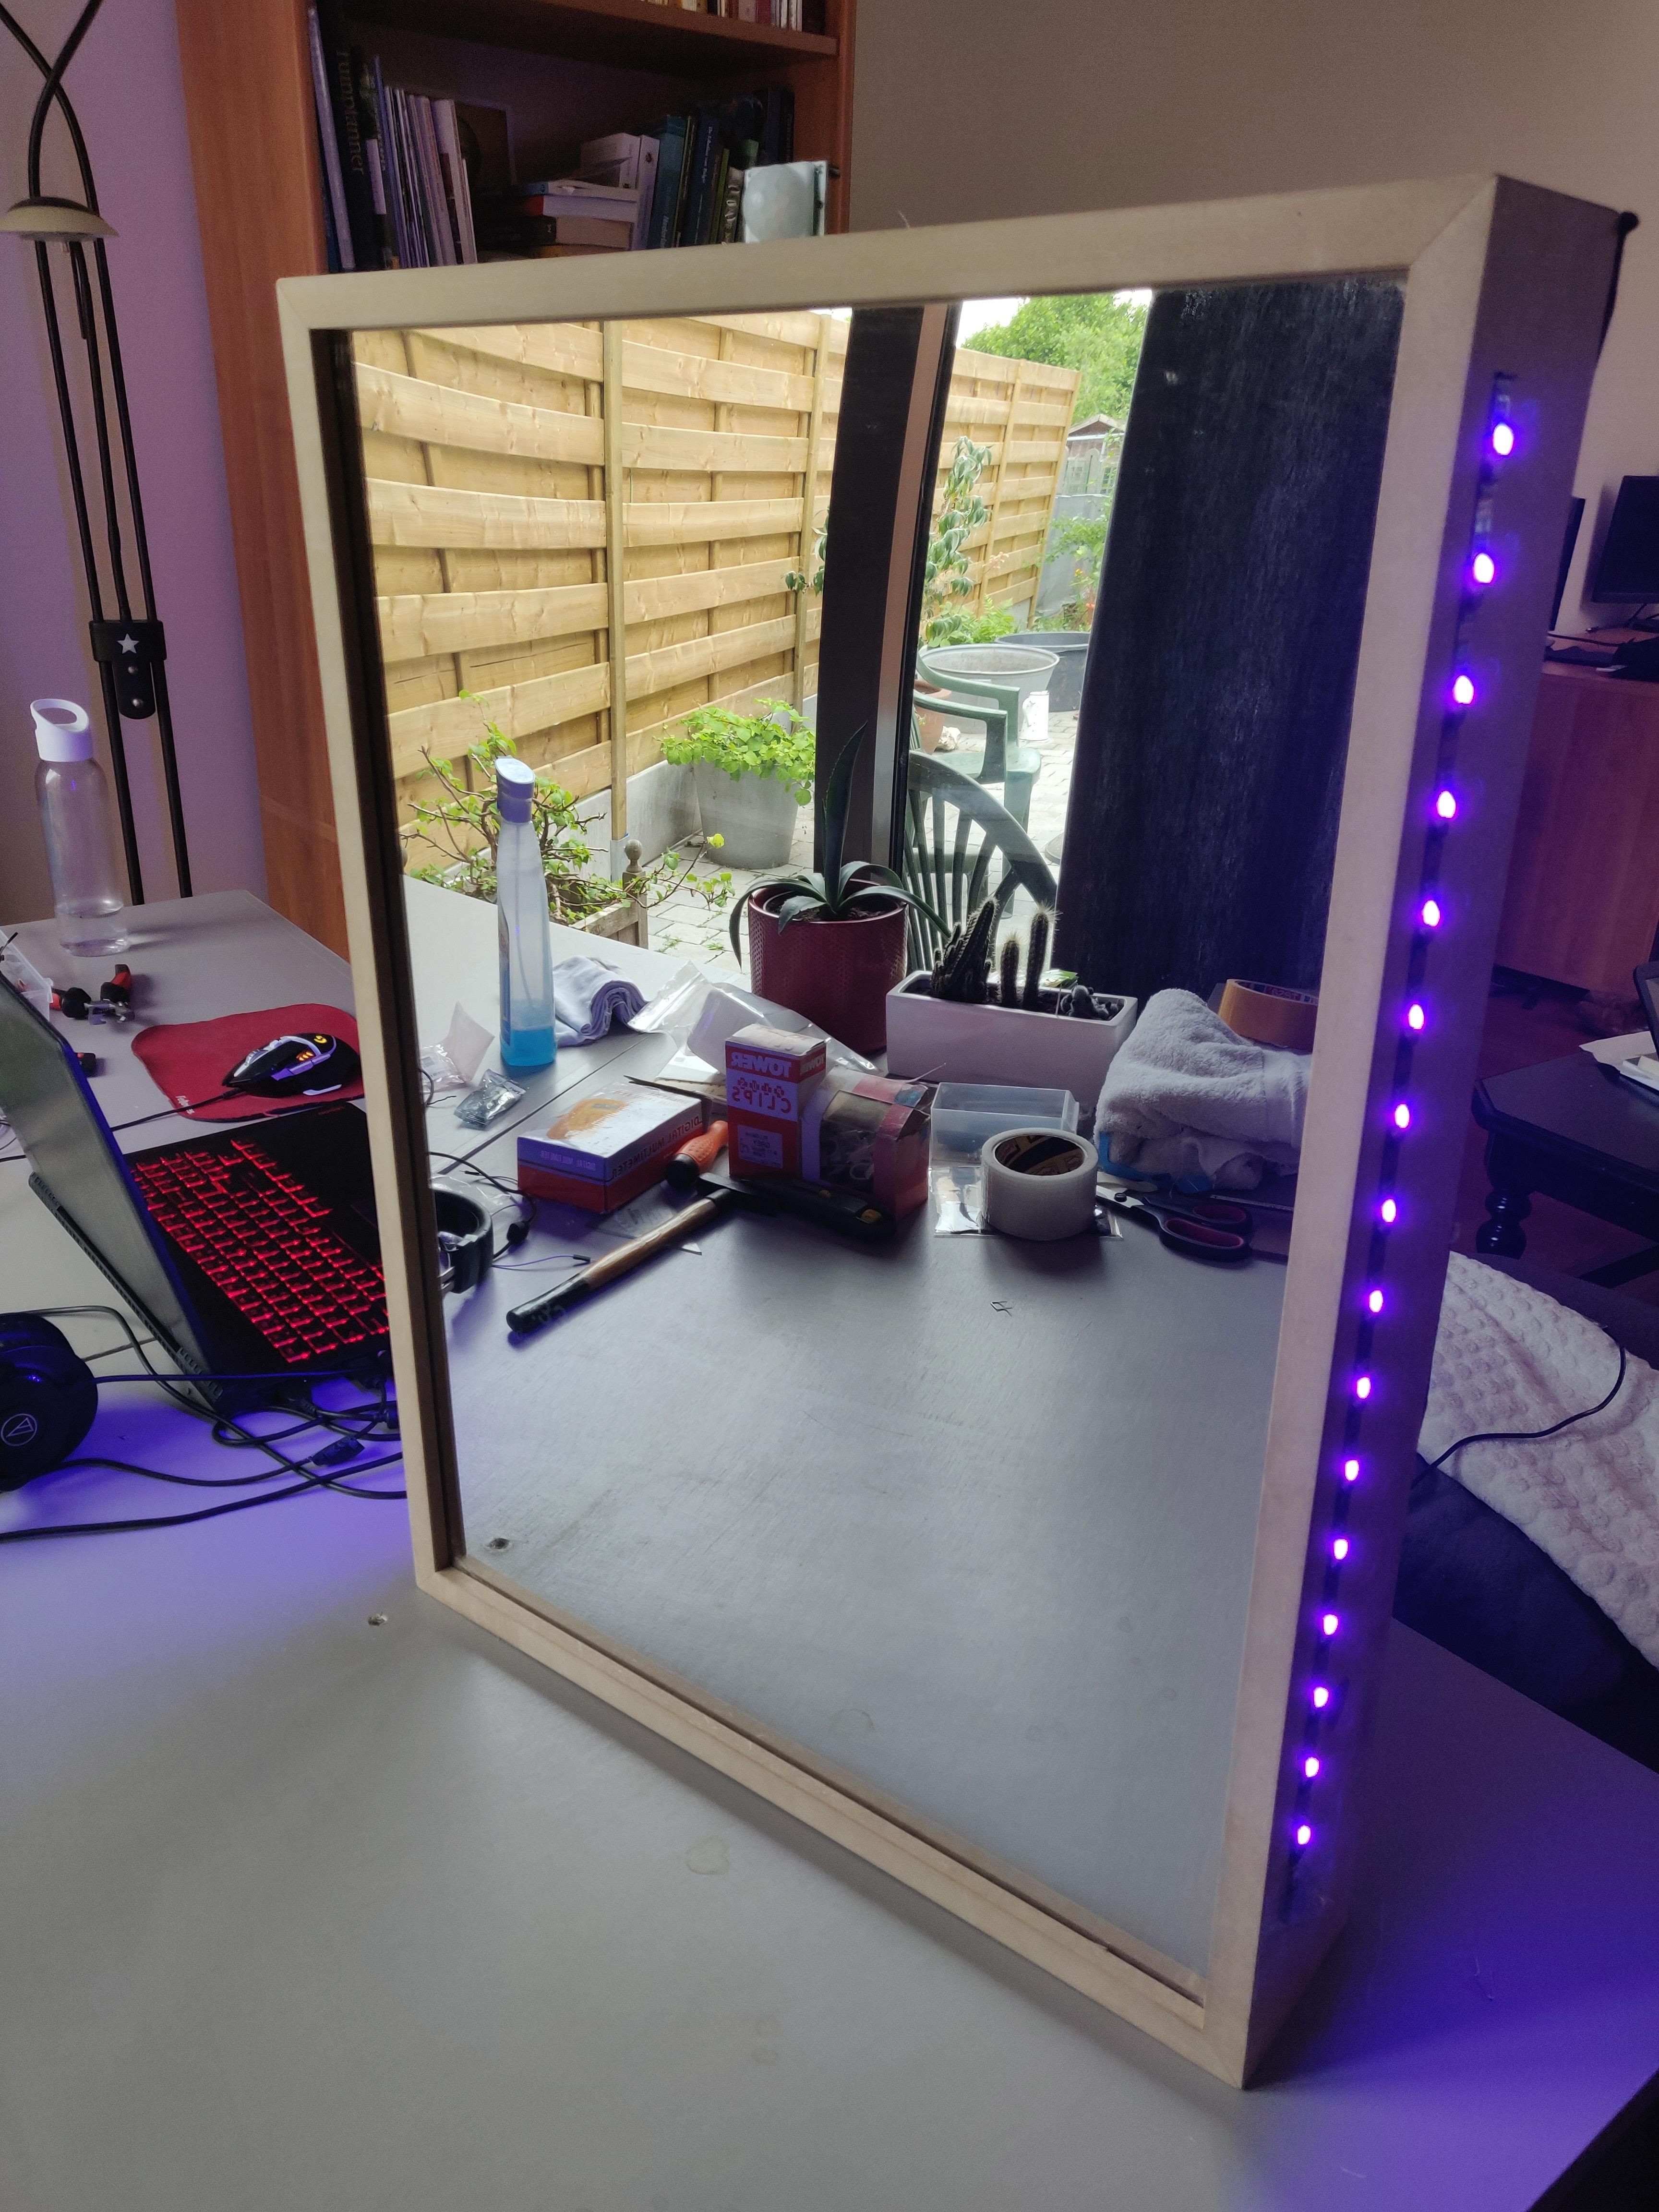
I added a black cloth to the back of the mirror to hide the electronics. It also darkens the inside of the case, which makes it much harder to see the wires through the mirror. I attached it with velcro, making it easier to access the electronics when needed.
Copy the Backend folder from my Github repository to a place you'll remember.
Add a systemd unit so the python script runs at boot:
sudo nano /etc/systemd/system/magicmirror.service
[Unit]
Description=The service for the magicmirror python script
After=network.target

[Service]
ExecStart=/usr/bin/python3 -u app.py
WorkingDirectory=/home/pi/magicMirror/Backend
StandardOutput=inherit
StandardError=inherit
Restart=always
User=pi

[Install]
WantedBy=multi-user.target
Change 'WorkingDirectory' to the Backend directory, and change User to your own username.
Interacting With the Webapp
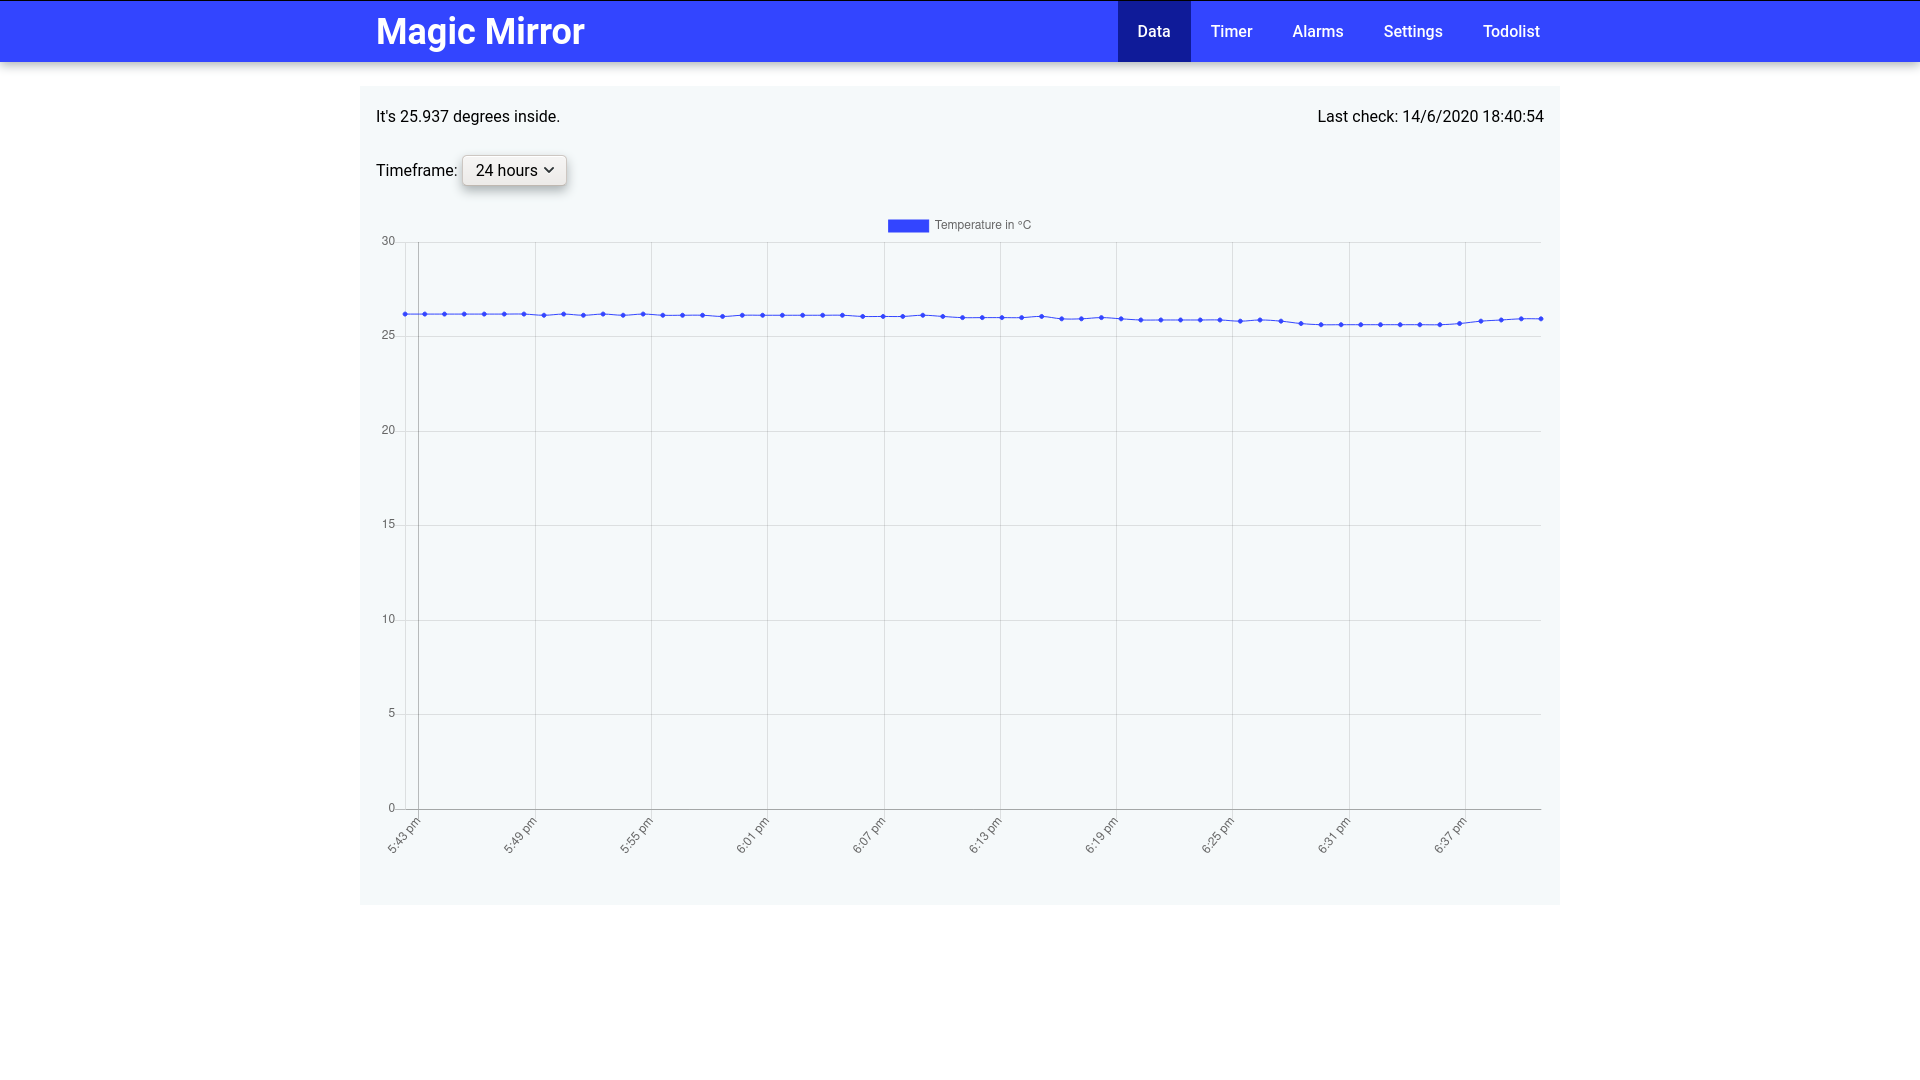
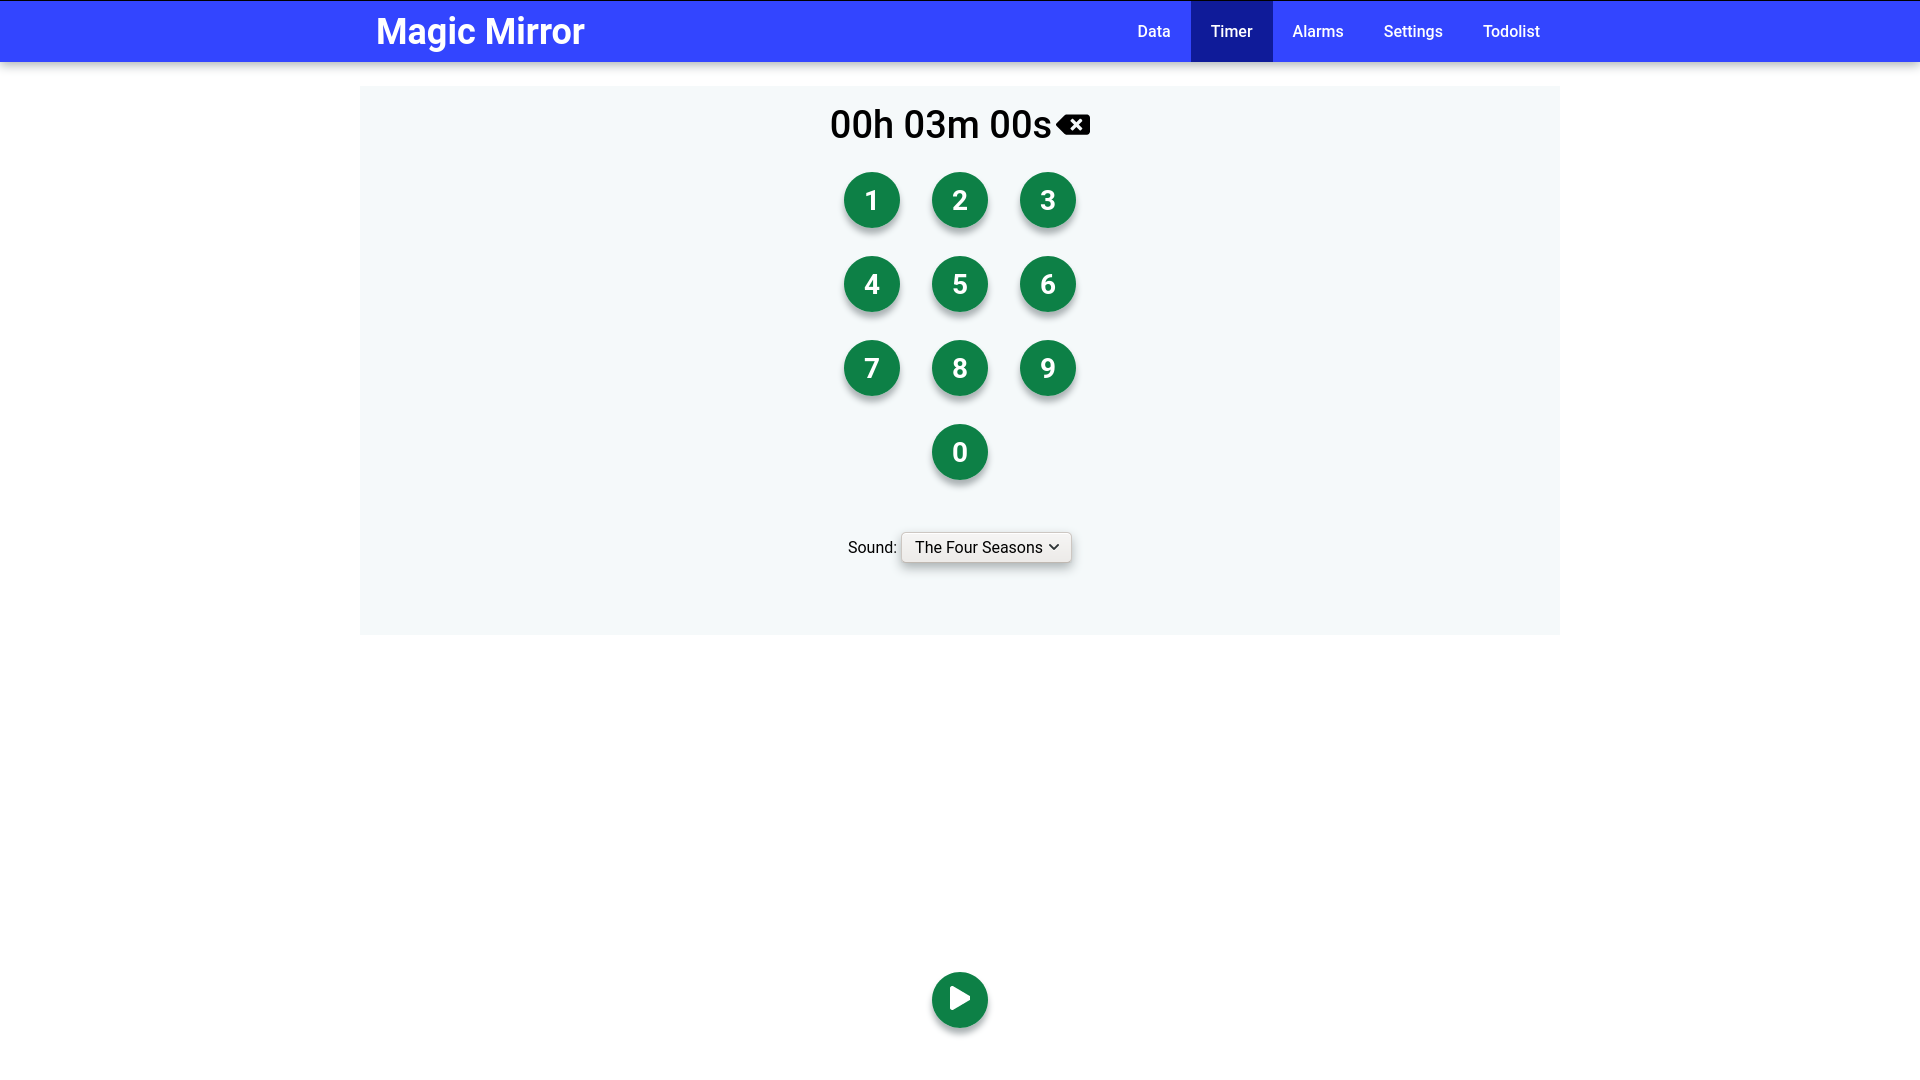
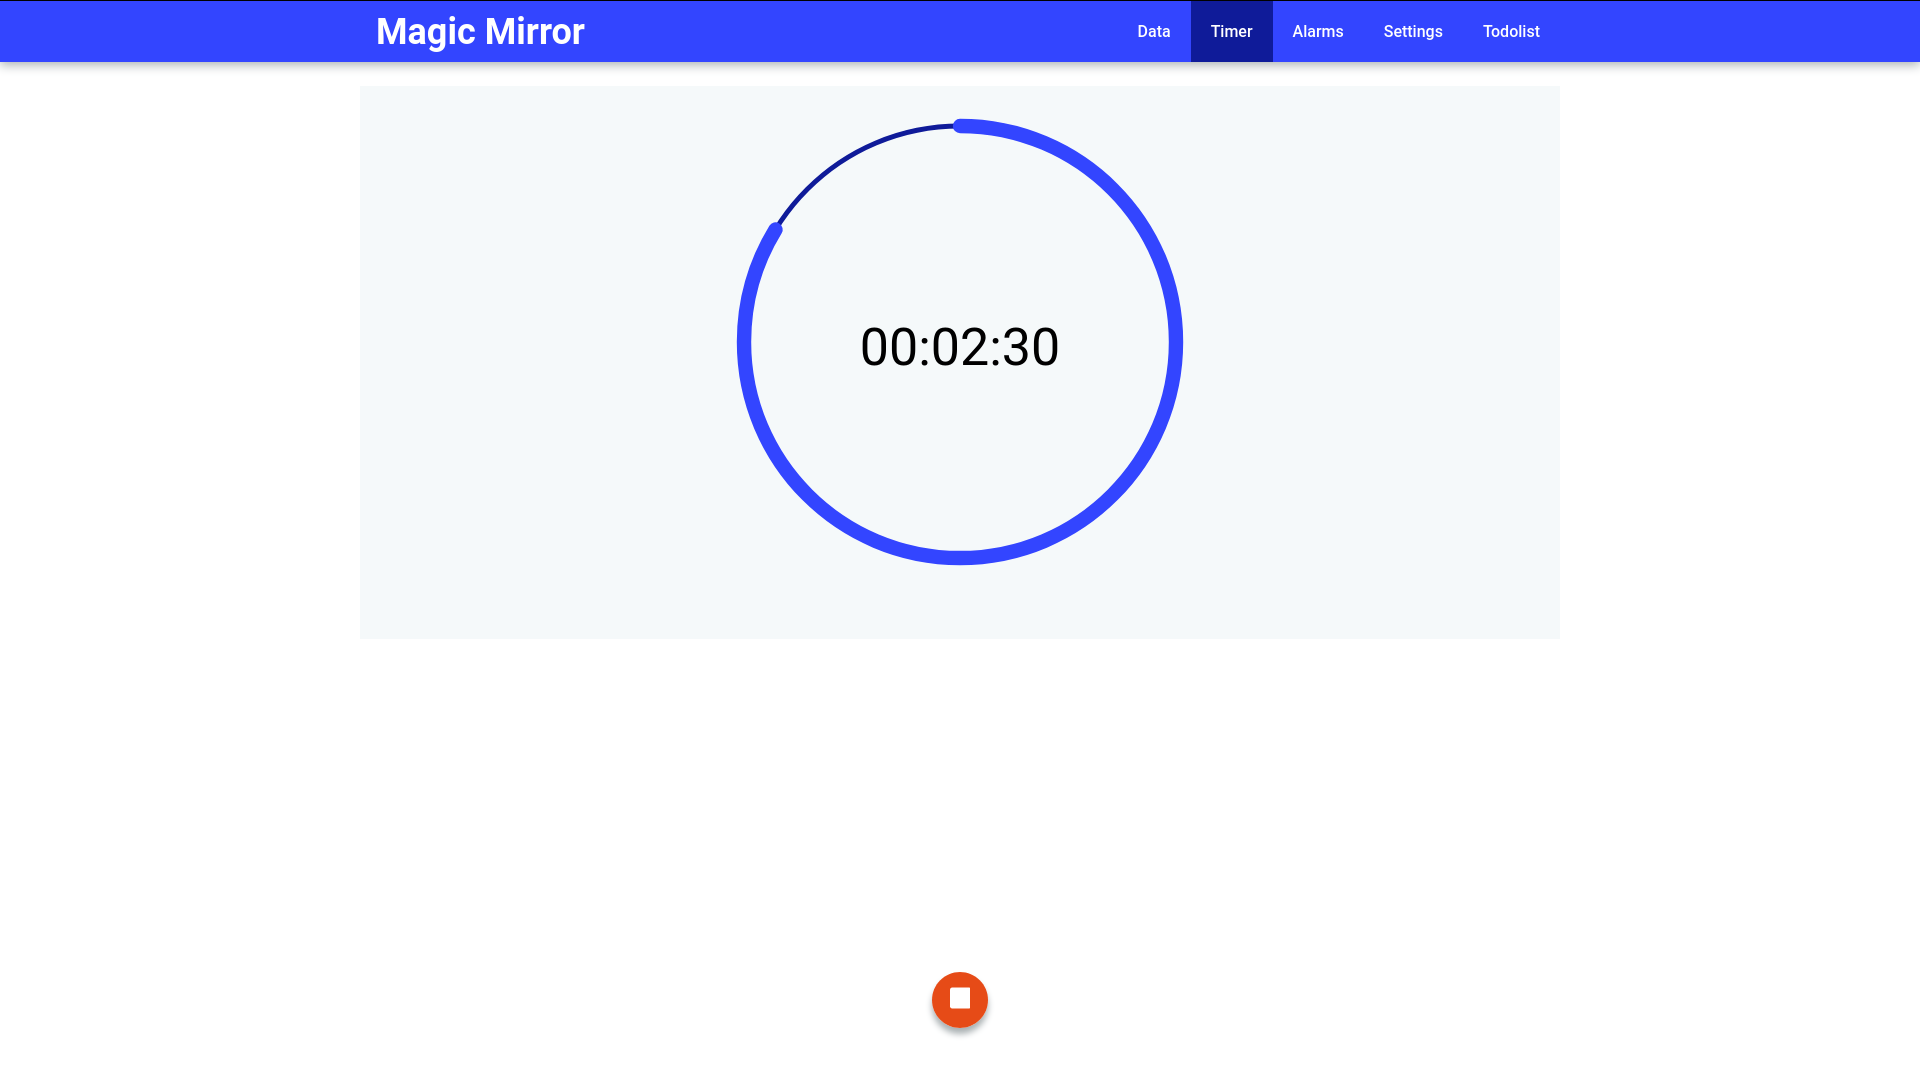
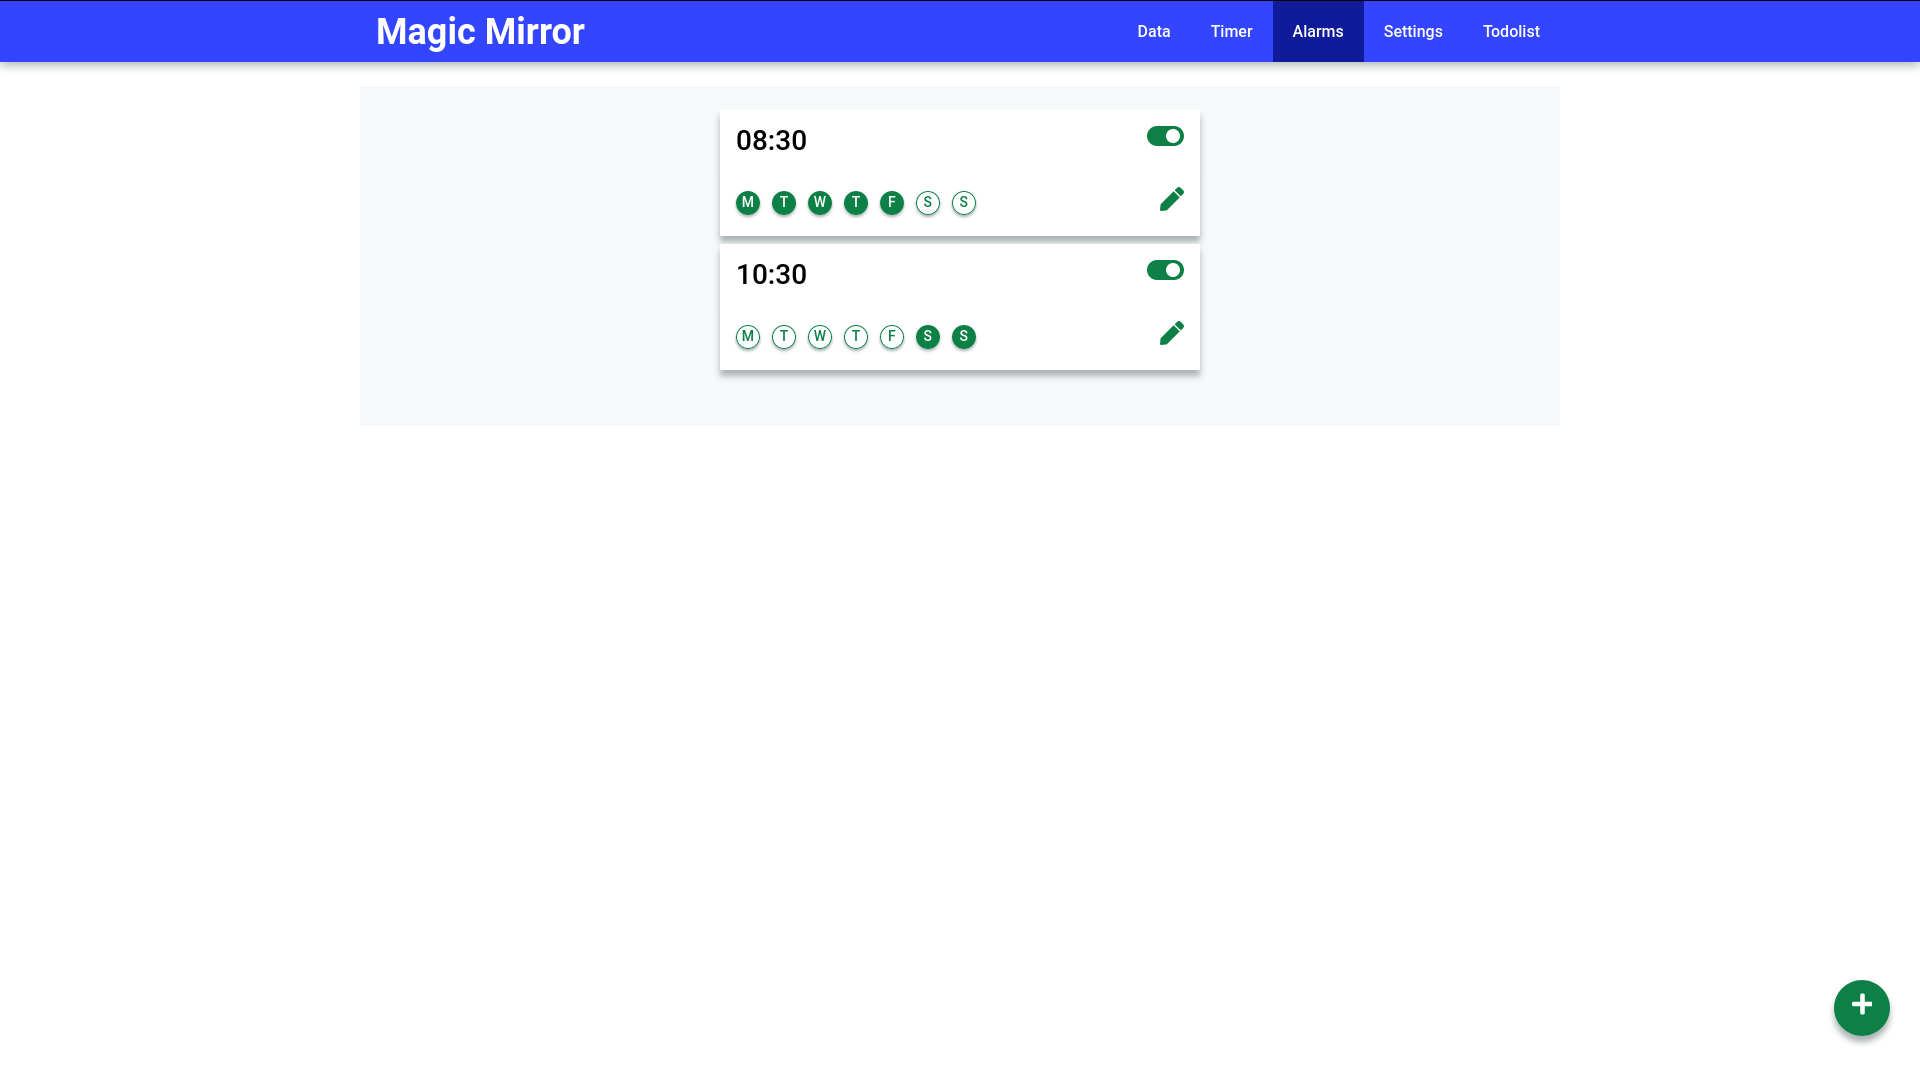
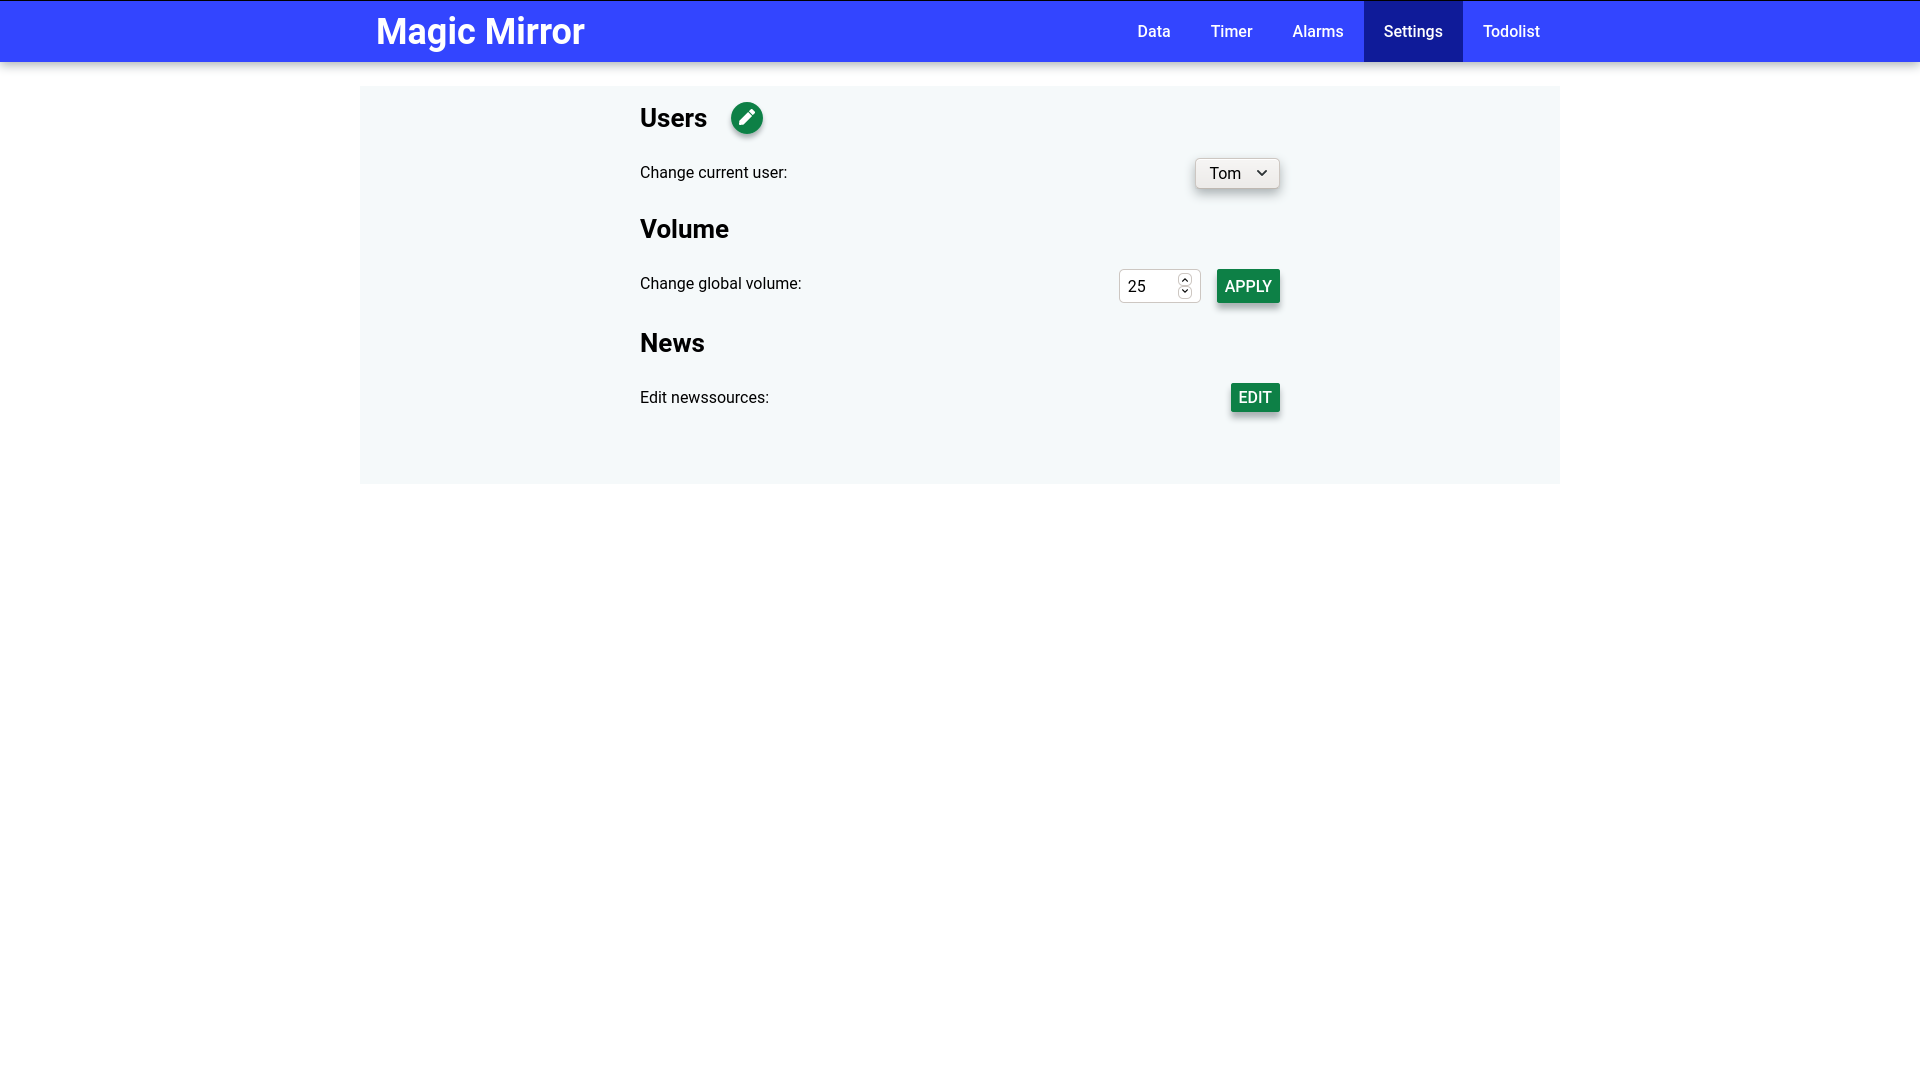
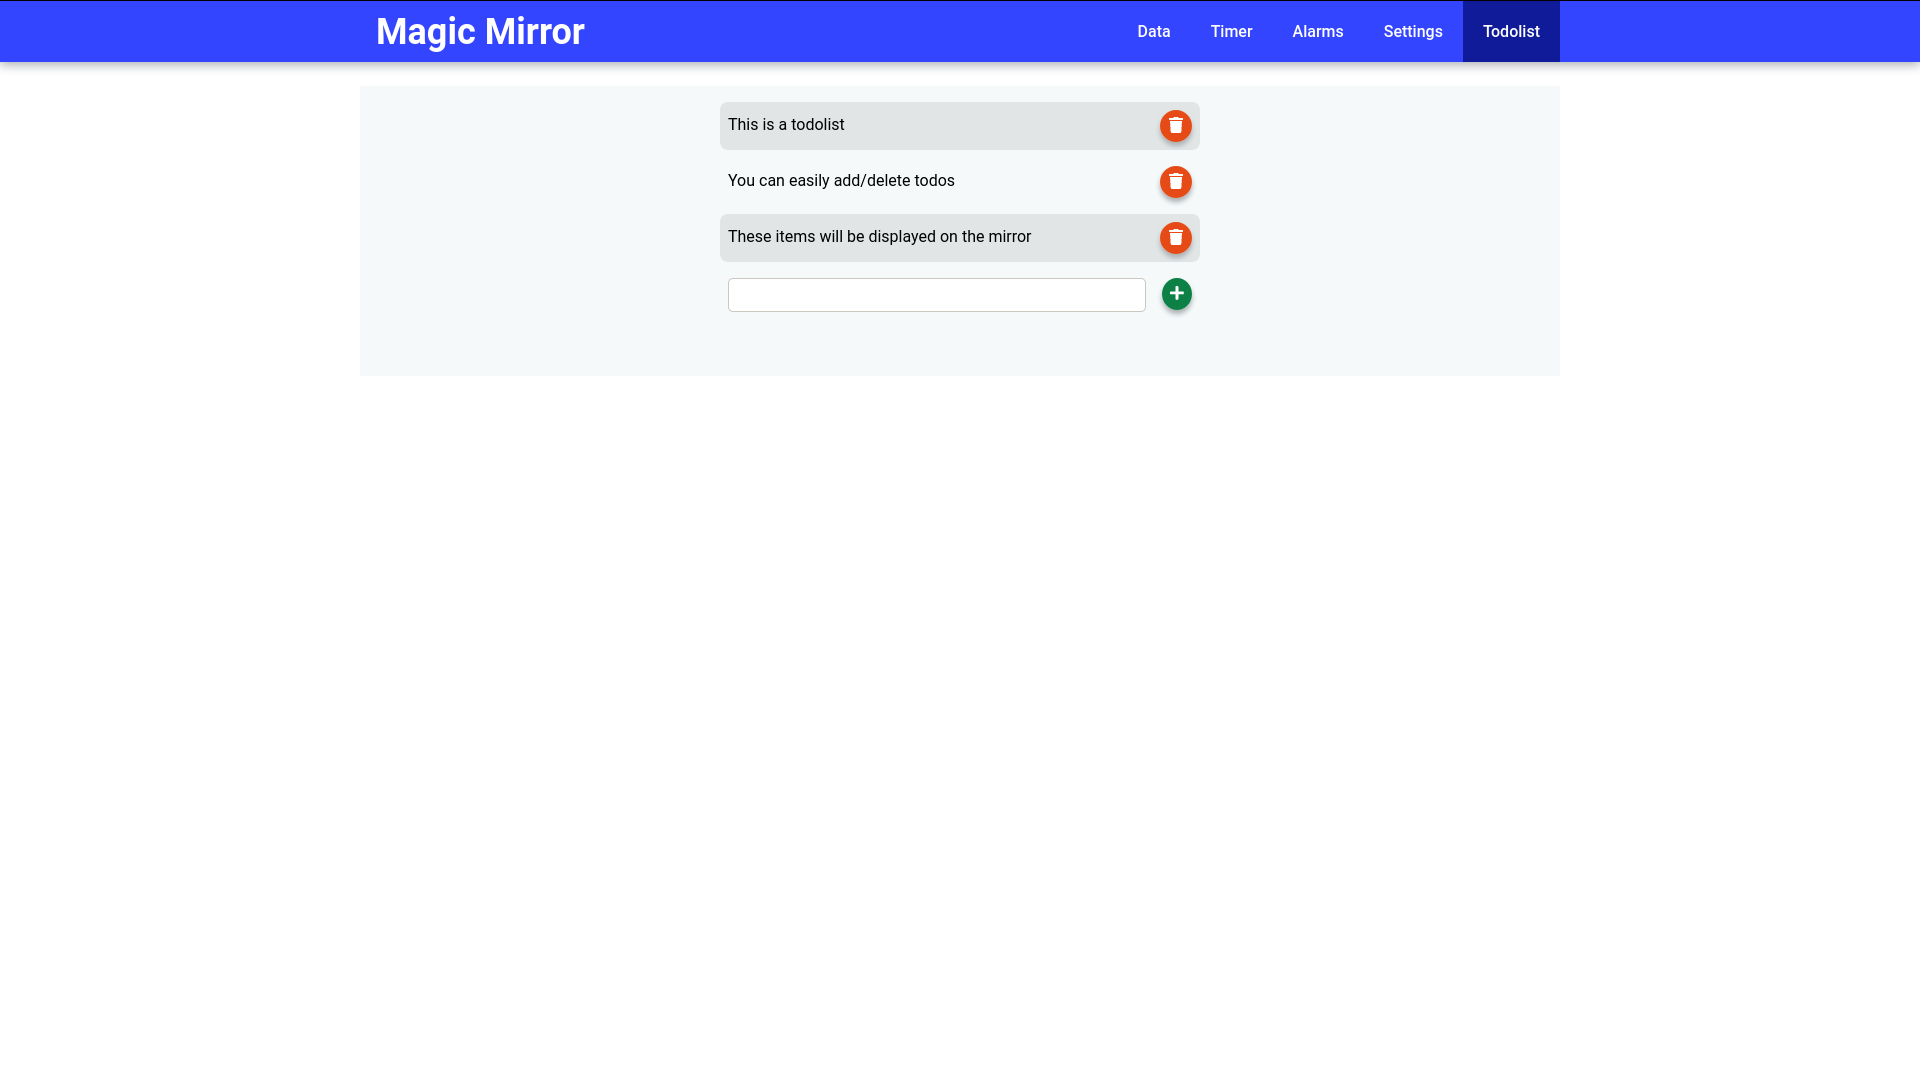
Surf to the IP address (which is on the display). You'll see a mobile-first website with the following features:
- An interactable temperature grap
- A time. When the timer is running, you'll also see a countdown on the mirror itself.
- An alarm system
- A settings tab, where you can edit users, newssources and speaker volume.
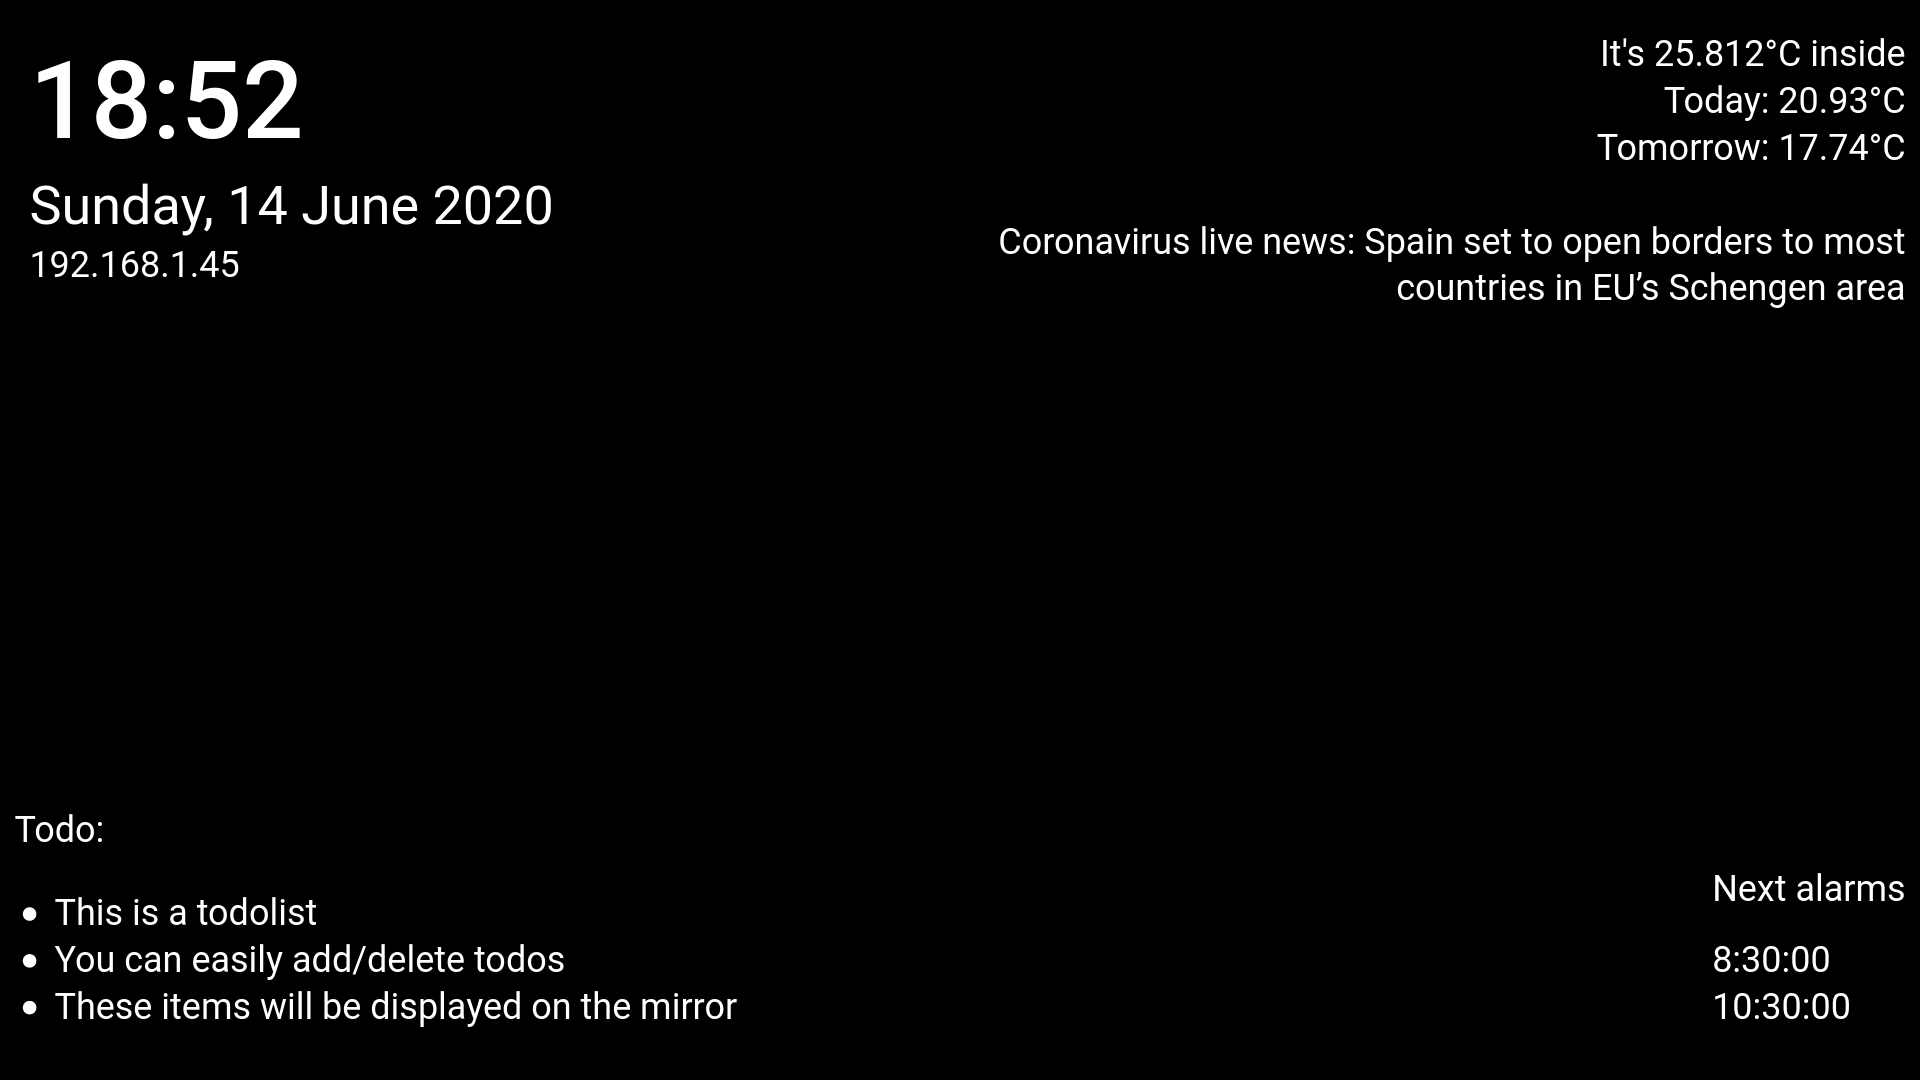
- A todolist. Todo items will be displayed on the mirror
Mirror.html is the page which is displayed on the Magic Mirror. I added an example in the images above.