MSC Audio Technology
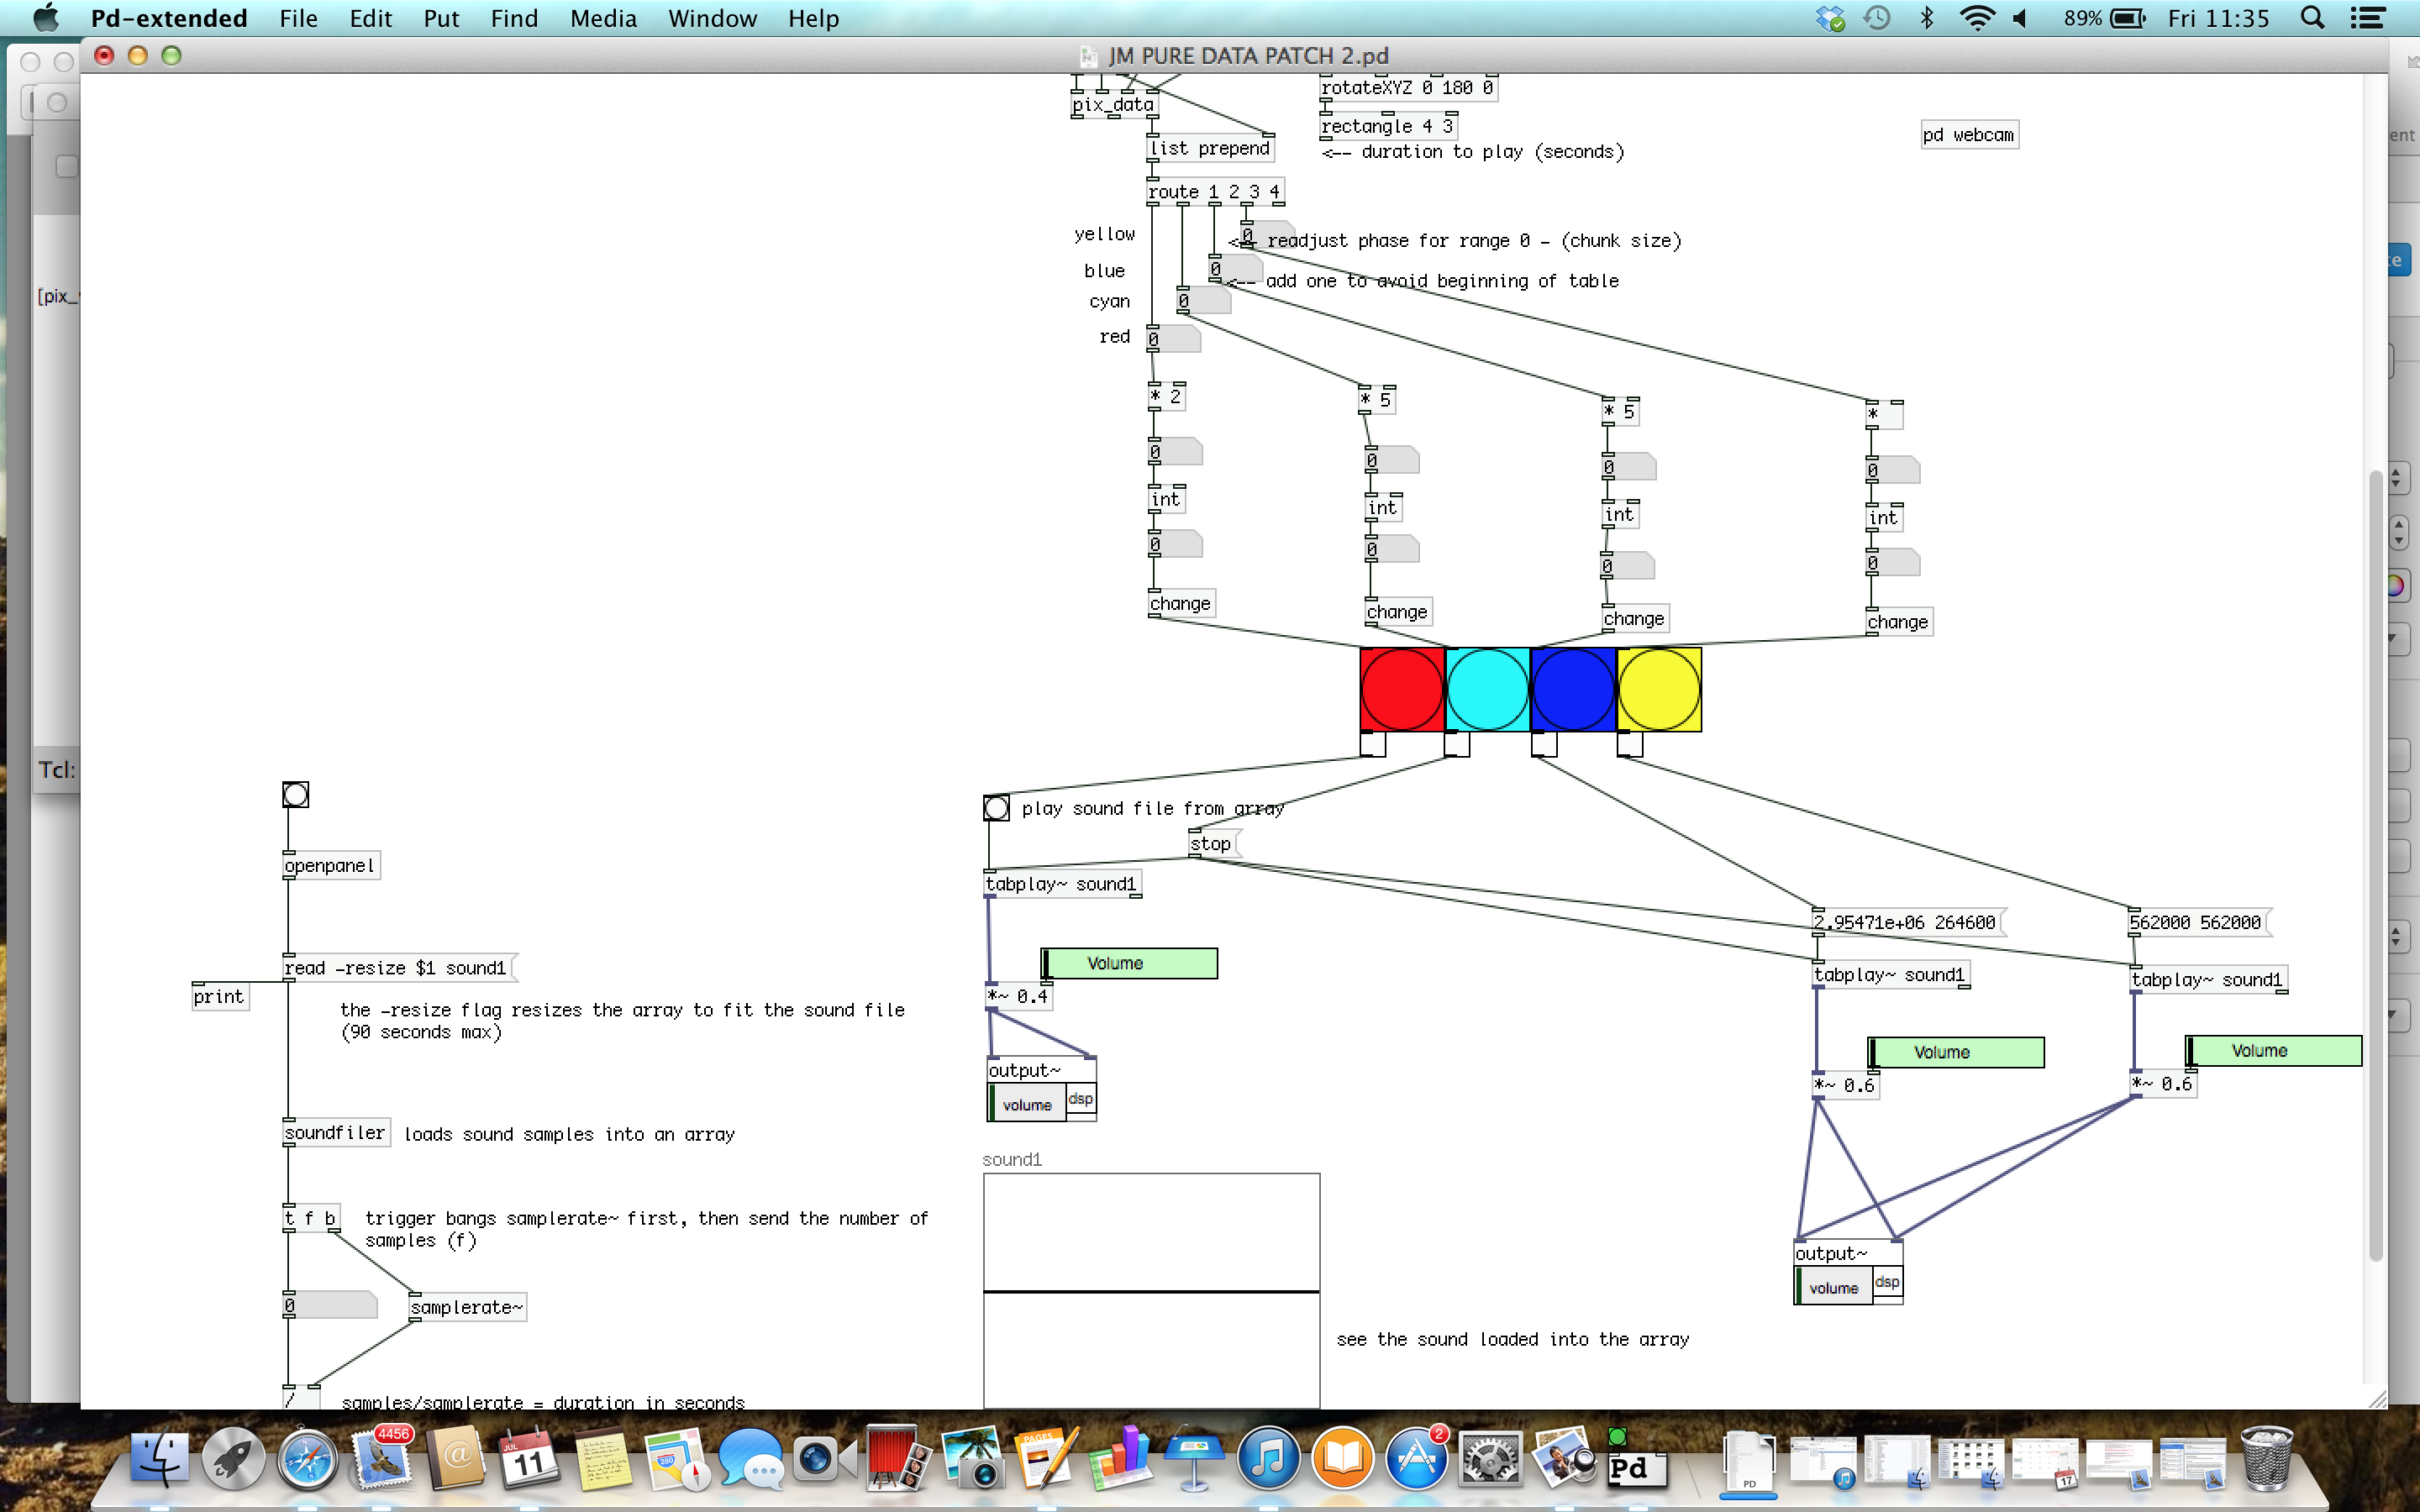
Welcome to my instructables presentation of my motion sensing audio patch in pure data.
Step 1: the Building Blocks
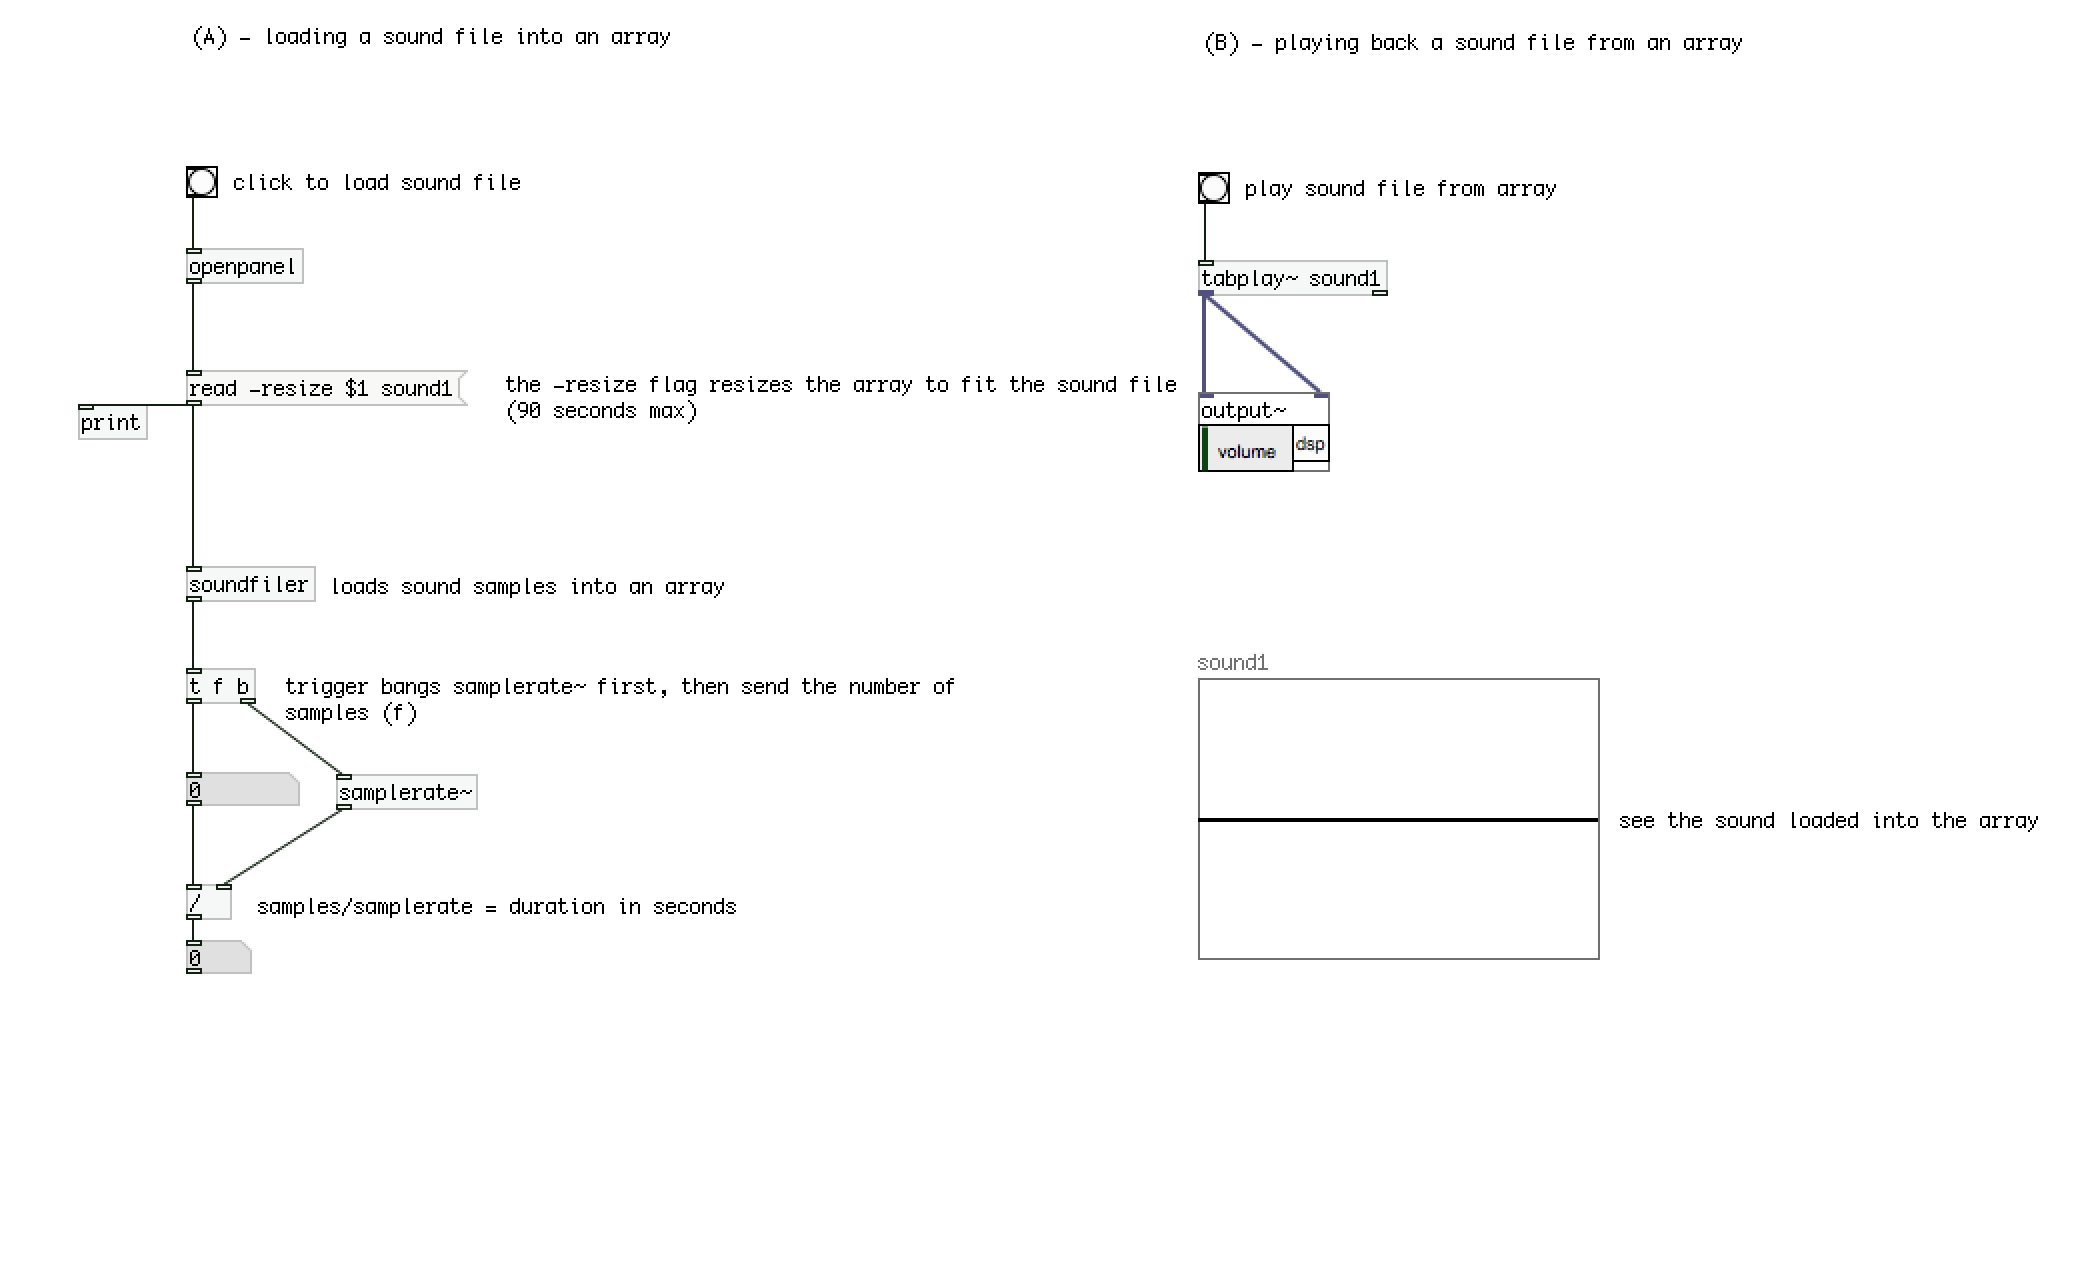
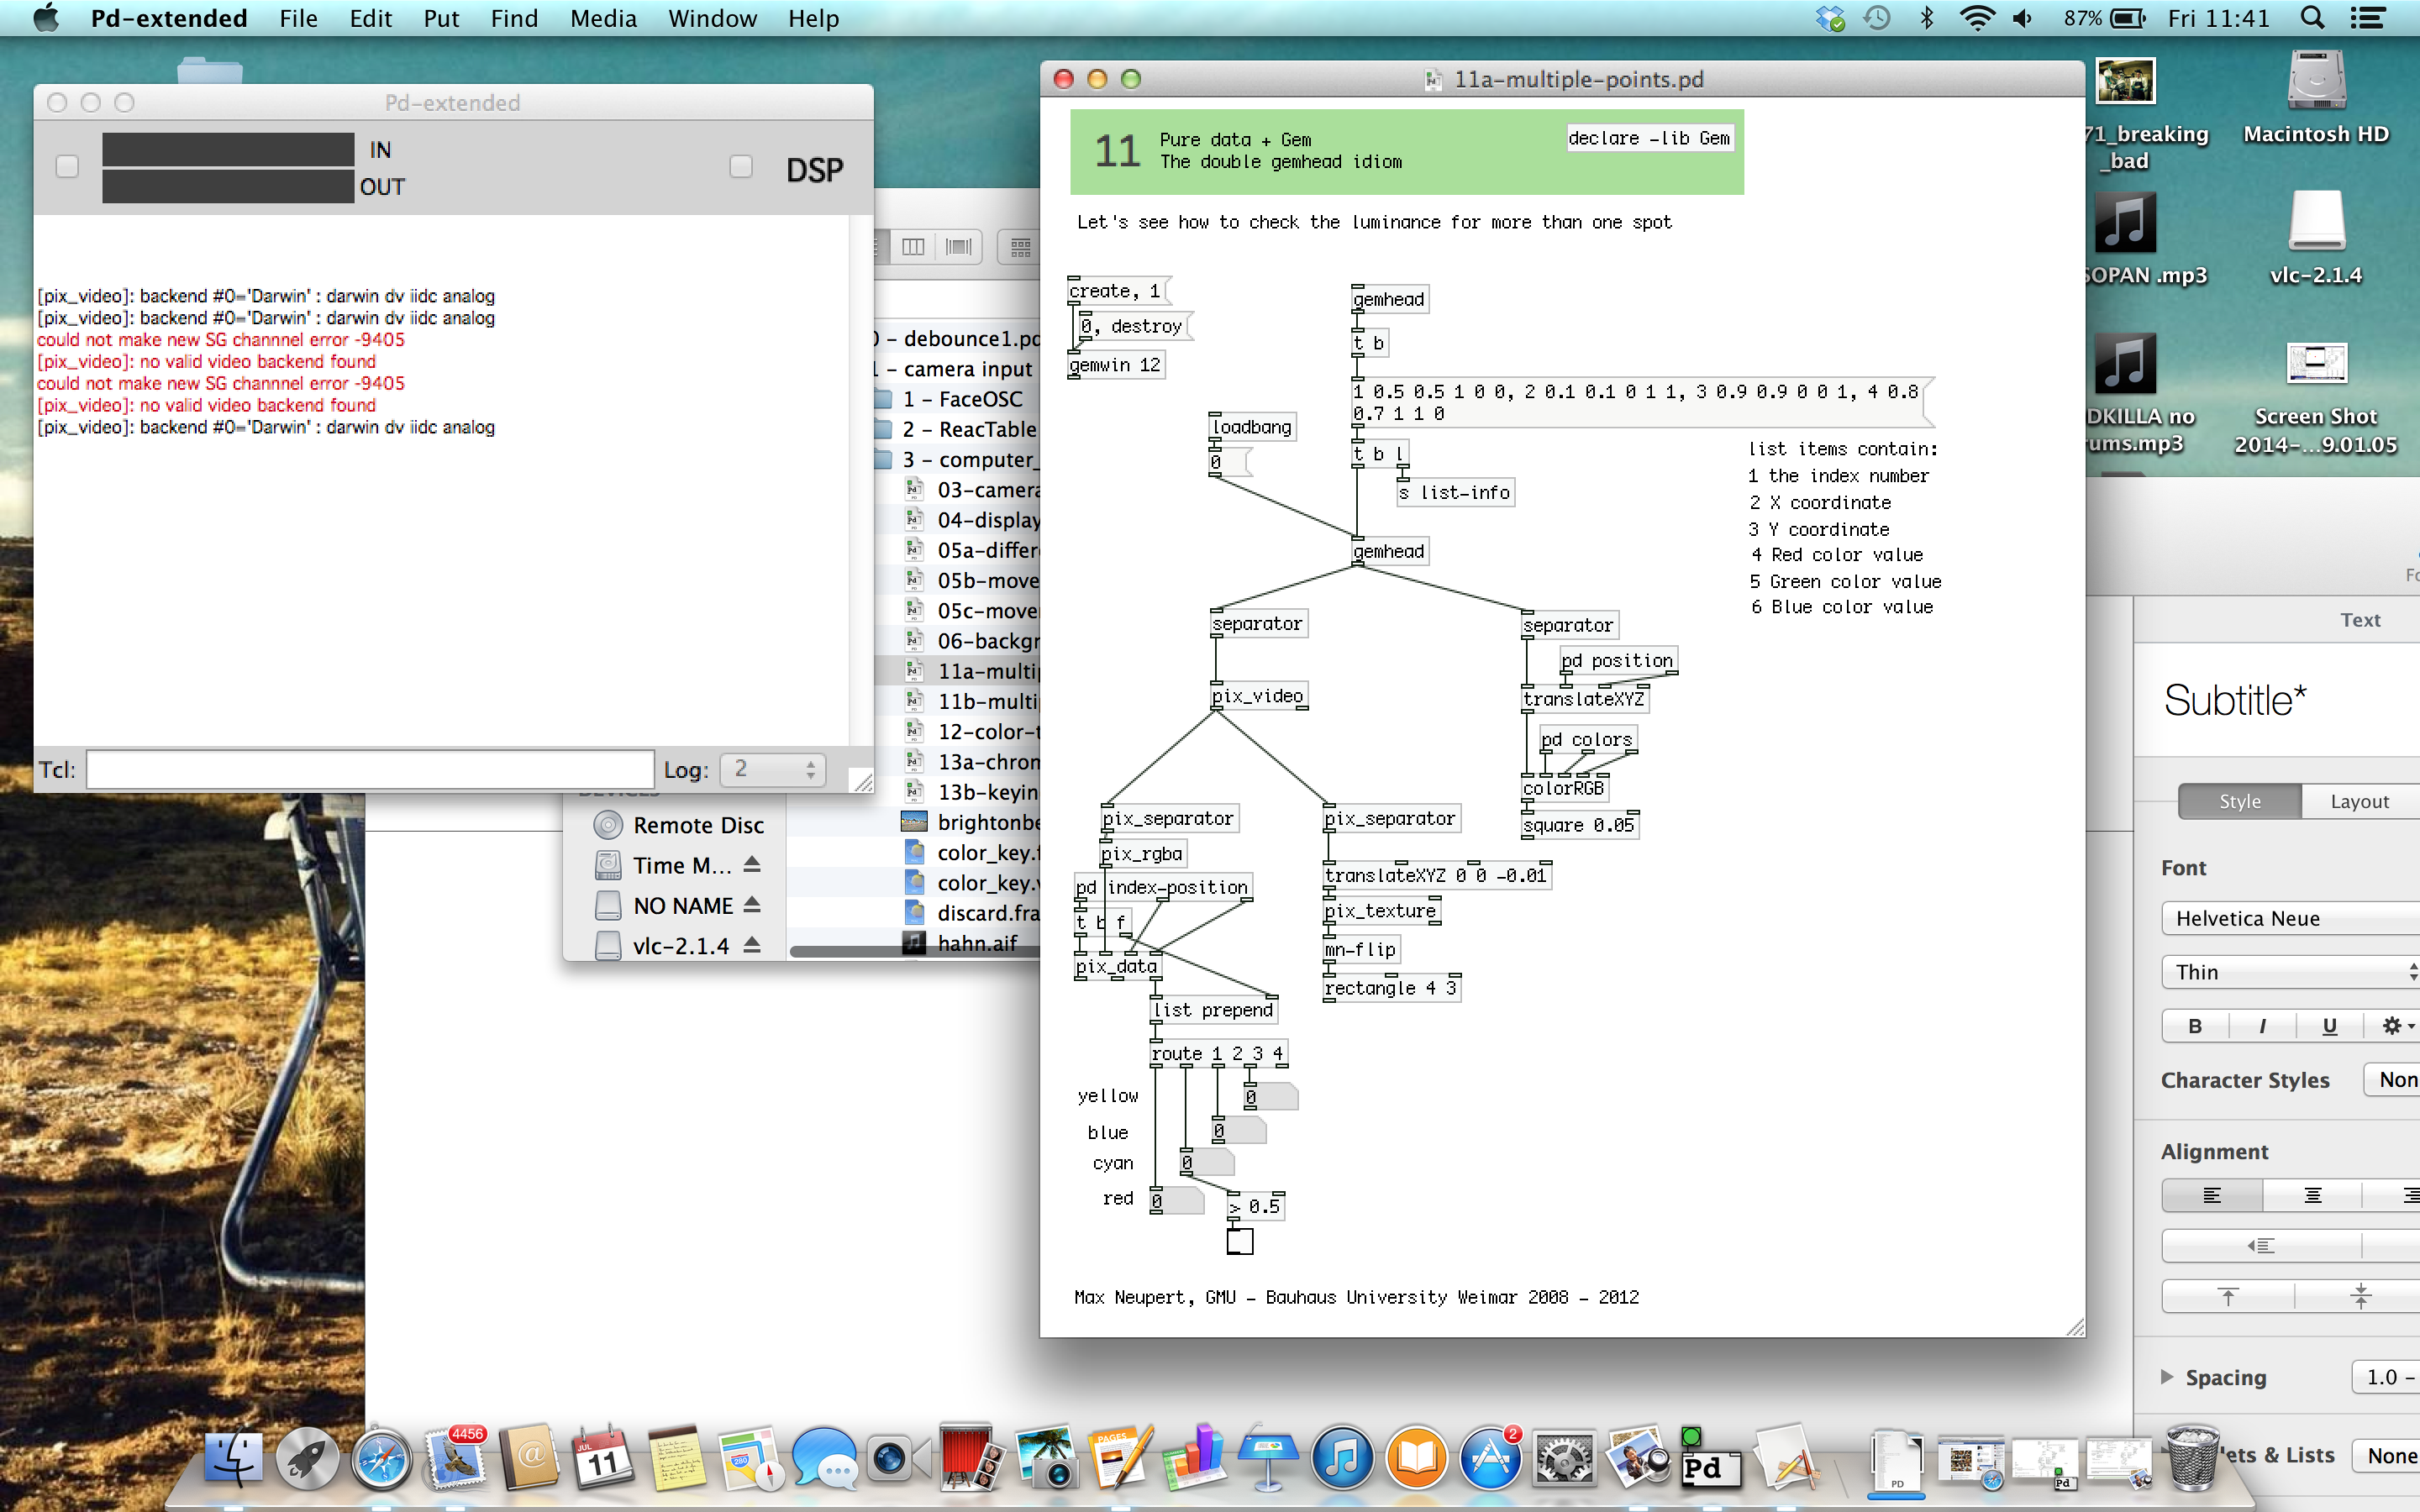
Max Neuperts patch shown Here, is what
i consider to be thebuilding blocks of my pure data patch.
This patch will also be included in the Patch Development folder
Step 2 - S List Info
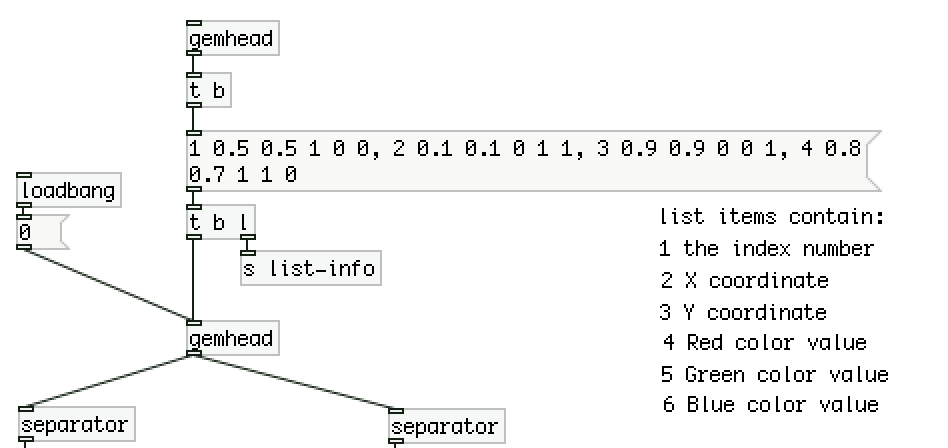
List Information sent through “s list‐info” to
Subpatch [pd shape].We can create a number of Trigger Points as long as they are listed within.
This is added onto gem head in the second part of the patch which is then divided into two parts by the separator modules.
The left side dedicated to what happens inside the video feed and the right hand side dedicated to the coloured squares overlaying on the video feed.
Step 3 : [Separator Module Right Hand Side]

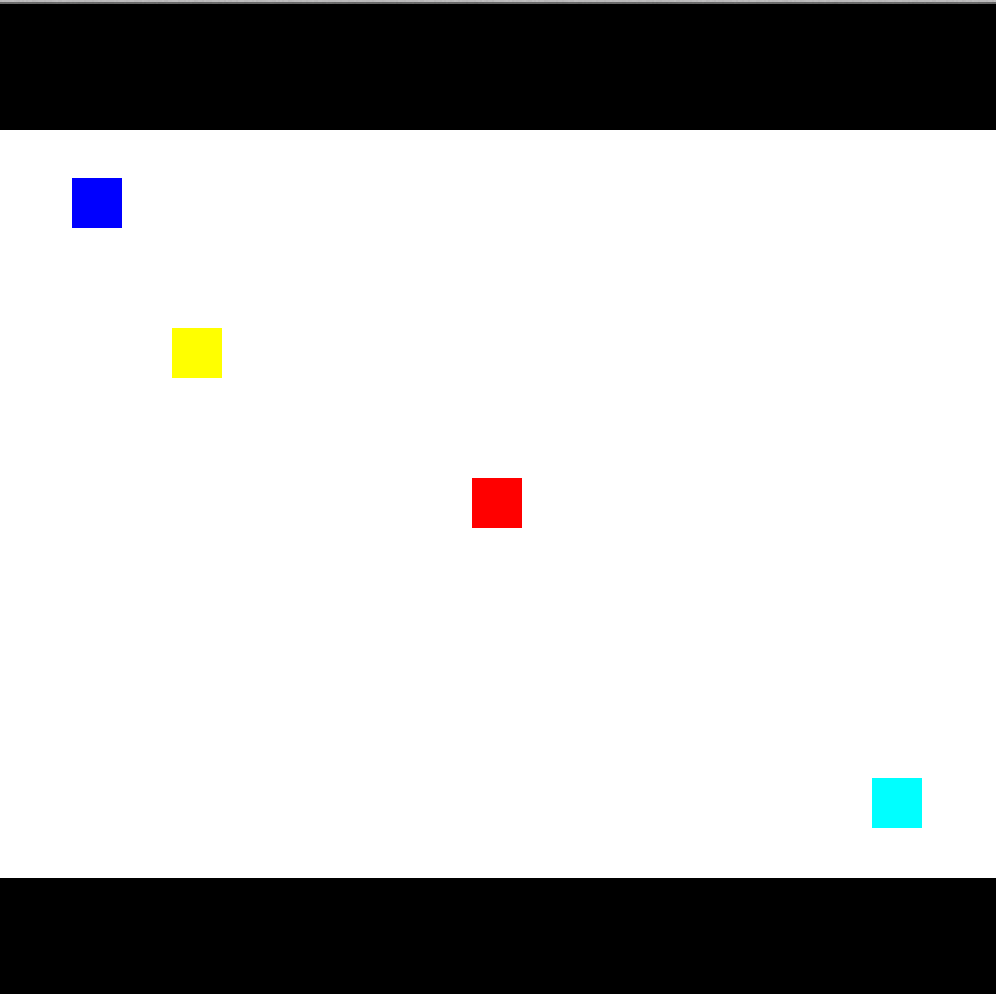
As it is displayed in side the patch this is what makes sure the dots or zones are in the right location within the video allowing for a trigger to be made via motion sensing from the camera feed.
Step 4 : [Separator Module Left Hand Side]
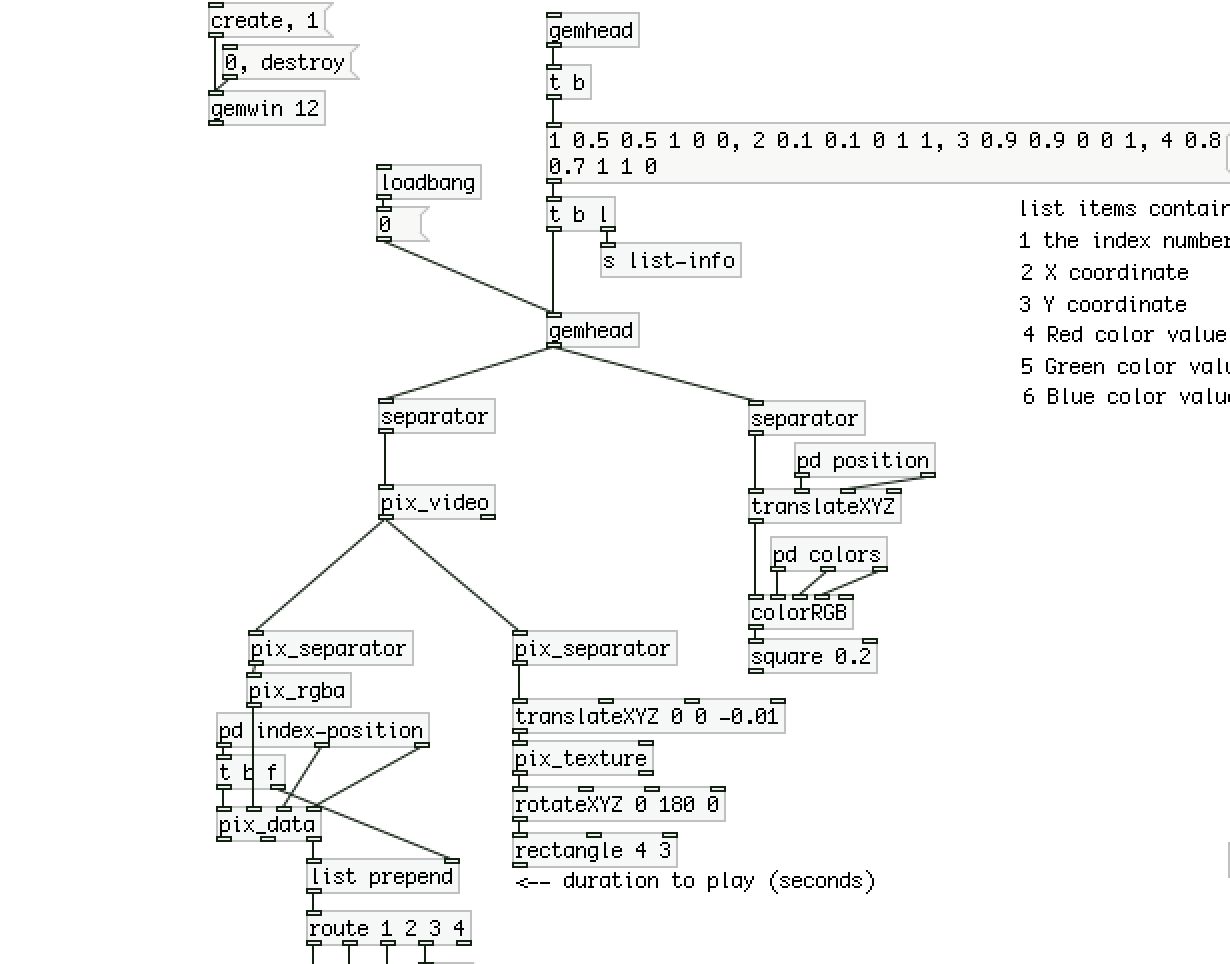
Here we have a module called pd index-position this module takes the information present from the s list spoken about earlier to be able to create the actual trigger points from the coloured squares.
When a threshold has been met at X,Y and Z coordinates send a bang/trigger to something in this case to play audio sample from an array.
Routing
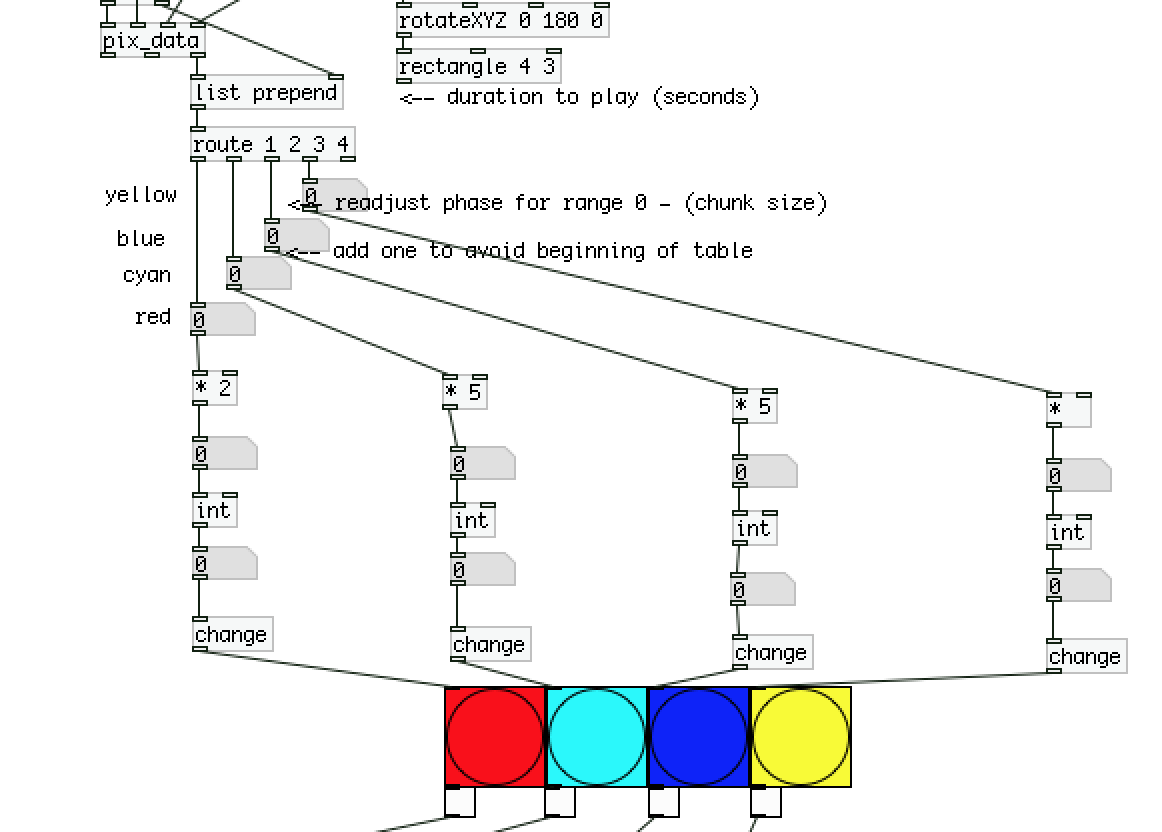
After all the information is collected it is then routed via which ever channel you select here in this example there is just 4 channels to choose from.
The Red Square in the Feed being 1 and the last square being yellow which is 4.
After a threshold is met inside the video a data is fed via the routing module to
The appropriate coordinates or squares this number is then fed into a multiplier which then causes a trigger, the triggers are each set so that 0 is off and 1 is on, when 1 is actuated a trigger or bang is set off causing a audio sample from the channel that caused it.
Triggering and Successful Audio Playback
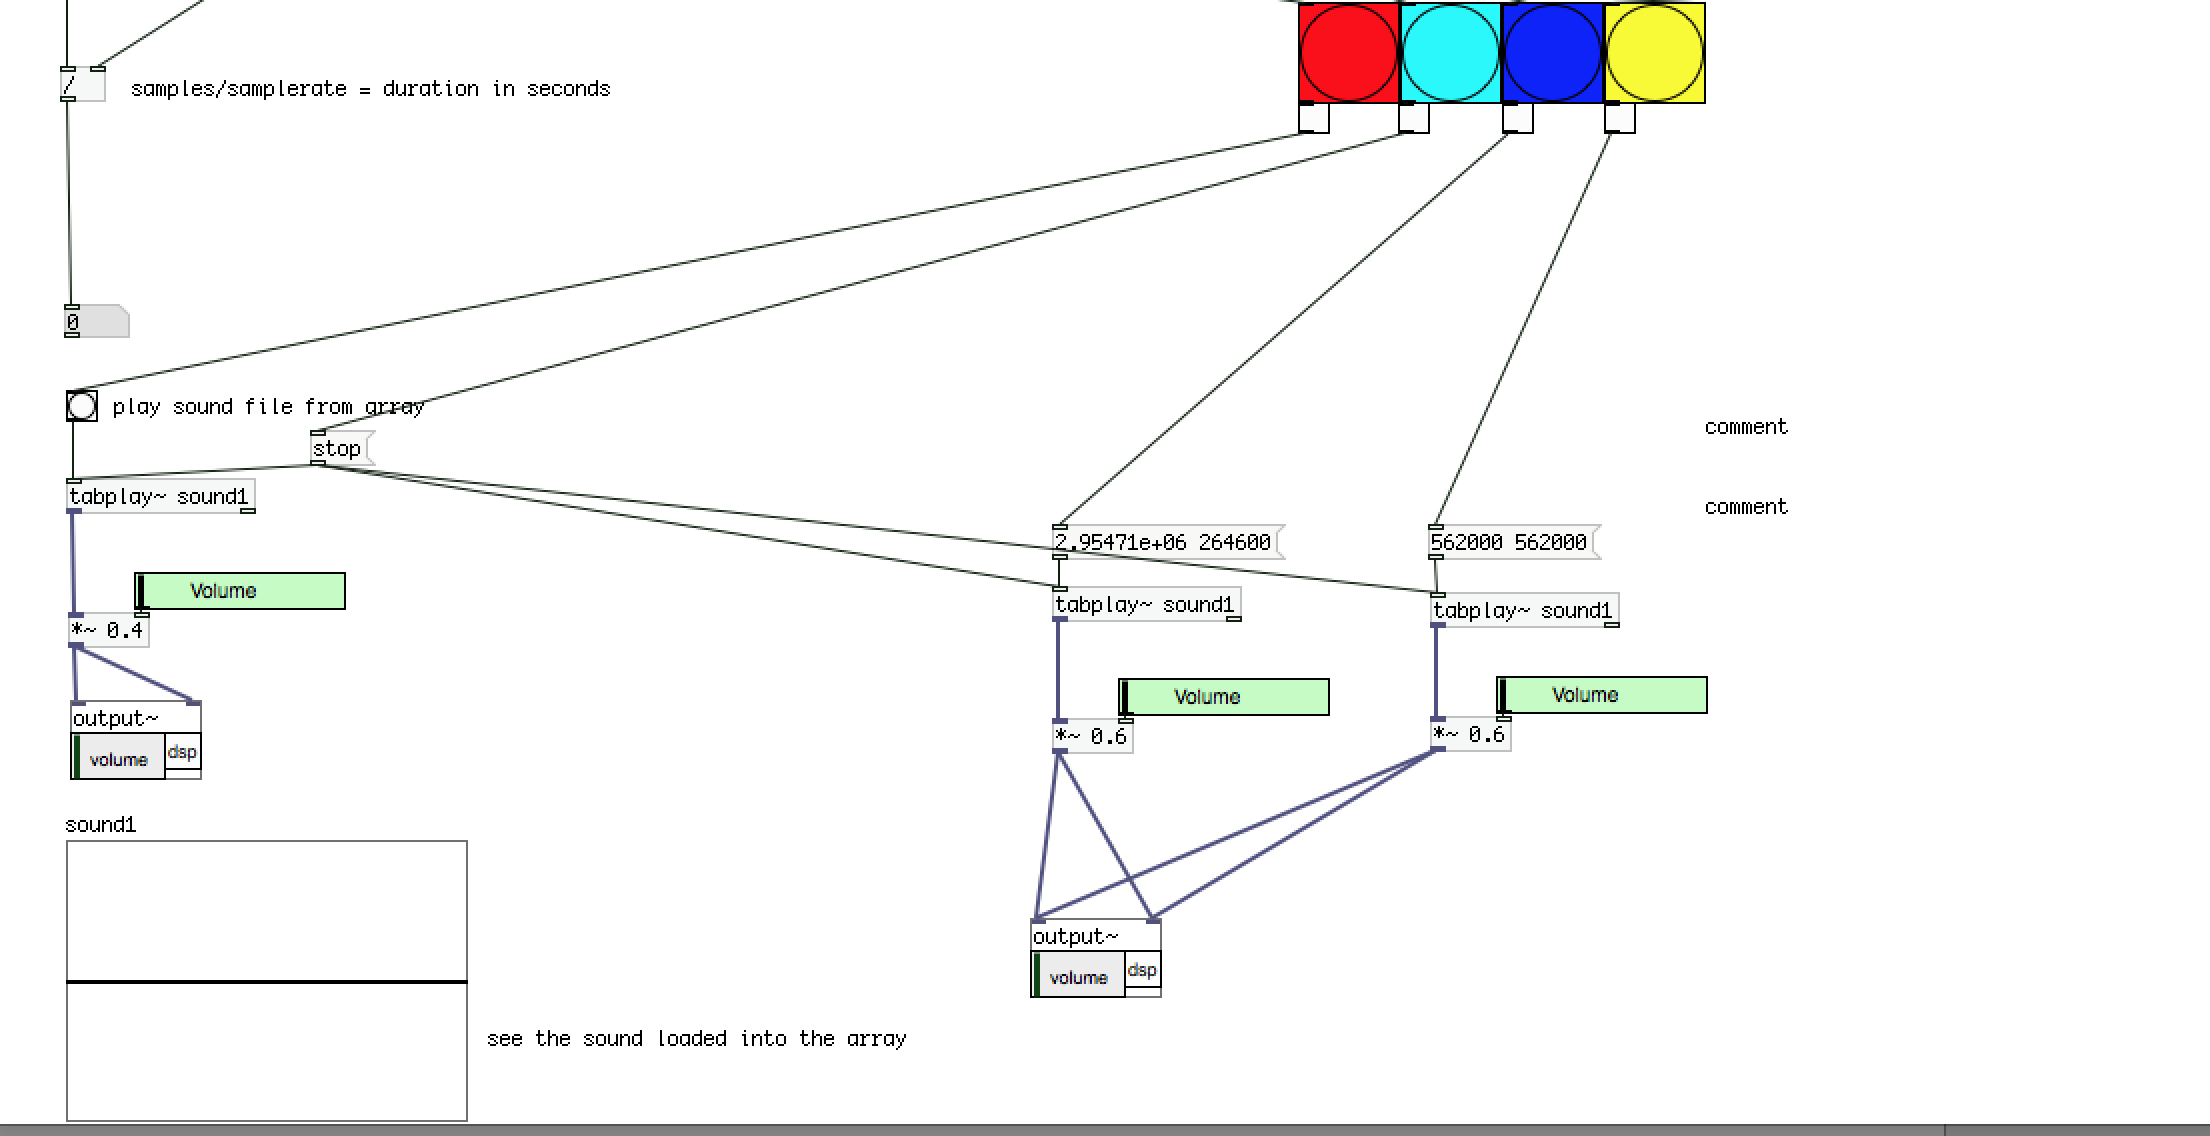
Once the appropriate channel is Triggered an appropriate action follows,
so as we can see here in the diagram it is colour coded.
When red has been triggered it plays the audio, when cyan is triggered it stops all audio, blue and yellow where used to demonstrate that the same sample could be used but to play at varying starting points.
However using the tabplay~ function i could change arrays to load in different samples and play more than one audio sample at any given time.
Patch Code
Patch code and reference patches to supplement step by step guide.