MQTT on Openhab 3 Tutorial
by Wim3d in Circuits > Remote Control
21553 Views, 3 Favorites, 0 Comments
MQTT on Openhab 3 Tutorial
In this Instructable I show you how I did my set-up of MQTT op my Openhab3 installation. This Instructable is not ment to tell you all you need to know. For reference see the desciption of the MQTT-binding on the Openhab website.
On the internet you can find several good explaination about MQTT and how it works. For example see https://randomnerdtutorials.com/what-is-mqtt-and-...
Supplies
Things you need to start
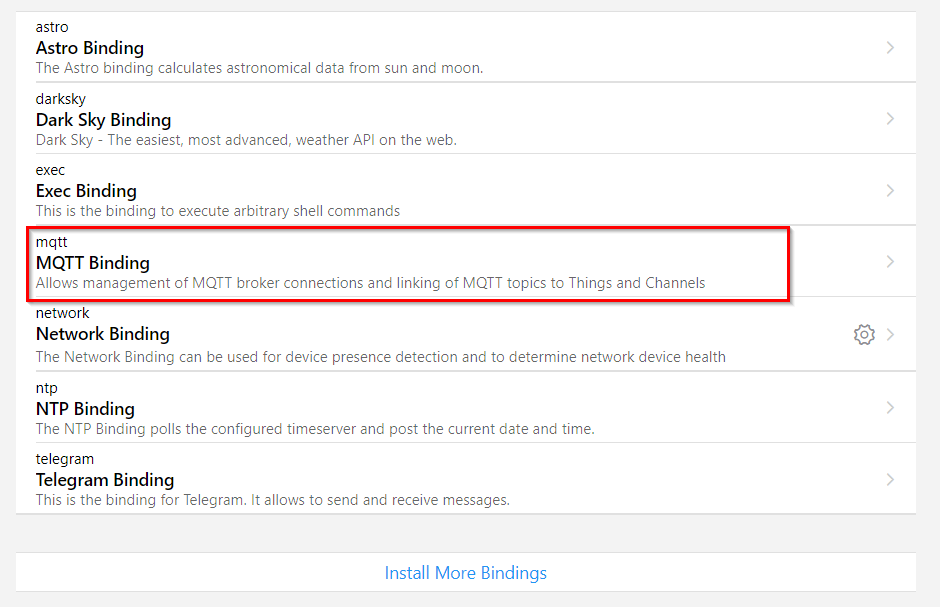
Install the MQTT Binding
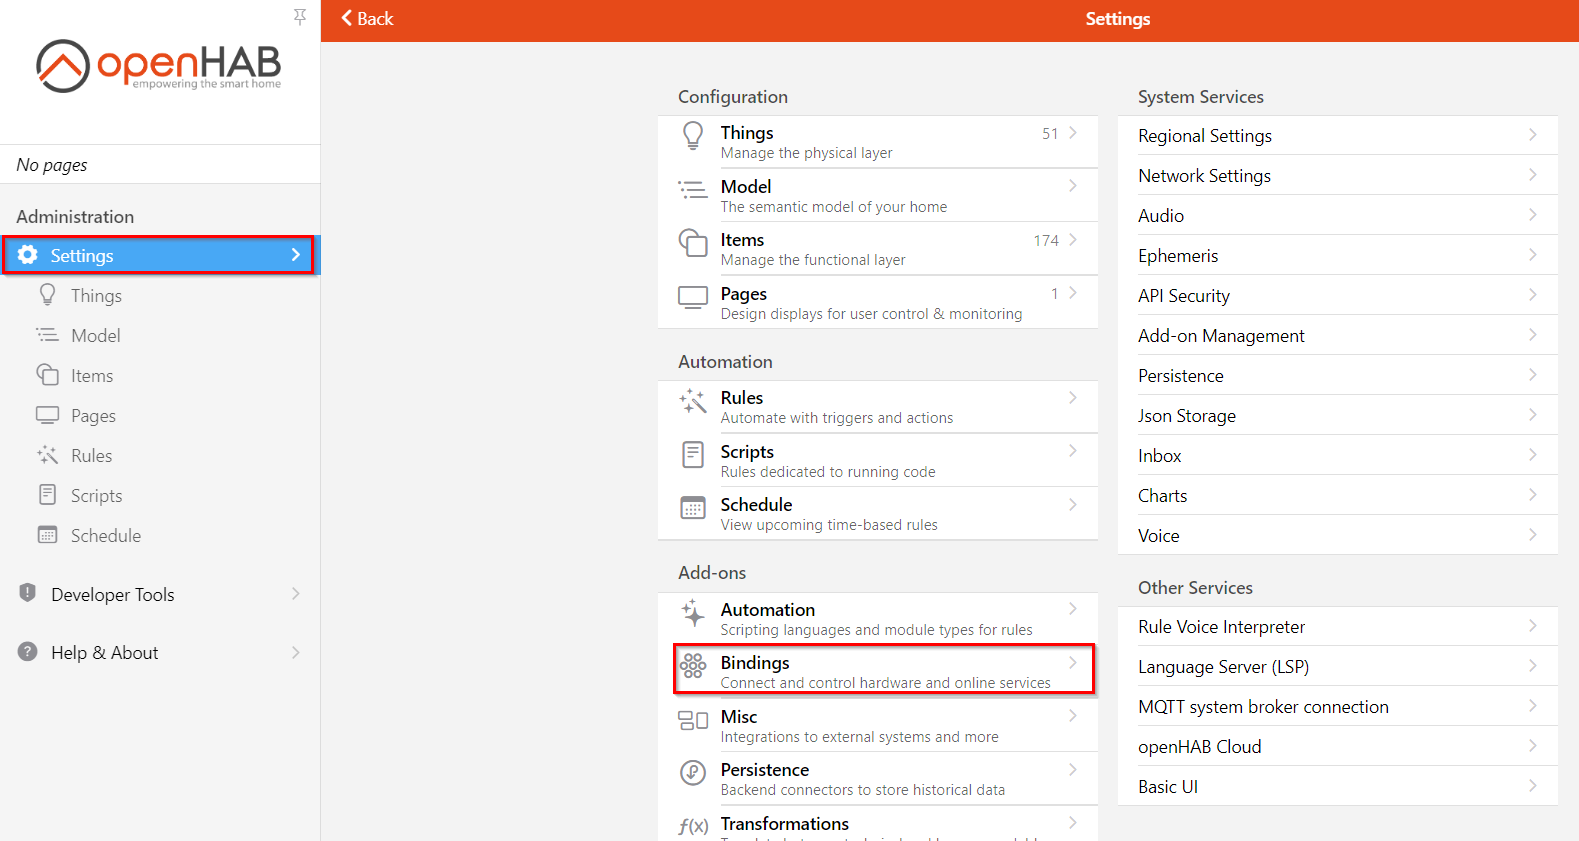
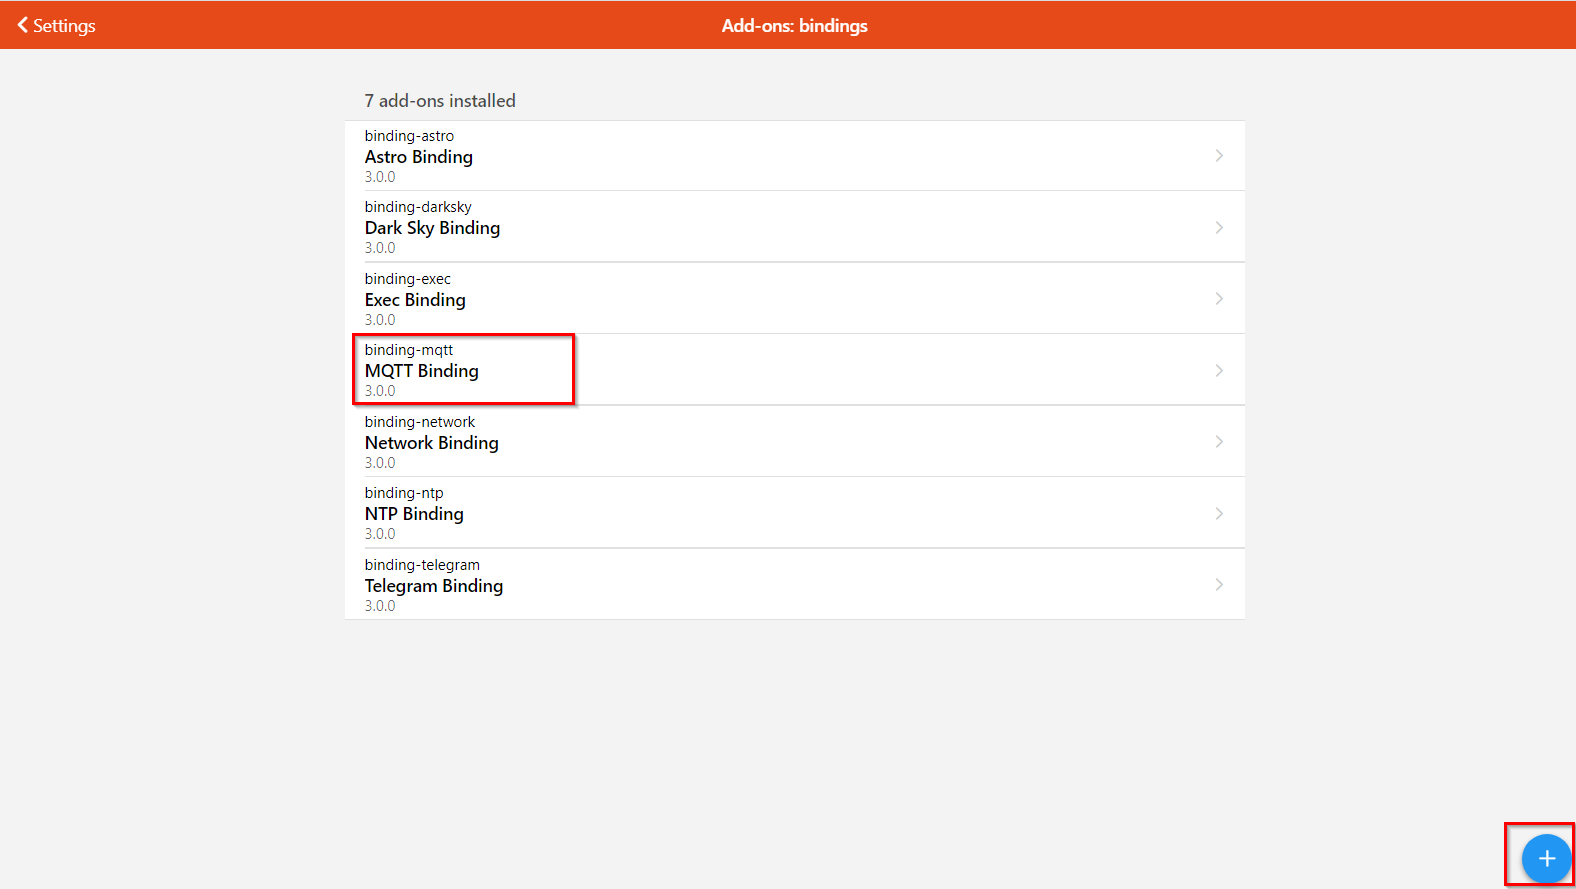
At the first login of Openhab you get a prompt to install bindings. If you did not install the MQTT binding at that moment, you can add the MQTT-binding easily at any time via the settings menu, see the pictures.
When you see the installed bindings, you can add the binding via the pop-up screen.
Add Things
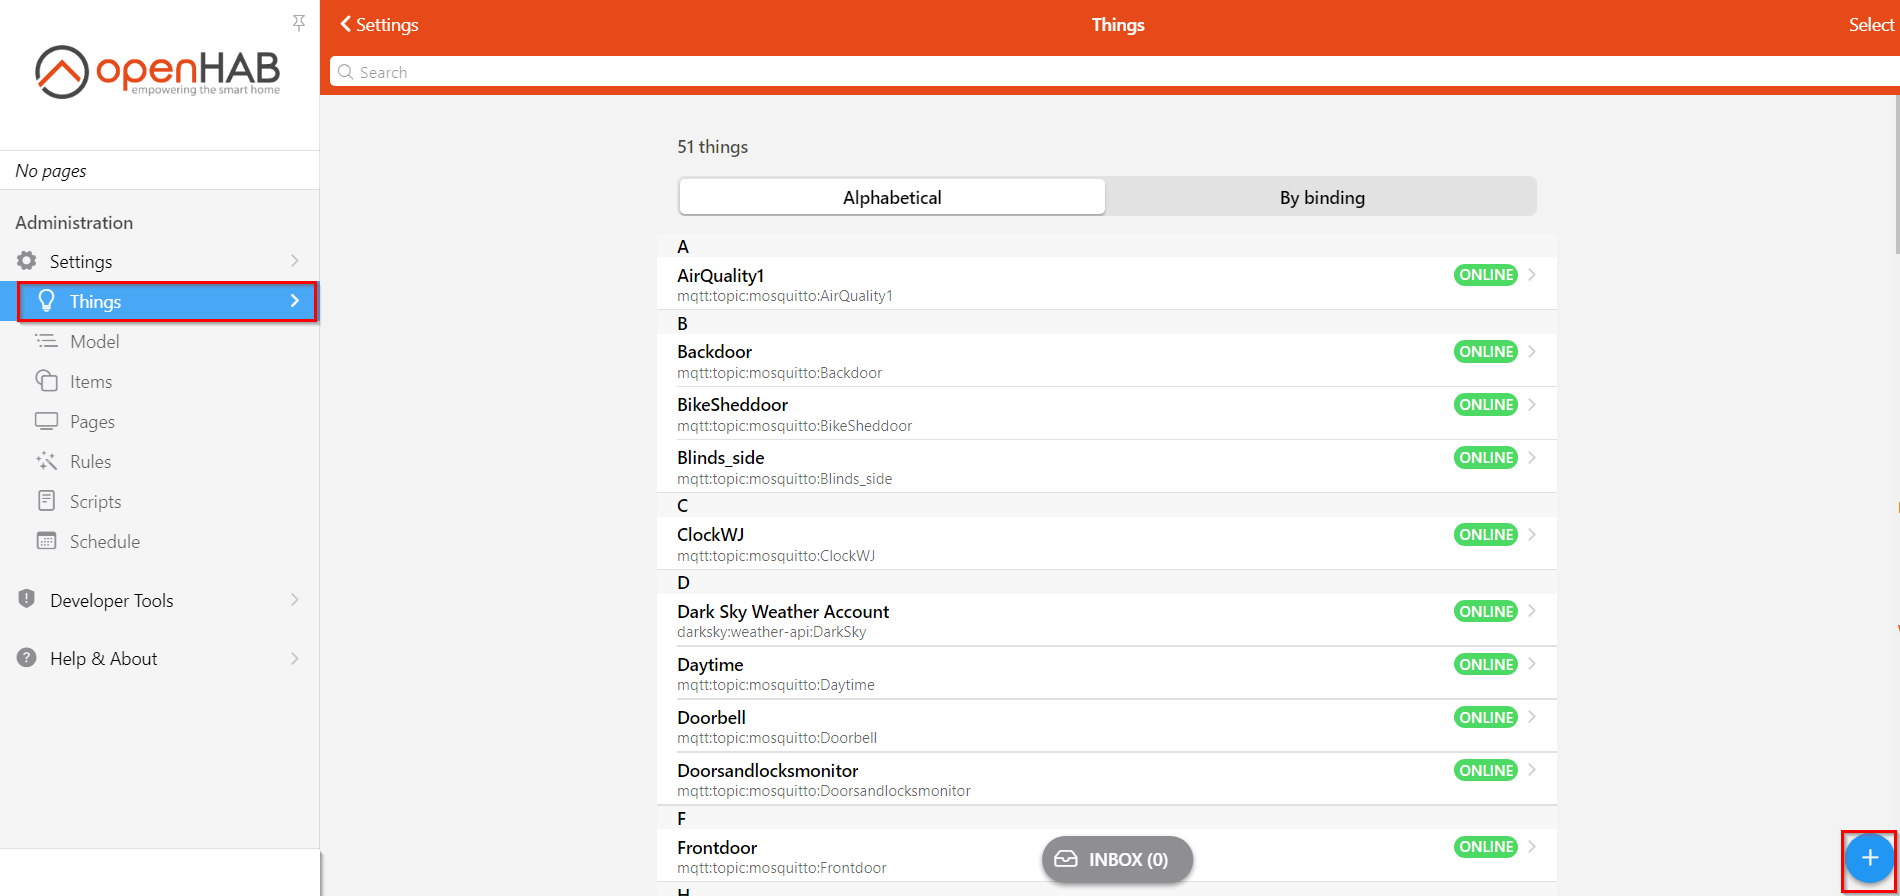
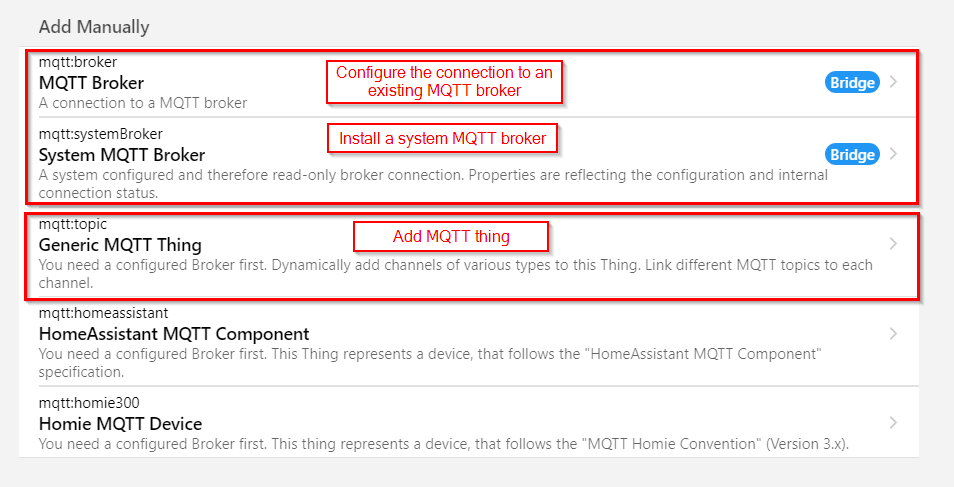
In Openhab the devices which communicatie via MQTT are called 'Things'. See Openhab website.
You add the things from the things-menu (see picture). Choose the MQTT-binding to add the MQTT-things.
In the last picture you see the different things you can add. I will explain the MQTT brokers and the generic MQTT-things in the next steps.
Add a MQTT Broker
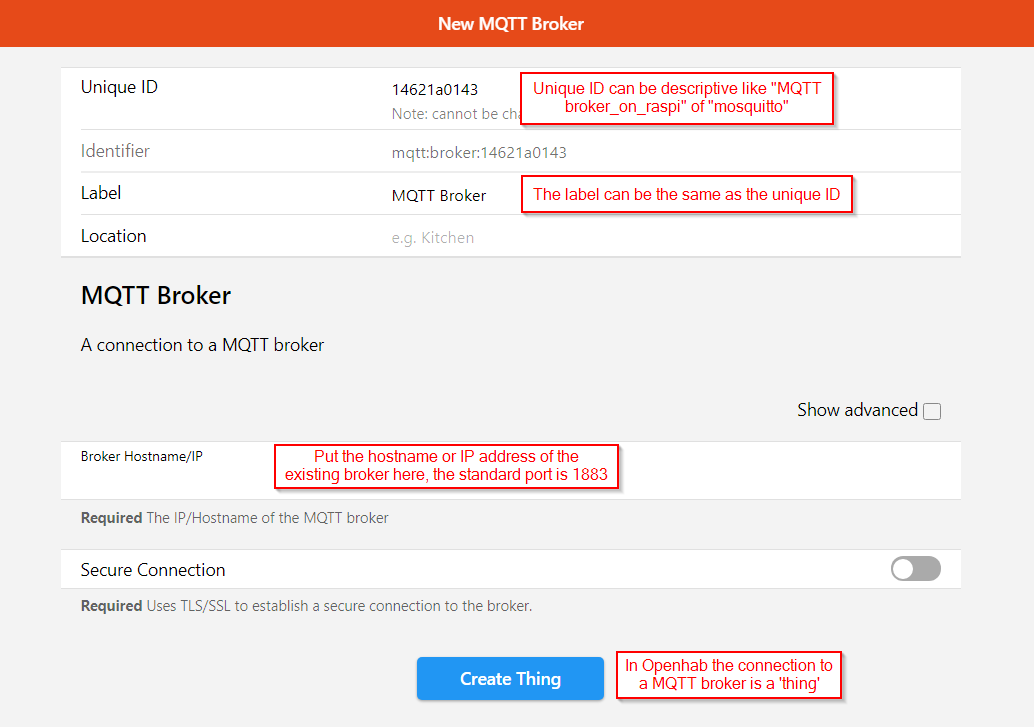
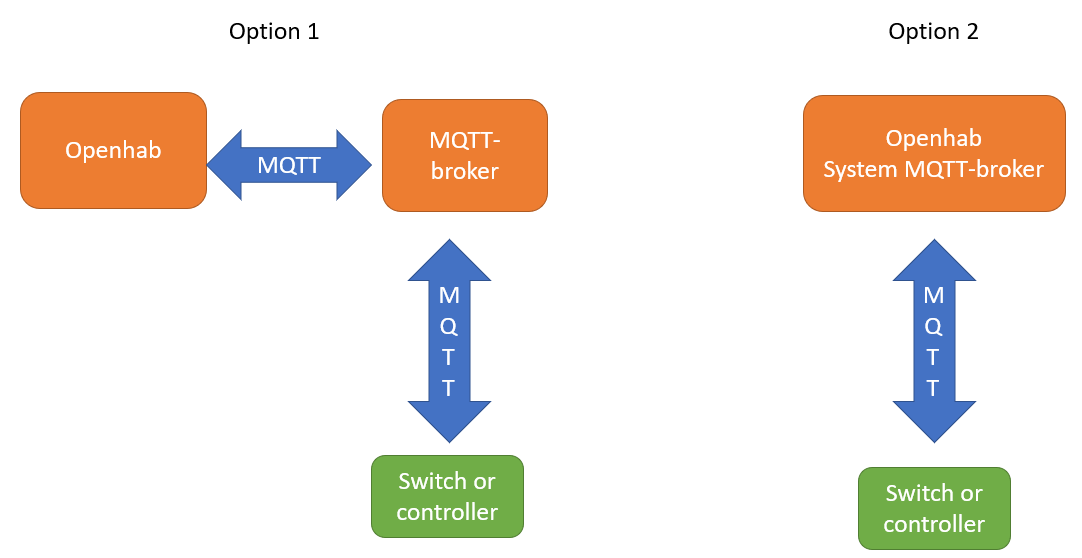
The communication between your Openhab set-up and your device runs via a MQTT broker. Your device and Openhab needs to be connected to the same broker and the same topics on this broker.
- You can use a separate MQTT-broker or
- install a MQTT broker from Openhab, which is called 'System MQTT broker'.
In my set-up I use option 1 and use Mosquitto as a separate MQTT broker. It runs on my Raspberry Pi on which also my Openhab is installed.
Option 1: to add the connection to the broker, fill in the address of the MQTT and add the connection as a Thing (see picture)
Option 2: add the system broker as a Thing which will install the MQTT broker software.
Add the MQTT Device
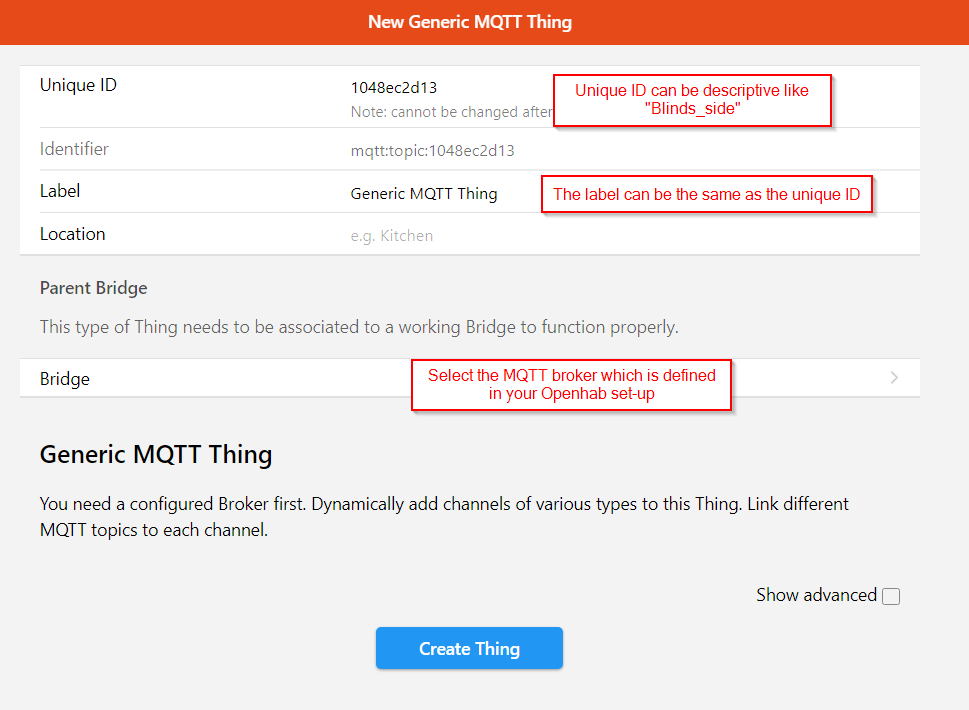
After the MQTT broker is set up, you can add the MQTT device and connect them to the broker. In Openhab the broker is identified as a 'bridge'.
See the picture. You can replace the generated unique ID with a more descriptive ID
Add the Channel
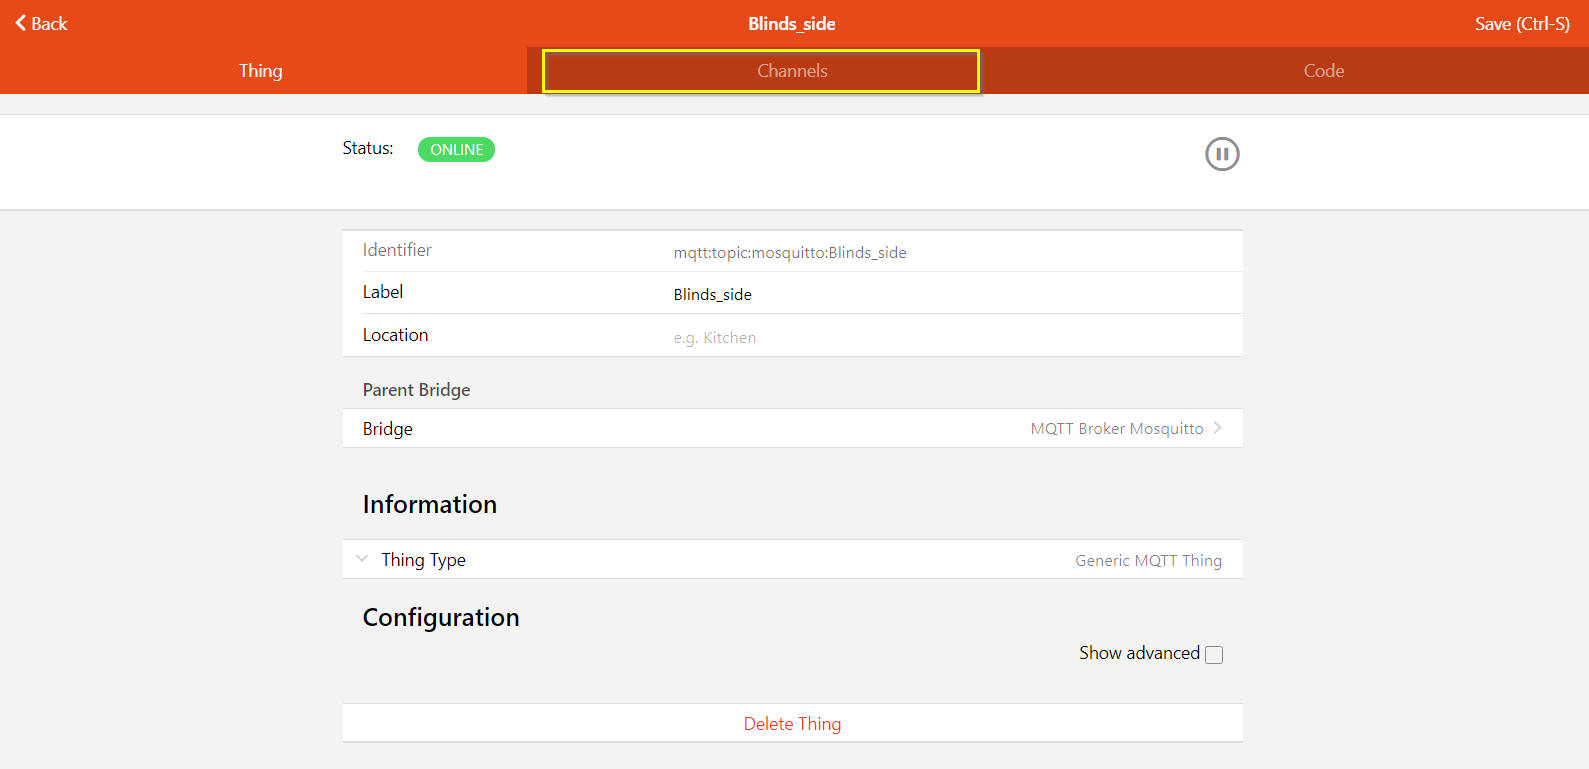
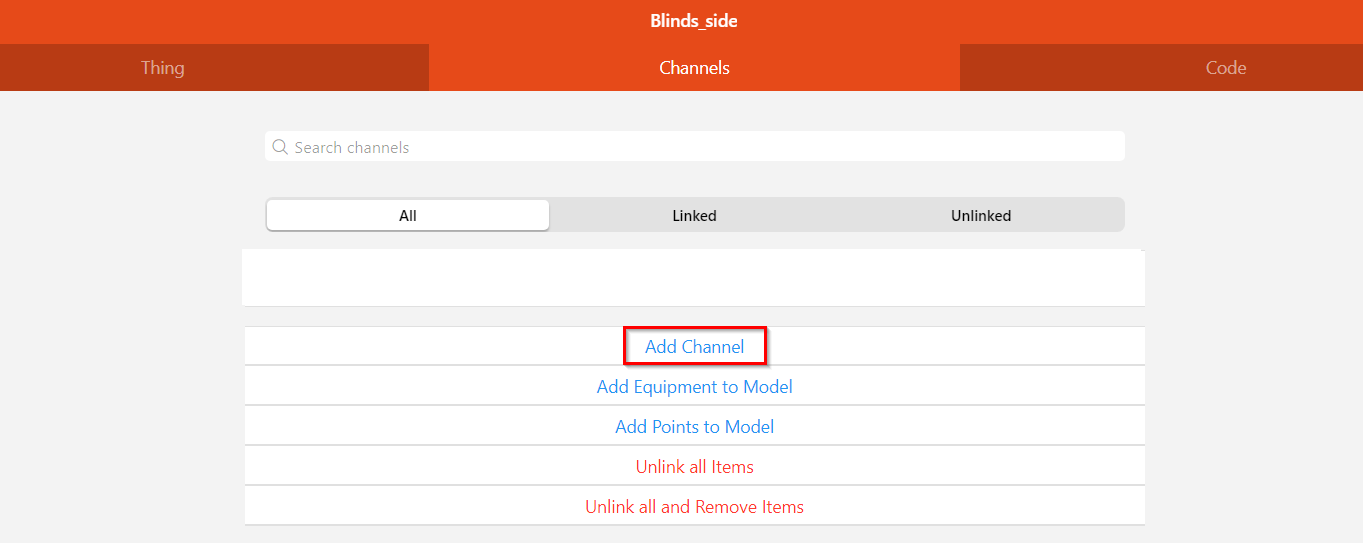
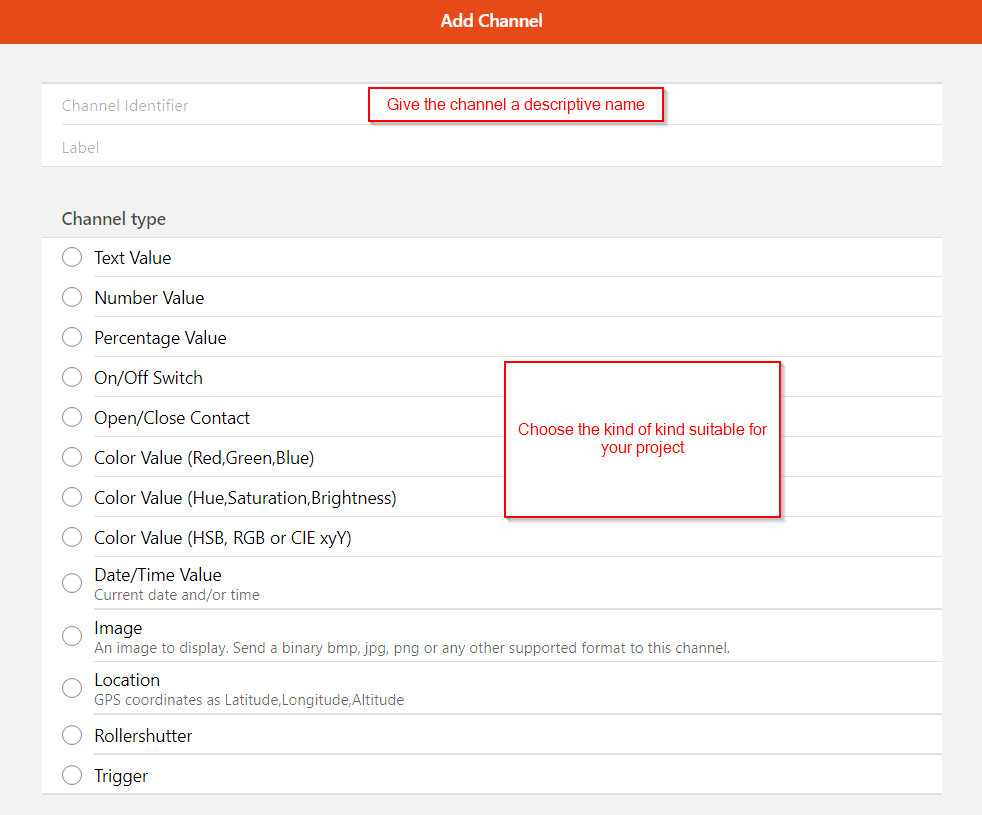
A MQTT-thing must have at least one channel in which the MQTT-topics are defined. You can add multiple channels to a device. For a example: If you have a climate sensor, you can add a temperature channel and a humidity channel.
To add a channel (see the pictures):
- Open the MQTT thing
- Click on the tab 'channels'
- Click on 'Add channel'
- Select the suitable type of channel
- Fill in the MQTT-topics
Example
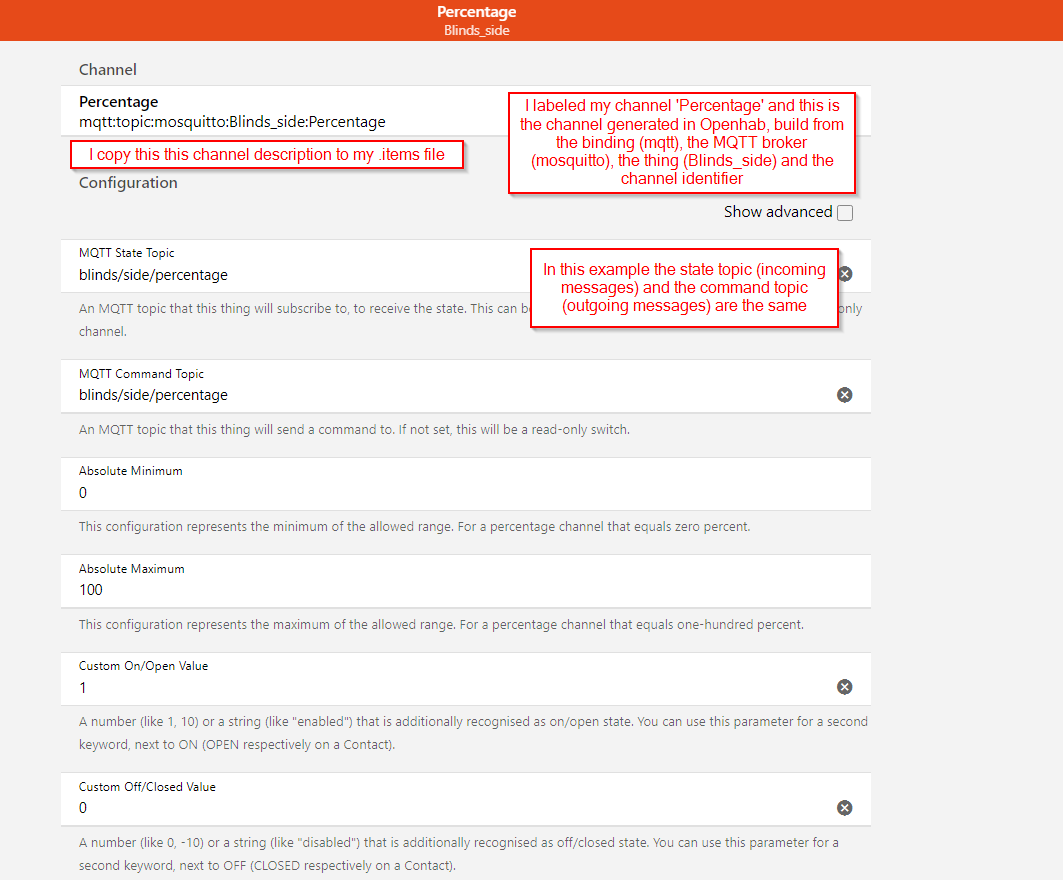
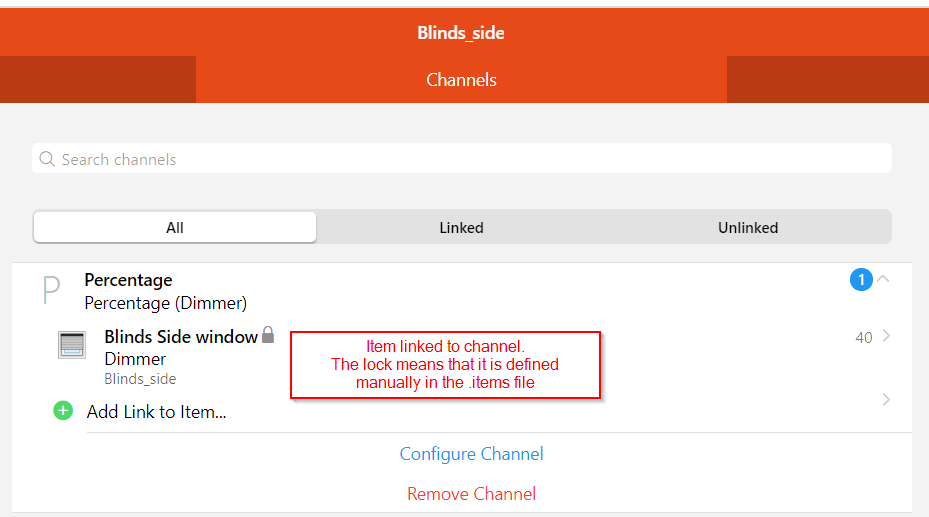
In the picture you can see an example of my Blinds controller MQTT channel.
I upgraded from an Openhab installation version 2.4 and wanted to re-use much of the configuration. I am used to define the items in the .items files and combine this with the UI-based generation of the Things and channels.
After the channel is set up, I copy the channel definition (see picture) and copy this for every channel to my .items file. See my example below.
When the item is generated and linked to the channel, you can this link in the Openhab settings when you re-open the Thing and its channel (see picture)
Dimmer Blinds_side "Blinds Side window [%d]" {channel="mqtt:topic:mosquitto:Blinds_side:Percentage", ga="Light"}