Luciferin, DIY Dynamic Bias Light for Your Monitor. (similar to Ambilight)
by sblantipodi in Circuits > LEDs
9710 Views, 83 Favorites, 0 Comments
Luciferin, DIY Dynamic Bias Light for Your Monitor. (similar to Ambilight)

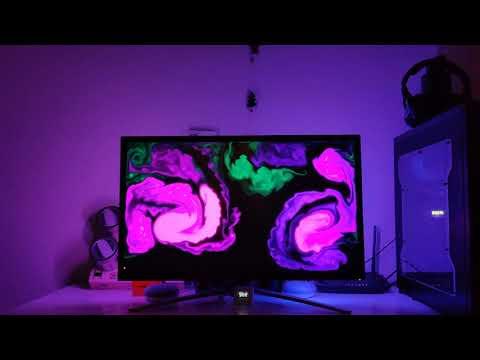
Luciferin is a generic term for the light-emitting compound found in organisms that generate bioluminescence like Fireflies and Glow Worms. Firefly Luciferin is a Java Fast Screen Capture PC software designed for Glow Worm Luciferin firmware, those two software creates the perfect Bias Lighting and Ambient Light system for PC.
Supplies
1) ESP8266 microcontroller (D1 Mini or NodeMCU) or ESP32
2) WS2812B LED strip or SK6812 LED strip
3) Power supply for the LED strip
4) A Windows or Linux PC (macOS support will be supported soon)
Connect the LED Strip to Your Microcontroller


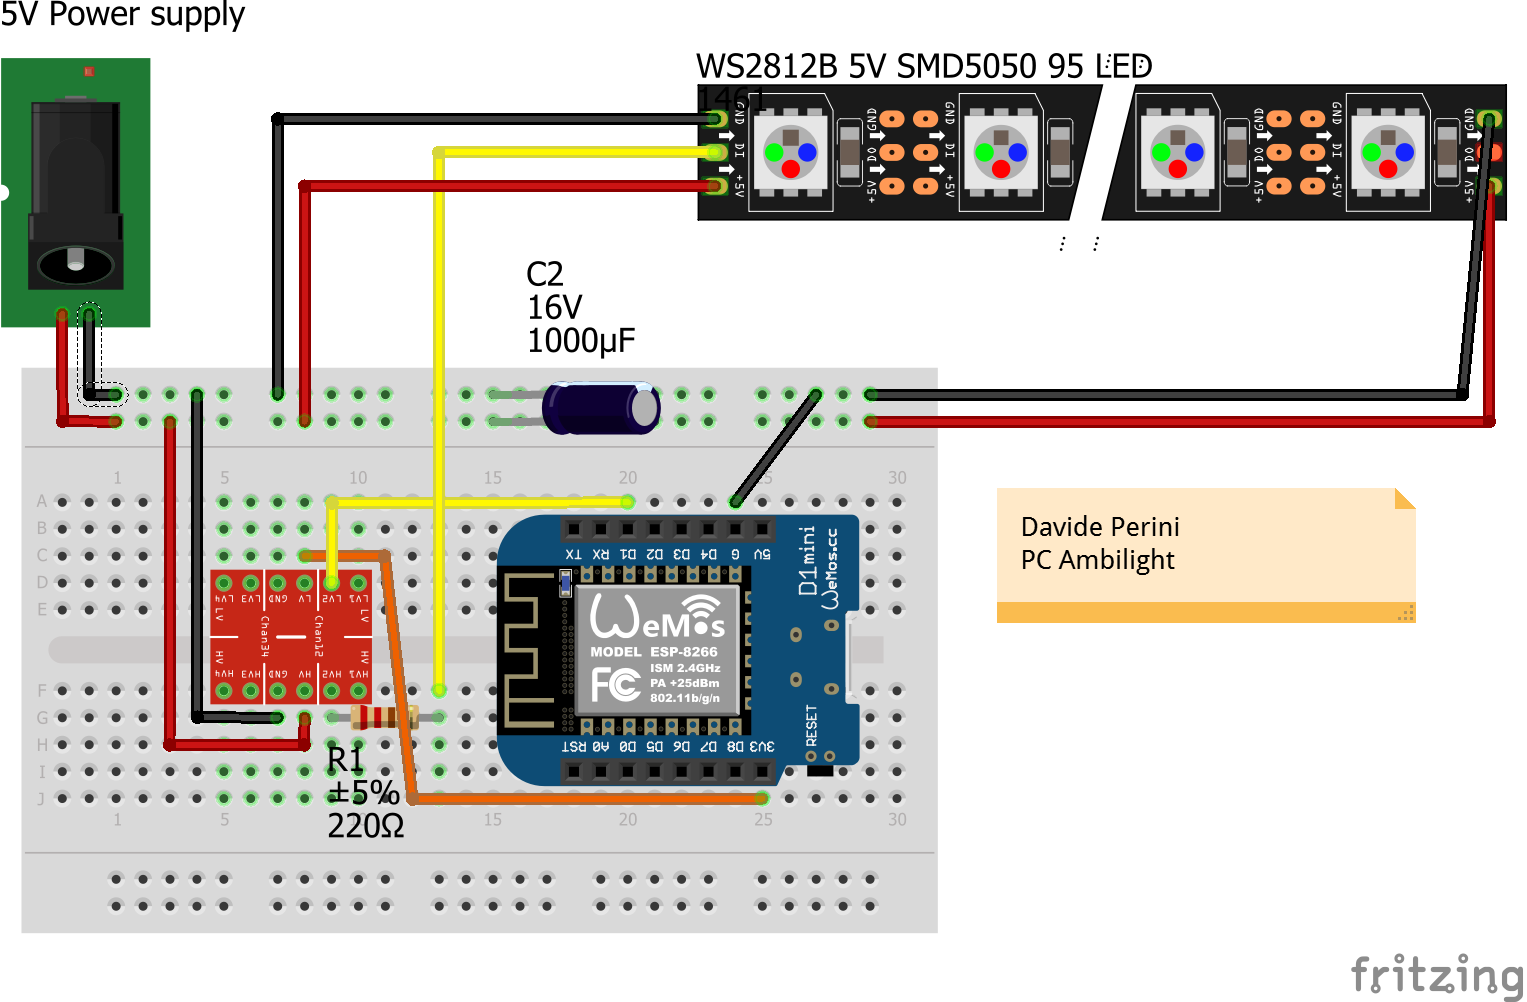
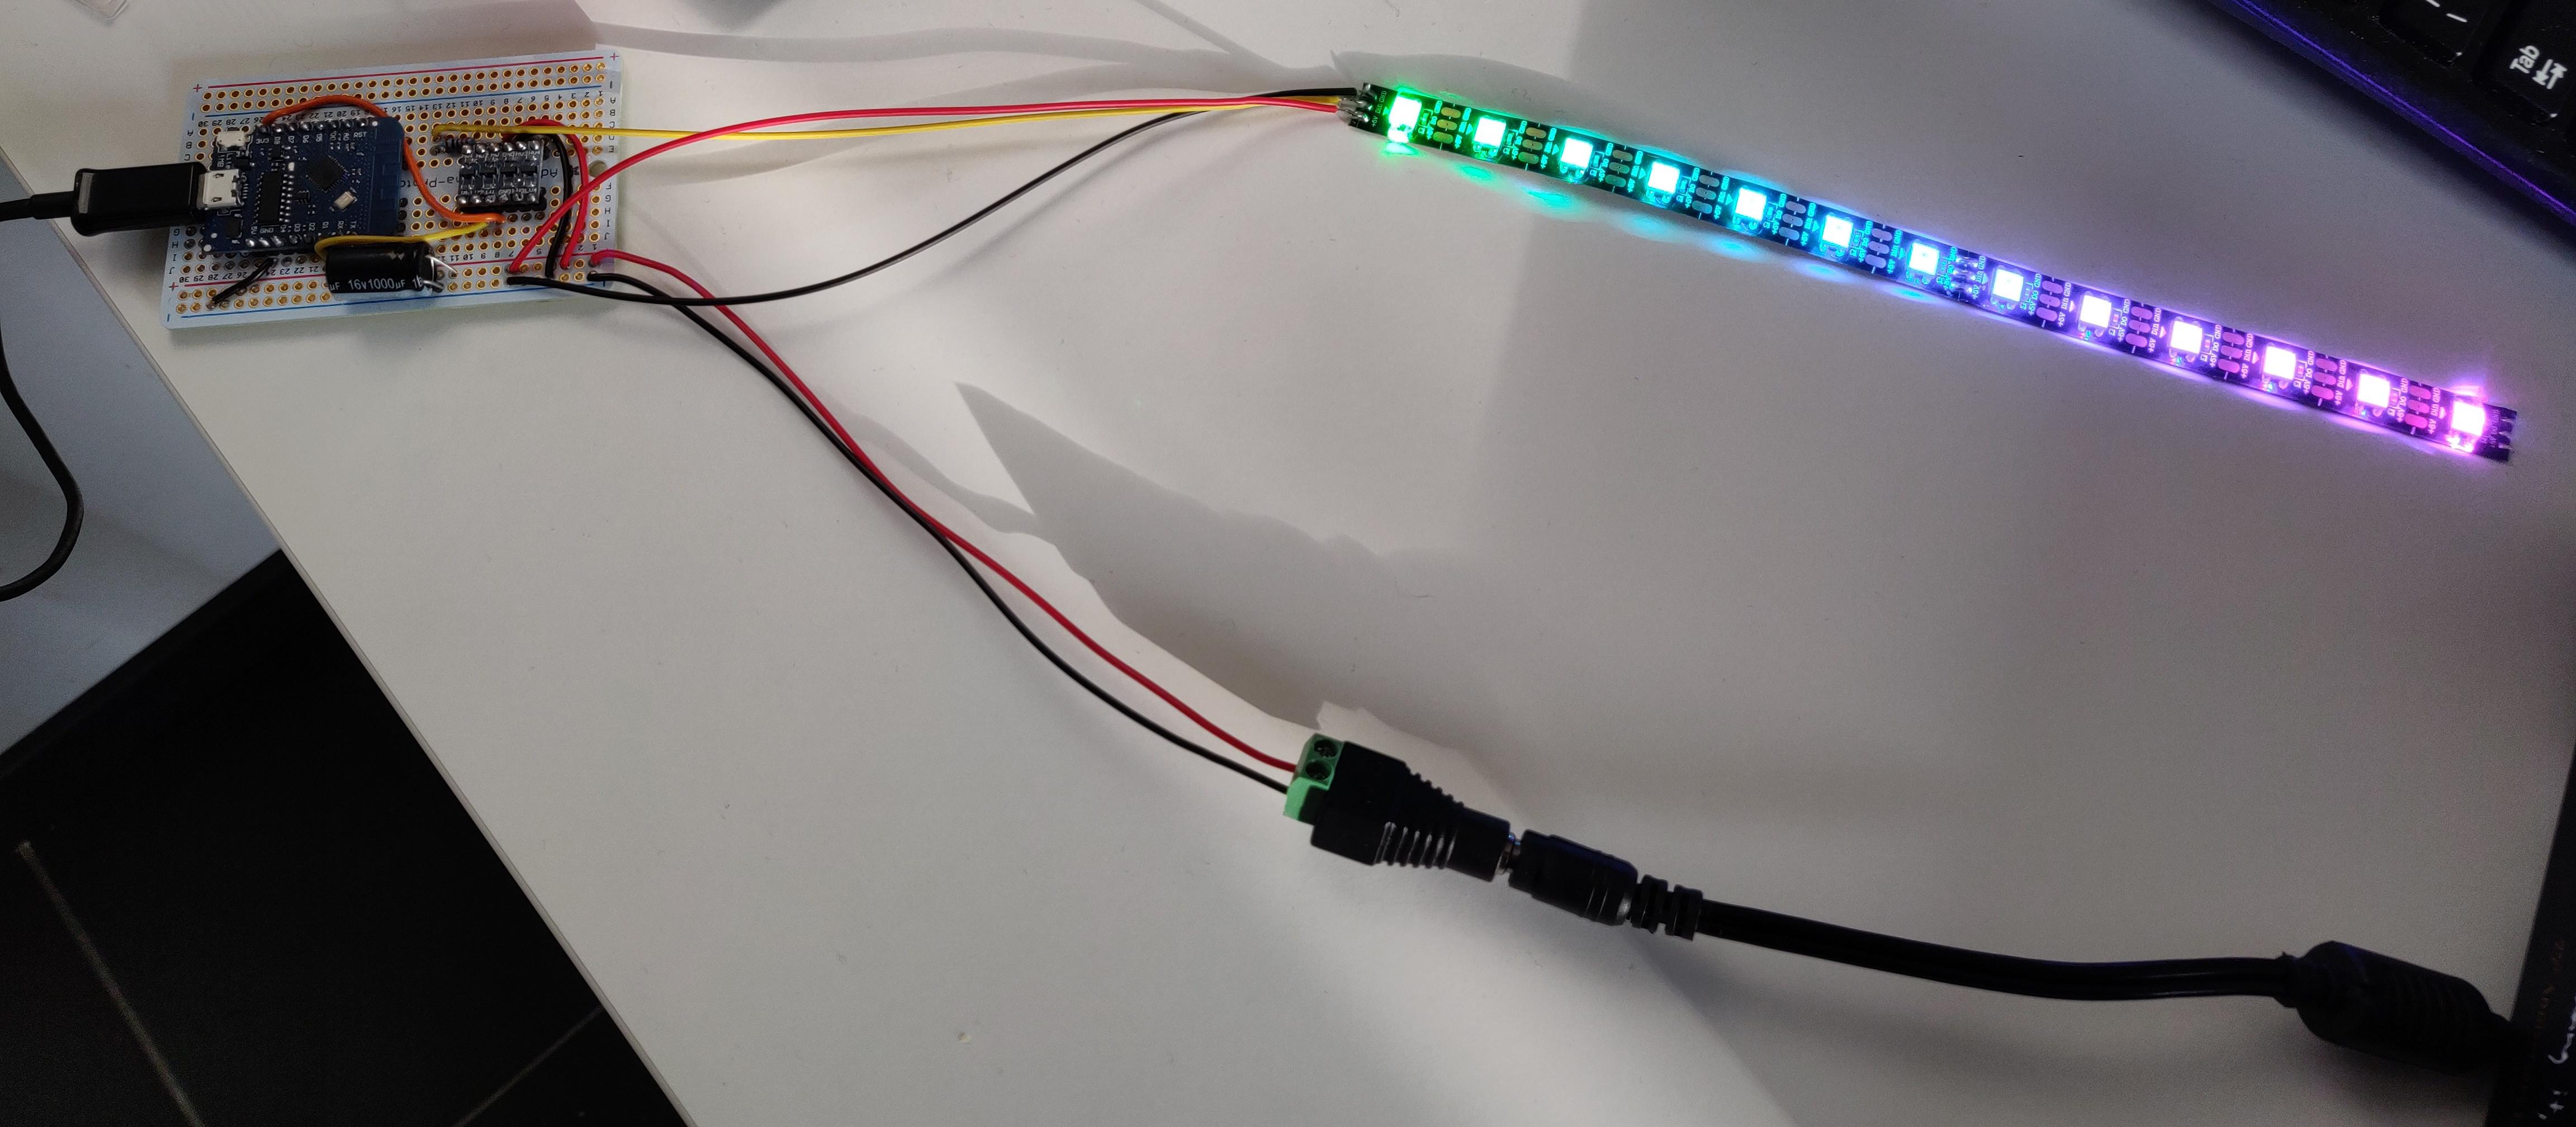
Capacitor, resistance and logic level converter helps "stabilizing the circuit", there are many people who don't use those extra components.
You need to buy a power supply capable of powering all the LEDs you want. For 60 LEDs a power supply of at least 5V/3A it's recommended, for 120 LEDs you need a 5V/6A power supply, do your math here. A bigger power supply generally works better and runs less hot than a smaller one. Don't undersize the power supply.
Note: LED strip must be connected to the D1 pin.
Put the LED's on the Back of the Monitor


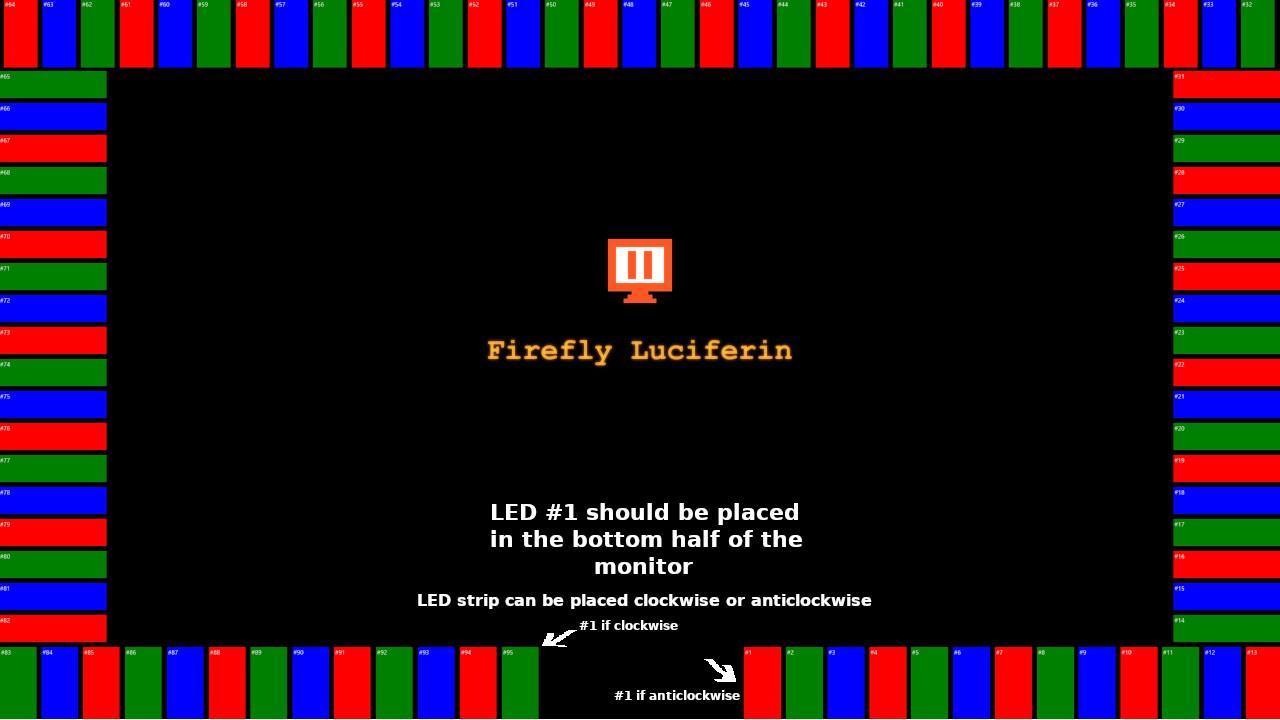
Double sided tape is all you need for this step. It's easyer if you cut the strip in 5 parts,
top row, left column, right column, bottom left, bottom right.
NOTE: If you want to use the automatically generated configuration, your first LED should be positioned in the bottom half of your monitor like shown in the image.
Install Glow Worm Luciferin Firmware on Your Microcontroller
Configure WiFi and MQTT on Glow Worm Luciferin FULL firmware using the Web Installer
Luciferin Web Installer is available here.
Please click the Install FULL button
 The install procedure will ask you the COM port where you want to install the firmware. Once the installation is finished you'll be able to enter the WiFi credentials.
 If you entered the right credentials you can visit the device where you can finish the firmware configuration. If you entered wrong credentials, please reinstall the firmware and select "erase device" checkbox during the process to clean the stored credentials.
 MQTT is optional but if you want to use MQTT, you must enable MQTT on the Web Interface settings. Click visit device. Once landed on the Web Interface, click the three lines button on the top right to access the firmware settings.

Download and Install Firefly Luciferin PC Software
Configure Firefly Luciferin for FULL firmware
You can download Firefly Luciferin here.
If you are using the FULL firmware, you need to enable WiFi on the Firefly Luciferin settings, enabling MQTT is optional.
If you want to use MQTT, both Firefly and Glow Worm must be configured to use MQTT. If you don't want to use MQTT, please disable MQTT on both Firefly and Glow Worm.
 if you have more than one devices running Glow Worm firmware it is recommended to select which device to use in the Output device section under the Mode tab.
Luciferin Web Interface
Glow Worm Luciferin FULL firmware exposes a Web Interface to control your lights from your browser without the needs of the Firefly Luciferin PC client.
 If you are on Windows or macOS you can access your device by pointing your browser to:
http://your_device_name.local
If you are using Android you need to enter the IP address of your microcontroller, example:
Home Assistant Integration
Thanks to the MQTT protocol Luciferin can be easily integrated into your preferred Home Automation system.
More info here.