Low Poly Tutorial - Adobe Illustrator
by Silvarius in Design > Digital Graphics
2726 Views, 1 Favorites, 0 Comments
Low Poly Tutorial - Adobe Illustrator

Low poly is typically used to describe a 3D model with a low amount of triangles (polys). However, you can triangulate 2D images with with the use of Adobe Illustrator to create a low poly effect.
Supplies

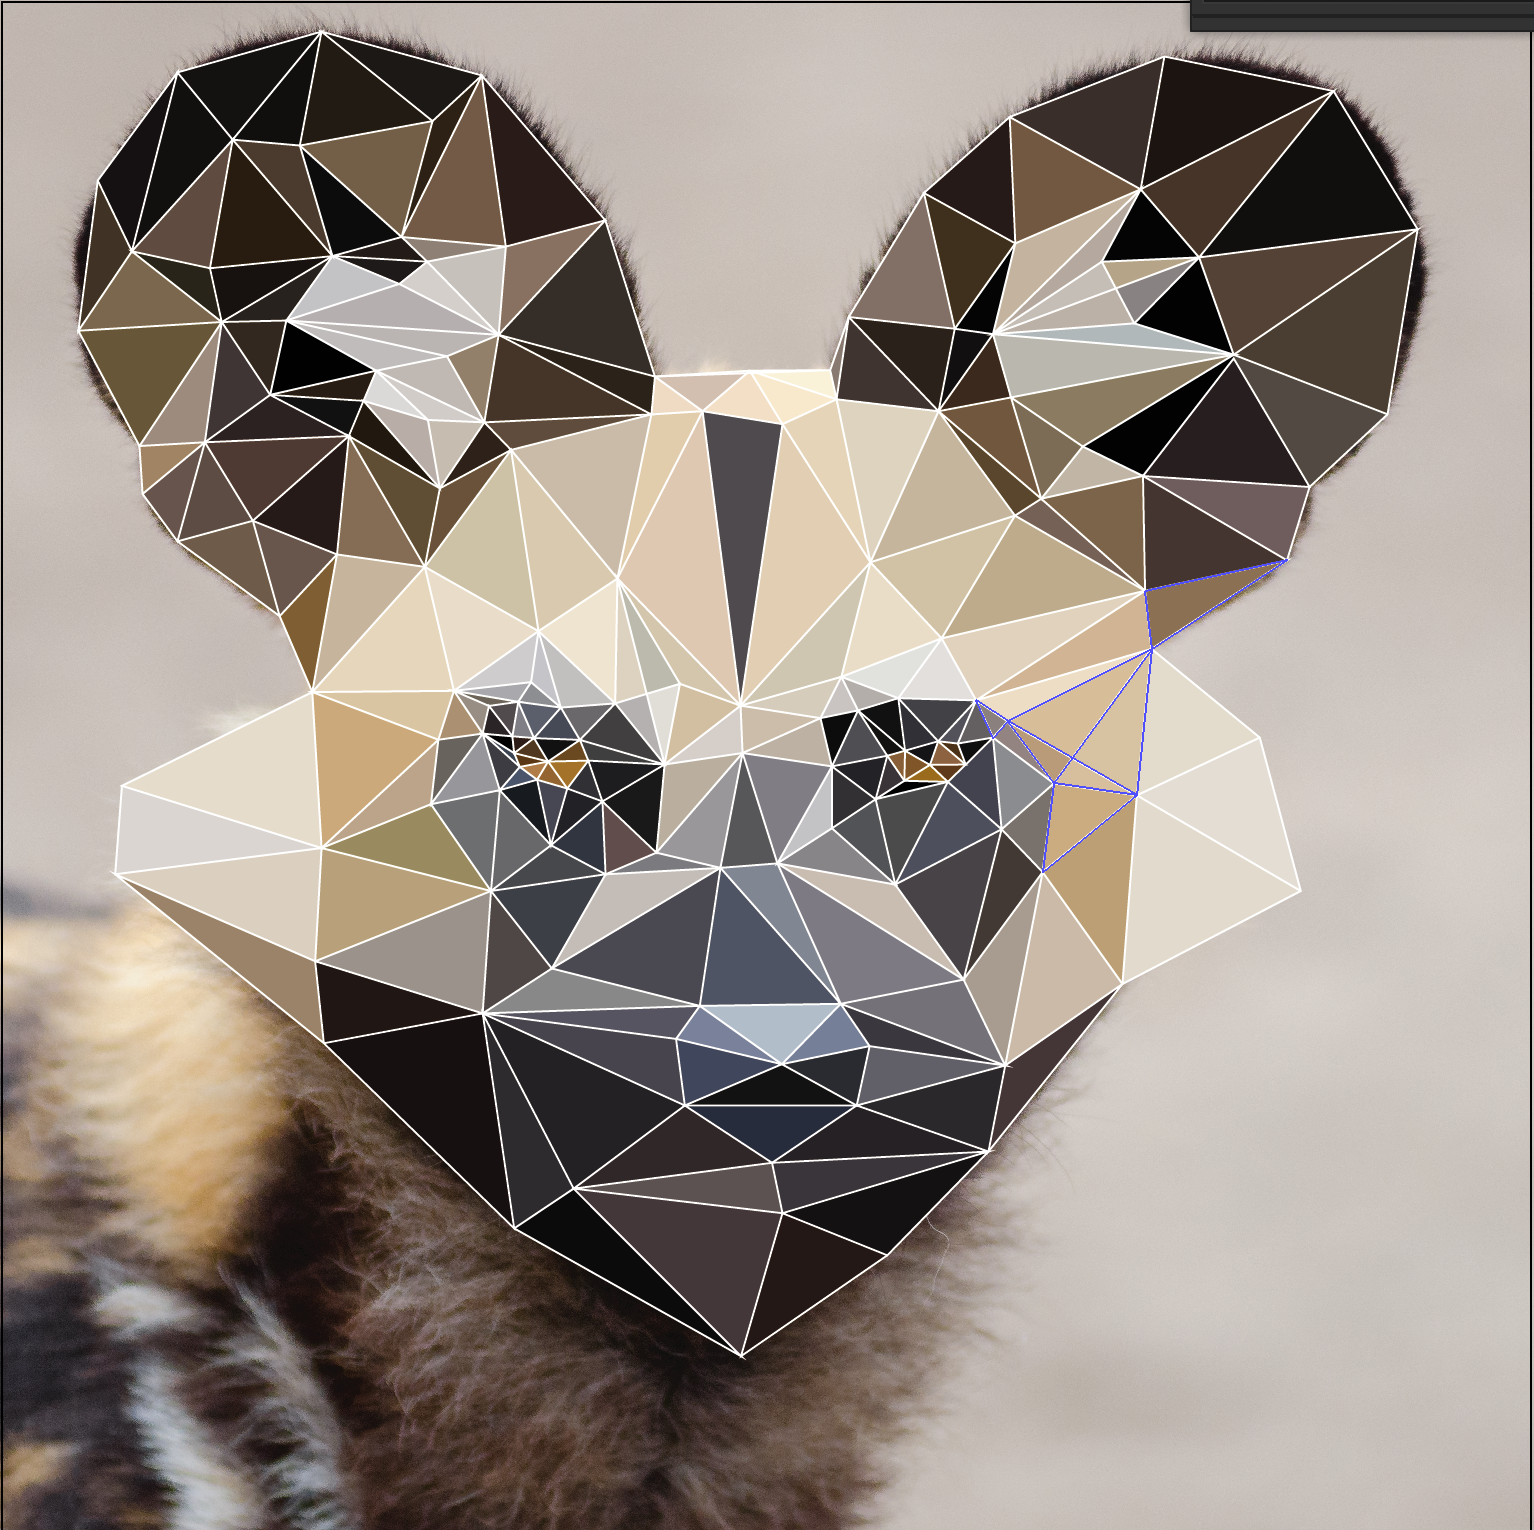
In this tutorial we will be using this image "African Wild Dog" by Mathias Appel (CC BY-NC 2.0). You will also need Adobe Illustrator, though it doesn't have to be one of the latest ones. I will be using Mac commands so if you are using Windows, check for your equivalent commands.
Opening the File
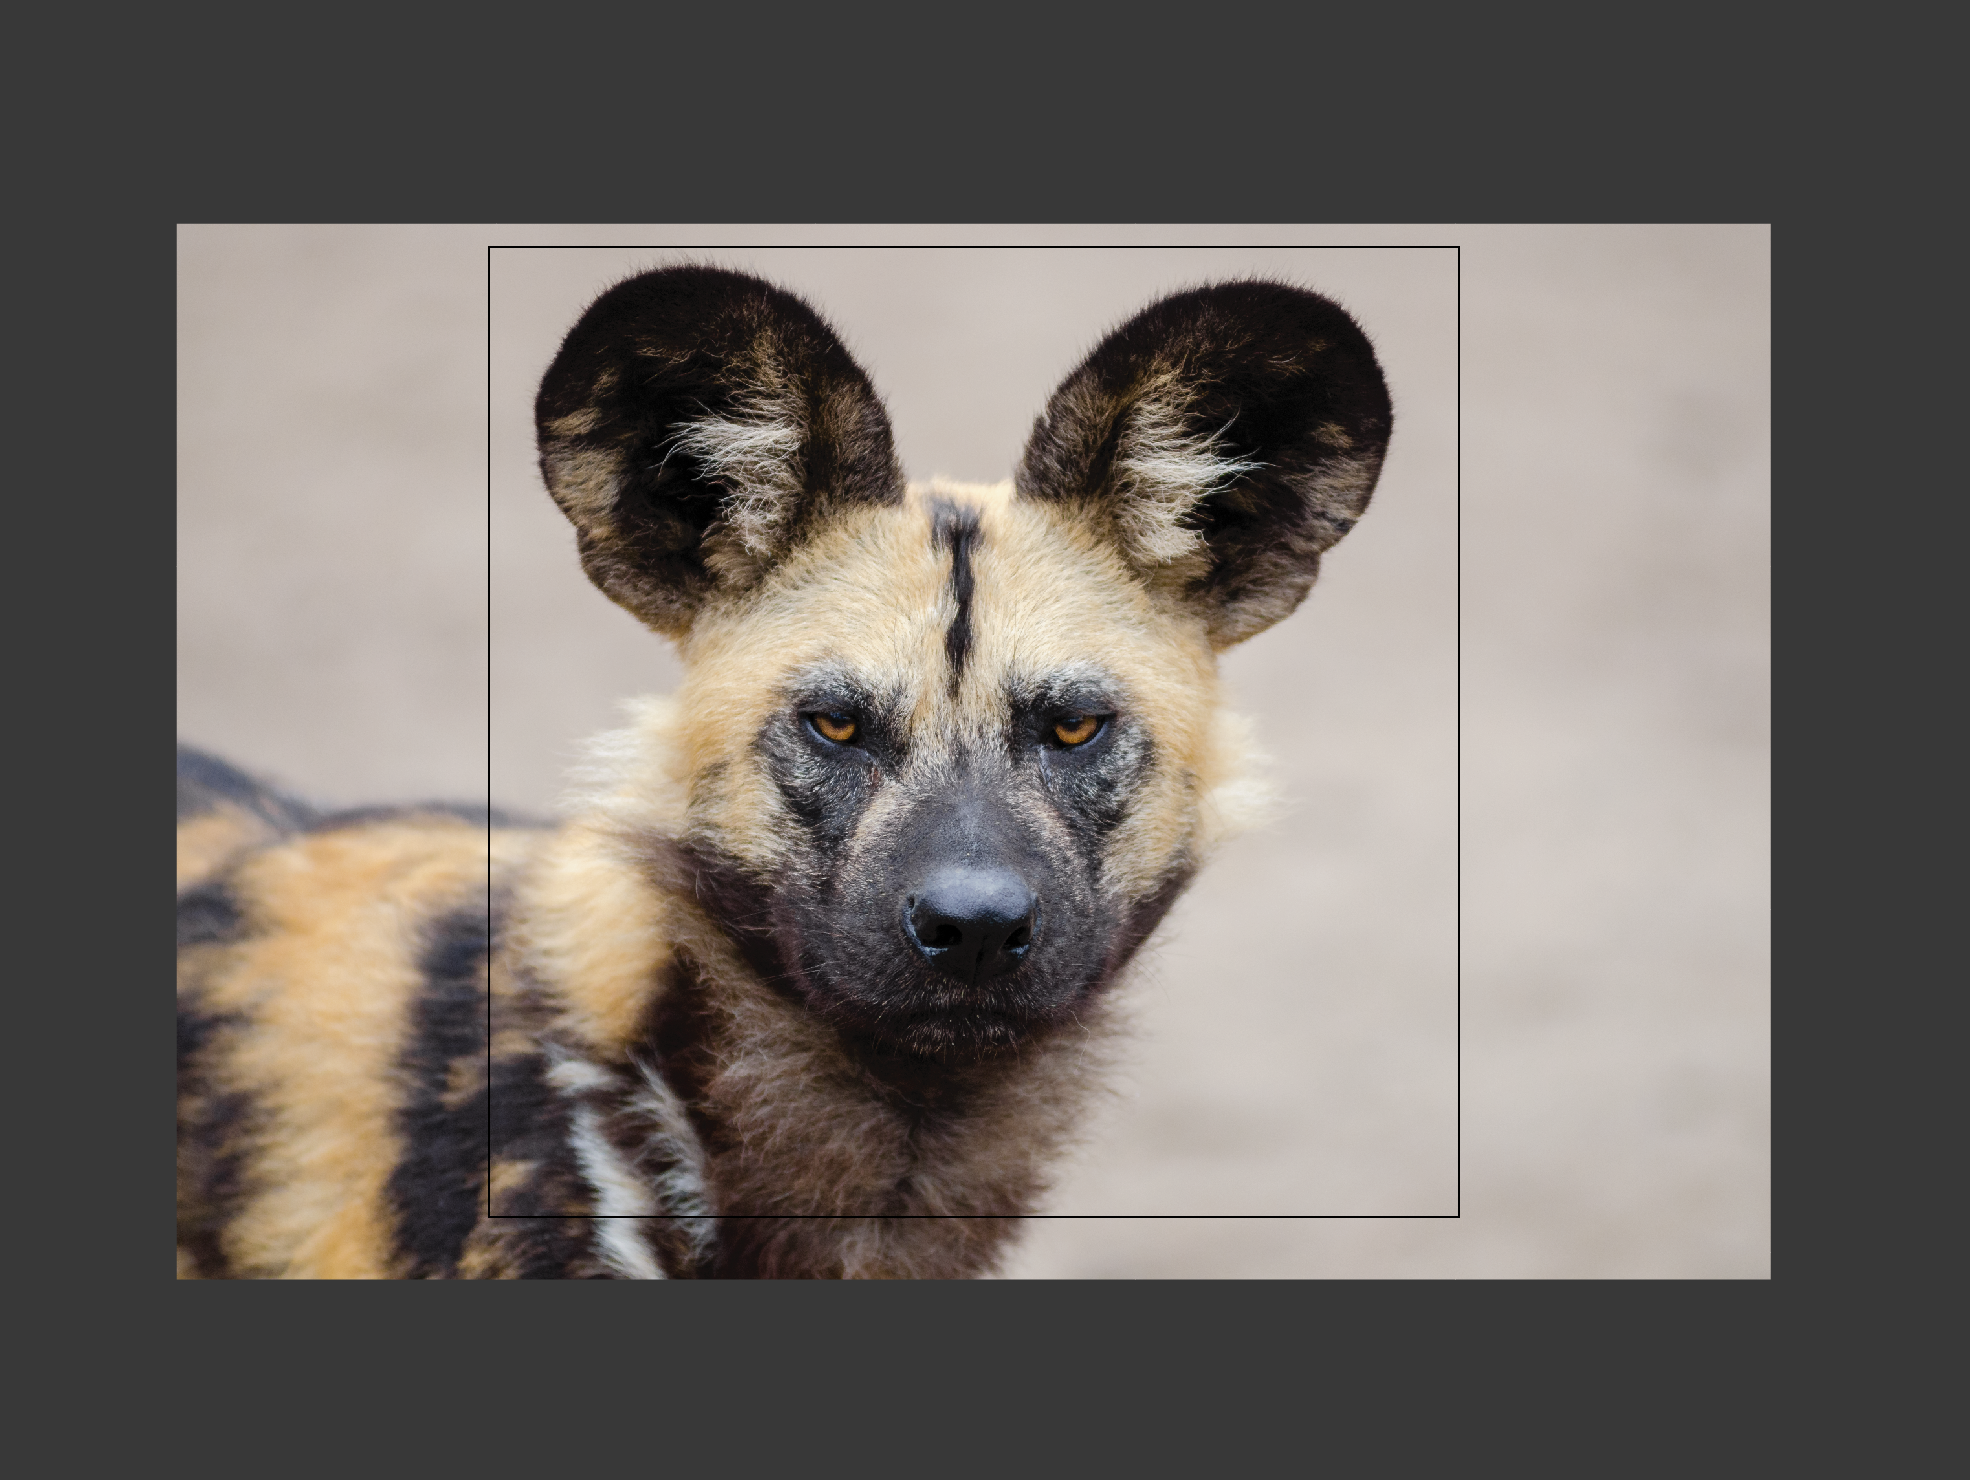
Open the image file with File -> Open or drag the image into the workspace. Move and resize to your preferred measurement. Lock this layer when done.
Lineart


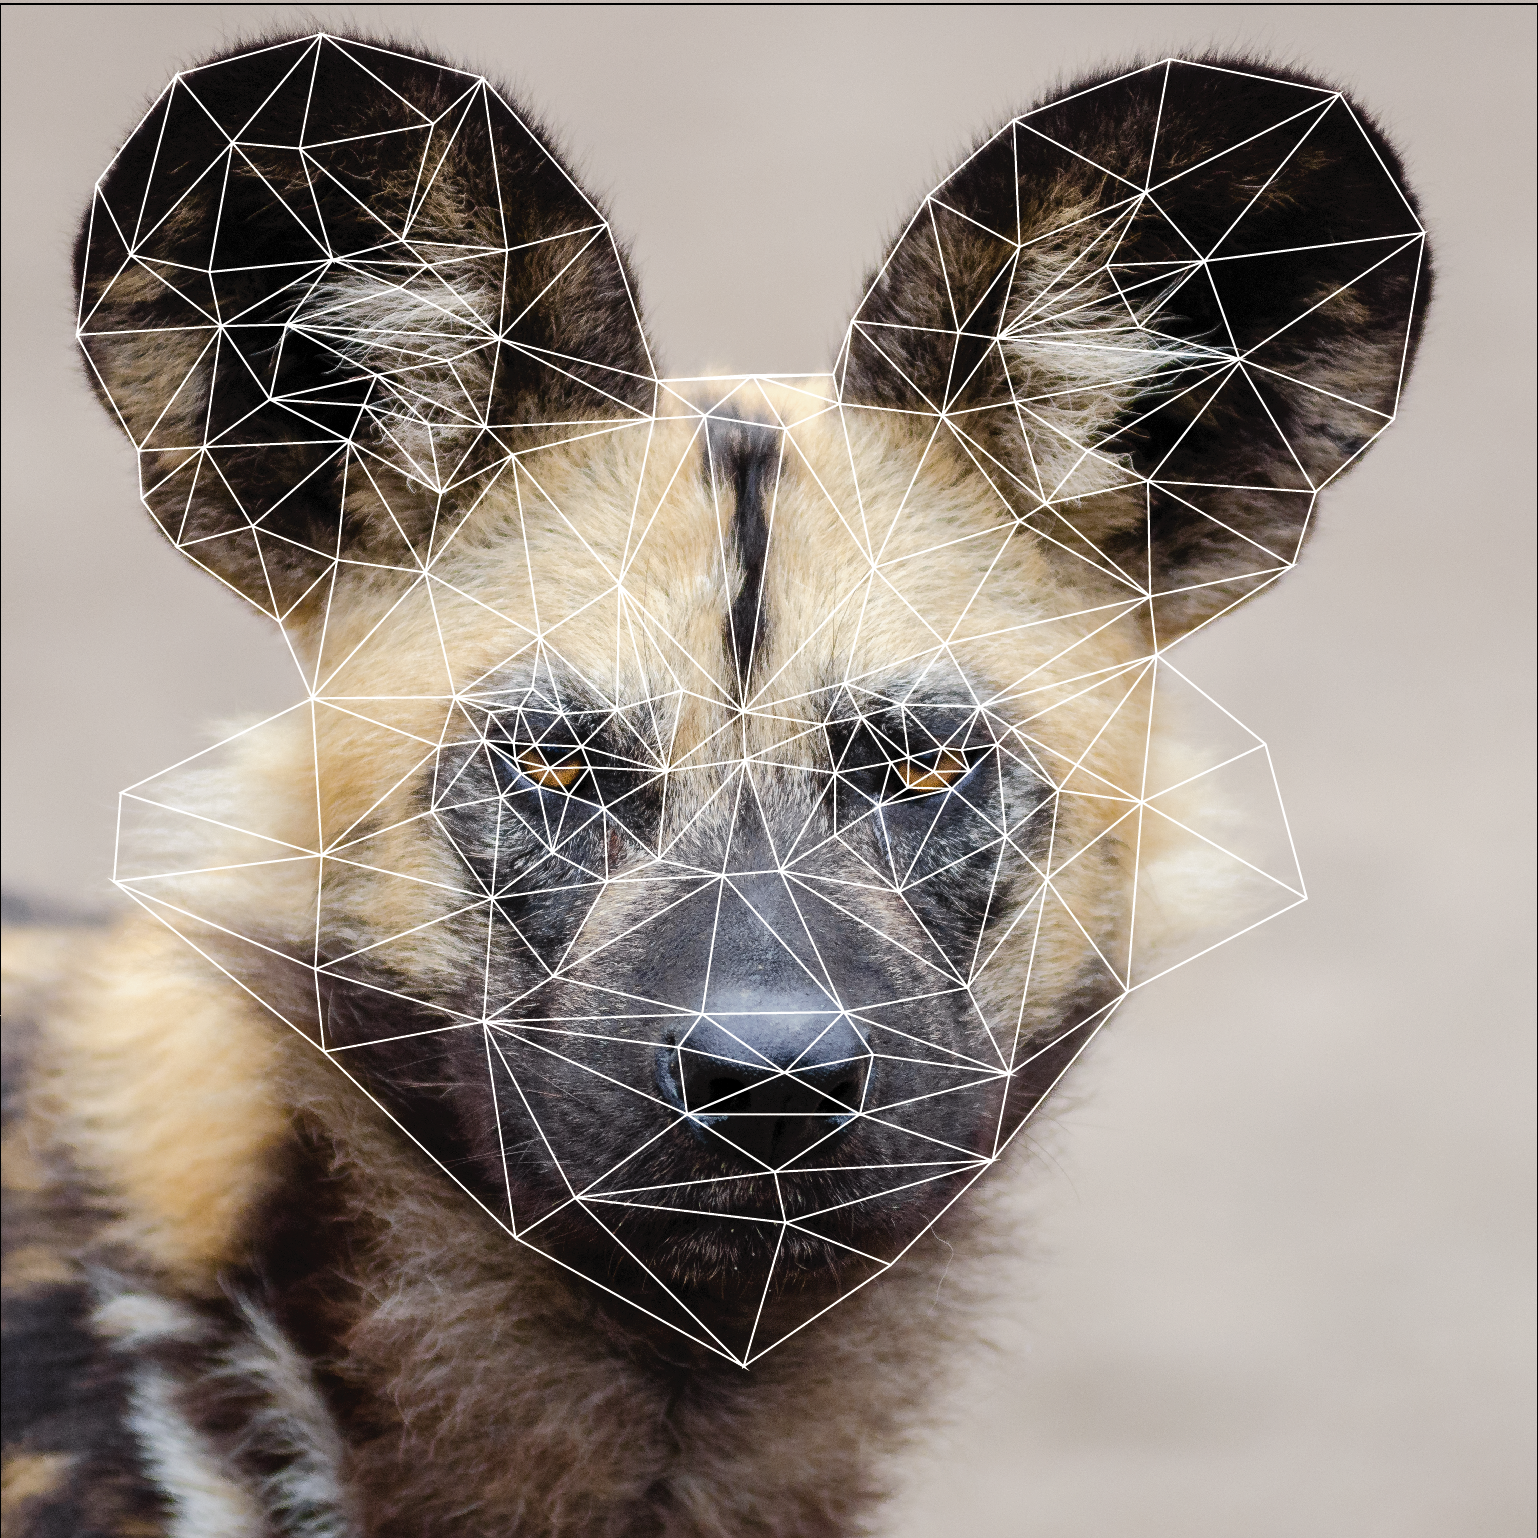
Next, on a new layer, grab the pen tool [P]. This will be the main tool needed for this project.
Select a color that contrasts the piece you are working on. In this case, since there is a lot of black, I will be using white. You do not want any fill. My stroke is set to 1pt, uniform, and basic at 100% opacity. You may change the stroke size based on your project but try to keep it thin for later.
To make a triangle with the pen tool, click three different points in the shape of a triangle. If the pen tool wants to delete points when connecting triangles together, hold down [SHIFT].
Now you start making triangles. Try to start with the details first since connecting smaller triangles are more complicated than bigger ones. Try to avoid heavy "weight" on a singular point. "Weight" in this case means how many segments are connected to a singular point. This caused the viewer to draw their eye to that specific point. This is fine in some cases but it can also be distracting to the overall piece, so be careful.
Create Live Paint
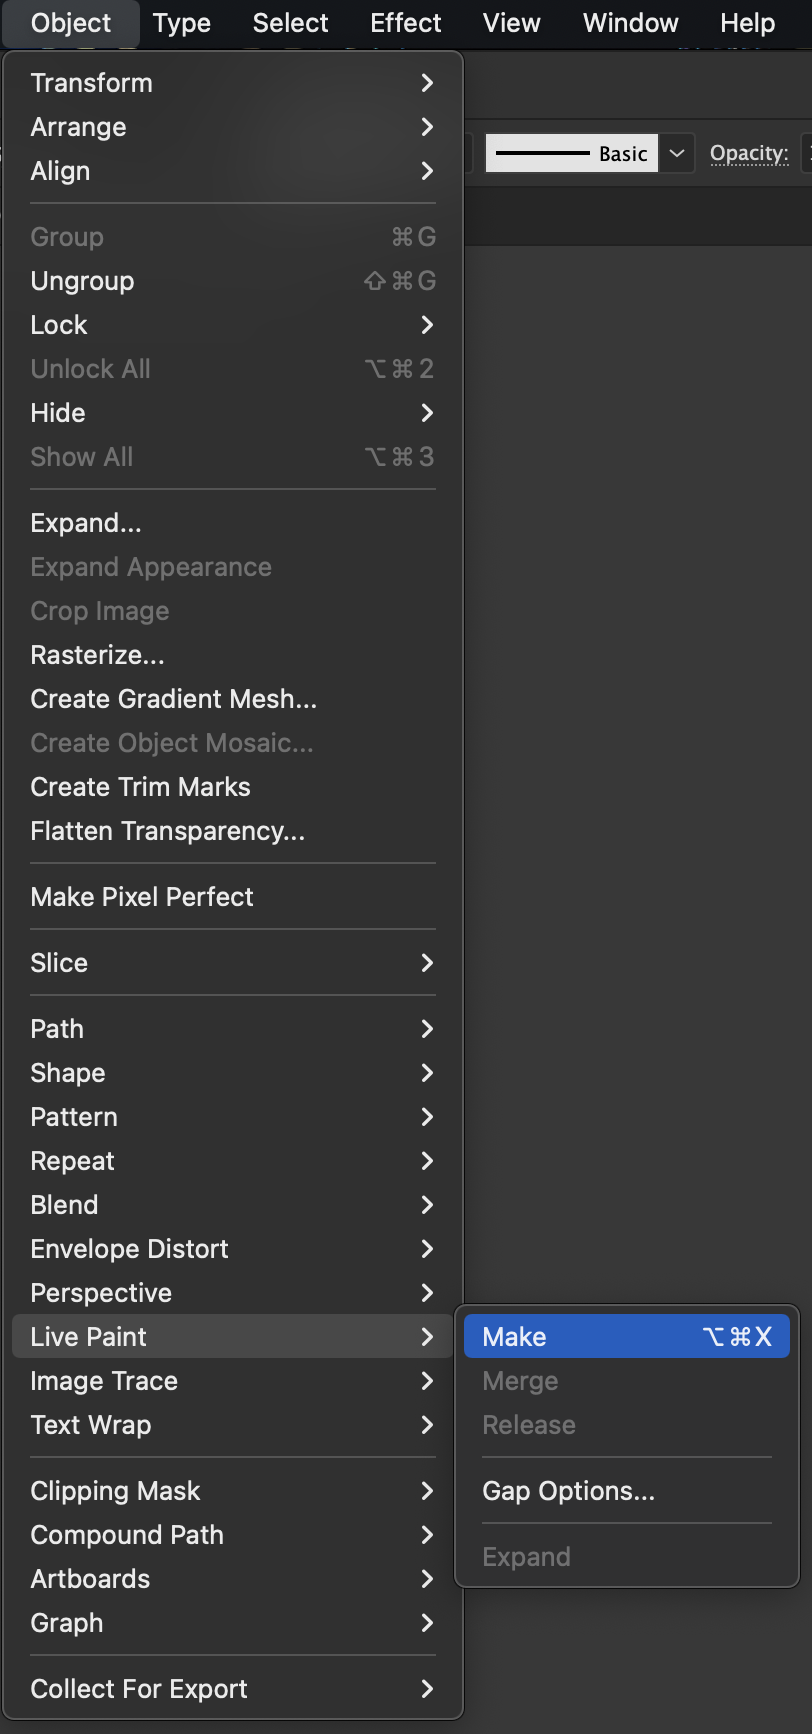
After finishing the line art, you need to prep for coloring. To this, select your work by using the Direct Selection Tool [A], and drag a selection box to select all of your triangles.
Once selected, go to Object -> Live Paint -> Make.
Coloring


After creating a live paint, you can now use the Live Paint Bucket [K]. Use the eyedropper tool [I] to select a color within the triangle. Then, use the paint bucket tool to click the area in the triangle, which will be highlighted in red. If you want to redo a color you can press undo [Command + Z] or remove fill on your color panel (as seen in step #2 above) and fill in with the live paint bucket. Now color to your heart's content.
Finishing


Once coloring is complete, grab the Direct Selection Tool [A] again and select your piece. Now go to Object -> Live Paint -> Expand. Now you no longer are using Live Paint. If you need to adjust your colors, you can activate Live Paint again by using Step #3.
For the last time, select your whole piece again and under your stroke color, change it to none. Your fill will have a question mark on it but that's okay since there are multiple colors in the piece. Your piece should now be rid of the line art and completed. You can turn off the original image layer to better see your piece and add any background you want.
Enjoy this new technique in your Adobe kit.