R Pi -Remote Control PA and Lighting System
by scanos in Circuits > Raspberry Pi
3283 Views, 6 Favorites, 0 Comments
R Pi -Remote Control PA and Lighting System
This is a simple project for making audio announcements and turning on and off lights on a PI remotely from a web browser. So here's what you need:
1) Raspberry Pi with Apache and PhP preinstalled. I used a old Pi v1 I had lying around. I assume that you have it connected to your home network through wi-fi or ethernet.
2) Audio speaker(s) which can be connected to the Pi via the output speaker connection. I used an old set of speakers from an ancient stereo system.
3) Set of Xmas tree lights - I bought mine from Poundland.
4) Crocodile clips and breadboard cables for connecting / testing the Pi to the speakers and lights.(see 7)
5) Pc or laptop with Putty terminal emulator for accessing the Raspberry Pi
6) Heat Shrink Wire
7) Hot Air gun for connecting speaker and lighting wires
The basic idea is that I use a web form to make remote announcements tthrough my speaker(s) and also switch the lights on and off. I use PHP scripts which in turn execute Espeak for the text to speech bit and GPIO commands for the lights. I am assuming that you know how to install Apache and PhP on your Raspberry Pi. It is very well documented.
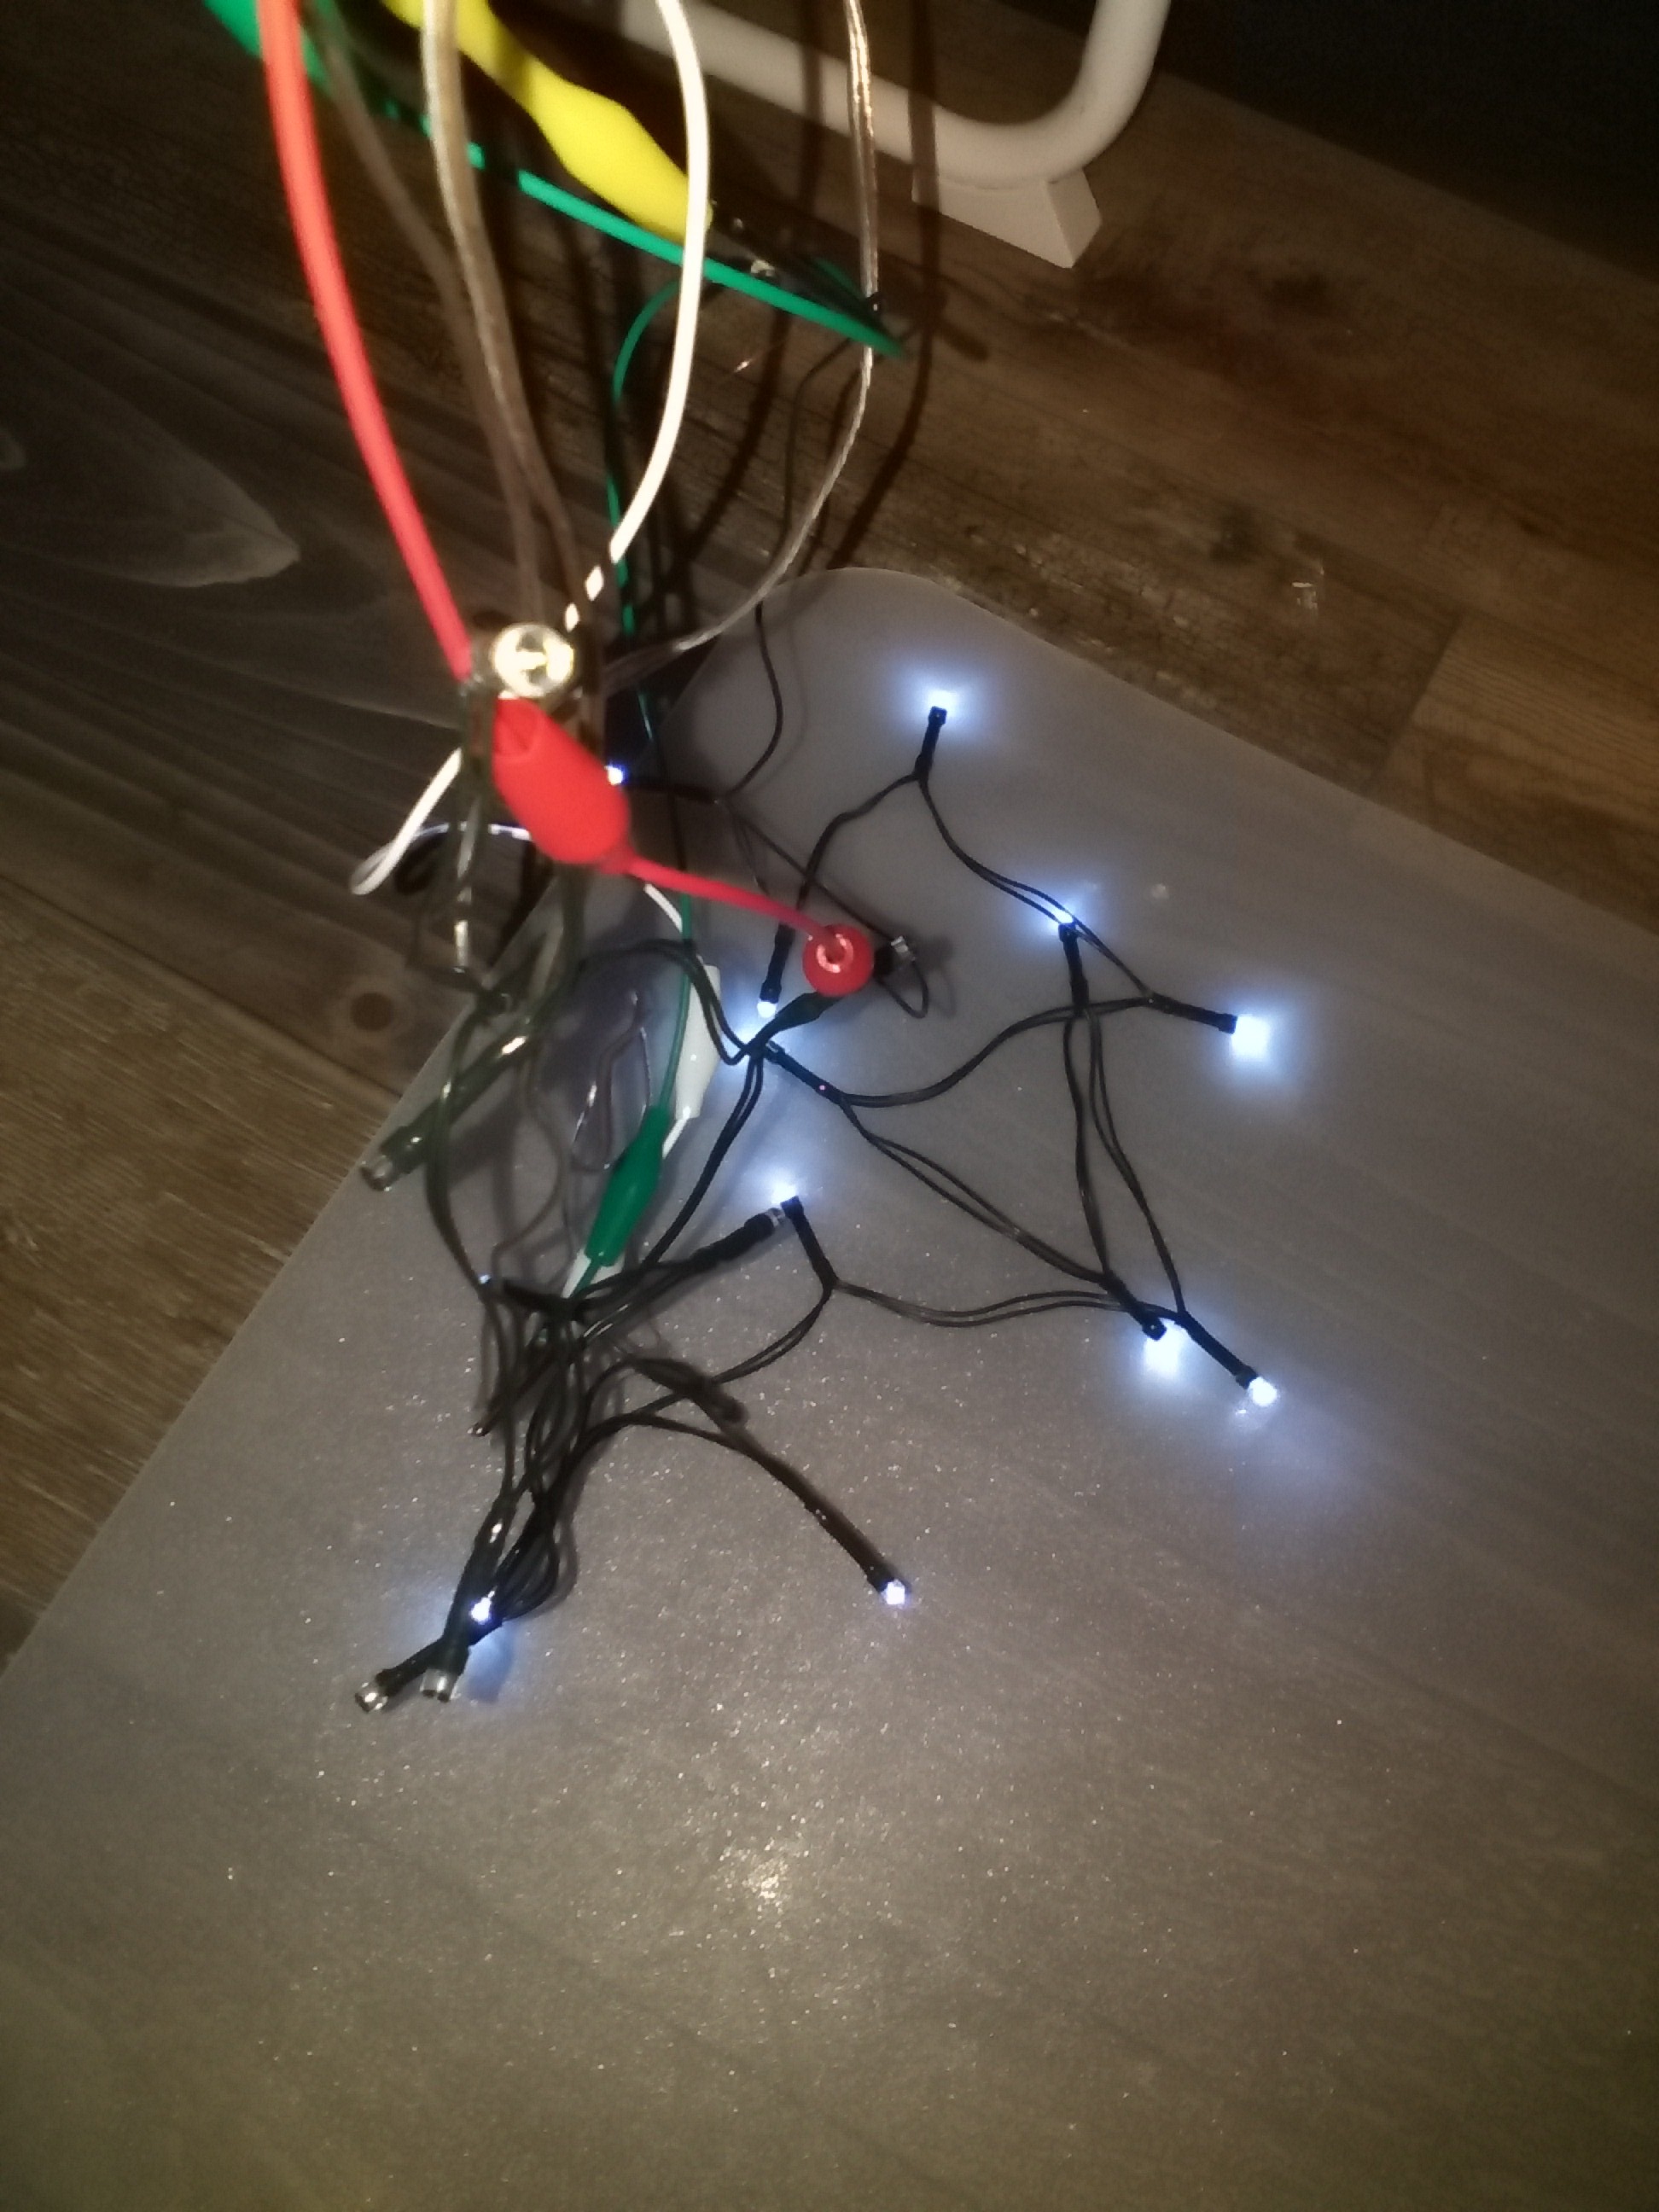
I tried to keep this low cost and so I used an old stereo system speaker I had, and after removing the connections and exposing the cables, I connected it it to an old mic cable which I had also cut up.This meant that whilst the speaker volume was lower than an externally powered speaker, I could power everything from the Raspberry Pi. The same was true of the lights. I removed the 3.3v power supply box from them, exposed the wires and connected them to the Pi using female / male breadboard connectors. I connected all of these with crocodile clips.
After testing and validation, I later connected all the wires with heat shrink wire using a hot air gun.
Set Up and Test the Hardware


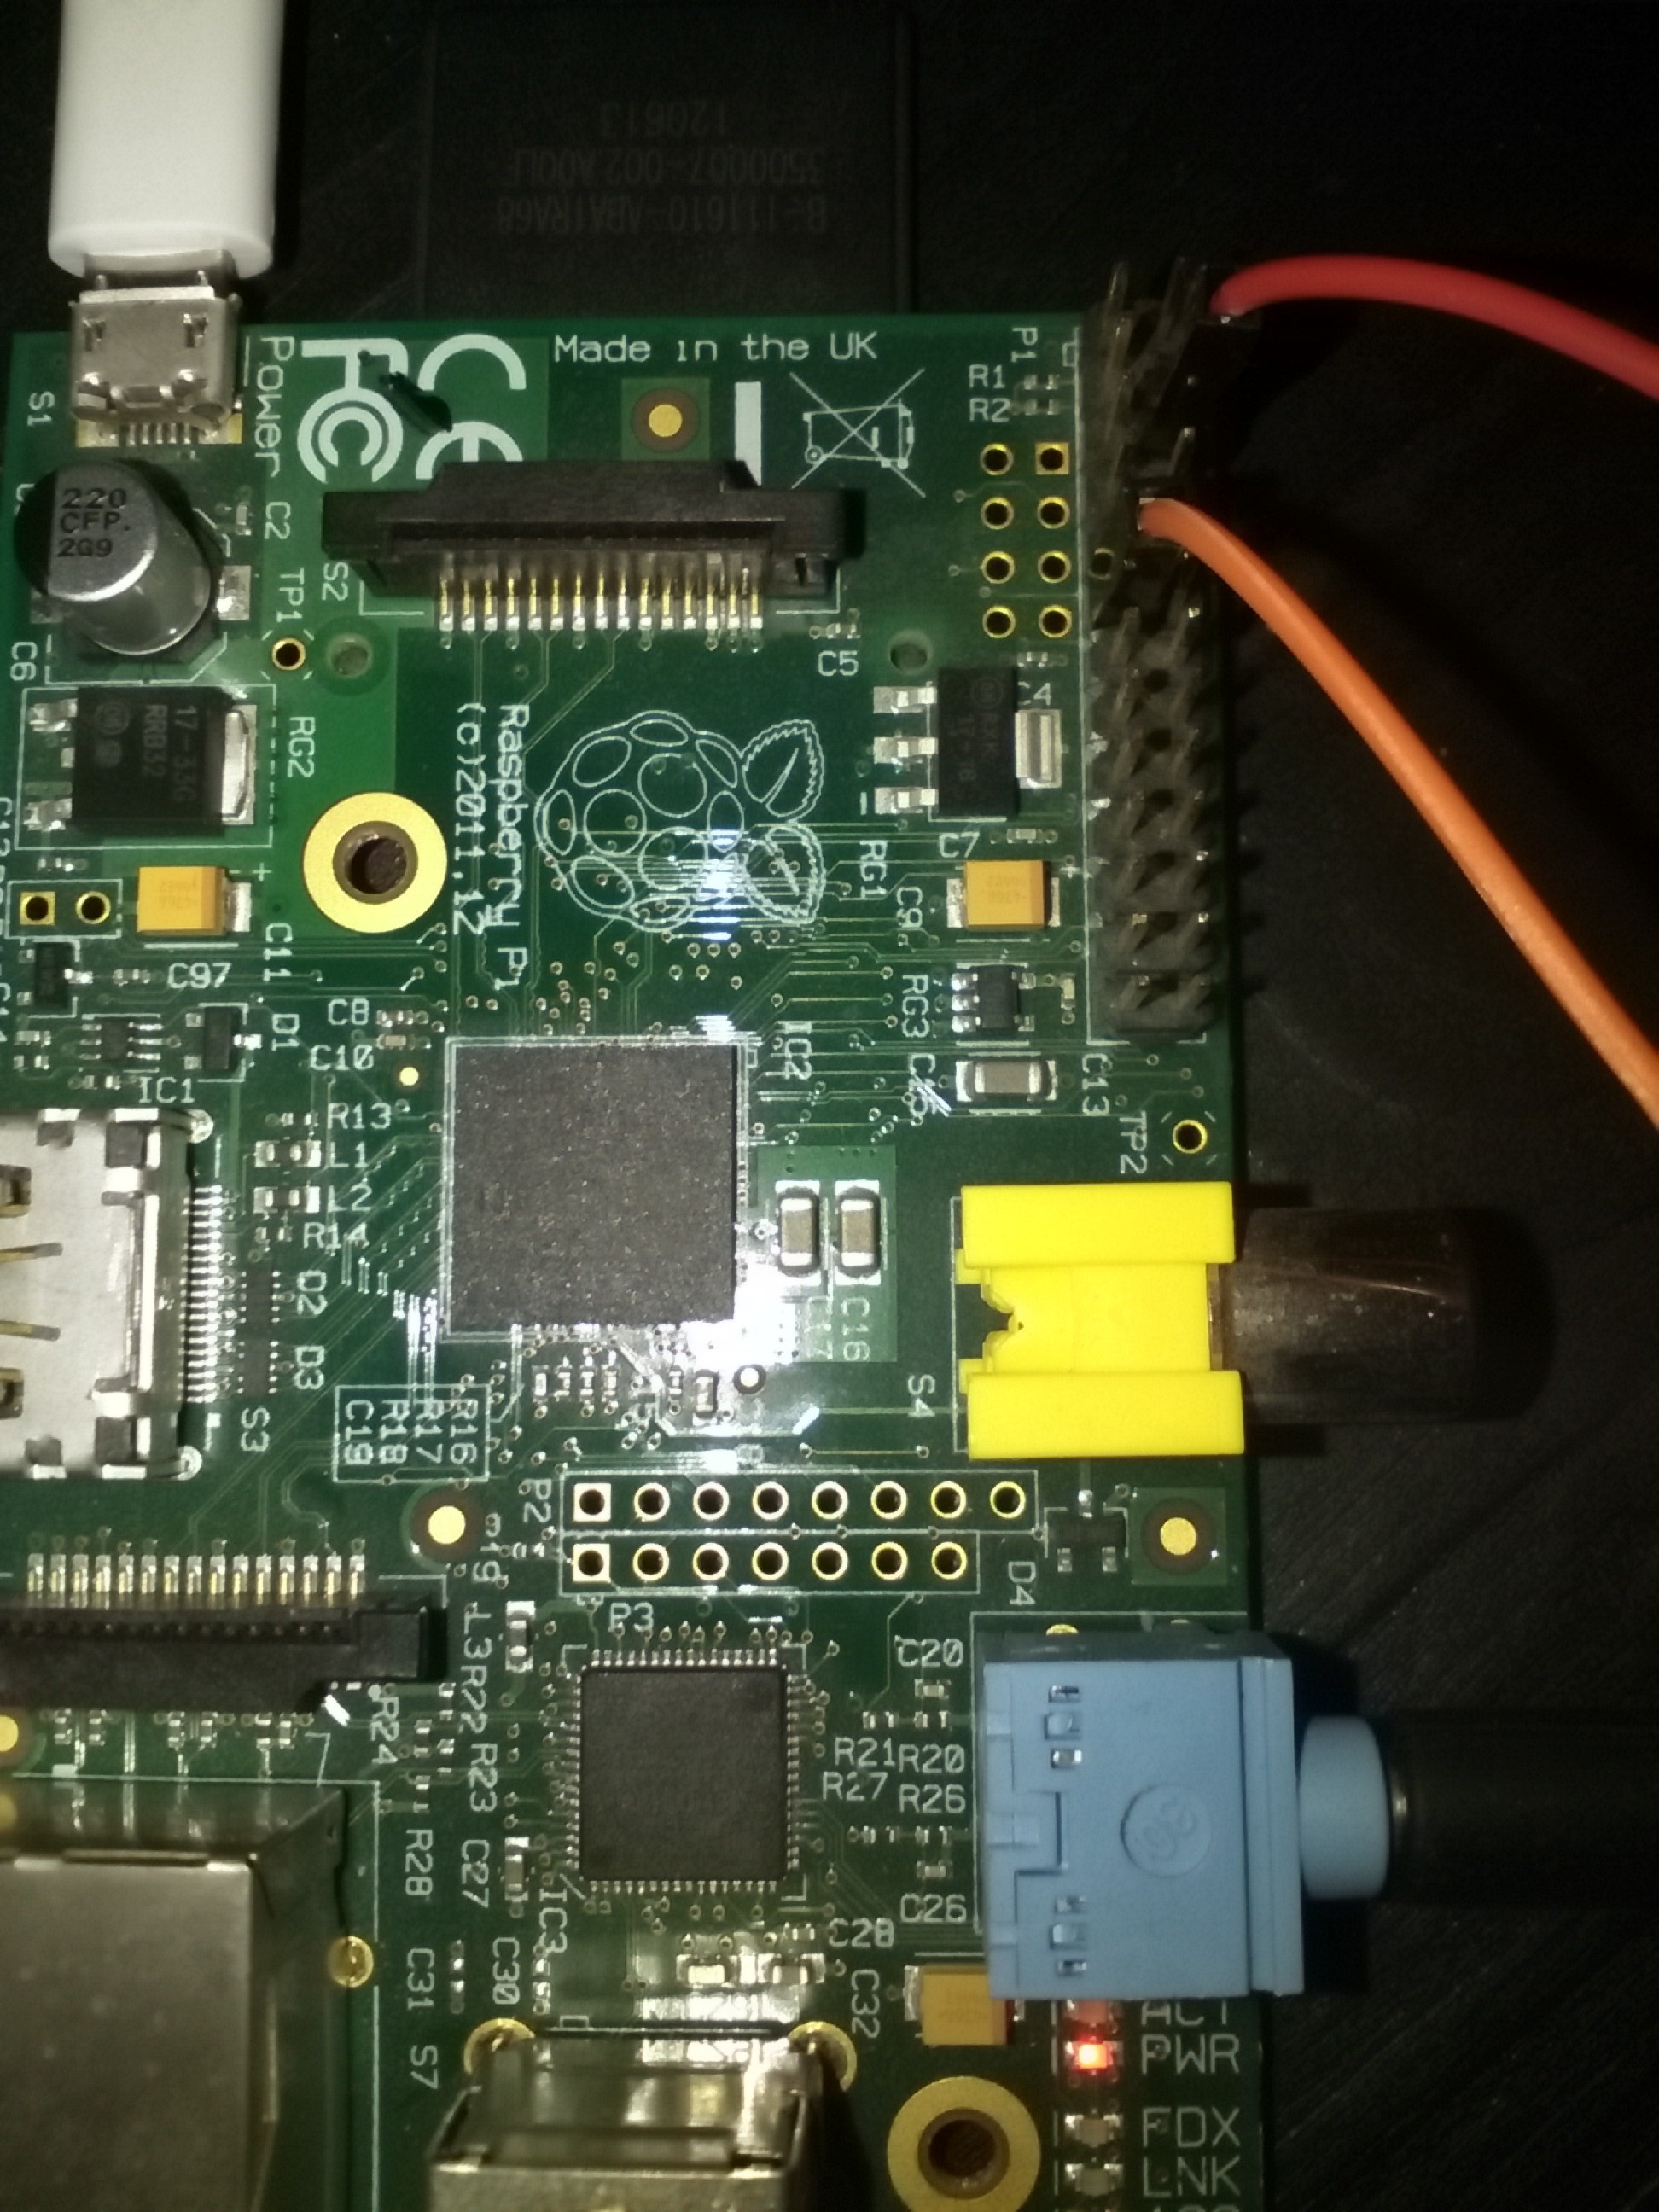
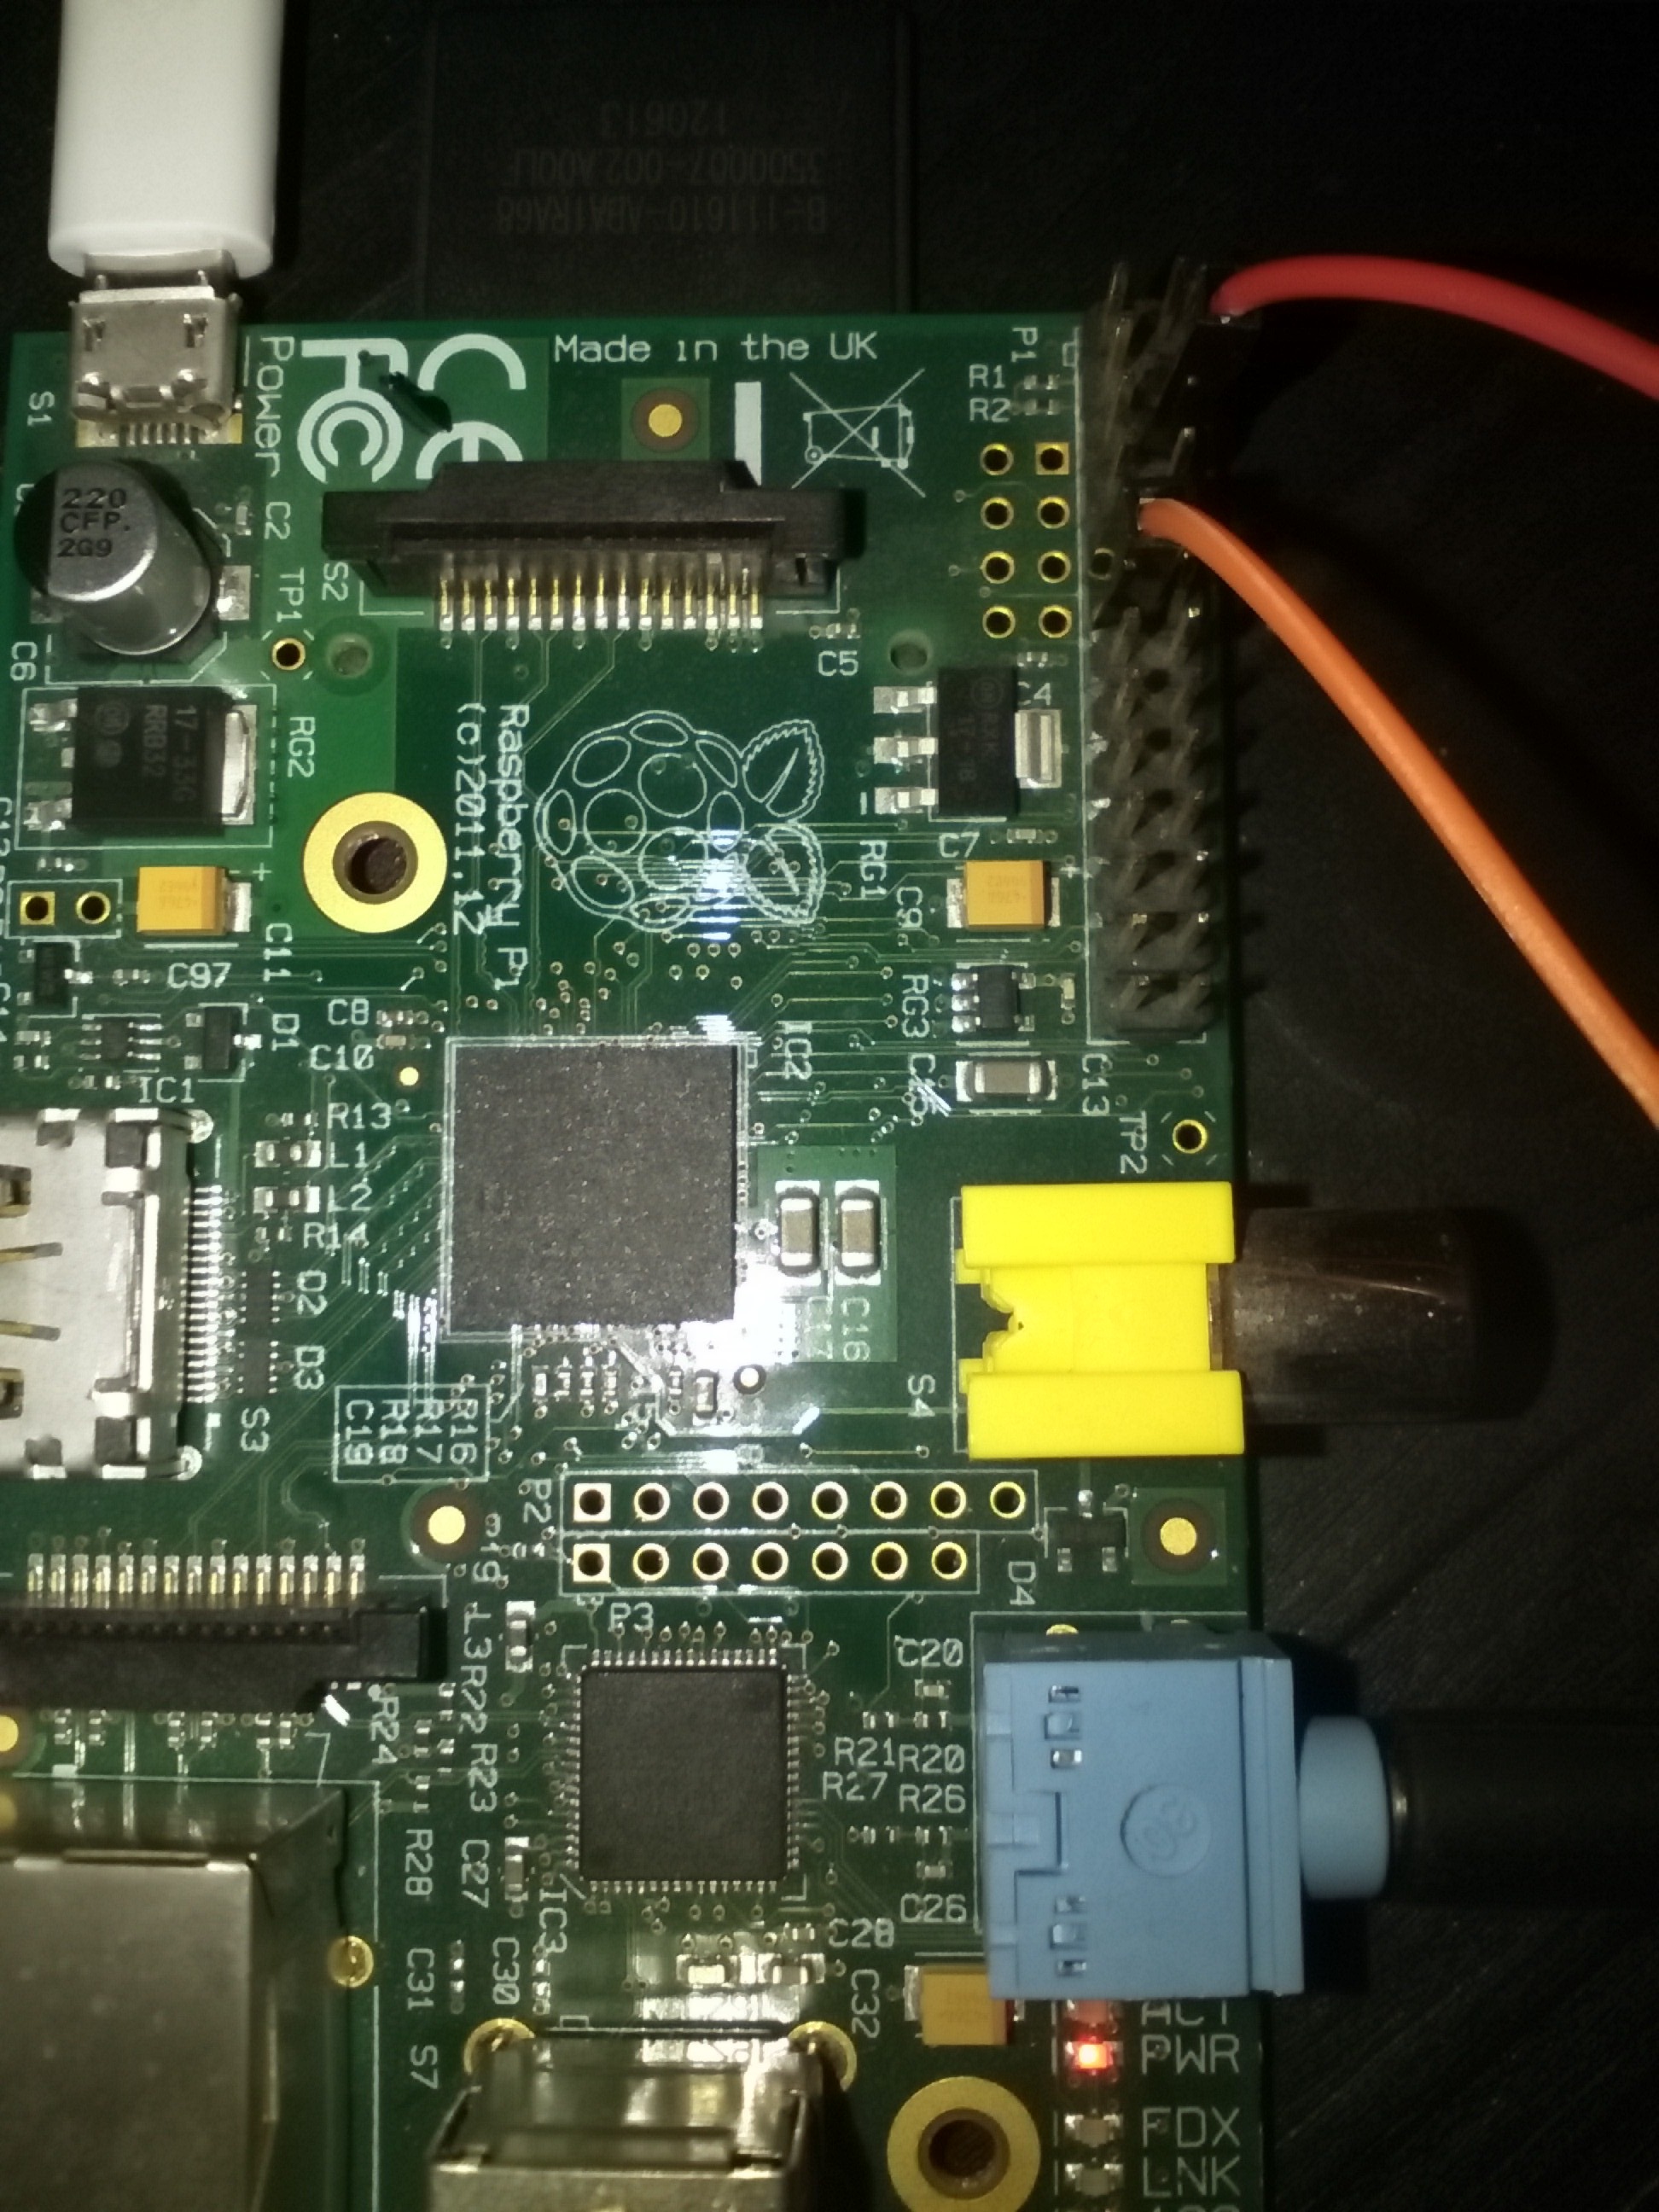
I powered the Pi and connected the speakers to the Pi's audio output jack. I connected the lights by connecting one end to GPIO17 ( 6th pin down on inner column) and GND (3rd pin down on outer column) - see the photo above. PLEASE NOTE THAT I USED A PI version 1 SO PLEASE CHANGE THE PINS ACCORDINGLY IF YOU ARE USING A LATER VERSION OF THE PI.
Shown above are the Heat Shrink Wire and Hot Air gun for connecting speaker and lighting wires
Next with everything powered on I logged onto the Pi using Putty from my Windows laptop. To find the Pi's IP address open up your router's IP address on your web browser (it's usually something like 192.168.1.254) which will show the list of connected devices including the Pi host name and IP address. You can use either of these to log into Putty but I usually use the IP address because I have a number of PIs. Alternatively, you can log into Putty by trying a hostname such as pi or raspberrypi. When prompted on Putty for the user name and password try pi/raspberry which are the defaults. (USING DEFAULTS IS VERY INSECURE AND LEAVES YOU OPEN TO ATTACK FROM HACKERS EVEN IF ON A PRIVATE NETWORK). In my experience, the Pi programs, Espeak and GPIO libraries are installed by default on most Pi images.
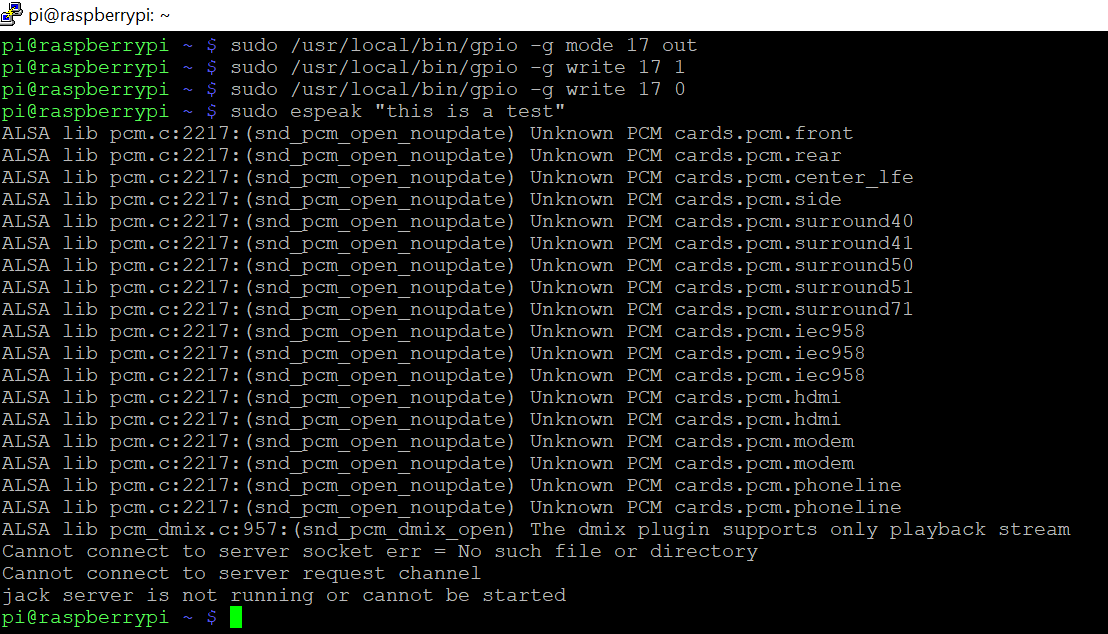
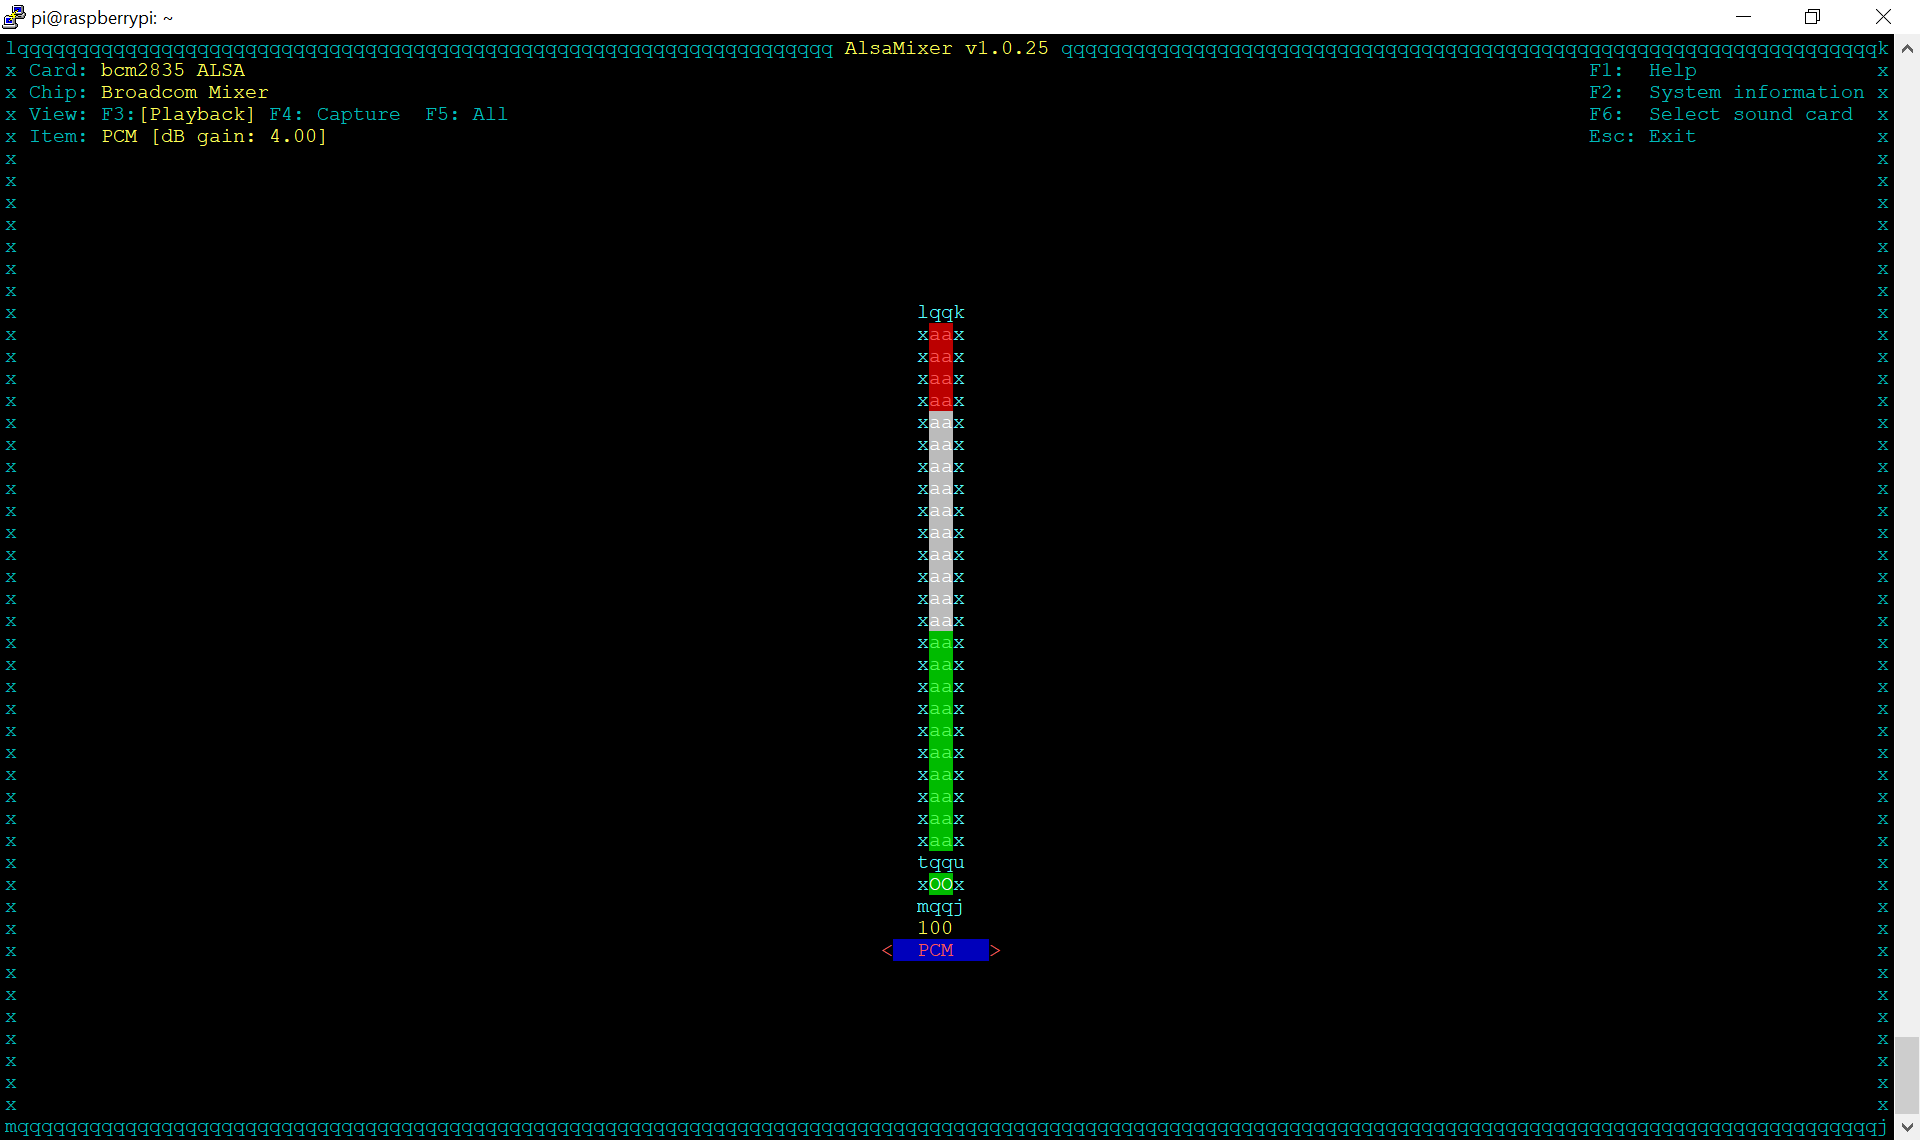
Okay, when you access the command line on the RaspberryPi try the following commands - sudo alsamixer which shoudl reveal a sound card controls - if you have a passive speaker, as I have used, you will need to increase the volume to max. Next, switch the lights on
sudo /usr/local/bin/gpio -g mode 17 out
sudo /usr/local/bin/gpio -g write 17 1
then,switch the lights off
(NB any problems just try just sudo gpio etc - also check out if gpio is installed by typing gpio -v - if you do need to install have a look at http://wiringpi.com/download-and-install/)
sudo /usr/local/bin/gpio -g write 17 0
Now test that espeak works
~ $ sudo espeak "this is a test"
I have rarely had problems with Espeak but have encountered issues when the Alsamixer volume is low, and sometimes other programs have grabbed the sound card. You need to run ps -ef and see what other media processes are running. You can use something like sudo kill -9 $(sudo ps aux | sudo grep -v grep | sudo grep mplayer | sudo awk '{print $2}') to kill them - We use this later in the PHP script
Setting Up the Web Server
There are a number of steps we need to carry out
1) Find the owner of the web service / server apache2 - run sudo ps aux | egrep '(apache|httpd)' and you should see www-data
2) add www-data to sudo group - run sudo nano /etc/sudoers --- add line www-data ALL=(ALL) NOPASSWD: ALL
3) add www-data to audio group - sudo adduser www-data audio
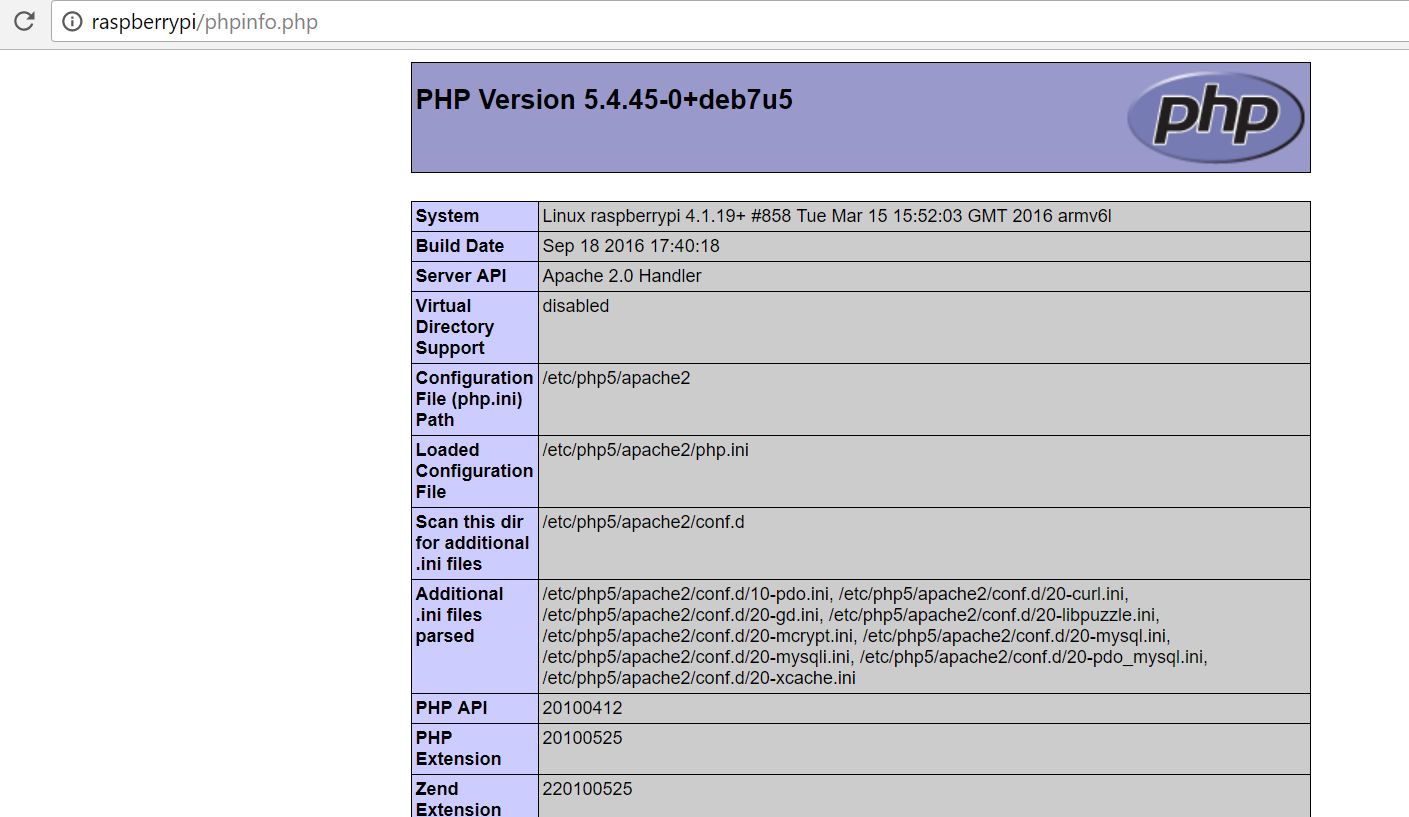
4) An optional step is to create a phpinfo file which tells you all of the PHP functions you have and the location of
the conf file should you want to change things. For example, some versions of PHP block the function shell_exec() which we need to run command line programs like Espeak from the web server. Here;s how you set up phpinfo..
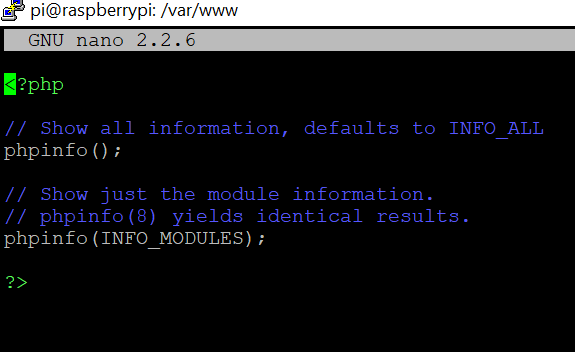
Go to your default web directory usually /var/www or /var/www/html..... it's the one with the index.html file and type sudo nano phpinfo.php then type the following into the nano editor and press control O to save and exit
Don't forget to make it executable by typing sudo chmod 755 phpinfo.php - To view it, open the following url in your web browser using your hostname instead of mine , i.e. raspberrypi - http://raspberrypi/phpinfo.php
?>
The PHP Code and Web Scripts
I have used two programs here - One for the webform (espeak_form.php) and the other which processes the form data (my_espeak.php) I have included these above as text files and to transfer them to your Pi , using Putty create both php files and then cut and paste from the respective text files shown above
pi@raspberrypi /var/www $ sudo nano /var//www/my_espeak.php
pi@raspberrypi /var/www $ sudo nano /var//www/espeak_form.php
Remember to make them executable by typing sudo chmod 755 *.php
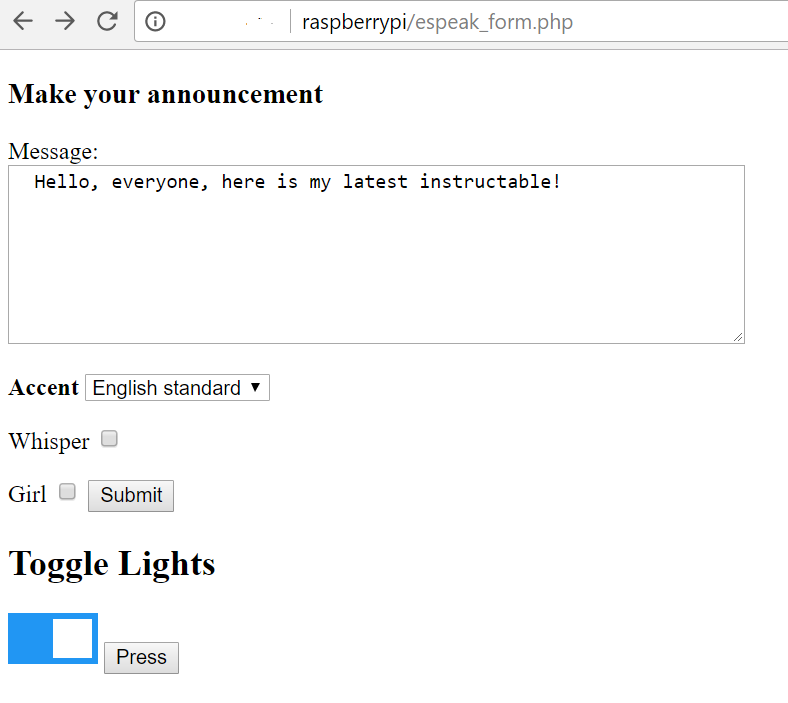
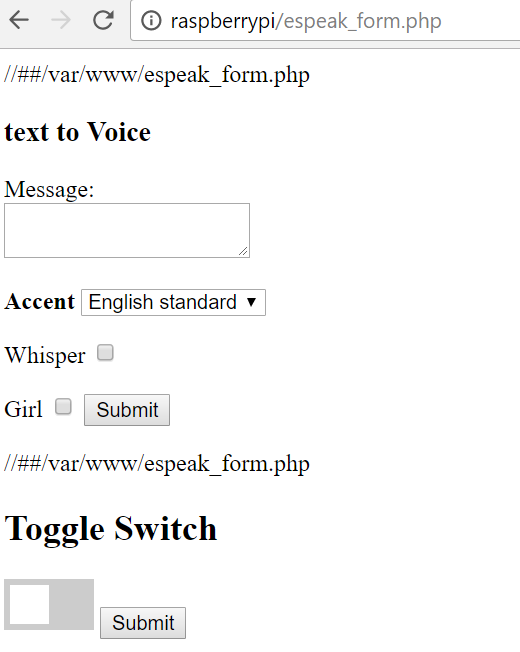
The web form PHP script (espeak_form.php) I wrote will not win any design prizes but it has 2 sub forms. One to make the announcement (text to speech) and the other form one is used to toggle the lights one and off. The espeak sub form permits you to select different accents, a female voice and a whisper function,
The core of my_espeak.php is the use of the php function - shell_exec(). As you can see, this permits PHP to execute Linux commands without the need for other libraries, as you would need say in Python.
Conclusion
This is a reasonably complex solution in that you are using many elements of the Pi environment, i.e. PHP, comand line functions, Apache , GPIO etc. I hope that it illustrates what you can do with PIs specifically and IOT in generl. There are a number of other ways to achieve this and you can even control it from the internet if you understand port forwarding, firewalling and/ or VPN. I hope you enjoyed it but here is my disclaimer:
I CANNOT GUARANTEE THAT THIS IS A SAFE OR SECURE SYSTEM AND THEREFORE PLEASE DO NOT USE IT FOR PURPOSES WHICH INCLUDES PROCESSING OF PRIVATE, PERSONAL OR COMMERCIALLY SENSITIVE DATA. ALSO, CONNECT YOUR CABLES SAFELY AND IF YOU ARE USING TEMPORARY CONNECTIONS, E.G. CROCODILE CLIPS THEN DO NOT LEAVE THE SYSTEM UNATTENDED OR USE IN HARSH ENVIRONMENTS.
This is a fantastic way to learn a lot about IOT and just remember before thinking about commercial applications using methods such as this. The Raspberry Pi is only as good as its SD card. I would say a year in normal usage compared to some servers I used which ran for 10+ years.
Anyway, good luck.