Long Range Wifi PPM / MSP
by Andi23456 in Circuits > Remote Control
8604 Views, 7 Favorites, 0 Comments
Long Range Wifi PPM / MSP
Some time ago I posted my Wifi PPM controller. It is working pretty good. Just the range is a bit short. I found a solution for this problem. The ESP8266 supports a mode called ESPNOW. This mode is much more low level. It dosn't loose connection so easy and if it looses connection it is reconnected immediately.
I use three ESP8266. One is the ESPNOW receiver, the other one is the ESPNOW sender and the third one is the access point to which you can connect. The third one is needed because the ESPNOW sender can't be an access point at the same time.
I also added some antennas to get better range.
There is a second access point directly at the receiver. If you connect to this you have the same like with the old WifiPPM project.
I also added support for MSP protocol receiver. This is the "MultiWii Serial Protocol" which is supported by MultiWii, Betaflight, Cleanflight and many other flight controllers.
Parts List

You need three ESP8266 modules of any kind. But you want the best range. So I suggest to use ESP8266 modules with antennas. It works also without antennas. I use the following parts:
2 x ESP07 (ESP8266 module with antenna connector)
1 x ESP12
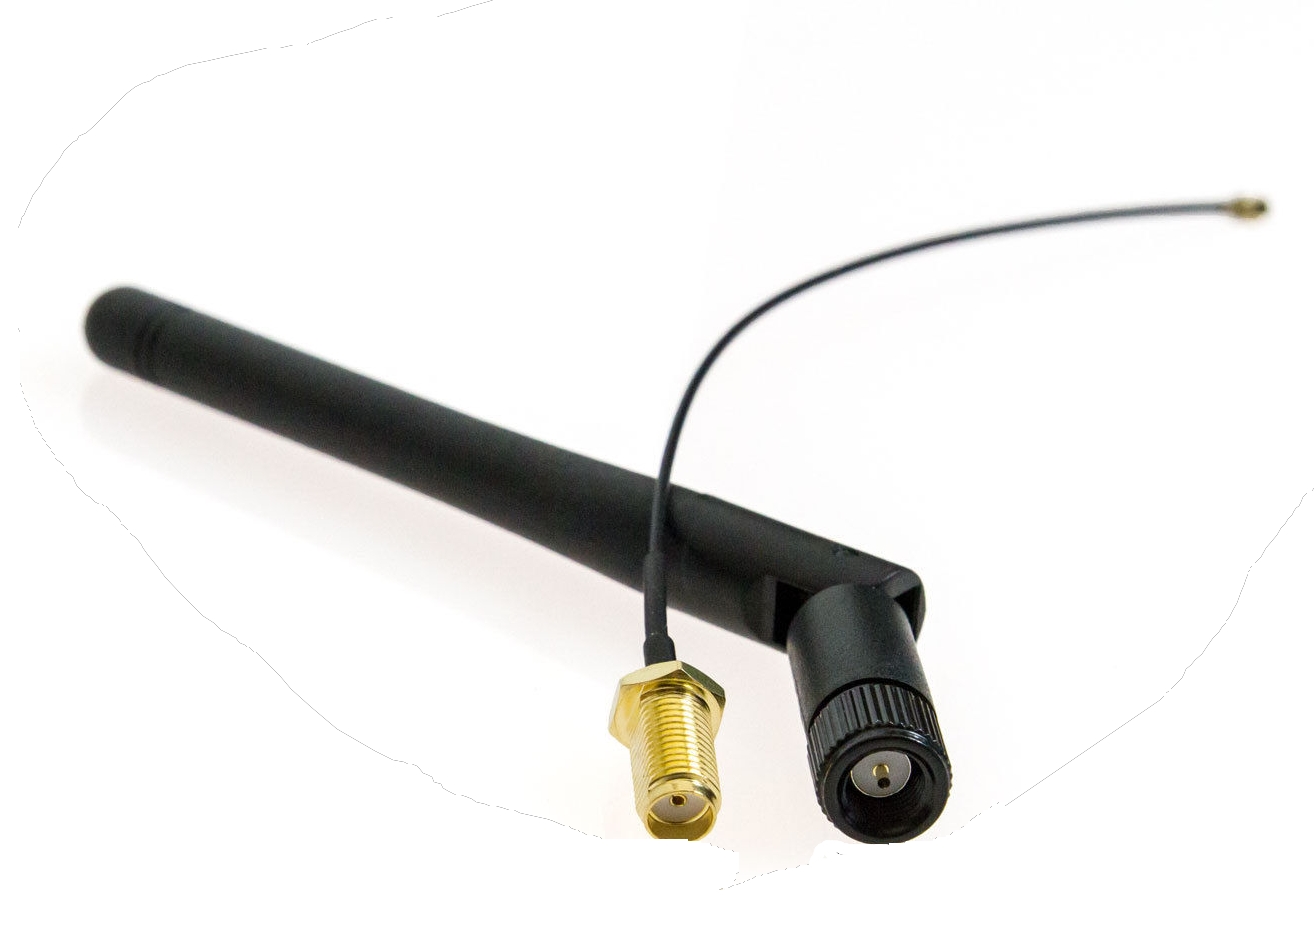
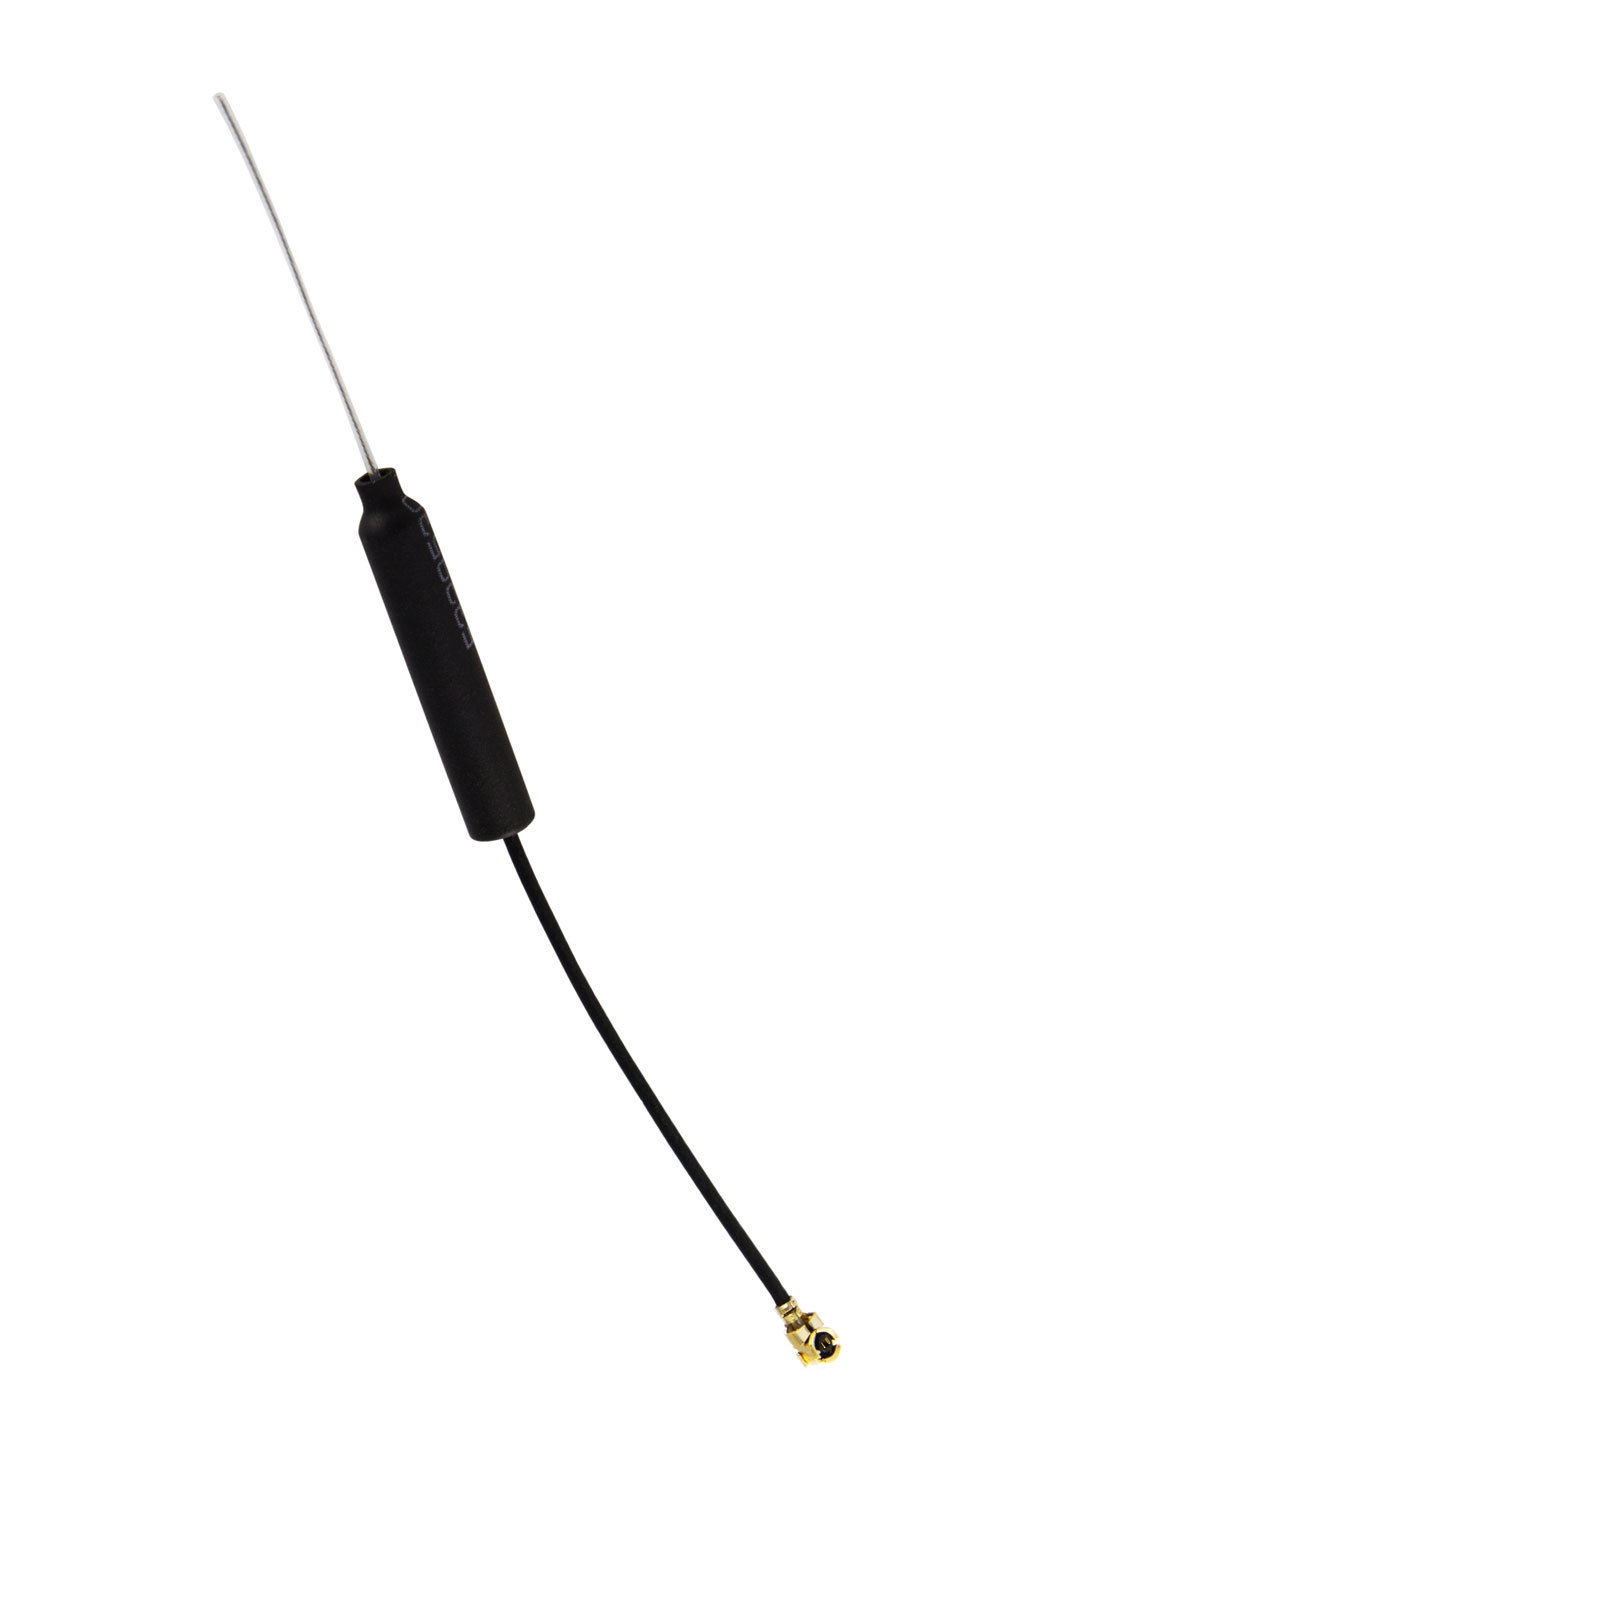
1 x 3dBi Mini Antenne I-PEX U.FL IPX at receiver side
1 x ESP8266 2,4 / 5 GHz 3dbi Wlan Wifi Antenne SMA Stecker / male + I-PEX Adapter at sender side
3,3 V power supply for all ESP8266 modules
You also need a PC with Arduino IDE: https://www.arduino.cc/en/Main/Software
ESP8266 support for Arduino IDE. Follow these instructions: https://learn.sparkfun.com/tutorials/esp8266-thin...
Websocket library for Arduino: https://github.com/Links2004/arduinoWebSockets
Download and Flash the Sketches
You can download the sketches here.
Unzip the file. There are three folders: Master-AP, Sender, Receiver
Master-AP: It is the sketch for the Access point. Open the sketch with arduino IDE. Set the CPU frequency to 160 MHz in the tools menu and upload the sketch to the ESP12.
Sender: That's the sketch for the MSPNOW sender. Set the CPU frequency to 160 MHz and upload it to one of the ESP07.
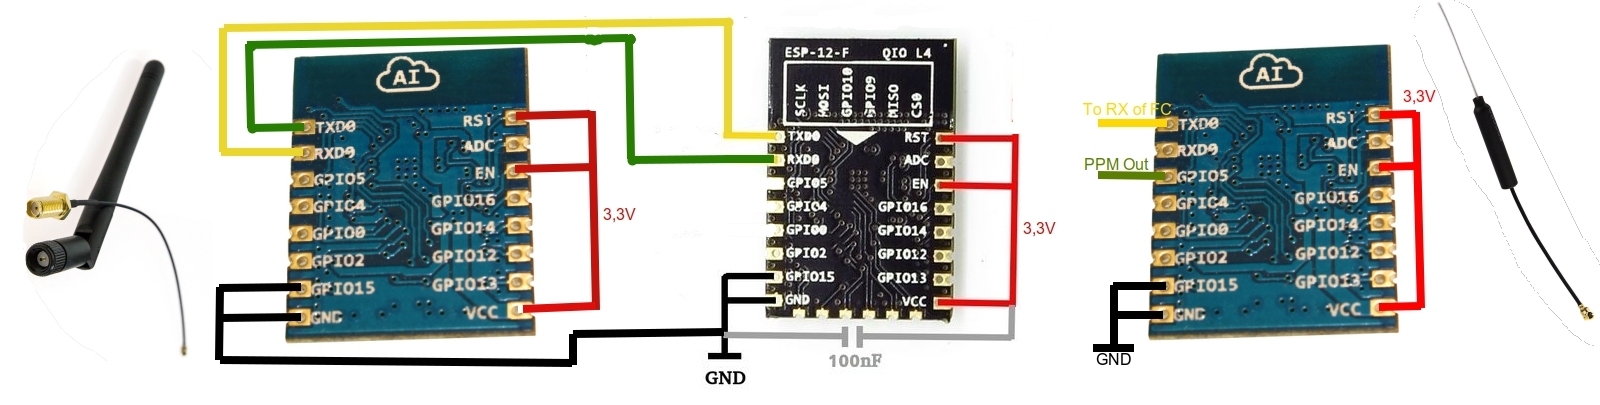
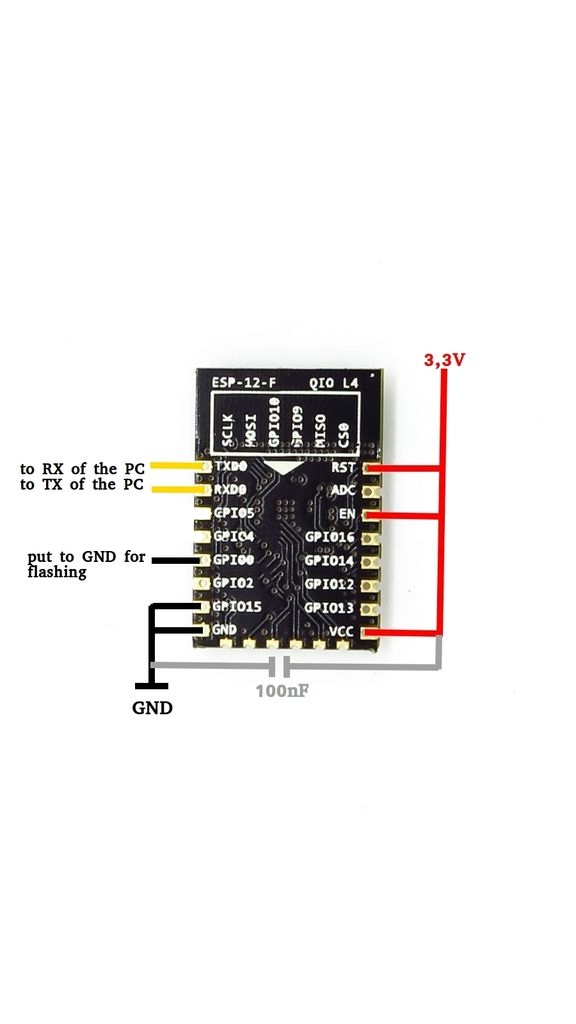
You can see in the first picture how to connect the ESP8266 module for flashing.
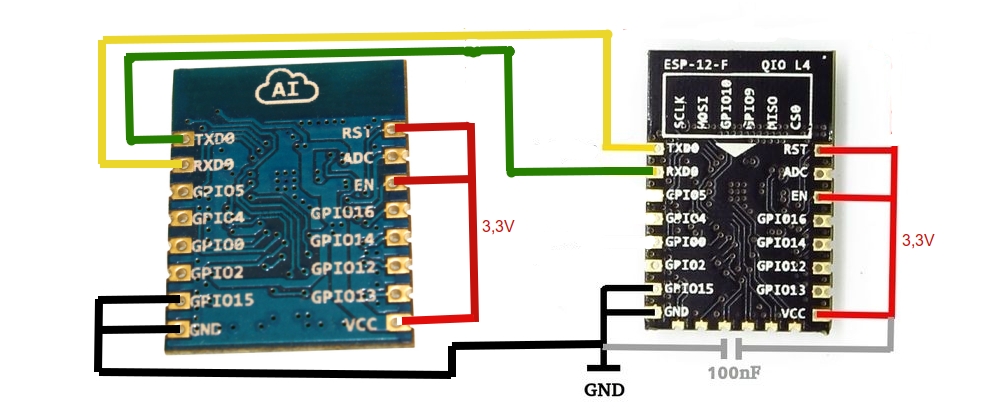
Now connect the ESP12 (Access point) and the Sender ESP07 serial ports and power connections (second picture):
ESP12 VCC -> ESP07 VCC
ESP12 GND -> ESP07 GND
ESP12 TX -> ESP07 RX
ESP12 RX -> ESP07 TX
Start both modules and connect to the access point "Long-Range-WifiPPM/MSP". The password is "WifiPPM/MSP"
Open a browser and open the IP adress 192.168.4.1. The control website will appear. Click on the "Wifi Info" button. A message box with the sender MAC and the receiver MAC will appear.
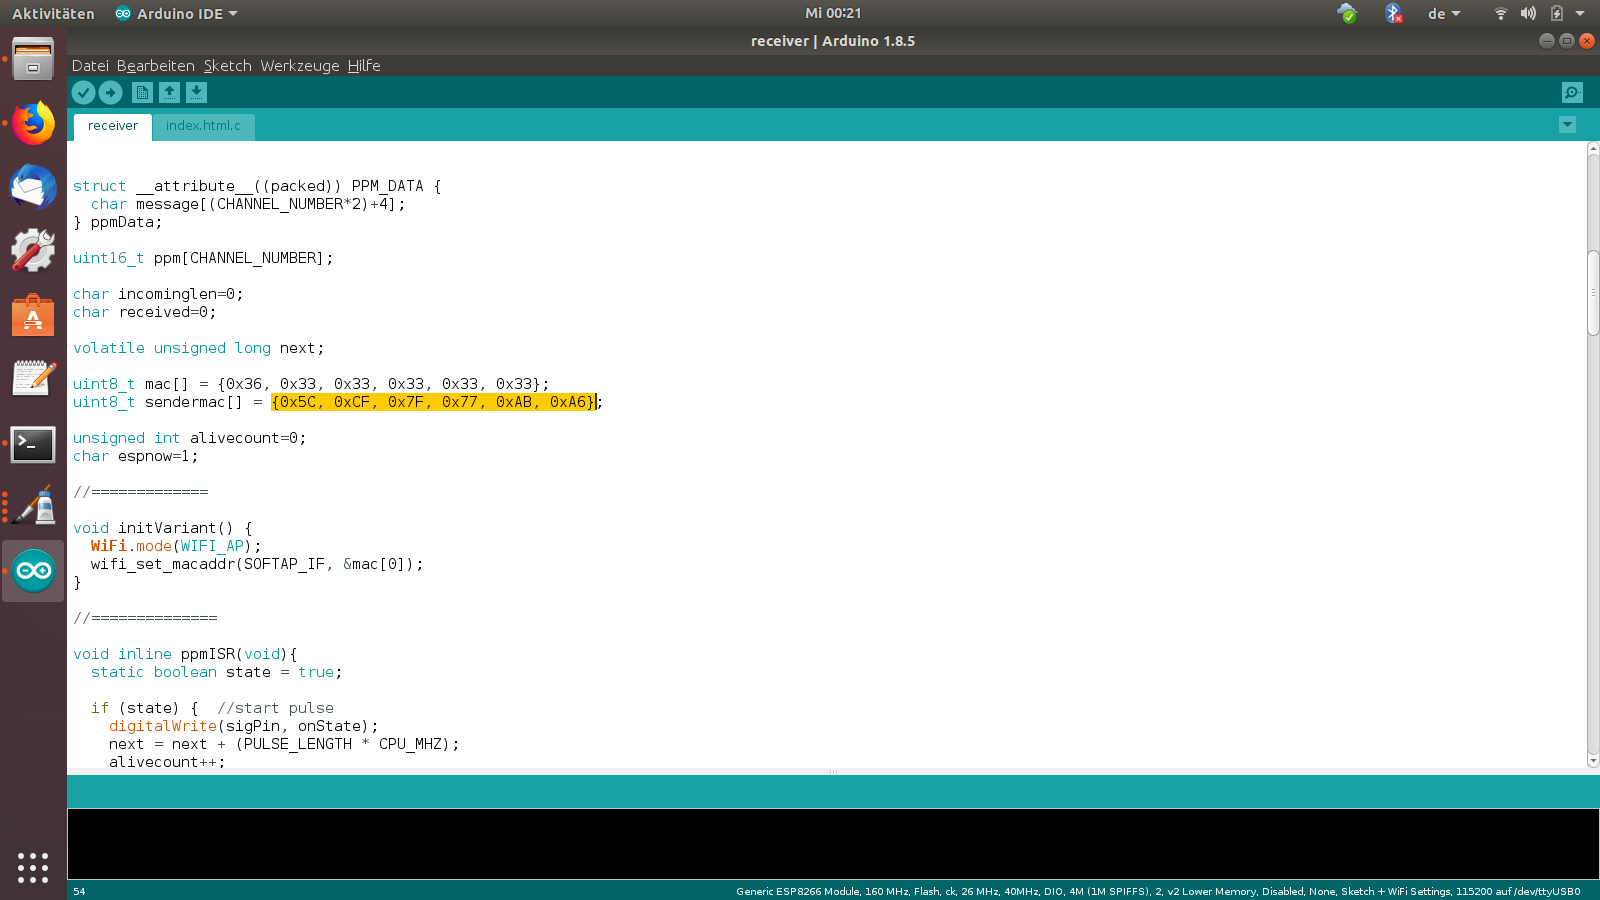
Open the receiver sketch in Arduino IDE. Change the line "uint8_t sendermac[] = {0x5C, 0xCF, 0x7F, 0x77, 0xAB, 0xA6};" (third picture) to the sender Mac address which is displayed at the website. The receiver Mac should be ok. Make sure the CPU frequency is set to 160 MHz and upload the sketch to the second ESP05.
Connect the Receiver to the Flight Controller and Setup Cleanflight
)
Connect now the receiver to the flight controller. Your flight controller should have a 3,3 Volt output with at least 200 mA. If not you need an additional 3,3V voltage regulator.
Connect GND of the ESP to GND of the flight controller.
Connect VCC of the ESP to 3,3V of the flight controller or to the additional 3,3V voltage regulator.
You can use the PPM output or the serial MSP output.
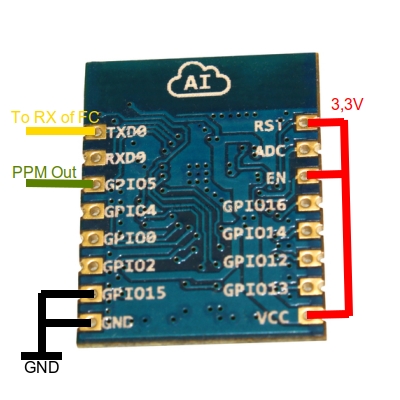
For MSP output connect TX of the ESP8266 to RX of any serial port of your flight controller. (Picture 1)
For PPM output connect GPIO5 of the ESP8266 to the PPM input of the flight controller. (Picture 1)
After wiring the ESP start the flight controller and open cleanflight. Connect with your mobile phone to the "WifiPPM/MSP" access point. The password is "WifiPPM/MSP"
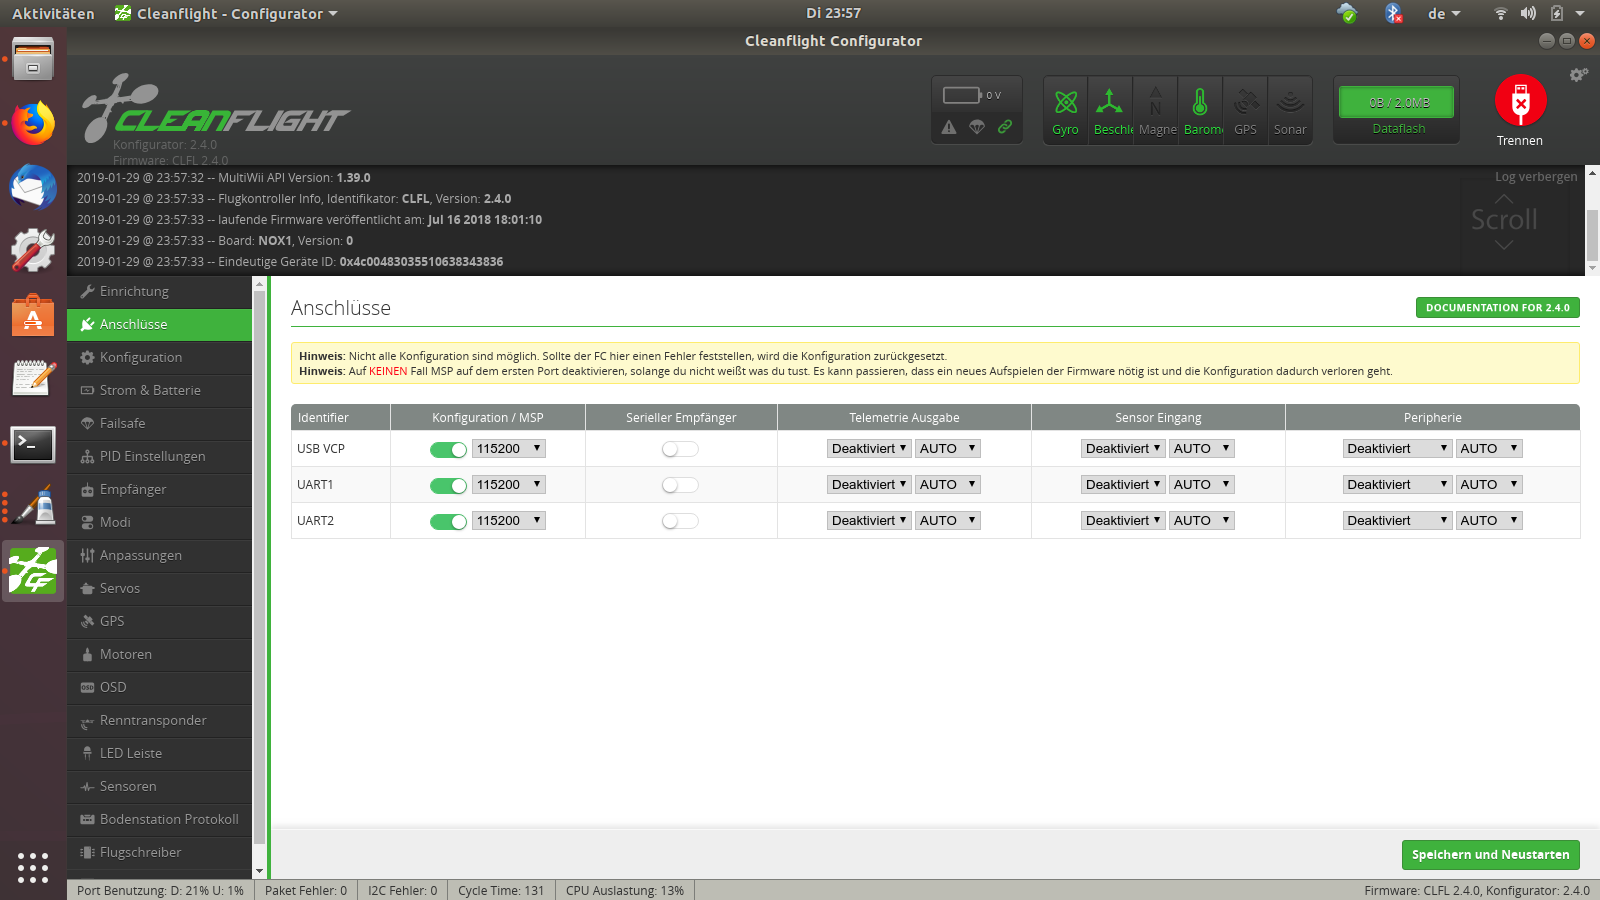
For MSP: Open the ports tab and set MSP at the serial Port you connected the ESP8266 (Picture 2). Save and restart.
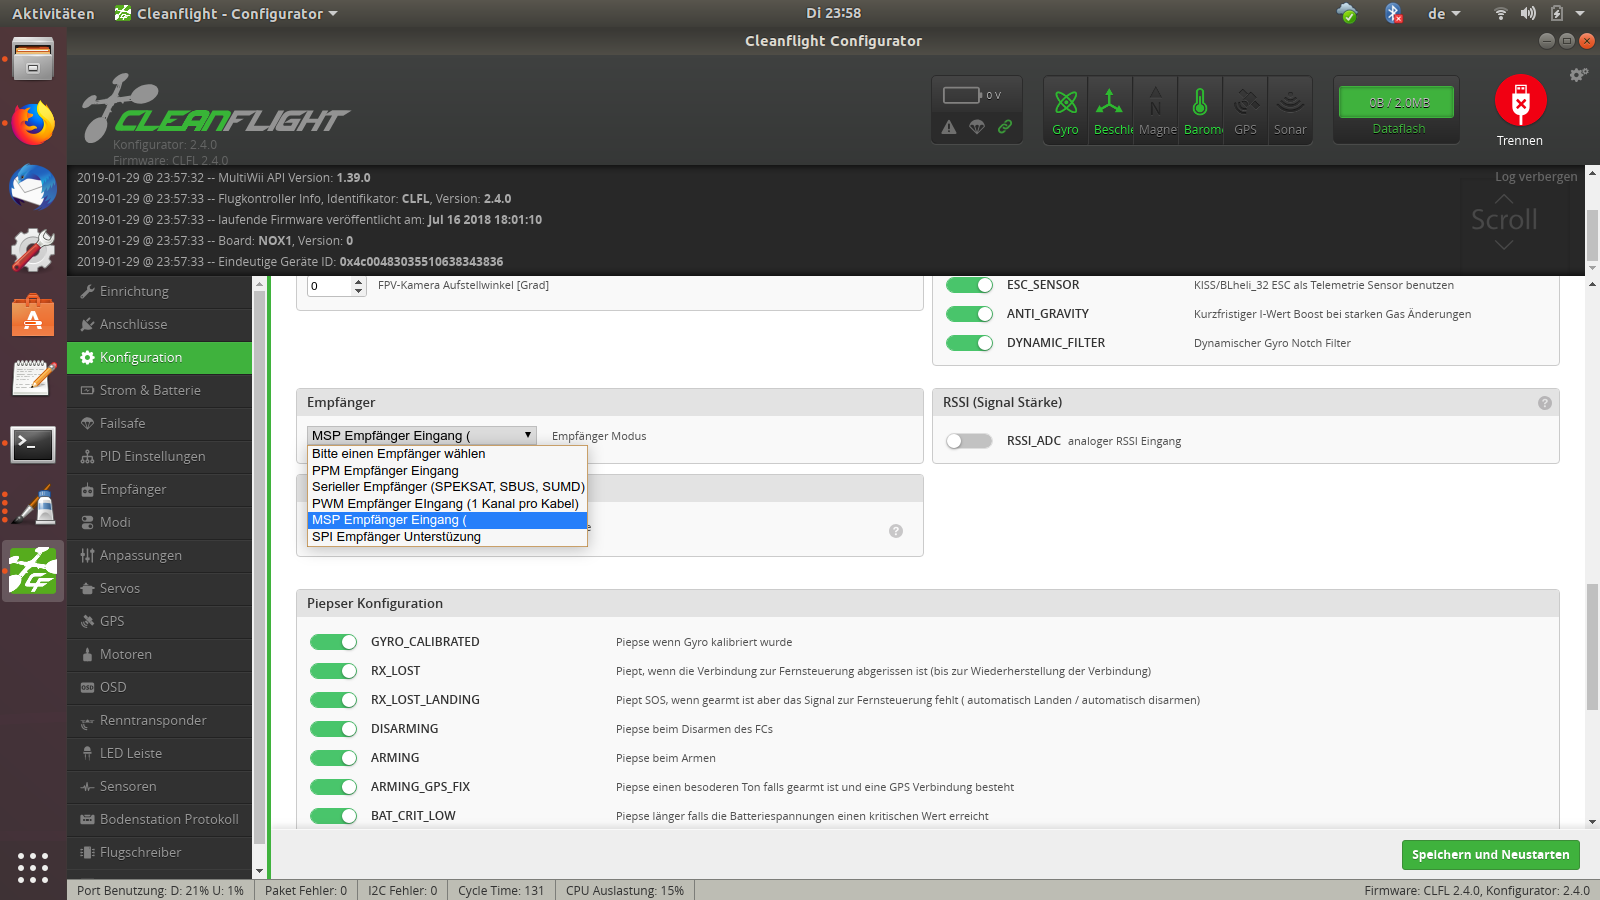
Go to the configuration tab and set the receiver to "MSP serial receiver"(Picture 3). Save and restart.
For PPM: Read in the manual of your flight controller how to setup PPM
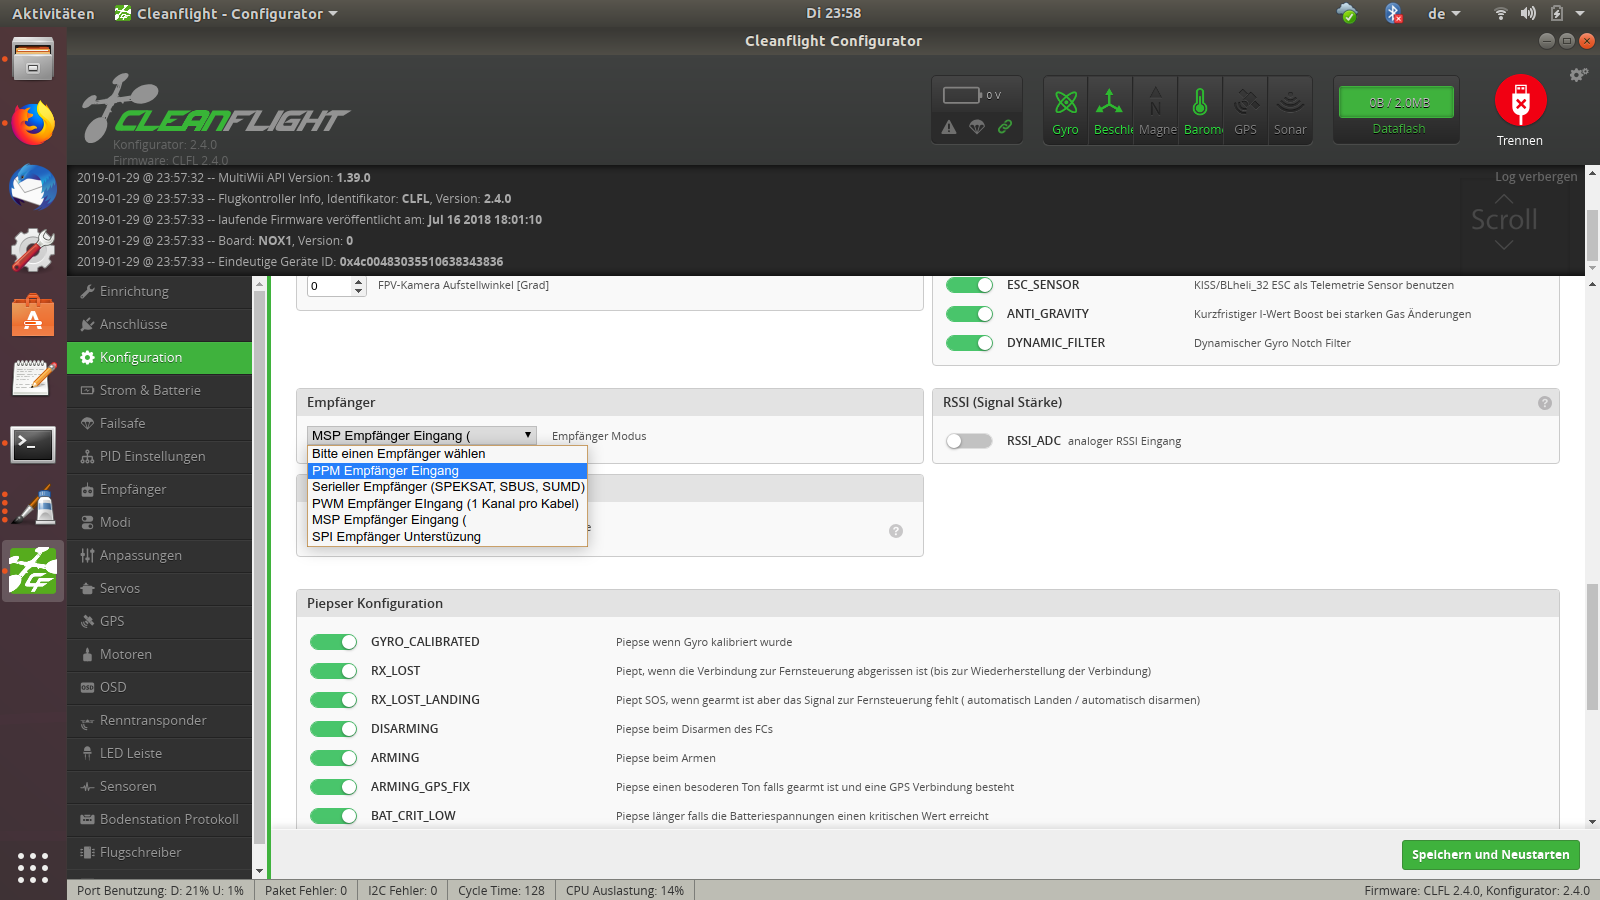
Go to the configuration tab and set the receiver to "PPM receiver" (Picture 4). Save and restart.
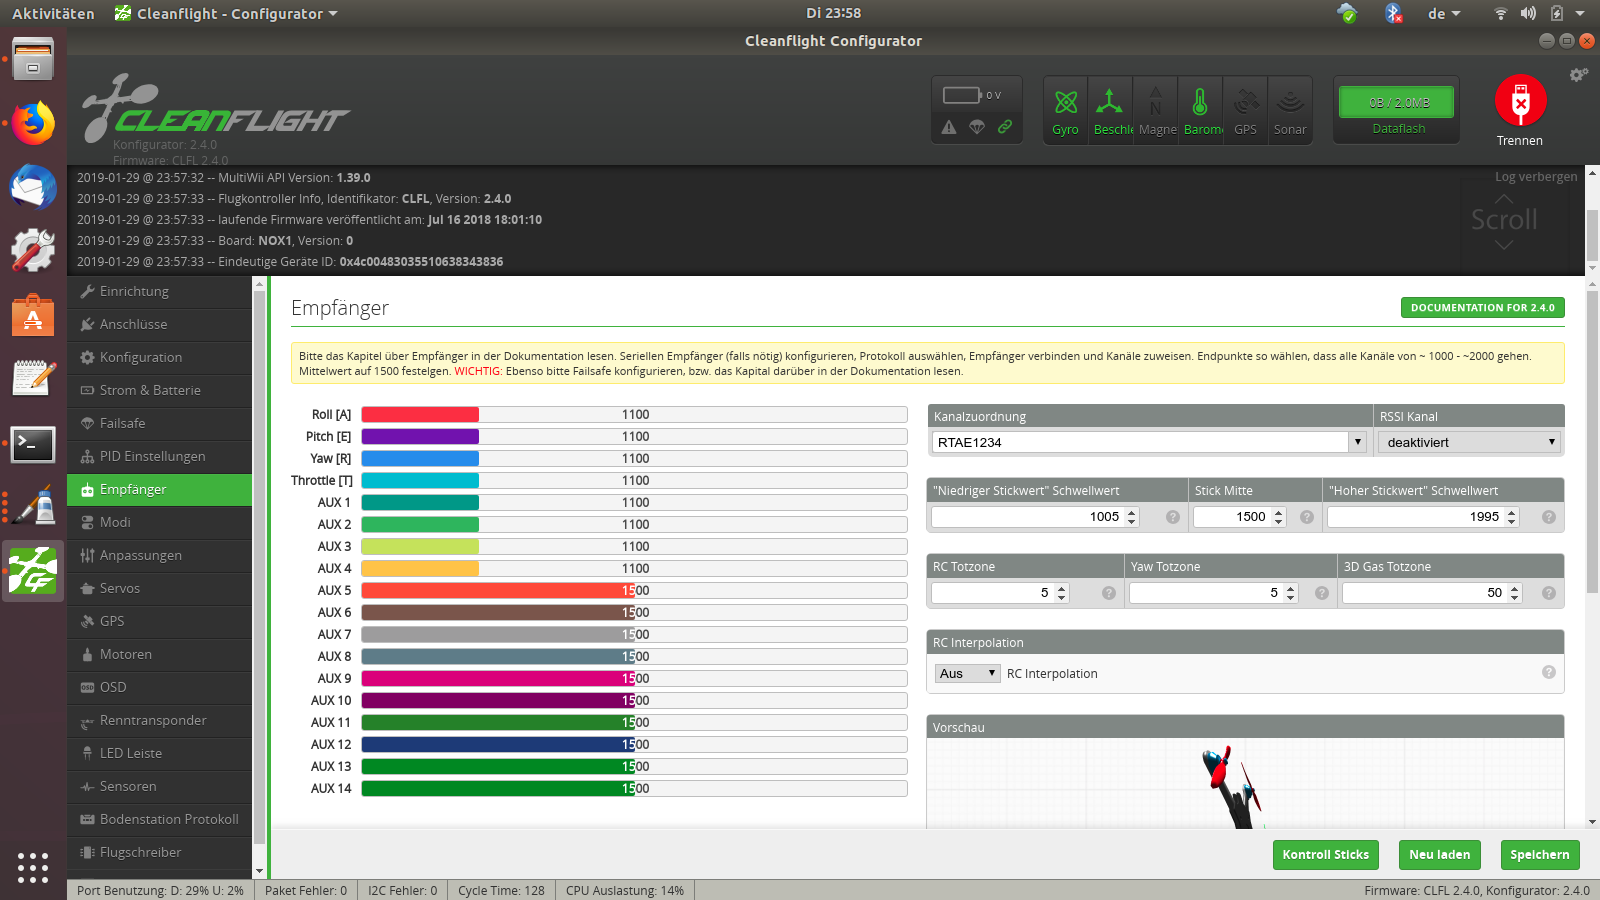
The next setup is for both receivers the same:
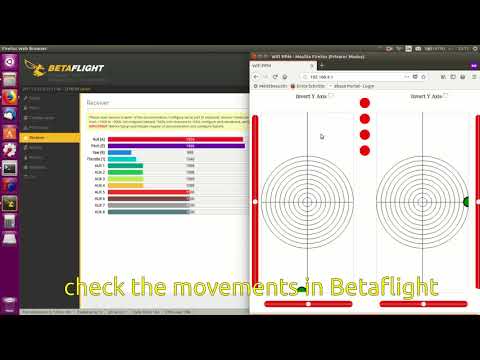
Go to the receiver Tab. Set the channels to "RTAE1234" (Picture 5/Video). Save the setup.
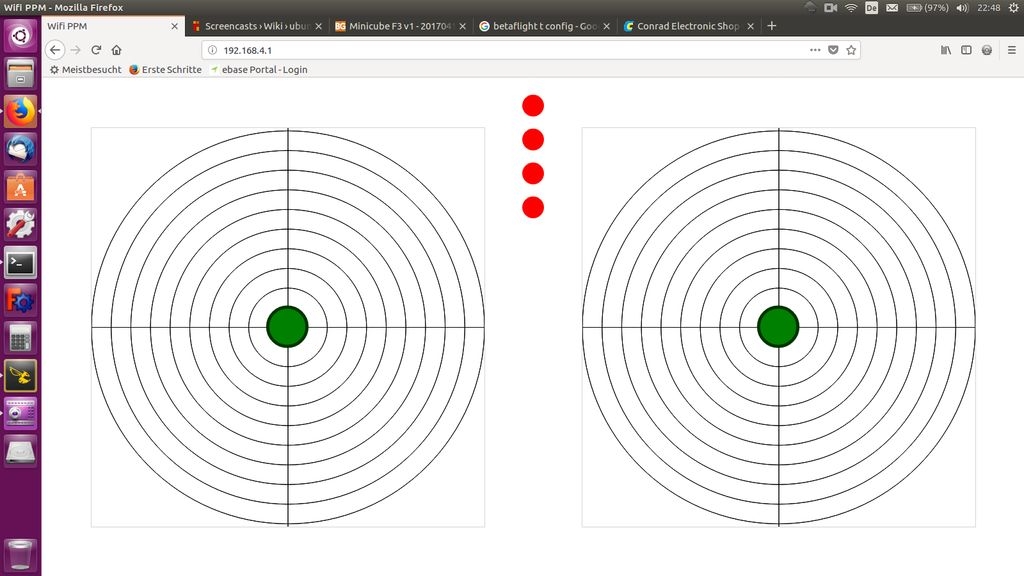
Now open a browser at your smartphone. Open the site 192.168.4.1 (Picture 6). Now you can check the controller.
If it's working, start the two sender ESP8266. Connect to the "Long Range WifiPPM/MSP" Access point. The password is "WifiPPM/MSP". Open again the website 192.168.4.1. Check again in cleanflight if it's working.
Connect the antennas to the ESP07 modules.
Some More Info
There are two access points in normal operation. The "WifiPPM/MSP" access point is like the previous WifiPPM project. You can use it if you just want to do a fast flight without connecting any additional modules when you don't need long range connection. If you connect to "Long Range WifiPPM/MSP" the long range controller takes control.
Maybe you want to know how long is "long range". Actually I don't really know. It's at least a few hundred meters. But I could not test it until now. It doesn't loose connection in my complete flat.
I added MSP control because I thought I could make a back channel for telemetry data. But that never worked stable. Anyway, MSP protocol is more accurate than ppm, because it doesn't depend on timing so much. Maybe it makes problems with slow flight controllers because there is heavy traffic on the serial port. With my Noxe F4 flight controller it works without problems.
If you have any configuration problems have look at the old WifiPPM project.