LoRa GPS Tracker
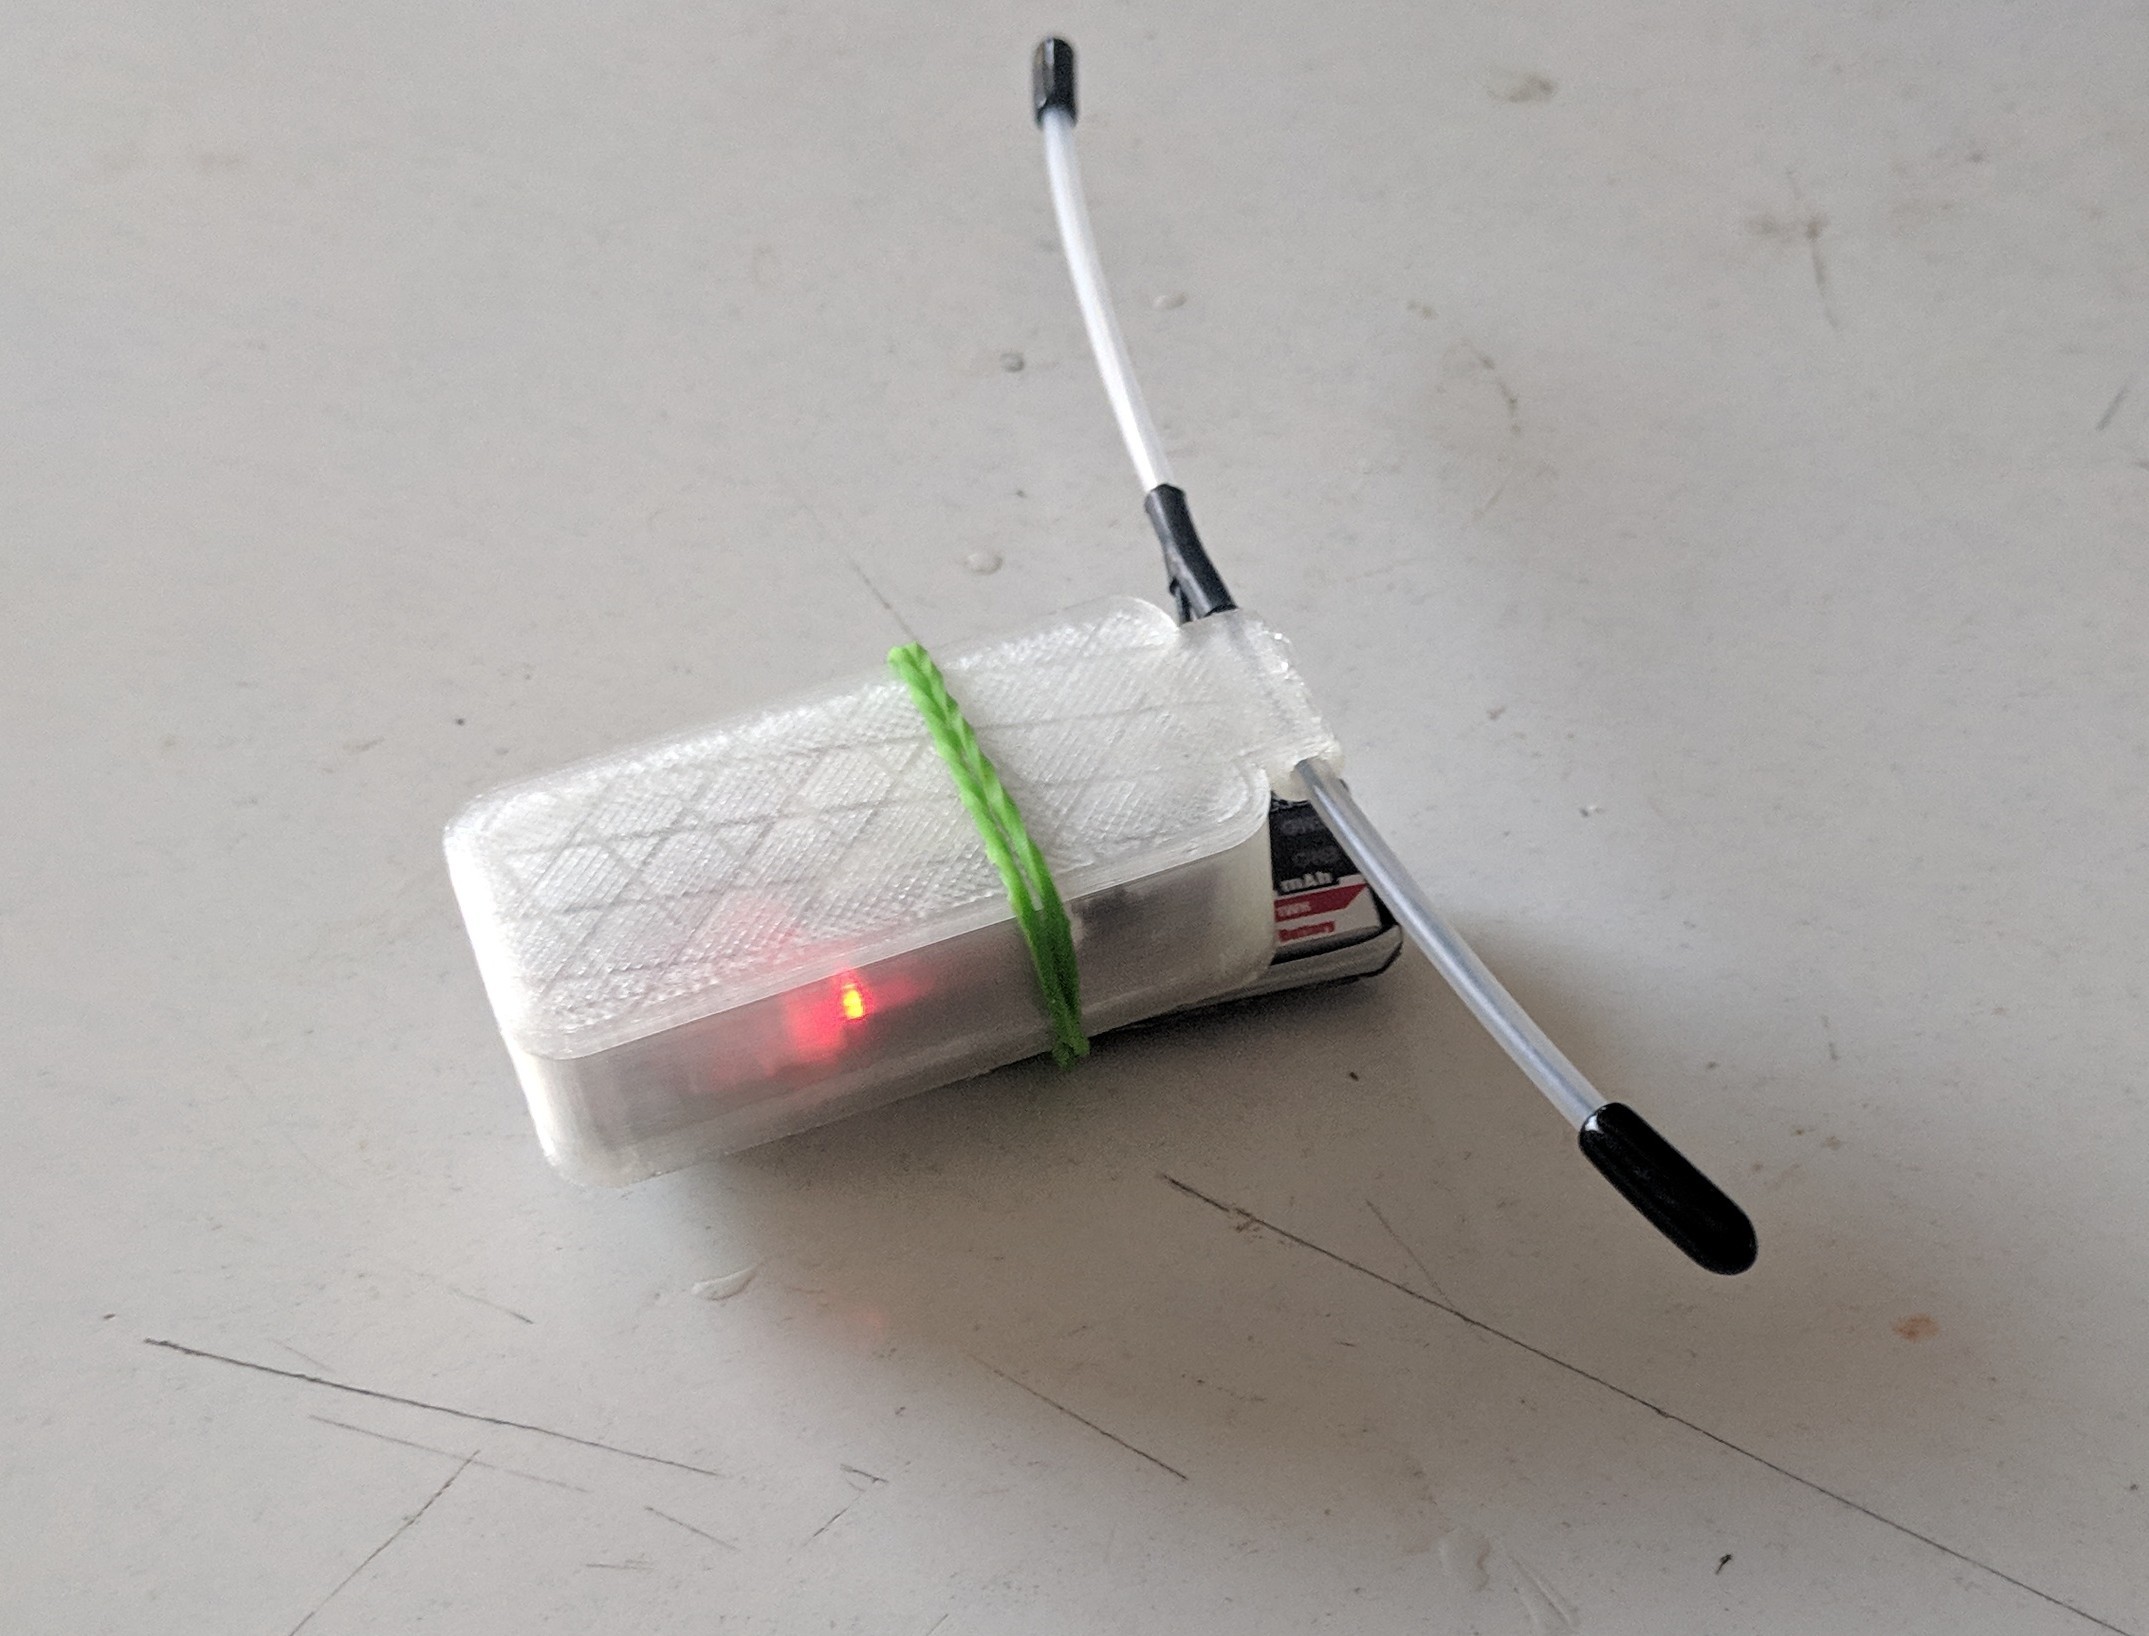
This project will show how to assemble your own GPS tracker module, for use with Ripple LoRa mesh networks. See this companion article for info: https://www.instructables.com/id/LoRa-Mesh-Radio/
These tracker modules use the Semtech LoRa radios, and compatible Arduino dev boards. Initially, there is just support for the Adafruit Feather, but will be more added over time. The modules can be used to track the location of anything remotely, via the LoRa packet radio mesh network.
Supplies
Hardware components can be purchased here:
- Adafruit Feather with LoRa module: https://www.adafruit.com/product/3178
- BN-180 GPS receiver: https://www.banggood.com/Beitian-Smallest-Mini-Dua...
- 900MHz dipole antenna: https://www.banggood.com/T-Type-900MHz-Long-Range-...
- 1S LiPo: https://www.banggood.com/GAONENG-GNB-4_35V-450mAh...
NOTE: the wires must be swapped in the connector of these Lipo batteries before plugging into the Feather!!
That is, this battery has right connector type, but the polarity is reversed!!
Alternatively, you can buy 1S lipo batteries from Adafruit. These have the connectors with right polarity.
Wiring
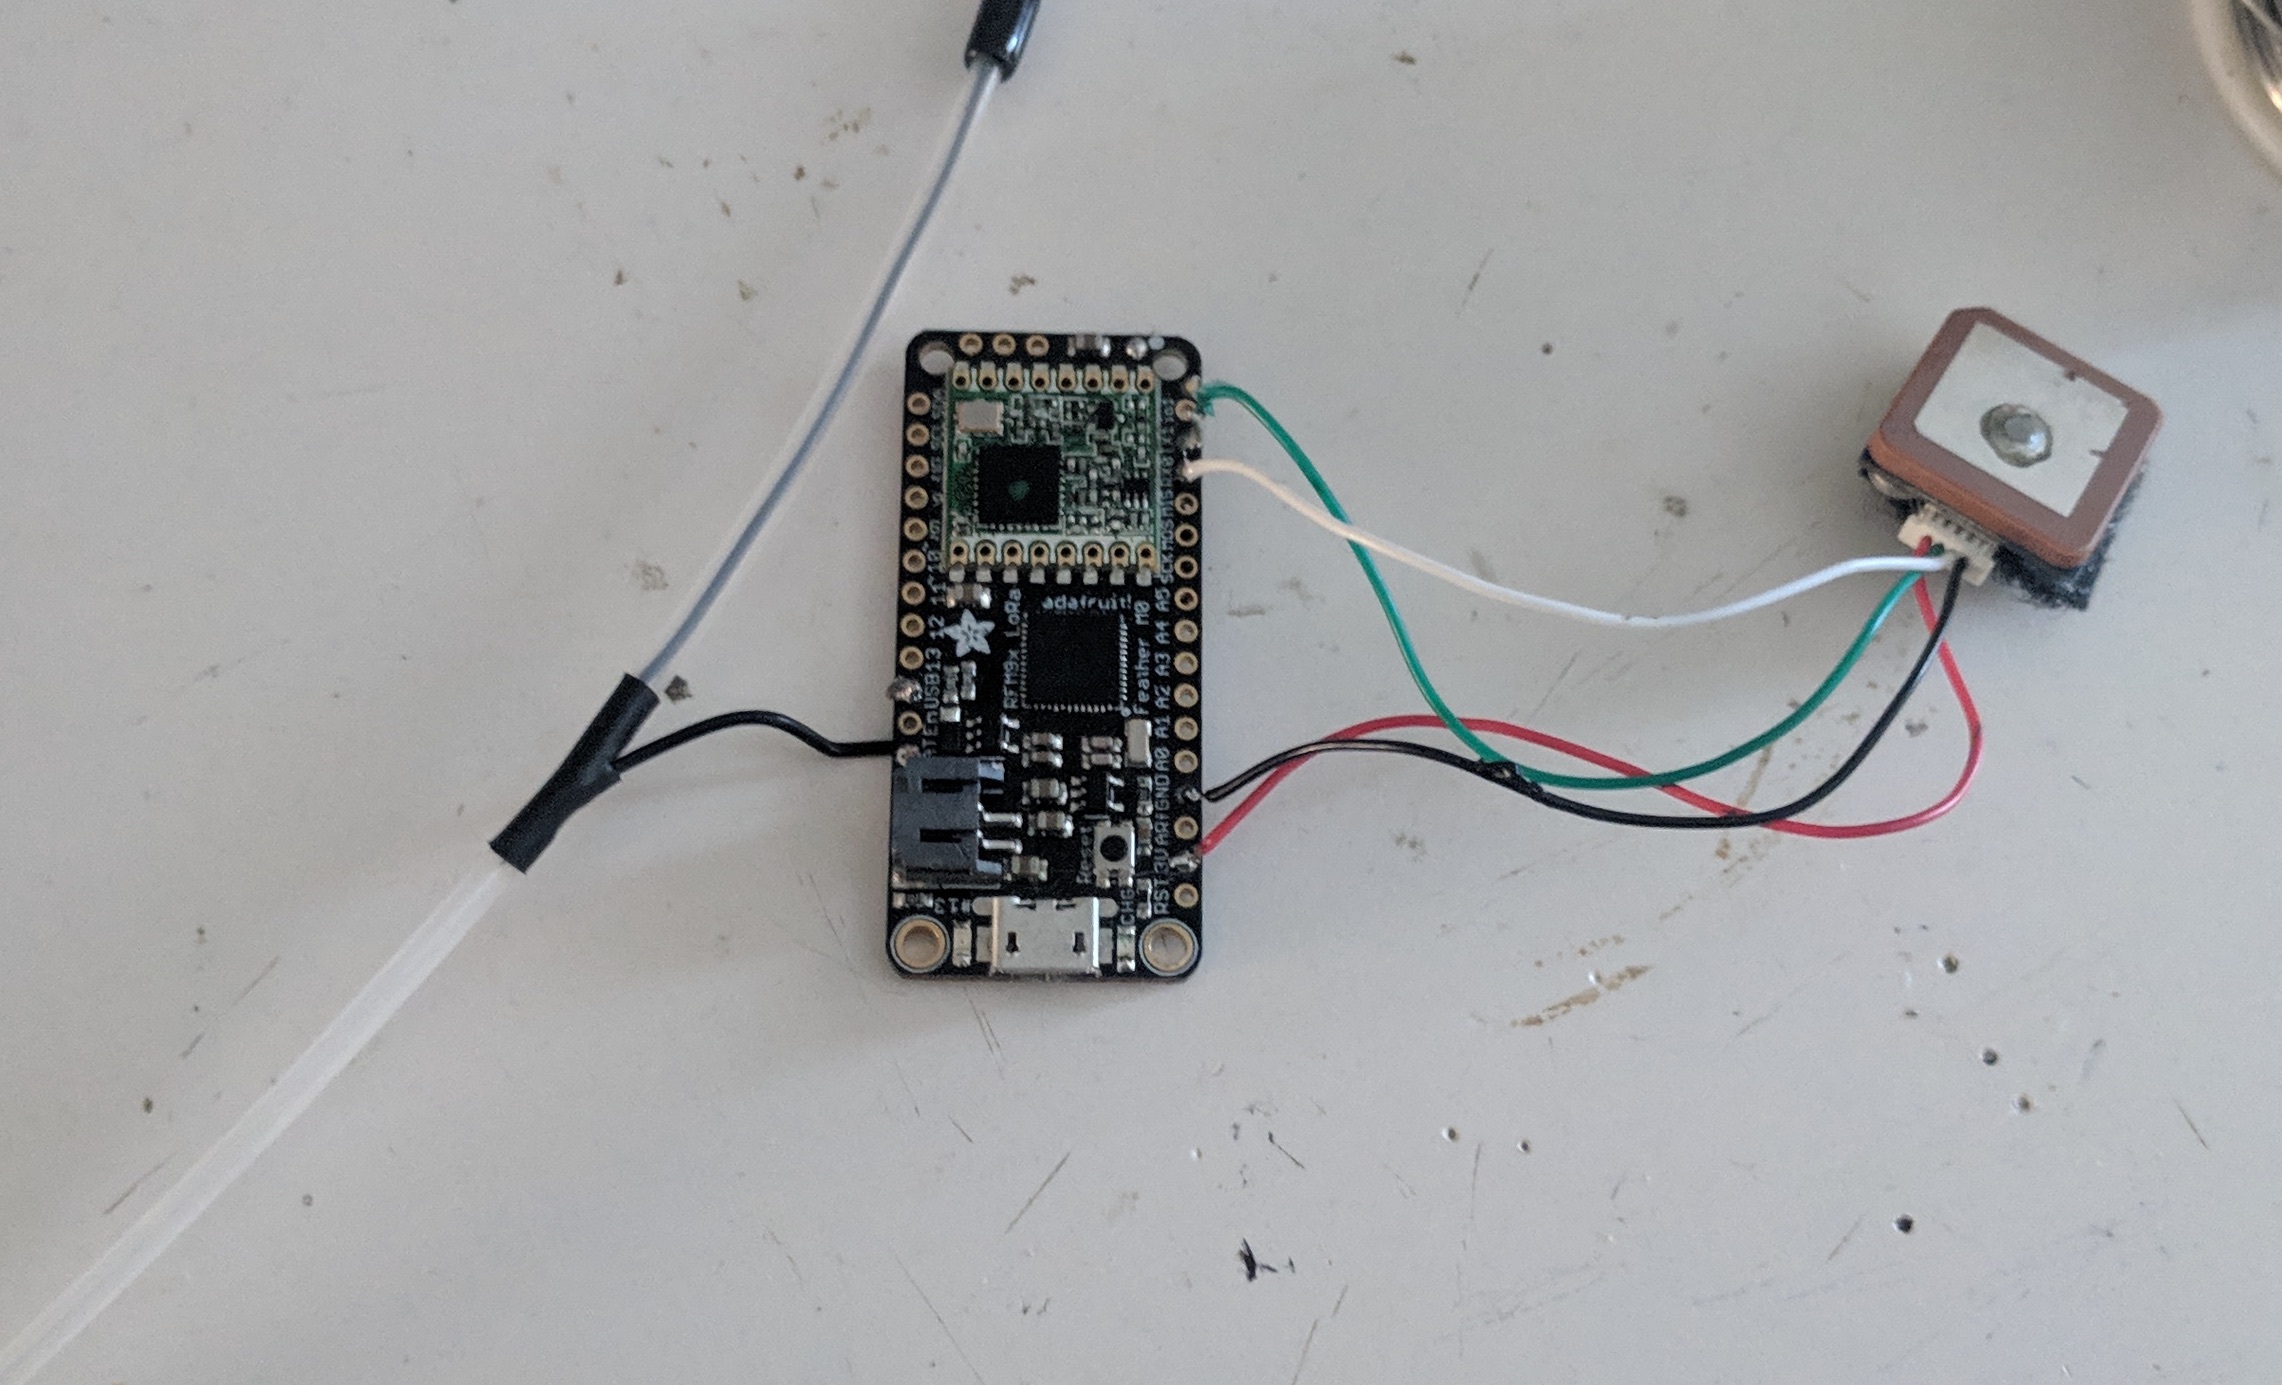
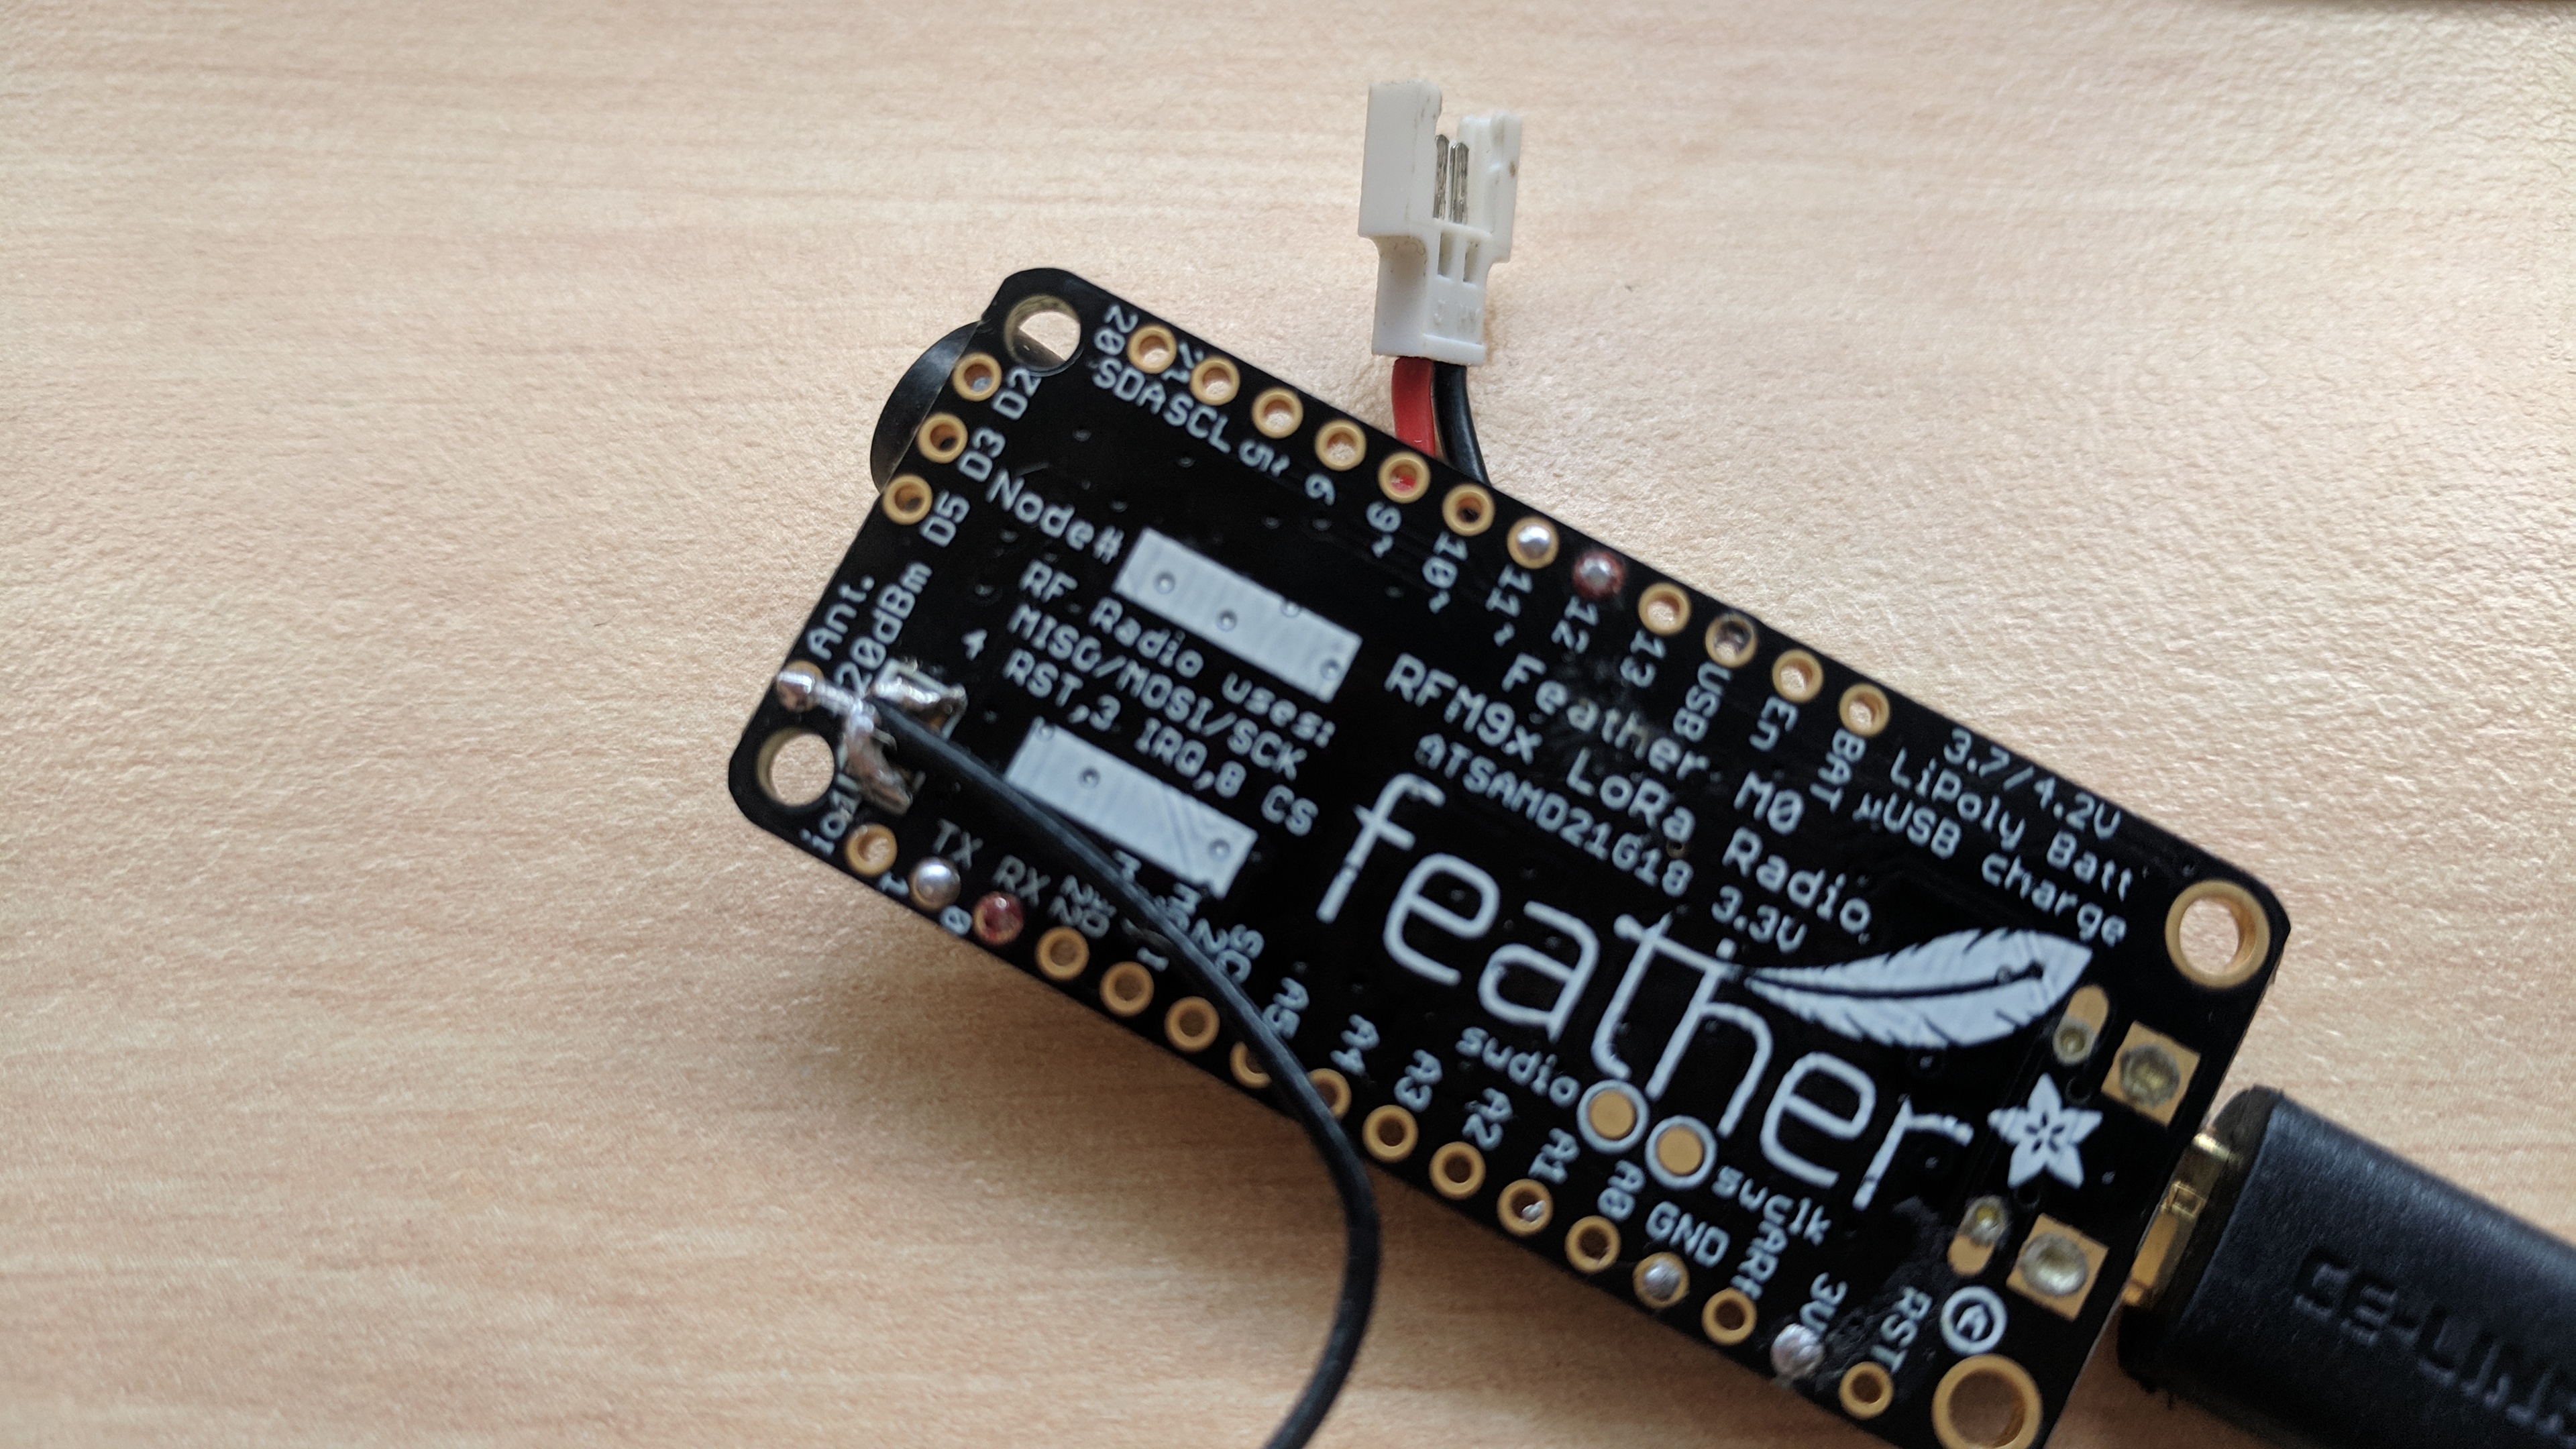
The Feather board just needs the BN-180 GPS receiver wired up to it, with the following connections:
- (black) GND -> GND pin on feather
- (red) VCC -> 3.3V pin on feather
- (white) TX -> RX1 pin feather
- (green) RX -> TX1 pin on feather
The antenna doesn't have the right connector, so you need to cut the IPEX4 one off, then separate the coax braids and solder to the antenna ground pads (see end pic above). To do this, you need to strip about 10mm of the outer plastic off the end of the cable, then separate the very fine surrounding coax wire mesh then put some solder onto this. Then remove about 1mm of the plastic from the inner active wire and put a small amount of solder on this.
Next, pre-tin the antenna ground pads on the Feather, and the active antenna pad in the middle, then solder the antenna to these pads (separated coax to ground pads, active inner wire to antenna pad).
Flashing the Firmware
For this you will need to have installed the Arduino IDE, and support for the target board type.
There are instructions on how to flash the firmware on this Github page: https://github.com/spleenware/ripple
Choose one of the 'GPS Tracker Node' targets.
With the board connected via USB cable, test that the firmware is OK by opening the Serial Monitor in the Arduino IDE. Enter 'q' (without quotes) in the send line, and press enter.
The serial monitor should reply with text starting with "Q: ..."
Configure the Tracker in the App
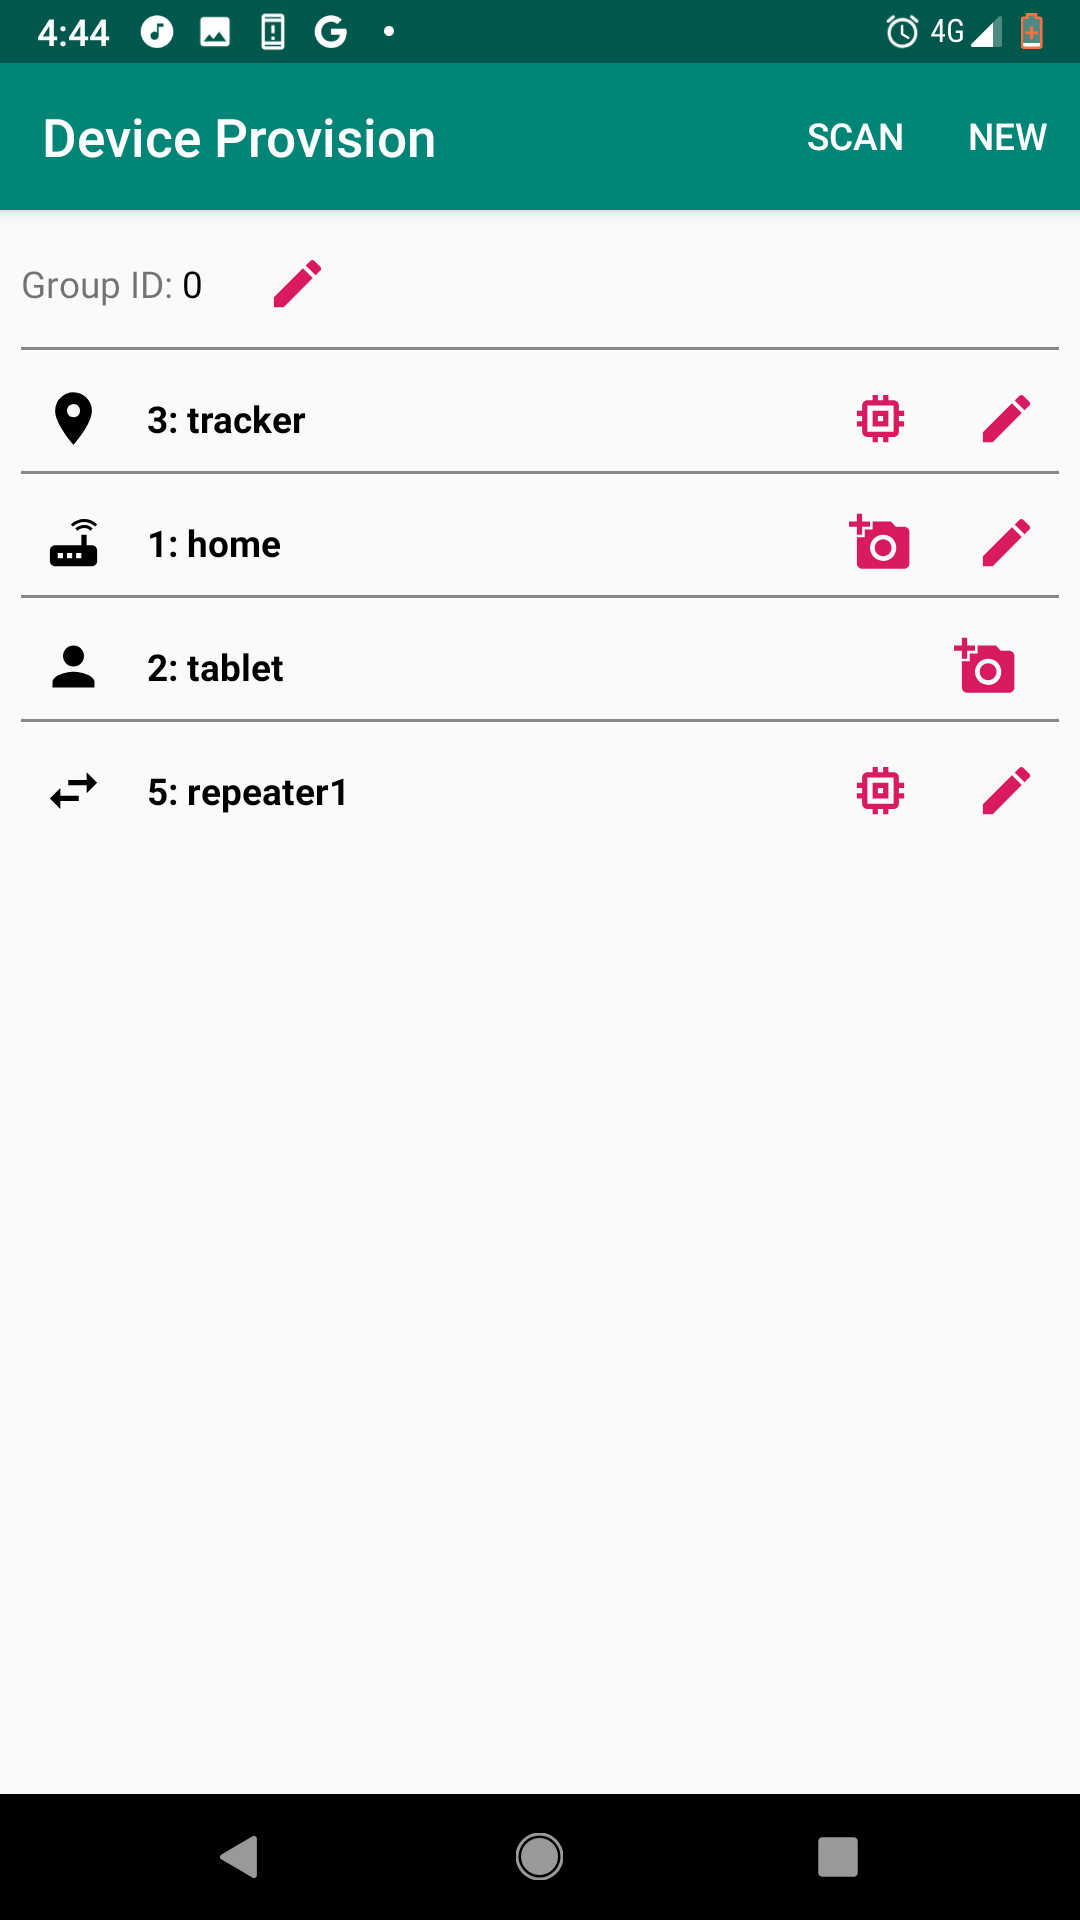
To configure the tracker module and to actually track it, you need to install the Ripple Commander app. Currently only Android is supported. Download from Play: https://play.google.com/store/apps/details?id=com....
The app has two launcher icons. The 'Device Provision' one is just for when you are setting up your mesh network (repeaters, sensors, gateway, etc). The tracker nodes just need to be assigned a unique Id (between 2 and 254), and have their encryption keys generated. Just click on the 'NEW' menu on the toolbar, and enter the Id and name for the tracker, then click SAVE.
The tracker should now be in the main list. Tap on the 'chip' icon to the right, to go the 'Programmer' screen. Connect the tracker board via USB-OTG cable to the Android, then tap on the 'PROGRAM' button. If all goes well, then there should be a message saying 'Done', and that you can now disconnect.
Exit back to the Android launcher, then tap on the main 'Ripple Commander' launcher icon.
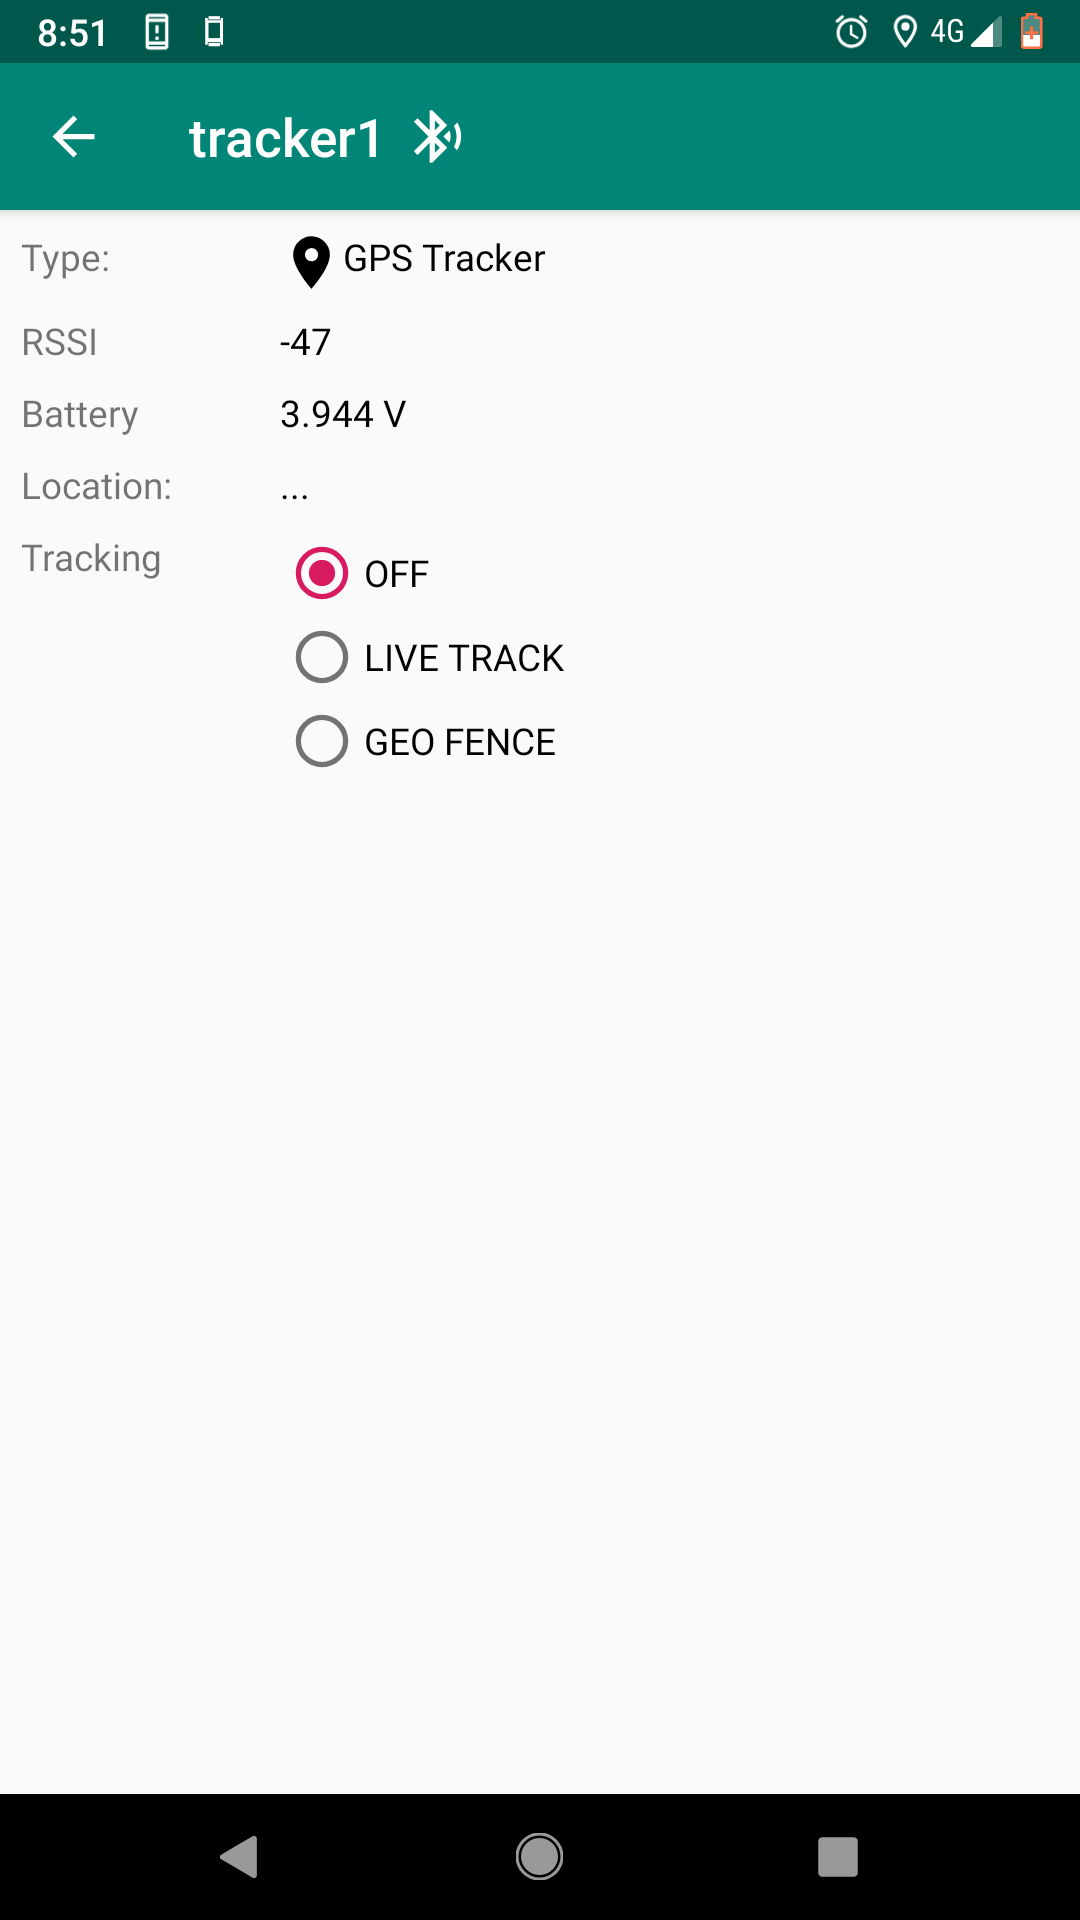
This is the main UI of the app, where you can chat with other 'pager' users in the network (who use the Ripple Messenger app), plus monitor your special nodes, like repeaters and the GPS Tracker nodes. Tap on a tracker node in the list, and you should see the device status screen (see second screen-shot above). Tap on the tracking option 'LIVE TRACK', and you should then be able to monitor the live location of the module.
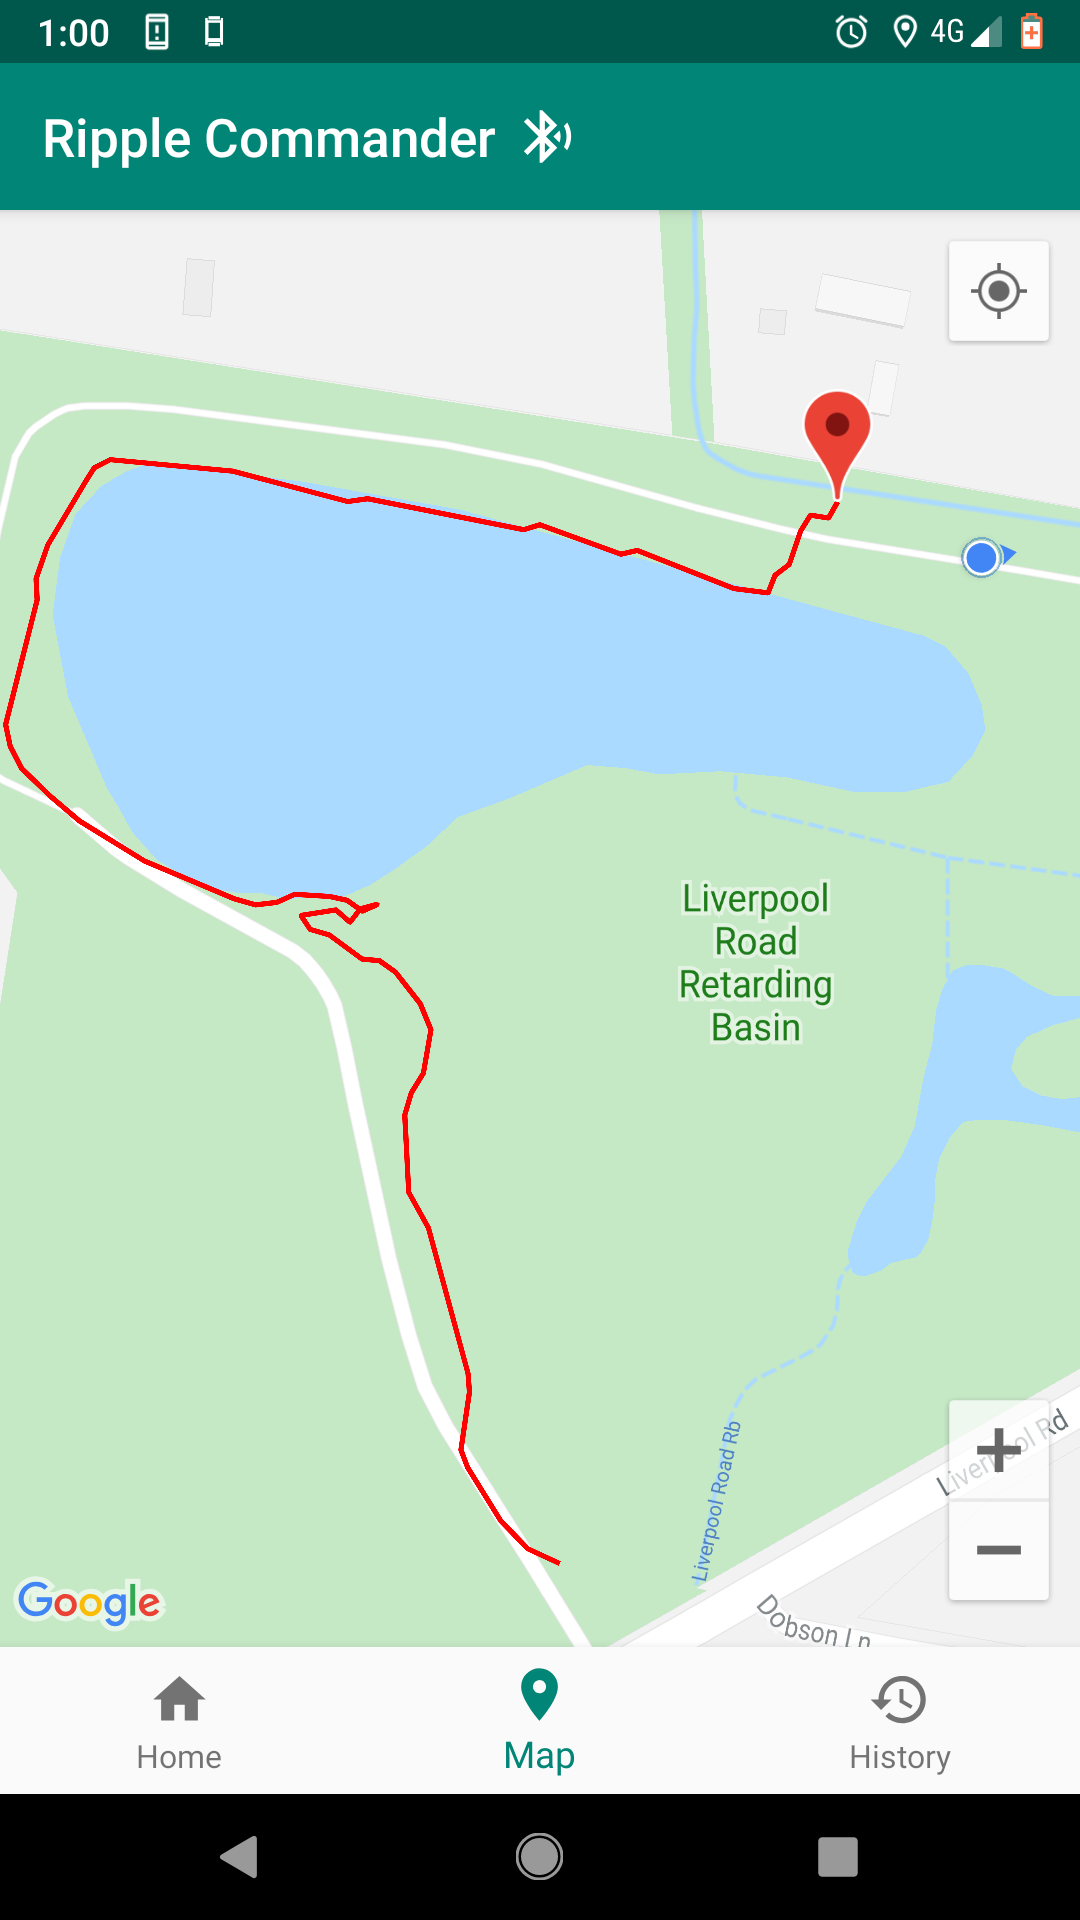
The 'Map' tab will show a map pin for each of the tracker modules currently being tracked.
NEW: Geo Fence Alerts
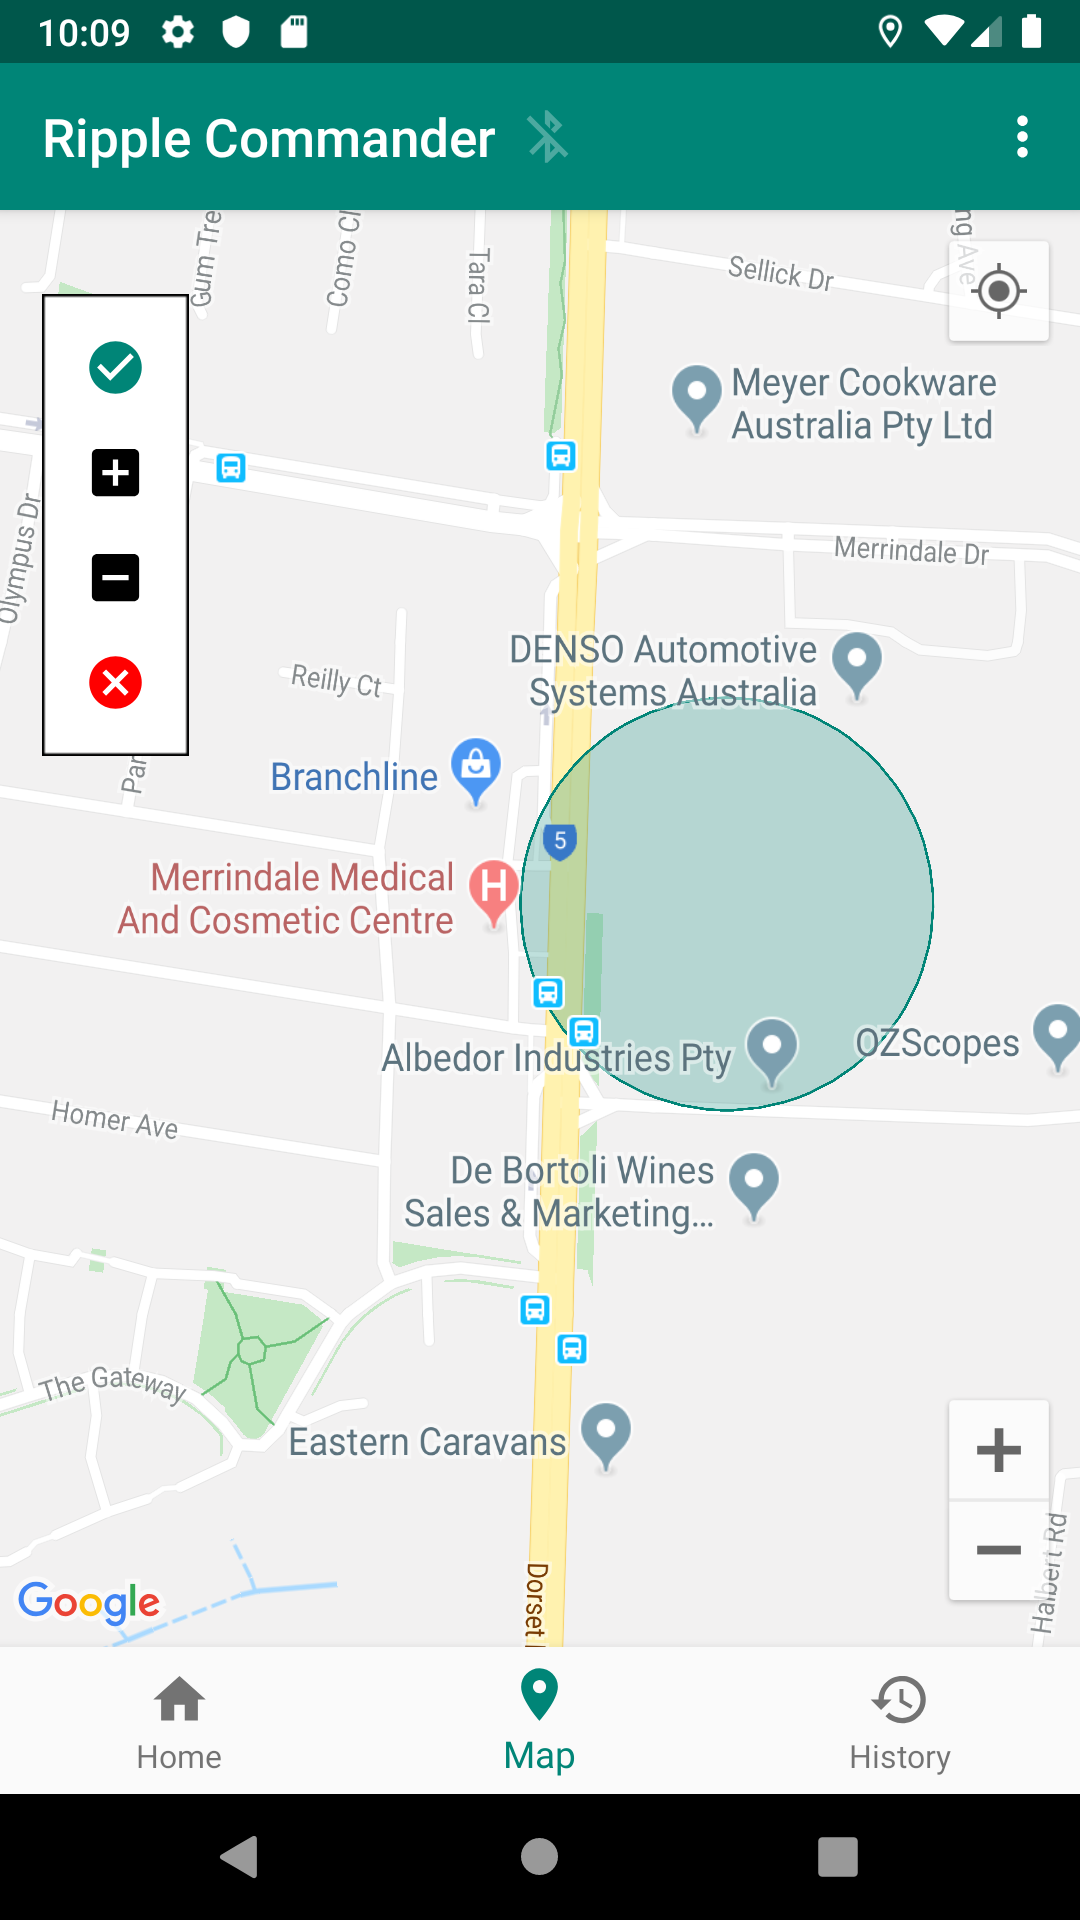
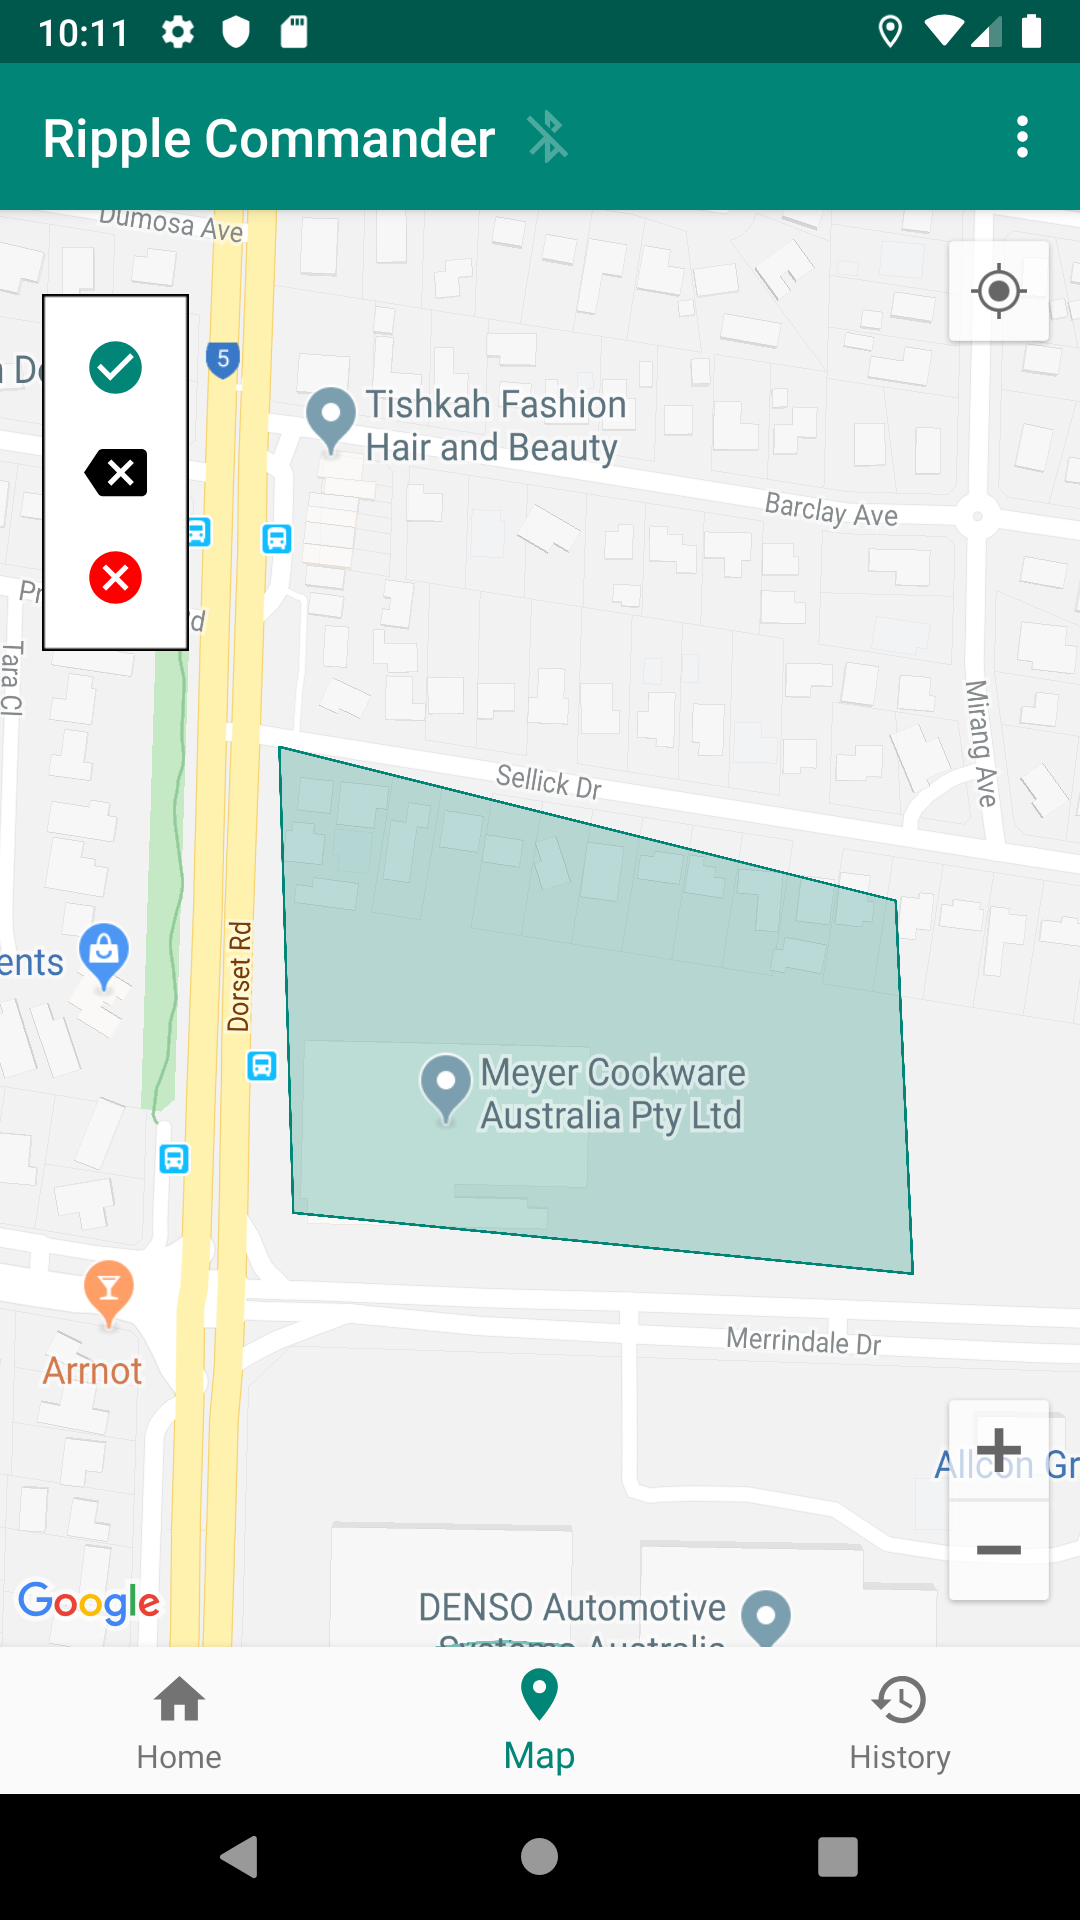
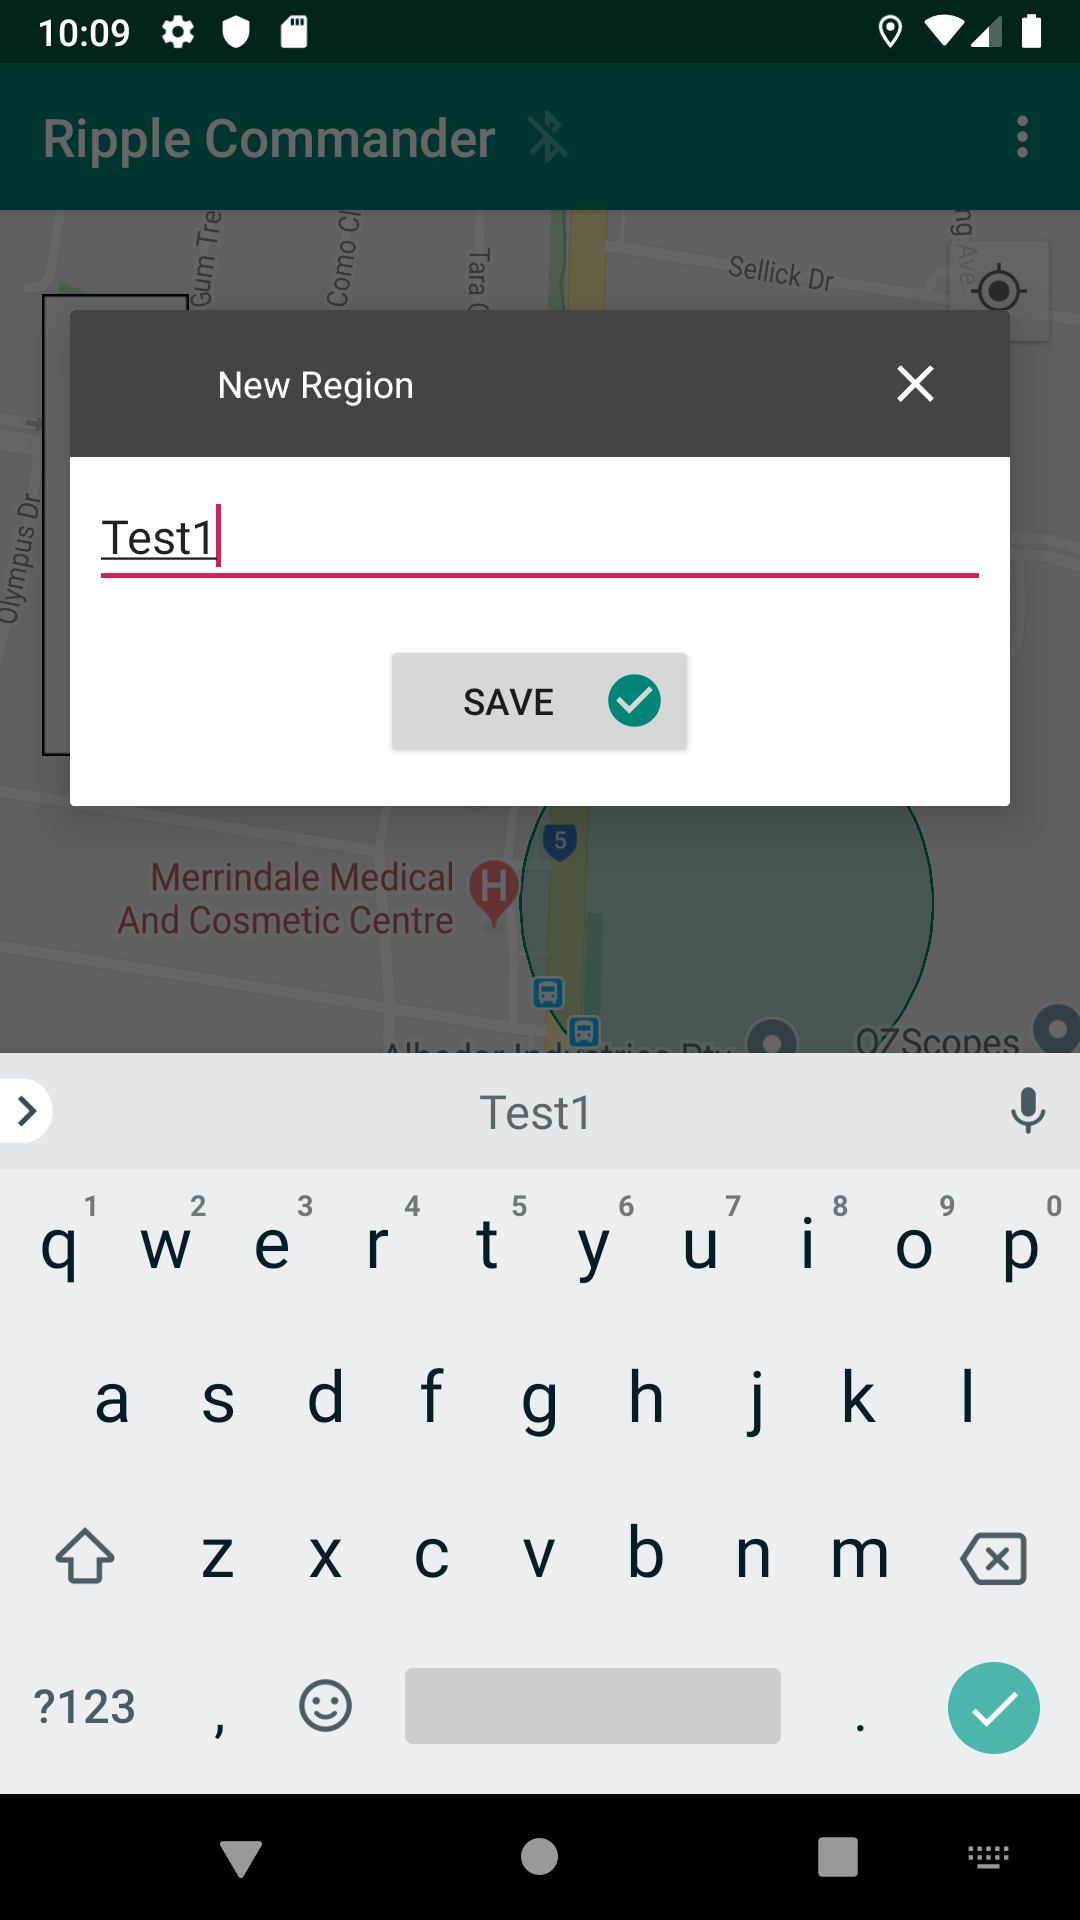
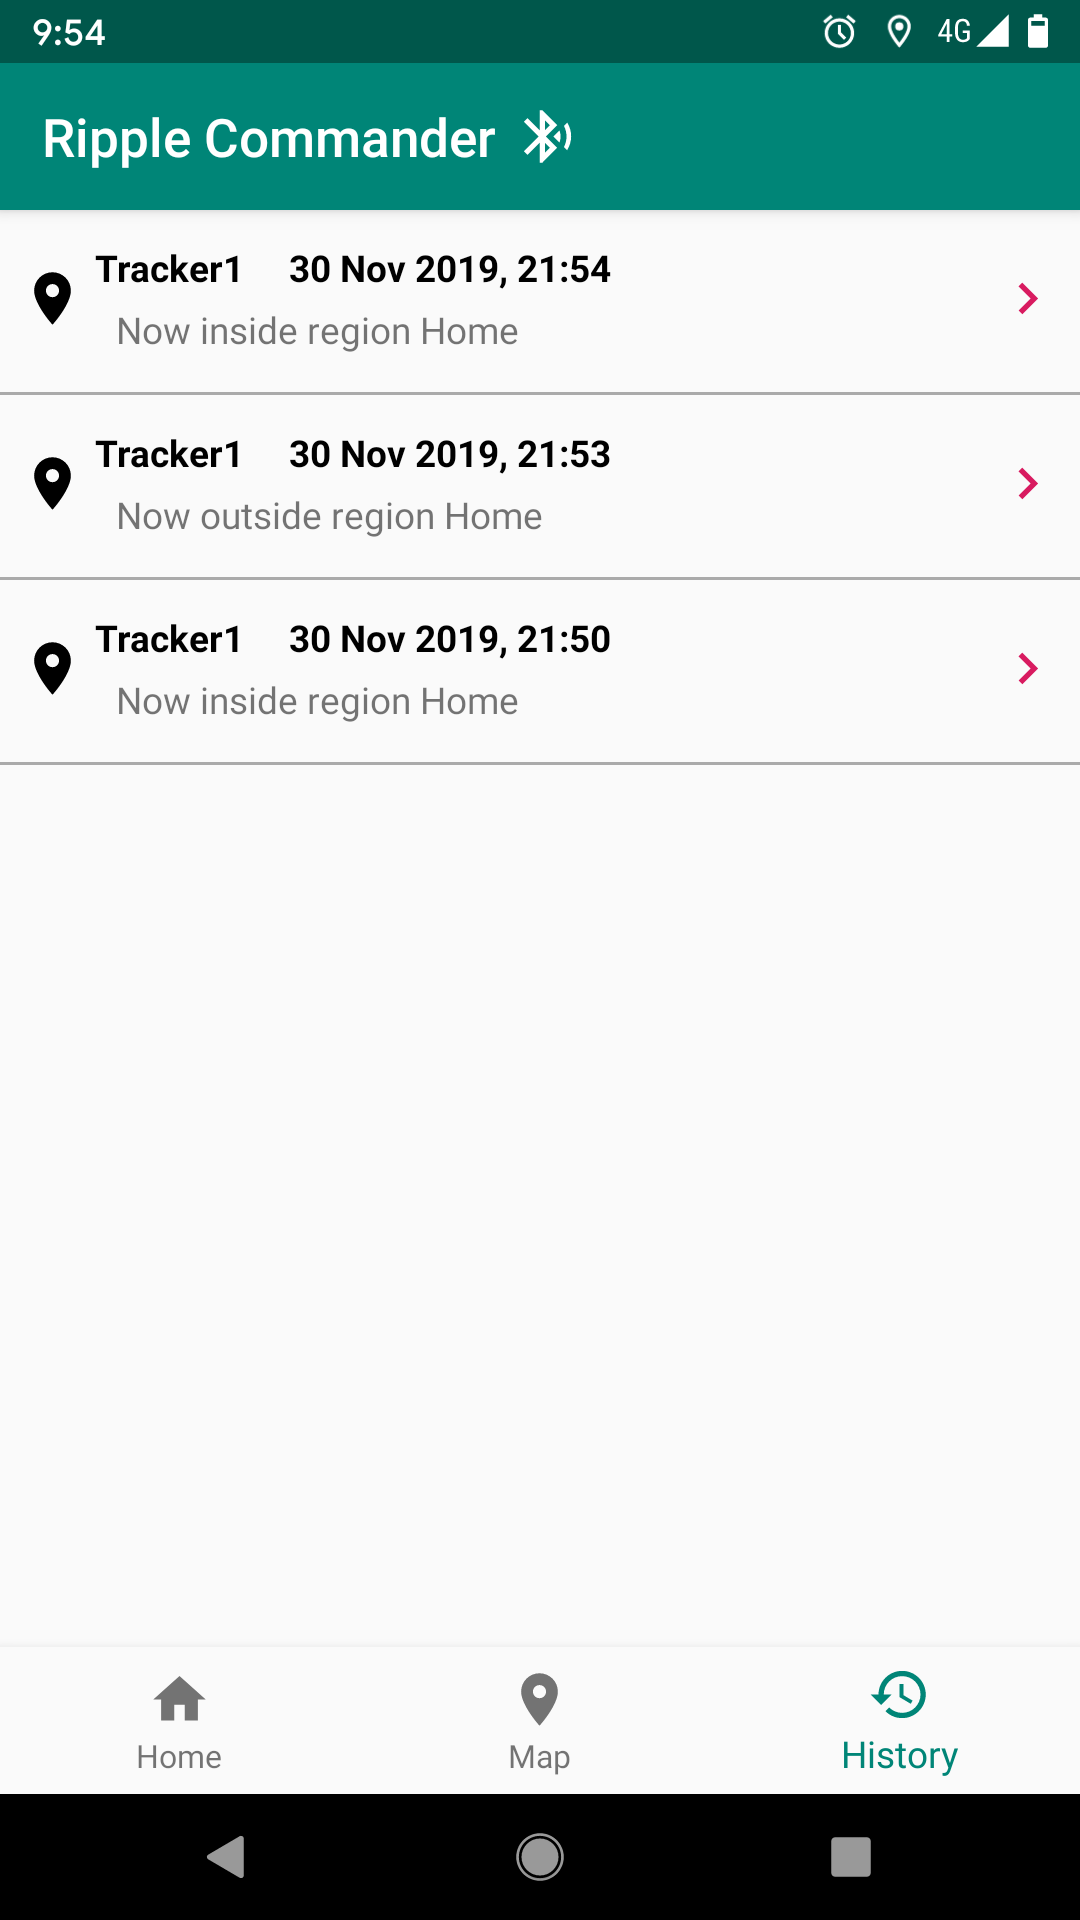
The latest firmware now supports Geo Fence mode. In this mode you select a geo region (which you define in the Map tab), and just get alert messages when the device goes in or out of the region.
First, switch to the Map tab, and tap on the '...' menu in the toolbar, then select one of the 'New Region' options (circle or polygon).
Circle: long-press on the map where you want the center of the circle region should be. Then tap on the '+' and '-' floating options to the left to increase or decrease the size.
Polygon: long-press each of the points in the polygon on the map. To undo the last point, tap on the 'x' button in the floating options to the left.
For either, once you have finished defining the region geography, tap on the green 'tick' option then enter a unique name for the region.
Back in the 'Home' tab, tap on the tracker item in the list, to go to the tracker status screen. Now select the 'GEOFENCE' option under Tracking, then select a region from the list. If all goes well, the status will update, and the tracker device will send alert messages when it goes in or out of the region. See the 'History' tab for the alert messages.
(Optional) 3D Print the Case
This case can nicely house the feather and GPS: https://www.thingiverse.com/thing:3947782
It also has a holder for the antenna.
Above is a picture of my dog with a tracker attached to here collar :-) (the first beta tester of the system!)
Feedback
Let me know if this has worked for you, or if you encounter problems. The feedback is very welcome.
Enjoy!
regards,
Scott Powell.