Literature in 3D: Crafting Bookends With AI Assistance
by PrintedScript in Craft > Books & Journals
235 Views, 0 Favorites, 0 Comments
Literature in 3D: Crafting Bookends With AI Assistance

This is my first Instructable, although I hope to create many more in the future!
This post was made as an entry to the Made with AI Student contest!
As a high school student, I wanted to expand upon my skills and start entering more contests on various sites, so that I can expand my resources and skills to be able to make more, better projects, and help others to create awesome projects as well!
I decided to try and make this project as accessible as possible by making it so that you can use a 3D printer or a Laser cutter for this project.
Although you can apply this to any book or series that you would like, this was inspired by scenes in Brandon Sanderson's Stormlight Archives'! I chose the scene of the Falling Out of the Knights Radiant to try and create a bookend for!
If you just want to Print (or Cut) your own version of this reversible bookend, I'll have linked it on Printables!
Stormlight Archives Layered Bookends (Laser and 3dp Files) by Printed Script
Supplies
I decided to link all the software and sites mentioned in this Instructable so that you can easily access them!
Hardware needed-
3D Printer
AND/OR
Laser Cutter
Software needed-
Photo editor such as
-Gimp
-Photoshop
-Or similar
Inkscape- This is to convert our edited PNG file into a vector file (such as SVG) to use in our CAD software.
You will also need to use some kind of CAD program. I will be using Fusion360 but you can do it in Sketchup as well.
I also suggest this plugin for Fusion that made the process of creating the tab and slot joints way easier: https://github.com/FlorianPommerening/FingerJoints?tab=readme-ov-file
Additionally, you will need to use the correct program for your Laser Cutter or 3D Printer.
I will be using CuraSlicer for my 3D printer, and LightBurn for my Laser cutter.
Sites we will use-
Some kind of generative art AI, I will be showing Microsoft Designer (a Dalle3 Model) and Leonardo.AI.
Find Reference Art!
This is a fun and simple step that makes the creation a lot easier!
Let's talk about why this step is important! Reference art allows you to be able to better organize your artwork by referencing others! It also allows you to be able to get your creative juices going so you can actually design the bookend how you want! Although you might not find perfect references, it can really help you to be able to create the bookend you want!

Here is my reference art for the Falling Out of the Knights Radiant scene (above)!
Remember not to use other people's art for this project! We are only looking at other's work in order to get those creative juices flowing! AI art is fine when making the bookend, but using other people's work without their permission would be stealing!
Ideate With AI Art
This step will take some time. The goal of this step is to use an AI art program such as leonardo.AI to create images that we can then edit to use for our bookends.
I'll start by teaching my preferred program, Leonardo.AI, however, you may find that a different AI or model works better for you or for the images you are trying to generate!
Option 1: Leonardo.AI
First, you need to learn some basic parts about leonardo.AI if you want to be able to use your tokens to the best of your ability.
Let's break this program down into some easy parts!

1- Tokens- In the free version, you get 150 tokens per day that can be used for generations. There are many ways to get your most out of these tokens!
2- Number of images generated- In Leonardo, you have the option to generate up to 8 images at the same time. I usually do 4 at a time until I have something I like, or 2 when I'm trying to get the perfect generation or am trying to fix a not working prompt.
3- Advanced features- PhotoReal, Alchemy, and Transparency are all advanced features in my opinion, and they significantly increase the number of tokens used per generation. I recommend having these off.
4- Input Dimensions- This tells the AI what size you want the picture to be, although there is also a manual editor slightly lower.
5- Prompt Input- This is where you input your carefully crafted and slowly edited prompt. This is what the generator will try to generate. There is a random prompt generator as well.
6- Generation Model- Different models will have been trained differently, with different strengths and weaknesses. This is one of the things that will significantly alter your model. I found that the Leonardo Diffusion XL worked the best in my case.
7- Generation History Tab- This is where all of your generated and generating photos will appear.
8- Prompt Generation Tab- This tab has a handy little tool that will help you get the most out of your generations. You can input a prompt, and it will give you a number of prompts of what it thinks you want that you can then edit and use to generate photos with.
Here's what we will be doing in order to generate references for our bookend.
Using the Prompt Generation tab, input the basic idea of what you want to generate. This should include parts that are very important to the style and design of the image. Be sure to include Silhouette in the prompt.
Once you have a prompt generated, you can tweak it slightly to fix your exact needs and goals. Sometimes, instead of generating the whole image, you will want to generate individual important components, which is what I was mostly doing.
Once you have your prompt, enter it into the generate tab, and make sure that you have turned off almost all of the special features. You just need the basic generation for this project, and you want it to cost the least amount of tokens possible.
When you hover over an image that is close to what you want, but not quite there, you can click the double arrow button called Use as image guidance. It will make the image very similar to what it was previously.
Option 2: Bing Image Generator
Although much simpler to use than Leonardo, this program has its strengths that allow it to work just as well or better.
Some of the strengths of this program are: infinite generations, better understanding of some words such as silhouette, and simpler interface. Although simpler, don't underestimate the power of this program! If you are struggling to make/find a suitable prompt, then you should try using Edge Copilot or ChatGPT in order to make a better prompt.
This is proof of all the cool stuff this program can do, even though it's simpler than Leonardo!
Generate some images, then when you have what you want, go put them together and tweak it in the next step!
Prep the Layers With GIMP & Inkscape
Scary, right? Well, don't be afraid, this step is way easier than it looks or sounds !
We are only going to be using 4-5 tools for this in gimp!
The Important ones for you to know are the Eraser, Pencil, Bucket, Lasso, and Move tools.
Start by Lassoing the portion of the image you want, and then go to Select > Invert. This will protect that section.

Now, go to: Colors > Color to alpha and set the settings as so. Apply.

You should get something like this:

Now, go to Select > None, then set your tool to the Bucket. The settings you will want are: Mode-Erase, BG color fill, Fill similar colors, and Diagonal Neighbors.

Now, select your pencil tool. This needs to be set to a small size, ideally 1-4 pixels. This is for cleanup of gaps and whatnot that would make items hard to print or cut. Everything should be connected. You should get something like this once you are done.

Repeat this process for each item that you would like to combine to make your bookend. Then, combine all of those parts into one document and organize them in a way where you have 3-4 layers that are made up of those objects that are all connected. To save each layer individually, show the part you want to save and export them as a Png. Repeat for each layer of the bookend (Important!). Here are what my layers look like:


Now, let's fire up Inkscape and vector these for use in modeling!
Once you have launched Inkscape, go to: File > Open, and open one of your bookend's layers Import it with the smooth setting. Now, Select: Path > Trace Bitmap and select Edge Detection, then hit apply. Now delete the original. You should get something like this:

Now, select: File > Save As, and export it as a DXF File.
Repeat for each Layer of the bookend.
You should have one DXF file for each layer at the end of this step!
Model It in CAD: FUSION 360
After opening Fusion 360, create a new project, then import your DXF layers. You can do this through the upload button.
Once you've got the layers, Select the measure tool, and measure the bottom edge! The reason we are doing this is so that we can do a little bit of simple math in order to get each layer to the perfect bottom width!
Jot down the number that you get in inches, and grab or pull up a calculator. We are going to do a simple equation in order to figure out how much we need to scale the design. If you are afraid of math, that's fine, but this is very easy and won't take very long.
The simple equation we will be using is W/X = Scale factor. The W stands for the wanted width of your bookend, and the X is the current width of the layer in fusion. In this case, the wanted width of the bookend is 4 inches, so the equation will be 4/X = Scale. Once you get your number, go back to Fusion 360.
Click and Drag over your model from the left side, then click the Modify dropdown menu and select the Scale tool from the menu.
Select the object again and enter the Scale Factor you got into the side menu and hit okay (Do include all the decimal values, it helps it scale correctly). Double check that the width is the desired width, as sometimes Fusion will not completely scale the model due to a massive size difference. Repeat the previous steps to correct the width if necessary. Make sure to update the scale factor accordingly if you do.
Then select the Extrude tool and extrude each surface upwards by 1/8 inch. (If using a laser cutter or 3d printing, this is the thickness I would recommend.)
Once you have done those steps, you should have something like this for each.
Now, we will use the Extrude tool again in order to make those tabs you see in the photo above. They aren't fully made into tabs yet, but they will be soon! Extrude the sides that will be touching the side and bottom of the bookend by 1/8th of an inch.
Once you have done this for each part, group each slice and make it a combined component. This will make it way easier to move around and make it so that you can use another tool later. You should have something like this:

Once you have done that to each piece, make the side and bottom of the bookend. Using a sketch tool, make a rectangle that is the length of your bookend plus 1/8th of an inch by the depth so that it can lock together with the wall. Now extrude that by 1/8th of an inch in order to account for the thickness of the wood. Then make another sketch that is a 1/8th of an inch rectangle by the depth of the bookend. Extrude that upwards until it is as tall as you want you bookend to be. You should have something like this by the end of this step:

Let's focus on the sides again so that I can give you an important trick that will make this modelable for you. Hit S, then type in ALIGN. This tool makes it so that two surfaces will be perfectly aligned, allowing for the easy assembly of this multipart model. Practice using it on the side and the bottom of the bookend. It will perfectly align the planes that are selected. Try and get it so that they are overlapping on one corner, like this:

Then align the back layer to the front of the bookend sides. Use the move tool and use the arrow in order to push it back to where you want it without it losing alignment. Remember to leave a section at the back so that it slots together and doesn't fall out.
Repeat this for each layer until you get something like this:

Now, Let's use that tab and slot plugin that I recommended at the start of the Instructable. It'll allow you to get that perfect joint for where the side and bottom come together.
I recommend hiding the layers for this step, and just having the side and bottom visible.
Hit S, and search for the Finger Joint tool. (It will only show up if you properly install the plugin and place it in the correct folder. I recommend following their guide to install.) Select the side and the bottom, and then select the line that runs the length of both of them.
It should show you the joint, but if it doesn't, fiddle with the minimal finger size until it does.
If you aren't using the plugin, you can create a sketch on one of the objects (With the other hidden) and negatively Extrude on both sides, then use the Combine tool with the Cut operation and Keep tools enabled. This works just as well but takes slightly longer.
Then repeat the Finger joints operation on the layers, so that they will lock into the sides and bottom. I found that varying the minimal Finger Size helped with getting the perfect cuts and extruded any cuts that seemed too close to the side/bottom joint.
You should have something like this once complete:

Now, let's prepare the model for lasering/printing.
Let's start with 3d printing, as it's the easier one of the two to get set up.
If you want to get any of the finer detail out of this, I'd recommend that you FULLY calibrate your printer and use a .2mm nozzle, as it will be much more precise. You should also increase the size of the slots by a tiny bit in order to get the parts to fit together. Sanding may be required in order to get the bits together.
To adjust the slots for tolerances, negatively extrude the walls of each side of the slots by 1/2 of your printer's tolerances. I recommend using a tolerance testing print for this purpose.
I'll assume that you've grouped everything together as separate components, as it's a good design practice and makes the process way easier.
After adjusting the slots for tolerances, I'd right-click each part and save them as a MESH, using the STL filetype.
Now for the complex one, Lazer...
There are actually a lot of steps in order to get this ready for a Laser program like Lightburn, so let's be happy that those programs have their own tools in order to deal with Curf.
First, hit S, and use the Arrange tool. you want to go to the Envelope area in that tool and select the Arrange on plane, and select the XY Plane (Y is not up, contrary to Minecraft's beliefs.) Make sure the objects have some spacing as well. You also need to set the width and length to a size that will fit all of the parts, otherwise you'll have to do this a couple times with some of the parts at a time. I recommend setting it to the cut length and width of your Laser Cutter's bed. You should have something like this:

Right click that arrangement in Fusion's Browser and select Create A Drawing. Hit okay, then click on the paper that appears once, and set orientation to Top.
Under Sheet Settings, hide the Sheet Size and Title block. You should have something like this:

Hit Export, and export as a DXF File. You can now make some slight alterations in Inkscape if parts are too close together for a laser or if you want to tweak some curves. Just make sure the scale stays the same, and that you keep it as a DXF file.
Remember to add some Curf to the pieces in your laser program so that the pieces will slide together. Otherwise, you might have to glue it or do some sanding.
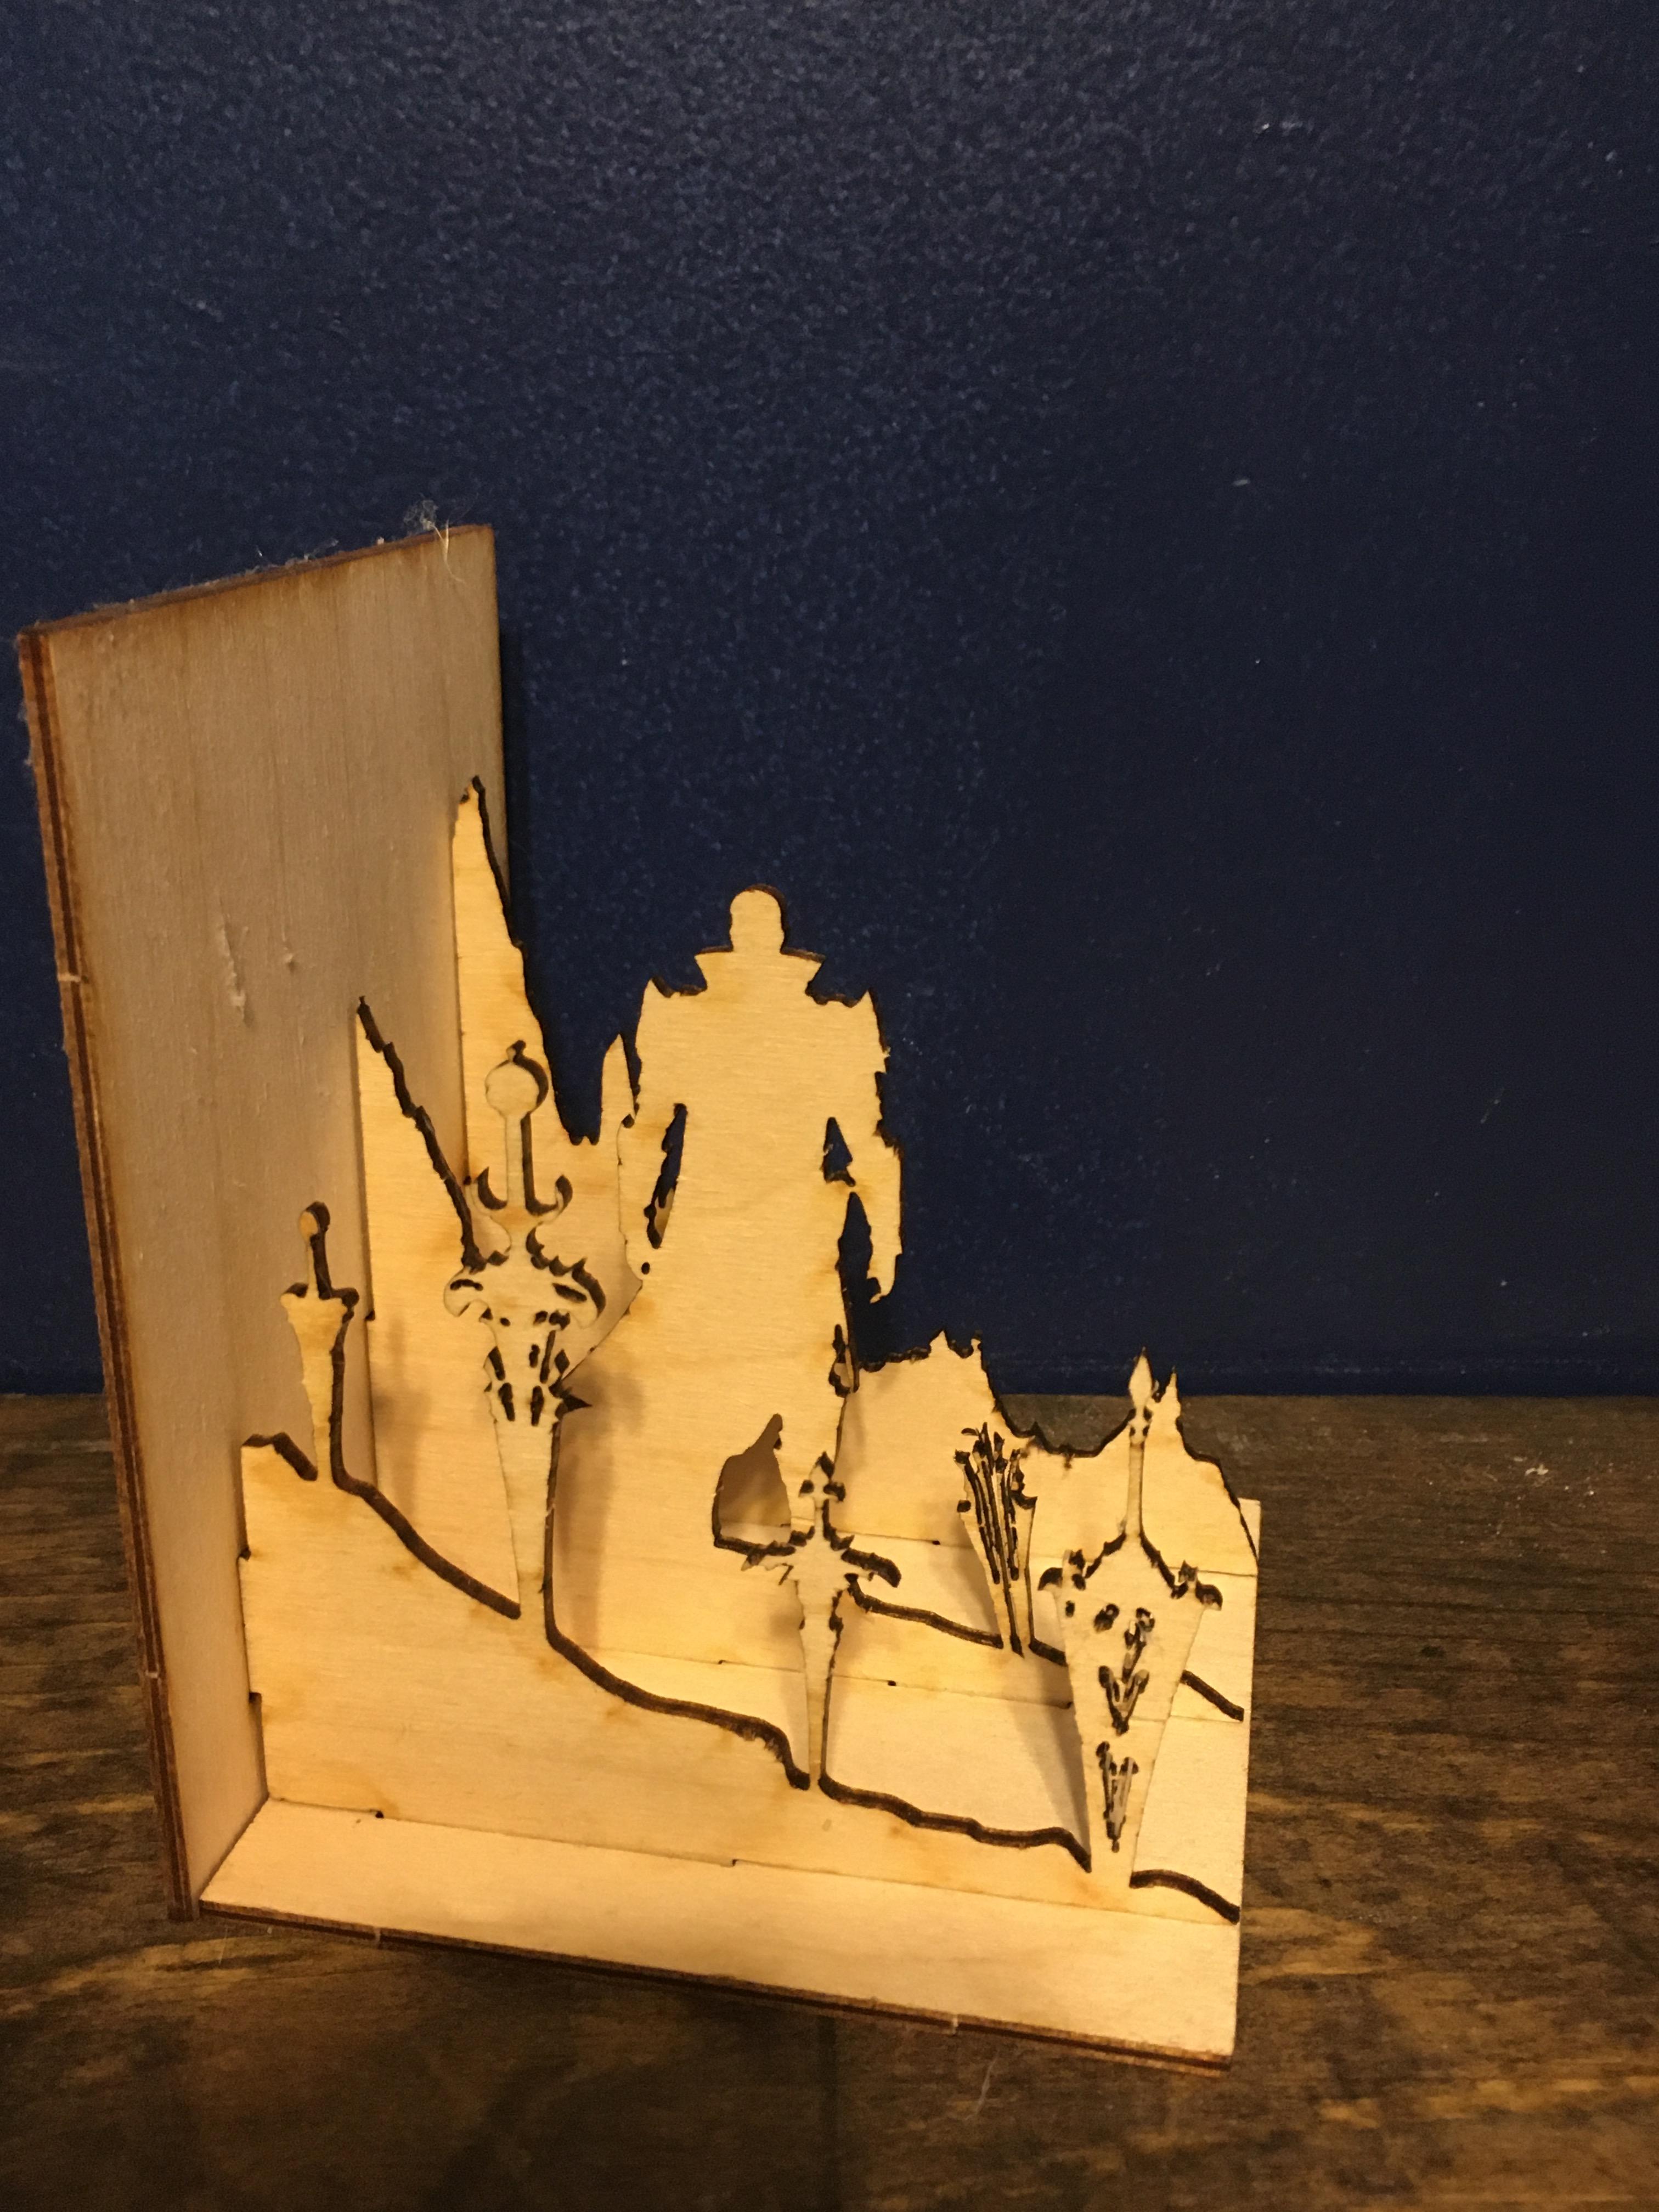
Test, Refine, and Share
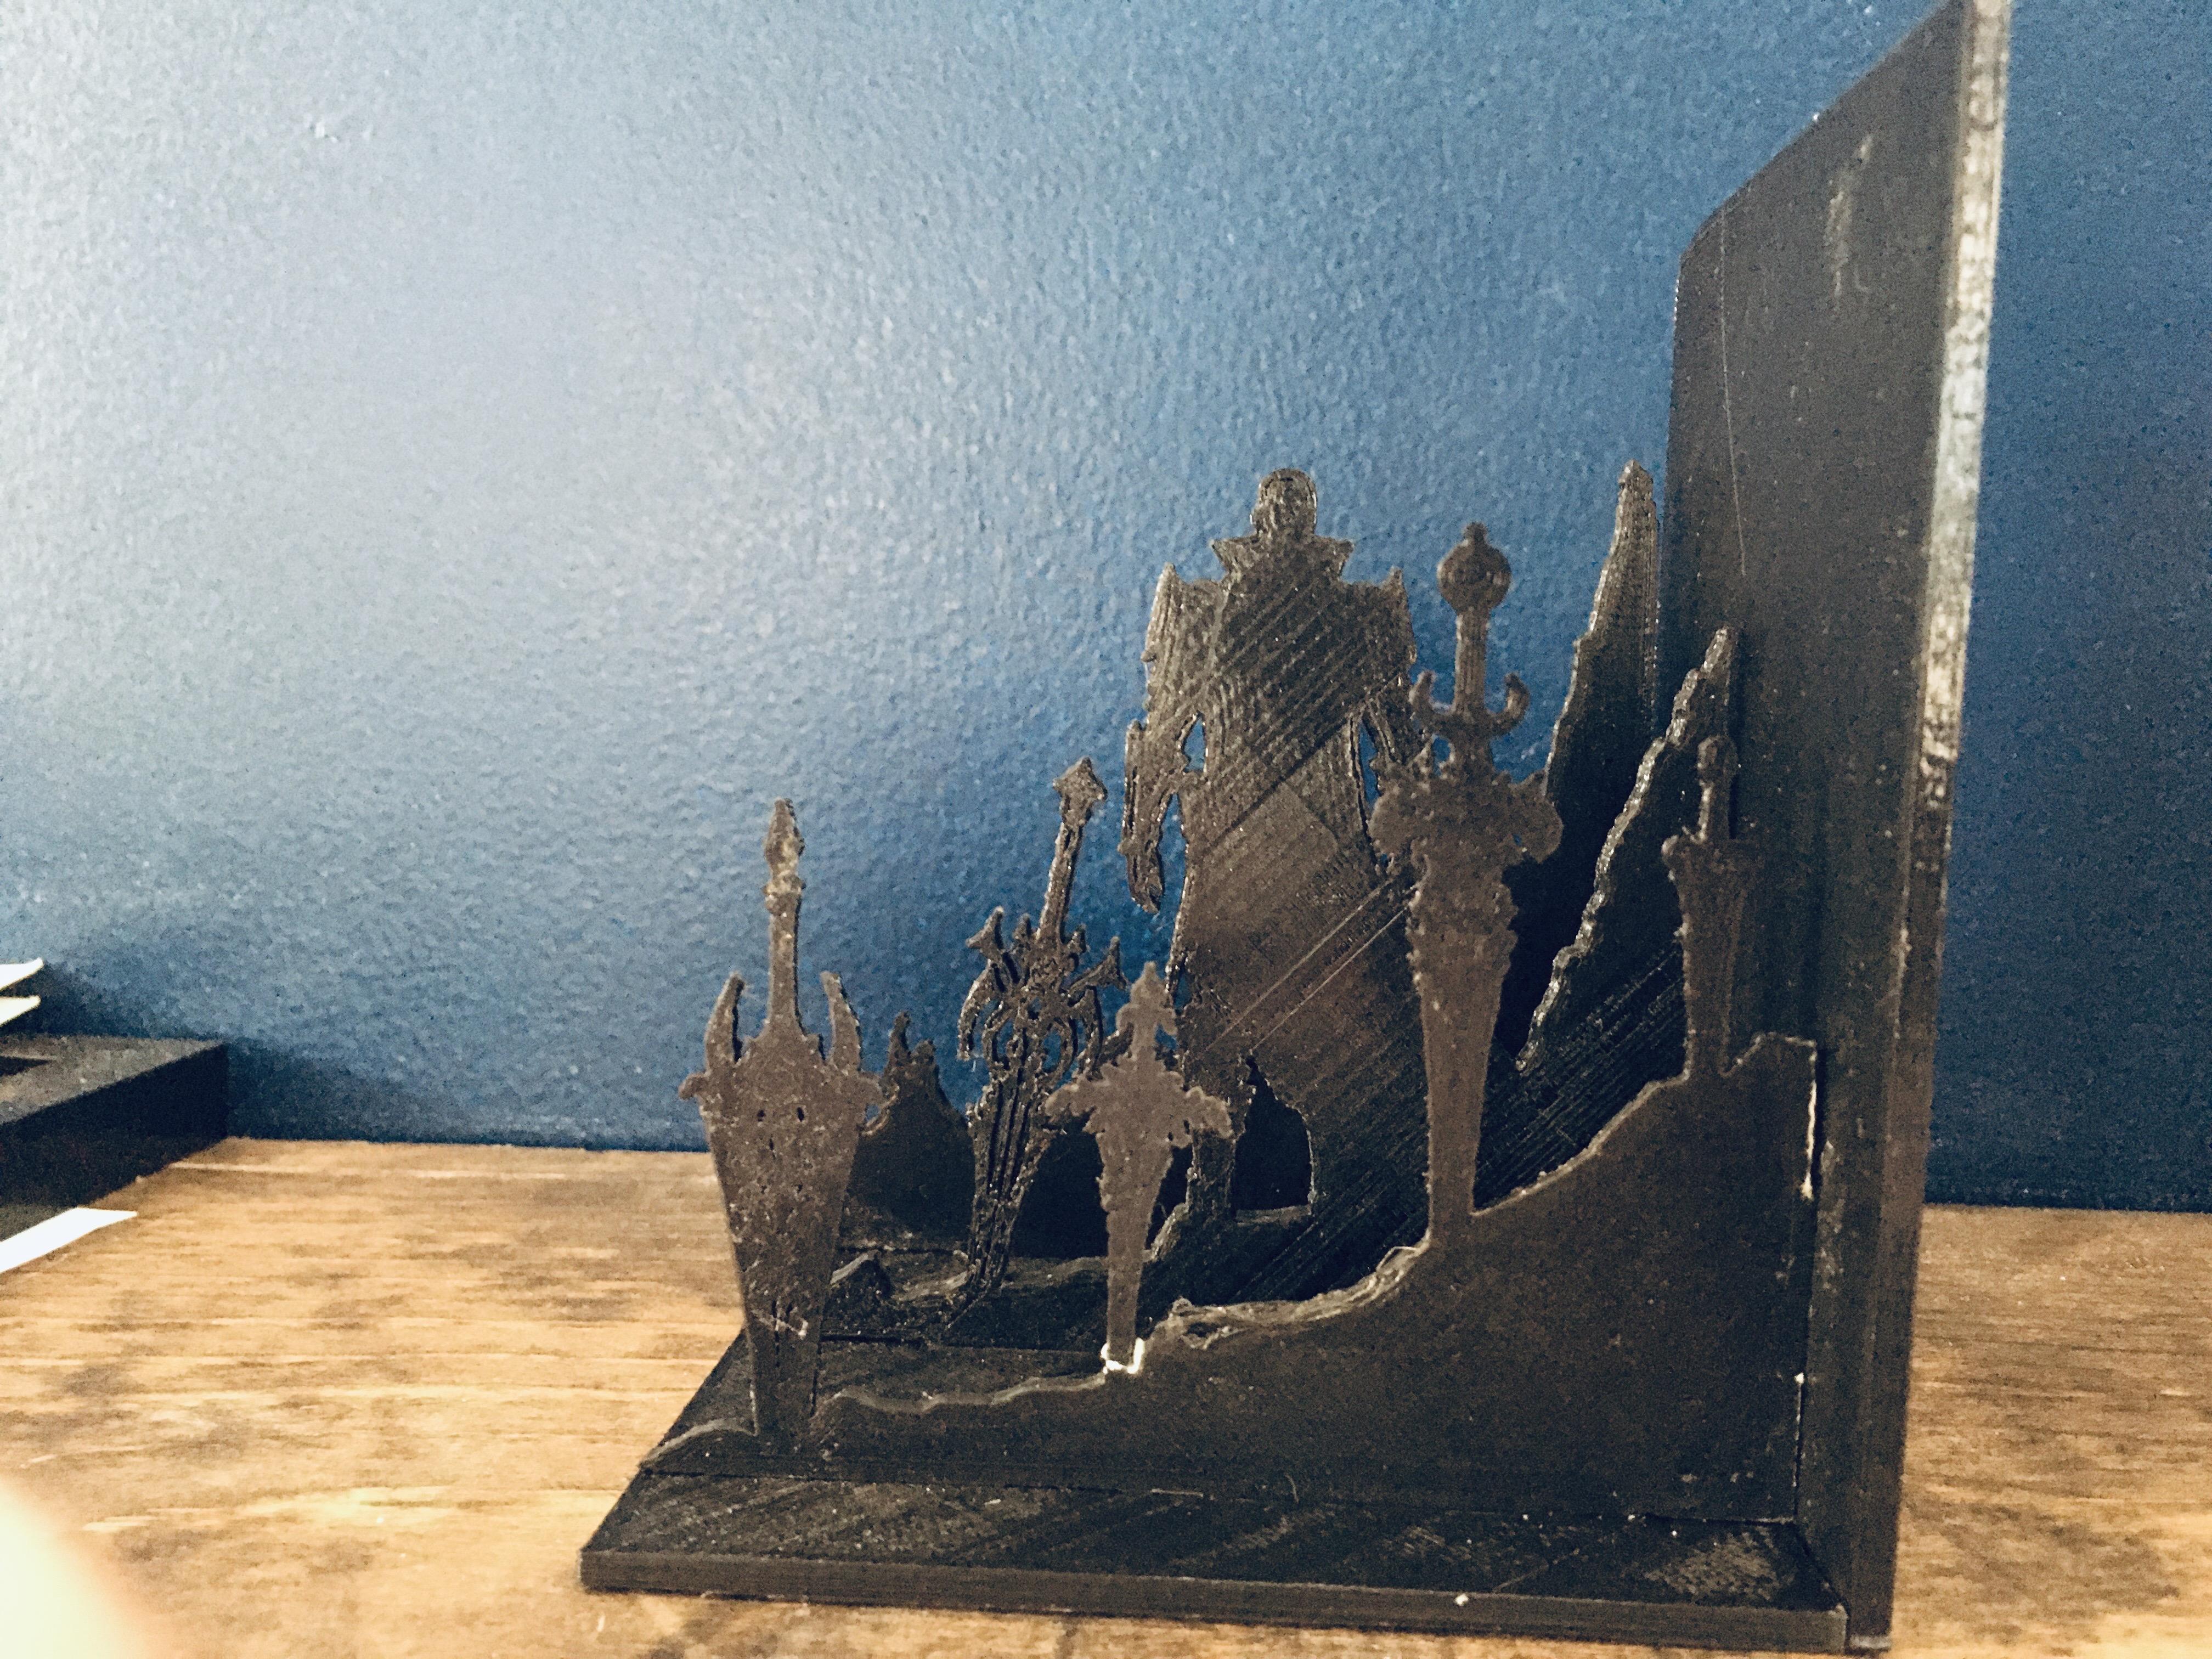
One thing that everyone should do with almost any project, is test the design and make sure it's working!
I started with a foam-based bookend, just to make sure that the design would work, but there is a bit of a downside with foam, and that is that that it shrinks and melts really quickly. Unfortunately, you can see that these prototypes took a bit of damage in transport.

I then tested with a wooden model, and it worked perfectly. It completely survived, until transport.... There are still some tweaks to be made, but I think the model is good enough for now!

The latest version was 3D printed, and I think that it turned out better than the lasered one!
I hope that you all will find this tutorial helpful! Lemme know if you try and make your own!
I think there are still things I can do to make it look even better, such as messing with making it lithographic, or even thinning the layers and making the slots longer than the tabs for easier assembly!
Just as a reminder, I have the model that I made available to download here:
Stormlight Archives Layered Bookends (Laser and 3dp Files) by Printed Script
I hope you all enjoy, and HAPPY MAKING!
Sincerely, PrintedScript