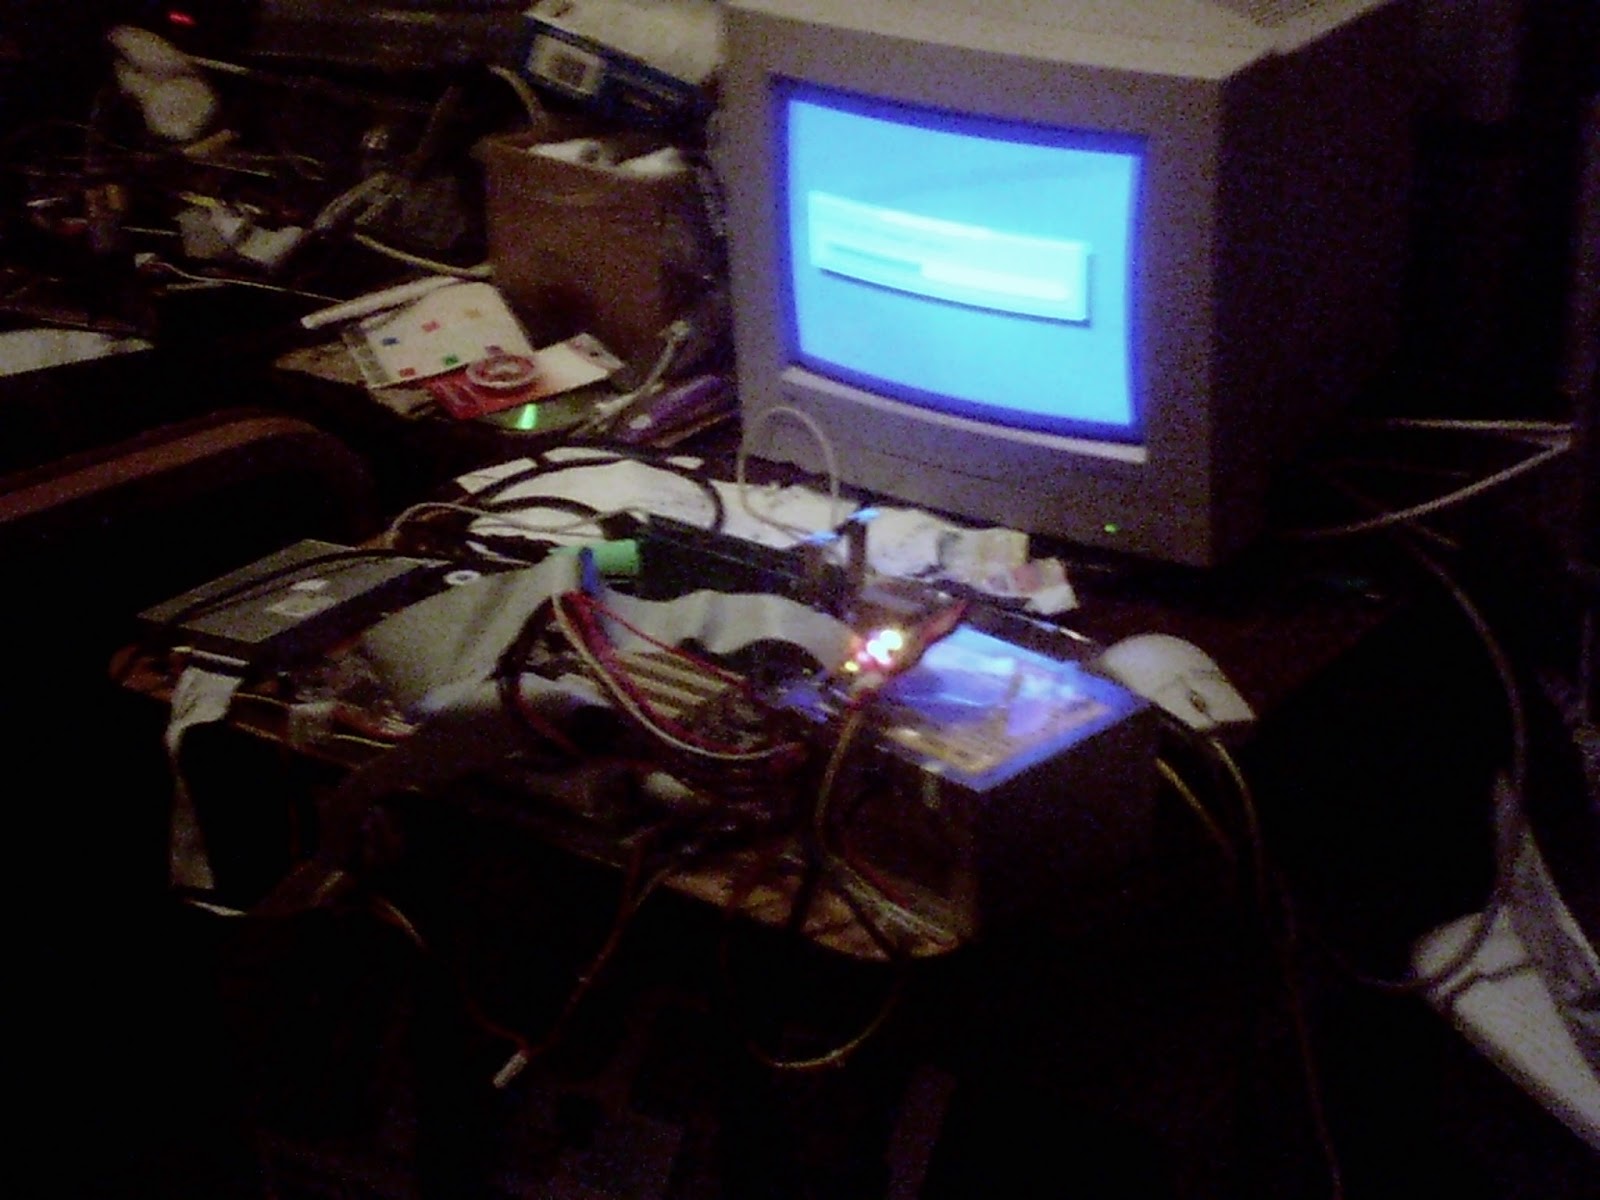
Linux Hints II

We will take several distros show web server setup including the install and then some other hints.
1 Terminals
2. Debian net install setup.
3. Debian install.
4. Fedora net install setup
5. Fedora install
6. Arch net install setup.
7. Arch install.
8. Openbsd (a linux cousin) pxeboot script
9. Slackware linux
10 Network scanner
11 Mplayer
12. Day counter
0dh, Remote music via the gui
14. Network document scanner
Old Laptops and Etc.


Old laptops and serial terminals make excellent terminals for linux,especially embedded devices. You can use Pitus floppy based linux for laptops. You can use a dos disk and hiterm software.
Debian Boot From Server


Linux Debian is kind of taking of the reigns of being one of the most popular linux distros. Like installing any operating system the traditional way, you can run into roadblocks. For example, you may not be able to burn a linux cd, the machine you want to load linux on has a broken cd/dvd rom, or a host of other reasons. What we are about to do is what is known as pxeboot networking. Another words we will use a web server to get us started with a linux install on a system. Traditionally you actually had to have several servers to do the network install. You had to modify a Dhcp (Ipaddress servers) server, a Tftp (boot files) server, and among other systems which general required a lot of setup and the blessing of the system administrator,
Tried this with the python web server, but you have to have all the files in one directory from what I could see. I just did not want to take the time to do it.
$ python -m SimpleHTTPServer
I went ahead and used the Apache2 web server. You can get portable versions of the Apache2 web server so that there is not much to install. But before I get ahead of myself, we need a way to boot the target computer to access the network.
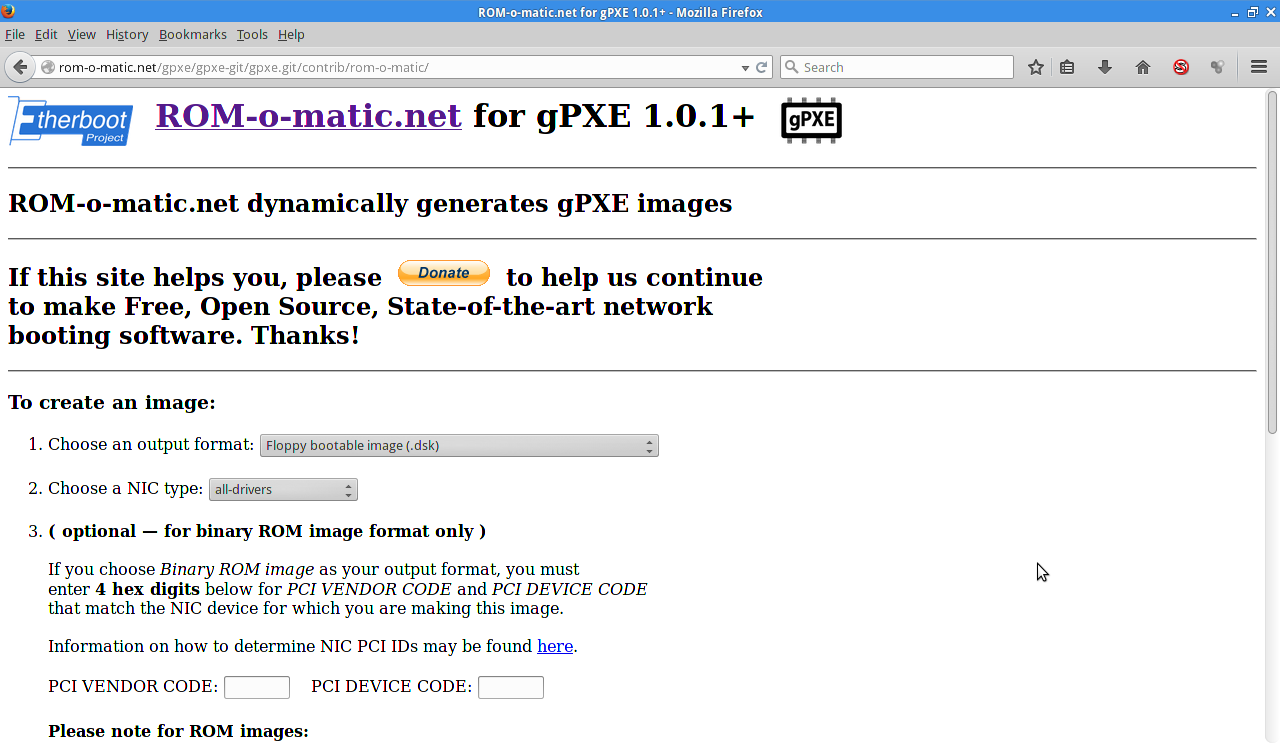
Etherboot led the way in this direction and had now graduated to Ipxe. (more information at www.etherboot.org). So we need to make a boot disk for the computer we want to install linux on. You have severaal choices. For our purposes a floppy will be used. You can also use a cd/dvd rom disk and or a very small usb stick. We need to go to www.romomatic.org to create the boot media for our system.
We chose the floppy disk. Now even though we can use the floppy disk to access the network, we need to add a short script to let the floppy know about the web server we want to use. in our case the script was for oeorgan1 using the debian in /var/www directory. The script is pretty standard so all we had to do was to change one line of the script.
#!gpxe echo Performing DHCP on first network interface dhcp net0 set 209:string pxelinux.cfg/default set 210:string http://oeorgan1/debian/ chain ${210:string}pxelinux.0
You will press the customization button to get the text box where to enter the script. If the script is ok, the you want to save it to your existing system. It is usually saved as a very long name so I use the gui to rename it to test.dsk.
Now we need to get the image written to the floppy and that is pretty easy,
$ sudo dd if=test.dsk of=/dev/fd0
Note: on newer systems it might be something like:
$ sudo dd if=gpxe-1.0.1+-gpxe.dsk of=/dev/sdb
The client machine is ready to go, so now let us look at the server. You probably want to make a special directory such as debian in your document root. /var/www/.
$ sudo mkdir debian $ cd debian
Now that we have a place to store the files we need to download them. Remember we will not have to burn a dvd. Here is where the files are, so all you have to do is download them directly to your web server,
$ sudo wget http://debian.linuxmint.com/incoming/dists/testing/main/installer- i386/current/images/netboot/netboot.tar.gz
The we need to expand the archive in the /var/www/debian directory.
$ tar zxvf netboot.tar.gz
Then you also need to get the cdrom image file for your system. In this case we are going for the i386 version,
$ wget http://ftp.nl.debian.org/debian/dists/wheezy/main/installer-i386/current/images/netboot/mini.iso
That is all you need! Make sure your apache2 web server is running though.
$ sudo service apache2 status
Apache is running (pid 12345)
Now it is time to boot up your client machine with the floppy media!
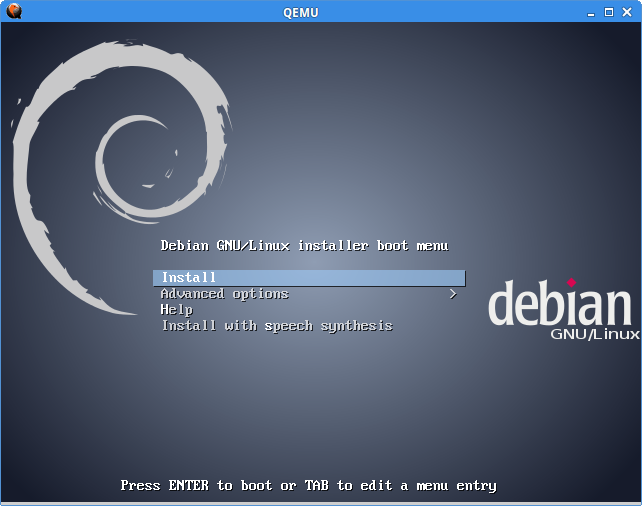
In just a few seconds you should get the install menu. Now the rest of the install should come from the internet. That is another article. We have our server set up to support several linux distros. i.e. Debian, Mint, Ubuntu, and others. Using a standard boot media, there is.no need to burn new cd's every time a new version of linux comes out. Have fun!
Even if your computer does not have a floppy drive you can get a usb floppy drive fairly cheap. Since the data on the floppy is so small, it should not take long to load even with a usb floppy drive.. For mass installs we recommend the cobbler, drbd/clonezilla, or as a last resort the Fog software. I will talk about them later. Last but not least you can also use this method to install MSWindows systems..
Debian Install.

Debian testing, currently aliased jessie at the time of this article, contains software being tested for inclusion in the next major release. The packages included in this distribution have had some testing in unstable but they may not be completely fit for release yet. It contains more modern packages than stable but older than unstable. This distribution is updated continually until it enters the “frozen” state. Security updates for testing distribution are provided by Debian testing security team.
In this article, we are going to learn to install & setup Debian Xfce “jessie” testing from scratch using netinst/minimal iso which is around 300MB in size. Note: This method of installing Debian requires a functioning internet connection during installation. Although both Ethernet and wireless connections are supported, a wired Ethernet connection is better. This method requires internet connection because only minimal packages as opposed to the full version and the other stuff has to be downloaded during installation.
Step 1: Download the ISO & make a bootable disk
Download the iso & make a bootable usb drive using software like “Unetbootin” or some other similar software that lets you copy iso files to a usb drive & make it bootable. You can find the weekly builds of all architecture & all formats in this link, http://cdimage.debian.org/cdimage/weekly-builds/. Here are the direct links to download the weekly builds of the testing iso,
- 32bit – debian-testing-i386-netinst.iso
- 64bit – debian-testing-amd64-netinst.iso
Do a server/network setup to install the debian system: http://computoman.blogspot.com/2014/10/http-based-linux-install-starter.html
Step 2: The installation from the iso
Boot from the usb drive and choose install. For older machines just use the cdrom and the cd/dvd drive. Yes don’t choose the graphical installer as we are going to use the basic installer. You can refer to the attached images at the end of the article for the step by step process of the installation. There are a total of 42 pictures so we are just going to list only the important steps during the installation.
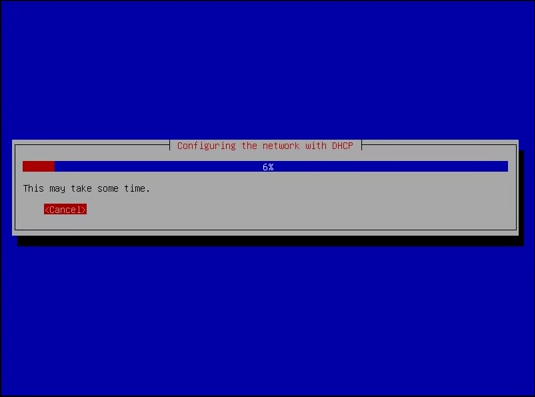
Configure Network
If you are using dhcp on your home router then the network setting will be configured automatically. If you are not using dhcp then the installer will ask you to configure the network manually. We have dhcp setup in my home router so the network settings were configured automatically by the installer.
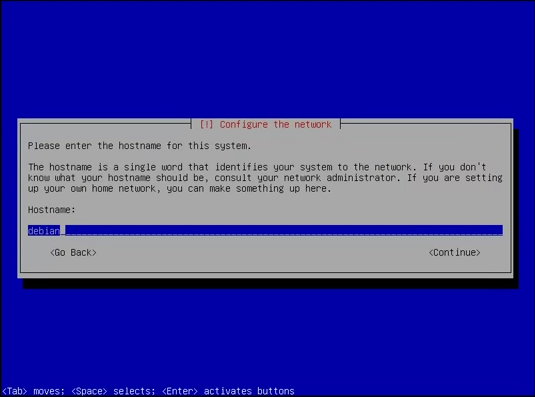
Hostname
Name that identifies the particular system on the network. You can leave debian as the hostname or choose something else. I chose myinuxbox.
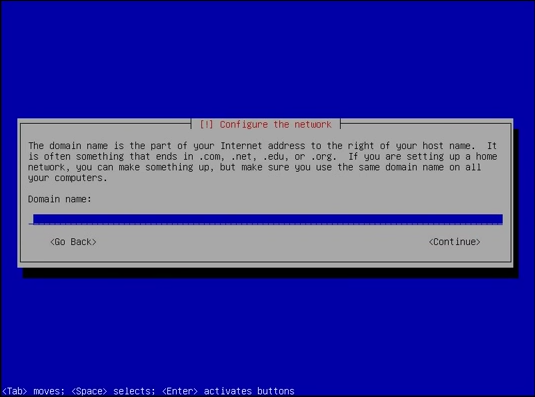
Domain Name
If you are on a particular domain, then use that. If you are not sure then you can just leave it blank. You can always go back later and name it. We left it as blank as we are not in any domain. (Note: Don’t use local as its a reserved name)
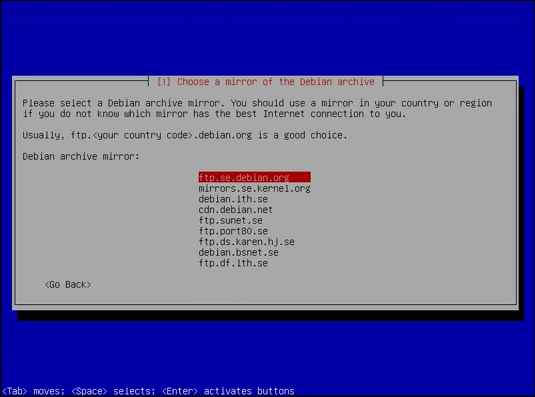
Choose Mirror
Choose the mirror country and the mirror to use to download the packages & updates from. We usually just use the defaults.
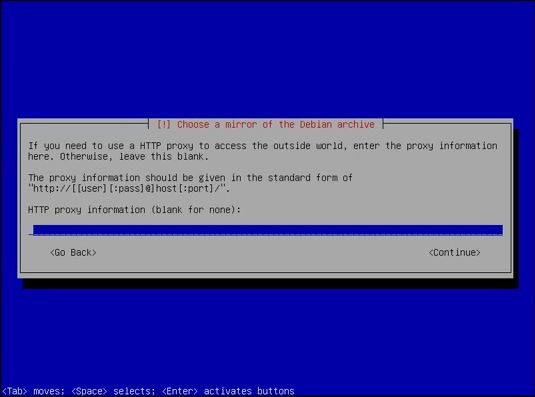
Proxy
Generally proxies are only used in a business or protected network. You network administrator can get you the details you need. If you want to configure proxy then you can do it here. If you are not going to use a proxy then leave it as blank and go to next step. We left it as blank as we are not using any proxy server.
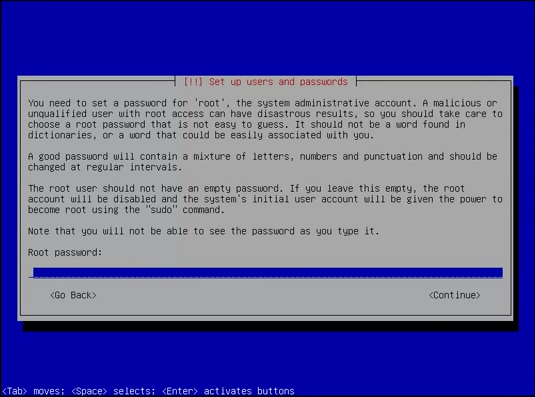
Root Password
Actually we are going to grant sudo (administrative rights) access to the user we are going to choose in the next step. So basically the root access is of much use when multiple users are using the system and you don’t want others to have sudo (aka root) access. Enter the root password and re-enter the root password.
Username & Password
Enter the username (no caps as it makes it easier to keep up with users and for you to have a simpler log in name) and the fullname of the user. Its better to choose a password different from the root password. First thing people will try to become root is to use your password if they know it.
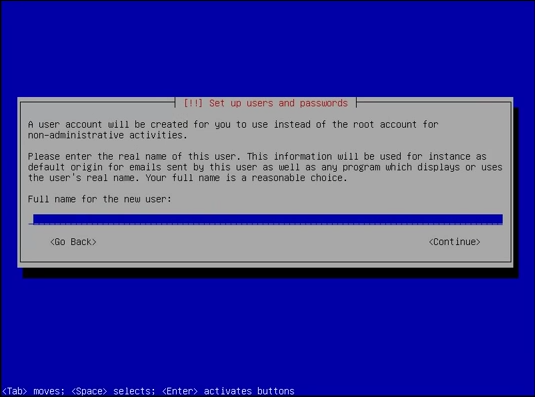
Partition Manager
We to arrange the system as you might setup a file cabinet to partition the files. The partition manager is same as the partition manager from the graphical install except for the fact that we will be configuring everything using keyboard itself. Choose one partition for the installation and another partition for swap. Ex:
- 20GB partition with ext4 filesystem with mount point as / (you can leave all other options in the default value)
- 4GB swap (usually swap size it twice the RAM size, so if the system has 2GB RAM then the swap size should be 4GB)
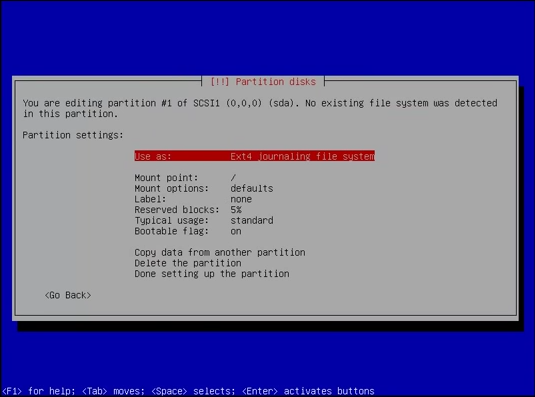
After choosing the partitions, choose “yes” to write changes to disk.
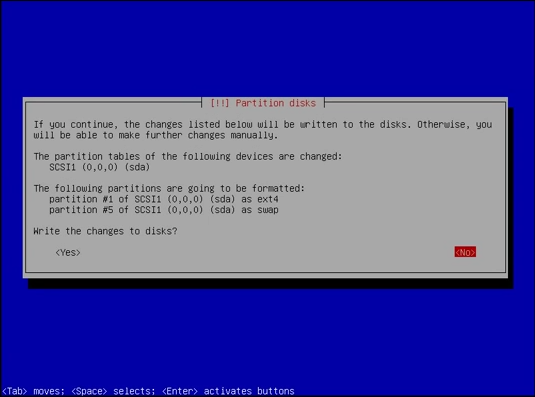
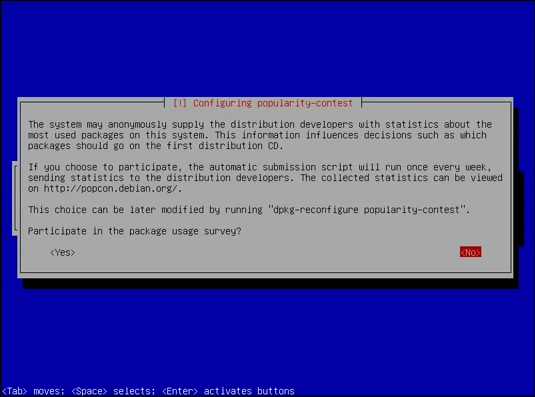
Package usage survey
If you are too much concerned about “privacy” then choose no or else choose yes. We chose NO. Basically Debian wants to know what packages are important to you.
Step 3: Software selectio
This is the most important step in this installation, so make sure to choose the “correct” options. We are going to install Xfce desktop environment later. Xfce is a less system resource hog, So deselect the “Graphical desktop environment” option and continue. You may want to select the “Laptop” option if you are using a laptop for the installation.
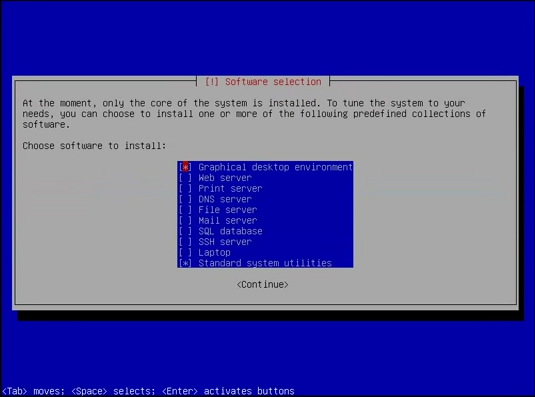
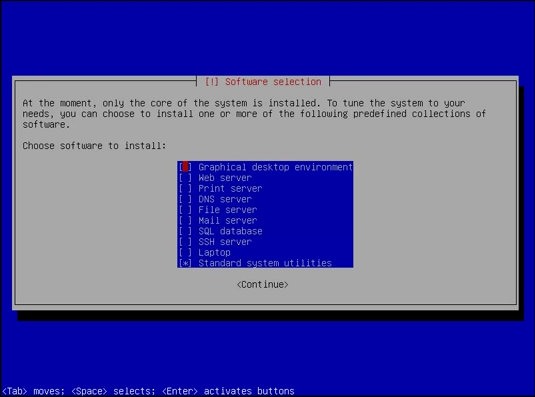
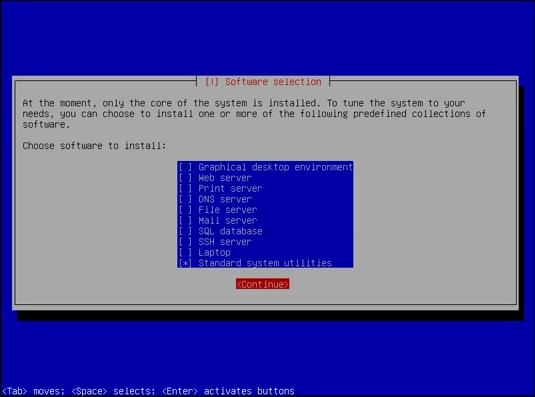
Step 4: GRUB Installation GRUB
GRUB will check if any other operating systems are already installed in the system and will list them. If the list is correct then you may proceed with the installation. Usually GRUB boot loader is installed in /dev/sda but if you have more than one HDD, then you can choose the HDD in which you want the boot loader to be installed.
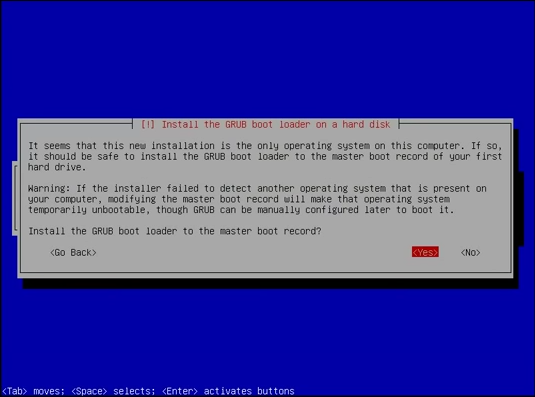
Complete the installation from the iso
Get ready to boot into your new installation after the installer reboots the system.
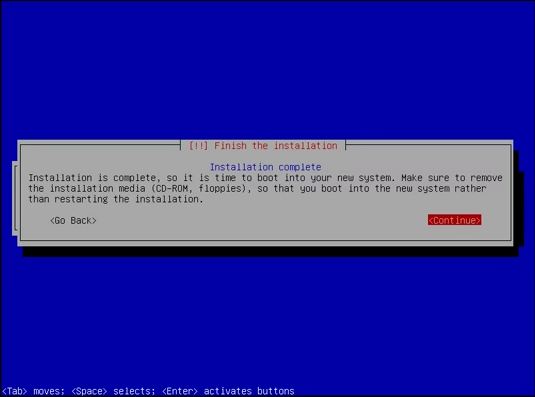
Step 5: Boot into the new installation Boot into your new Debian installation and get ready to roll… Nope, not actually. We still have few more steps to do.
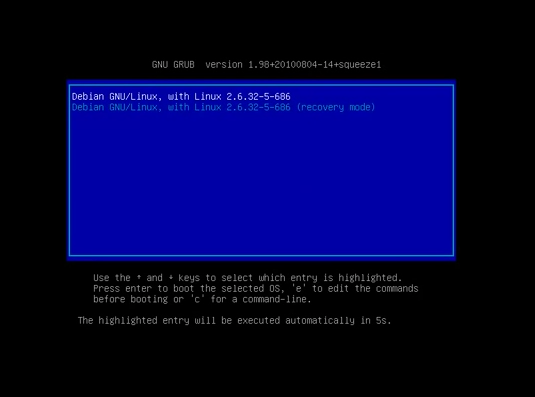
After booting into Debian, you will still be greeted with a command line because we are yet to install a display manager nor the graphical desktop environment. Enter the user login & password that you chose during the installation.
Now we have to switch to super user mode (root) and edit the resources list to testing, update and then install sudo & grant sudo rights to the user. Here are the commands,
su
Enter the root password
nano /etc/apt/sources.list
You’ll find something like
deb http://ftp.us.debian.org/debian jessie main # deb-src http://ftp.us.debian.org/debian jessie main deb http://security.debian.org/ jessie/updates main # deb-src http://security.debian.org/ jessie/updates main
Now what we are going to do is make this installation as testing forever. So even after jessie goes stable, this installation will still download packages from the next testing release which will have some other code name. Also we are going to add “contrib” & “non-free” repositories that are not 100% FOSS as per the Debian Free Software Guidelines.
- “contrib” – repositories include packages which do comply with the DFSG, but may fail other requirements. For instance, they may depend on packages which are in non-free or requires such for building them.
- “non-free” – repositories include packages which do not comply with the DFSG
Now replace “jessie” with “testing” and add “contrib non-free” after main. Save and close the file.
deb http://ftp.us.debian.org/debian testing main contrib non-free deb-src http://ftp.us.debian.org/debian testing main contrib non-free deb http://security.debian.org/ testing/updates main contrib non-free deb-src http://security.debian.org/ testing/updates main contrib non-free
If you want to use a installation that is 100% FOSS as per the Debian Free Software Guidelines then just don’t add “contrib” & “non-free”. Note: I would like to let you know that we are going to install software from the “contrib” and “non-free” repositories too.
Now lets update the system & grant sudo access to the user.
# apt-get update # apt-get install sudo # usermod -a -G sudo <username>
Replace <username> with your username to which you want to grant sudo access.
# reboot
Step 6: Update & Upgrade the new installation
Now we are going to update & upgrade the system. We are using the iso from the weekly builds, so this step should take less time. Log into your user and run the following commands.
$ sudo apt-get update $ sudo apt-get upgrade $ sudo apt-get dist-upgrade
If you get any messages, press q to exit the message and continue the installation. You may read them if you want and then press q. When you get a dialogue box asking if services can be restarted automatically during upgrade, choose “yes”.
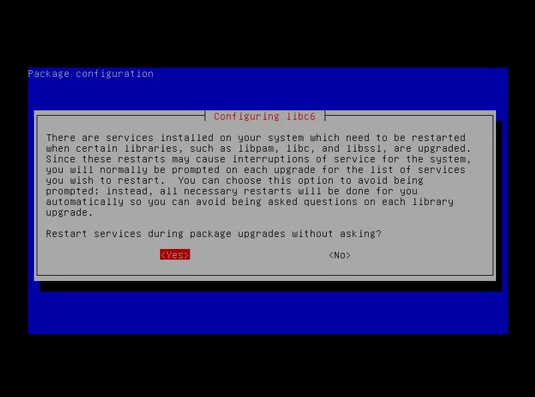
After the upgrade is complete, restart the system
$ sudo reboot
Step 7: Install the Xfce Desktop Environment
Now we are going to install Xfce & goodies by running the following command.
$ sudo apt-get install xfce4 xfce4-goodies
The “Goodies for Xfce” project includes additional software and artwork that are related to the Xfce desktop, but not part of the official release.
To view the list of packages installed by xfce4-goodies, check this link, https://packages.debian.org/jessie/xfce4-goodies.
If you want to start the HDD temp monitoring daemon during startup then you chose “yes” or else choose “no”. we chose “no”.
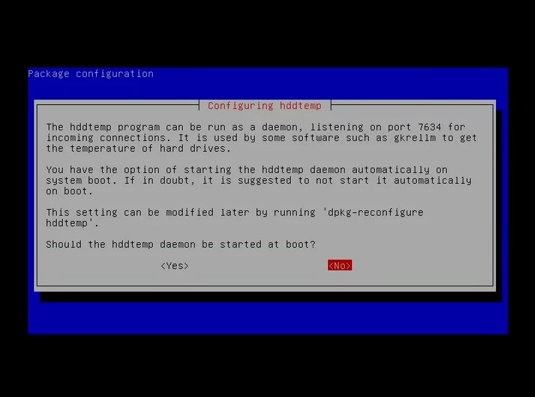
After the installation is complete, run the following command to check if the Xfce installation was successful.
$ startx
The startx command is actually a “front end” for the xinit system which will bring up the GUI (Xfce in this installation).
After running the above command you will see the Xfce desktop environment that we just installed. Now log out to get back to the command line.
Step 8: Install the Lightdm display manager
Now we are going to install lightdm display manager (i.e. the GUI in which you enter username & password) which is the recommended display manager for Xfce. You may install some other display manager as per your choice. You can find the list of display managers available in Debian in this link, https://wiki.debian.org/DisplayManager.
$ sudo apt-get install lightdm
Now we are going to install few packages,
- synaptic package manager – graphical package management tool which enables you to install, upgrade and remove software packages in a user friendly way.
- apt-xapian-index – maintenance and search tools for a Xapian index of Debian packages
- gdebi – simple tool to install deb packages
- gksu – graphical frontend for su
- menu – generates programs menu for all menu-aware applications
- iceweasel – Iceweasel is just Firefox but with a different name
Note: we like to also install vim, mc, links2, and gpm to make command line use easier.
$ sudo apt-get install synaptic apt-xapian-index gdebi gksu menu $ sudo reboot
After rebooting the system and while entering your username & password, choose “Xfce Session” from the drop down box. Now enjoy your new Debian Xfce installation.
Plus:
First lets update the sources and grant sudo access to the default user. Also we are going to add “contrib” & “non-free” repositories that are not 100% FOSS as per the Debian Free Software Guidelines.
- “contrib” – repositories include packages which do comply with the DFSG, but may fail other requirements. For instance, they may depend on packages which are in non-free or requires such for building them.
- “non-free” – repositories include packages which do not comply with the DFSG
If you want to use a installation that is 100% FOSS as per the Debian Free Software Guidelines then just don’t add “contrib” & “non-free”. Note: I would like to let you know that we are going to install software from the “contrib” and “non-free” repositories too.
Now lets begin. Open terminal & run the following commands,
$ su
Enter the root password
GUI to manage network connections :
We have 2 choices here,
- wicd – If you are going to use only wired & wireless wifi network connections.
- network-manager-gnome – If you are going to use VPN or mobile broadband in addition to wired & wireless wifi network connections.
I installed wicd in my system just to check its performance and I can say that its much smooth & stable than the default network-manager. I could see the difference immediately in iceweasel, pages were loading faster and smoother than before wicd was installed. Initially I installed wicd just for the sake of testing it so that I could add the steps in this guide but after experiencing the network smoothness, I decided to stick with wicd and purge network-manager.
Network-manager-gnome
If you want to use VPN or mobile internet then can’t use wicd and have to settle with the default network manager. To install the frontend gui for network manager, run the following command sudo apt-get install network-manager-gnome You can refer the Debian wiki, https://wiki.debian.org/WiFi/HowToUse, for information on setting up wifi.
Extra screensavers: (Optional)
If you are a fan of the matrix screensaver like me, then you might want to install it.
$ sudo apt-get install xscreensaver-gl
That is all for now.
Fedora Net Install.


Been spending time looking at booting systems to the net to install
linux operating systems. So far we have looked at Arch and Debian based systems. Both Fedora and Centos have pre-made iso's for network install.
Centos:
http://www.centos.org/download/
Fedora:
http://fedoraproject.org/en/get-fedora
But if you want to roll your own, here are some scripts to look at:
Fedora
#!ipxe
dhcp any
# Set source URI
set mirror http://download.fedoraproject.org/pub/fedora/linux/releases/20
# Detect CPU architecture and calculate repository URI
set arch i386
set repo ${mirror}/Fedora/${arch}/os
# Start installer
kernel ${repo}/images/pxeboot/vmlinuz initrd=initrd.img repo=${repo}
initrd ${repo}/images/pxeboot/initrd.img
boot
or
#!ipxe
dhcp any
# Set source URI
set mirror http://download.fedoraproject.org/pub/fedora/linux/releases/18
# Detect CPU architecture and calculate repository URI
cpuid --ext 29 && set arch x86_64 || set arch i386
set repo ${mirror}/Fedora/${arch}/os
# Start installer
kernel ${repo}/images/pxeboot/vmlinuz initrd=initrd.img repo=${repo}
initrd ${repo}/images/pxeboot/initrd.img
boot
or older releases
#!ipxe
dhcp any
# Set source URI
set mirror http://archives.fedoraproject.org/pub/archive/fedora/linux/releases/14
# Detect CPU architecture and calculate repository URI
set arch i386
set repo ${mirror}/Fedora/${arch}/os
# Start installer
kernel ${repo}/images/pxeboot/vmlinuz initrd=initrd.img repo=${repo}
initrd ${repo}/images/pxeboot/initrd.img
boot
----------------------------------------------
Centos
dhcp any
set base http://mirror.centos.org/centos/6/os/x86_64
kernel ${base}/images/pxeboot/vmlinuz stage2=${base}/images/install.img ksdevice=${netX/mac}
initrd ${base}/images/pxeboot/initrd.img
boot
=================================
Our local server ipxe script
#!ipxe
dhcp any
set base http://oeorgan1/distro/centos
kernel ${base}/pxeboot/vmlinuz stage2=${base}/install.img ksdevice=${netX/mac}
initrd ${base}/pxeboot/initrd.img
boot
Files for local server needed:
${base}/
boot.iso
install.img
${base}/pxeboot/
initrd.img
vmlinuz
Posted by
Edward
at
7:24 PM
No comments:
Fedora Install

This is guide for users with previous Fedora experience using screenshots, how to install Fedora 20 “Heisenbug” (F20) using Live CD or Live USB. Fedora 20 “Heisenbug” Installation can be done also with using Fedora NetInstall (Net Install) with gPXE and BFO (boot.fedoraproject.org). Also see http://computoman.blogspot.com/2014/10/fedoracentos-ipxe-bootscripts.html and www.romomatic.org
Note: now Fedora 21 is the latest version.
1. Before Fedora 20 “Heisenbug” Installation
1.1 Download Fedora 20 LiveCD Image
https://fedoraproject.org/get-fedora
Select your favorite Live CD (Gnome, KDE, LXDE, XFCE) and architecture i686 or x86_64. On this guide I use Fedora 20 Gnome Live CD and 64-bit version. 1.2 Burn Fedora 20 Image to CD/DVD or Create Live USB and Boot Computer
Using Fedora 20 Installation Media
Remember to check Fedora 20 image MD5 sum and then burn image to CD with your favorite CD burner or create LiveUSB example with https://fedoraproject.org/wiki/How_to_create_and_use_Live_USB. And boot computer using Fedora 20 Installation Media.
2. Fedora 20 “Heisenbug” Installation
Install
2.1 Fedora 20 Boot Option Menu
2.2 Fedora 20 “Heisenbug” Live Media Booting
2.3 Start Fedora 20 Installation Click Install to Hard Drive
2.4 Select Language
2.5 Fedora 20 Installation Summary Window
2.6 Setup Date and Time
2.7 Setup Keyboard Layout
2.8 Set Hostname
2.9 Select Installation Destination
2.10 Full Disk Summary
2.11 Select Partition Type
This guide uses manual way.
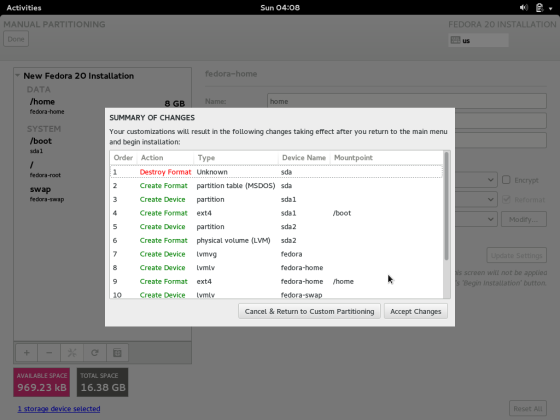
2.12 Modify partitions manually
2.13 Accept Changes
2.14 Begin installation
2.16 Setup root Password
When installation start select “Root Password” and set good and secure password for root user.
2.17 Create User Account
Fedora 20 User Account Advanced Options Screen.
2.18 Fedora 20 Installation Done
Then simply reboot computer and remove installation media.
3. Finishing Fedora 20 “Heisenbug” Installation
Finishing
3.1 Fedora 20 Boot Menu (Grub 2)
3.2 Booting Fedora 20
3.3 Fedora 20 “Heisenbug” GDM Login Window
3.4 Fedora 20 Gnome 3.10 Welcome Screen
3.5 Select Input Sources
3.6 Add Cloud Account (not required)
3.7 Start Using Gnome 3.10
3.8 Fedora 20 “Heisenbug” Desktop Screenshots
Gnome Shell 3.10.2 plain
Gnome 3.10.2 Details
Arch Linux Net Install

Arch Linux Netboot Live System
The Arch Linux netboot environment allows booting Arch Linux live media directly over the network. It will boot into a menu where you can choose from a list of available mirrors. The image will be downloaded into memory.
Requirements: A computer that connects to the internet via LAN and DHCP.
If your ethernet NIC is not supported by iPXE, you must use your NIC's netboot capabilities. This is only possible if you select "Boot from network" in the BIOS and configure your DHCP server to load the PXE image provided below. In this case, the UNDI driver will be used for downloads until Linux is booted. The first stage of the download can be extremely slow.
Test netboot with qemu
Download an iPXE kernel image.
ipxe.lkrn Graphical Menuipxe_text.lkrn Text Menu Run qemu with the kernel image:
qemu -m 1G -kernel ipxe.lkrn
Boot with any Linux bootloader
Download an iPXE kernel image to /boot.
ipxe.lkrn Graphical Menuipxe_text.lkrn Text Menu Add the image to your bootloader configuration:
GRUB 2:
menuentry 'Arch Linux Netboot Environment' { set root='(hd0,1)' linux16 /ipxe.lkrn } Syslinux:
LABEL archnetboot MENU LABEL Arch Linux Netboot Environment KERNEL /ipxe.lkrn GRUB Legacy:
title Arch Linux Netboot Environment kernel (hd0,0)/ipxe.lkrn
Boot from USB
Install a bootloader (e.g. GRUB or syslinux) onto the USB drive and use the .lkrn file as described above.
Boot from Floppy
Download an iPXE floppy image.
ipxe.dsk Graphical Menuipxe_text.dsk Text Menu Write the image to your floppy:
dd if=ipxe.dsk of=/dev/fd0
Boot from CD
Download an iPXE ISO image and write it to a CD.
ipxe.iso Graphical Menuipxe_text.iso Text Menu
Boot from the network (from the Arch documentation)
There are two ways to do this:
Using an iPXE image
Download an iPXE PXE image into your TFTP root.
ipxe.pxe Graphical Menuipxe_text.pxe Text Menu Set the PXE filename to ipxe.pxe (using the filename option in dhcpd or the -M option in dnsmasq).
This method is recommended, as it will always work - if iPXE lacks a native NIC driver, the UNDI driver will be used.
Flashing your boot ROM
You can build a custom iPXE images and flash it to your boot ROM. You must include one of the following iPXE scripts:
arch.ipxe Graphical Menuarch_text.ipxe Text Menu If you do this, your computer will always boot the Arch netboot environment when you netboot your computer.
Arch Install

1. Get Arch Linux.
2. Download Arch installation media. The primary forms are image files for CD or USB Key available on the Arch Linux website. Go to the Arch Linux website and select a version. If you are unsure which form to download, select the Core ISO appropriate to your processor architecture (e.g. i686 or x86)
3. Burn the image to CD using your preferred CD recording software or, in Windows XP, by right clicking on the .iso file and selecting “Copy Image to CD”. Alternately, if you downloaded the USB Key version, use the Bash command: dd if=path-to-iso of=/dev/sdX.[1] Alternatively you may use other software to image the USB drive.
4. Insert the prepared device into the computer you are installing Arch on and restart the computer. The computer should start up into a menu system similar to the one shown below.
5. Select “Boot Arch Live” and wait for the system to auto-detect your devices and start up. When it is finished, you will be running Arch Linux live from the installation media.
6. Log in as root by typing root at the login prompt. It does not require a password.
7. Run the installation script by entering /arch/setup. The menu based process is designed for ease of use, and will give useful feedback.
8. Use the arrow keys to highlight "Select Source" and press enter. If you chose the core installation media select “CD-ROM or OTHER SOURCE”. Select OK at the prompt. You will then be returned to the main menu.
9. Select "Set Clock". Choose the appropriate timezone and then select set time and date and choose the appropriate time format. Confirm that the time is correct and select return.
10. Select “Prepare Hard Drive” and select the appropriate options. If you are installing Arch on a clean system or do not intend to dual boot with another preexisting operating system, simply select “Auto Prepare.” If you would like to partition the drive manually select the appropriate option. Make sure to check documentation on partitioning and formatting Linux drives.
11. Enter “Select Packages” and look through the packages available, pressing space to select the highlighted package and enter to finish selection. The base system will always be installed; for a minimal system, select no packages. For a system with additional basic tools, select the base-devel package category, or go through the packages and select those you want individually.
12. Enter “Install Packages” and wait while the script installs your operating system. This may take a while.
0dh. Enter “Configure System” and go through the options. If you do not know which to select, choose the default option. When you reach the screen labelled “Configuration” with files listed, go through each if you wish to check or change the default contents of your config files. Make sure you set a root password that you will remember, you will need it to administer your system. Beginner users can leave the rest of the configuration files alone.
14. Select “Install Bootloader” and choose your bootloader. If you are unsure which to select, choose GRUB. At this point, you will be prompted to examine your bootloader configuration file. If you are not dual booting, you will not need to make changes. If you have a Windows operating system installed, ensure the Windows entry in the file is not commented out by removing the "#" signs in front of each line. If you want Windows to be the default, make sure you change the default line. When prompted to select the boot device to install the bootloader, select the entry without a number at the end, such as /dev/sda.
15. Exit the installer and type “reboot” to restart your system. Wait for your computer to boot into your new Arch Linux operating system. Login as root with the password you entered and enjoy your new system.
Openbsd: a Cousin of Linux.


Note I kept the pxeboot scripts if you would still like to use them Also uploaded the floppy image install. whuch does not require a web server to install the os.
Open BSD is a Unix-like computer operating system descended from Berkeley Software Distribution (BSD), a Research Unix derivative developed at the University of California, Berkeley. It was forked from NetBSD by project leader Theo de Raadt
in late 1995. As well as the operating system, the OpenBSD Project has produced portable versions of numerous subsystems, most notably PF, OpenSSH and OpenNTPD, which are very widely available as packages in other operating systems.
The one thing I like about Openbsd is that you can use it with a variety of hardware. Normally you want to standardize the hardware you use, but on a pinch, you can use alternative hardware. This is also fortunate for people with a limited budget can use older systems to be able to compute. Now Openbsd is being made available for the new microcontrollers. which brings about other exciting opportunities. Shown above is possibly Openbsd 5.2. Notice you can have a graphical user interface aka (gui) so you are not forced to use the traditional text only interface that most people think is cryptic and hard to use. Though you can can use that type of interface if you prefer.
Actually I prefer to use the textual interface for a lot of tasks as it s easier to automate a lot of duties. The above picture is of a fresh install onto a virtual machine. Sort of a computer within a computer. Openbsd like most computer operating systems has regular upgrades in addition to the usual updates. Version 5.7 I think is the latest version. Openbsd is free as in speech. You can download it and install without paying a price at the door so to speak.
www.openbsd.org is the main site. To install Openbsd, you really need a live internet connection. Generally you will start with some minimal software to load and go from there. This last install was actually started with just a floppy disk so speak. No licensing codes or a set of a zillion disks to deal with. You will need a system with a free disk drive for installation and a working network card.
If you wanted to try out Openbsd without devoting a system to it you could set up a virtual machine.
Set up the virtual hard drive of 5 gigabytes
$ qemu-img create openbsd.qcow 5G
You will need to download a boot image. you can get it in several formats including a cdrom, I decide to use a floppy disk image as it is only a could of megabytes and not gigabytes. Start the install.
$ qemu -fda ~/Downloads/floppy57.fs -hda openbsd .qcow -boot d -net nic -net user -m 196 -localtime
More details about the installation can be found at http://www.openbsd.org/faq/faq4.html. For the most part I just used the defaults.
Once you have finished the install the floppy is not needed anymore so you can eliminate it from the setup.
$ qemu -hda openbsd.qcow -boot d -net nic -net user -m 196 -localtime
exit
Once you have done the installation, you can add lots of productivity software depending on the amount of free disk space you have. By the way a web server is built in traditionally. We plan to outfit some old existing Pentium I computers for use in a school saving the school many dollars in computer hardware costs.
Let's update it. I linux you have a sources.list file. with bsd perse you have to set a parth to the packages the first time
# export PKG_PATH=”http://mirror.esc7.net/pub/OpenBSD/$(uname -r)/packages/$(arch -s)/”
Will take into account the version of bsd and the hardware platform you using.
# Now the upgrade:
# pkg_add -uvi
There should not be any updates if you have just done a fresh install.
Now for packages. Screen is a very useful program especially if you use the command line a lot.
#pkg_add -i screen
Will allow you to install screen interactively.
For more information see: http://www.openbsd.org/faq/faq15.html#PkgInstall
Note to load Openbsd on a live machine. For example you may want to do a floppy install install. You will needto create the media.
First check to see which device os the floppy. You would hate to wipe a hard drive.
$ sudo fdisk -l
Then you can create the boot disk with:
$ sudo dd if=floppy57.fs of= /dev/sdc
$ sync; sync
Then you should be able to remove the disk. Go to then instendedn machine and start the install.
Slackware.


What operating system do you put on a legacy Pentium one computer. Let's see Mac os/x will not work. None of the latest Microsoft offerings of 8, 9, or 10 will work. Most linux major linux versions need at least a Pentium II. Enter Slackware 14. You can install it on a Pentium I thereby keeping lots of older computers viable a while longer. They would be good starter computers as a stop gap to keep a IT budget in line. One thing that should mentioned is Slackware can go on a variety of systems including the Raspberry Pi and is definitely not limited to older systems.
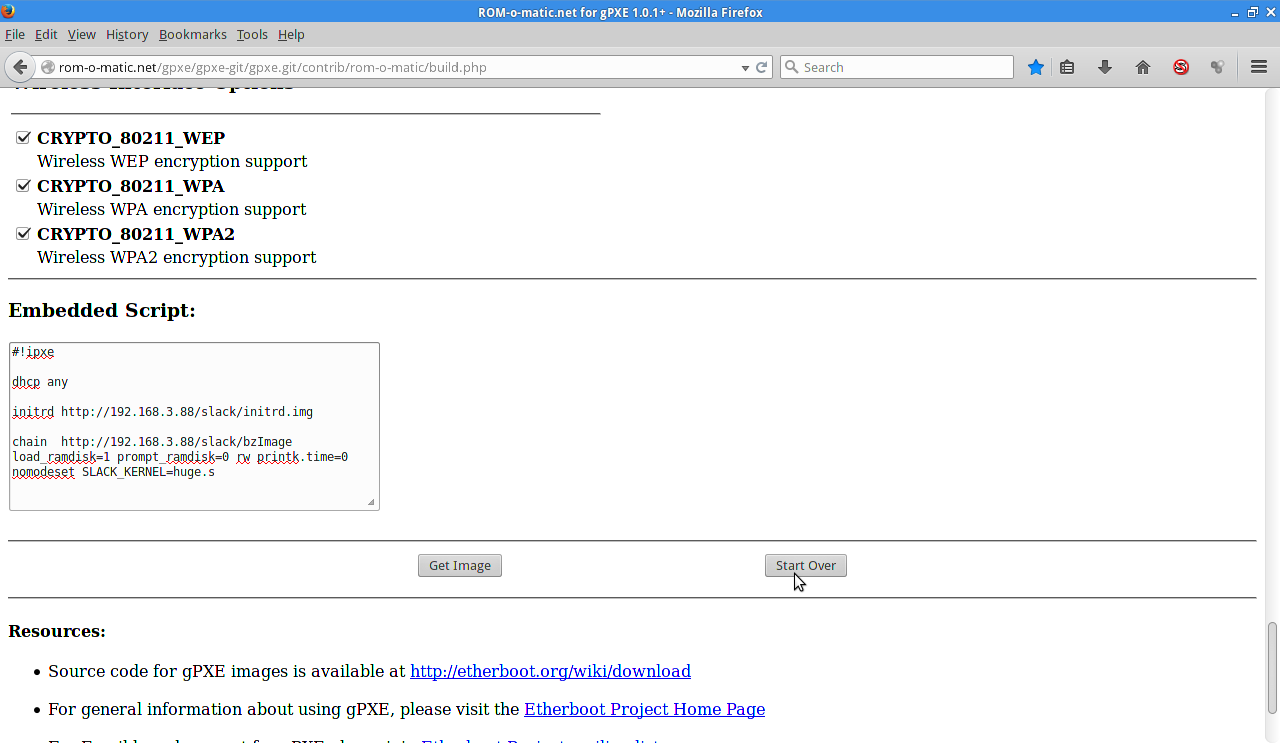
Traditionally to install an operating system, you need a cd/dvdrom or a boatload of floppy disks and a hard disk for the operating system to be installed on for each system. We used a compact flash with an ide to compact flash adaptor for the hard drive. We also wanted to avoid all the making of media, though we did need to make a minimal floppy disk to get the install started. On floppy could be used for multiple machines in a layered install process. What floppy disk do we need? We need first to make a pre-execution environment boot disk . Pxeboot disk for short. The we just need a simple web server to make a couple of files available on the network. To make the floppy disk, you will need to go to romomatic.net
You will want to customize the image by putting in the details for the server that will hold the special files. That means you need to download initrd.img and bzImage from ftp://ftp.slackware.com/pub/slackware.slackware-14.1 and copy them to the slack directory on the server. The ip address should be the actual ipaddress of your web server that is going to host the files.
#!ipxe dhcp any initrd http://192.168.3.88/slack/initrd.img chain http://192.168.3.88/slack/bzImage load_ramdisk=1 prompt_ramdisk=0 rw printk.time=0 nomodeset SLACK_KERNEL=huge.s
Then you need to start the install. (More information at: http://docs.slackware.com/slackware:install)
For the source you will want to use install from ftp/http server usually option 4. That saves having to make a lot of install cd's.
Server:
ftp://ftp.slackware.com
Directory /pub/slackware.slackware-14.1
If you have you have used linux before the rest should be pretty straight forward. For our installation, when the software started downloading, I hit the sack and planned to finish the install when I woke up. The system was waiting there for me to add the last finishing touches to the install and fairly quickly we were up and running linux on a Pentium 1 without any per se Microsoft products!. Also see http://docs.slackware.com/slackware:install for some post install suggestions. Have fun!
Simple Network Scanner.

Our goal here to see what is live on the network and how possibly
vunerable those machines are. Might be interesting to use with a wifi network.
First lets get the live systems at the moment. You will need to change your code depending on your network,
alive.sh
[code]
#!/bin/bash
rm goodips
is_alive_ping()
{
ping -c 1 $1 > /dev/null
[ $? -eq 0 ] && echo $i >> goodips
}
for i in 192.168.1.{1..255}
do
is_alive_ping $i & disown
done
[/code]
Generated goodips file:
192.168.1.1
192.168.1.32
192.168.1.99
192.168.1.126
Then we can run a sort of network scanner.
scannet.sh
[code]
datafile="goodips"
a=1
m="not done"
while read line
do fdata[$a]=$line
echo $line
let a=a+1
for p in {1..1023};
do
(echo >/dev/tcp/$line/$p) >/dev/null 2>&1 && echo "$p open"
done
done < $datafile
[/code]
Then we can run the bash file to see what is open. (You could also save it to a file.)
192.168.1.1
23 open
53 open
80 open
192.168.1.32
22 open
80 open
110 open
111 open
143 open
443 open
993 open
995 open
92.168.1.99
21 open
80 open
139 open
515 open
192.168.1.126
22 open
25 open
80 open
139 open
445 open
A Bit of Mplayer


Thinking about getting a stereo for the office area, but really did
not want to spend any money if I could use an old pc.Love to play free open source royalty free music. If you think about it, the footprint of a stereo is edflike a pc but without the monitor. Maybe I could just use an old Linux box to get the job one.
Then I thought would it be nice if I could lt the pc stereo stand alone and then access it from a remote machine. Something linux can do very easily using the ssh environment. Installed a switch and ran the cables from the desk top to the music server. You could also do this via wifi, but that can be a security issue.
Once you have everything set up, you will want to move your music files and then organize your music in some way before starting the shell command.
so $ ssh oeorgan1
$ sudo apt-get install mplayer
Execute the shell command to play all the sonegs in the subdirectories from the main subdirectory. Note: if you know how to use the screen command, you can enhance your control a lot easier.
eddie@oeorgan1:/var/media/music$ mplayer -really-quiet -playlist <(find $PWD -type f)
Then you can use various keyboard commands to control the music. The ones I use most are:
> next song < previous song p pause r continue c stop
Here are two keyboard formats that might be of interest.
Like Alton Brown of "Good eats" fame, he detests single use appliances, Since computers are good at doing more than one thing, you take your pc stereo system and add web, mail, file and a host of other programs to make the systems more versatile. Let us see whether your gardent variety stereo can do that.
Days Till a Certain Date.

Just an experiment of how many days between two dates.
[code]
#!/bin/bash
D=`date +%Y-%m- %d`
D1=`date +%s -d "$D"`
D2=`date +%s -d "2017-01-20"`
((diff_sec=D2-D1)) echo - | awk -v SECS=$diff_sec '{printf "Number of days : %d",SECS/(60*60*24)}'
echo " till Obama leaves office."
[/code]
Results:
$ ./datediff.sh
Number of days : 655 till Obama leaves office.
$
Remote Music Via the Gui.


Now let us take a look a remote music controller called mpd. With
mplayer we could do everything from the command line, mpw we should be able to use the gui on the remote machine. We will not need to use ssh here either.
You will want to set up your host machines with speakers as before. Then we need to add a new piece of software called mpd. It is available for a wide variety of systems including Android.
$ sudo apt-get install mpd.
Server does not have to have gui installed. Copy your music files to the server if they are not already there. Then you will want go edit the config file for you file settings and etc.
$ sudo vim /etc/mpd.conf
Once you have that done, you will need to go to the client machine and install the following:
$ sudo apt-get install mpc gmpc
Then go to the gui menu for the sound and video. Choose the gnome-music-player-client. Everything is gui from there. You will need to set the servername and the port number (usually 6600). In many cases it will autodetect it for you.
Start playing music from the server.
Note: this could be a perfect project for a Raspberry Pi running Raspian as a host.
Network Document Scanner.

Setting up a network scanner:
Here are the steps to installing and accessing a network scanner from Ubuntu desktop client. It is assumed that the network scanner server is already up and running.
1) Let us first check whether there is a scanner available on our Ubuntu client host. Without any prior setup, you will see the message saying that "No scanners were identified."
$ scanimage -L
2) Now we need to enable saned daemon which comes pre-installed on Ubuntu desktop. To enable it, we need to edit the /etc/default/saned file, and set the RUN variable to yes:
$ sudo vim /etc/default/saned
Setting up a network scanner:
Here are the steps to installing and accessing a network scanner from Ubuntu desktop client. It is assumed that the network scanner server is already up and running.
1) Let us first check whether there is a scanner available on our Ubuntu client host. Without any prior setup, you will see the message saying that "No scanners were identified."
$ scanimage -L
2) Now we need to enable saned daemon which comes pre-installed on Ubuntu desktop. To enable it, we need to edit the /etc/default/saned file, and set the RUN variable to yes:
# Set to yes to start saned
RUN=yes
3) Let's edit the /etc/sane.d/net.conf file, and add the IP address of the server where the scanner is installed:
4) Restart saned:
$ sudo service saned restart
5) Let's see if the scanner is available now:
Now we can open "Simple Scan" (or other scanning utility) and start scanning documents. We can rotate, crop, and save the resulting image:
Note: most generic print servers do not support this feature.


