Lightsaber VFX (Rotoscoping in Blender)
by SaberCPP in Design > Digital Graphics
1525 Views, 2 Favorites, 0 Comments
Lightsaber VFX (Rotoscoping in Blender)
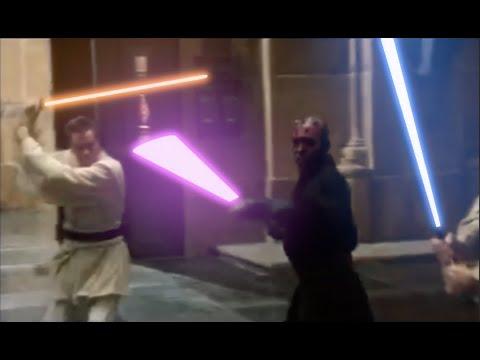
Today we're going to create lightsaber effects using Blender. The lightsabers can be simple props or sticks, we'll make them glow. Make sure to check out the images for each step, as they have helpful notes and show you what the instructions are referring to.
Supplies
Filming
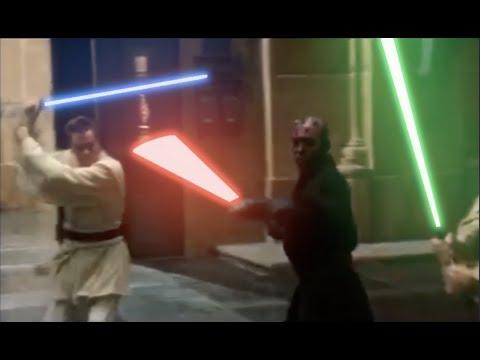
The first thing you need to do is film some footage. To make post production easier, try to film with a saber blade that stands out from your background. In the footage I used (from the Phantom Menace) they had colored sticks for the saber blades. You can also use a dowel or PVC pipe with a little bit of colorful tape to make your blade easier to see.
Prepare Your Footage

Blender works better on a series of photos than a video, so we'll use Blender to cut our video up into frames.
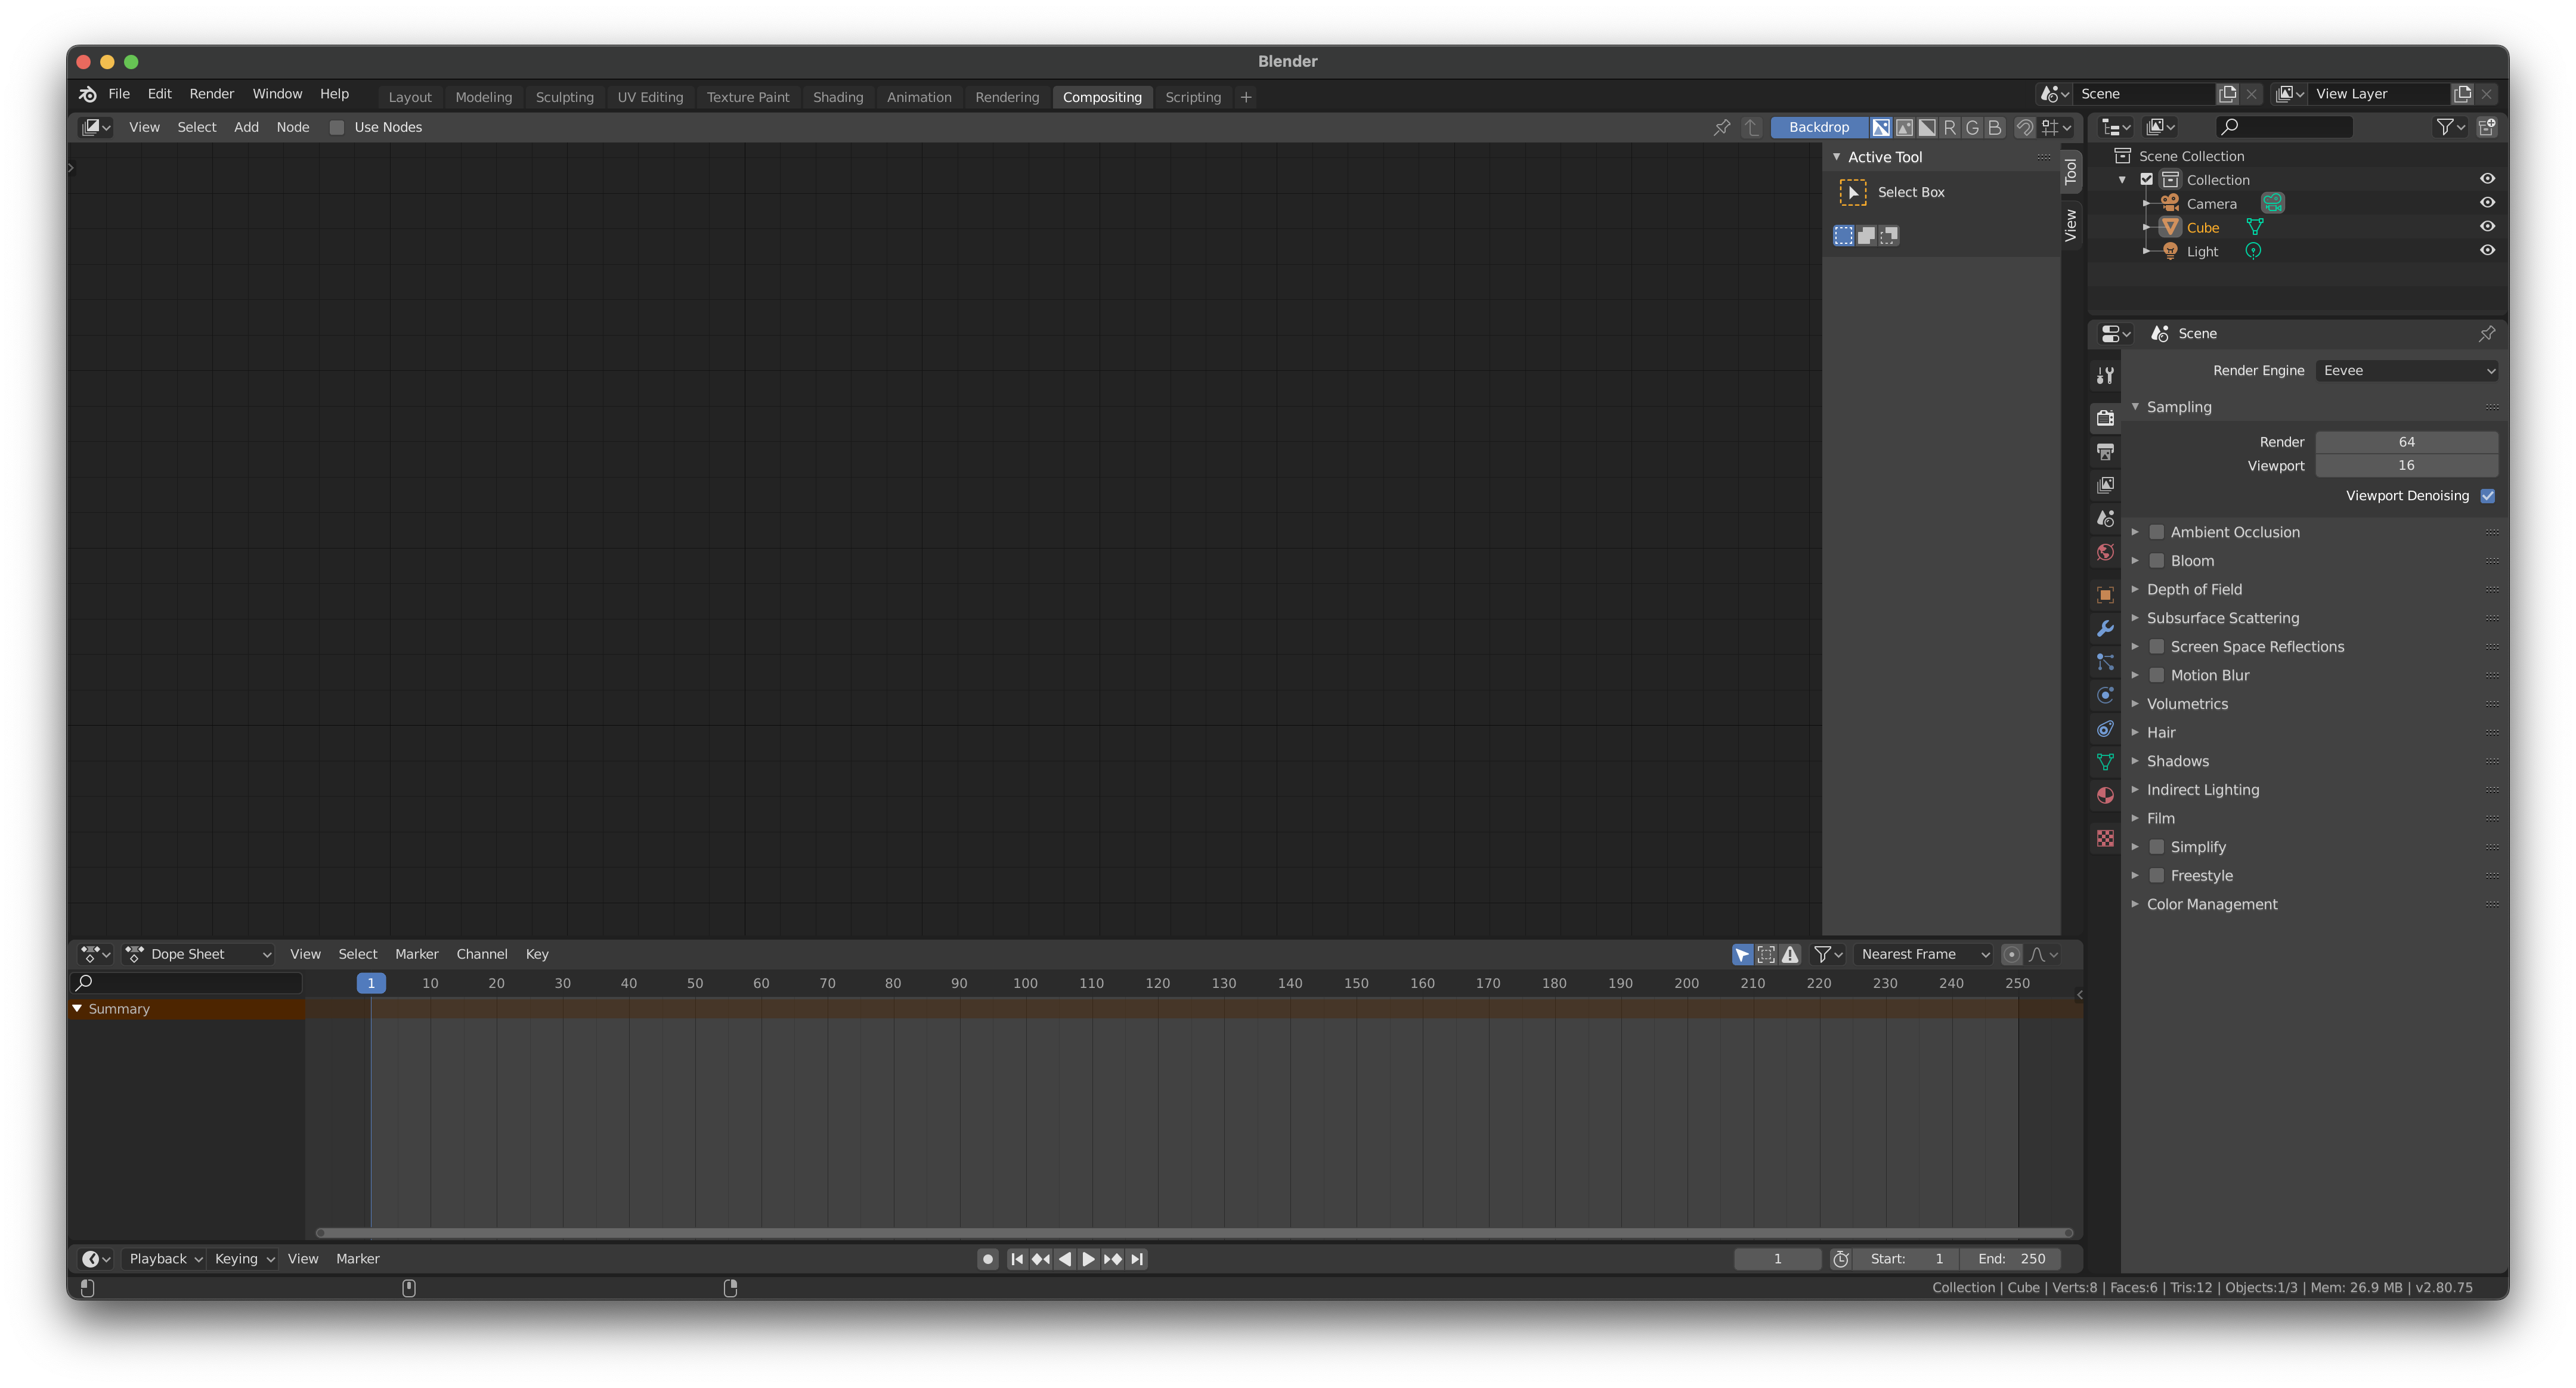
1) Open up Blender and select the the Compositing tab. Make sure to check Use Nodes.
2) Delete the 'Render Layers' node by selecting it and using the X key.
3) Press Shift+A to create a new node, and select Input->Image. Connect the Image output to the Composite node.
4) Click Open on the Image node and navigate to your video. Set Frames to the number of frames your video has.
5) Set the End frame in the Dope Sheet (the timeline at the bottom of Blender) to the number of frames your video has.
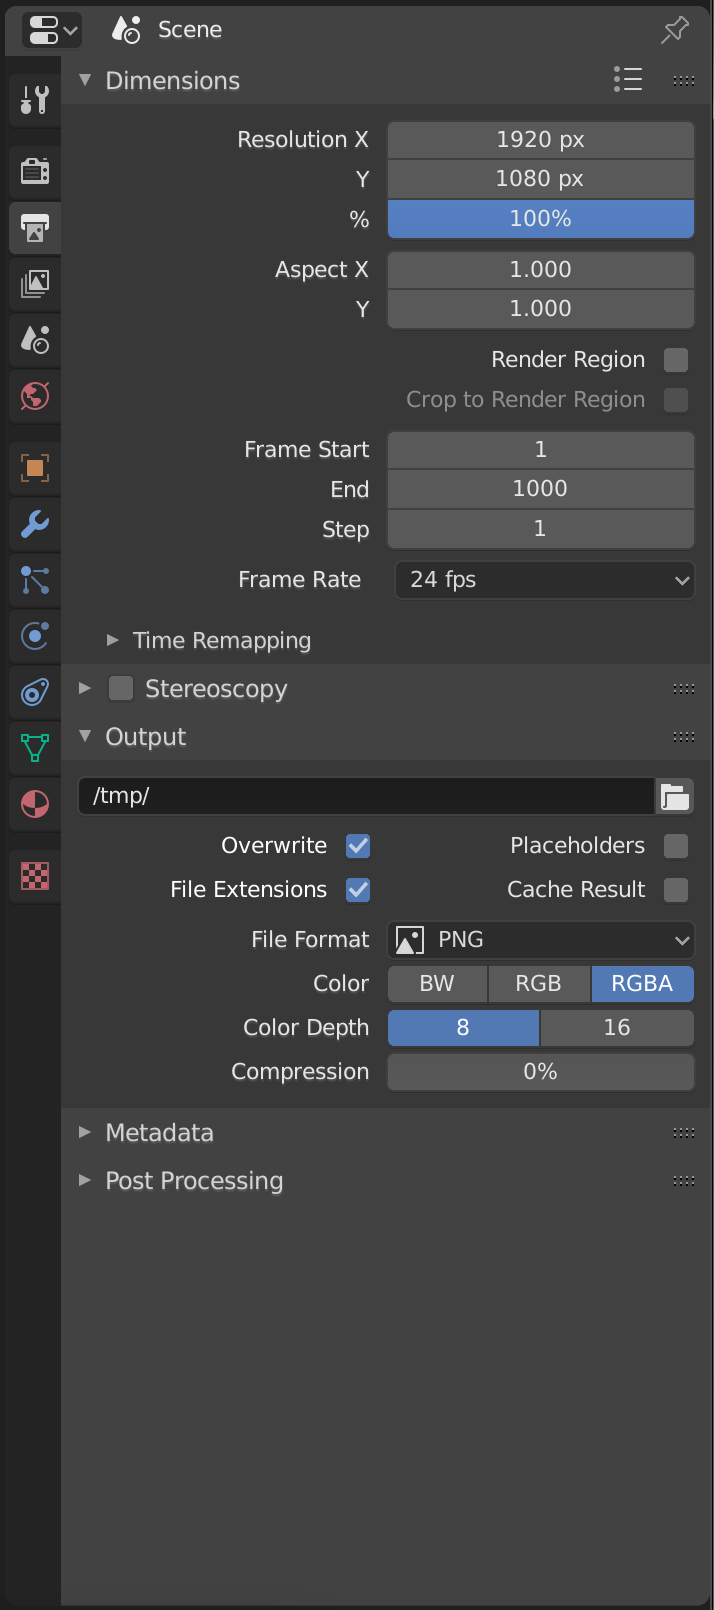
6) Now look at the left panel. You'll want to select the Output tab if it's not already selected. It's the one that looks like a printer. (If you hover over the tab icons they'll show you their names.)
7) Set the Resolution X and Y to the appropriate values. Also you may want to change the Output folder to something other than /tmp/. Make sure the File Format is set to PNG.
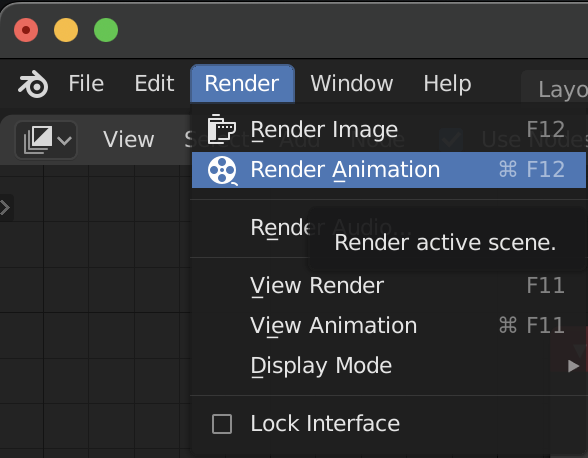
8) In the menu at the top right corner of Blender, select Render->Render Animation. Your video will now be exported as a series of images.
9) Save the blender project if you desire and open up a new one for the next step.
Rotoscope
Now we're going to tell the computer where the lightsabers are at each point in the video. Does that sound time consuming? It is. But the final effect will be worth it.
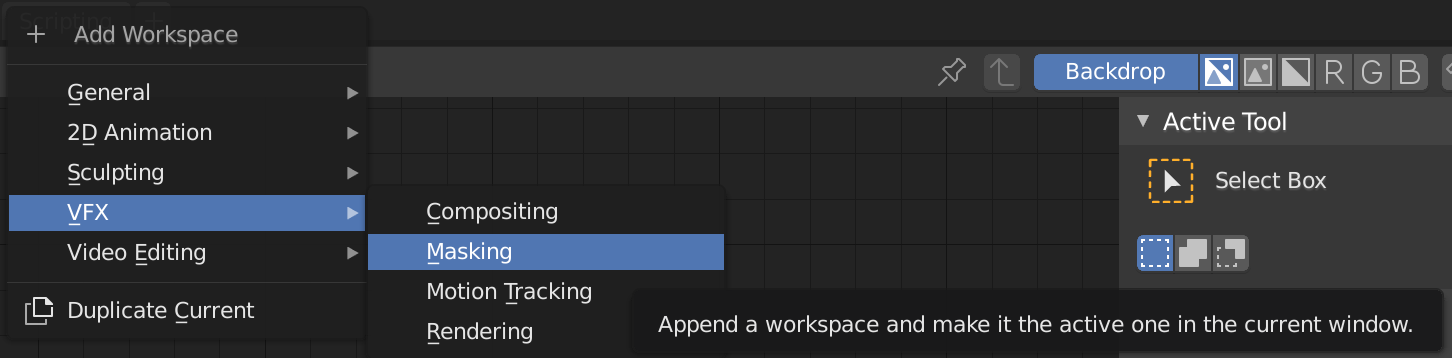
1) Select the + in the tab bar and open a new Masking workspace.
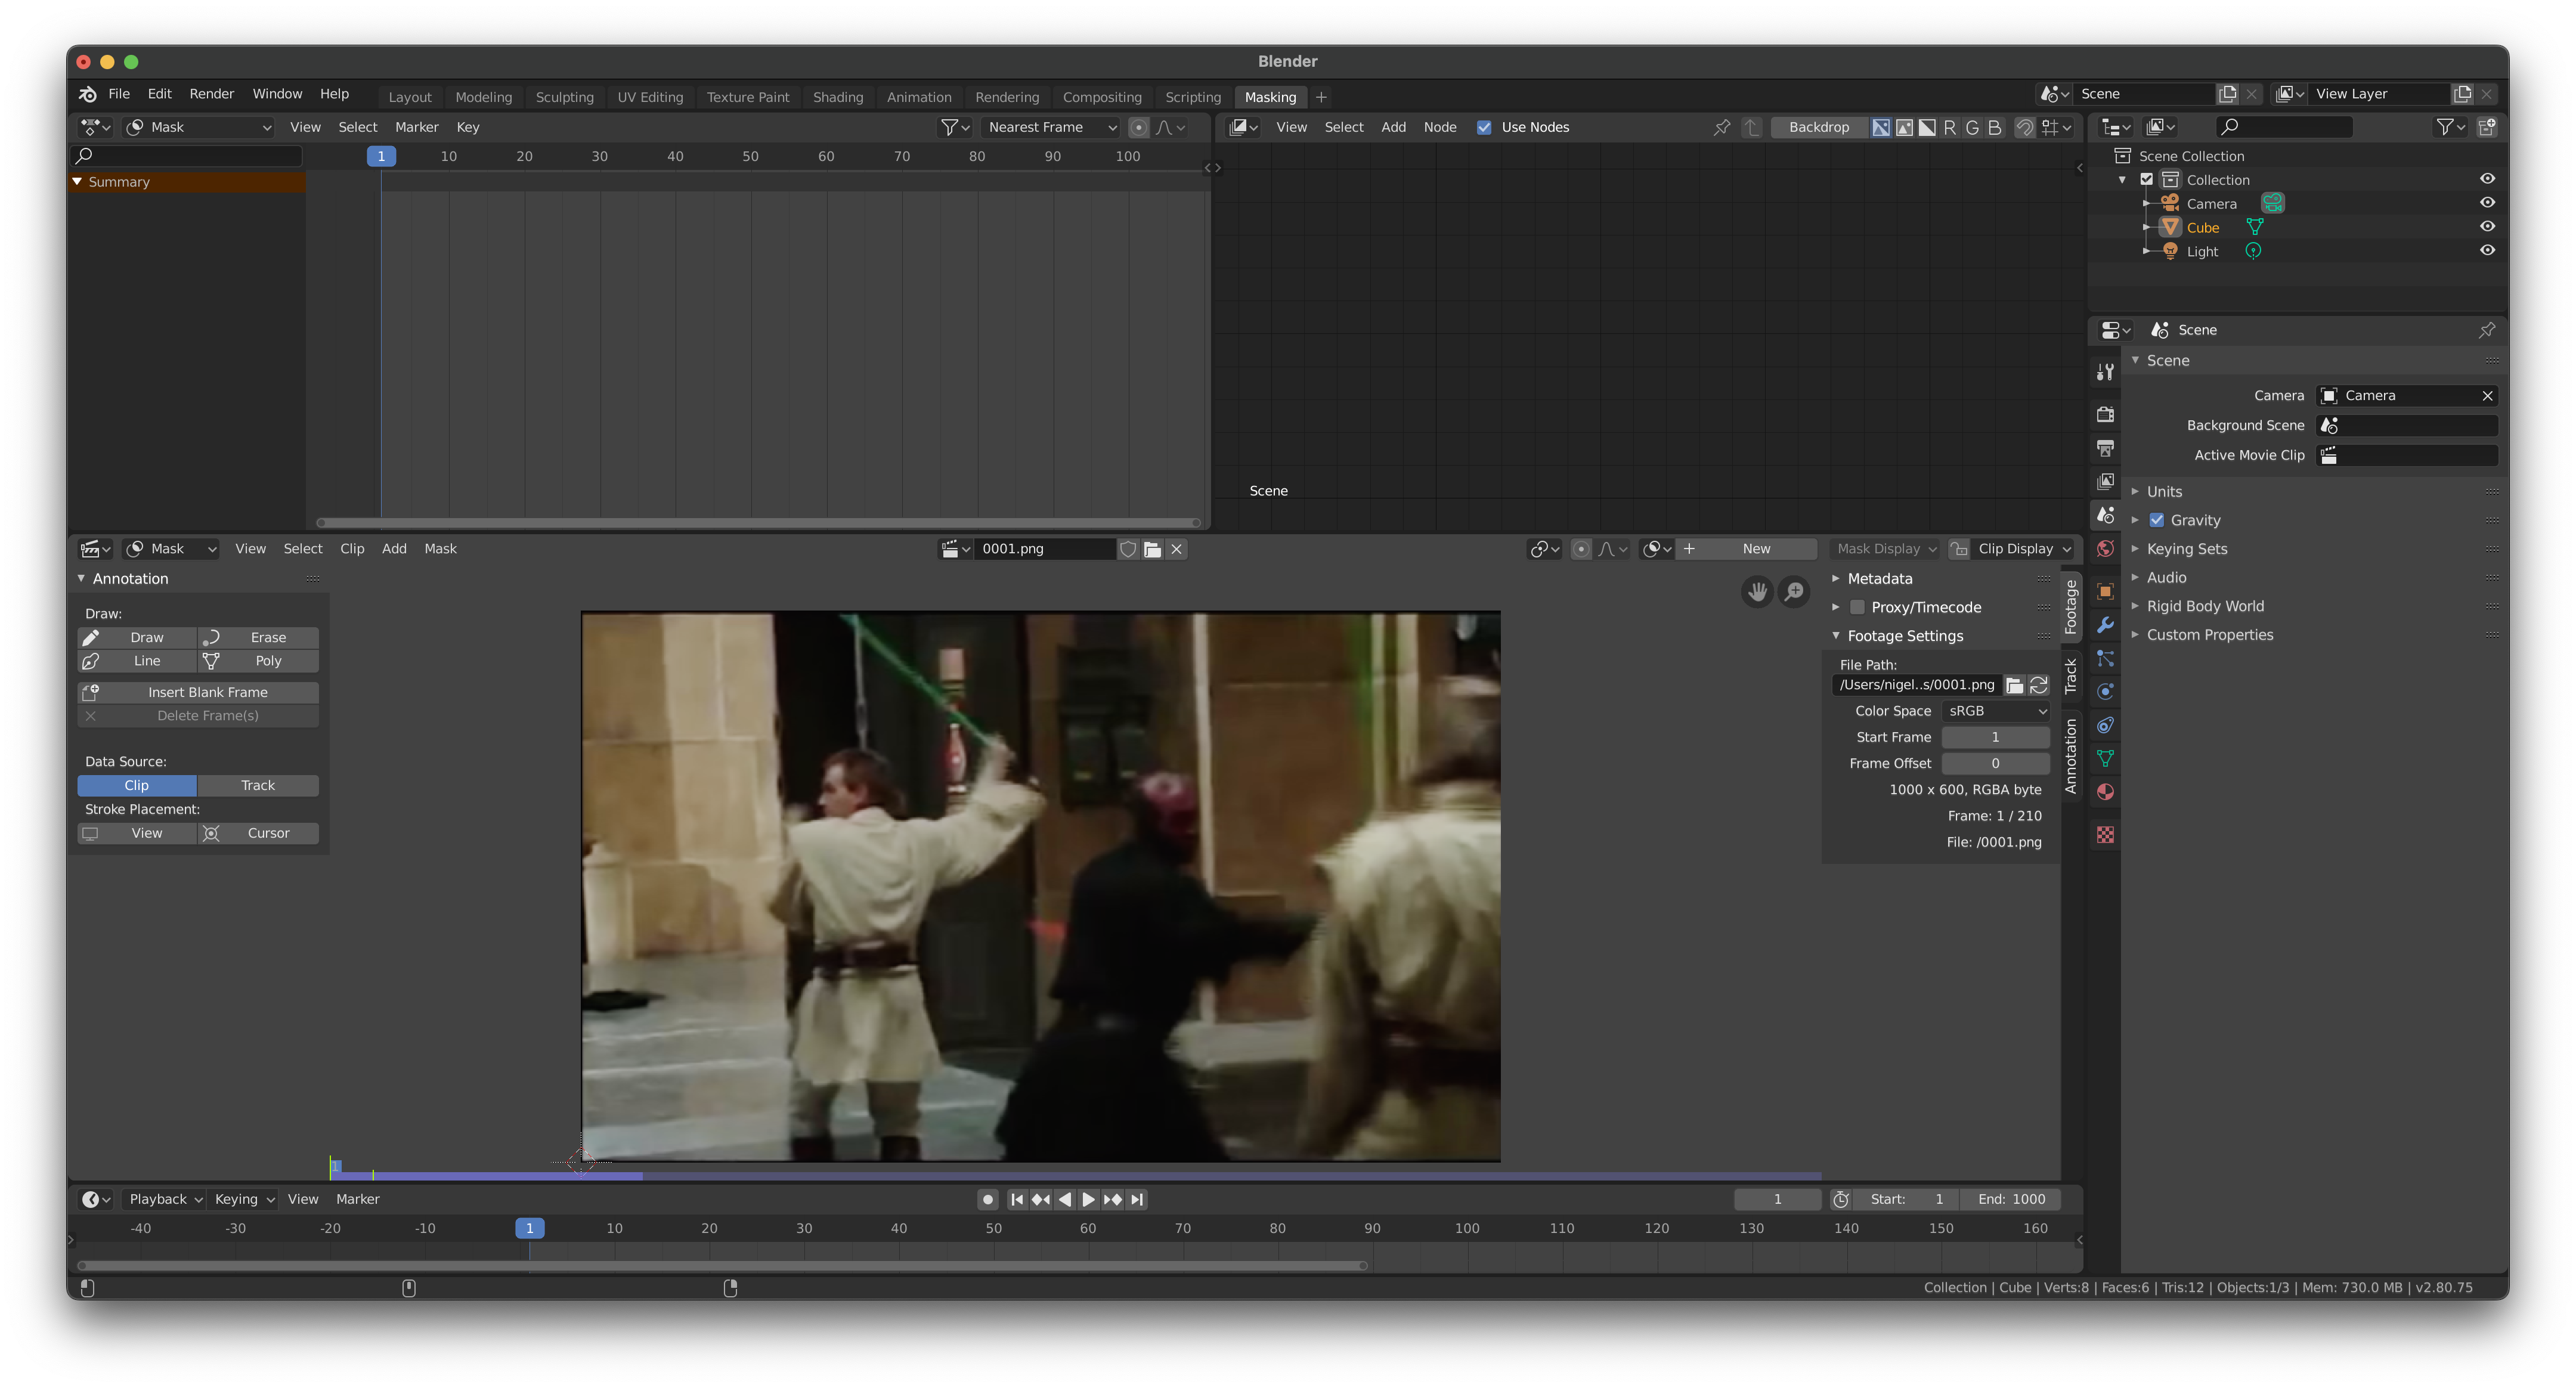
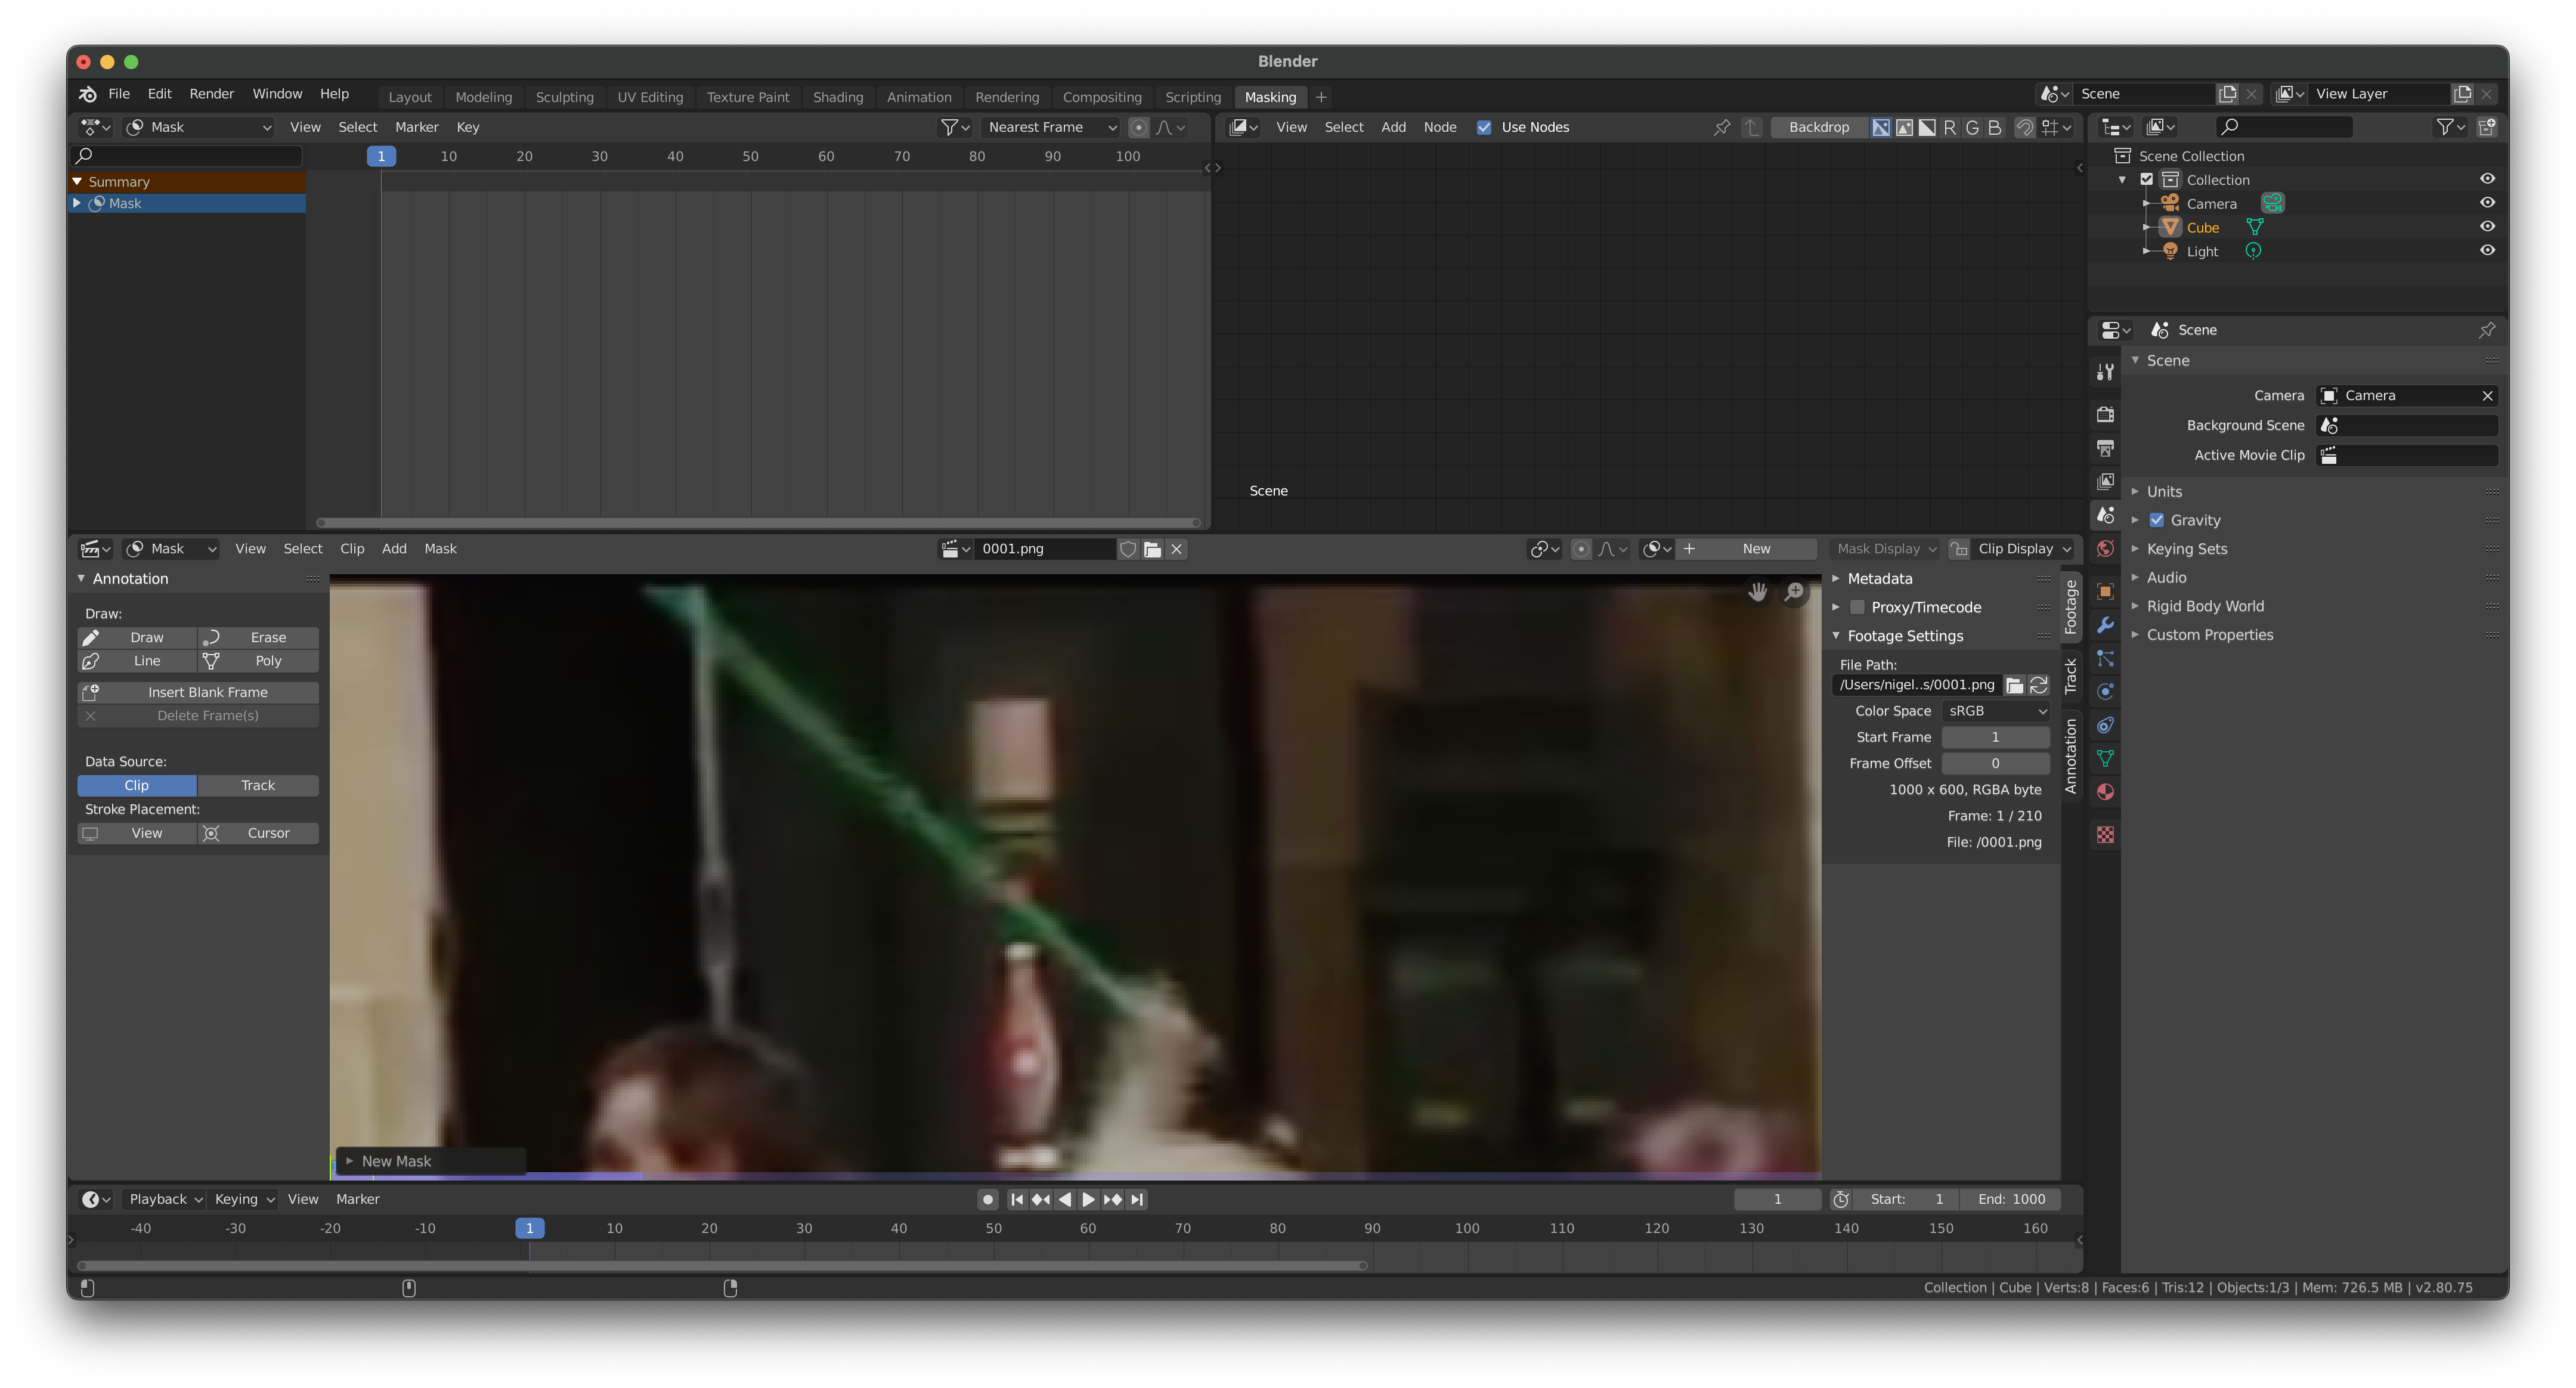
2) Click on the Open button and navigate to the series of frames you created in the last step. Make sure you select them all. Once they're imported, select Clip->Prefetch Frames.
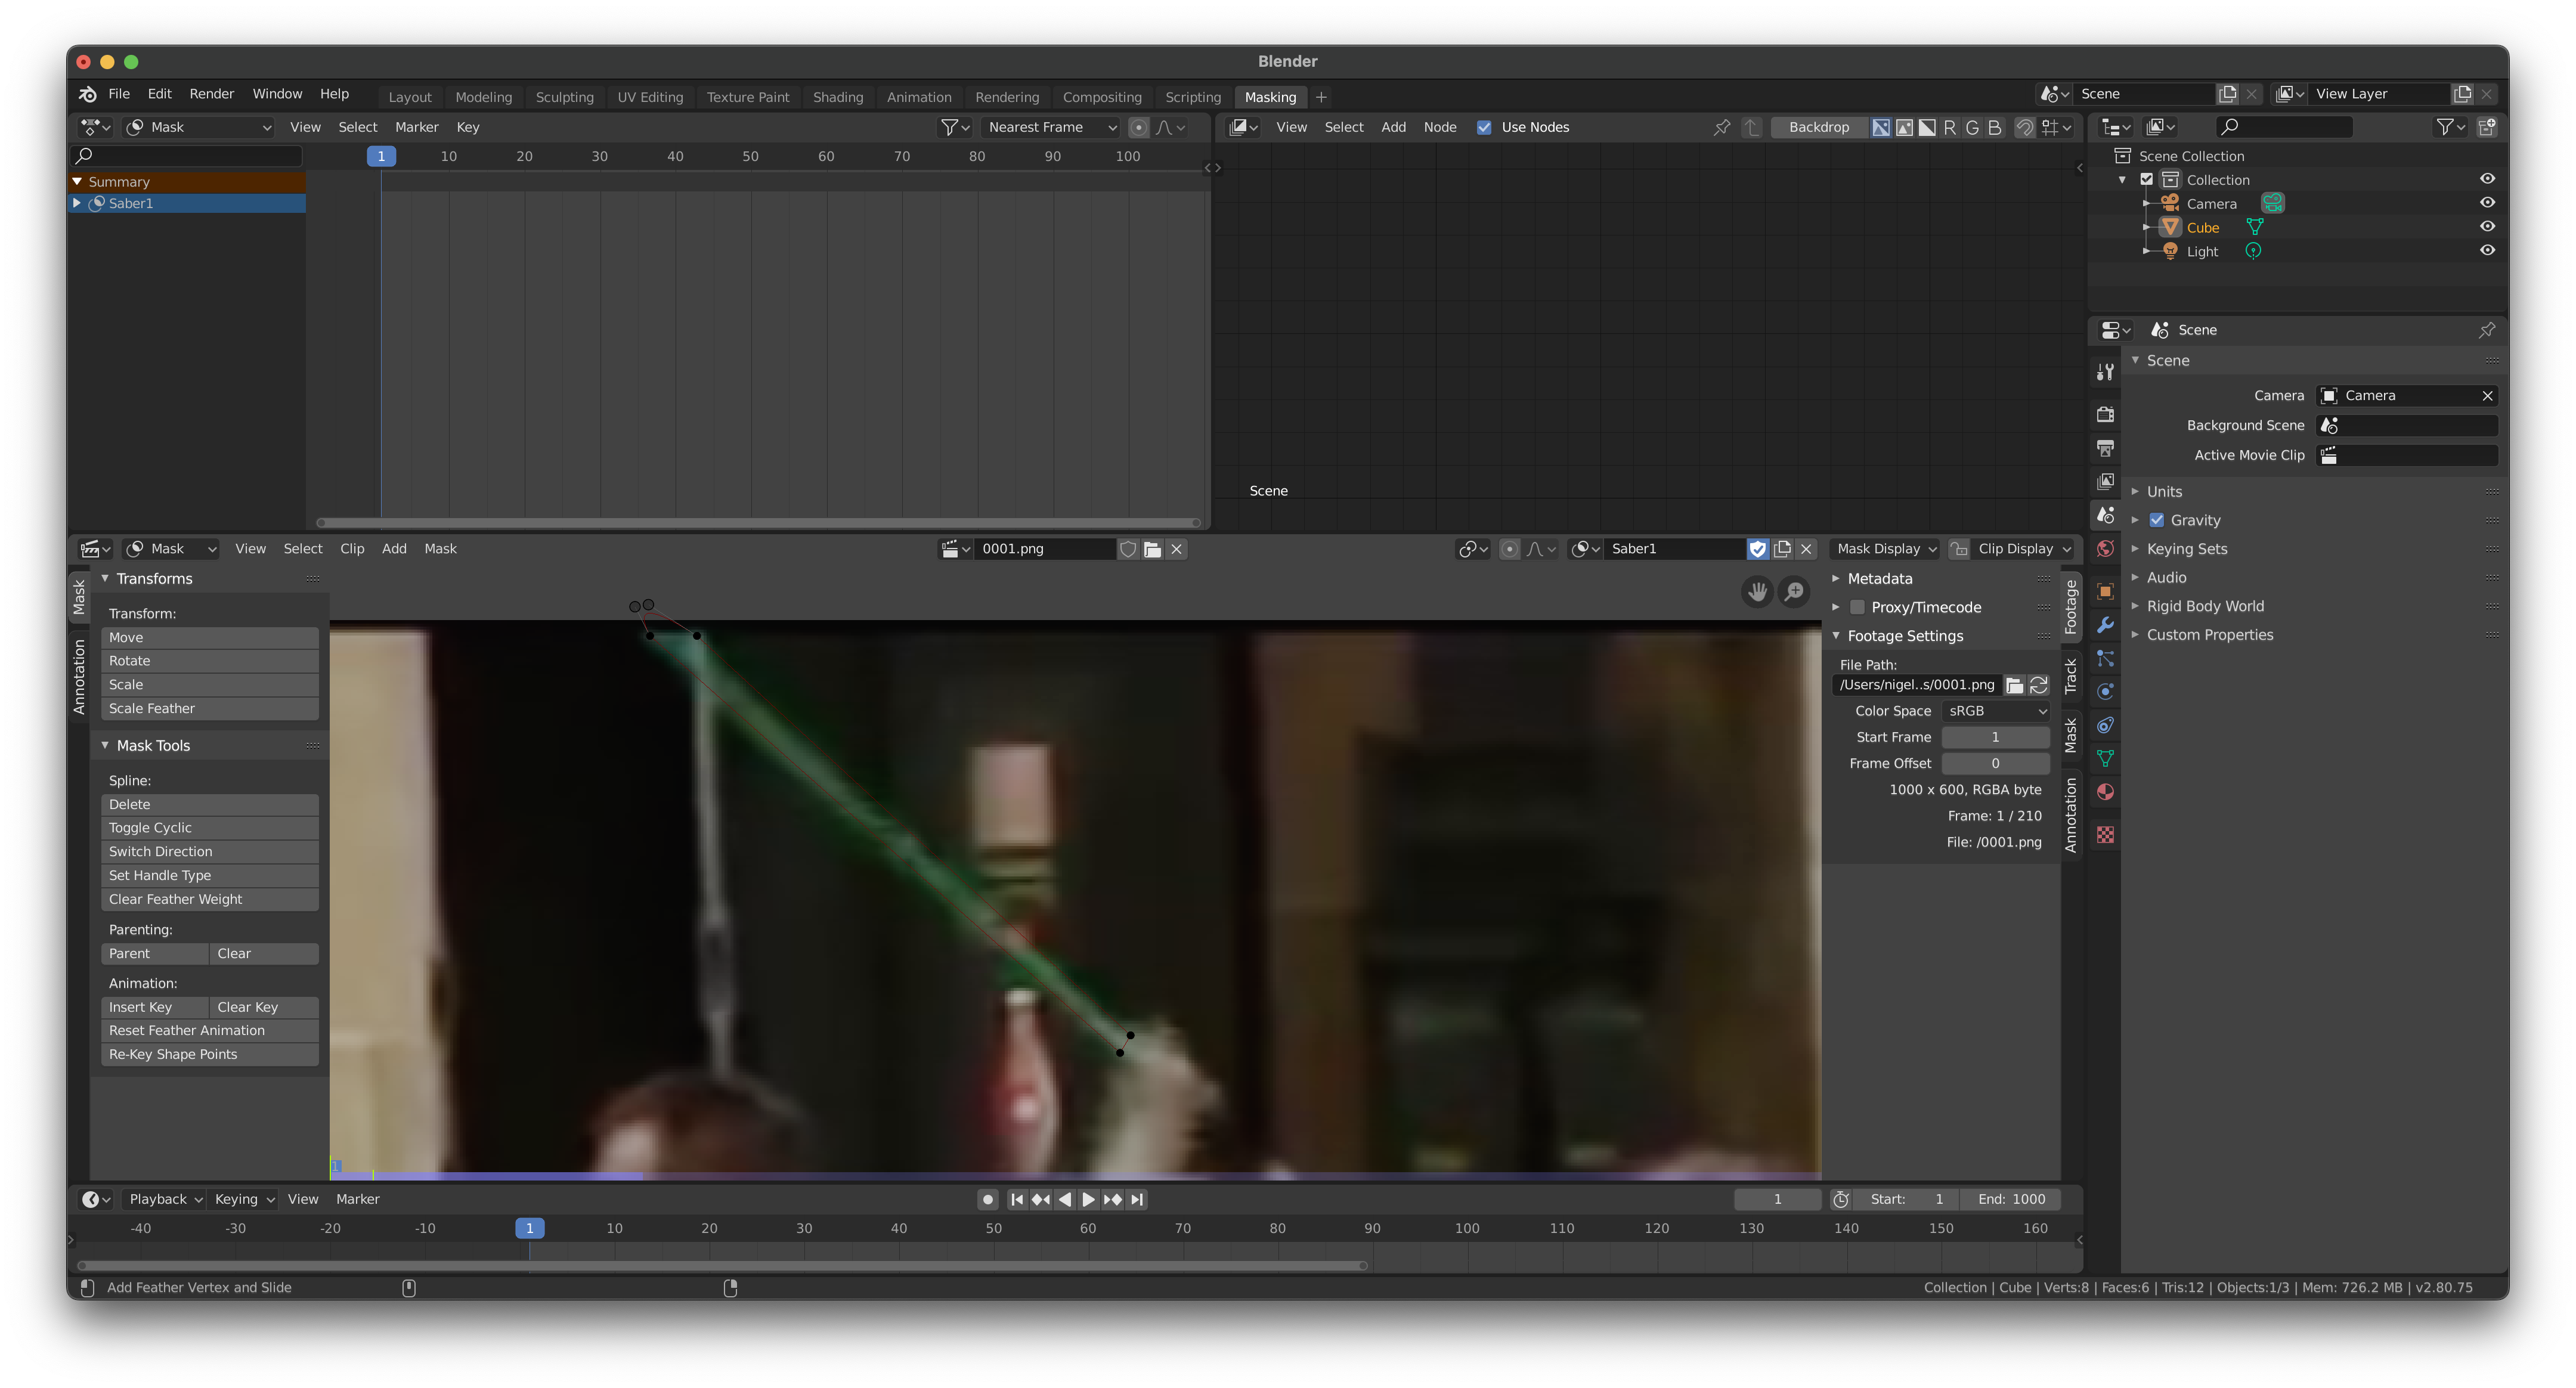
3) Click on the +New button and it will create a new Mask. Rename the mask to something helpful like 'Saber' and then create the mask by holding down Control (or Command on Mac) and clicking. Once you've created 4 points, press Alt/Option + C to close the mask.
4) Currently the mask is very rectangular, so drag the top line of the Mask into a nice curve. It's fine for the blurred edges of the prop to stick out past the Mask as the Mask will have a glow effect that will cover the imperfections nicely.
5) Turn on Auto-Keyframing by selecting the little dot near the Play Button. It should turn blue.
6) Use the Right Arrow to move to the next frame. At that frame, reposition the Mask around the saber.
7) Repeat step 6 a lot. You can get away with doing this every few frames when the saber is moving slowly, but if it's moving quickly you'll want to do it every frame.
8) If you have multiple sabers, you'll need to create a separate mask for each and do this same process for all of them.
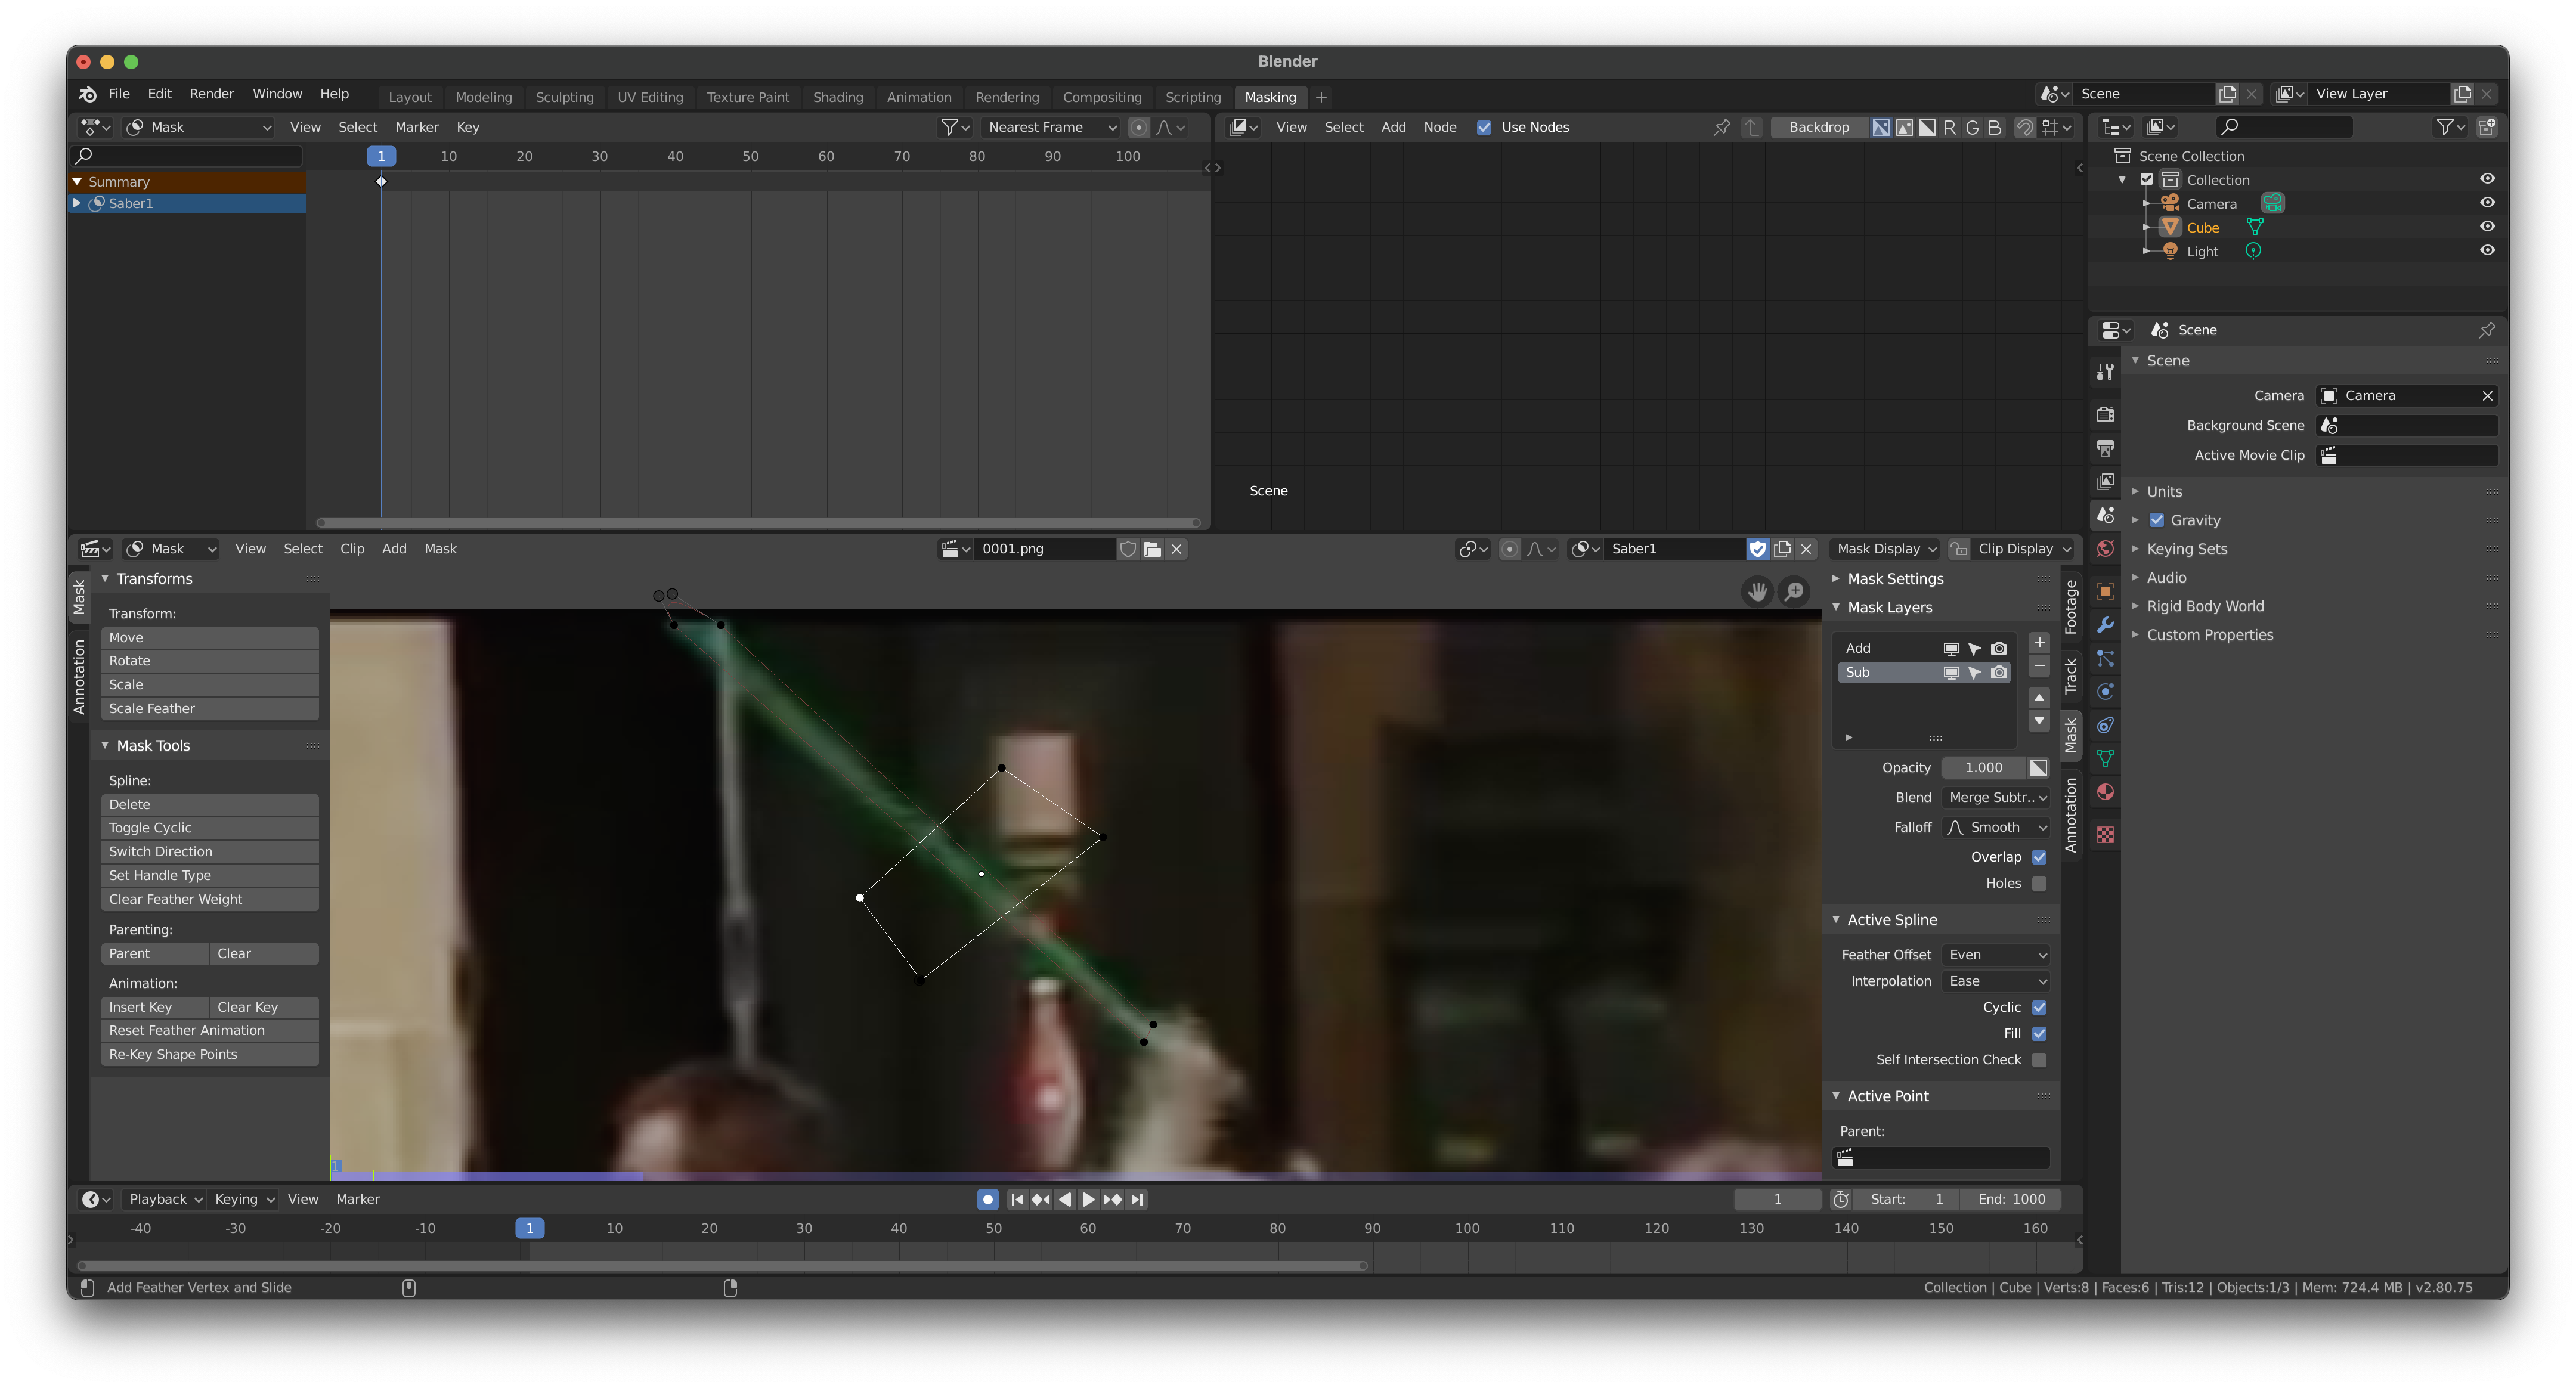
If a saber goes behind an object at any point, you'll need to do part 9 to create a new mask to mask the mask. That's not confusing at all, is it? Otherwise, skip part 9.
9) On the right side of the Movie Clip Editor you've been working in, select the Mask tab. Click the + button to add a new layer and set the Blend to Merge Subtract. Now use Command/Control + Click to add new points and Alt/Option + C to close the mask. You can now position this mask to block the other one. When it's not needed, simply drag it off the video.
Apply the Effects

You've done the hard part - now the computer knows where the saber is. It's time to add the colors and make it look awesome!
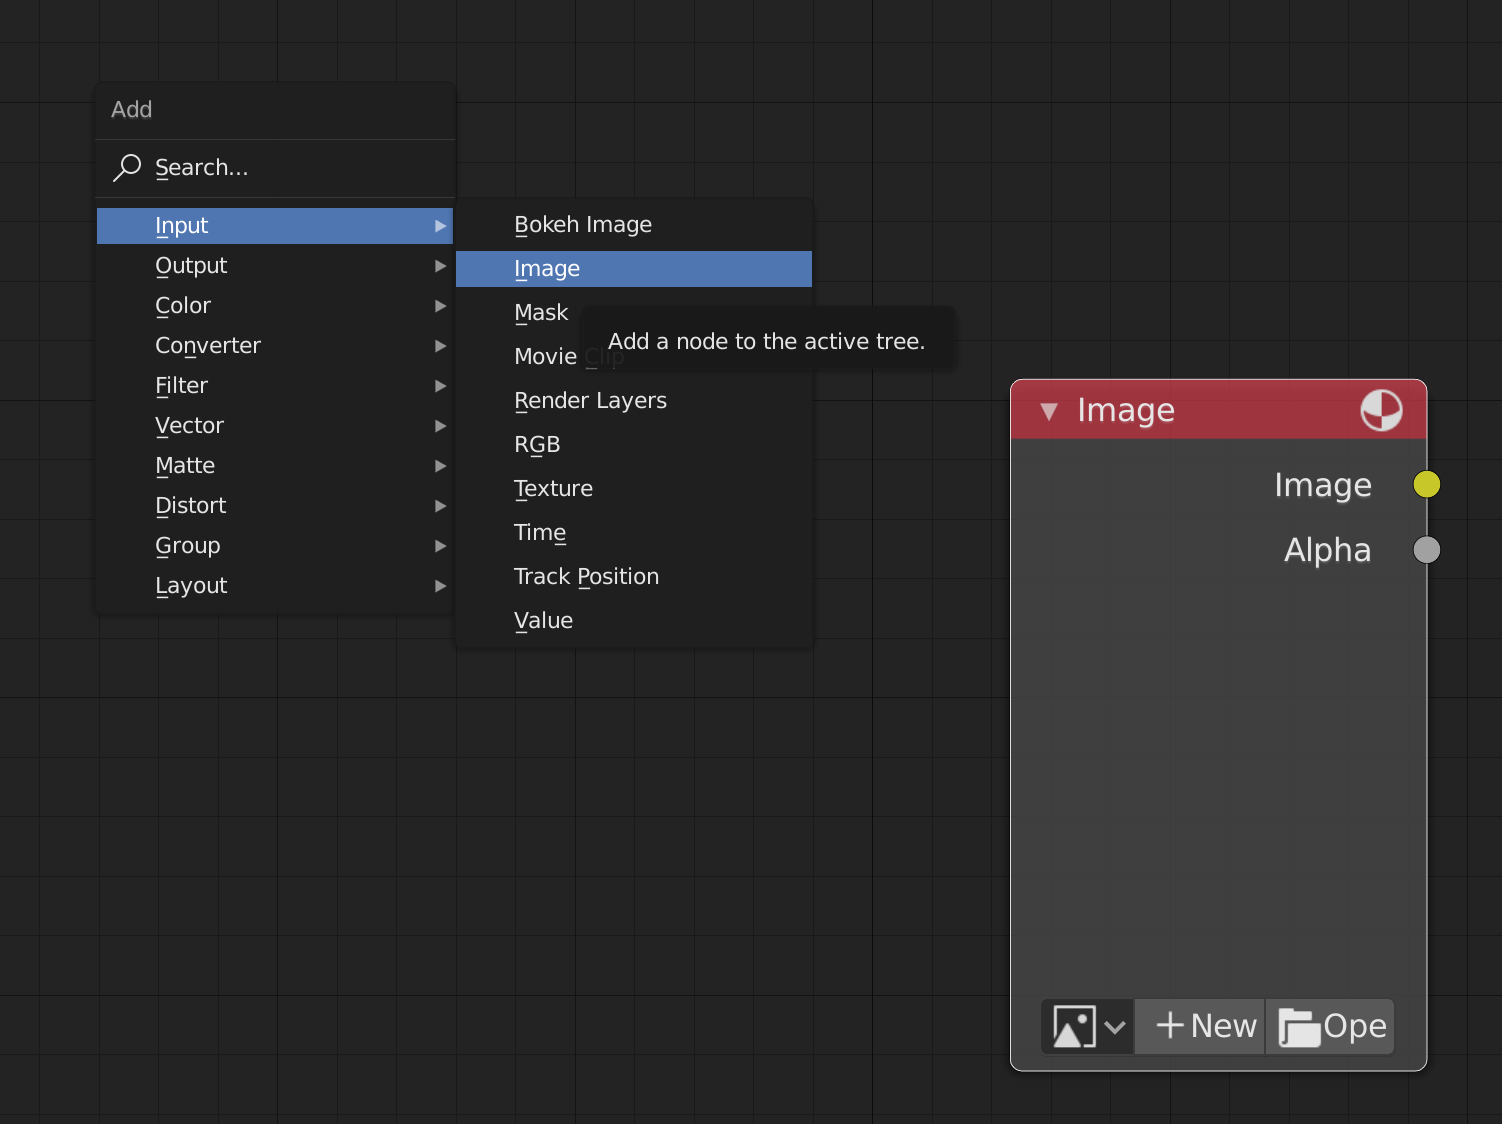
1) Click on the Compositing tab and make sure Use Nodes is checked. If there's a Render Layers node, delete it. Leave the Composite node, as you'll need it at the end.
2) On the right side of the screen, click on the Texture tab at the bottom of the Properties tabs list.
3) Click the + to create a new texture and name it something useful, like SaberTexture. Change the Type to Clouds and under Clouds set the Type to Hard and the Size to 0.03.
Now we're going to add a bunch of nodes that will create a cool glow effect. You can add nodes with Shift+A and then clicking on the search field and typing in the name. You can plug nodes into each other by dragging from a dot on the right side of a node into a dot on the left side of a different node. Make sure to look at the screenshot above to see the full node setup.
4) Add a Texture node and select the Texture you made (SaberTexture).
5) Add an Alpha Over node and plug the Value output from the Texture into the Fac input. Set the first Image input to the color you want the saber to be, and set the second Image input to be a more washed-out (closer to white) version of that color. Don't worry about getting it perfect, you can adjust it later.
6) Add a Mask node and select the Mask you made.
7) Add a Dilate/Erode node and set the mode to Feather. Connect the Mask node from 6 into the Mask input of the Dilate/Erode node.
8) Add an Alpha Over node. Connect the Dilate/Erode node to the Fac input. Click on the top Image input and set the drag the A slider to 0 (this should make it show a checkerboard pattern). Connect the Alpha Over from 5 to the bottom Image input.
9) Create 3 Blur nodes with the top dropdown set to Gaussian. Stack them up vertically and set the top one's X and Y to 250 and it's Size to 1. Set the middle one's X and Y to 25 and it's Size to 1. Set the bottom one's X and Y to 7 and it's Size to 0.001.
10) Create 3 Hue Saturation Value nodes and connect a Blur to each one of them, once again stacking them up vertically. The top one should have a Value of 1.1. The middle one should have a Value of 1.5. The bottom one should have a Saturation of 0.3.
11) Create an Alpha Over node and connect the top Hue Saturation Value node to the top Image input and the middle Hue Saturation Value node to the bottom input.
12) Create a new Hue Saturation Value node and connect the Alpha Over from the last step to the Image input. Set the Value to 2.
13) Create another Alpha Over node and plug the Hue Saturation Value from 12 into the top Image and the bottom Hue Saturation Value from 10 into the bottom Image.
14) Create an Image node, click Browse and select your original footage that you cut up into PNGs.
15) Create an Alpha Over node and set the first Image input to the Image node with your footage from 14 and the second Image input to the Alpha Over from 13.
16) Create a Glare node and set the Color Modulation to 1 and the Streaks to 3. Connect the Alpha Over from 15 to the Image input.
17) Connect the Image output of the Glare node from 16 to the Image input of the Composite node.
You're done, you can go to the next step! Unless you have multiple sabers, in which case read on for a little more.
18) Select all of the nodes you've created except for the Glare and Composite nodes at the end. Use Shift + D to duplicate all of those nodes and drag the new ones down so they don't get mixed up. Set the colors on the first Alpha Over node (that you set your colors on in 5) to be the colors for the new saber.
19) Create a new Alpha Over node and connect the second-to-last Alpha Over node of the first set of nodes to the first Image input and the final Alpha Over node from the second set of nodes to the second Image input. Set the output of this node to be the input of the last Alpha Over node (the one with the footage connected to the top of it).
20) Repeat 18 and 19 for each saber you add.
Export
1) Now look at the left panel. You'll want to select the Output tab if it's not already selected. It's the one that looks like a printer. (If you hover over the tab icons they'll show you their names.)
2) Set the Resolution X and Y to the appropriate values. Make sure to set the frame rate to your original footage's frame rate. Also you may want to change the Output folder to something other than /tmp/. Make sure the File Format is set to a video format like AVI JPEG or MP4.
3) In the menu at the top right corner of Blender, select Render->Render Animation. After a few minutes (or longer, depending on the length of your footage and your computer) you should have your video in the output directory you selected.
This is my first Instructable. If I've made any mistakes or you have any suggestions on how I can improve it, please let me know in the Comments.