Lighting a NeoPixel Ring or NeoPixel Stick With IR Receiver and Remote Control With Arduino or ATTiny85
by Artful_Dabbler in Circuits > Arduino
3291 Views, 16 Favorites, 0 Comments
Lighting a NeoPixel Ring or NeoPixel Stick With IR Receiver and Remote Control With Arduino or ATTiny85
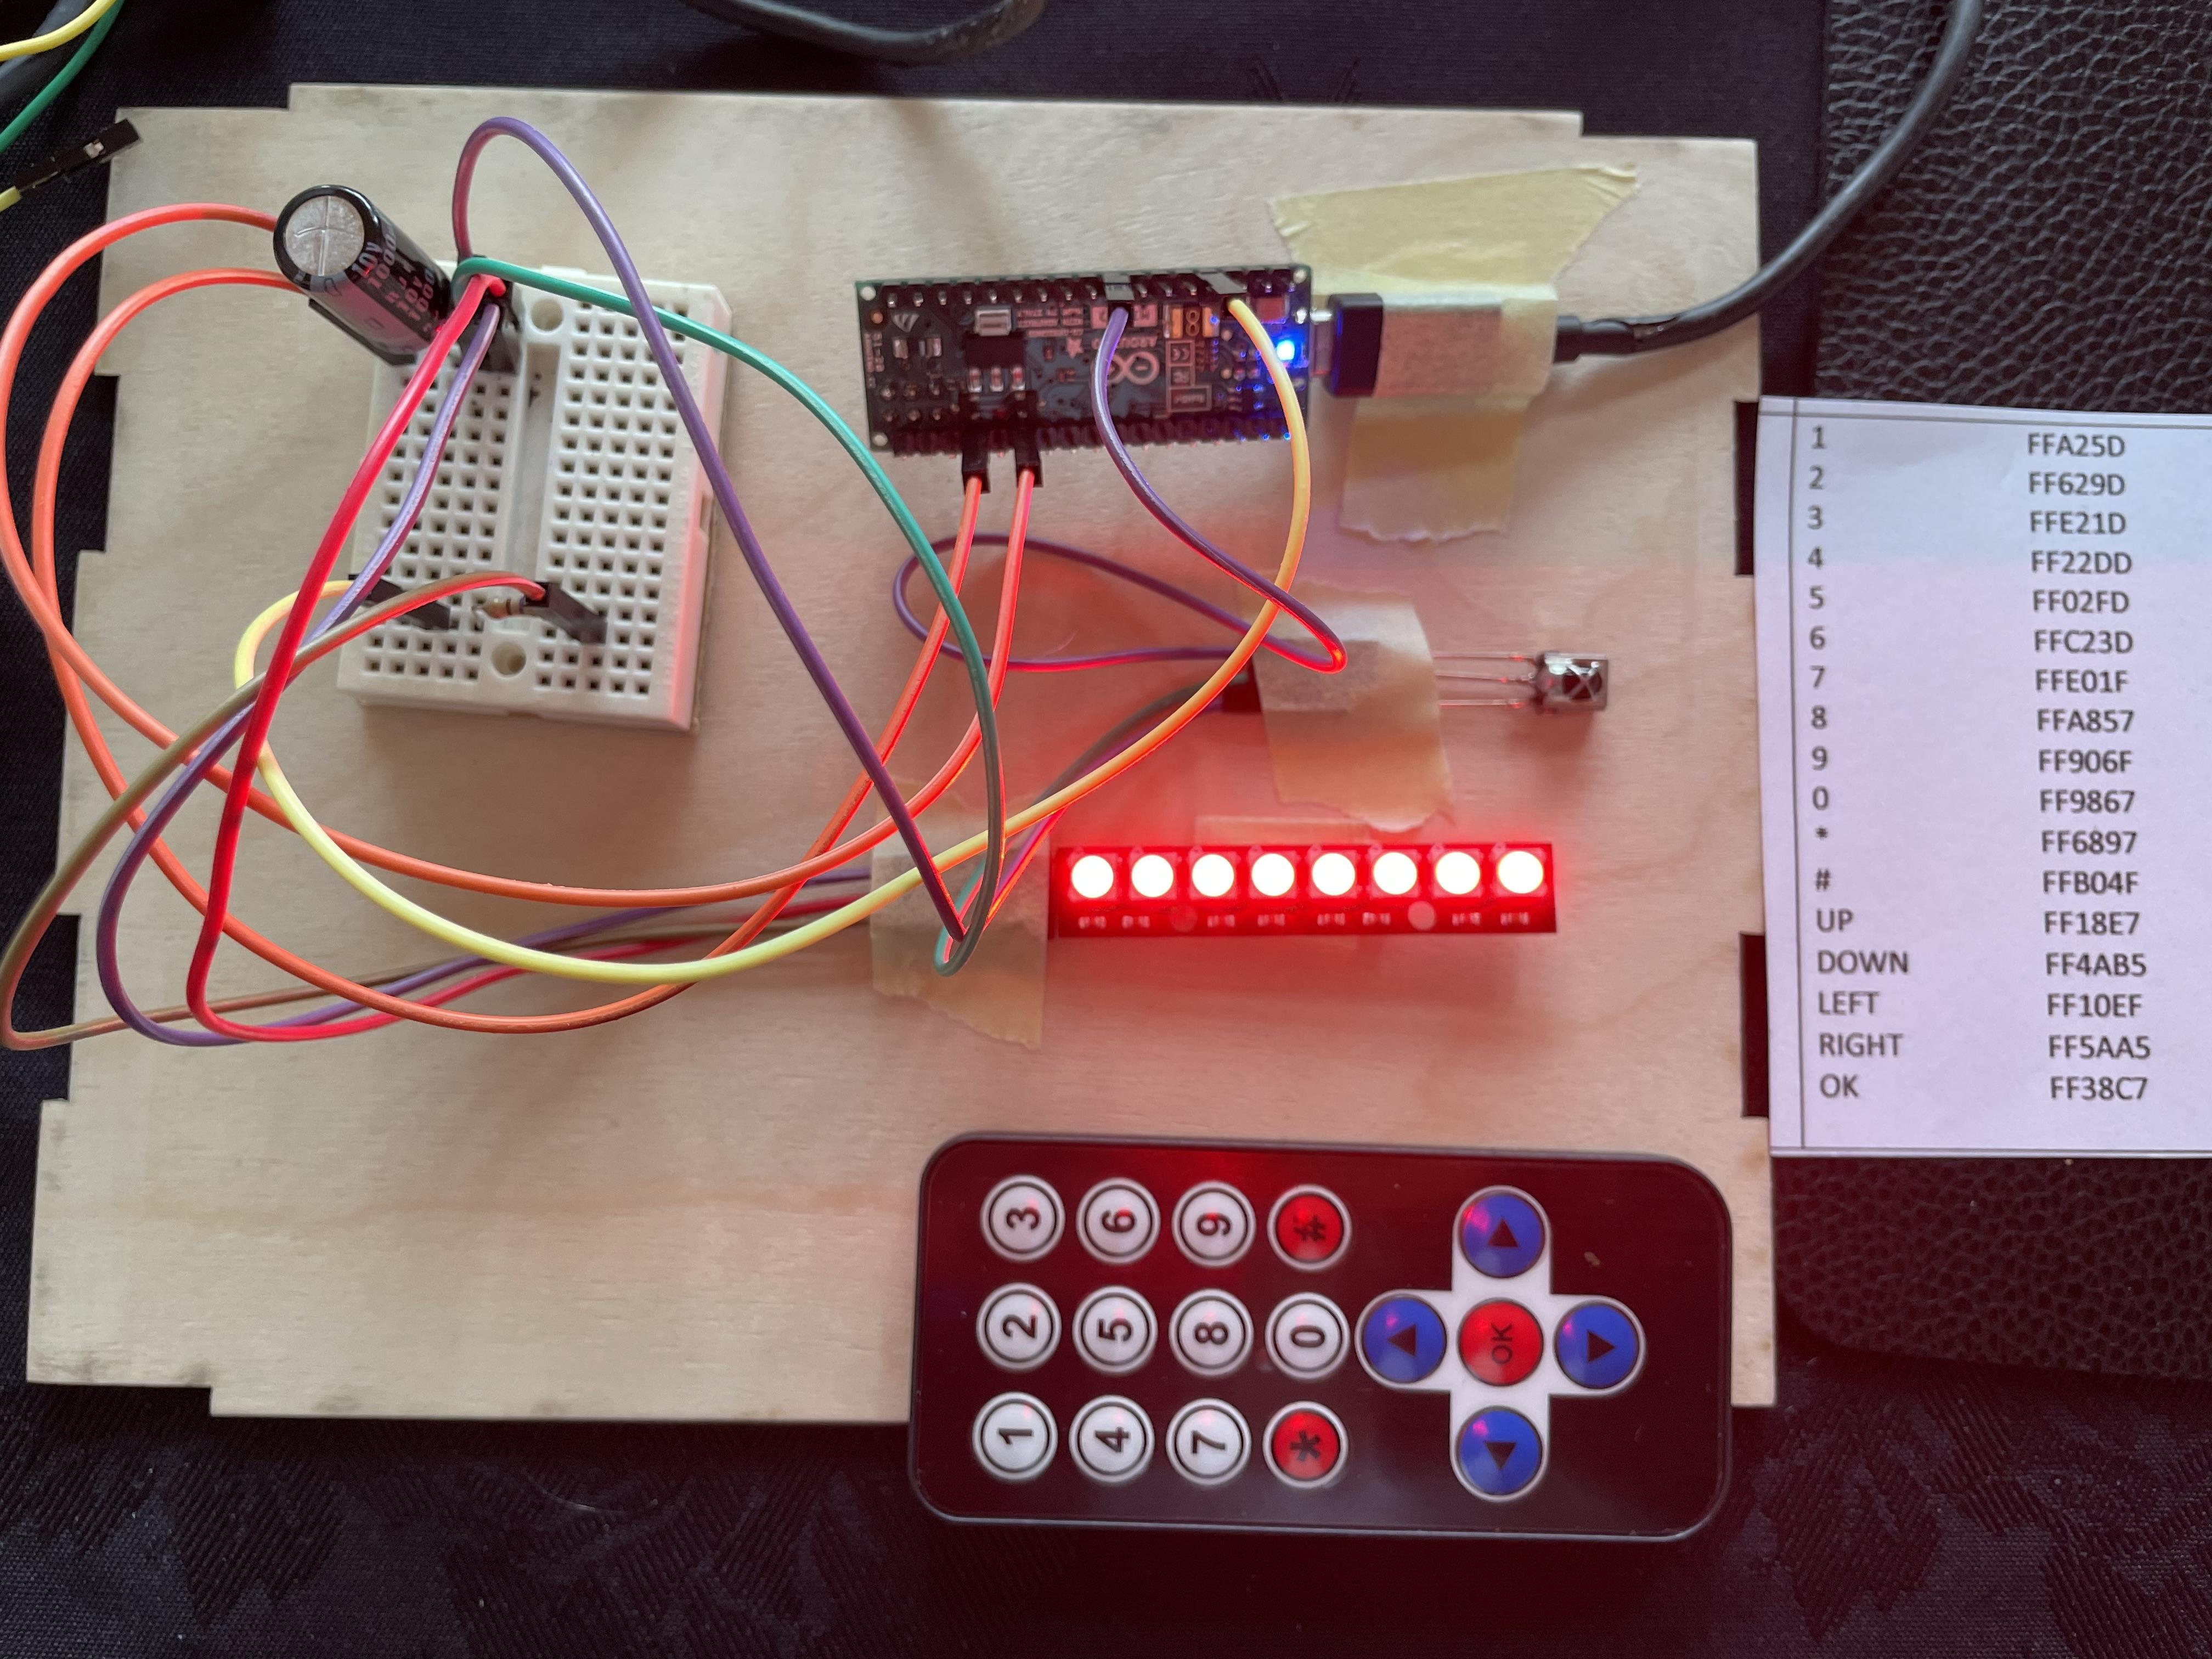
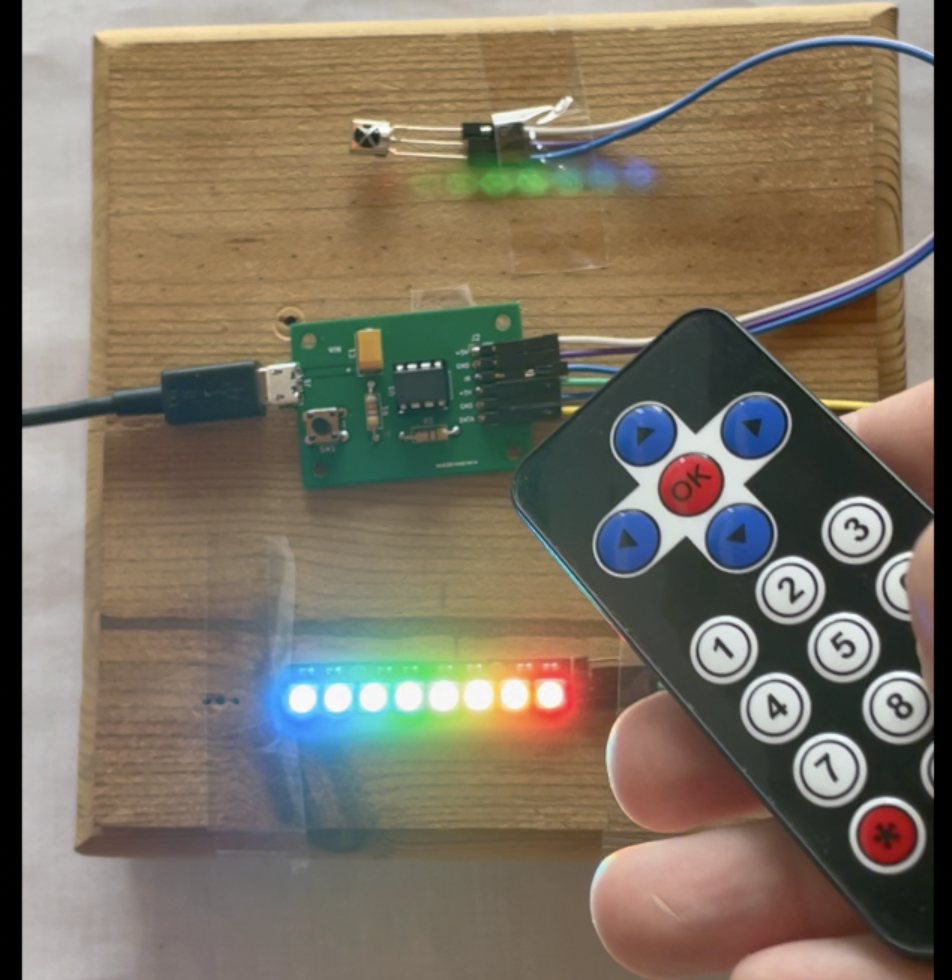
I very much like the Neopixel rings and sticks from Adafruit. Really easy to use, lovely colour combinations and easy to code.
If you have a project that you want to light up in interesting ways and be able to change the colours or intensity using a remote control then this Instructable will show you how.
You can do this with an arduino but also move the project onto a smaller board using the ATTiny85.
I have also created some permanent through-soldered PCBs that you can buy from my store if that makes things easier for your projects (go here www.artfuldabblers.com).
Supplies
For arduino board version:
- An Arduino board
- Small Breadboard
- Adafruit NeoPixel ring or stick (here)
- Infrared remote and receiver
- Capacitor 100-1000 uF and atleast 6.3v
- Resistor (470 ohm)
For minimised ATTiny85 version:
- ATtiny85
- Sparkfun ATtiny Programmer (here)
- Micro USB power source
- L-Headers
- Button switch and and 4.7k ohm resistor
Tools needed:
- Soldering iron and solder
Create the Circuit on a Breadboard Using an Arduino
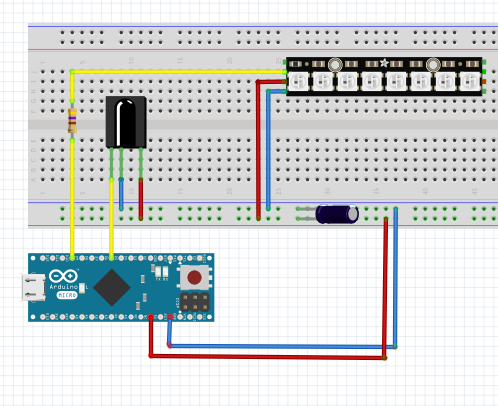
I used an arduino micro for testing but can use any you have to hand.
The wiring is as follows:
- IR receiver signal wire to Pin 5 of micro arduino
- Connect Pin 9 of Arduino to Pixel stick/ring data in wire via a 470 ohm resistor (suggested in best practice guide from Adafruit. See here for details.)
- All other lines connected to 5v and GND with a 100-1000 uF (atleast 6.3v) capacitor between the lines. I used a 1000uF 16v variant.
Decode Your IR Transmitter Using the Serial Monitor
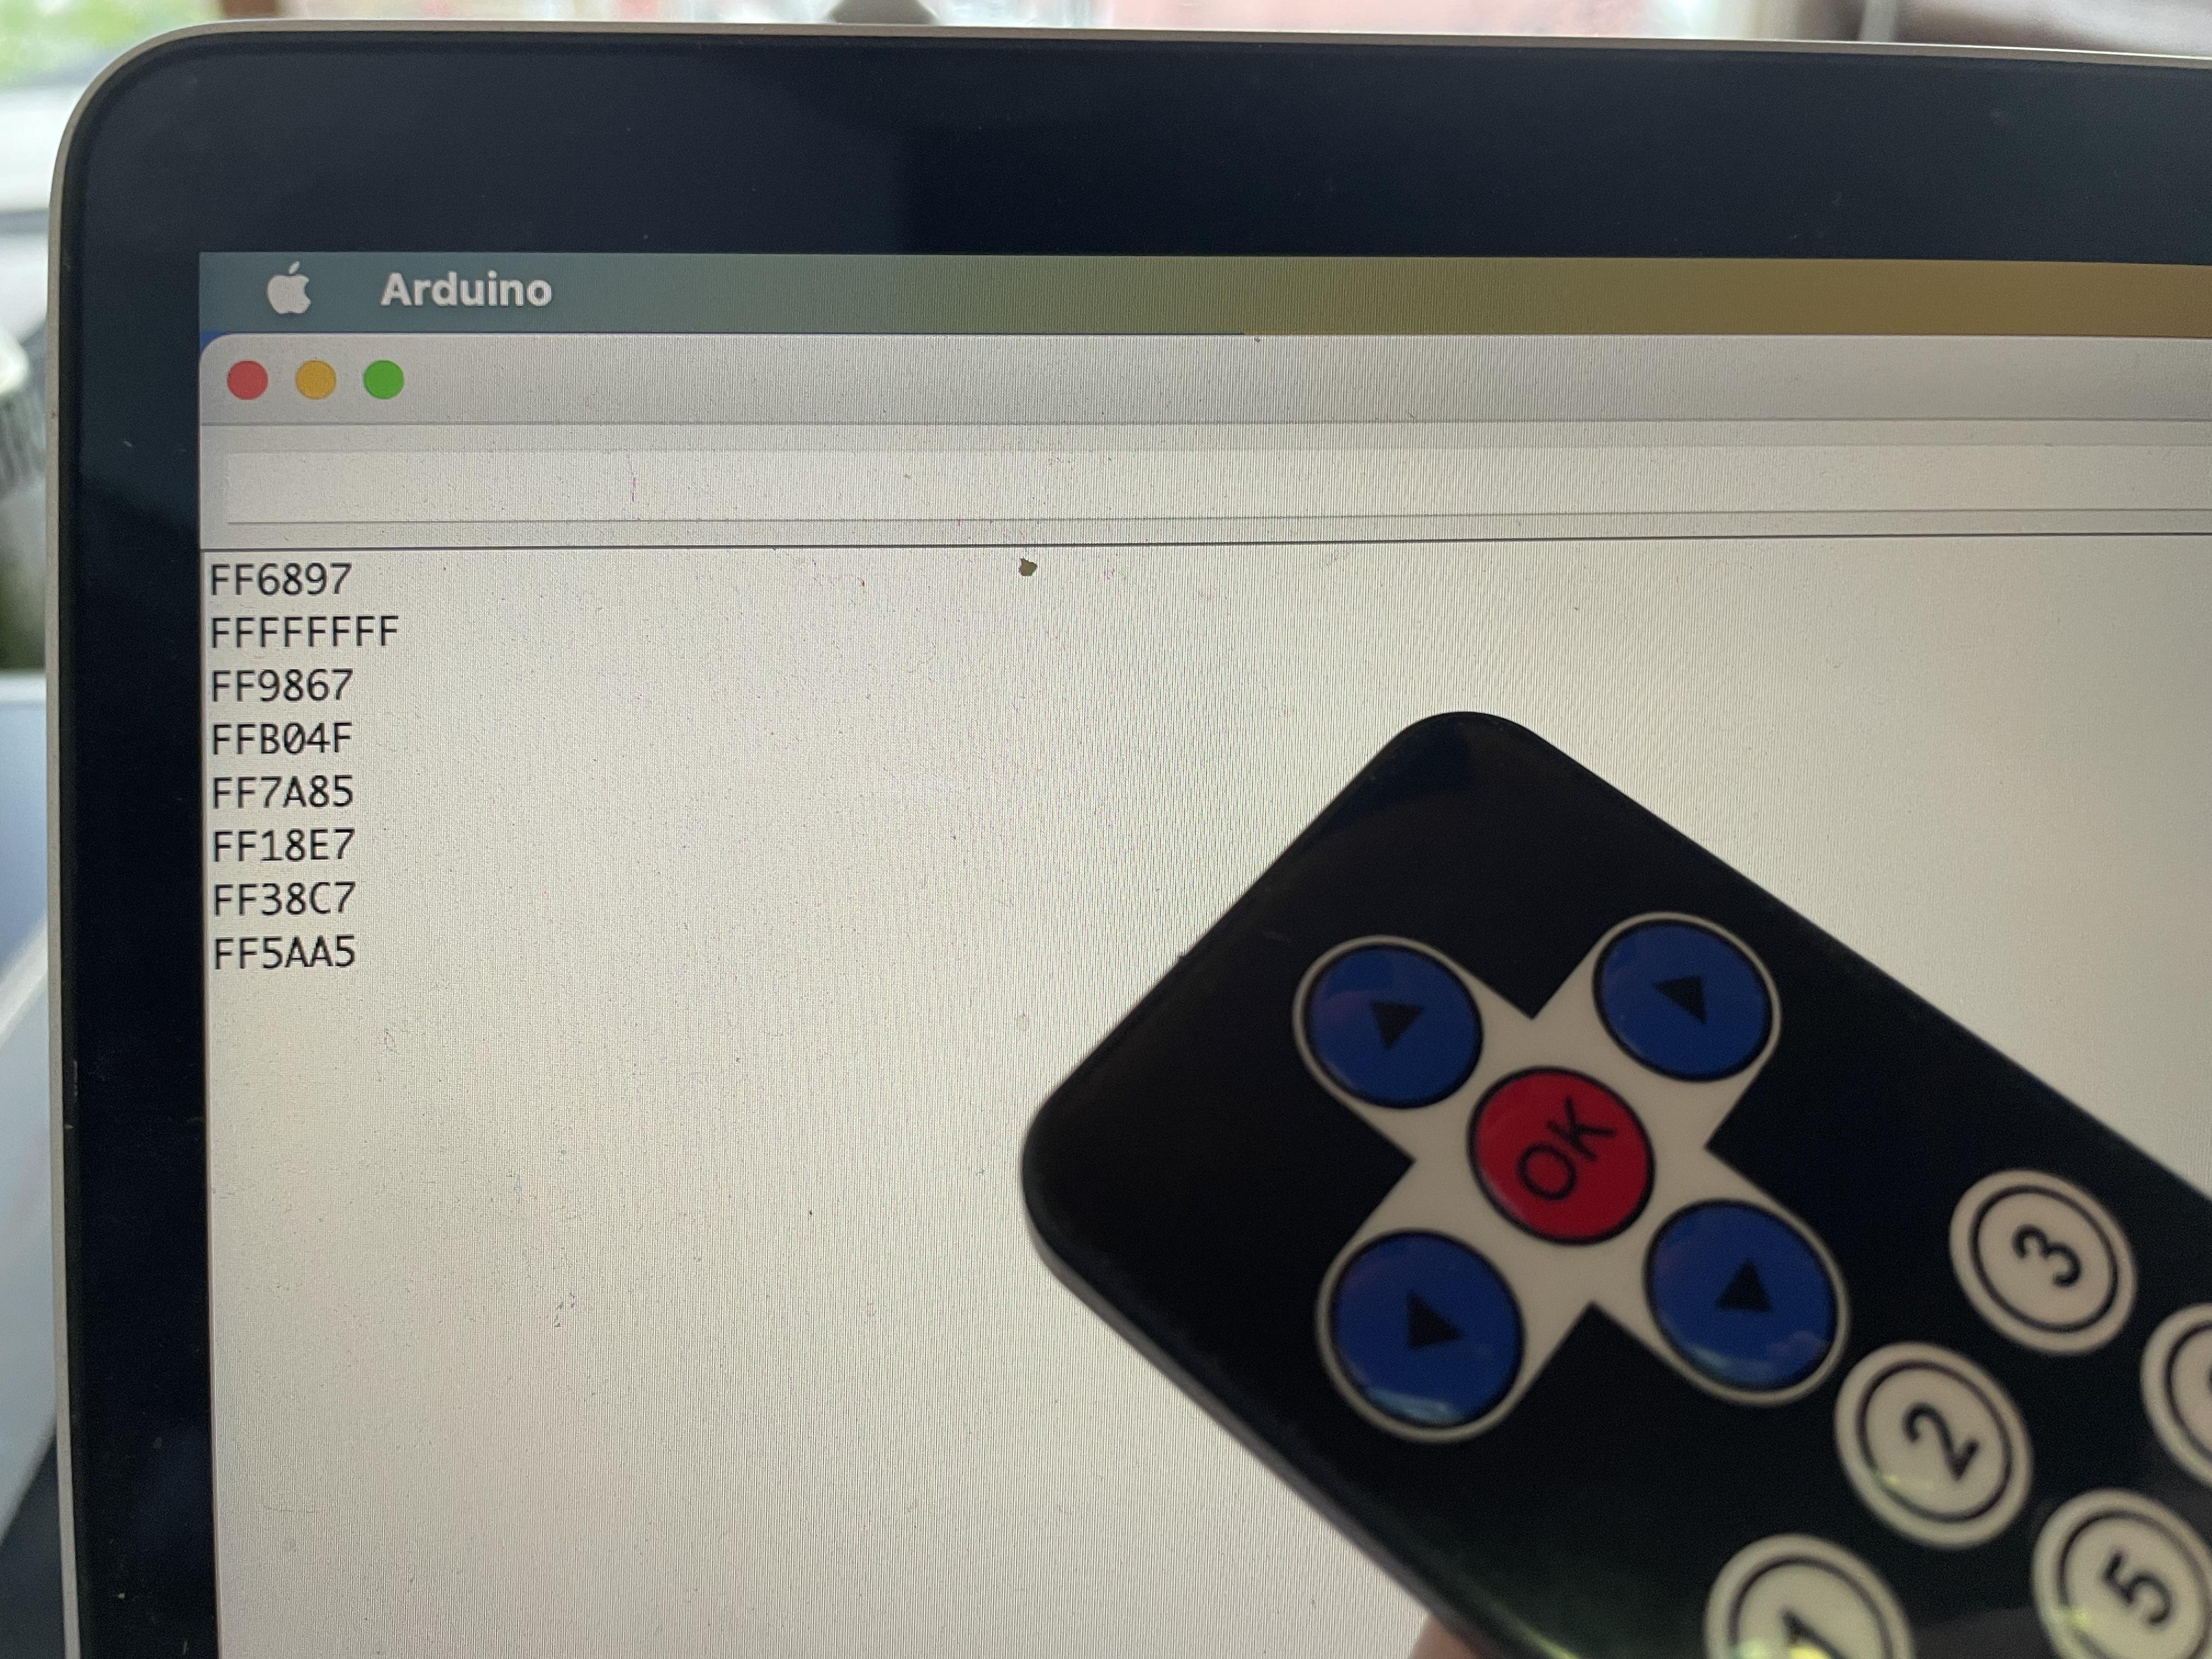
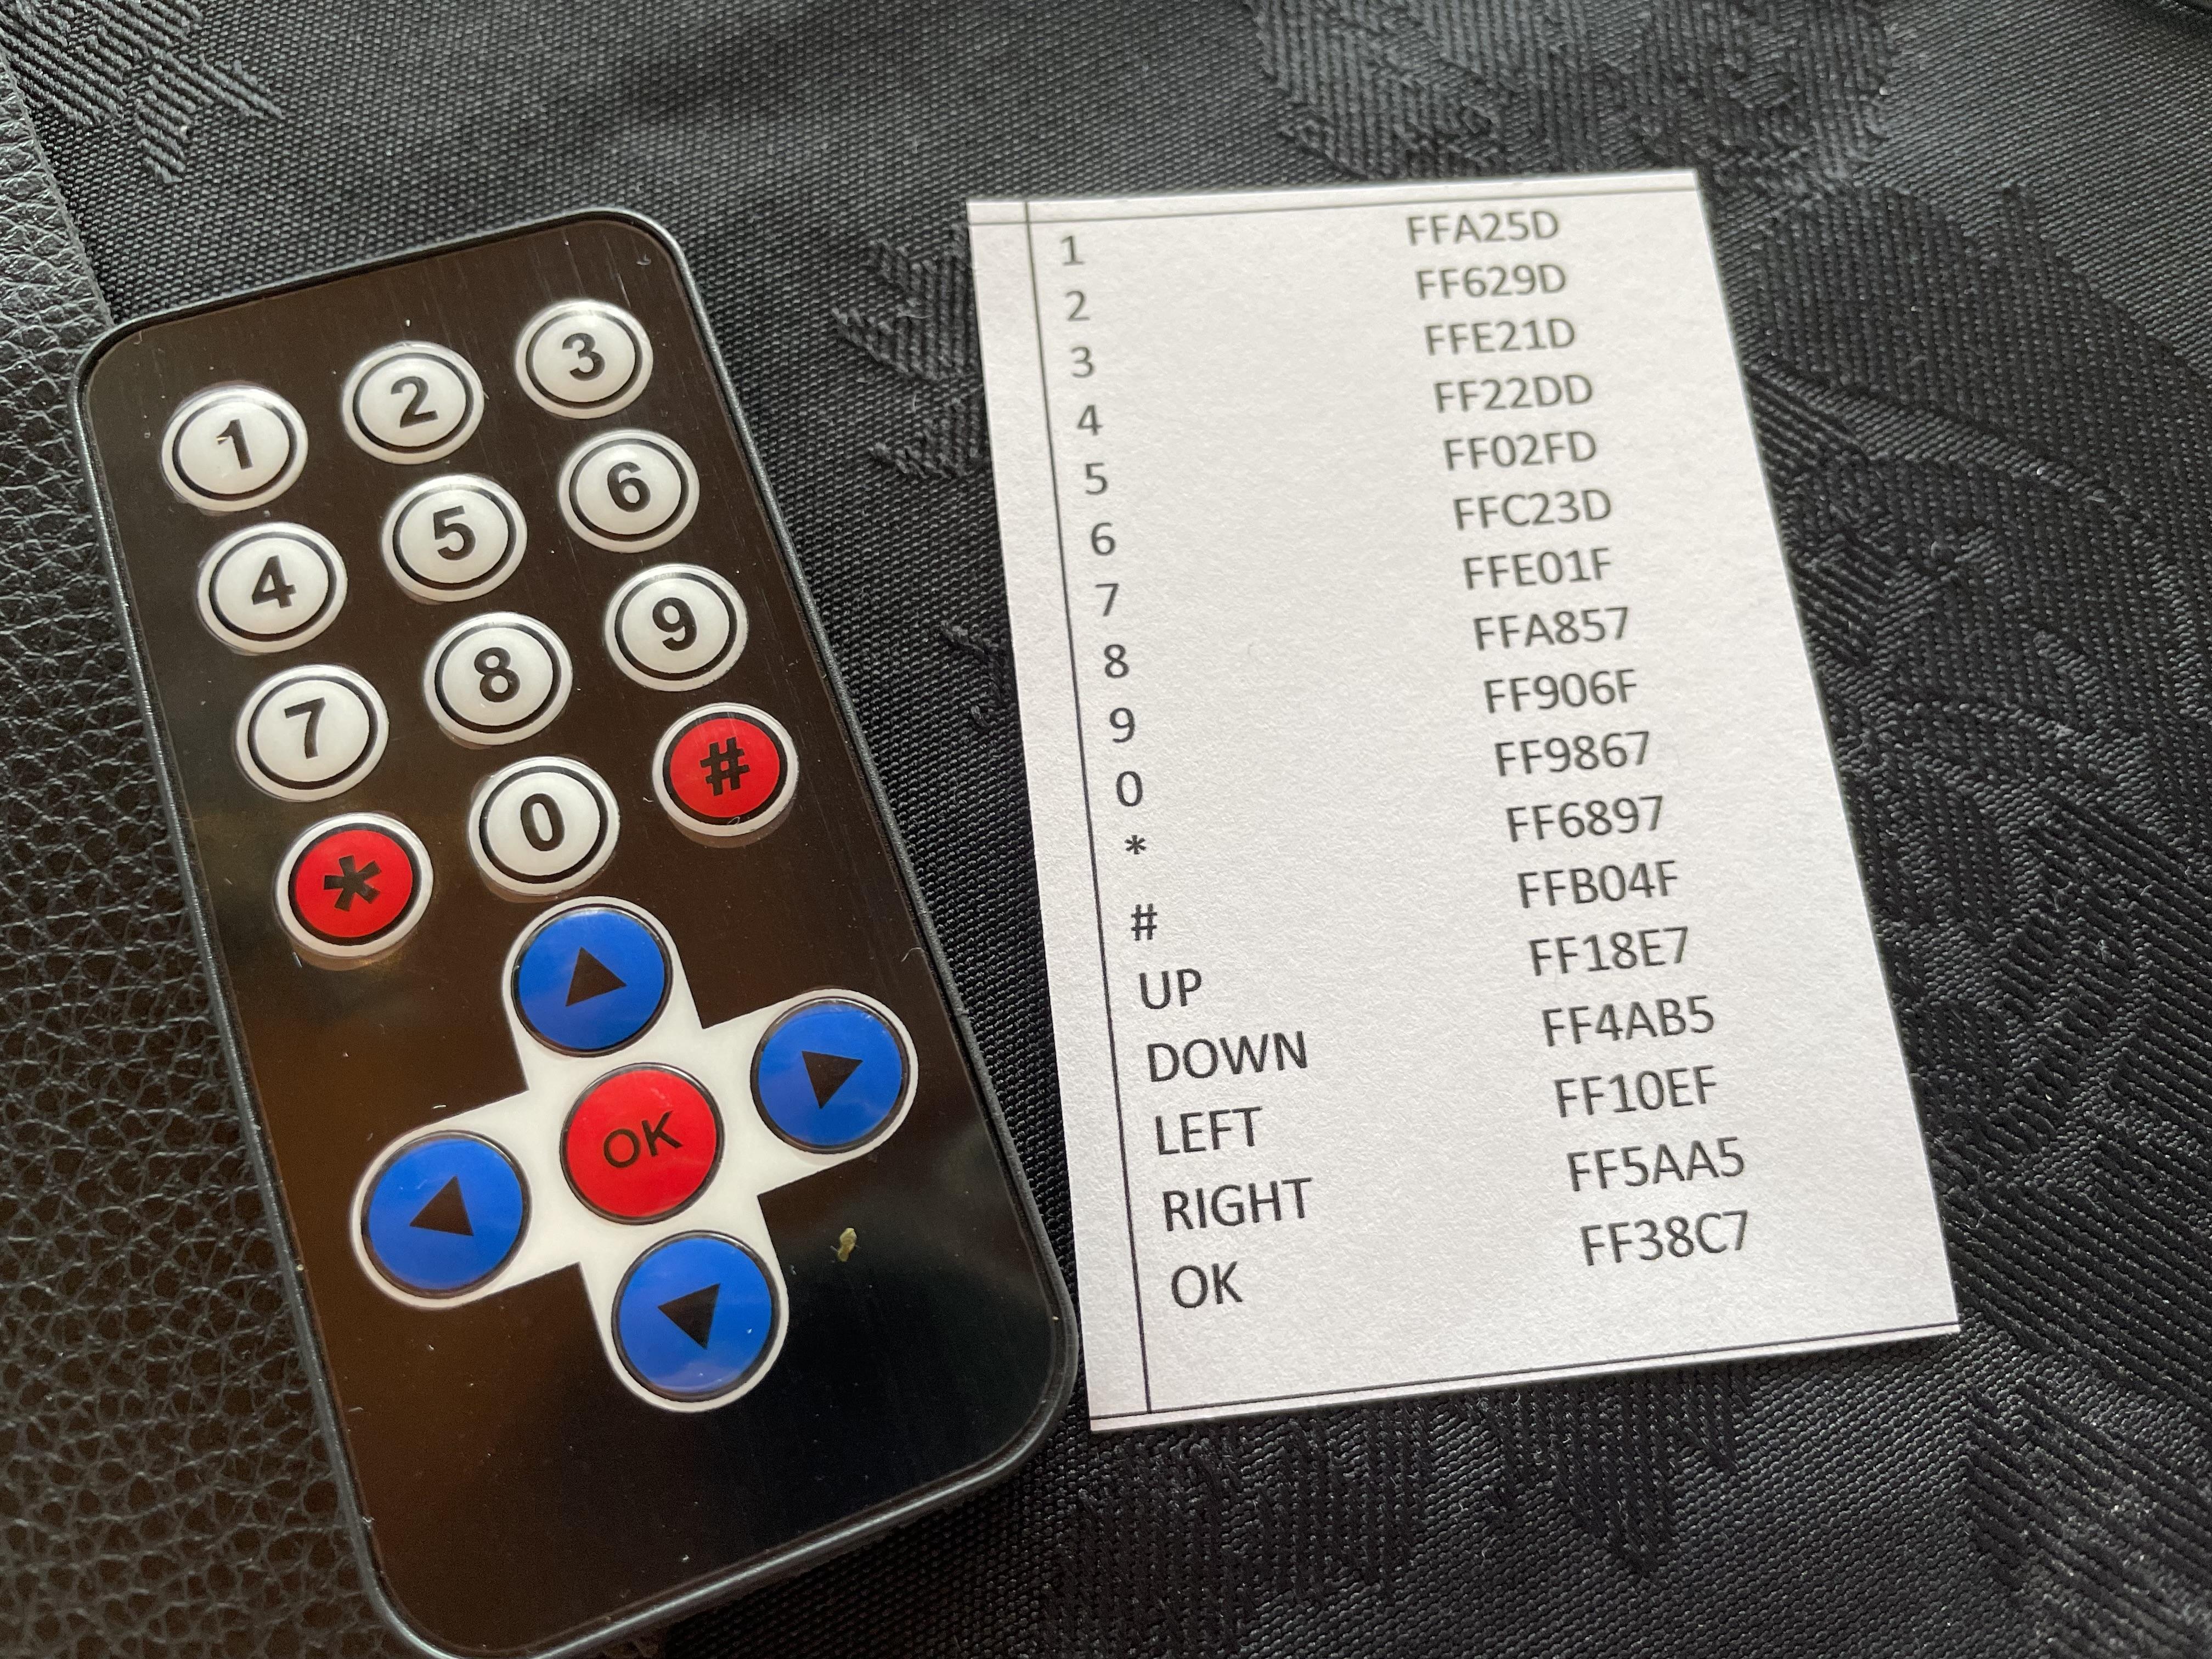
Next ensure that you know the correct codes from the Infrared transmitter so that you can code the buttons to do what you want them to do.
I followed the instructions on Maker Guides here but in short:
- Download the IRremote.h library in the Arduino IDE. You can add this in the Arduino IDE Manage Library tool.
- Load the code below to the arduino - thanks here goes to Makerguides.com
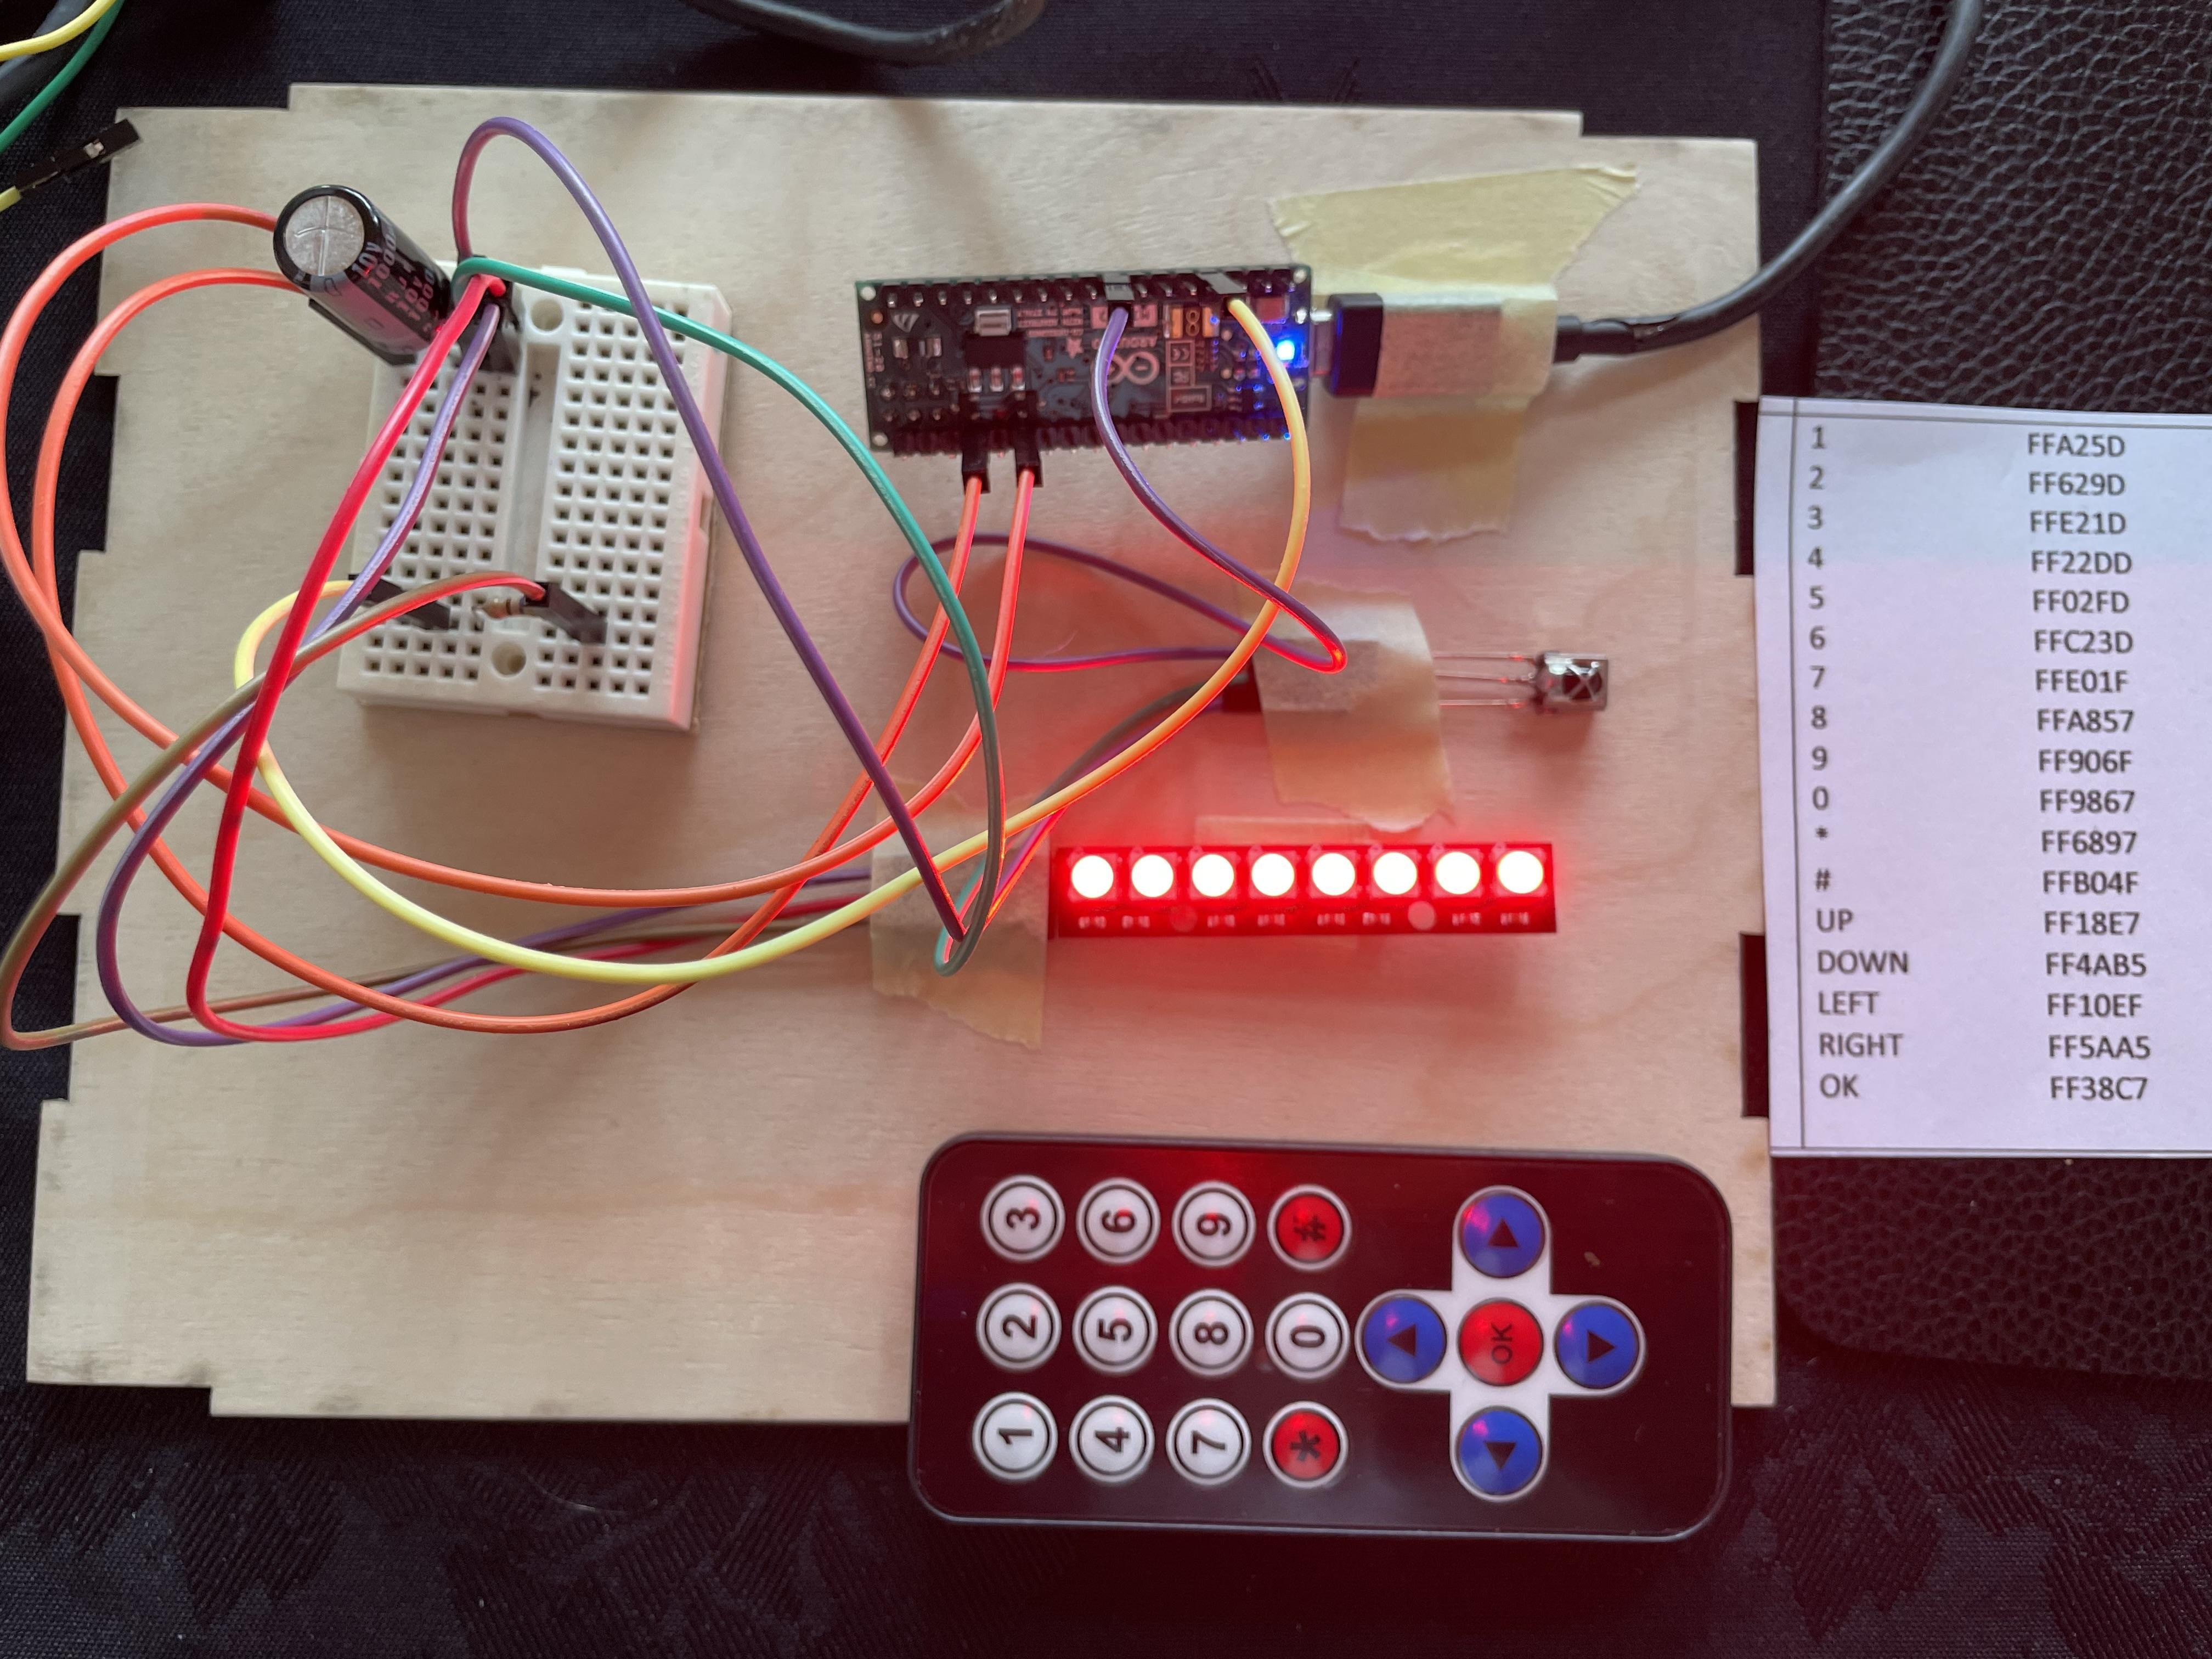
- Open the serial monitor and press the remote keys one by one. You will then receive the code for each IR button on the transmitter. See picture attached and resulting codes.
/* Finding the key codes for your remote. More info: https://www.makerguides.com */

#include <IRremote.h> // include the IRremote library
#define RECEIVER_PIN 5 // define the IR receiver pin
IRrecv receiver(RECEIVER_PIN); // create a receiver object of the IRrecv class
decode_results results; // create a results object of the decode_results class
void setup() {
  Serial.begin(9600); // begin serial communication with a baud rate of 9600
  receiver.enableIRIn(); // enable the receiver
  receiver.blink13(true); // enable blinking of the built-in LED when an IR signal is received
}
void loop() {
  if (receiver.decode(&results)) { // decode the received signal and store it in results
    Serial.println(results.value, HEX); // print the values in the Serial Monitor
    receiver.resume(); // reset the receiver for the next code
  }
}
Code the Arduino With Your Preferred Colour Choices
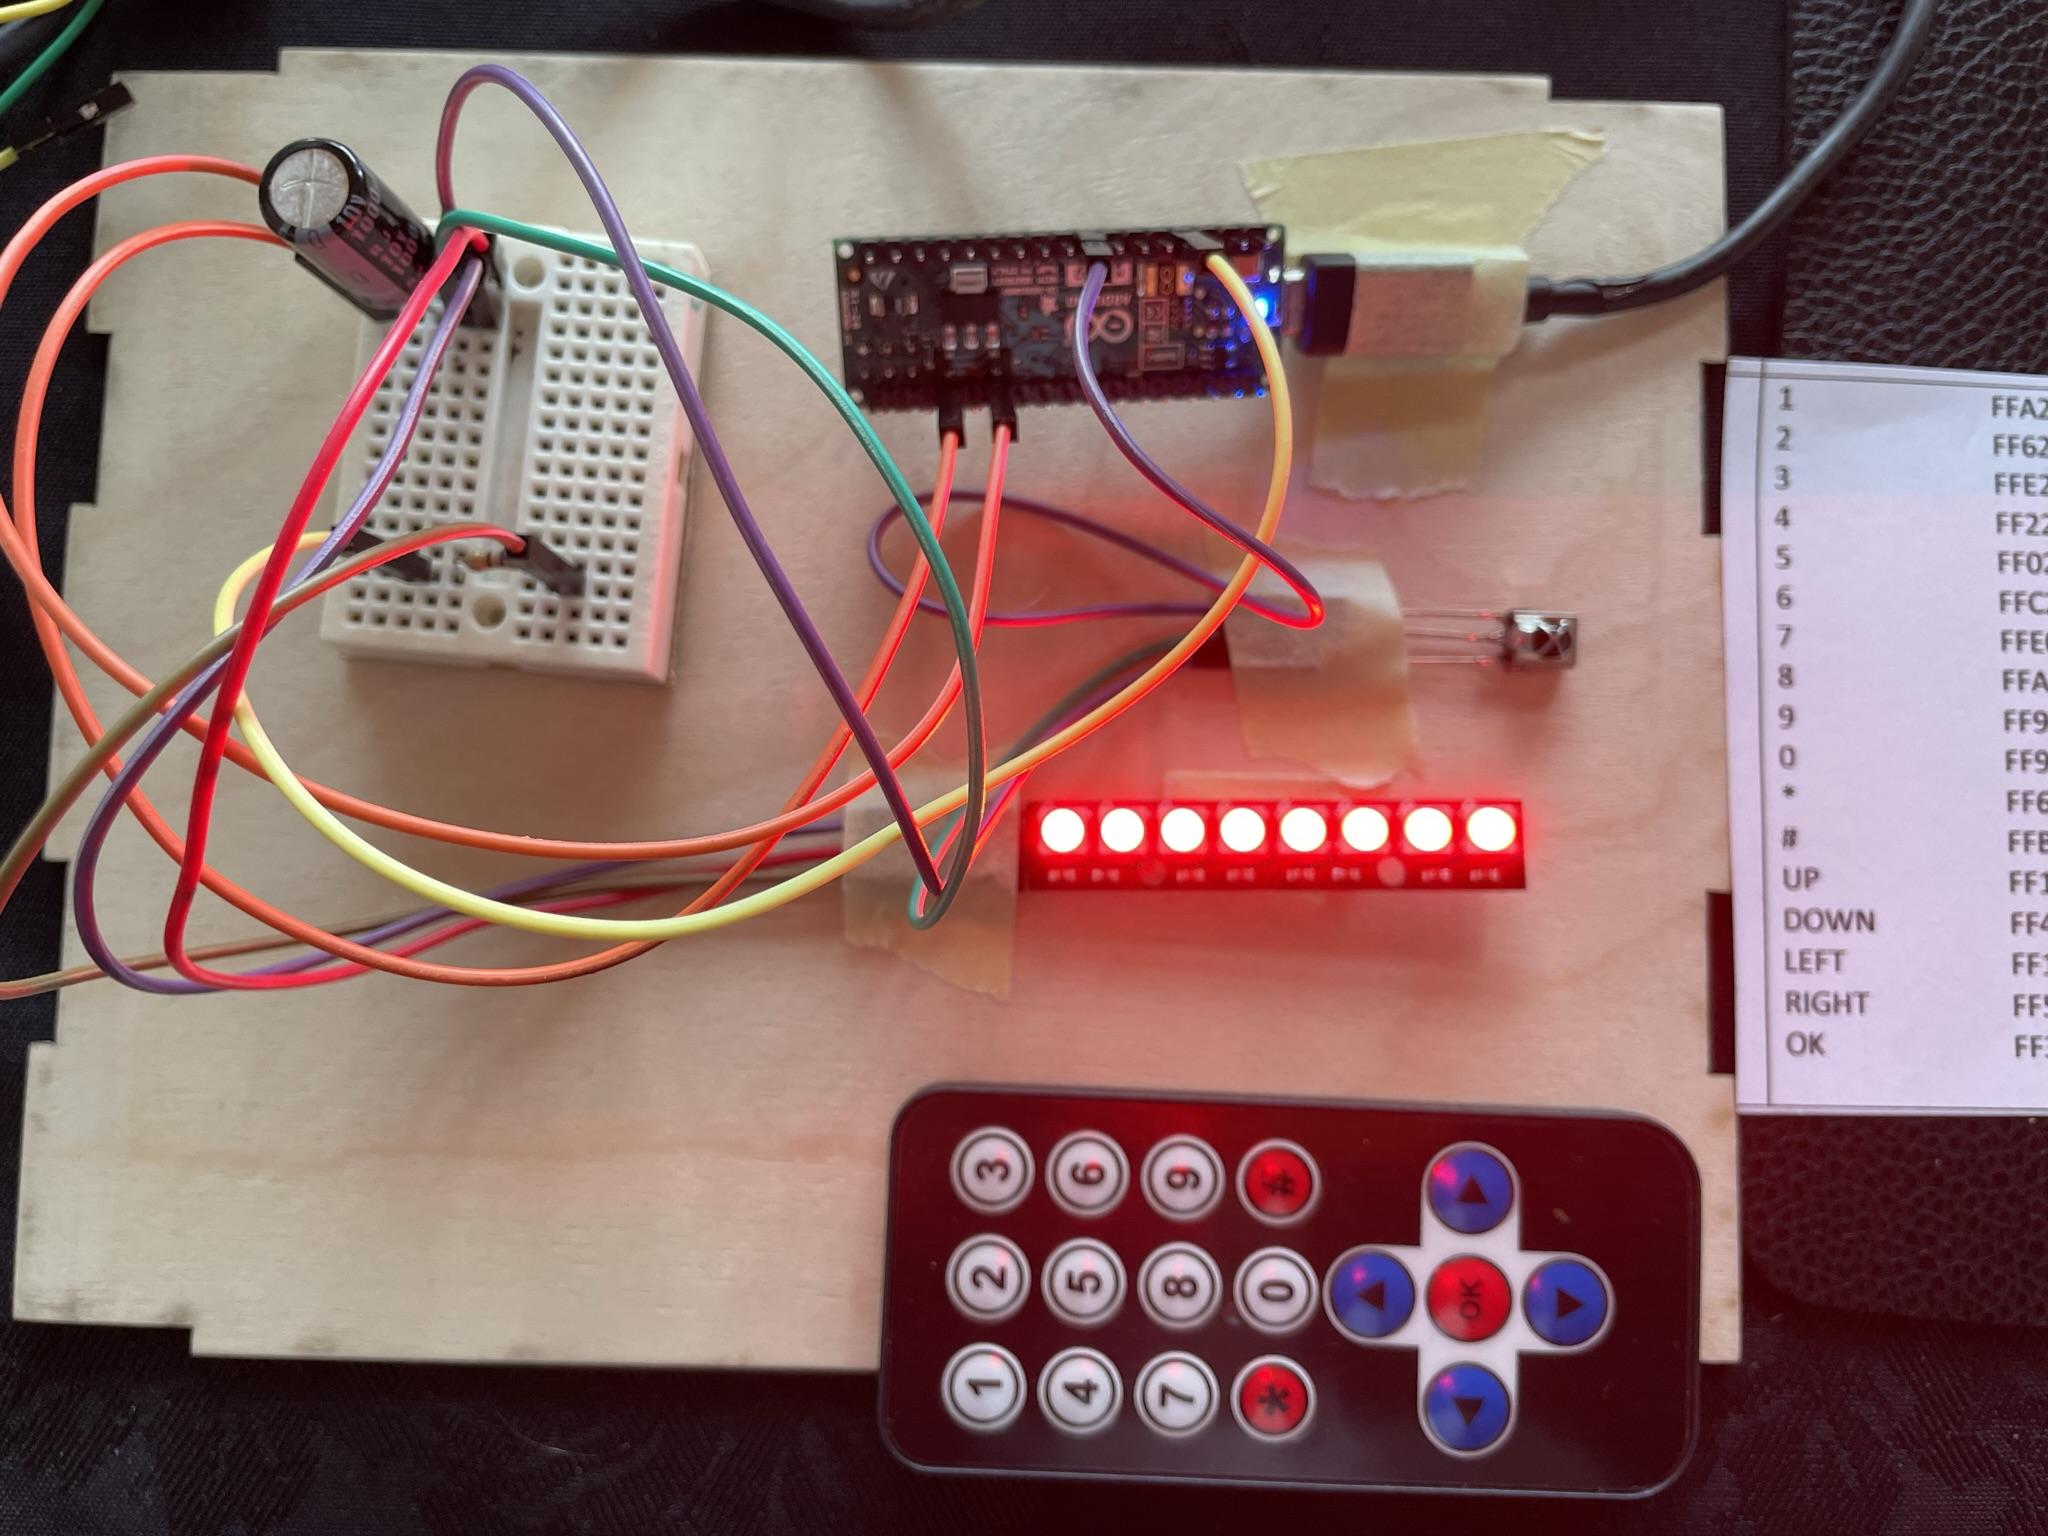
Then use the following code ensuring the following:
- Add both the IRremote.h and Adafruit_NeoPixel.h libraries. You can add these in the Arduino IDE Manage Library tool.
- Amend the "Define Key" lines to be correct for your IR remote (per Step 2)
- If you are using the NeoPixel stick, you will need to reduce the number of LEDs in this line of code (#define NUM_PIXEL 12 //amount of pixels) to 8. If using the ring then this can stay at 12.
- Change the colours or code routines to the ones you want. Right now it does something quite simple.
- Buttons 1-5 just show single colours of my choosing using the "ColourWipe" library command.
- Button 6 to 8 cycle though colour combinations.
- And button 9 runs the lovely "Rainbowcycle" library sequence.
- Button 0 then turns the LEDs to Black (therefore off).
- Finally the right and left keys increase or decrease the brightness in increments of 10. The brightness starts on 250 (maximum) and therefore would take 25 presses of the button downwards to go to zero brightness.
There is lots of advice on the Adafruit site here.
If successful it will look do what you see in the video here.
/*Description:
Press 1 on the keypad and pixelring glows one colour until another button pressed
Press 2 on the keypad and pixelring glows one colour (different) until another button pressed
Press 3 on the keypad and pixelring glows one colour (different) until another button pressed
Press 4 on the keypad and pixelring glows one colour (different) until another button pressed
Press 5 on the keypad and pixelring glows one colour (different) until another button pressed
Press 6 on the keypad and pixelring glows three different colours (ColourWipe) until another button pressed
Press 7 on the keypad and pixelring glows three different colours (ColourWipe v2) until another button pressed
Press 8 on the keypad and pixelring glows three different colours (ColourWipe v3) until another button pressed
Press 9 on the keypad and pixelring runs RainbowCycle until another button pressed.
Press 0 on the keypad and all pixelring goes off.
Right key - brighter setting
Left key - dimmed settings

*/

#include <IRremote.h>
#include <Adafruit_NeoPixel.h>

#define RECEIVER_PIN 5 // arduino pin for reception

IRrecv receiver(RECEIVER_PIN); // create a receiver object of the IRrecv class
decode_results results; // create a results object of the decode_results class
unsigned long key_value = 0; //save the ir code received

int brightness=250; //value for the pixels brightness

//===ENTER YOUR IR CODES HERE====
#define KEY_1 0xFFA25D
#define KEY_2 0xFF629D
#define KEY_3 0xFFE21D
#define KEY_4 0xFF22DD
#define KEY_5 0xFF02FD
#define KEY_6 0xFFC23D
#define KEY_7 0xFFE01F
#define KEY_8 0xFFA857
#define KEY_9 0xFF906F
#define KEY_0 0xFF9867
#define KEY_RIGHT 0xFF5AA5
#define KEY_LEFT 0xFF10EF

unsigned long KEY_IR[12]={KEY_1,KEY_2,KEY_3,KEY_4,KEY_5,KEY_6,KEY_7,KEY_8,KEY_9,KEY_0,KEY_LEFT,KEY_RIGHT};

#define NUM_PIXEL 12 //amount of pixels
#define PIN 9    //arduino pin for pixelring

uint16_t i, j;       //define the pixel that turn on
uint8_t color=0;      //change the color
unsigned long timePixel=0; //time for each pixel turn on

Adafruit_NeoPixel strip = Adafruit_NeoPixel(NUM_PIXEL, PIN, NEO_GRB + NEO_KHZ800);

void setup() {
 Serial.begin(9600);  //serial transmittion at 9600 bauds
 receiver.enableIRIn(); // enable the receiver
 receiver.blink13(true); // enable blinking of the built-in LED when IR signal occurs
 strip.begin();     //initialize the pixelring
 strip.setBrightness(brightness); //set the brightness
 strip.show(); // Initialize all pixels to 'off'
 pinMode(13, OUTPUT);
}

void loop() {
 if (receiver.decode(&results)){ //if a ir code has been received
  for(int num=0;num<12;num++){ //cycle for compare with KEY_IR
     if(results.value==KEY_IR[num]){ //compare the ir code received with KEY_IR (correct ir codes)
      key_value = results.value; //save the ir code received
      Serial.println(key_value, HEX); //show on serial monitor

      i=0; //reset the variables for the pixels
      j=0;
      color=0;
      colorRing(strip.Color(0, 0, 0), 0); //turn off the pixels

      num=255; //put a number >12 for get out of the cycle "for"
     }

  }

   receiver.resume(); // reset the receiver for the next code
 }

  switch (key_value) { //compare the key_value received and saved

  case KEY_1:
   colorWipe(strip.Color(255, 0, 0), 500); // Red
  break;

  case KEY_2:
   colorWipe(strip.Color(255, 0, 255), 500); // Magenta
  break;

  case KEY_3:
   colorWipe(strip.Color(0, 0, 255), 500); // Blue
  break;

  case KEY_4:
   colorWipe(strip.Color(0, 255, 255), 500); // cyan
  break;

  case KEY_5:
   colorWipe(strip.Color(0, 255, 0), 500); // Green
  break;

  case KEY_6:
   if(color==0) colorWipe(strip.Color(0, 255, 155), 500); // Turquoise
   else if(color==1)colorWipe(strip.Color(0, 125, 255), 500); // Ocean
   else if(color==2)colorWipe(strip.Color(0, 0, 255), 500); // Blue
  break;

  case KEY_7:
   if(color==0) colorWipe(strip.Color(255, 0, 96), 500); // Pink
   else if(color==1) colorWipe(strip.Color(255, 0, 0), 500); // Red
   else if(color==2) colorWipe(strip.Color(64, 0, 128), 500); // Purple
  break;

  case KEY_8:
   if(color==0)colorWipe(strip.Color(0, 255, 125), 500); // Turquoise
   else if(color==1)colorWipe(strip.Color(0, 255, 0), 500); // Green
   else if(color==2)colorWipe(strip.Color(125, 255, 0), 500); // Spring Green
  break;

  case KEY_9:
   rainbowCycle(20);
  break;

  case KEY_0:
   colorRing(strip.Color(0, 0, 0), 0); // Black
   key_value=0;
  break;

  case KEY_RIGHT:
    if(brightness<245) brightness+=10; //increase the brightness

    strip.setBrightness(brightness); //set the new brightness
    key_value=0;           //reset the key_value
  break;

  case KEY_LEFT:
    if(brightness>11) brightness-=10;; //decrease the brightness

    strip.setBrightness(brightness); //set the new brightness

    key_value=0; //reset the key_value
  break;

 }
}

void colorWipe(uint32_t c, uint8_t wait) { //set the color in only one pixel

 if(i<NUM_PIXEL && millis()-timePixel>wait){ //compare with the "wait" time
  strip.setPixelColor(i, c); //set the color on pixel i
  strip.show();    //show the color on pixel

  i++;         //increase the pixel number
  timePixel=millis(); //take the current time

 }
 else if(i>=NUM_PIXEL){ //if it reachs NUM_PIXEL, reset the variables and increase the color for keys 6,7,8
  i=0;
  color++;
  if(color>2) color=0;
 }

}

void colorRing(uint32_t c, uint8_t wait){ //set the color in all the pixel ring
 for(uint16_t pixel=0; pixel<strip.numPixels(); pixel++) {
   strip.setPixelColor(pixel, c);
   strip.show();
   delay(wait);
 }
}

// Slightly different, this makes the rainbow equally distributed throughout
void rainbowCycle(uint8_t wait) {

 if(i<NUM_PIXEL){
  strip.setPixelColor(i, Wheel(((i * 256 / strip.numPixels()) + j) & 255)); //set the rgb color (wheel subroutine)
  i++; //increase the pixel number
 }
 else{
  strip.show(); //show the color on pixelring
  delay(wait);  //delay for "wait" time
  i=0;      //reset the pixel number

  if(j<256*5){ //for increase the J parameter for rainbowCycle effect
   j++;
  }
  else{
   j=0;  //reset the J parameter
  }
 }

}

// The colours are a transition r - g - b - back to r.
uint32_t Wheel(byte WheelPos) {
 WheelPos = 255 - WheelPos;
 if(WheelPos < 85) {
  return strip.Color(255 - WheelPos * 3, 0, WheelPos * 3);
 } else if(WheelPos < 170) {
  WheelPos -= 85;
  return strip.Color(0, WheelPos * 3, 255 - WheelPos * 3);
 } else {
  WheelPos -= 170;
  return strip.Color(WheelPos * 3, 255 - WheelPos * 3, 0);
 }
}
Minimise the Project Using the ATTiny85
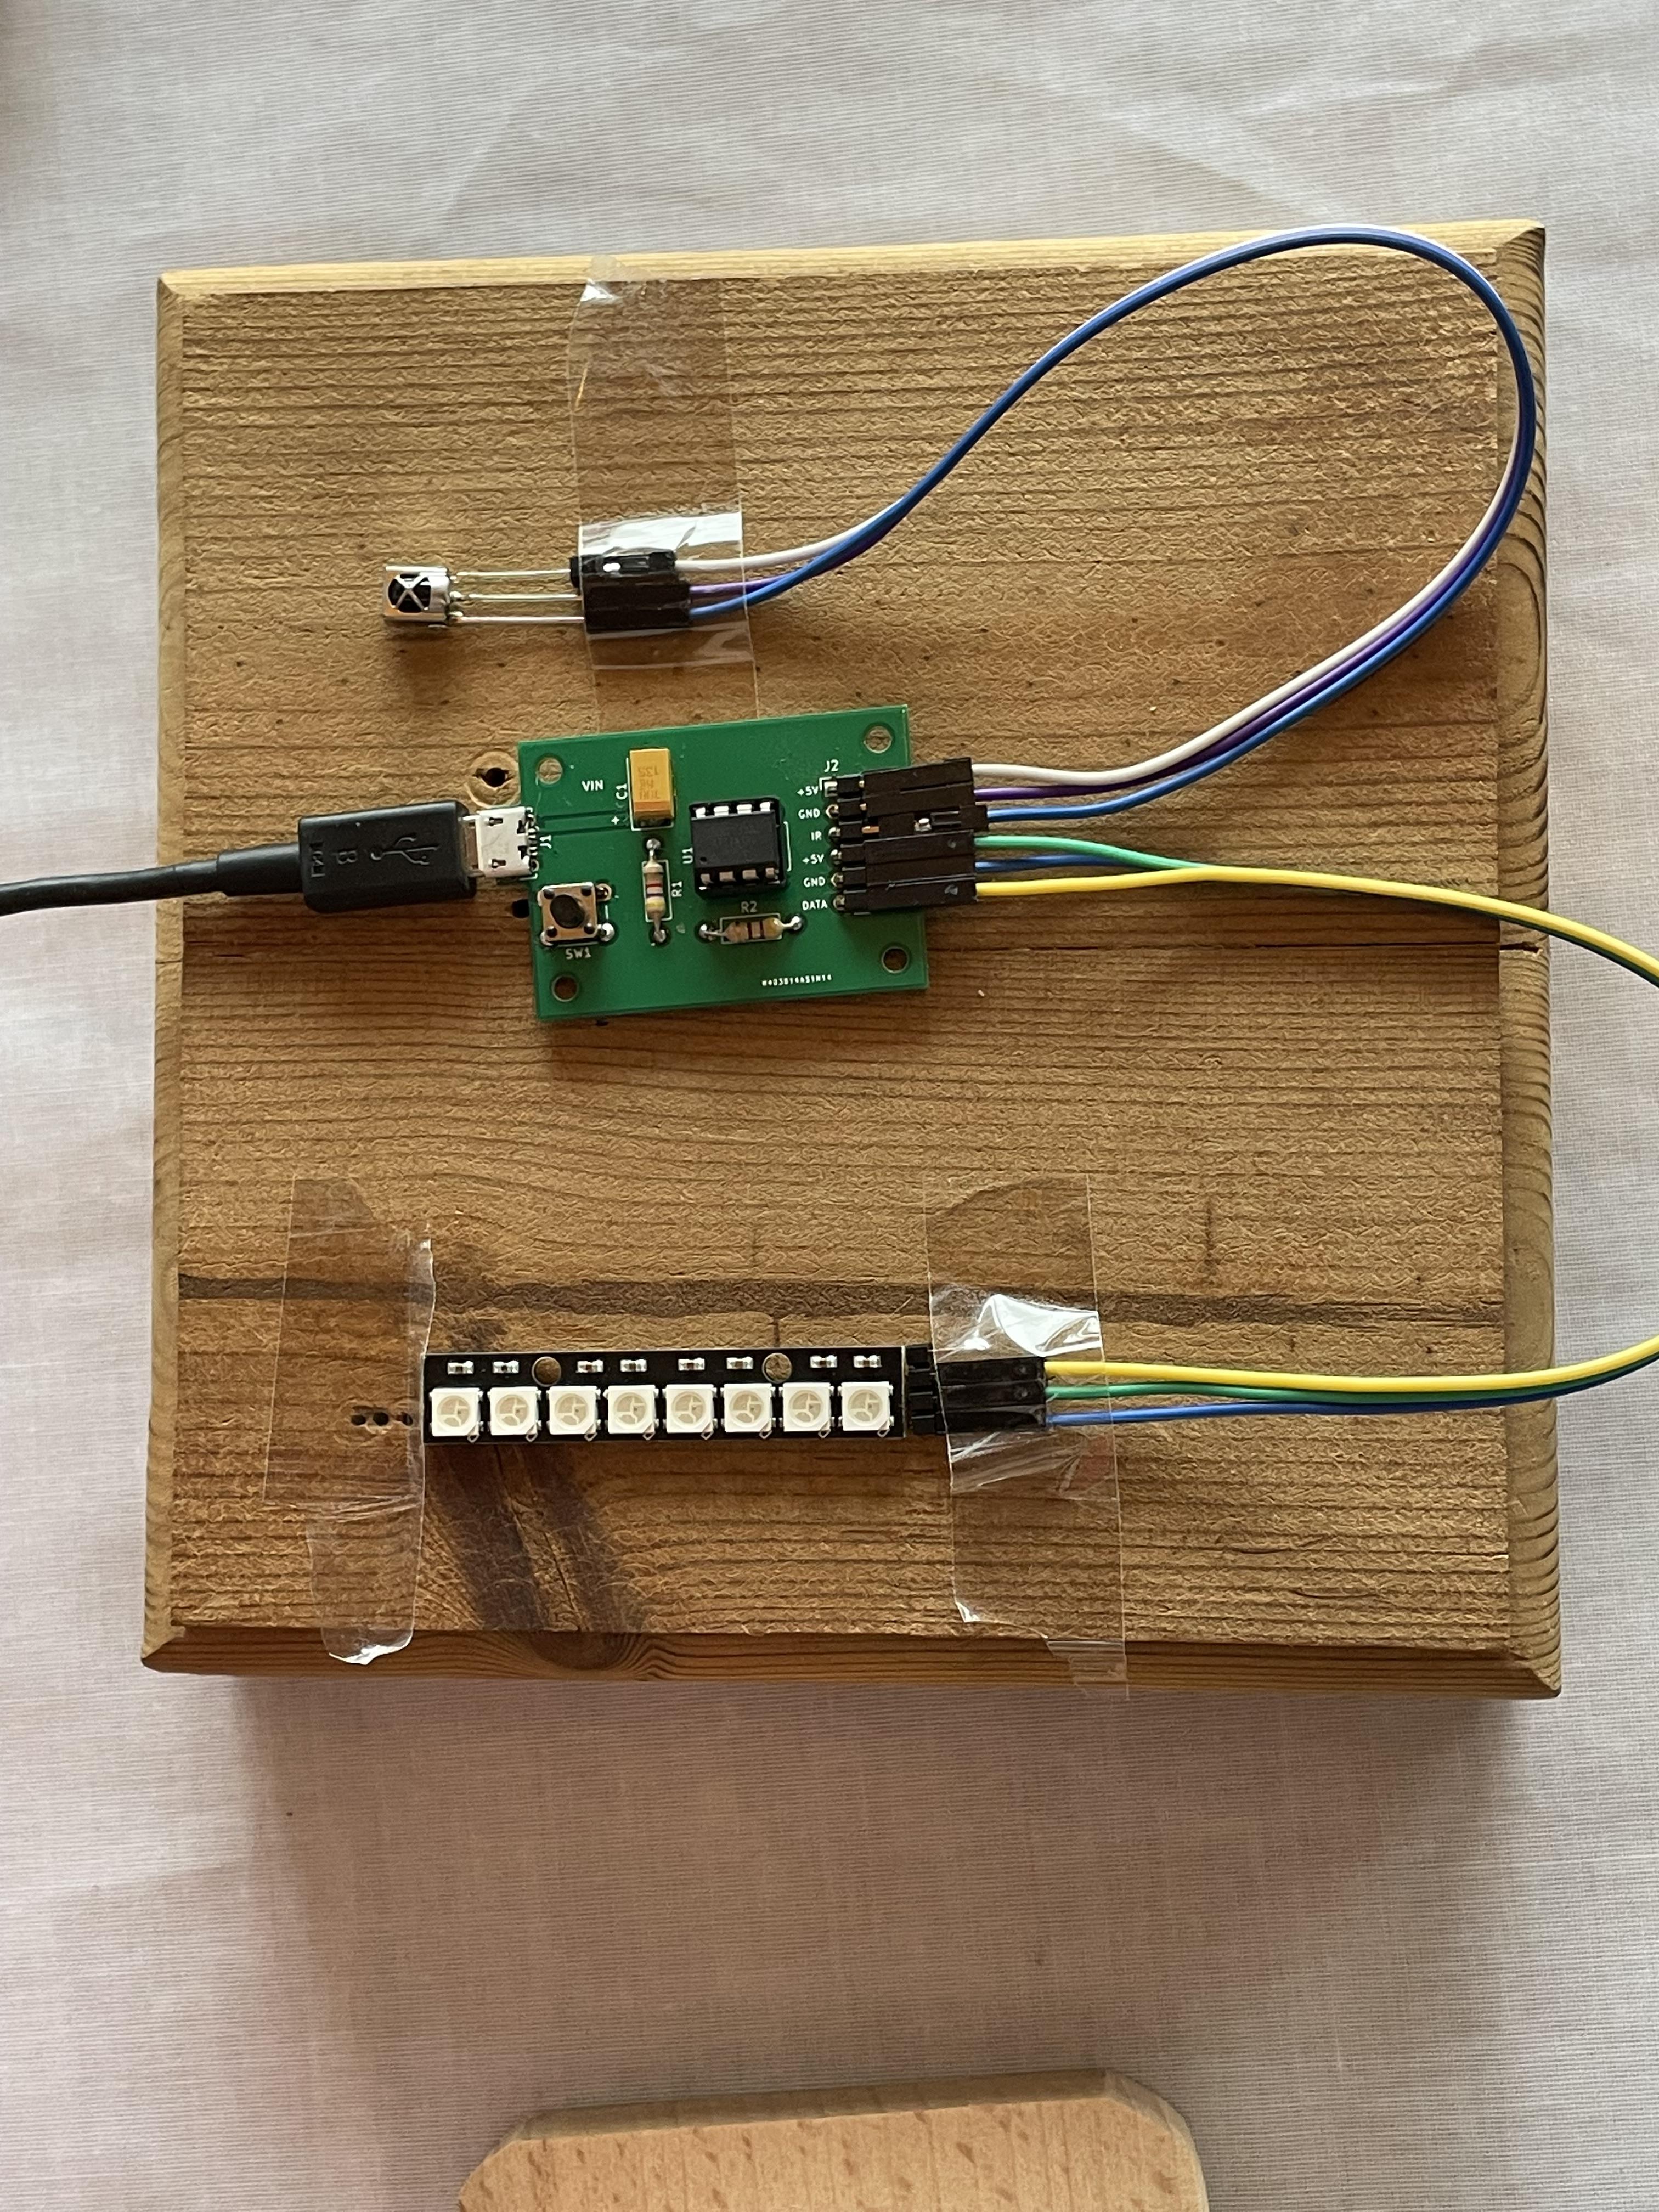
I then chose to minimise the project and make it more permanent. I chose to use the ATtiny85 for this.
The steps are as follows:
- Add the library "tiny_IRremote.h" which you can find on Github.
- Use the Sparkfun Tiny Programmer (here) to load the code below on the ATtiny85. The hook up and instruction guide is here. It is really easy to use.
- In the arduino IDE - remember to pick your board (ATTiny85), clockspeed (Internal 8mhz) and Programmer (USBTinyISP) before loading. Also Burn Bootloader first so that the ATTiny85 runs at 8mhz.
- Then wire the ATtiny85 per the Fritzing diagram attached and it should run as it did on the micro arduino.
- Note - I added a reset button to the ATTiny85 which runs from Pin 1 and uses a 4.7k resistor. See here for details.
#include <tiny_IRremote.h>
#include <tiny_IRremoteInt.h>
#include <Adafruit_NeoPixel.h>

#define F_CPU 8000000
#define __AVR_ATtiny85__

int RECV_PIN = 1;

IRrecv irrecv(RECV_PIN);

decode_results results;
unsigned long key_value = 0;

//===INSERT YOUR IR CODES====
#define KEY_1 0xFFA25D
#define KEY_2 0xFF629D
#define KEY_3 0xFFE21D
#define KEY_4 0xFF22DD
#define KEY_5 0xFF02FD
#define KEY_6 0xFFC23D
#define KEY_7 0xFFE01F
#define KEY_8 0xFFA857
#define KEY_9 0xFF906F
#define KEY_0 0xFF9867
#define KEY_RIGHT 0xFF5AA5
#define KEY_LEFT 0xFF10EF

unsigned long KEY_IR[12]={KEY_1,KEY_2,KEY_3,KEY_4,KEY_5,KEY_6,KEY_7,KEY_8,KEY_9,KEY_0,KEY_LEFT,KEY_RIGHT};

int brightness=250; //value for the pixels brightness

#define NUM_PIXEL 12 //amount of pixels
#define PIN 4        //arduino pin for pixelring

uint16_t i, j;             //define the pixel that turn on
uint8_t color=0;           //change the color
unsigned long timePixel=0; //time for each pixel turn on

Adafruit_NeoPixel strip = Adafruit_NeoPixel(NUM_PIXEL, PIN, NEO_GRB + NEO_KHZ800);

void setup() {
  irrecv.enableIRIn();

  strip.begin();          //initialize the pixelring
  strip.setBrightness(brightness); //set the brightness
  strip.show(); // Initialize all pixels to 'off'
}

void loop()
{
  if (irrecv.decode(&results))
  {
   for(int num=0;num<12;num++){  //cycle for compare with KEY_IR
          if(results.value==KEY_IR[num]){  //compare the ir code received with KEY_IR (correct ir codes)
            key_value = results.value; //save the ir code received

            i=0;  //reset the variables for the pixels
            j=0;
            color=0;
            colorRing(strip.Color(0, 0, 0), 0); //turn off the pixels

            num=255;  //put a number >12 for get out of the cycle "for"
         }

    }
    irrecv.resume();
  }

  switch (key_value) {  //compare the key_value received and saved

    case KEY_1:
      colorWipe(strip.Color(255, 0, 0), 500); // Red
    break;

    case KEY_2:
      colorWipe(strip.Color(255, 0, 255), 500); // Magenta
    break;

    case KEY_3:
      colorWipe(strip.Color(0, 0, 255), 500); // Blue
    break;

    case KEY_4:
      colorWipe(strip.Color(0, 255, 255), 500); // cyan
    break;

    case KEY_5:
      colorWipe(strip.Color(0, 255, 0), 500); // Green
    break;

    case KEY_6:
      if(color==0) colorWipe(strip.Color(0, 255, 125), 500); // Turquoise
      else if(color==1)colorWipe(strip.Color(0, 125, 255), 500); // Ocean
      else if(color==2)colorWipe(strip.Color(0, 0, 255), 500); // Blue
    break;

    case KEY_7:
      if(color==0) colorWipe(strip.Color(255, 0, 96), 500); // Pink
      else if(color==1) colorWipe(strip.Color(255, 0, 0), 500); // Red
      else if(color==2) colorWipe(strip.Color(64, 0, 128), 500); // Purple
    break;

    case KEY_8:
      if(color==0)colorWipe(strip.Color(0, 255, 125), 500); // Turquise
      else if(color==1)colorWipe(strip.Color(0, 255, 0), 500); // Green
      else if(color==2)colorWipe(strip.Color(125, 255, 0), 500); // Spring Green
    break;

    case KEY_9:
      rainbowCycle(20);
    break;

    case KEY_0:
      colorRing(strip.Color(0, 0, 0), 0); // Black
      key_value=0;
    break;

    case KEY_RIGHT:
       if(brightness<245) brightness+=10; //increase the brightness
       strip.setBrightness(brightness);  //set the new brightness
       key_value=0;                      //reset the key_value
    break;

    case KEY_LEFT:
       if(brightness>11) brightness-=10;; //decrease the brightness
       strip.setBrightness(brightness); //set the new brightness
       key_value=0;  //reset the key_value
    break;

  }
  delay(10);
}

void colorWipe(uint32_t c, uint8_t wait) { //set the color in only one pixel

  if(i<NUM_PIXEL && millis()-timePixel>wait){ //compare with the "wait" time
    strip.setPixelColor(i, c); //set the color on pixel i
    strip.show();        //show the color on pixel

    i++;                 //increase the pixel number
    timePixel=millis();  //take the current time

  }
  else if(i>=NUM_PIXEL){ //if it reachs NUM_PIXEL, reset the variables and increase the color for keys 6,7,8
    i=0;
    color++;
    if(color>2) color=0;
  }

}

void colorRing(uint32_t c, uint8_t wait){ //set the color in all the pixel ring
  for(uint16_t pixel=0; pixel<strip.numPixels(); pixel++) {
      strip.setPixelColor(pixel, c);
      strip.show();
      delay(wait);
  }
}

// Slightly different, this makes the rainbow equally distributed throughout
void rainbowCycle(uint8_t wait) {

  if(i<NUM_PIXEL){
    strip.setPixelColor(i, Wheel(((i * 256 / strip.numPixels()) + j) & 255)); //set the rgb color (wheel subroutine)
    i++;  //increase the pixel number
    timePixel=millis();
  }
  else{
    strip.show();  //show the color on pixelring
    if(millis()-timePixel>wait){
       // delay(wait);   //delay for "wait" time
        i=0;           //reset the pixel number

        if(j<256*5){  //for increase the J parameter for rainbowCycle effect
         j++;
        }
        else{
         j=0;   //reset the J parameter
        }
    }
  }

}

// The colours are a transition r - g - b - back to r.
uint32_t Wheel(byte WheelPos) {
  WheelPos = 255 - WheelPos;
  if(WheelPos < 85) {
   return strip.Color(255 - WheelPos * 3, 0, WheelPos * 3);
  } else if(WheelPos < 170) {
    WheelPos -= 85;
   return strip.Color(0, WheelPos * 3, 255 - WheelPos * 3);
  } else {
   WheelPos -= 170;
   return strip.Color(WheelPos * 3, 255 - WheelPos * 3, 0);
  }
}
Permanent PCB
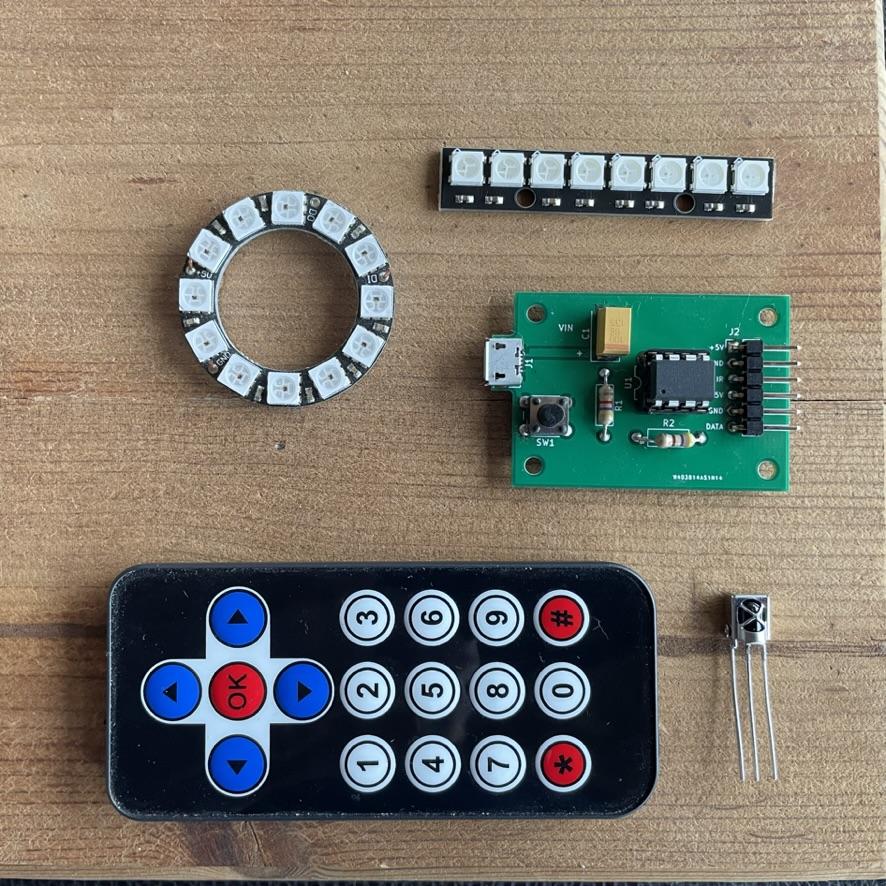
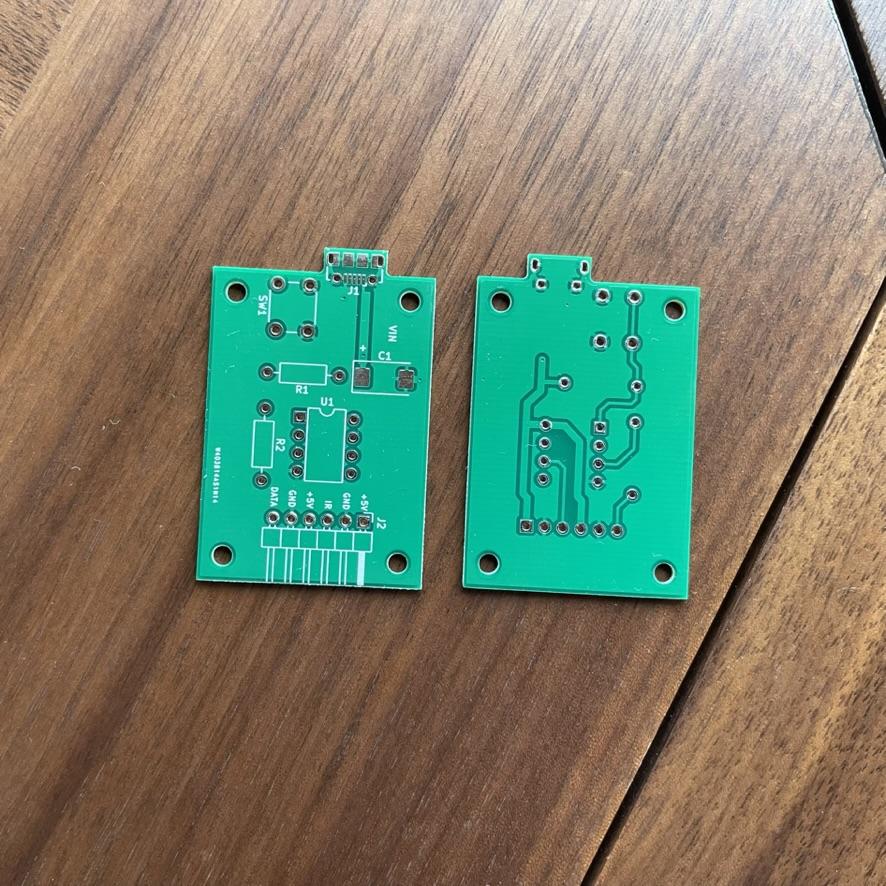
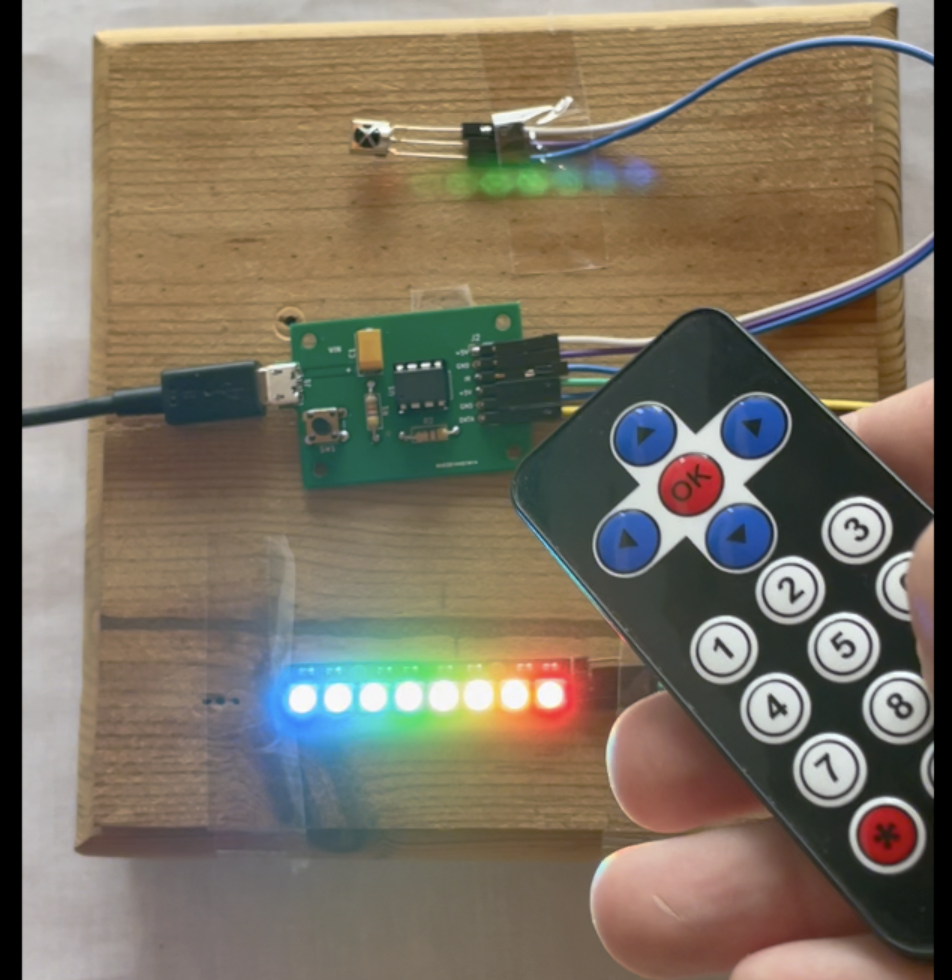
I have lots of projects where I want to use neopixels and therefore decided to produce a PCB dedicated to this Instructable. I did this through PCB way. See the video and pictures attached.
If you want to buy one of these and the associated components then I have made some available on my site here.