Light Up and Talking PotatOS From Portal 2
by codename-3c in Craft > Costumes & Cosplay
37985 Views, 235 Favorites, 0 Comments
Light Up and Talking PotatOS From Portal 2
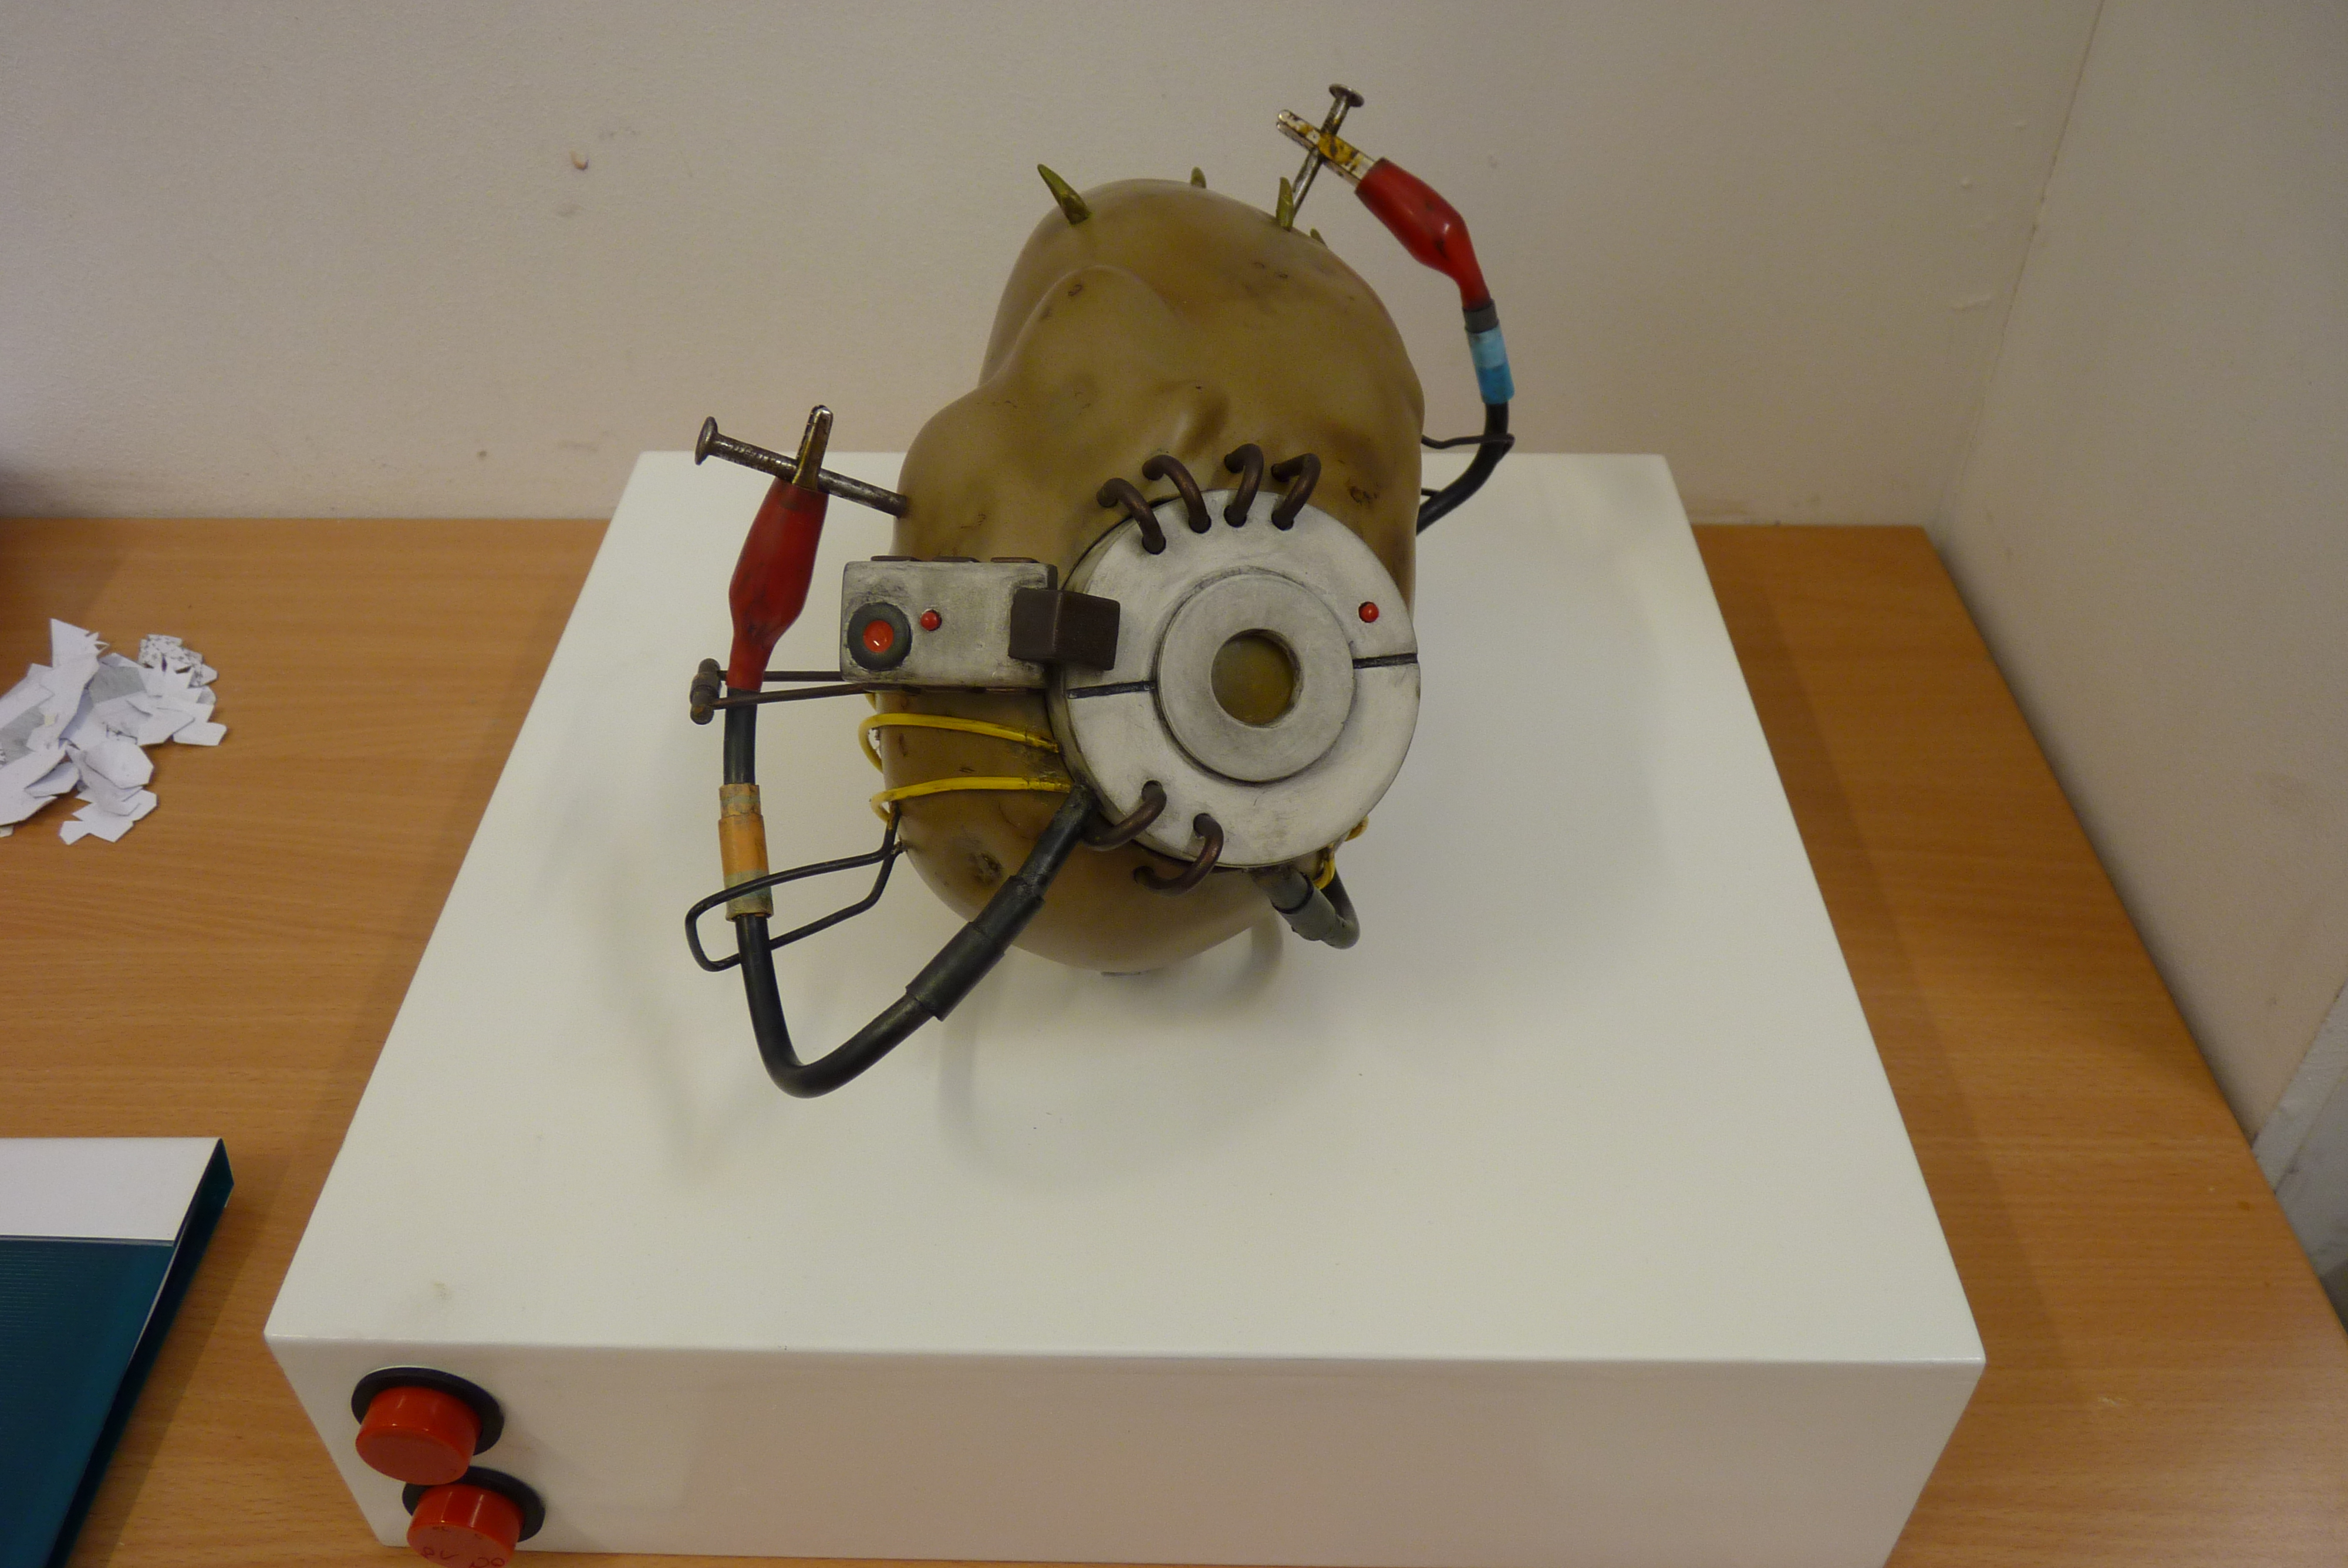
This Instructable is for a light up and talking PotatOS from Portal 2. She was made as a college project which had a size restriction of 1ft cubed. She was also used as a means for me to get to grips with electronics which I'd never incorporated into a project before plus I really wanted my own talking Potato!
[EDIT: Oh wow! A lovely featured sash across my Instructable, that's so awesome!]
WARNING: THERE IS A SLIGHT CHANCE THAT THIS INSTRUCTABLE MAY CONTAIN SPOILERS ABOUT PORTAL 2 IF YOU HAVEN'T PLAYED IT YET! BUT DON'T WORRY THEY MOST LIKELY BE SMALL ONES IF YOU WANT TO KEEP READING!
Materials Required:
NOTE: none of these materials are set in stone, if you can find a better material to incorporate into the project let me know! I'm always keen to know an easier way to do things!
Cardboard,
Paper,
Insulation Foam,
Foam Glue,
Car Body Filler (I used Ispon, the American version is Bondo by 3M),
Red Filler Putty (this is optional but gives a smooth finish, also by 3M),
Two Part Epoxy Putty (I used Milliput but there are many brands out there),
Grey Primer (Optional),
Smooth-On Rebound 25, Oomoo 30 and Smooth Cast 305
Hard Plaster (Or alternatively Smooth On Plasti Paste or Fibre Glass)
One Step release agent (or any silicone release agent)
MDF,
Thin Modeling Wire,
Thick Modeling Wire,
Black Wire Covering (I took the black covering off an old monitor cable which fit over the modeling wire perfectly),
2 Nails,
2 Crocodile Clips,
Acyrlic Inks,
Warhammer Tin Bitz and Boltgun Metal Modeling Paints (Optional),
Tamiya Weathering Kit (Optional),
White Spray Paint,
Red Enamel or Acrylic,
Styrene and styrene tubing of various sizes (Cheaper option for styrene tubing: Ask an art shop to keep all the tubes from the top of brushes next time they get a delivery in!),
Yellow Electrical Wire / Rubber Bands (The straps around PotatOS are meant to be rubber bands, I used yellow wire by mistake, seems so obvious now!)
Super Glue,
3 Yellow LEDs
Some Electric Wire and Tape
A few Female Jumper Cables (Probably only needed if you use the same sound module I did, each module is different)
1 6v Battery and Holder
1 9v Battery and Holder or Connector
1 Sound Recording Module / Chip
1 Speaker
1 on/off rocker switch
2 Mini Push Buttons
2 Large Push Buttons (If you're making a stand like I did)
Resistors
Solder
Hook and Loop Pads
A fair bit of sandpaper (I used grades ranging from 60 to 1200)
Tools
NOTE: Again, you don't have just the one option for each method!
Rotary Tool,
Sanding Blocks,
Scalpel,
Steel Ruler,
Spatula (Lollipop sticks make good disposable spatulas),
Breathing Mask and Eye Protection (I was very bold and didn't always use my mask but trust me car filler damages your health something fierce so take lots of precautions!),
Nitrile Gloves,
Sculpting Tools,
Disposable Cups for Mixing,
Router Tool / Lathe
Soldering Iron
Needle Files (Optional)
Airbrush (Optional)
Paint Brushes
Calipers (Digital is best but not essential!)
Computer Programs Used
NOTE: These probably aren't all essential, but helped a lot.
Portal 2
3D Ripper DX
3ds Max Student Version (Autodesk are amazing, if you're a student, they give you their software for free!!)
Any Graphic Software (eg: GIMP, Inkscape, Photoshop, Illustrator etc)
Any Good Music Player (eg: Windows Media Player, VLC, etc)
Nem's Tools: Crafty and GCFScape
Getting References!
What I did...
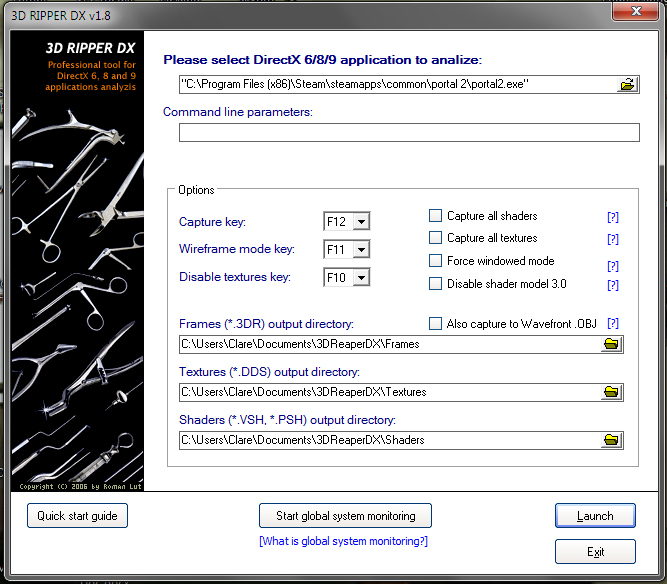
For my PotatOS I decided I wanted her to be as accurate as possible. To do this, rather than getting a potato and molding it or making a generic potato shape, I used a program called 3D Ripper DX which you can download for free to do so.
Running Portal 2 through the 3D Ripper means that when you take a screen shot, rather than just capturing an image, it captures the entire level, including the textures and saves them in a file format that is openable by 3DS Max, which you can get for free if you're a student, or you can use other free graphic software.
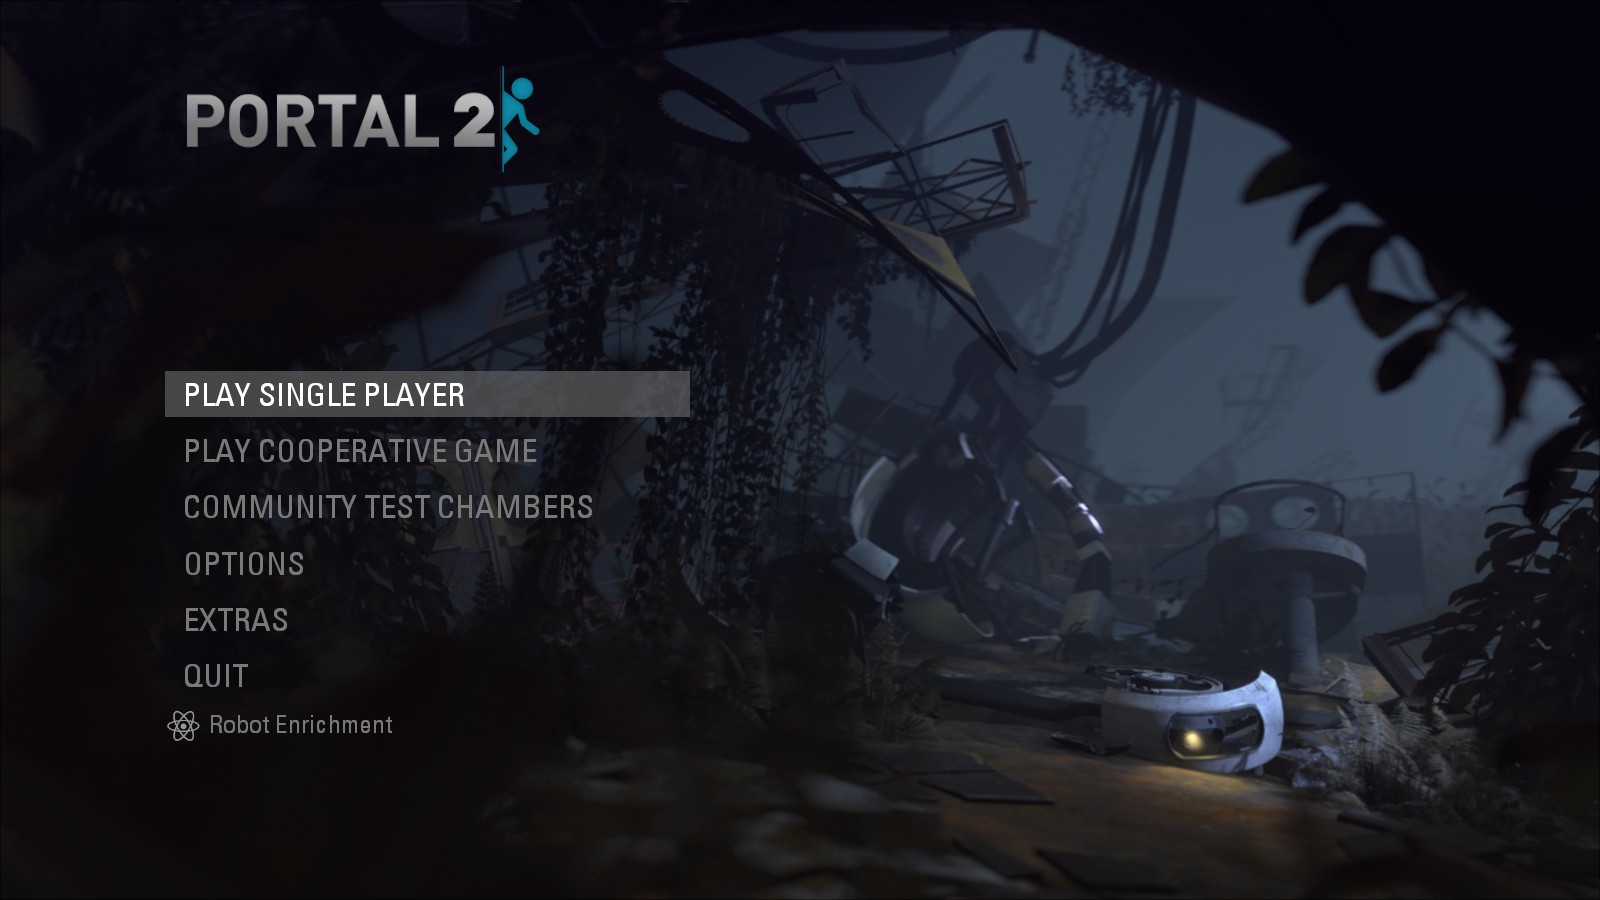
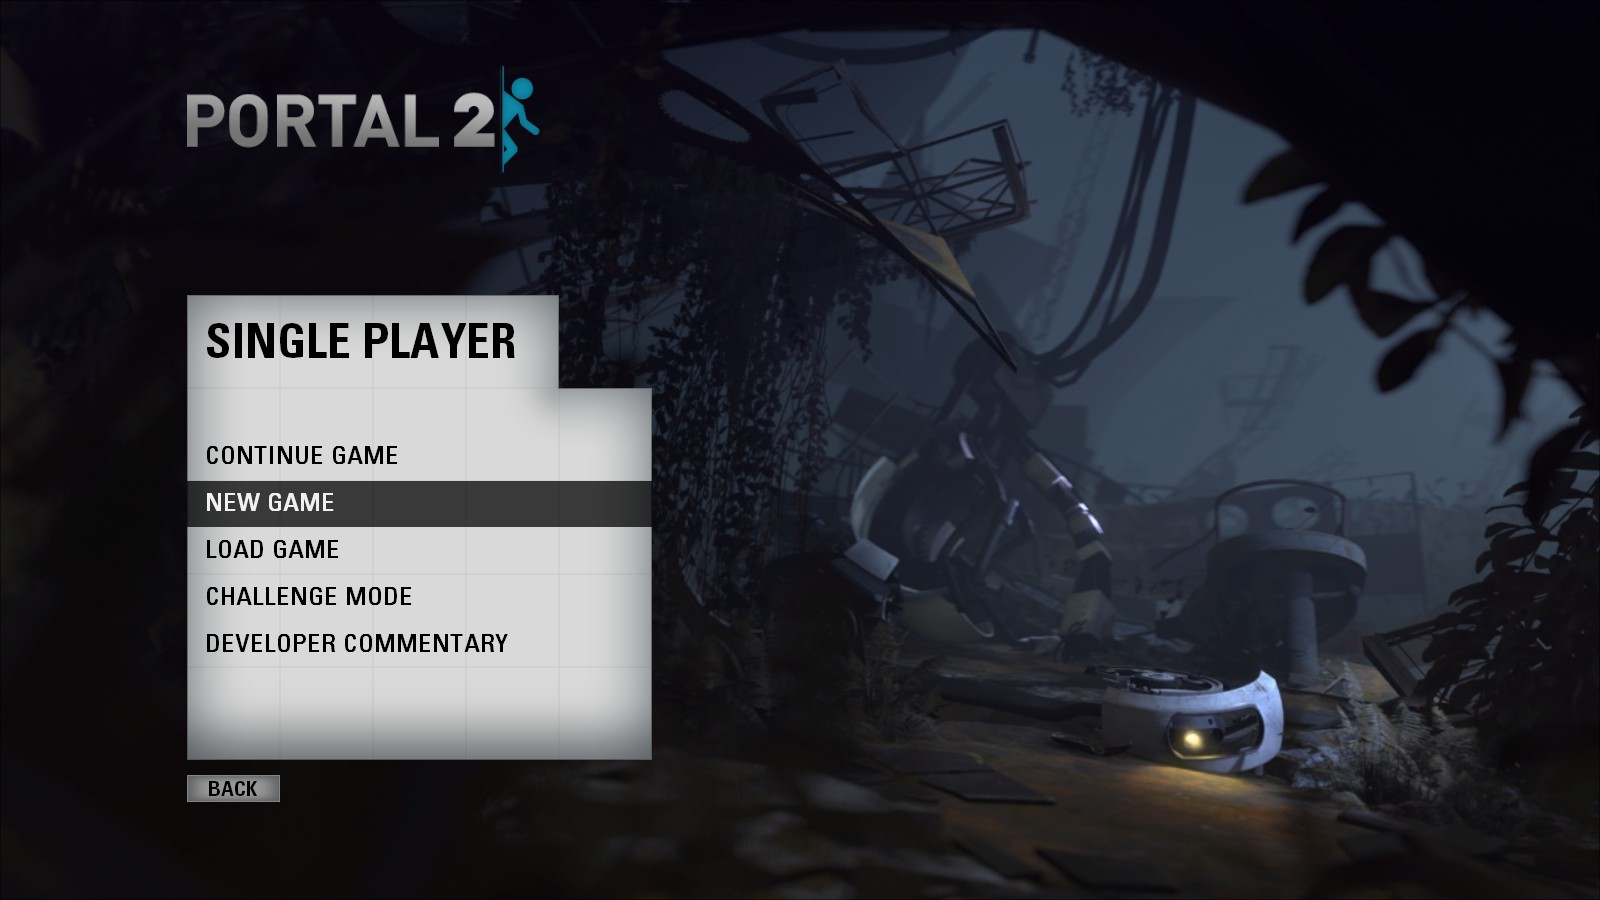
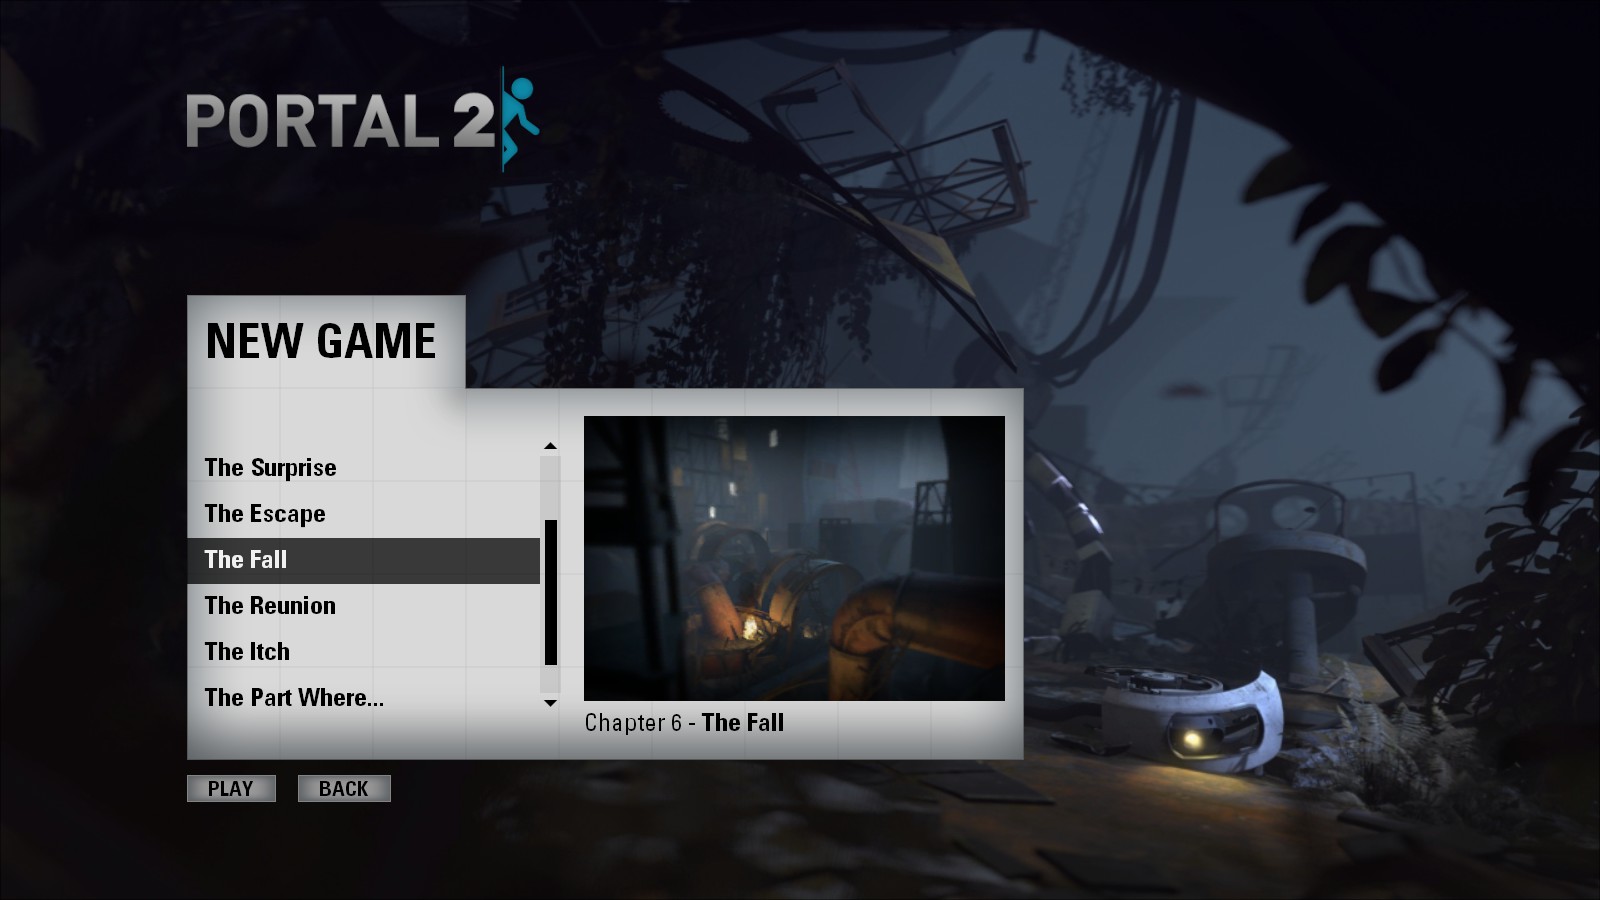
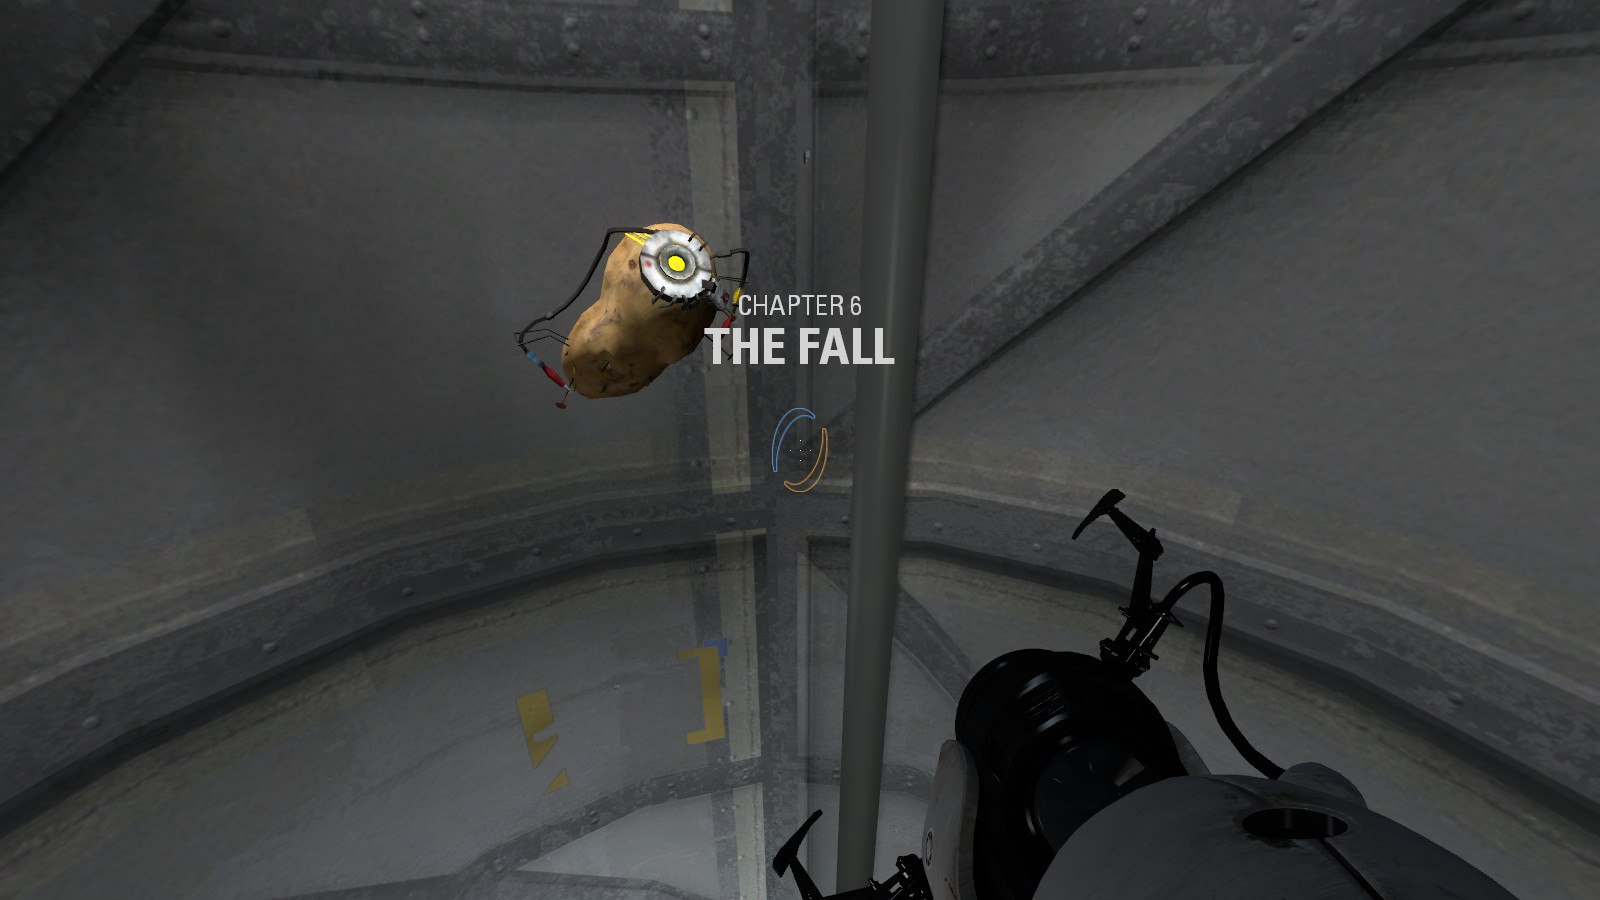
- To do this, open 3d Ripper DX, set where you want the files to save, what button you want to use as your capture button and launch the Portal2.exe file through it. This will launch your Portal 2 game with 3D Ripper DX running in the background. My PotatOS was taken from Chapter 6: The Fall. This scene is better because you only have the pipes and portal gun to clear out of your way and in game when she's attached to your gun she has no backing as I found out the first time I pulled out a scene. .To start Chapter 6 which thankfully the fall through the pipes is at the very begining of go to Main Menu > New Game > The Fall. The level will load with you falling alongside PotatOS so while she's talking away. Press your chosen capture button to capture the scene. Dont panic if the game freezes for a second, its just making sure it captures all the data from that one point. After it captures the scene you can exit the game.
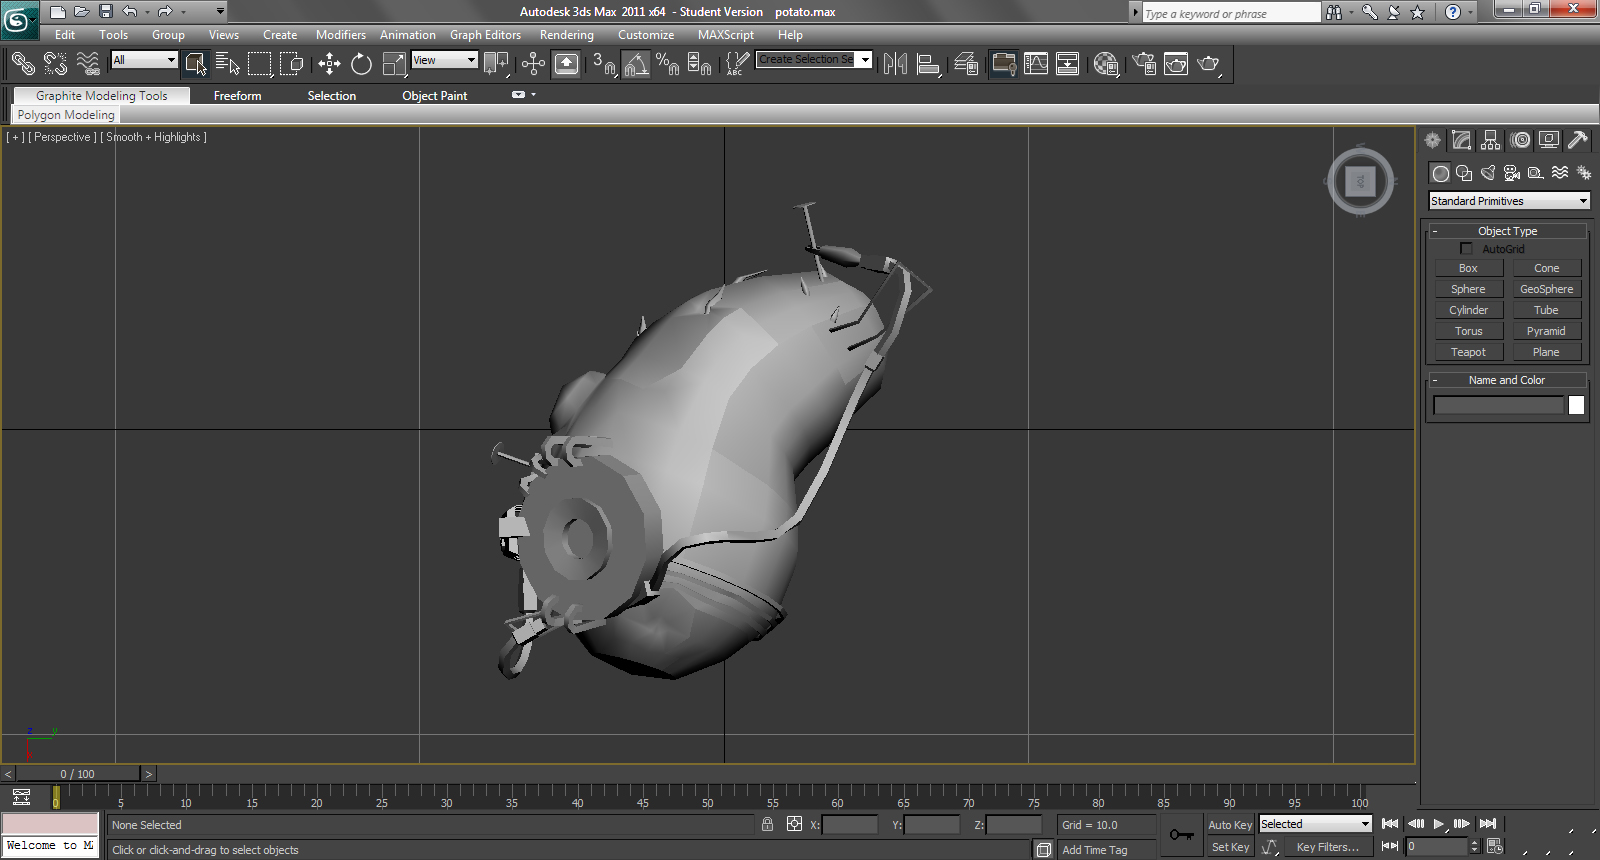
- Open up 3ds Max (or whatever graphics software you are using) go to File > Import and find where you saved your files, open the Frames folder and import the .3dr file you captured. The textures wont load into the file but you can find them in the textures folder and rearrange them if you like, I just never found the need to plus I find it easier to see detail it it's one solid colour. You then need to clear out everyone else in the level so you have a clear shot of PotatOS
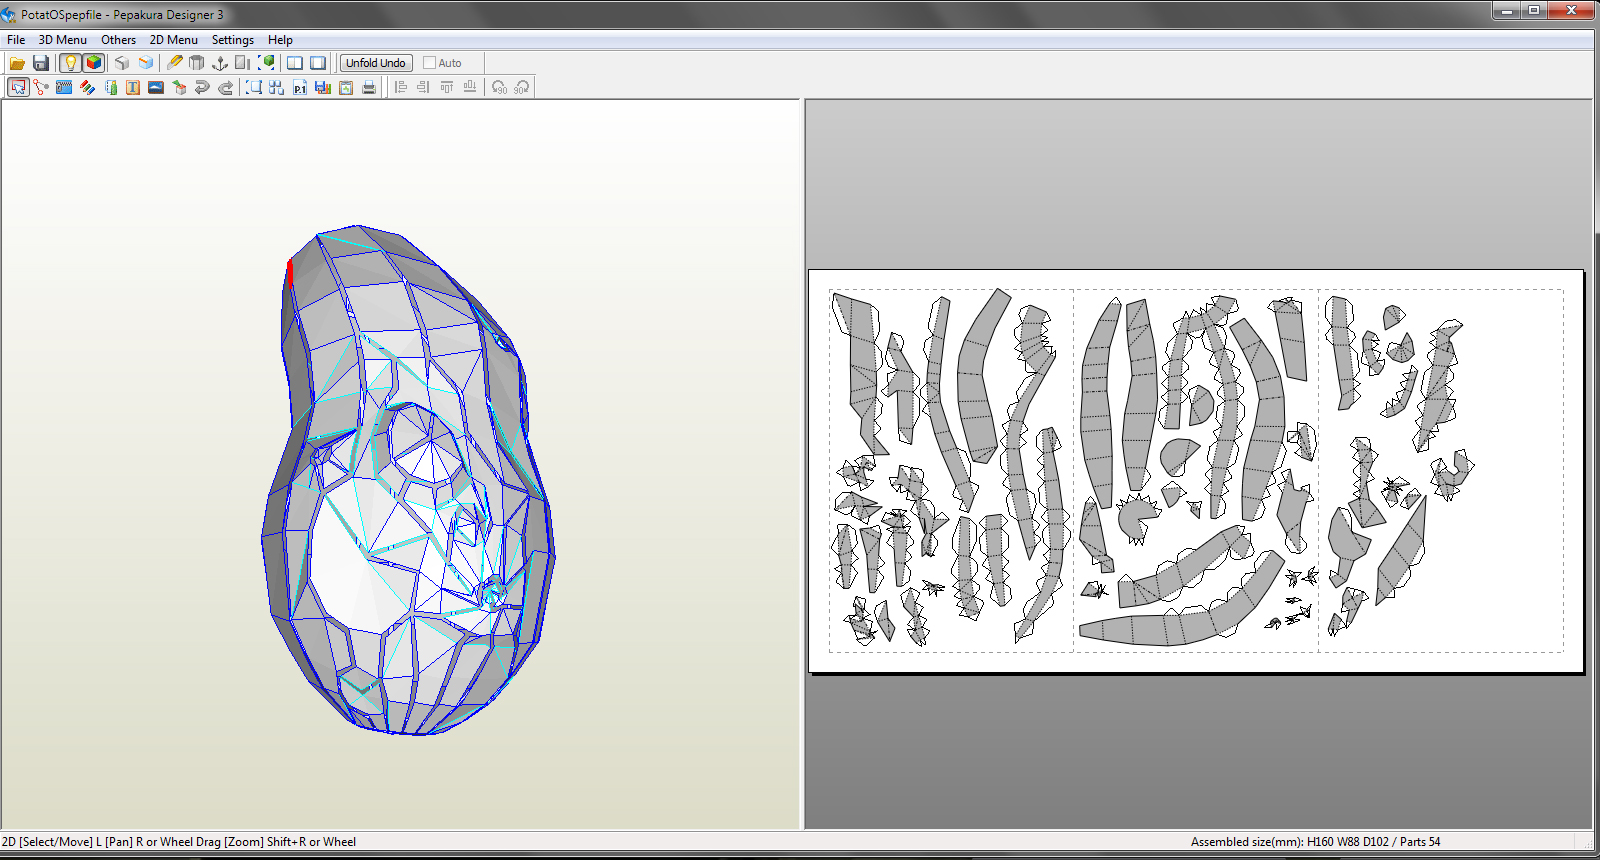
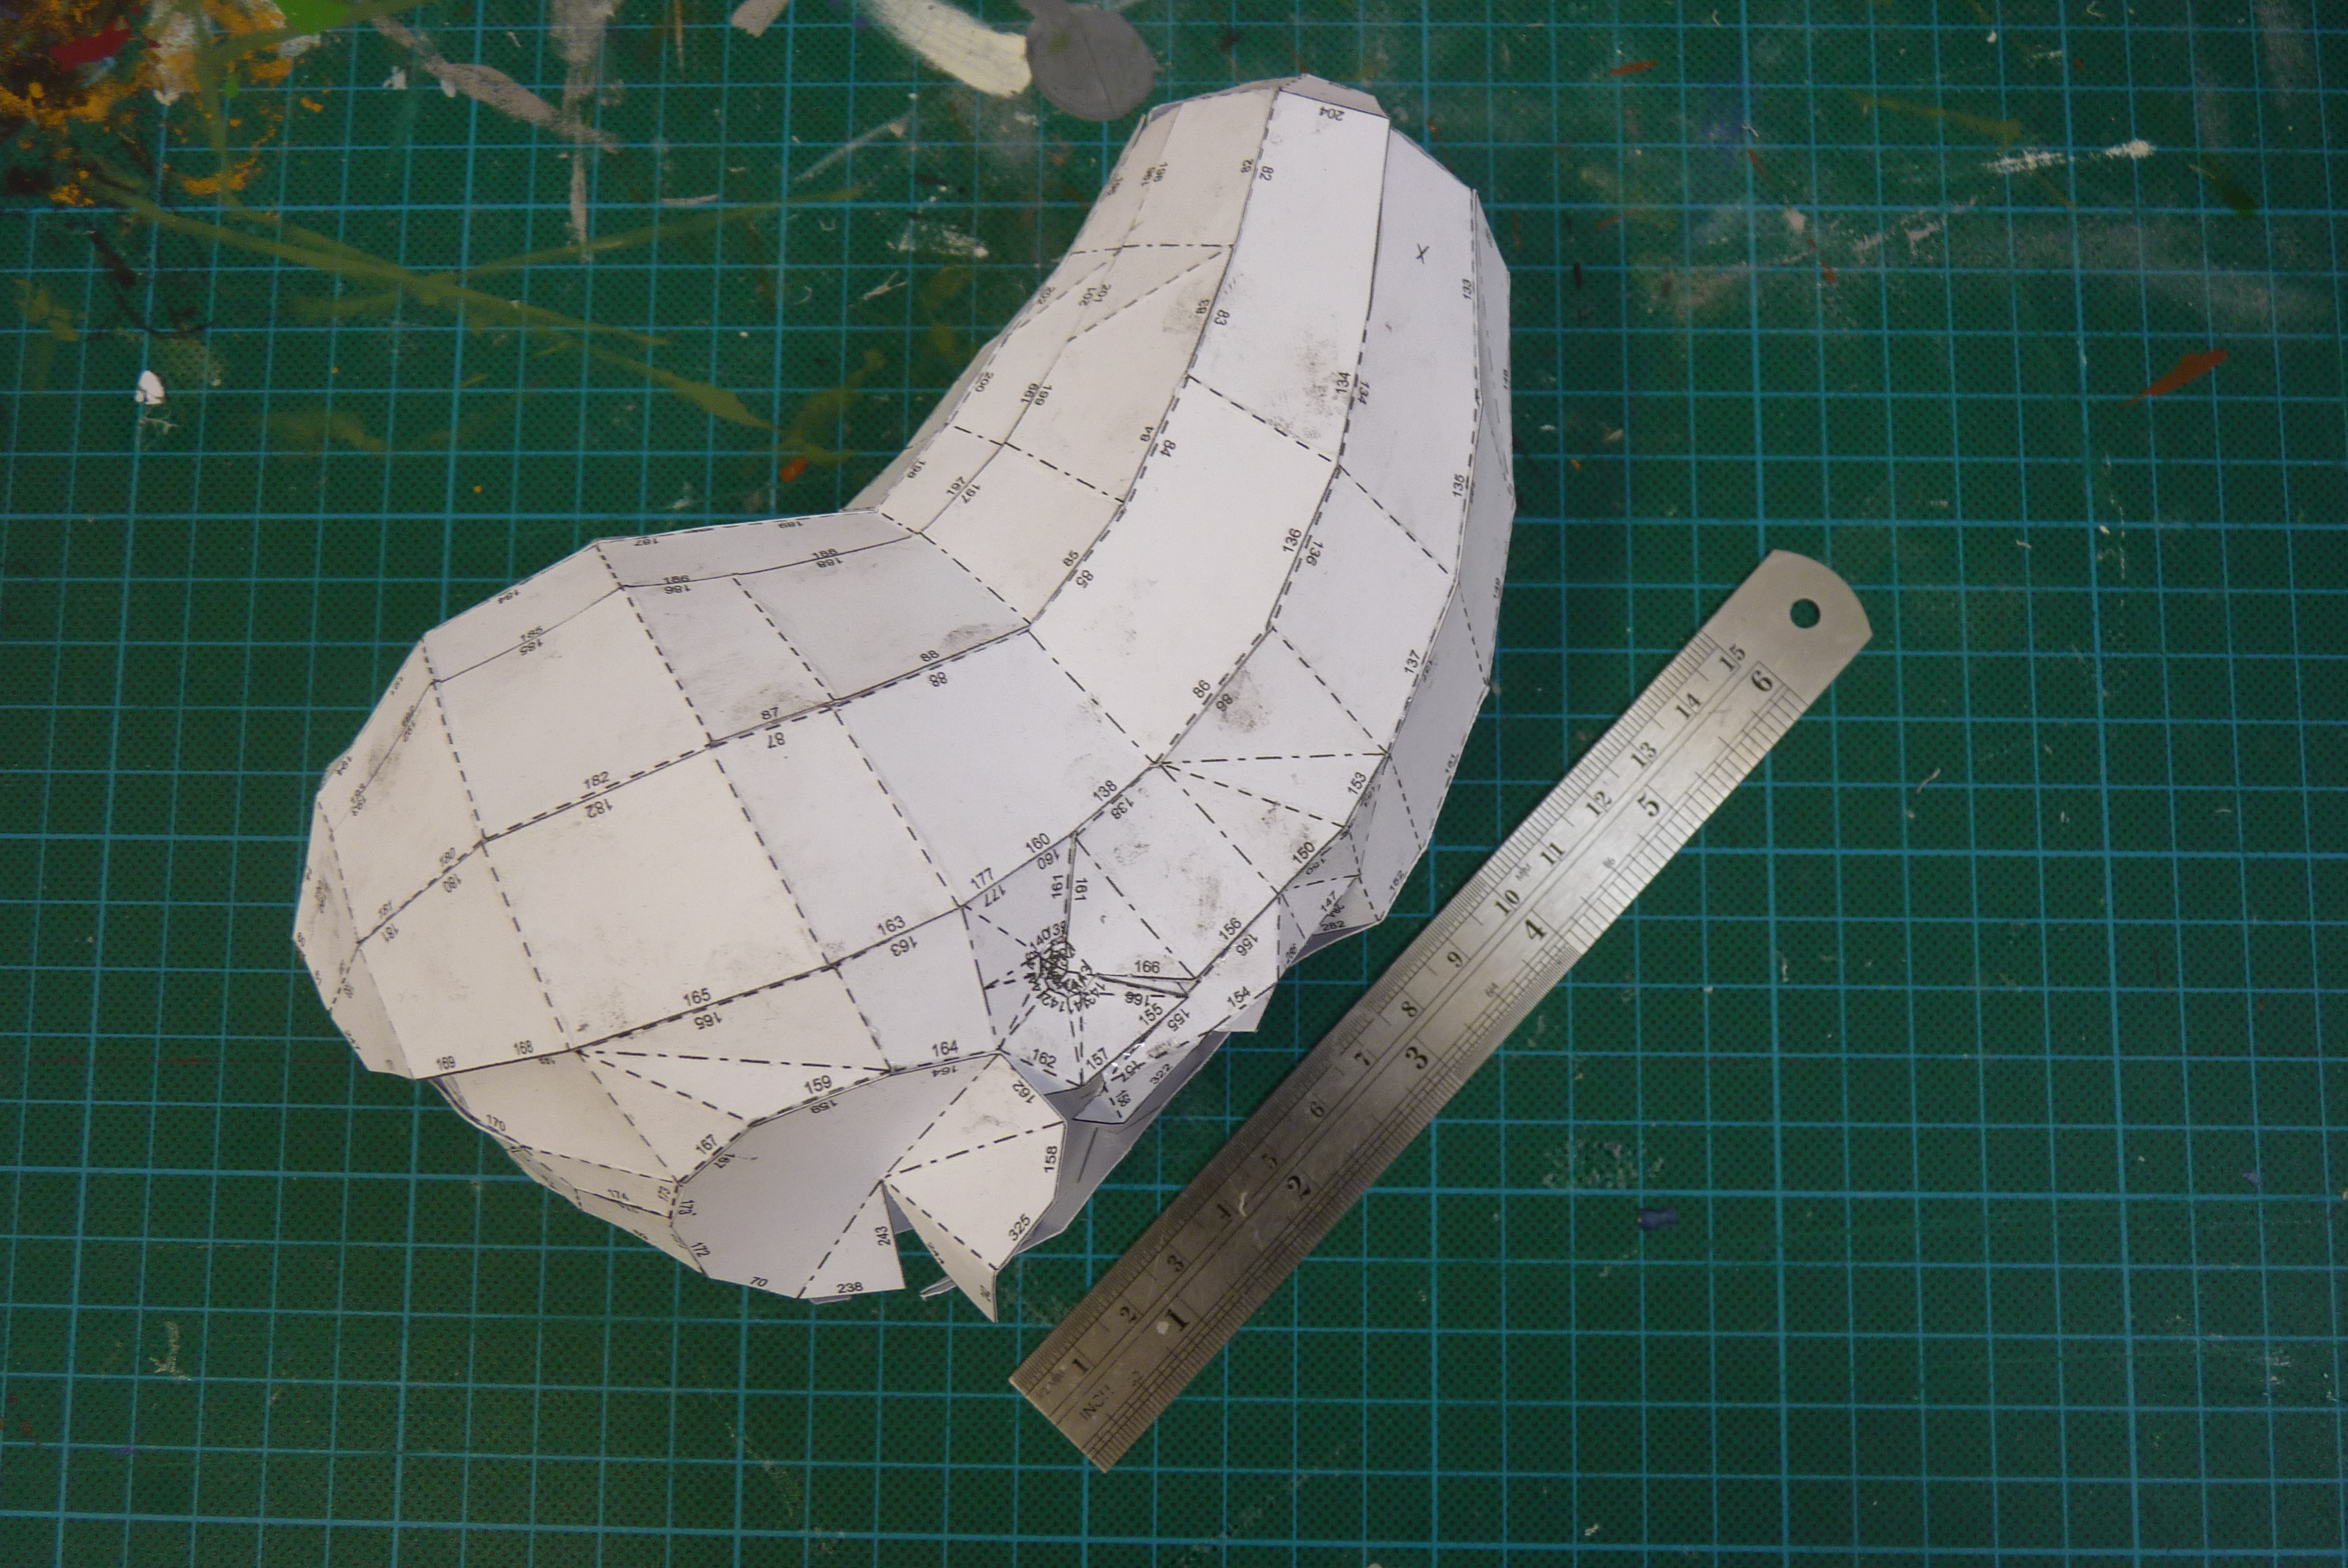
- From there you can render out various angles or like I said before take screen shots. At this point, before I went to tidy up my images, I deleted all the excess parts around the potato so all i was left with was the potato, and exported it as an .obj file (File > Export > chose what to export as and where). I then opened the .obj file in Pepakura Designer and printed out a test run of the potatOS part of the potato. This was only so i could guage size and then see if there were any bits I hadn't noticed.
- The next step with your screenshots or renders is to take them into Gimp, Photoshop, Illustration, or whatever graphics and illustration software you're using, create a new layer and trace over them with the pen tool so you're left with an outline of PotatOS. You'll need this for templates in the next section so it's good to take your time and do it right.
Now you have an reference images to work from it's time to get making! Keep the 3D model and the original shots of renders handy so you can check them from time to time, it's always nice to have then near by because sometimes a flat image doesn't convey a lump or bump so keep checking back to make sure you're going in the right direction!
Or you could..
If you wanted you could stop at the pepakura point and make your potato like mini Halo armour. I will warn you that because of the eyes in the potato some points can be a little tricky. Also if you wanted to do you ENTIRE PotatOS it'd be a little trickier as the way the model for the game was made, all the extra bits in the model and stuck into the main Potato Body, so you'd need to cut into your pepakura potato when you're done to attach them, or trim them down.
Of course if you don't want to be messing around with those programs or your not that way inclined do not fret! Using images found online, or screenshots taken from the game there's no reason you can't make PotatOS by eye, it may be a little trickier, but it's a nice alternative. If you chose this method then you'll just need to use your own references for different parts when I'm using mine.
[EDIT: It was brought to my attention that 3D Ripper DX has some problems talking with Windows 7. This seems to effect only certain games, and Portal 2 seems to work ok, but if you want to use the 3D Ripper DX program for a different game using the same methods check out this chart that @Blackjosh on the tested.com forums passed onto me: http://www.lagspike.com/tools/3d_ripper_dx_compatibility/chart.html ]
Onward to Step 2!
Makin' That Potato!

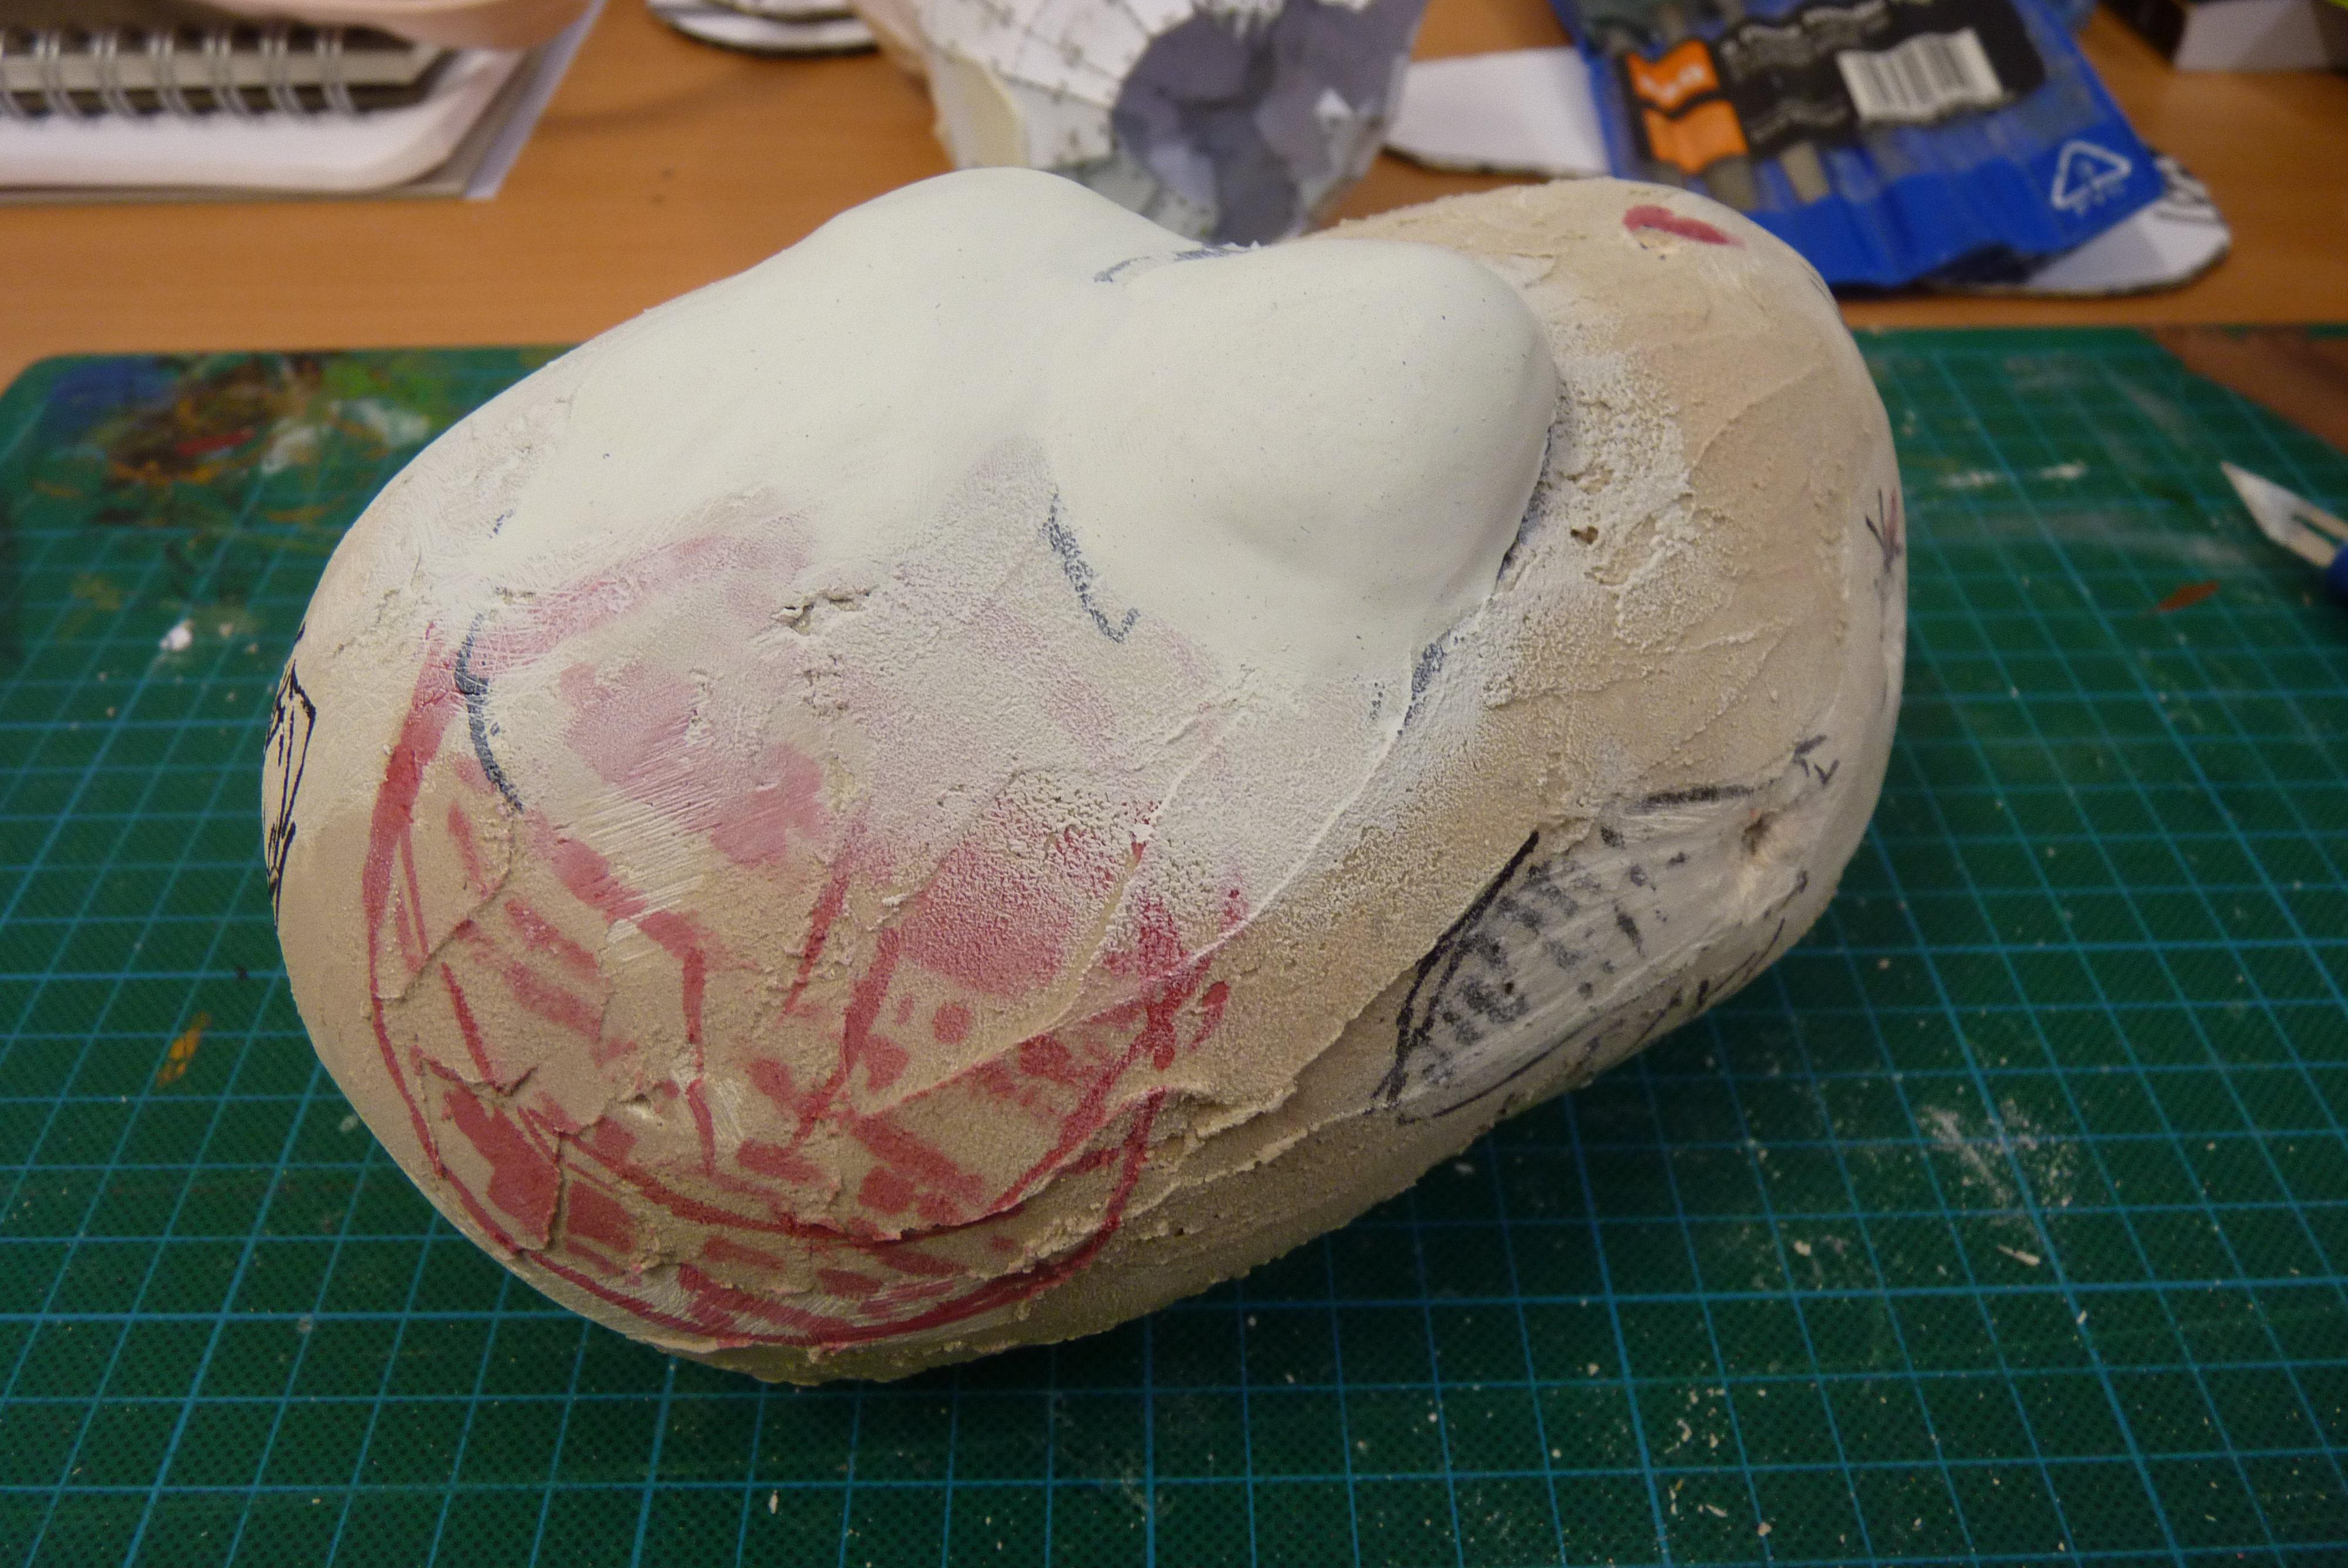
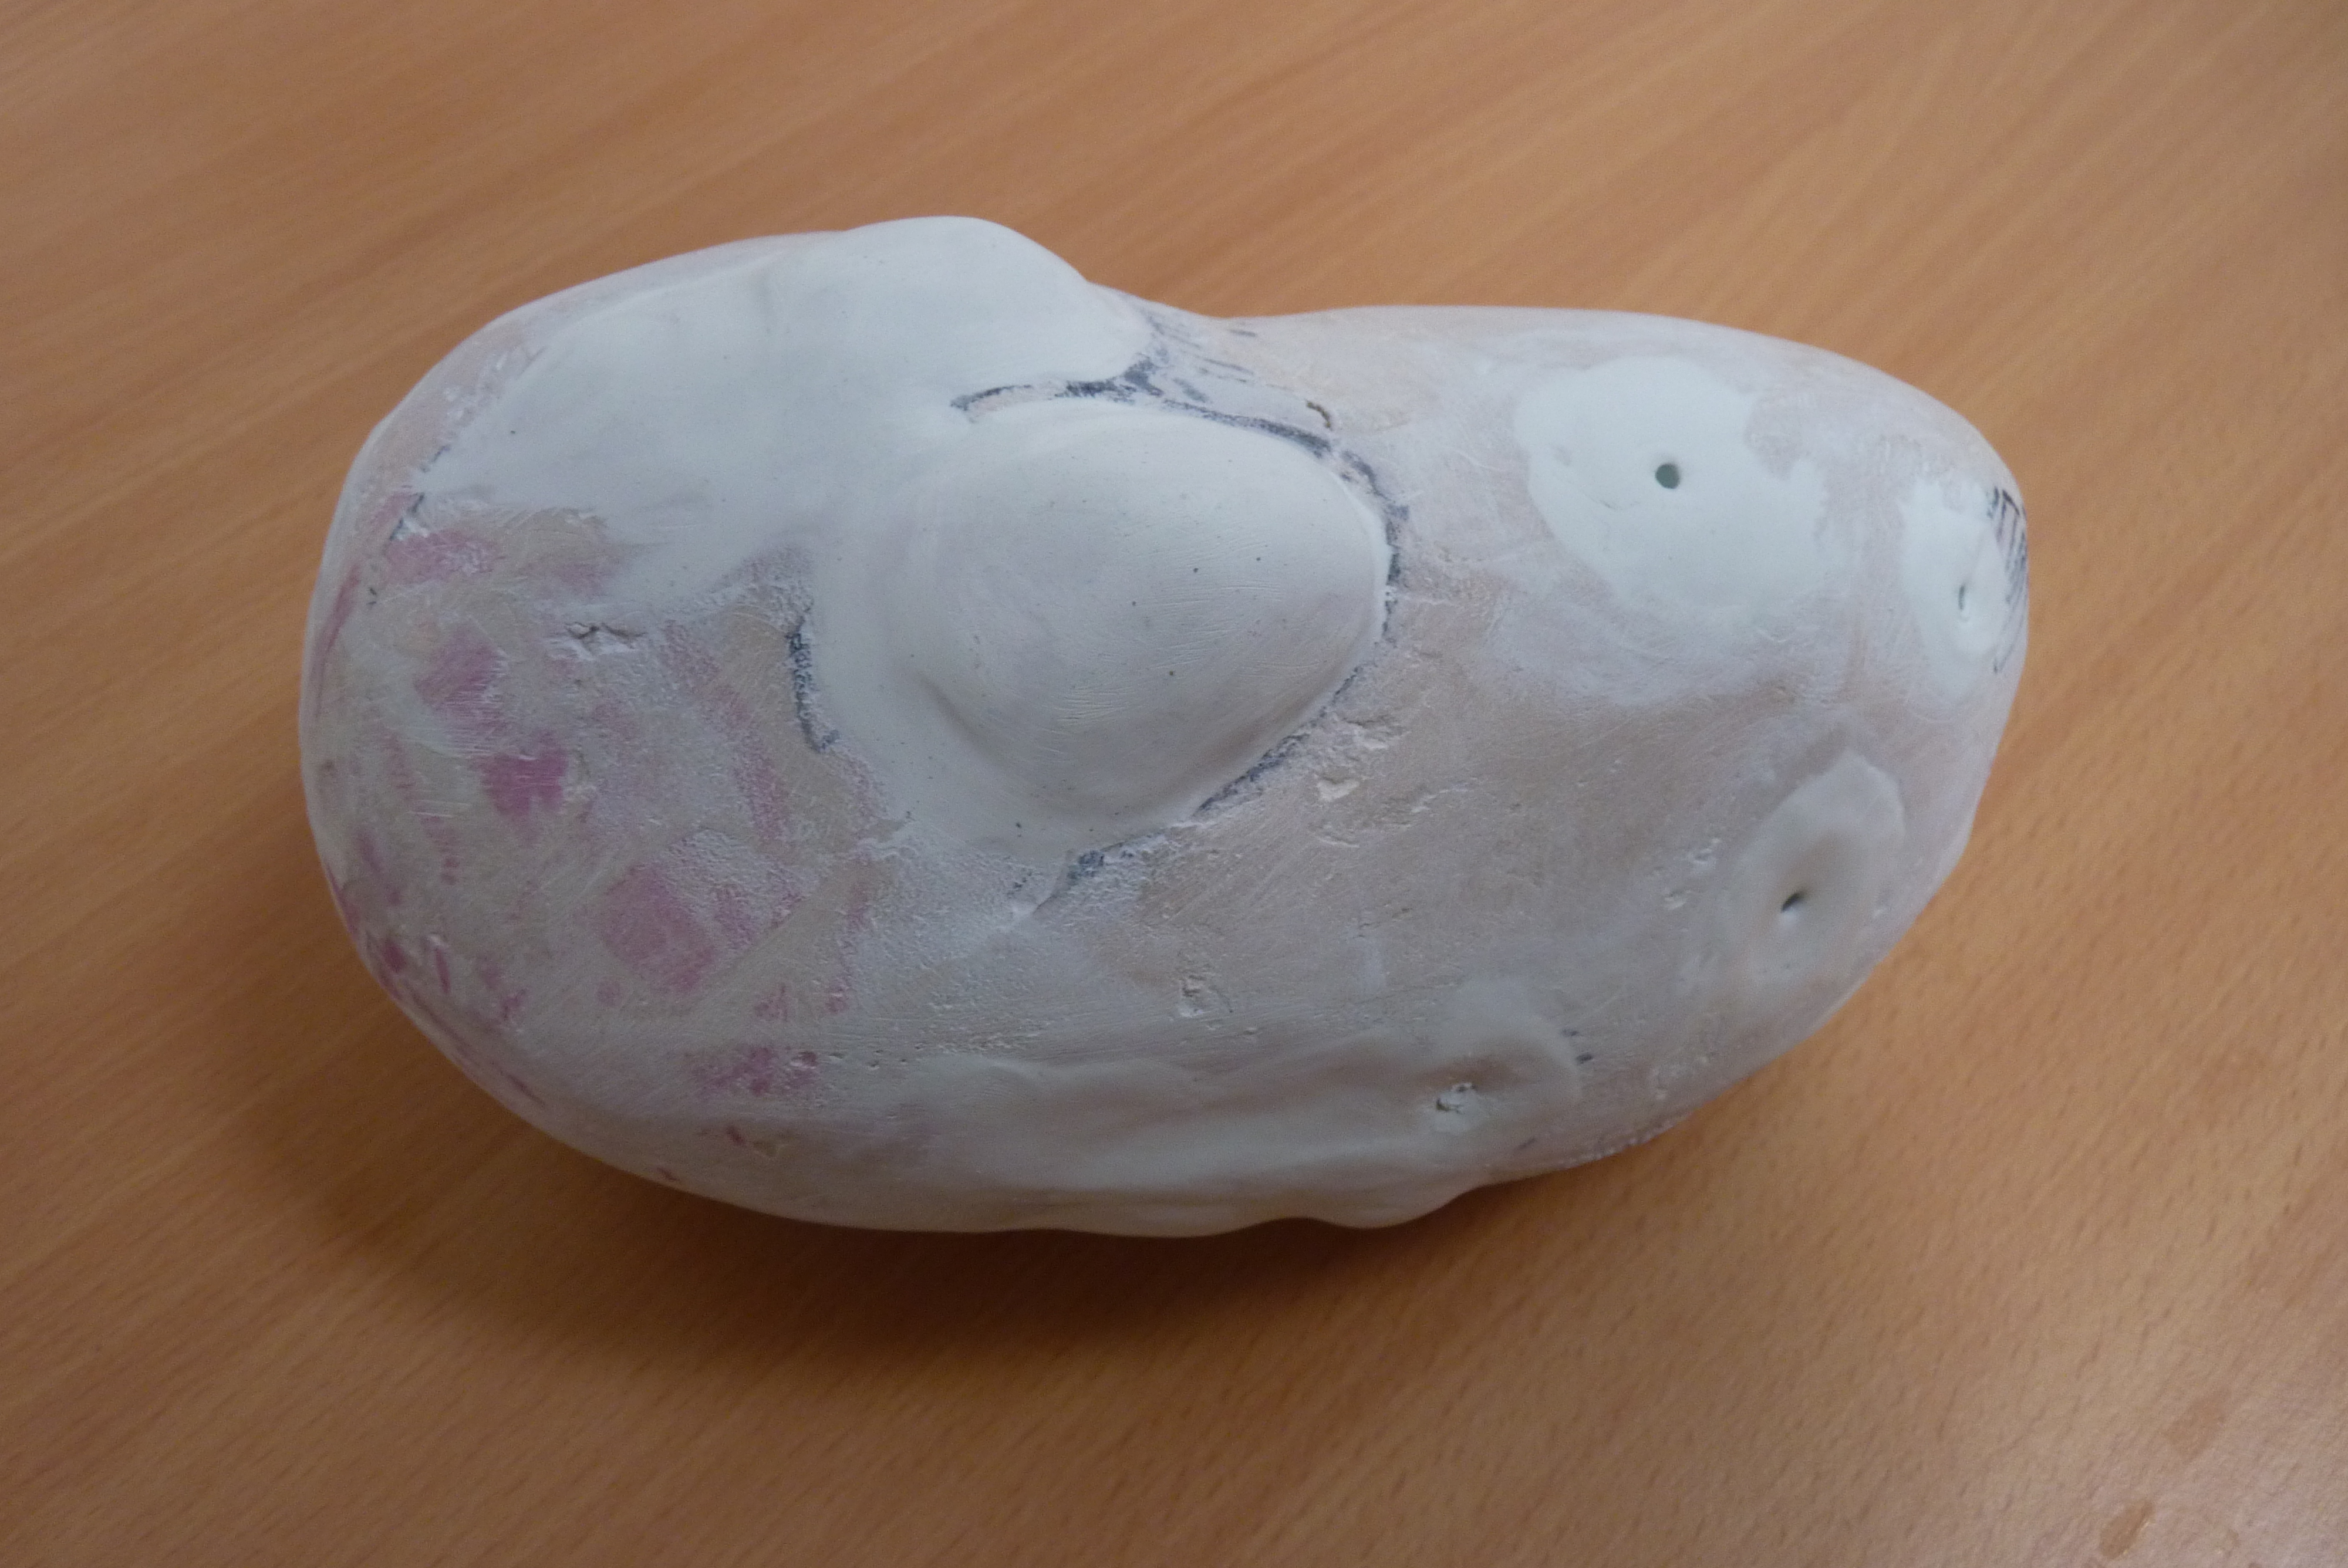
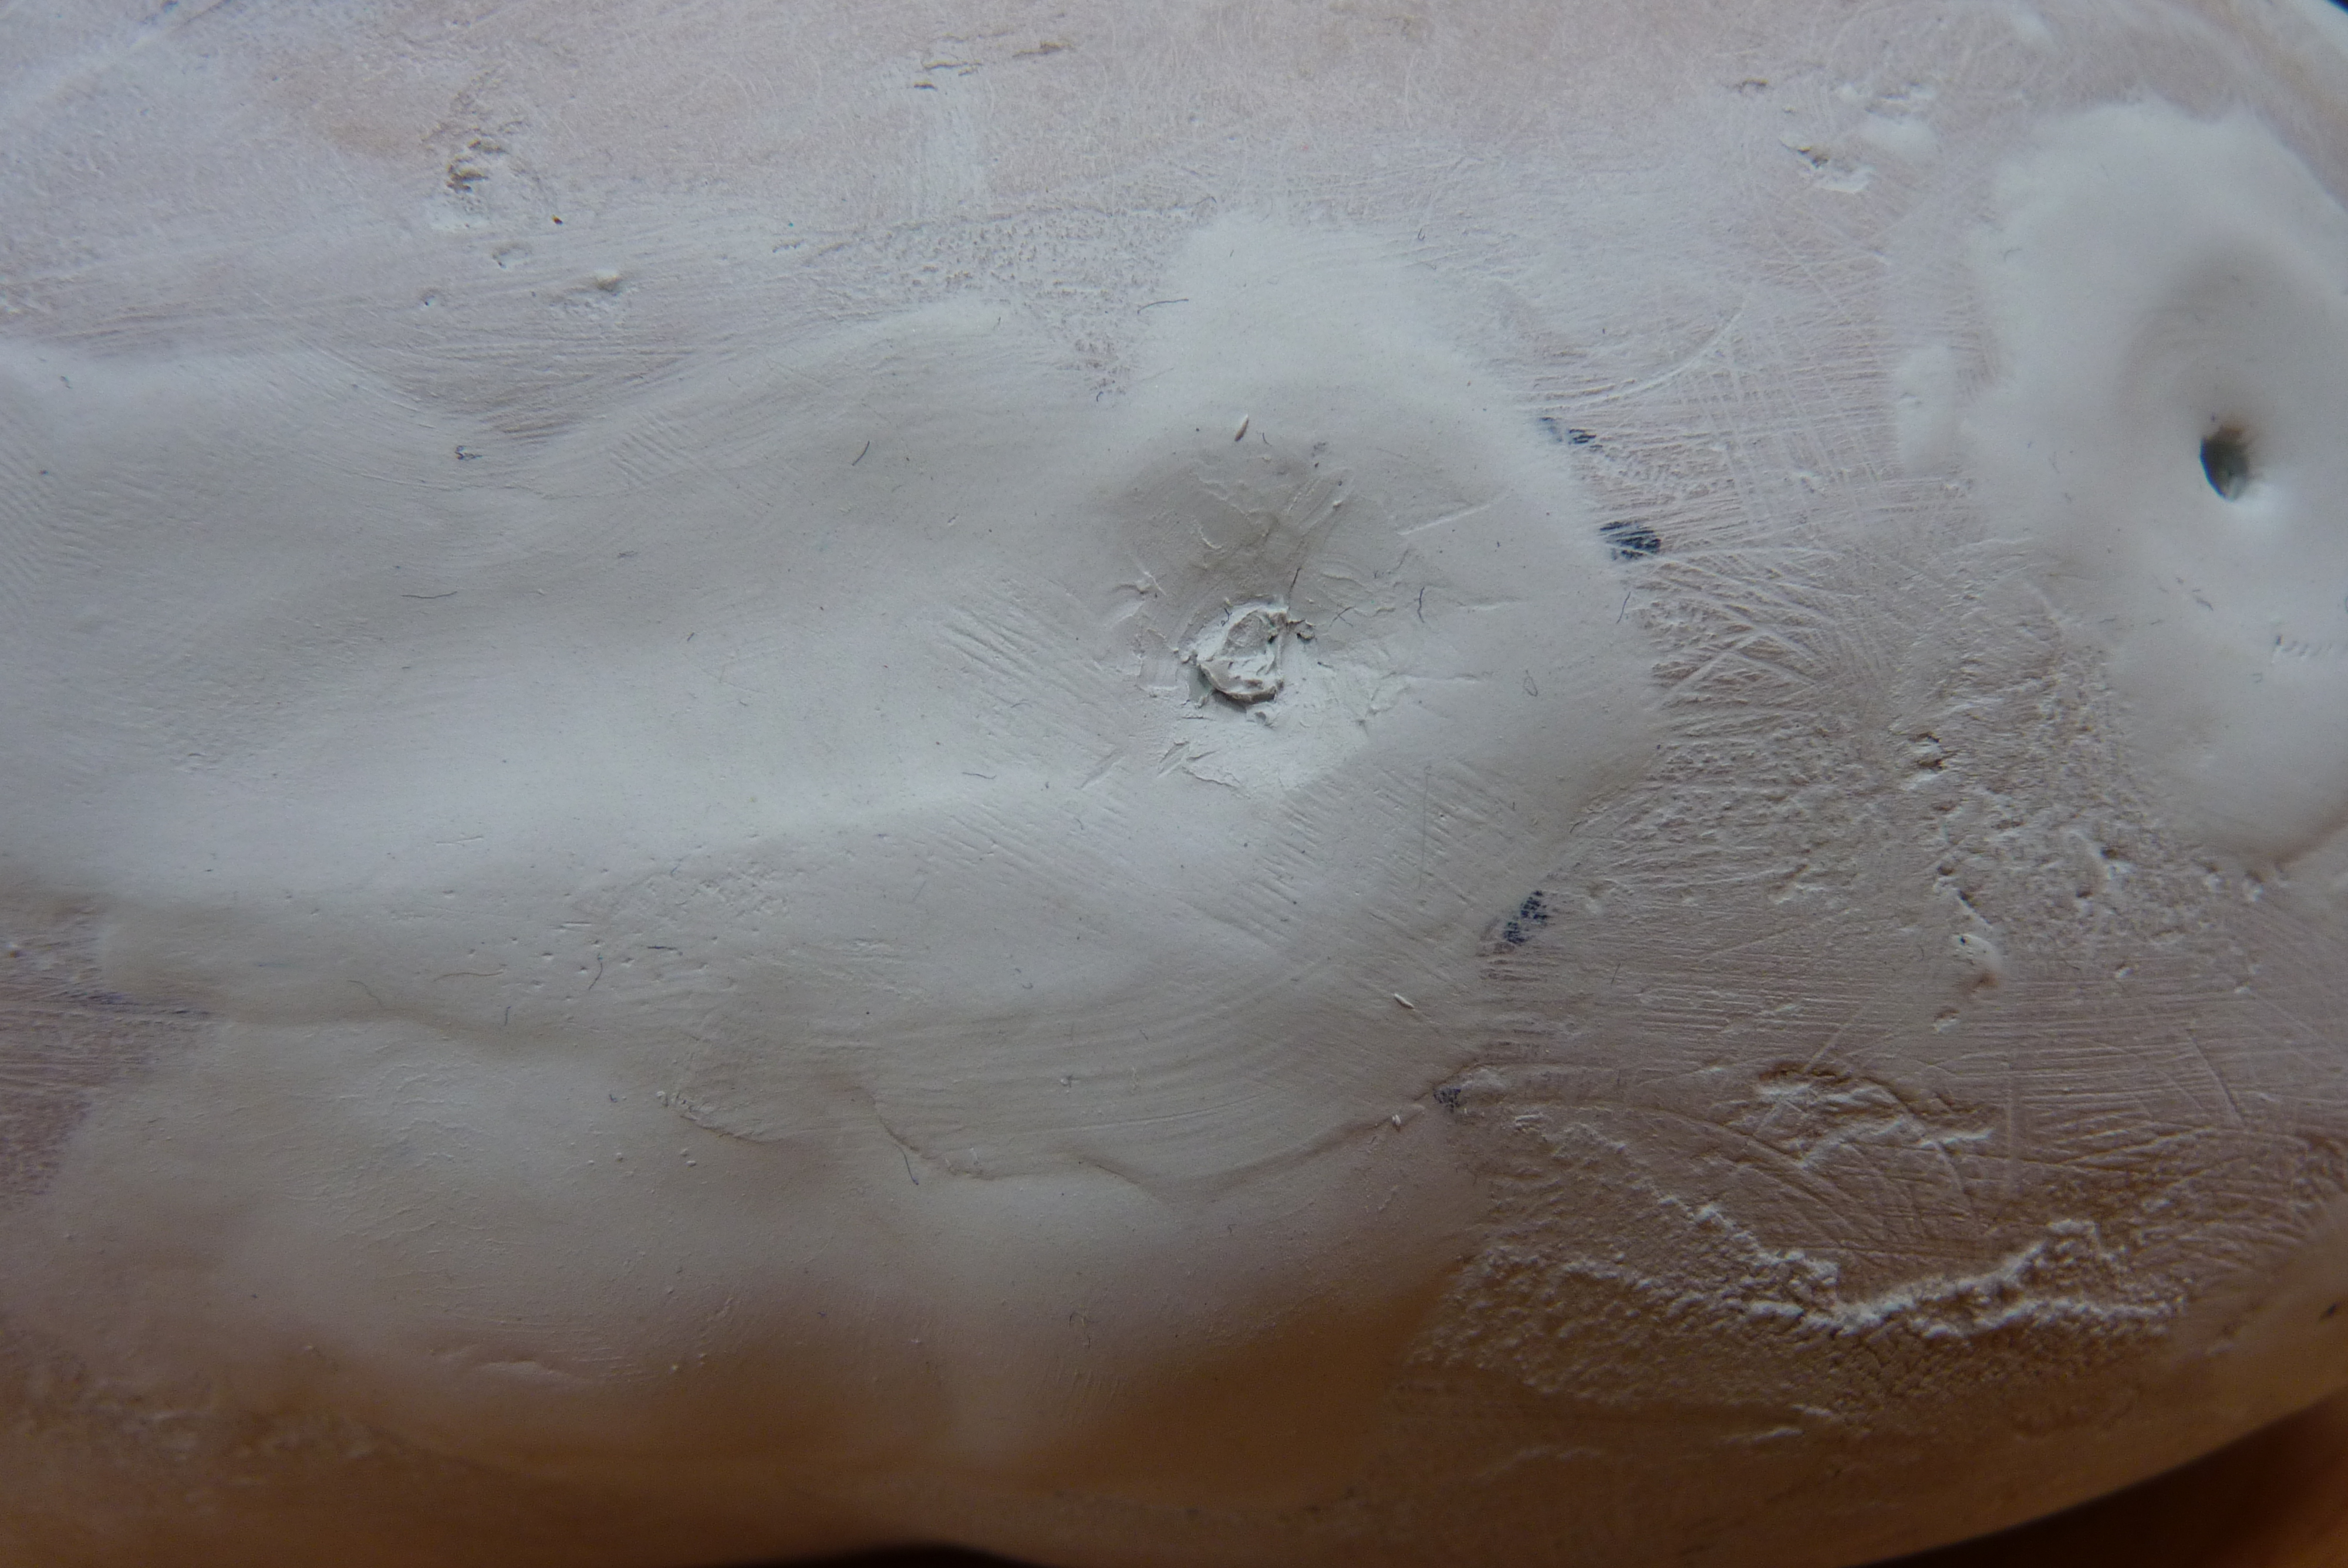
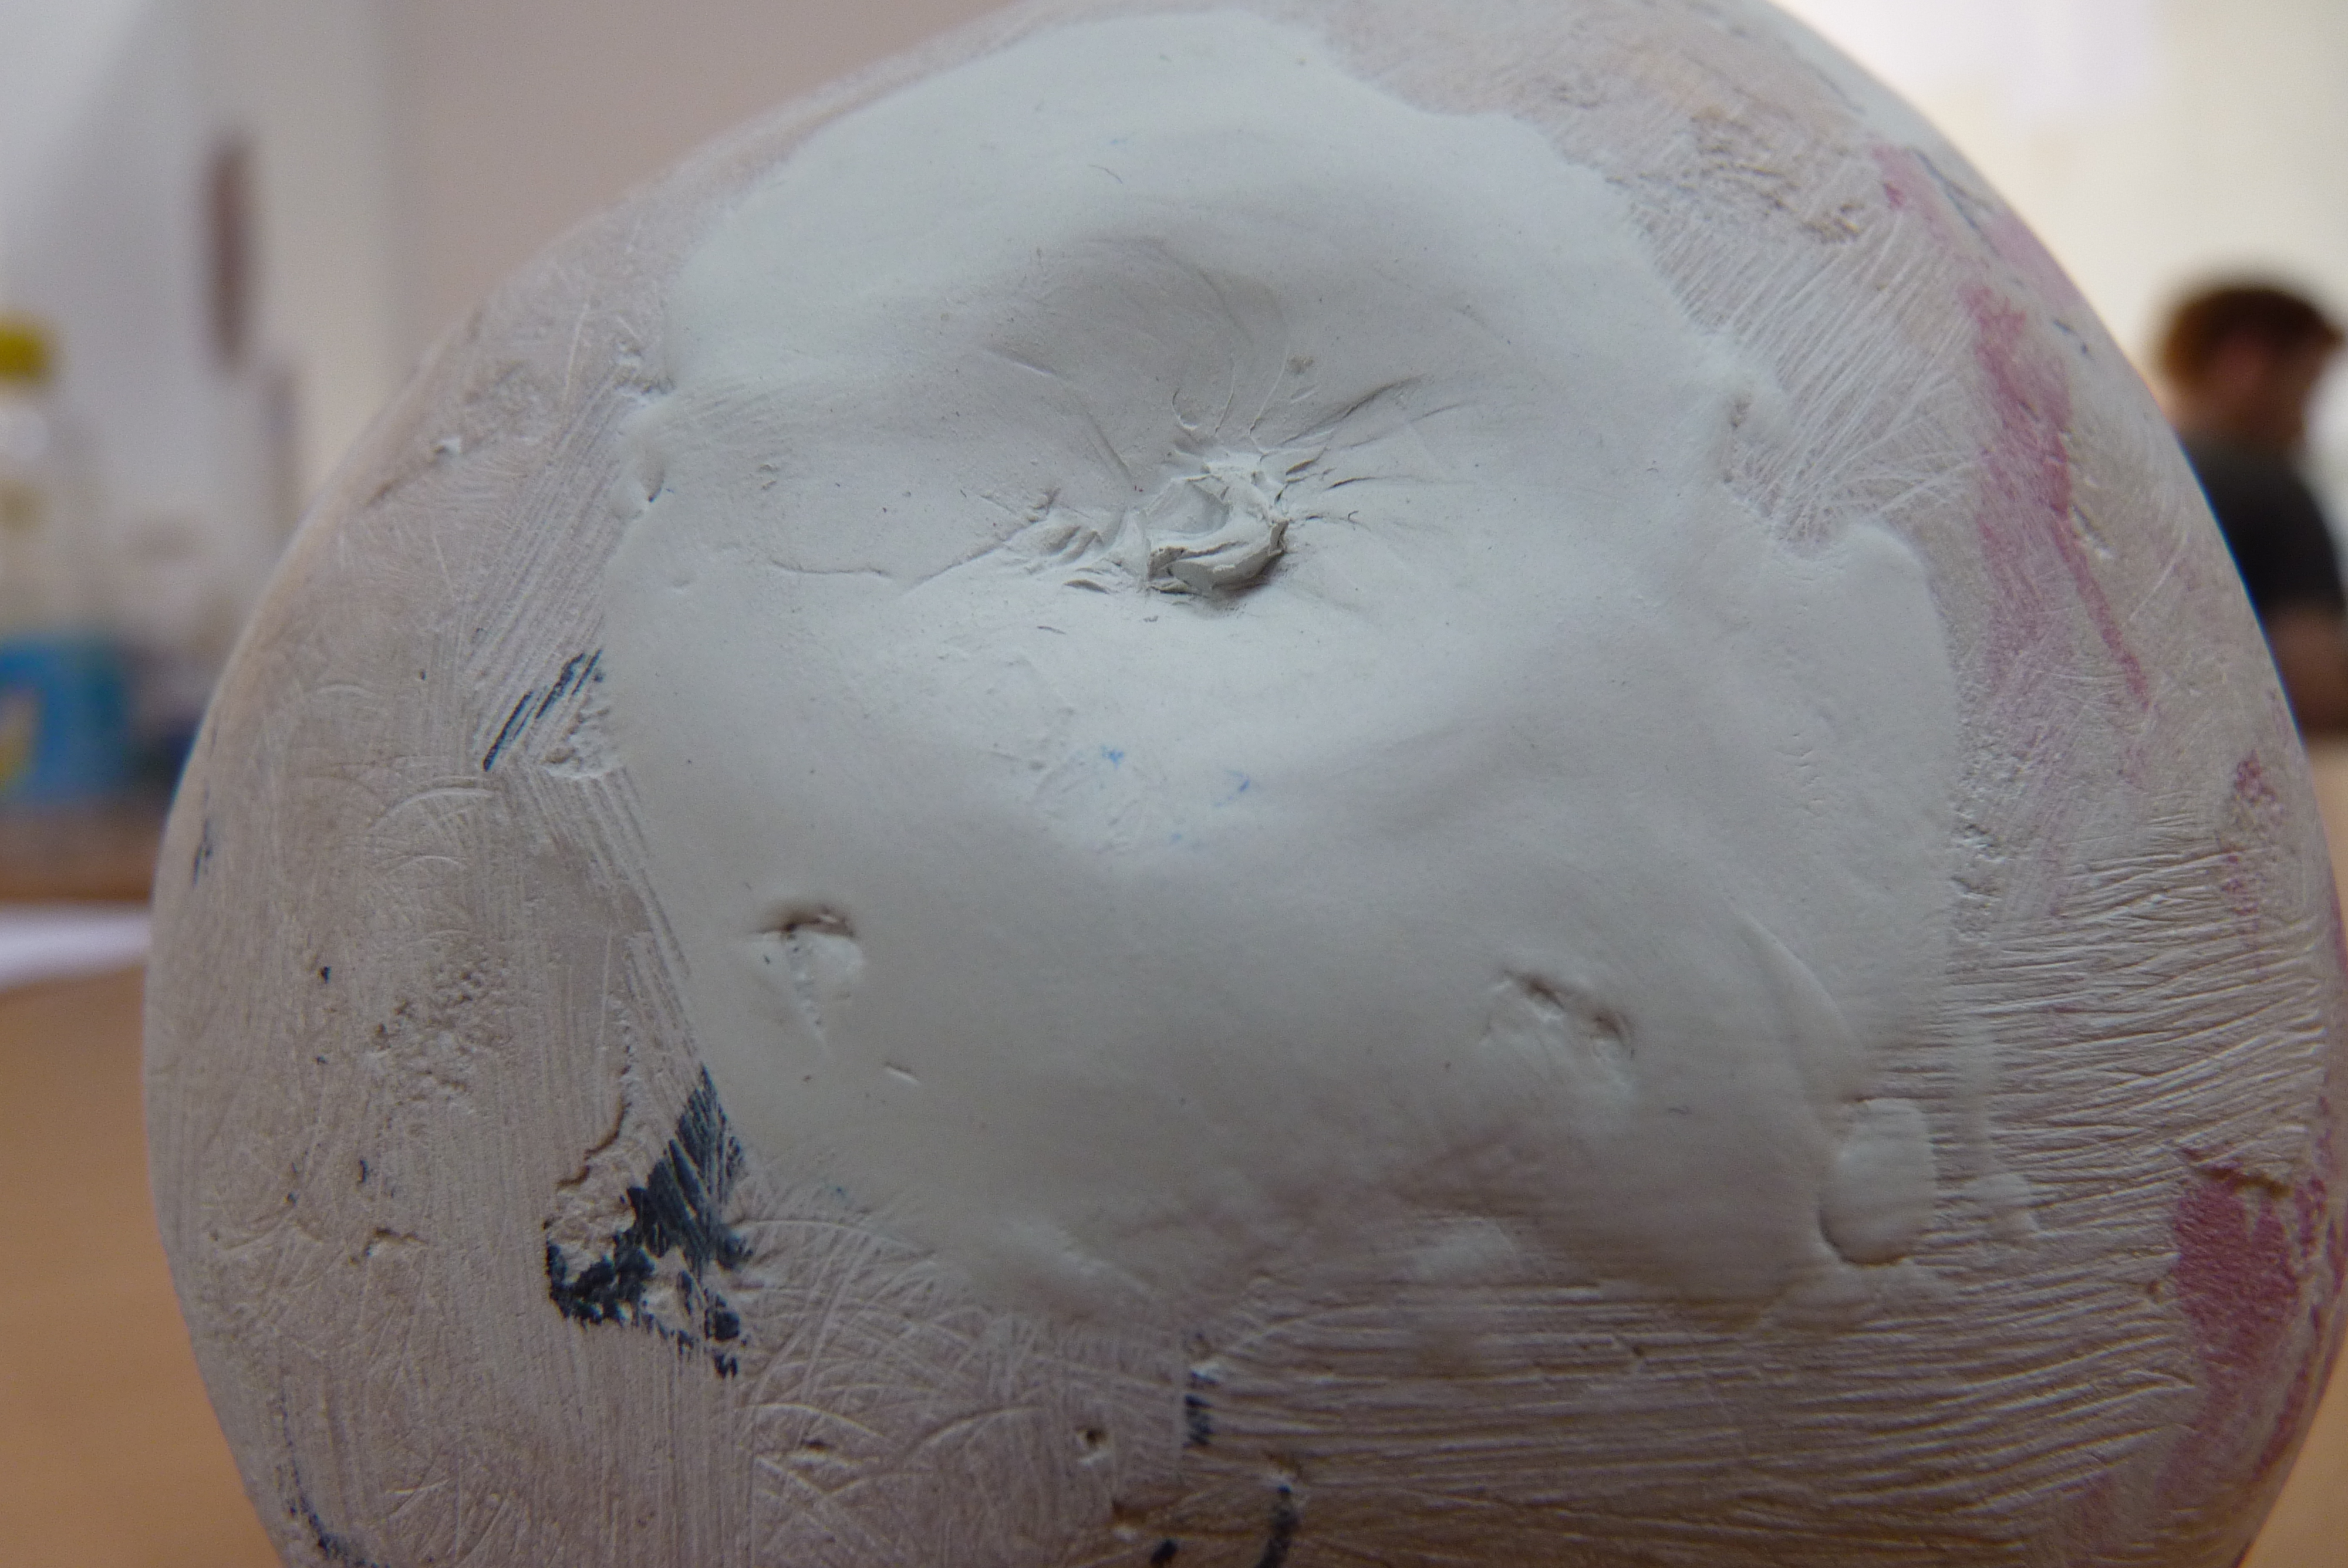
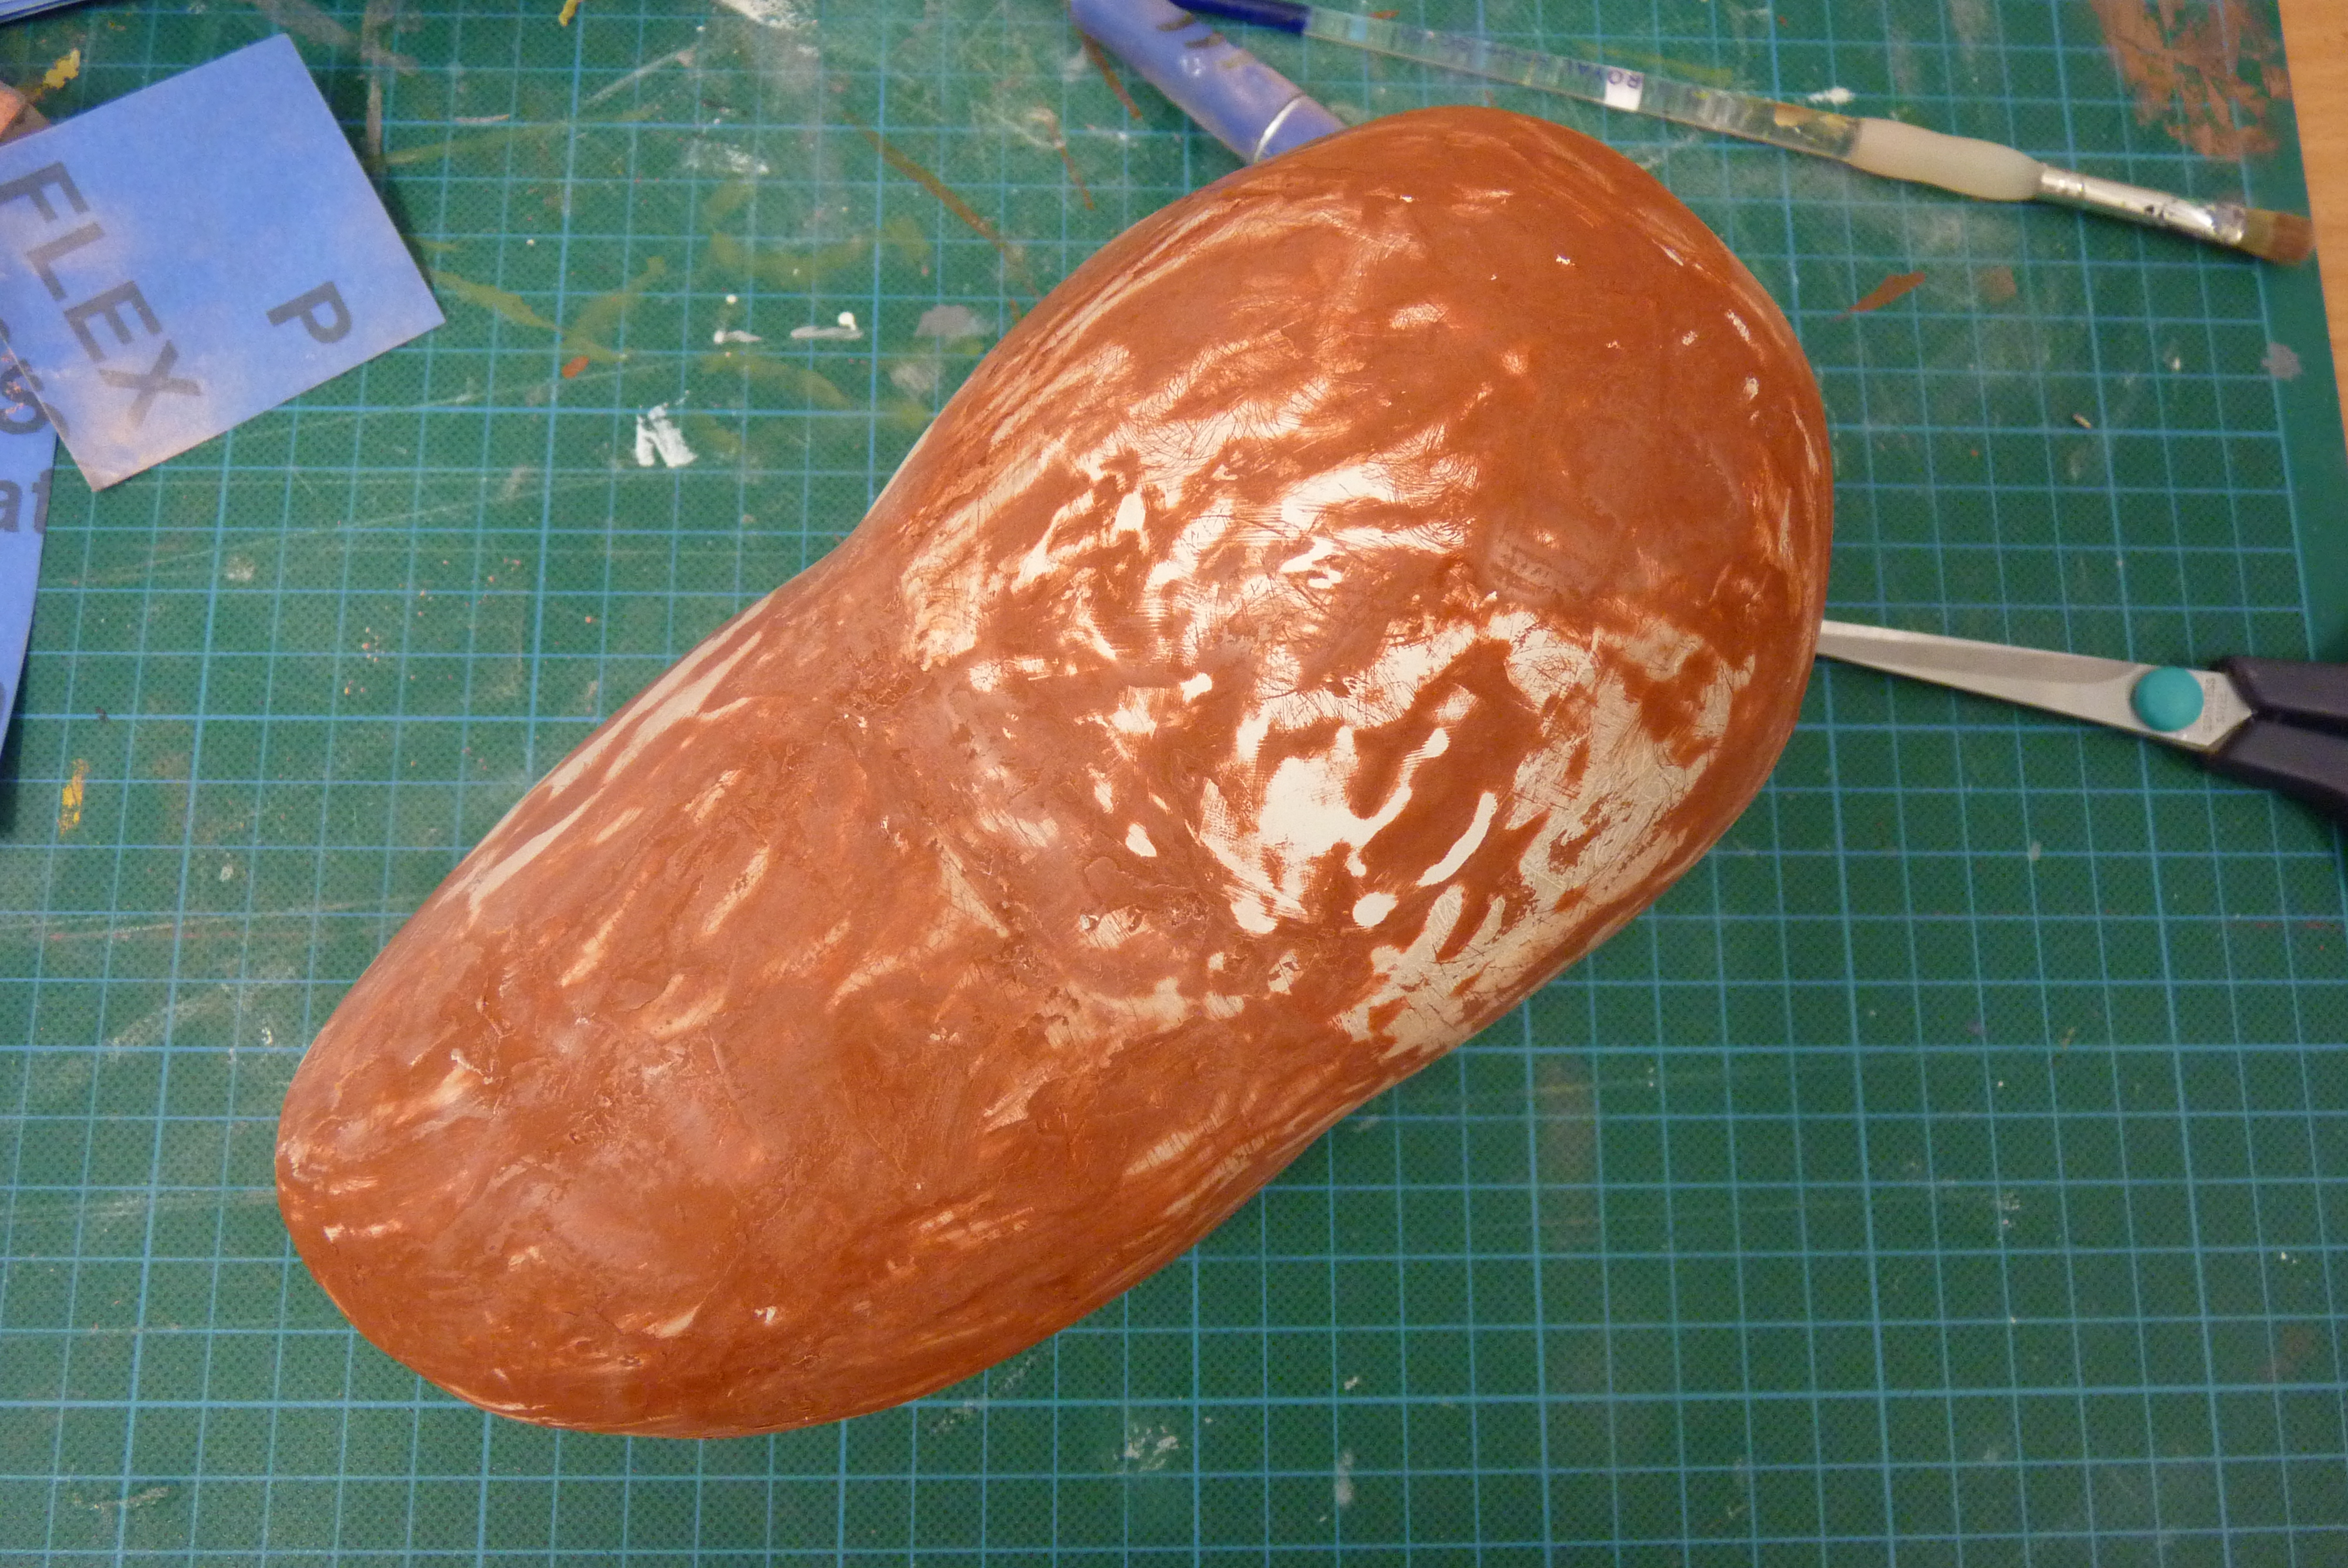
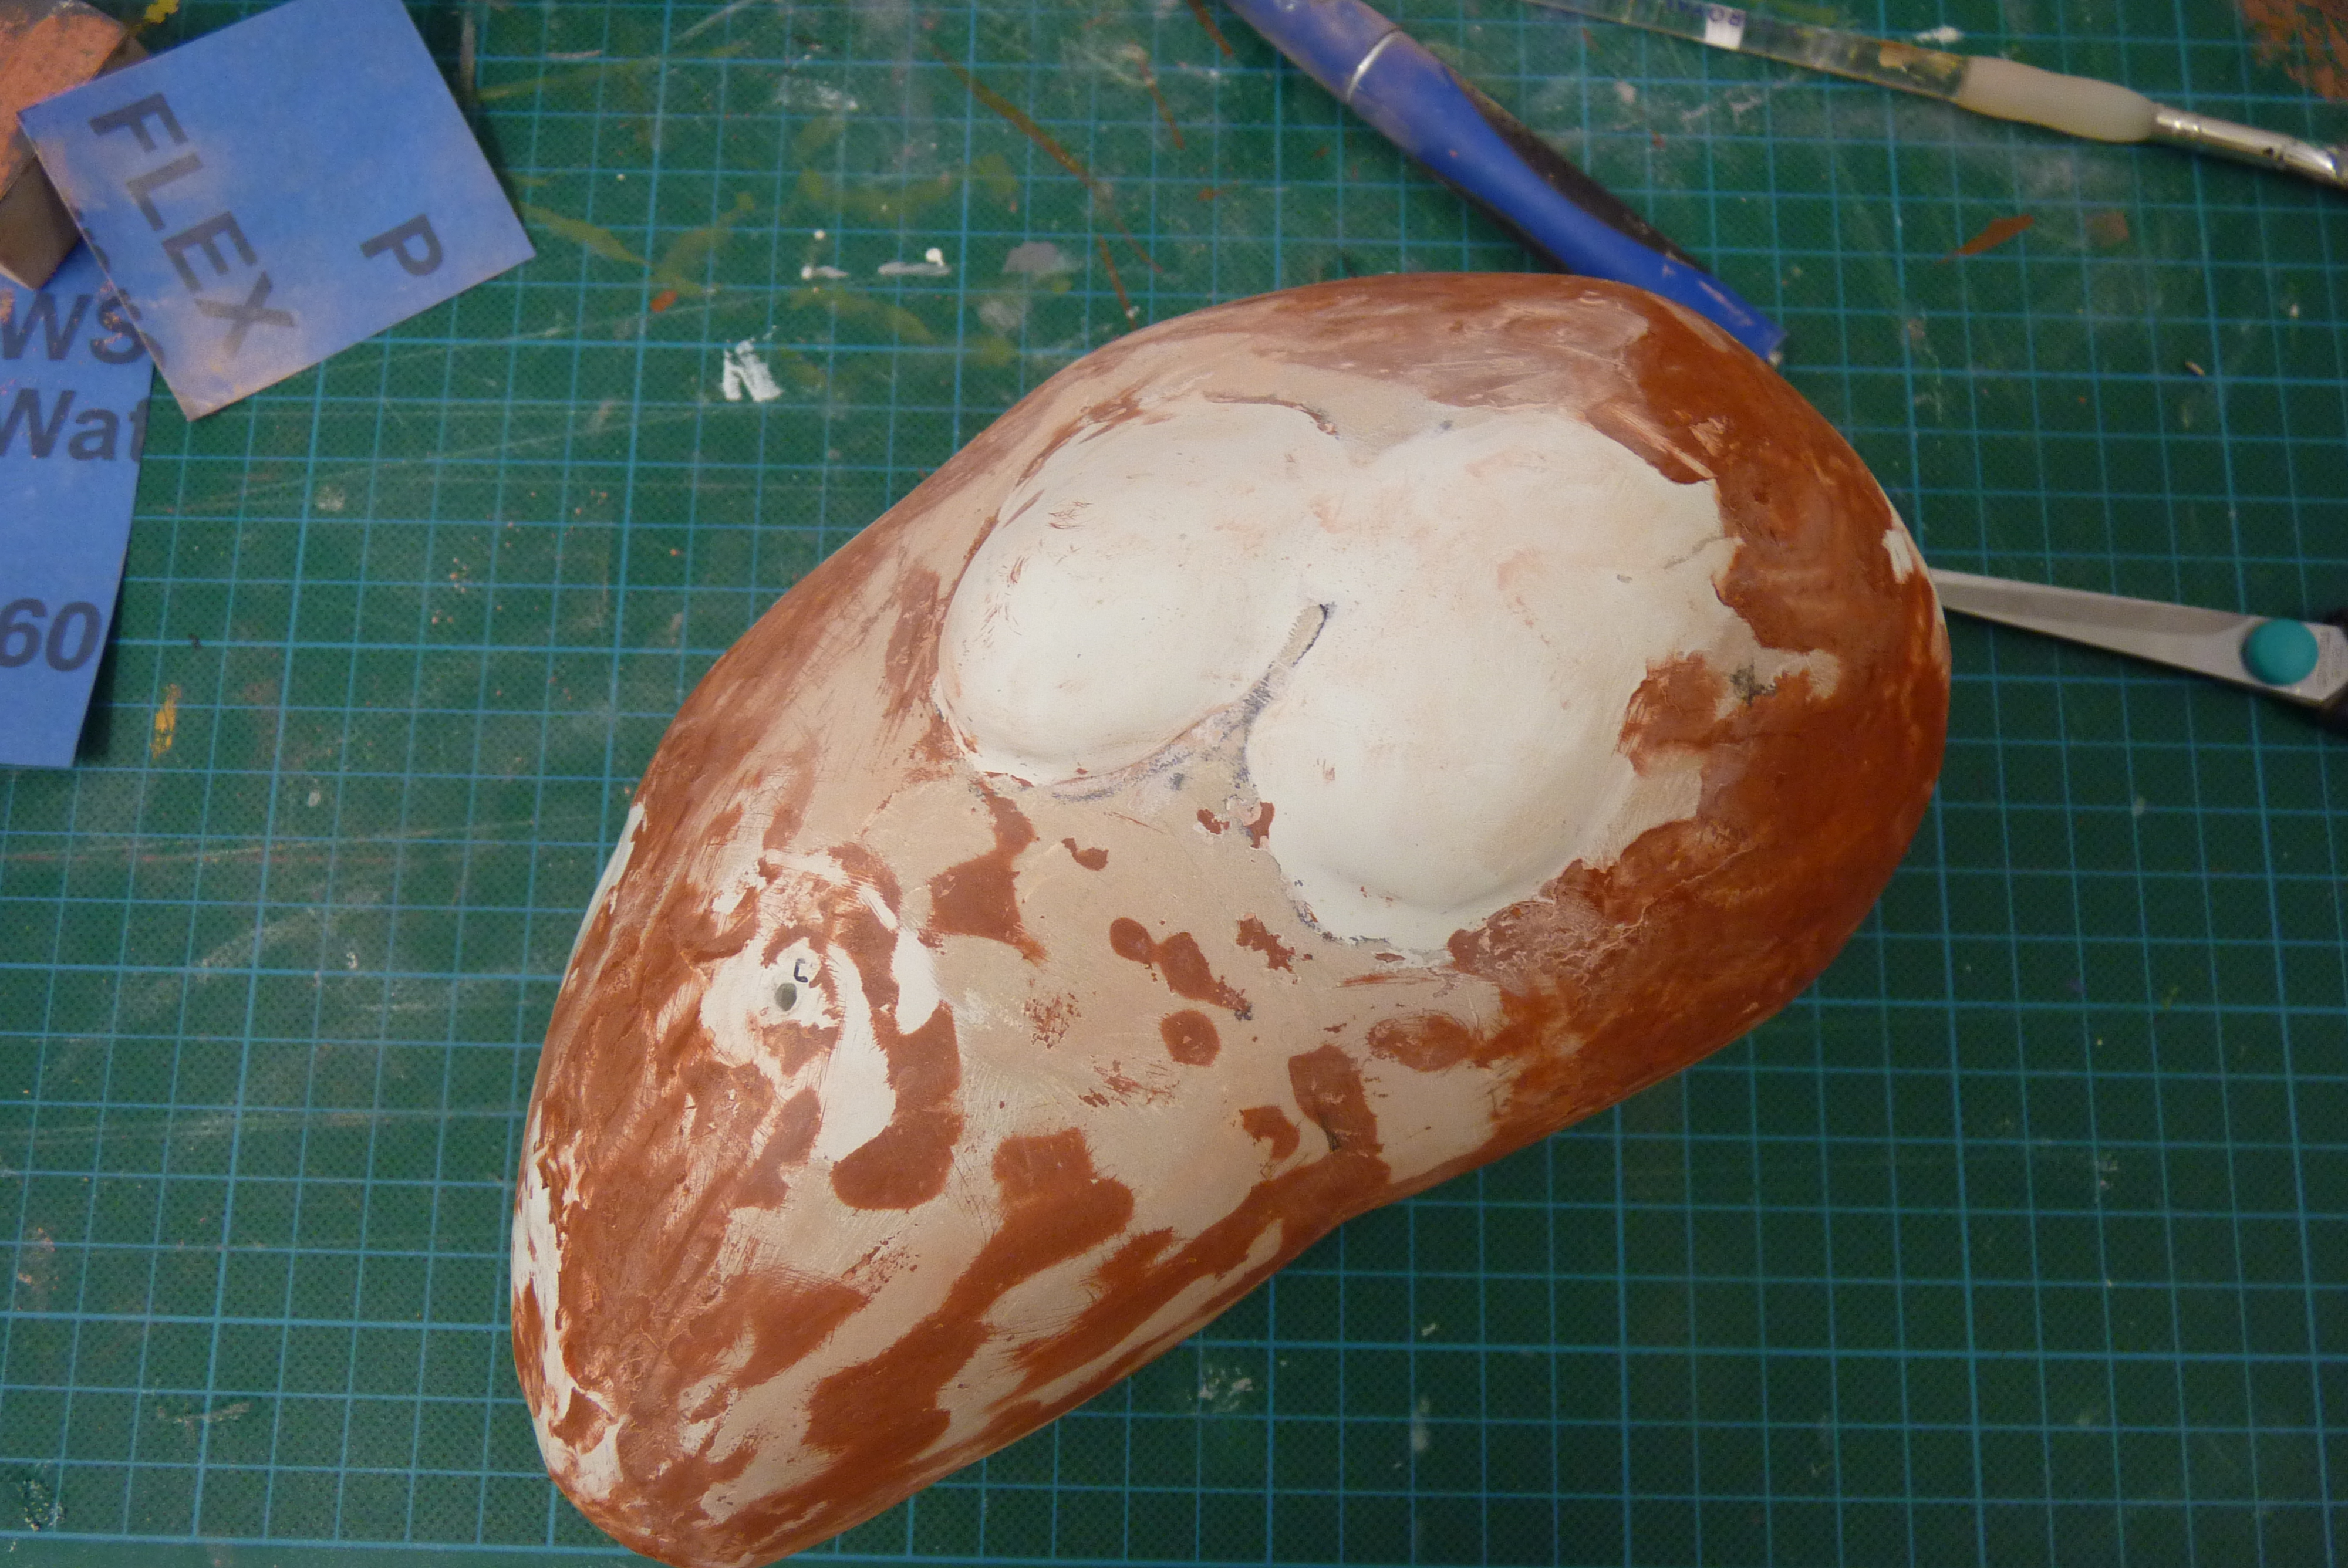
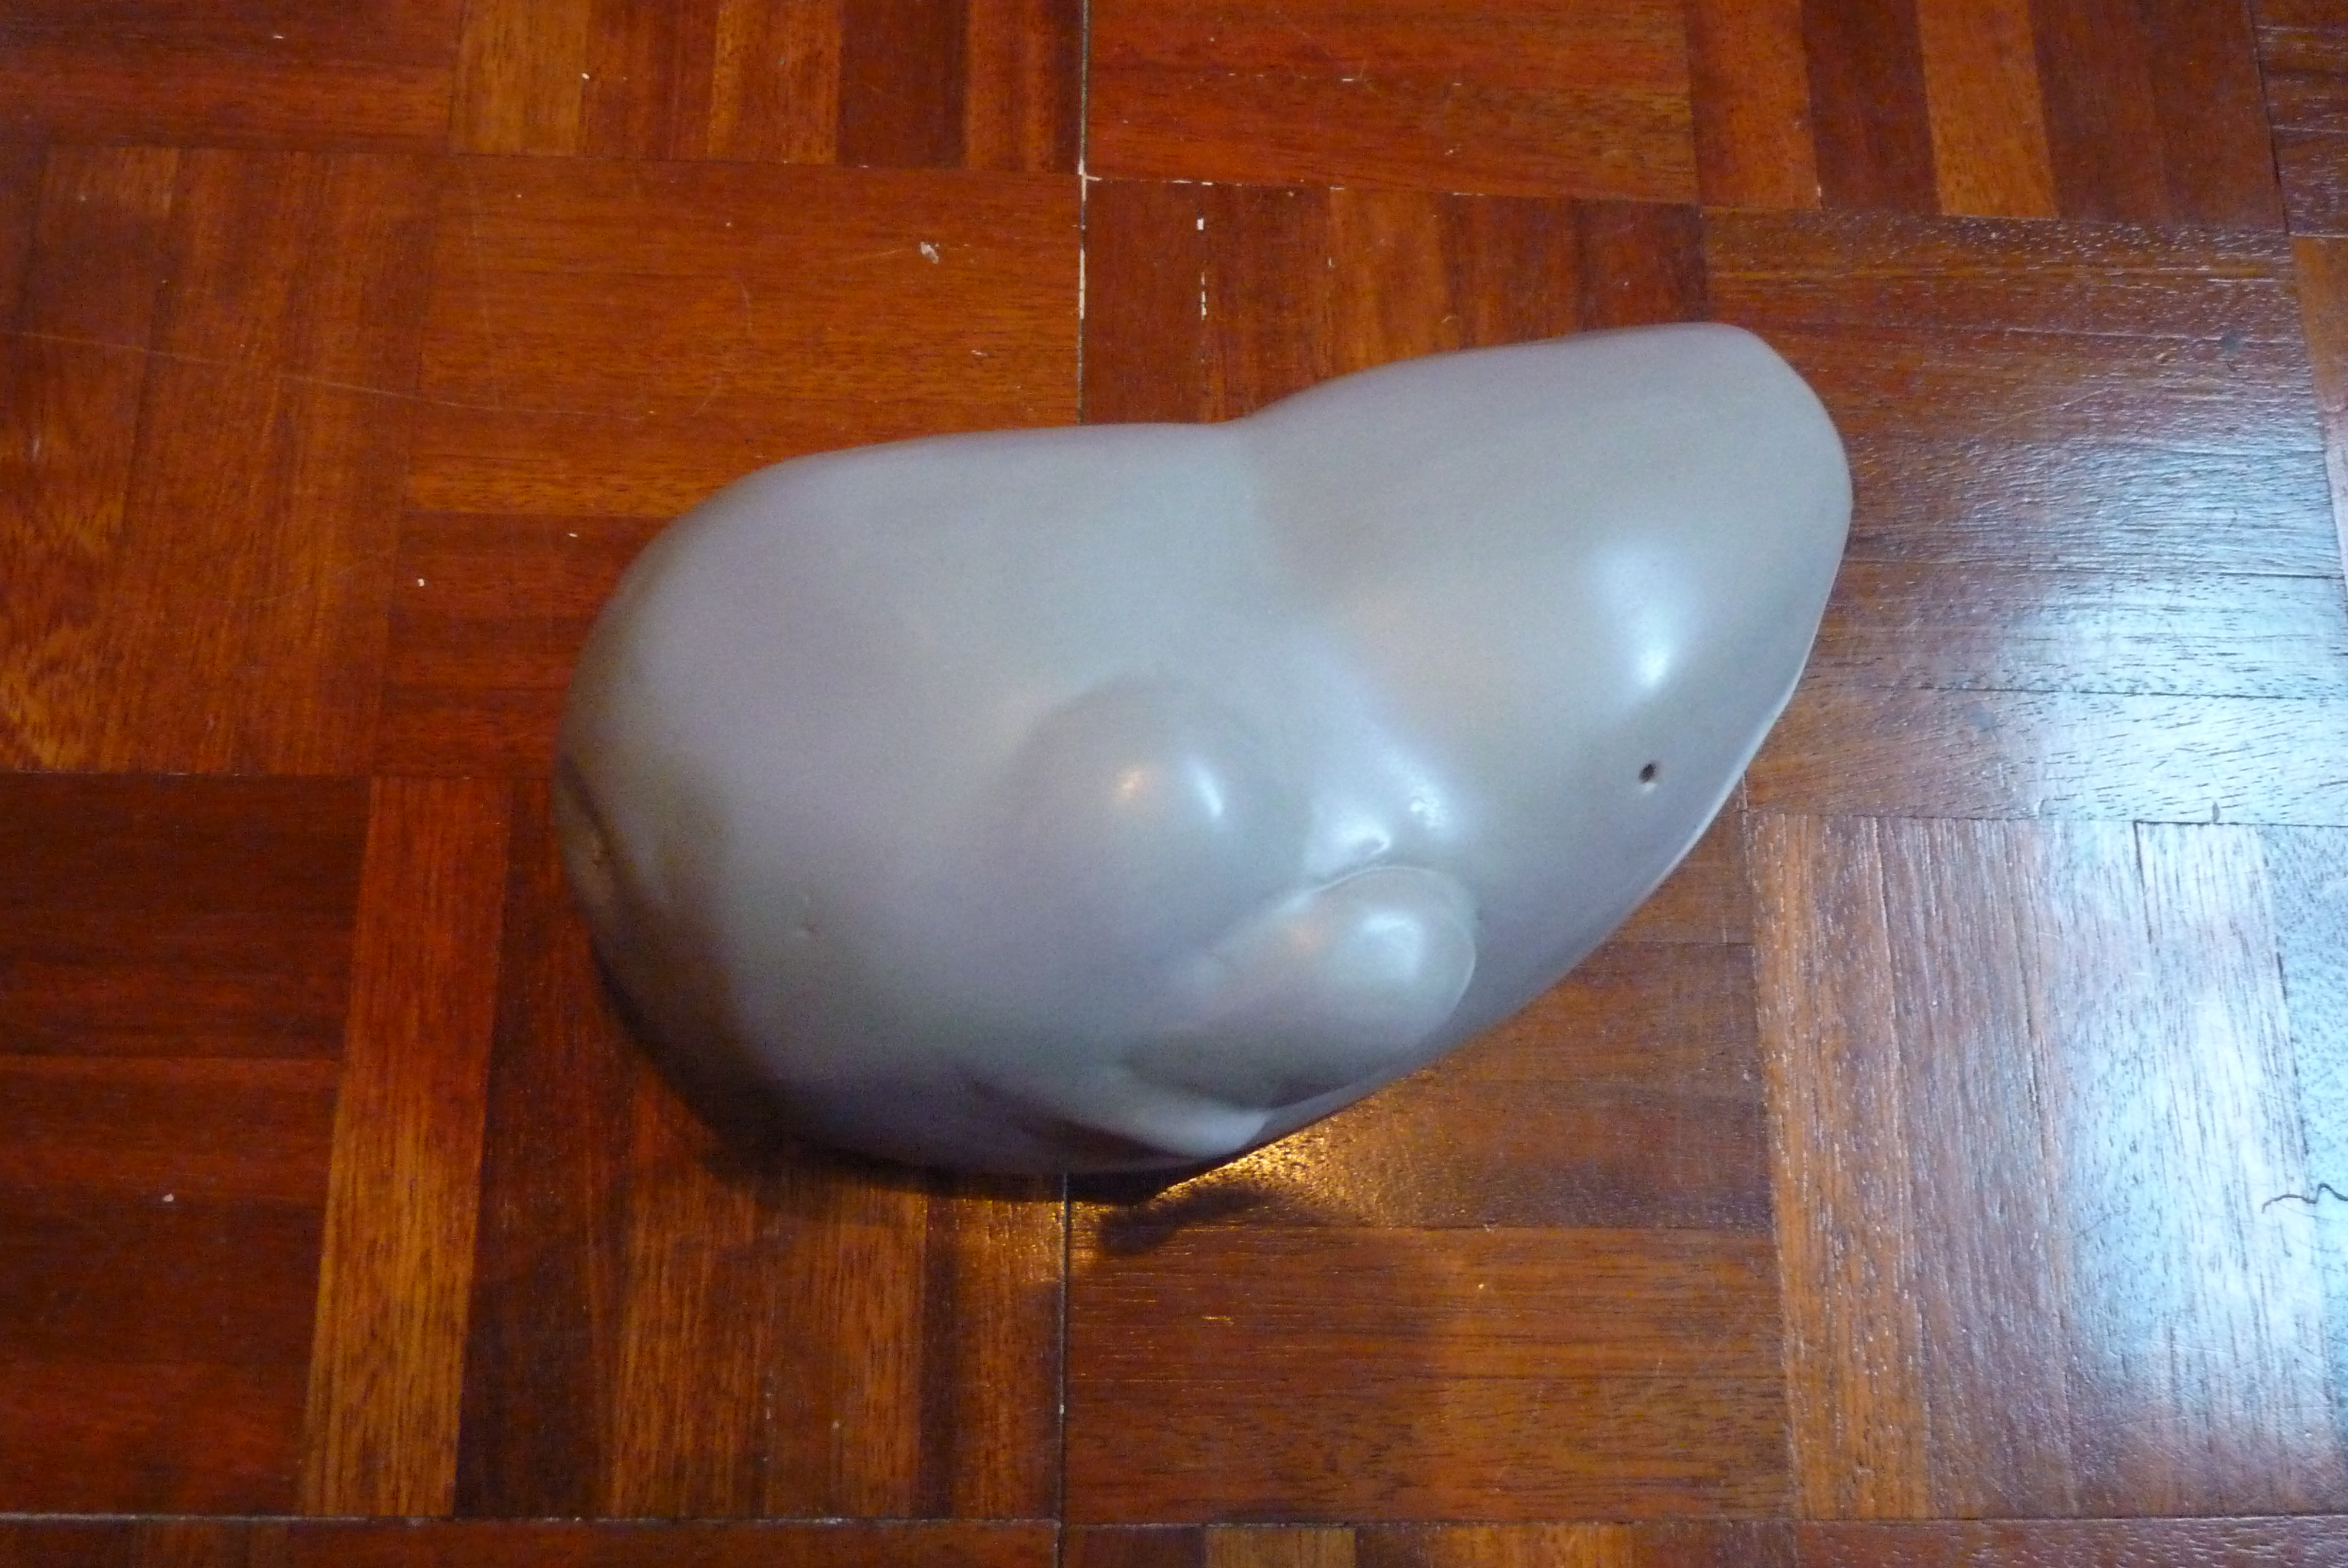
For this section remember to use your dust and fume mask, goggles and protective clothing! Work in a well ventilated area away from food prep areas or pet areas and clean up your dust when you're done!
What I did...
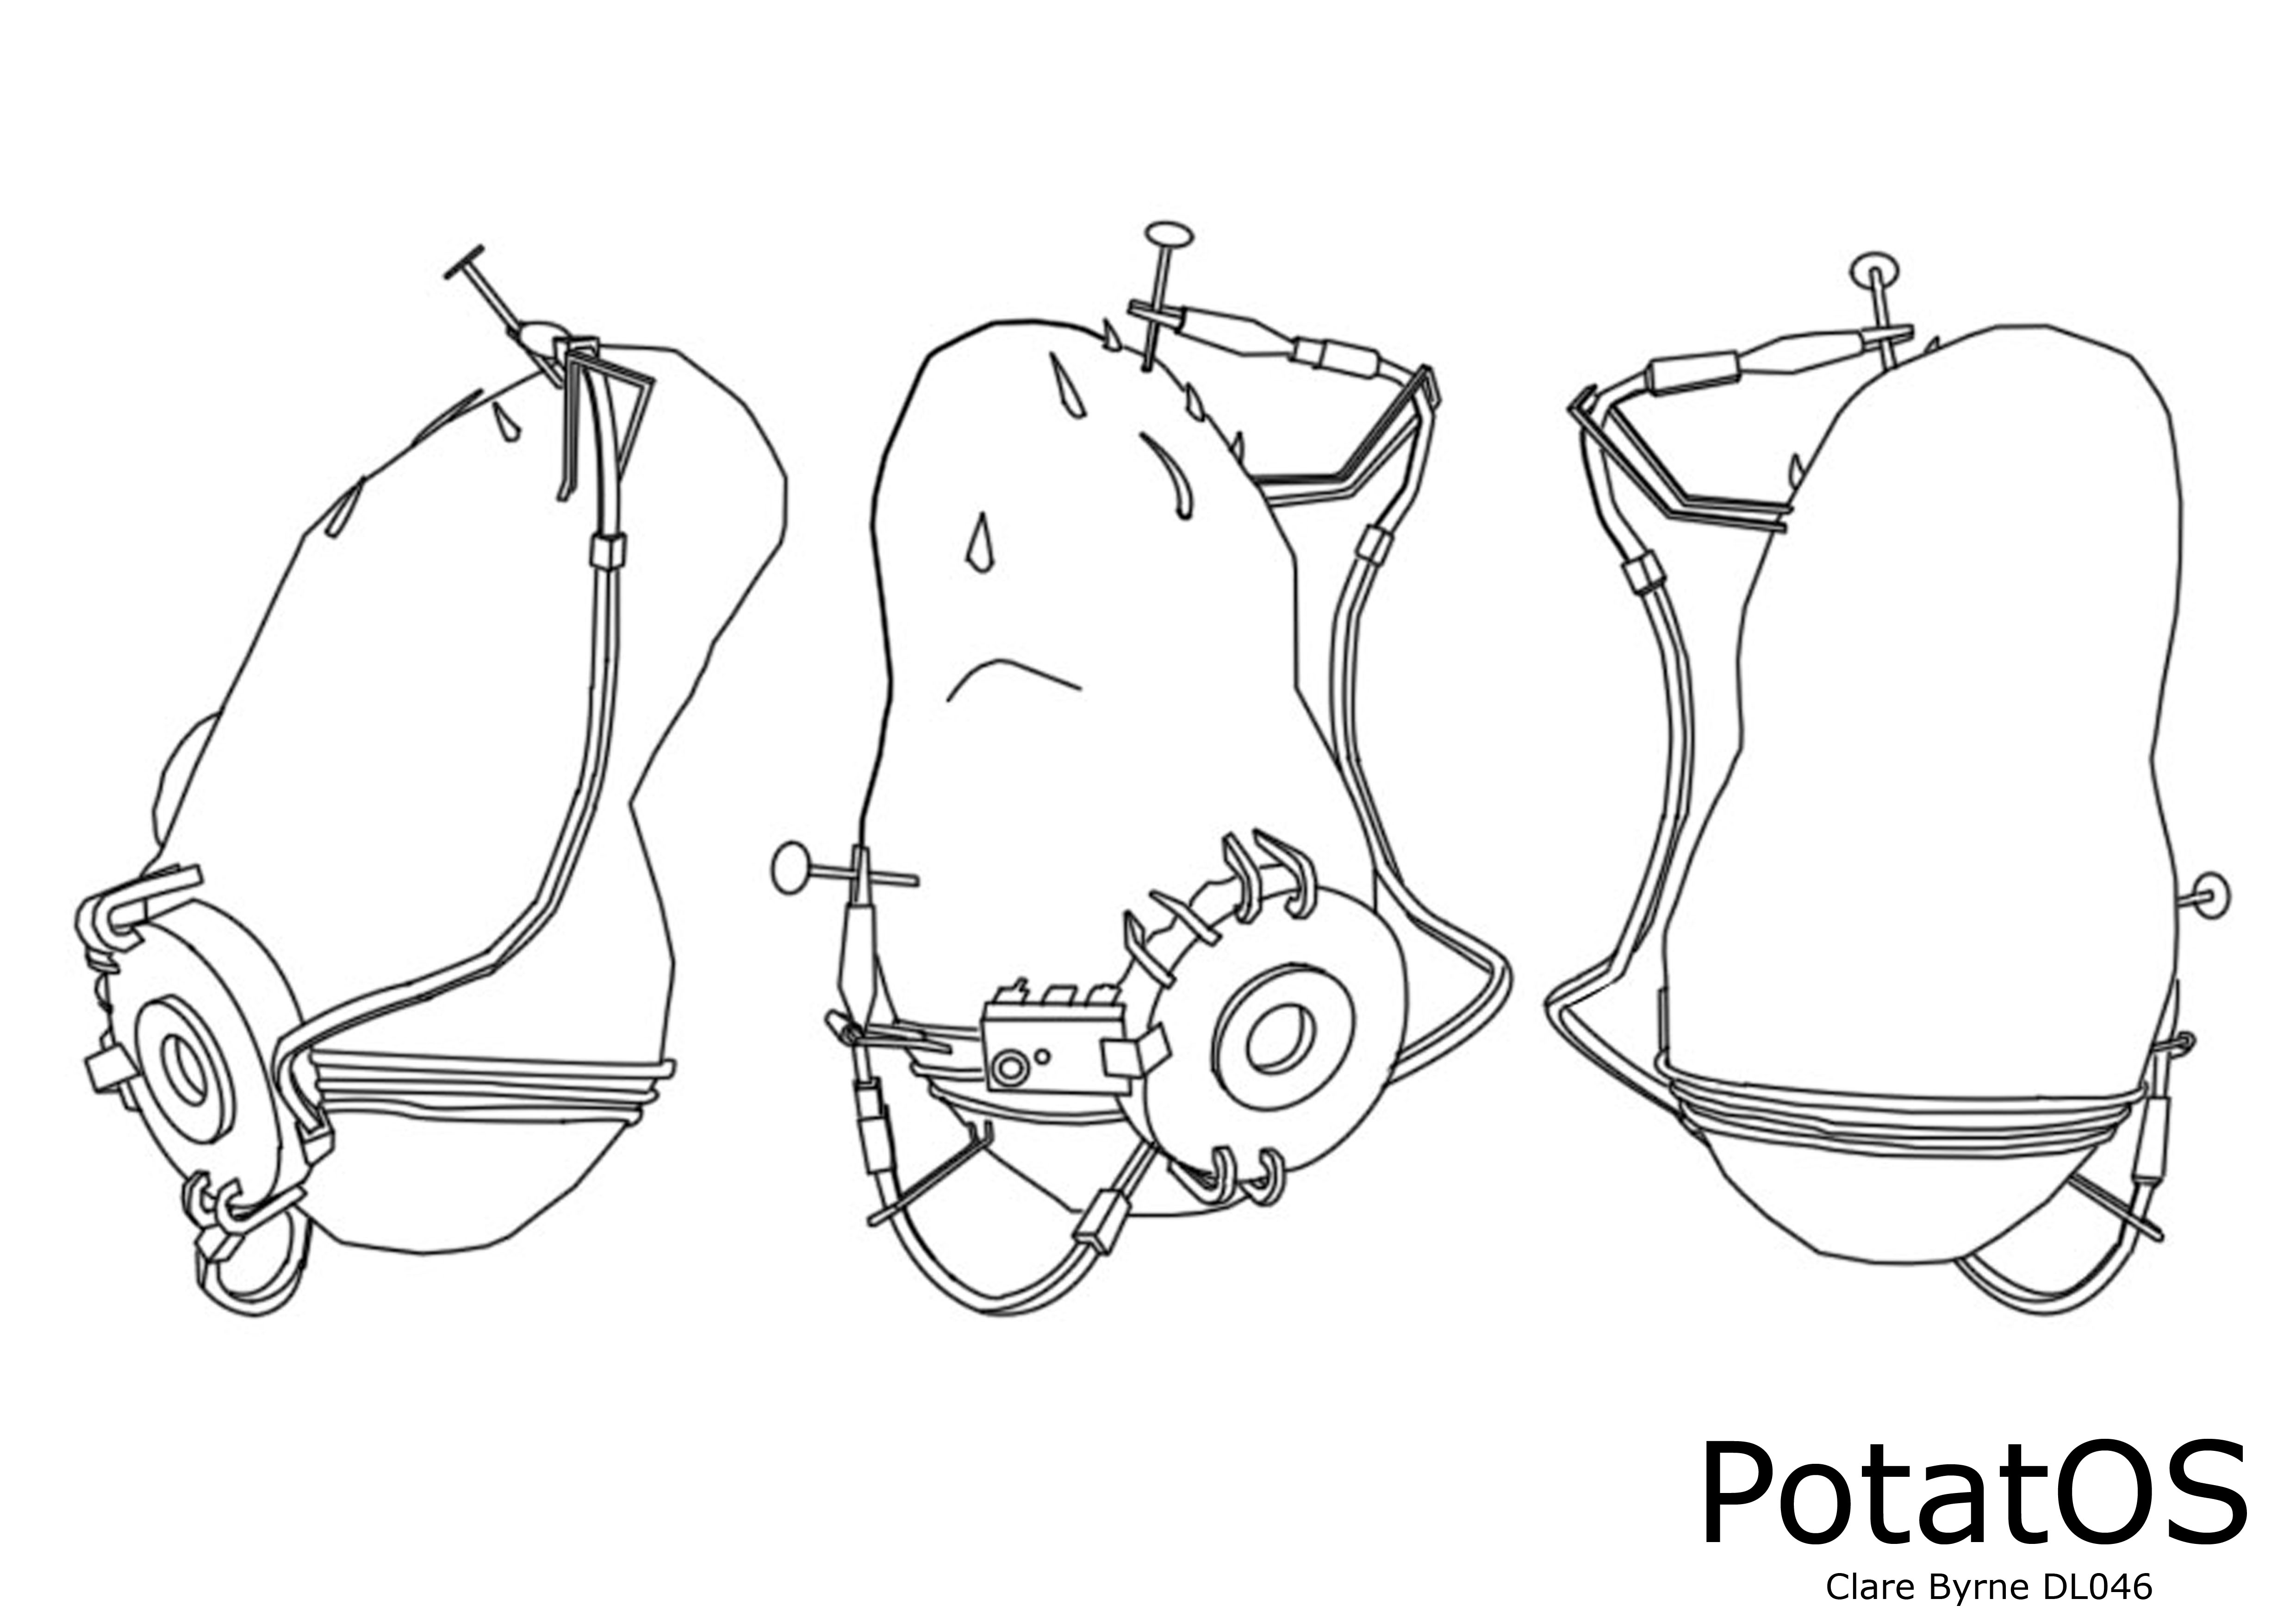
This is where the outlines (Fig 1) you drew in step 1 come in handy. Don't worry about all the attachments just yet, you need a potato to stick them to first. If you want you can draw an outline of the potato without all the bits attached, but I found it easier to keep them their so I knew which side of the potato I was on.
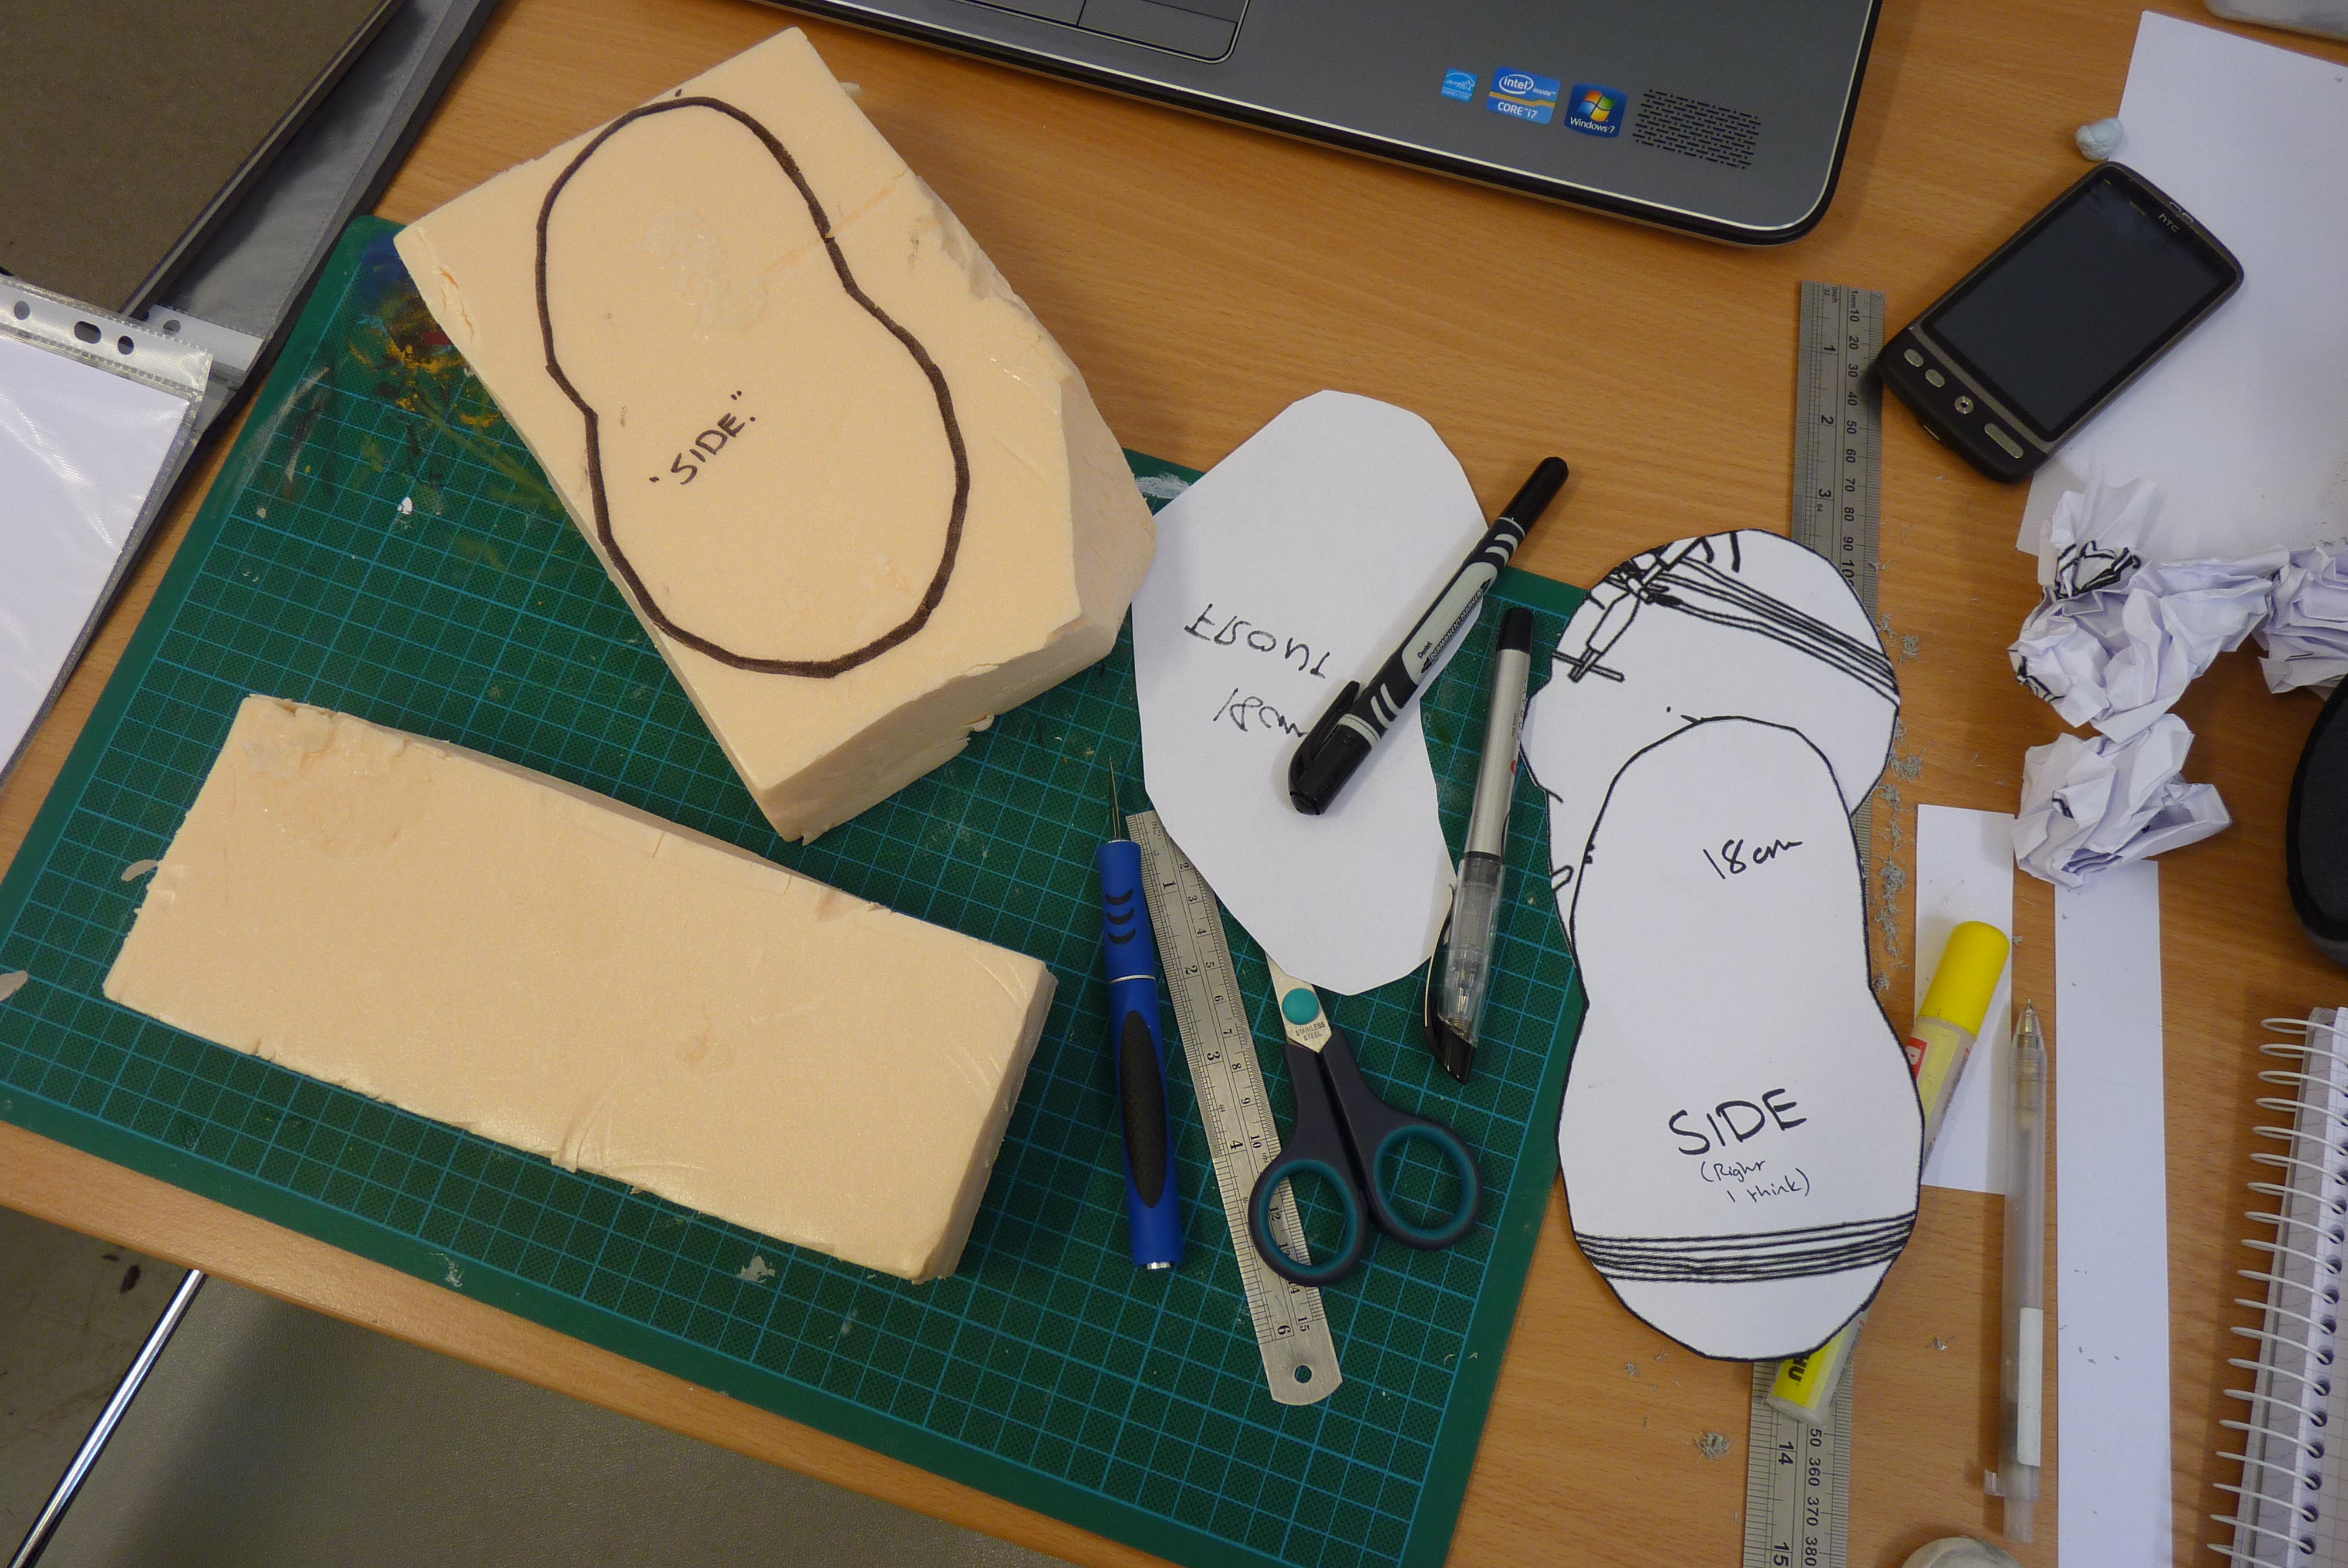
- Printing out your 3 outlines (You can use mine below if you like) stick them to cardboard with a bit of glue and cut them out to make a hard template for yourself.(Fig 2) My templates were 18cm tall from top to bottom.
- Next, take your block of insulation foam, you might need to splice two or three pieces together to get your desired shape. (Fig 3) I had a few scraps left over from building a large puppet so I glued them together. Make sure you use Foam Glue or Solvent Free glue for this, I used a glue with a solvent in it and my foam started to melt. My original potato still has a massive cavity in it and still rattles a bit because something broke off inside! Draw the outlines on each side, these will be your guides when shaping your potato.
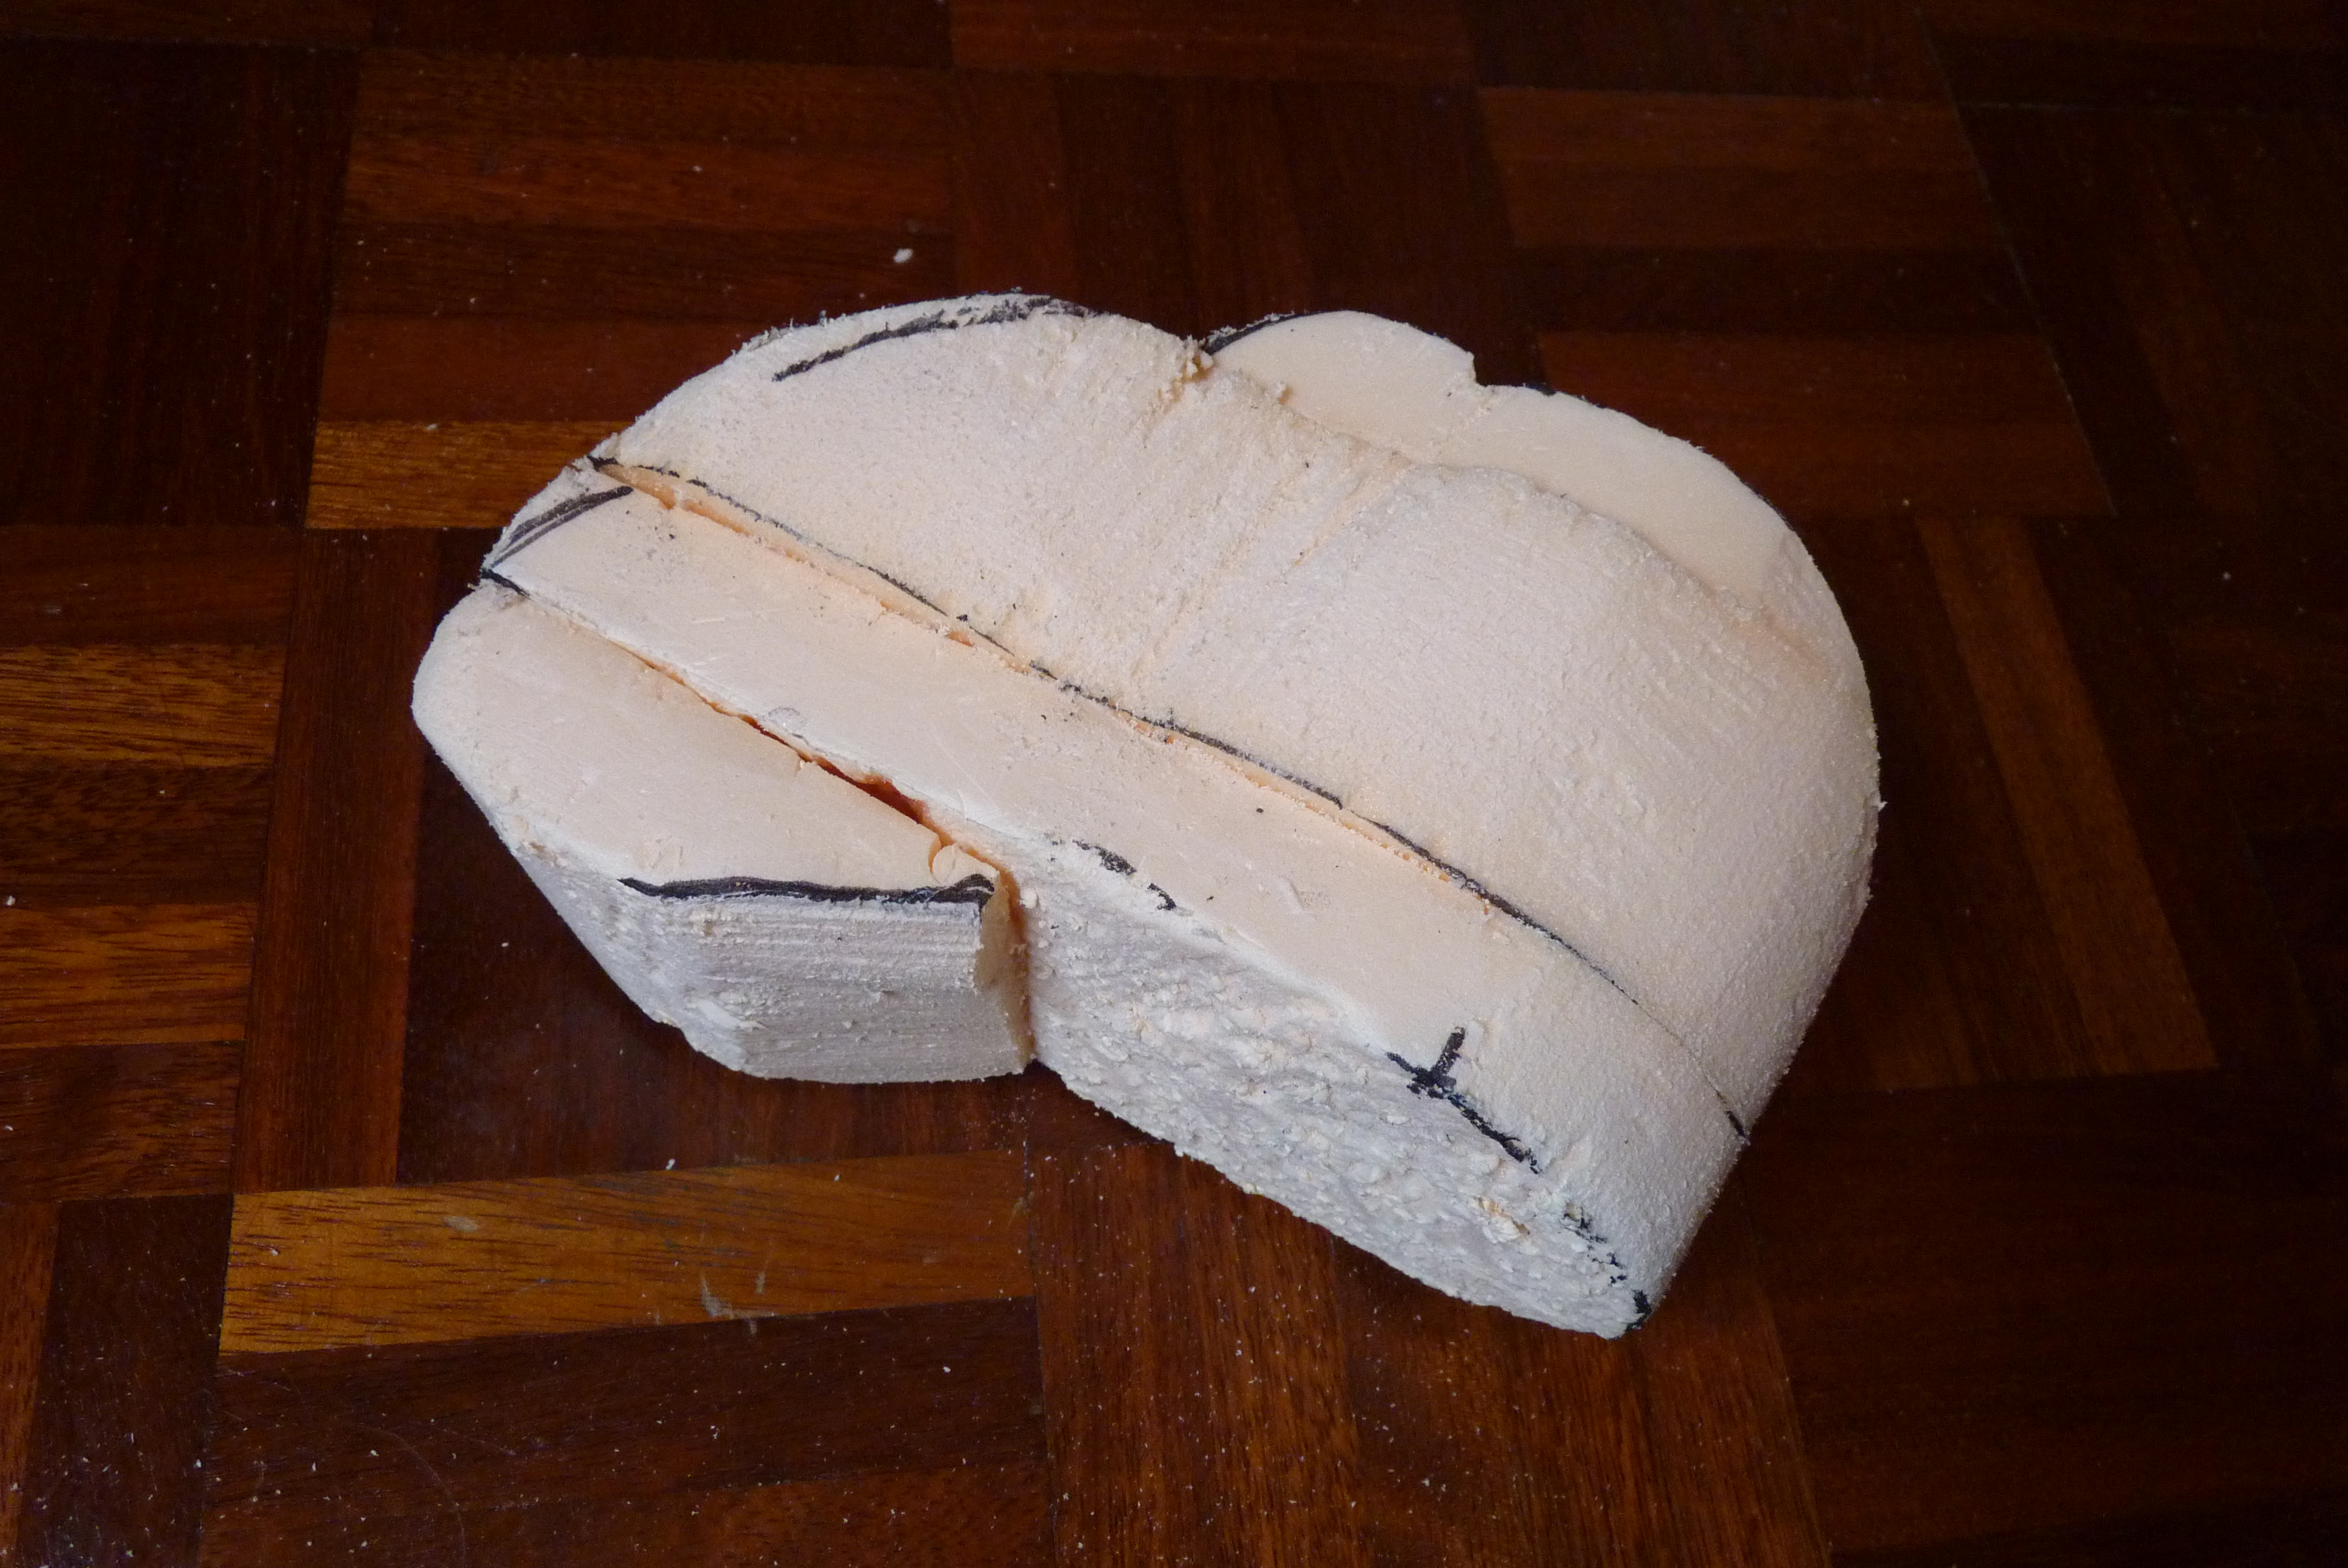
- Using a knife, a scalpel or I used a mini saw for the larger chunks, start cutting down all the excess on your potato, making sure you keep the outline. At some stage you're going to have to cut through the lines on either the Front or the sides to continue the shape. Once you have your square potato you can use a bit of 80 grit sandpaper or a sanding block (just use double sided tape to stick sandpaper to the side of a scrap bit of wood) to start adding your curves to you potato. (Fig 4) This is a good point to keep your 3ds Max file open so you can keep an eye on the shape as you go.
- When you're happy with your shape, you need to give it a bit of strength and a smoother surface. Mix up a small amount of Isopon (Bondo in the US) and start to spatula it onto your potato. The more catalyst you use the faster it'll go off, and if it's a perticularly warm day that'll help it too. You're better mixing it in small amounts so's not to waste it if it's going off very fast. In the image I have for this step (Fig 5) you can see I added a bit of white epoxy putty to form the two lumps on the front of the potato. These can't be clearly seen in my outline which is why I should've had my 3ds Max model open here to double check. If it is too tricky to sand around them and then coat them in Isopon then the epoxy putty works fine too. Keep in mind though that epoxy putty can take a good few hours to cure. Milliput takes about 4 hours, but it wont be completely cured for a lot longer then that, where as Isopon should be fully cured and ready to sand in less than an hour.
- Time to start sanding this potato down. Make sure your Isopon and milliput if you added it has fully cured or you'll just end up clogging your sandpaper. If you can support the potato in any way I recommend it, between this project and my final project in college where I was gripping things and sanding for hours on end rather than using a vice or some other form of support, I ended up giving myself golfers elbow. Or at least take regular breaks. I started with a rougher grit, about 80 or so to get the large lumps of Isopon down, and then progressed to 250 grit, and then on to 400 / 600 grit to get a nice smooth finish. (Fig 6) If you happen to sand back to the foam underneath don't worry, just coat it with Isopon and sand it again.
-At this point you can use some two part epoxy putty again to sculpt details like the potato eyes and the dimples where the roots are sprouting out of (Fig 7 and 8). Like the Isopon (Bondo) only mix as much as you'll use. But if you have little bits to spare you can use them to sculpt the roots and set them aside now rather than doing it later.
- You'll see in the pictures of the potato eye there, that the surface of the Isopon (Bondo) is still really rough, with lots of lines from the sandpaper. You could spend more time sanding down with different grades, or you can give the potato a thin coat of Red Filler Putty. (Thicker coats will take a loooong time to cure, so try to keep it under 1mm thick) 3M is the only brand I could find but there are some different types out there. This will fill in all the scratches you have, and give you a great surface. (Fig 9 and 10) You will need to keep sanding with a high grit, 800/1200 to make sure you remove all the red, except for the parts where it has filled in scratches. This will take a little longer than the Isopon (Bondo) but it's worth it!
- When your potato has the shape and surface you desire, give it a thin coat of grey car primer. This will help seal the potato for molding and also show up any scratches or imperfections you may have missed. if this happens just go right back in there with a small amount of red putty, and when it has cured, give it another light coat to check it. (Fig 11)
- Give the primed potato a light sand, make sure you're happy with the shape and wipe any dust off with a damp cloth and it's ready for molding.
Or you could...
Like I said in step 1 you could do this out of pepakura and make it the same way people make Halo armour with fiber glassing resin or something similar. You may need to add putty or Isopon to it to get it to the more curved rather than angular shape. This would also work well if you didn't want to mold the potato because it would already be hollow. Just be careful when putting the resin on that your potato doesn't collapse in on itself or change shape, maybe do one half at a time.
You could also if you want to add more texture to your potato, before you prime it, it you wanted it to be gritty. Isopon can be diluted with acetone to give a paste that you could stipple on, in various places which you can paint like dirt later.
On to molding...
Molding and Casting That Potato!
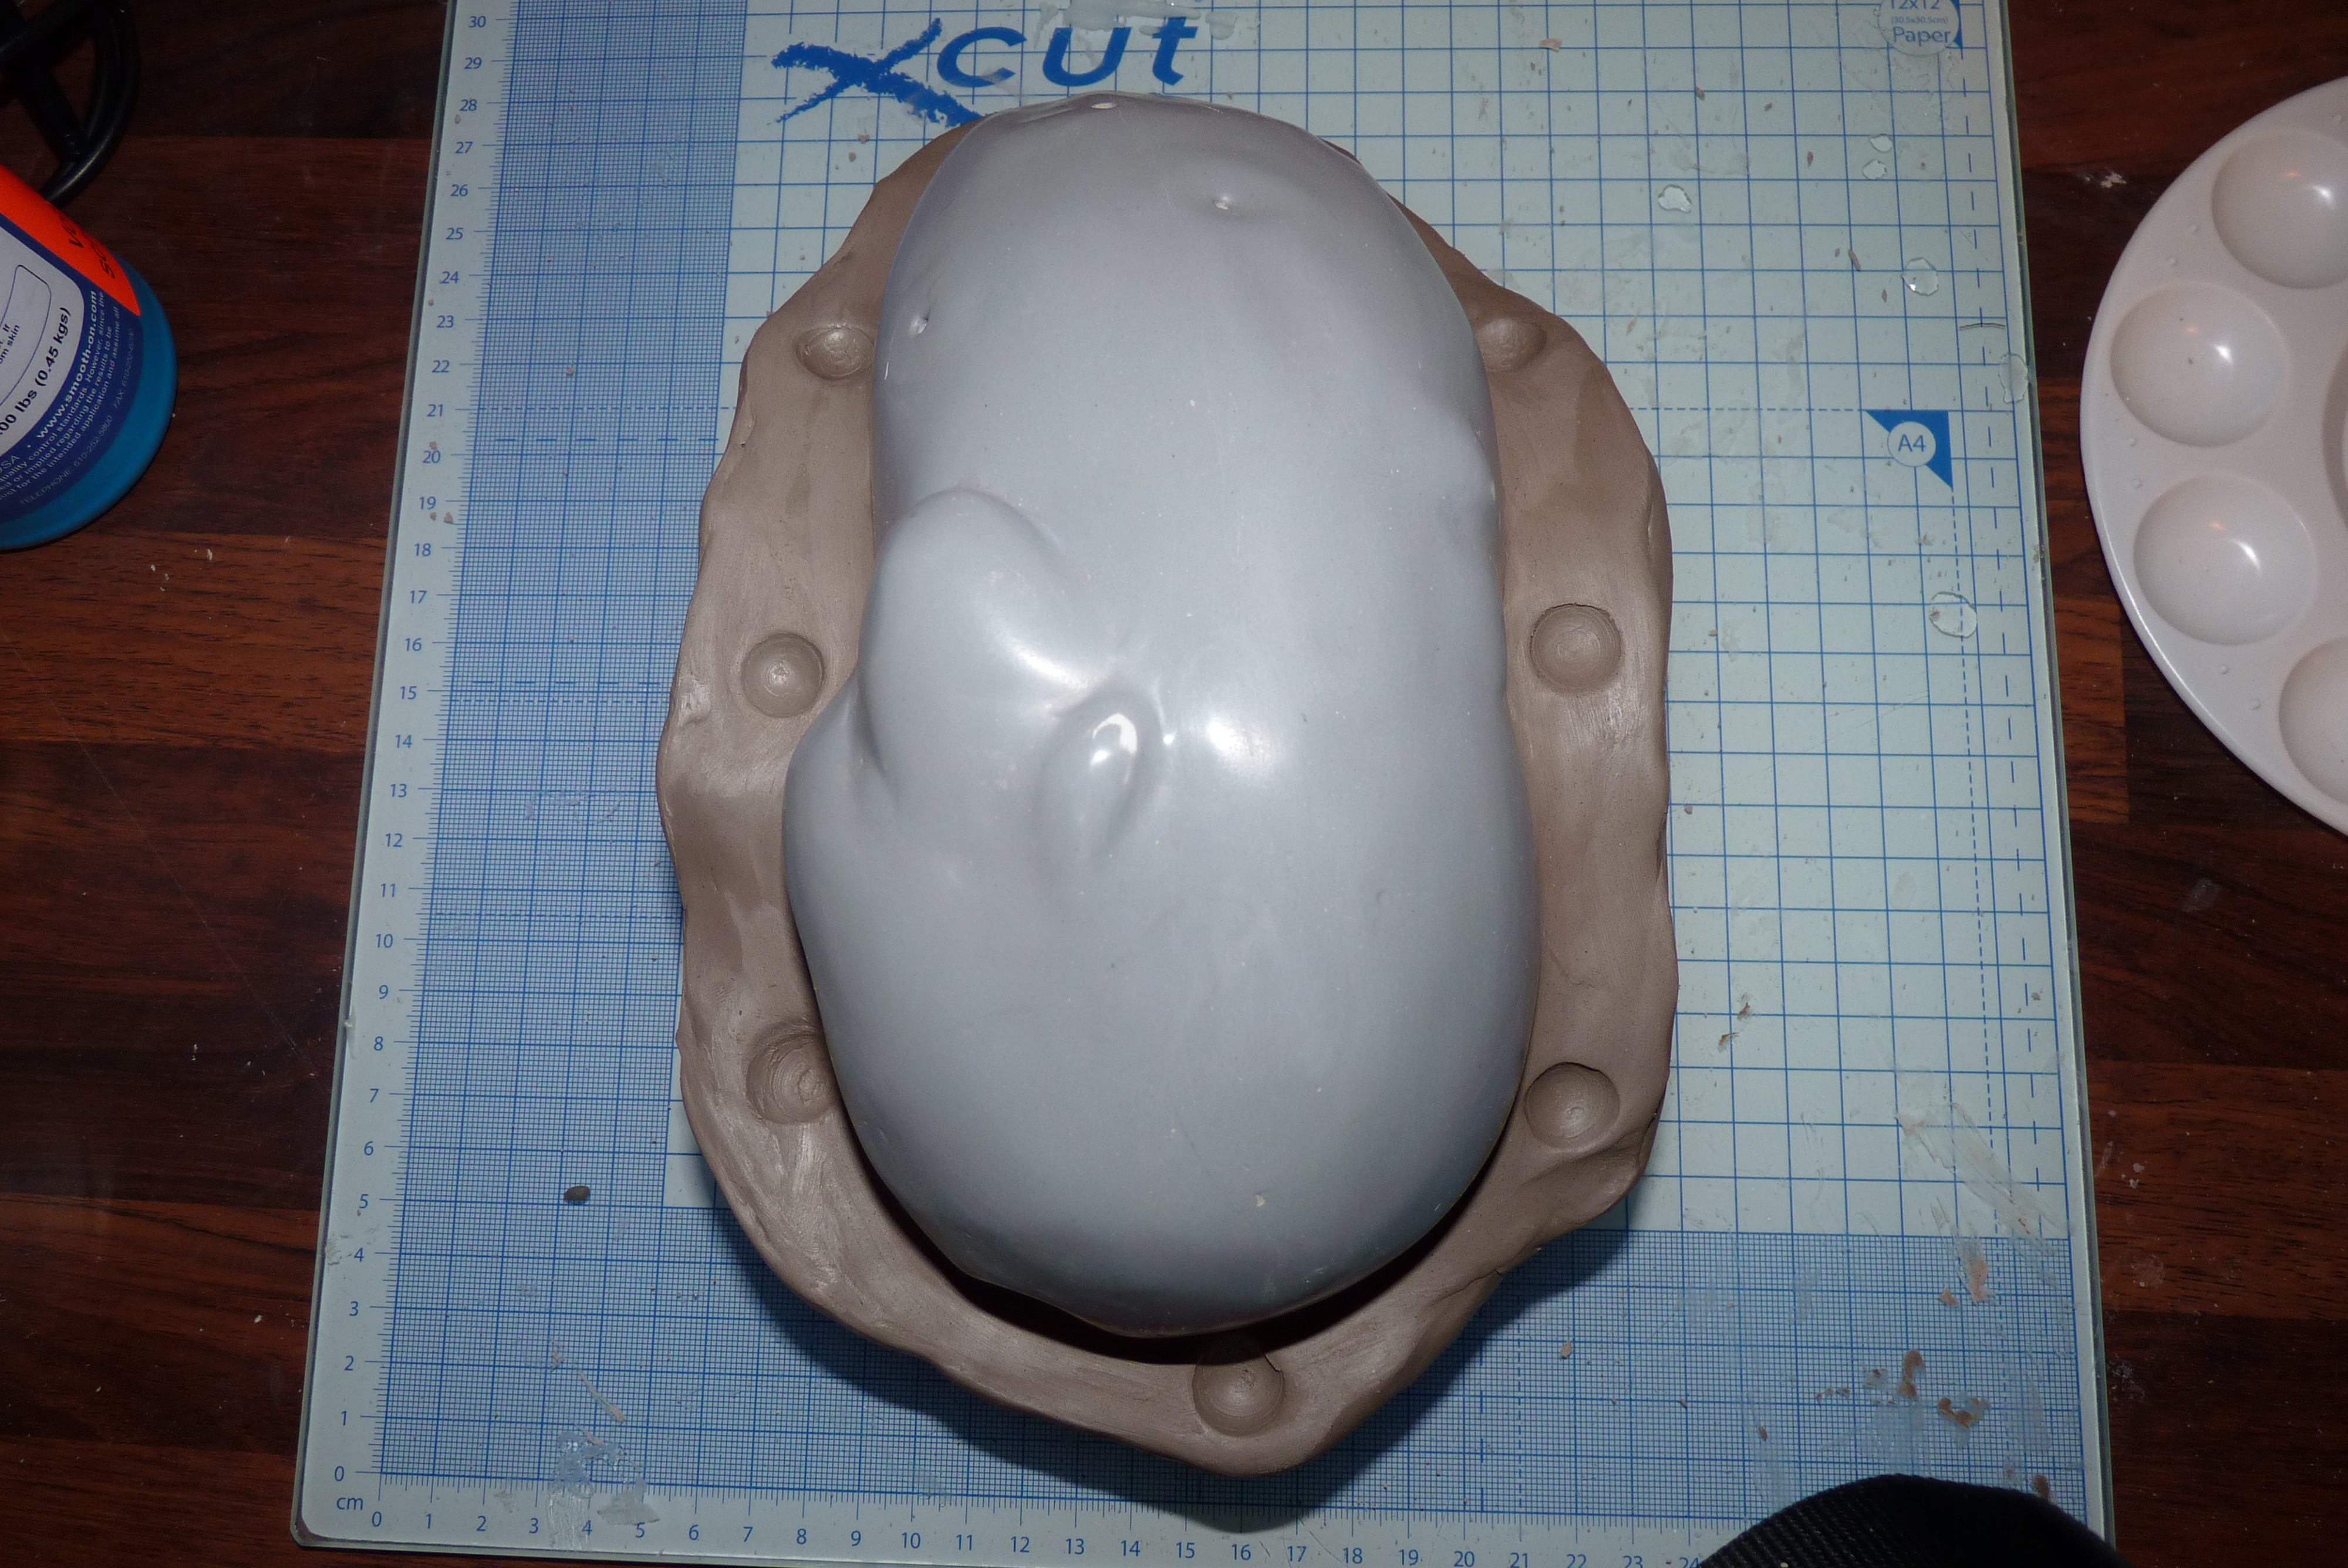
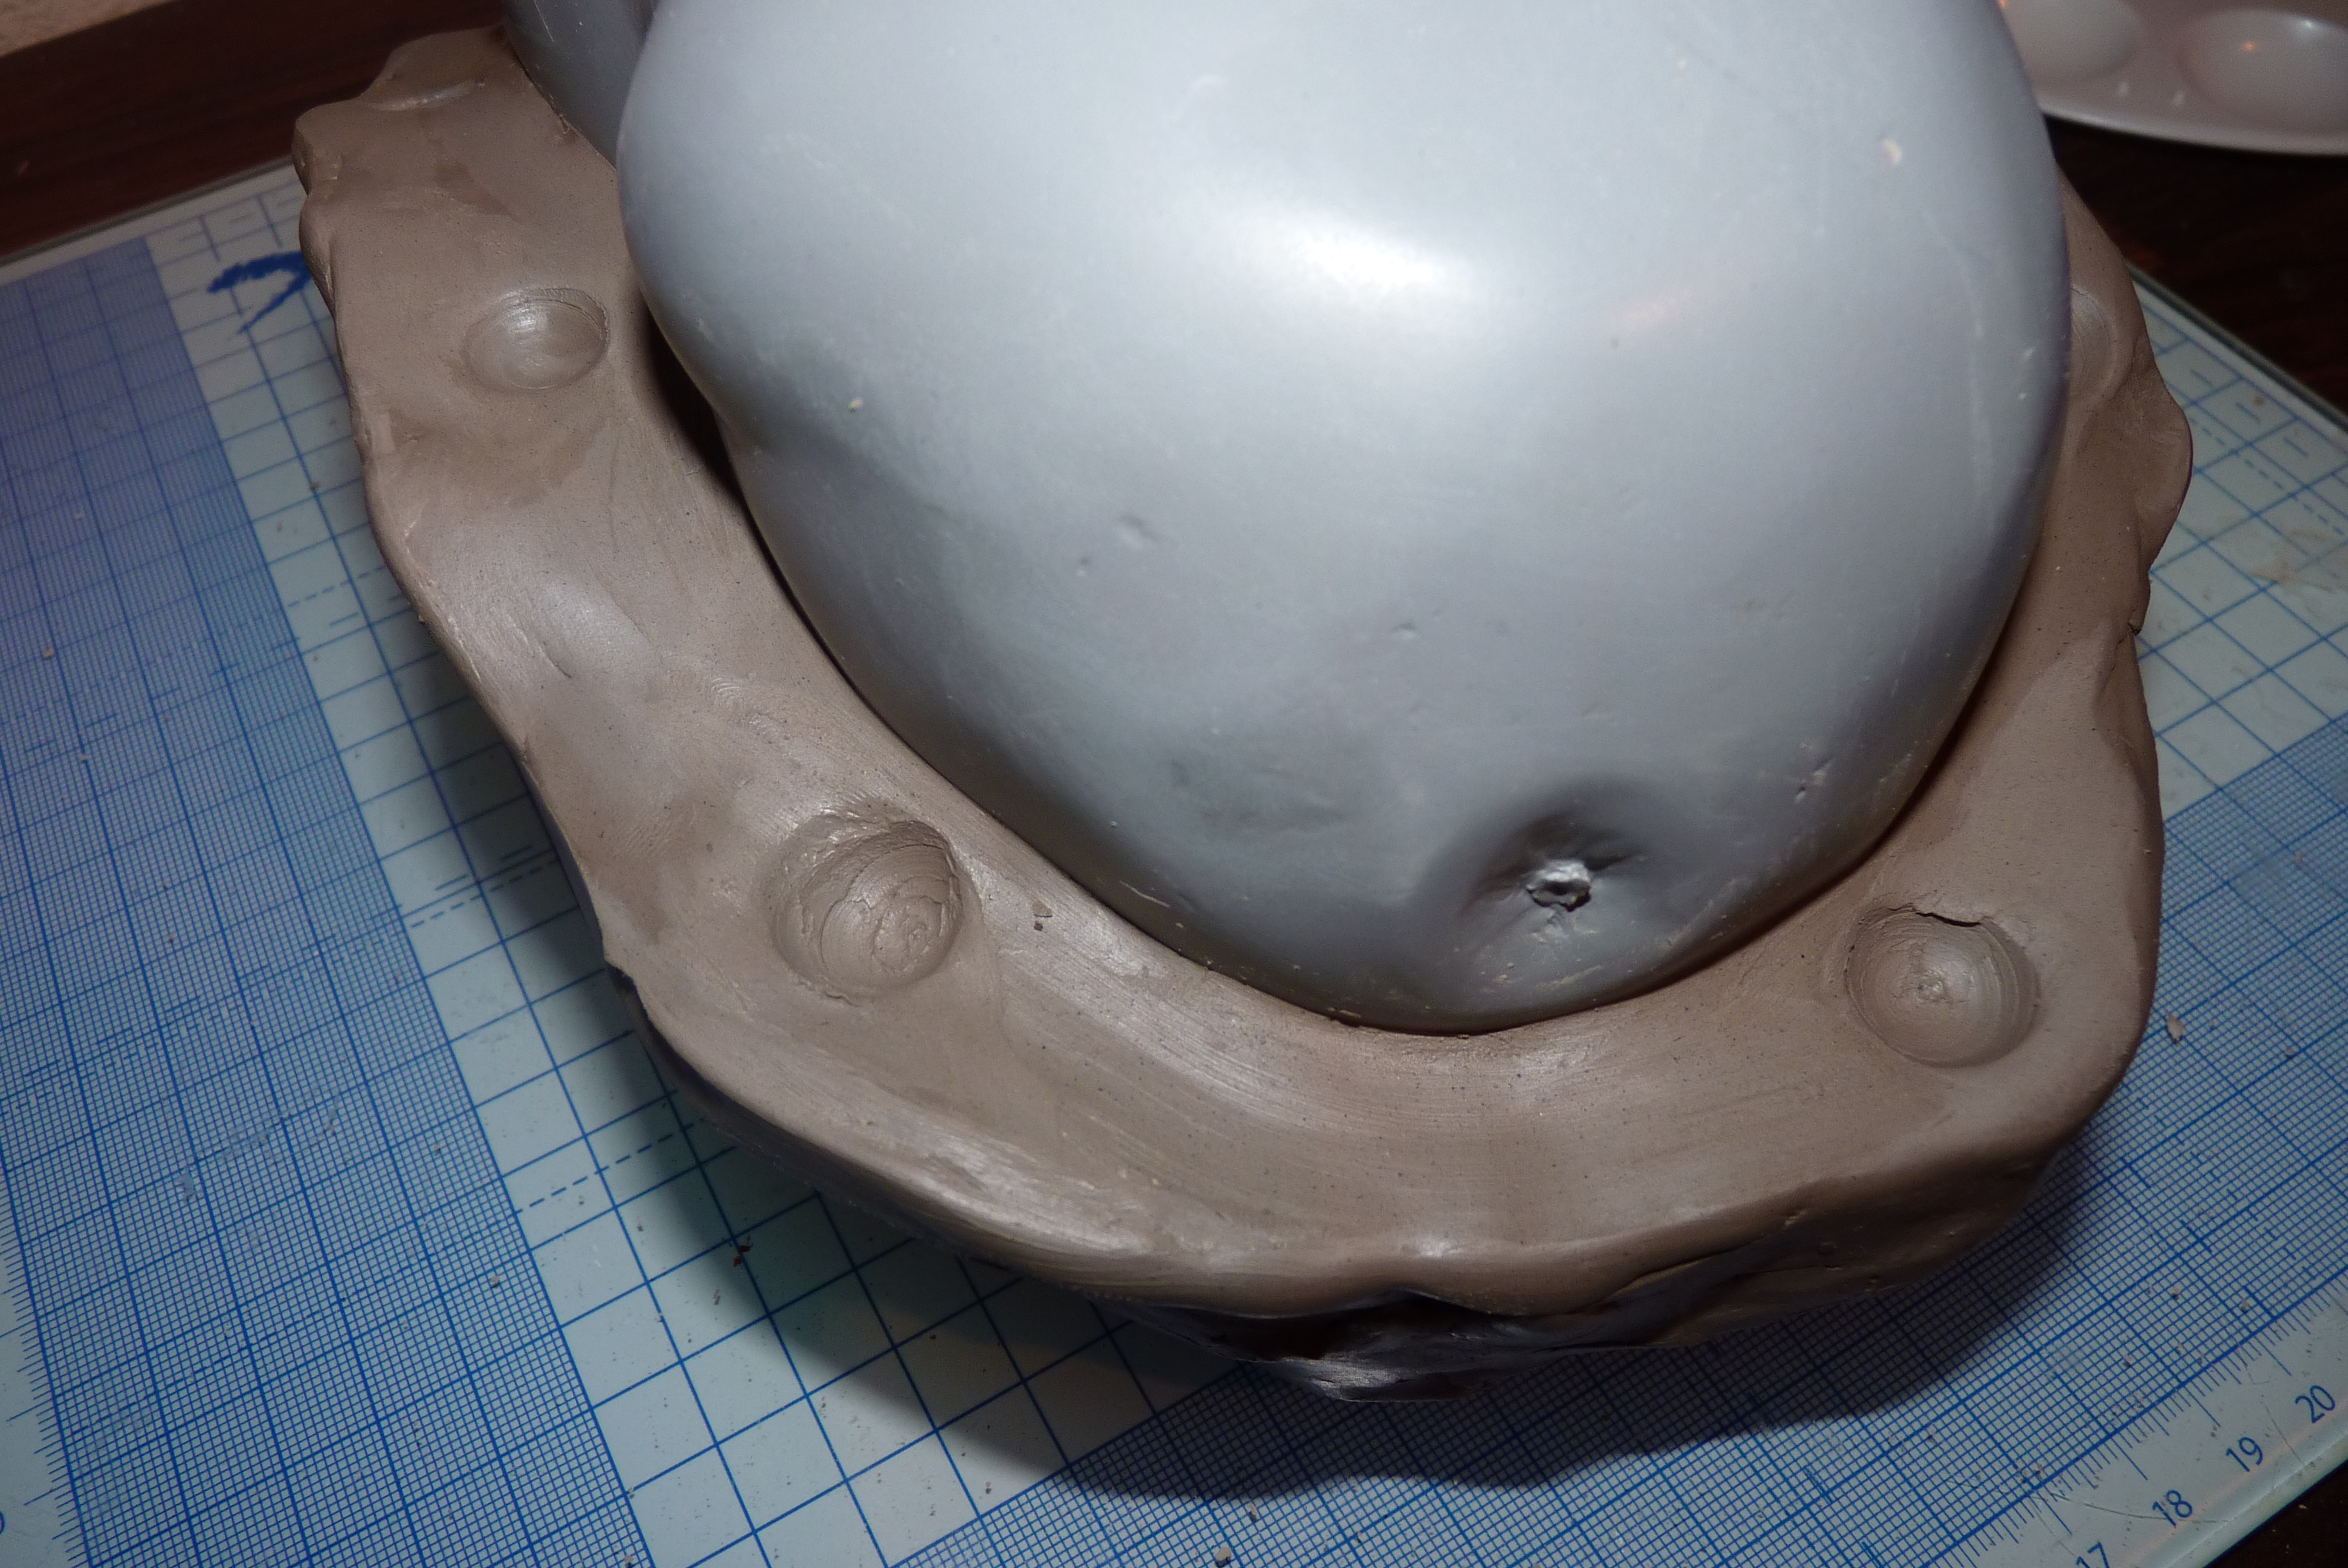
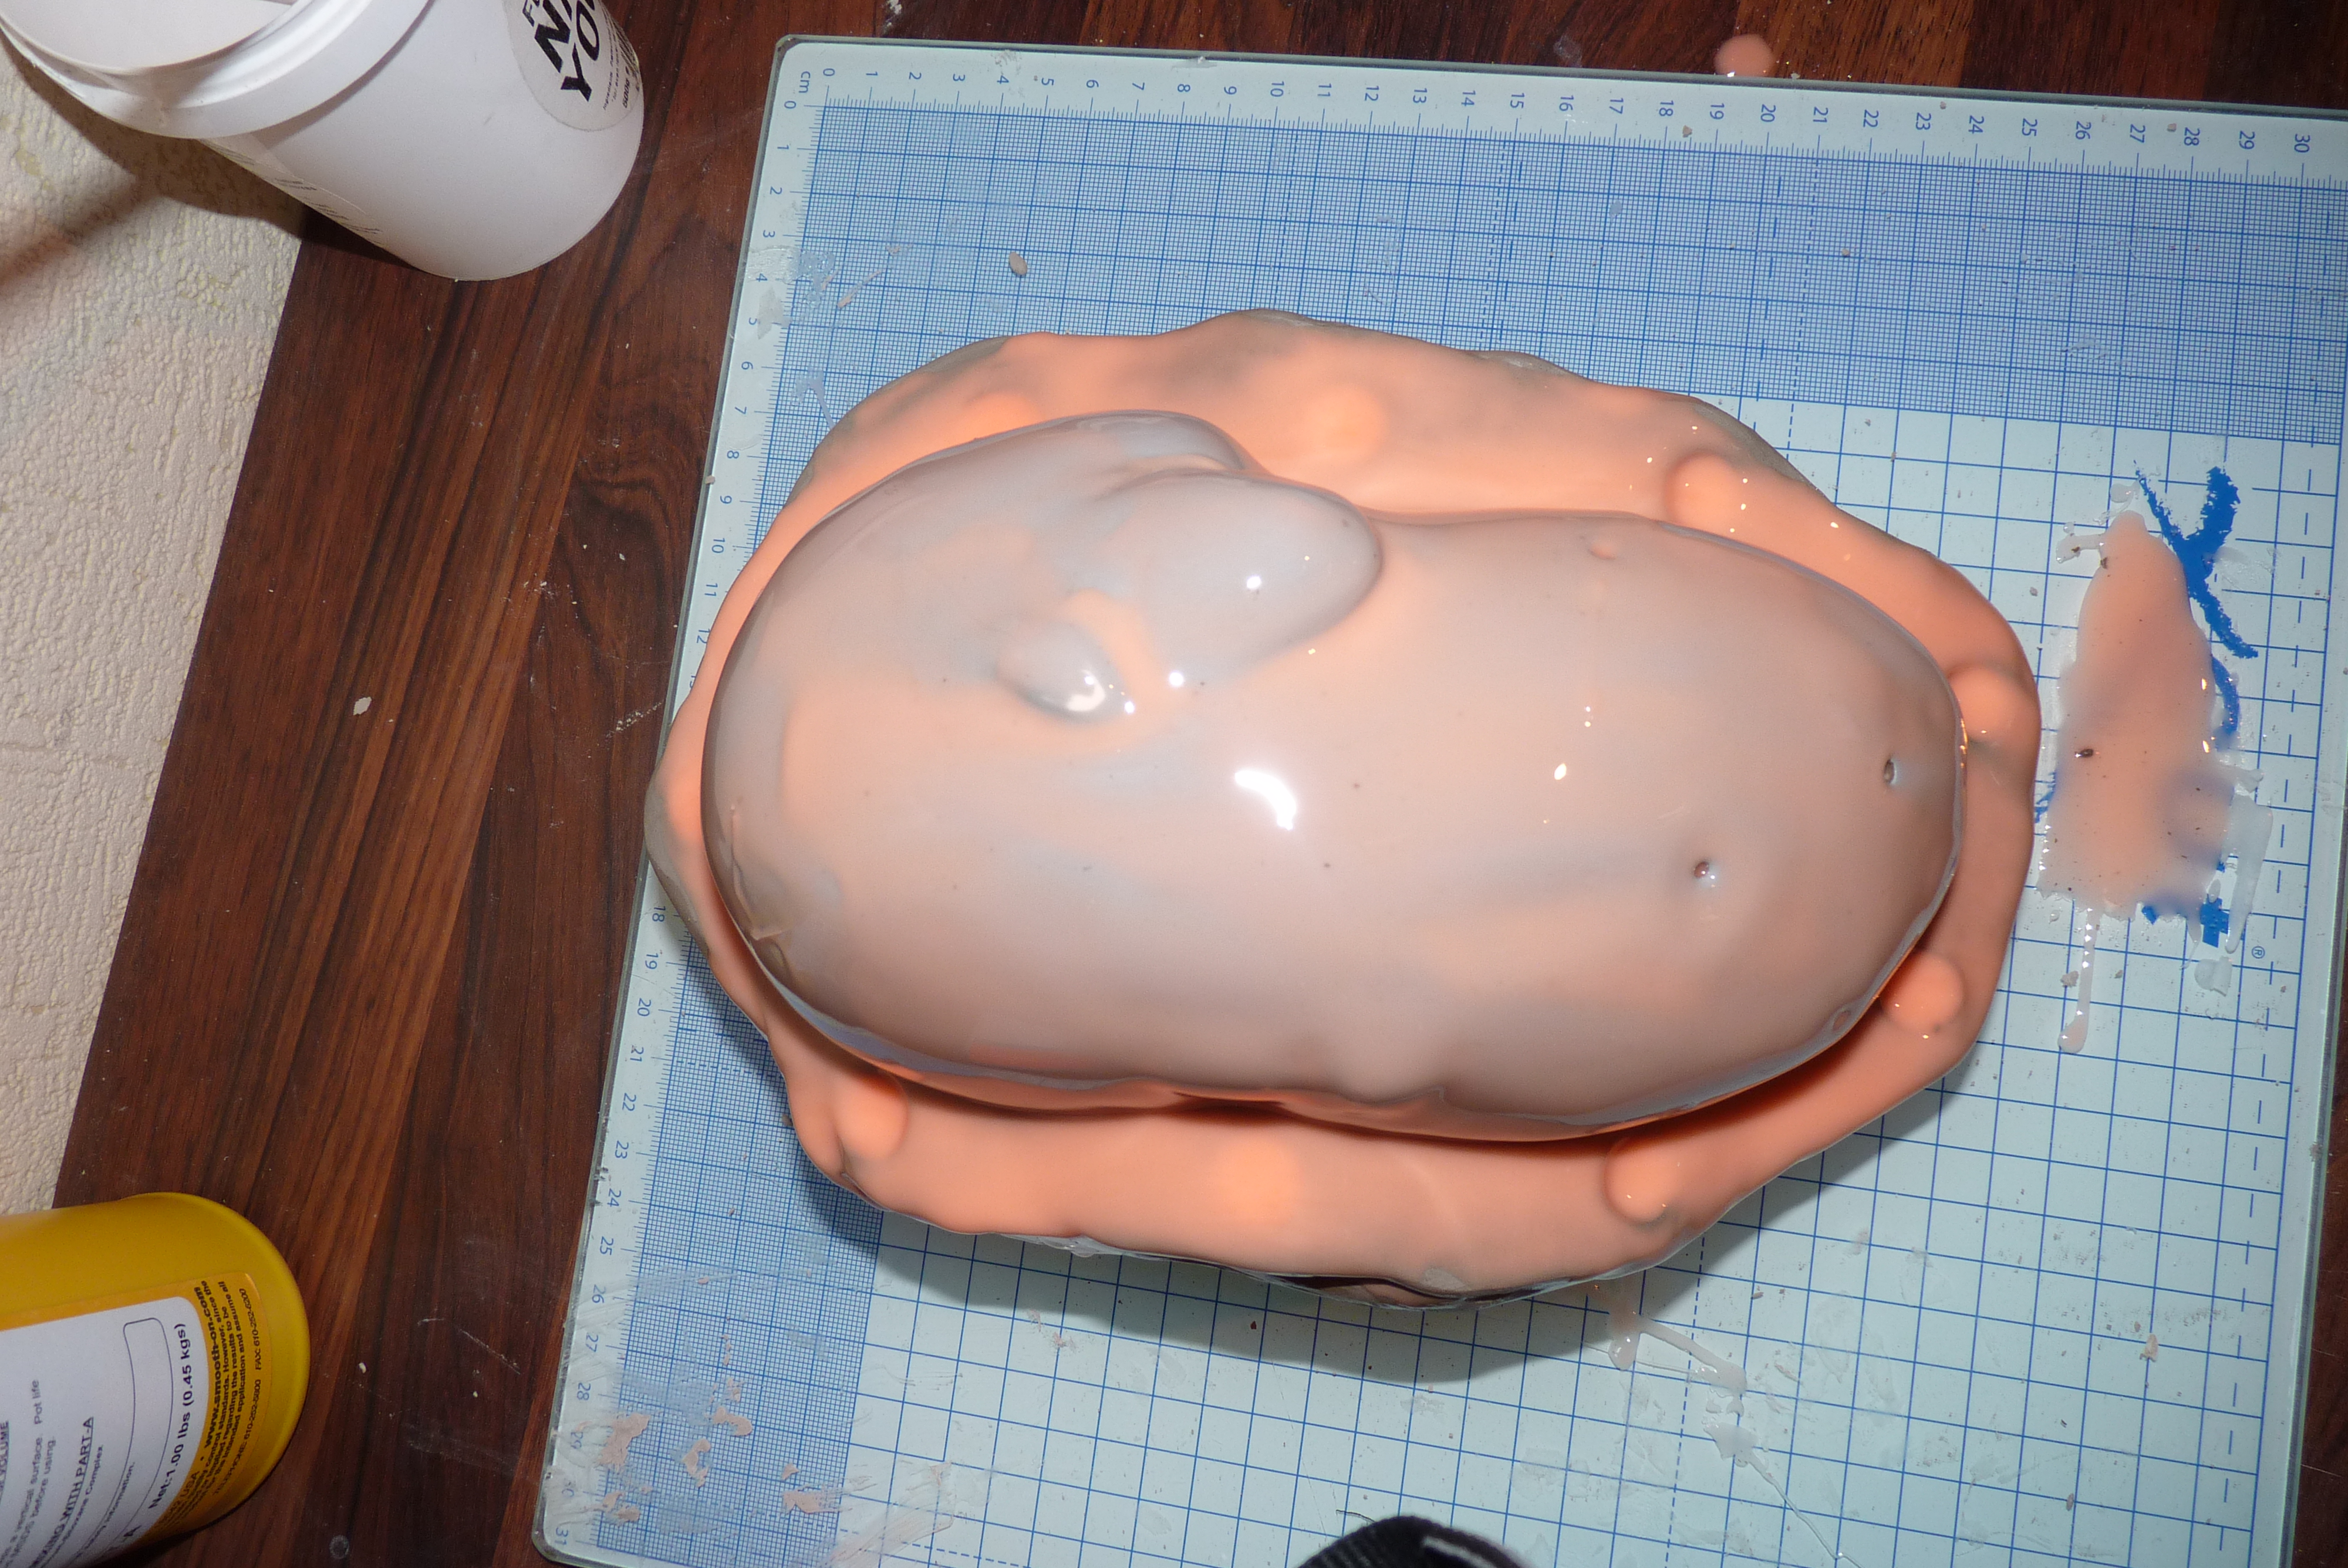
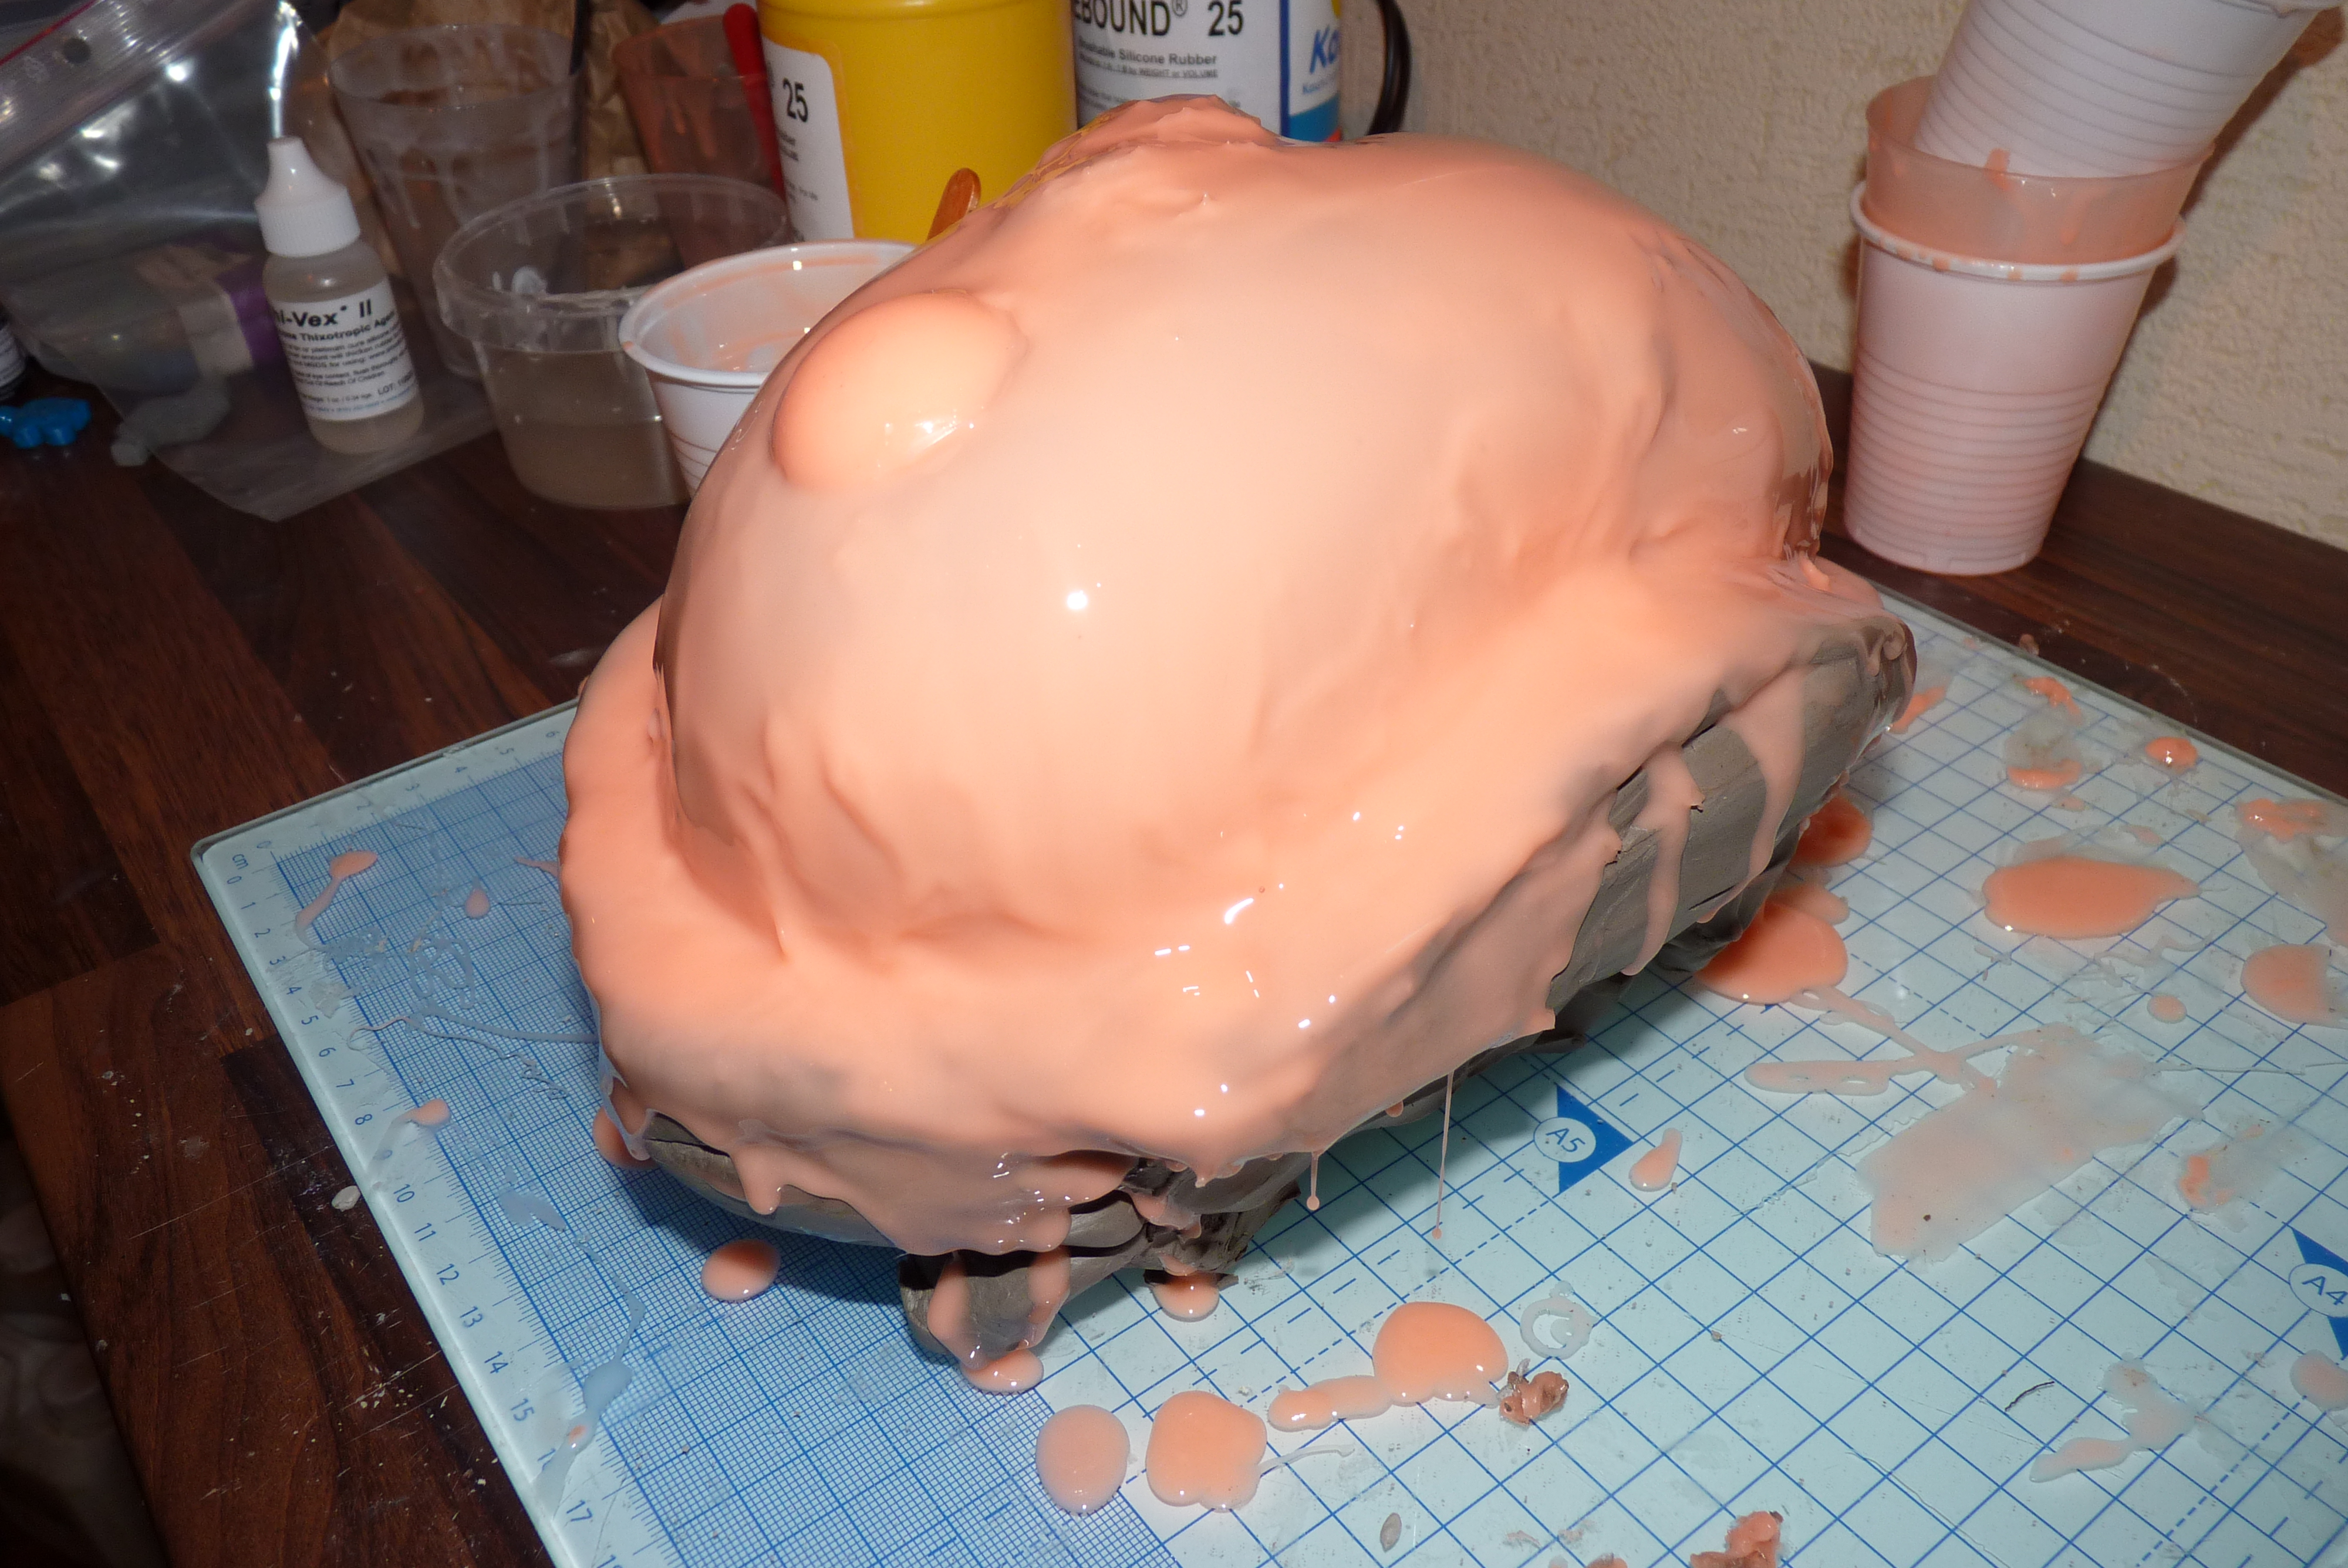
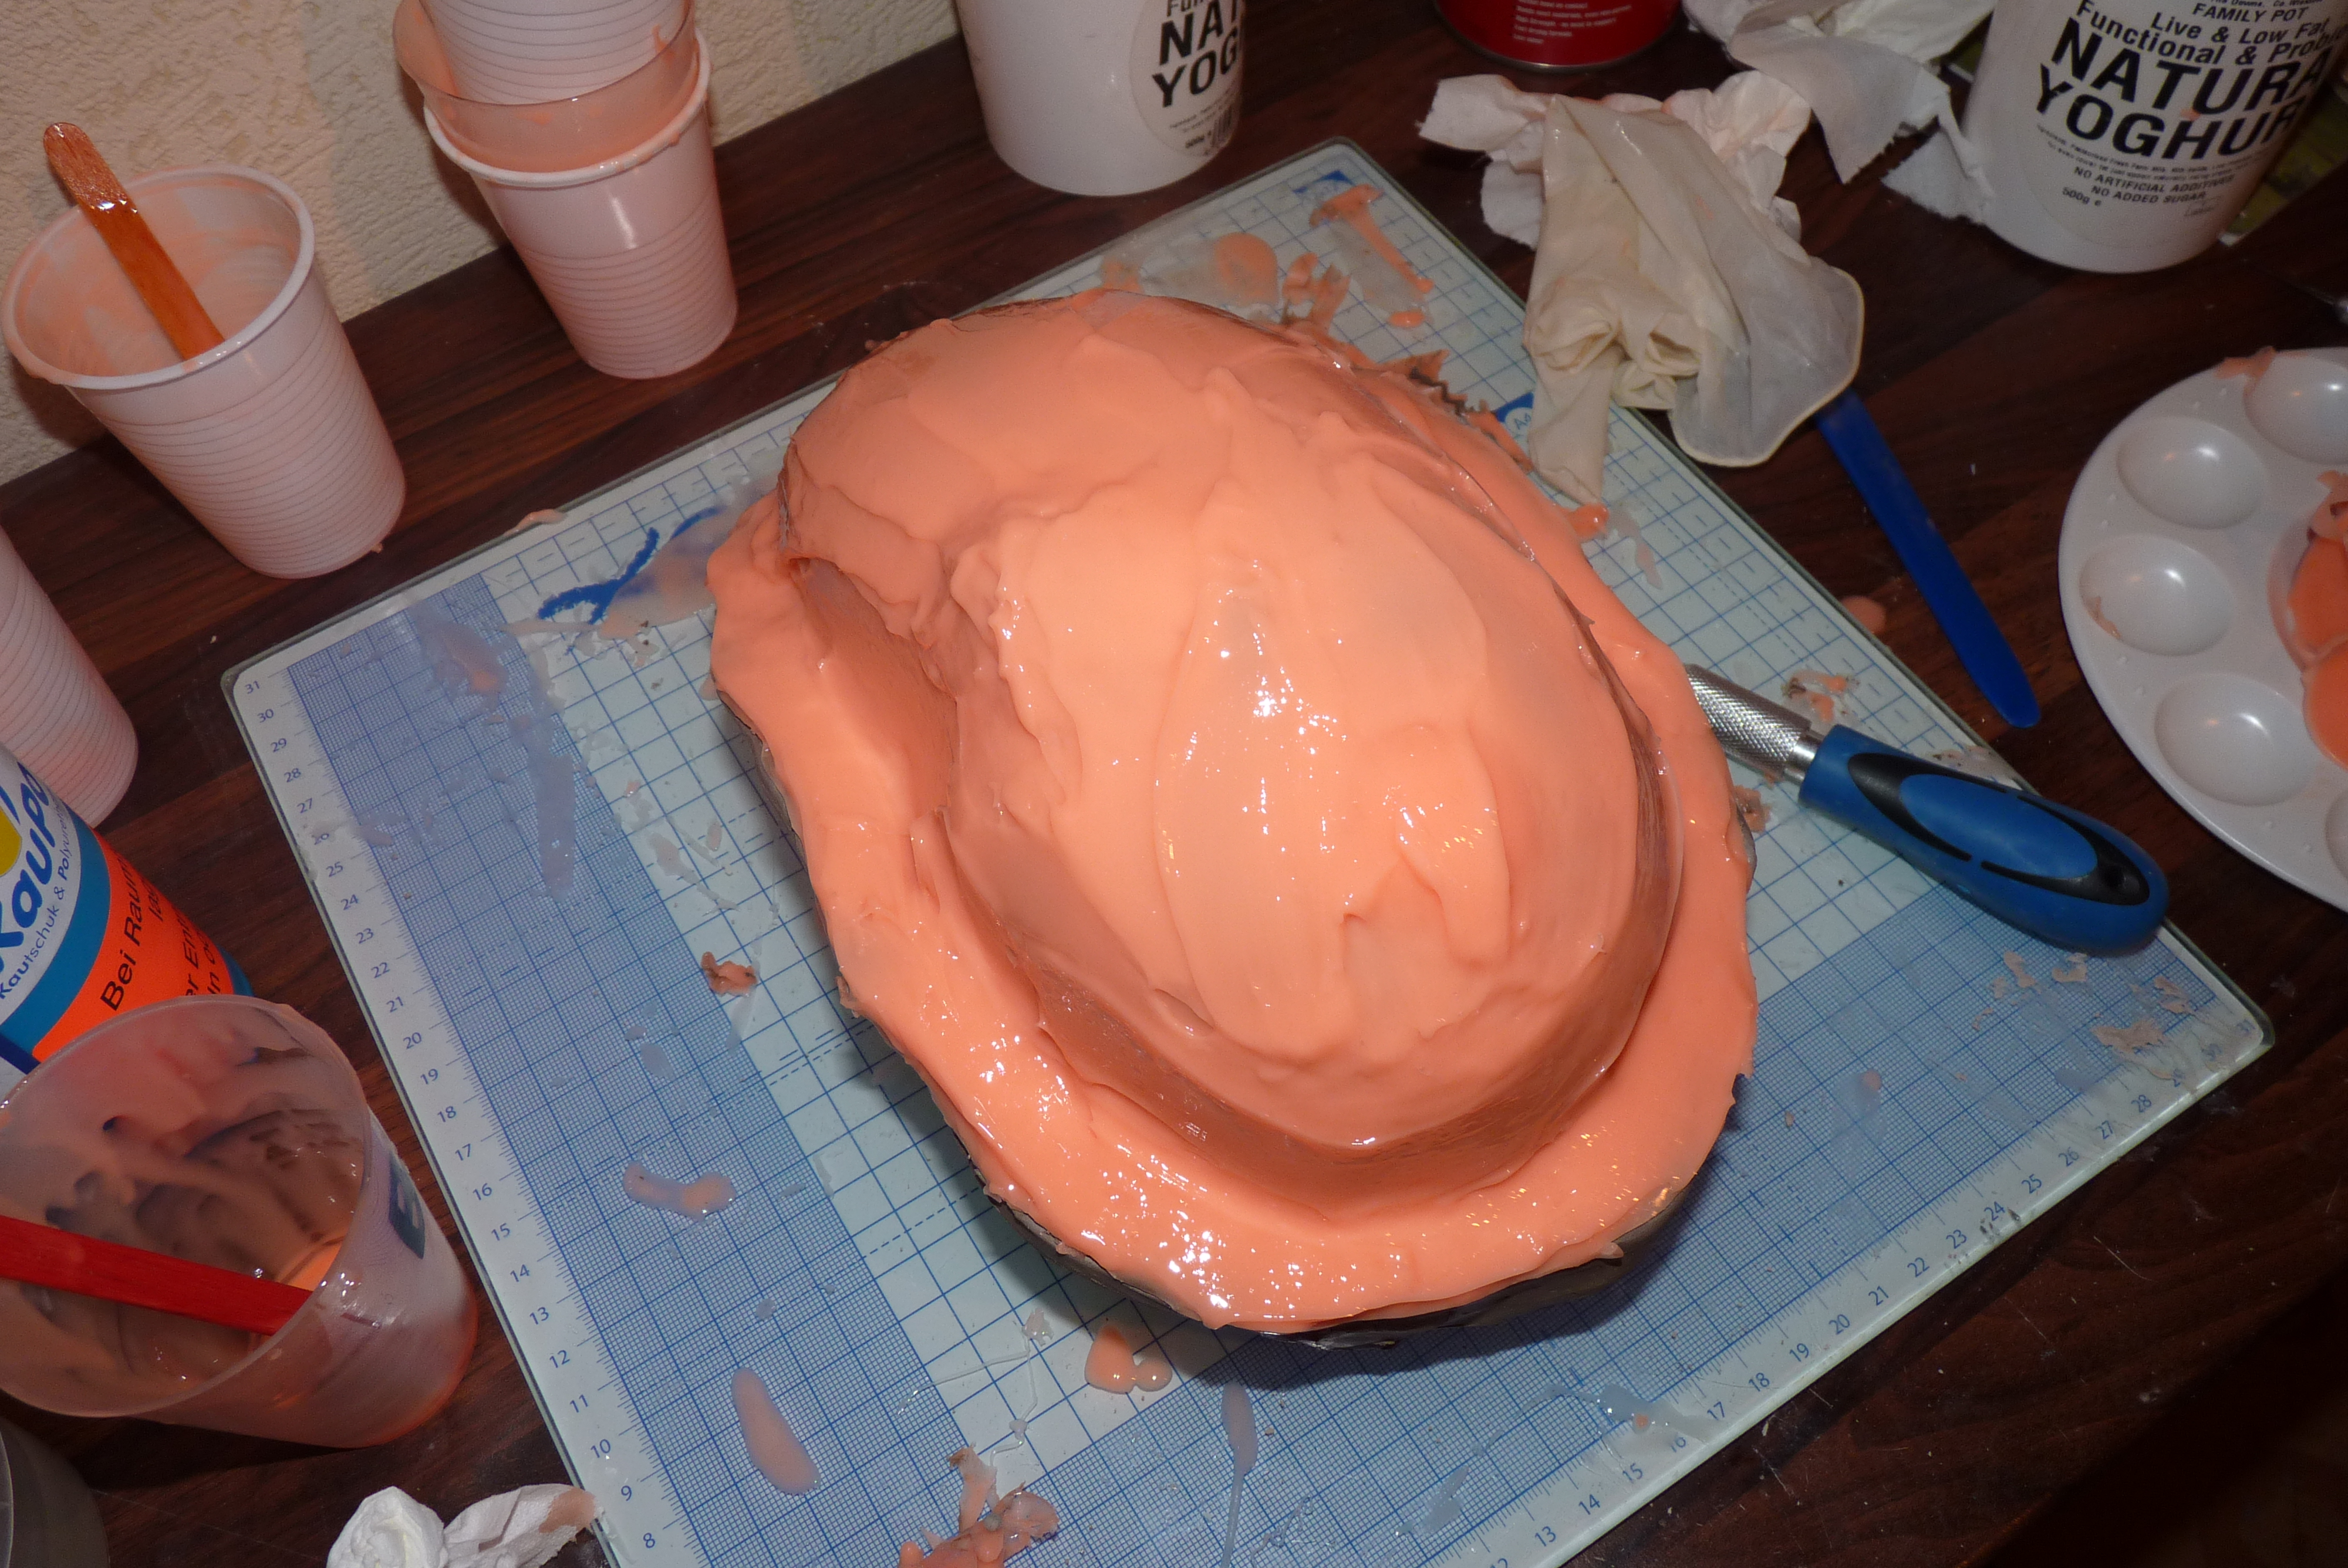
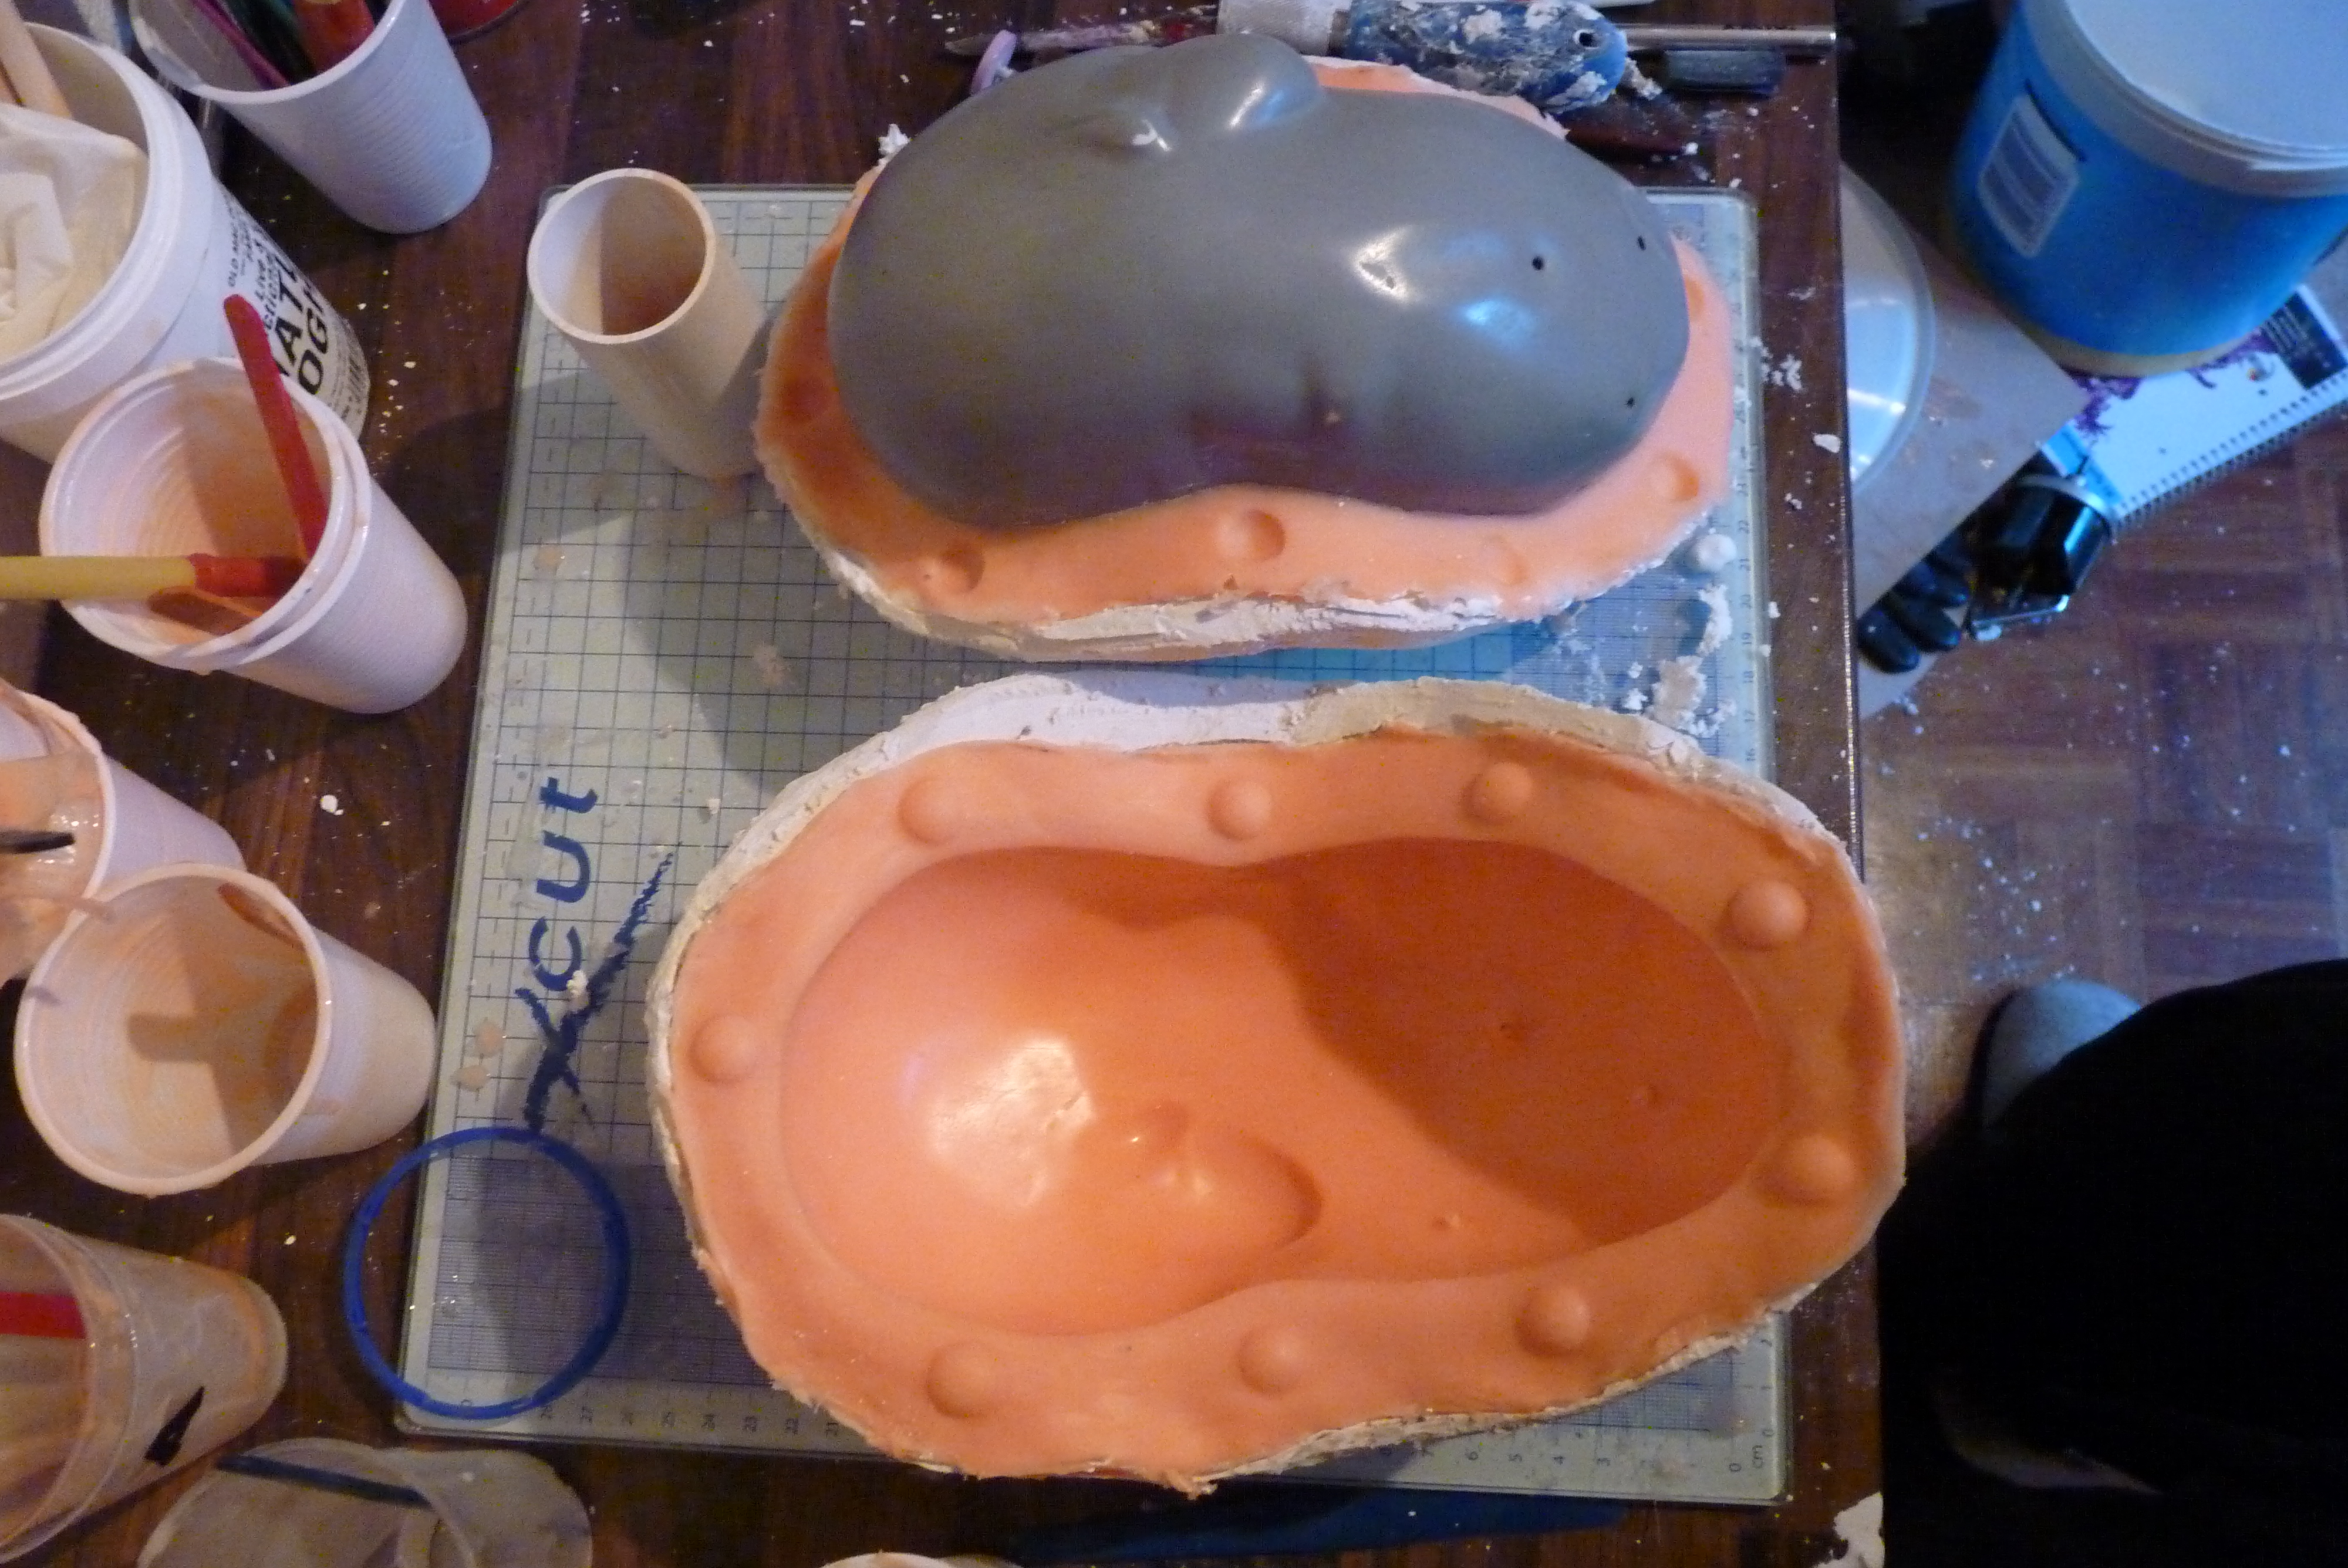
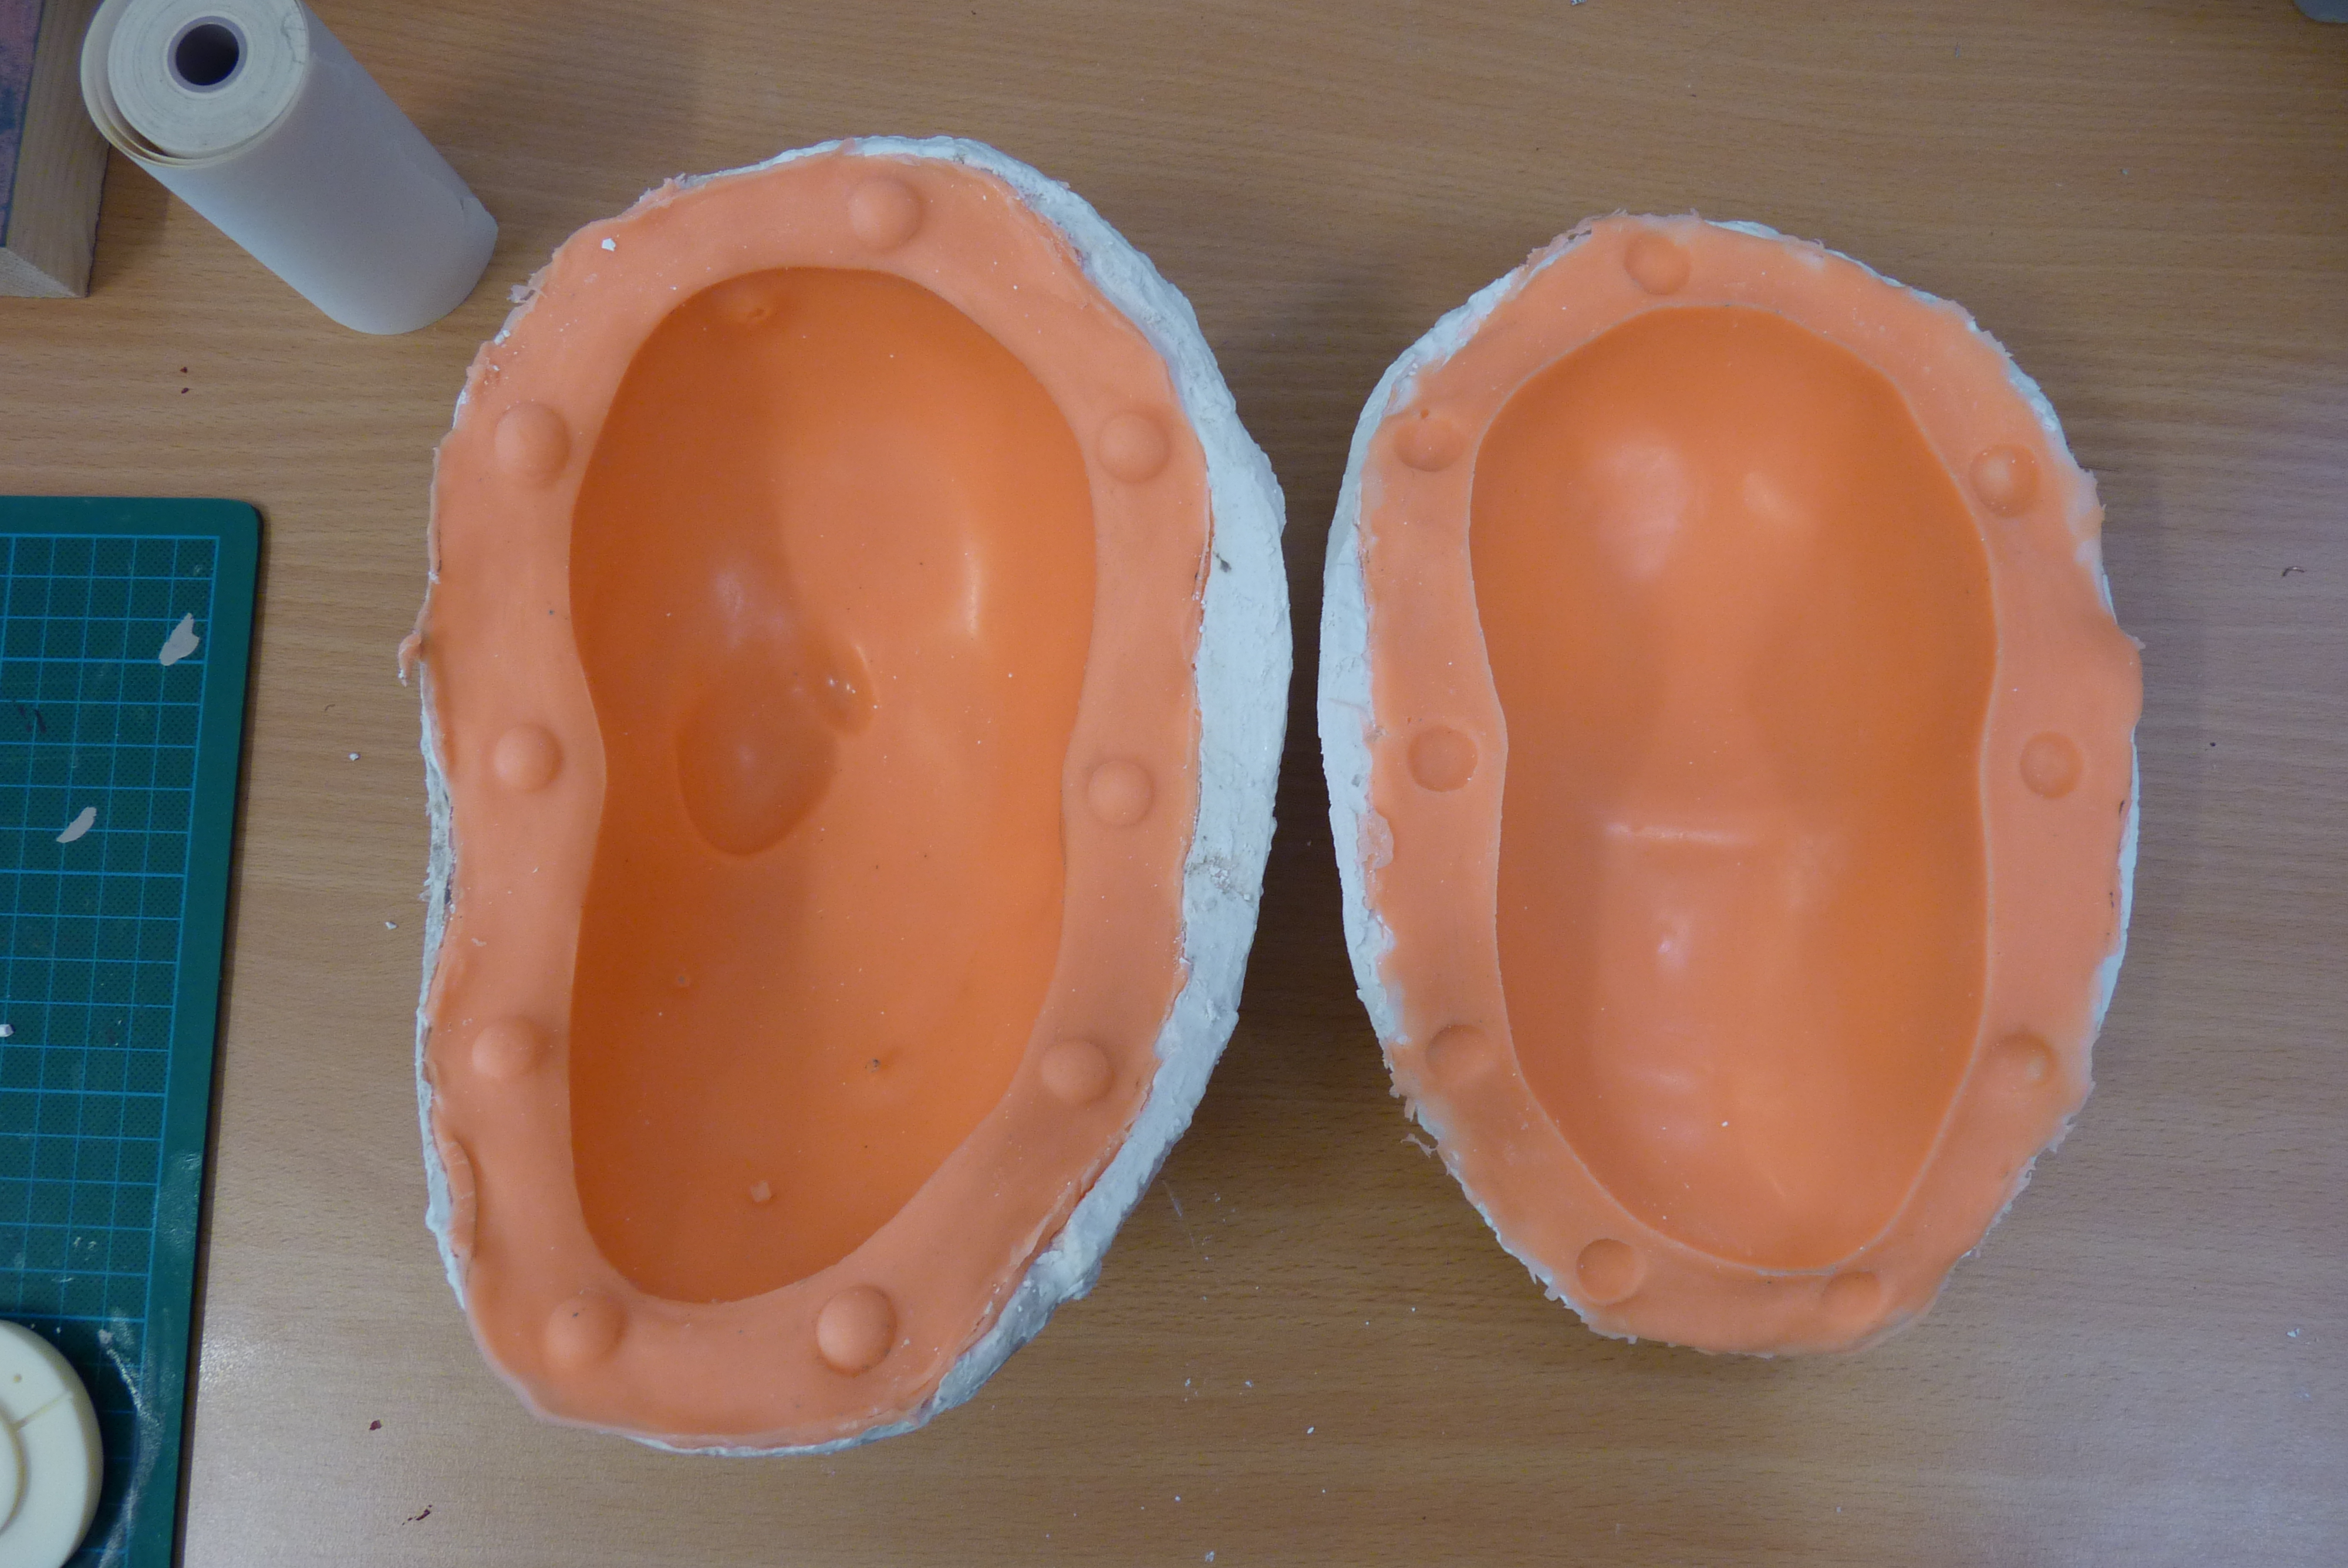
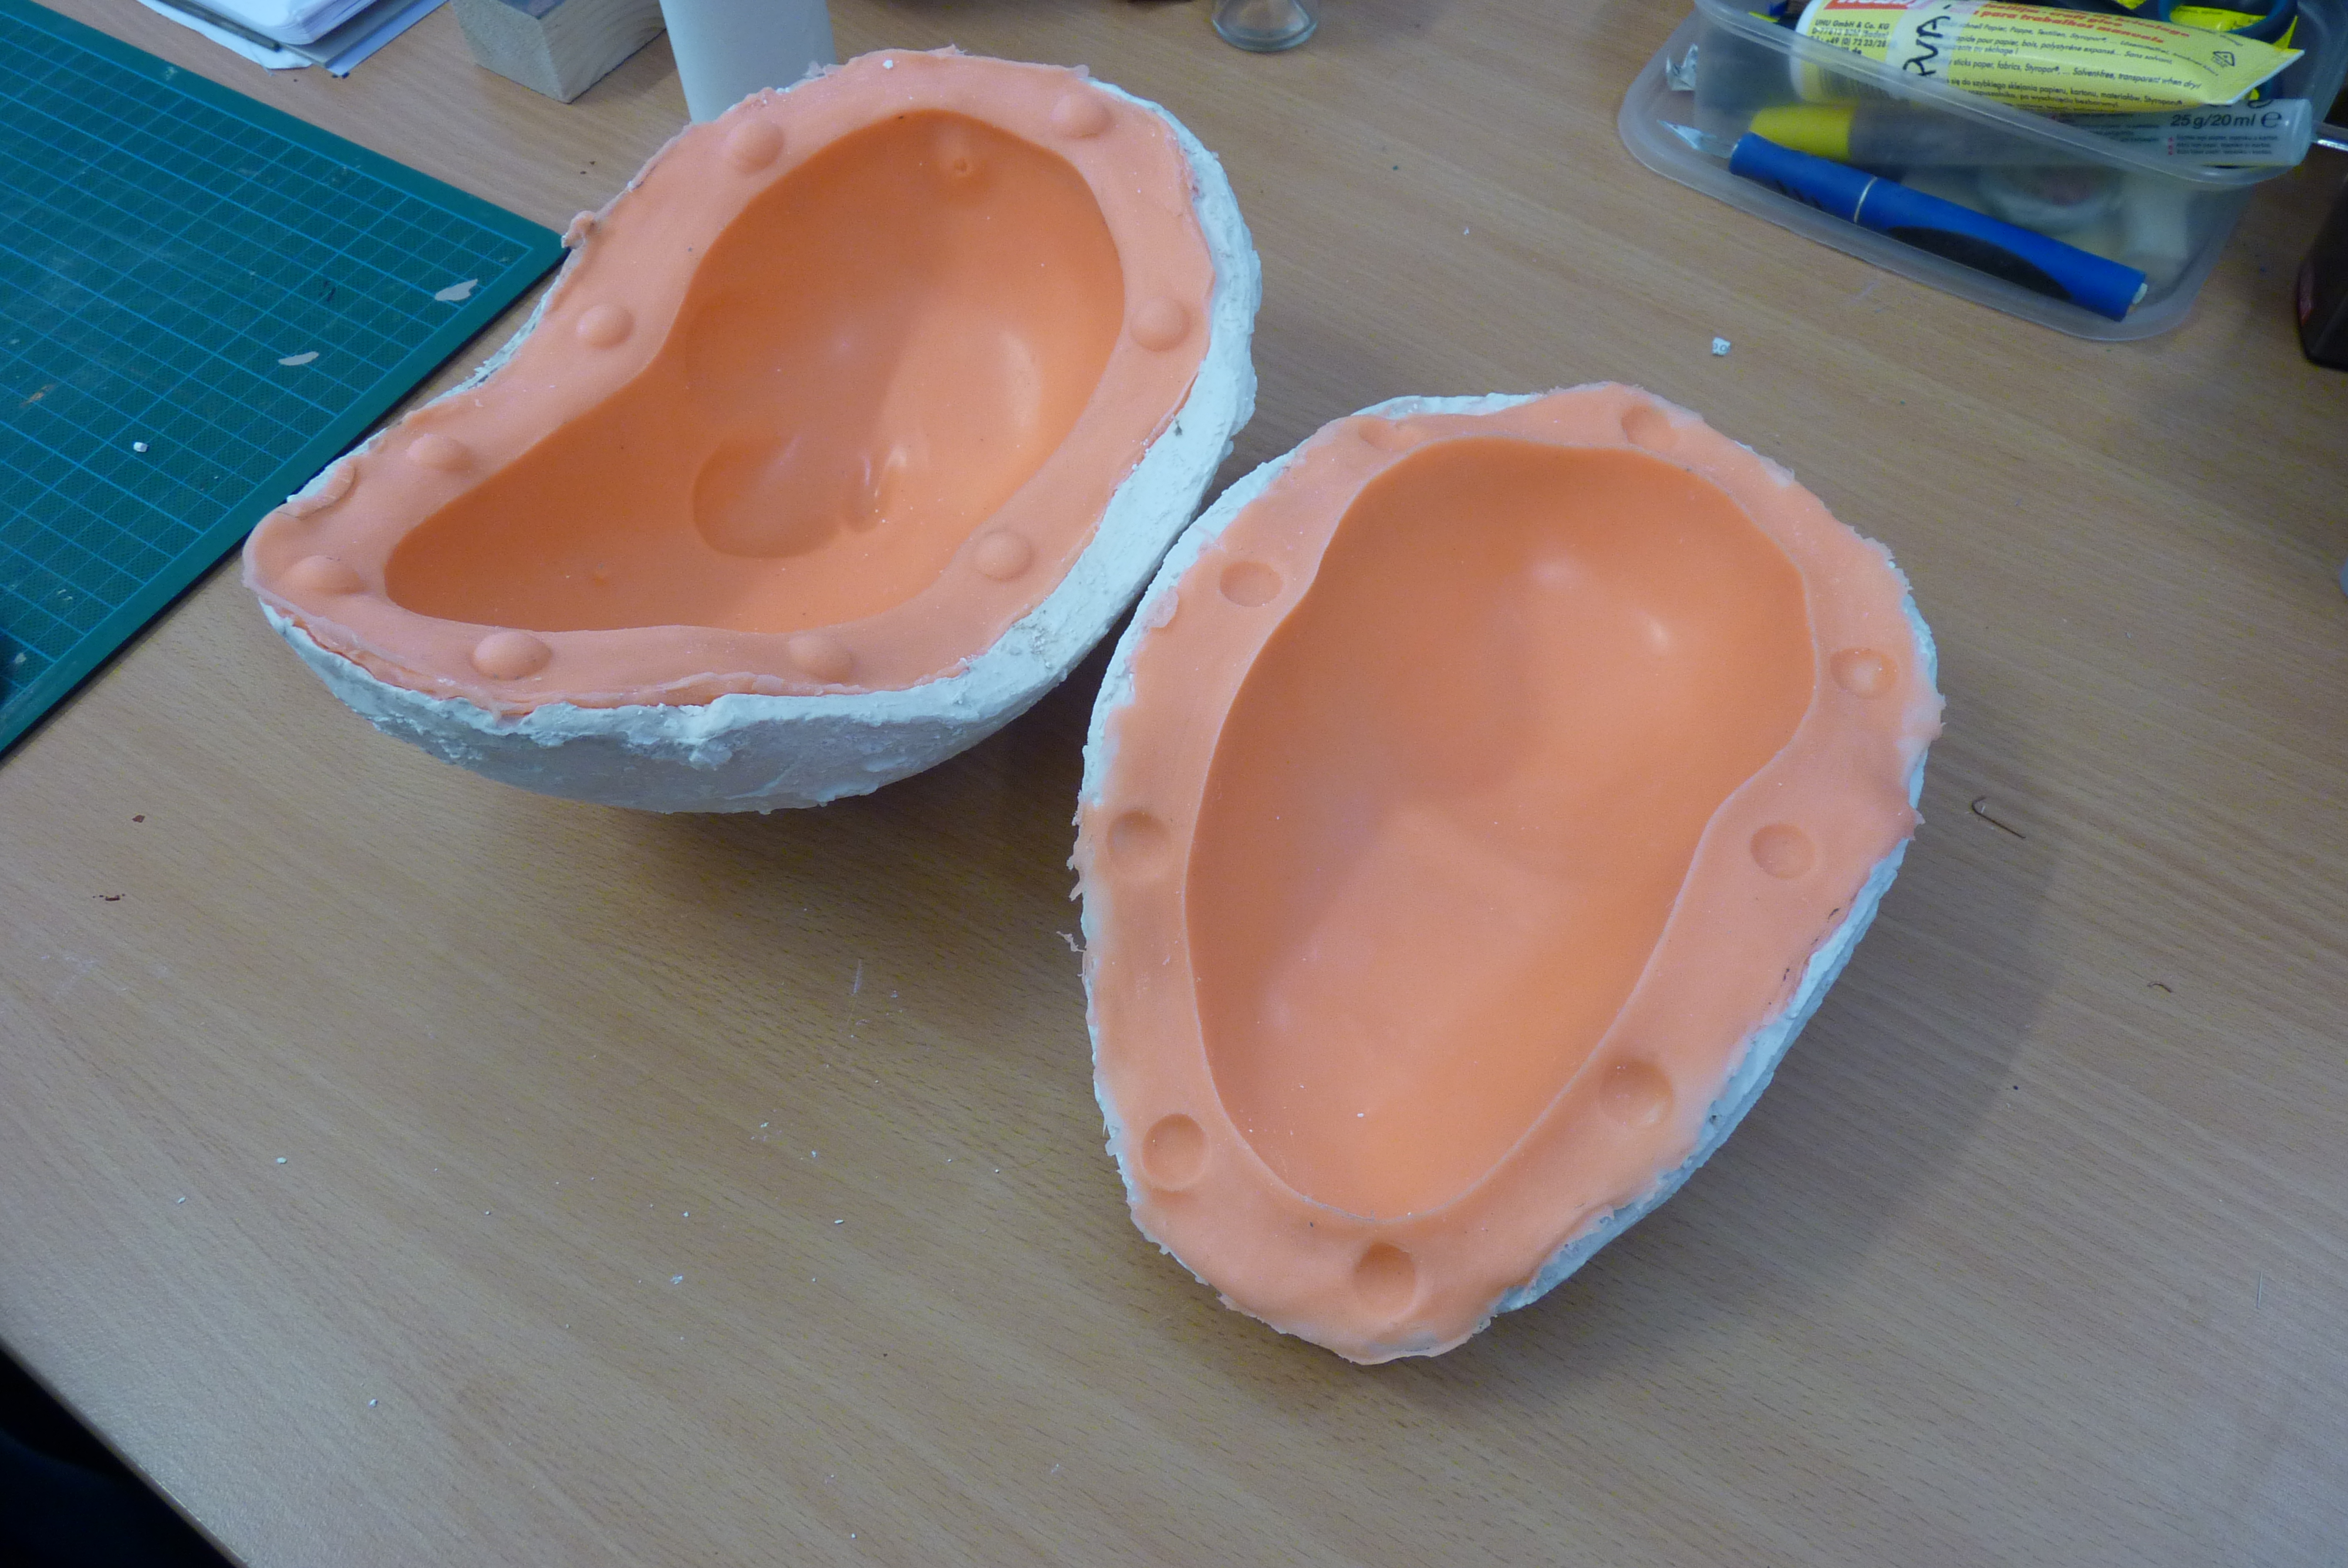
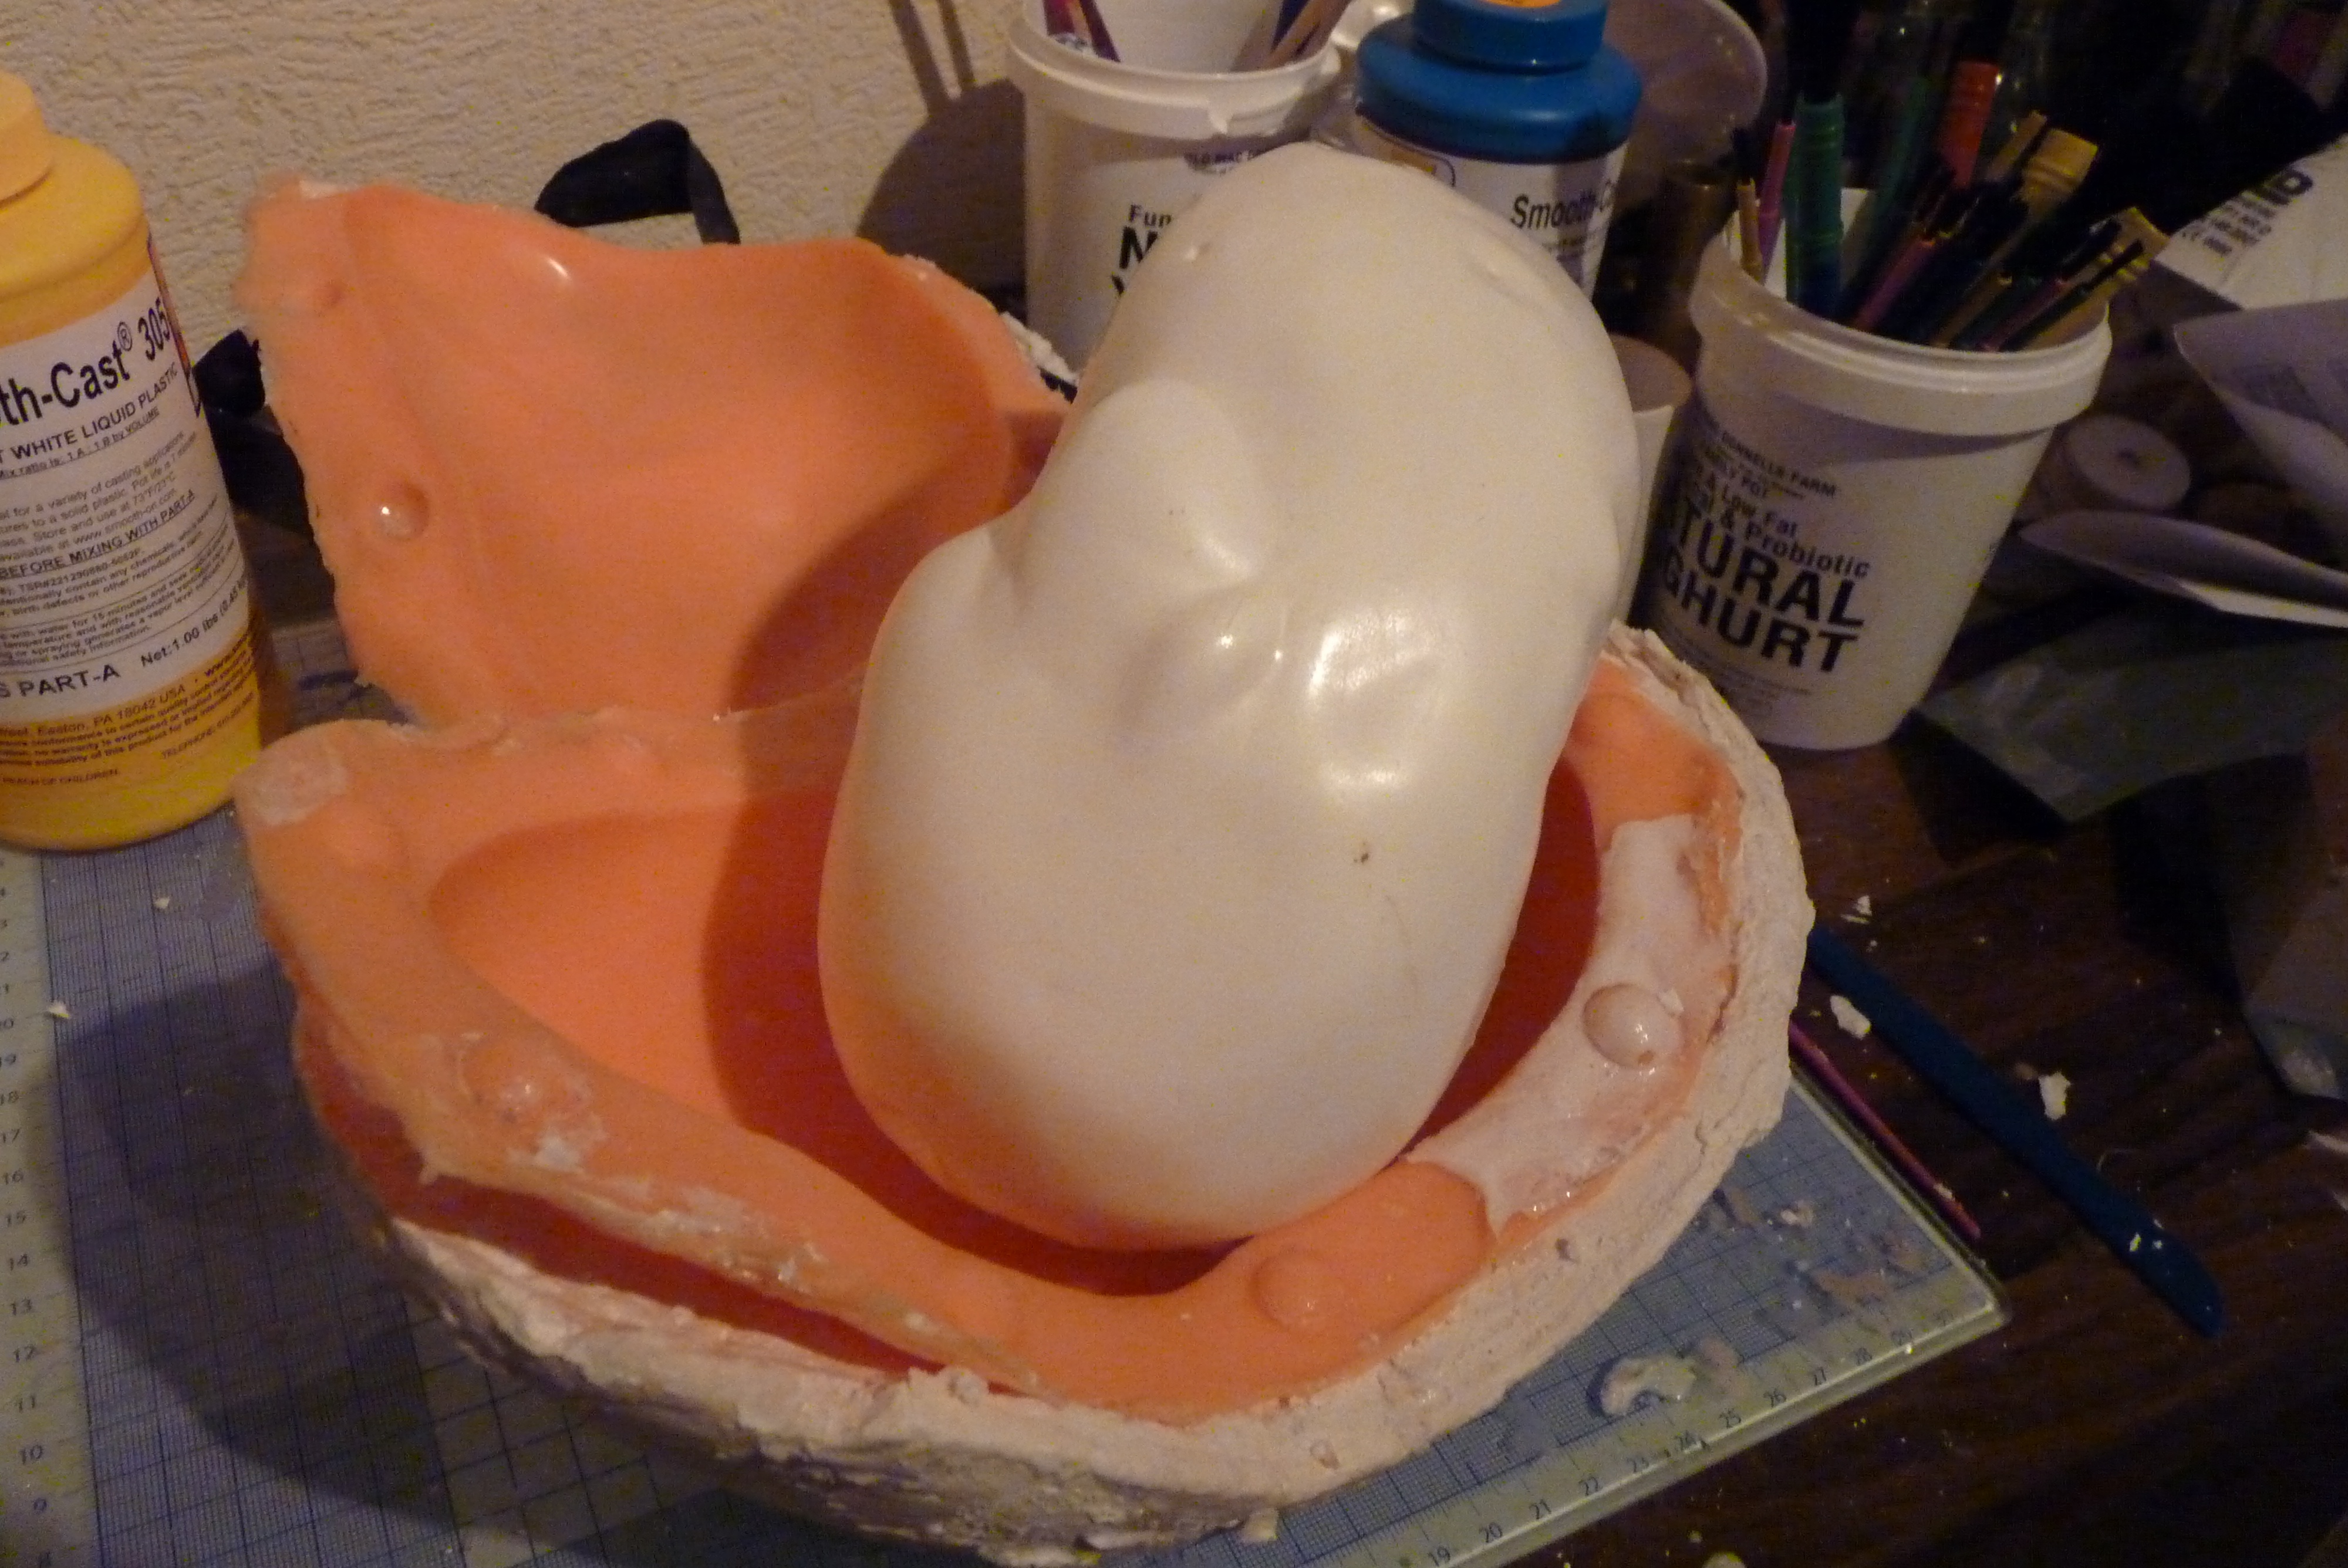
Wear protective clothing, because silicone is a pain to get out of fabric! Also Nitrile gloves so you don't get silicone all over your fingers too!
What I did...
- Because this is a two part mold, start by making a clay base for your potato, (Fig 1) keeping half of the potato buried in the clay and half of it exposed. You can decide yourself where you'd prefer your mold join and your seam line on your potato to be, I kept all my detail in one part so a little more that half of my potato was exposed. You can use water based clay for this, or if you're using oil based clay make sure it's sulfur free as some silicons can be inhibited by it.
- When you have your clay packed around, give it a nice smooth ledge about around the potato. Mine here (Fig 2) is about 1" or so and a nice even surface. Try and keep it as straight out from the potato, and make sure you dont cause any undercuts around the potato, this wouldn't be a problem for the silicone but it could cause a problem for the mold shell down the line. Keep you clay packed in tight to the potato, this may require a little bit of work with a sculpting tool, but you done want any gaps because your silicon with slip through and end up ruining your seam line and cause more work to remove it. Also get the rounded end of a paintbrush or pen and give it a gentle push into the clay to make keys like mine (Fig 1 and 2 again) these will help you line your mold back up when it comes to casting. Remember to use something with a rounded edge rather than a sharp one, even if it's circular, even with release agent I've had this cause problems for me.
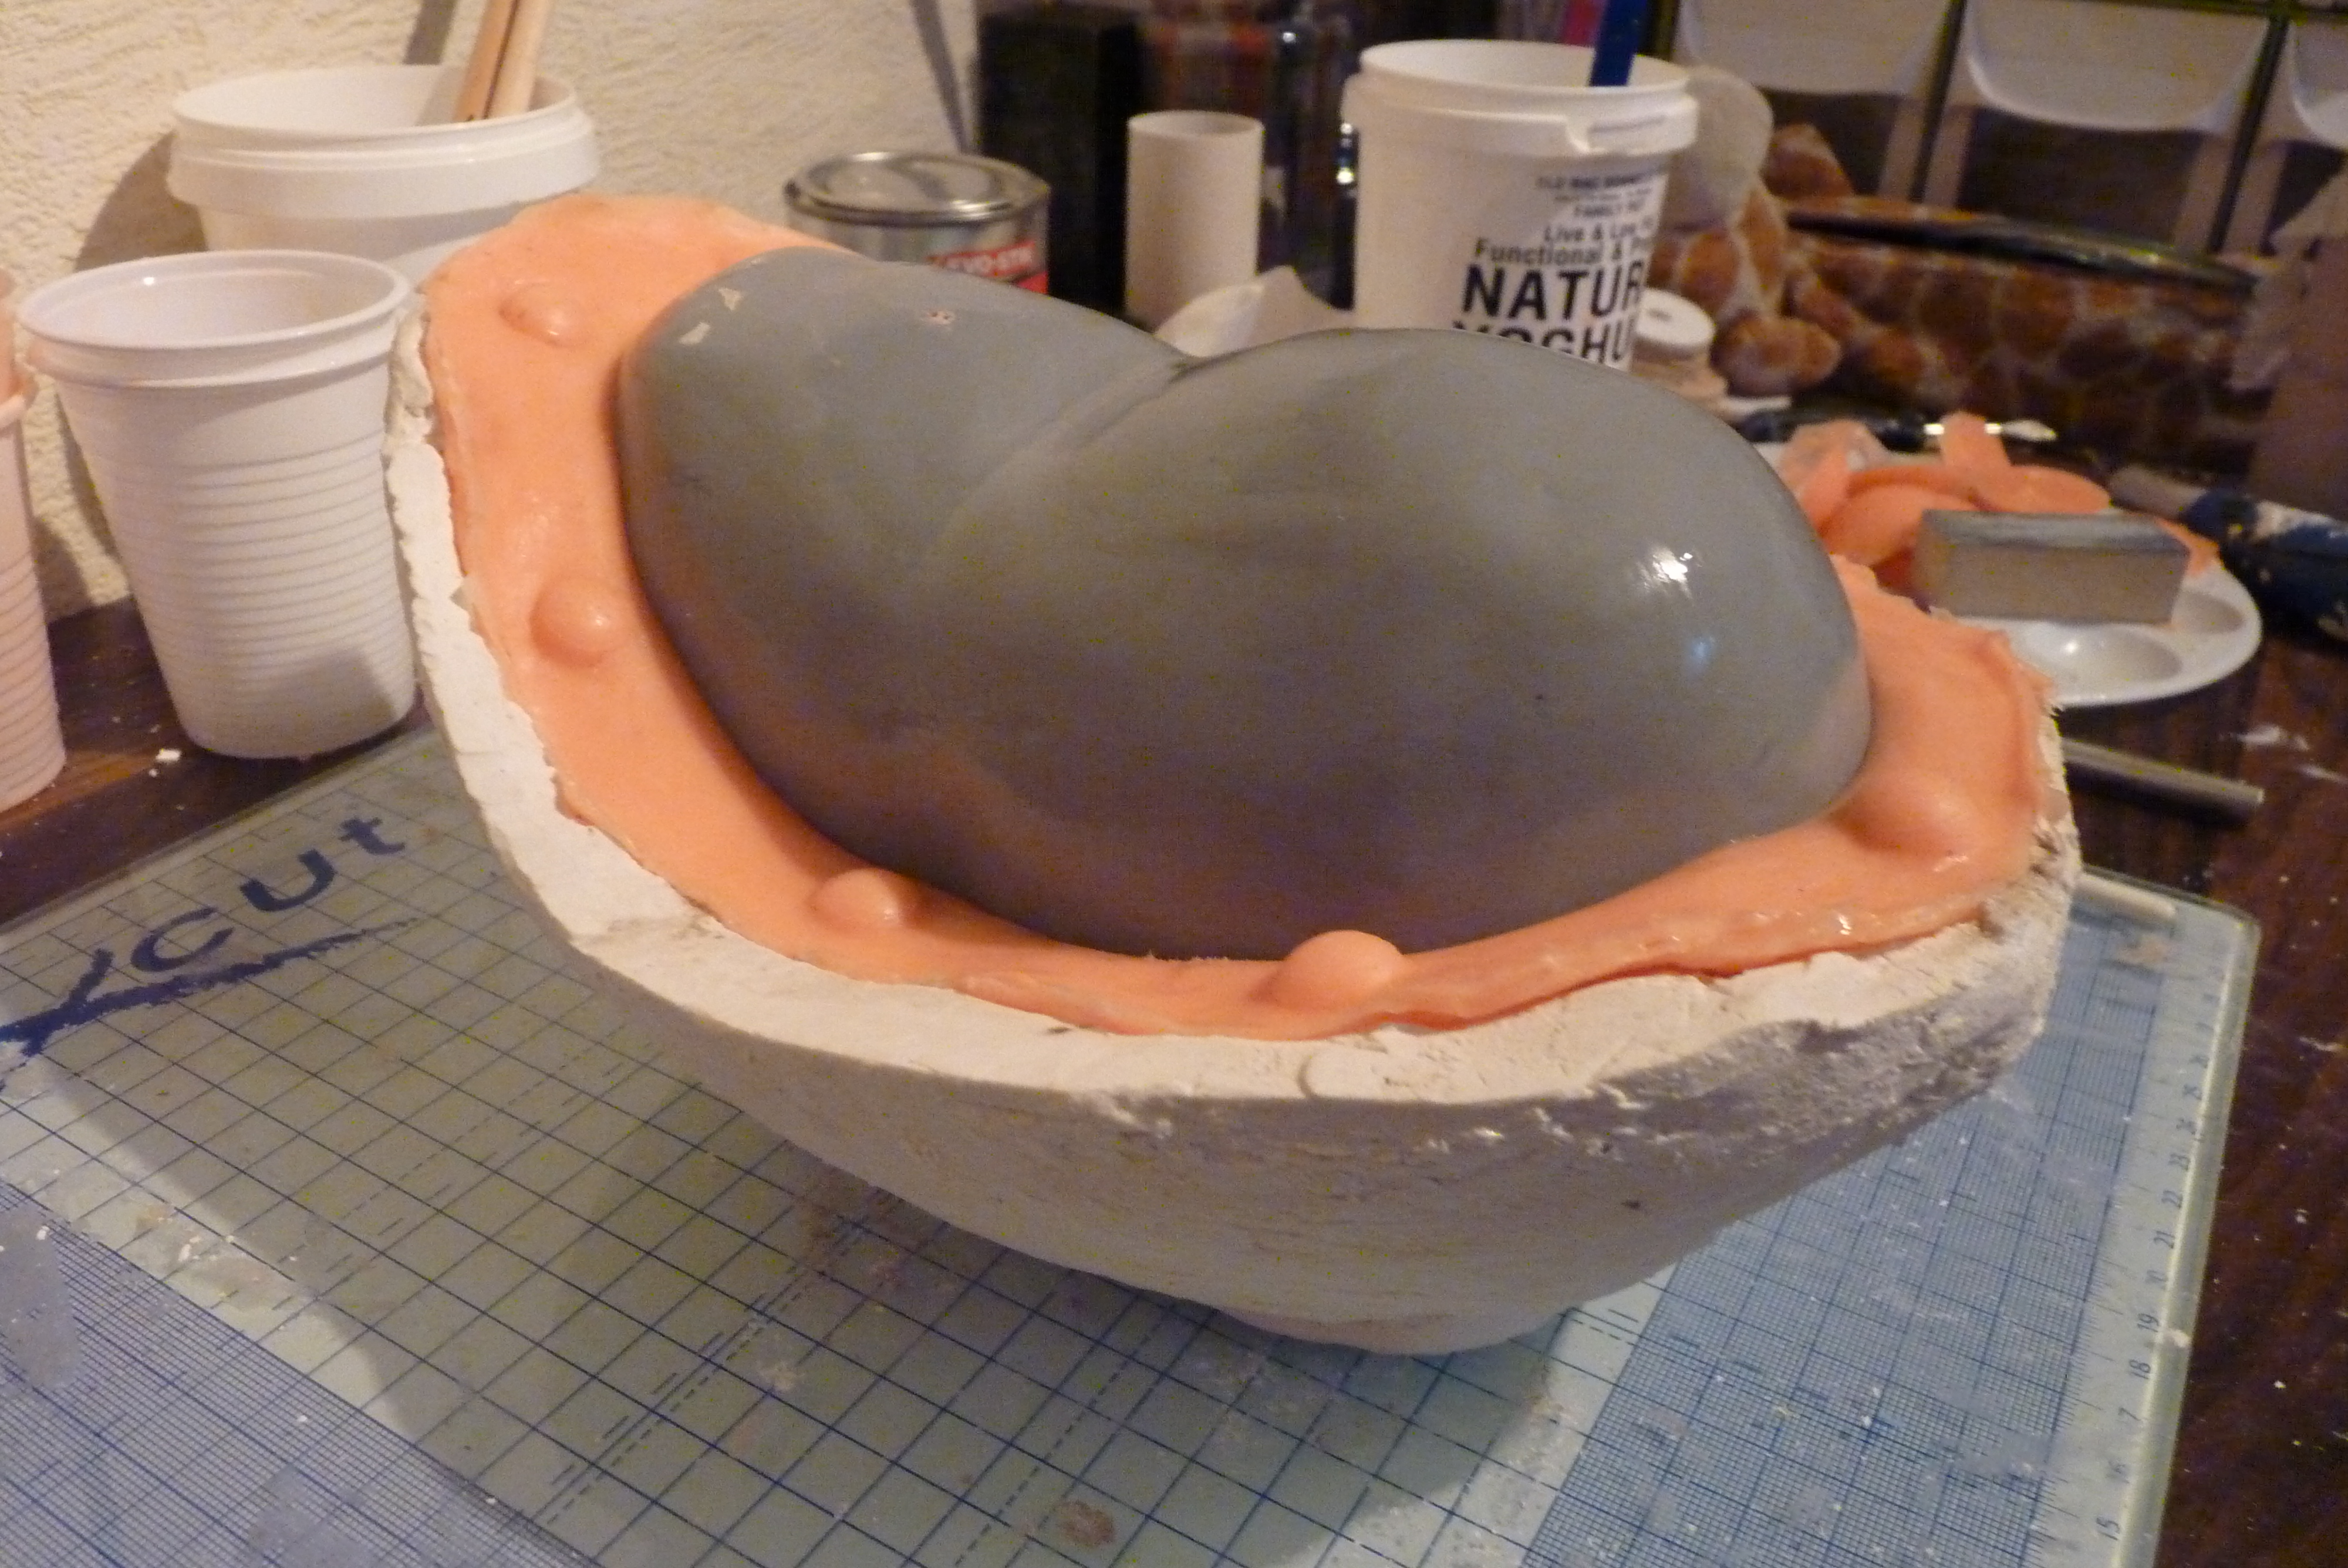
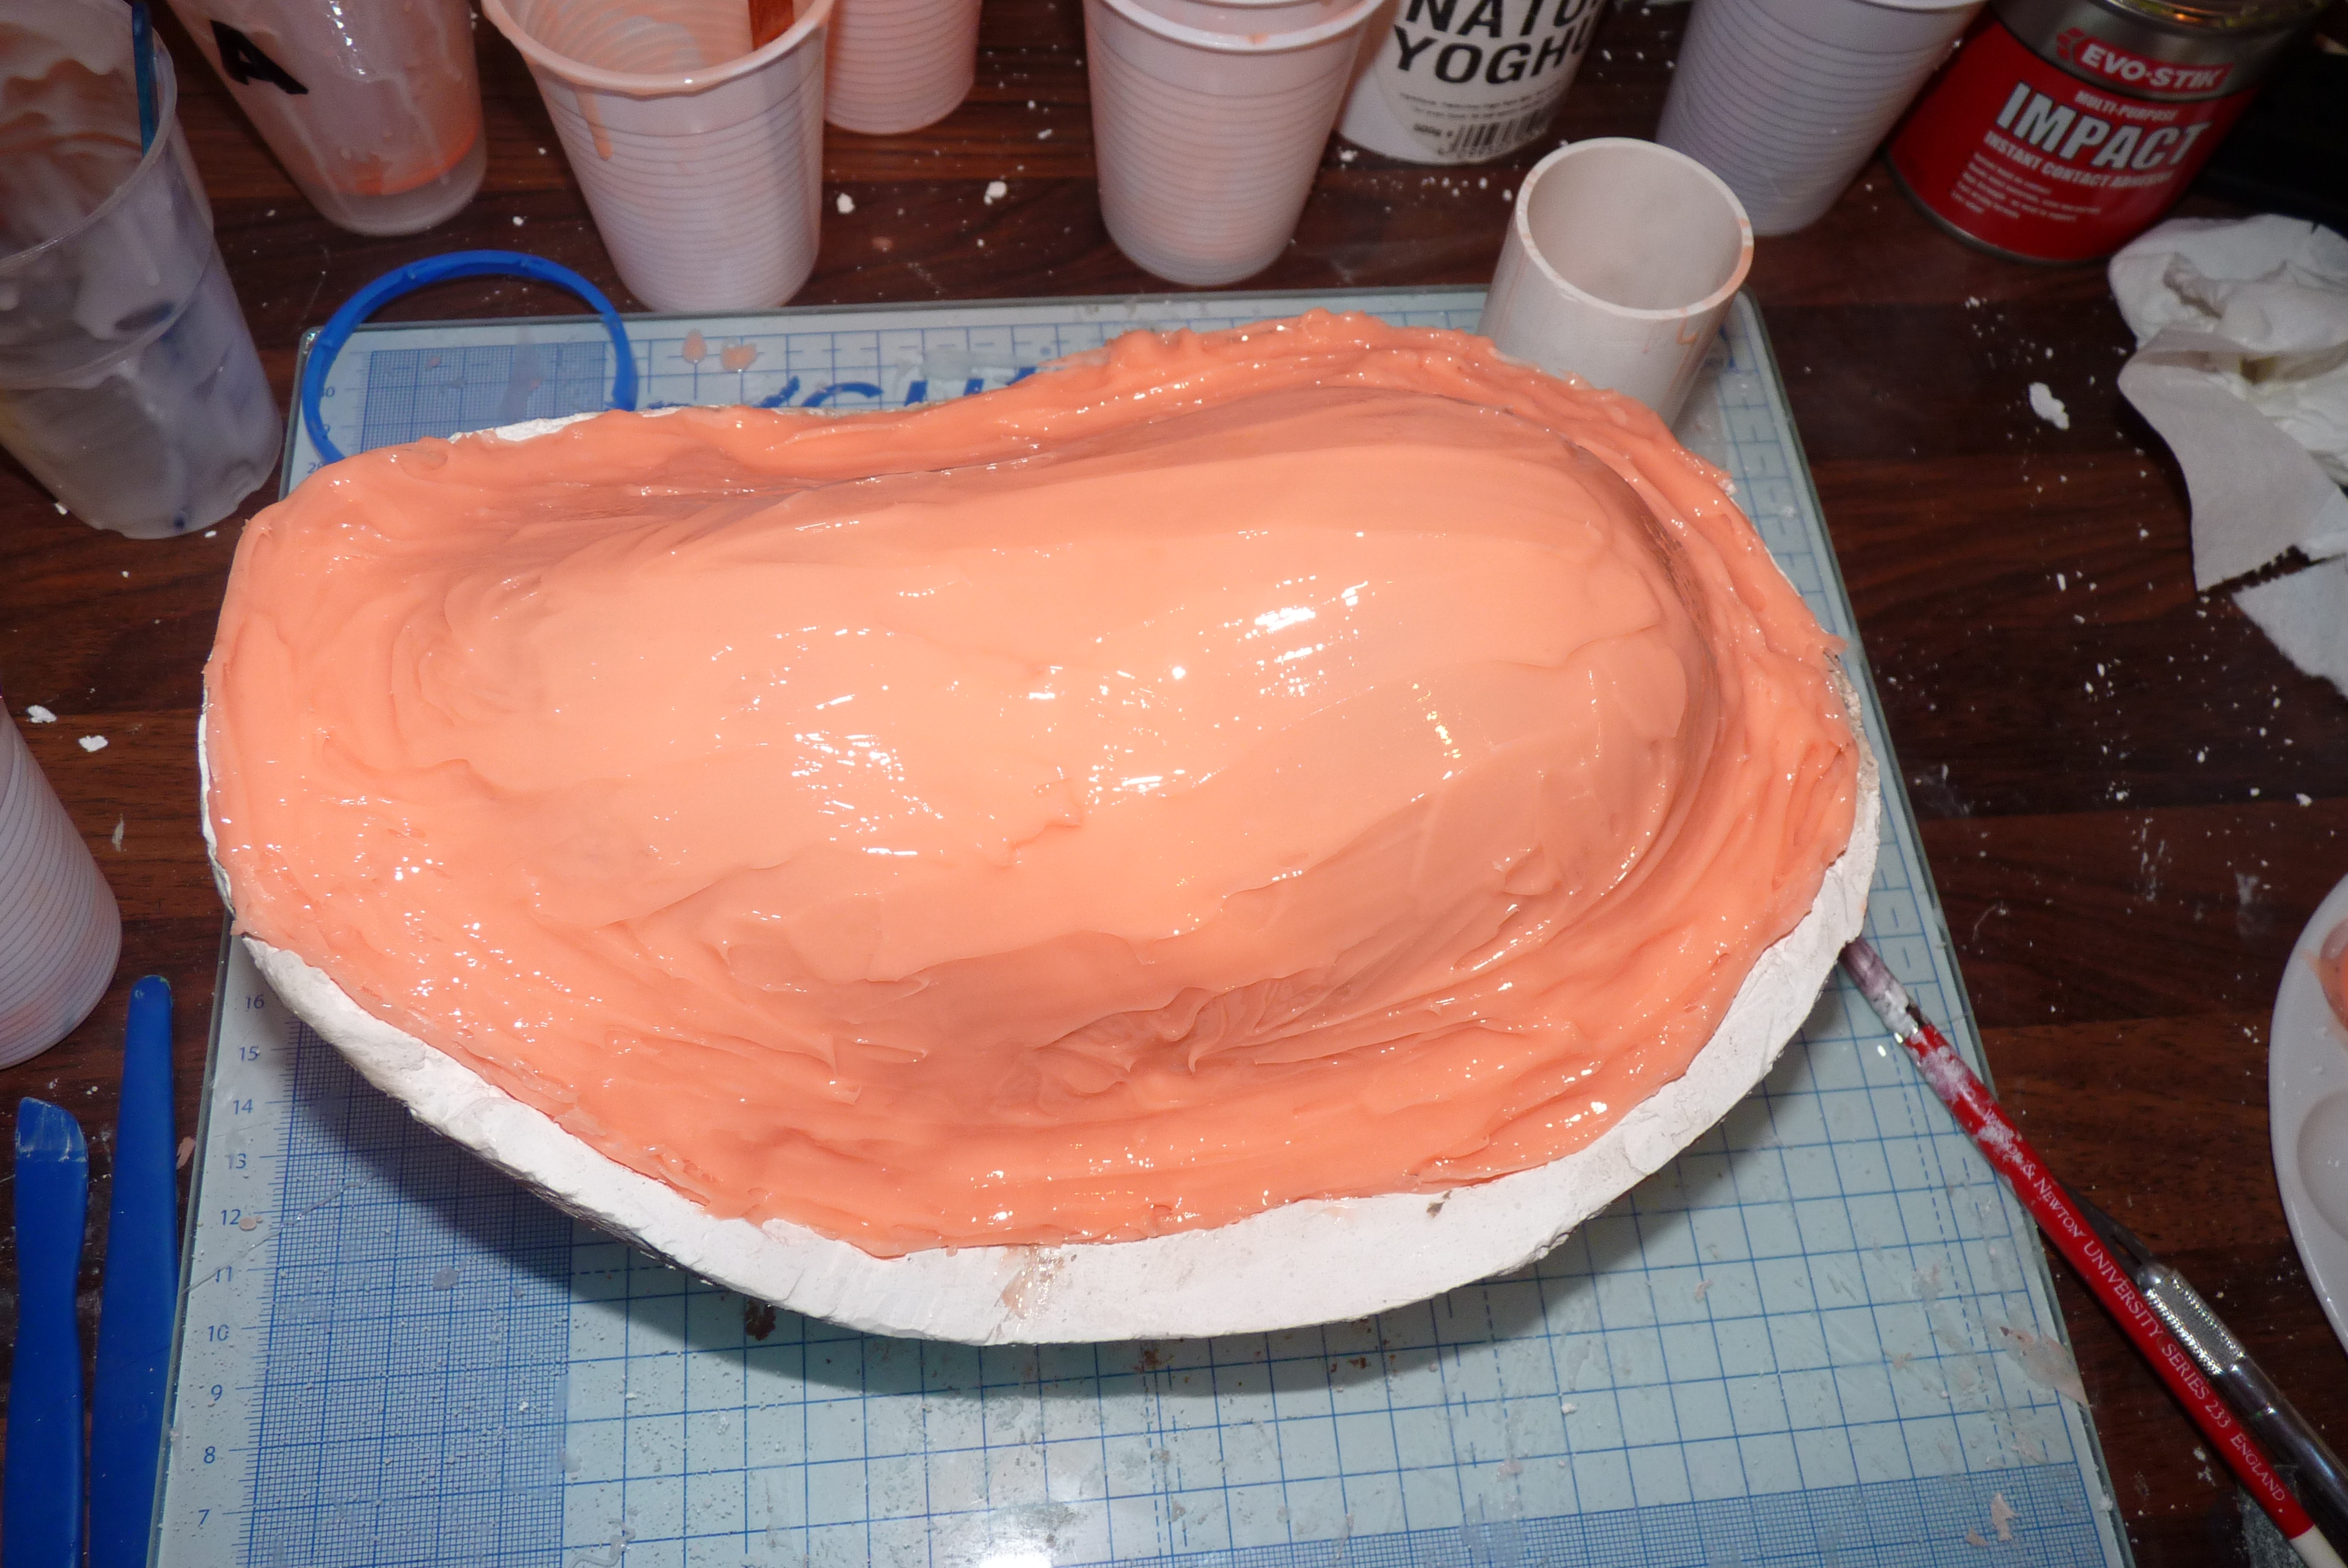
- Now that your have your potato in a nice clay nest, it's time to add some silicone. I used Smooth-On Rebound 25 for this, which is a brush on silicone that only requires 4 thin layers to make a great reproduction of something. You can see Smooth-On instructional video here for it. Mix the Rebound 25 1A:1B, you don't need to mix much because you need to allow for it to cure a little in between layers. I measured my two parts out in little plastic party shot glasses and that was more than enough for each layer. Mix the two parts together until you have one even color and use a cheap brush to stipple your thin layer of silicone onto your potato, this is to prevent air bubbles and so you get silicone into all the details. Don't stipple the clay, your brush will grab chunks and mix it into your silicone, let the silicone trickle off he edge and brush it around the clay gently working out any air bubbles and making sure your keys get filled. (Fig 3)
- Let the each layer cure for about 1 hour before you add a new one. To test if it's ready, touch off some silicone with your finger (in a clean glove of course!) if the silicon sticks to your finger, give it another few mins to cure, you need the finger to come away cleanly but still be a little tacky. Once you have all 4 layers on you'll need to let them cure for about 6 hours. (Fig 4 and 5) You can if you want to, premix some rebound and pour it into a pallet like I have there on the right of some of the images, if you want to make keys to stick onto the outer layer of the rebound to work as keys for the hard shell. I made only one to test it, but decided the lumps on this side of the potato would be keys enough.
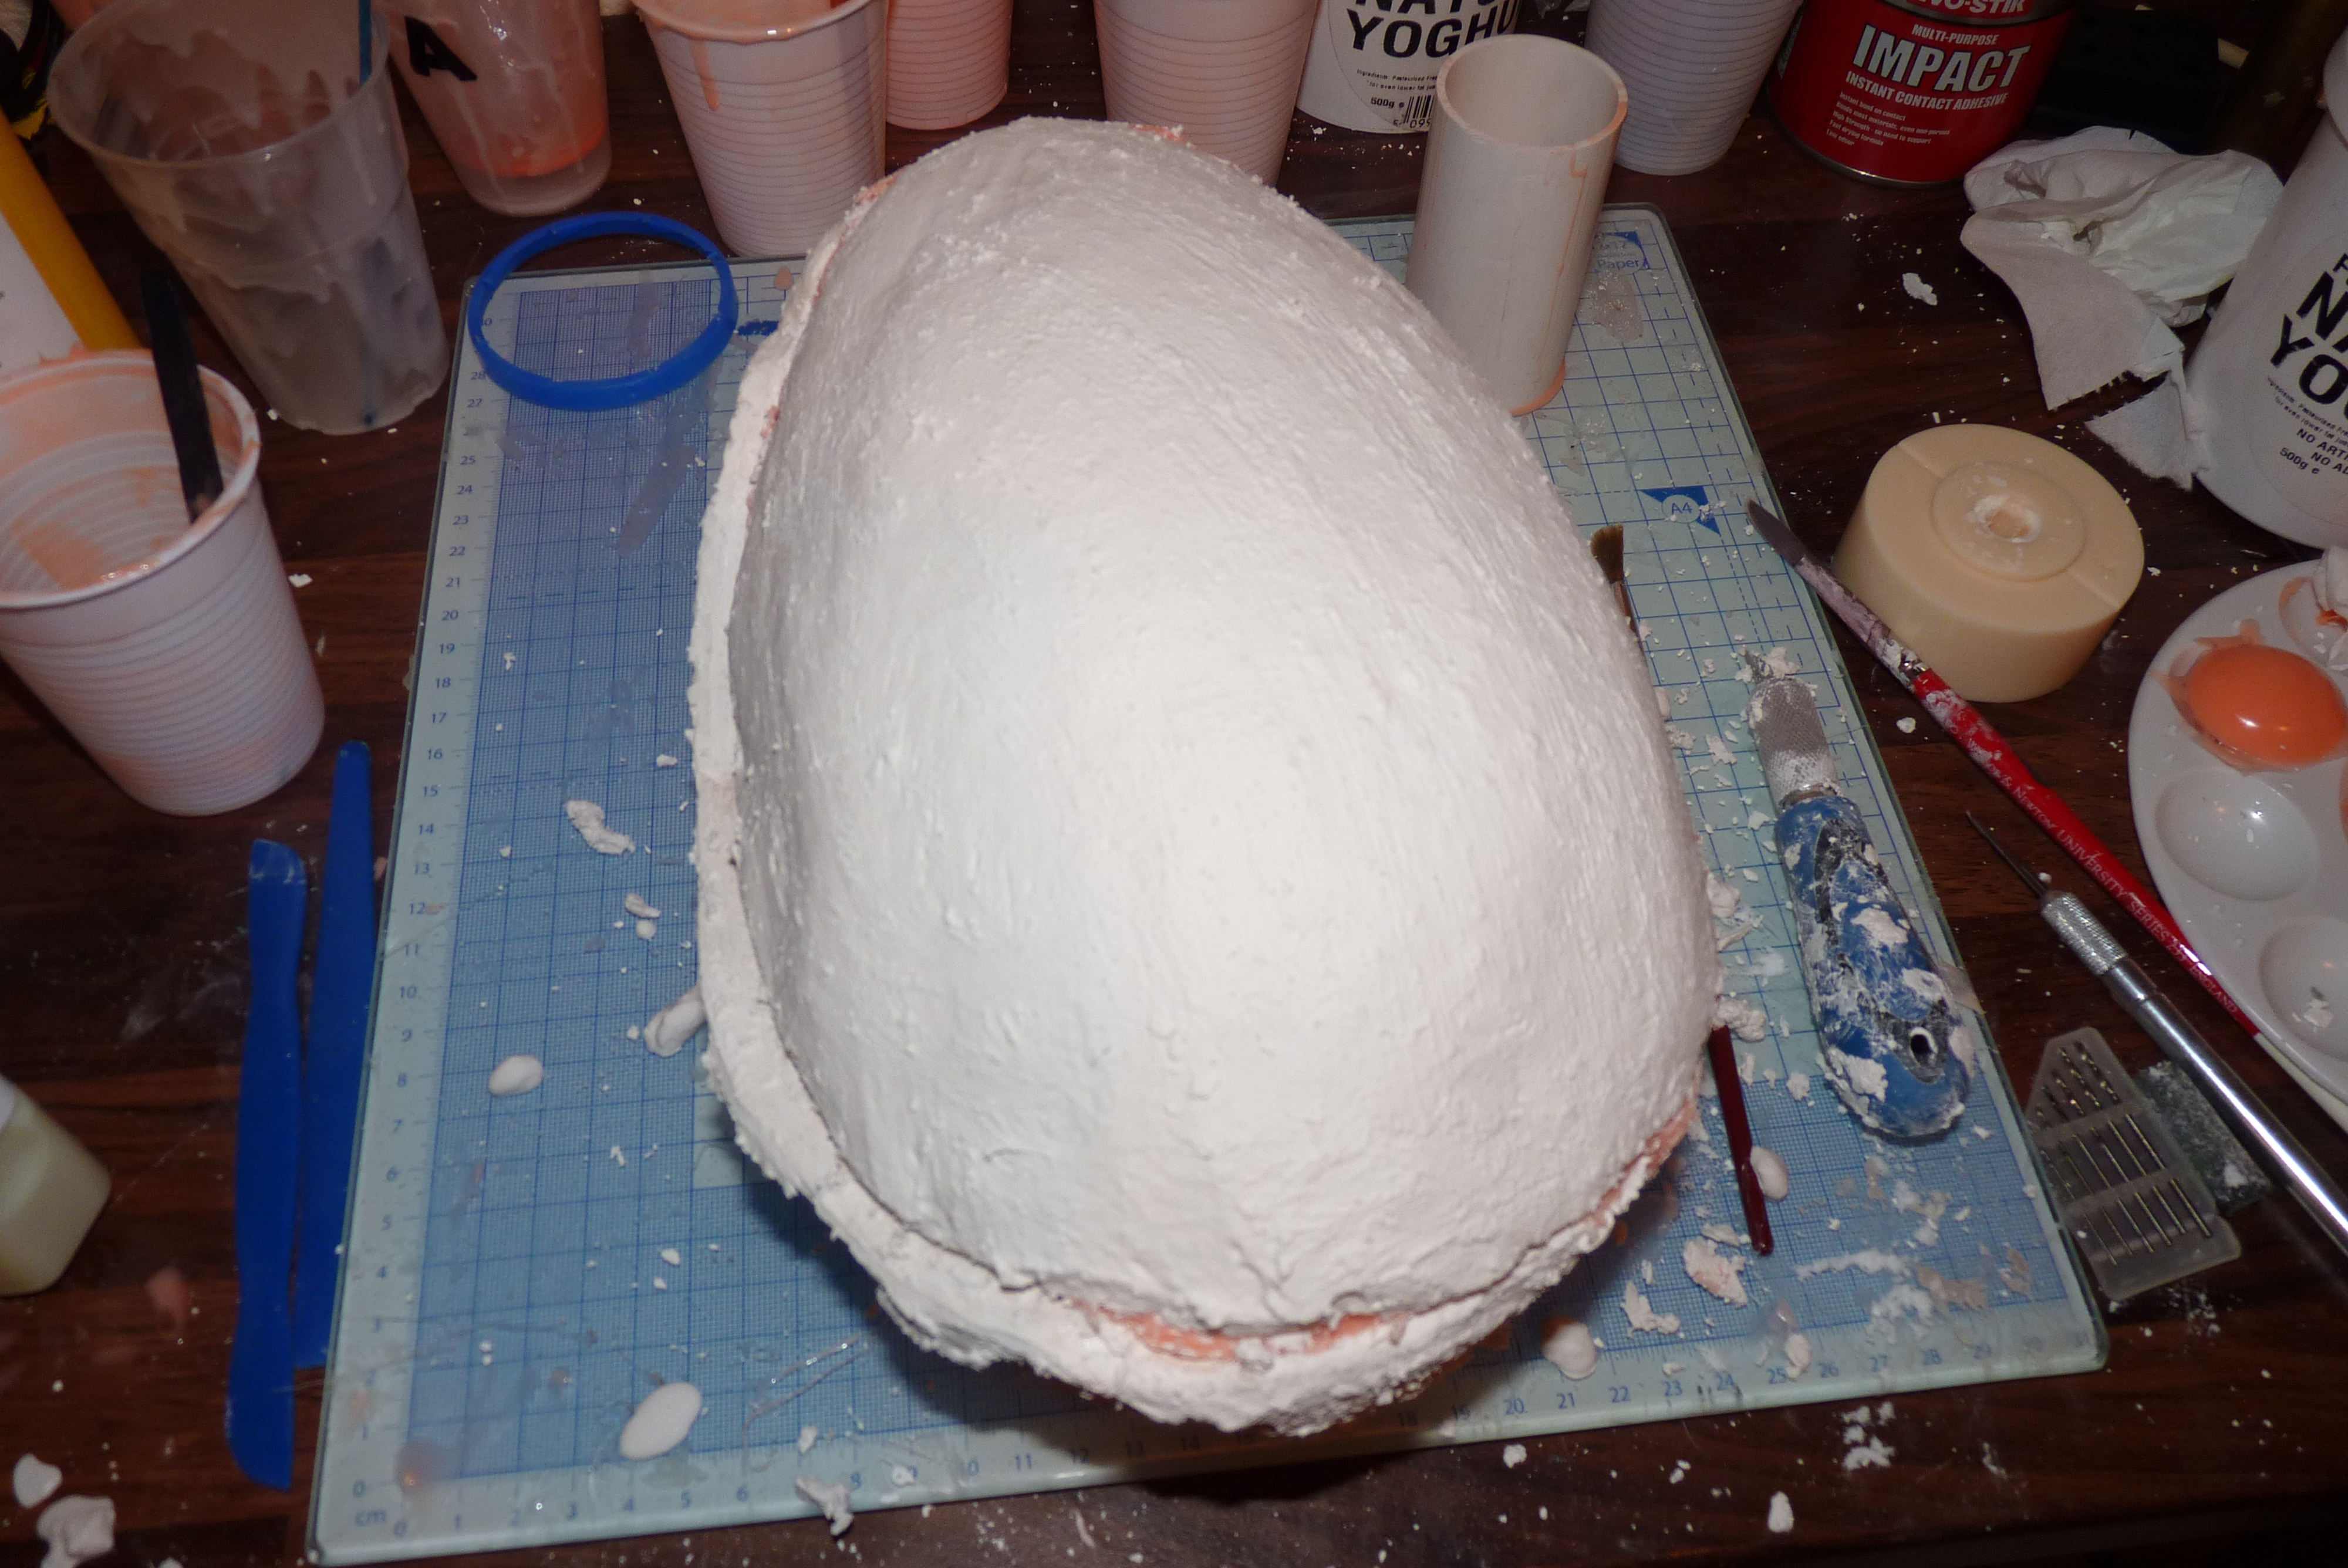
- After the silicone is cured, again you can try the glove test, but this time your finger needs to come away cleanly AND it shouldn't be tacky. Now, you can use Plasti Paste (another Smooth On Product) or Fiber Glass for the shell of your mold, but I had some hard plaster left over from another project so I used that instead. When you're making the first have of your shell, don't forget to give it a flat top so when you flip it over it wont roll away on you, and will stay somewhat level for the making of side 2. (Fig 6) I made the plaster shell about a 1/4" thick to make sure it was good and strong as it wouldn't have the shame shock resistance as Plasti Paste or Fiber Glass.
- Once your plaster is dry, flip your mold over and remove the clay. Give your mold a good cleaning with a soft brush and some water, to remove all the clay residue, being careful not to break the seal the silicon has on your potato. Let it dry, and then brush it down with some One Step release agent, or whichever release agent you have chosen. You can use regular petroleum jelly as One Step is basically an extremely diluted version, but the regular jelly can go on thick and be a pain to clean, so I recommend One Step or similar if you can get it. When your release agent has cured, repeat your 4 layer process followed by plaster on this side too. Be careful you don't let the plaster touch or your potato will be sealed in there! (Fig 7 and 8)
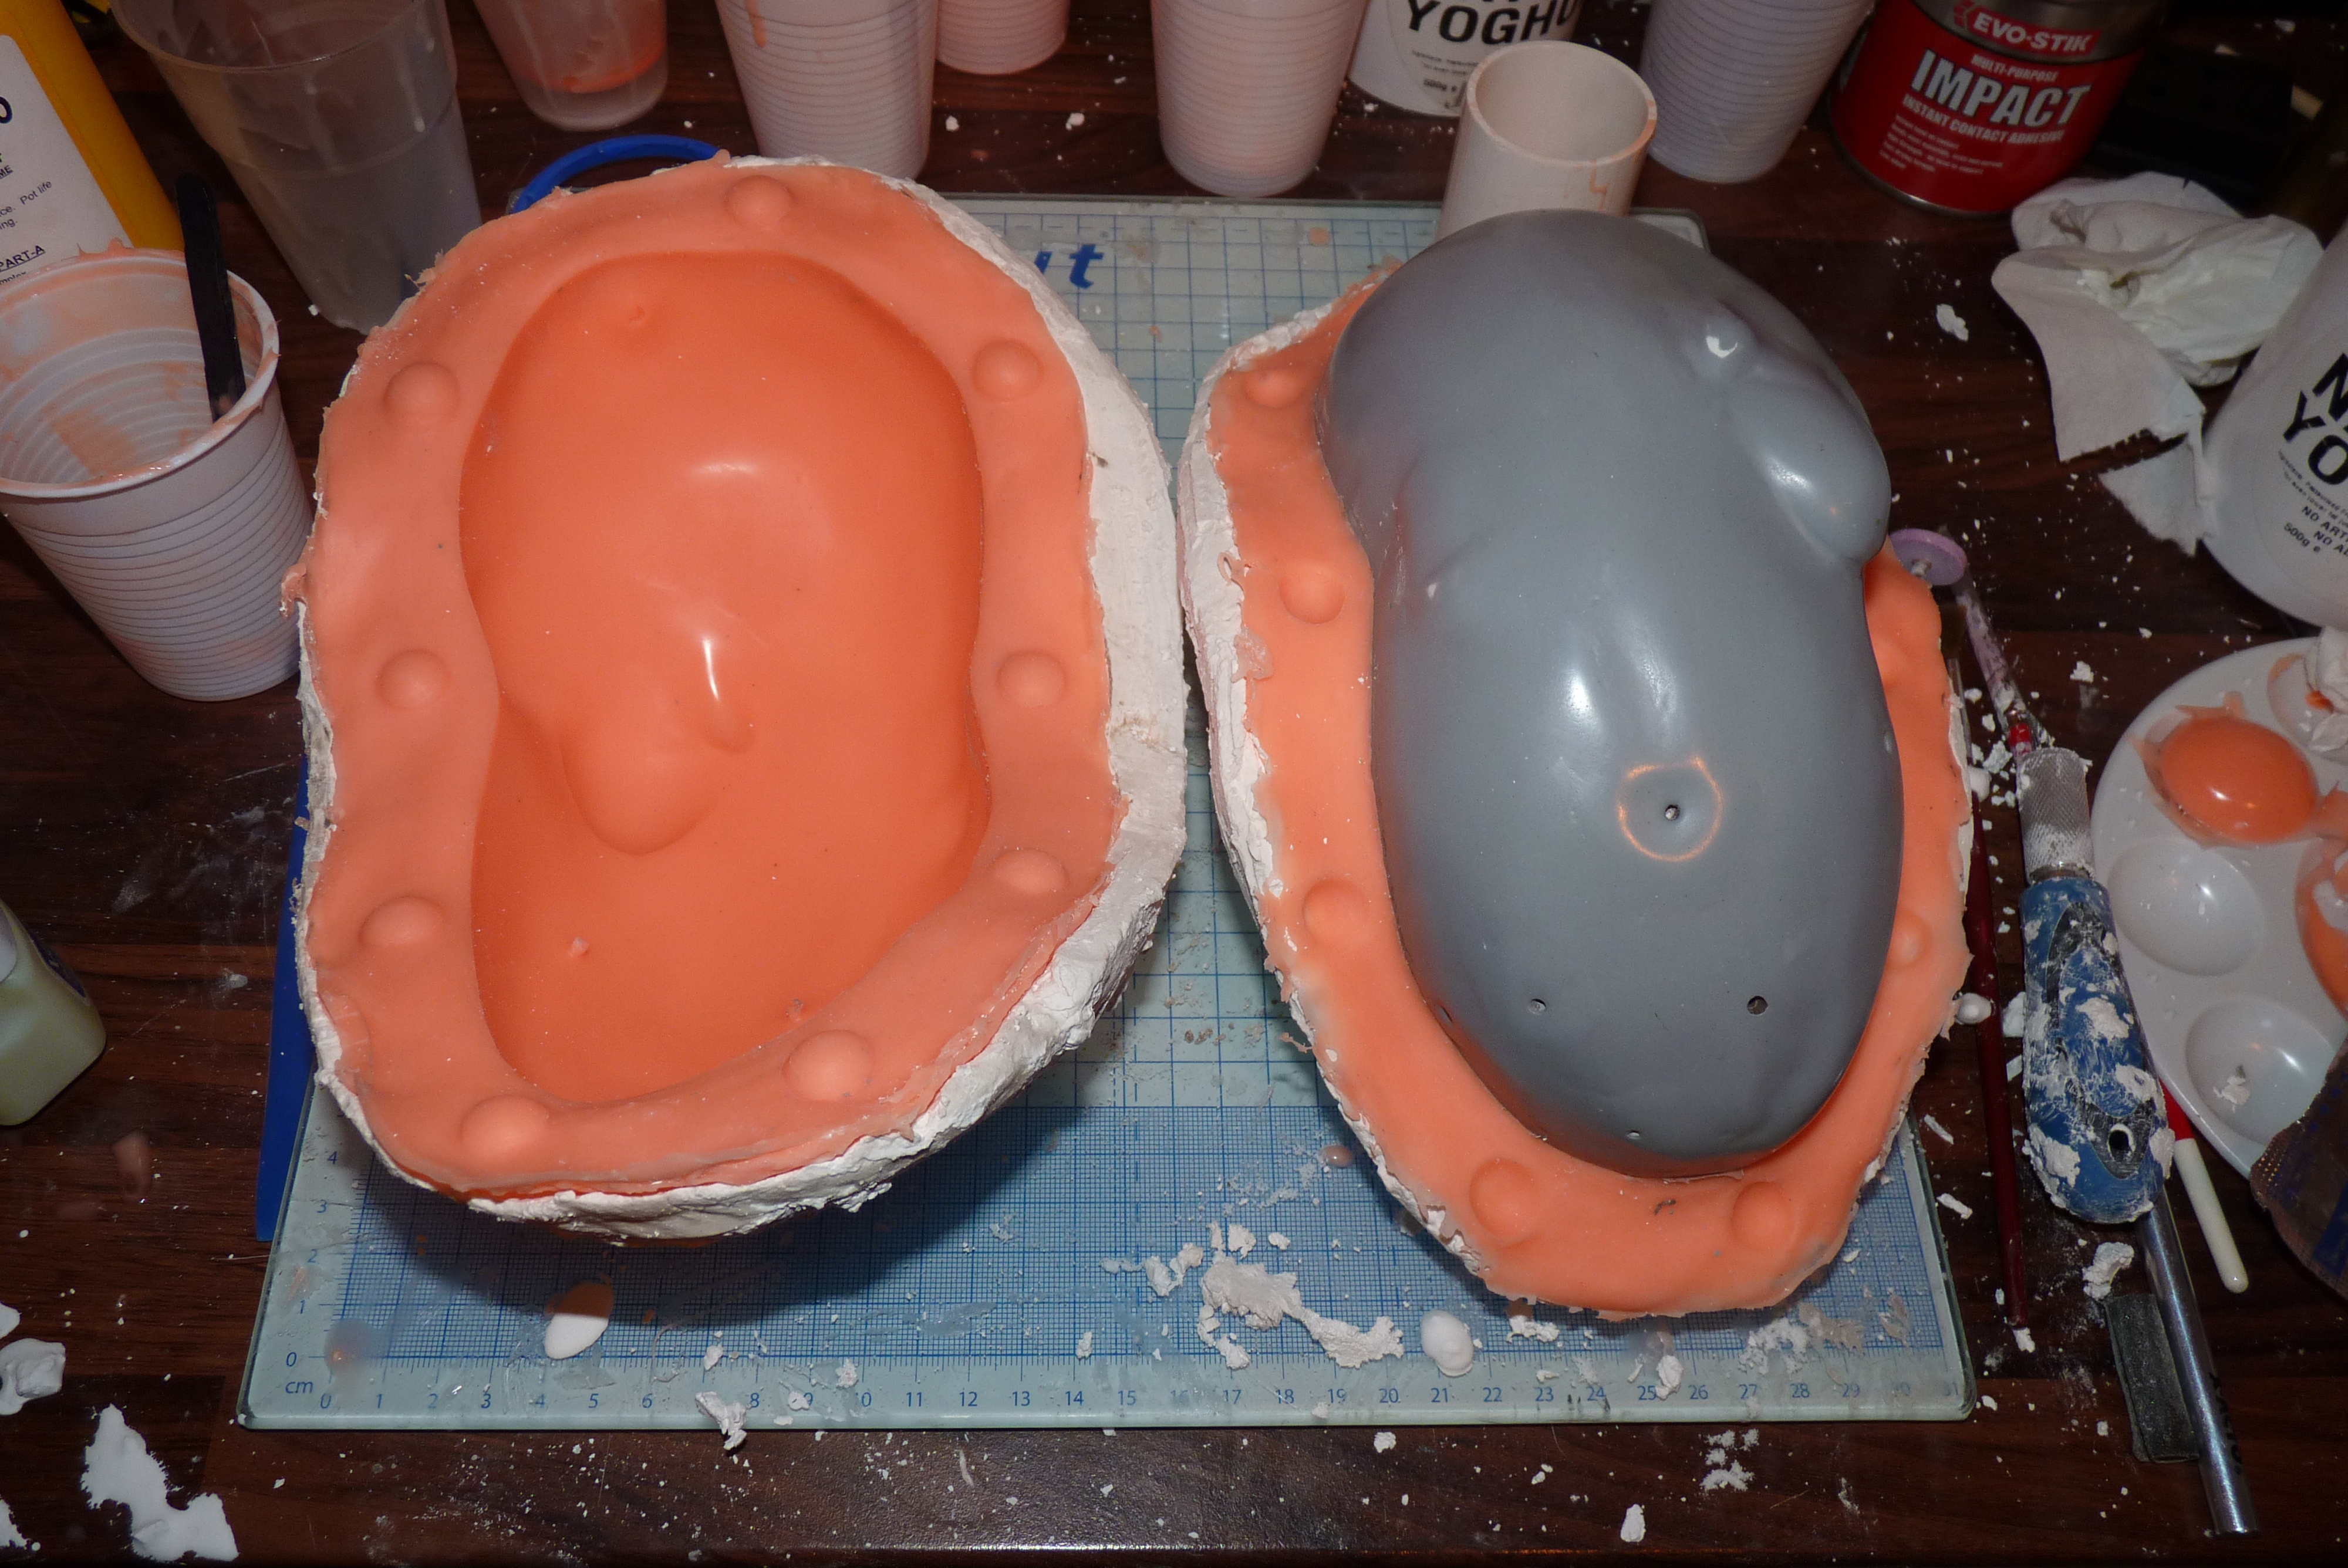
- When your plaster is fully dry, you can gently pry your mold apart. You'll probably need to remove the layer of plaster first, and then carefully peal your silicon appart, if there are are bits that dribbled over and stuck, just trim them with a scalpel. The potato may take a little bit of jiggling but it will pop out probably in the order of plaster then silicone again. match your silicon halves back up to your outter shells and you have a mold ready to go! (Fig 9 - 12)
- To cast your potato, have some clamps of cable ties ready and mix about 1 cup of Part A and 1 cup part B of Smooth Cast 305 (or whatever ratio the resin you chose to use needs) You probably wont use all of this, what you need is it to just coat the inside of the mold. about 1/5" or so thick, so you have a hollow space in the middle for electronics. Pour your mixed resin into one half of the mold and close it up, use a strap, clamp or cable tie(s) to seal the mold and start rotating in every direction! I recommend doing this over an old sheet or lots of paper as resin will most likely leak out at some point and you don't want to get it on yourself!
- Smooth Cast 305 has a pot life of about 7 mins, so once you hit the 7-10 min mark it isn't going to move much more so get it down and if any resin leaked out and looks like it's sealing your to halves together remove it while it's soft otherwise it'll be a pain to open when it's fully cured. Once your resin is cured, about 30 mins, but I left mine the full 60 mins because my first potato was still a little soft after 30 mins, you can demold your potato the same way you did with your original.(Fig 13) You might need to cut off some flashing around the edge, and if there's a seam you want to get rid of, simply sand it down with a high grit sandpaper (so as not to take chunks out of your potato) and use the Ispon and Red Putty to fill any bits in.
Or you could...
- You could do a 2 part block mold for this using Oomoo 30 or similar, but that would require a lot more silicone whereas I had half of my Rebound 25 kit left over. I did try a block mold but I needed 2 Oomoo 30 kits for one side, and I dont have that kind of money to spent, and Rebound 25 works just as well.
- If you're not putting electronics inside you could add more resin to make your potato more solid, but it might make it tricky to drill through. In my opinion, lighter is better.
On to the details....
Details and Attachments!
Warning: If using MDF, remember to wear a dust mask as the dust it gives off is known to be toxic, wear it when sanding down filler or primer and when pouring resin as the fumes can be strong. Wear gloves and protective clothing to avoid silicone in fabric situations. Wear a mask and protective eye gear when using a router and/or a rotary tool.
What I did...
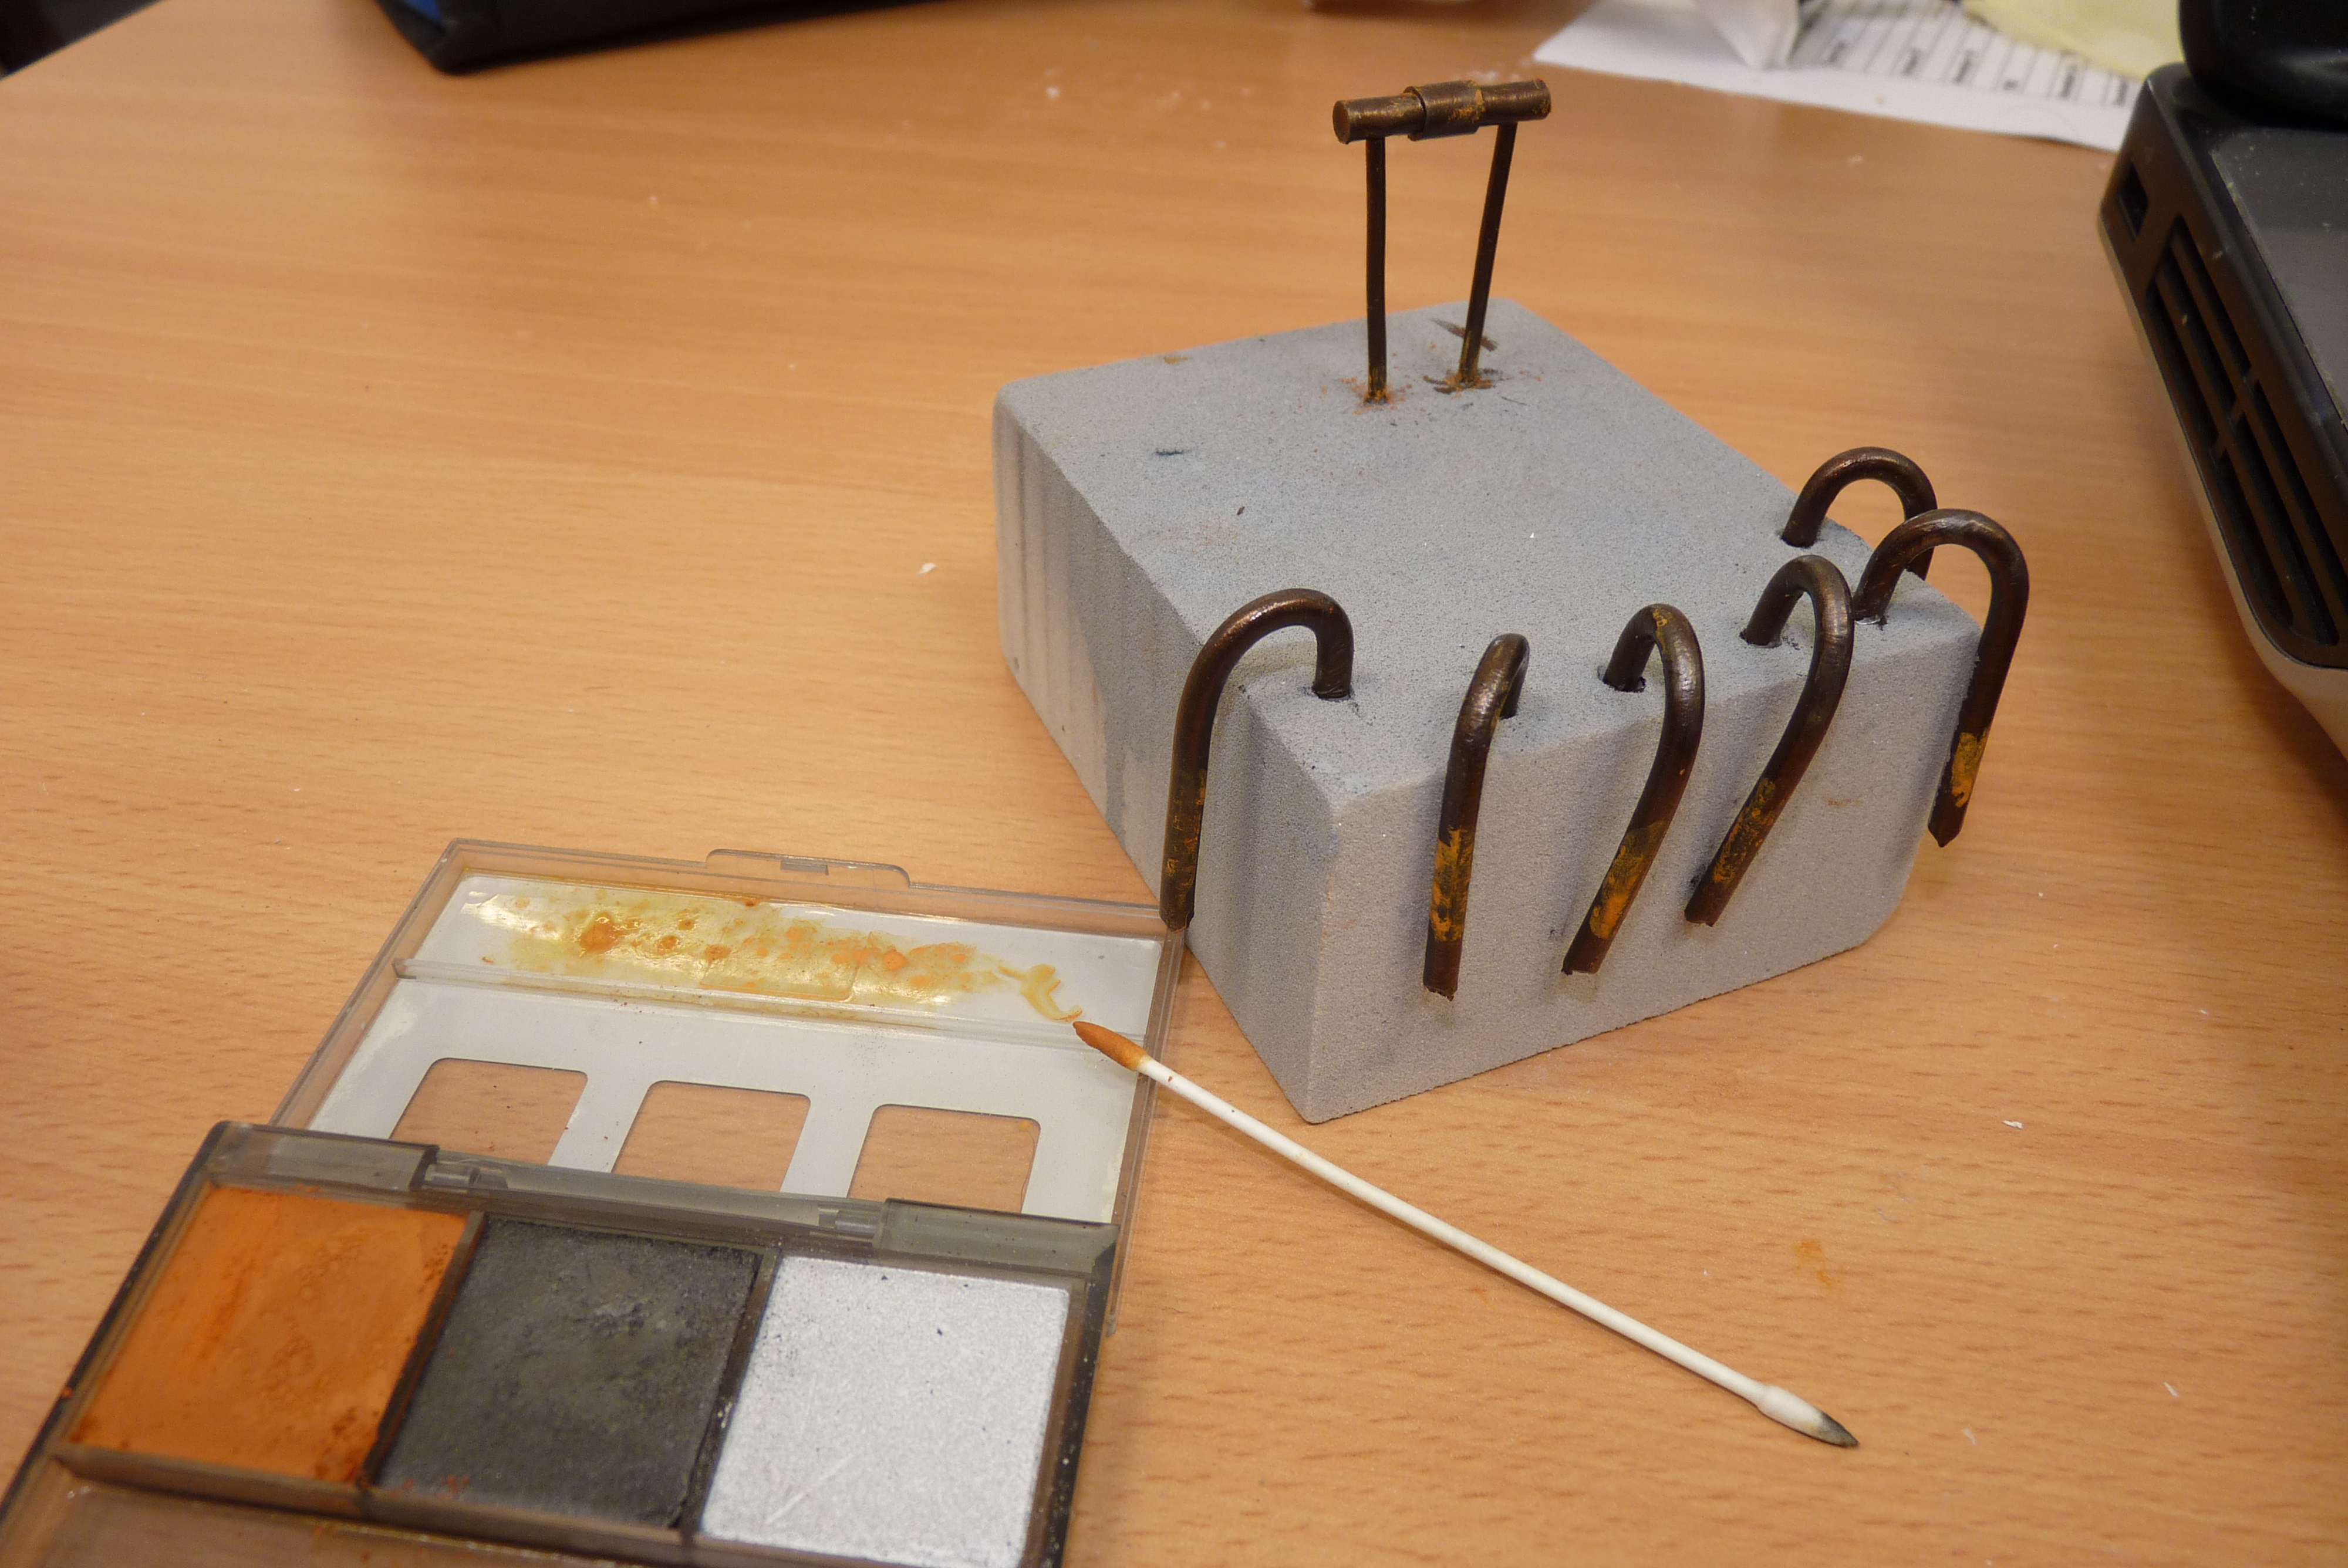
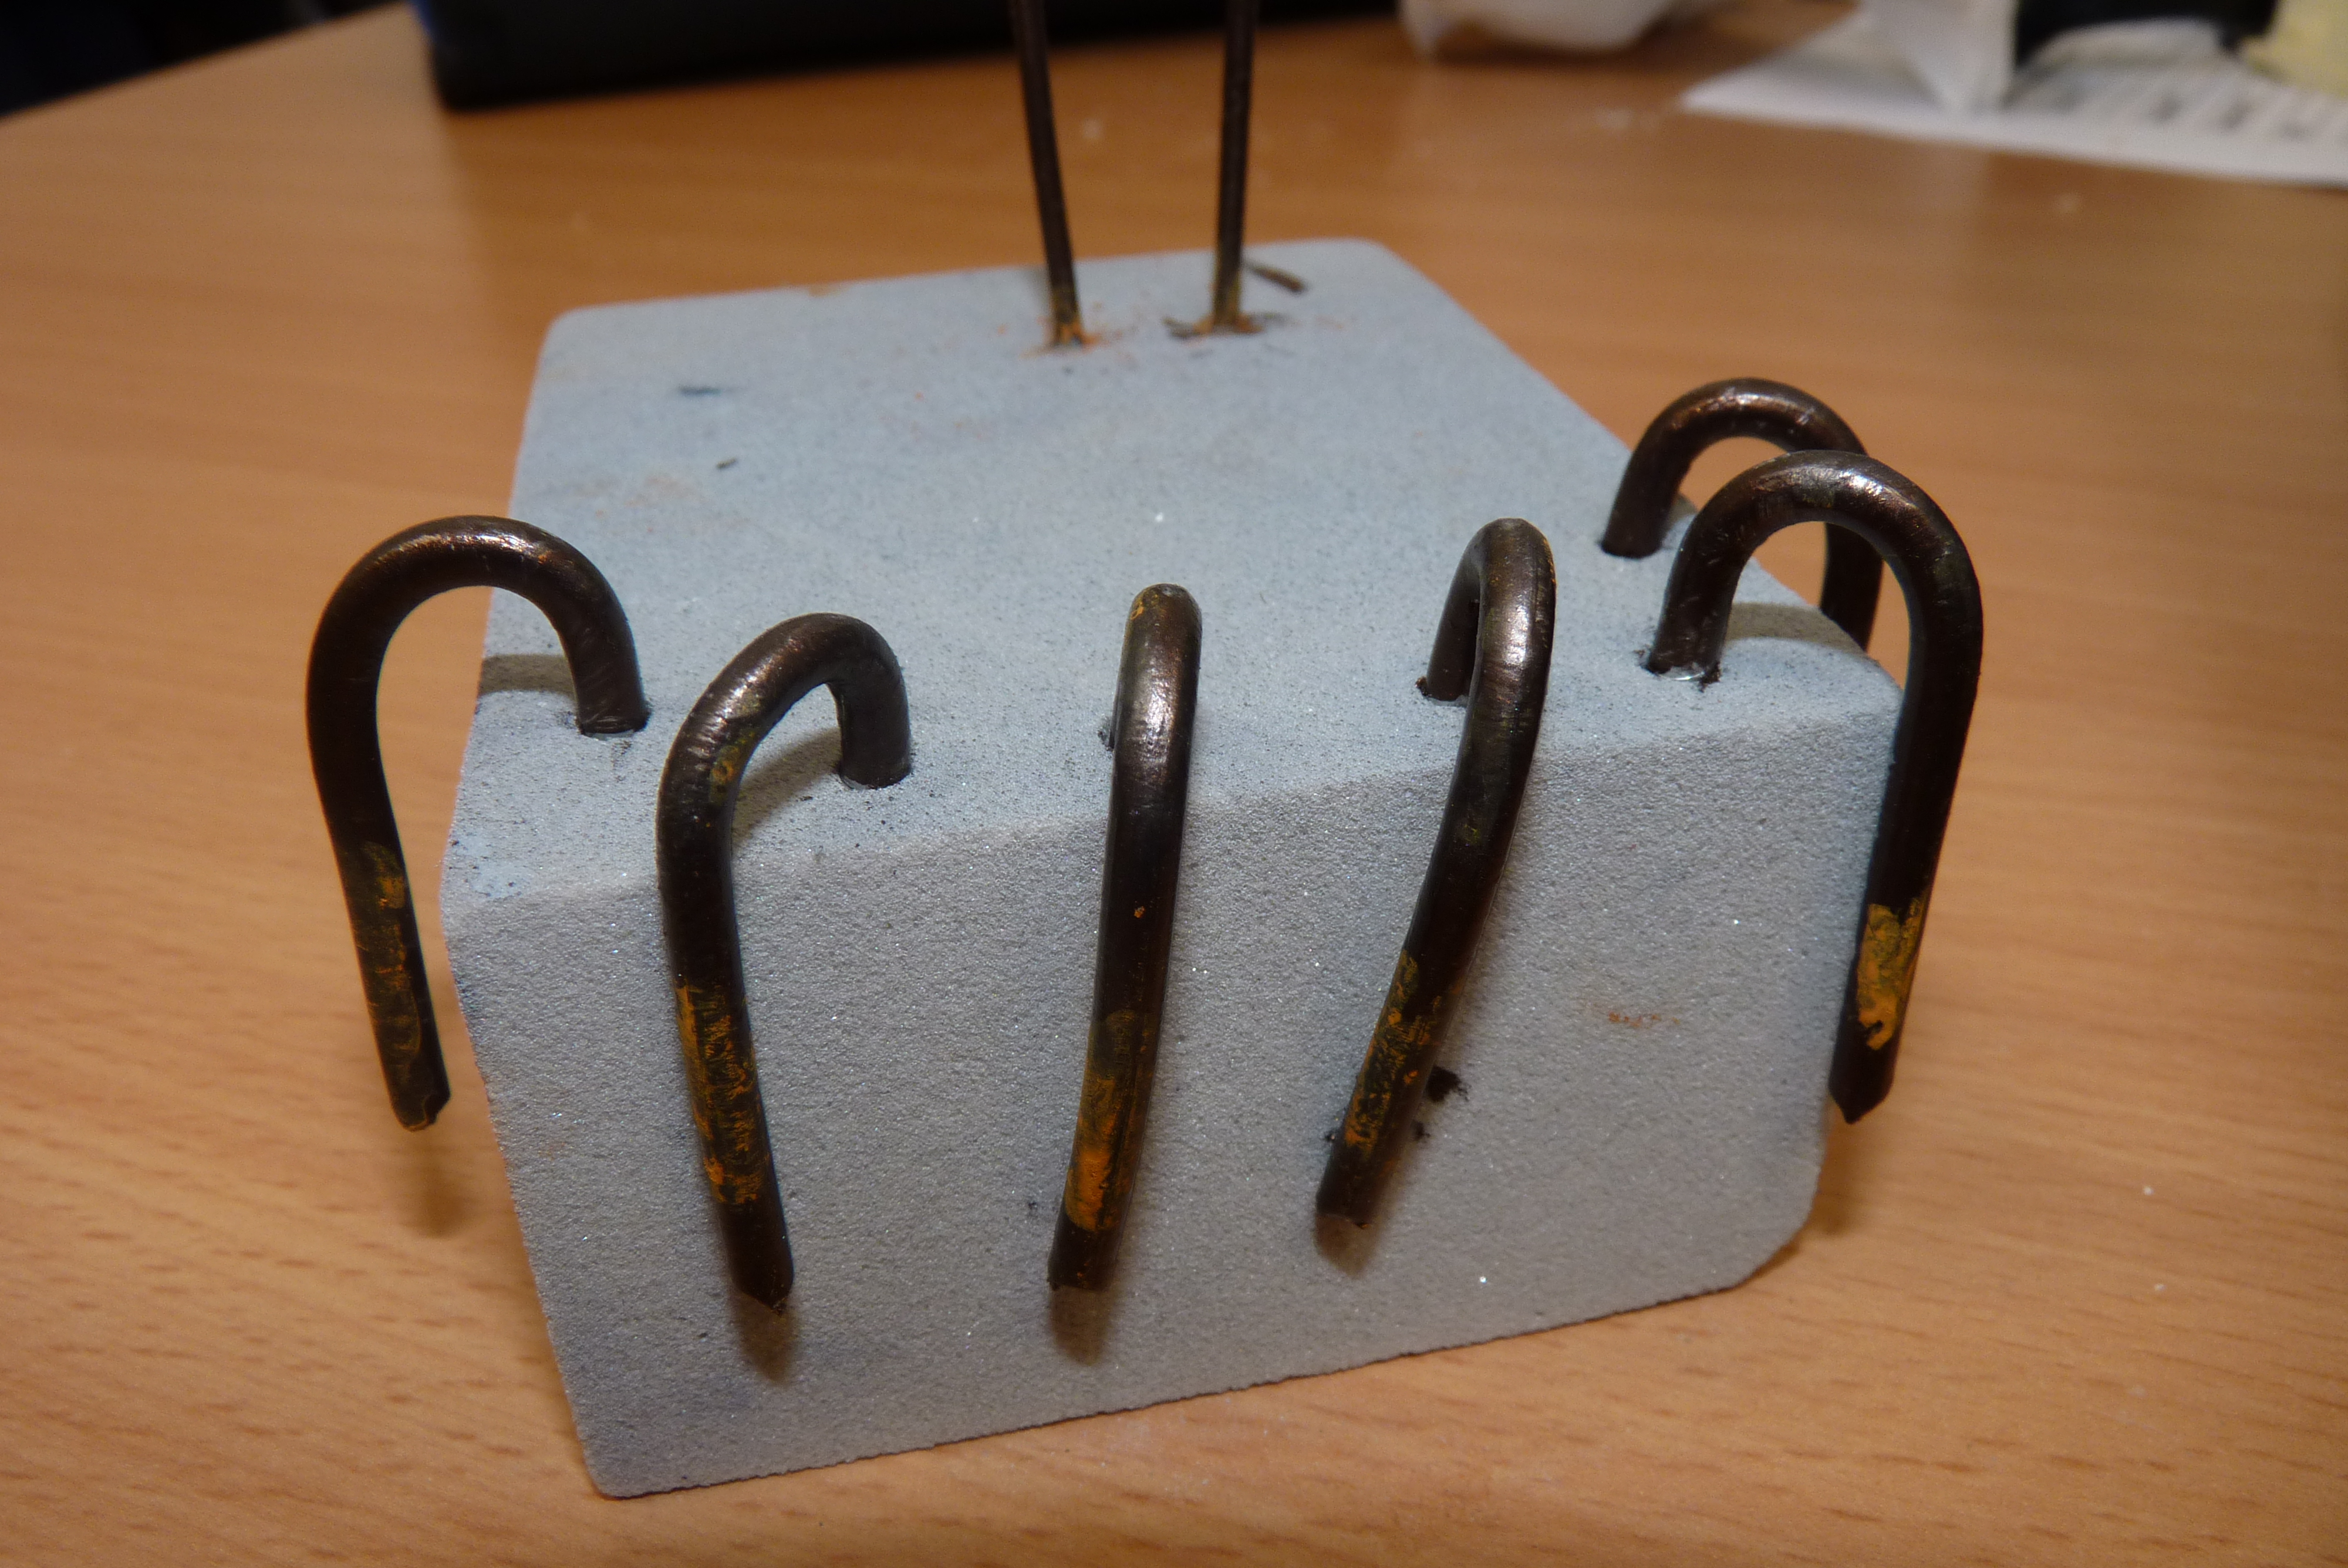
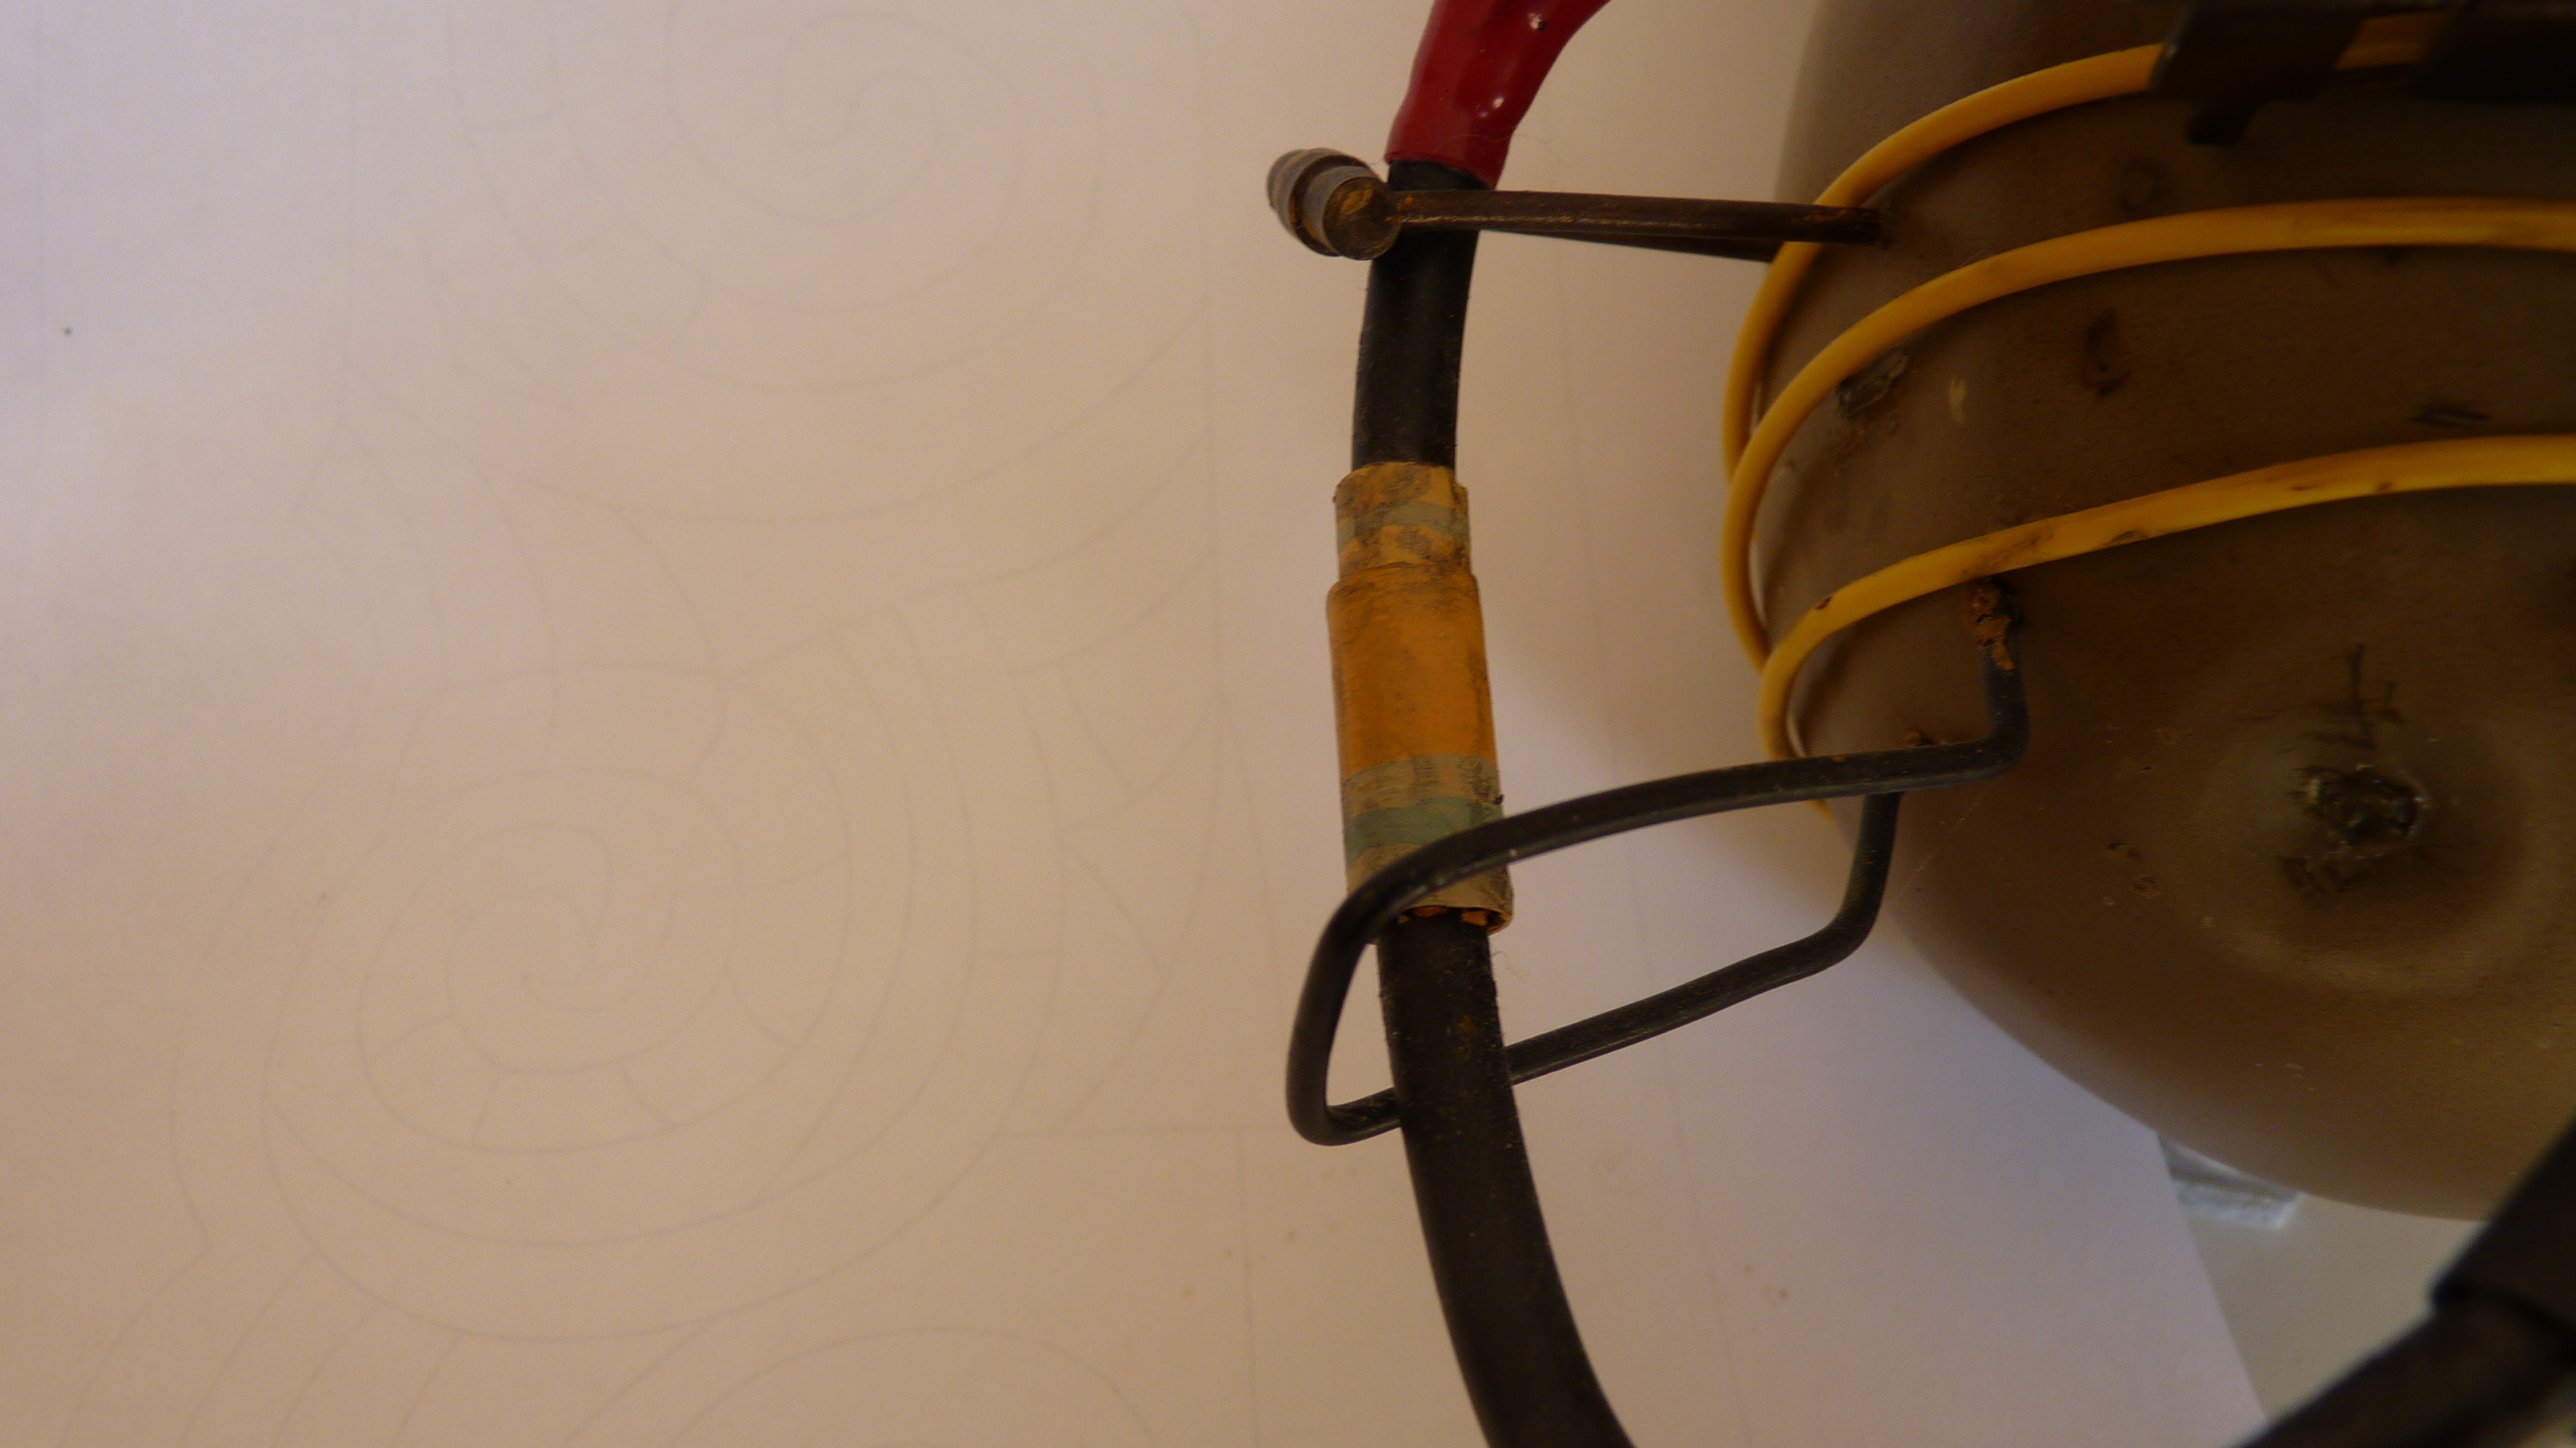
- PotatOS has a few brackets sticking out of her to hold her wires in place. You can see one of them in (Fig 1). This was made using some styrene tubing. The other two brackets were made using simple thin-medium modeling wire bent into shape. For the staples that hold her eye in place, I used thick modeling wire which I bent over a pliers into shape. Both these and the styrene bracket were painted wtih Warhammer Tin Bitz model paint and weathered using the Tamiya rust weathering kit. (Fig 1 and 2)
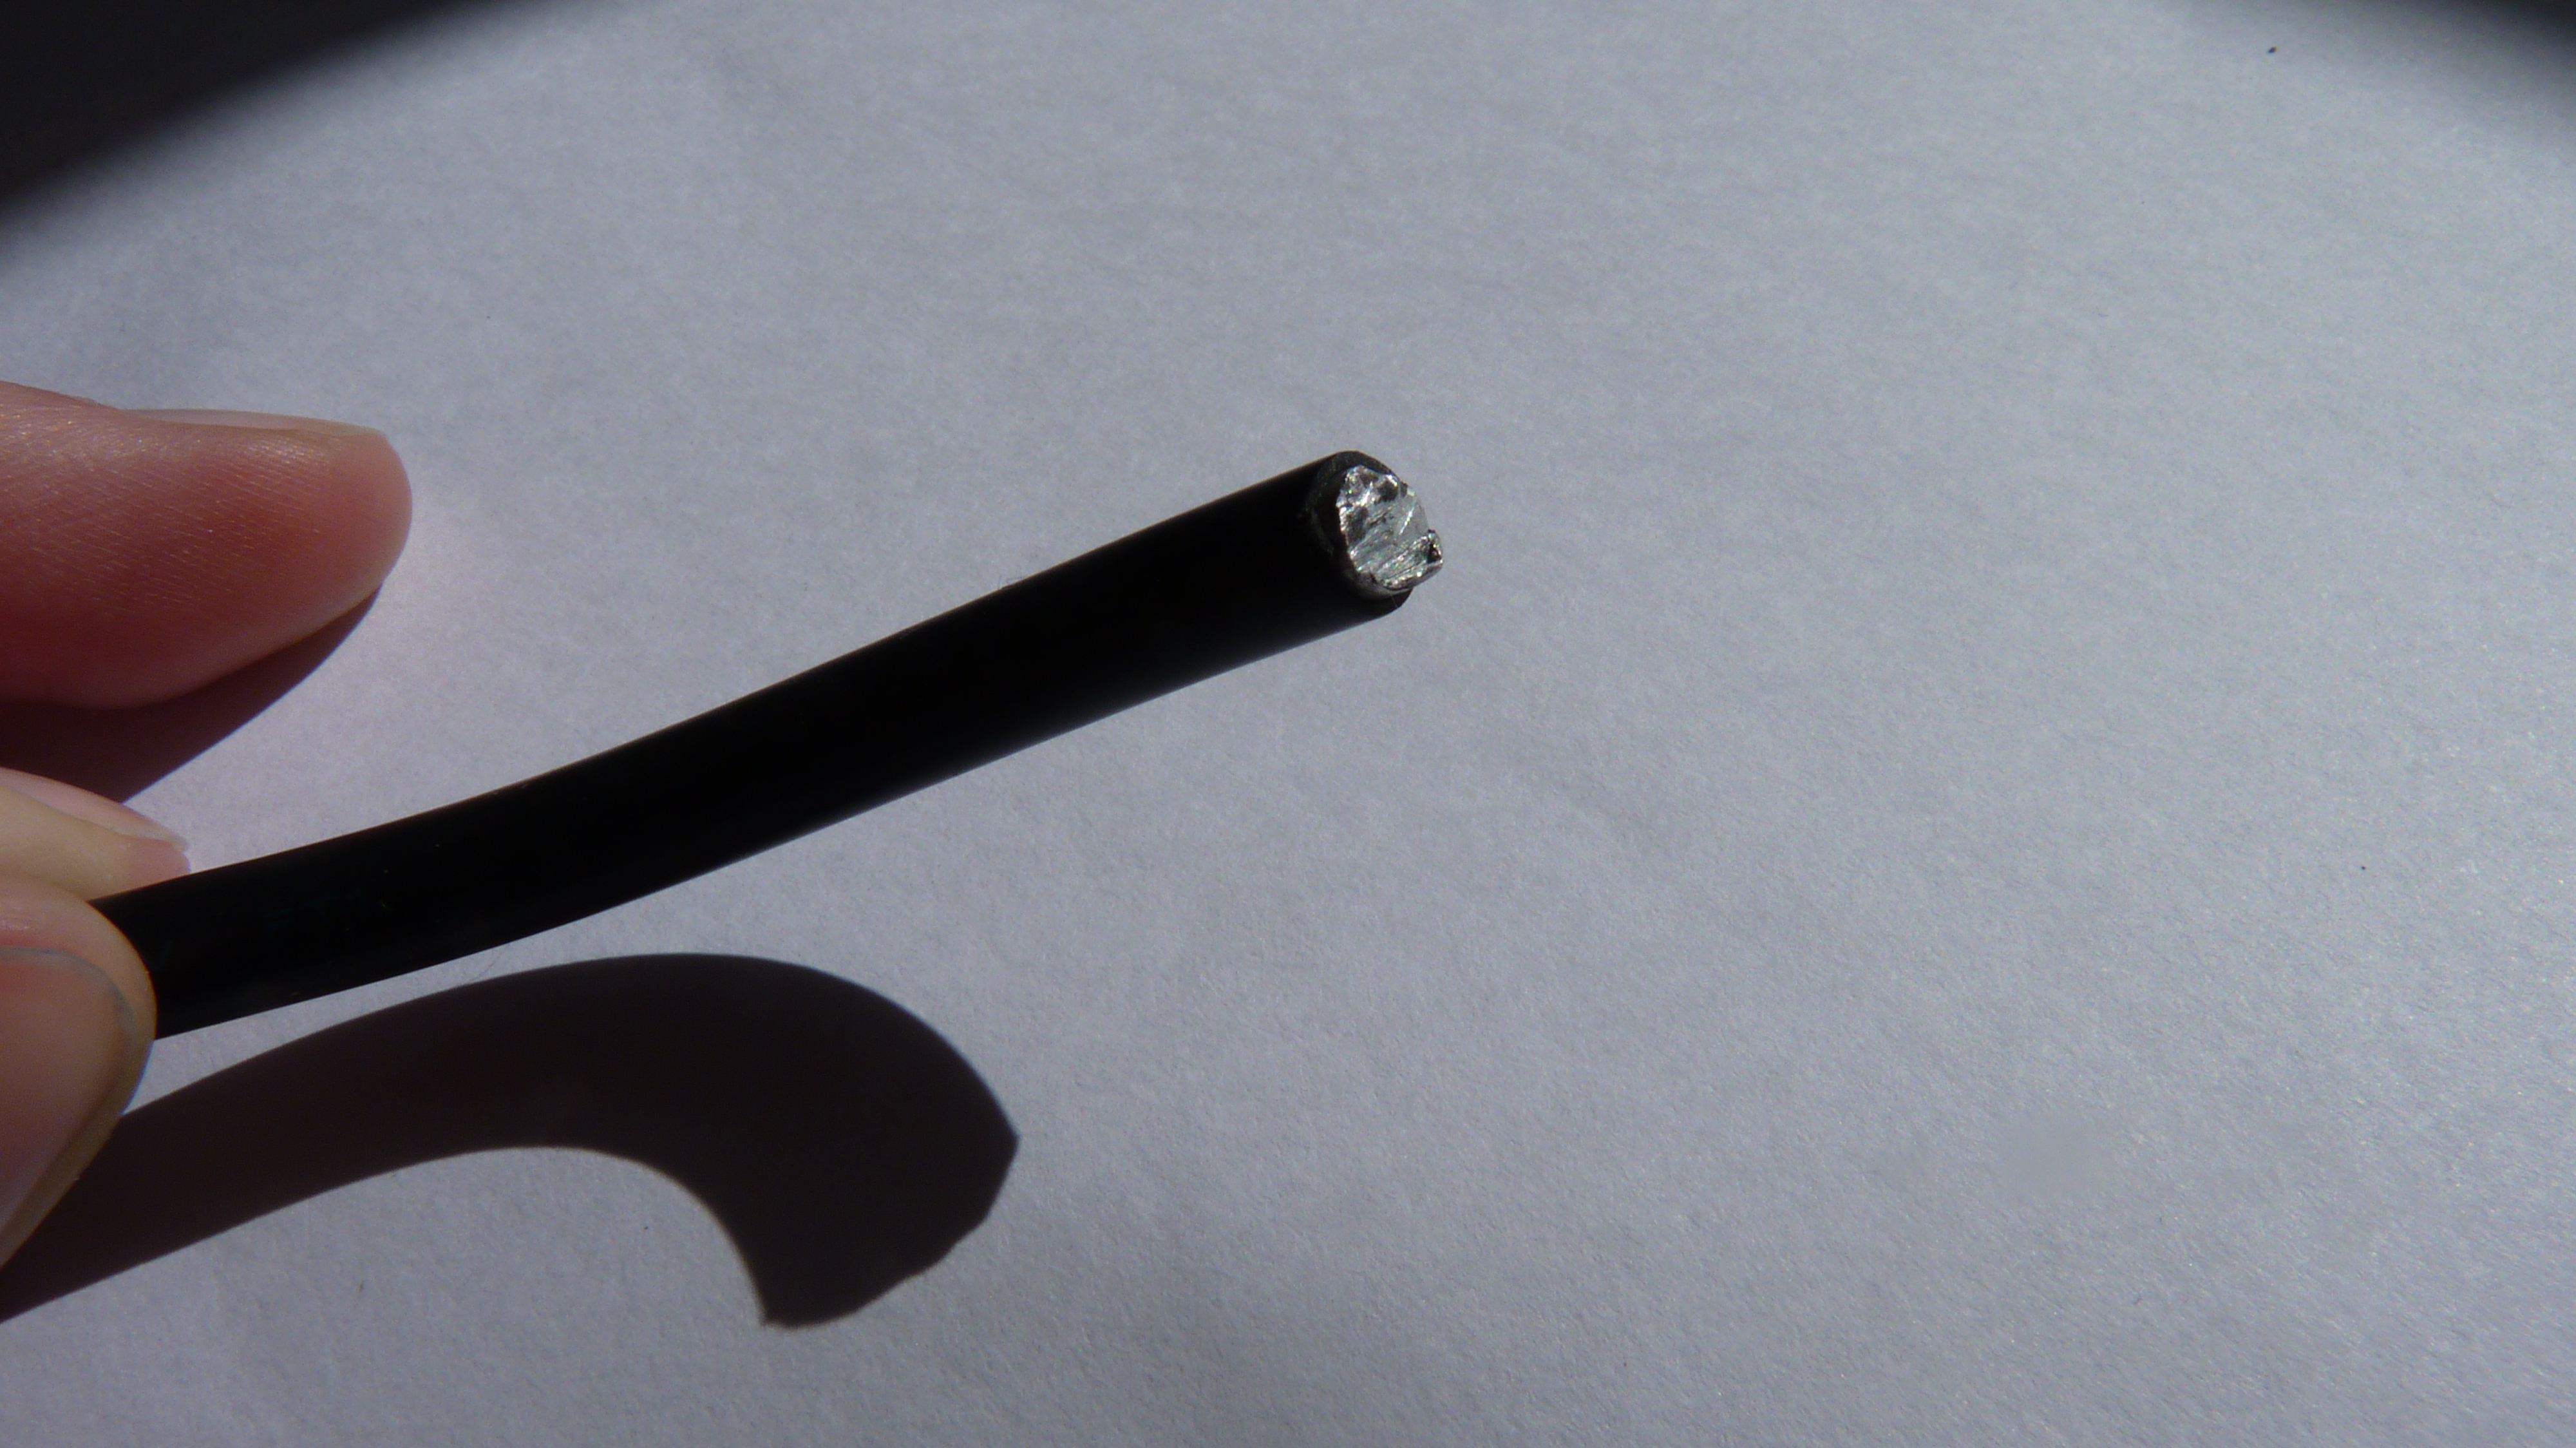
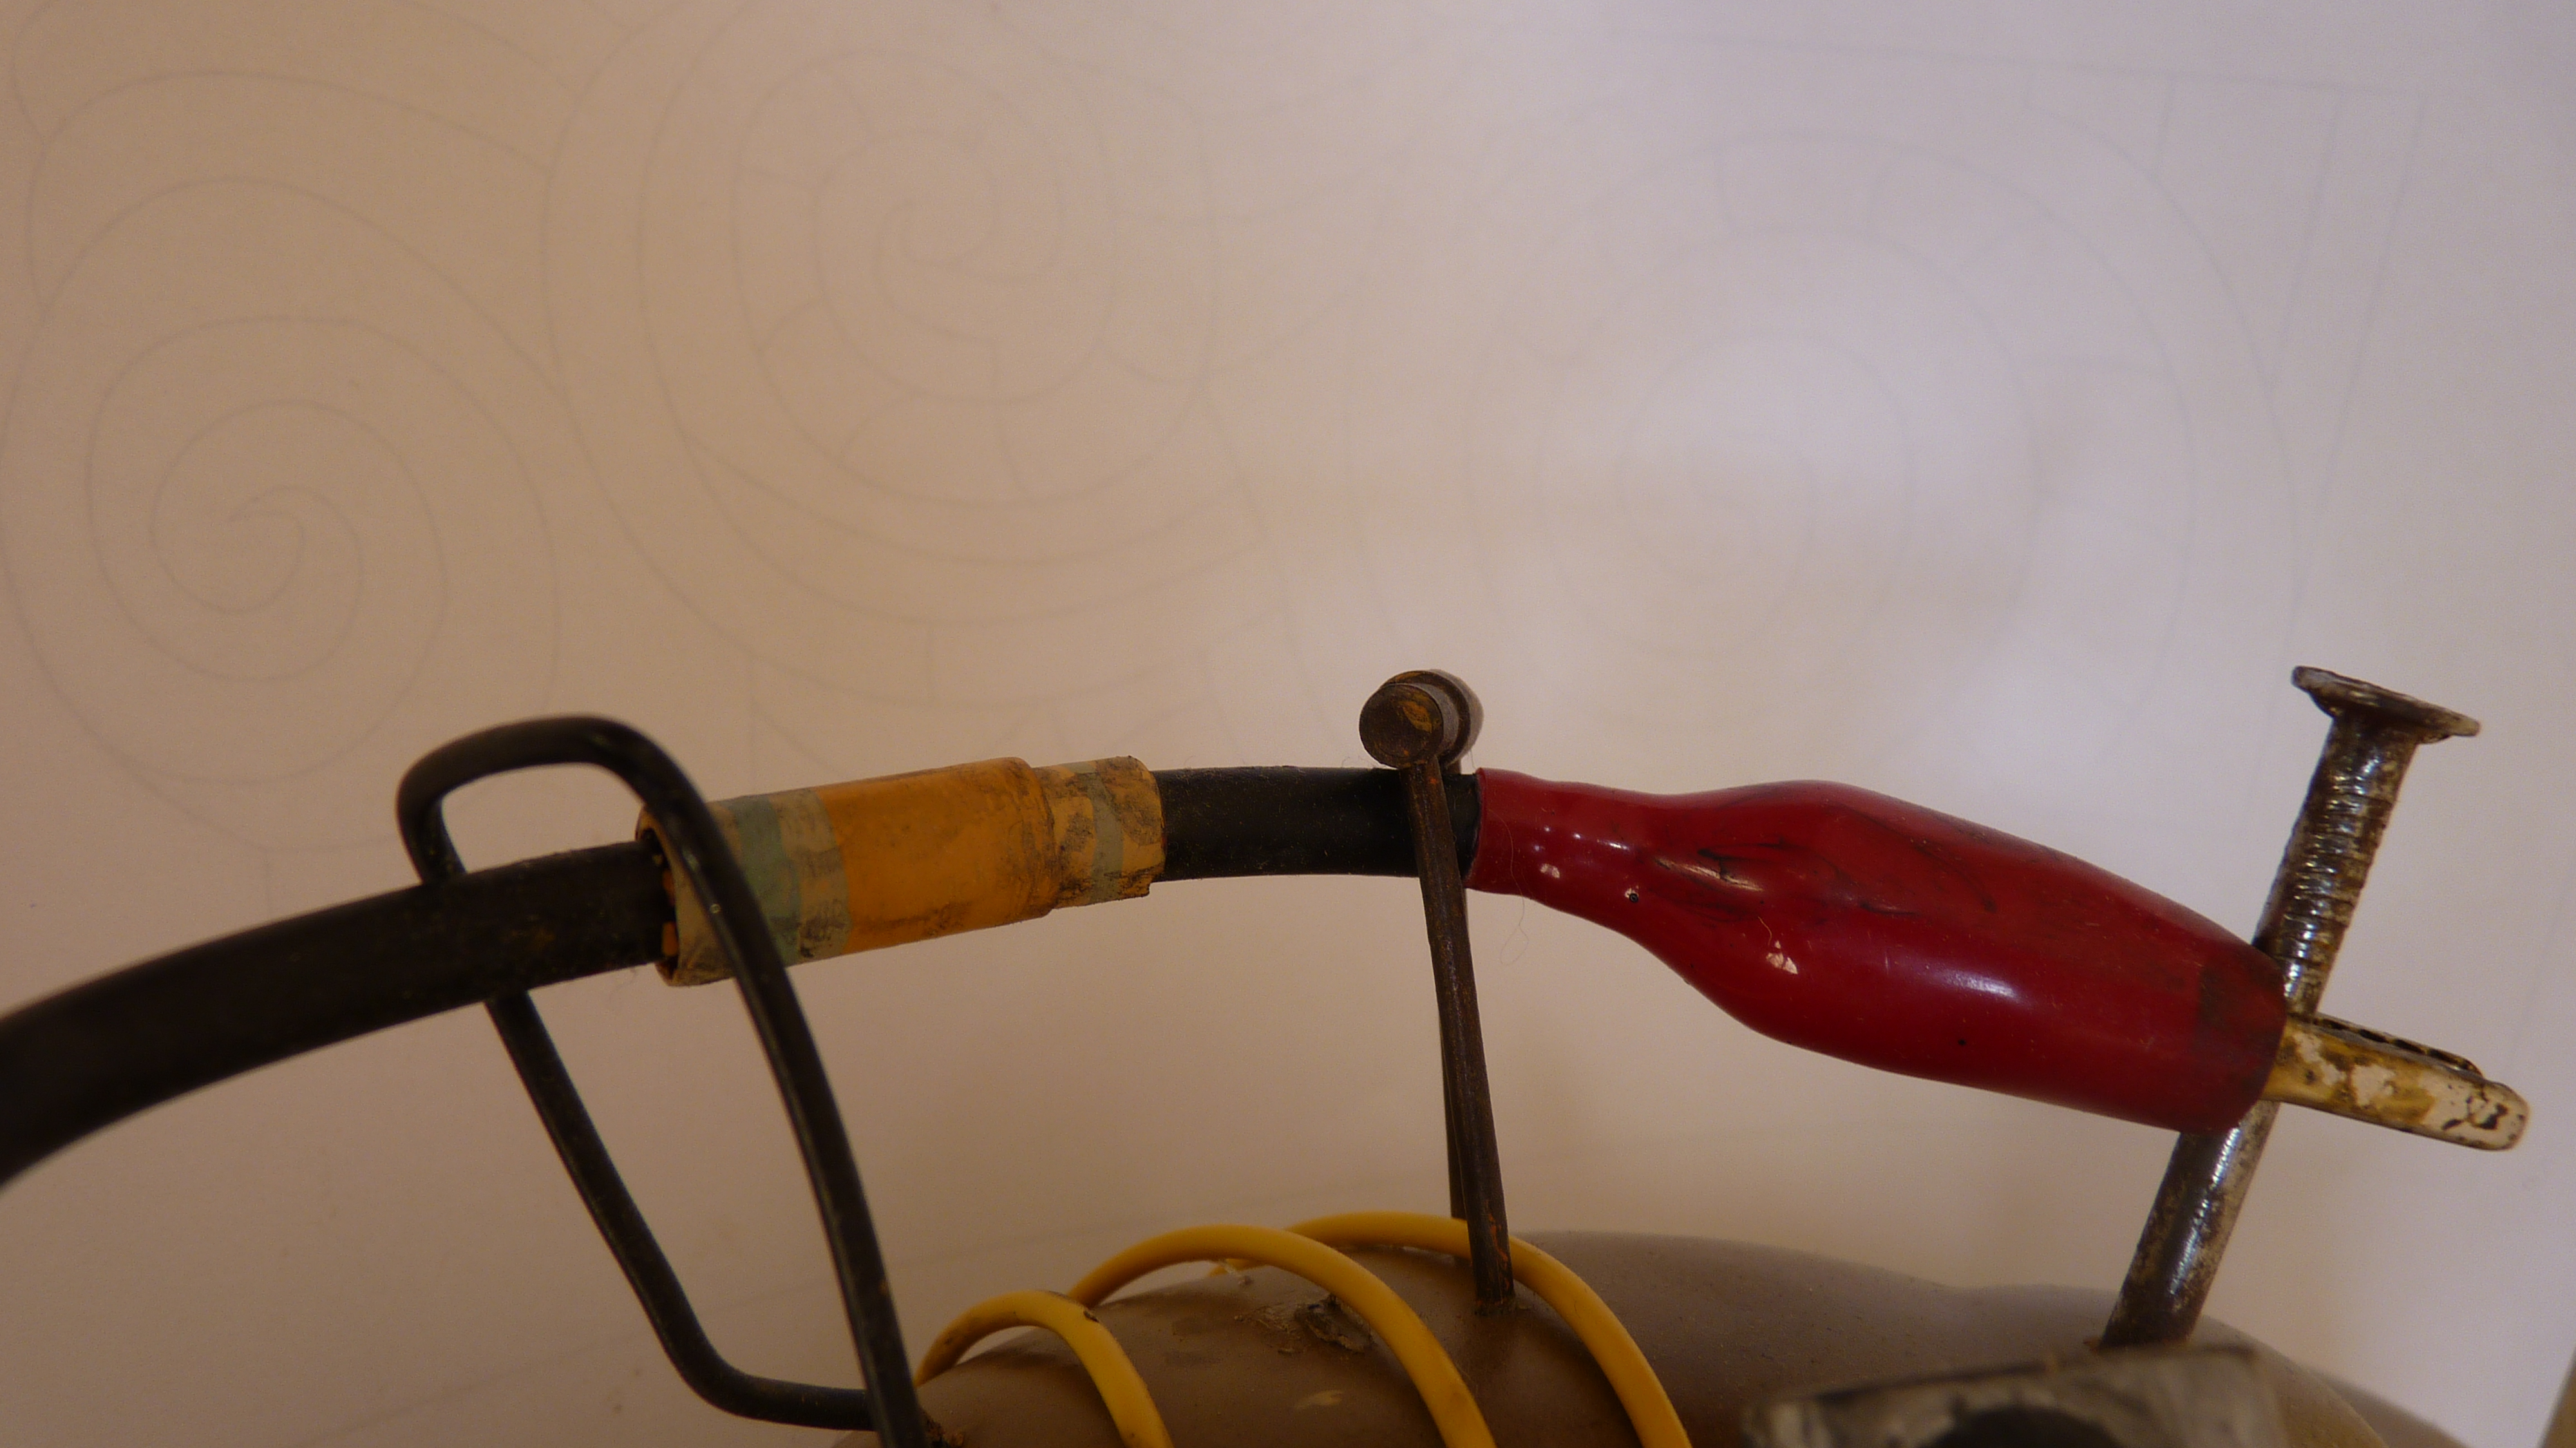
- For the wires, take a old computer monitor cable or something of similar thickness, cut off both ends and pull out the wires from the middle of the cable, being careful not to stab yourself with any wires poking out. Cut them to roughly the length you need, longer than you need is better in case your estimate is a little off, and you can trim it down later or case you want to cut it at an angle too. Then take thick modeling wire, 4.2mm fits very snuggly in the wire covering and aluminium would be best as it is softer and easier to bend than steel. Start feeding the wire into the black covering, it'll take a few minutes if your combo is a snug fit (Fig 3). When you have it fed through, leave a little bit of modeling wire exposed and pop this into your large crocodile clip. It wont fit in the metal part but should be a great size for the red plastic covering. To ensure it doesn't fall off, give it a bit of super glue to hold it in place. (You can see it assembled in Fig 4 and 5)
- There are two coloured wraps (Fig 4 and 5) around the wires, near the ends, using two styrene tubes, one that slides over the wire, and one that slides over that one again, you can put then in place and glue then together before you start bending the wire into shape. I painted mine with acyrlic model paint and then added a bit of dirt and grime from the Tamiya weathering kit to them and the crocodile clips.
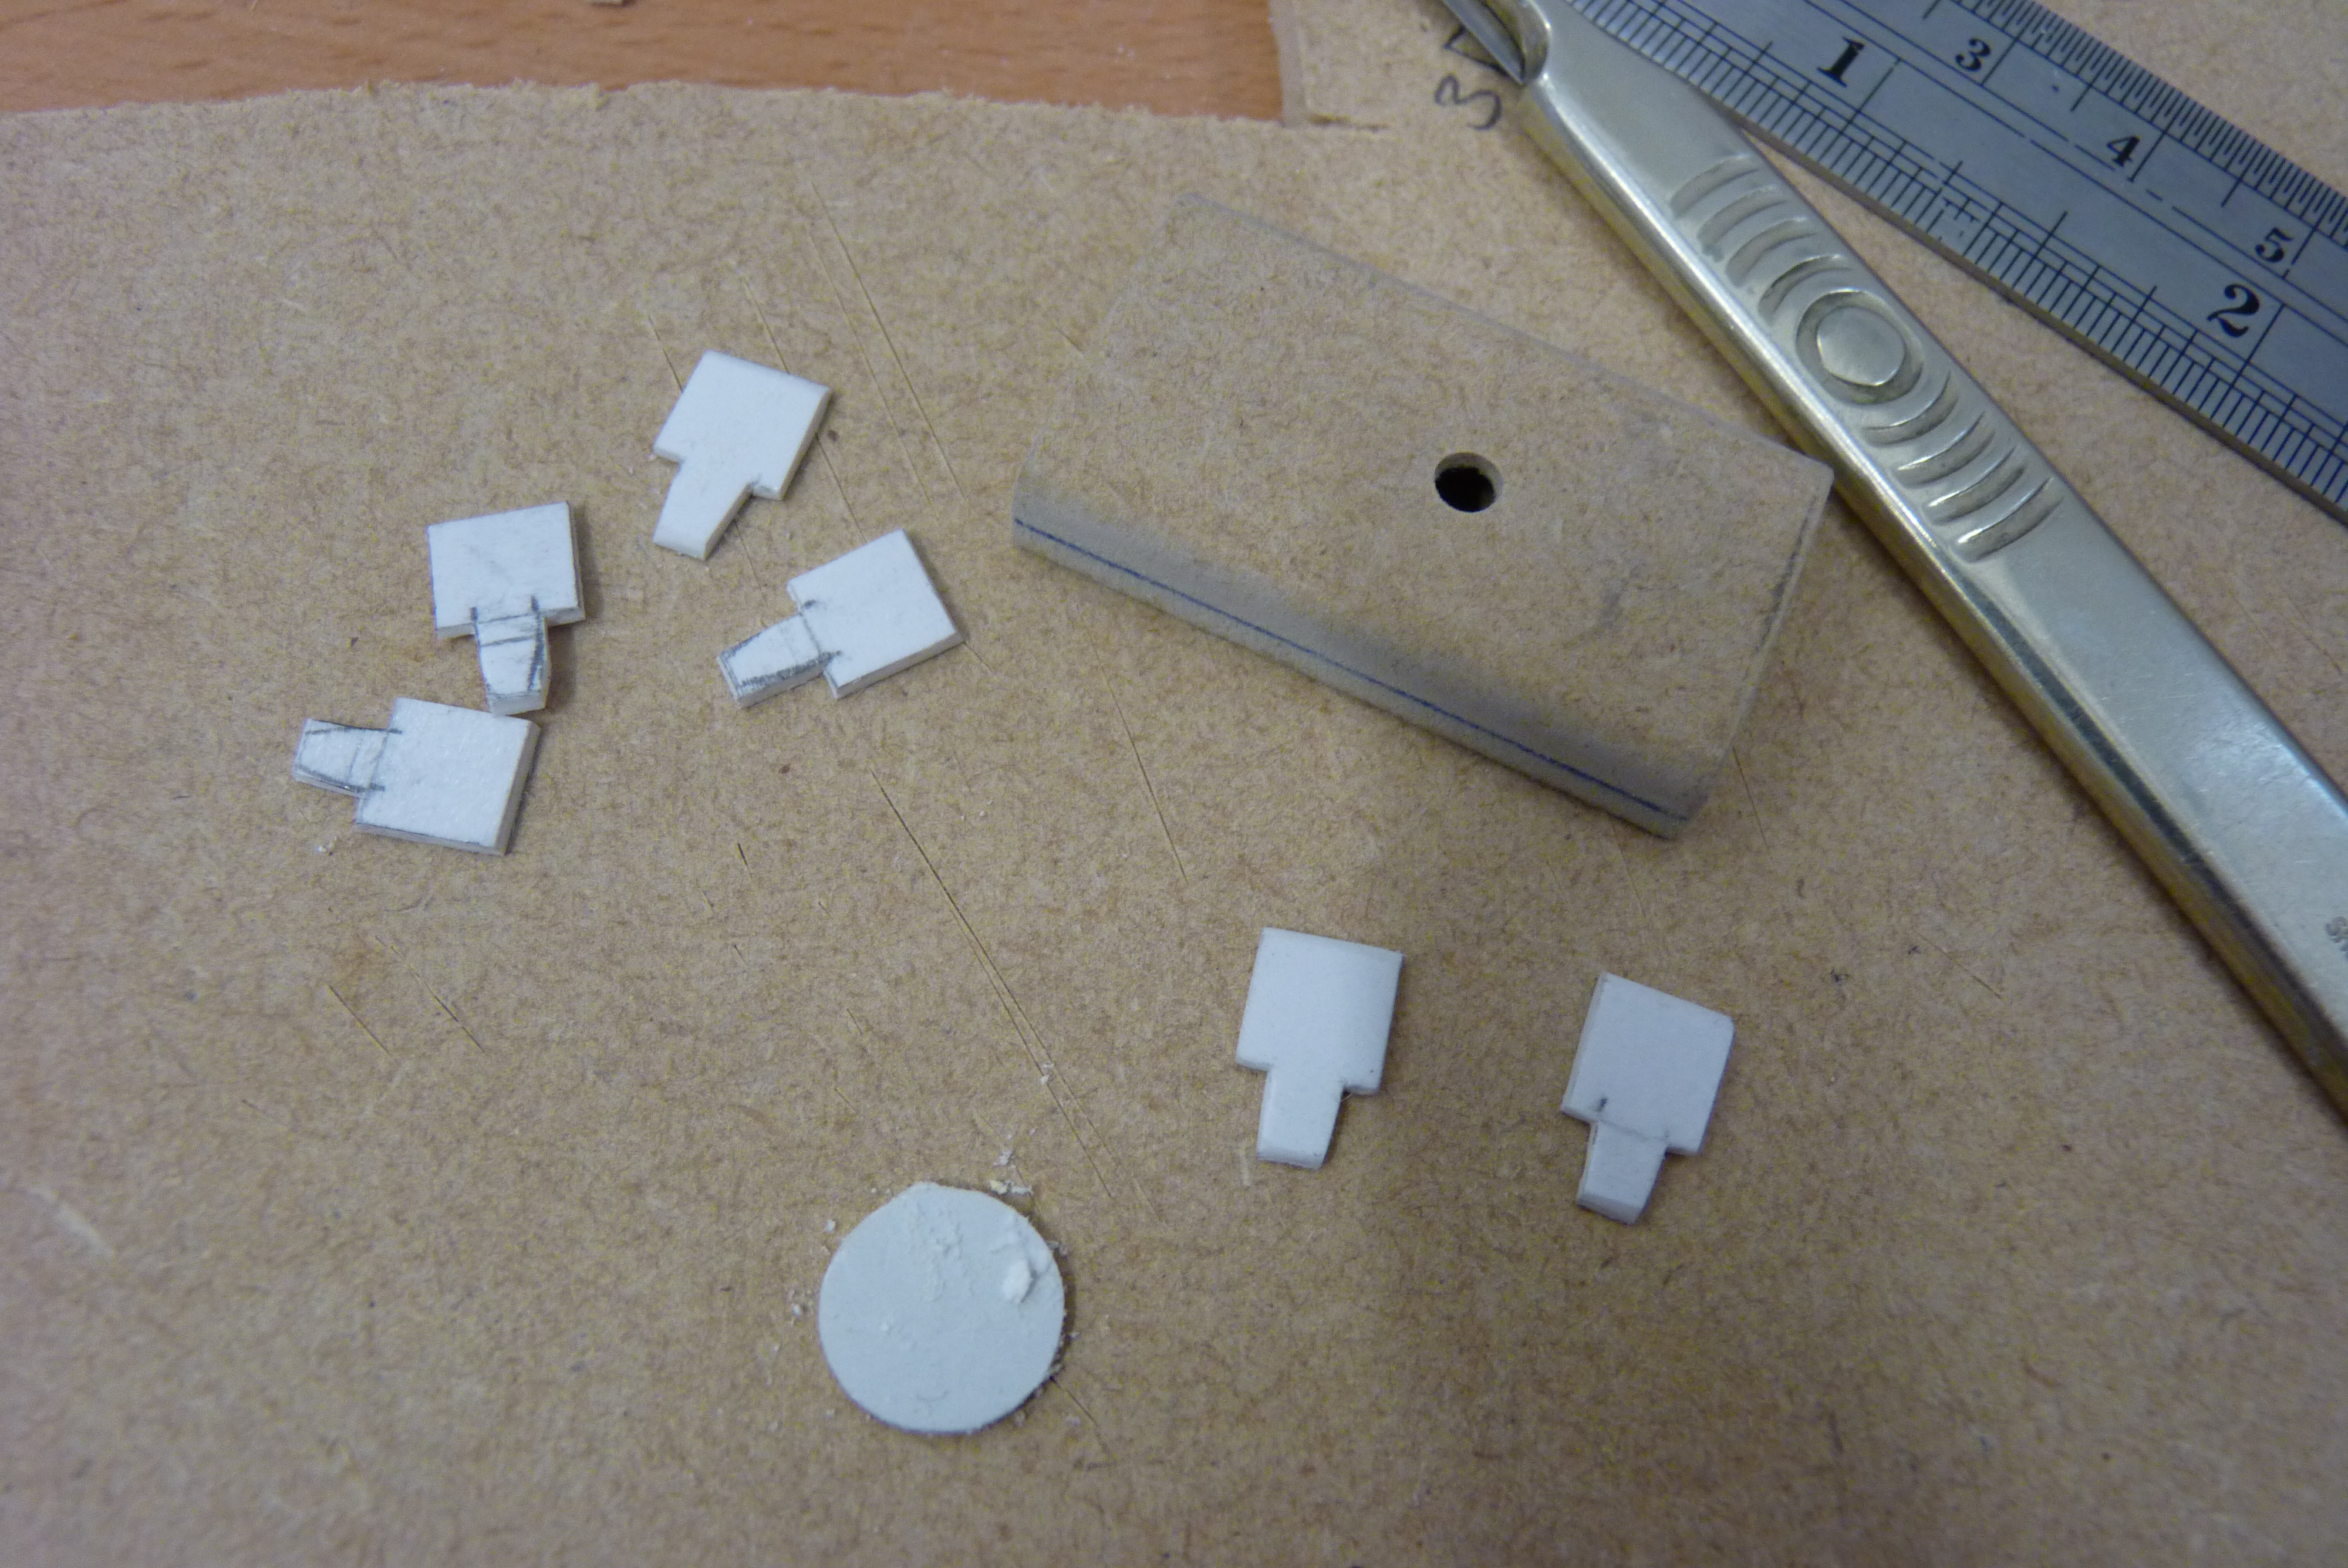
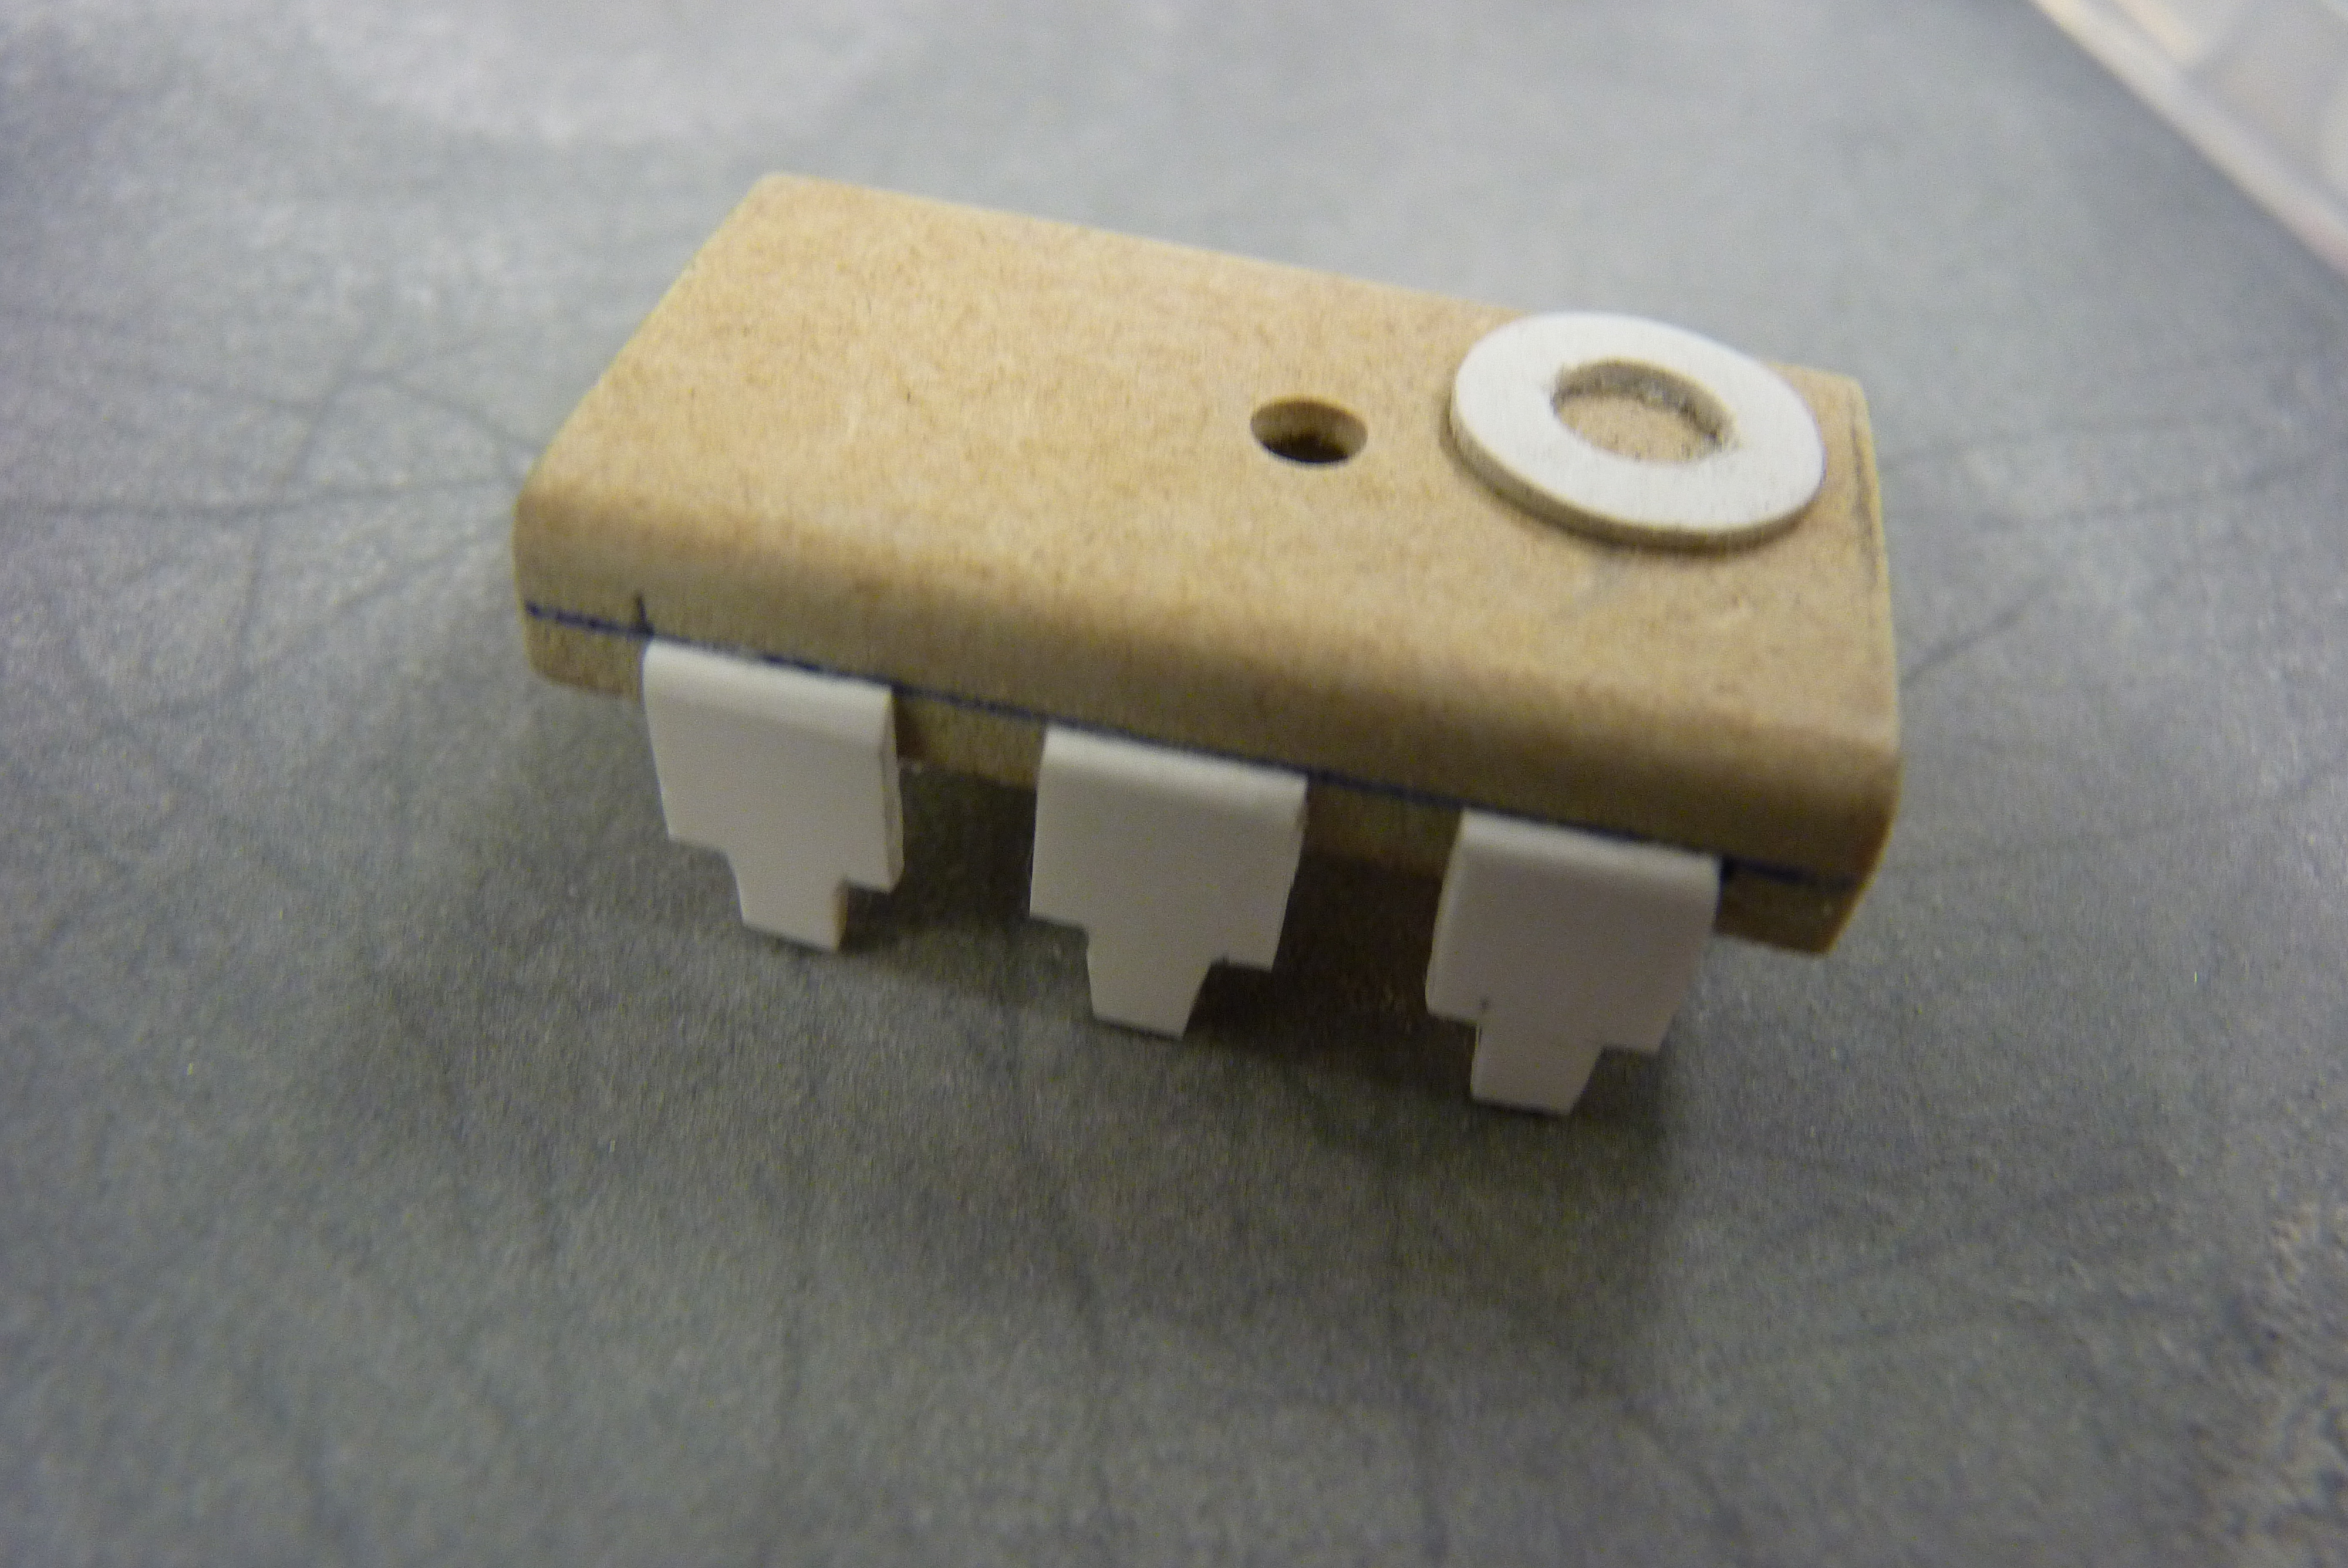
- The computer chip was made using a small bit of MDF and styrene for the feet and a styrene ring about 2mm thick for detailing. My chip body was about 6mm MDF with the top corners rounded with the feet inset by about 2mm and spaced evenly appart. A hole was also drilled in it just off centre for a red button which would be one of the voice buttons for the sound chip. This will be getting the same paint treatment as the eye so you can put it aside for now.(Fig 6 and 7)
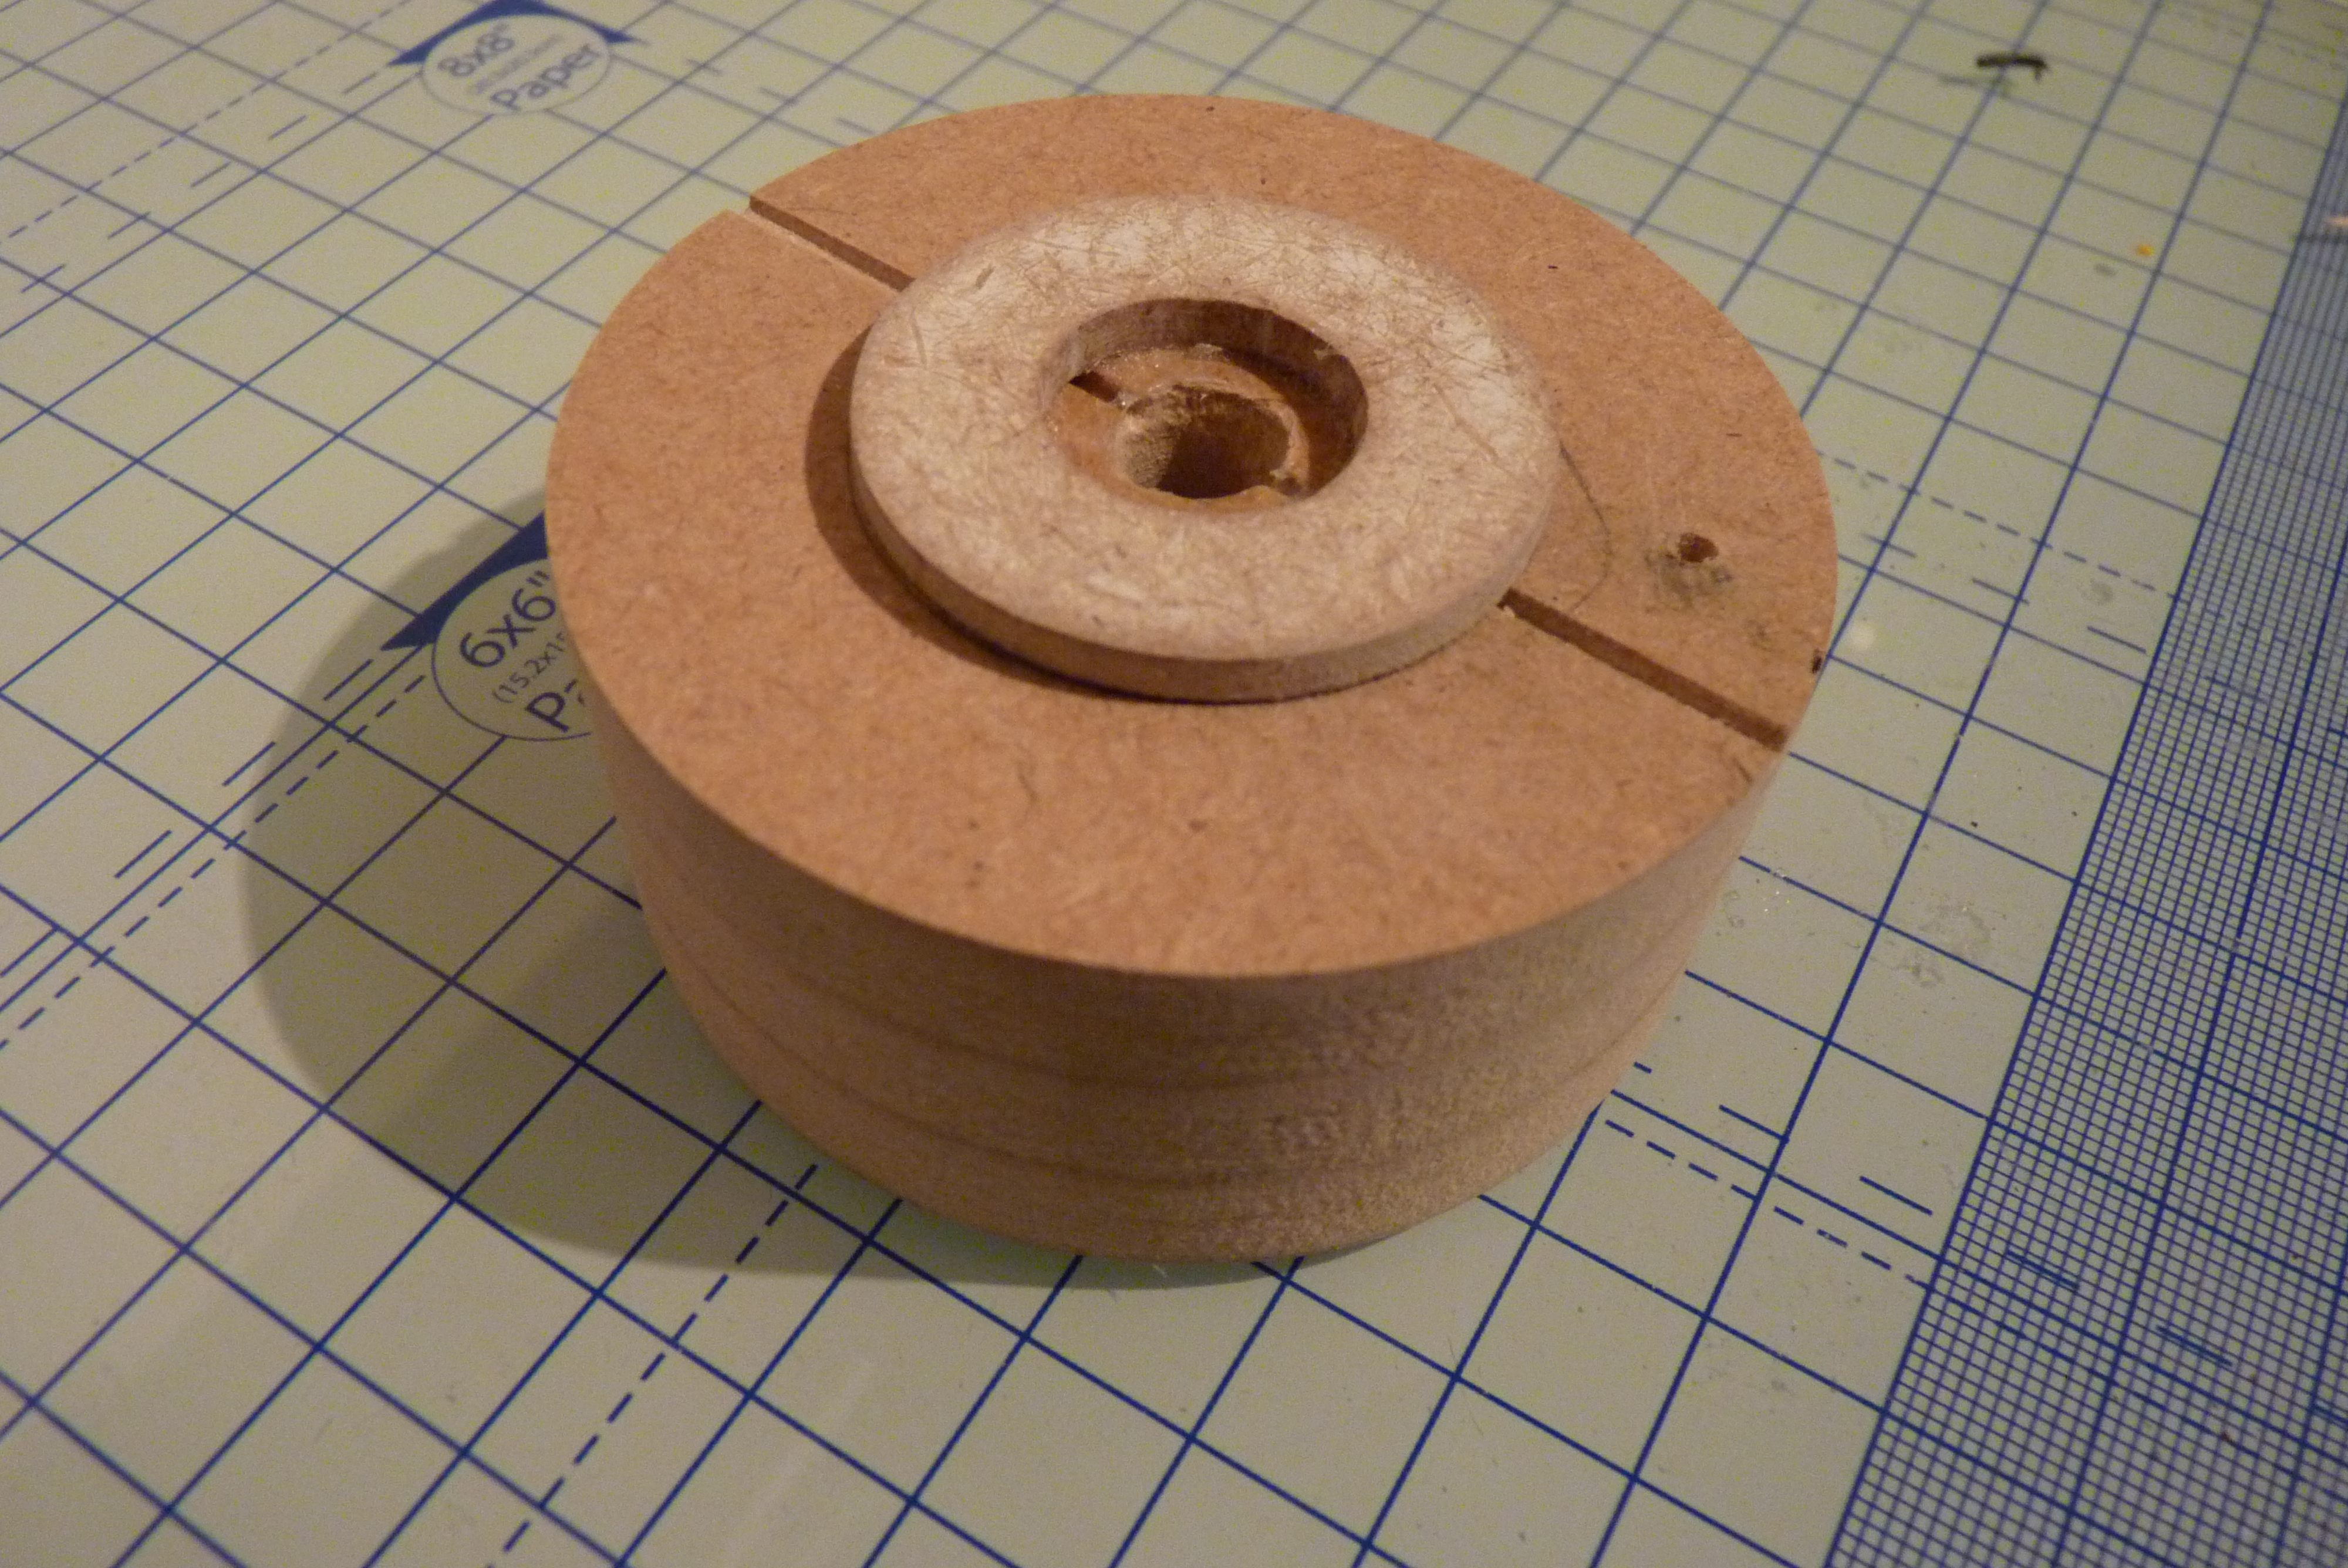
- I made the eye out of a stack 3 6mm MDF circles and one 2 mm MDF circle (Fig 8). My circles for my potato worked out at about 65 mm diameter for the larger ones and 35 mm for the smaller one with a 16 mm hole in the centre. Making the stack slightly taller than it needs to be so you can push it into a hole you make in the potato in the next step and also means you don't run the risk of it being too short on one side. There are a few ways you can cut the circles, you could laser cut them (use ply instead as it wont give off bad chemicals like mdf would), lathe them, or you could cut them out using a router circle jig. I used the circle jig method, and then glued them together using wood glue. Before you add the top smaller disk, draw a line along the diameter, and use a straigh edge needed file, or a dremel with a router attachment if you have one to cut a trench into it 1mm thick and 1mm deep approx. Also take this opportunity to mark where the red button will go in the eye.
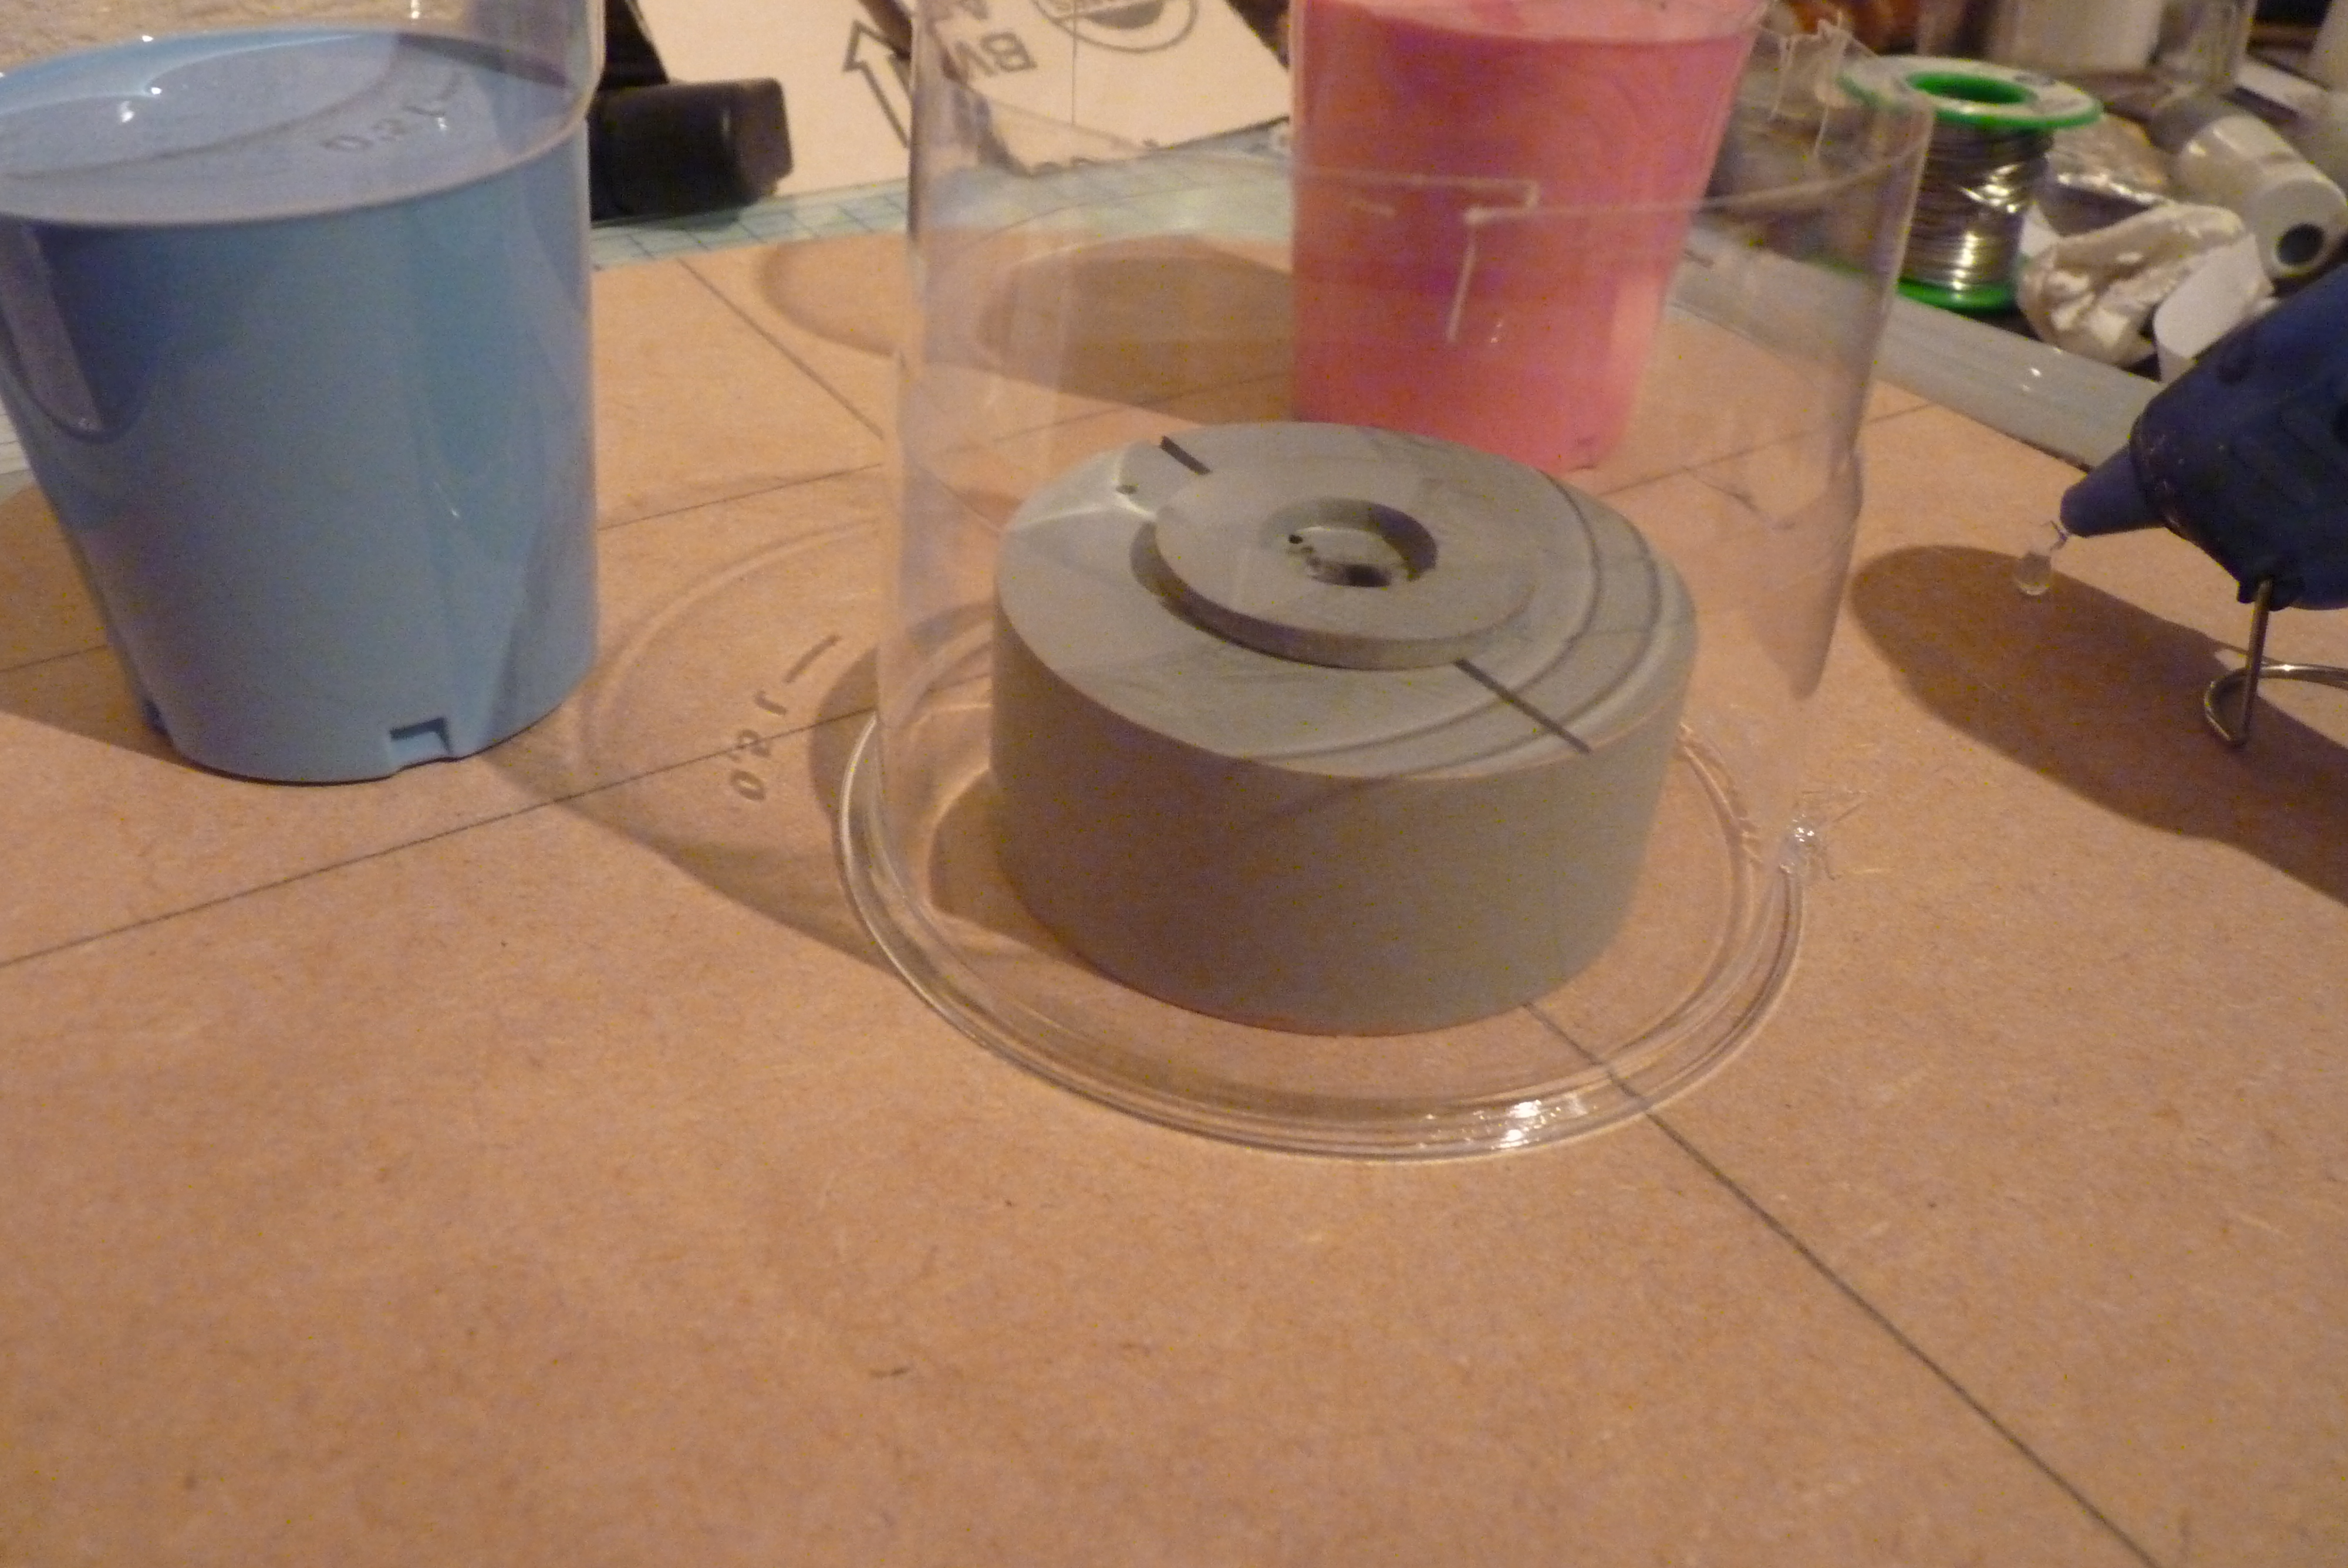
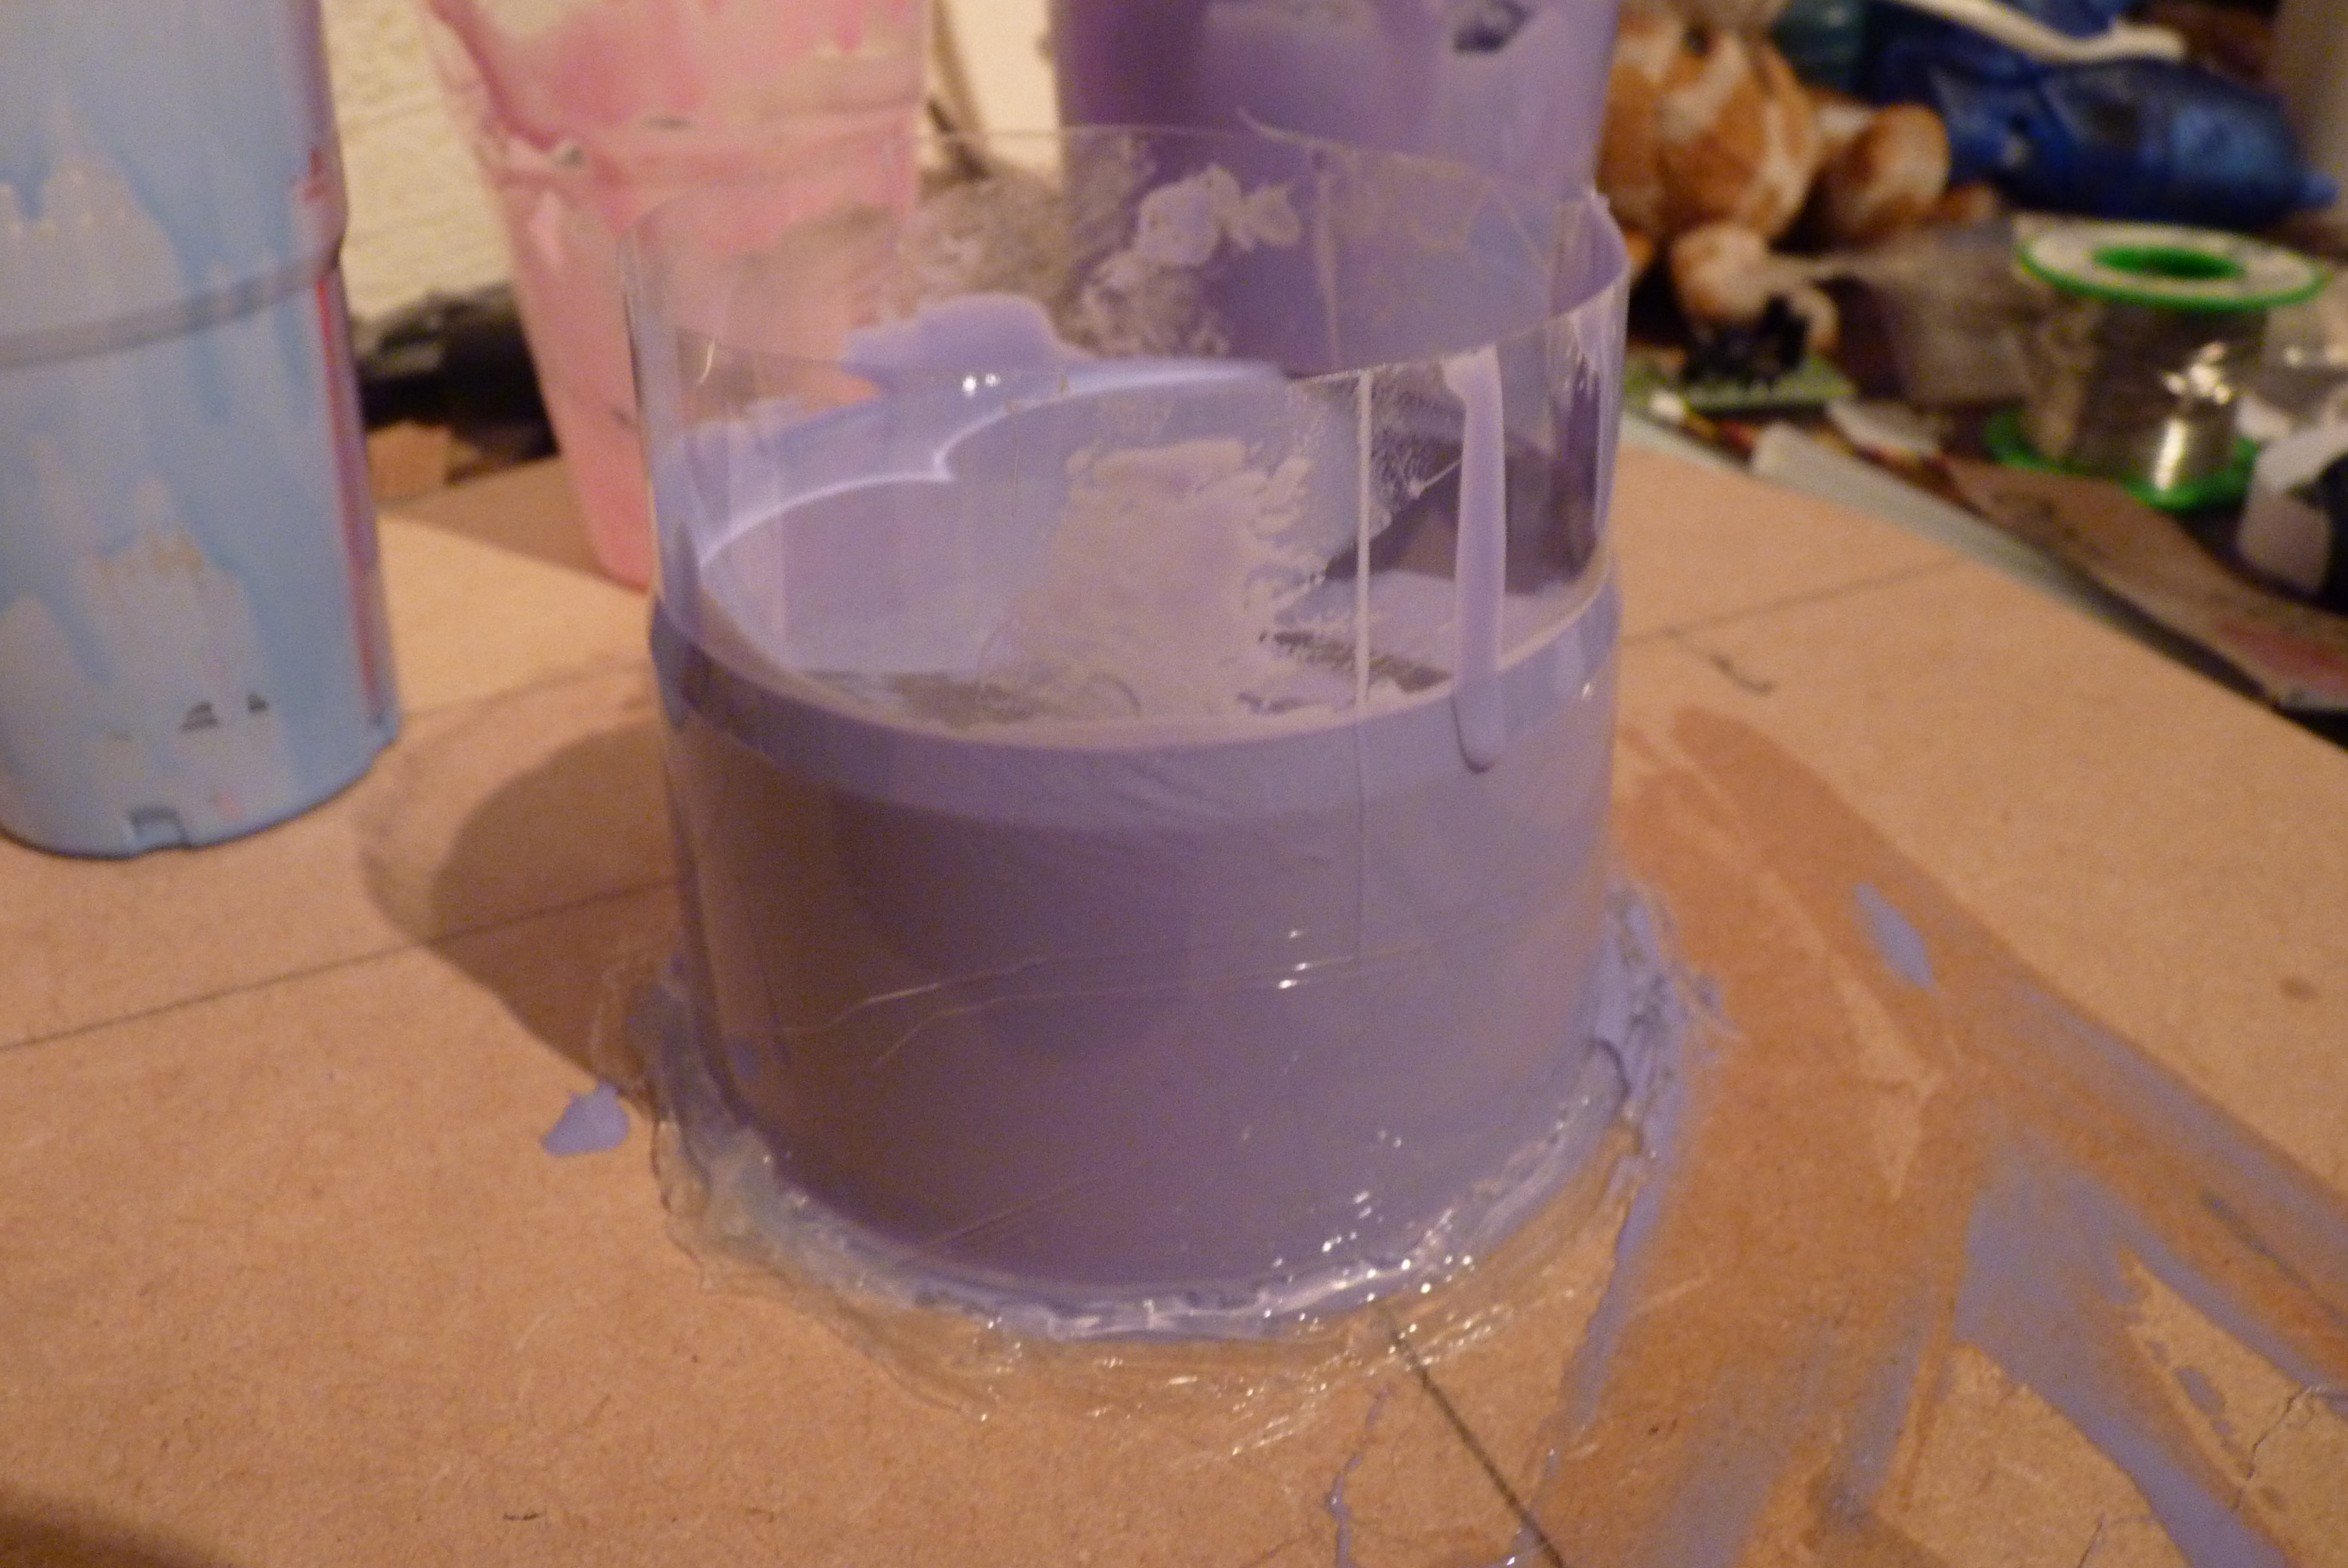
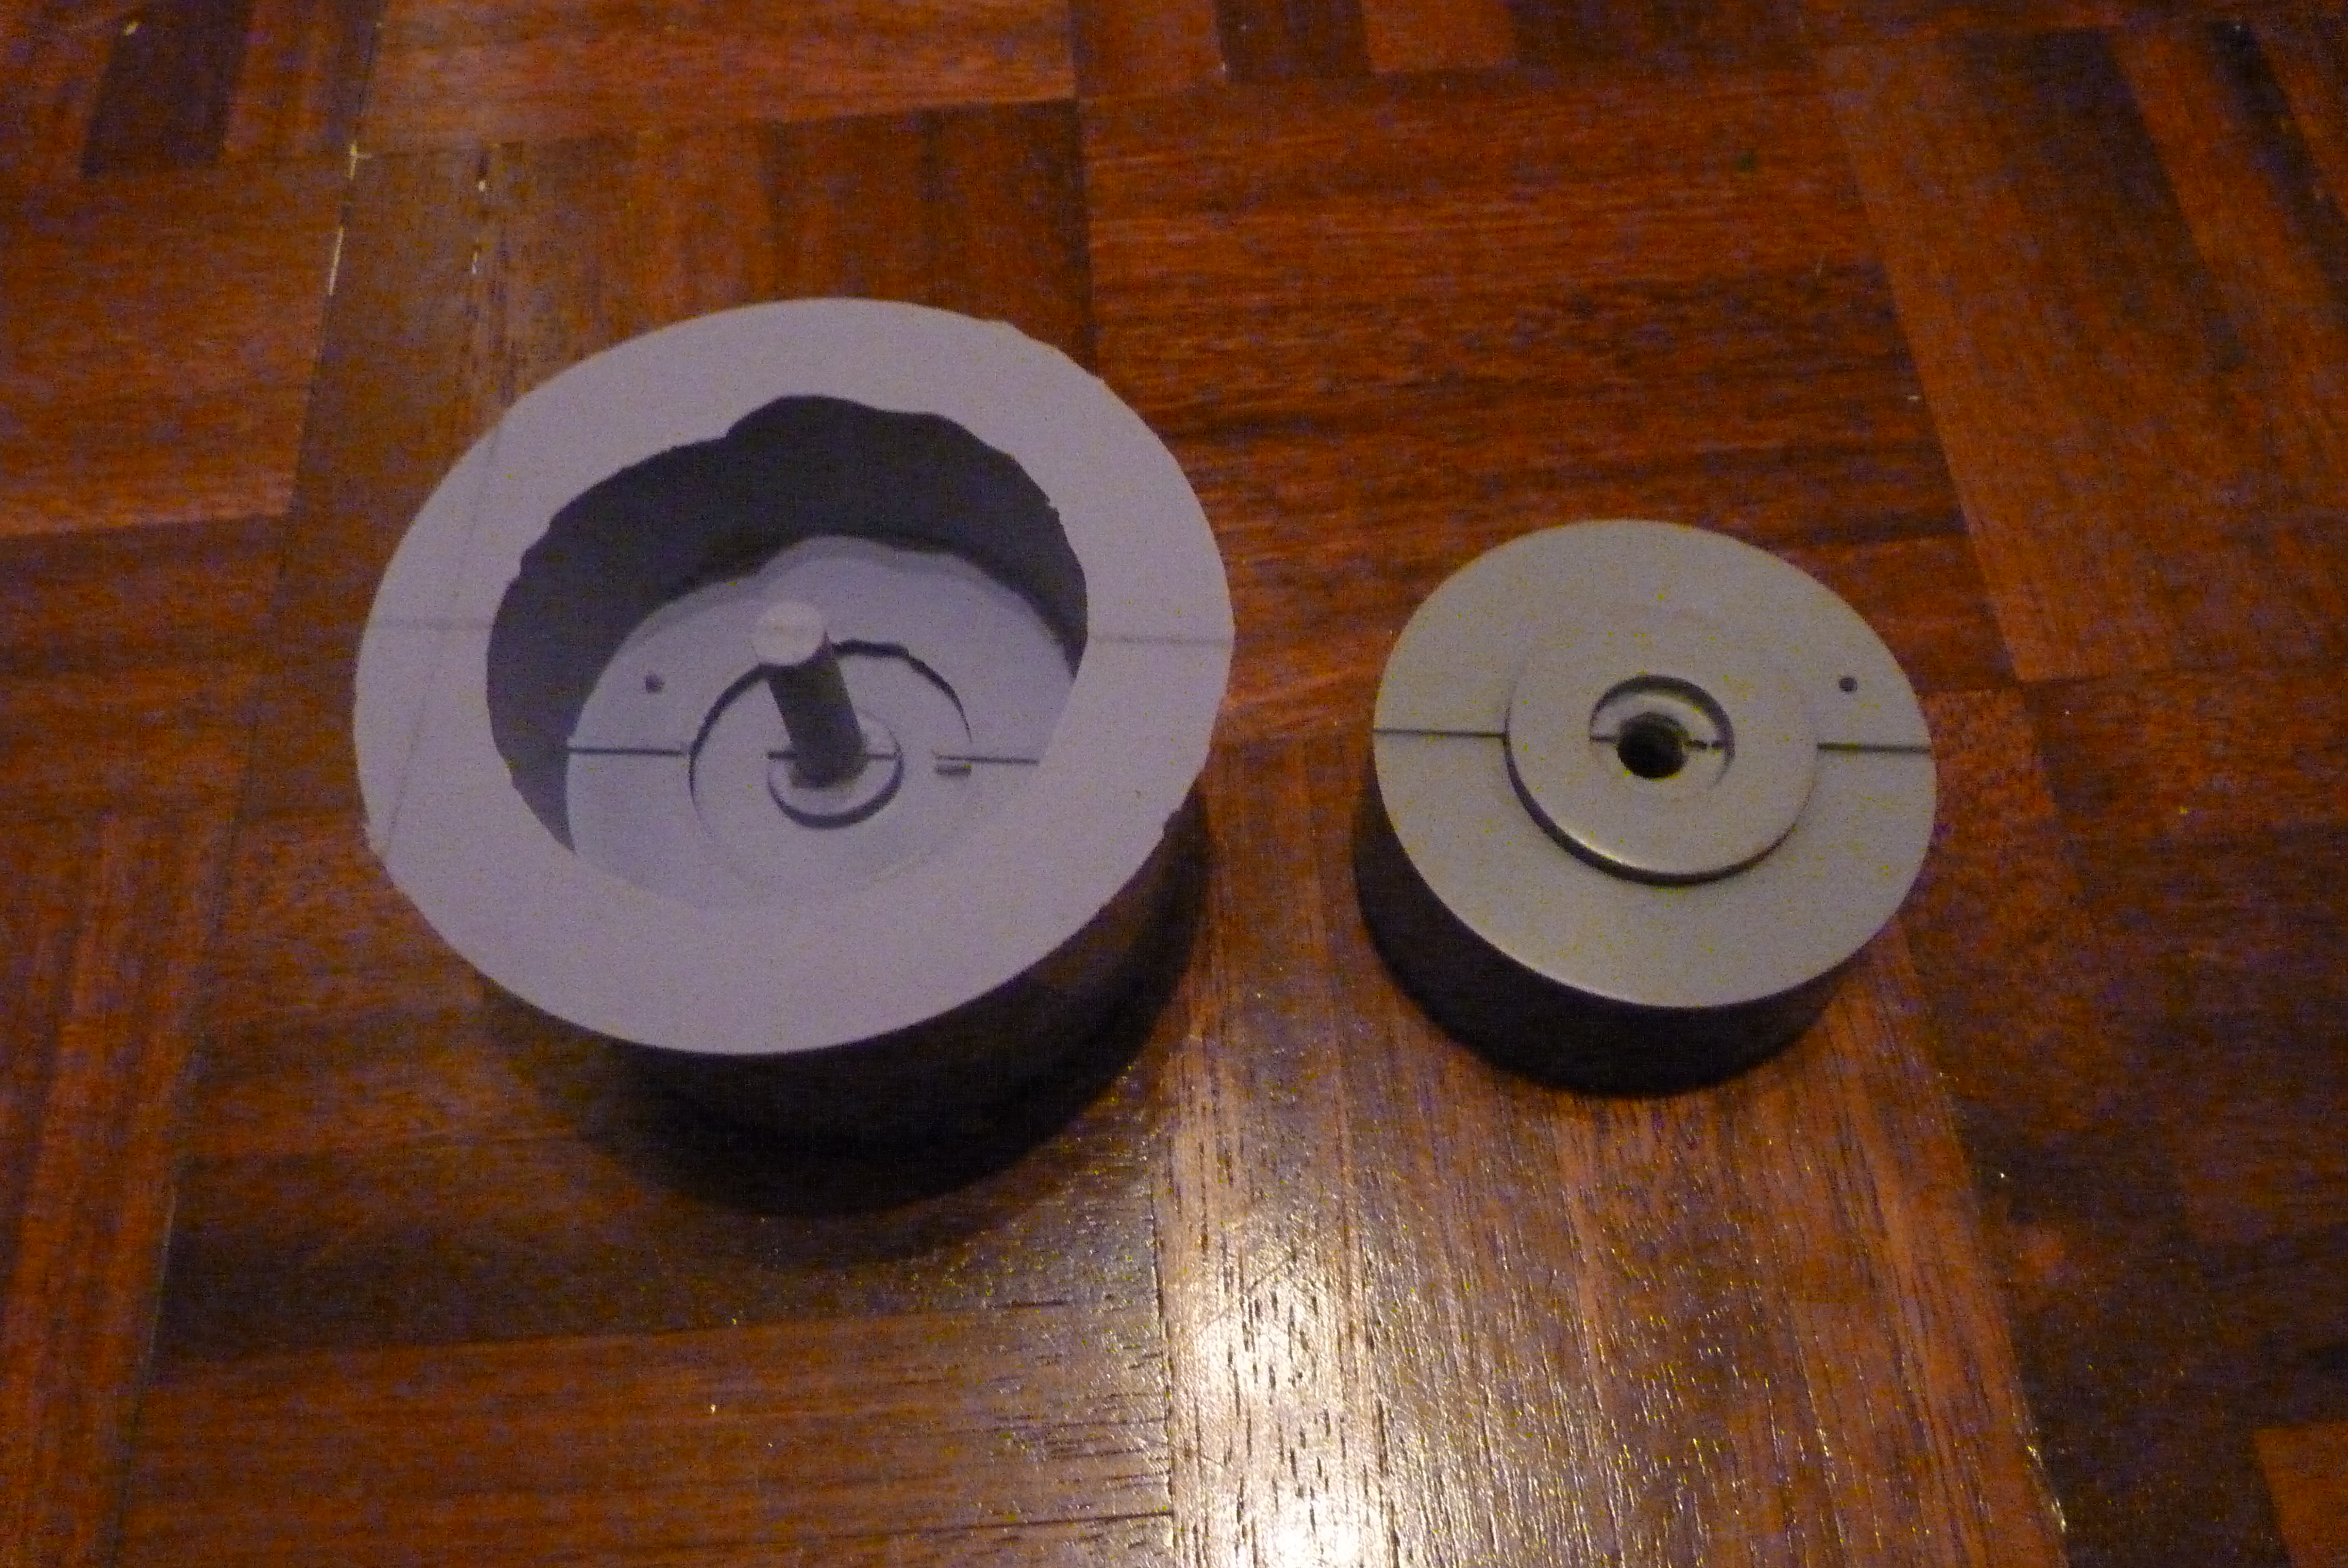
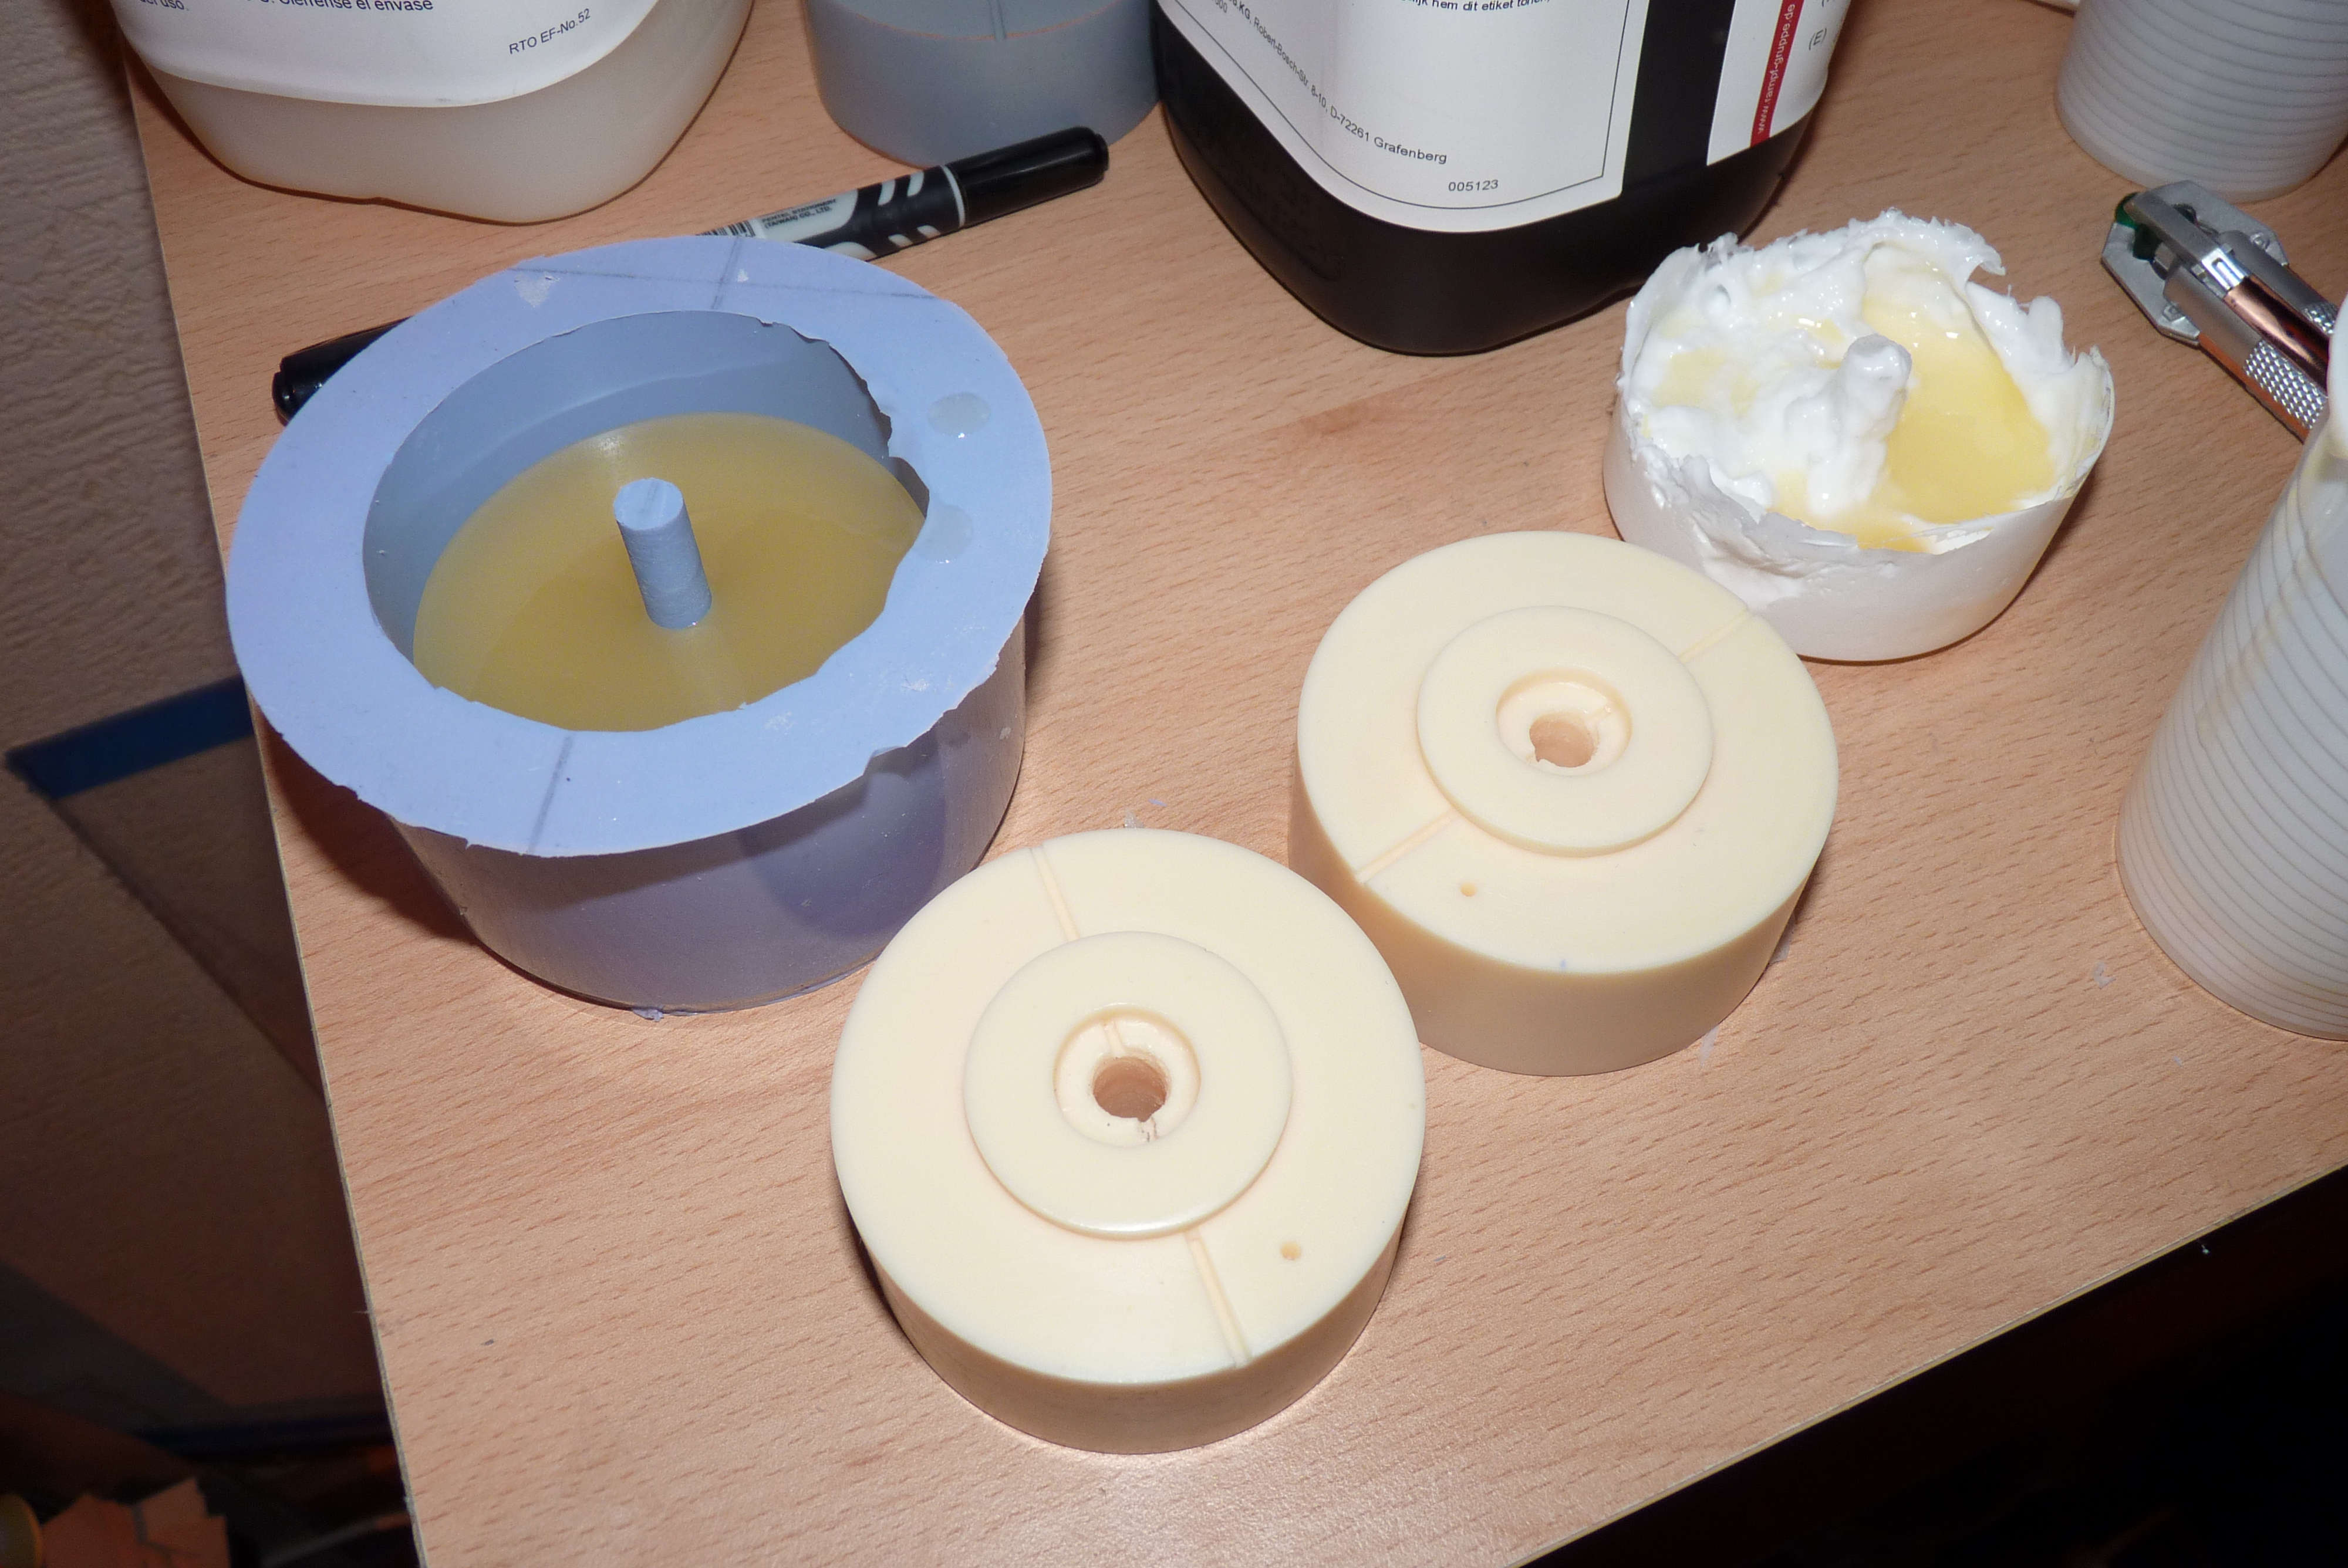
- Just like you did with the potato, you'll need to fill and prime the eye before you mold it. I used a wood filler for the MDF which gets a little fully around the edges when you sand it. To mold the eye piece, take a large drinking cup, and cut the top 1/3-1/2 off to make a molding box, or cylinder for for your eye piece. Use a small bit of glue to temporarily fix the eye and the top of your cup to a scrap piece of MDF and use a hot glue gun to seal around the edge of the cup, this will stop the silicone leaking out (Fig 9). Mix together equal volumes of Part A and Part B of Oomoo 30, just enough cover the eye by about 1cm should be enough. This silicone flows nicely so there is no need to degas it, you can just pour it once you have mixed it fully, no coloured streaks, just a nice solid purple. (Fig 10) It takes six hours for Oomoo 30 to cure, but then you're ready to cast the eye (Fig 11)
- When casting the eye, only add a little bit of resin to the mold rather than filling it up and rotate it similarly to the potato (just not upside down!). The aim is to get a coating of resin, but to leave space for the leds and the buttons. It'll require some dremeling, but better you slosh cast it now rather than trying to drill though solid resin to clear enough space. It took me a few tries to get a casting I was happy with. You can use Smooth Cast 305 for this, I was running out and used standard bi resin for some of the casts which is why some of the castings a bit yellower (Fig 12) I found that doing the face of the eye which is the end of the mold first in one pass, and then the sides in a second pass helped to get a decent coating on the parts that would be seen, and slightly thinner on the part of the eye inserted into the potato.
- For the eye, you will need to dremel out the hole where her lens goes (Fig 13) if yours was filled in like mine, I also have the hole for the button completely drilled through there, along with a hollow for the button to rest in and the holes for the staples which I will talk about in the next section. Once I had the lens hole done I also dremeled back a bit of the surrounding area to make a slight frame that a piece of plastic to sit into to maker her lens. I tinted mine yellow with some markers to help the yellow LEDs out, and also it would help to frost it a little (using a bit of 400 grit sandpaper or similar) to help diffuse the light from the LEDs.
Or you could...
If you wanted to only stick to the one kind of silicone you could easily make the eye mold using Rebound 25, and similarly giving it a hard shell. I found it easier to use the Oomoo 30 for this because it wasn't two sided, and it cures in 6 hours, where as you would be waiting on each layer to cure a bit, and then for the whole silicone jacket to cure before adding the hard shell.
On to hole drilling!
Drilling Holes!
Remember to use eye protection and a dust mask when using a Dremel / rotary tool, spray paint and an airbrush. Mind your fingers and always measure twice, and cut once. As always use protective clothing and nitrile gloves.
What I did...
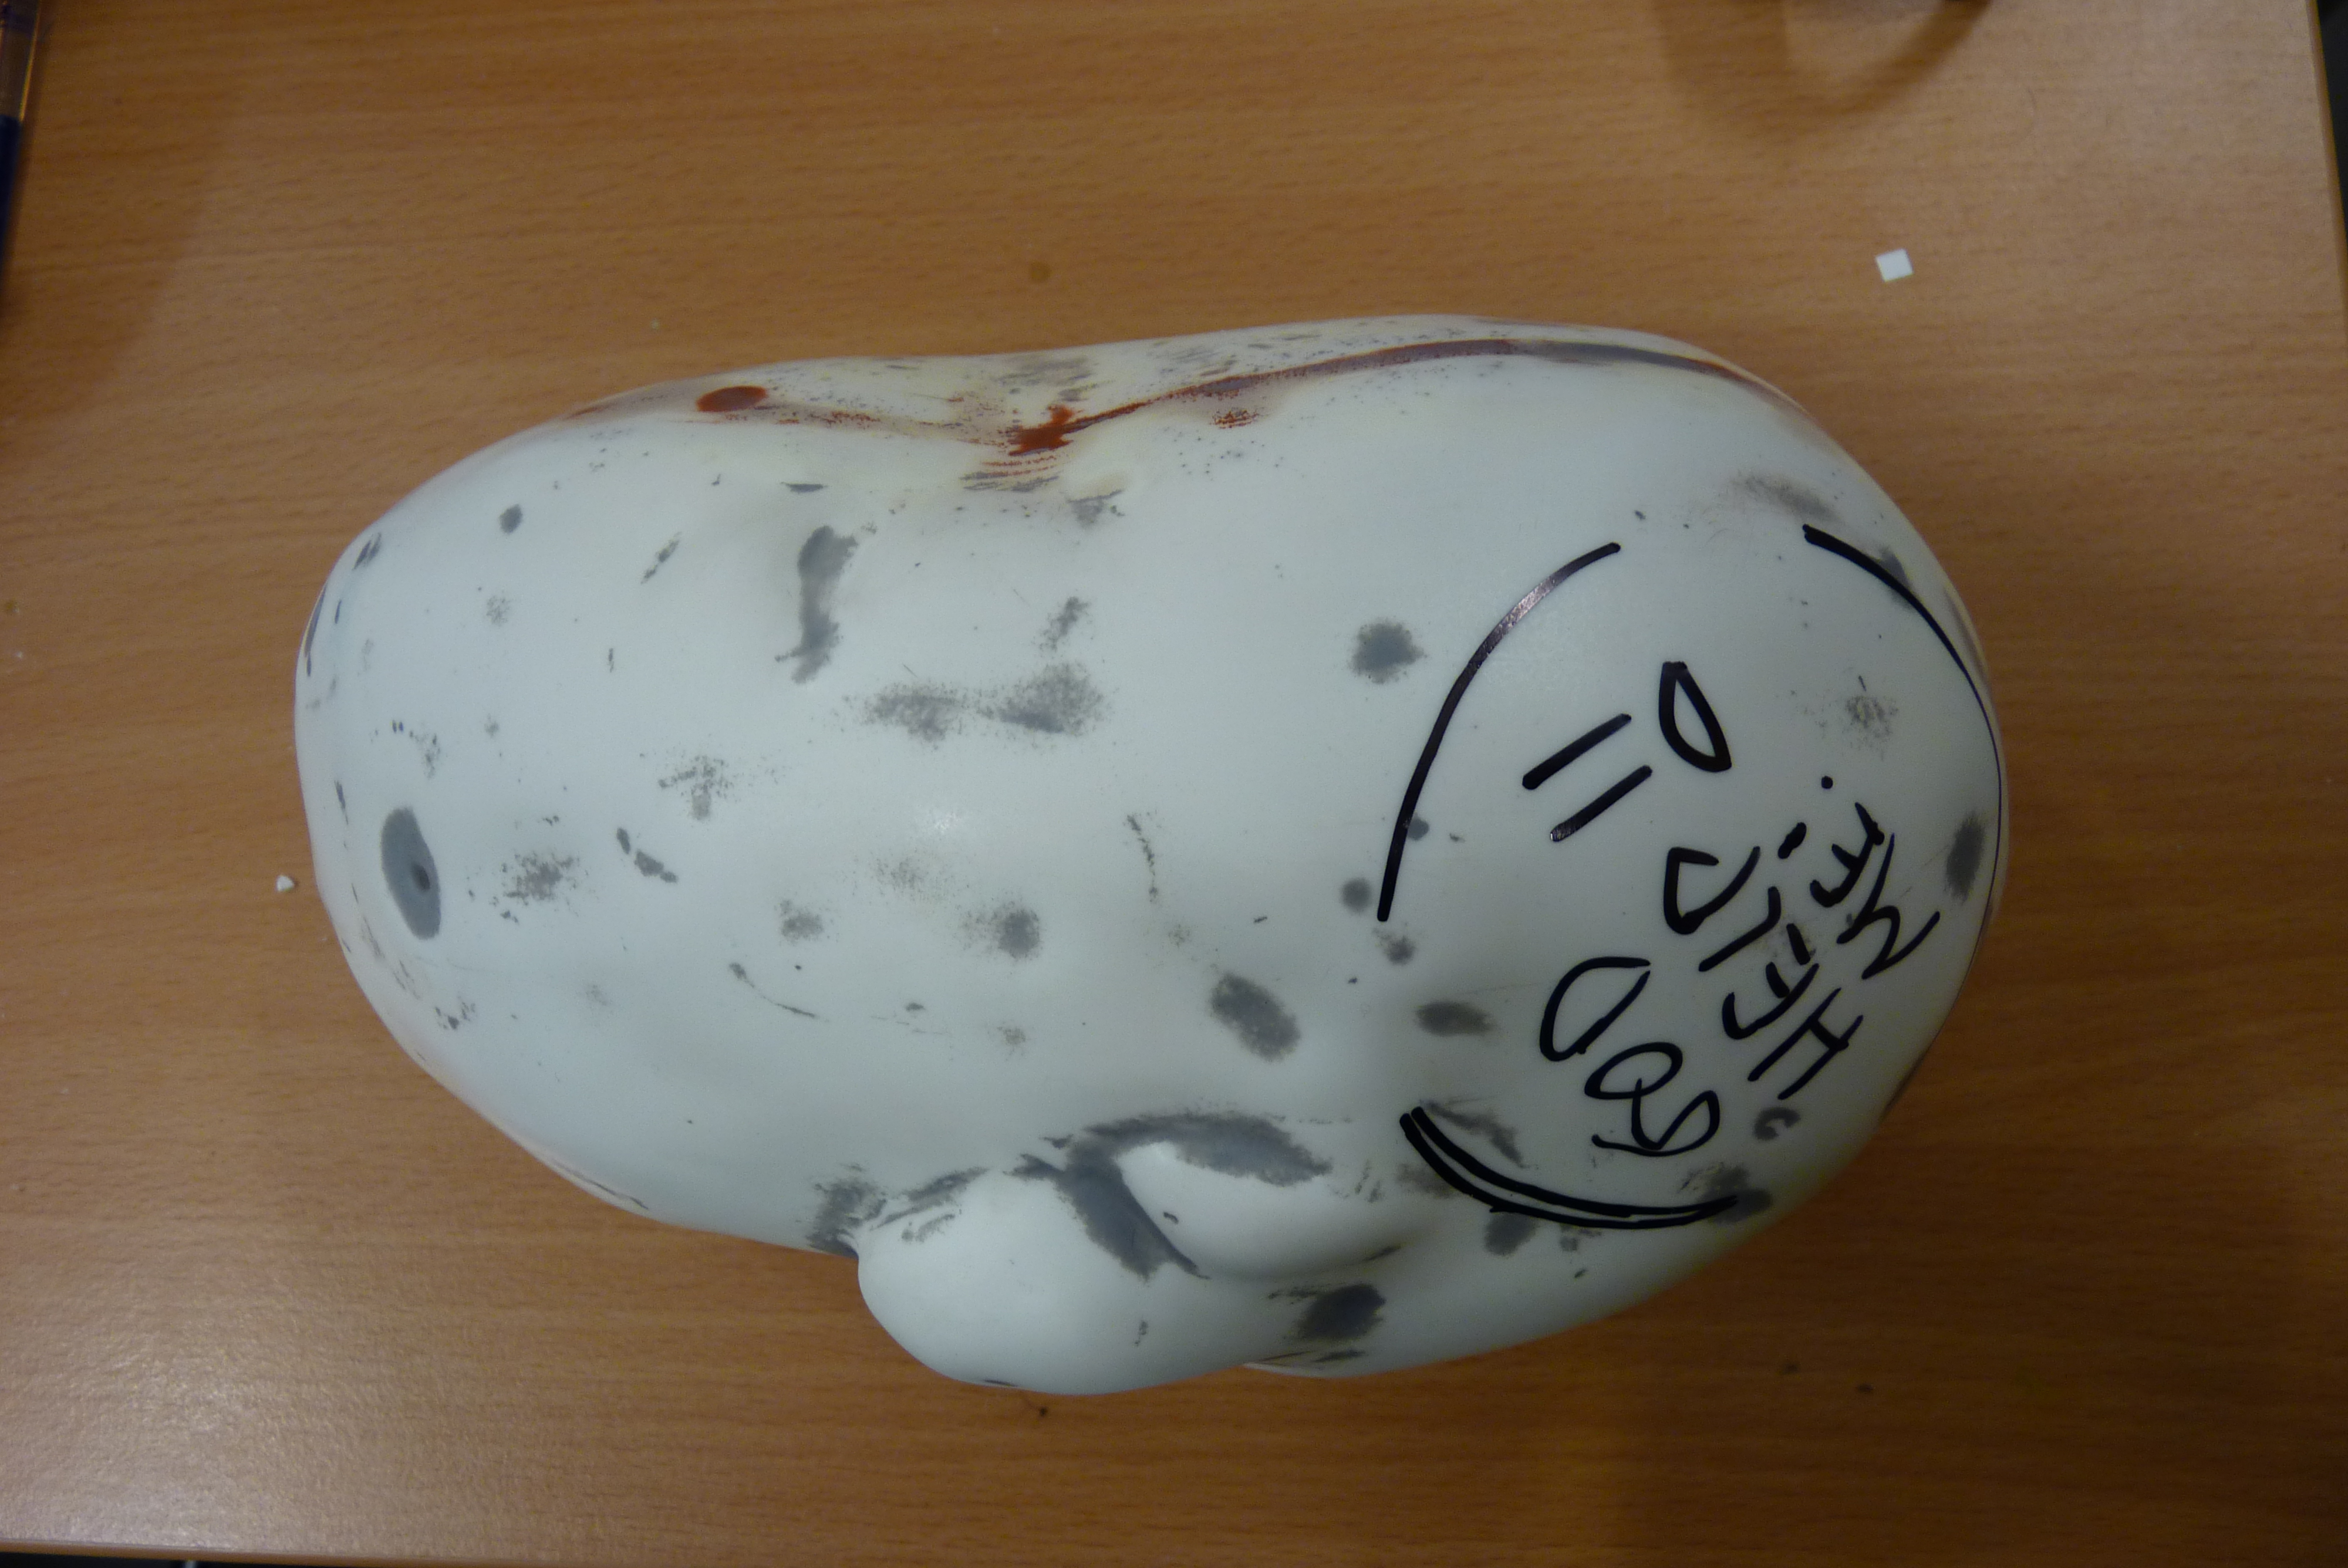
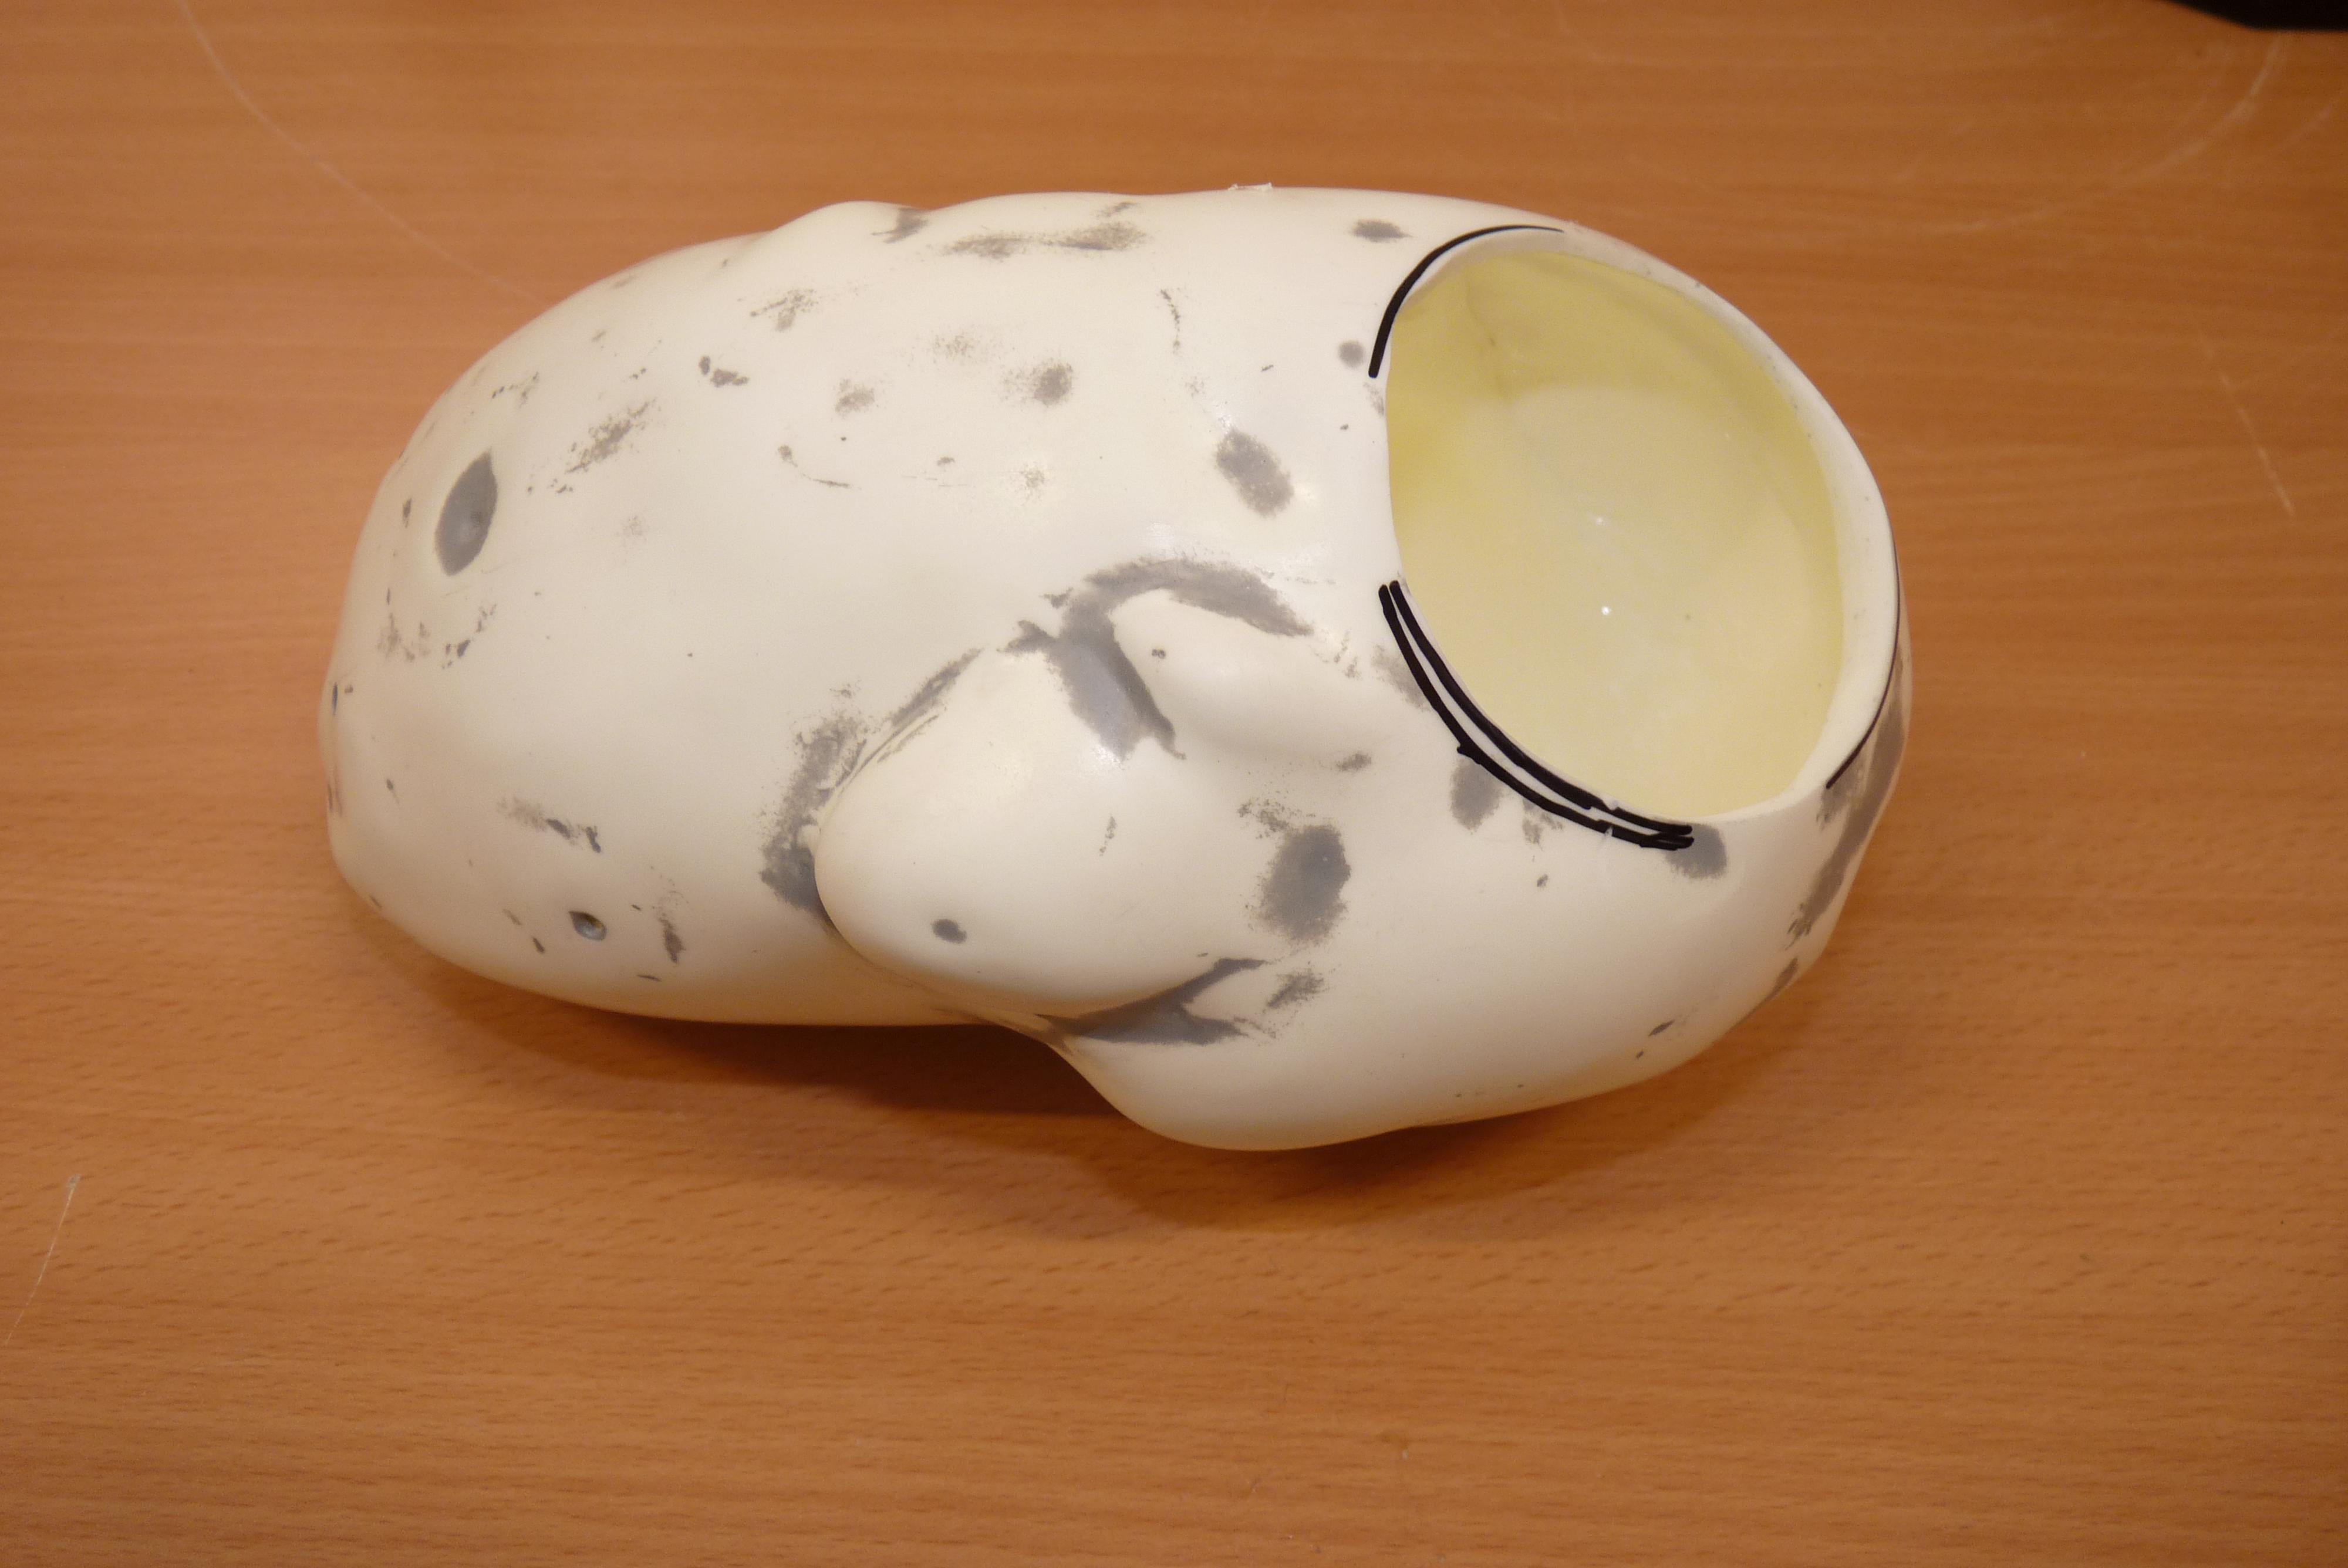
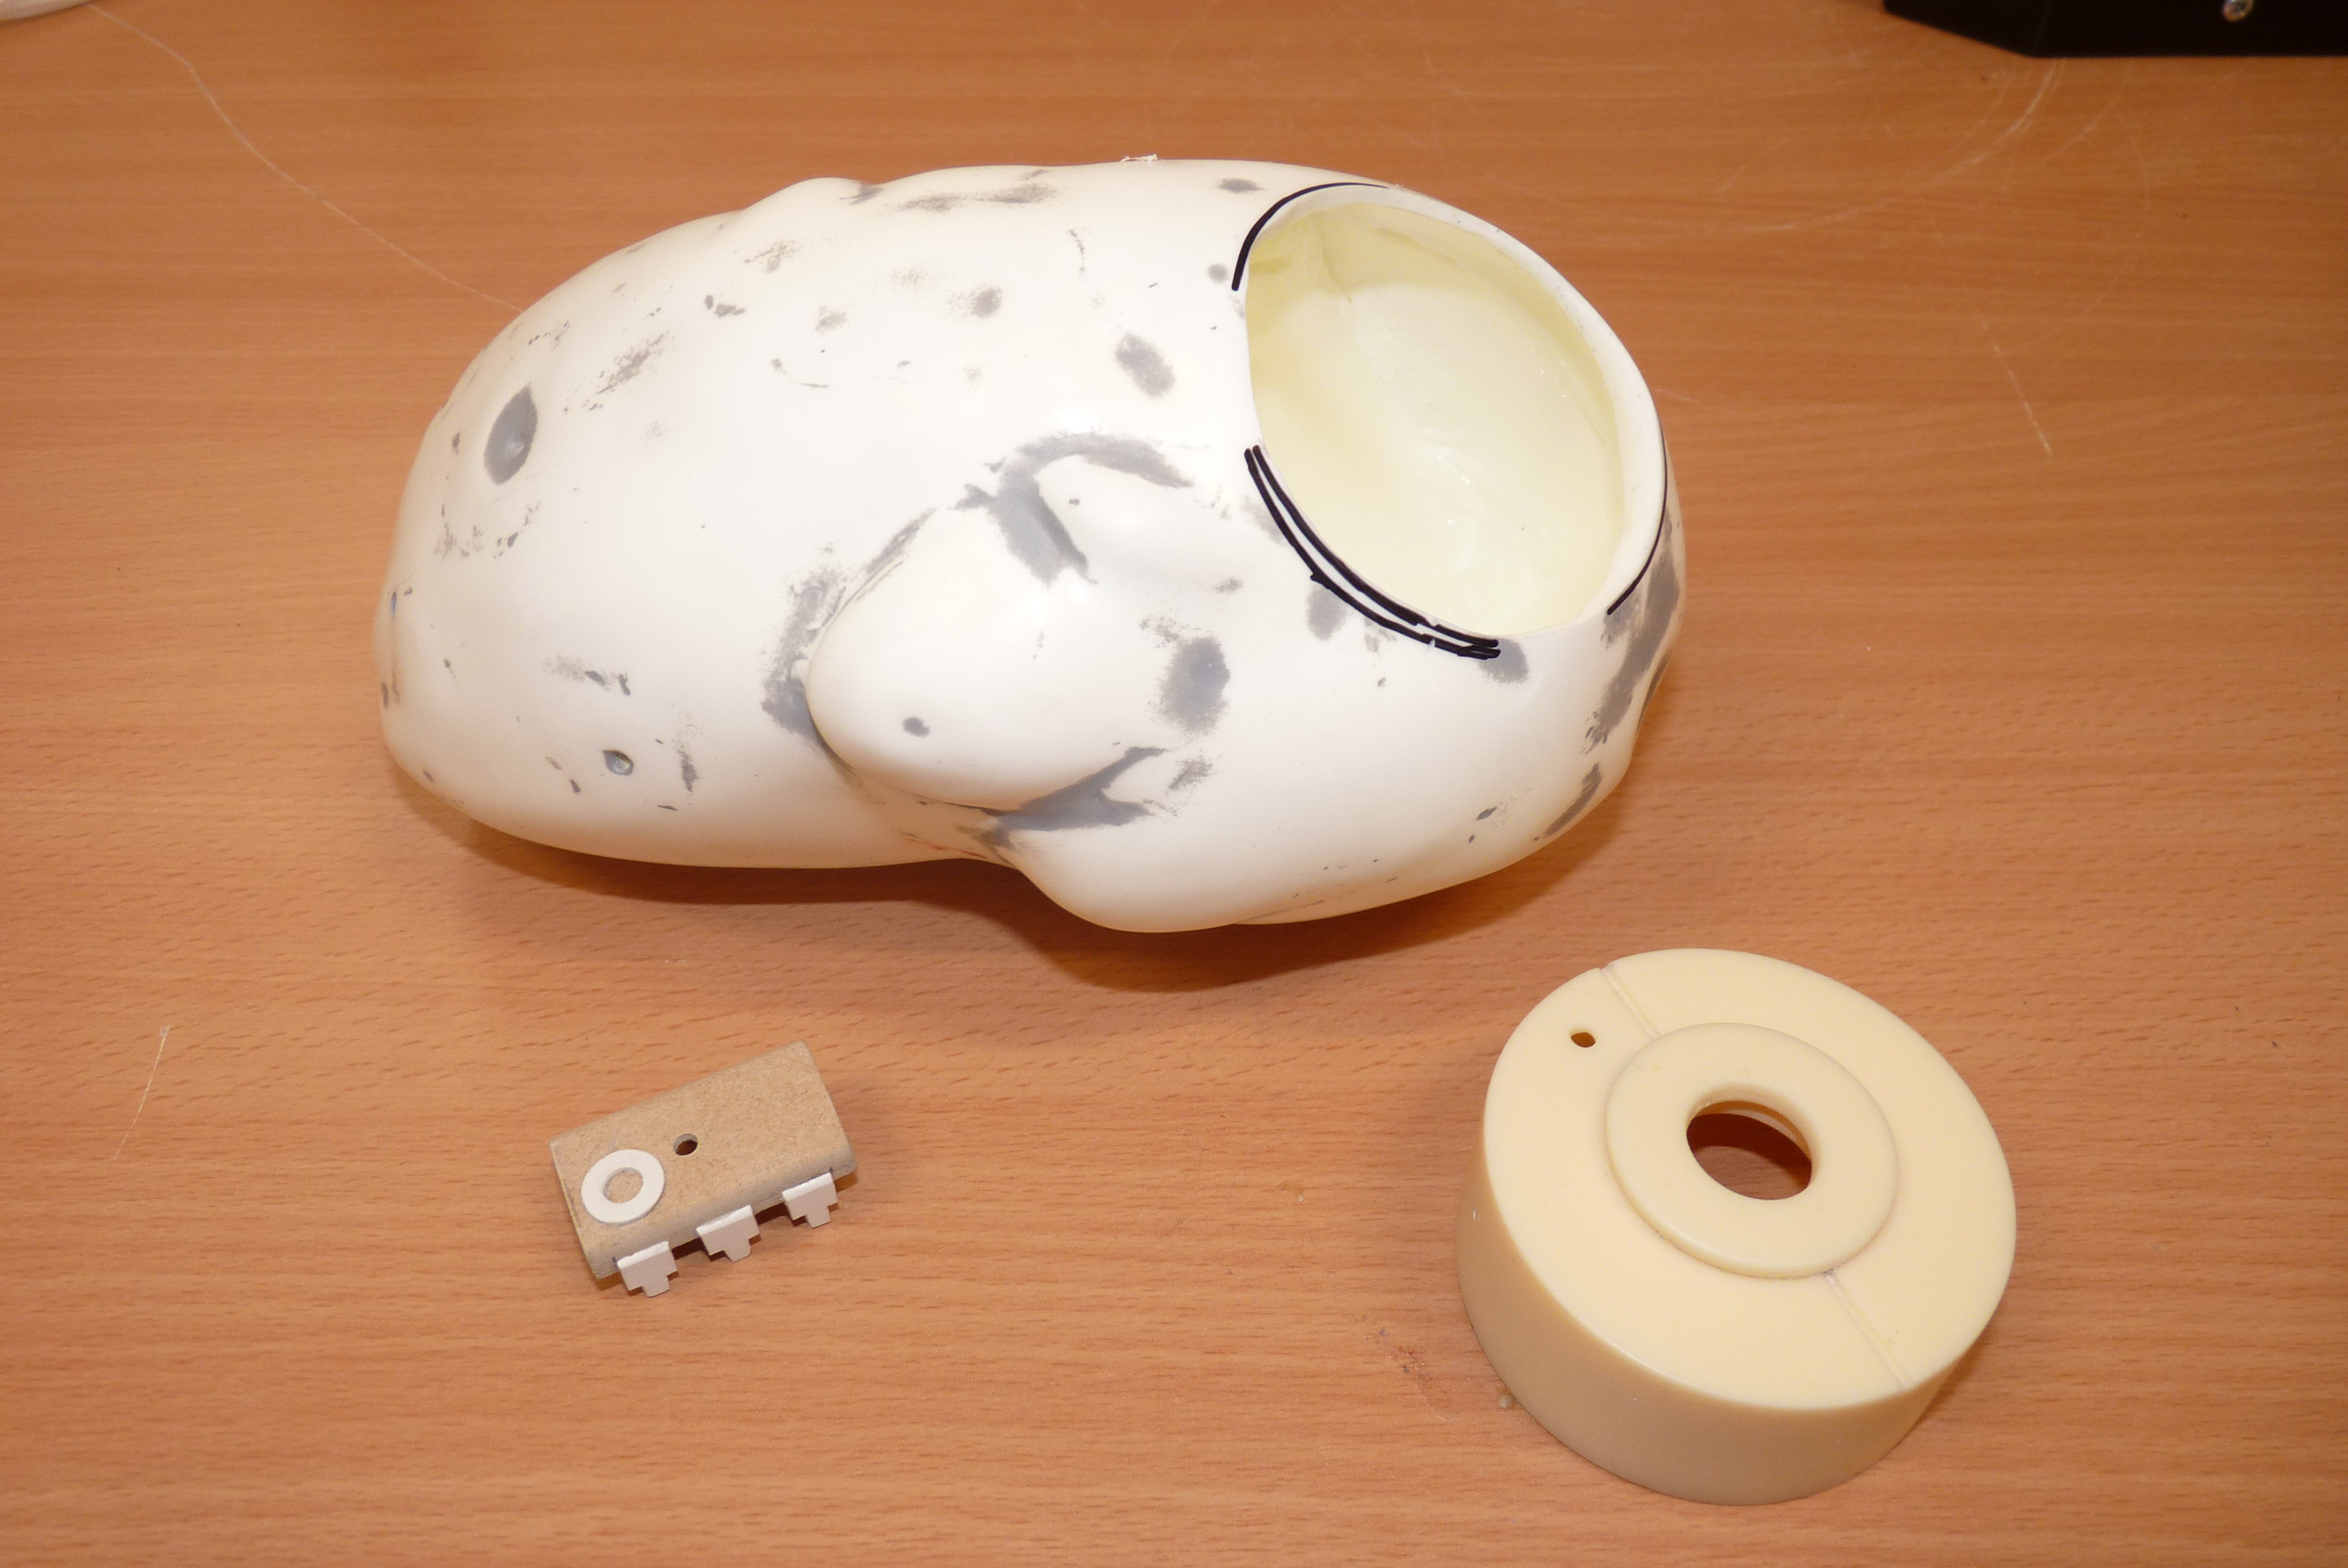
- Now you have your eye piece molded, it's time to line it up to the potato. Using your references line up the eye at the point you think it should go AND the angle. If you leave the edges of the hole at the wrong angle, it can tilt your eye piece the wrong way so make sure you know in your head if you've to sand the edges a perticular way. You can see in the images (Fig 1) that I drew guides for myself. You can do this by drawing roughly around the eye piece but keep the line in tight so you don't make the hole too big. Better to make it too small and remove more material, then make it too loose and have to figure out how to put material back or have to cast a new potato altogether!
- Start your large hole by drilling small holes about 3-5mm around the inside of your lines. Then by either using a saw, a sideways cutting drill bit, or the small saw attachment for a dremel, cut through to join up the circles your made to pop the centre out. You can then use sandpaper, starting with a higher grit, and then working back to a finer grit to make the hole. You can use a dremel or rotary tool too, but just be careful as the speed and friction against the resin will cause it to melt, so take precautions of hot bits of plastic flying in different directions, and wear a mask and open a window in case of fumes. Keep testing the hole with your eye piece until you get a nice snug fit where you can push it in, and it wont go anywhere, but you can still remove the eye piece. (Fig 2 and 3)
- There are a few other holes required before you start painting. These are the holes for the staples in the eye and in the potato, the holes for the brackets, and the nails. I used my digital reference to judge where each hole looked best. If you're putting a button in the chip like I did, make sure you have a hole big enough for the button and wires to come through and reach the chip. Take some time to decide where all the holes for the attachments will go, mark them with a marker or pencil take time to consider their angles etc before you drill them. Drill in the direction the nails will go in too. If you have a vernier calipers handy you can use this to check the width of your nails, and brackets so your holes are the right size when you drill them, you can add glue if needs be, but you for holes like the ones for the nails, which are heavier than the brackets, try keep them a light fit.
- Keep the eye in the hole when you're marking so you can match up the where you want the two holes for your 6 staples to go. Again, keep checking with your references and don't drill your holes until you're happy with the look. Drill in the direction your staples are going in, like you would have done for the nails and their angles, in case you have a slightly thicker area on the other side.
Or you could...
- This is more of an "And you could" section. My Potatos didn't sound right for 2 reasons, I recorded the sound off my laptop as you'll see, and there was no holes for the sound to escape out of. If you want, you could drill 5-6 holes on her underside to allow for the sound to escape. You can wait until your electronics are sorted before you do this, so you know where inside your potato your speaker is going to be, and you can drill holes accordingly.
- The second set of holes I regret not drilling is extra ones around the side of the eye where the wires come in. It would look a lot better if these had holes to slip into. If you test fit your wires by inserting the nails, getting the crocodiles clips to grab where you think they should be on the nail and shape them to the desired curves you can mark out where they would be going into the eye and drill a hole of a small well there to give the illusion of a hole. You don't want your wires getting in the way of your real wires and LEDs on the inside!
Painting Things!
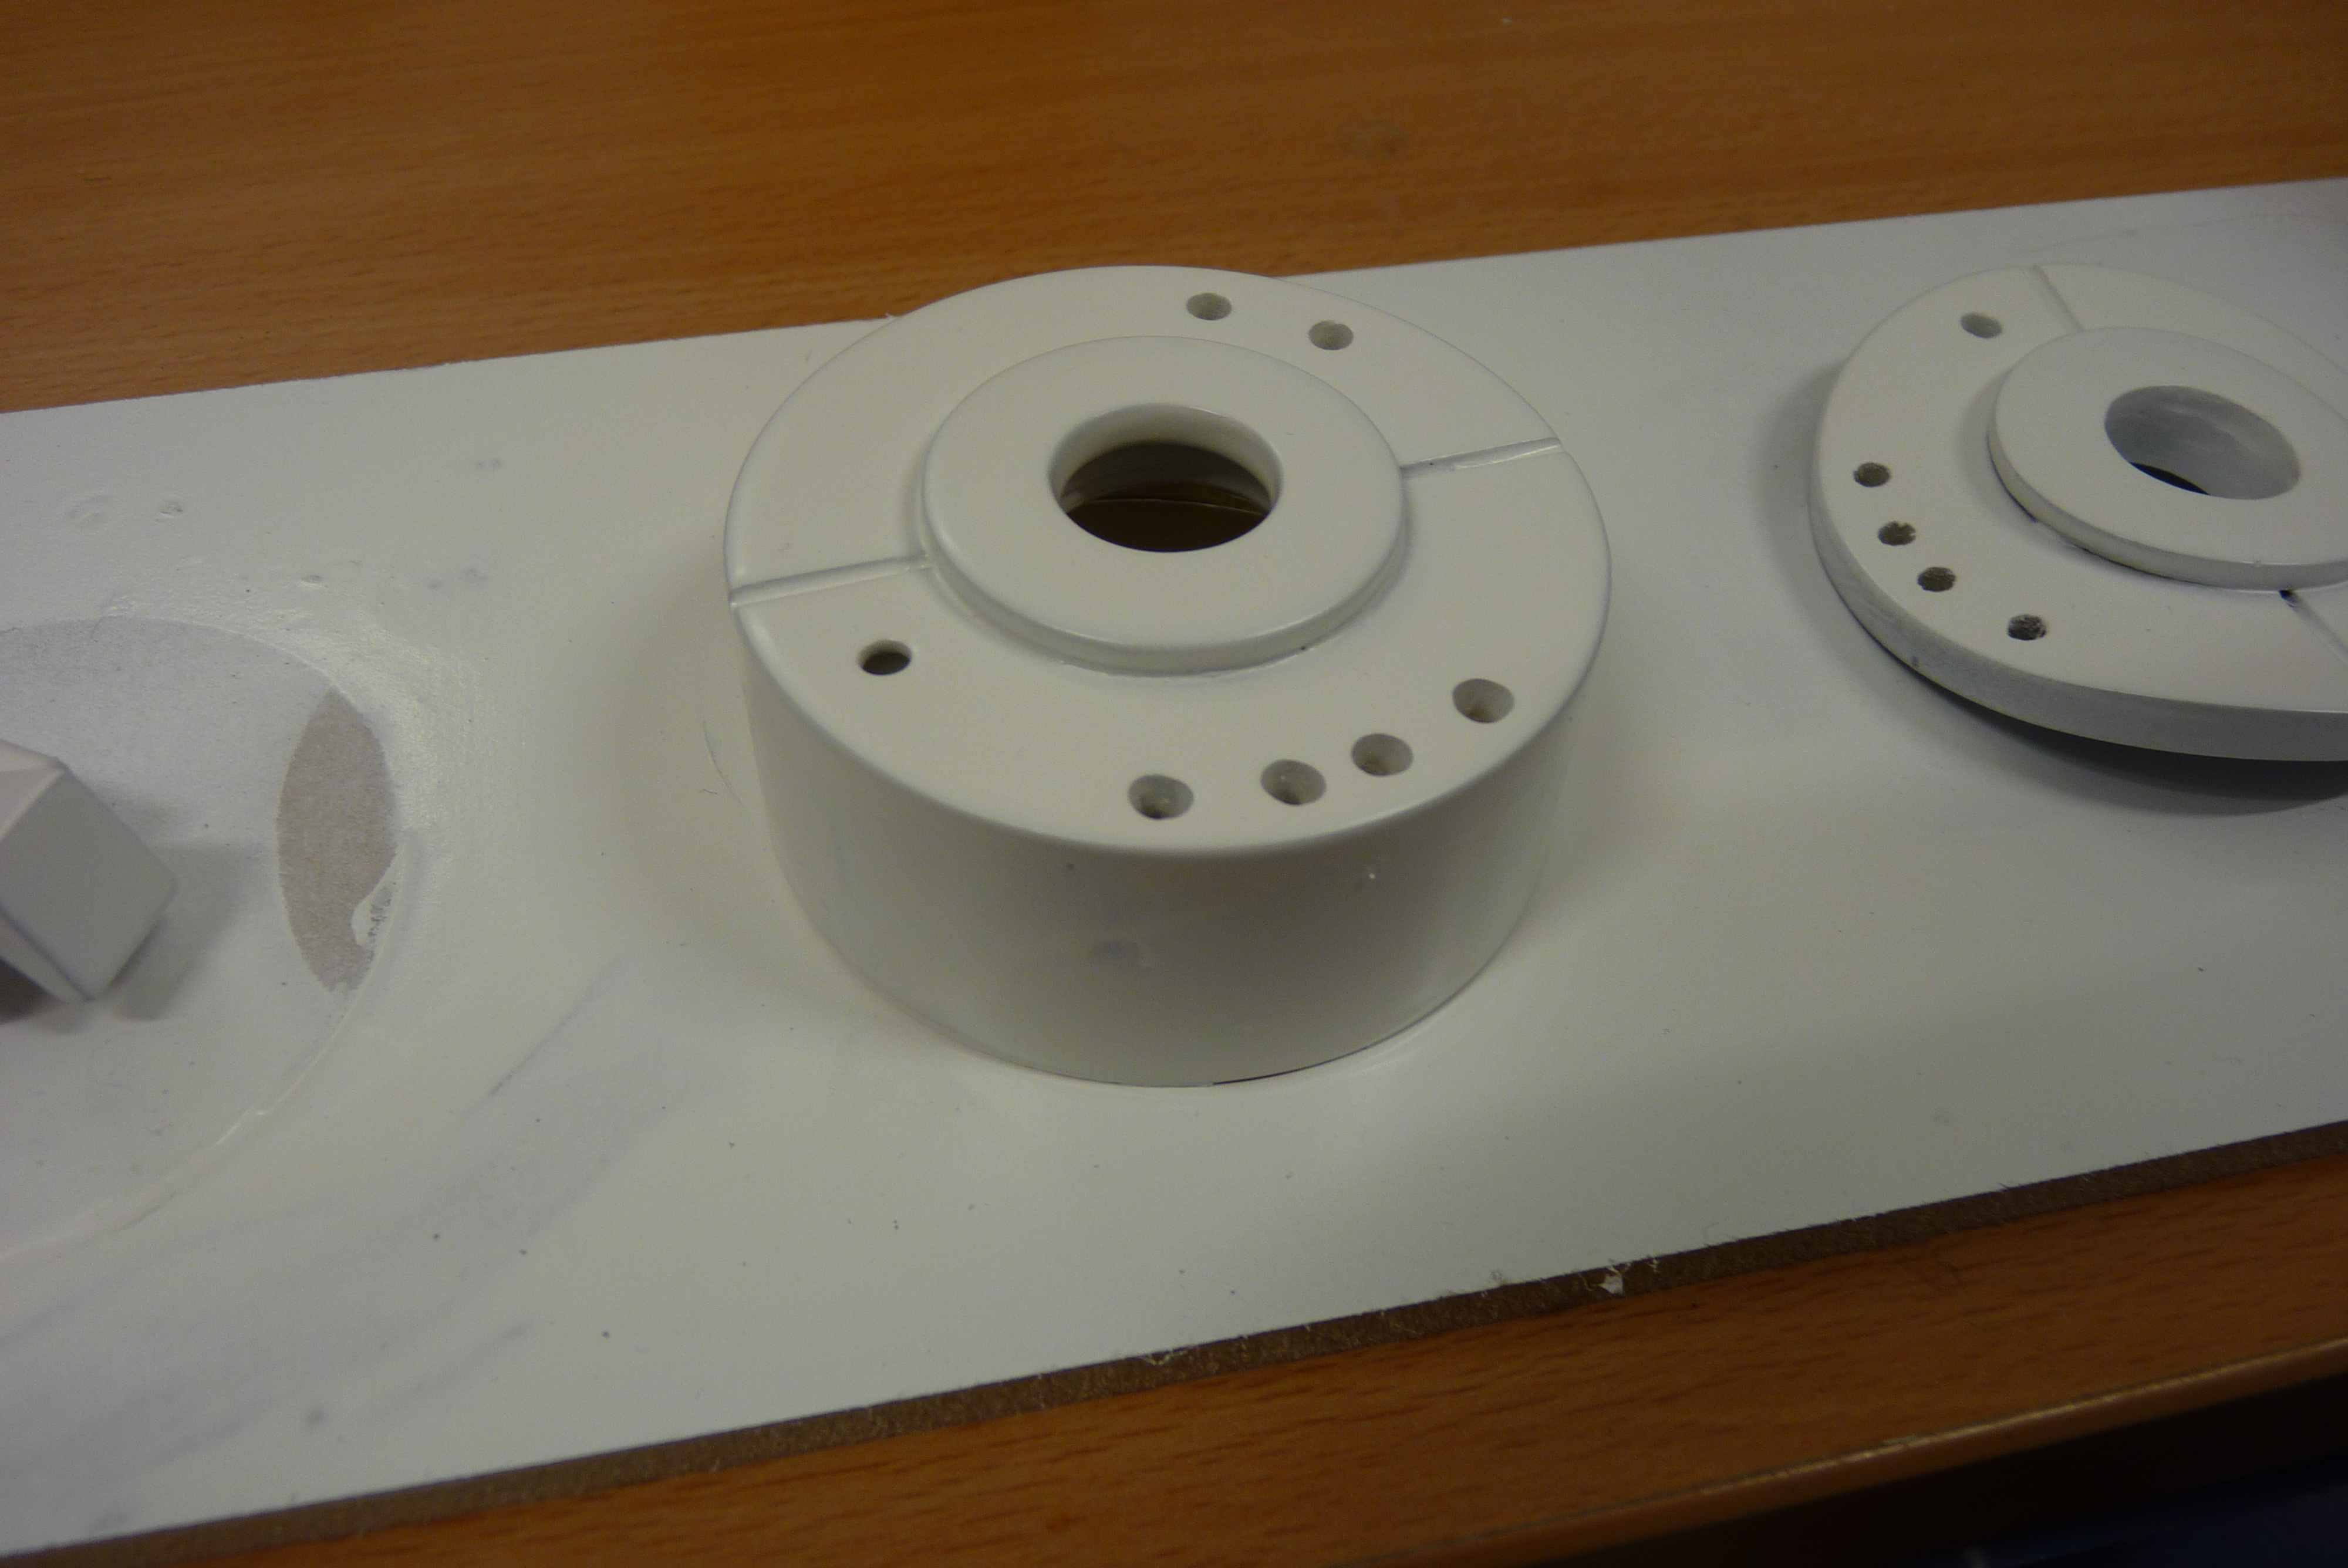
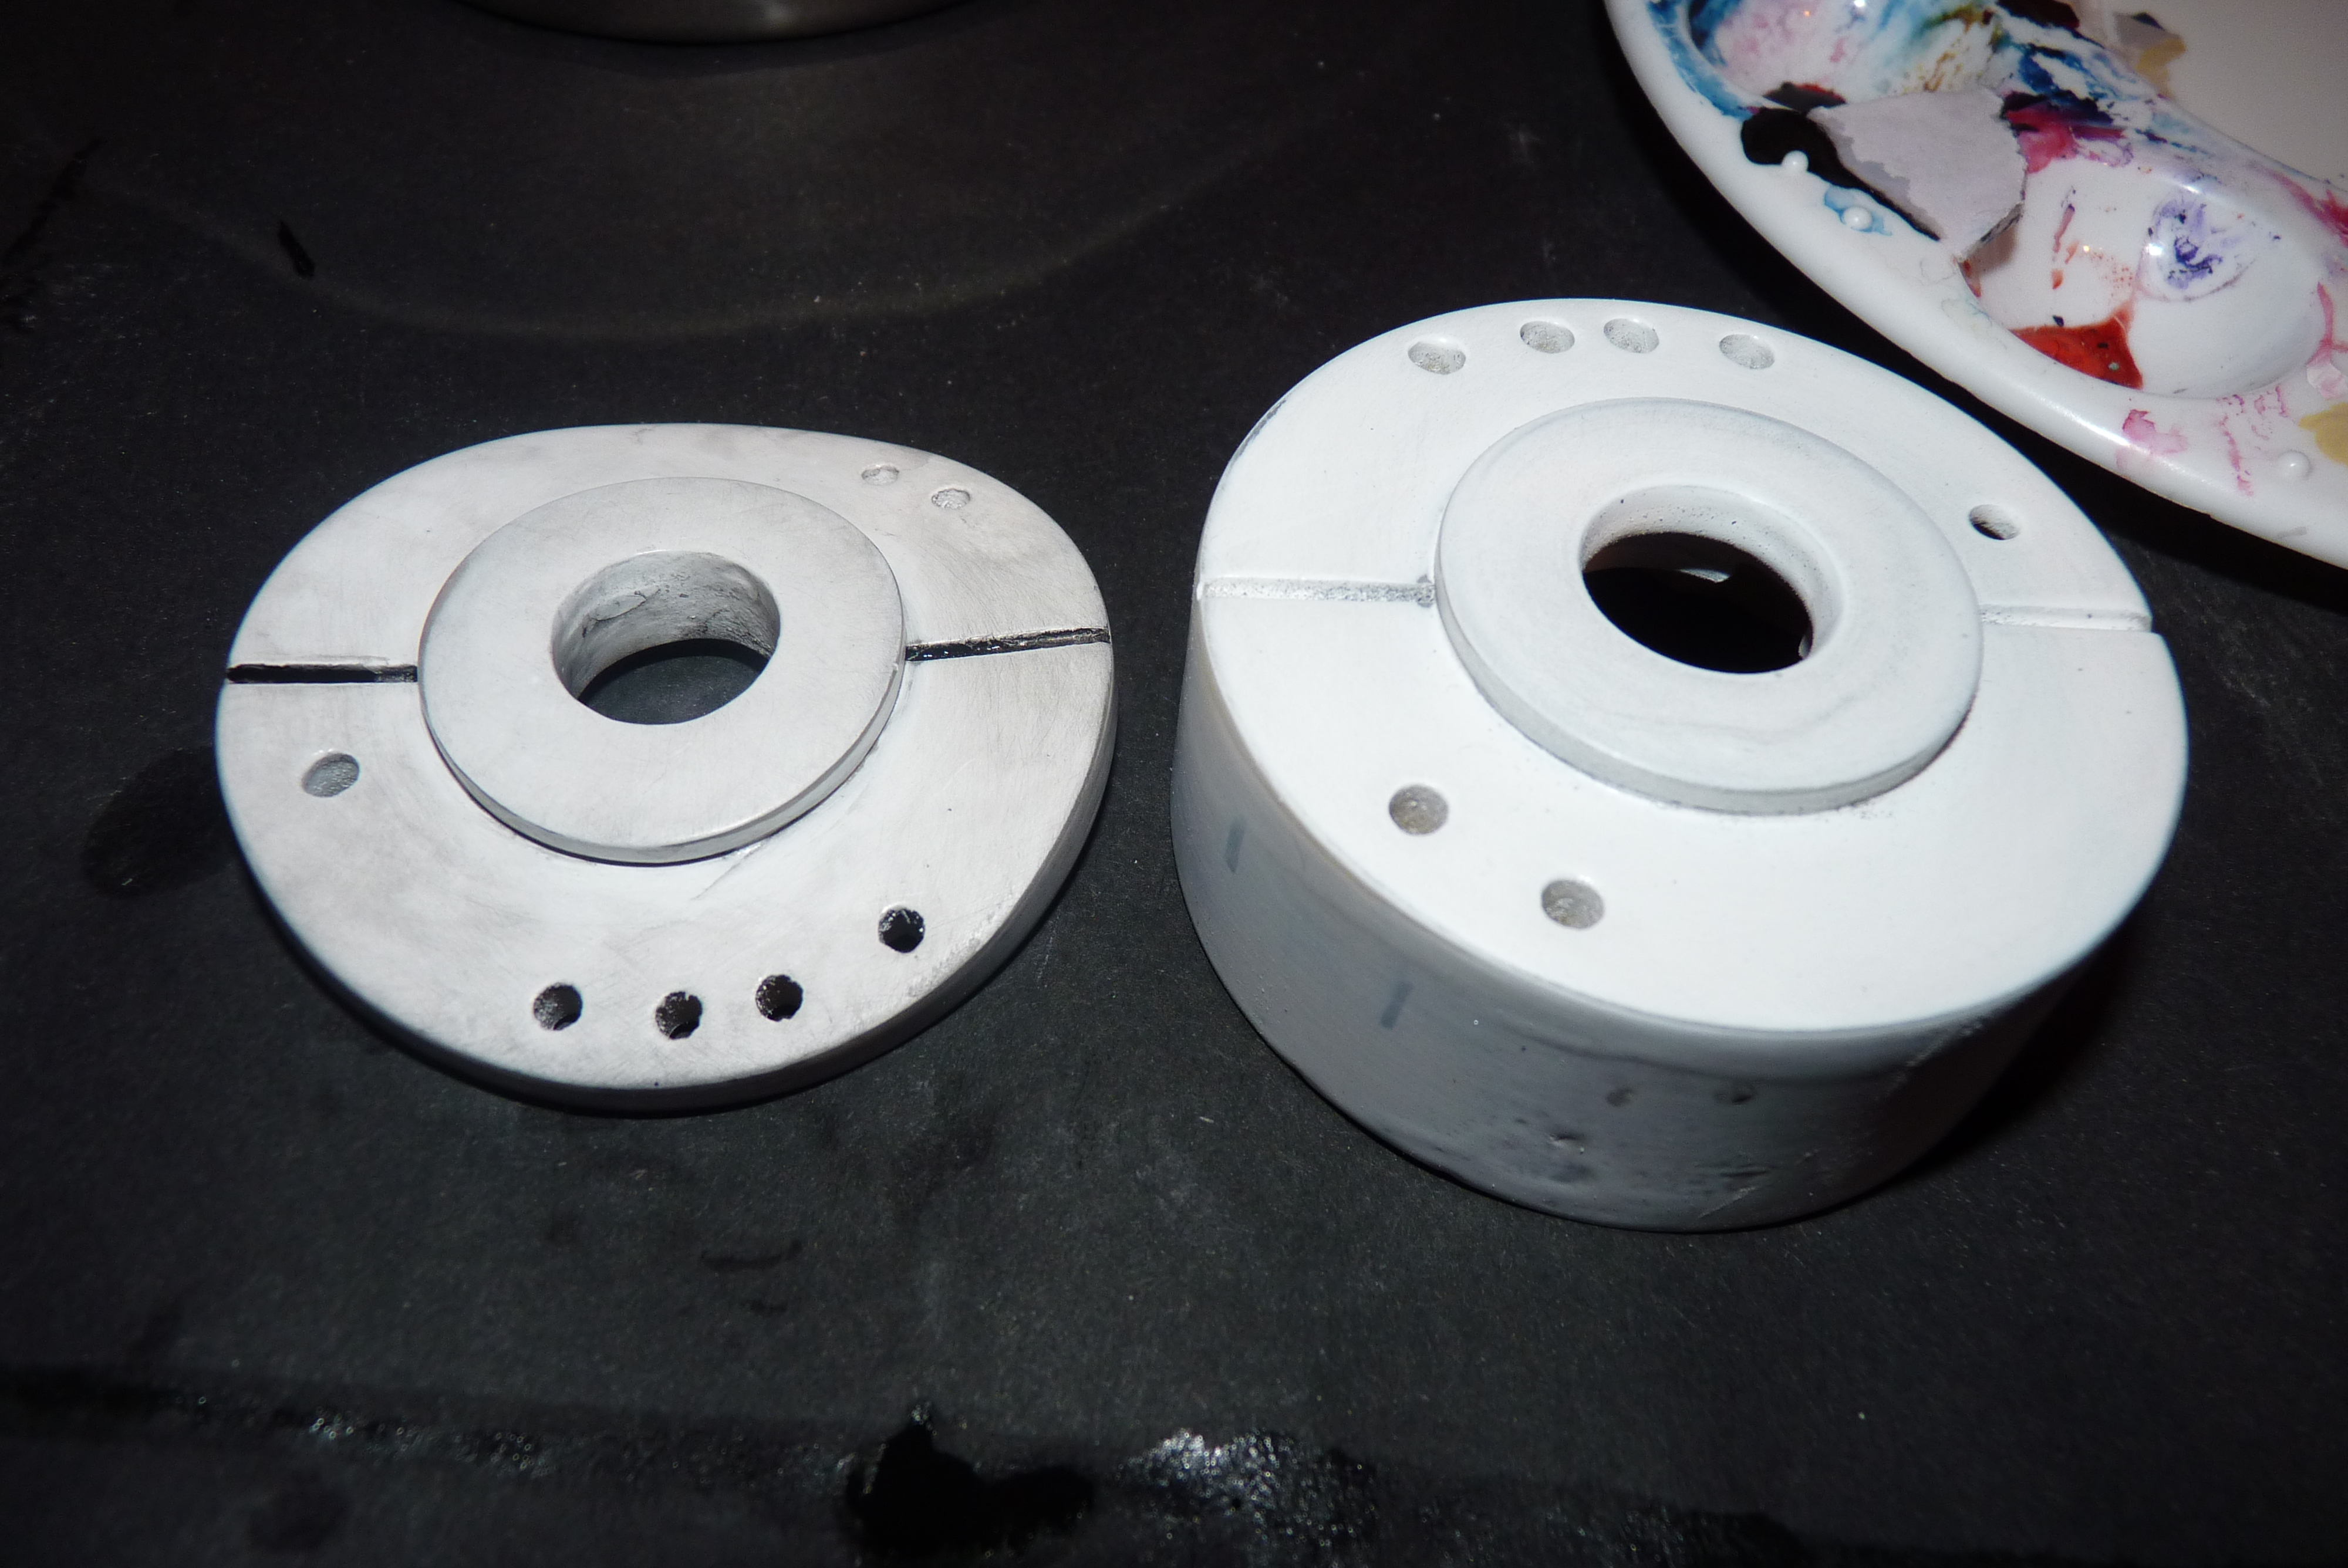
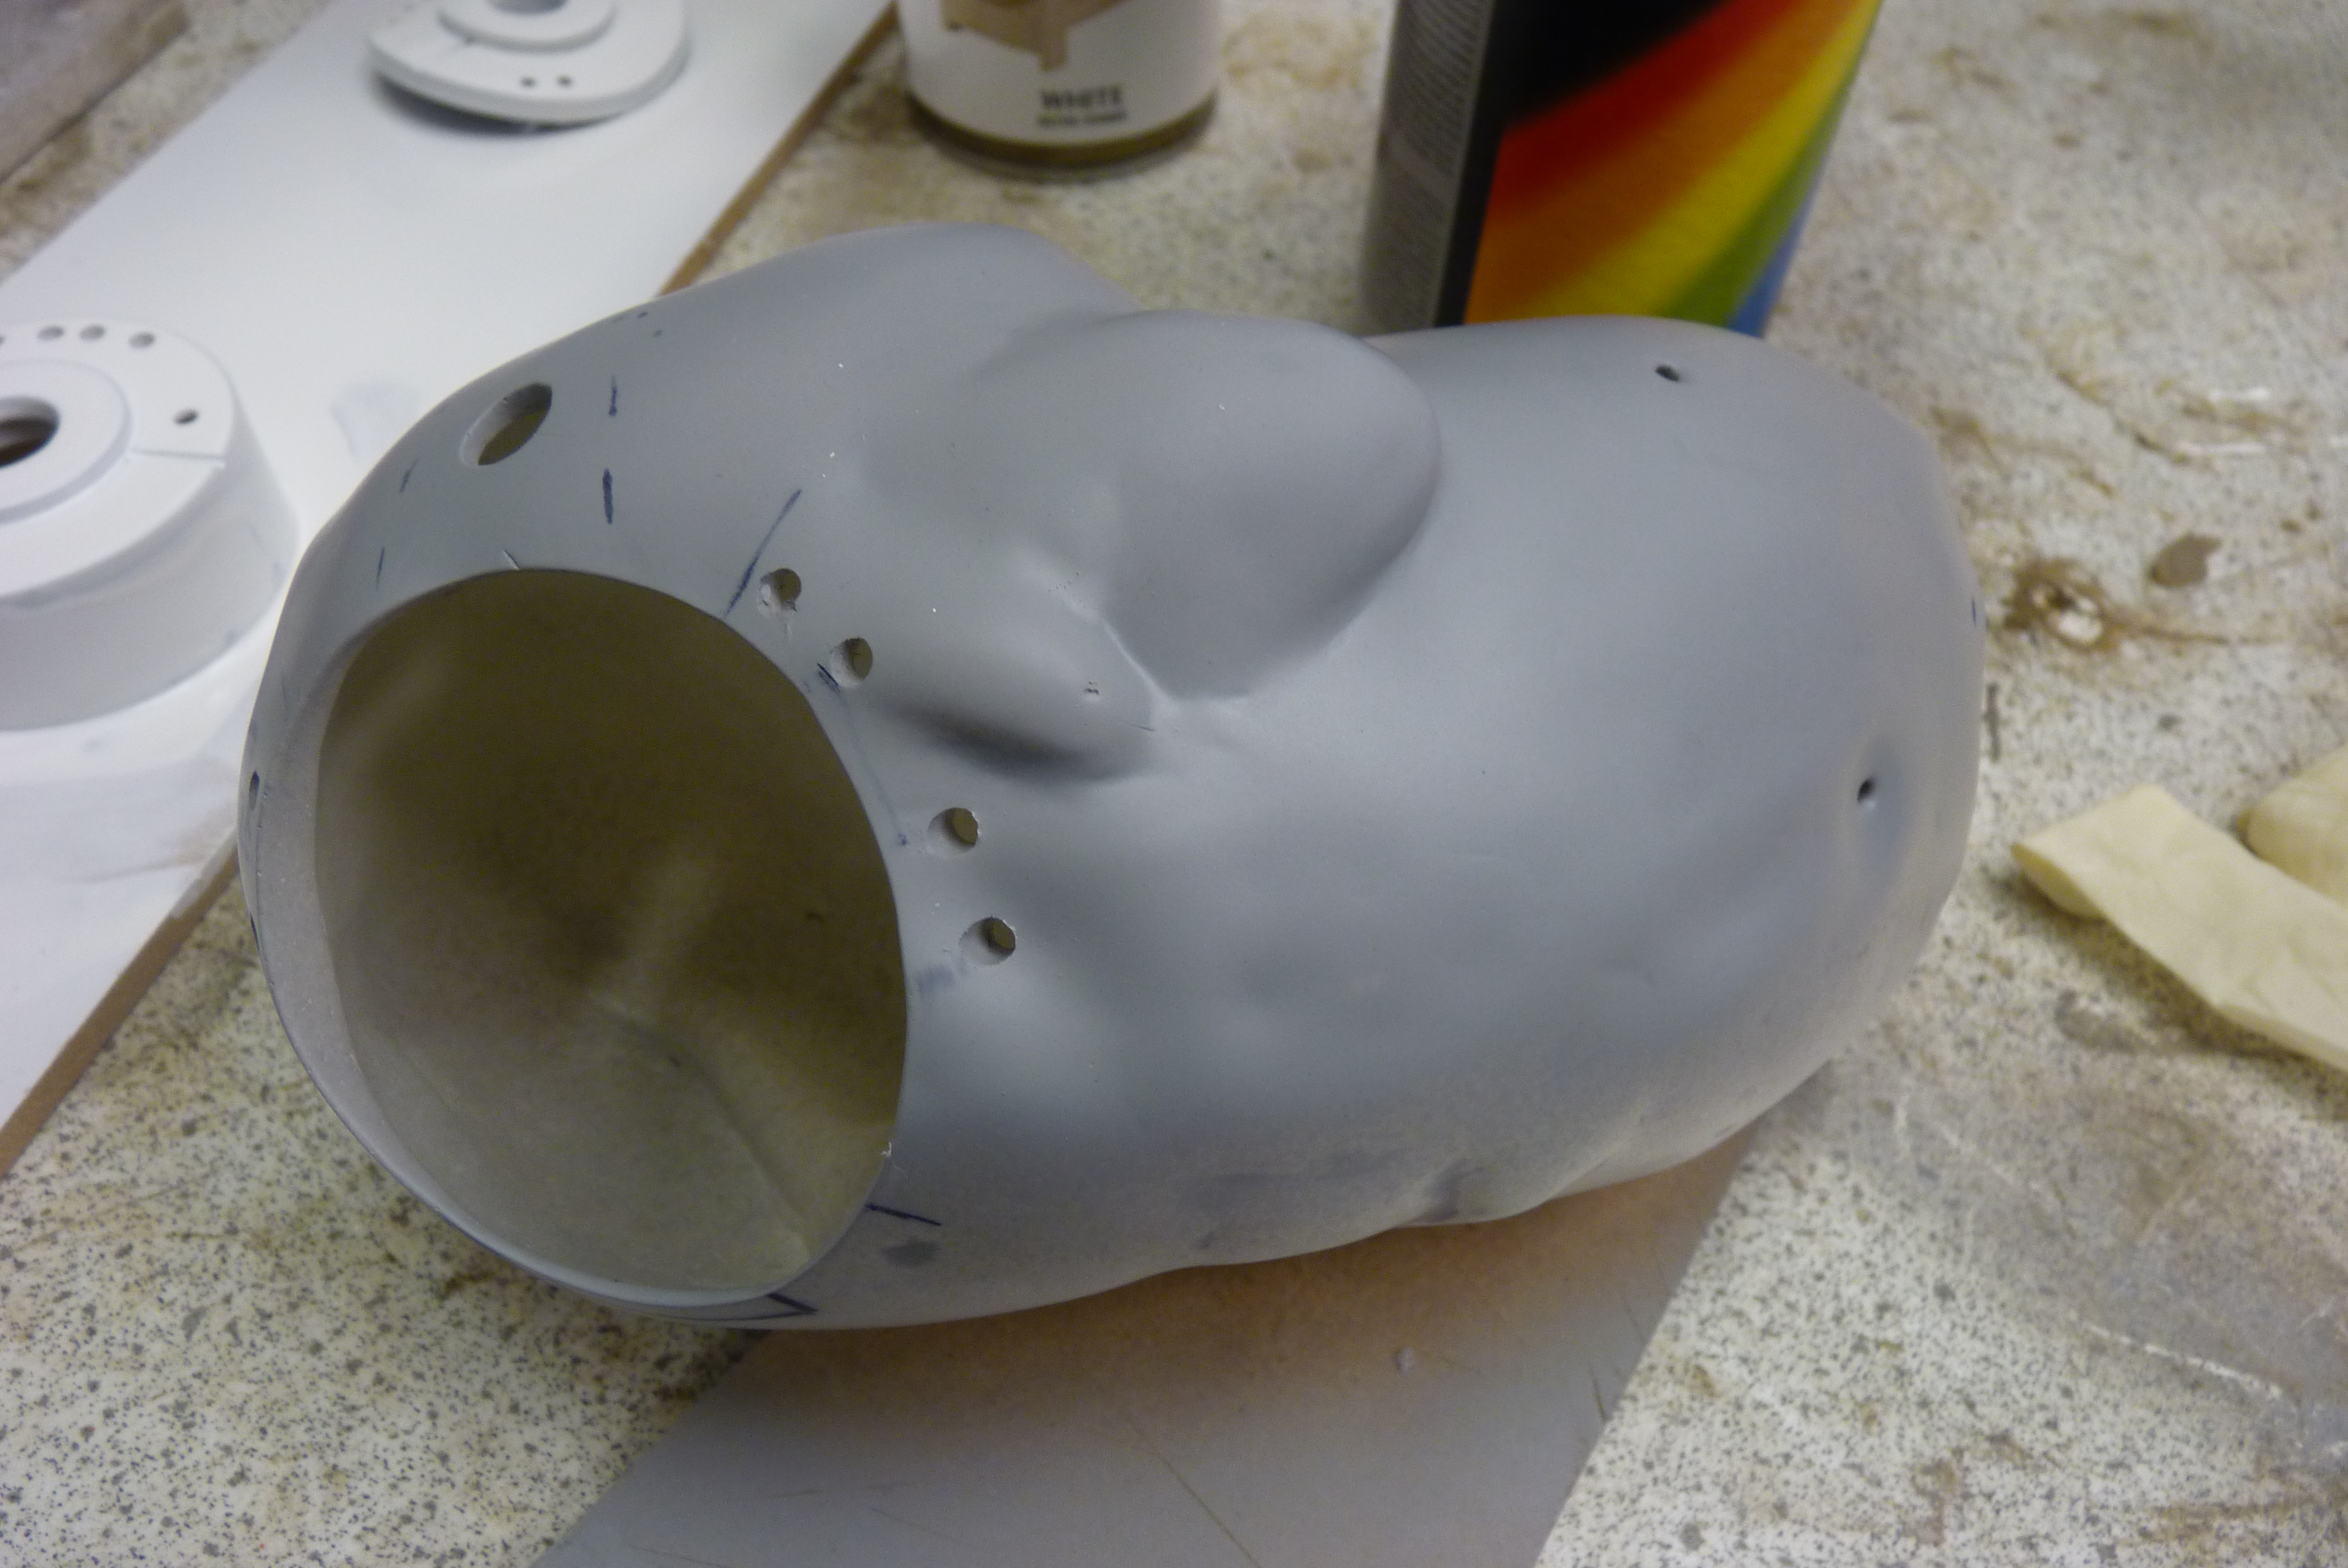
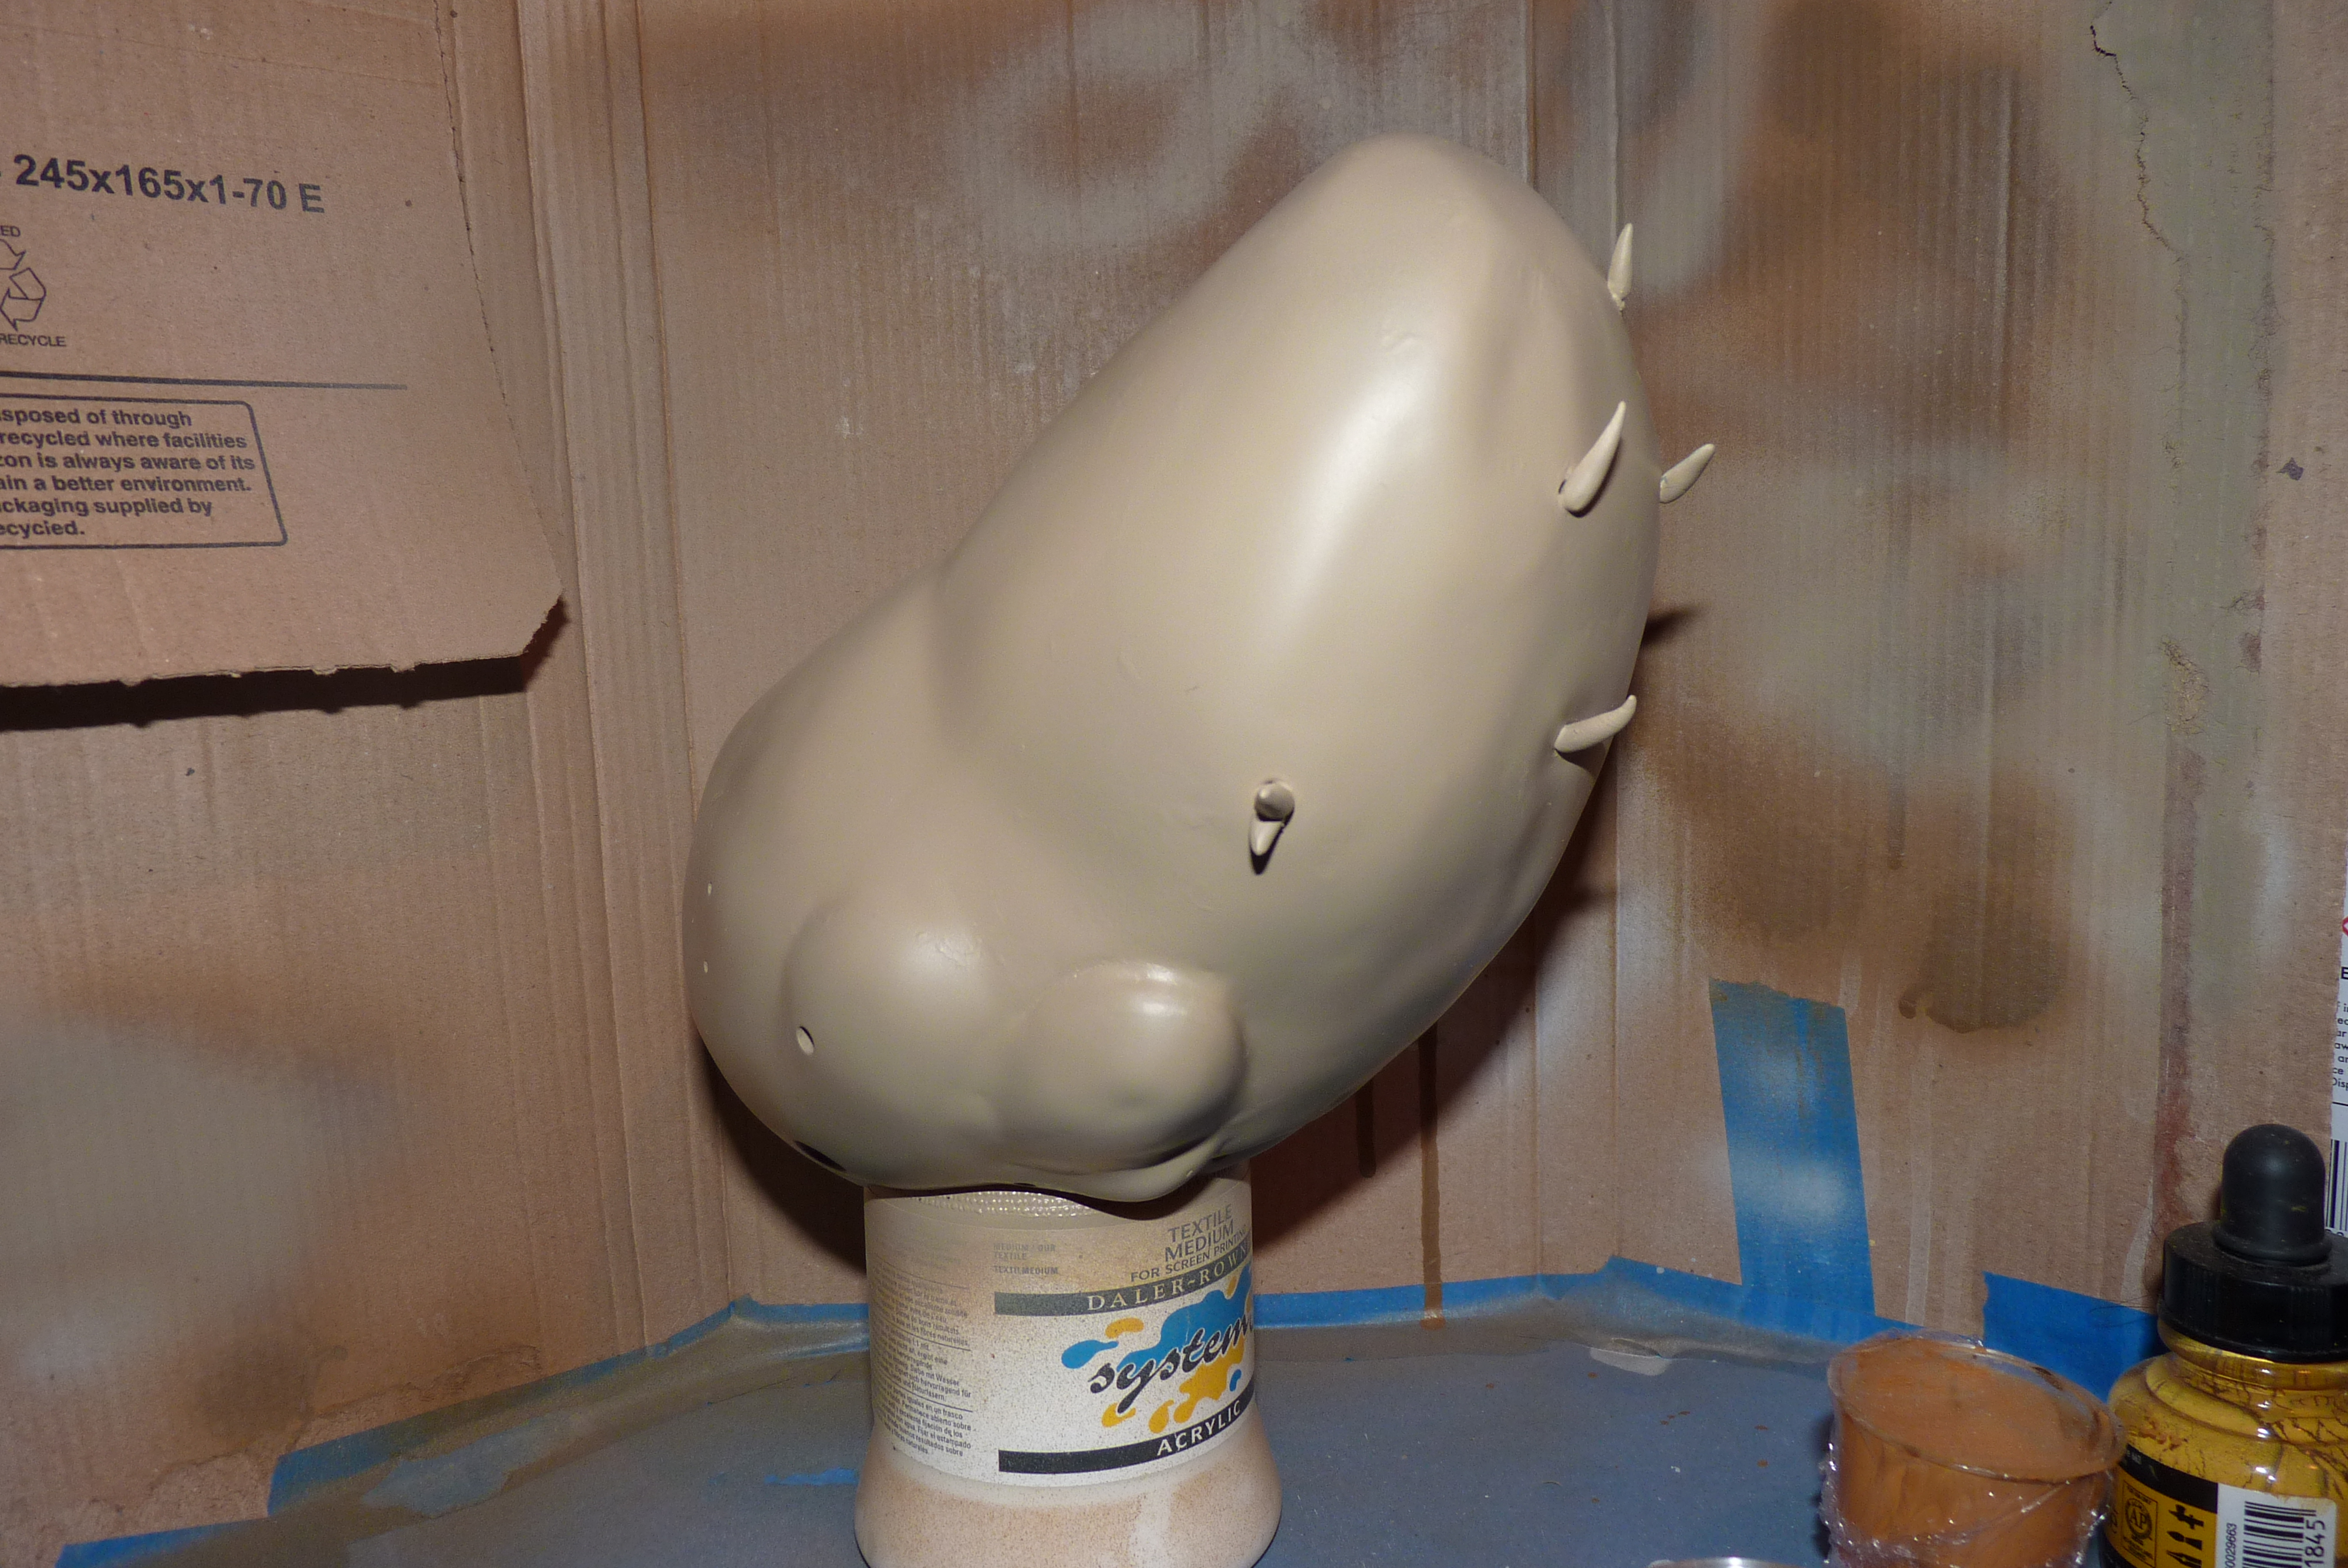
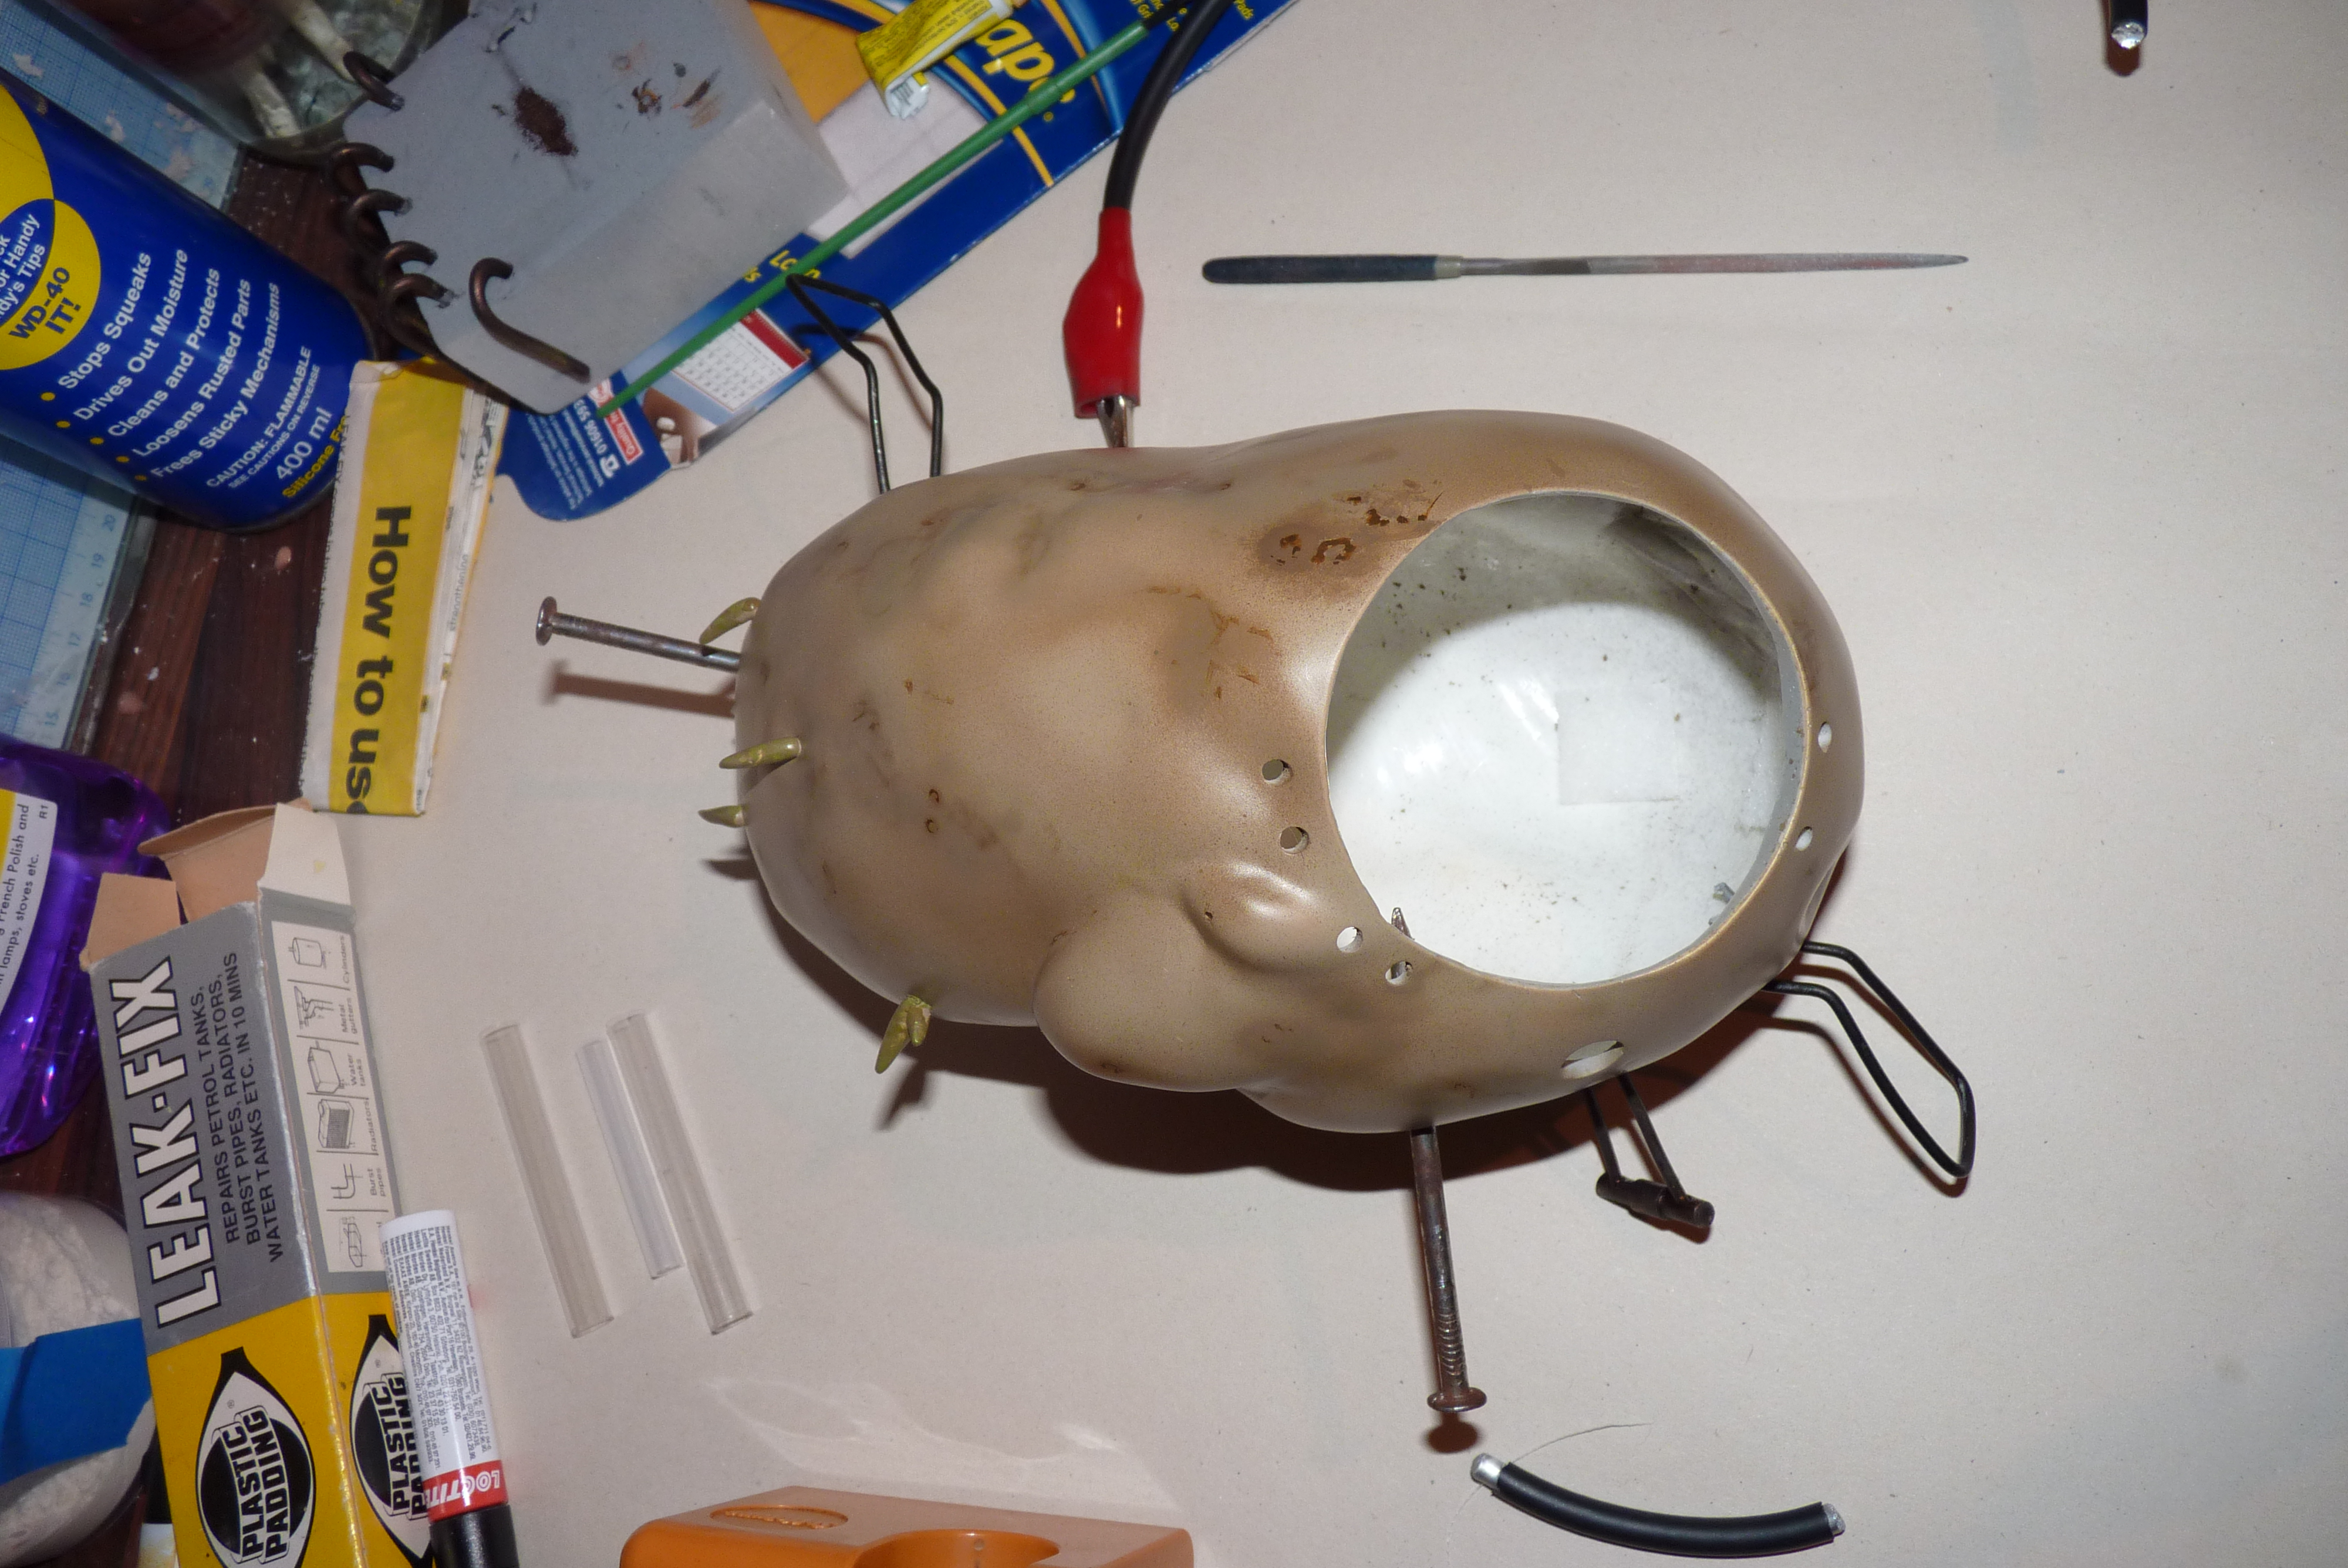
If you use spray cans or an airbrush remember to wear a particle mask or at least a dust mask, work in a well ventilated area (I had a spray booth in college, but I know a lot of people wont have that luxury) and as always, goggles, protective clothing and gloves!
What I did...
- Starting with the eye and chip first as they have a similar finish, place them on a scrap bit of board (Fig 1) give the eye piece a light sand with 800 grit so it wont affect the surface, but will give your paint something to cling on to. Give them a light prime like you did for the originals, and leave it to dry. Remember to read the back of your can and follow the instructions to avoid over-spraying which could cause pooling of the paint and take a very long time to dry. (often if the paint is thick enough the surface will dry and the paint underneath remains soft).
- Once the primer is dry, coat the eye and chip with a thin layer of white. because it is while going onto grey, you may need a few coats as I did to get it looking almost solid white. Don't worry about the edges appearing darker, we'll be weathering this once it's dry anyway, so you don't need to over do it with the while.
- I had a test eye to practice on and as you can see in (Fig 2) the contrast between the white eye, and the weathered one. You could leave your eye pure white, I know the ThinkGeek version is a very clean white, but PotatOS in game isn't that clean, Aperture Science is run down and dirty now, even her main body is a little scuffed, I don't see a reason to make her pristine. To weather the eye, water down some black acrylic and wash it over the eye. Before the acrylic has a chance to try, wipe it away again. You may need to do this a few times depending on the thinness of your wash, and how much weathering you want to add to it. Letting the wash flow into the trench and around the base of the top circle and letting it sit there for a little longer so those areas get darker, or even going back in and darkening them with a paint brush and some wash will help them to stand out.
- Use the same weathering process for the chip. The only difference is the feet and the ring are darker. I painted my ring black and dropped a bit of red enamel into it and painted the feet and the connector between it and the eye, with Tin Bitz, the same paint that's on the staples. I had forgotten to mention the connector before. I made mine out of a bit of MDF, and when I was testing how the eye fits into the body and the chip beside it, I just sanded it down to fit between the two. By sticking the the connector onto the chip I then at least have a reference as to what angle I had the chip at etc when it comes to attaching everything together.
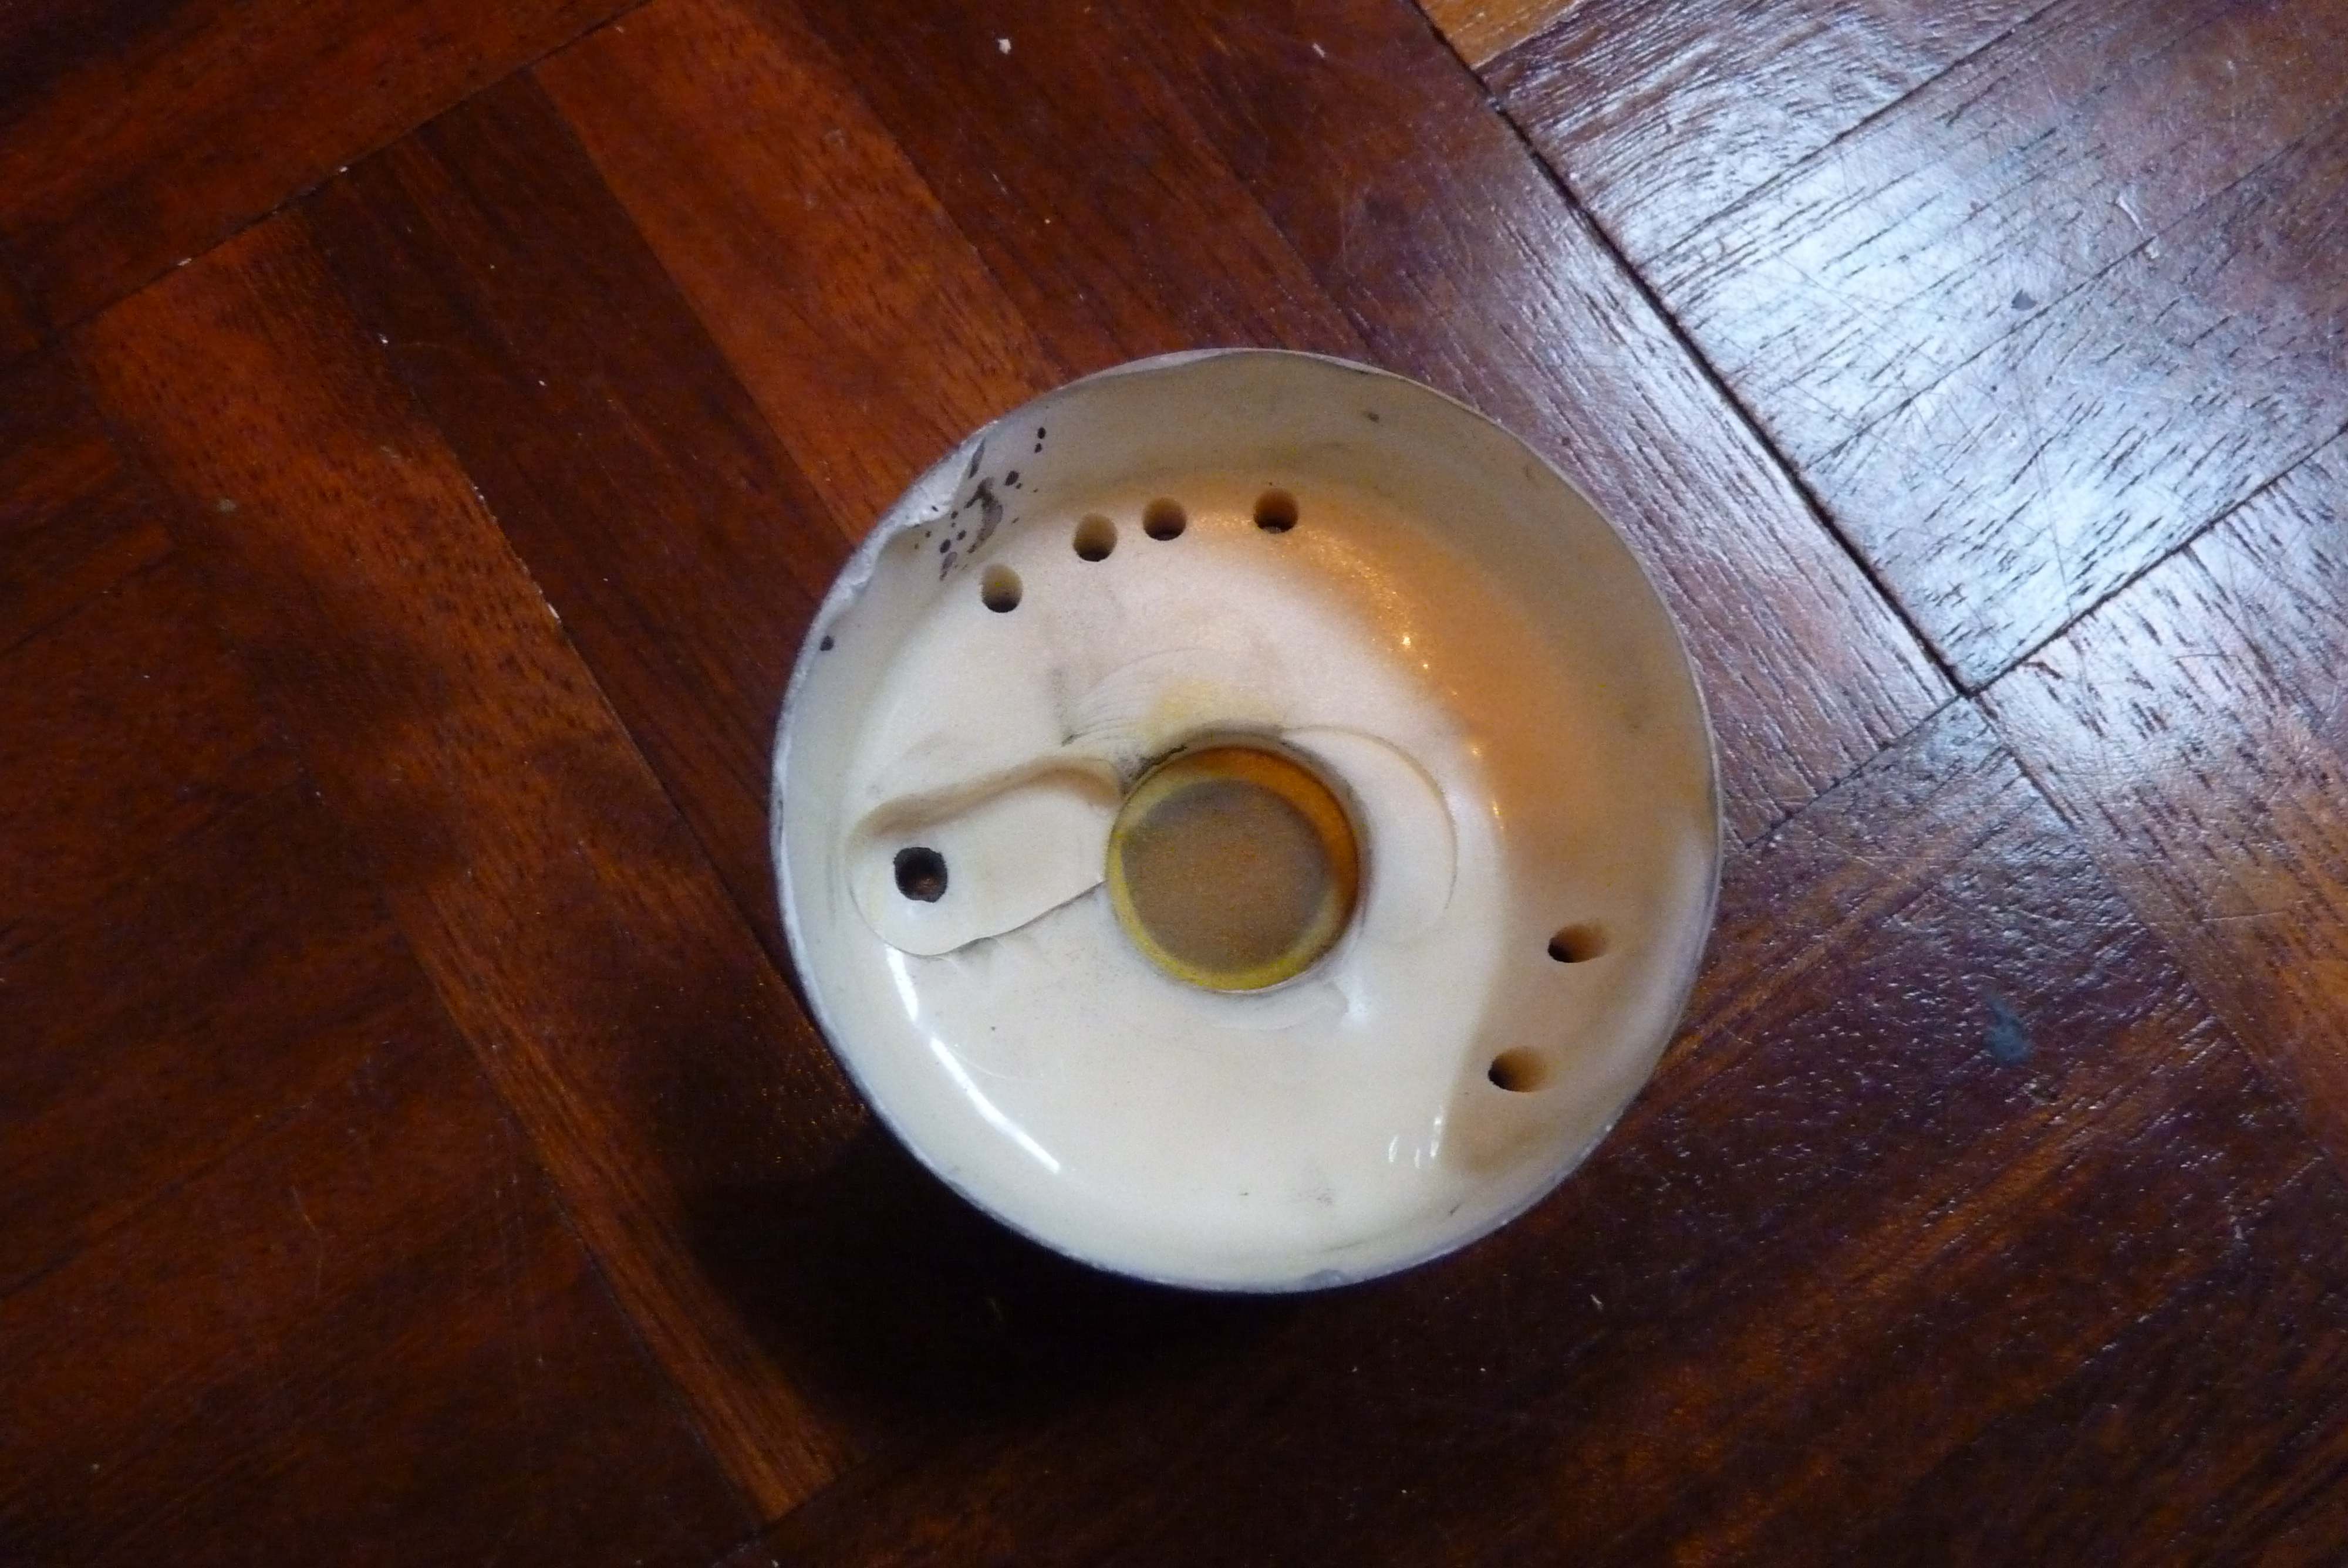
- Before you start painting the potato, be sure to attach the sprouts if you made any for yours, otherwise after painting they'll be a little trickier to get on. Give the potato a light sand if you haven't already to key it for the paint and give it a light prime (Fig 3). You'll probably need a way to hold the potato in place while you work so nothing is touching off your table. I found the lid of a Daler Rowney 250ml acrylic tub fit perfectly into the hole in my potato which allowed me to turn her when I needed to. You could also try a Pringles can, or fashion your own cardboard tube and weigh it down in the center with a sandwich bag of rice or similar to prevent it from toppling. (Fig 4)
- Once your potato is secure you can begin painting. I used Daler Rowney FW Acrylic Inks in my airbrush simply because they're already the proper consistency so I didn't need to be messing around with watering them down. You can also use airbrush paints you get in your local hobby shop or your own watered down acrylics. Start building up from light browns to dark (Fig 4) again looking at the textures on PotatOS' body in any reference images you have, or if you'd prefer, you can us your own real world potato as a guide too. Touching up finer details and the sprouts which are a kinda greeny brown with a paintbrush (Fig 5)
Or you could...
- If you don't have an airbrush, you can use spray paint which would be a little harder to control, or model paints / acrylic paints with a paintbrush. Or maybe you'd like to stipple your paint on with a sponge to give it texture.
The Base (Optional)
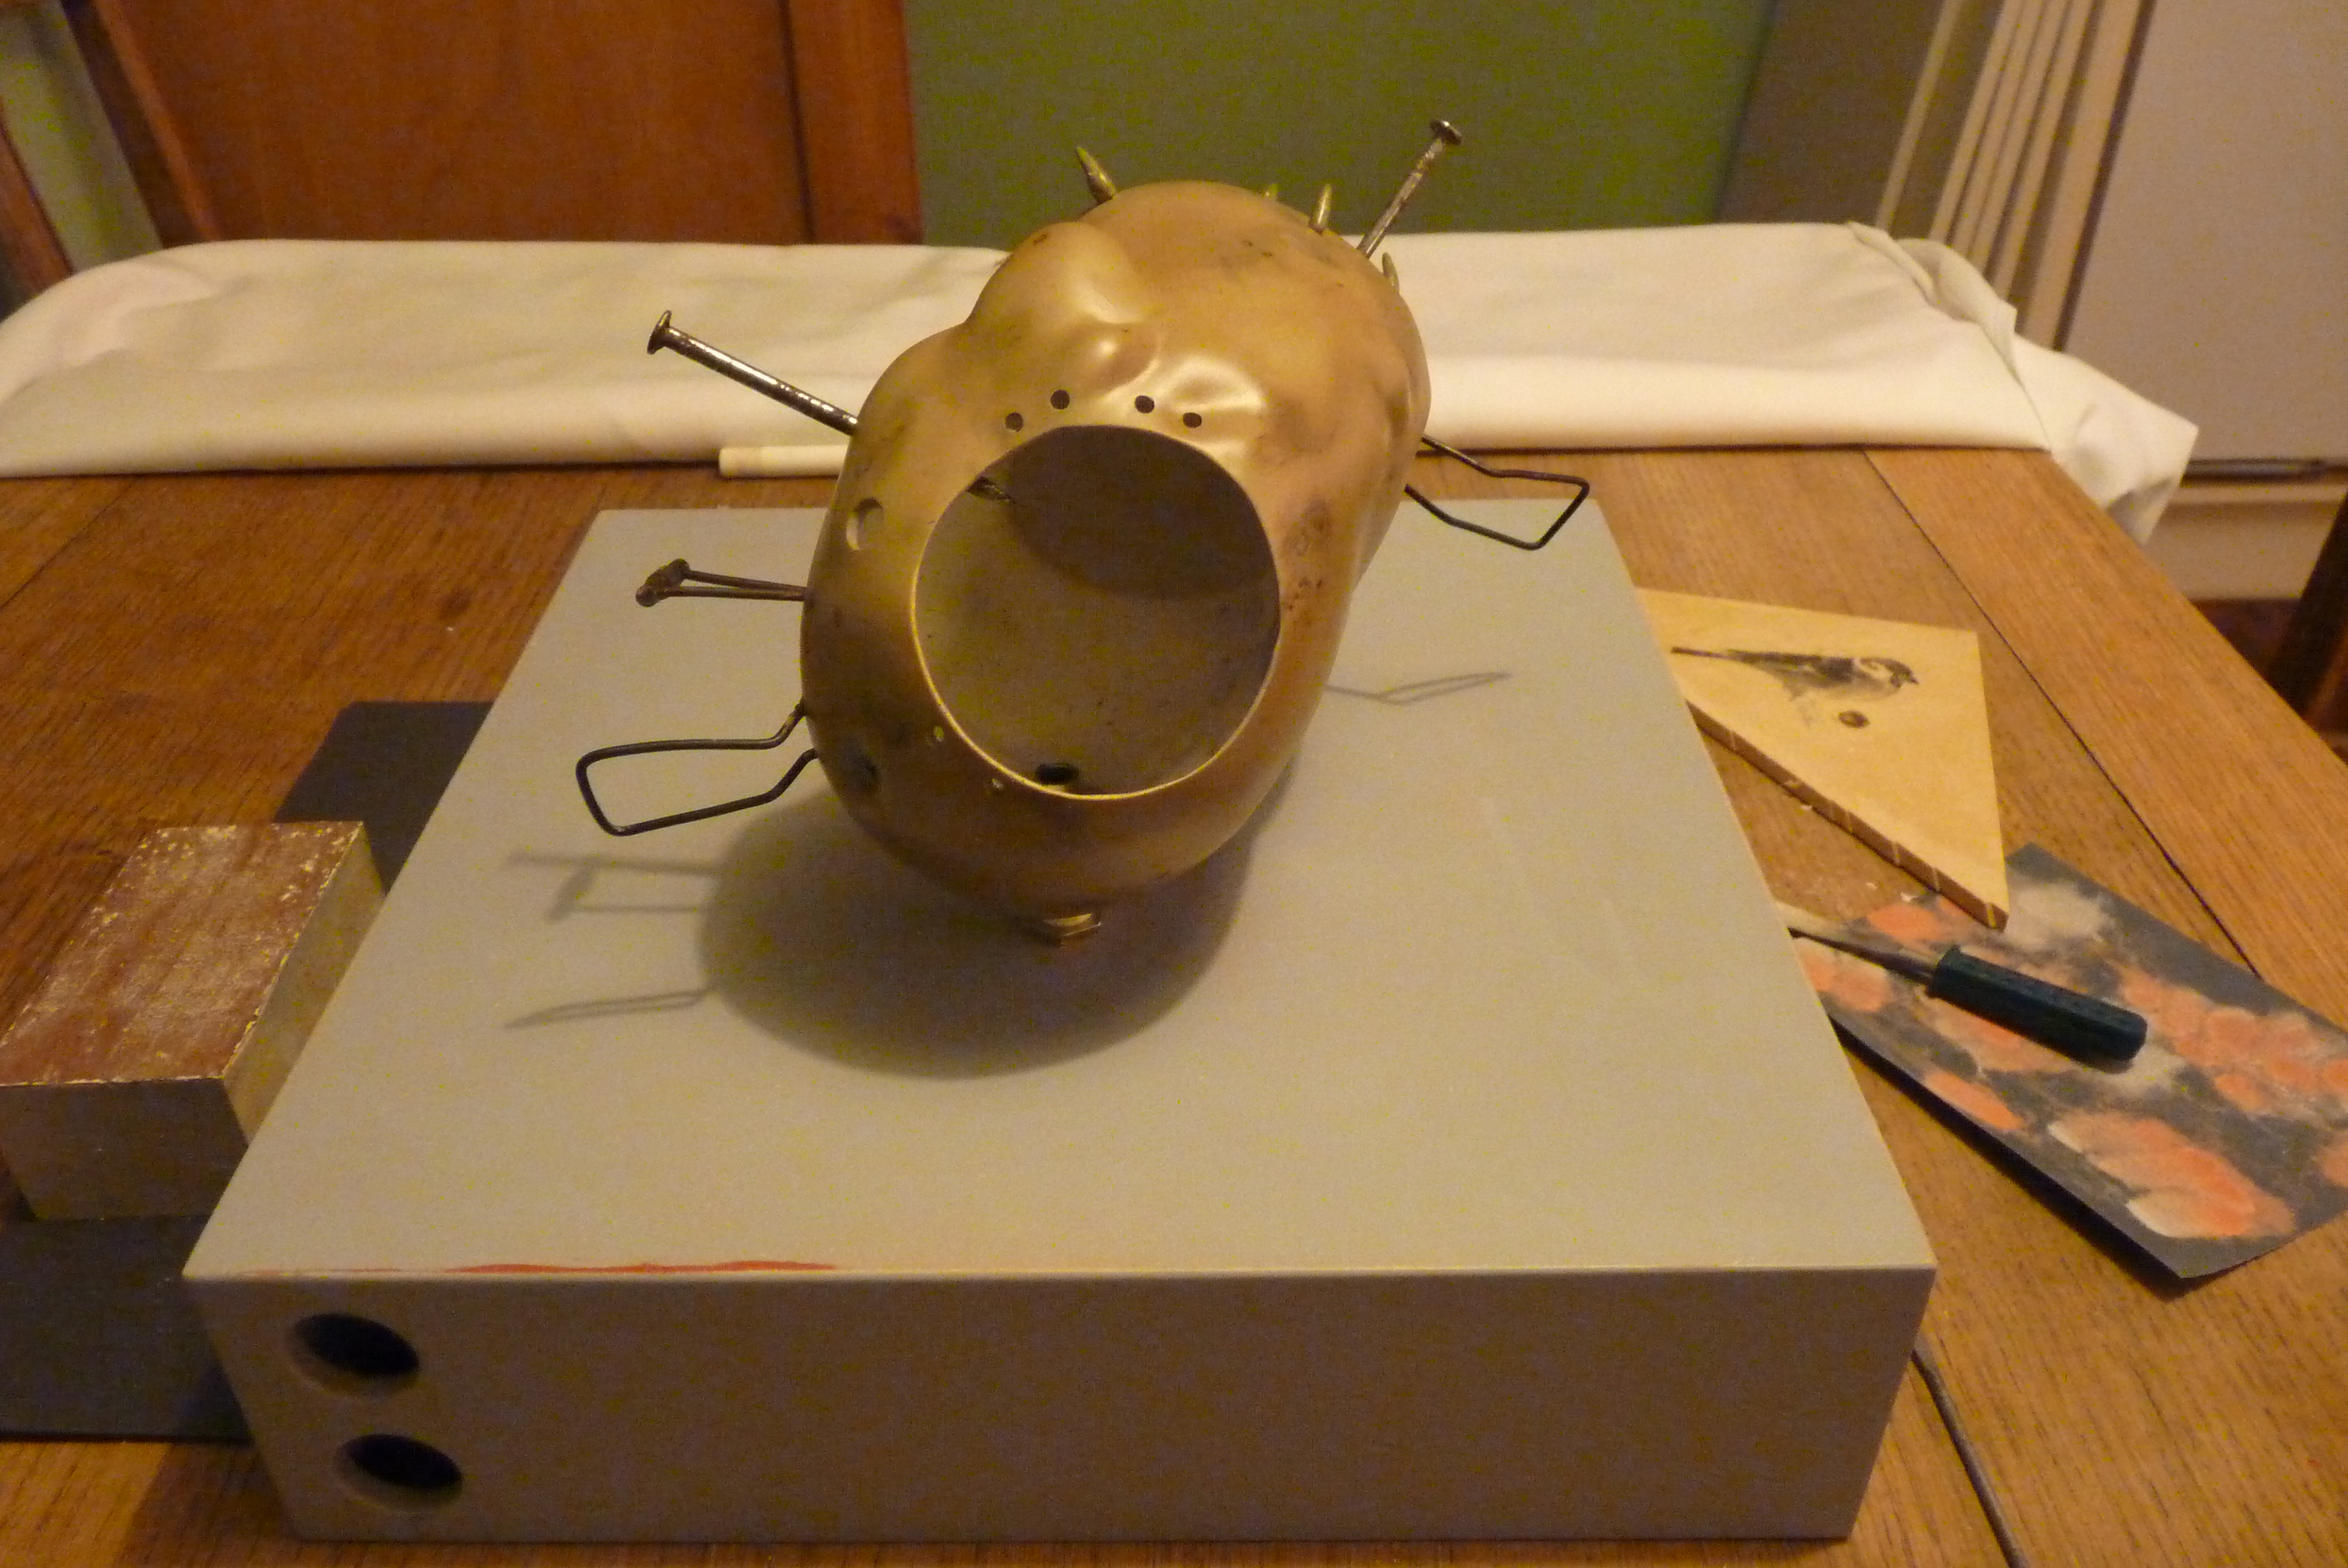
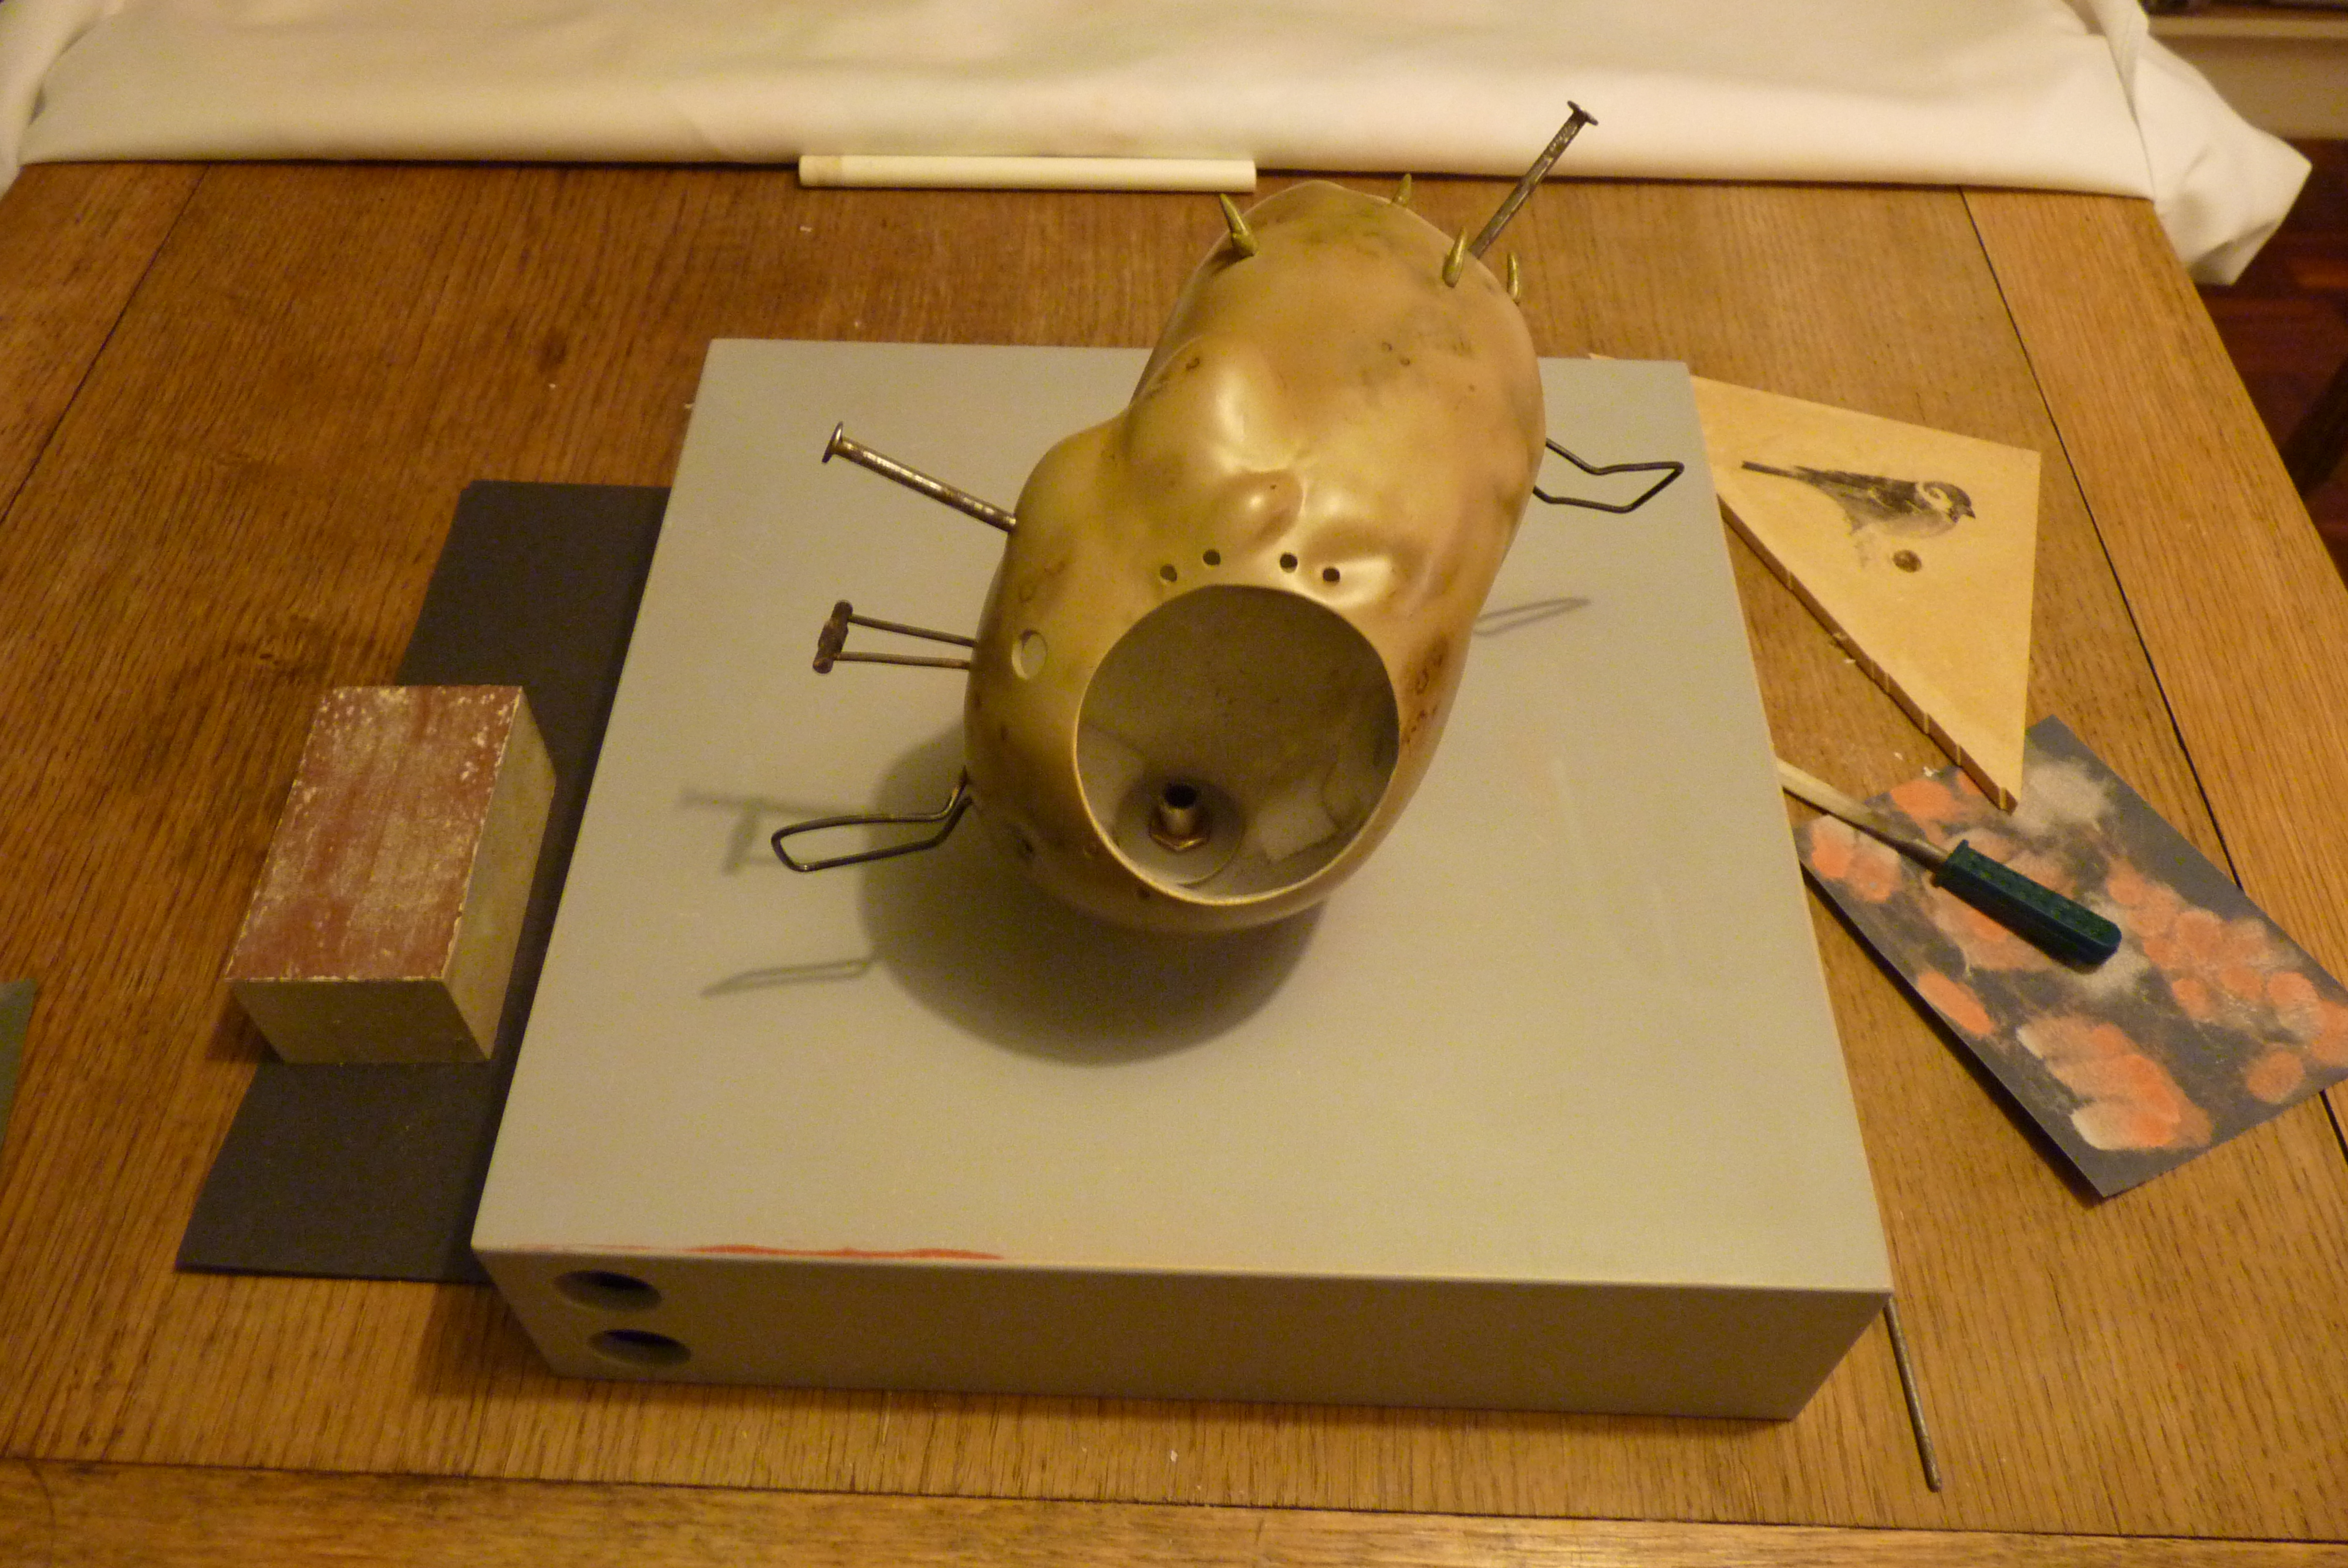
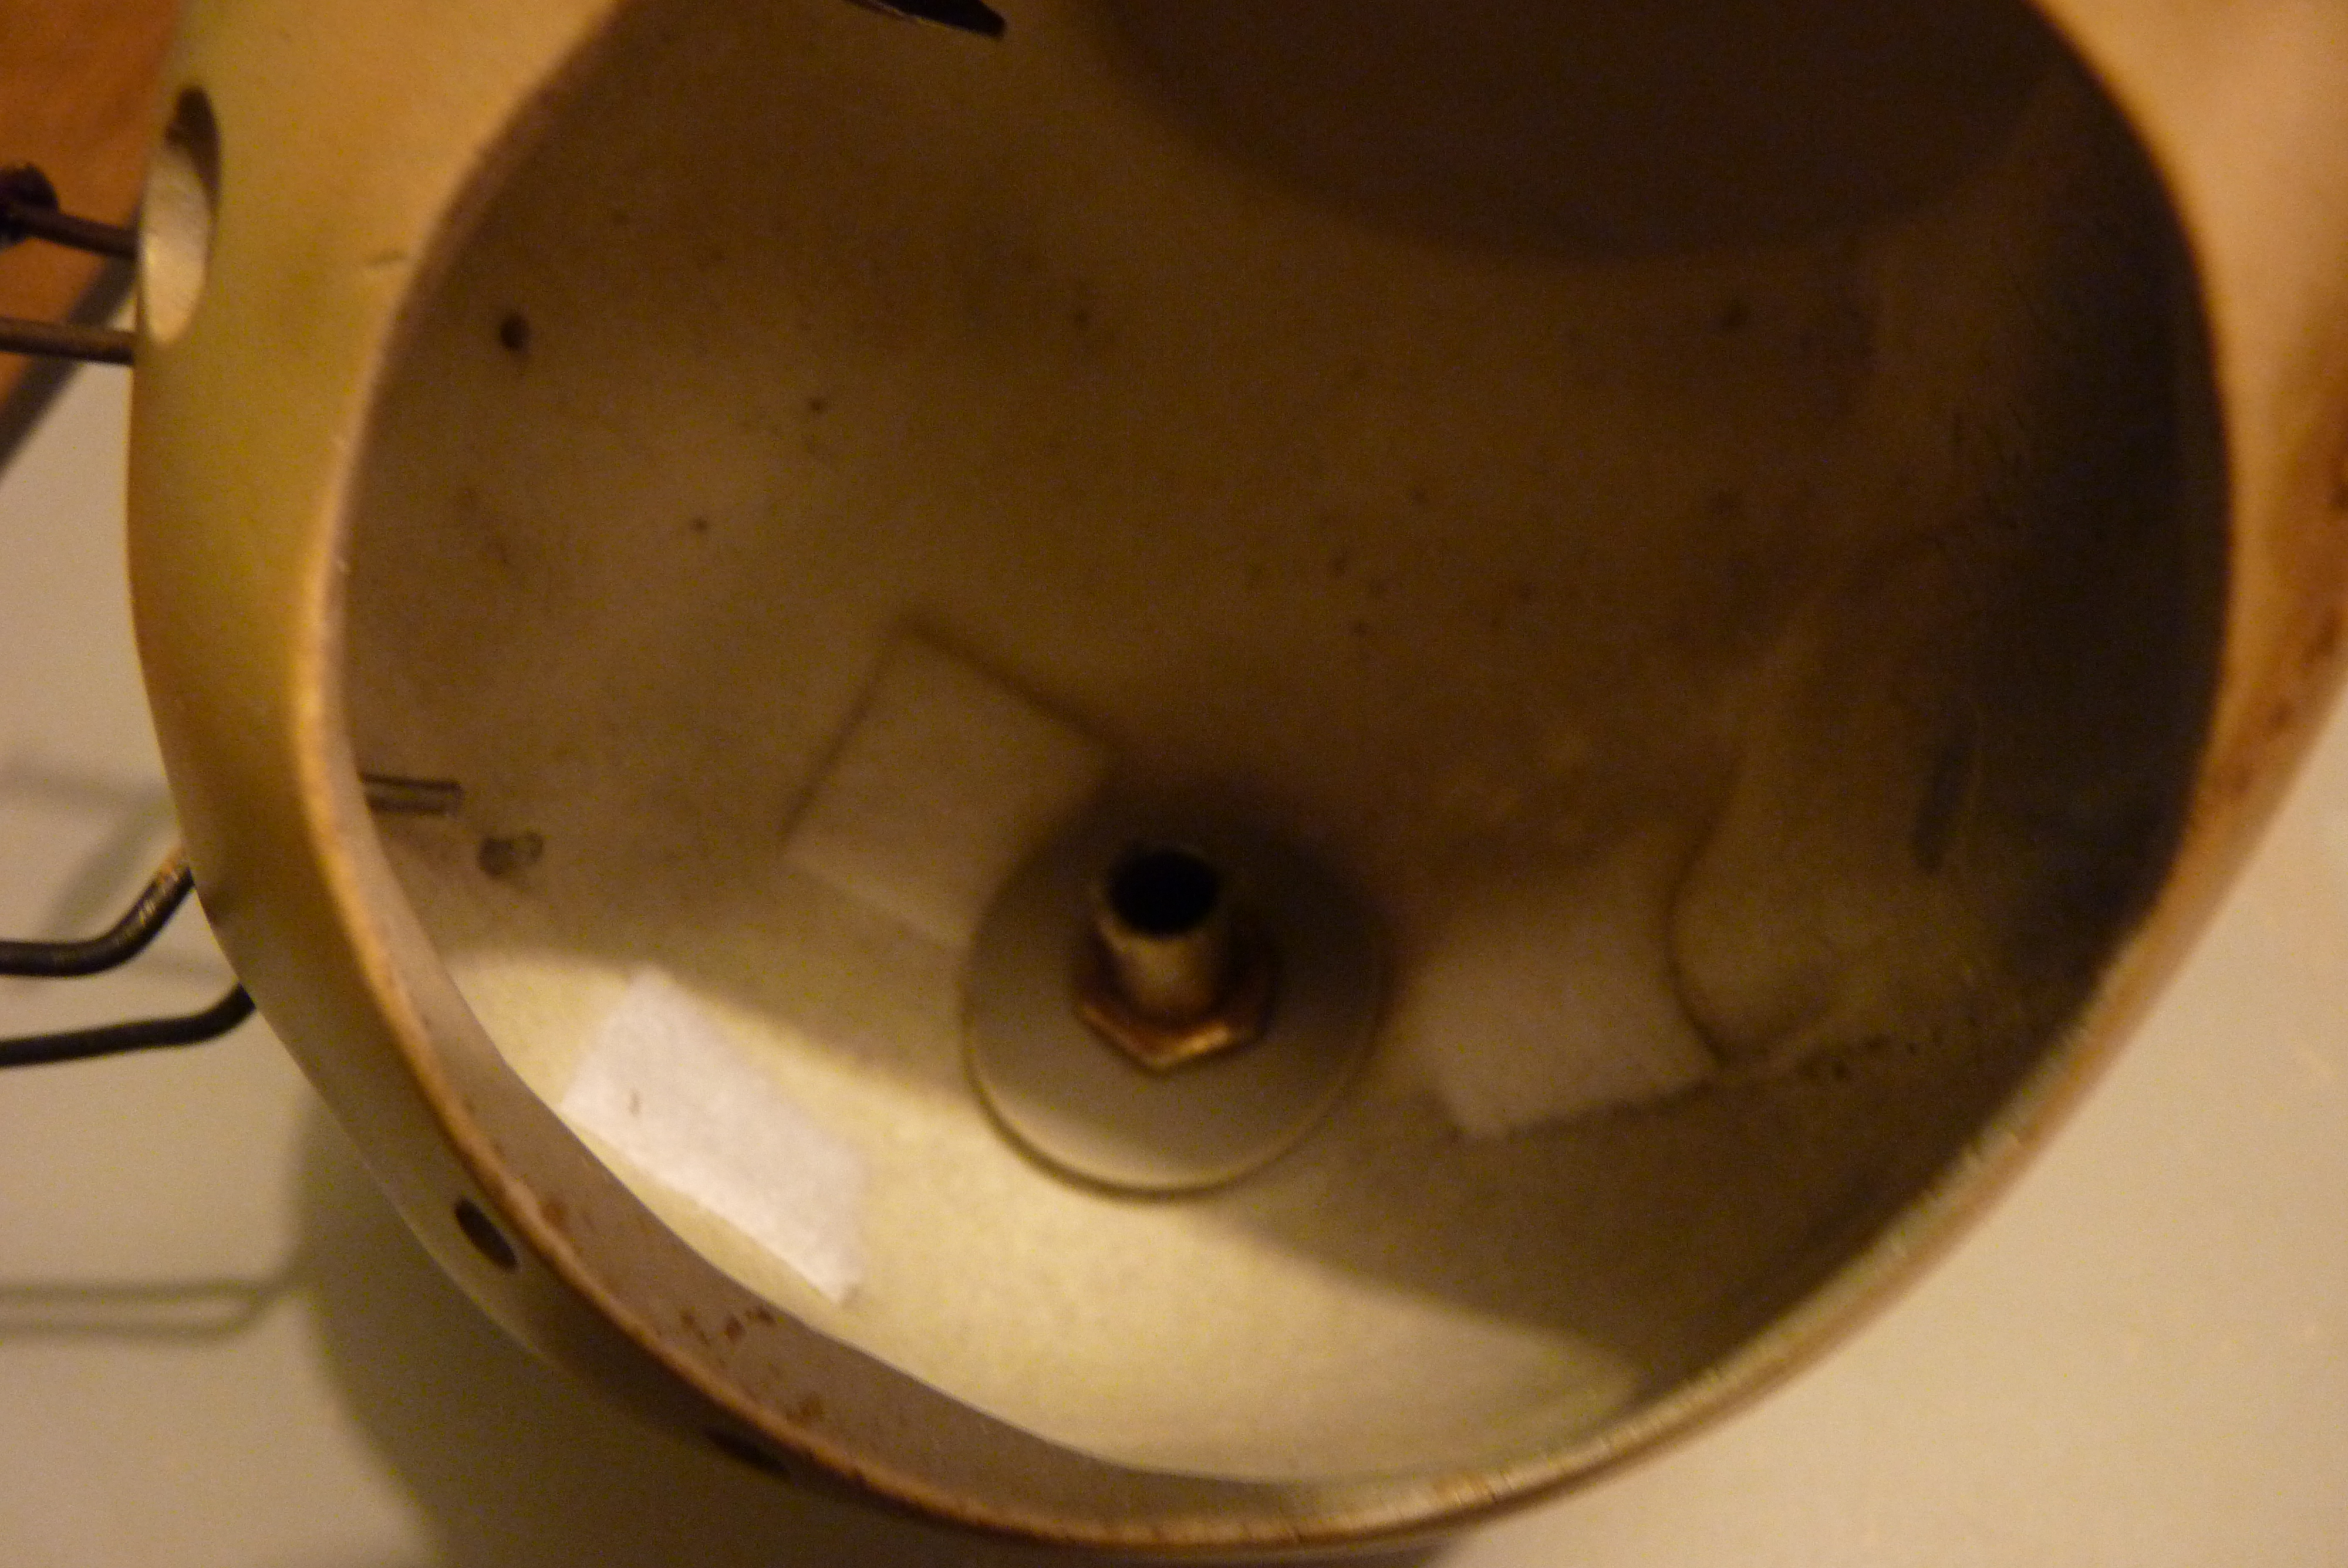
The usual layers of protection, dust mask, goggles, ventilated area, protective clothing.
This next bit is optional, I needed a base to display my PotatOS on for college, I also incorporated extra buttons so you wouldn't need to touch the model, and a switch for the LEDS. If you decide not to make a base, the electronics will be fairly similar, you'll just need to adapt them for you model.
- To make the base I used a top piece of 4mm MDF 1ft x 1ft ( 30.5cm x 30.5cm), four side pieces 1ft x 2 7/8" (30.5 cm x 7.2 cm approx) with mitered ends, you don't need mitered ends, I just thought they looked a little neater for my presentation. This was to give PotatOS a sturdy base, to sit on, within my 1ft cubed limitations, but a lot just tall enough to house the two large red buttons I wanted to place at the front, as an alternative to people touching the body. (Fig 1)
- Glued together with wood glue, I filled in the edges and primed the box. The box was sprayed with the same white spray paint I used on the eye and chip, you could can spray it any colour your want of course, but before you do that, there's one more hole that needs drilling. This hole goes through the bottom of the potato, and into the base below. (Fig 2 + 3) This is where a tap and die kit comes in handy, I didn't have one at the time of making PotatOS but I was lucky to find a hollow plastic pole with a thread on it inside an old lamp of all places. I then used nuts and washers tightened arounf the potato and the base so the bar was a little exposed in the middle so she looks like she's floating. Because the part I drilled through the potato wasn't the centre, I had the hole in the base to match it set forward a bit too, so she was nicely inside the 1ft cubed space i was restricted to.
- The reason this tube is hollow, in you were wondering why not use a threaded metal bar, is because this is how the wires for the electronics inside the potato get to the switches in the base. If your wires aren't going into the base to switches and buttons, then you don't really need a hollow tube, you could use some solid threaded bar if you wanted to.
The Tricky Bit!

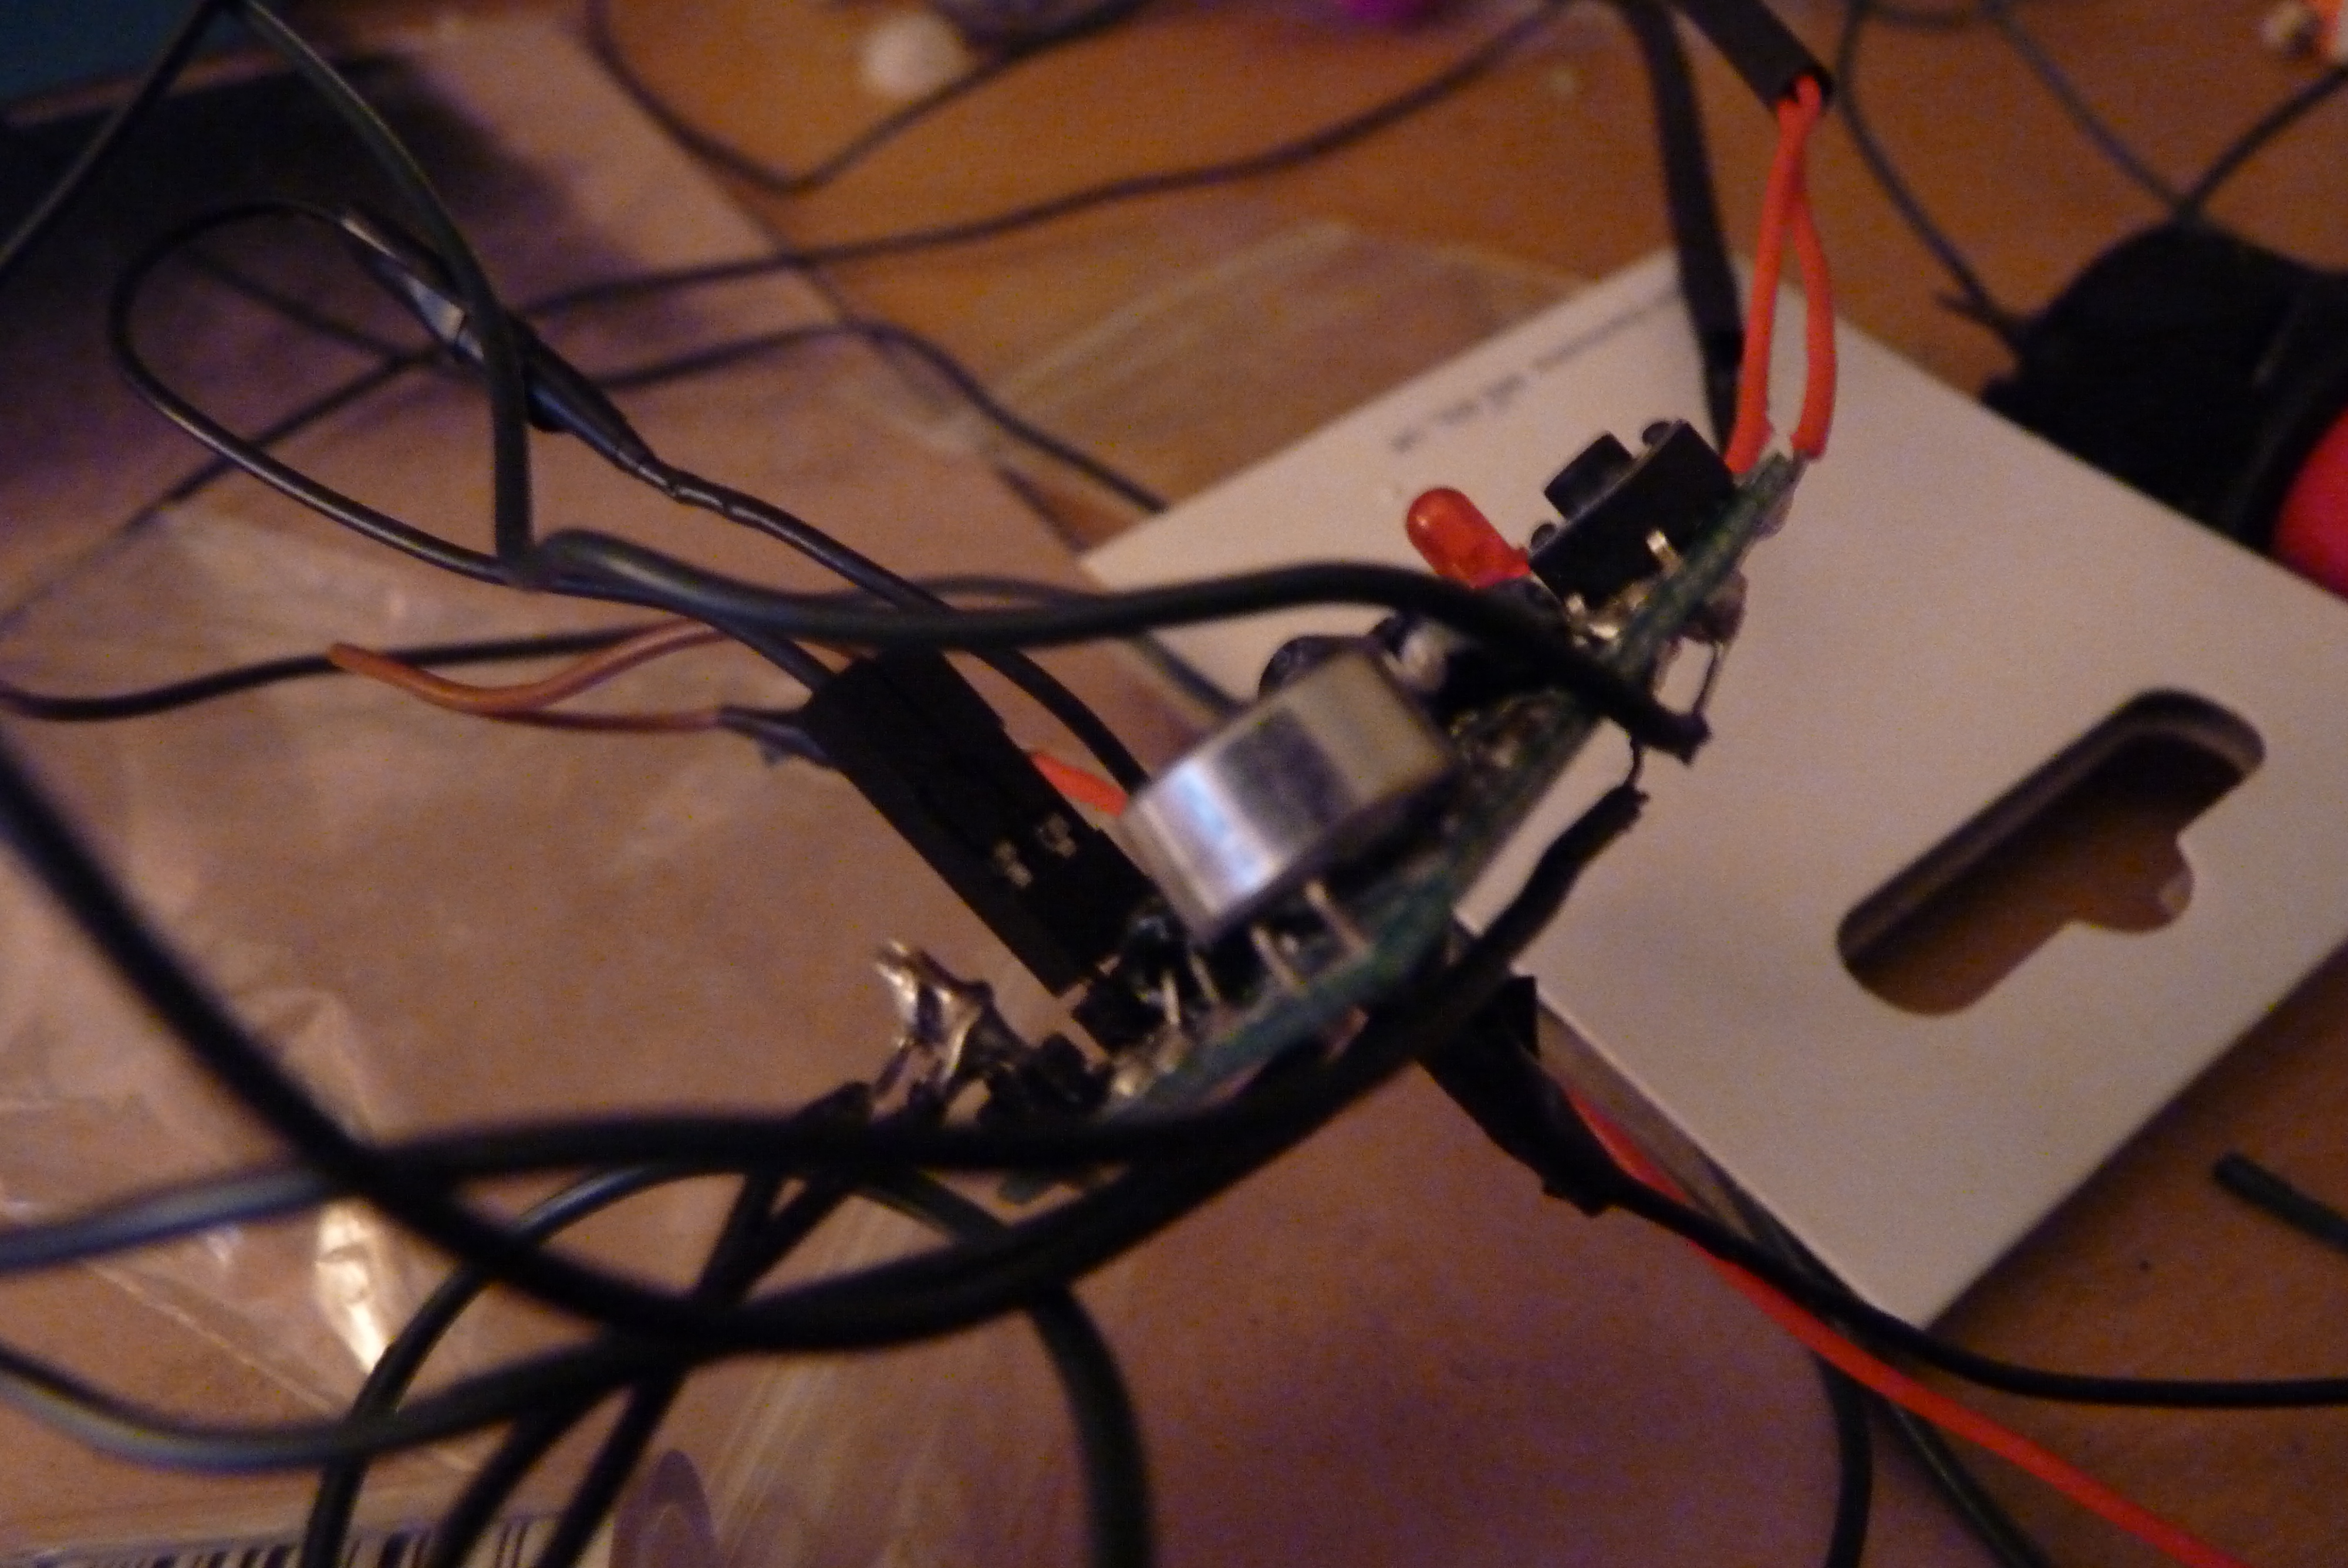
Those of you who have a lot of exp in soldering LEDs, switches and whathaveyou will need to bear with me, this was my first time incorporating electronics into a project, and my first time doing proper soldering too so things will look messy. For those of you who like me get a bit muddled when it comes to electronics I will do my best to explain to you clearly what was going on. Hence my calling this the tricky bit, despite soldering LEDs actually being rather easy once you get used to it.
Soldering irons are hot, and molten solder can be a bit fumey so it might be a good idea to work with a window open.
What I did...
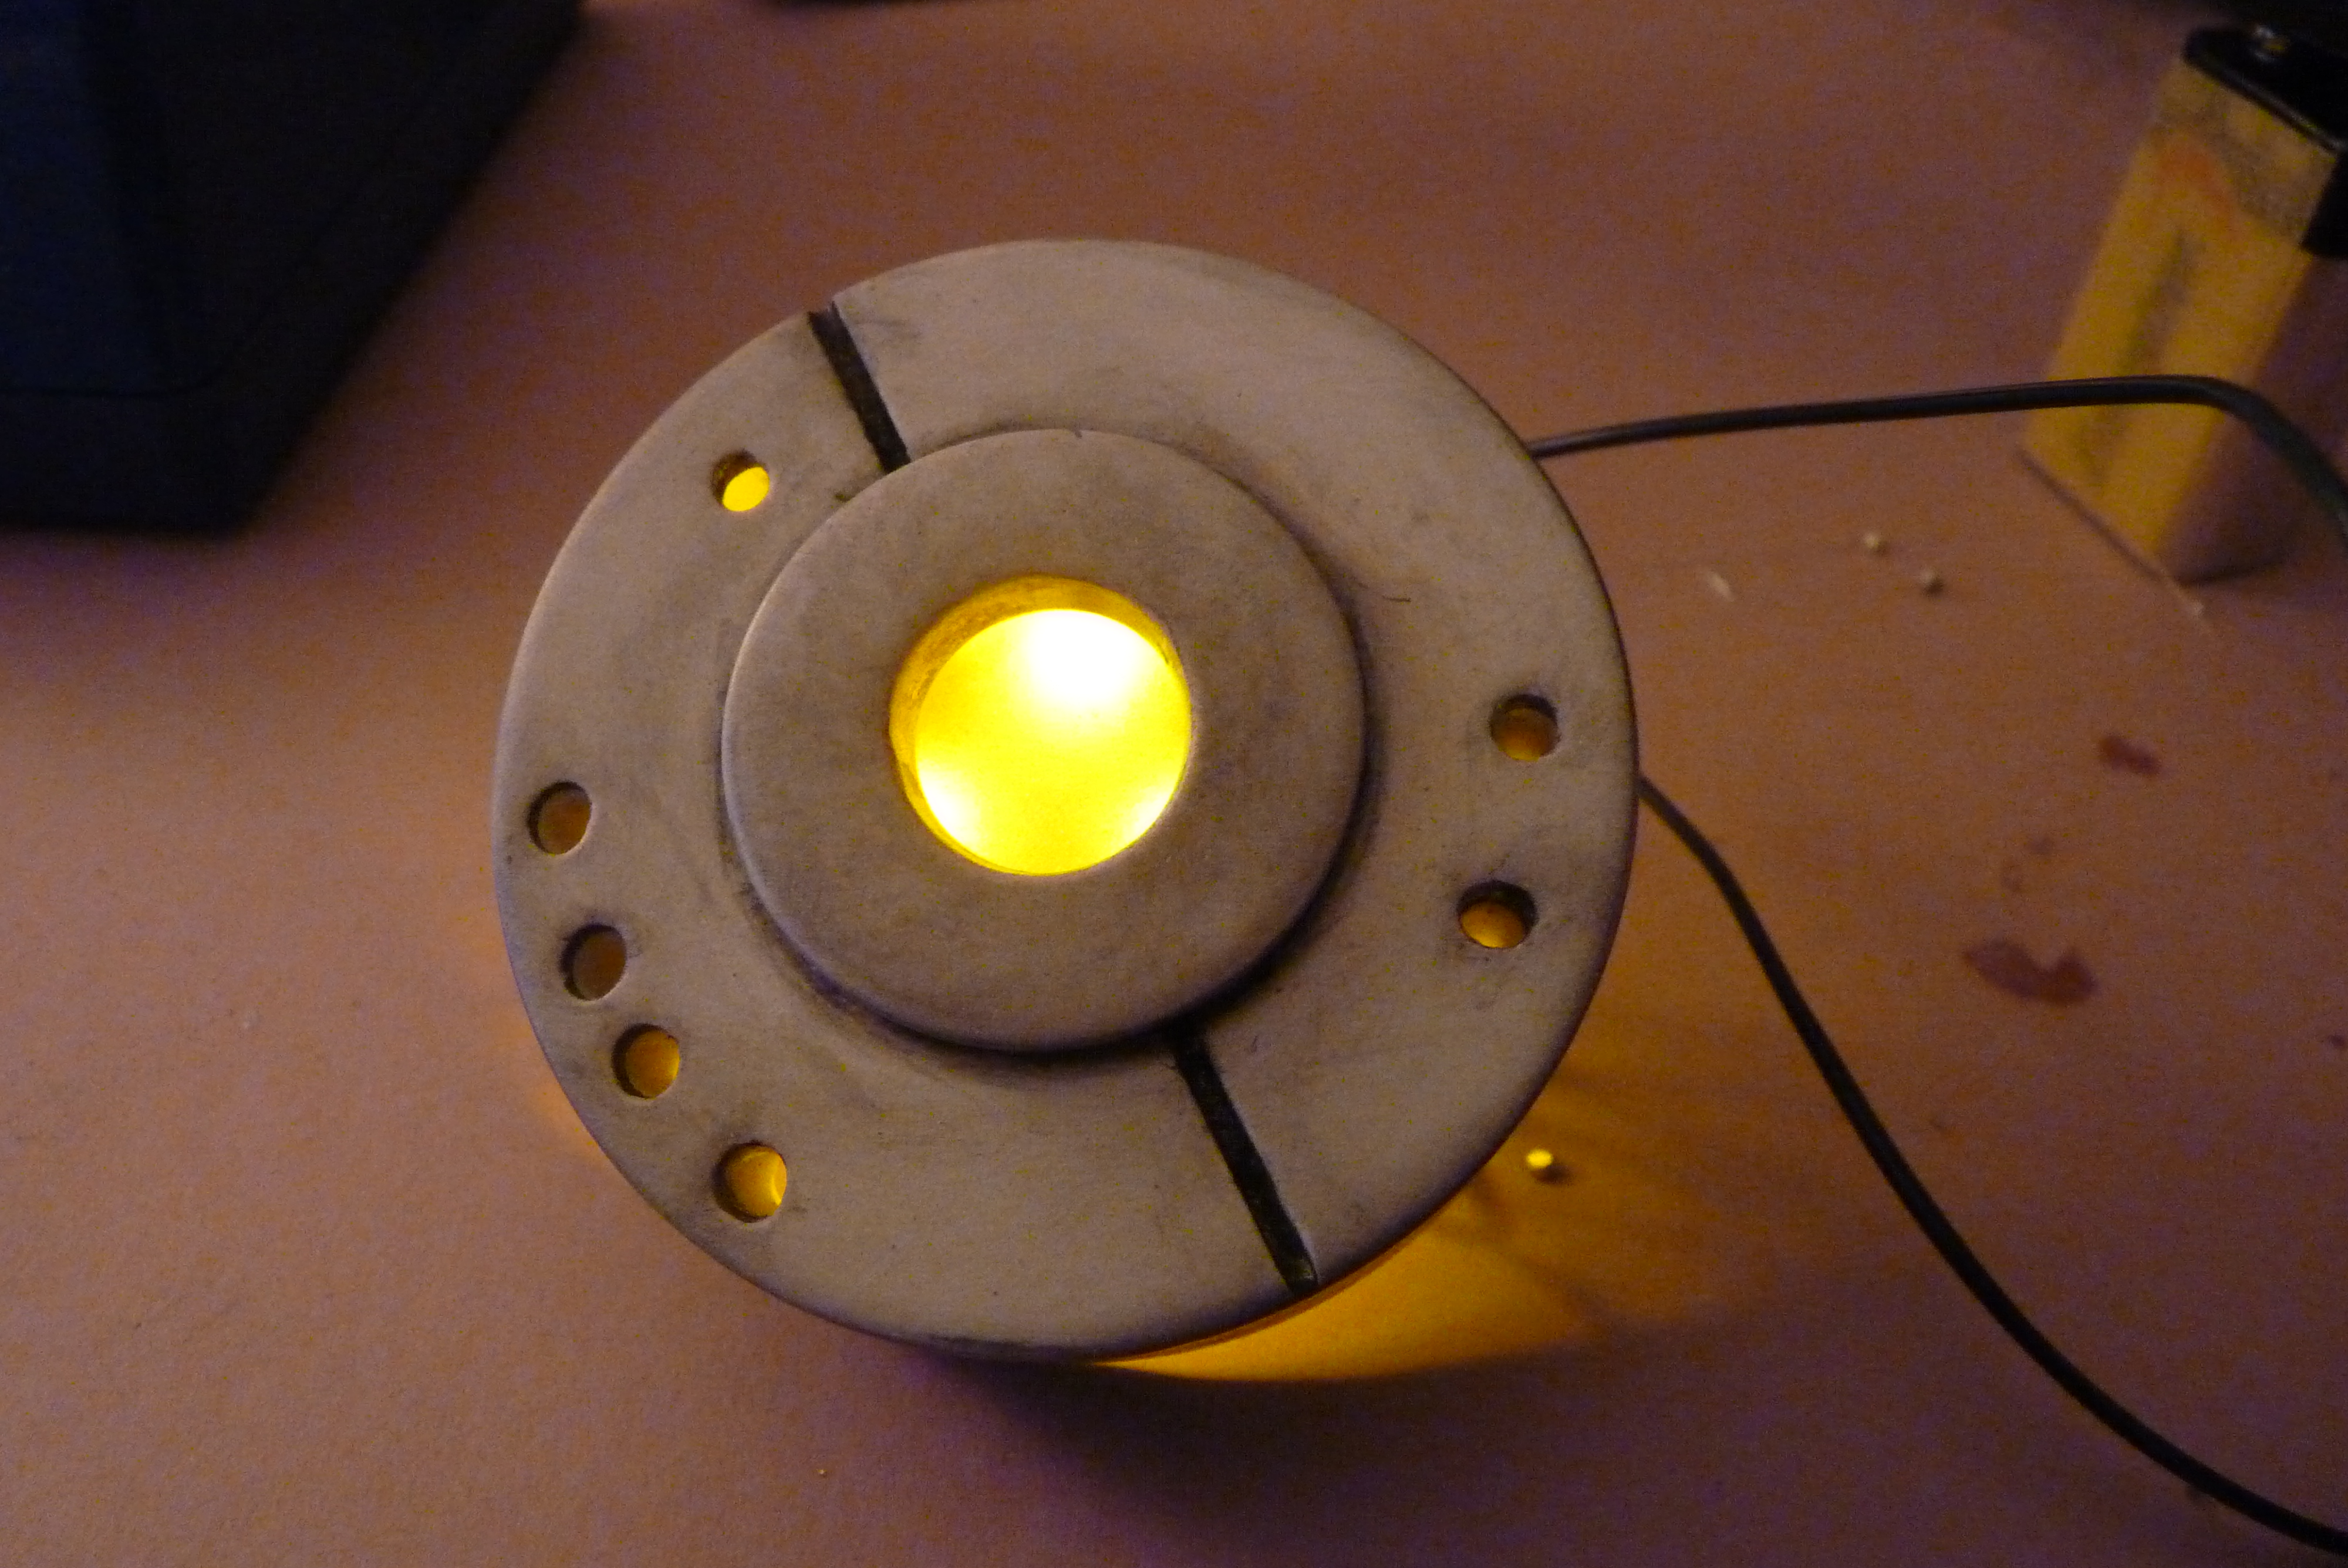
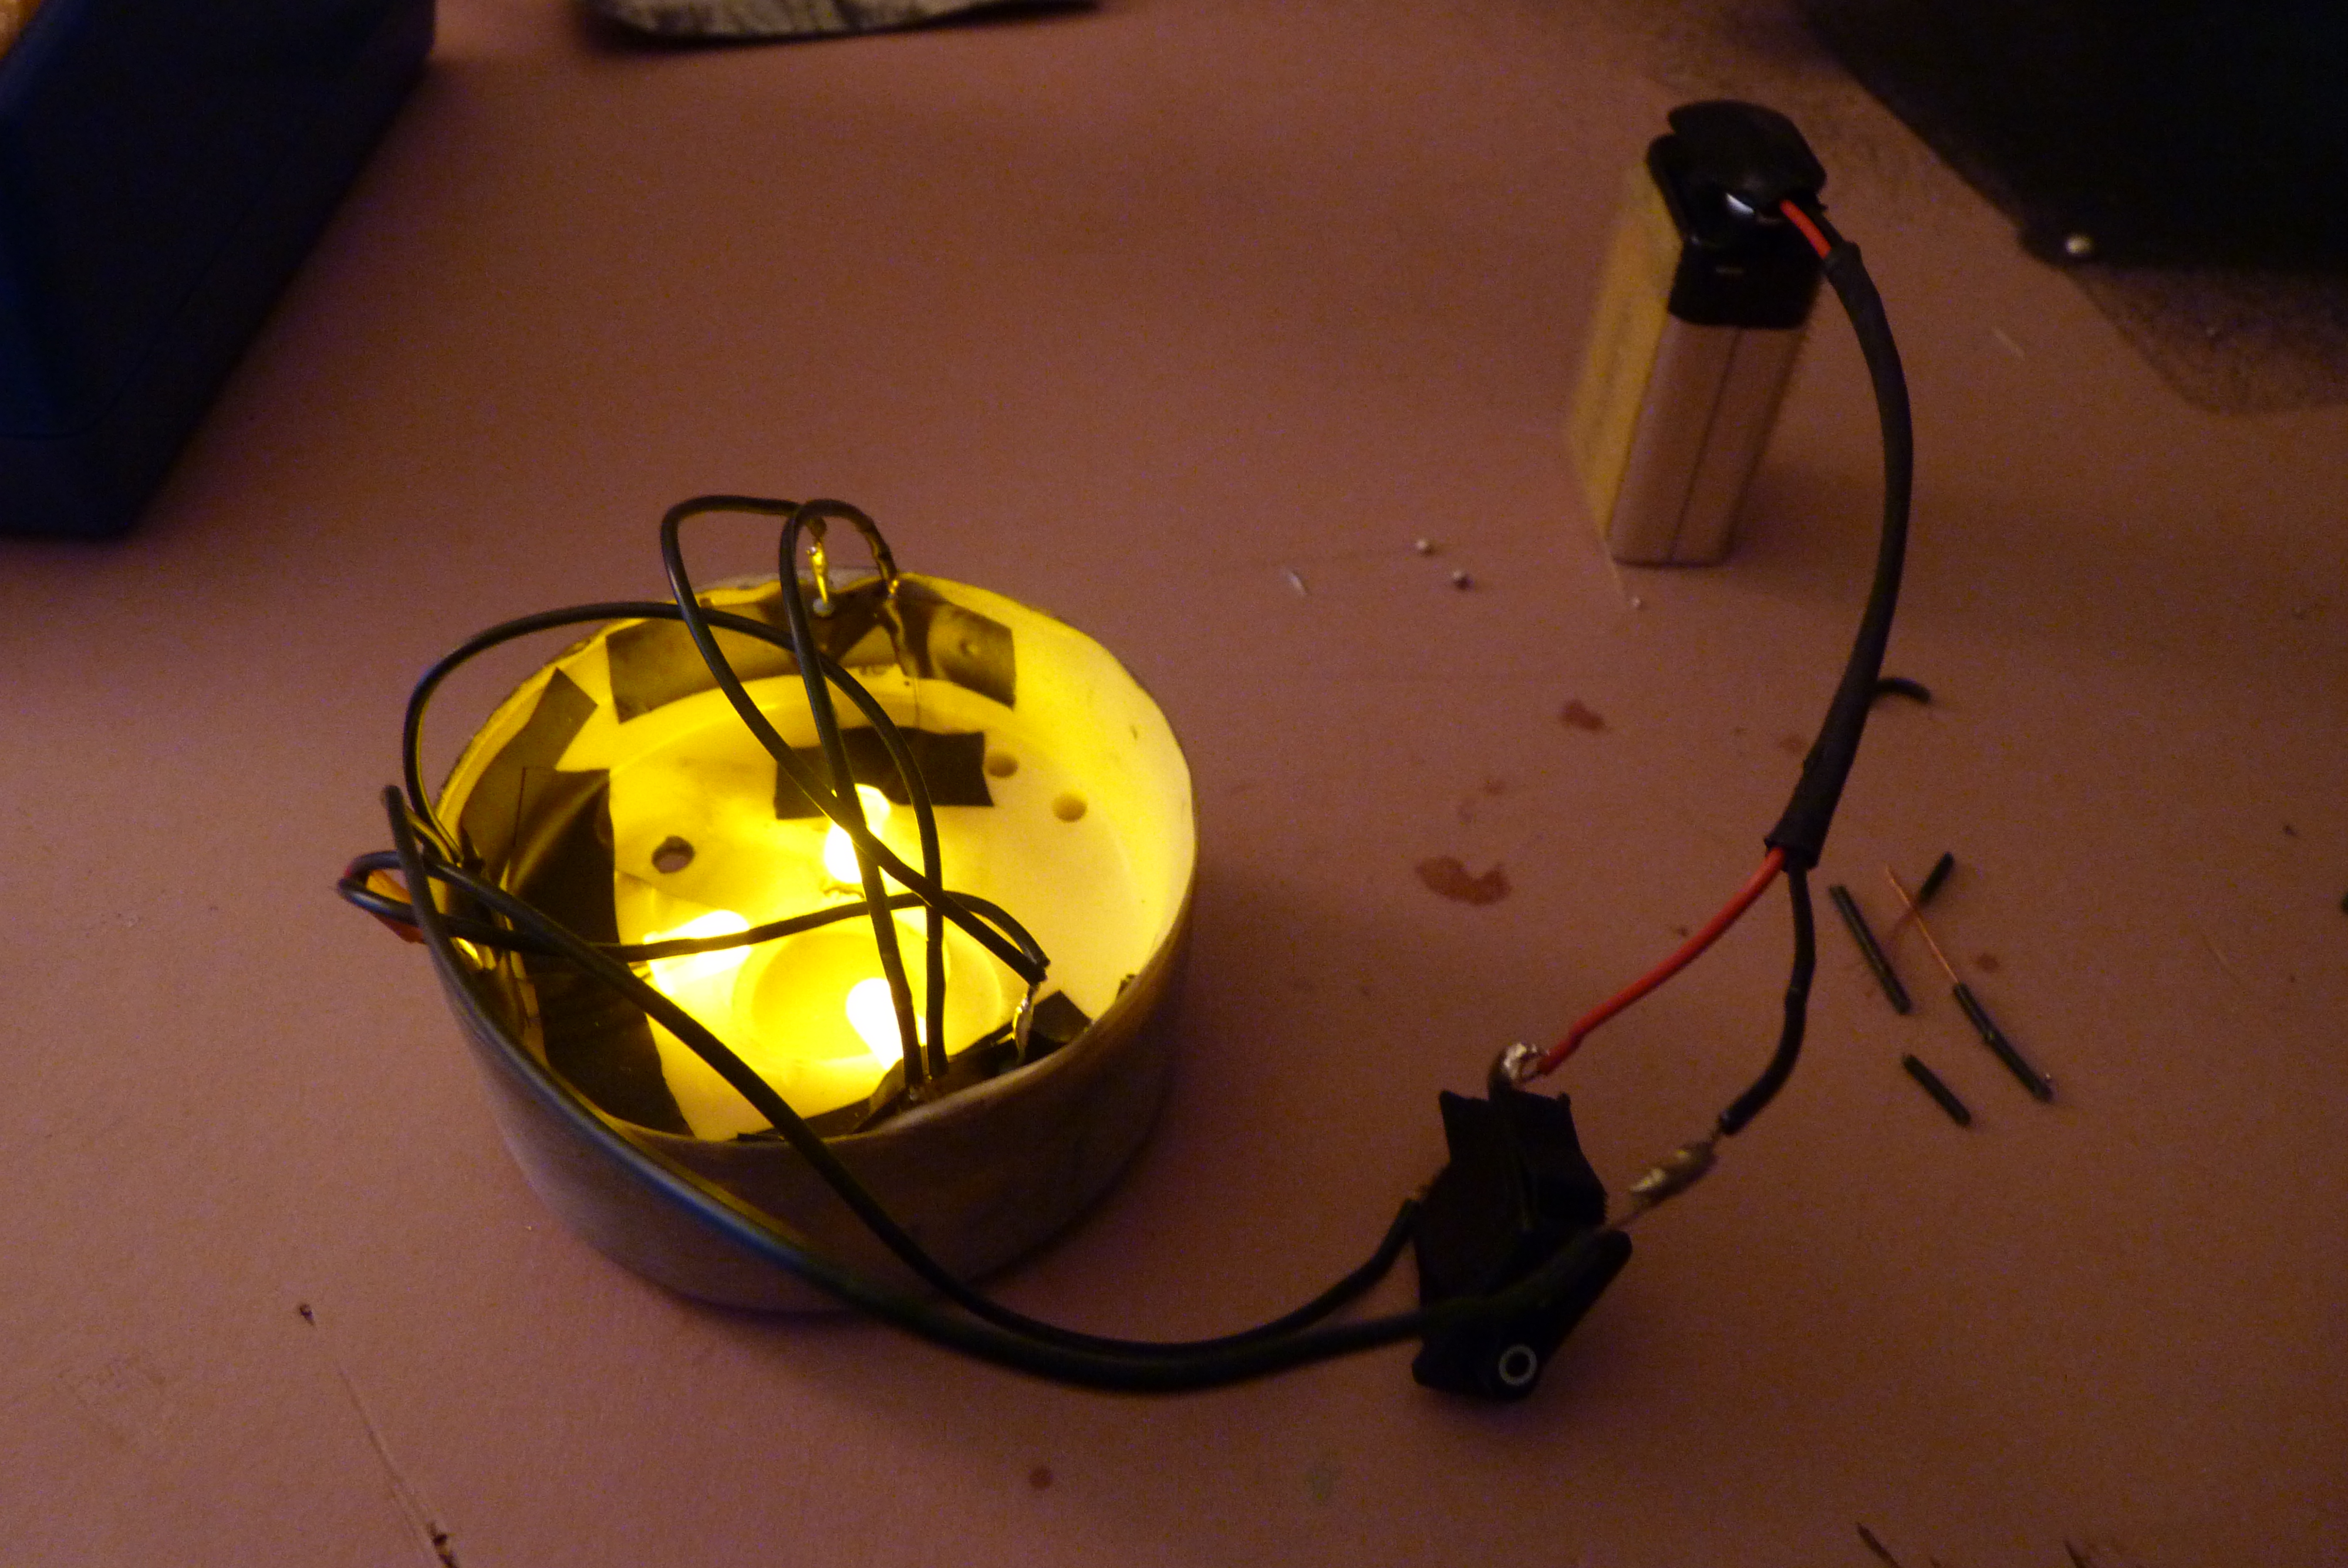
- I used 3 large LEDs for my PotatOS eye, with the circuit going 9v battery > switch > resistor > LED > LED > LED > back to battery I tried illustrating it for you as it would be better than me explaining it (Fig 1) But the resistor I used was 169 ohms, which I recommend you try recalculate a resistor for yourself, I could only buy a mixed bag in my electronics store and this one seemed to be the best fit.
- I ran the wires for my battery and my switch through the hollow tube, the switch for the LEDs was placed at the back of the box, and the 9v battery was velcroed to the underside of the base so it could be changed easily as I thought that would run out faster than the one for the voice card. (Boy was I wrong!)
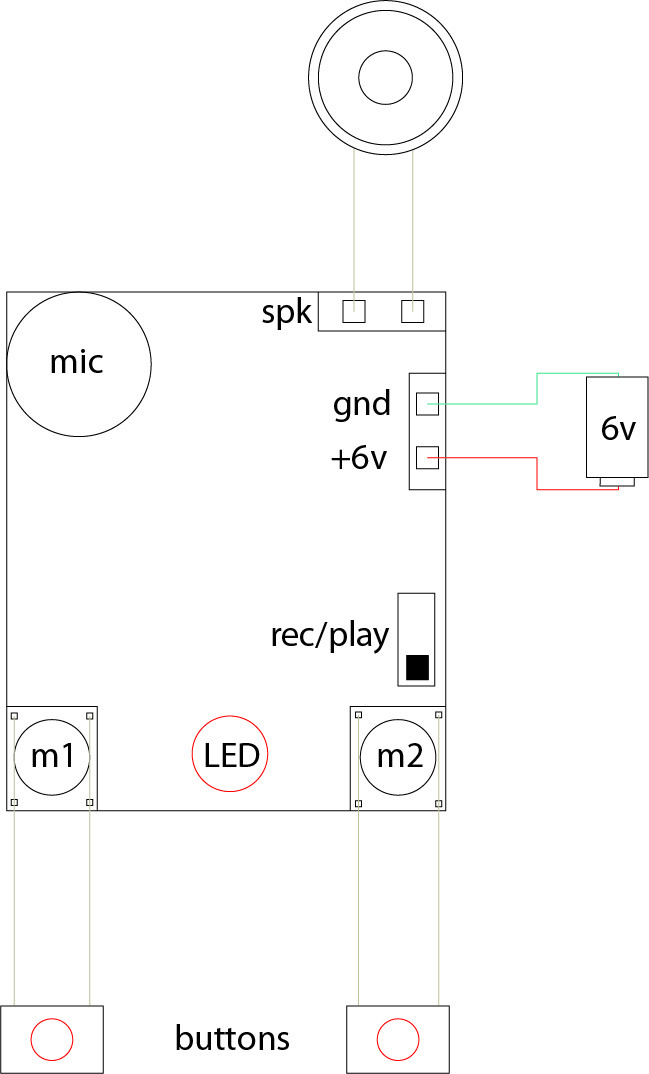
- For the sound recording module I used was this one which can record 2 voice messages at 20 seconds each and runs on a 6V battery. There is a little slide switch on the module (Fig 3) so you can switch between Rec and Play mode, I found the easiest way to record was to press record and hold the module up to the speakers of my laptop. To extract the sound files from the game it's back to Nem's Tools again, but this time we're using GCFScape. Open the program and go to File > Open > Wherever your Steam folder is > Steam > Steamapps > Common > Portal 2 > Portal 2 > pak01_dir.vpk scroll down this massive amount of files to Sound > vo > GLaDOS and search for the PotatOS fall files. You can then extract the files you want to an easier to get to folder. Because her sounds are a bit cut up, I made a two playlists in windows media player with what I wanted her to say, I found this to be the easiest option. From there following the instructions you got with your sound module, you can record and re-record the sound until you're happy with it.
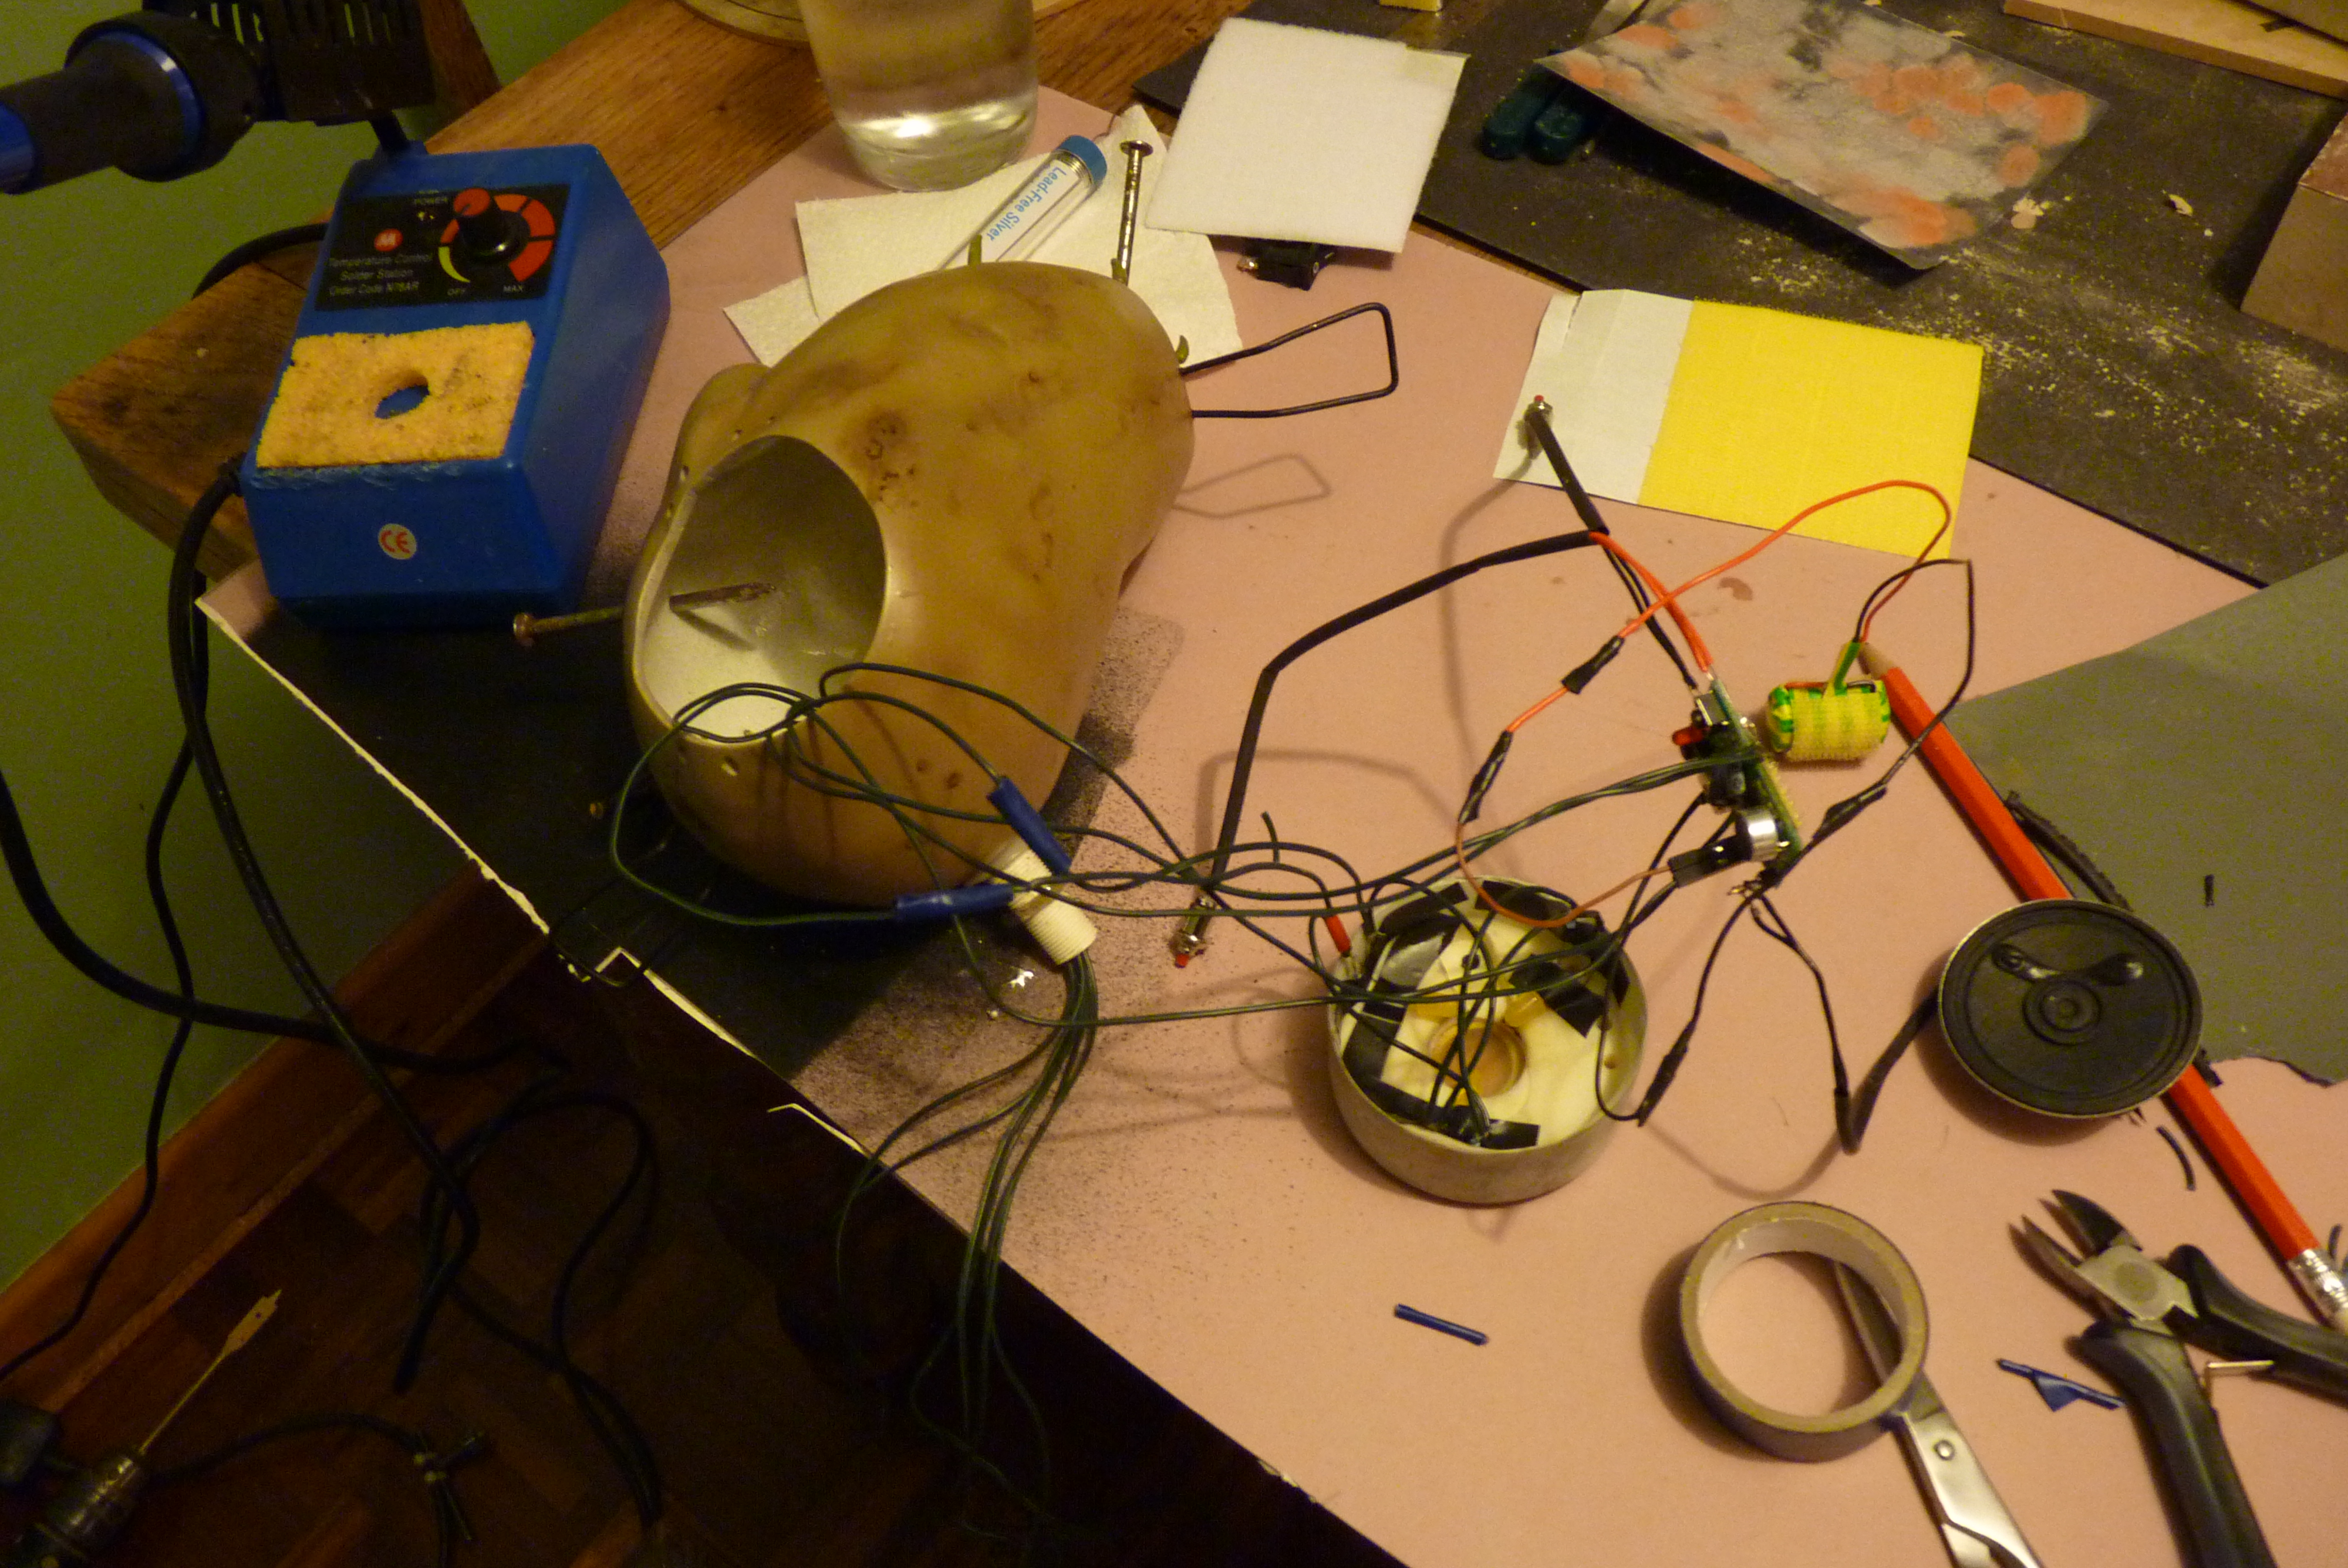
- On my sound recording module when the slide switch is in the play position, the buttons used to record doubled up as play buttons, but they're no use to me if they're stuck inside a potato! Flipping the module over I soldered wires to the positive and negative pins that were semi exposed which then ran off to my small button and my large button (Warning! If you have any switches in the base remember to feed the wire through the hollow pipe to them, don't solder them before hand because they wont fit though that little hole!). I did did this button extender trick for the second button, and they worked like a charm. If you do they same be careful not to fry your module in the process! (Fig 4 and 5)
- The speaker I used for the sound module I had to buy separately but I bought it in a buzzer kit that I needed to solder together myself which was good practice and I do recommend it. Make sure when you're getting your speaker though, that it's not too big, otherwise it will never fit in your potato!
Or you could...
- You could mount the speaker outside in the base along with the large buttons and batteries for better sound.
- This is where you guys come in! If anyone see's see an easier way to do this, or knows the resistor you should use for 3 LEDs and a 9V, please comment below and I'll make edits here accordingly!
Putting Her All Together!
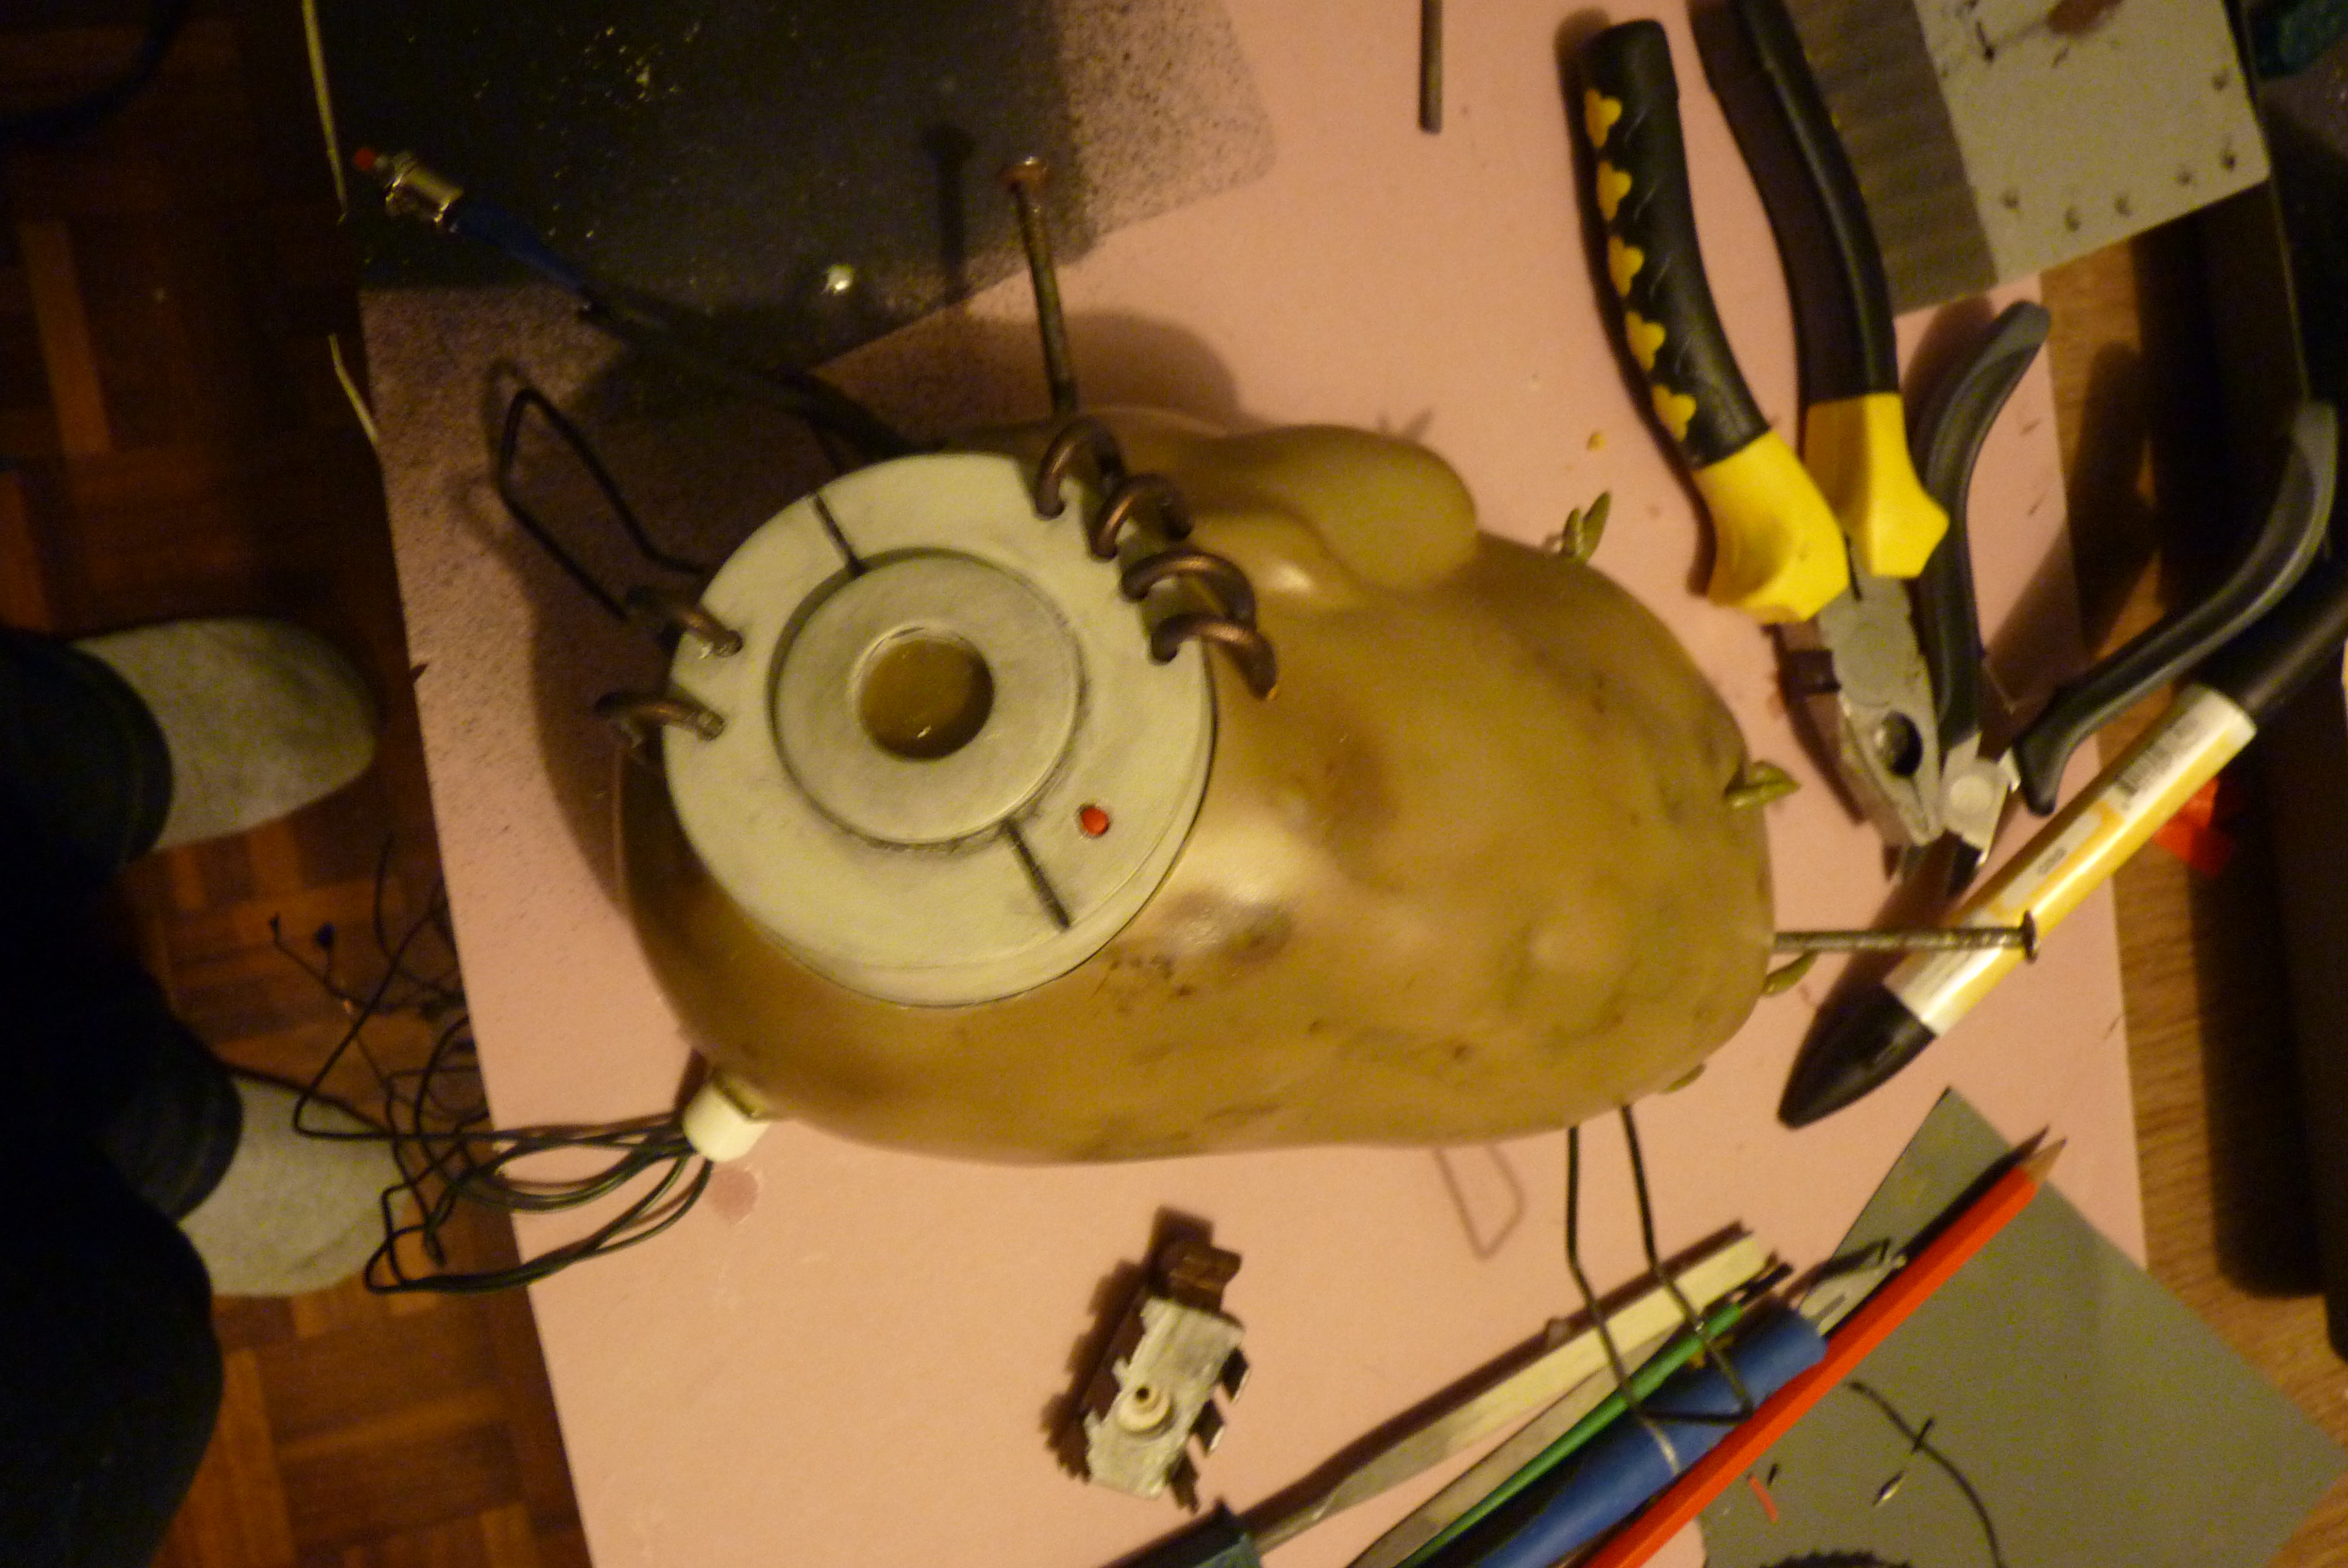
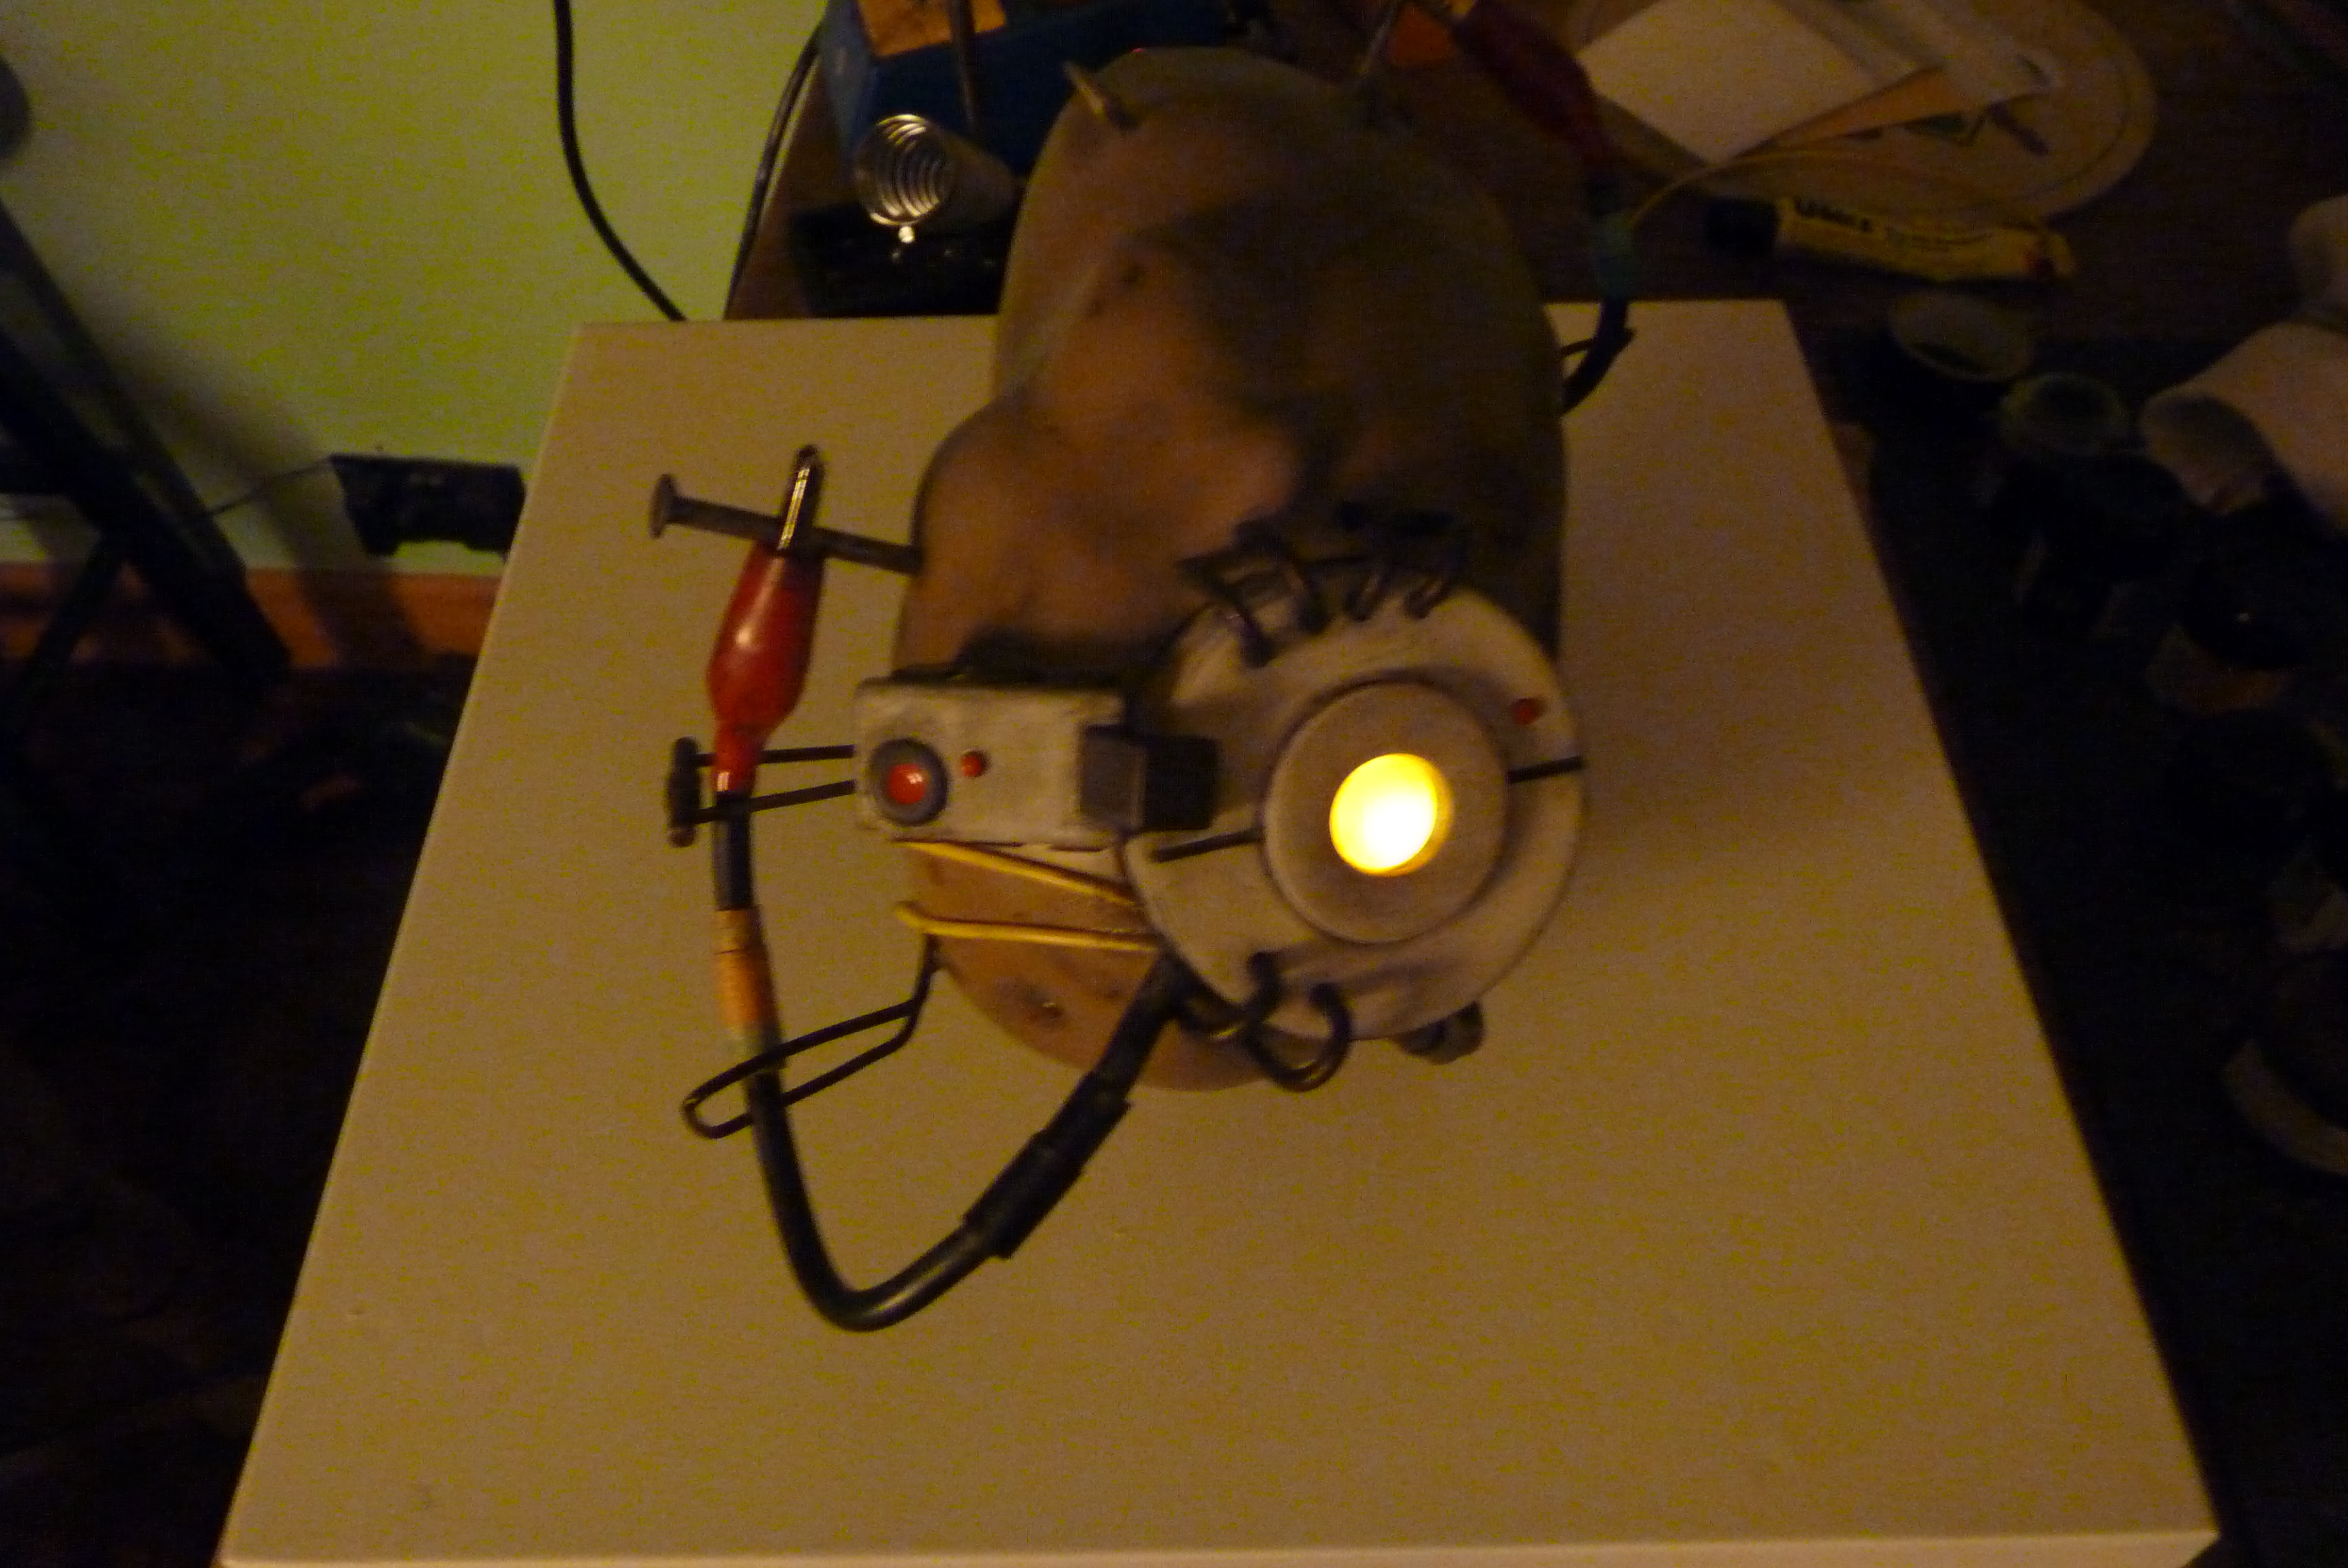
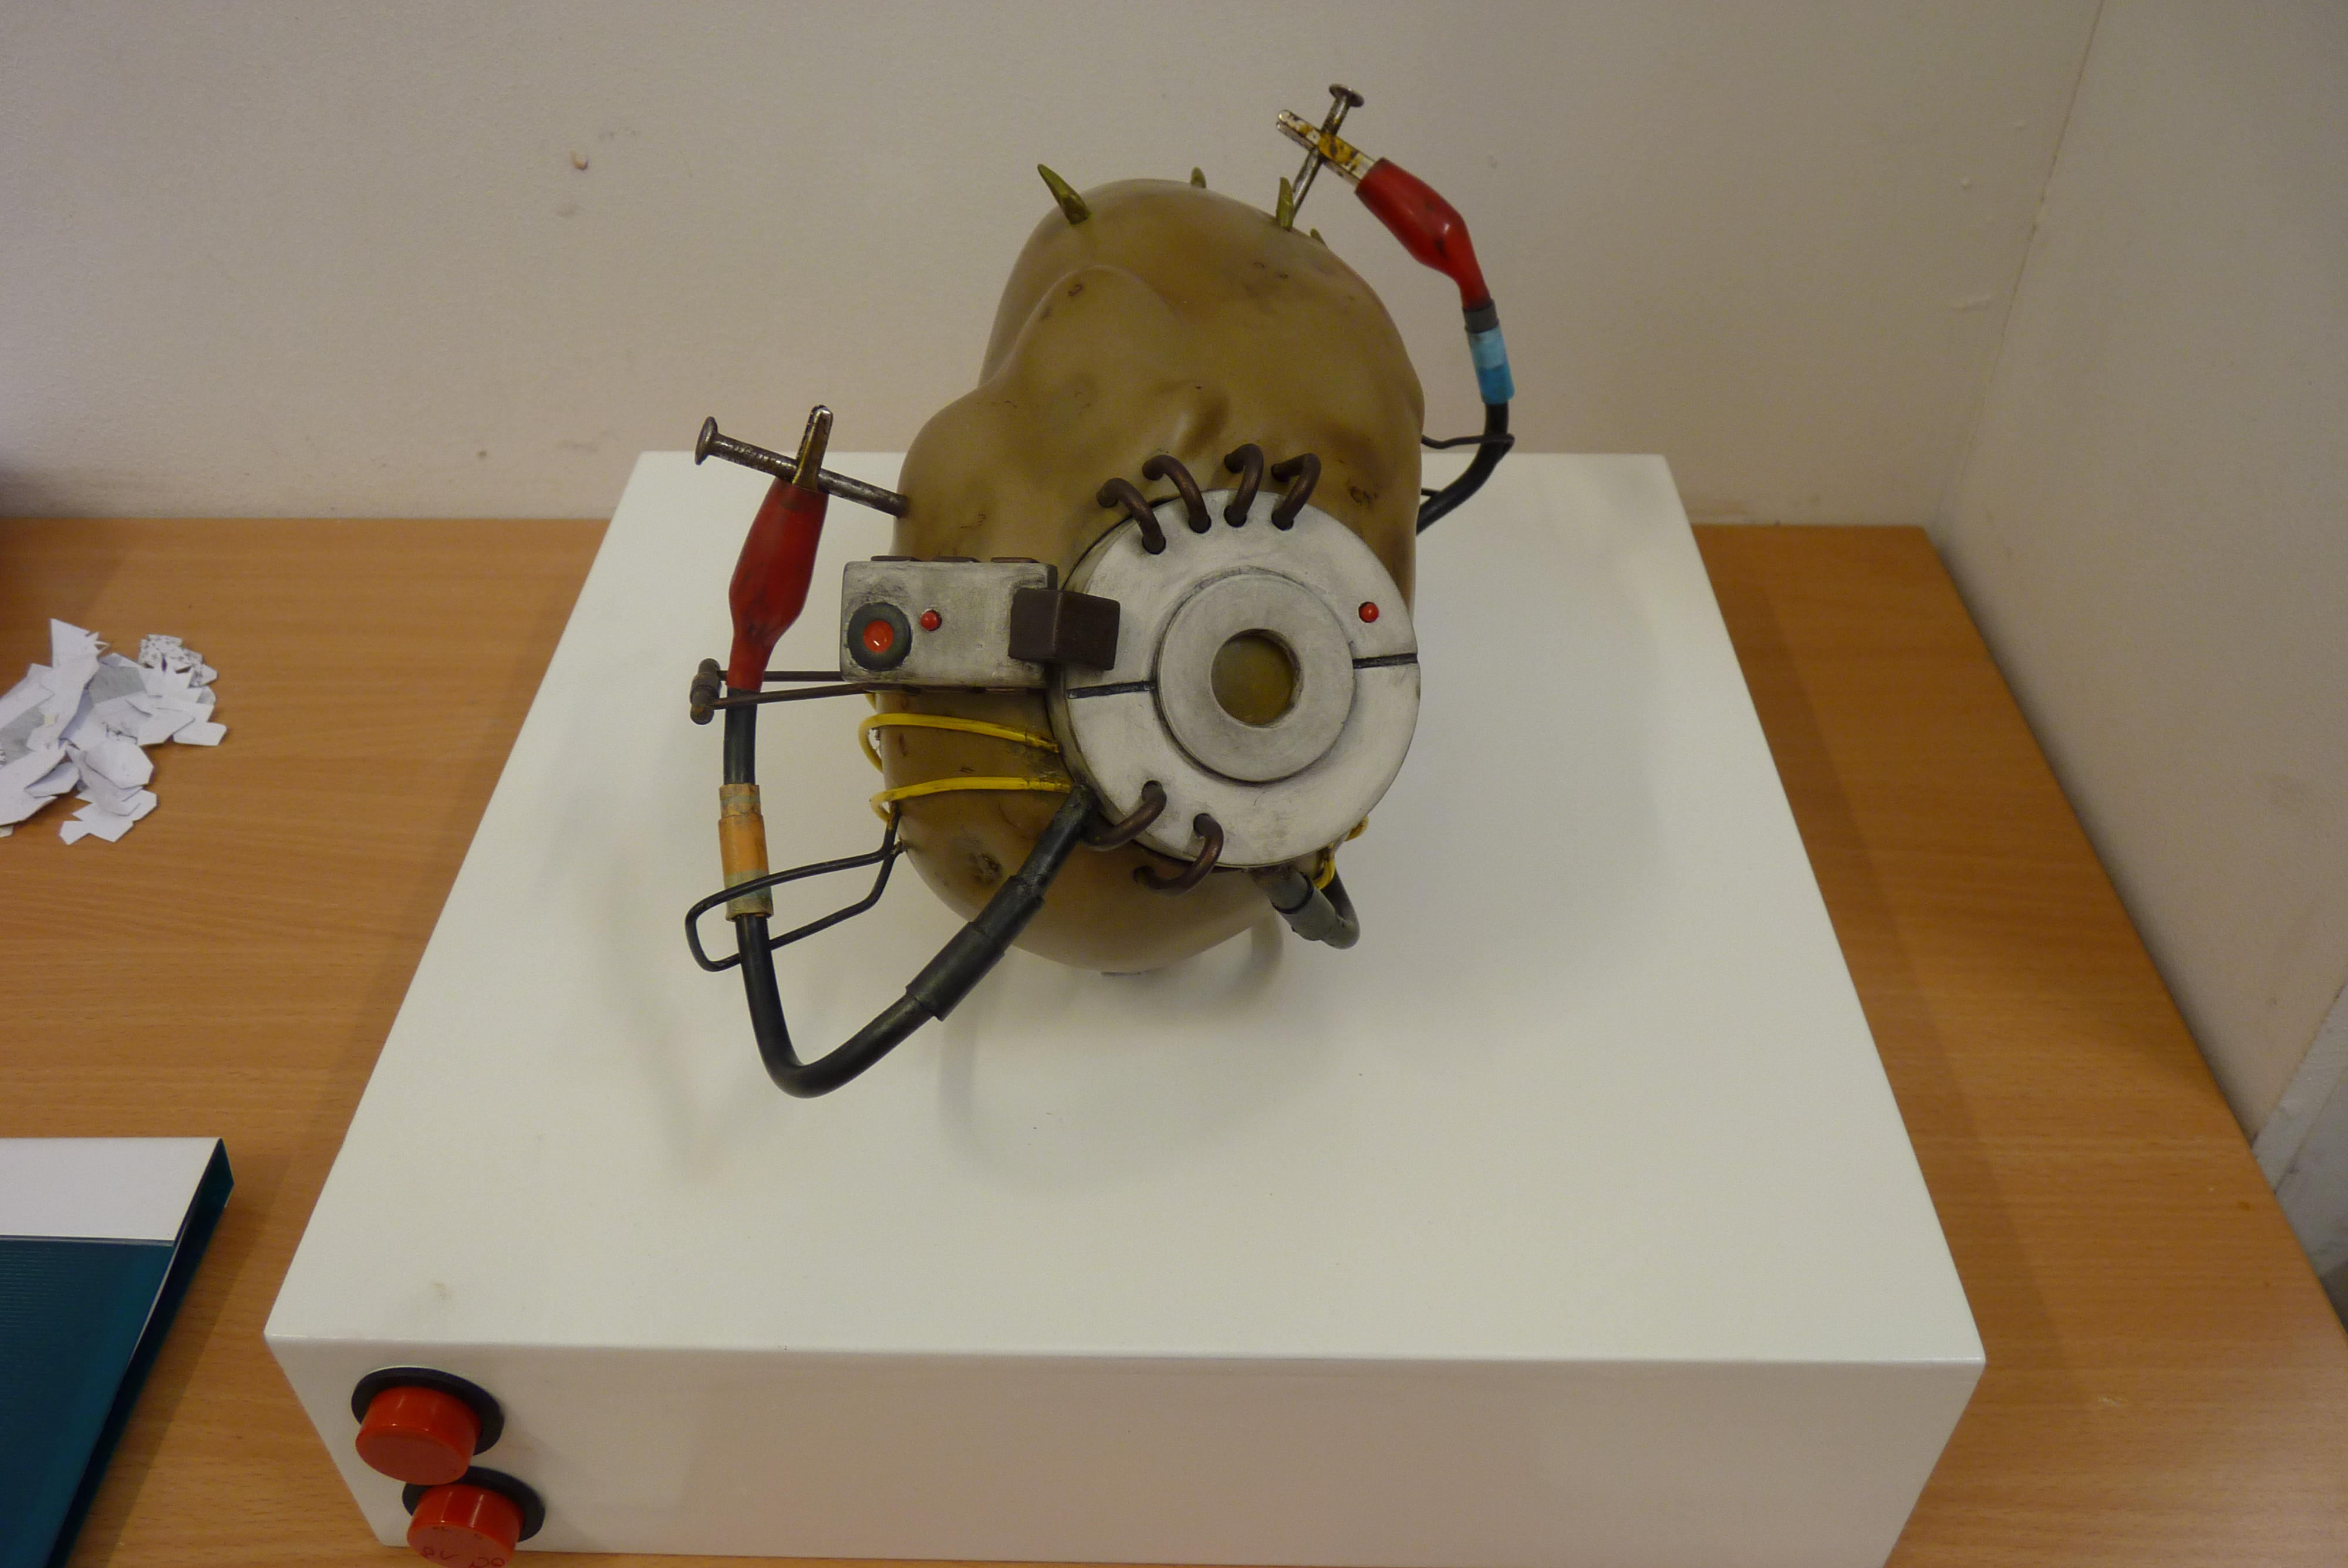
Almost there! You just need to put all her parts together now, double check your electronics and test fit things before you add any glue too.
- The very last thing to mention is the yellow bands around her body. I used yellow wire glued into place once I had everything where I wanted, but as it turns out these are supposed to be elastic bands! You can cut up your elastic bands and fit them into place, or the yellow wire does the job anyway I think and doesn't run the risk of wanting to spring back into it's original elastic band shape once you've glued it.
- When putting feeding your electronics into your potato, small hook and loop (velcro) pads are great for keeping things in place, especially the speaker. The last thing you want is a heavy speaker crashing into your sound module.
- LEDs were kept in place with just a dollop of super glue. Electric tape can work wonders too, but beware as it might want to come off the resin surface after a while.
- When you have the brackets in their final position, you can hide the obvious clean hole in the potato by adding a bit of glue and painting around the area with the weathering kit and adding a bit of rush colour to where the metal enters the potato.
Here's a video of her working, I managed to get a clip just before her batteries died. You can see how the speaker not having air holes hinders the sound a tone. That and her batteries were dying.
Thank you for reading my Instructable! If you decide to make your own PotatOS using some or all of the steps you've seen here please post pictures in the comments, I would love to see what people come up with and any improvements people make!
Also check out my website www.3cCreations.com which has links to my facebook, twitter and google+ which I'll be adding details of new projects to soon!