Light Up the Cassette Tape, Get Hyped in Rave Parties.
by GALDEN999 in Circuits > Wearables
4214 Views, 23 Favorites, 0 Comments
Light Up the Cassette Tape, Get Hyped in Rave Parties.


What up! This is Galden.
Galden is a crew to propose hobby electronics for gals, by gals. Let me introduce you how to make LED accessories which are perfect fit for rave parties.
What will look lit when lighted up? When you have something lighted up, you'll get an attraction, but not everything look cool when lighted up. Sometime I make something not cool when I don't think about it carefully.
This time, I made a necklace with LED as a prototype but this doesn't touch my heart at all. I threw it away from a window with a tear in my eyes.
The moment came when I was listening to speed core and eatings snacks.
" A cassette tape looks perfect to hang around the neck and dope!"
Thank god of speed core, you should always listen to speed core when you don't come up with a good idea.
Get Stuffs.
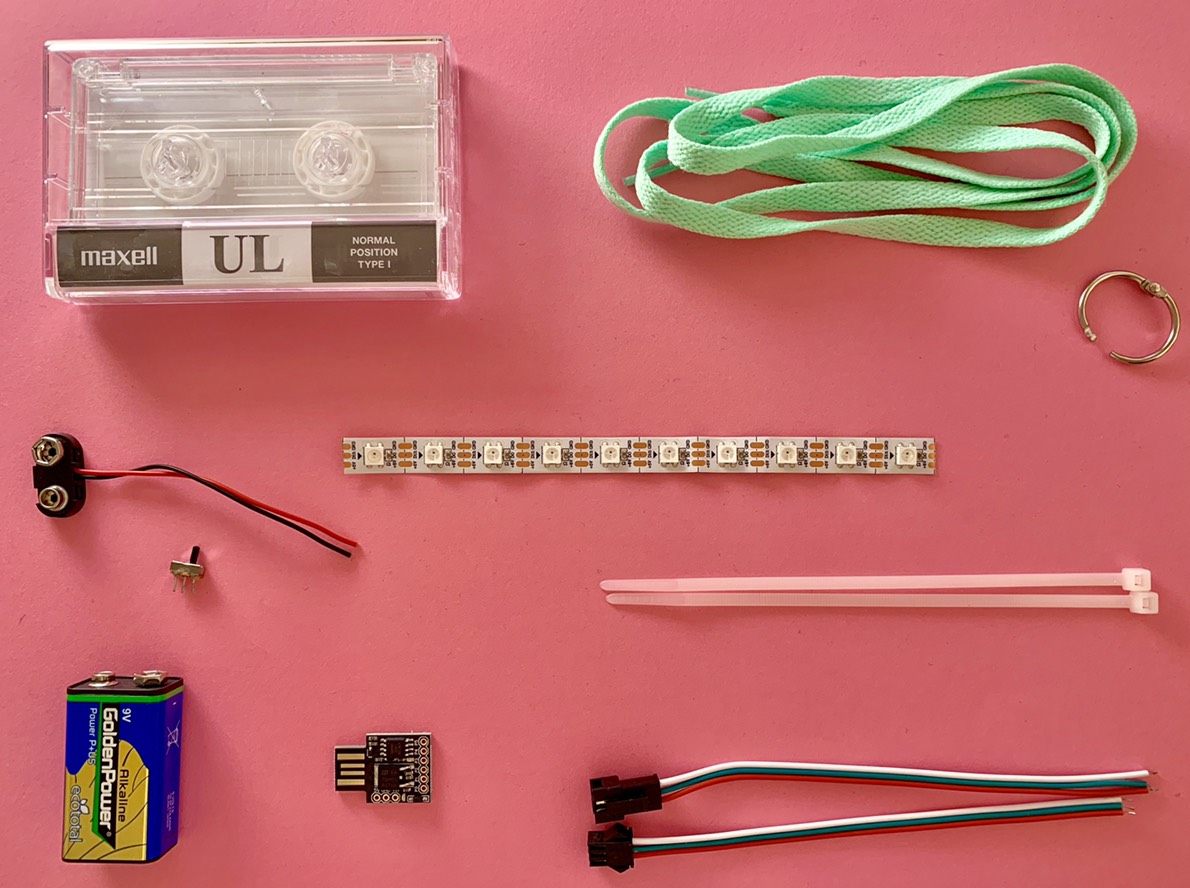
You can get most of materials to make this item in one dollar stores.
I'm using a super tiny board compatible with Digispark. It's a bit complicated to set up, but because it's cheap you can make electronics without worrying a budget.
Materials
- 1×Cassette tape (Better to choose the one with a transparent body)
- WS2812B LED tape (10 LEDs of 60LEDS/1m are needed)-Amazon
- 1×String (For a strap. I used a shoe lace)
- 1×Metal ring
- 1×Digispark compatible board-Amazon
- Electrical wire (Better with connectors for rewriting the program)
- 1×9V battery
- 1×9V Snap button-Amazon
- 1×Slide switch-Amazon
- 2×Wire band
- Double sided tape
- Glue gun
- Nipper
- Wire stripper
- Soldering iron
- Solder
- Hand drill or Pin Vise
- Computer
Modify the Cassette Tape to Place LEDs
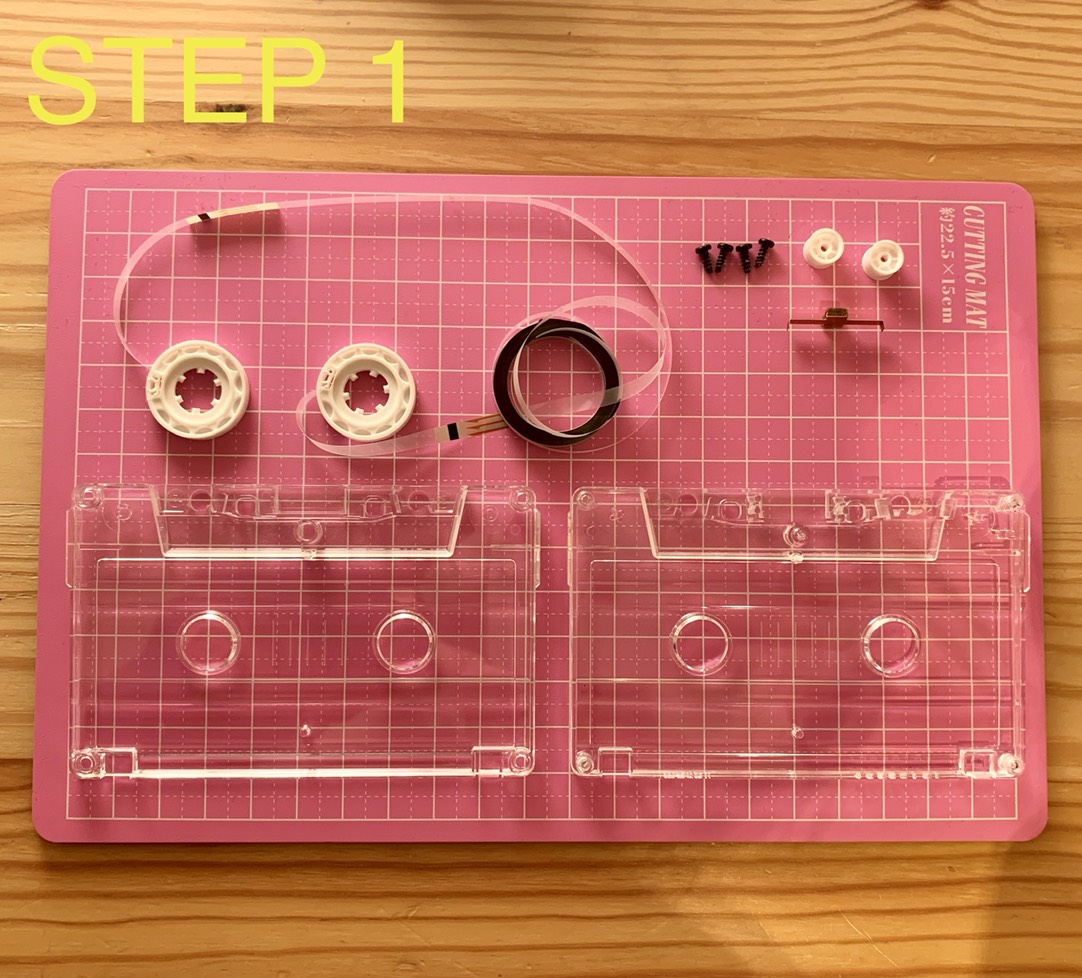
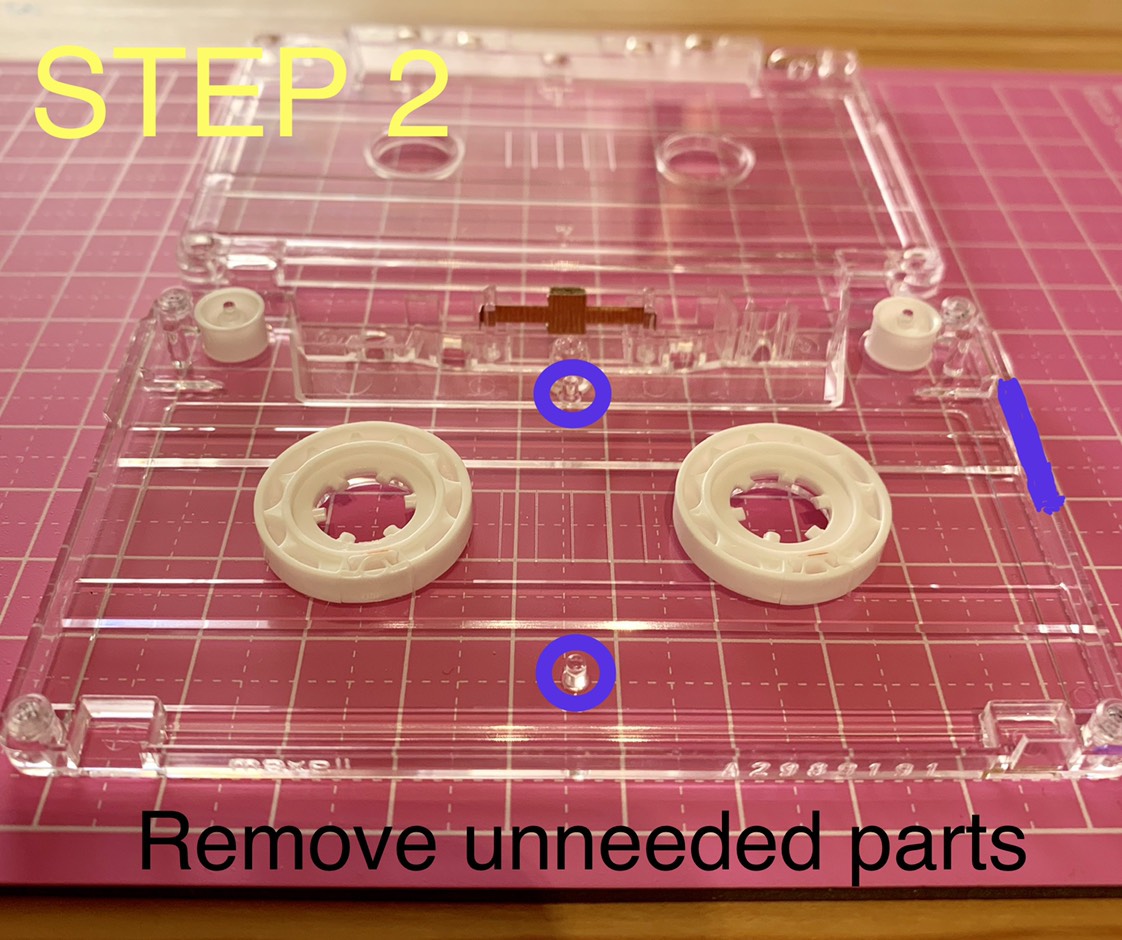
First of all, remove screws on the each corner. Do not lose those screws. I recommend you to put them on a masking tape or keep them in some box.
Also, it's better to take a photo before disassemble, so that you can reassemble it easily later. We're not using the magnetic tape so cut it off with the scissor.
Make a hole on the top of the cassette for wiring. Keep everything in the original position except for the magnetic tape.
That's all for modifying the cassette tape. Once again, do not loose screws, you'll be so sad.
Soldering of LEDs and the Board
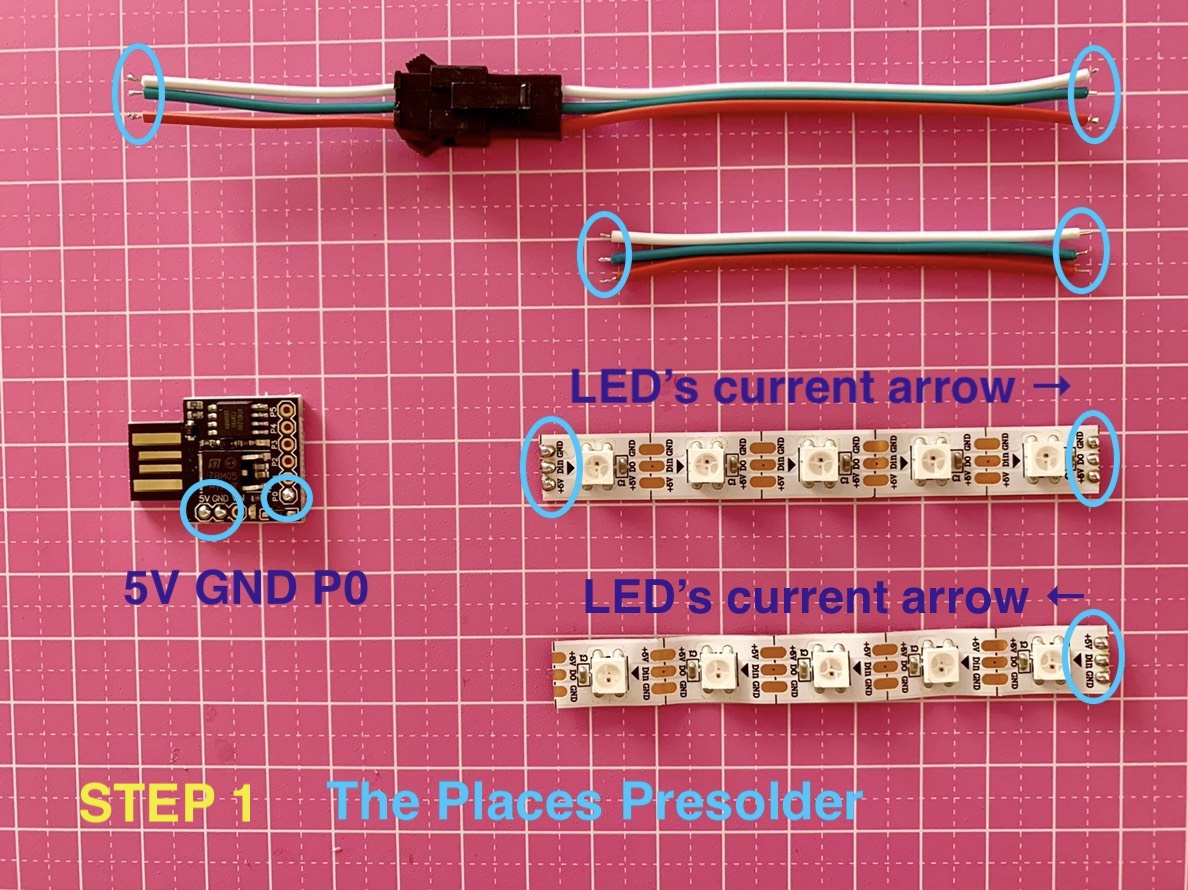
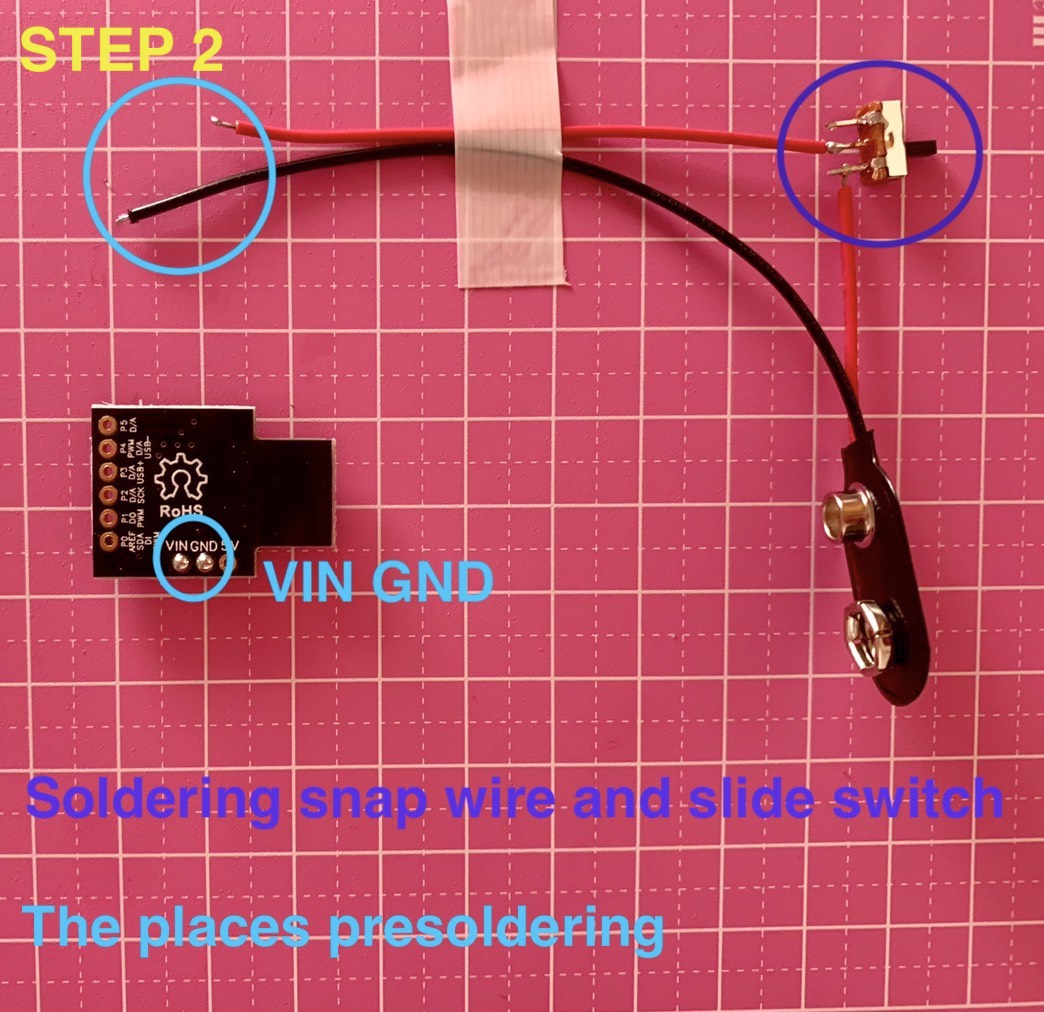
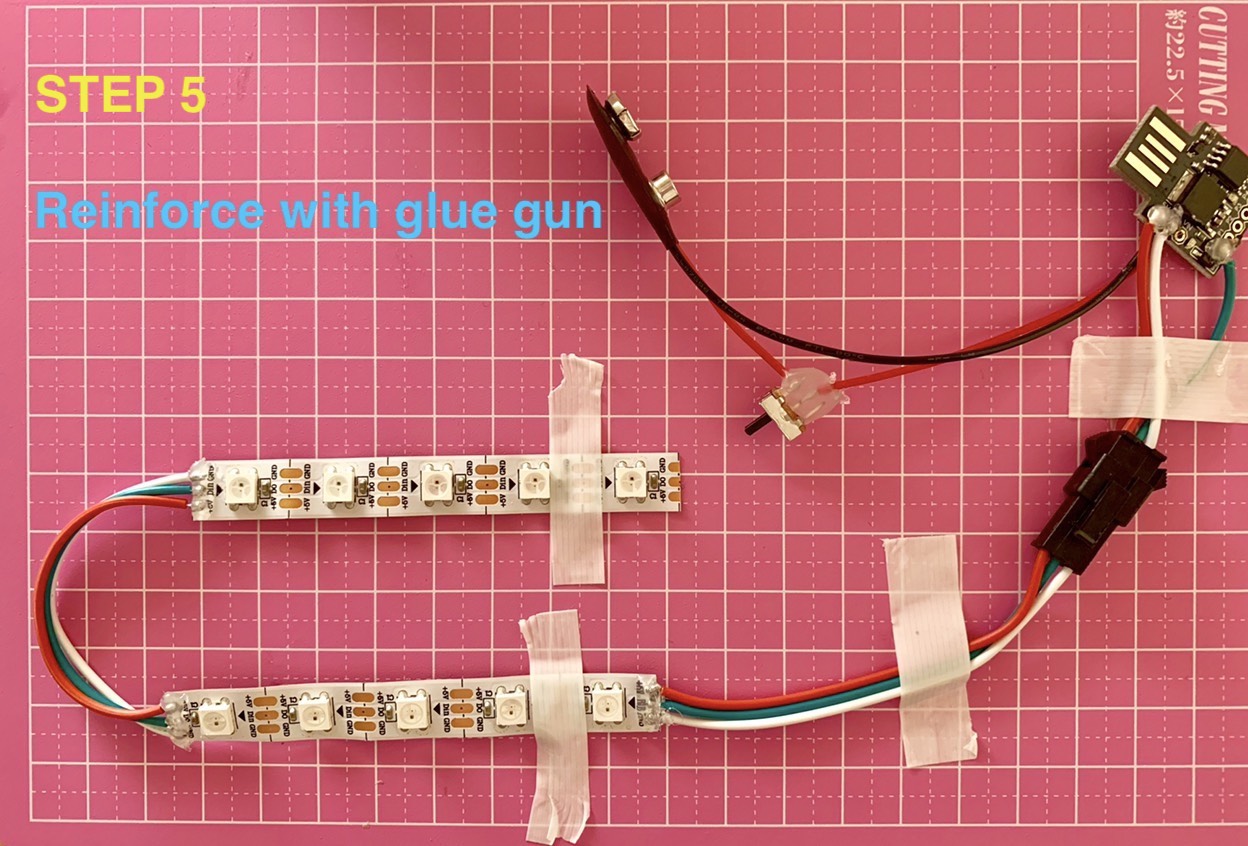
Cut the LED tape in half (5 LEDs each) to fit in the cassette.
STEP1: Solder where circled in the above photo. It's called presoldering and it makes easier to solder wires and other parts together.
Presolder the digispark board on holes with 5V, GND and P0.
STEP2: Cut the red snap wire into half and put the slide switch in to middle of wire by soldering.
Presolder the backside of the board and the snap wire for 9V battery. For the backside, solder holes with VIN and GND.
*Don't solder 5V and GND, it will burn the board and you'll freak out.
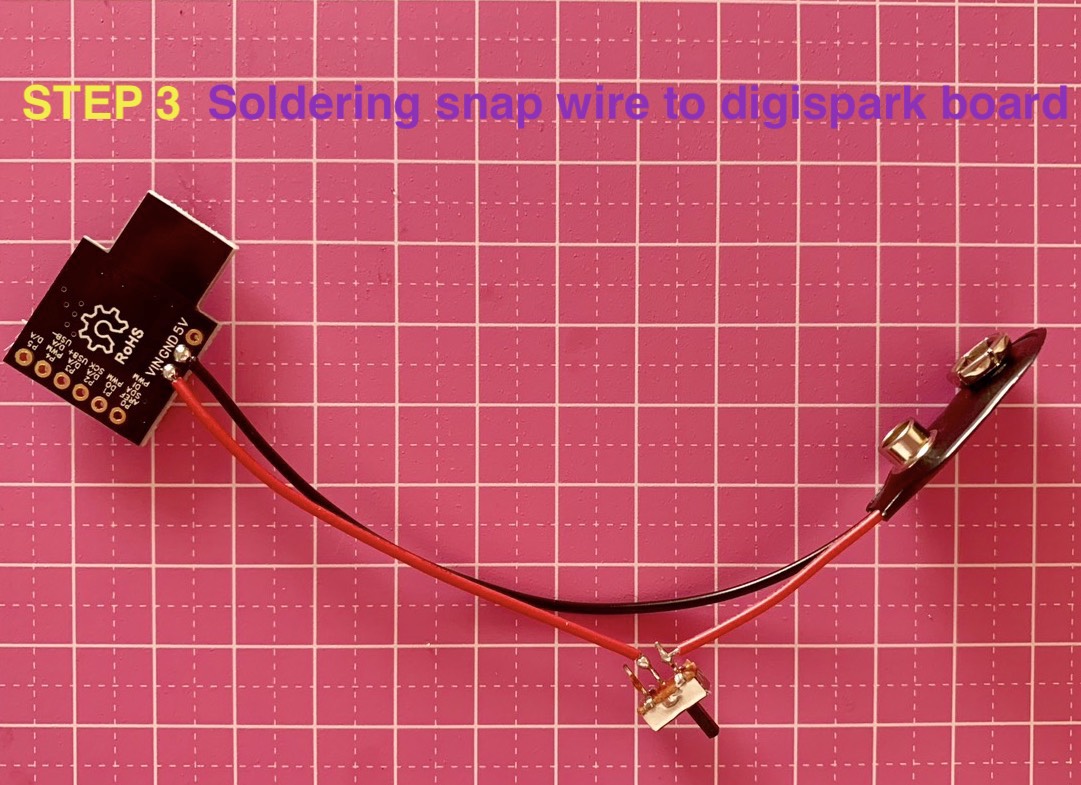
STEP3: After presoldering, solder the backside of the board and the snap wire at first.
VIN - red wire(plus)
GND - black wire(minus)
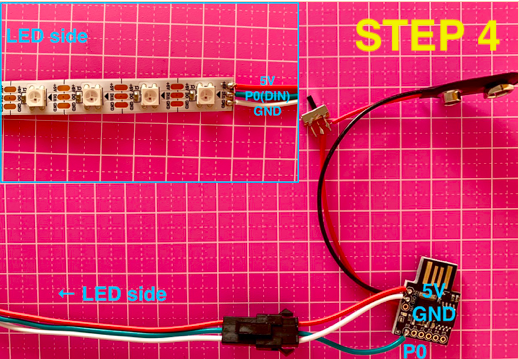
STEP4: Then solder 3 wires for LEDs to the frontside of the board.
5V - (LED) 5V: Red wire in the example
GND - (LED) GND: White wire in the example
P0 - (LED) DIN: Green wire in the example
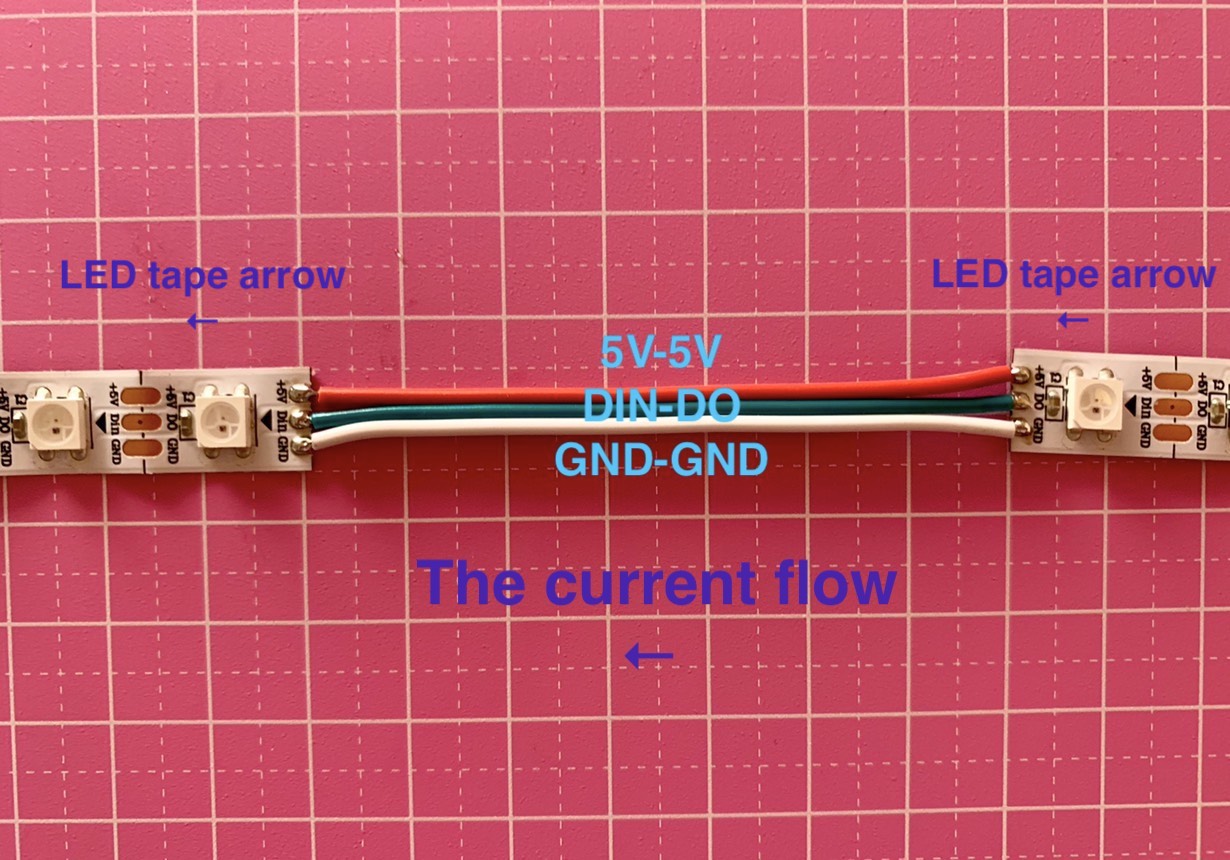
Solder 2 LED tapes together. Be careful to solder them same direction shown as the arrow mark.
STEP 5: It will look like this. I suggest to put glue gun on soldered part to reinforcement.
That's all for soldering part.
Coding


From this part, it'll look a bit difficult for beginners. Don't worry, you always can google when you don't understand some term.
Install Arduino IDE on your pc to write a program to the digispark board. -Getting Started with Arduino and Genuino products
Set up Arduino IDE for Digispark
You can refer the below link to install it. http://digistump.com/wiki/Digispark/tutorials/con...
I tested with Windows10(64bit) and ArduinoIDE 1.8.3.
For windows,
1. Download and install the driver
2. Launch ArduinoIDE, go to File > Setting > Additional board manager URL. Then copy and paste the link. http://digistump.com/package_digistump_index.json
3. Click Tool > Board > Board Manager
4. Click Search, Search for "Digistump AVR Boards" and install.
5. Select "Board: Digispark(Default - 16.5 mhz)" from Tool.
That's it.
Install Neopixel library
For using WS2812B LED tape,you will need to install library call "Adafruit NeoPixel".
You can follow installation step on Adafruit's neopixel library installation guide.
Writing Code
Here your preparetion to run code is done. Copy and paste below program to ArduinoIDE.
→Click here to download code←
Caution when writing
Click "Write to board" on ArduinoIDE without connecting Digispark to pc. Insert Digispark to pc after the message like in picture1 is shown.
Writing is done when the message like in picture2 show up.
Integrate LED and the Cassette Tape
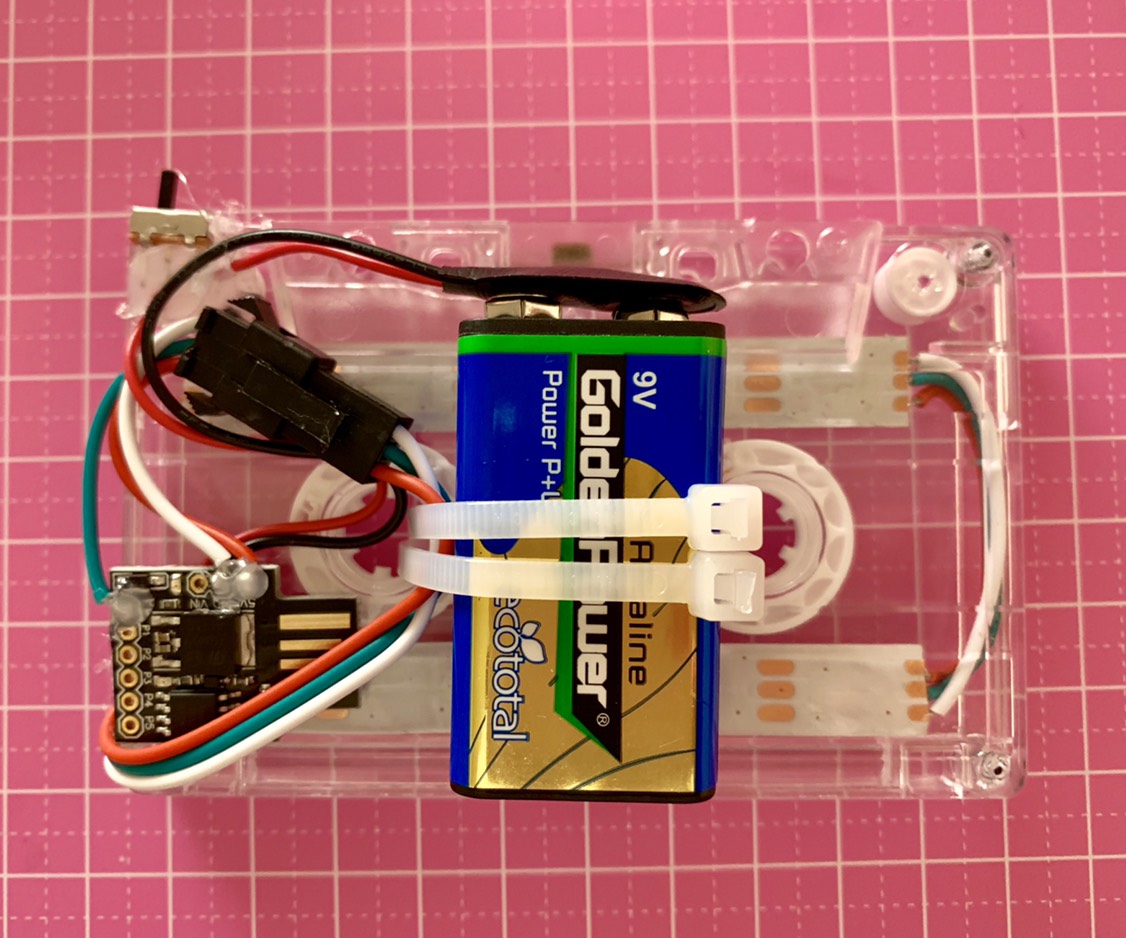
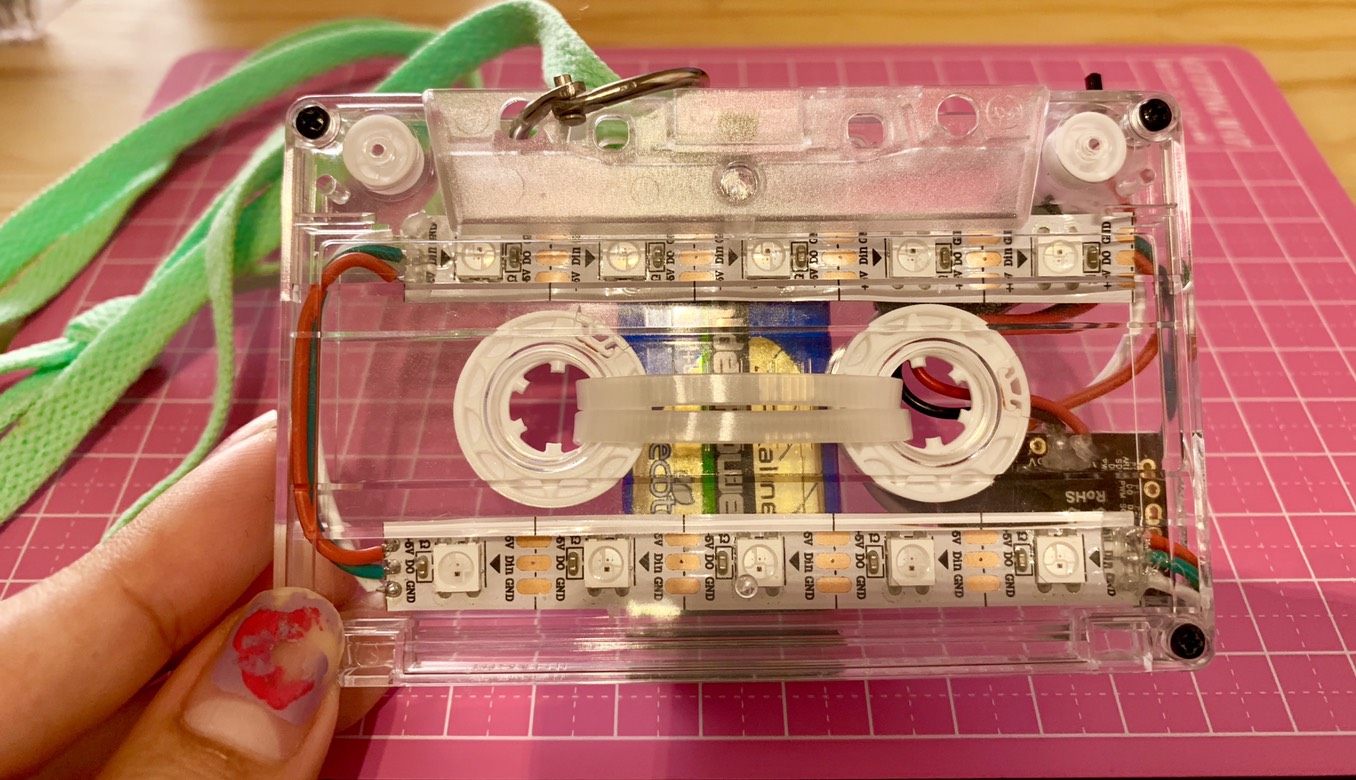
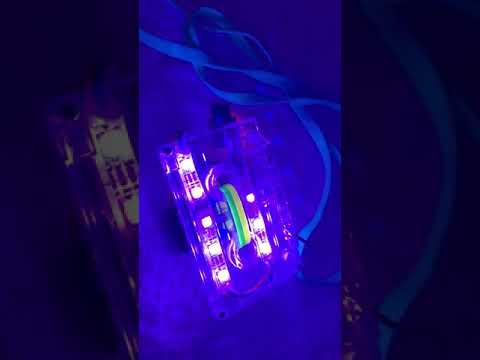
As shown in the picture, place LED tape and stick it on the side where you made the hole for wires. Place back all the parts and tighten the screws.
Bundle wires and place 9V battery with wire band using the holes on the center. Put double sided tape on backside of the battery and backside of the board so you'll not gonna loose parts even when you dance so hard in the party.
Use slide switch when you want to turn the lights on and off.
Based on the program you wrote, battery consumption varies. With the program in this article, the battery will last for about 3 hours.
Put the ring to the hole on cassette tape with then put any strap you want and it's finished!
We brought this LED cassette tape to several raves in Japan and got so much attention! Hope you'll make one and bring it to the parties!