Light Shadow Box
![IMG_20180405_010730[1].jpg](/proxy/?url=https://content.instructables.com/FYB/T7MV/JG2W50DN/FYBT7MVJG2W50DN.jpg&filename=IMG_20180405_010730[1].jpg)
![IMG_20180409_114247[1].jpg](/proxy/?url=https://content.instructables.com/FT7/NY34/JG2W4X66/FT7NY34JG2W4X66.jpg&filename=IMG_20180409_114247[1].jpg)
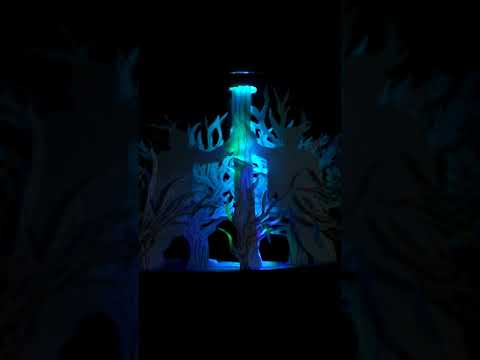
Have you ever wanted to make a picture come to life and give it a 3D look? Well that's exactly what a light shadow box does.This project lets you bring any landscape picture come to life with different layers of paper that is lightened up by a light source that gives the landscape a special glow, the more layers you have the better effects you get. You can pick any theme you want, it could be an underwater theme, or a forest theme, it could even be a city, or Christmas theme.
If you are looking for a fun project to make this is the project for you, I had made this light shadow box for my Advanced Tech class at school. I had a lot of fun making this project and it looks really nice when its done. You could make this for school, you could give it as a gift, or even just make it for fun.
Gathering Your Materials
![IMG_20180402_235323[1].jpg](/proxy/?url=https://content.instructables.com/F1V/IOR0/JG2W4X5E/F1VIOR0JG2W4X5E.jpg&filename=IMG_20180402_235323[1].jpg)
![IMG_20180409_113933[1].jpg](/proxy/?url=https://content.instructables.com/F5P/8M11/JG2W4X62/F5P8M11JG2W4X62.jpg&filename=IMG_20180409_113933[1].jpg)
![IMG_20180409_114044[1].jpg](/proxy/?url=https://content.instructables.com/FE2/AXGA/JG2W4X65/FE2AXGAJG2W4X65.jpg&filename=IMG_20180409_114044[1].jpg)
![IMG_20180409_113954[2].jpg](/proxy/?url=https://content.instructables.com/FZA/CBY7/JG2W4X6B/FZACBY7JG2W4X6B.jpg&filename=IMG_20180409_113954[2].jpg)
![IMG_20180404_232927[1].jpg](/proxy/?url=https://content.instructables.com/FIP/1RQT/JG2W50M4/FIP1RQTJG2W50M4.jpg&filename=IMG_20180404_232927[1].jpg)
![IMG_20180405_010244[1].jpg](/proxy/?url=https://content.instructables.com/FG2/P4D8/JG2W50F4/FG2P4D8JG2W50F4.jpg&filename=IMG_20180405_010244[1].jpg)
![IMG_20180409_114405[1].jpg](/proxy/?url=https://content.instructables.com/FTG/6C3D/JG2W50M7/FTG6C3DJG2W50M7.jpg&filename=IMG_20180409_114405[1].jpg)
What you will need is:
- White Card stock
- Cardboard
- Ruler
- Pencil
- Eraser
- Exacto knife
- Hot glue gun and glue sticks
- Box (you can use a box that is previously made, or you can make your own with cardboard.)
- light source (Led strip)
Optional materials:
- Vinyl cutter
- Silhouette Pens
Design Your Layers
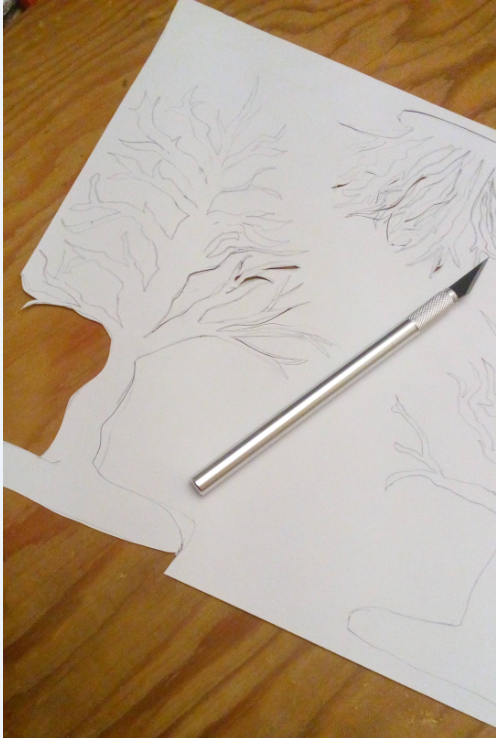
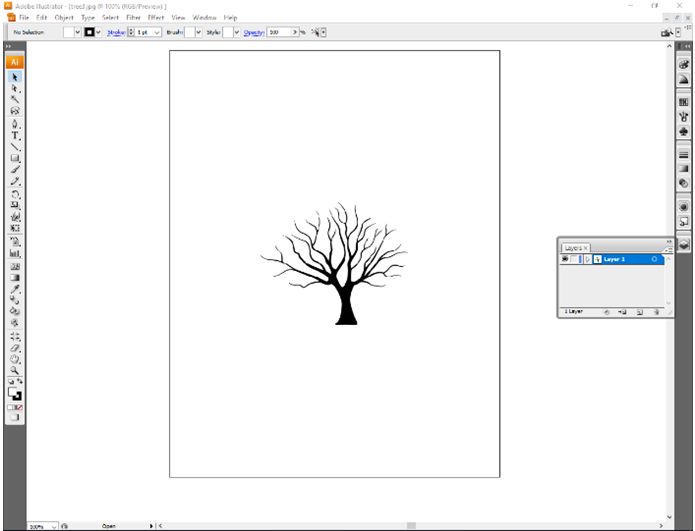
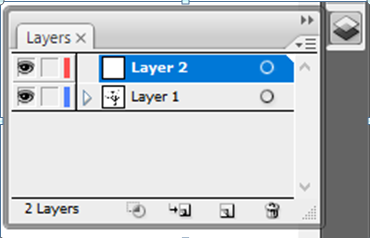
To design your layers the first thing you need to do is chose a theme that has scenery, you can choose any thing, it could be a forest, underwater, or even a city, it could even be of somewhere you always wanted to go or a place you have been. For my theme I went with a forest.
There are different ways to design your layers after you pick your theme the first way is to free hand draw it. This can take a while depending on how many layers you have and what your theme is. You have to keep in mind that the more intricate designs you have the harder it will be to cut out.
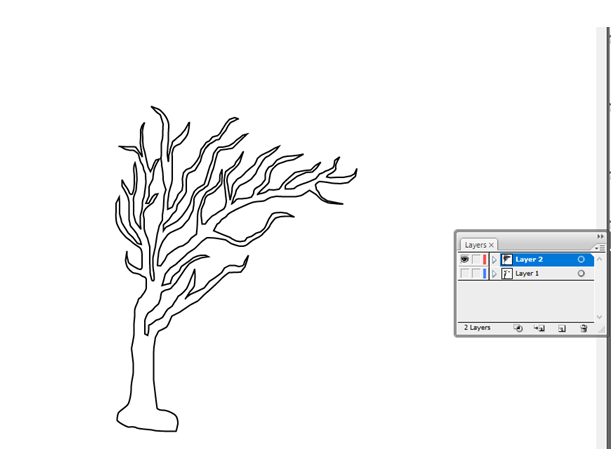
The last way you can do it is with Adobe Illustrator. This way does take some time to do, when you use this you have to keep in mind to add layers and to be on the right layer. If you do plan on doing it this way it's a good idea to have a reference in the background. This is also a good thing to use if you add want to add something else into your theme. I added people into my theme and all you have to do is get a picture and bring it into adobe illustrator and then you need to add a new layer and grab the pencil tool and then you can trace over the people.You can also do this with other objects like trees or buildings.
Cutting Your Layers Out
![IMG_20180404_230515[1].jpg](/proxy/?url=https://content.instructables.com/FRC/QL75/JG2W4X5H/FRCQL75JG2W4X5H.jpg&filename=IMG_20180404_230515[1].jpg)
There are different ways to cut your layers out depending on how you designed your layer. If you drew your design free hand then all you need is an Exacto Knife, you want to do this on a hard surface that you don't mind if it gets cut up because the Exacto Knife is very sharp and can cut through soft surfaces. If you do this then you have to be careful, not to rip your design or accidentally cut a part off that you need. After I had all the parts cut with the Exacto Knife I added details to the trees by drawing lines on it to resemble bark on a tree. I added the details so that when the lights were off the trees were still noticeable.
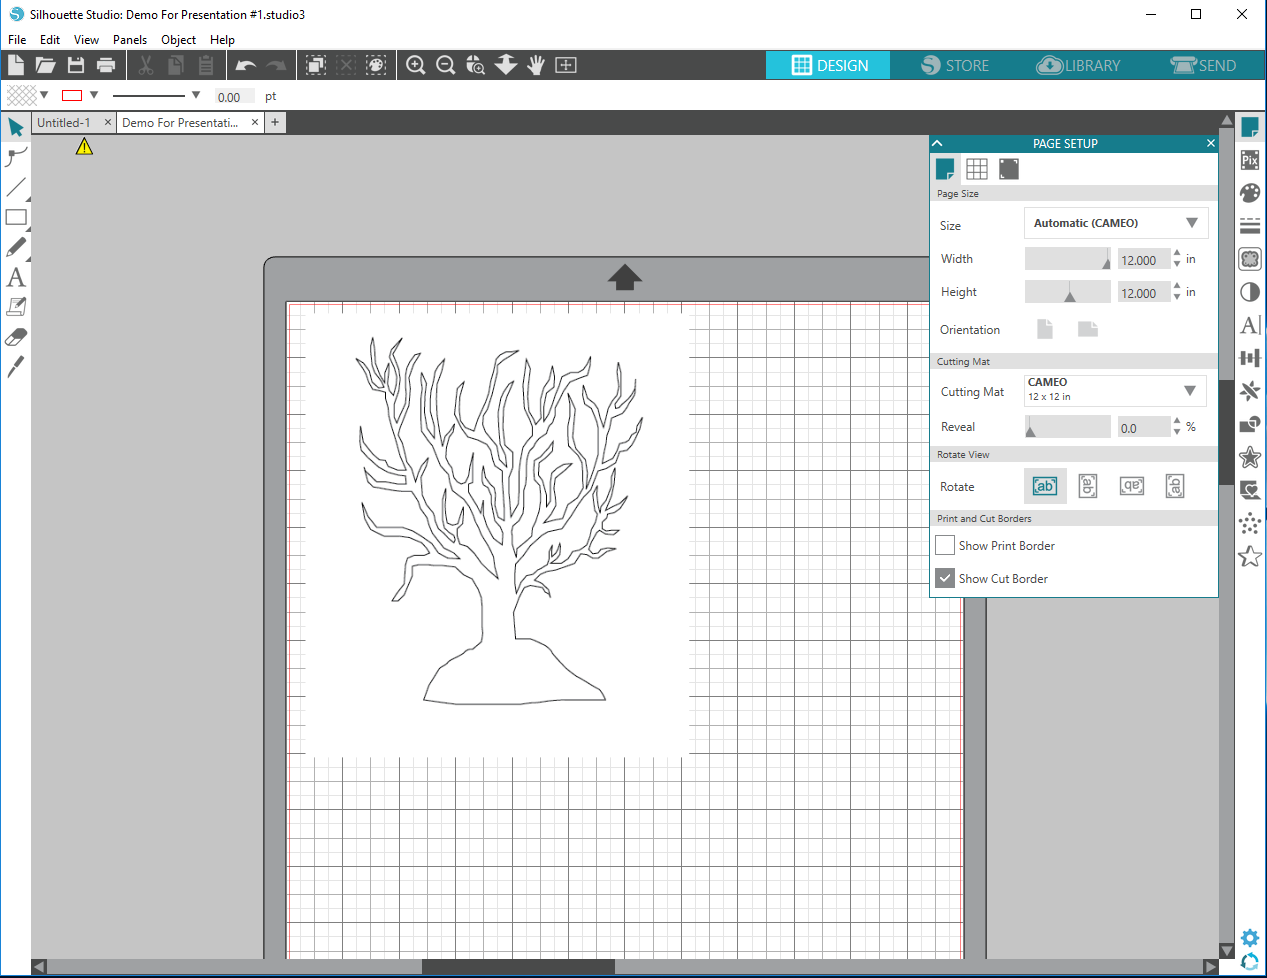
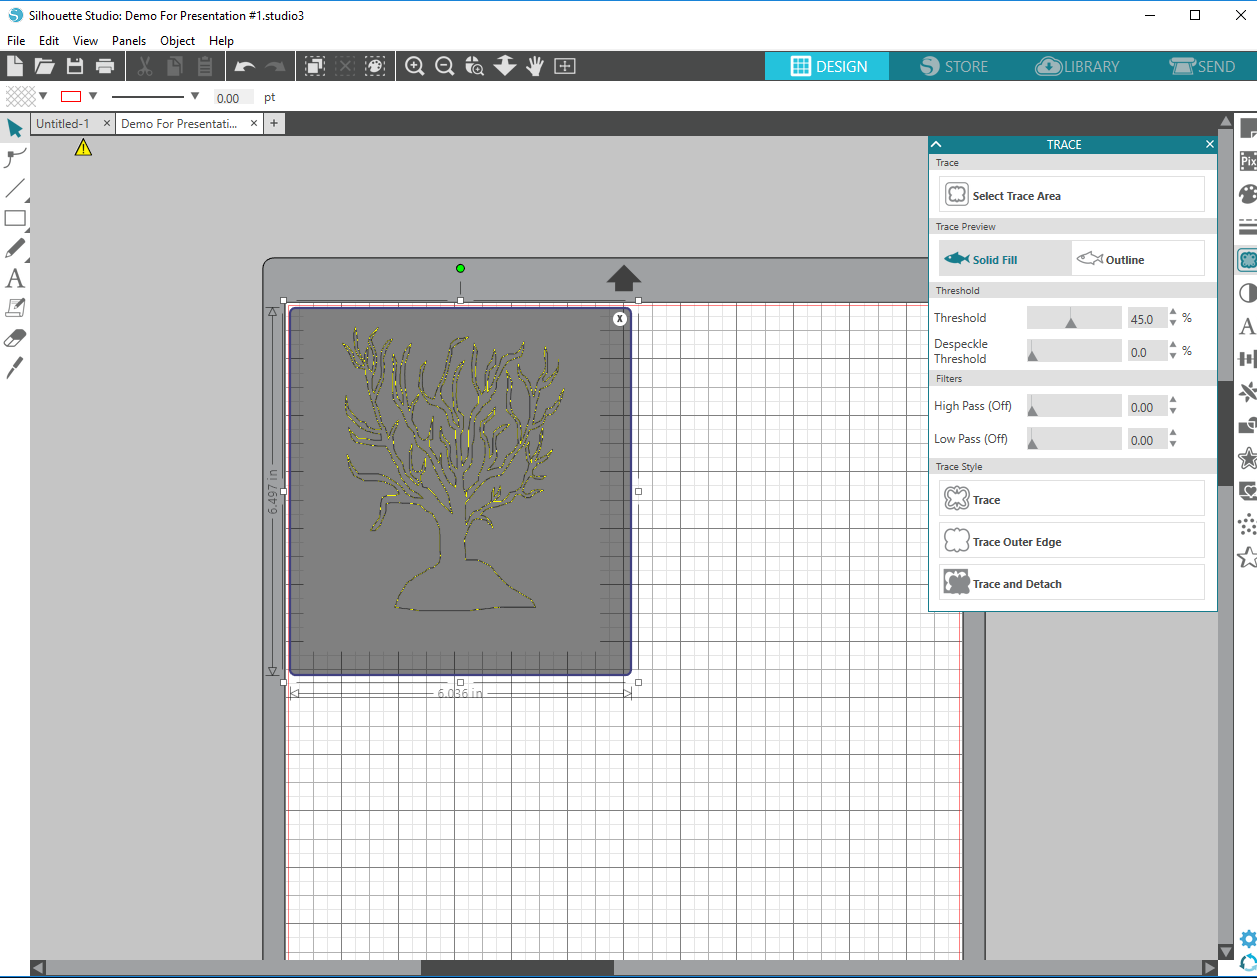
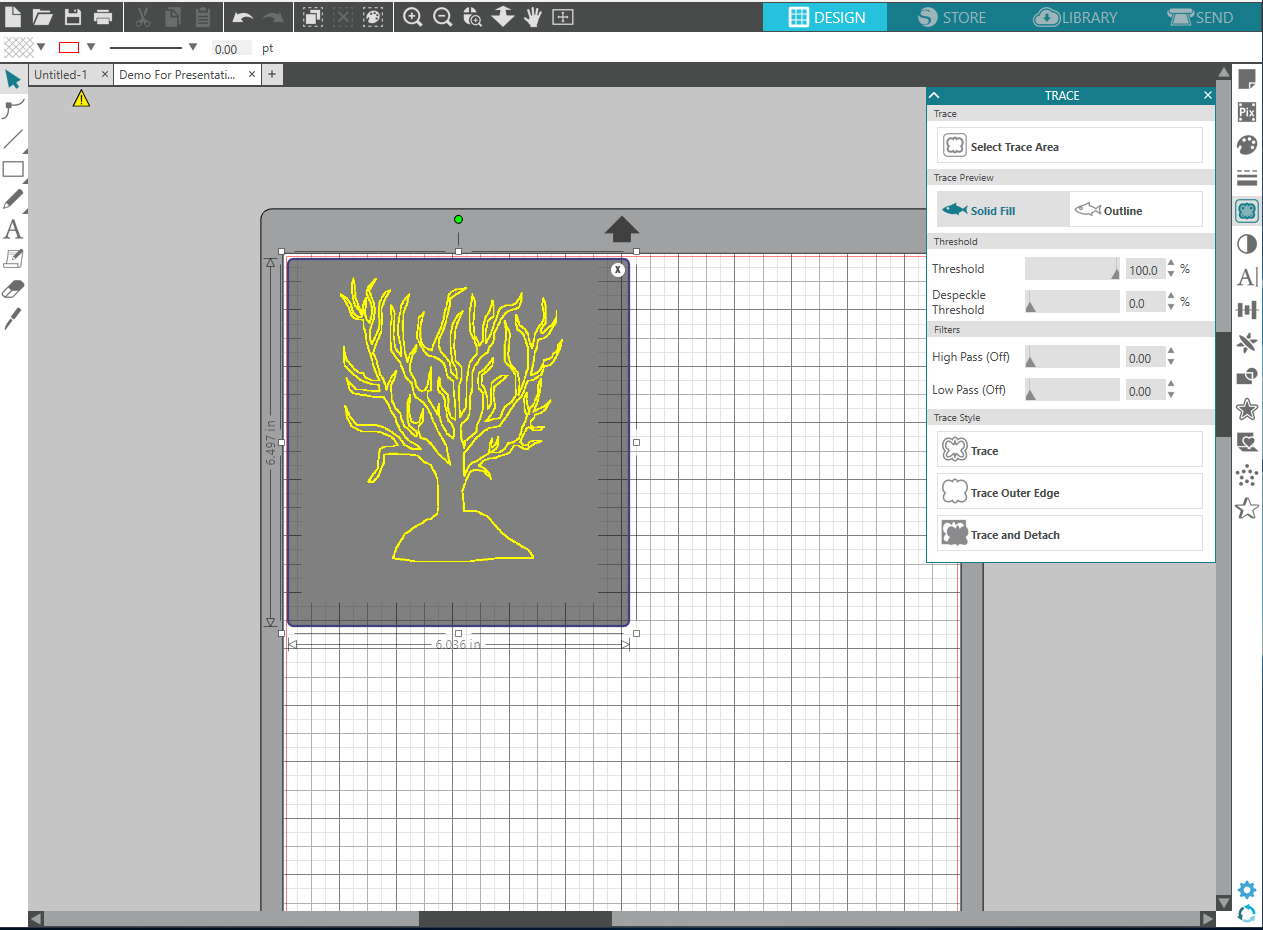
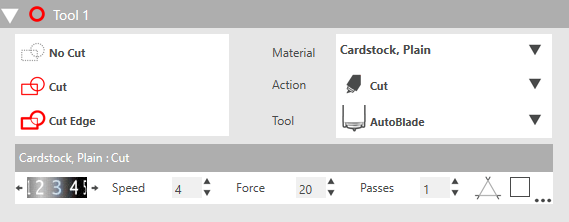
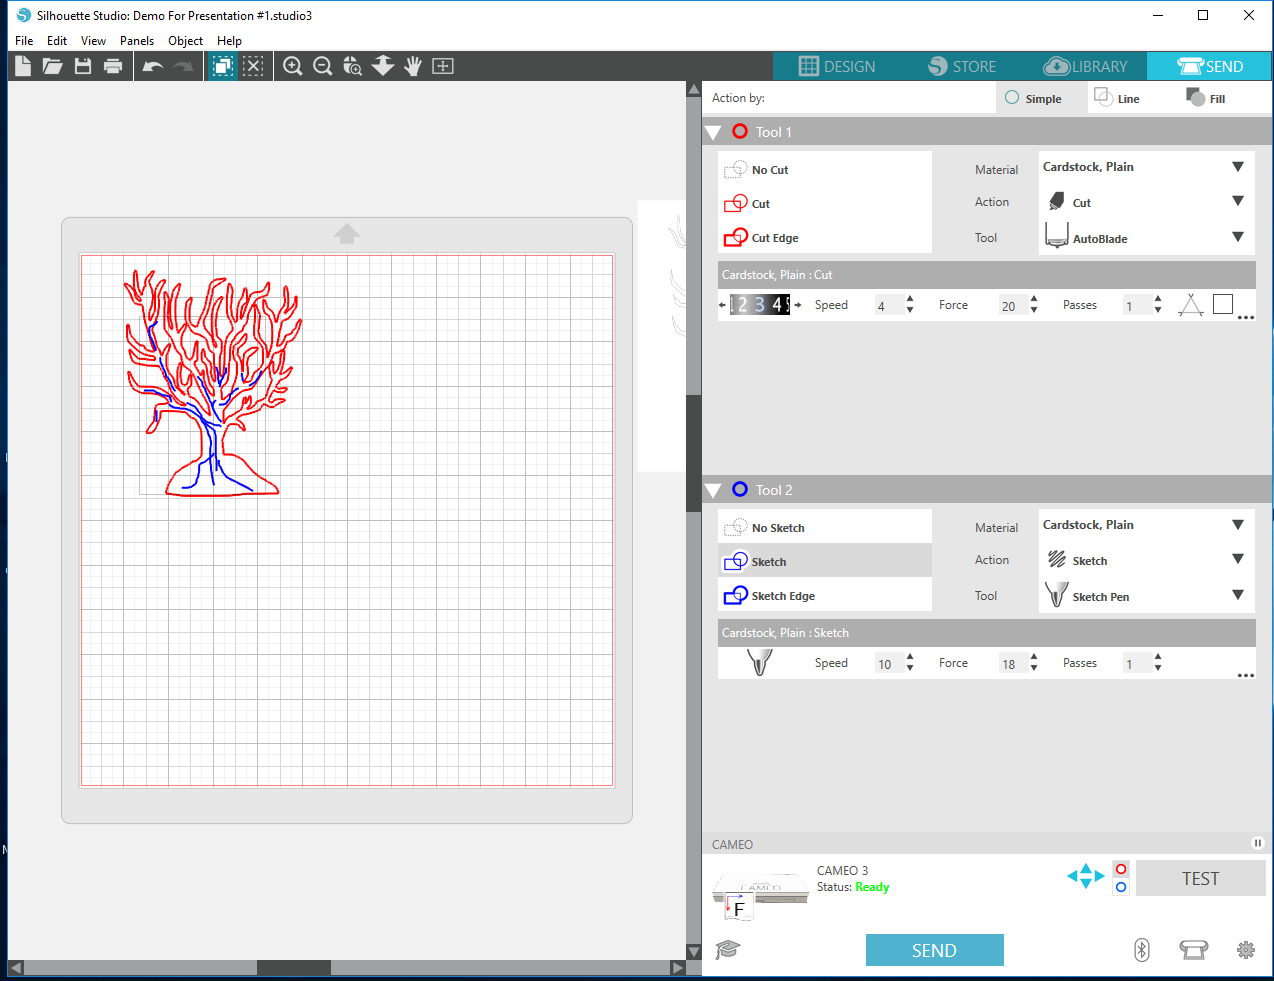
If you designed your Layer with the Adobe Illustrator then you can bring it into Silhouette Studios and set it up to cut card stalk and you can cut out your design with silhouette studios. You can set it up to cardstock when you go to cut it you want to make sure that your first tool is set for cut, the material is set for cardstock and you can choose whether or not you want it as auto blade,which sets the depth of the blade itself, or you can change the depth of the blade on the silhouette yourself. Before you cut your full design you should do a test cut which is a little triangle inside a square. Doing this makes sure that the blade is set at the right depth, and it makes sure that it is easy to peel and that the paper will not rip.
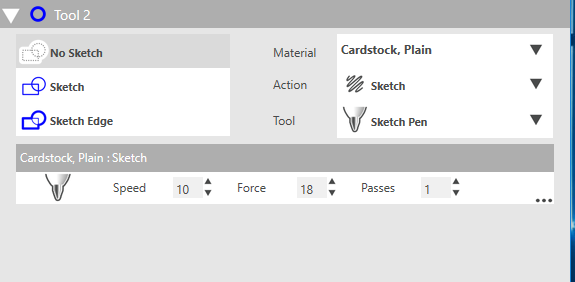
While using Silhouette Studios I had set up a second tool to draw on details to the tree. To do this you need to add a second tool, you need to set the material to cardstock, the action to sketch, and the tool to sketch pen. You need to select the part you want drawn to be the same color as the second tool, then you need to add the sketch pen to the silhouette cameo, then you are good to cut and draw your design.
Putting Your Layer Together
![IMG_20180404_230515[1].jpg](/proxy/?url=https://content.instructables.com/FKS/2SQC/JHQJM4QX/FKS2SQCJHQJM4QX.jpg&filename=IMG_20180404_230515[1].jpg)
![IMG_20180404_232927[1].jpg](/proxy/?url=https://content.instructables.com/FH8/8ULR/JHQJM499/FH88ULRJHQJM499.jpg&filename=IMG_20180404_232927[1].jpg)
![IMG_20180528_194916[1].jpg](/proxy/?url=https://content.instructables.com/FT2/7MHZ/JHQJM4DA/FT27MHZJHQJM4DA.jpg&filename=IMG_20180528_194916[1].jpg)
![IMG_20180528_194928[1].jpg](/proxy/?url=https://content.instructables.com/FP4/DJHV/JHQJM4FF/FP4DJHVJHQJM4FF.jpg&filename=IMG_20180528_194928[1].jpg)
The first thing you want to do is to make sure you have an idea on where you want each layer to go. You can do this by playing around with the layers and stack the layers on top of each other until you find the order you want it in. Once you find the order you want your layers in you can get you glue gun ready and let it heat up. While the glue gun is heating up you can cut little strips of card board to put in between your layers.
Once the glue gun has heated up enough you can start to glue the pieces of card board to the layers. I had glued the card board on the ends of the strip of back of the layers. Once you are done that you can glue the layers to each other and then let the glue dry.
Putting the Box Together
![IMG_20180405_010236[1].jpg](/proxy/?url=https://content.instructables.com/FBG/GFSZ/JG2W50FU/FBGGFSZJG2W50FU.jpg&filename=IMG_20180405_010236[1].jpg)
![IMG_20180405_010250[1].jpg](/proxy/?url=https://content.instructables.com/FFM/ZMQK/JHQJGSVP/FFMZMQKJHQJGSVP.jpg&filename=IMG_20180405_010250[1].jpg)
![IMG_20180405_005142[1].jpg](/proxy/?url=https://content.instructables.com/FBD/MCP6/JHQJGSVQ/FBDMCP6JHQJGSVQ.jpg&filename=IMG_20180405_005142[1].jpg)
![IMG_20180409_114405[1].jpg](/proxy/?url=https://content.instructables.com/FJ3/VFWY/JHQJM4MW/FJ3VFWYJHQJM4MW.jpg&filename=IMG_20180409_114405[1].jpg)
![_20180504_181156[1].JPG](/proxy/?url=https://content.instructables.com/FYP/TZB9/JHQJGSVN/FYPTZB9JHQJGSVN.jpg&filename=_20180504_181156[1].JPG)
![IMG_20180405_010728[1].jpg](/proxy/?url=https://content.instructables.com/FH8/9KQM/JG2W50DO/FH89KQMJG2W50DO.jpg&filename=IMG_20180405_010728[1].jpg)
For the box you can make your own out of card board, styrofoam,or wood, or you can use one that you already had. When you go to make or use a box you already had you want to make sure that the box is deep, and big enough to fit all of your layers in. If the box isn't deep enough then you might lose the 3D effect to it because you wont be able to use all your layers.
For my box I already had one so I didn't need to make mine, I had painted the back inside wall black to make the layers more noticeable. After I had let the paint dry I had to cut a hole in the top of the box for the light, to do this I had used a Exacto Knife and cut a hole big enough for the light in the middle of the box, then I had glued the light to the top of the box where the hole was. The light I used was a small multicolored changing light that I had.
Once the light was on I glued a black strip of card stalk to the bottom edge of the box, this created a frame and hid the bottom of the the layers and helps the layers stay in. Once that is done you can slide your layers in. If you want to you can also add a piece of glass, or clear see through plastic to the box, this will make sure the layers will not fall out or get bent while it is in the box. Now your light shadow box is done.