Light Sensitive, Scheduled IoT Blinds
by gelber_j1 in Circuits > Raspberry Pi
475 Views, 1 Favorites, 0 Comments
Light Sensitive, Scheduled IoT Blinds
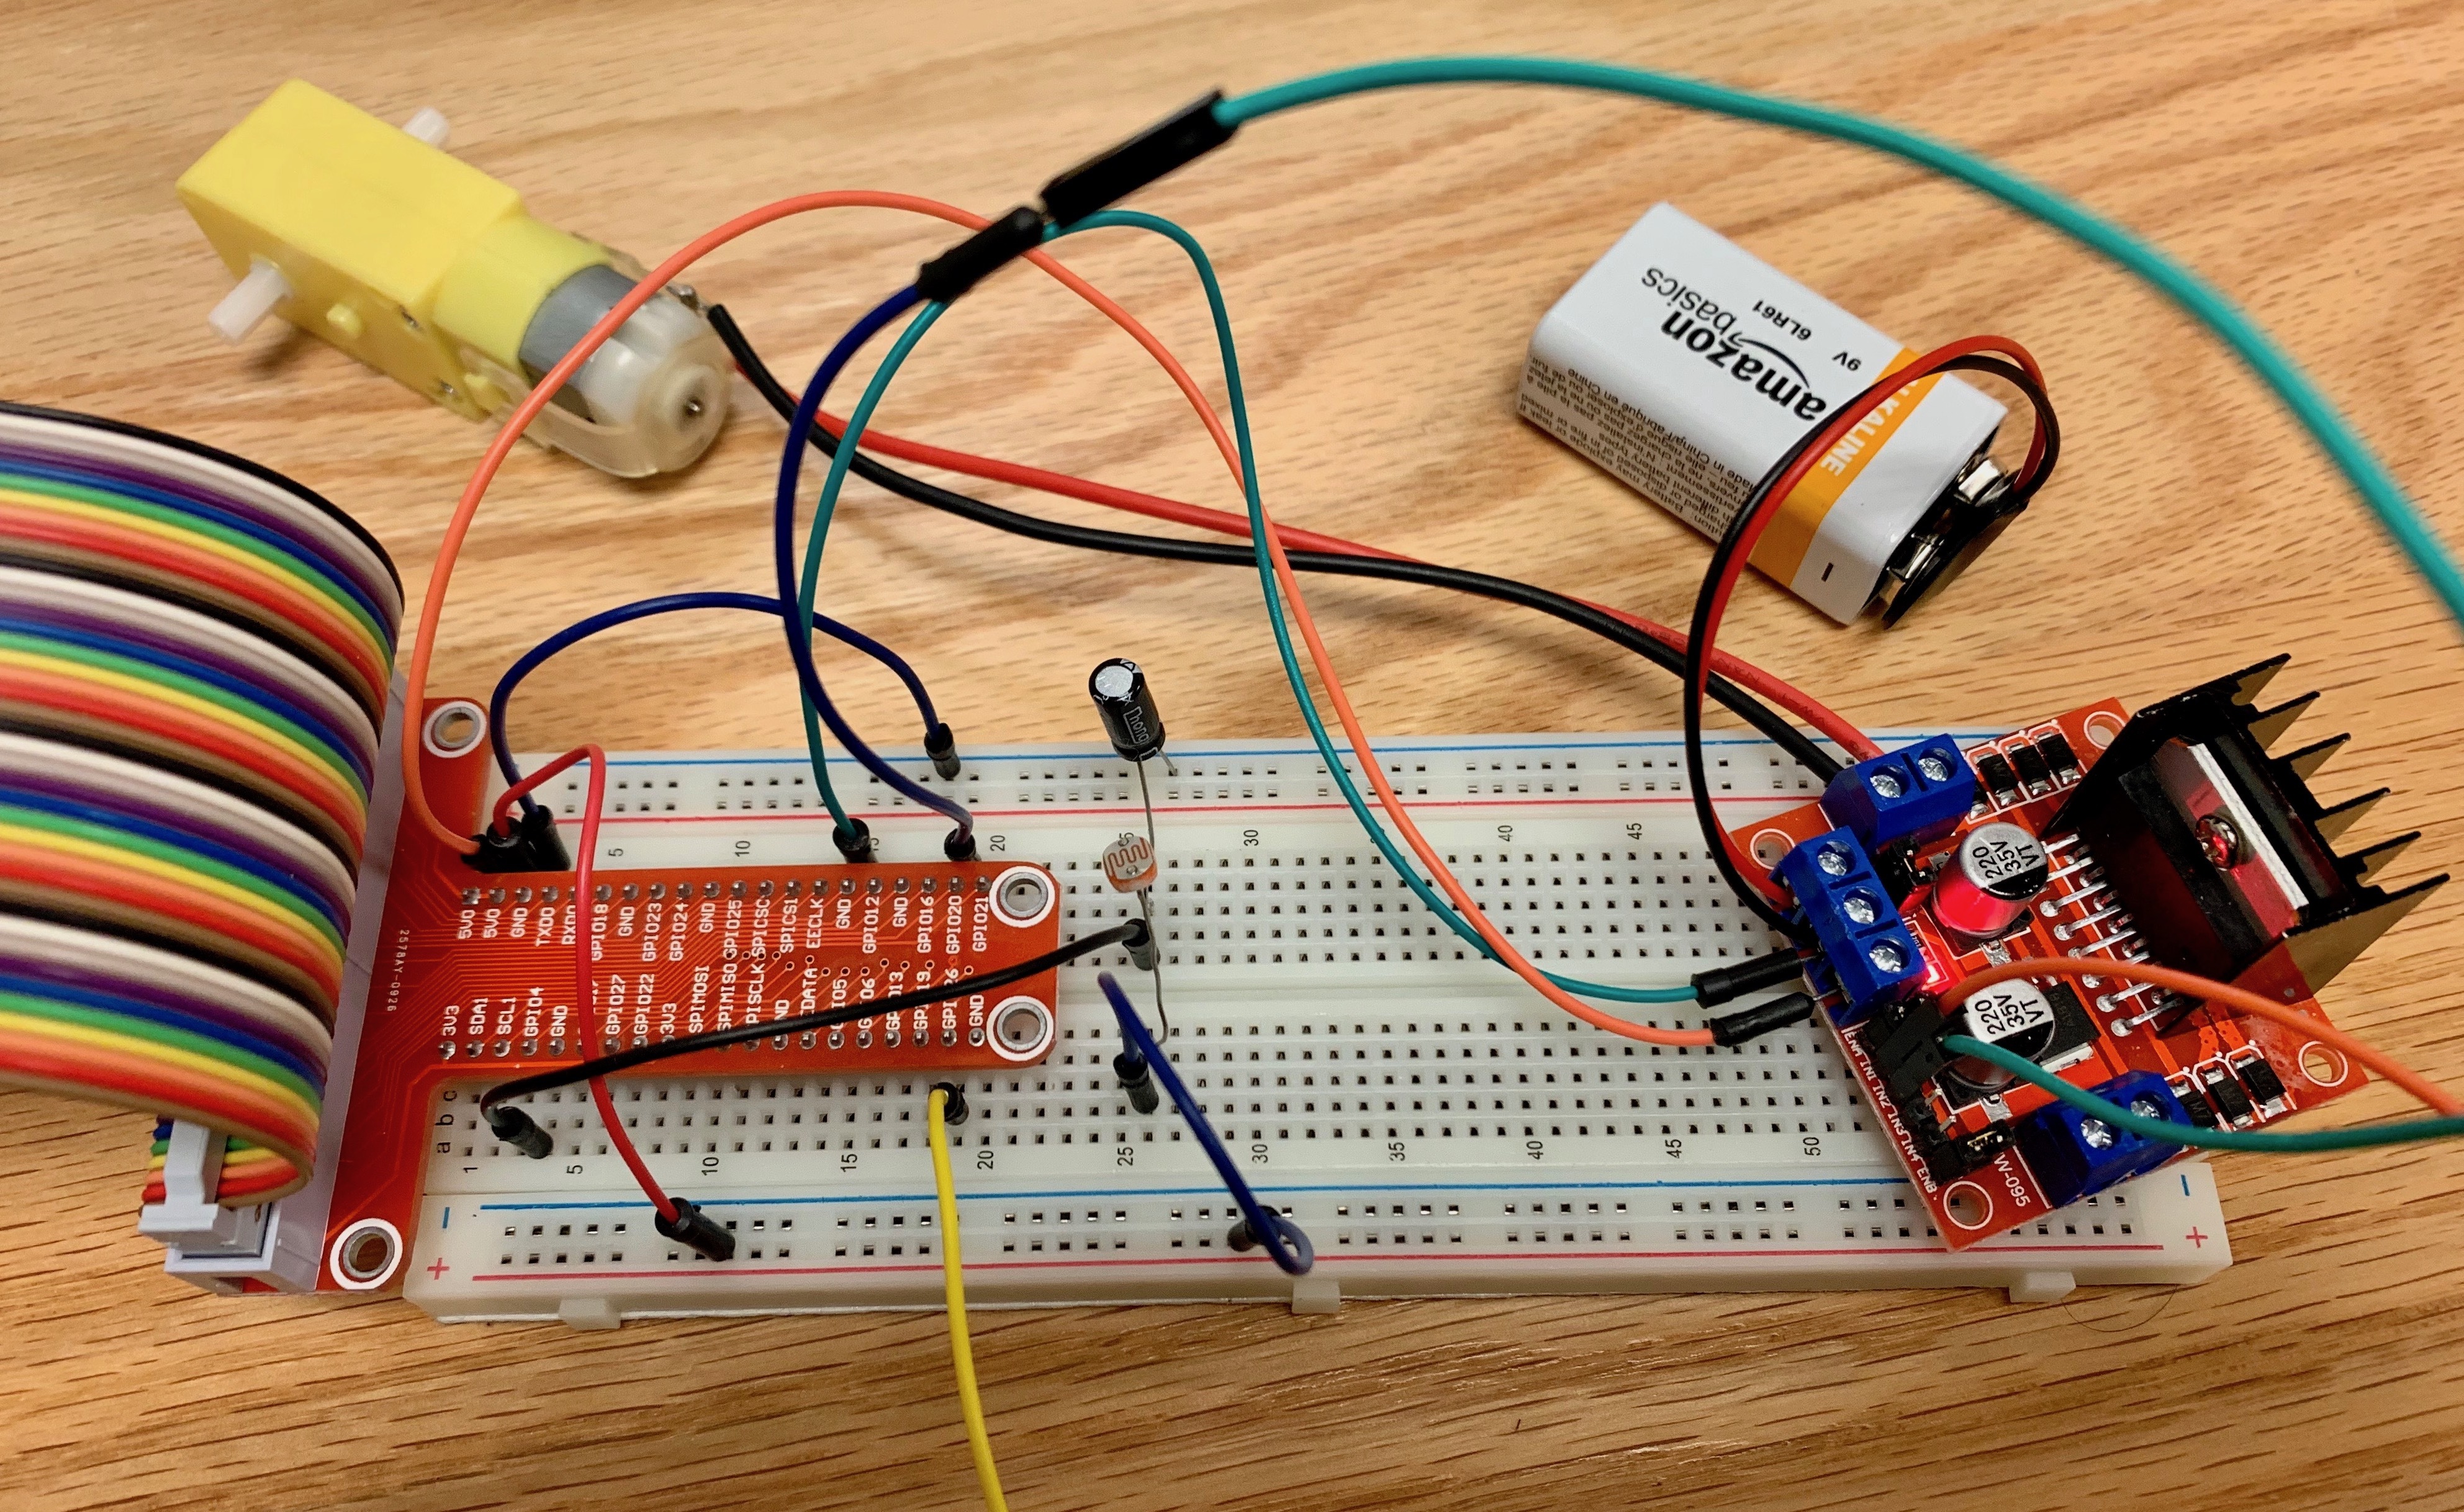
In this instructable, you will learn how to create your own set of IoT blinds! These blinds will open and close according to the light and/or according to a user's schedule. The user can edit and view the schedule using the web interface. Each day of the week can either have a scheduled start and end time or the day can be set to automatically work based on the light sensor data of the environment.
In this tutorial, first you will become familiar with the sensor used by this IoT device, the LDR sensor. A basic video tutorial is given that allows you to explore the sensor and test out the hardware. After becoming familiar with the LDR sensor, you will configure the hardware of the IoT device using the sensor and an actuator, a DC motor. This step will walk you through the hardware specifics, built off the hardware built in the first step. After this, you can test out your hardware configuration using the given code. Using this test, you can ensure the hardware is functional before moving onto the next steps. Additionally, this test will help you get used to the hardware and the associated software so you can introduce more customization and functionality when the actual device is created. After the hardware has been tested, the next step is to move onto building the server and the web interface. We recommend using a Django framework and JSON to organize the user's settings for both viewing and editing. Finally, you will combine the software and hardware by testing the device using the web interface. Additionally, you can customize your web interface using basic HTML and CSS.
After completing this project, you will have a clear understanding of the hardware and software used to create this device. There are countless ways to further customize and personalize this device, and this tutorial should get you on the path to creating your ultimate IoT Blinds experience.
Supplies
- Raspberry Pi
- Power Source
- Micro SD Card
- Breadboard
- GPIO Breakout Board & Ribbon
- Monitor & Keyboard
- Wires
Motor Supplies
- DC Motor
- L298 Motor Driver
- 9V Battery
- 9V Battery Snap Connecter
Light Sensor Supplies
- LDR Sensor (Photoresistor)
- 10µf Capacitor
Configuring and Testing the LDR Sensor
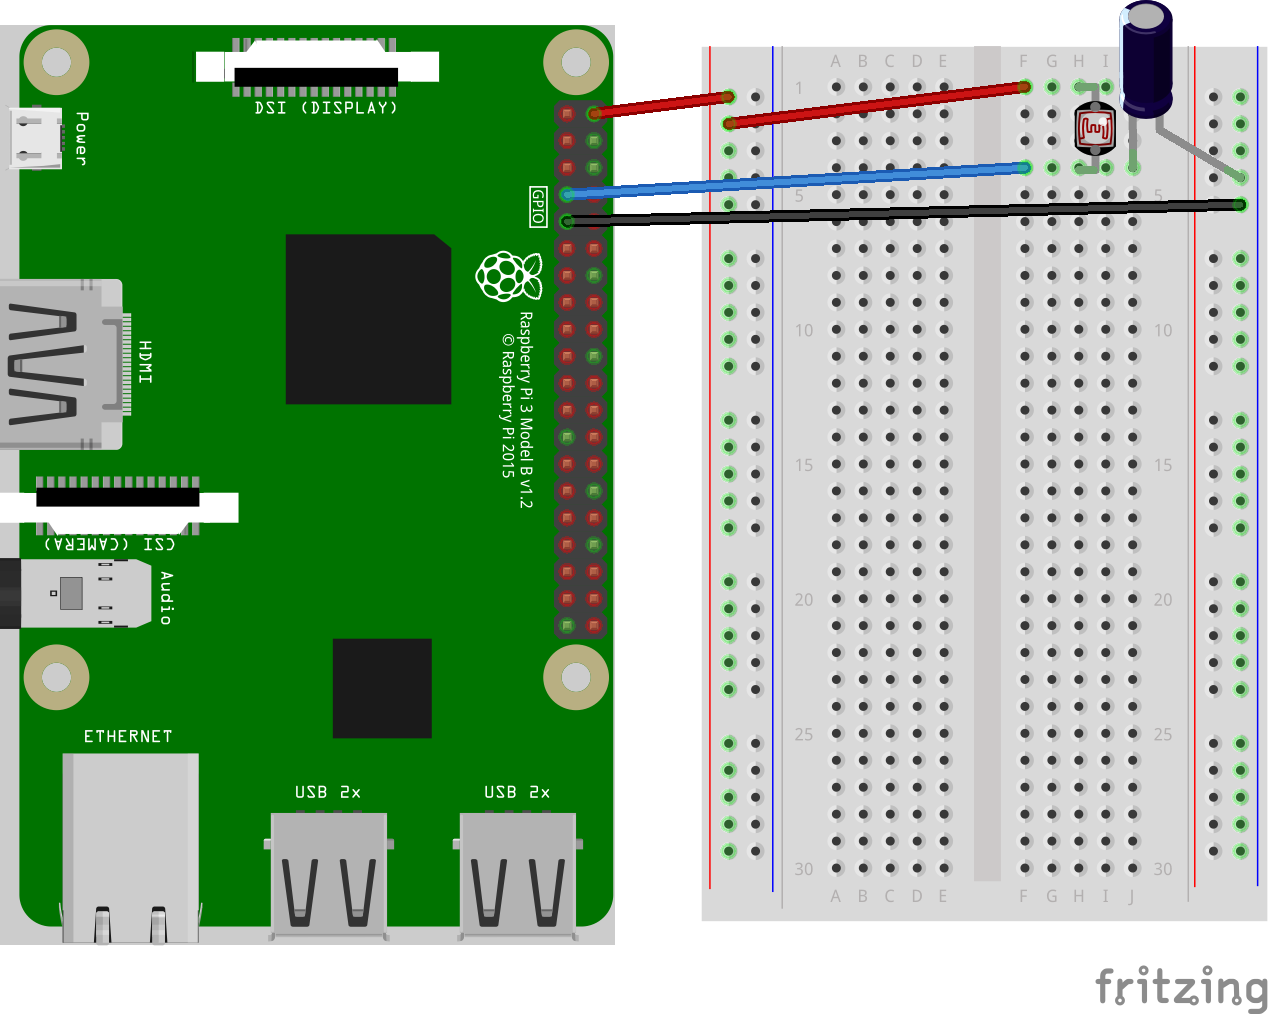
Before creating your IoT device, get to know the sensor that it will be collecting the data. The LDR sensor (or photoresistor or light sensor) sends data about its environment to the Pi, which can be printed and analyzed. This quick video tutorial will walk you through the steps of configuring a photoresistor with a Raspberry Pi. The circuit diagram above details the wiring used in the tutorial.
Follow the following steps to setup the hardware.
- Use the GPIO expansion board and ribbon to connect the Raspberry Pi and breadboard.
- Connect a 5V pin to the red power rail on the breadboard and a GND pin to the blue ground rail.
- Insert the LDR sensor straddling the two sides of the board.
- Connect one pin of the photoresistor to the power rail.
- Connect the other pin of the photoresistor to GPIO 4.
- Insert a 10uF capacitor to the same side as the wire going to GPIO 4. Connect the longer, power pin of the capacitor to the photoresistor and connect the shorter, ground pin to the ground rail on the breadboard.
Upload and run the code below on your Pi and test the LDR sensor by blocking light, moving it closer to a light source, etc.
from gpiozero import LightSensor
ldr = LightSensor(4, charge_time_limit=0.1)
while True:
	print(ldr.value)
This code uses the gpiozero library to print the values detected by the light sensor. The values are between 0 and 1, 0 being the darkest and 1 being the lightest.
Configuring the DC Motor
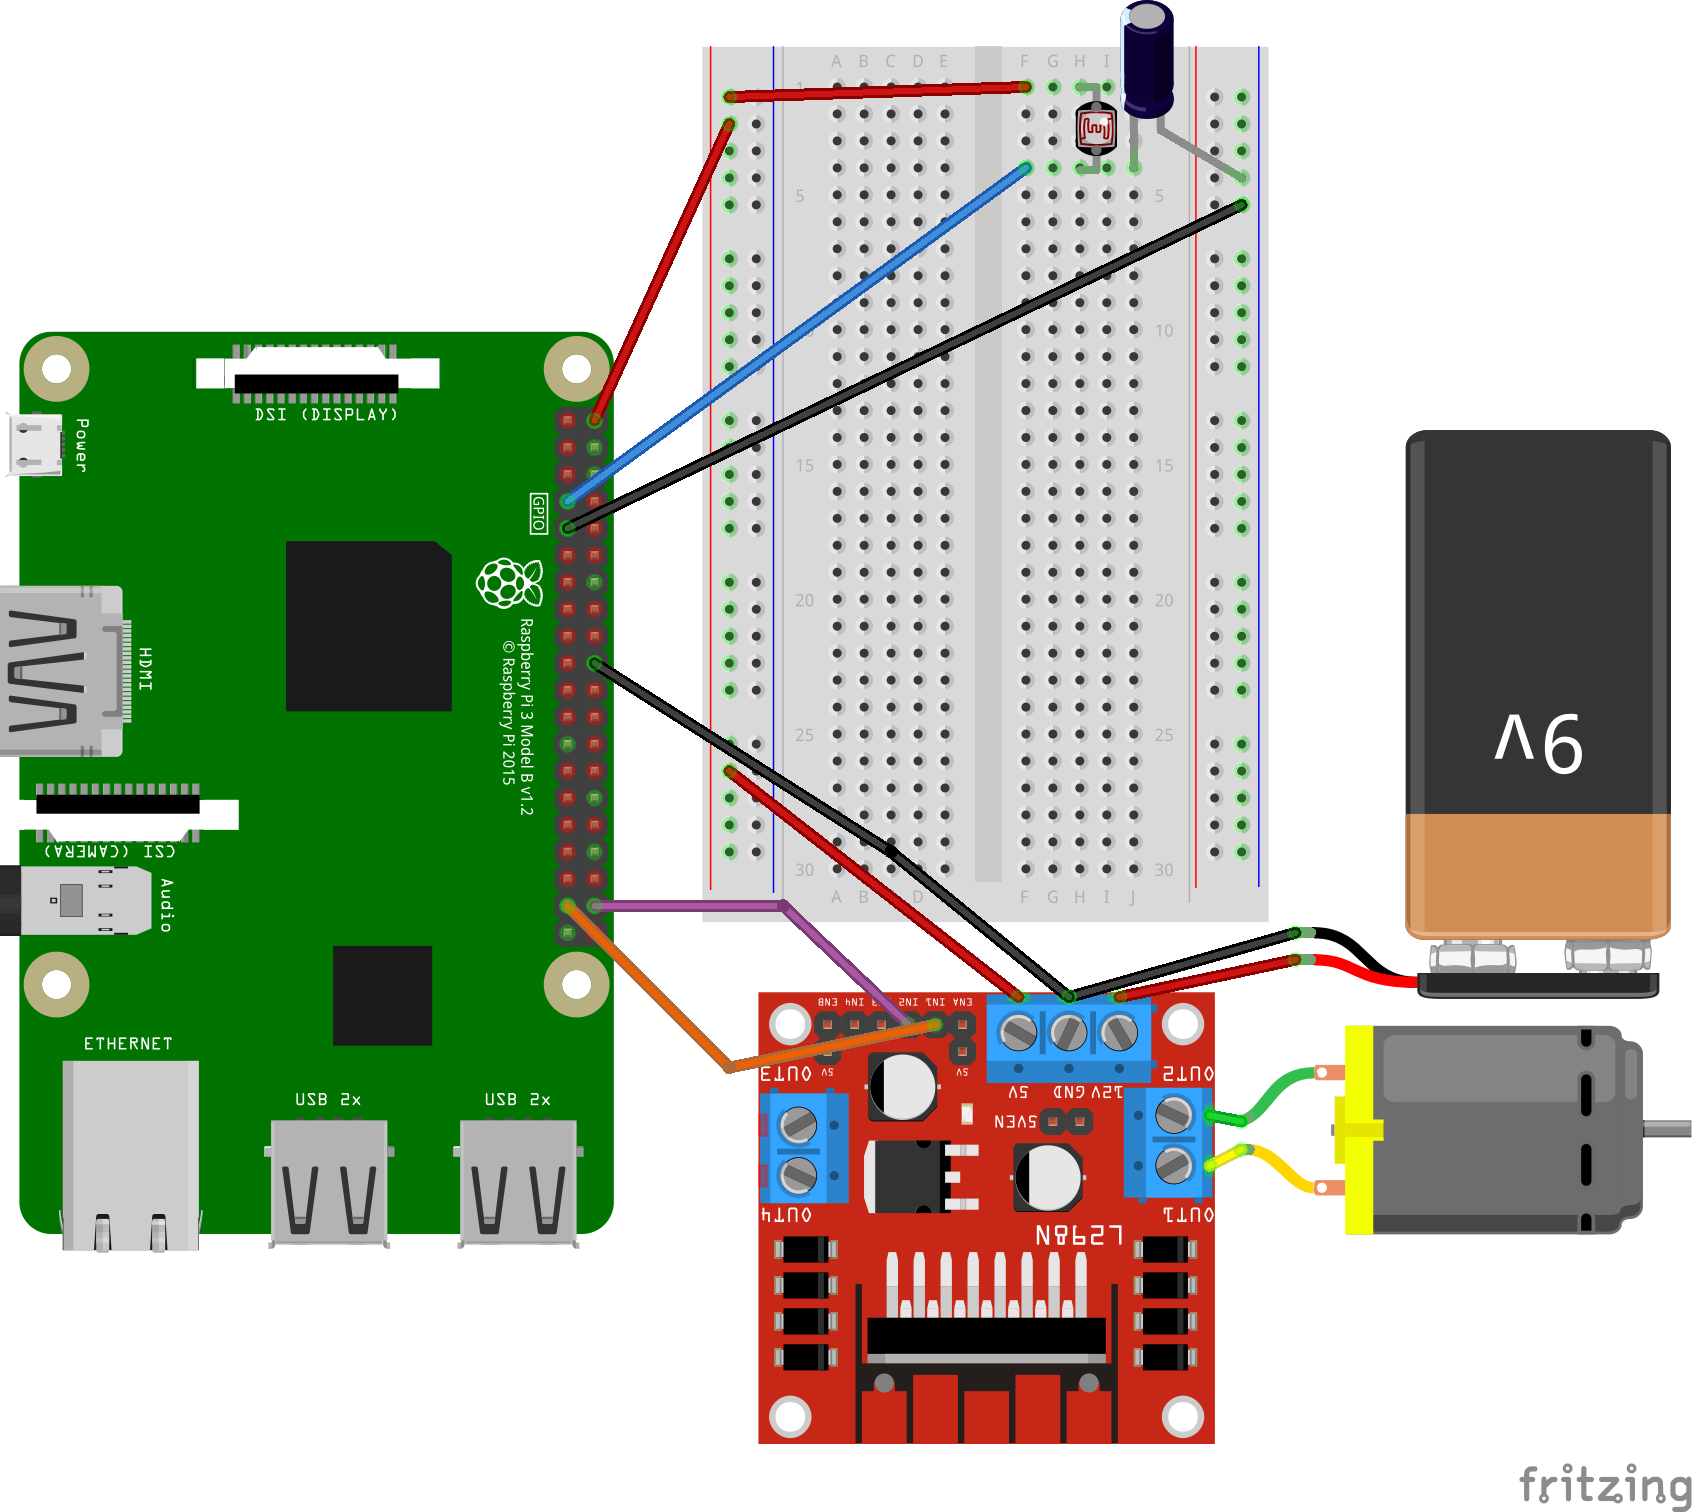
After configuring the photoresistor, the DC motor should be added to the existing hardware configuration. The following steps detail how to do so.
- Connect the power wire from the 9v battery to the 12v pin on the L298 motor driver.
- Connect the ground wire from the 9v battery to the GND pin on the L298 motor driver.
- Connect a GND pin on the Raspberry Pi to the GND pin on the L298 motor driver.
- Connect the 5v pin on the L298 motor driver to the red power rail on the breadboard.
- Connect IN1 on the L298 to GPIO 26 on the Pi.
- Connect IN2 on the L298 to GPIO 20 on the Pi.
- Connect the DC motor to OUT1 and OUT2 on the L298.
After following these steps, the hardware should match the circuit diagram included above.
Testing the LDR Sensor and DC Motor Hardware
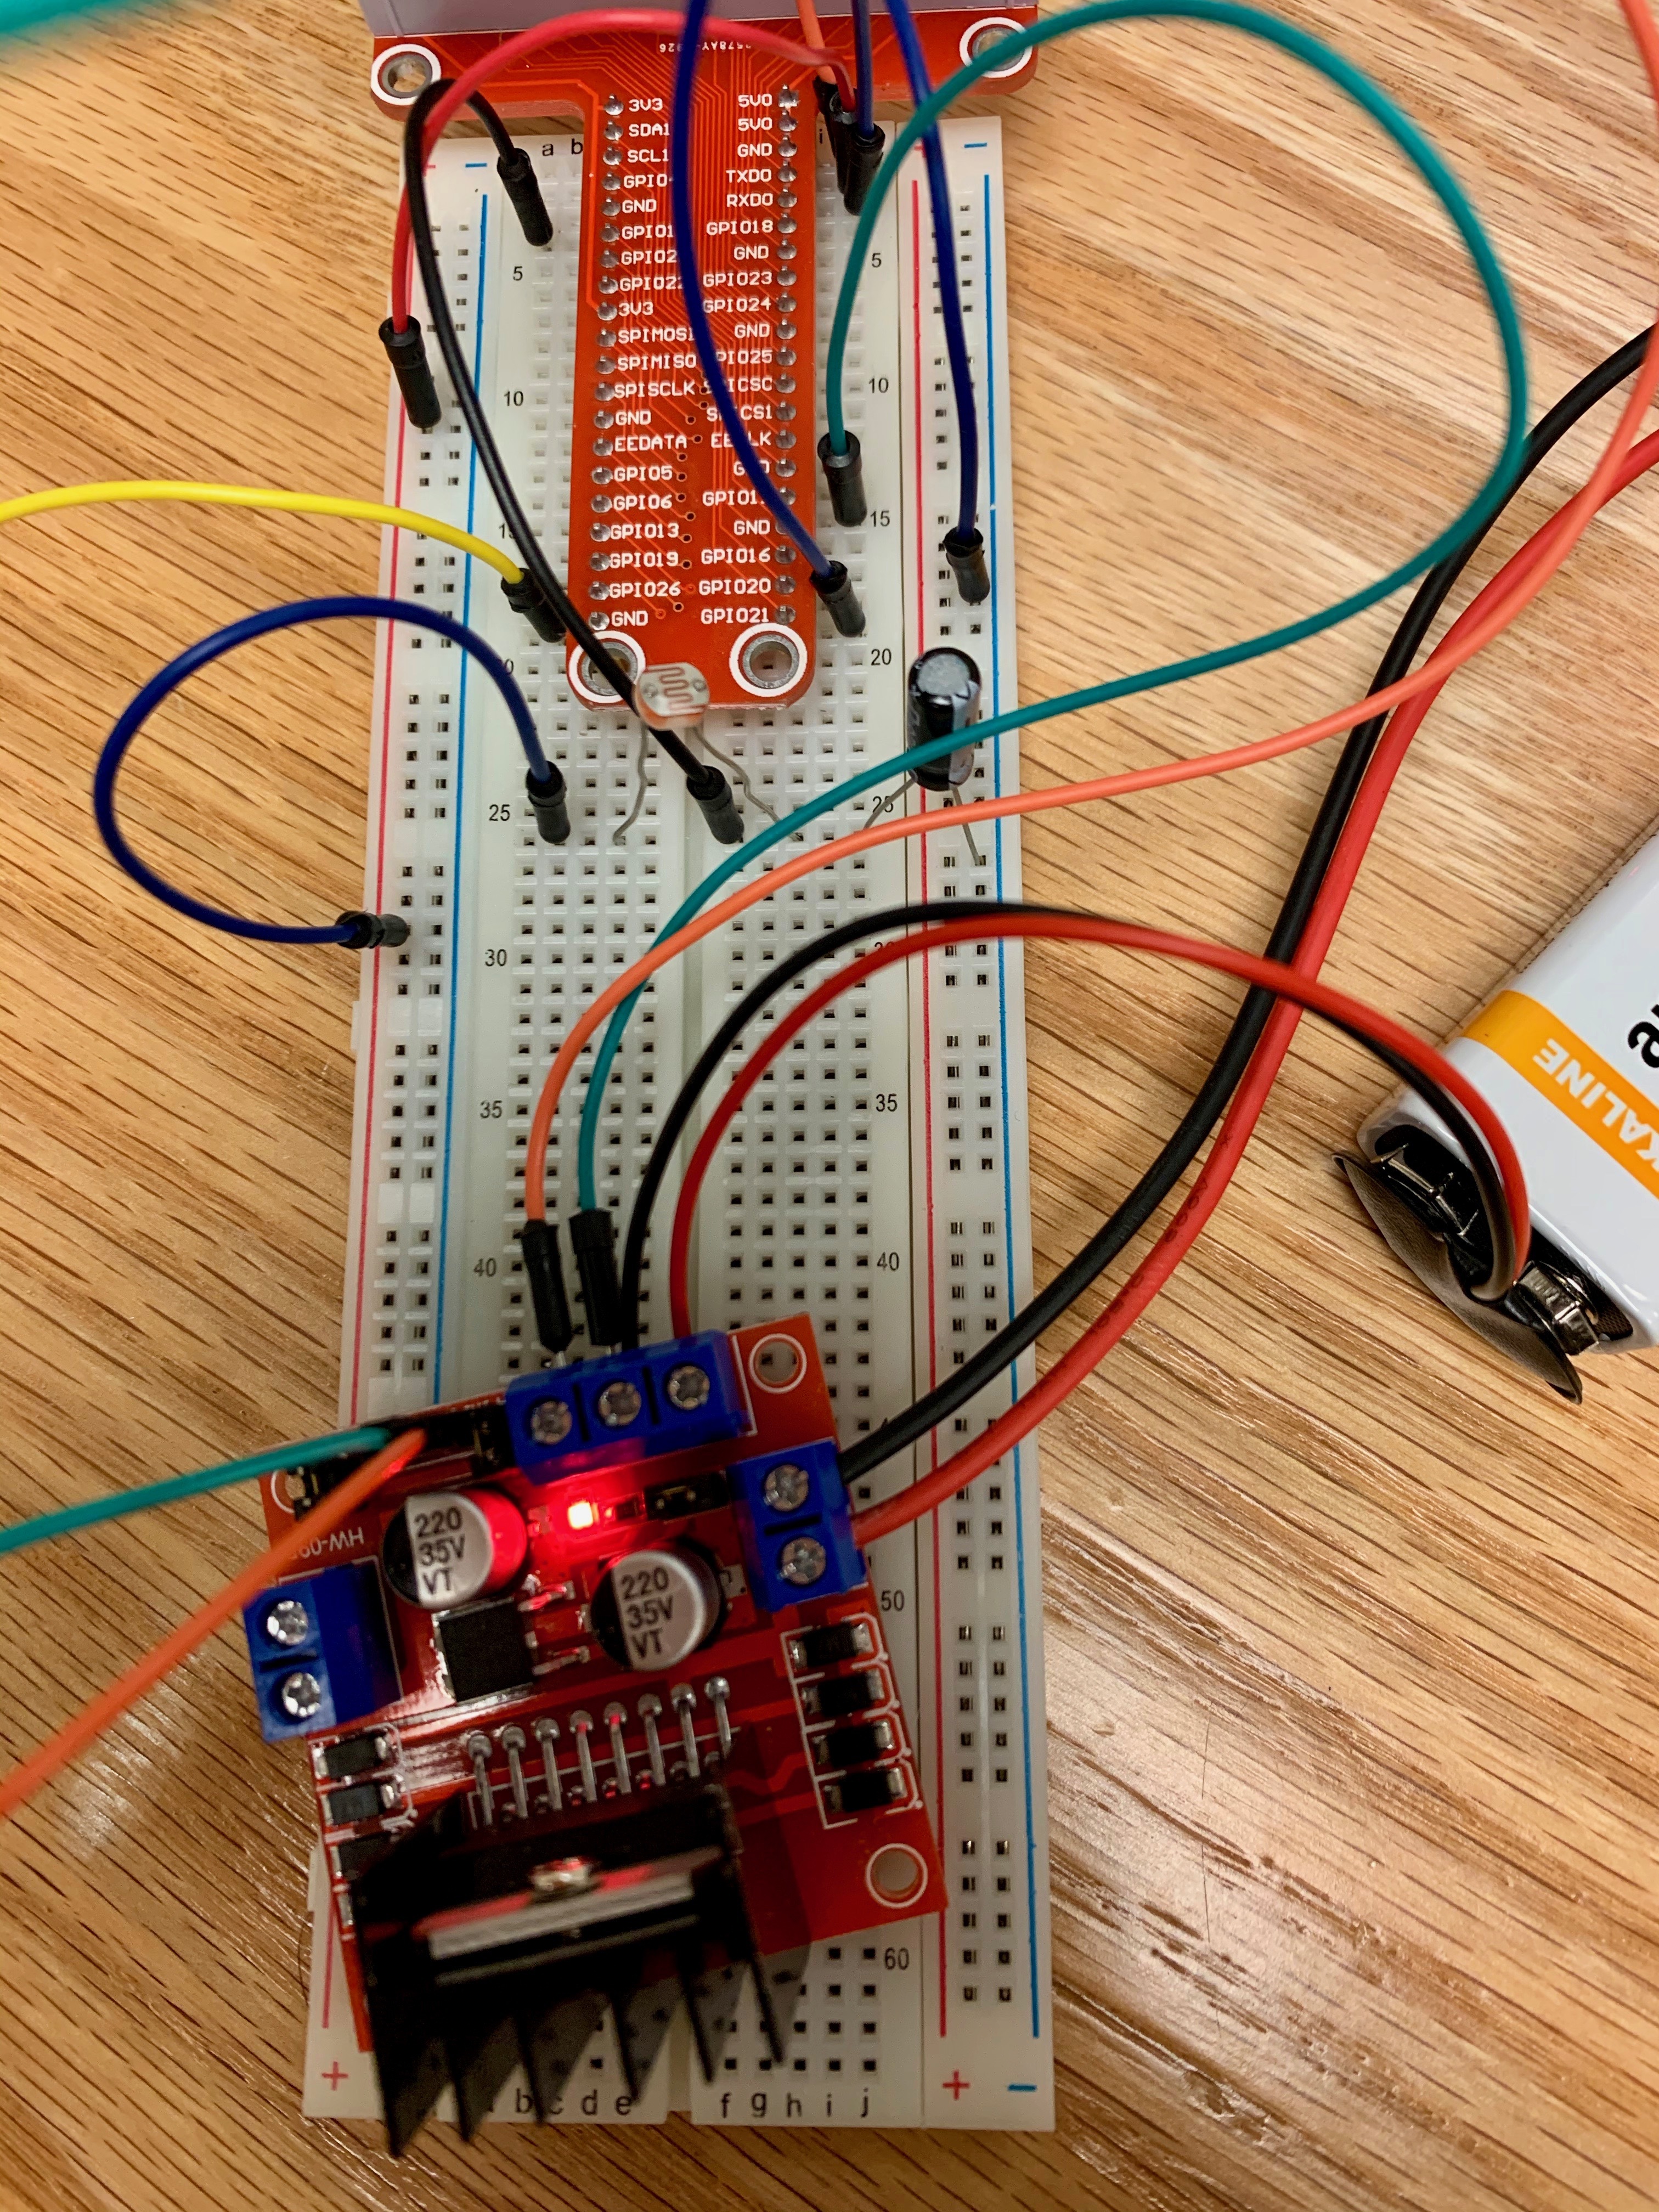
After completing the first two steps, your hardware should match the image above. After this is completed, test the hardware configuration by uploading and running the given python code on your Raspberry Pi.
This program continuously checks whether the LDR sensor detects light. If there is light detected, the DC motor moves clockwise or forward for three seconds. If there is no light detected, the DC motor moves counterclockwise or backwards for three seconds.
from gpiozero import LightSensor
import sys
import time
import RPi.GPIO as GPIO

# It is important to edit the charge_time_limit
# when using a 10uf capacitor.
ldr = LightSensor(4, charge_time_limit=0.1)
forward = 26
backward = 20
GPIO.setmode(GPIO.BCM)
GPIO.setup(forward, GPIO.OUT)
GPIO.setup(backward, GPIO.OUT)

# Move motor forwards for x seconds.
def forwards(x):
	GPIO.output(forward, GPIO.HIGH)
	print("Light Detected. Moving forward.")
	time.sleep(x)
	GPIO.output(forward, GPIO.LOW)

# Move motor backward for x seconds.
def reversed(x):
	GPIO.output(backward, GPIO.HIGH)
	print("No Light Detected. Moving backward.")
	time.sleep(x)
	GPIO.output(backward, GPIO.LOW)
while True:
	# If there is light detected, move forward for 3 seconds.
	if ldr.light_detected:
		forwards(3)
	# Else, there is no light detected, move backward for 3 seconds.
	else:
		reversed(3)
GPIO.cleanup()
When the code is run, if the hardware is setup correctly and functional, the device should work like the device in this video below.
Creating the Web Application and Server

Once the hardware has been configured and tested, you can move onto creating the software necessary for this device to function as an IoT device.
Django StartupCreating a server with django is a fairly straight forward task. Once django is installed, one uses some commands in bash to generate a project (which can contain several apps) and an app (which can be in several projects). We created a project (iot_blinds) and an app to go inside of it (lights). There is a good deal of configuration that one must do but the django [setup guide] holds your hand through the process. With that done, we followed the example to get a html page up and running.
DevelopmentThere are three parts of the server that require creation: a json export of settings, a settings view, and a settings editor. There is also the creation of the actual blinds controller that will pull the json data.
Settings EditorThis is the place we started. This portion is in the "views.py" file which has a dictionary of days with values of dictionaries with start time, end time, and a boolean of whether or not the blinds should work automatically.The work is done in the edit function. This displays a form (name.html) with all the days of the week displayed in columns with an automatic textbox, a start time, and an end time. The checkbox is easily validated because it only has on or off but the timeFields have a significantly more complicated validation before they can be turned into more usable datetime objects. Each column has it's own submit and that is what determines which day will be updated in the settings.
Settings ViewerThis is a much simpler function which takes the dictionary and renders it in html (display.html). The rest of this piece is done in html and css for formatting.
JSON and blind_controlThe other function will pass json when it is called. The blind control (which is outside the app) gets the json on a once every minute basis and operates the blinds as needed.Blind control does this through requests which takes the ip address as an argument when the class is called.With the ip address, requests gets the json and processes it to find the day of the week. On the current day of the week it sees if the blinds are supposed ti work automatically and, if so, ignores everything else. If they are not automatic, the blinds open when it is passed start time and close when it is passed end time.
Once you have walked through each of these steps, your code should resemble our code, all uploaded into a GitHub repository here.
Putting It All Together
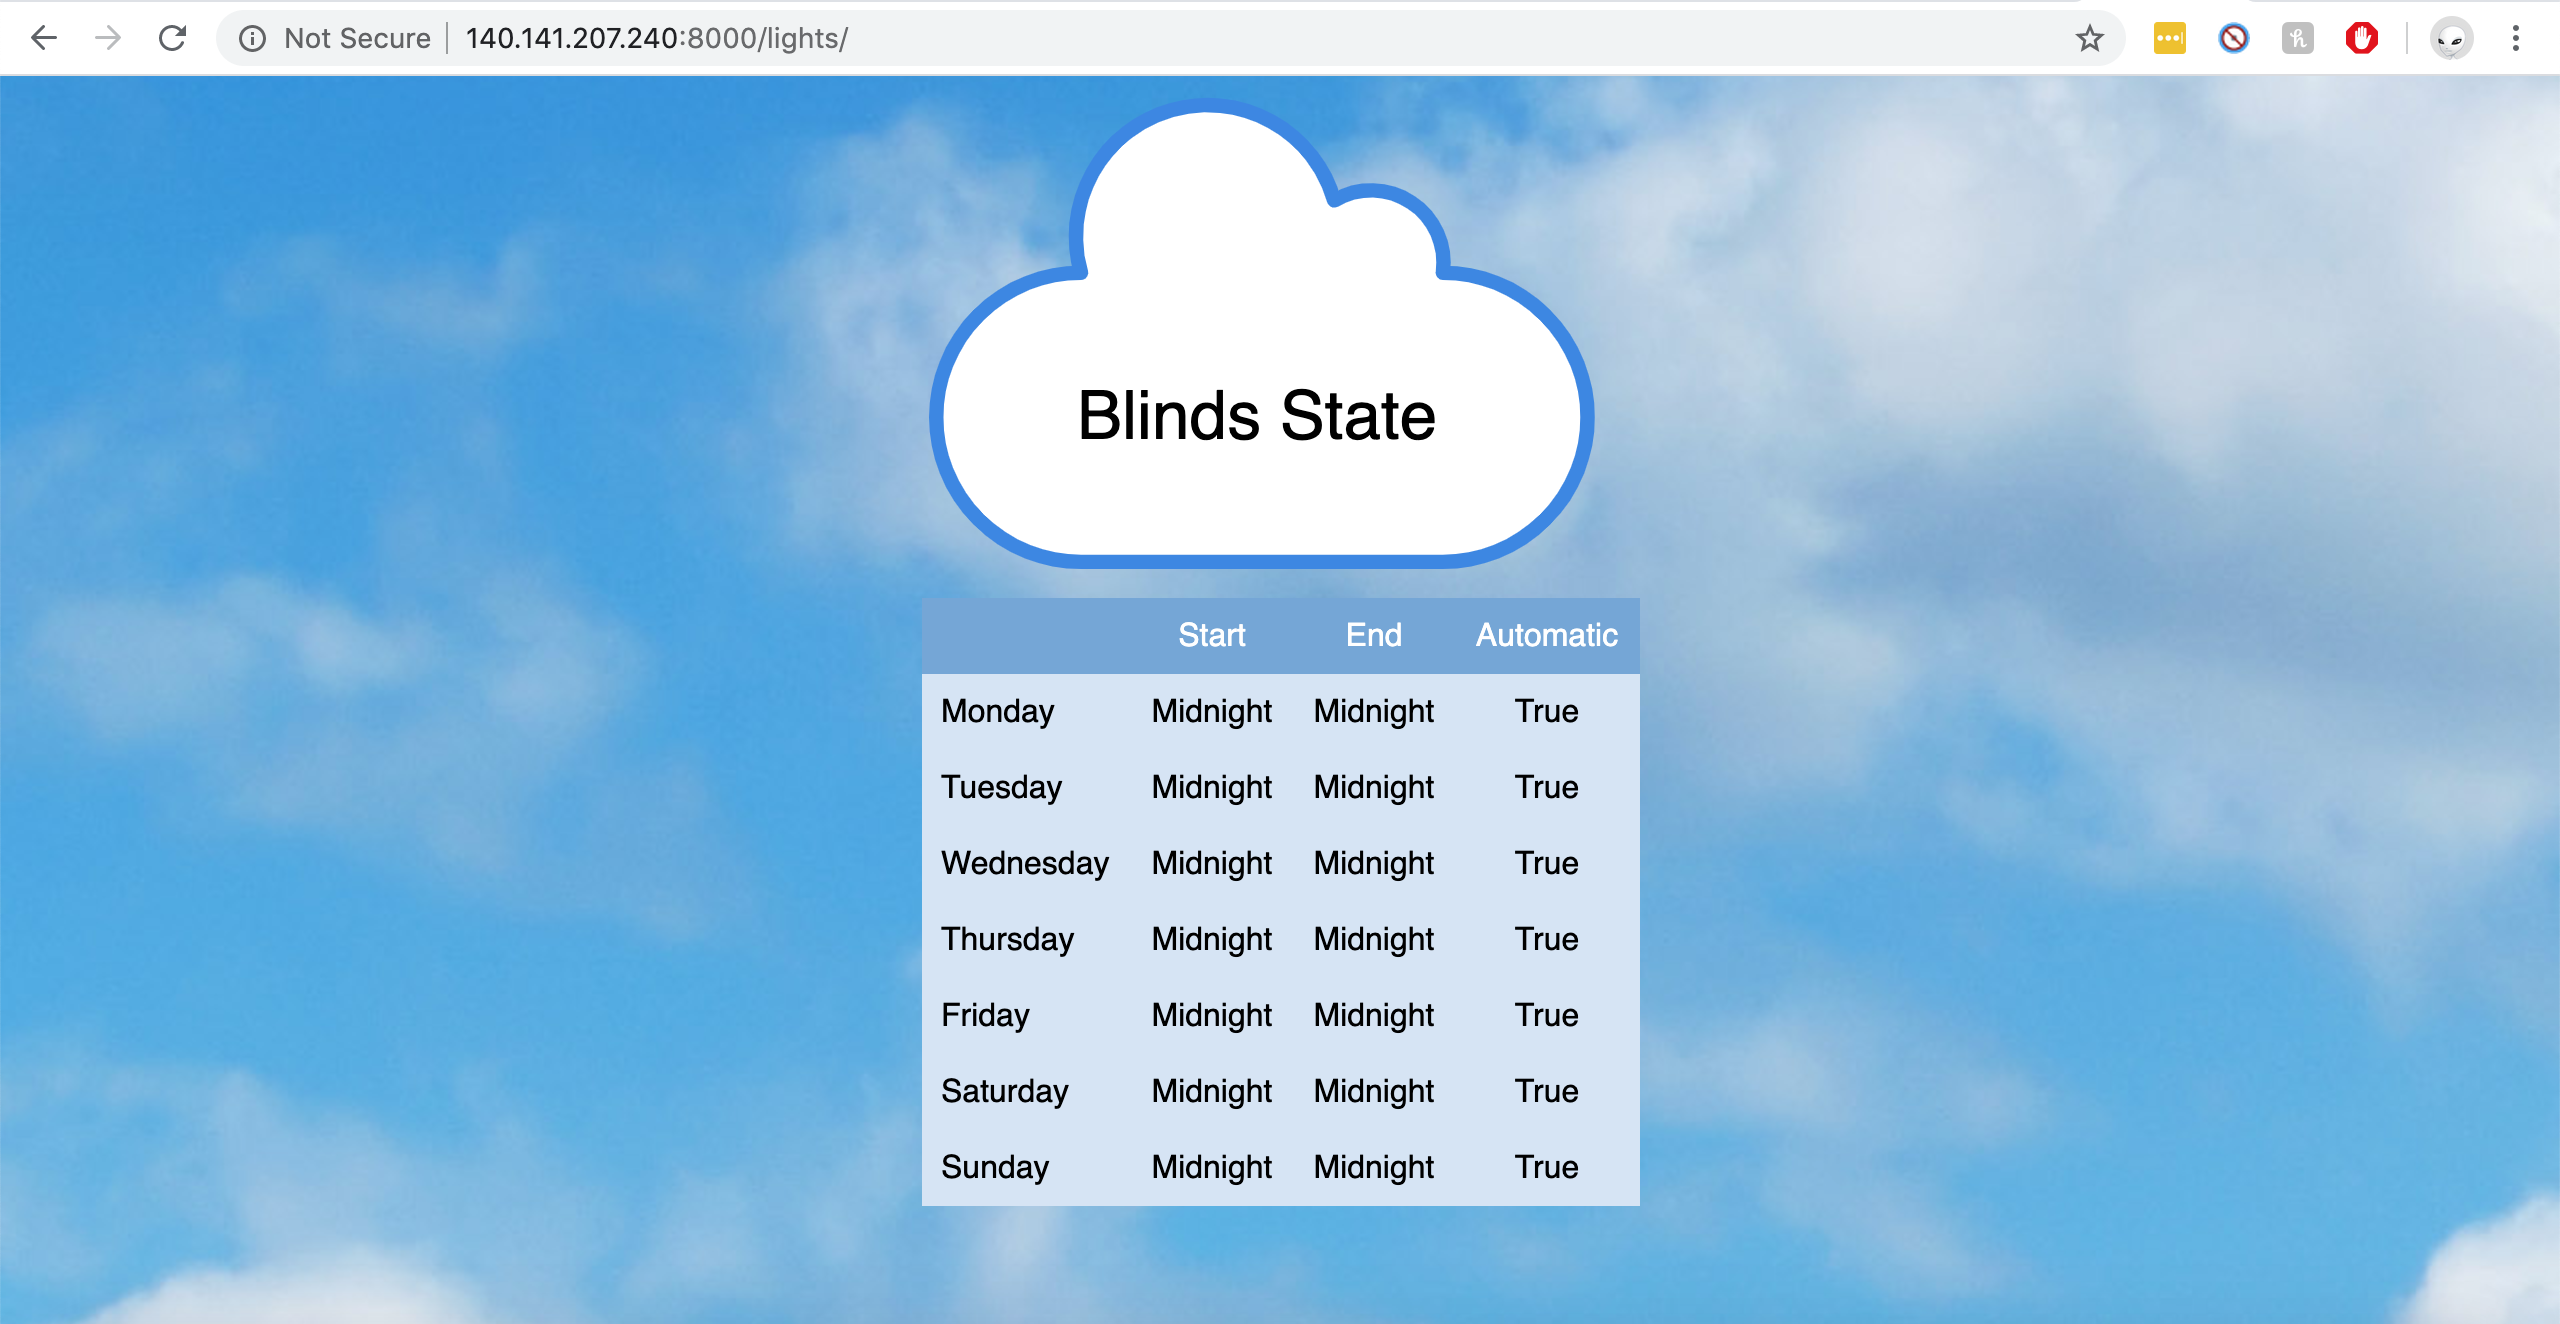
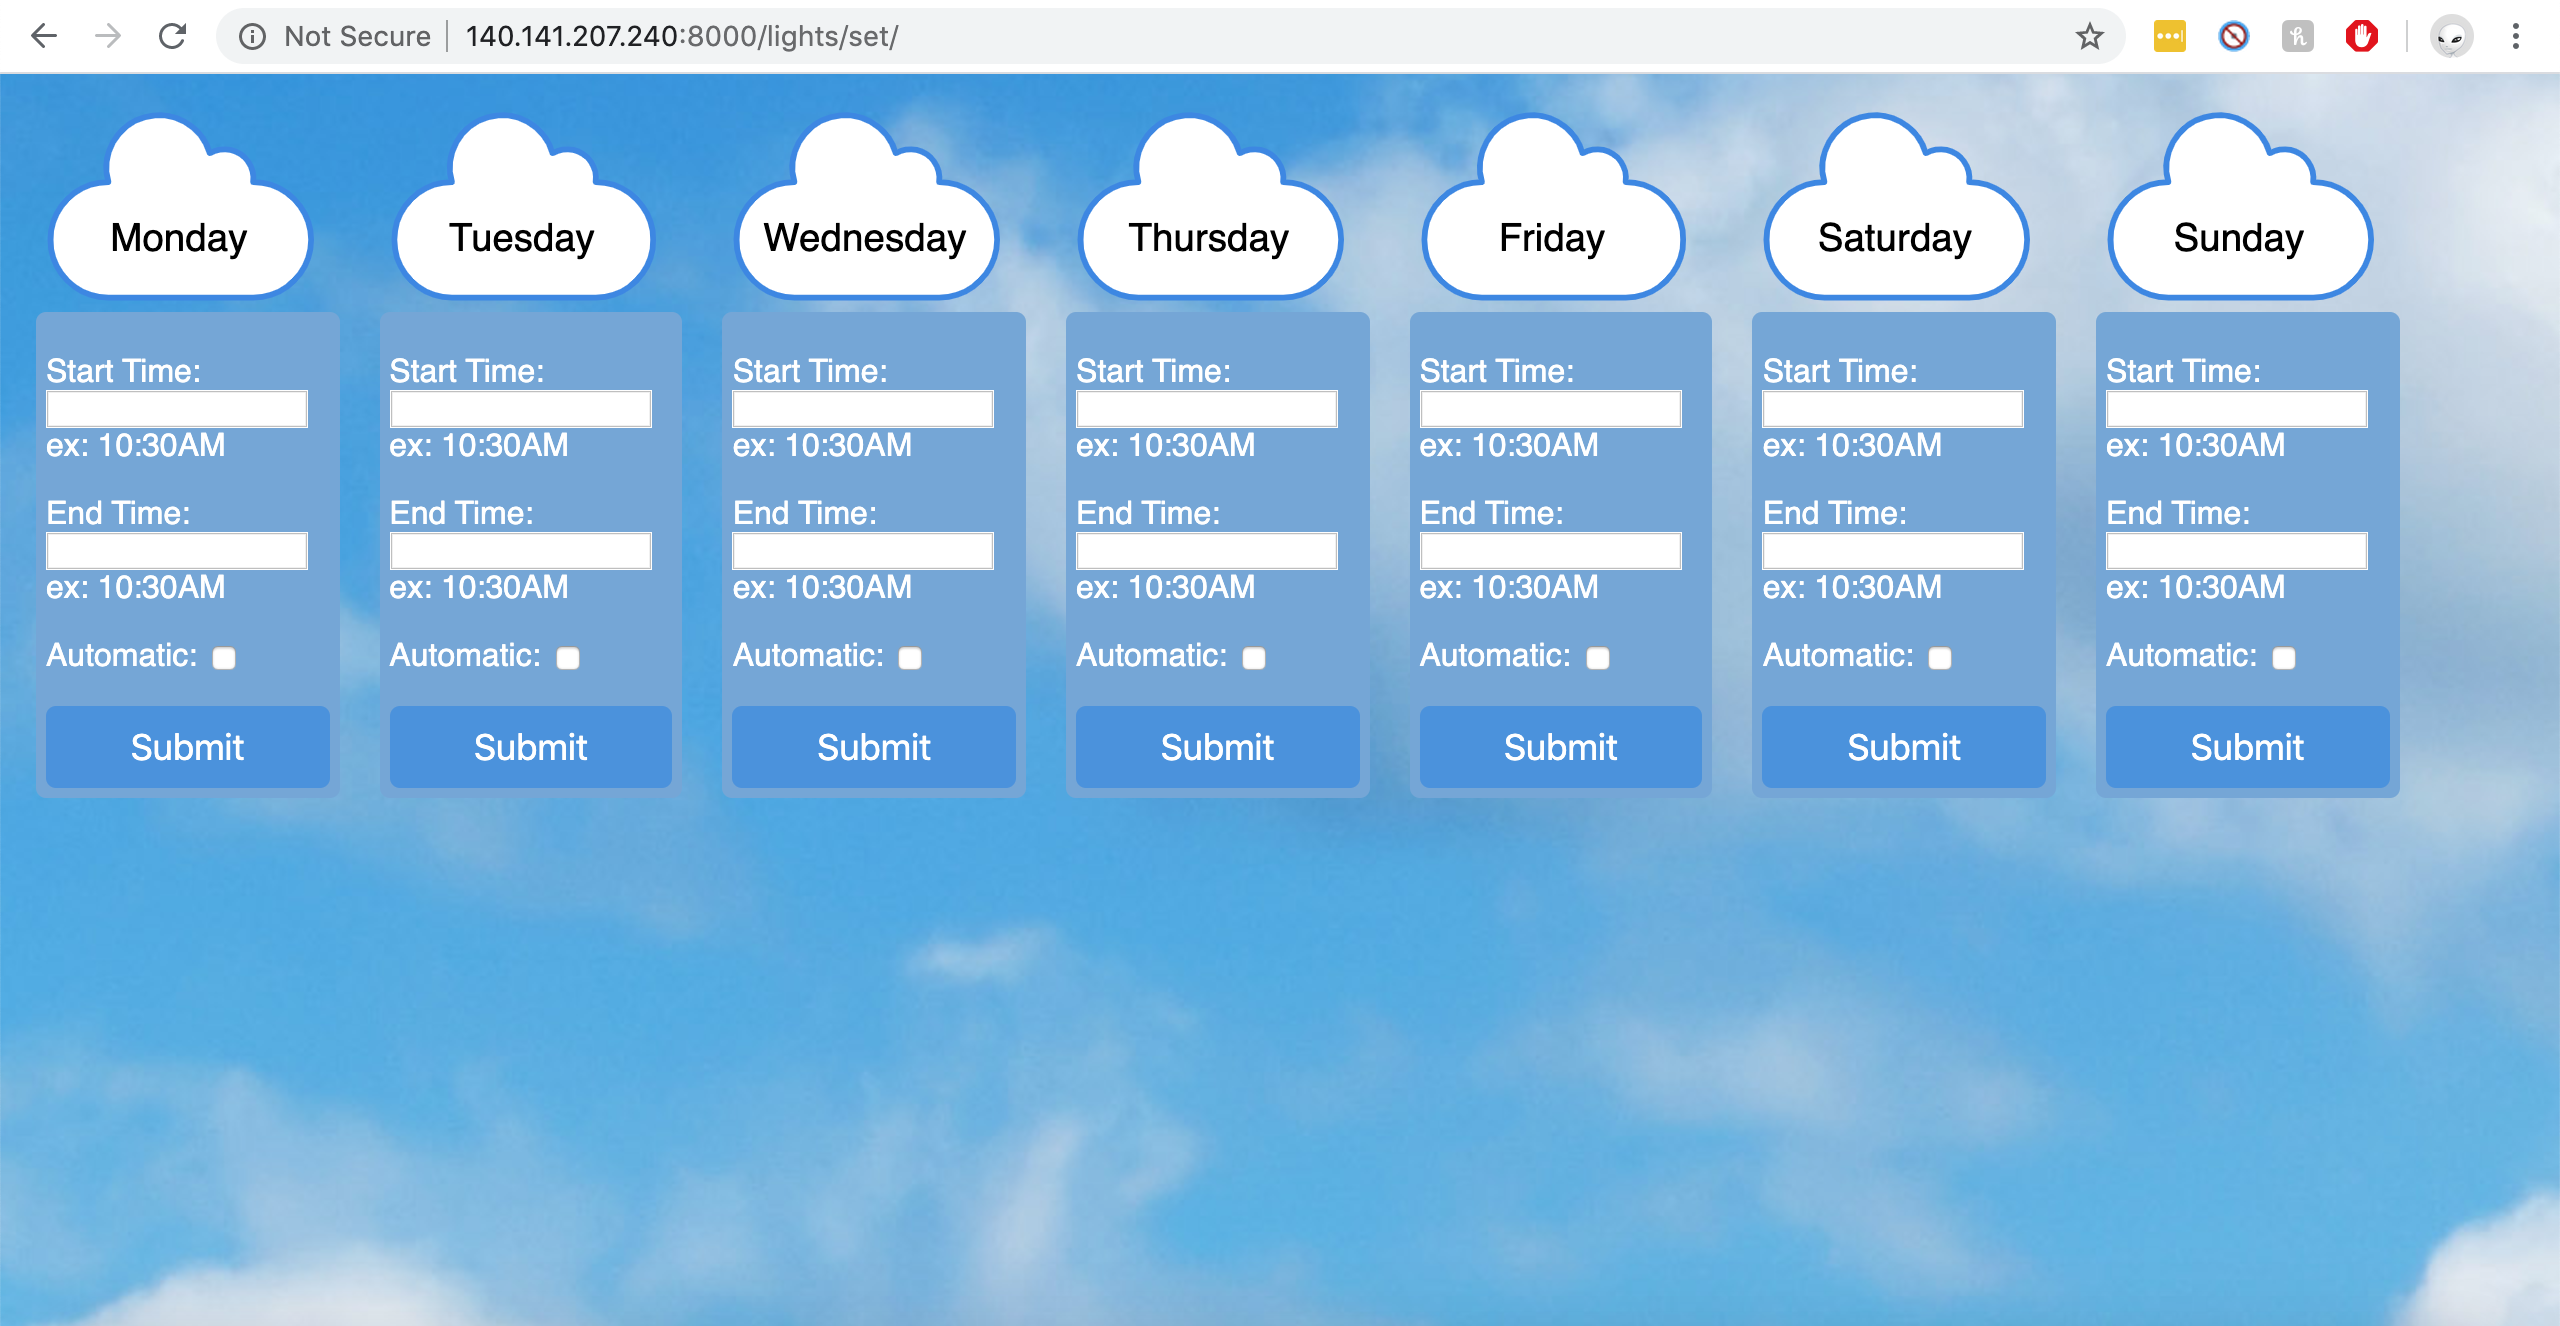
Once the device is connected to the internet and functioning, there are so many options to customize and schedule your IoT blinds. We customized the web interface in order to match the theme of this project. Our HTML and CSS files are in our GitHub Repository.
This video demonstrates the use of the different functions available to customize a user's IoT blinds. Each day of the week has custom settings. The automatic function allows a user to choose for their blinds to automatically open and close according to the light sensor data collected by the device. The schedule function gives the user the power to keep the blinds open for as little or as many hours of the day that they decide. These settings are visible to the user in the state webpage and customizable in the setting webpage.
Connect your DC motor to your favorite set of blinds and discover the power of IoT blinds!