Let's Use Google Speech to Control the Device
by louis_m in Circuits > Microcontrollers
1668 Views, 15 Favorites, 0 Comments
Let's Use Google Speech to Control the Device

Overview
Google's Speech-to-Text is a simple API based on machine learning that applies a powerful neural network model. Convert your voice to a string using the google.cloud.speech library. The converted string communicates with the W5100S via MQTT and controls the NeoPixel.
Supplies

Overview
Google's Speech-to-Text is a simple API based on machine learning that applies a powerful neural network model. Convert your voice to a string using the google.cloud.speech library. The converted string communicates with the W5100S via MQTT and controls the NeoPixel.
Prepare


Google Speech-to-Text
Speech-to-Text is an API that is powered by Google's artificial intelligence (AI) technology. You send your audio data to Speech-to-Text, then receive a text transcription of your audio data in response. For more information about how to construct a Speech-to-Text request, see the requests page.
https://cloud.google.com/speech-to-text/docs/before-you-begin?hl=en
Enable Speech-to-Text on a project.
- Make sure billing is enabled for Speech-to-Text.
- Make sure your project has at least one service account.
- Download a service account credential key.
Connect Raspberry Pi
Check out our step-by-step guide:
How to set up your Raspberry Pi 4 for the first time
Connect W5100S-EVB-Pico
W5100S-EVB-Pico is a microcontroller evaluation board based on the Raspberry Pi RP2040 and fully hardwired TCP/IP controller W5100S – and basically works the same as Raspberry Pi Pico board but with additional Ethernet via W5100S.
Setup Google API Service


In this tutorial, you'll learn how to use the Speech-to-Text V1 API from a Python application by following these steps:
Select a Google Cloud project and enable the Speech-to-Text API.
- Select a Google Cloud project and enable the Speech-to-Text API.
Set up authentication by creating a service account and downloading a key.
- Set up authentication by creating a service account and downloading a key.
Create a sample application that transcribes an audio file to text.
- Create a sample application that transcribes an audio file to text.
Estimated time to complete: To get started, click Start.
<step-1> Menu -> IAM & Admin -> Manage resources
<step-2> Go to the page [Manage Resources] and [+CREATE PROJECT] select.
<step-3> Enter a name for the project and press CREATE. This creates a project.
<step-4> Menu -> APIs & servuce -> Library
<step-5> [Cloud Speech-to-Text API] Find and click. [MANAGE] click
Create User Credentials


<step-1> [+CREATE CREDENTIALS] select and Service account click
<step-2> Enter a name for the account and press CREATE
<step-3> Verify that the service account has been created as follows:
Create API Key


Getting Started
- Connect the microphone to the RPi USB port and download the Google.spech library for the Google Speech-to-Text service.
pi@raspberry:~ $ pip install --upgrade google-cloud-speech

or

pi@raspberry:~ $ python3 -m install --upgrade google-cloud-speech

- Next, download and run mosquitto because you will control the device through mqtt. To install the Mosquitto Broker enter these next commands:
pi@raspberry:~ $ sudo apt install -y mosquitto mosquitto-clients
To make Mosquitto auto start when the Raspberry Pi boots, you need to run the following command (this means that the Mosquitto broker will automatically start when the Raspberry Pi starts :)
pi@raspberry:~ $ sudo systemctl enable mosquitto.service
Now, test the installation by running the following command:
pi@raspberry:~ $ mosquitto -v

- We will issue the data converted from Google STT to Text again in MQTT, so we will add the following command to the code. The Speech-to-Text and MQTT integrated source code is attached below.
mosquitto_pub -d -h mqtt_host -t mqtt_topic -m mqtt_msg
WIZnet W5100S-EVB-Pico setup
- Installing CircuitPython
Install CircuitPython on Raspberry Pi Pico by referring to the link above.
https://learn.adafruit.com/getting-started-with-raspberry-pi-pico-circuitpython/circuitpython
- Download the below uf2 file link on your computer
CircuitPython 7.3.3 link - DOWNLOAD
- Setup WIZnet Ethernet Library
Copy the WIZnet library Into the lib folder inside the Raspberry Pi Pico. https://learn.adafruit.com/ethernet-for-circuitpython/circuitpython-setup
Before continuing, make sure your board's lib folder has at least the following files and folders copied over: https://github.com/Wiznet/RP2040-HAT-CircuitPython
adafruit_bus_device
adafruit_wiznet5k
adafrui_minimqtt

- Setup NeoPixel Library
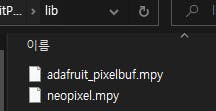
Copy the CircuitPython NeoPixel into the lib folder inside the Raspberry Pi Pico.
https://learn.adafruit.com/circuitpython-essentials/circuitpython-neopixel
adafruit_pixelbuf.mpy
neopixel.mpy
- Install Programs
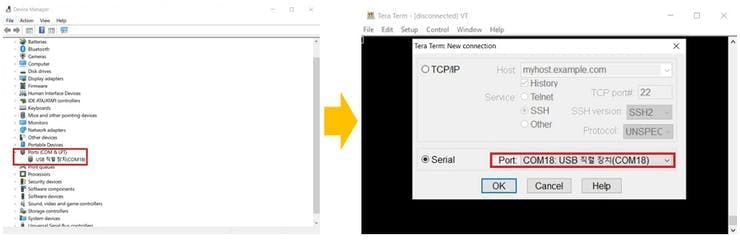
The following serial terminal program is required for MQTT Publish test, download and install from below links.
Before this, you should find the Raspberry Pi Pico COM port number from "Device Manager" on your PC.
Let's start Speech-to-Text control device
- Paste code into code.py on your Raspberry Pi Pico and Save it. Press "Ctrl+D" on the terminal window. you can see the messages as follows

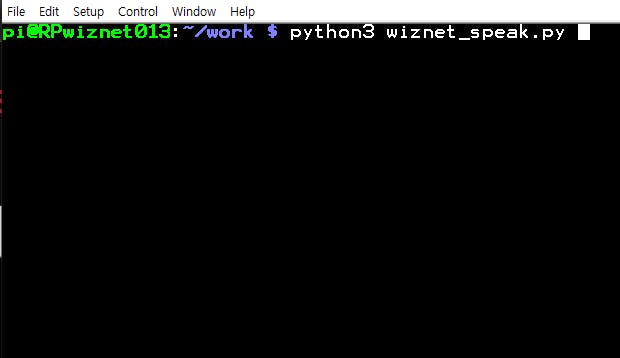
- Execute wiznet_speak.py Python code. I have attached the sauce below
- Let's shout "Hi Pico" into the mic
Rainbow Color
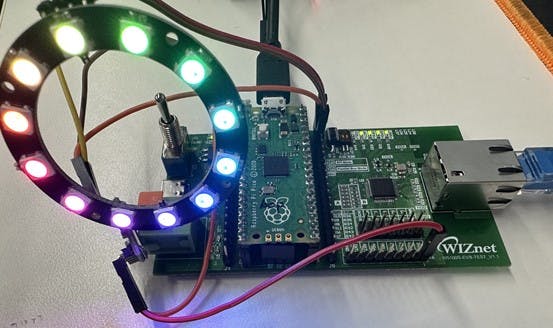
- Let's put the color we want into the microphone