Lets Make an Augmented Reality App in 6 MINUTES! TRUMP EDITION
by matthewh8 in Workshop > Science
30466 Views, 27 Favorites, 0 Comments
Lets Make an Augmented Reality App in 6 MINUTES! TRUMP EDITION
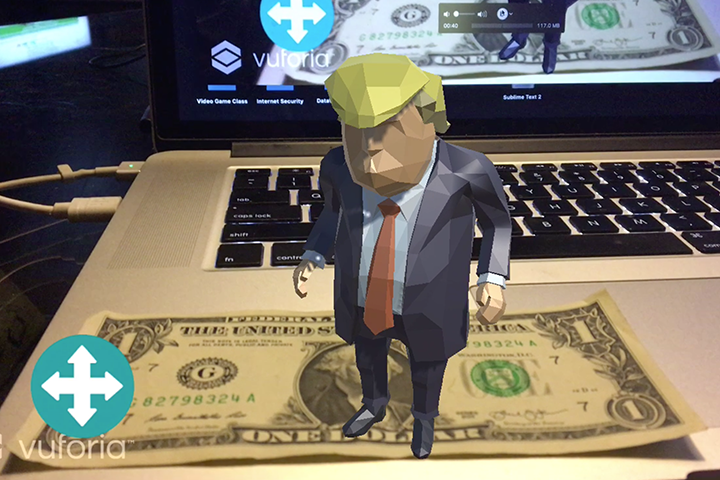
This tutorial will show you how to make an Augmented Reality App in 6 minutes. We will use the Unity3D video game engine and the Vuforia plugin to make a marker based AR app for Android or IOS. We will go through getting a 3D model of Trump showing up on a fiducial marker and also set up an on screen joystick so we can move him around. This method will also work with any other free 3D model that you can find.
Let me preface this tutorial by saying I know absolutely nothing about politics so please don't beat me up in the comments, I only made this app because I think trump is a hilarious human.
The AR App from the video can be downloaded free from the app store so you can try it before you make it.
Trump AR for Android: https://play.google.com/store/apps/details?id=com...
Trump AR for IOS: https://itunes.apple.com/us/app/trump-ar-augmente...
Download Unity and Set Up Vuforia.
First download Unity 3D if you don’t already have it and make sure to install the packages for Android or IOS support depending on what mobile platform you want to build out to.
Now we need to get the Vuforia plugin for Unity so go to vuforia.com and log in or create an account if you don’t already have one.
Click on Develop and add a license key. Copy the new key to your clipboard. Go to google and download a picture of a dollar bill or whatever other image you want to use as a marker. Put it on your desktop.
Go back to Vuforia and click on target manager. Add a new database, call it whatever you want, and click create.
Open that new database up and add the picture of your marker by choosing add target. Find the file on your desktop. Enter in 5 for the width and give it a unique name, click add.
Now download that image target database and put it on your desktop.
Download Your 3D Model and Get Vuforia.
Grab the Vuforia plugin for unity if you don’t already have it from the downloads section of Vuforia.com. Put that on your desktop next to everything else.
The last thing we need to download is the 3D model that we are going to move around.
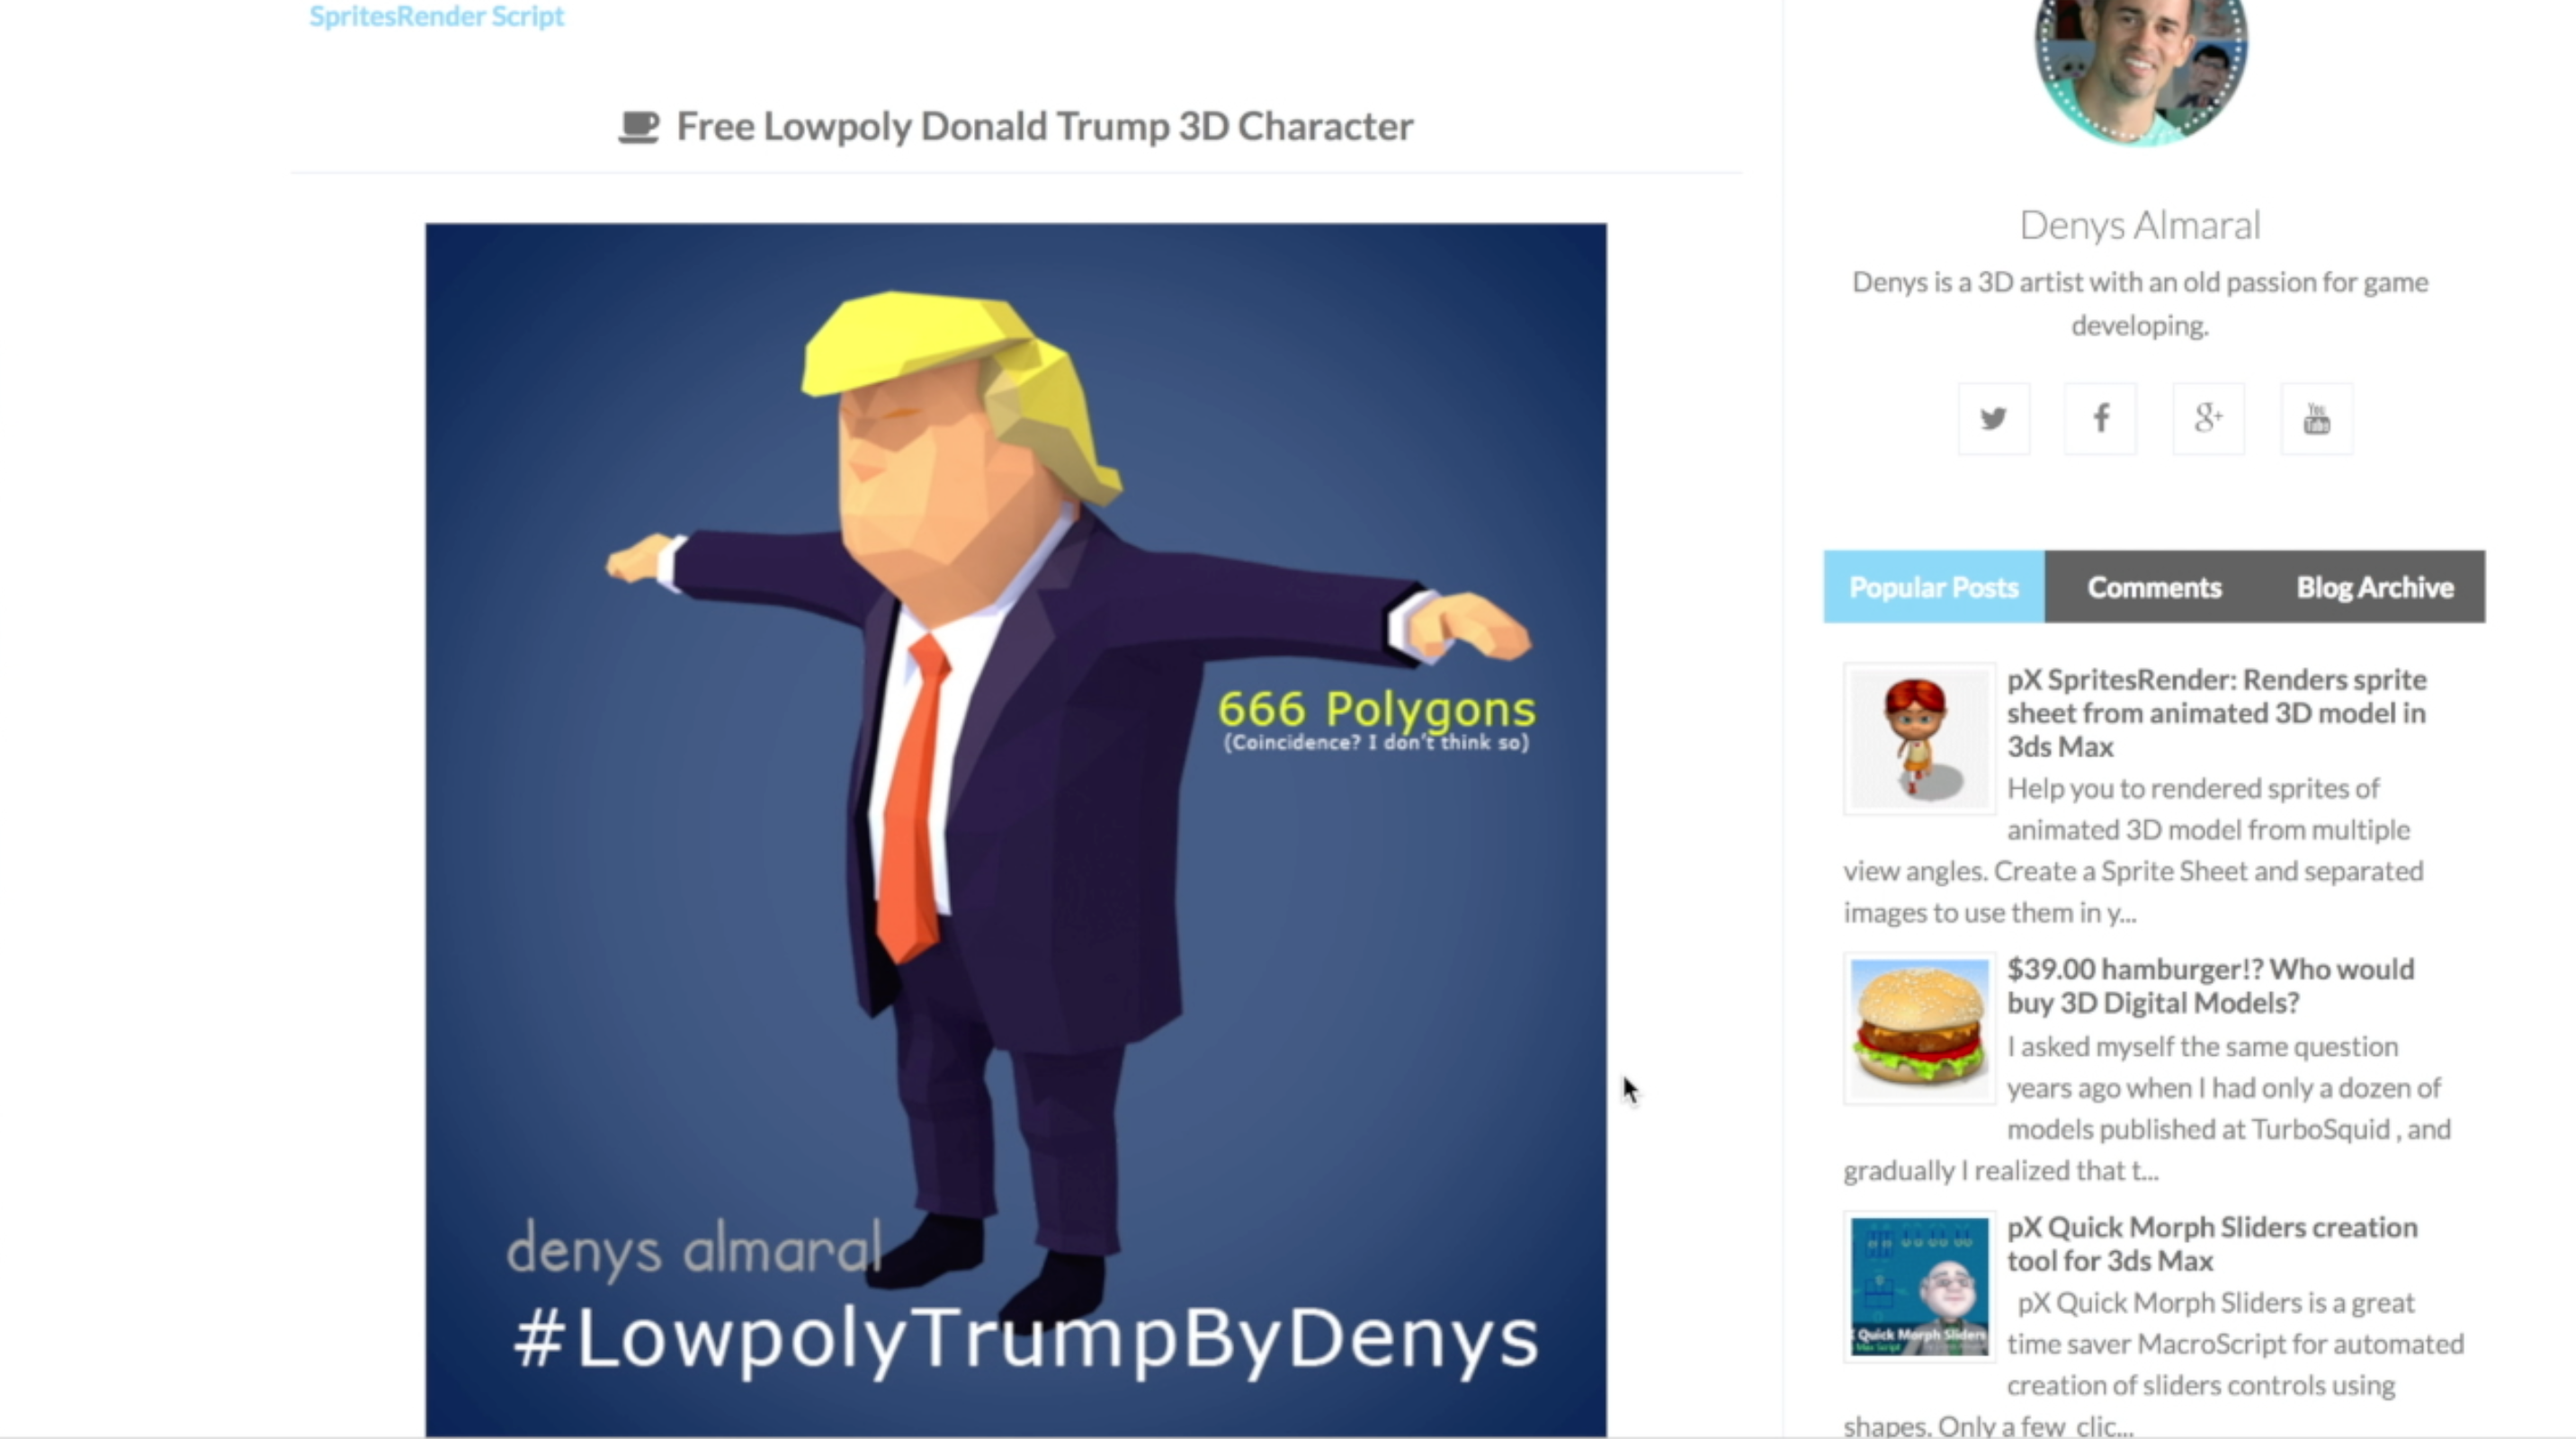
You could use whatever you want, but here I am going to search trump low poly model on google and choose this one.
Download this and throw it onto your desktop as well.
Now, open up unity and create a new project, call it whatever.
Go to file, build settings, and change your platform to Android or IOS.
Drag in the Vuforia plugin, drag in the image target database we created, unzip the trump 3d model folder and drag that in as well. Save the scene.
Setting Up Vuforia Really Is That Easy.
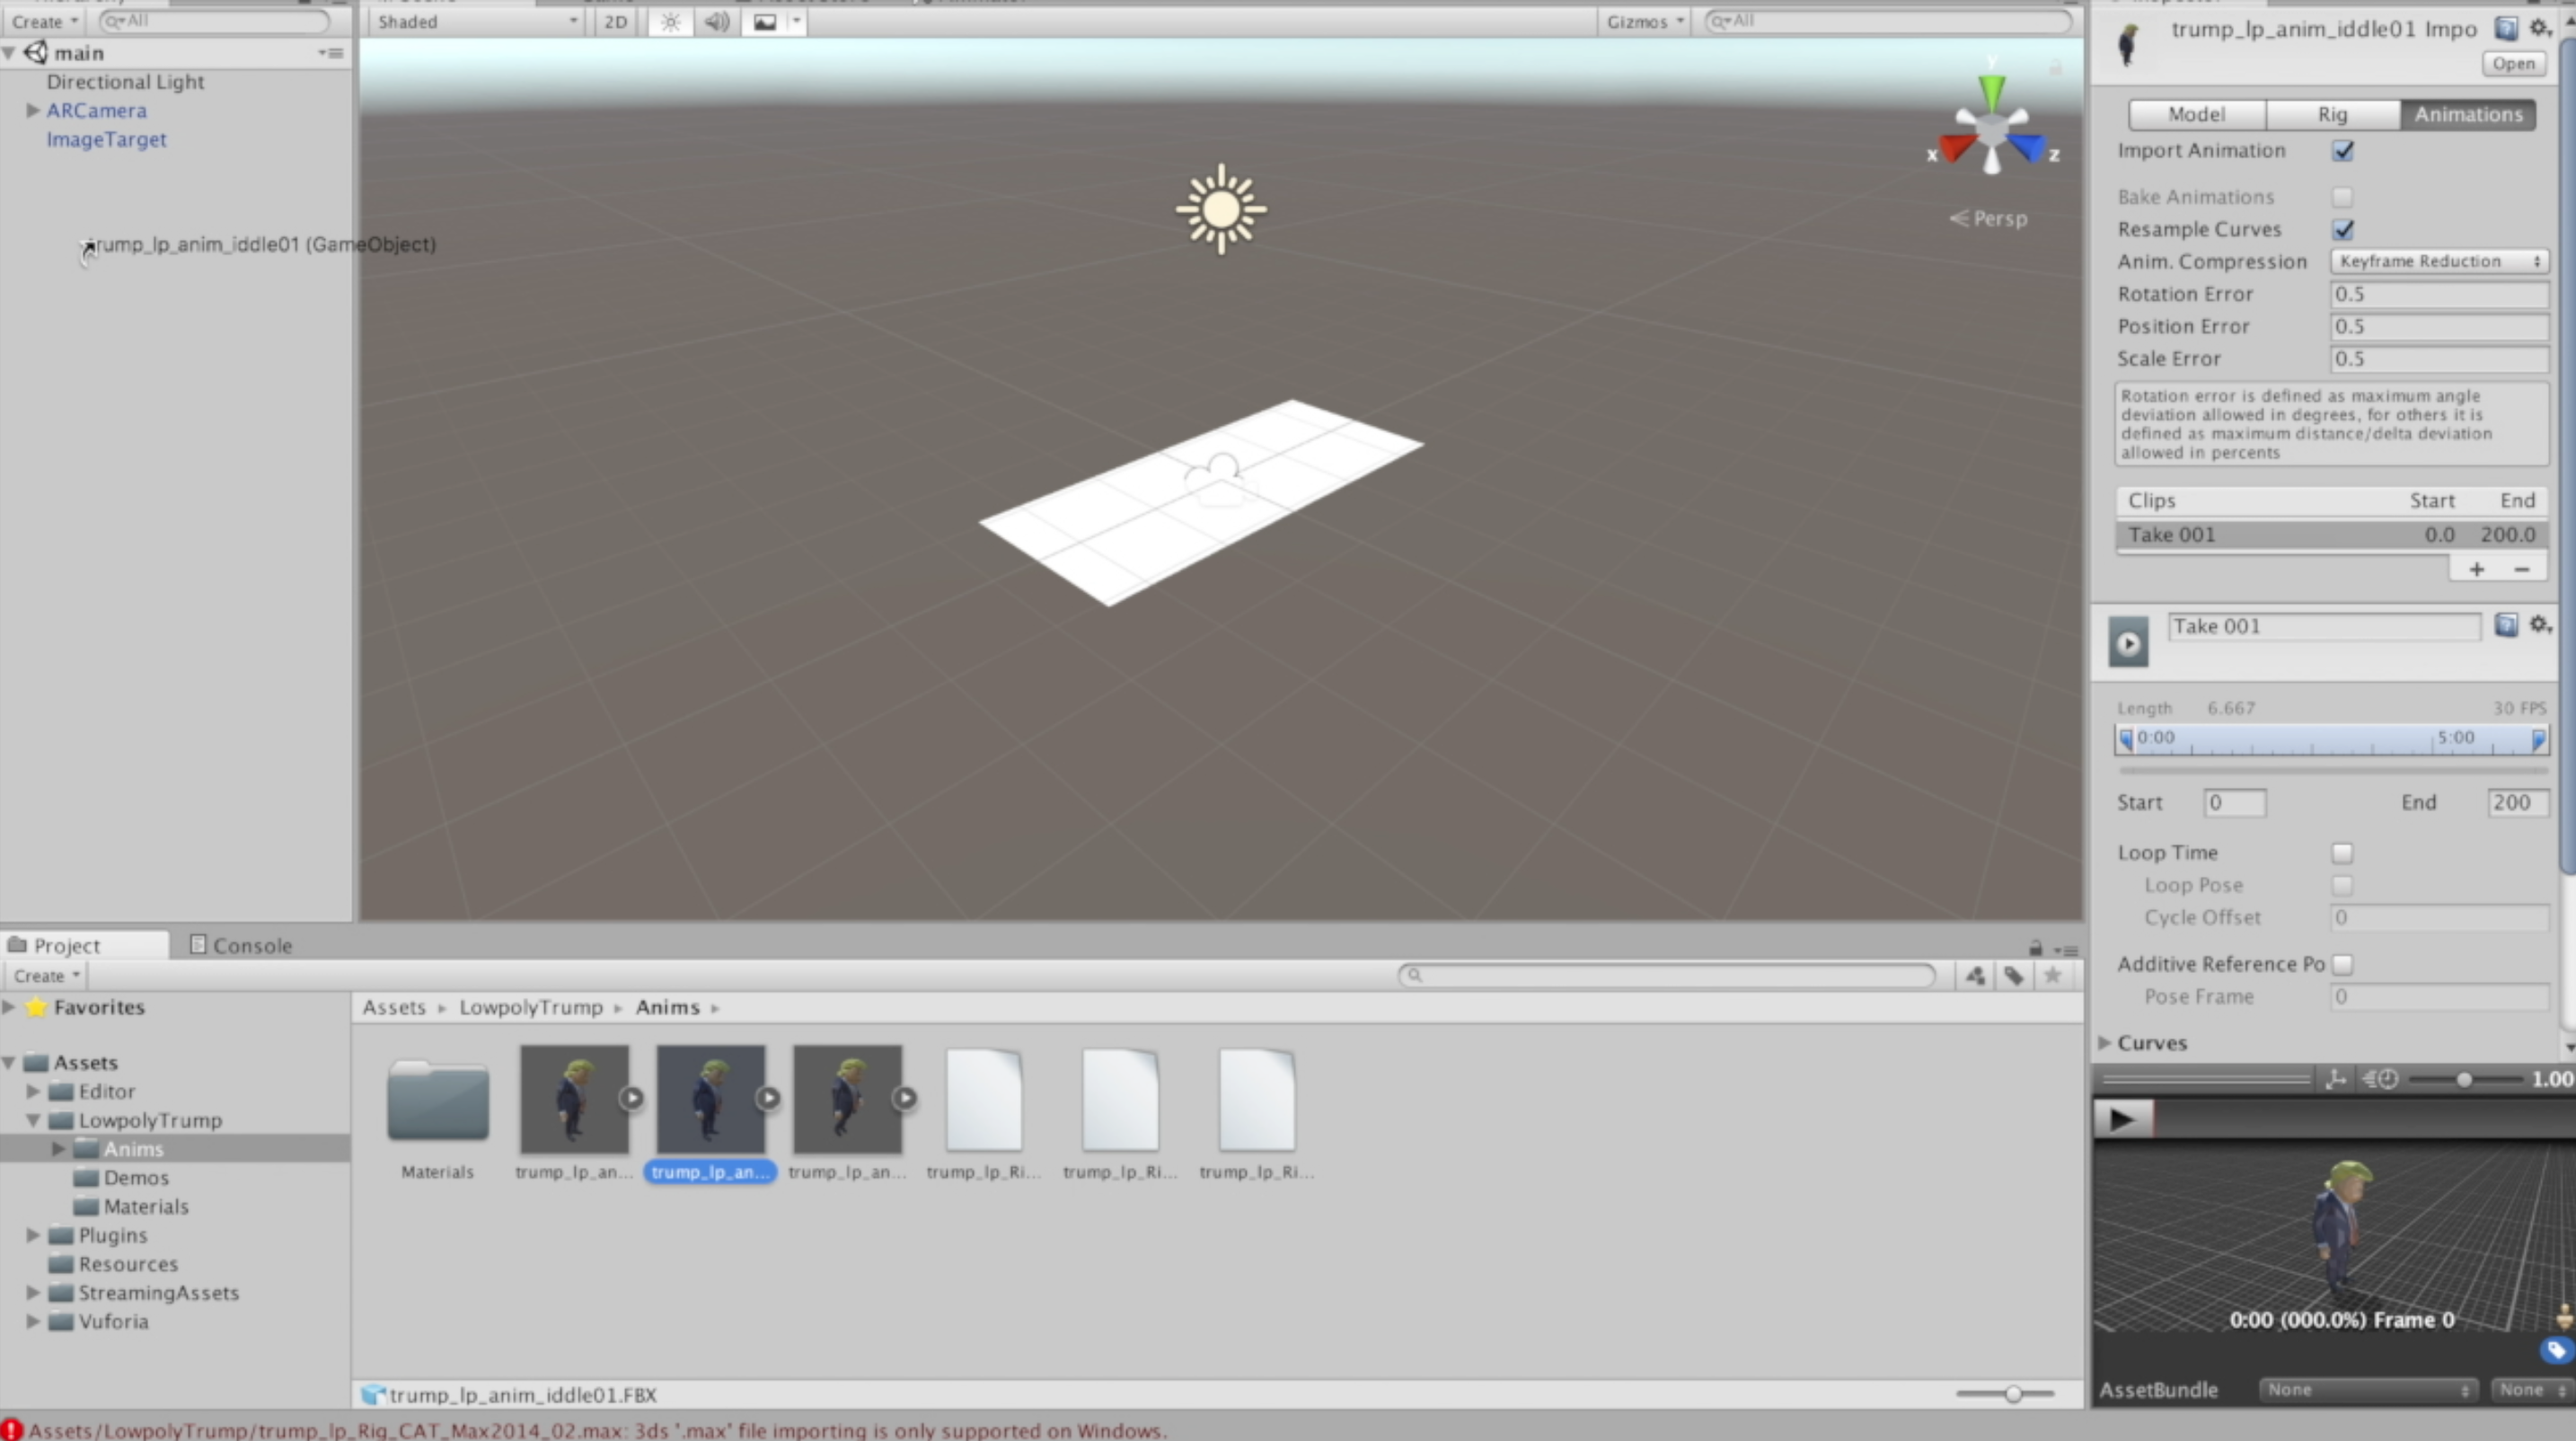
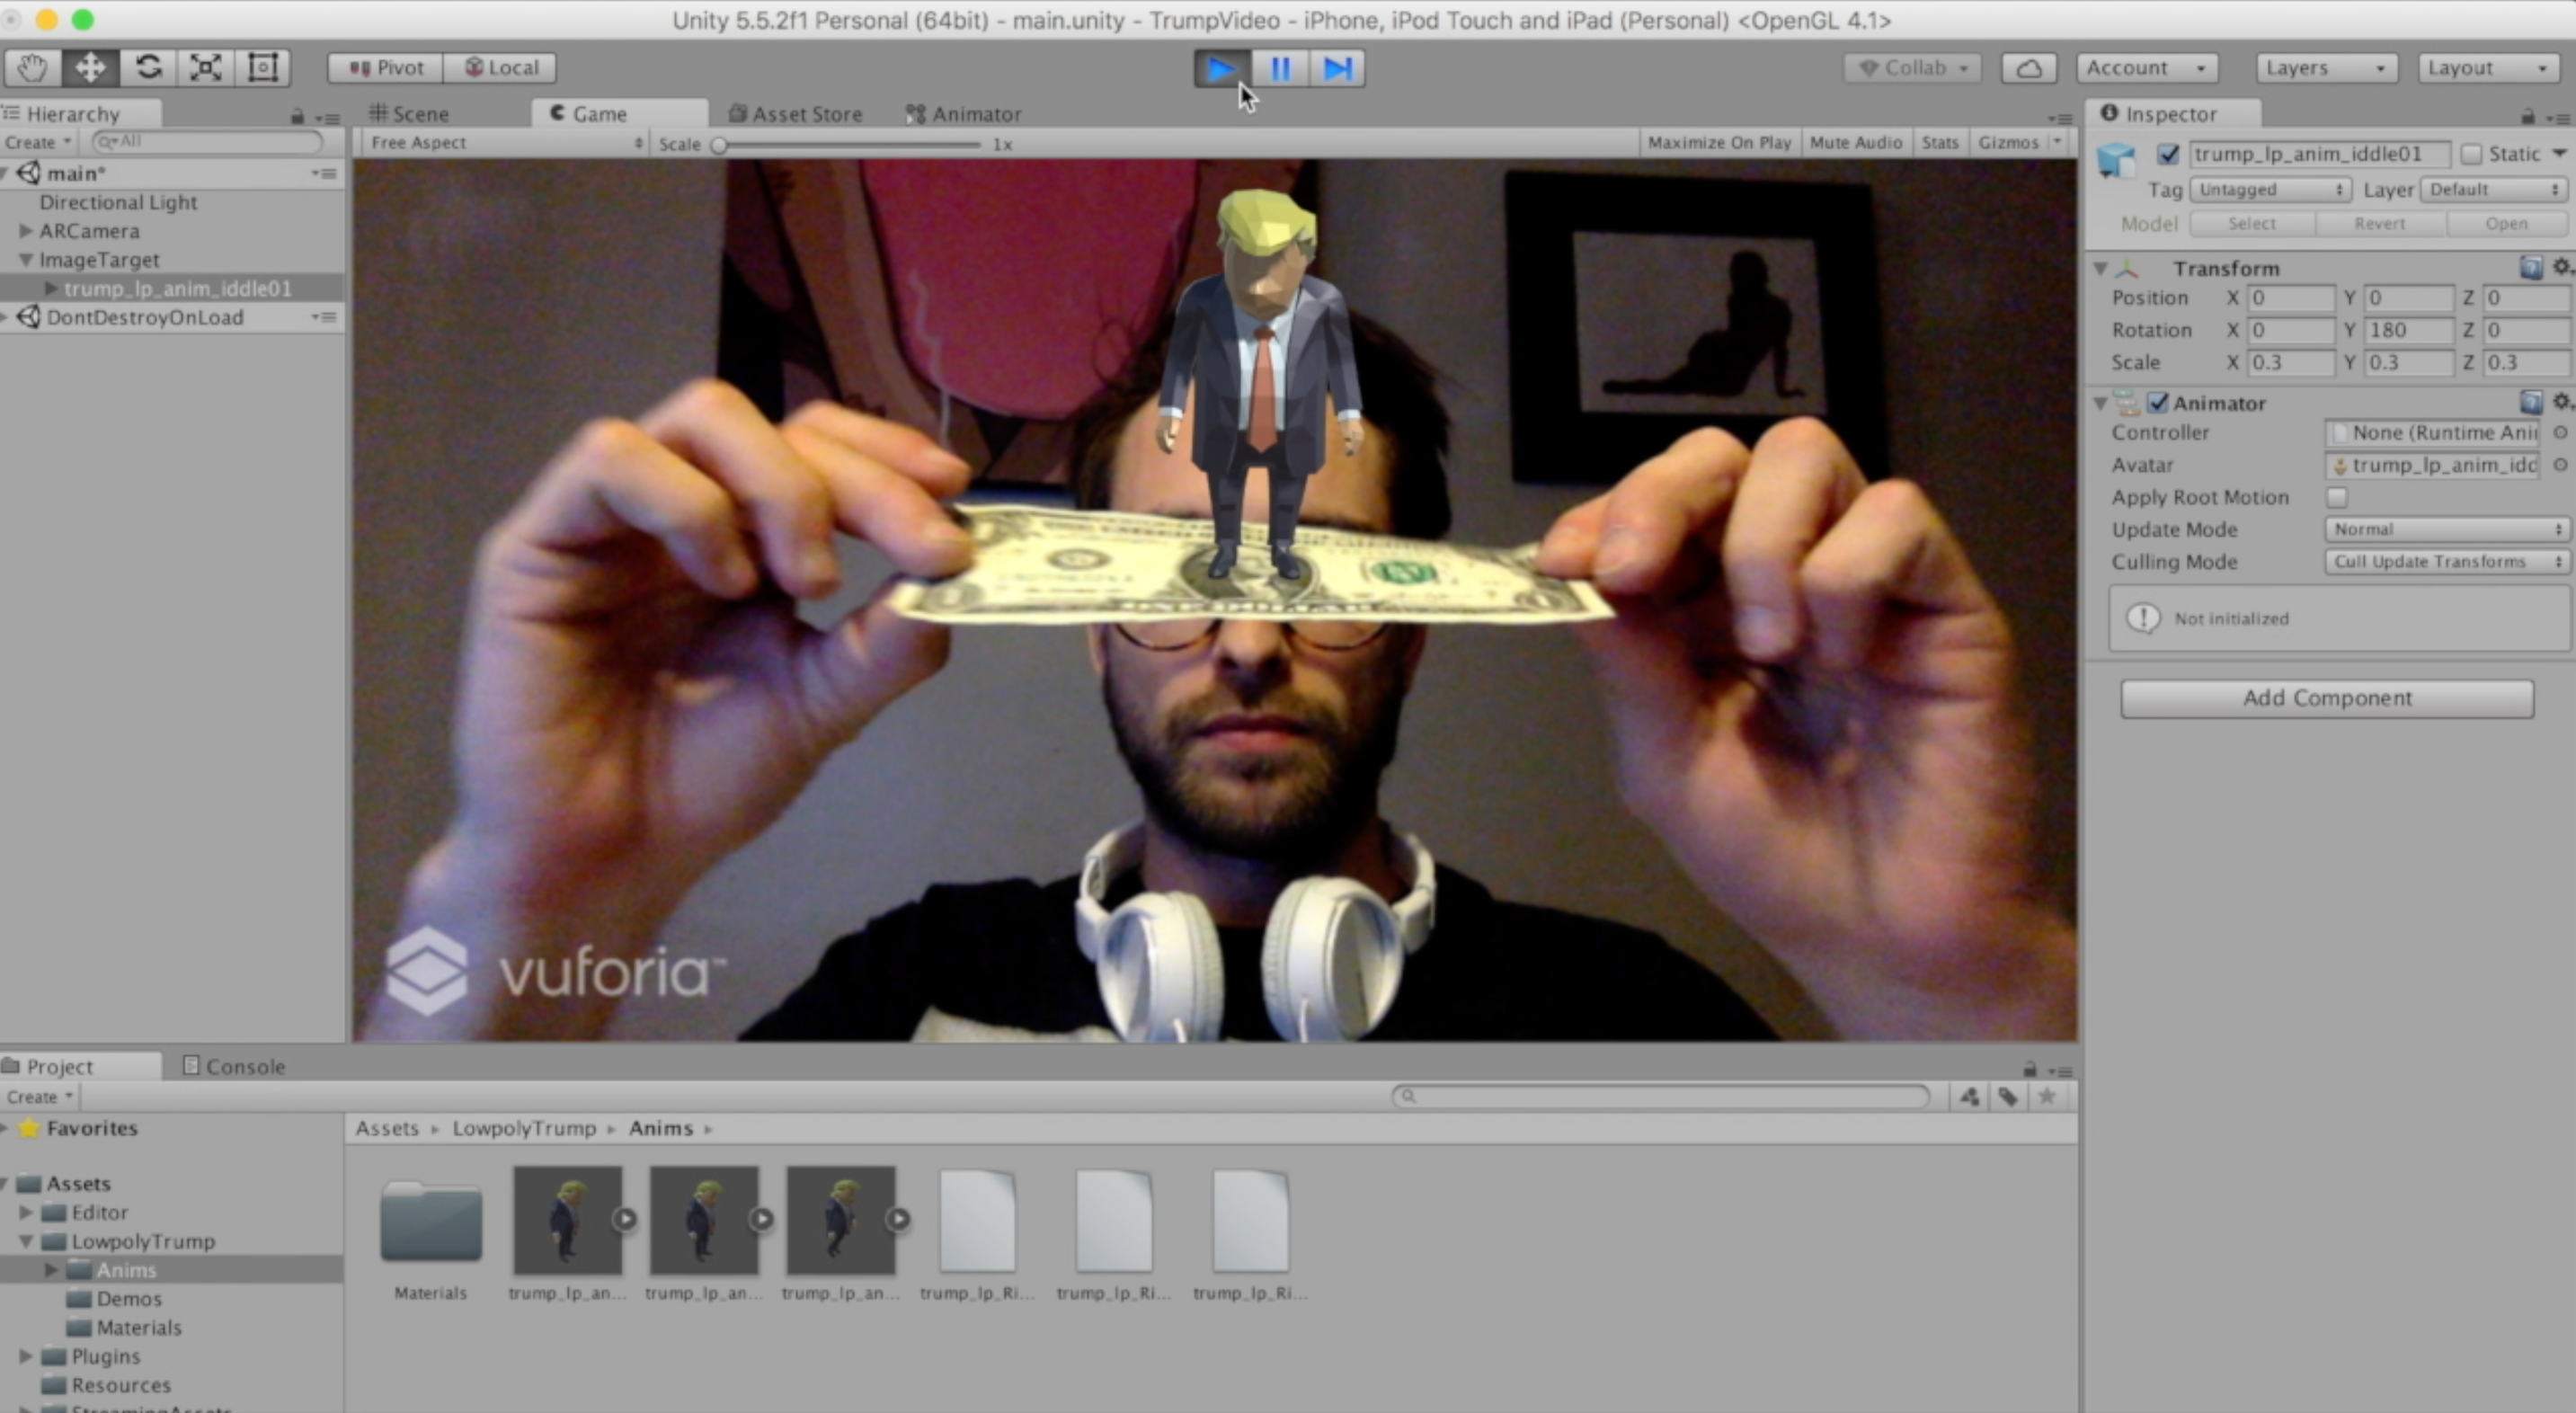
Now lets get tracking working so click the Vuforia folder, prefabs and drag in AR camera to the scene. Delete the main camera. Next drag the ImageTarget prefab into the scene. With the ARCamera game object selected click on open configuration in the inspector. Paste in your license key. Expand datasets and check load image targets database, and activate.
Select the image target gameobject and choose your image target database from the dropdown, and choose the image target you want to track.
Go to the low-poly trump folder and go to the animations folder. Find the trump with idle animation and drag that into the scene on top of the image target game object, making it a child.
Rotate trump by 180 degrees about the y, and up his scale to .3.
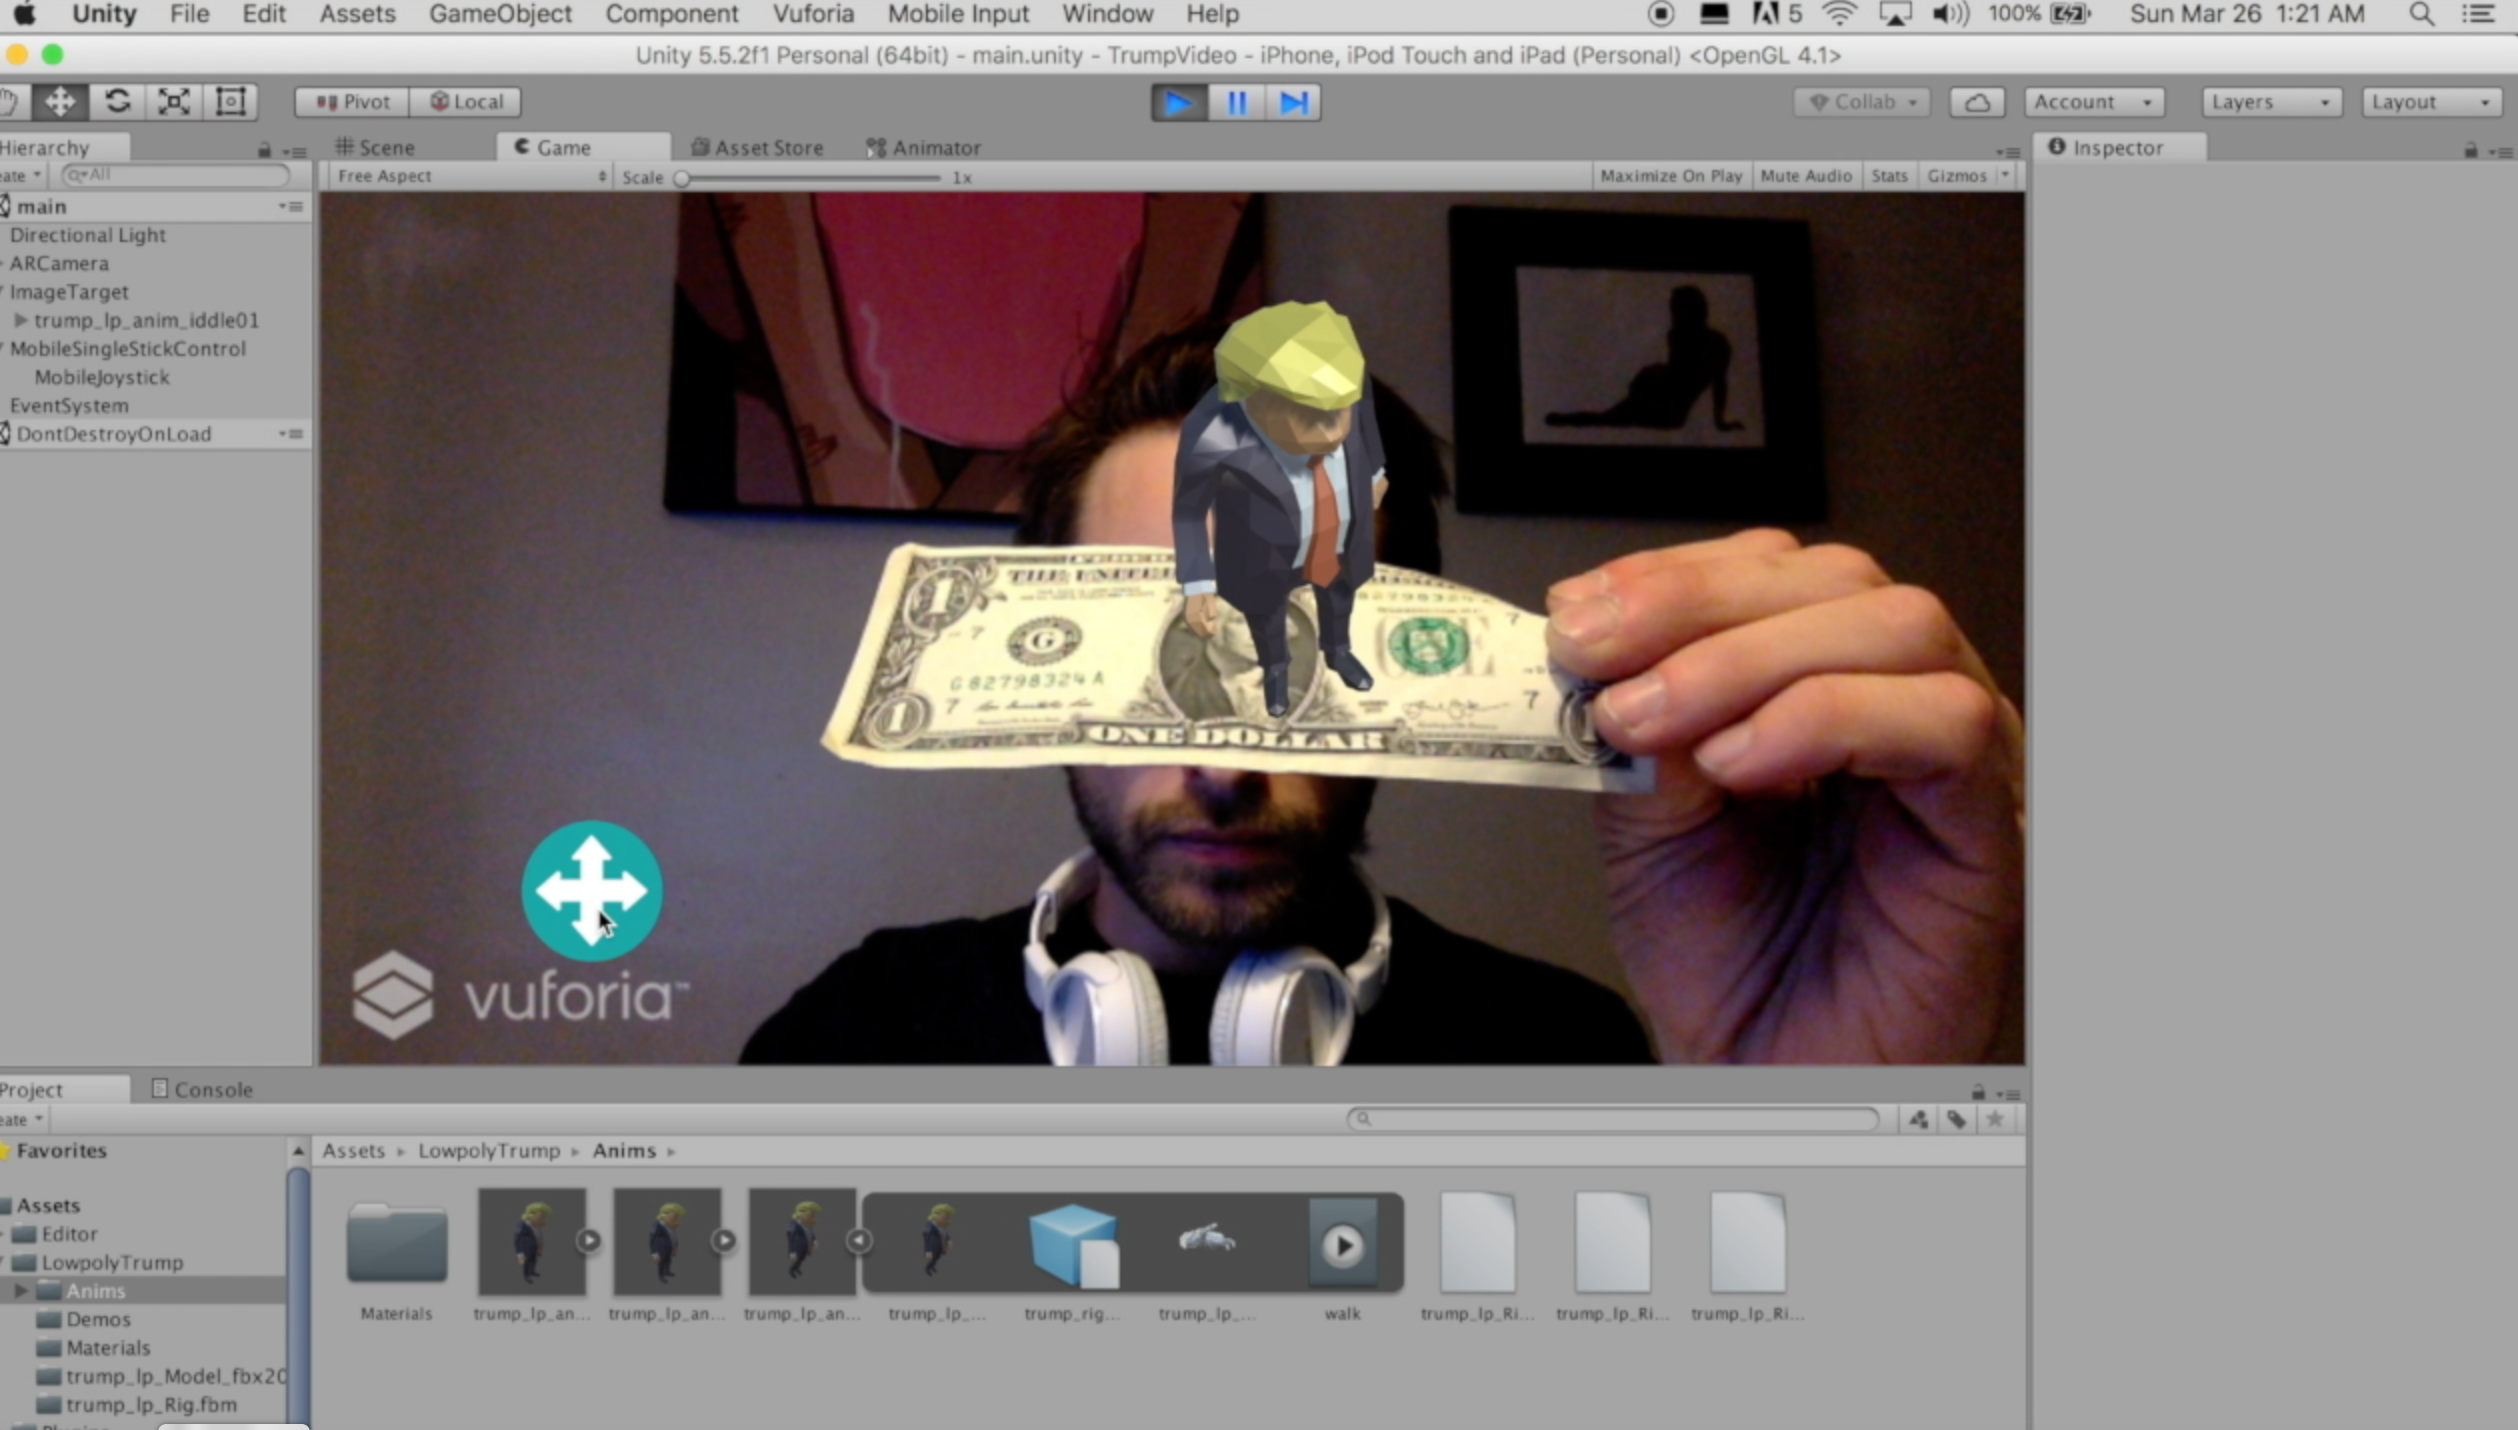
Click play in the editor and we should be able to see our 3D model on our marker.
Add the Joystick.
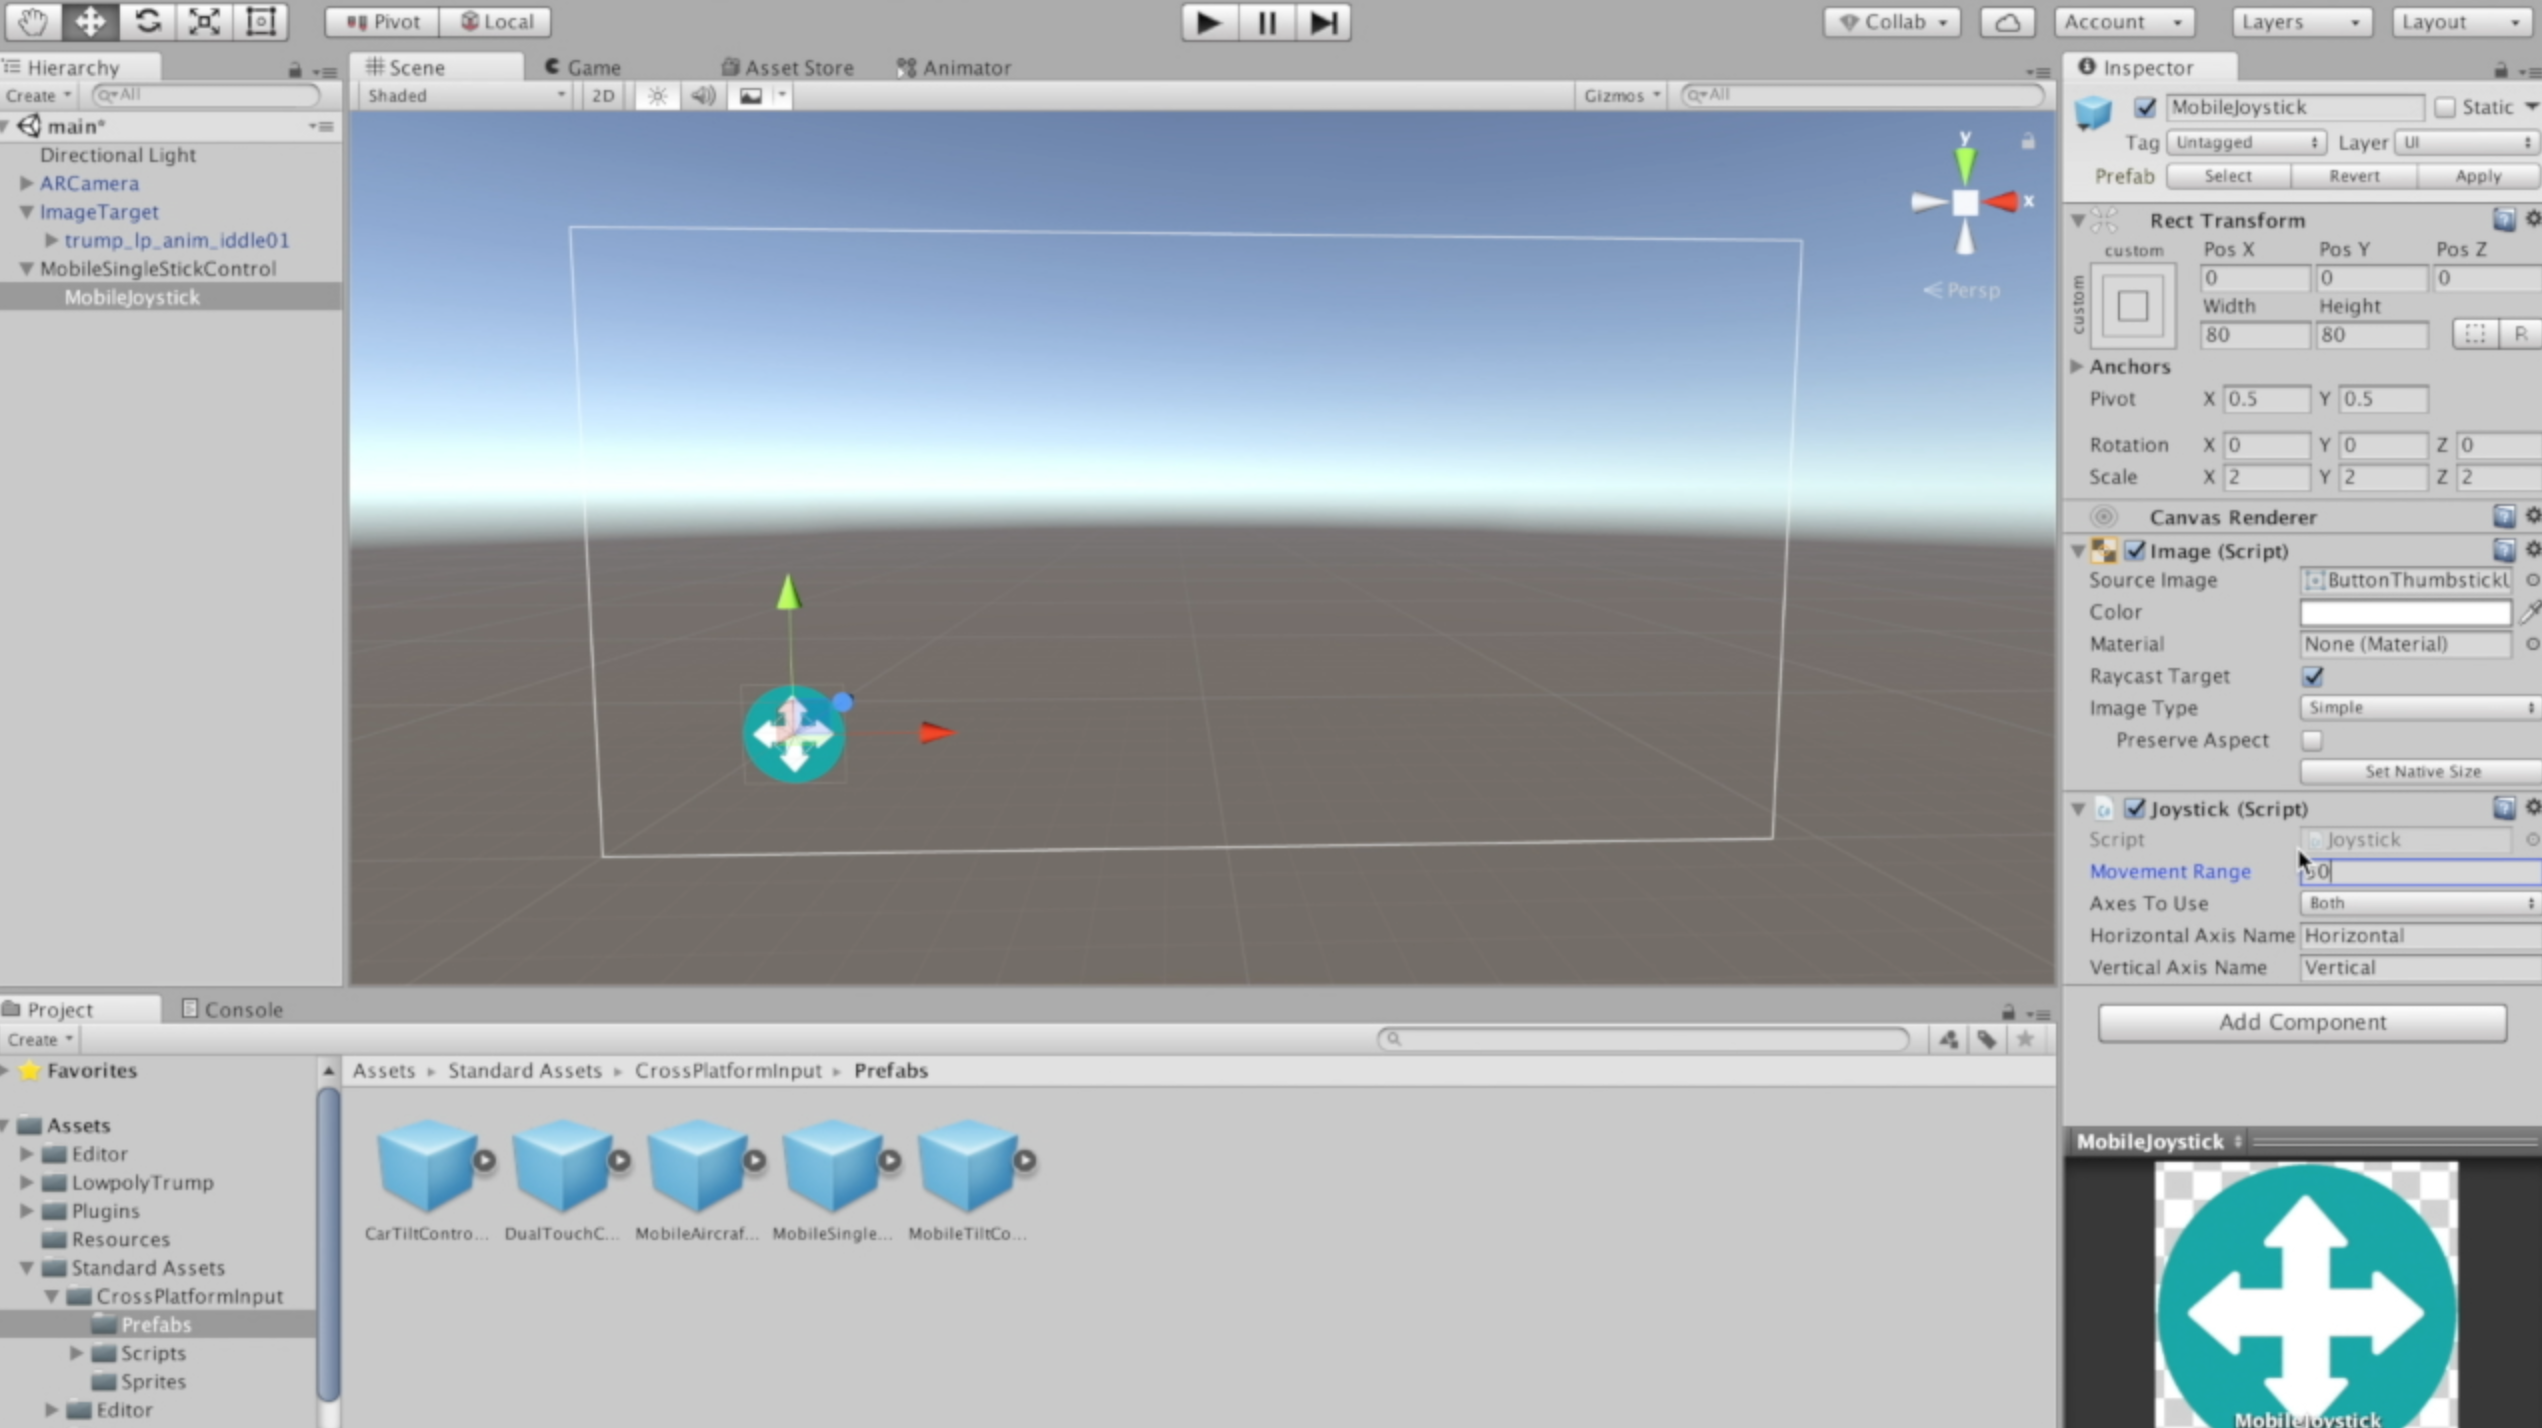
Now lets get the joystick working, Go to assets, import package, and choose cross platform input.
Go to standard assets, cross platform input, prefabs, and drag the mobile single stick control prefab into the scene.
Delete the jump button.
Up the scale to 2 on the mobile joystick child.
Also, change the movement range to 50.
Now go to the trump game object and add a rigid body component. Uncheck use gravity. Create a new C sharp script and call it trump controller. Double click it to open it in MonoDevelop.
Create the Movement Script.
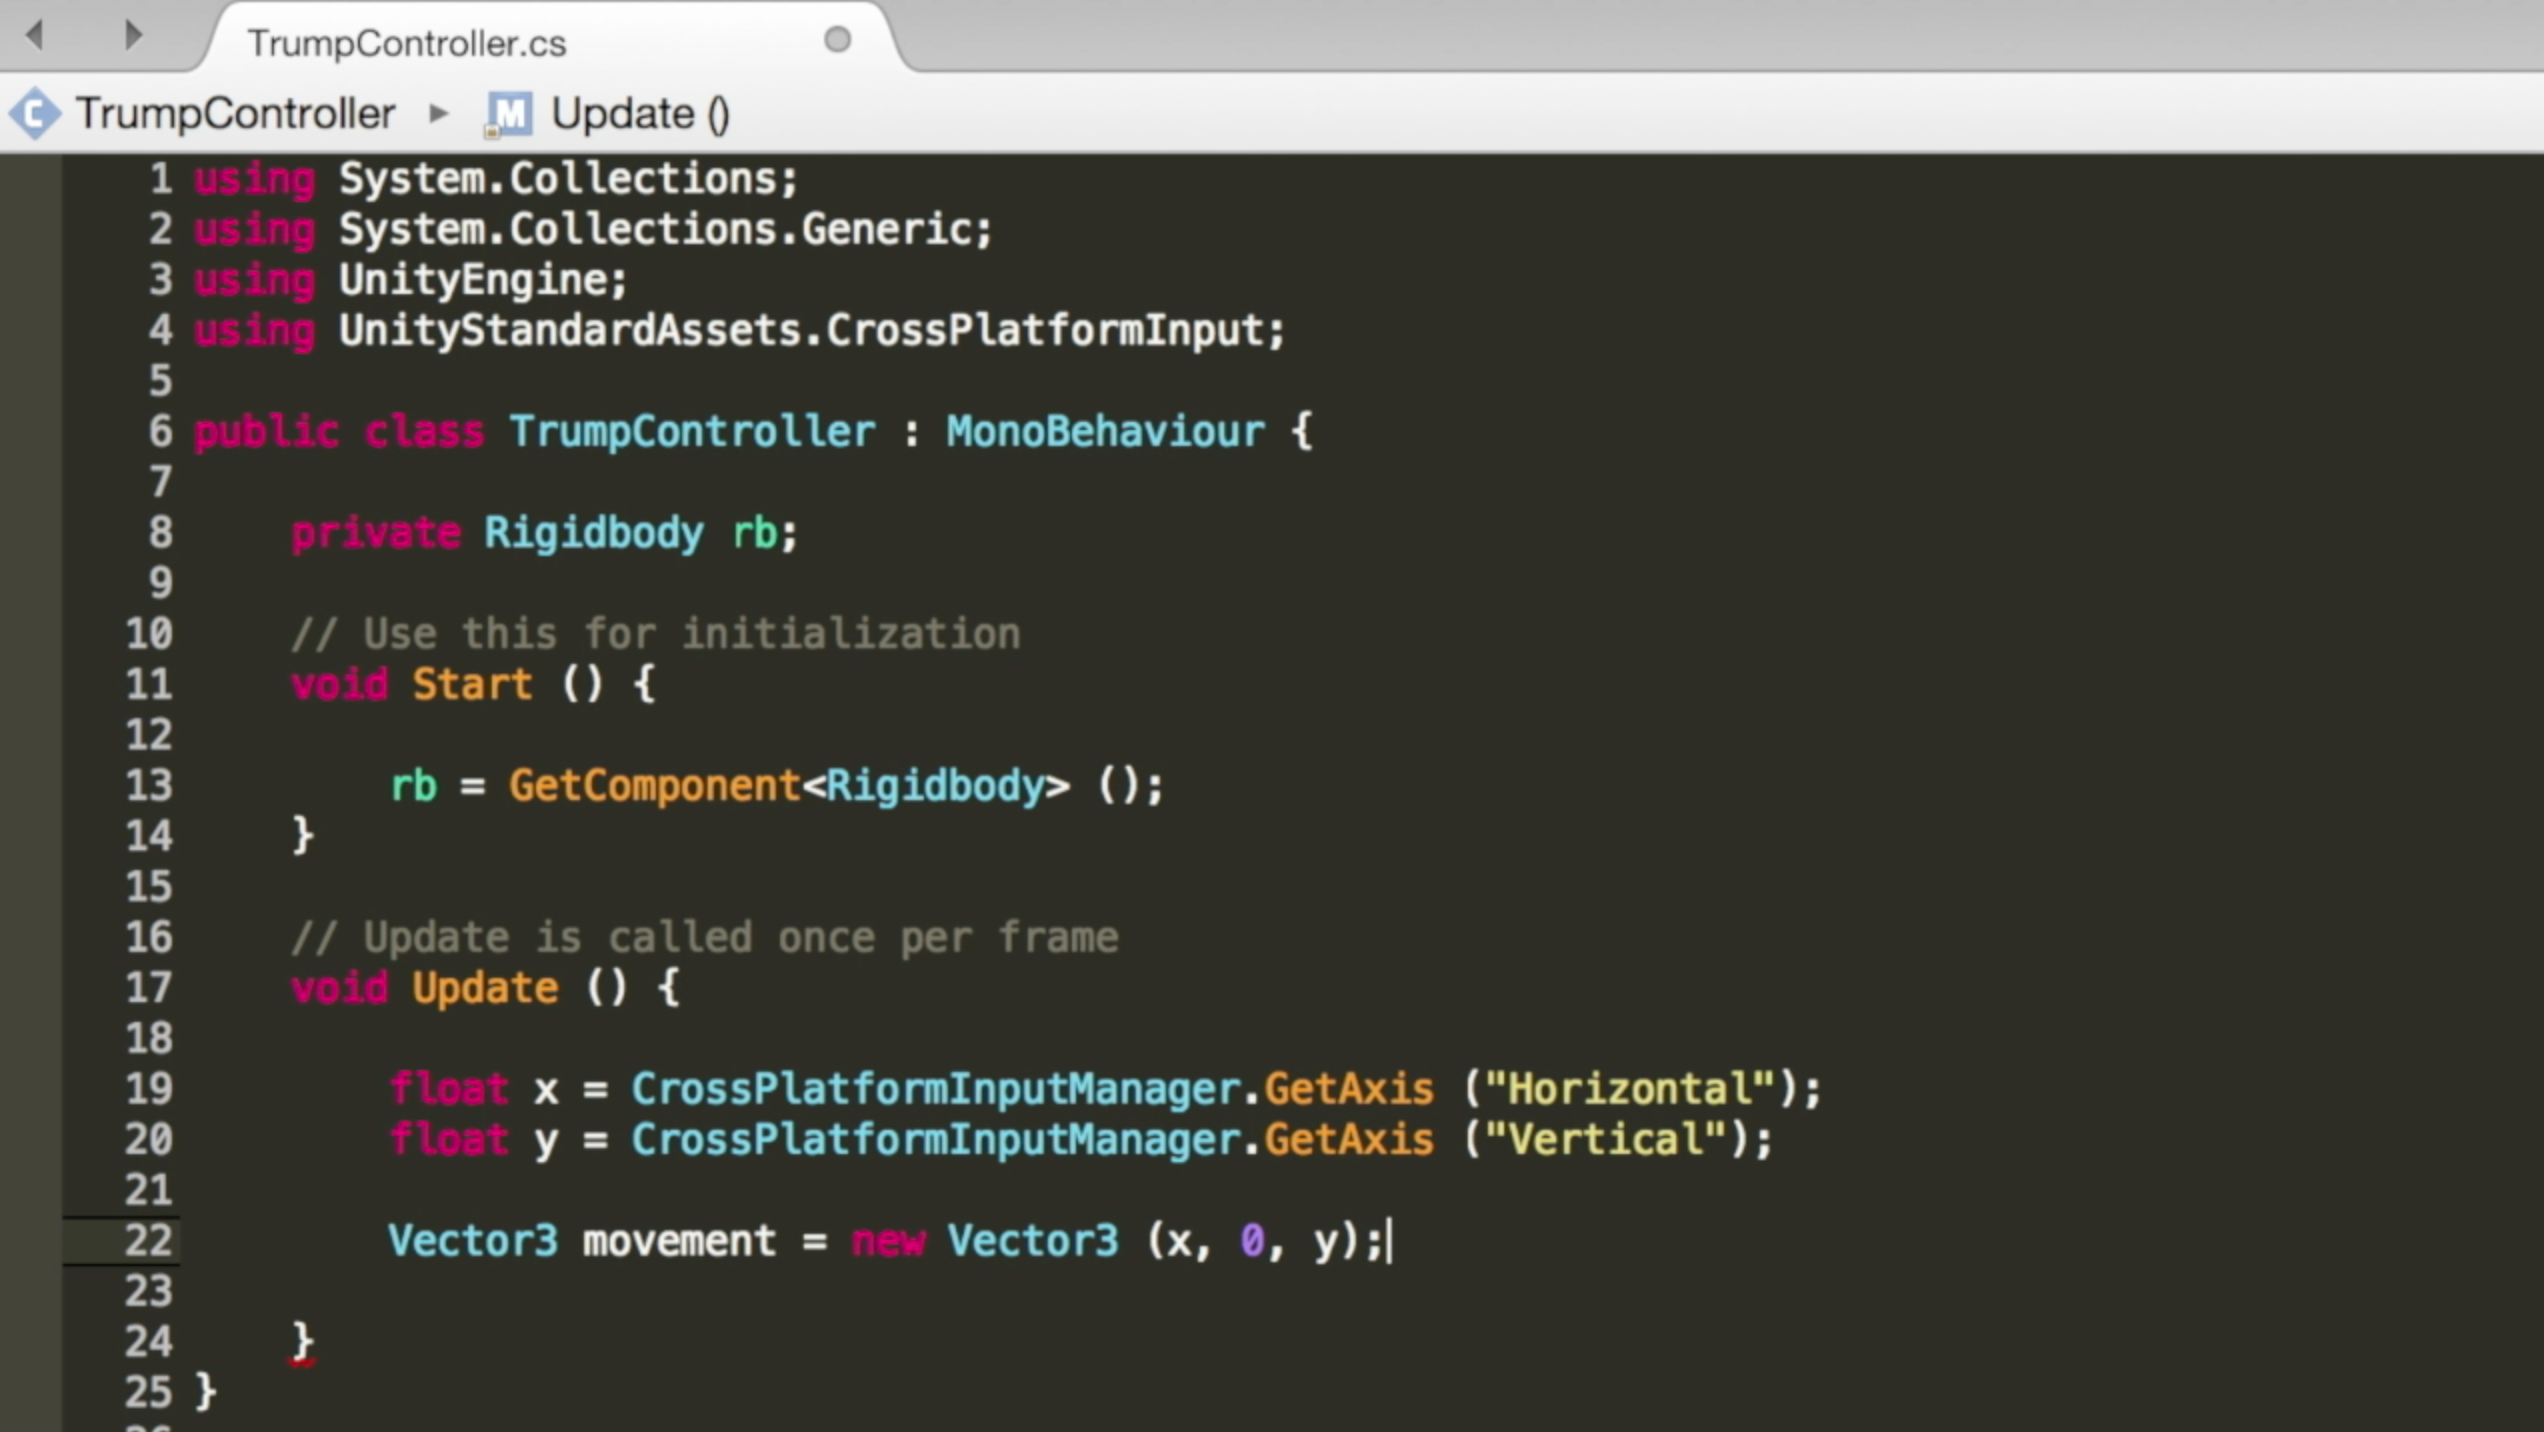
Create a private rigid body and just call it rb. In the start function set rb equal to this game object's rigid body component. We want to create this reference here so we don’t have to use get component in the update function, which gets called every frame. Inside update create a float x and set it equal to crossplatforminputmanager.GetAxis(“Horizontal”). Do the same thing for float y but get the vertical axis. This gives us a value between -1 and 1 for each.
Create a Vector3 called movement and set it equal to a new vector3 that uses the x variable, we want 0 for the y because we aren’t moving up and down, and set the y as the z. This is basically translating the 2d movement of the joystick to 3d movement.
Now do rb.velocity = movement * 4f; Just change this value if you want him to go faster or slower.
Now so far we will be moving trump in the direction the joystick is moved. Lets go a little bit further and make him face the direction in which we move the joystick.
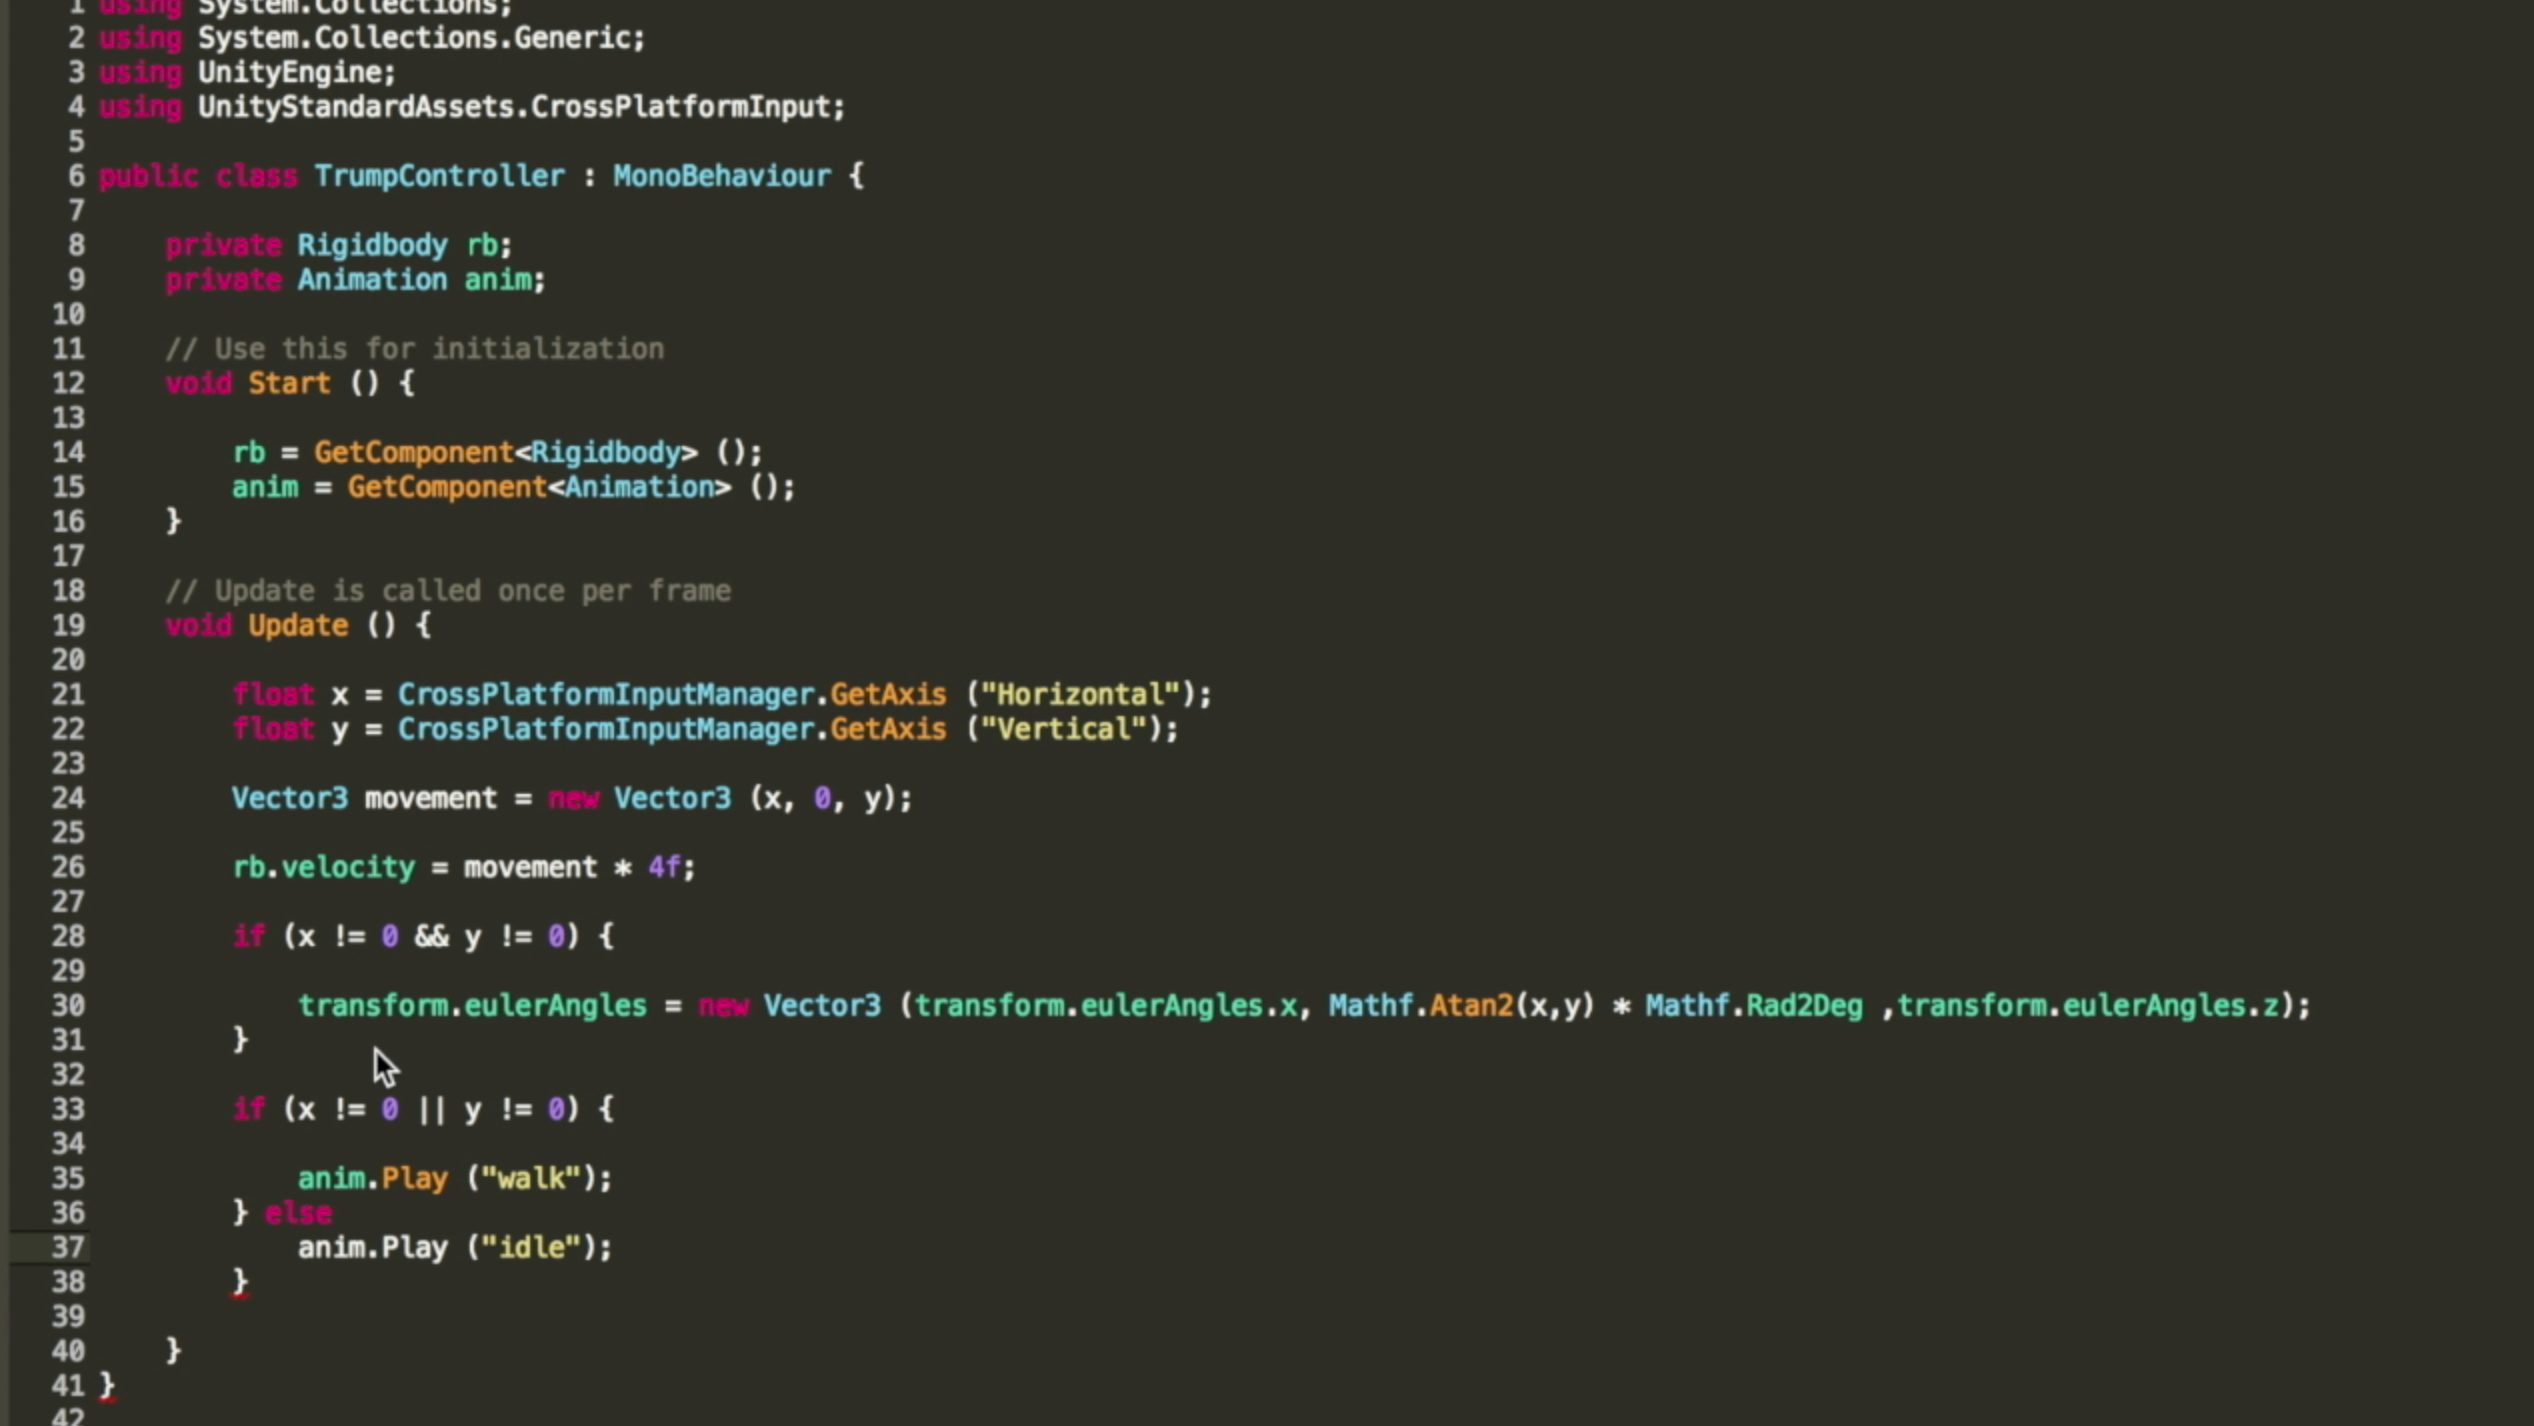
So, create a condition where if x and y do not equal 0 we will set the euler angles to a new vector 3 and we are only going to change the rotation about the y so set x and z equal to the current transforms x and z and then for the y we need a rotation in degrees so use mathf.atan2 and pass in the x and y then multiply that by mathf.rad2deg.
Lets Get the Animations Working.
Now we should have the correct motion so lets get the walking and idle animations working.
Go back to the trump folder and select the idle model with animation and change animation type to legacy on the rig tab and do the same thing for the walking model.
Expand the idle model and click the animation file, click edit, and change the wrap mode to loop and rename the animation to idle. Click apply. Do the same thing for the walking animation.
Go back to the trump game object in the scene and change the animation size to 2. Drag in the walk animation.
Go back to the trump controller script and create a private animation, just call it anim.
Create the reference in the start function.
Finally in the update function just create another condition and check if either the x or y does not equal 0, meaning the joystick is being moved in some way we will play the walk animation, else we will play the idle animation.
And thats it, now when we click play trump will walk around our marker in whatever direction we move the joystick.
Full Script for Reference.
TrumpController.cs
using System.Collections;
using System.Collections.Generic;
using UnityEngine;
using UnityStandardAssets.CrossPlatformInput;
using UnityEngine.UI;

public class TrumpController : MonoBehaviour {

	private Animation anim;

	private Rigidbody rb;

	// Use this for initialization
	void Start () {
		anim = GetComponent<Animation> ();
		rb = GetComponent<Rigidbody> ();
	}

	// Update is called once per frame
	void Update () {

		float x = CrossPlatformInputManager.GetAxis ("Horizontal");
		float y = CrossPlatformInputManager.GetAxis ("Vertical");

		//transform.position += new Vector3(0,0,y/10);
		//transform.position += new Vector3(x/10,0,0);

		Vector3 movement = new Vector3 (x, 0.0f, y);

		//enter trumps speed here!!!
		rb.velocity = movement * 4f;

		if (x != 0 && y != 0) {
			transform.eulerAngles = new Vector3 (transform.eulerAngles.x, Mathf.Atan2 (x, y) * Mathf.Rad2Deg, transform.eulerAngles.z);
		}

		if (x != 0 || y != 0) {
			anim.Play ("walk");
		} else {
			anim.Play ("idle");
		}
	}
}
Build Out to Your Mobile Phone.
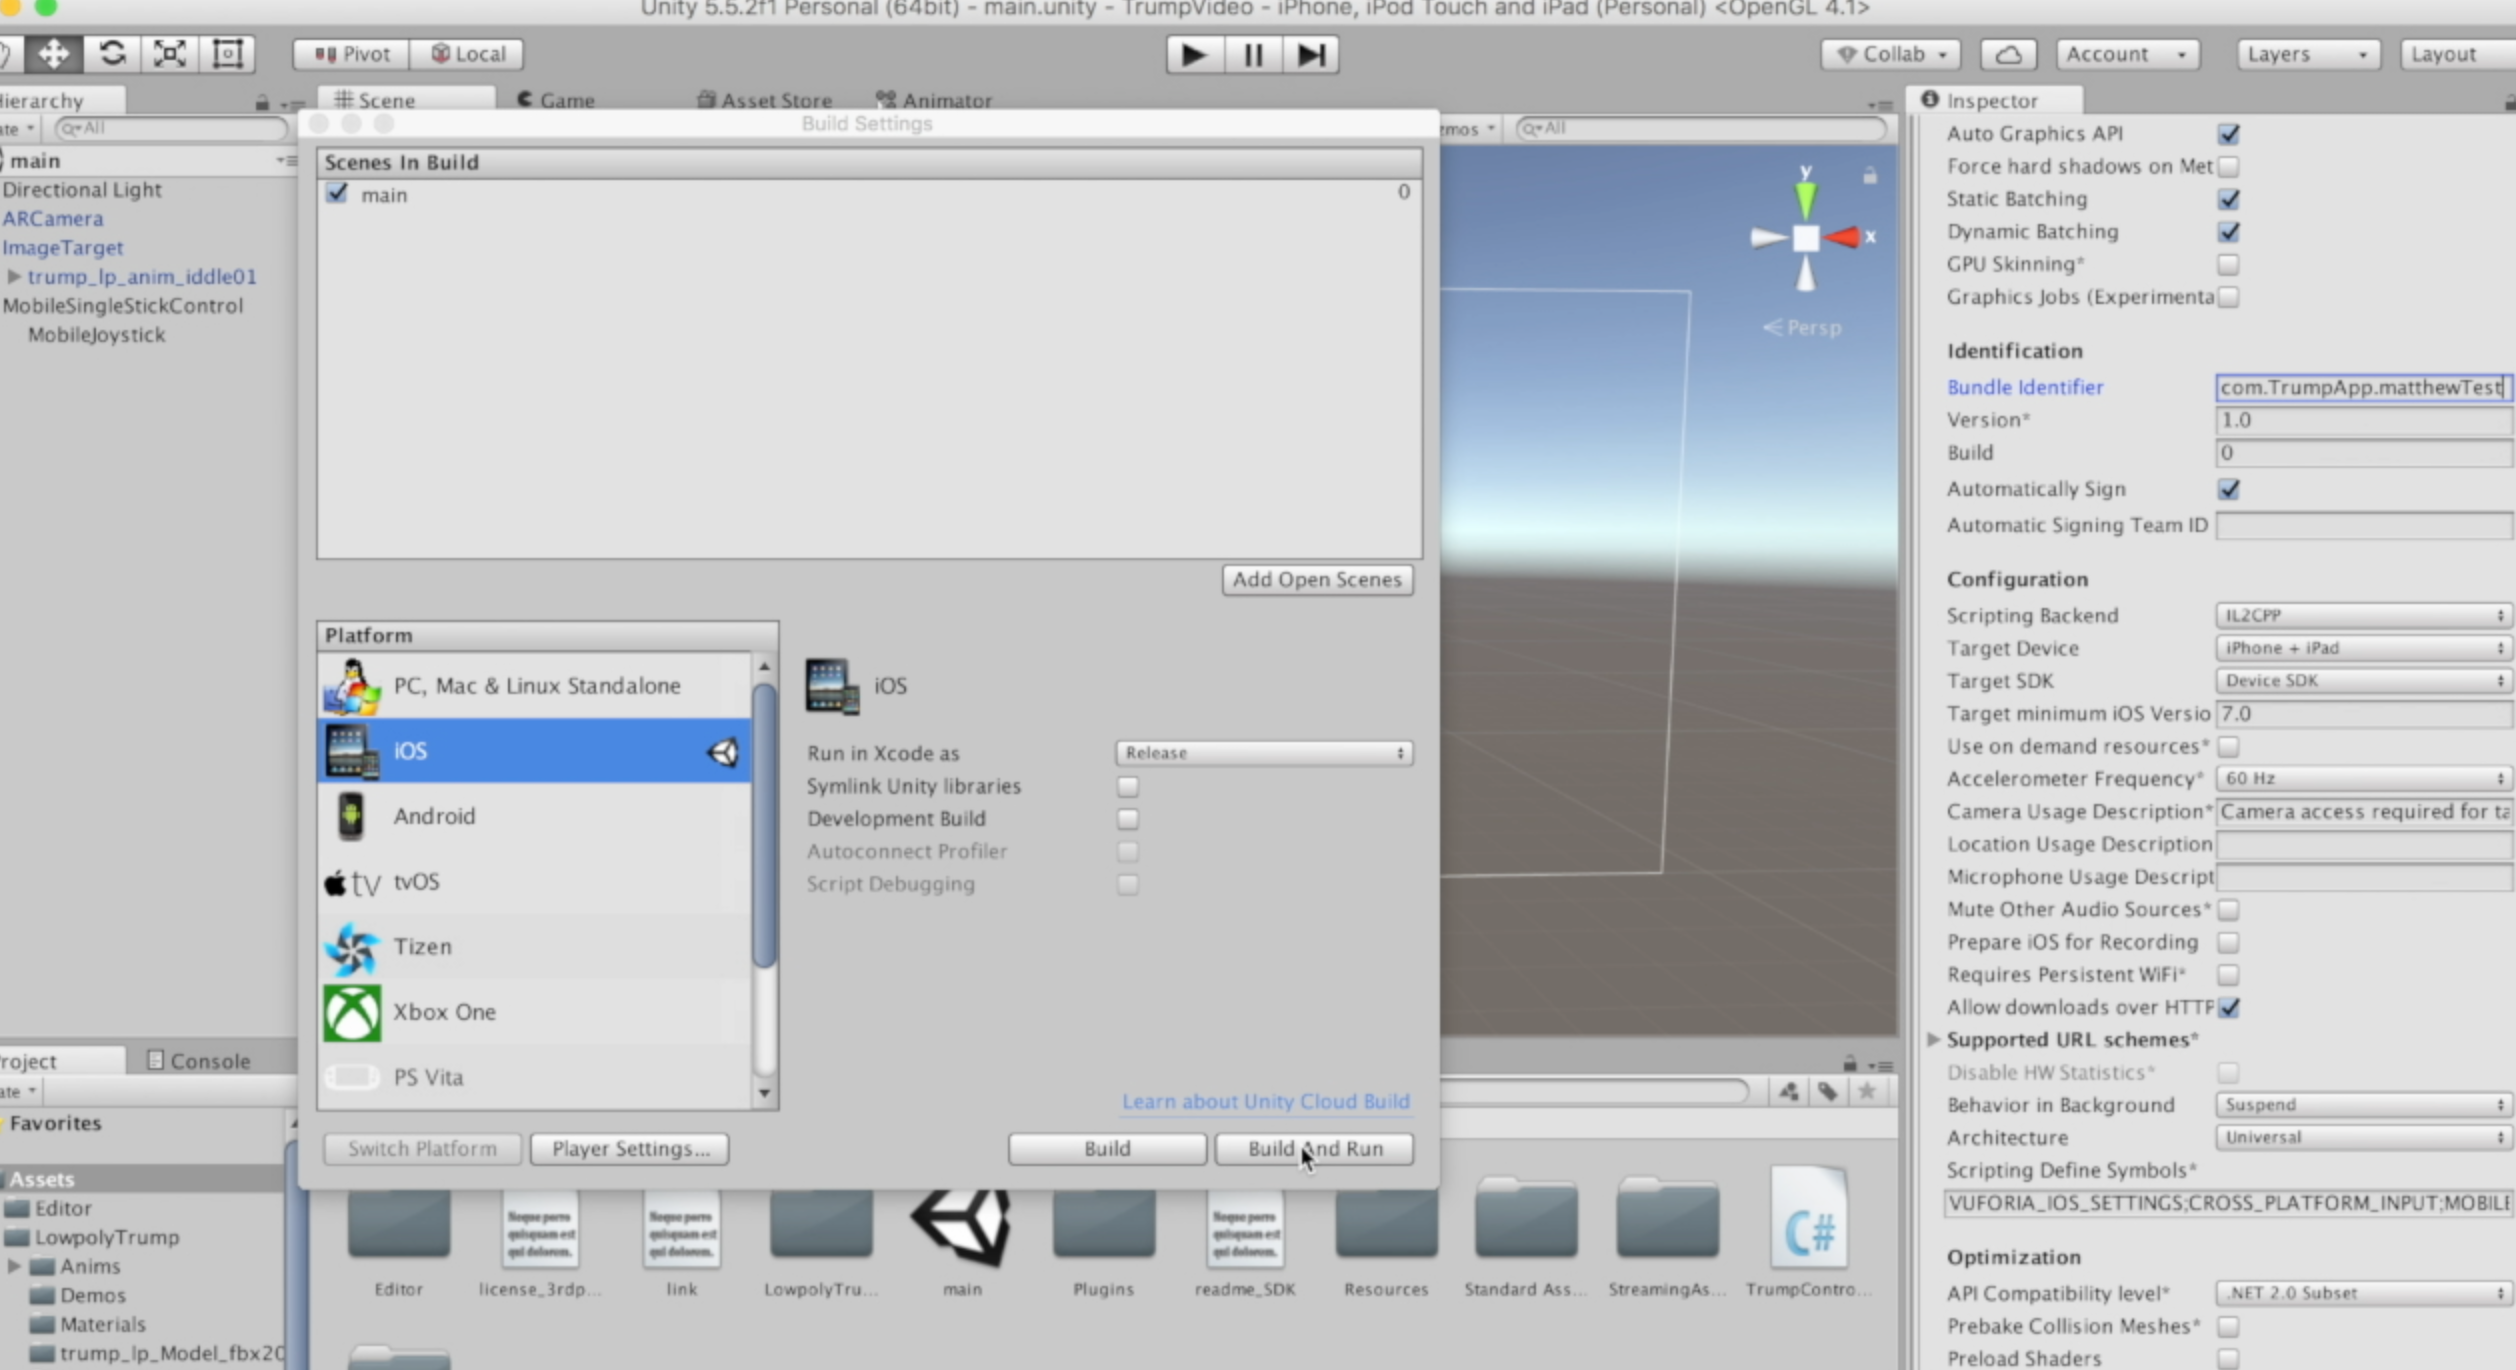
Now to get it on your phone go to file build settings and click add open scenes.
If you plan to build for Android, make sure you have usb debugging enabled on your phone, plug it in to your computer and hit build and run.
If you are building to an iPhone or iPad make sure you have Xcode downloaded.
Create a free apple developer account.
http://www.idownloadblog.com/2015/12/24/how-to-cre...
Hit build and run. This will bring up Xcode, just choose your team and click play to get it onto our phone!