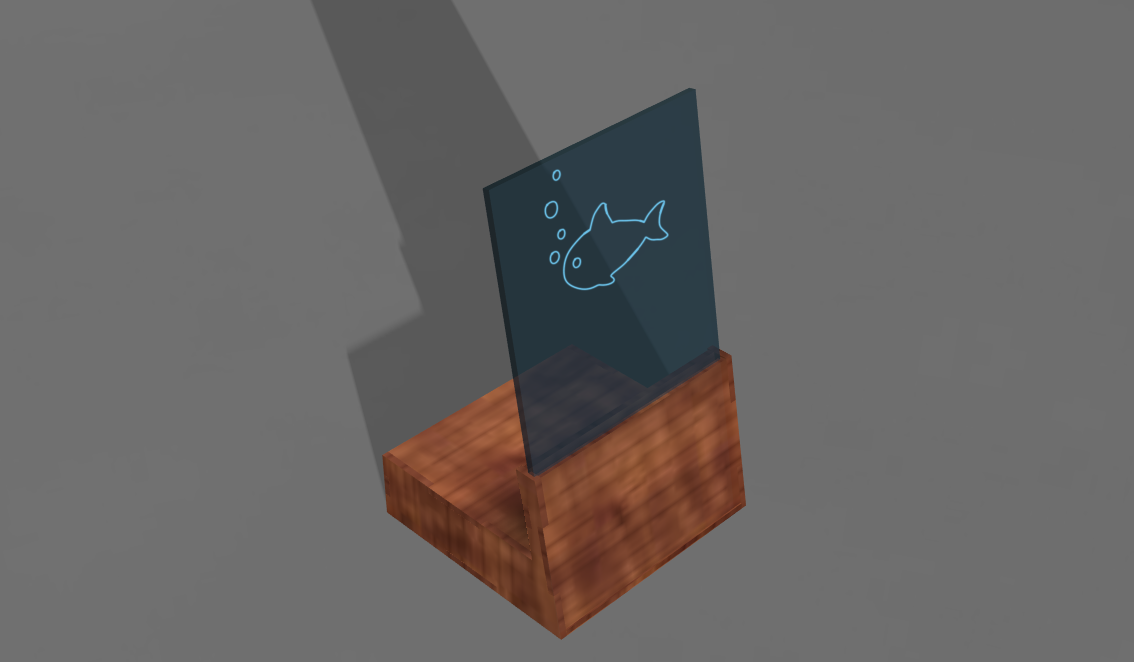
Letrero Luminoso De Un Pez
by Fresia Fasanando Ludeña in Workshop > Laser Cutting
186 Views, 0 Favorites, 0 Comments
Letrero Luminoso De Un Pez
Hi guys!
Today, I'm gonna teach you how to do a bright signboard with a fun picture of a fish.
Supplies
You only need your Autodesk account!
Base Face
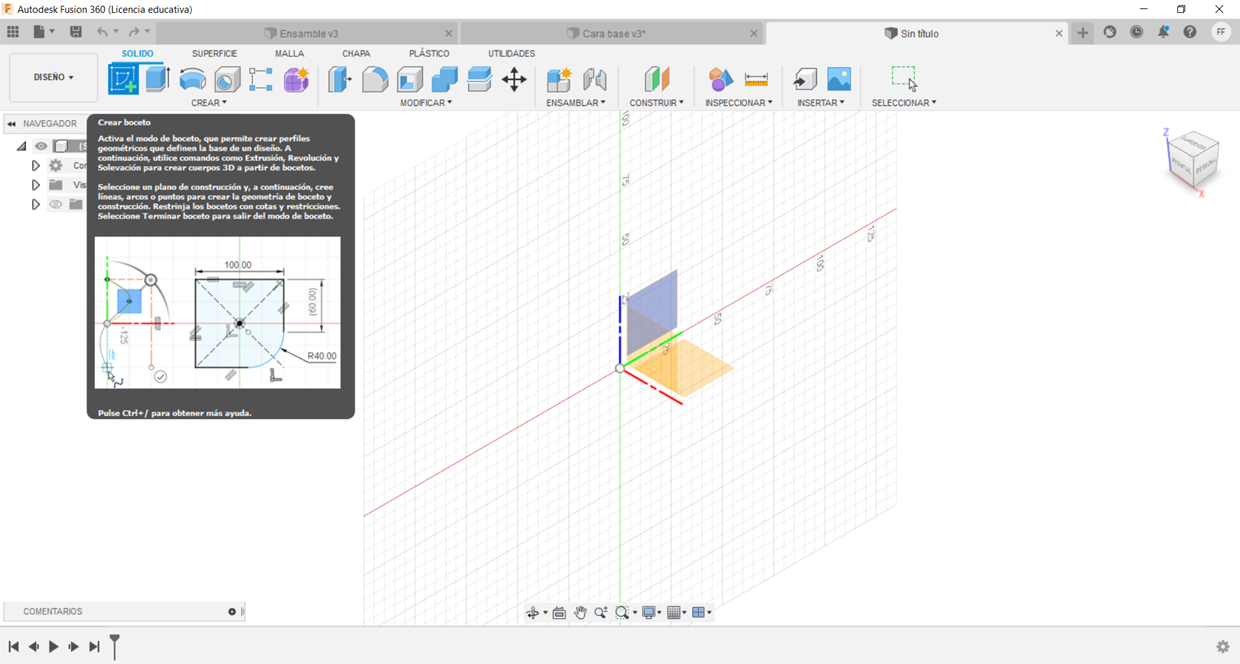
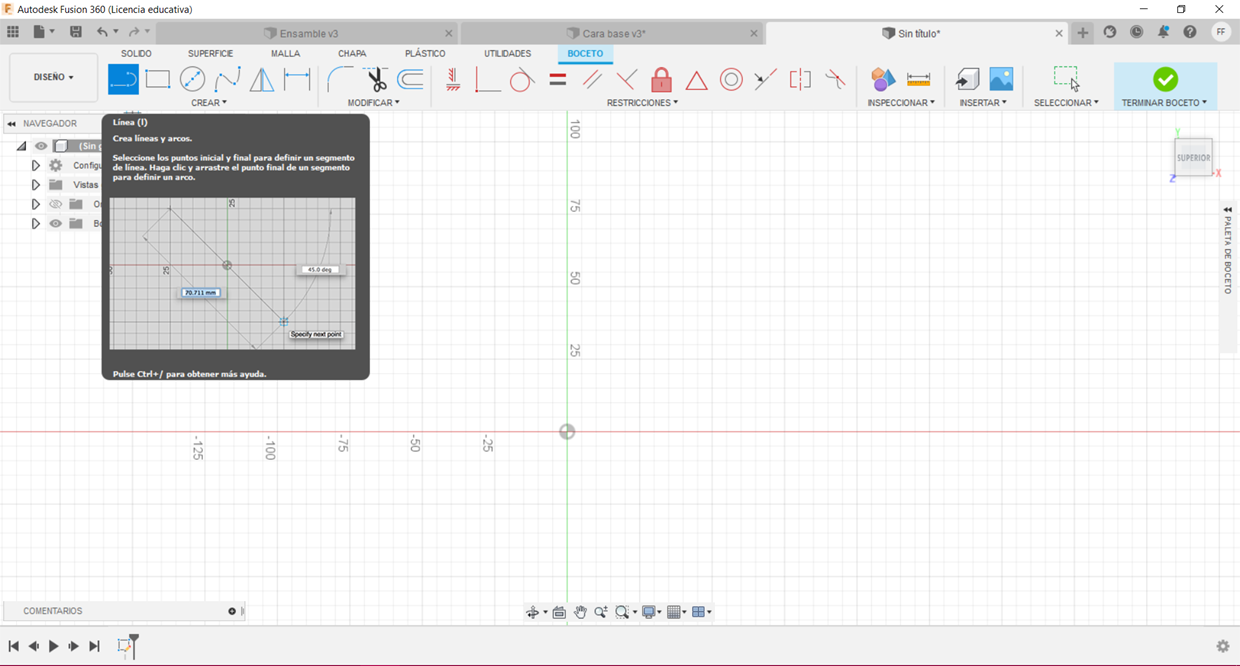
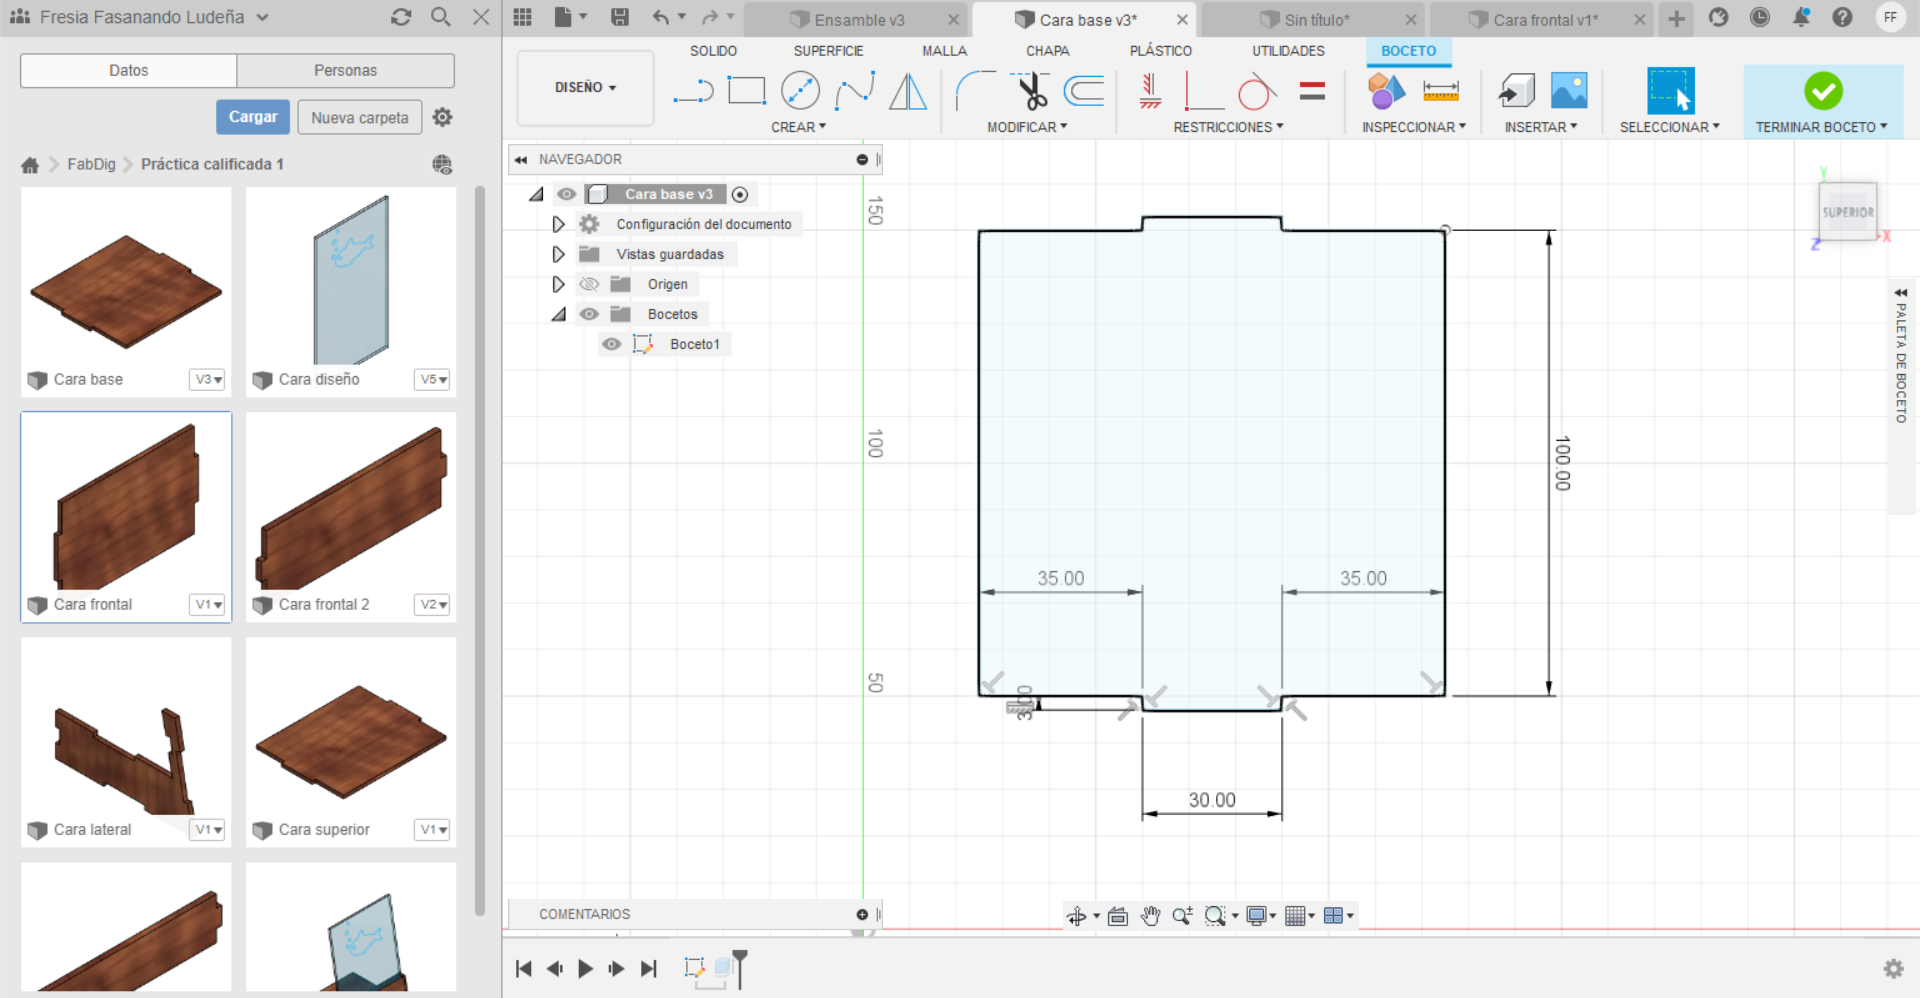
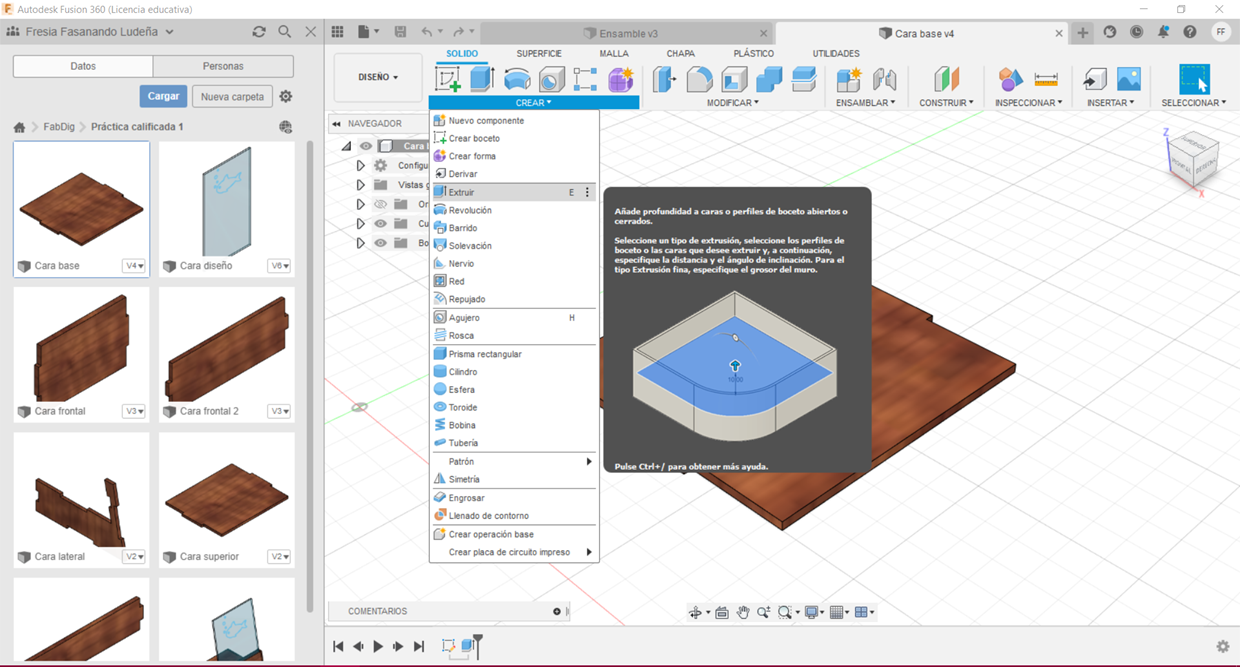
Let start with the position of our base.
We select the little square between the red(axis X) and green(axis Y) lines, this will help us to connect each part of our signboard very fast.
Then you will use the tool "Line", this tool is very simple, you have to make click in any part of your board and will show you a line that can lengthen if you move your cursor.
With this explanation you will follow this little plan:
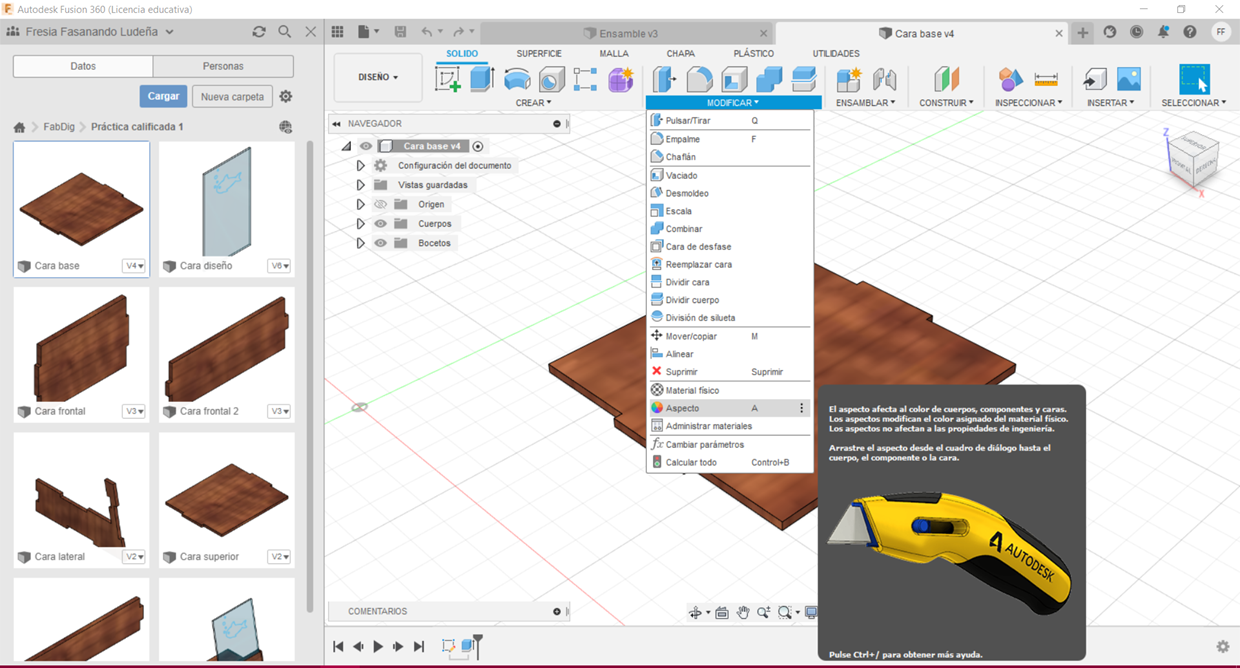
Then, you're gonna to go to the option "Create", select "Extrude" (This tool will give to our Face volume) and choose 3 mm of volume. Configure the color on "Appearance".
When you finish put on "Finish sketch" and save it.
Frontal Face
For the second step you will star at the same way that the first step but now choose the little square between blue(axis Z) and green(axis Y) lines and then follow this plan:
Then, you're gonna to go to the option "Create", select "Extrude" (This tool will give to our Face volume) and choose 3 mm of volume. Configure the color on "Appearance".
When you finish put on "Finish sketch" and save it.
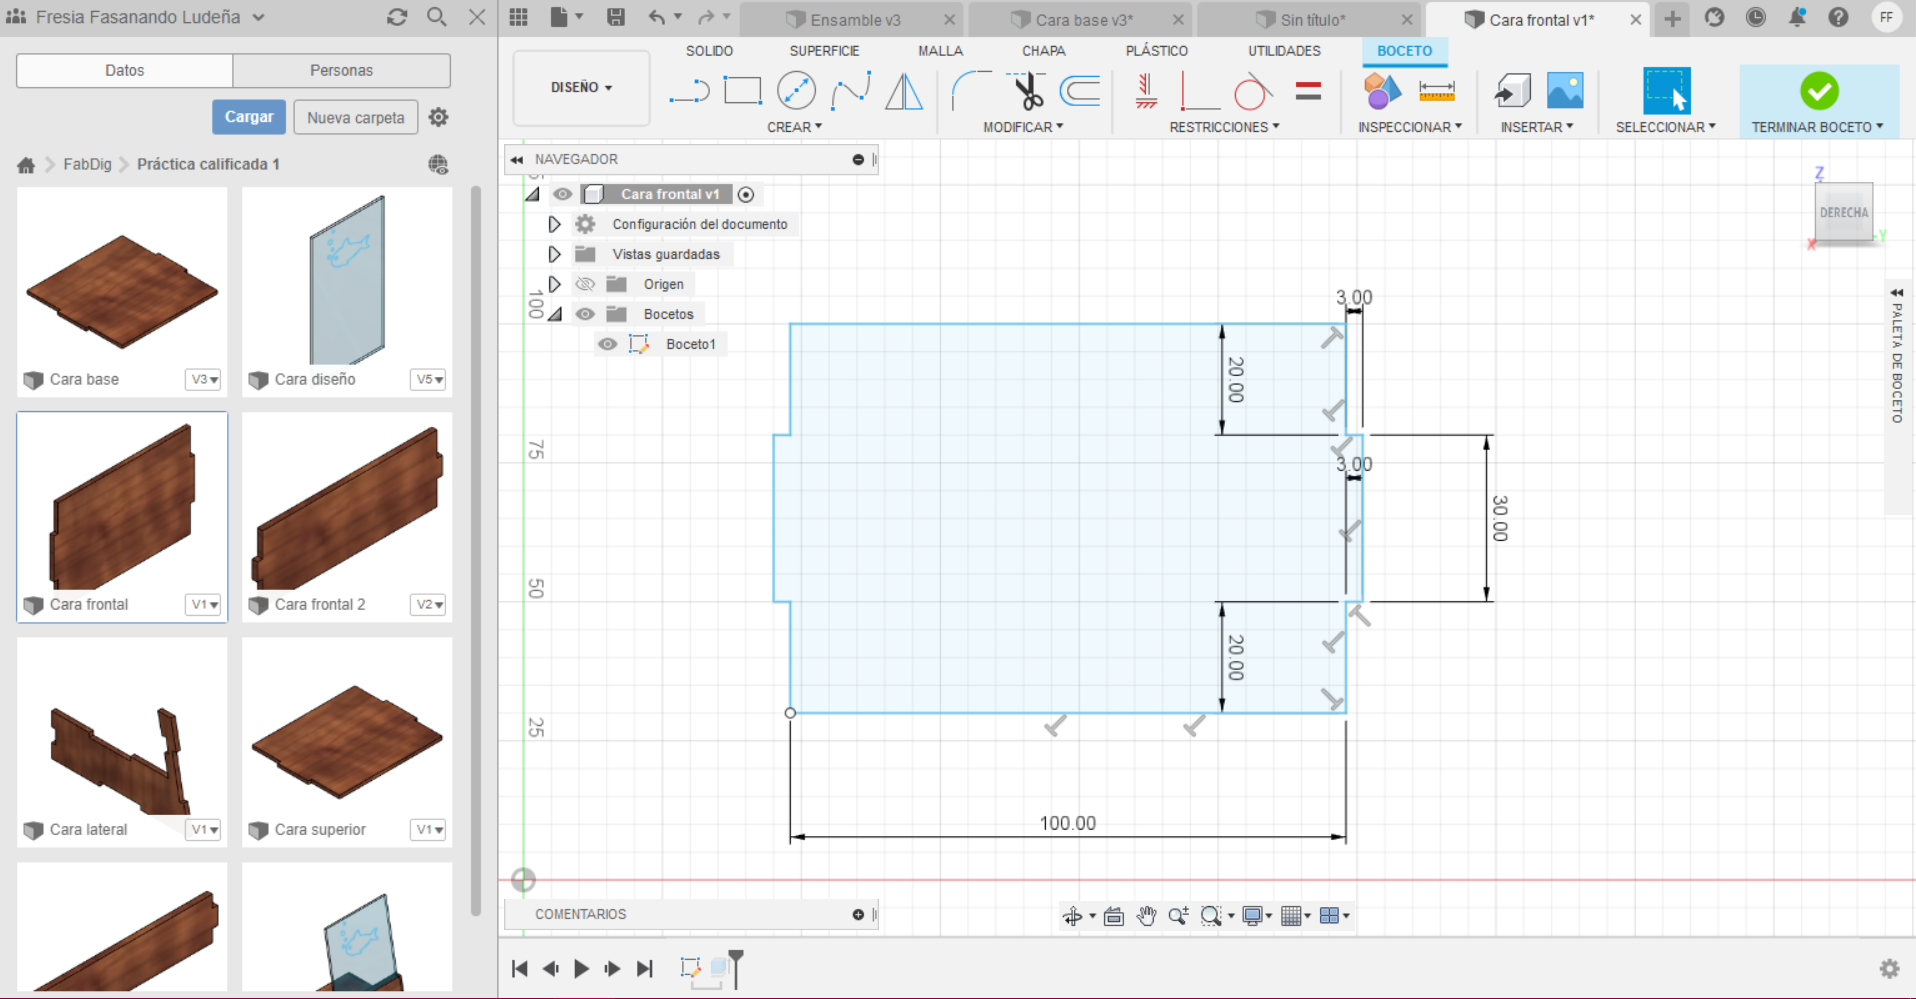
Frontal Face 2
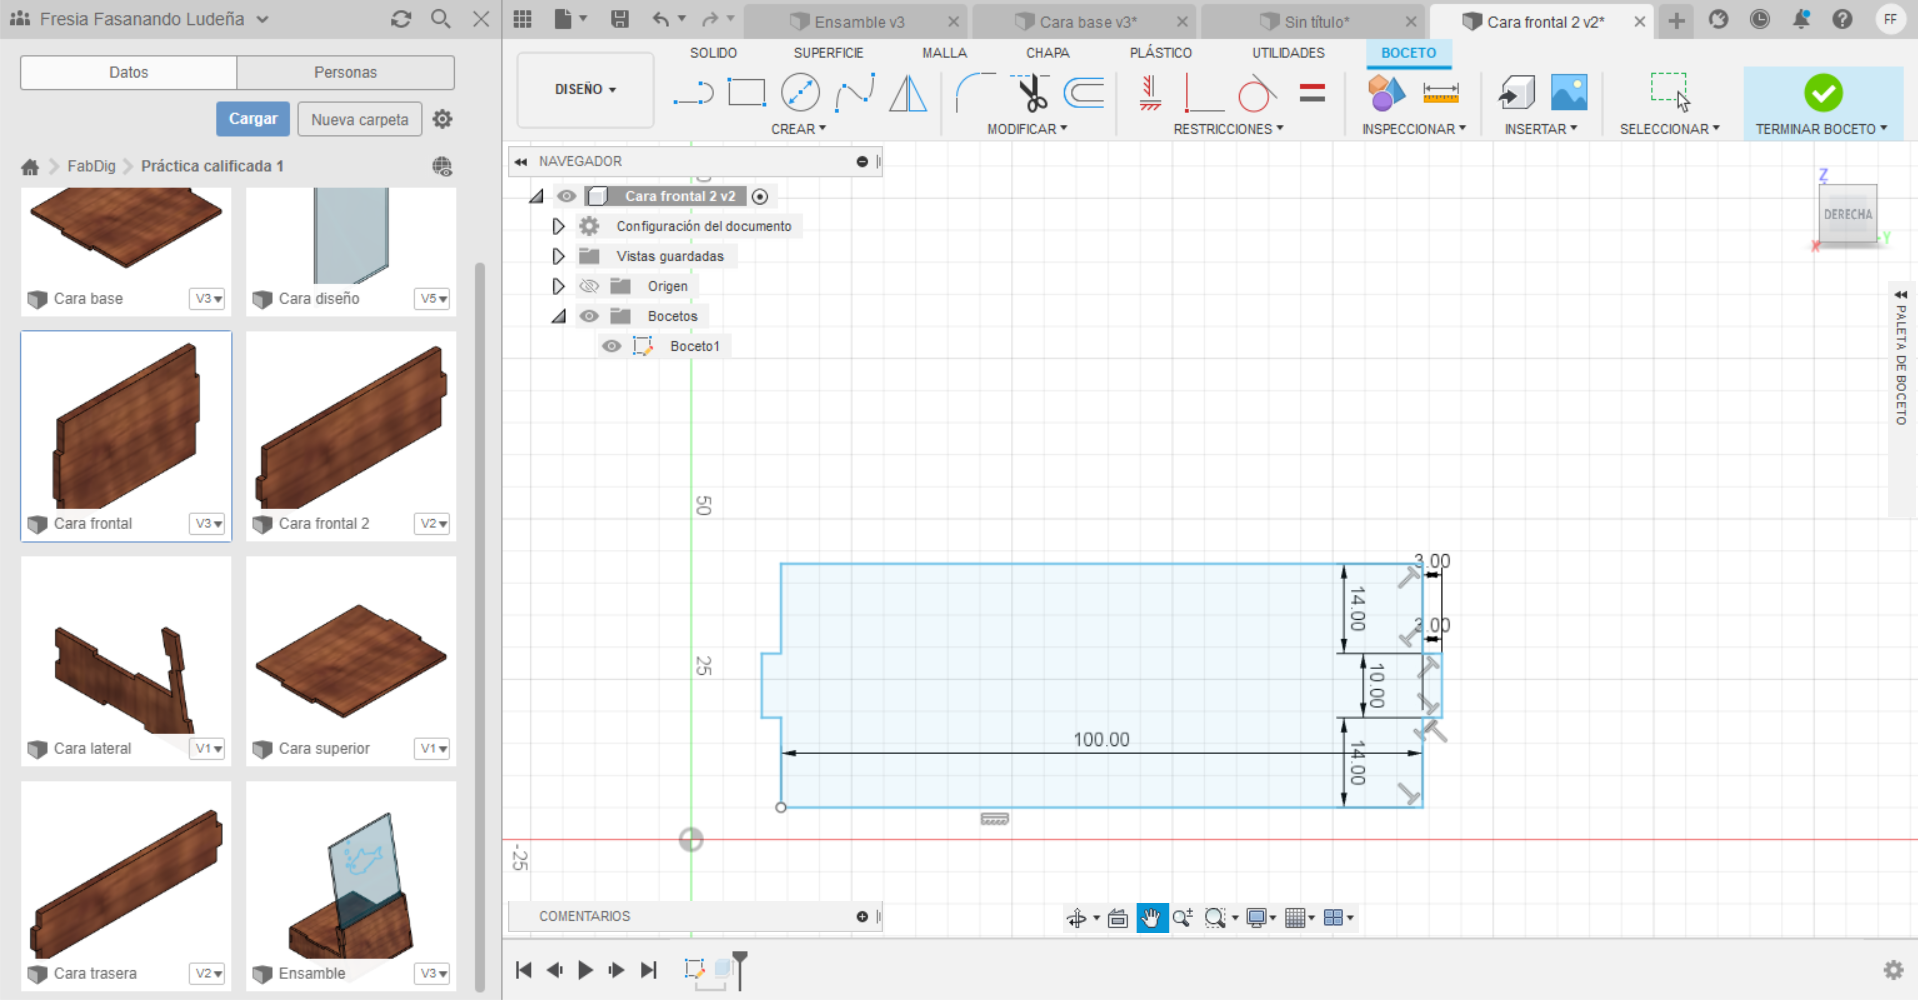
You will choose the little square between blue(axis Z) and green(axis Y) lines and do exactly the same but with this plan:
Then, you're gonna to go to the option "Create", select "Extrude" (This tool will give to our Face volume) and choose 3 mm of volume. Configure the color on "Appearance".
When you finish put on "Finish sketch" and save it.
Rear Face
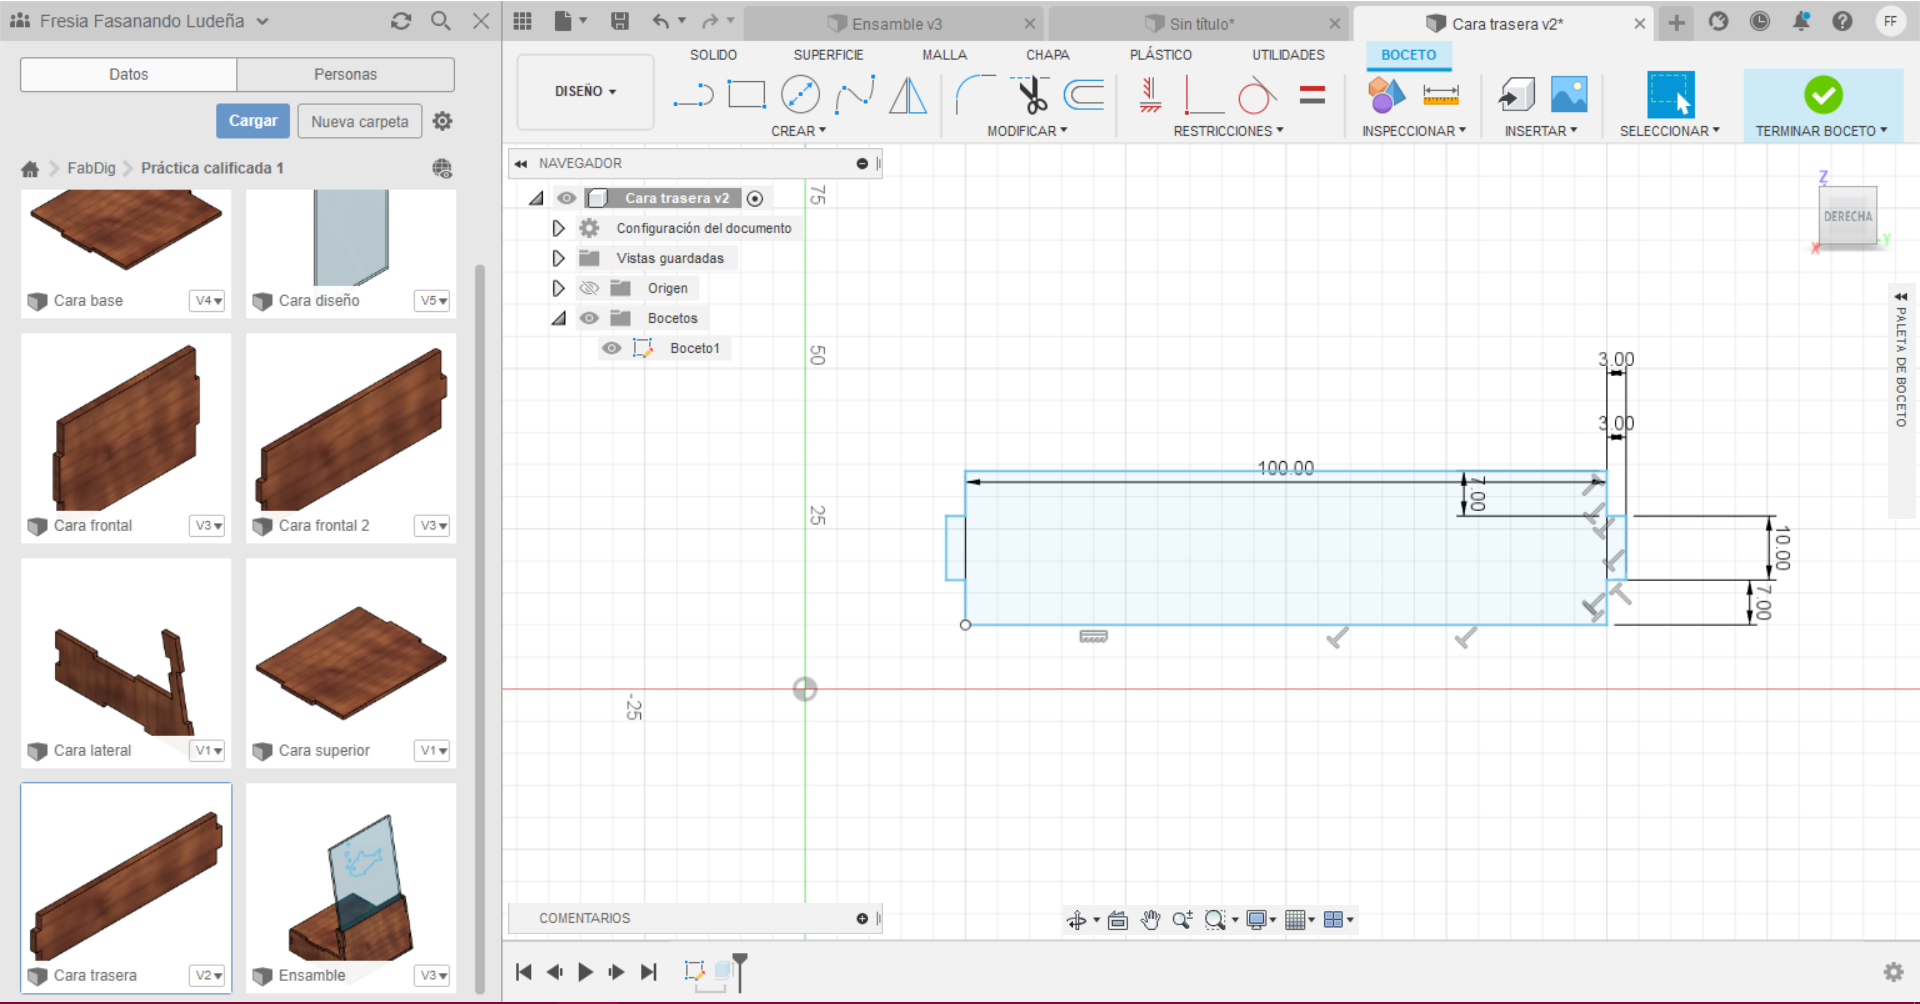
Choose the little square between blue(axis Z) and green(axis Y) lines and follow this plan:
Then, you're gonna to go to the option "Create", select "Extrude" (This tool will give to our Face volume) and choose 3 mm of volume. Configure the color on "Appearance".
When you finish put on "Finish sketch" and save it.
Superior Face
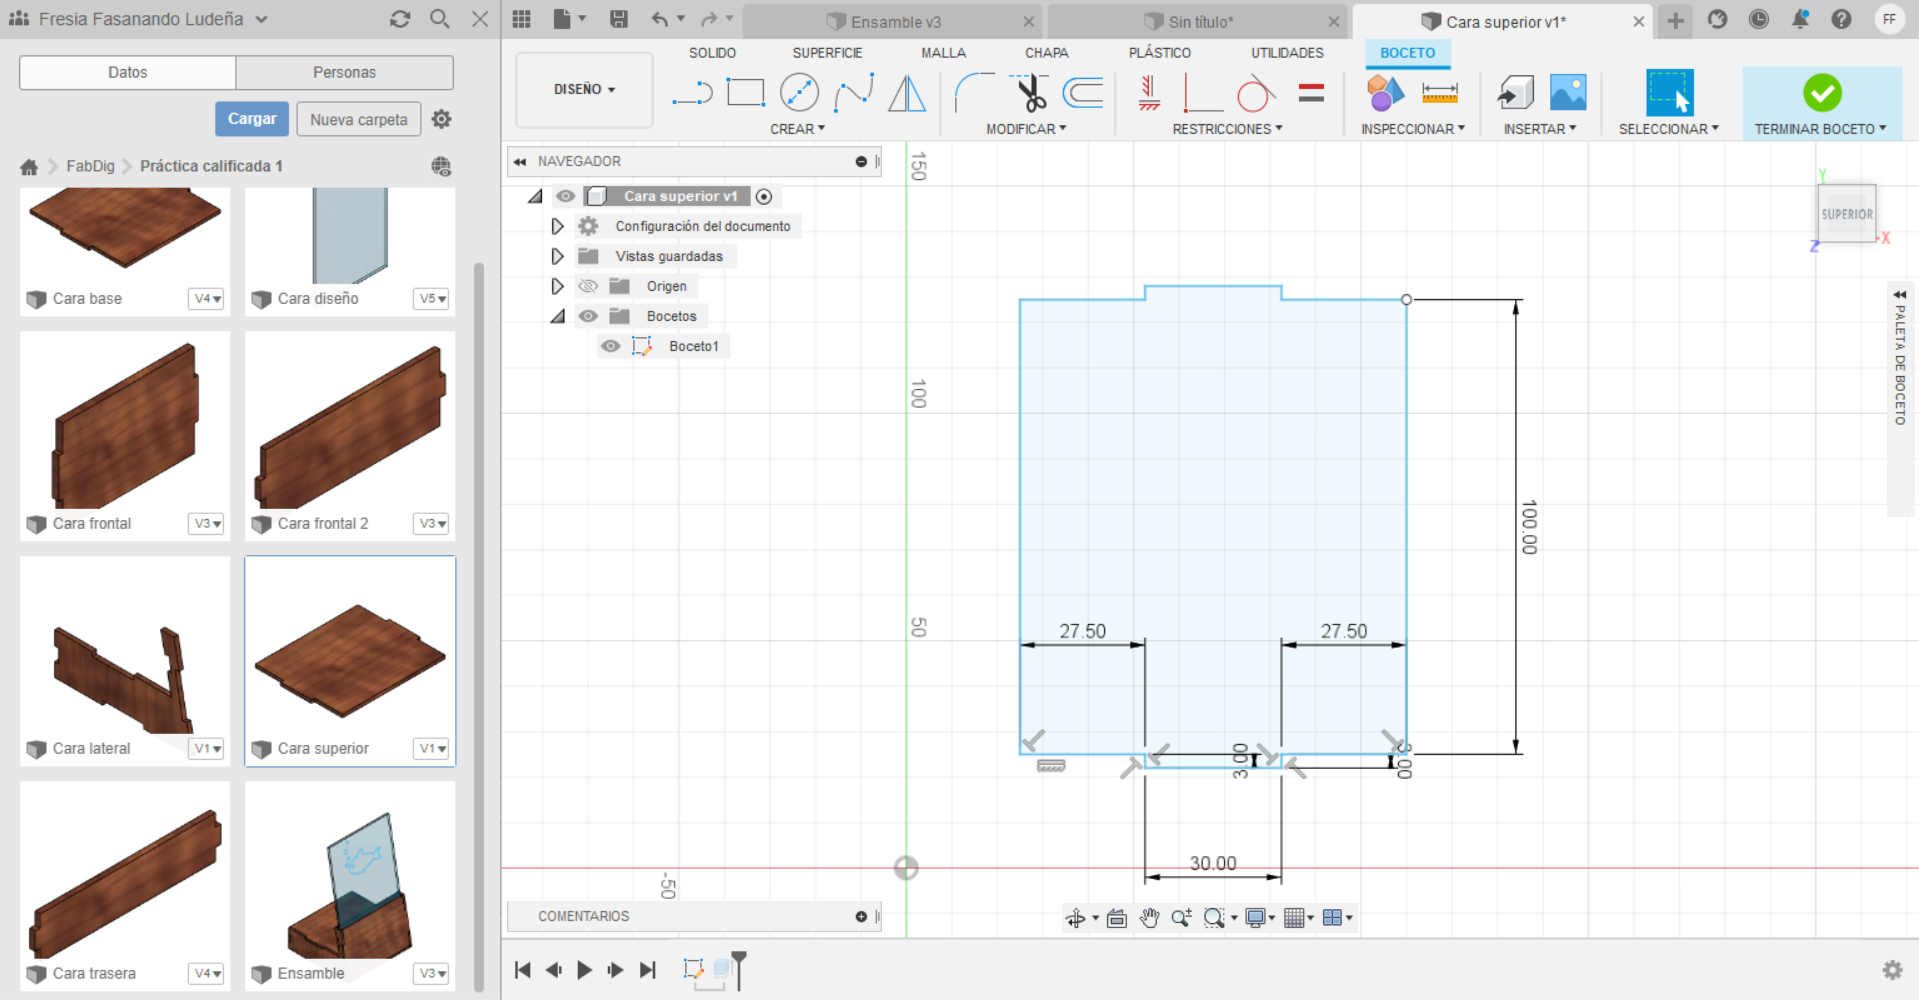
At the same way with this plan, choose the little square between green(axis Y) and red(axis X) lines and follow this picture:
Then, you're gonna to go to the option "Create", select "Extrude" (This tool will give to our Face volume) and choose 3 mm of volume. Configure the color on "Appearance".
When you finish put on "Finish sketch" and save it.
Side Face

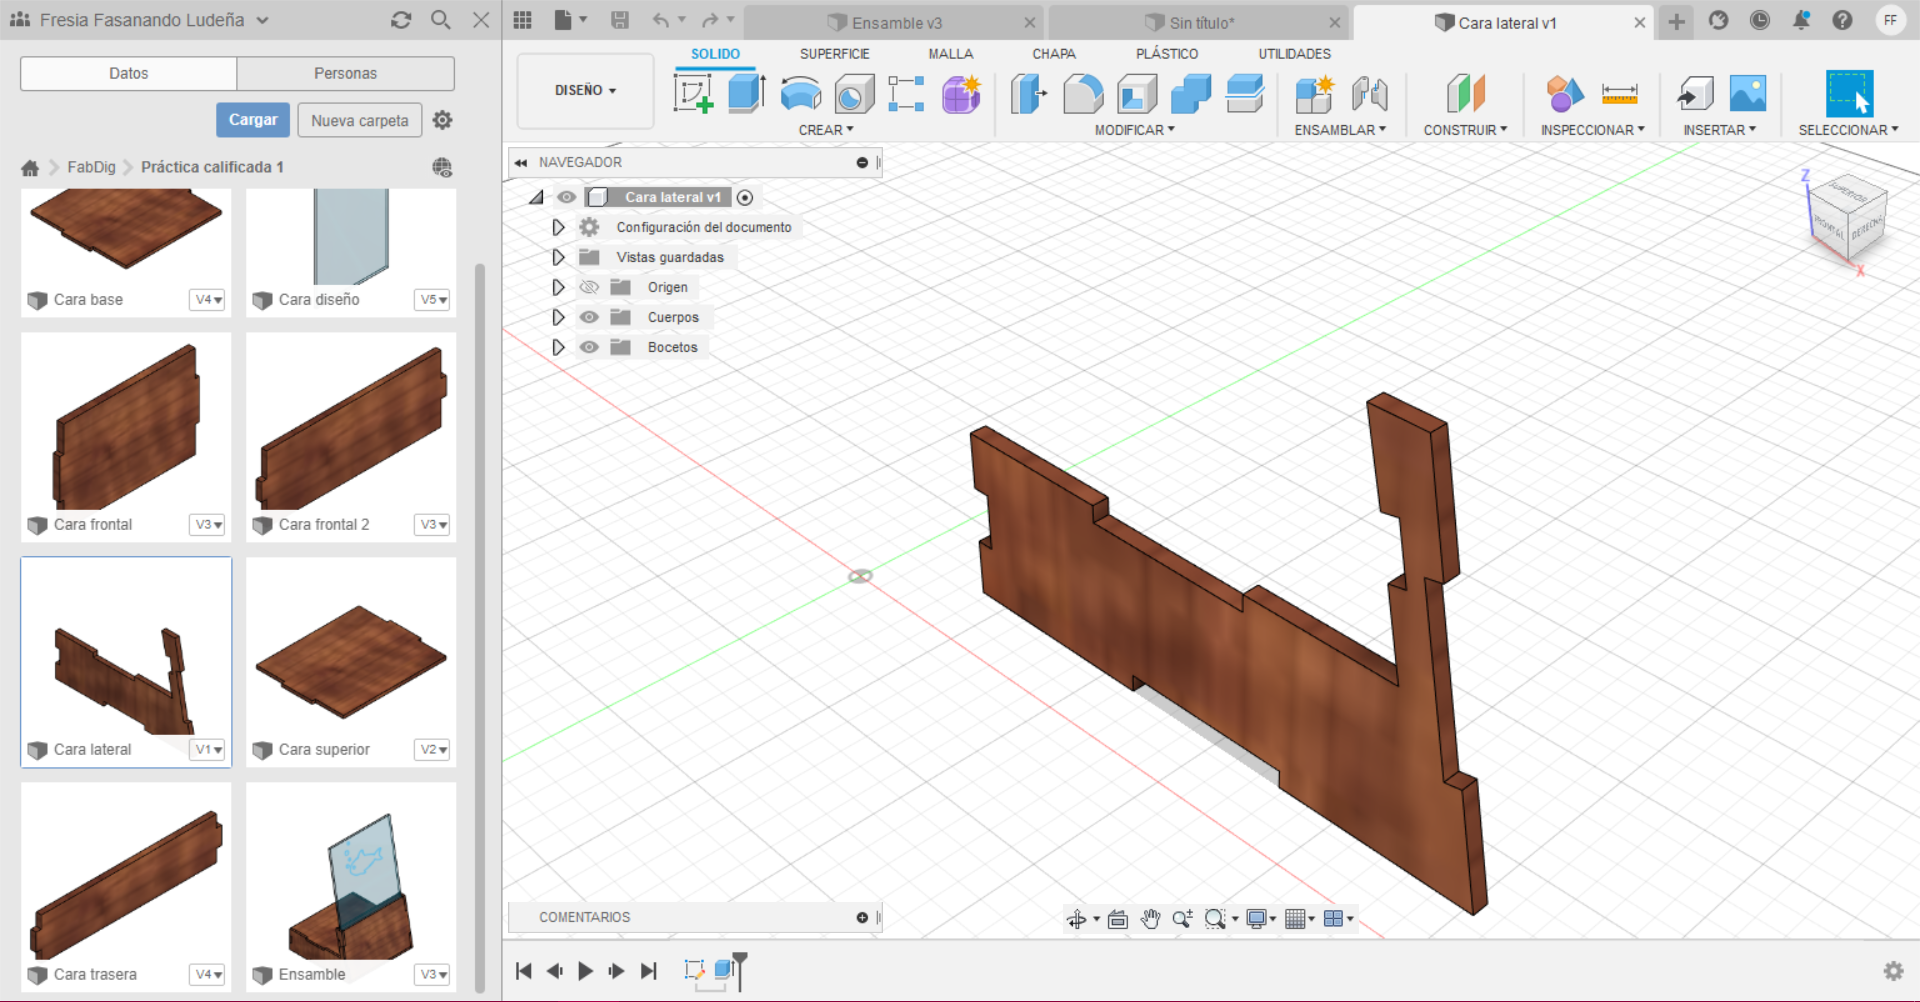
As you guess, follow the previews steps and do this new plan, is a bit complicated so don't stress. Then, you're gonna to go to the option "Create", select "Extrude" (This tool will give to our Face volume) and choose 3 mm of volume. Configure the color on "Appearance".
When you finish put on "Finish sketch" and save it.
Face With Design
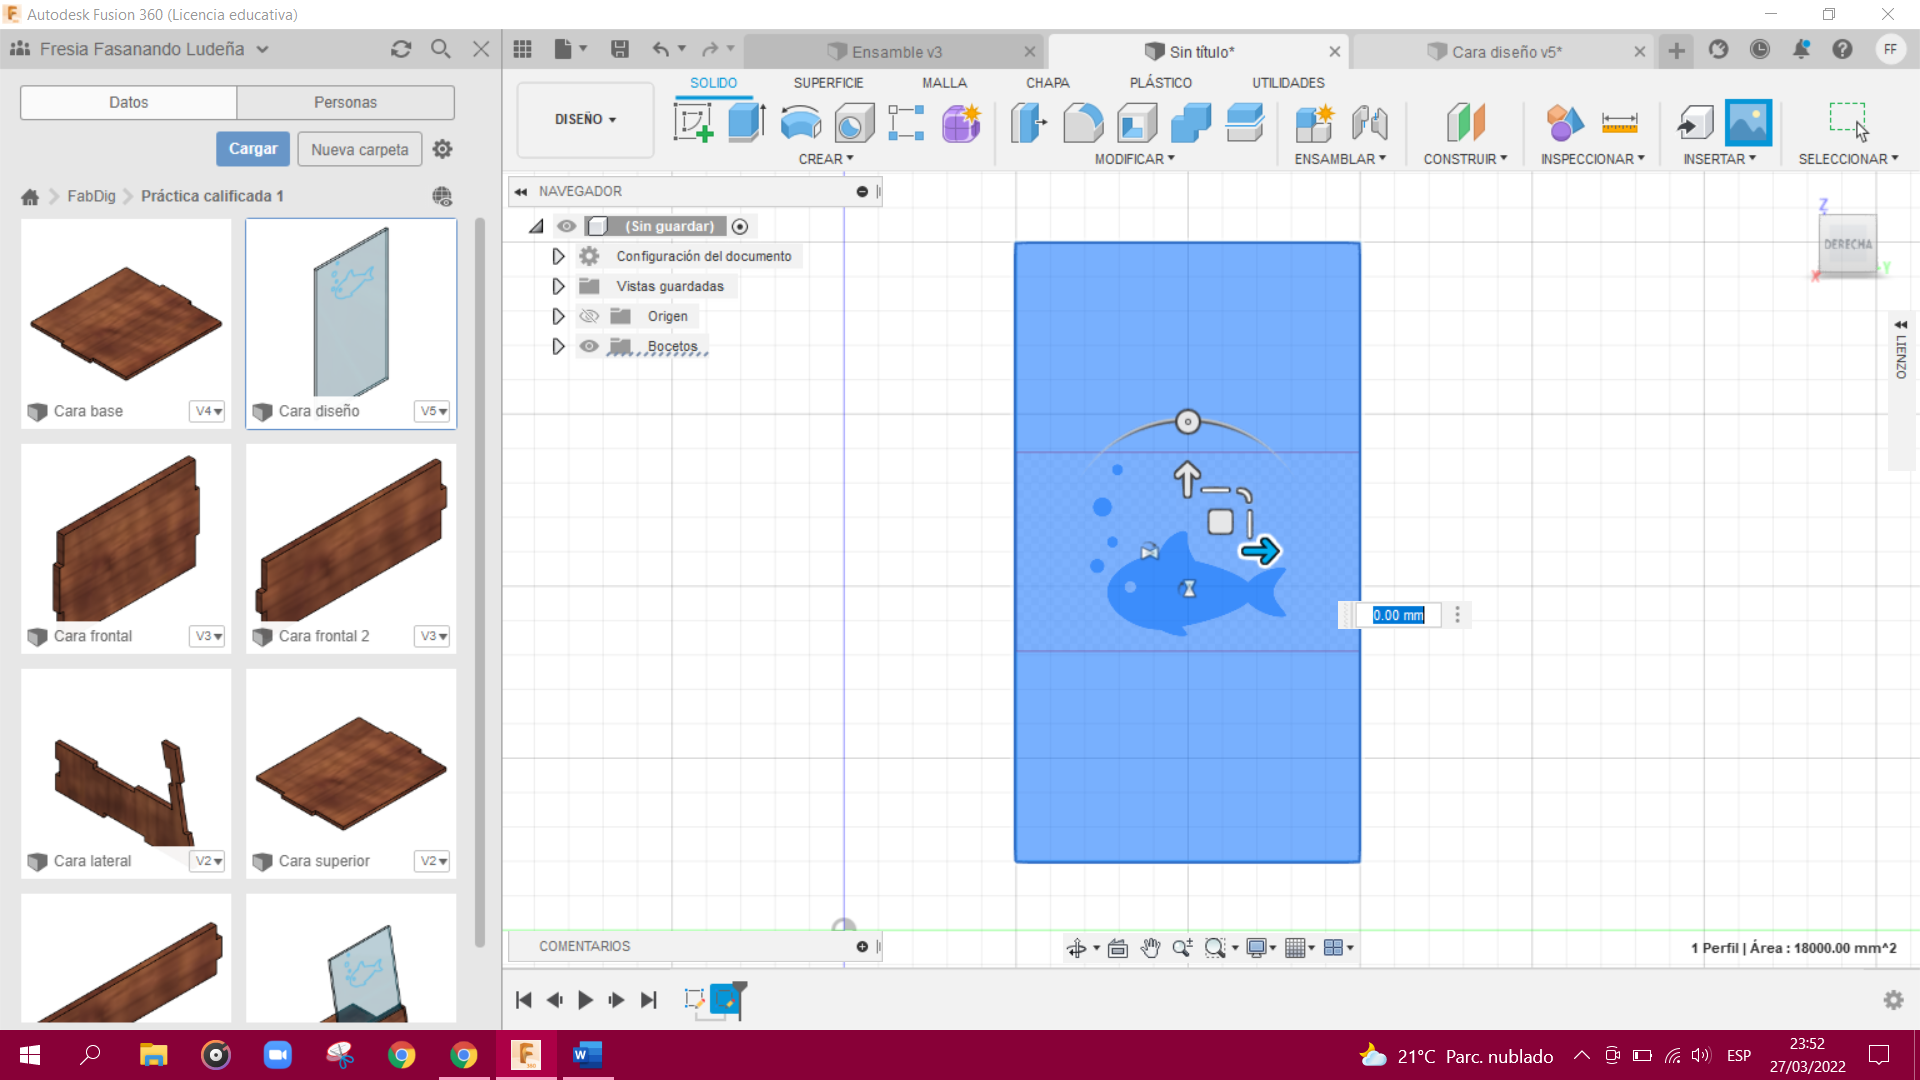
For this step you will choose the square between the blue(axis Z) and green(axis Y) lines, and do a rectangle 100mm wide and 180mm long.
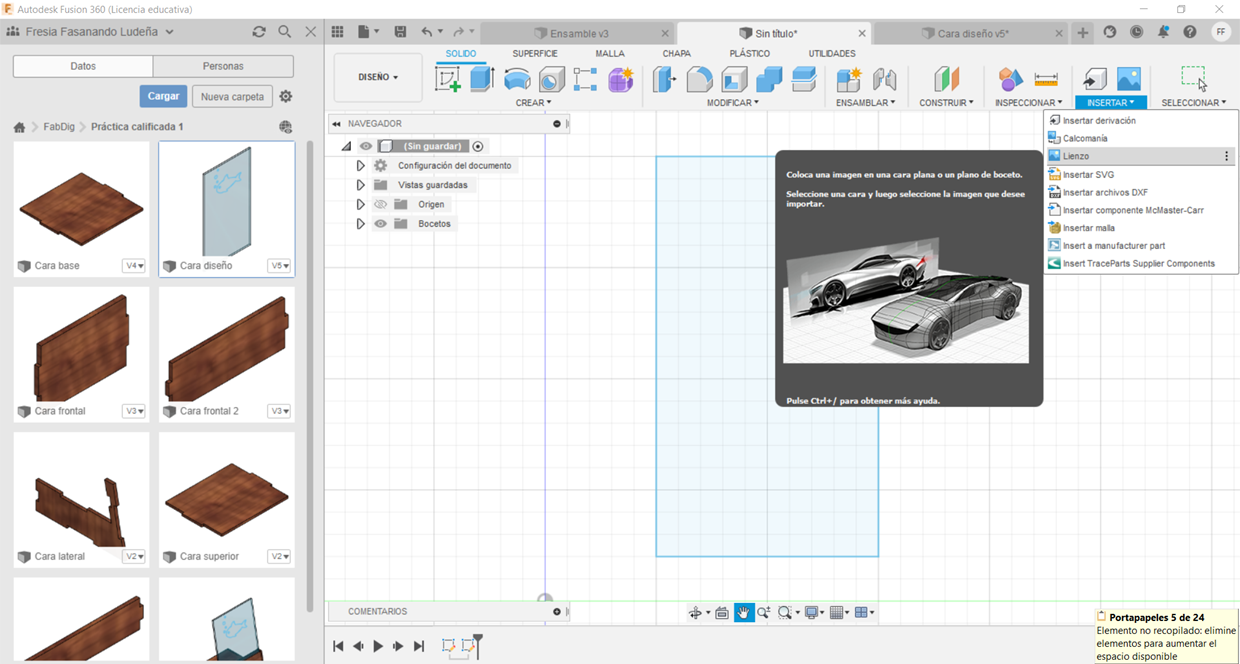
Then you will research on google "dxf fish" picture, like mine and download on your computer.
Then you go to "canvas" (where I'm indicating on the picture), then you select the previously downloaded picture, select the face you will use and this will appear on the rectangle, click on "Accept".
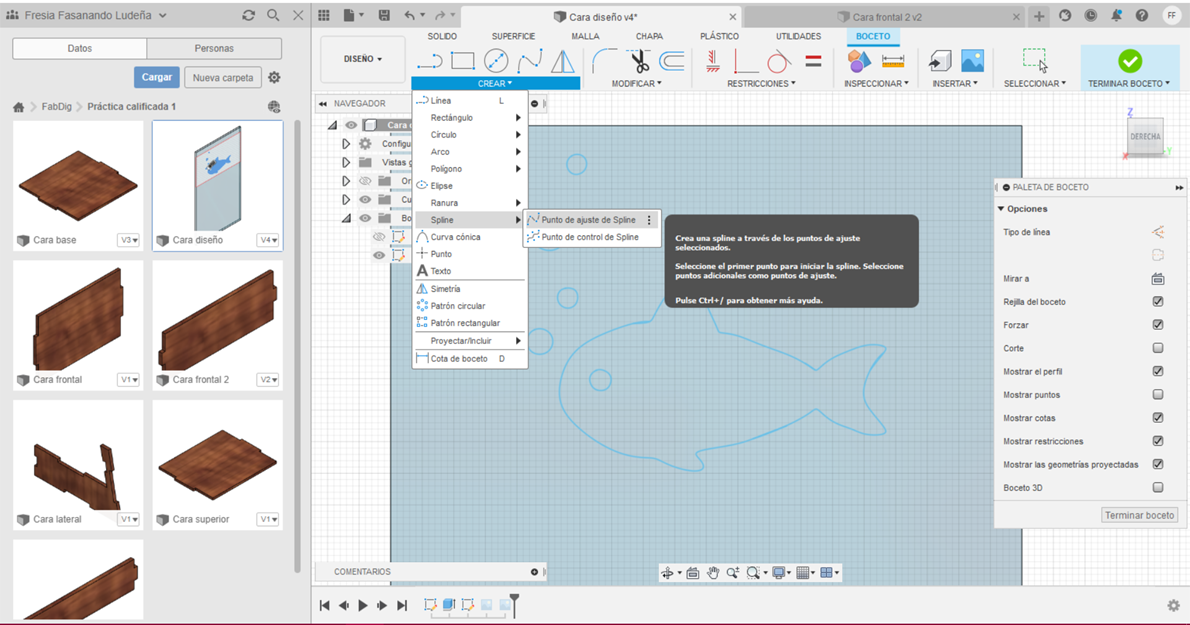
Now follow the third picture, select "Spline" and then the first option. With this tool you can draw curvatures easily.
Then, you're gonna to go to the option "Create", select "Extrude" (This tool will give to our Face volume) and choose 3 mm of volume.
When you finish to draw, put on "Finish sketch" and save it.
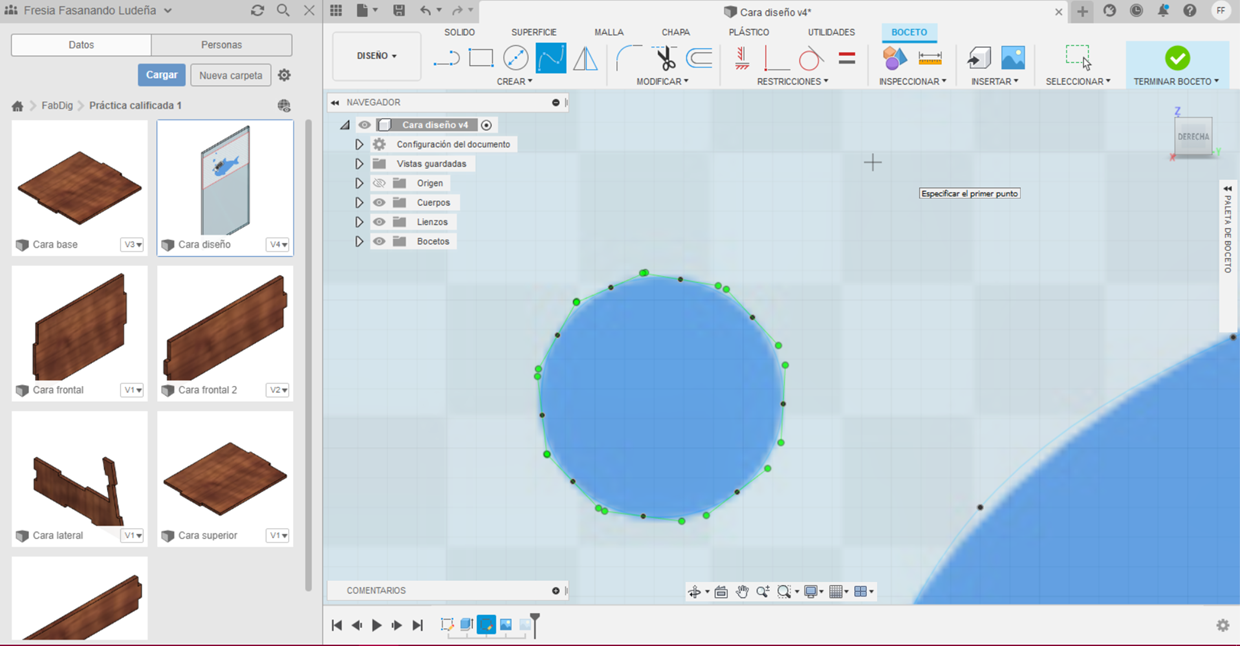
If you don't want to see your lines without the pictures, put on "canvas", (like the last picture's showing).
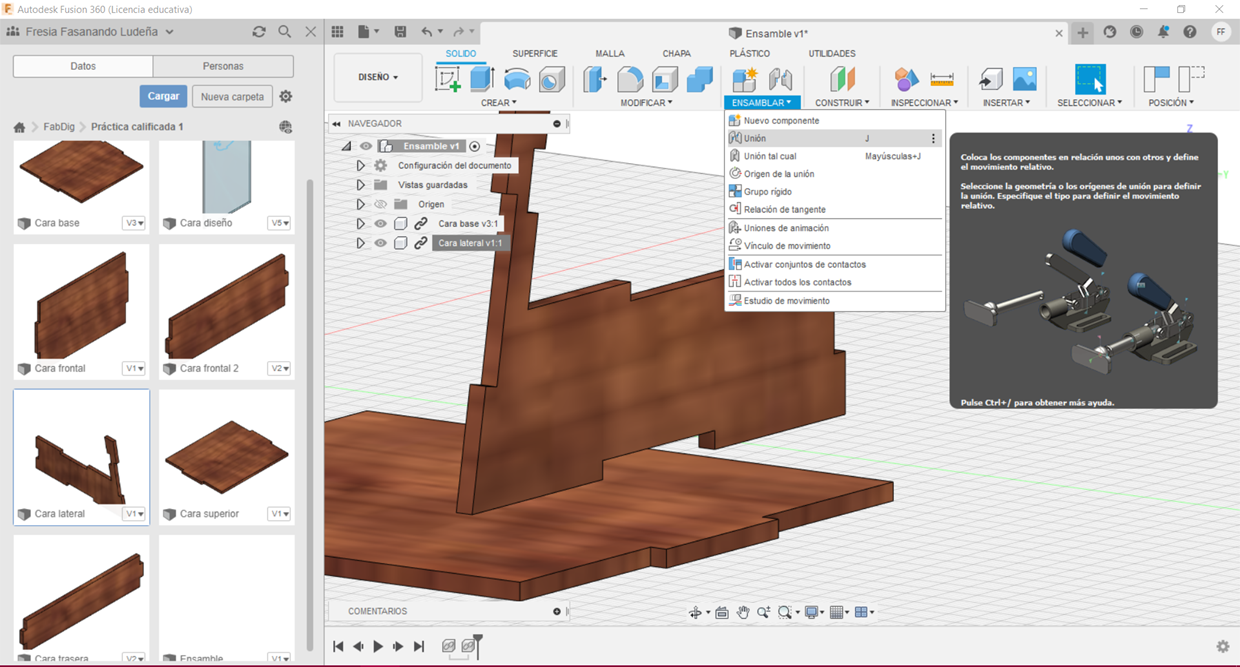
Join
We are almost finishing!
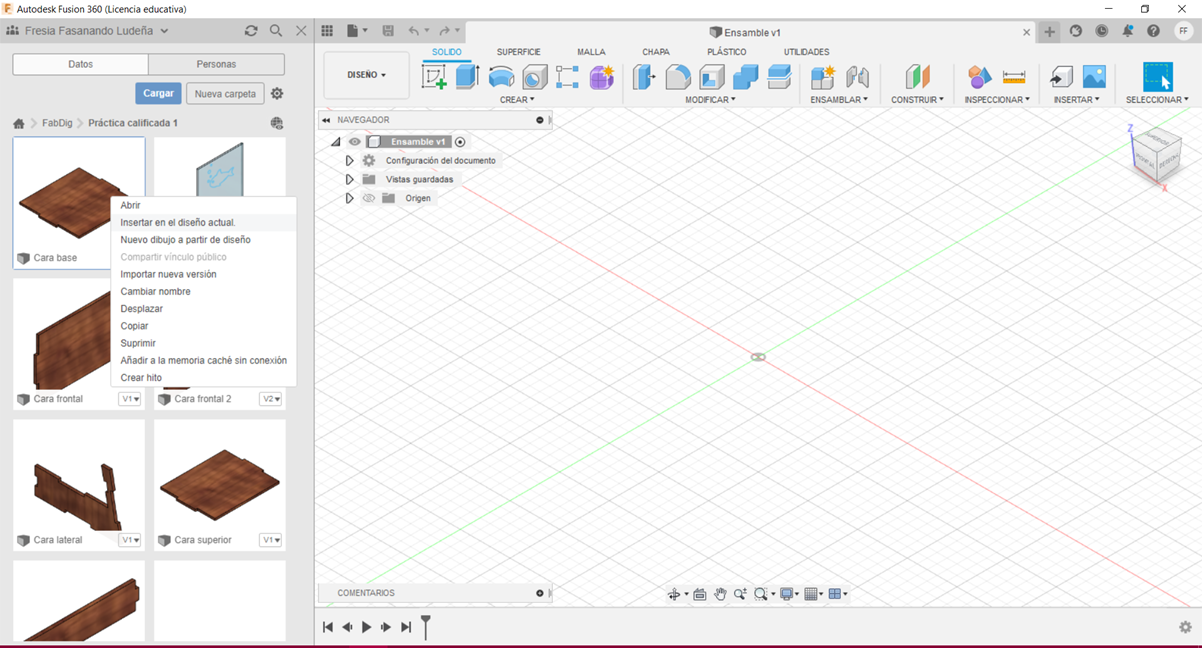
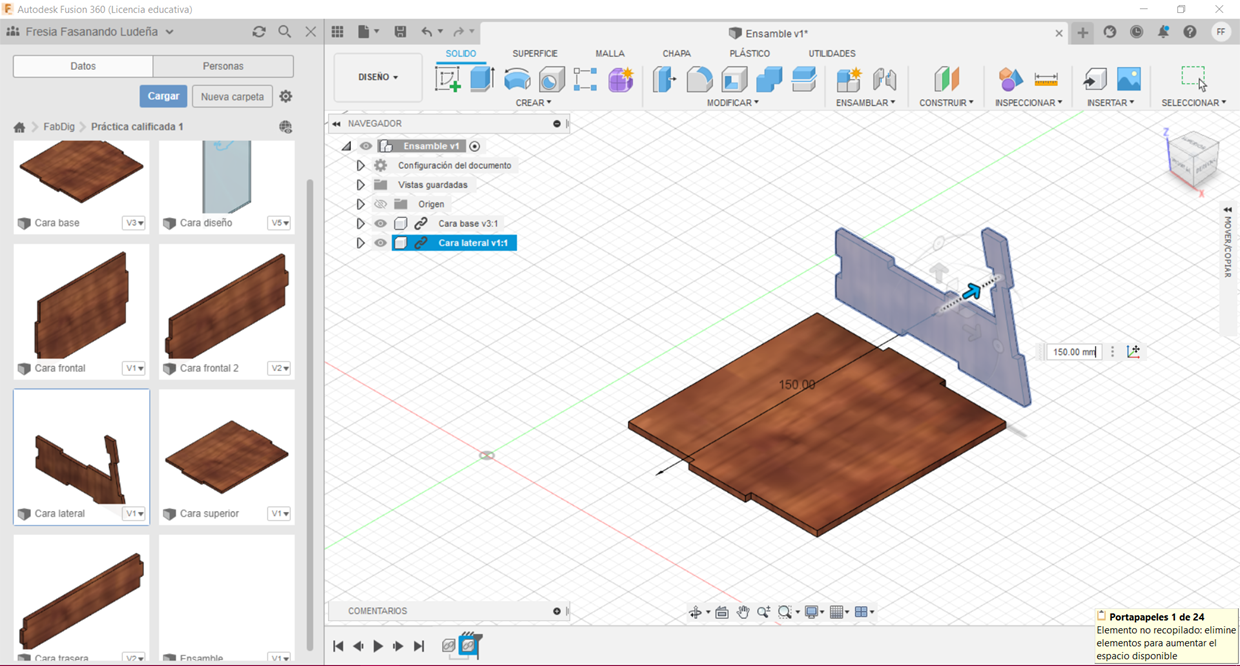
Now, you willl put right click on "Base Face" and select "Insert into current layout", then do the same with the "Side Face" and both píctures will appear.
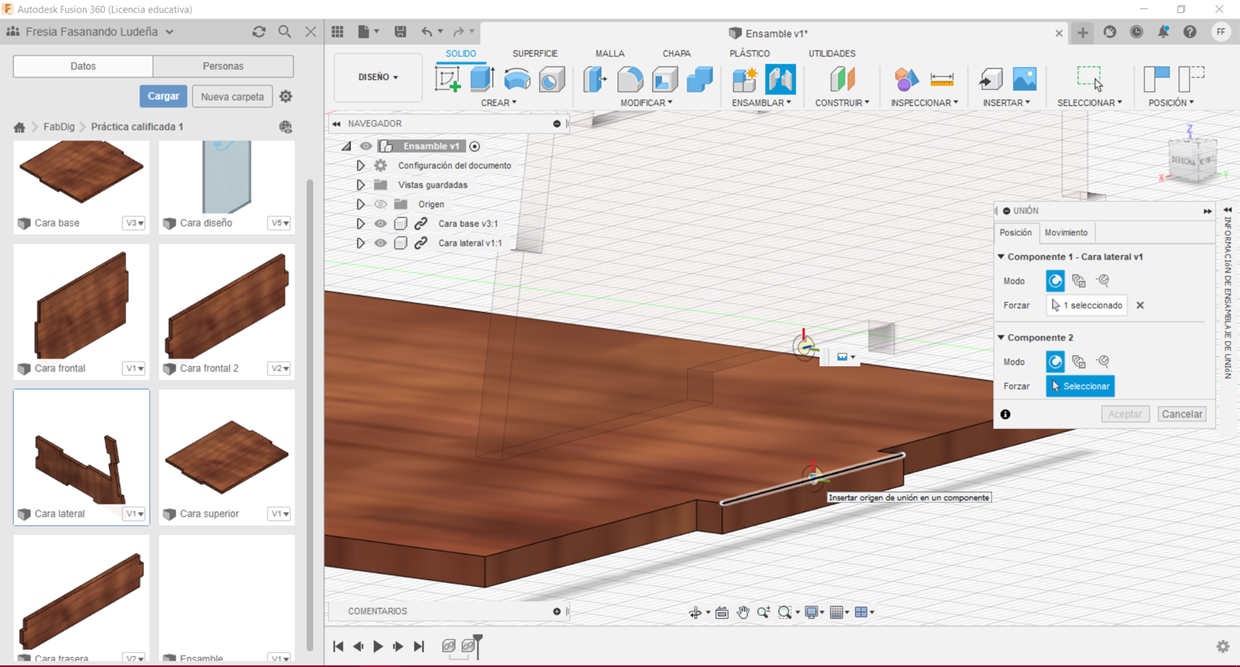
Try to put them near and on the option "Join" select "Union".
Then, select the middle of the line you will join with, do the same with the other line's face (look at the fourth picture) and accept.
Do the same with all the Faces
To Render

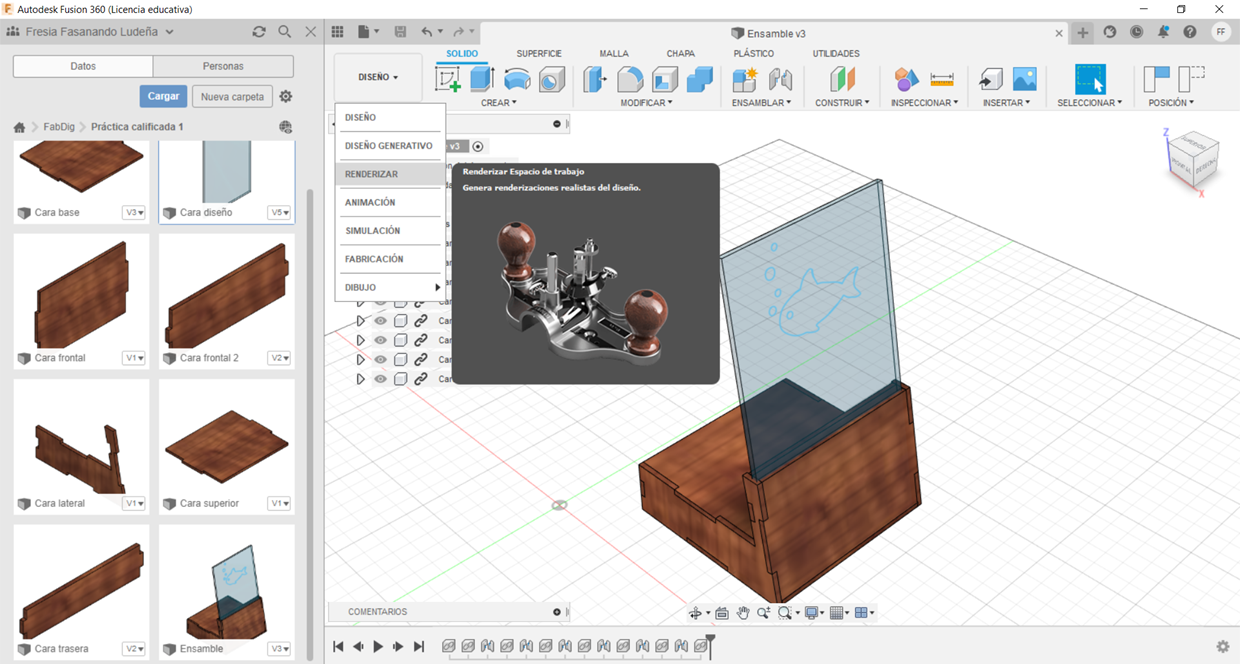
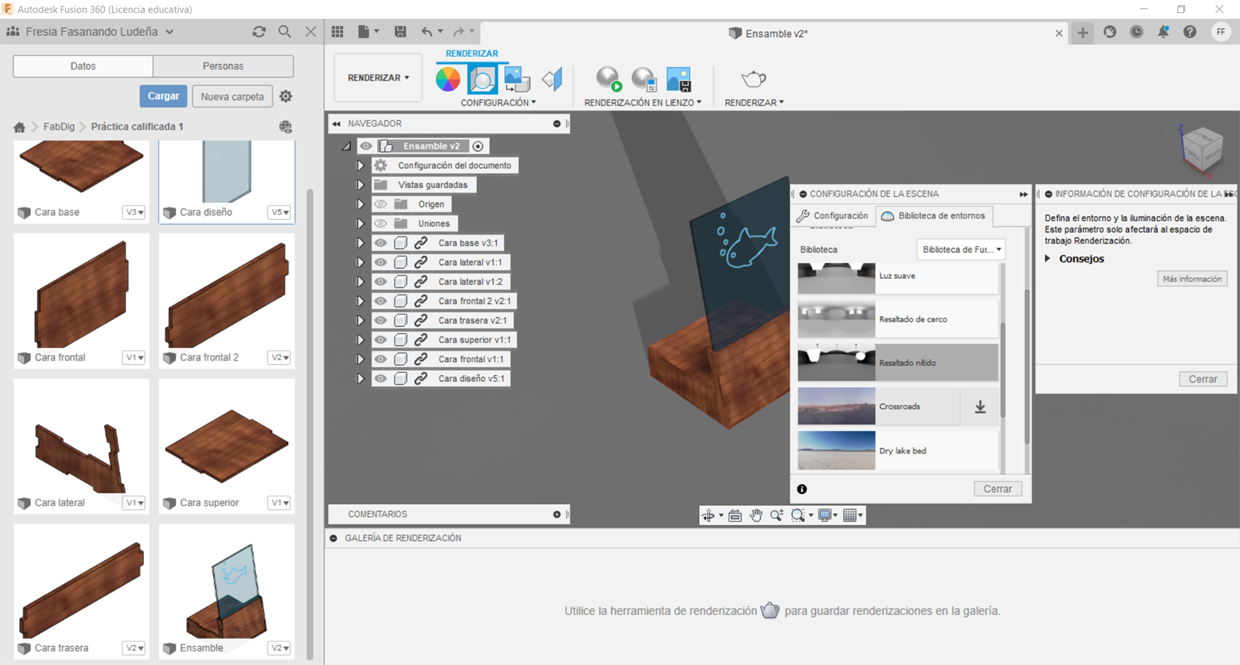
You did it! This is the last step!
Now, you only have to save the previews assembly and go to "To Render", then configure and finally click on "Accept".
Get a Picture! (optional)

If you want to save a picture of your work, put on "Capture picture", put on "Accept", then on "Save" and put it on your computer.
Thanks for follow this steps! enjoying it!