Let It Bass
Yuval's Bass drum kick by Adi Toledano & Maya Almagor
Supplies
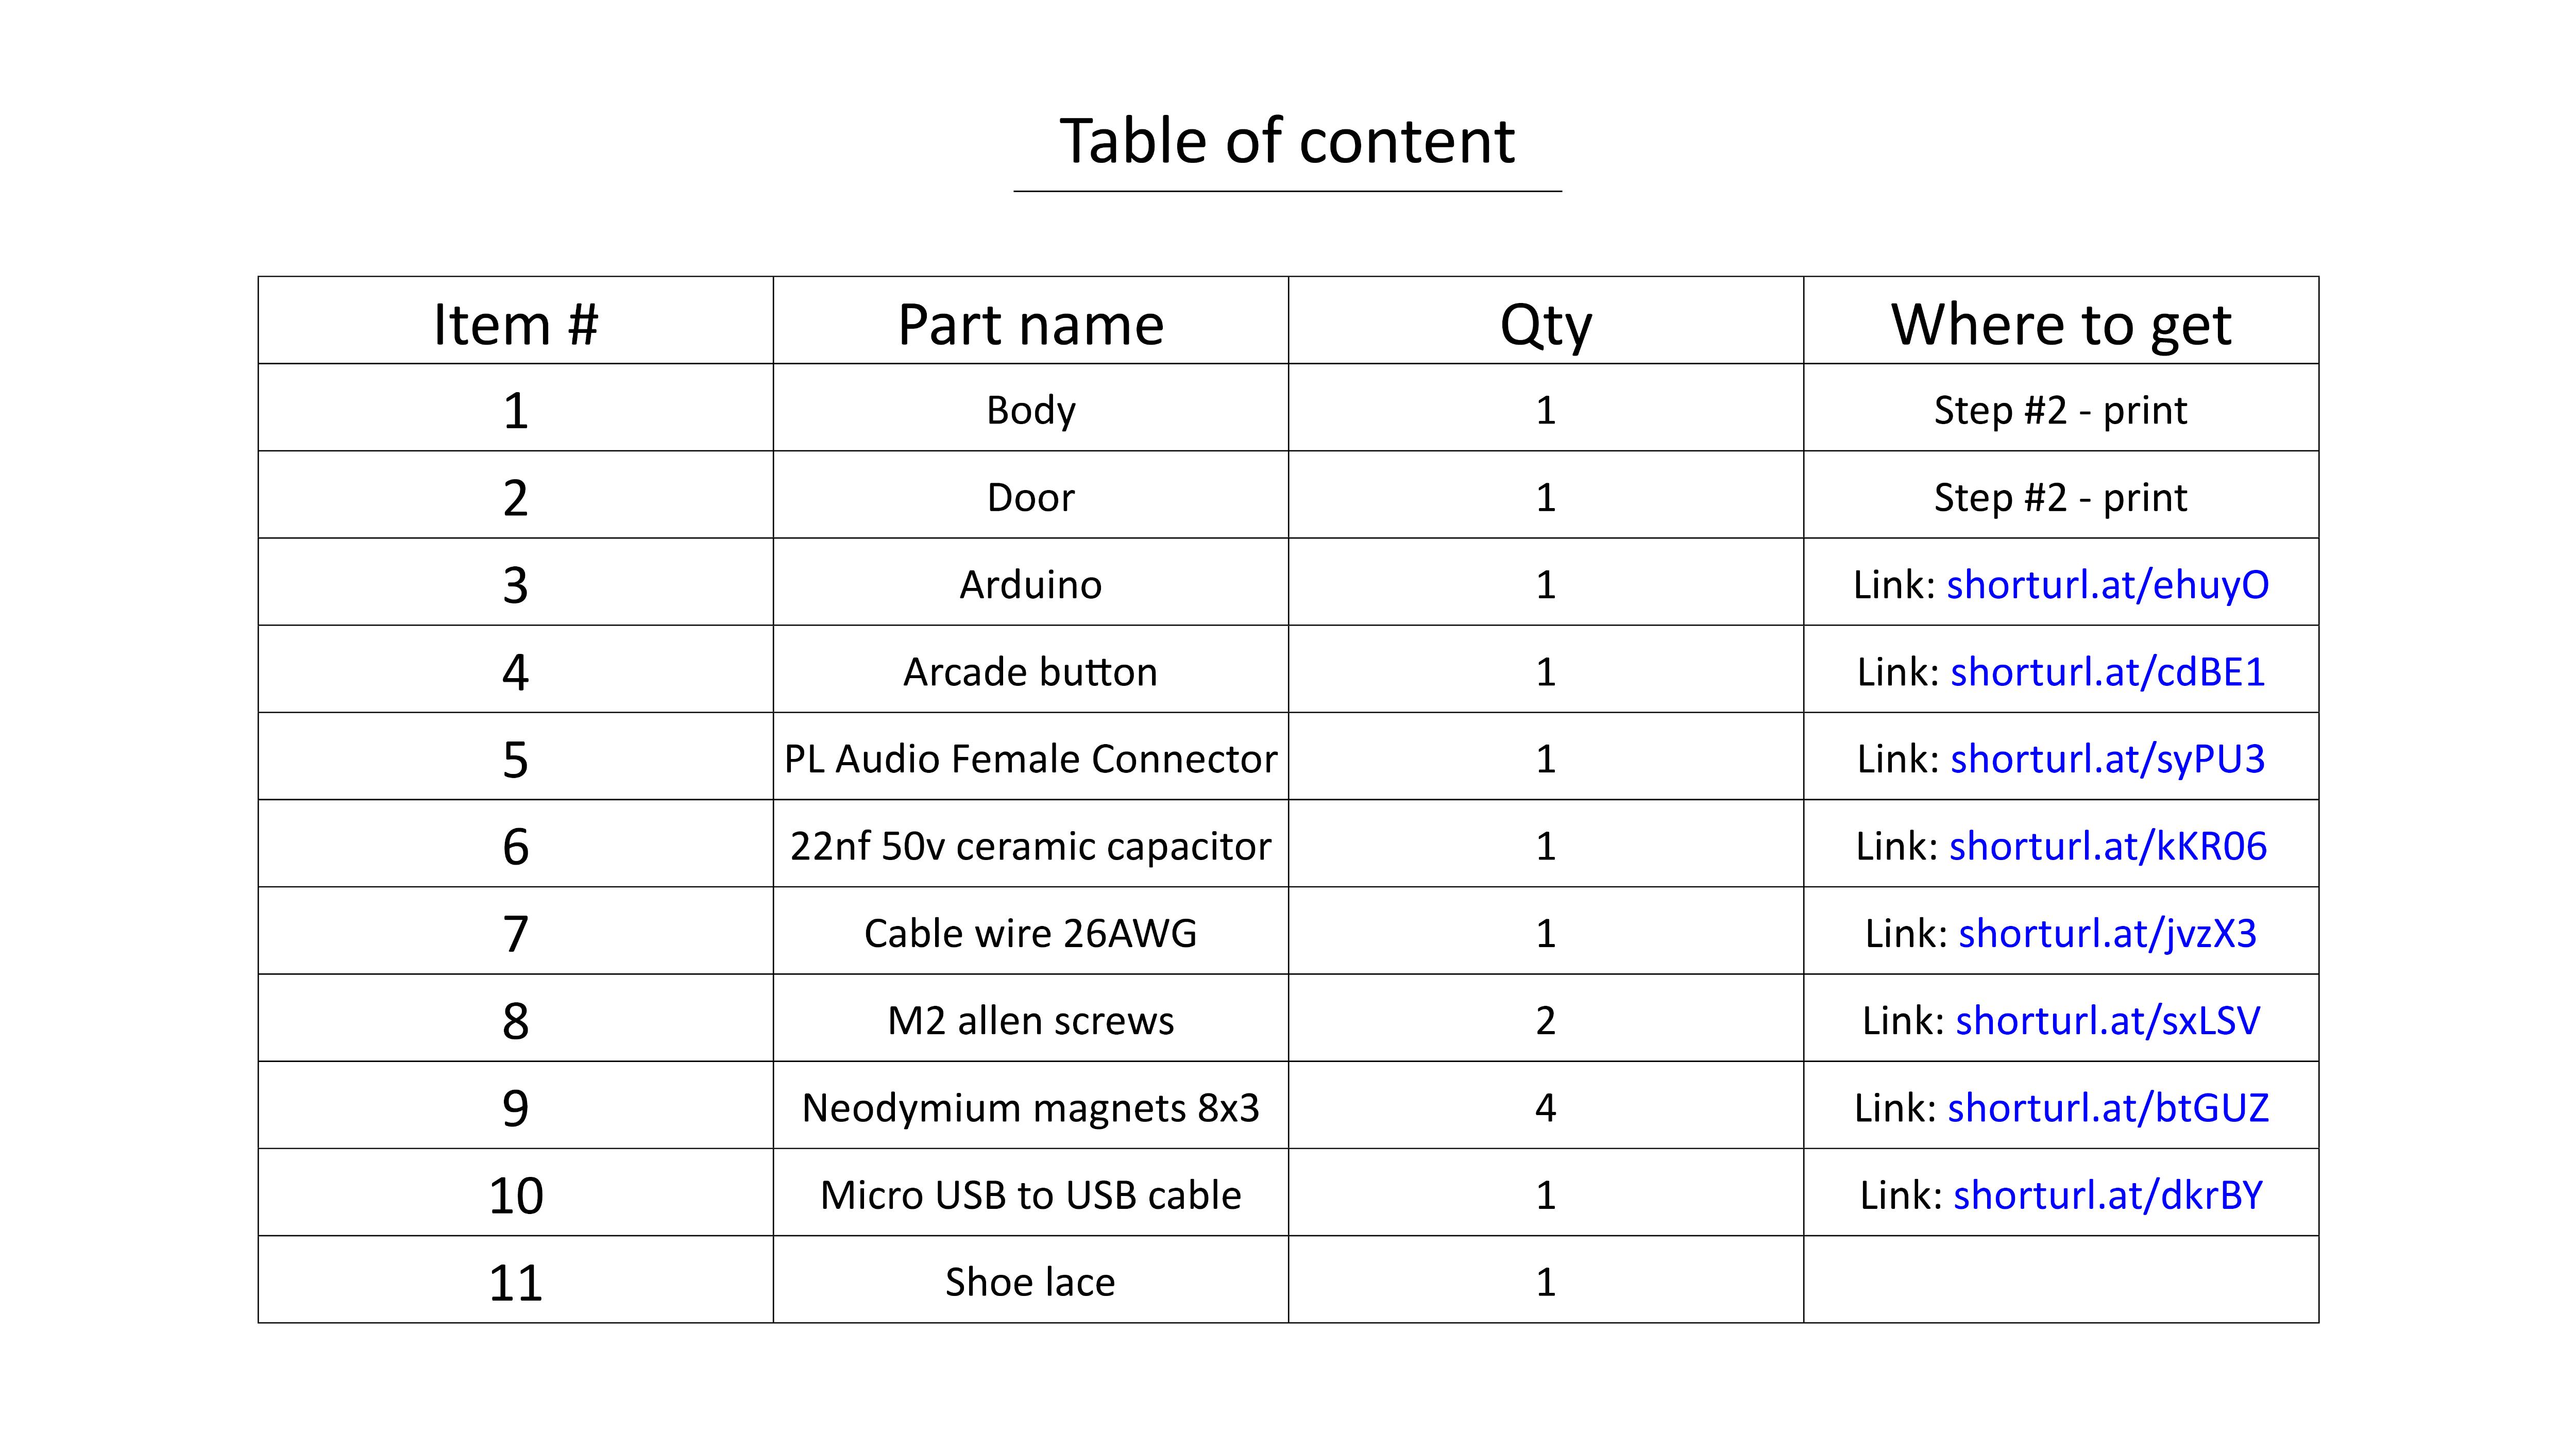
To Assemble, you will need an allen M2 key and a Mounting tape.
Video

Watch video
Print Files
Recommended:
PLA/PETG
High infill
Connect Arduino and Load Code
Connect the Arduino to your computer and use the link to upload the code.
https://gitlab.com/hit_made/letitbass/bassdrumst
- Run the project on STM32CUBEIDE
- Enter boot mode on the device While board is connected to power:
- Hold the boot button on the board
- Tap the reset button on the board
- Board should now appear on your computer in bootloader mode
- Click on UPDATEDEV.bat (in the link above) for the code be installed on the Arduino
Connect Ceramic Capacitor to Button

Solder the ceramic capacitor to the button.
Soldering iron is needed.
Place the Button
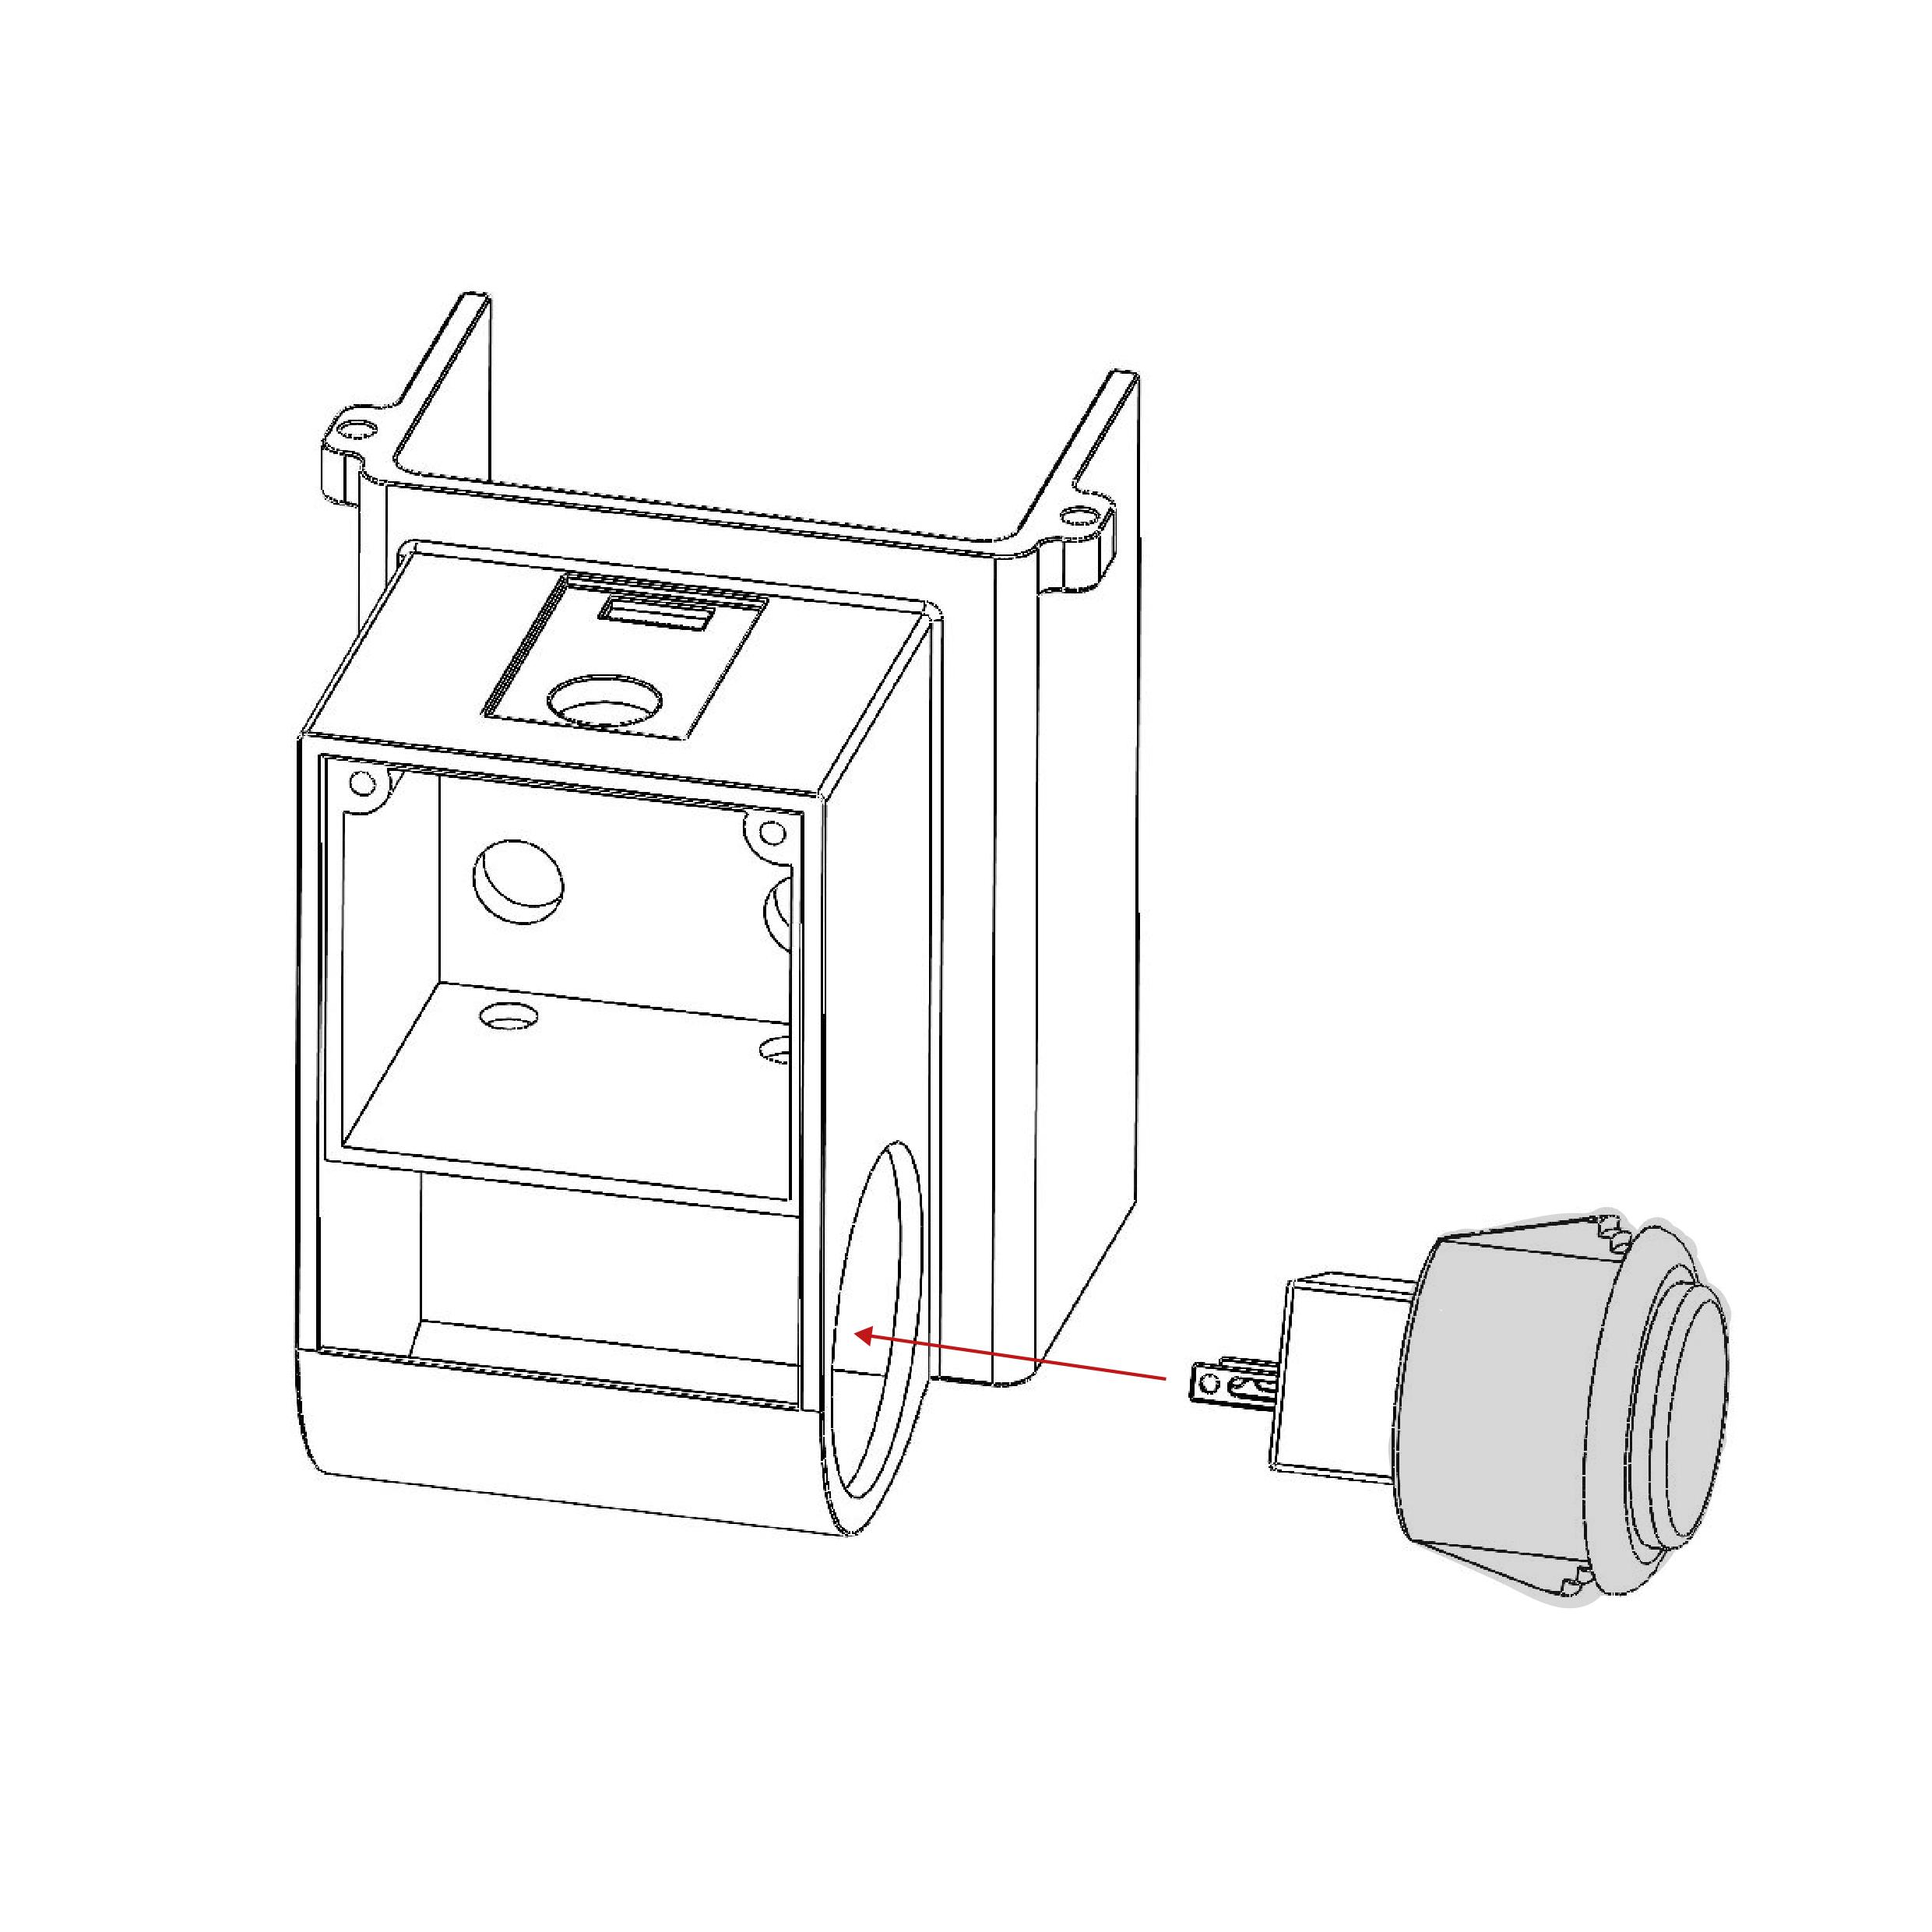
push the button in place, until it clicks.
Connect Electronic Circuit

Complete welding the rest of the circuit.
Soldering iron is needed.
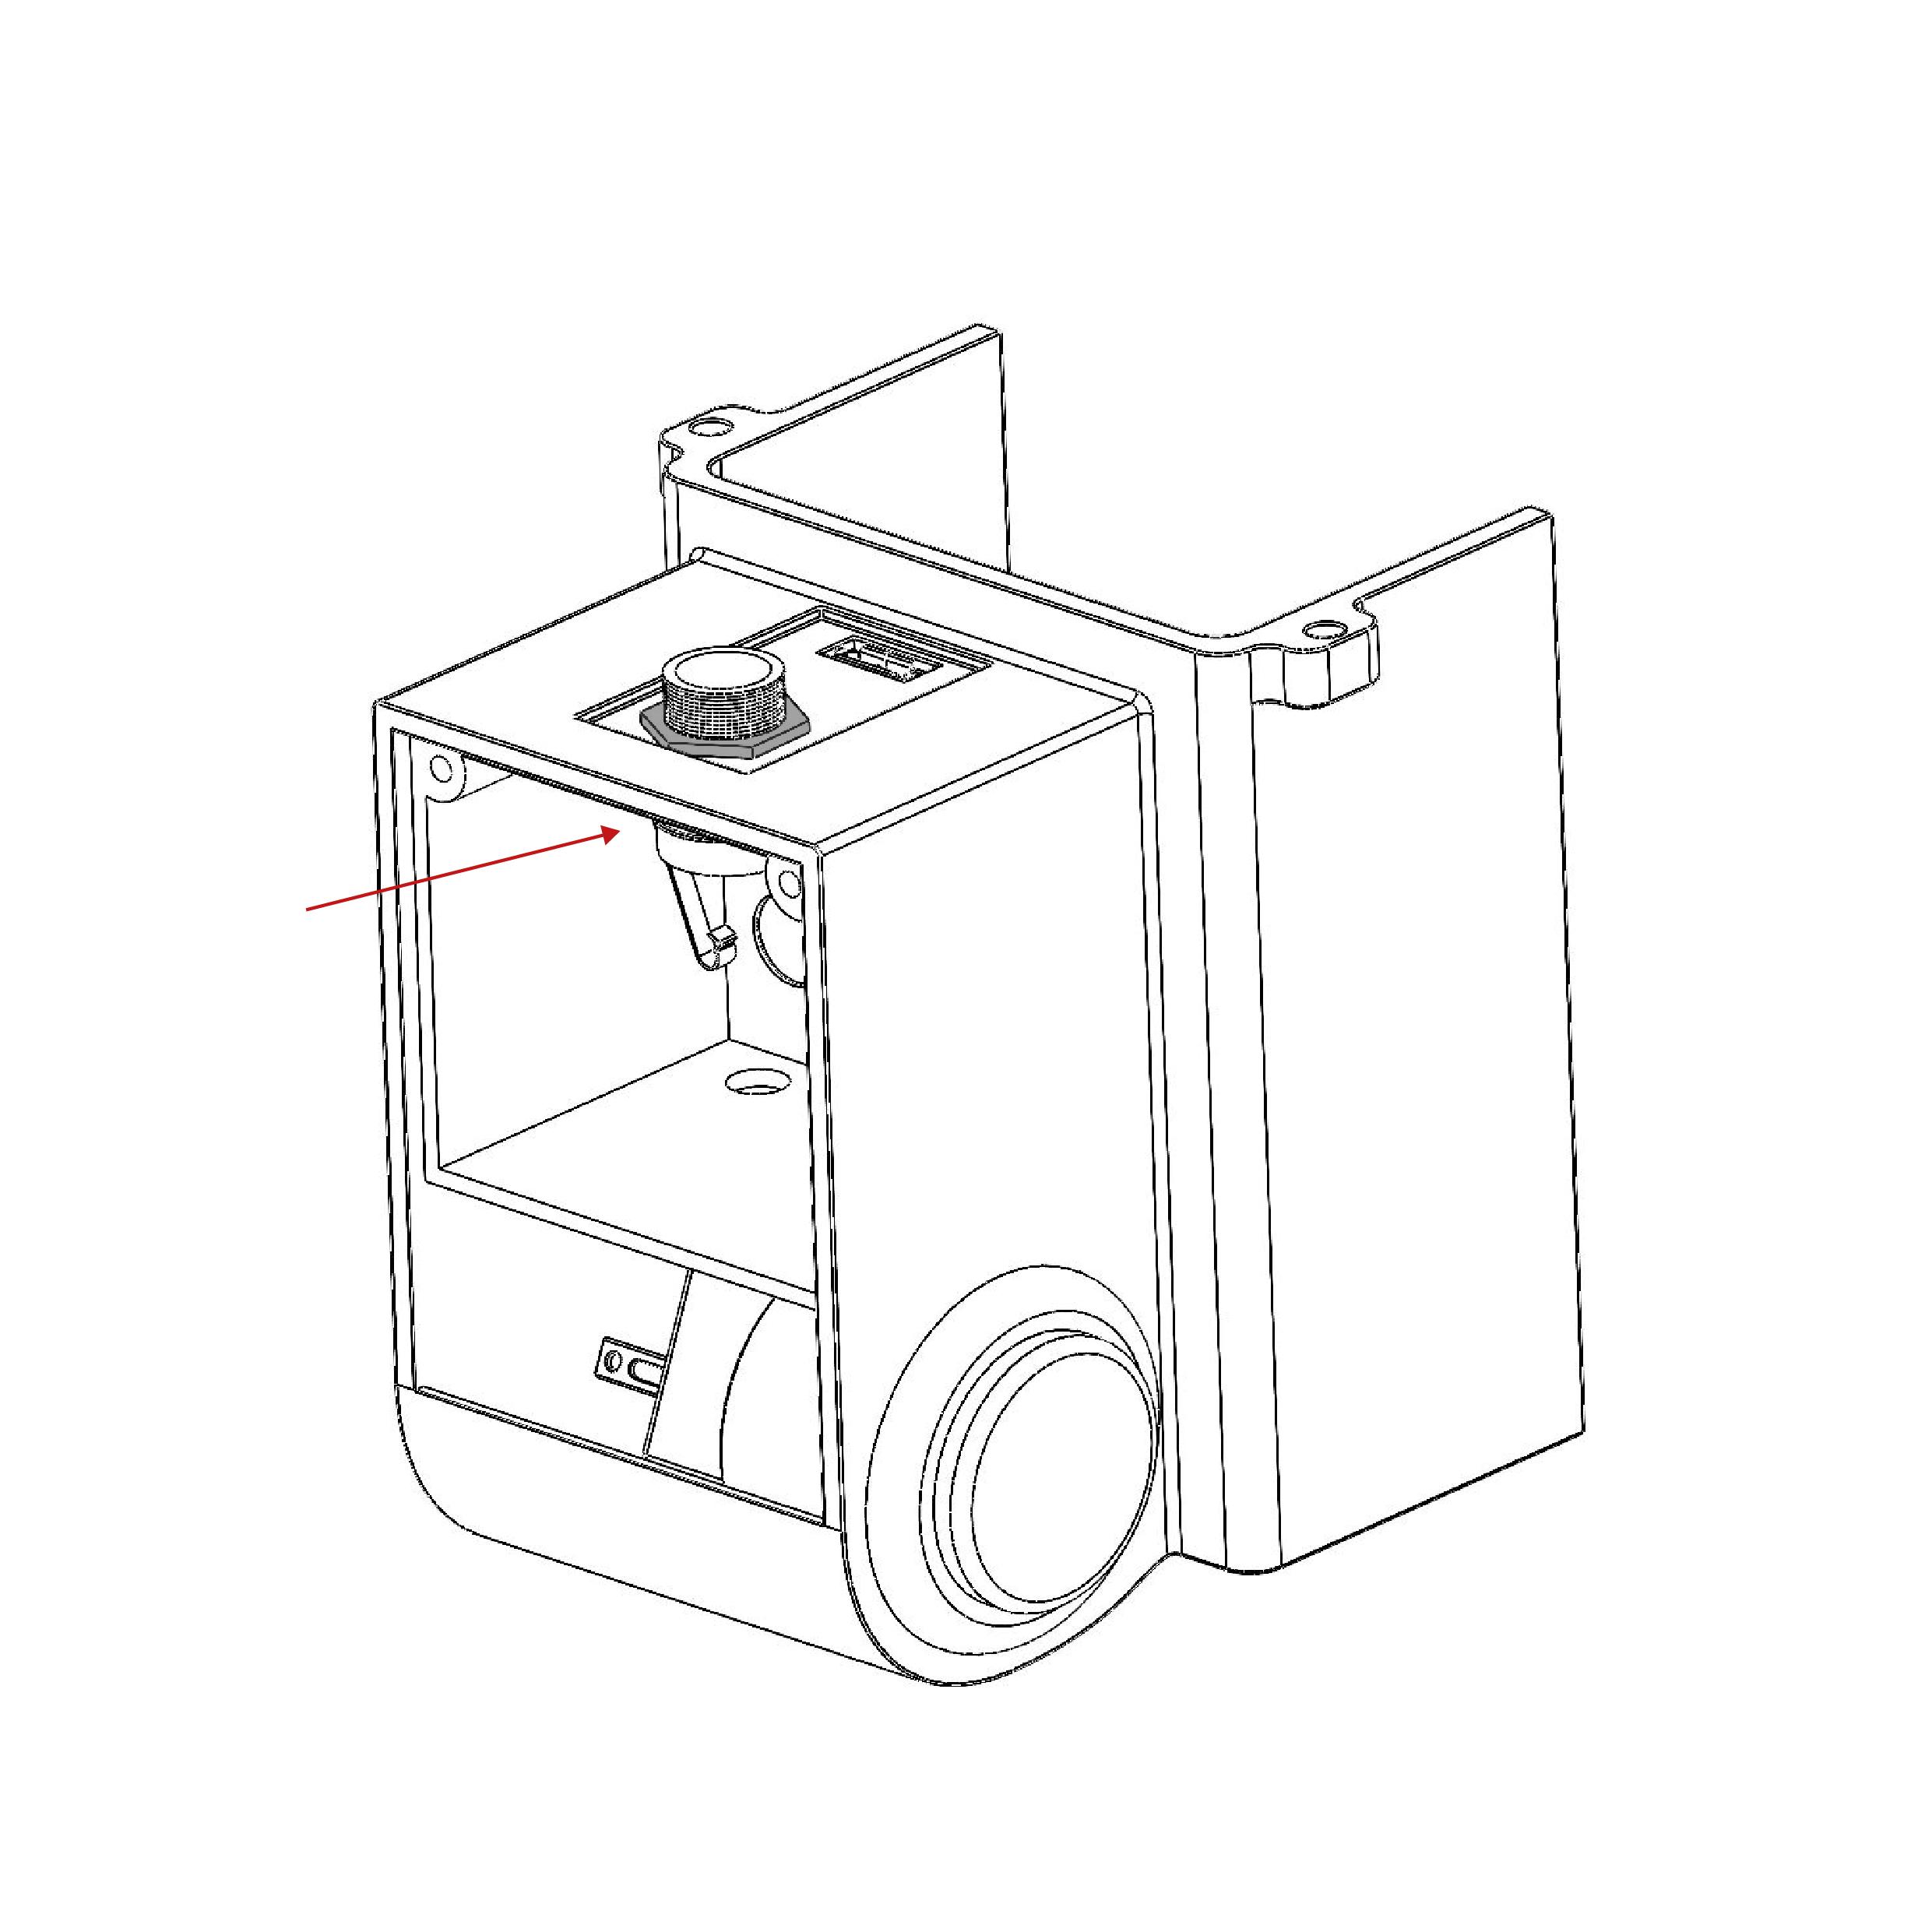
Insert Magnets
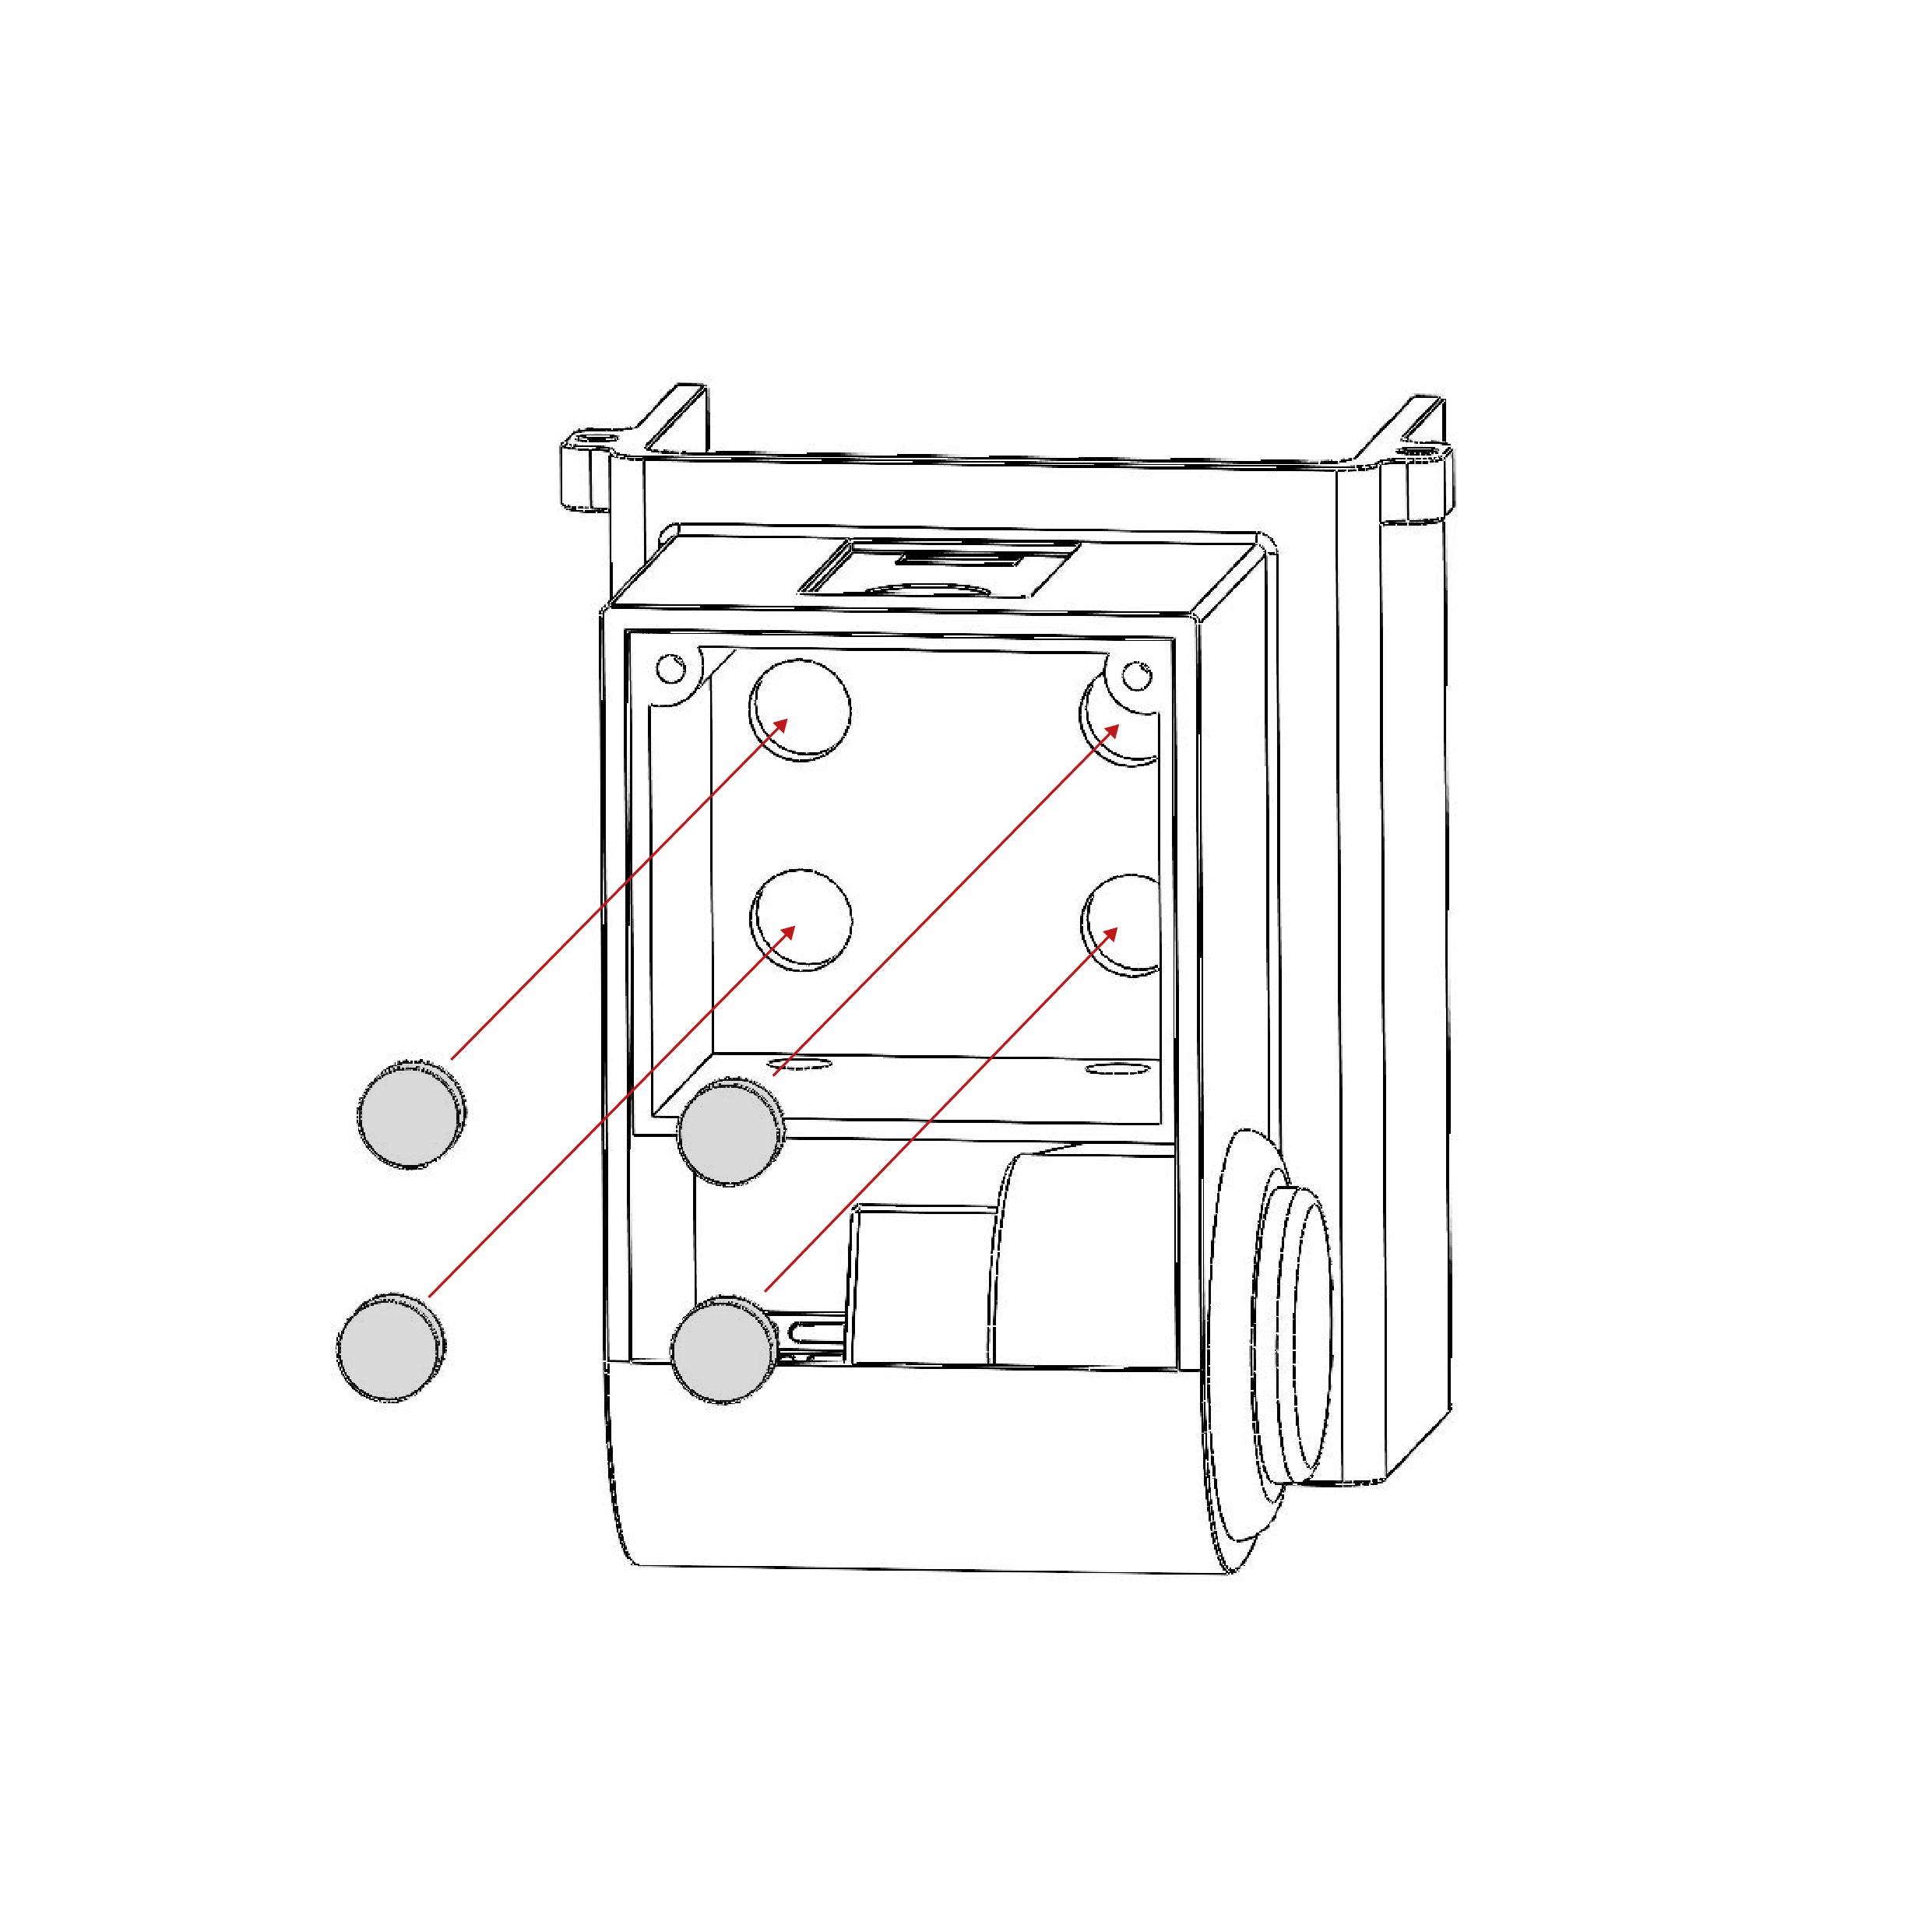
Push 4 magnets in the holes. The magnets will fit tight.
Make sure all magnets are facing the same way! (either all North / all south)
Insert Arduino
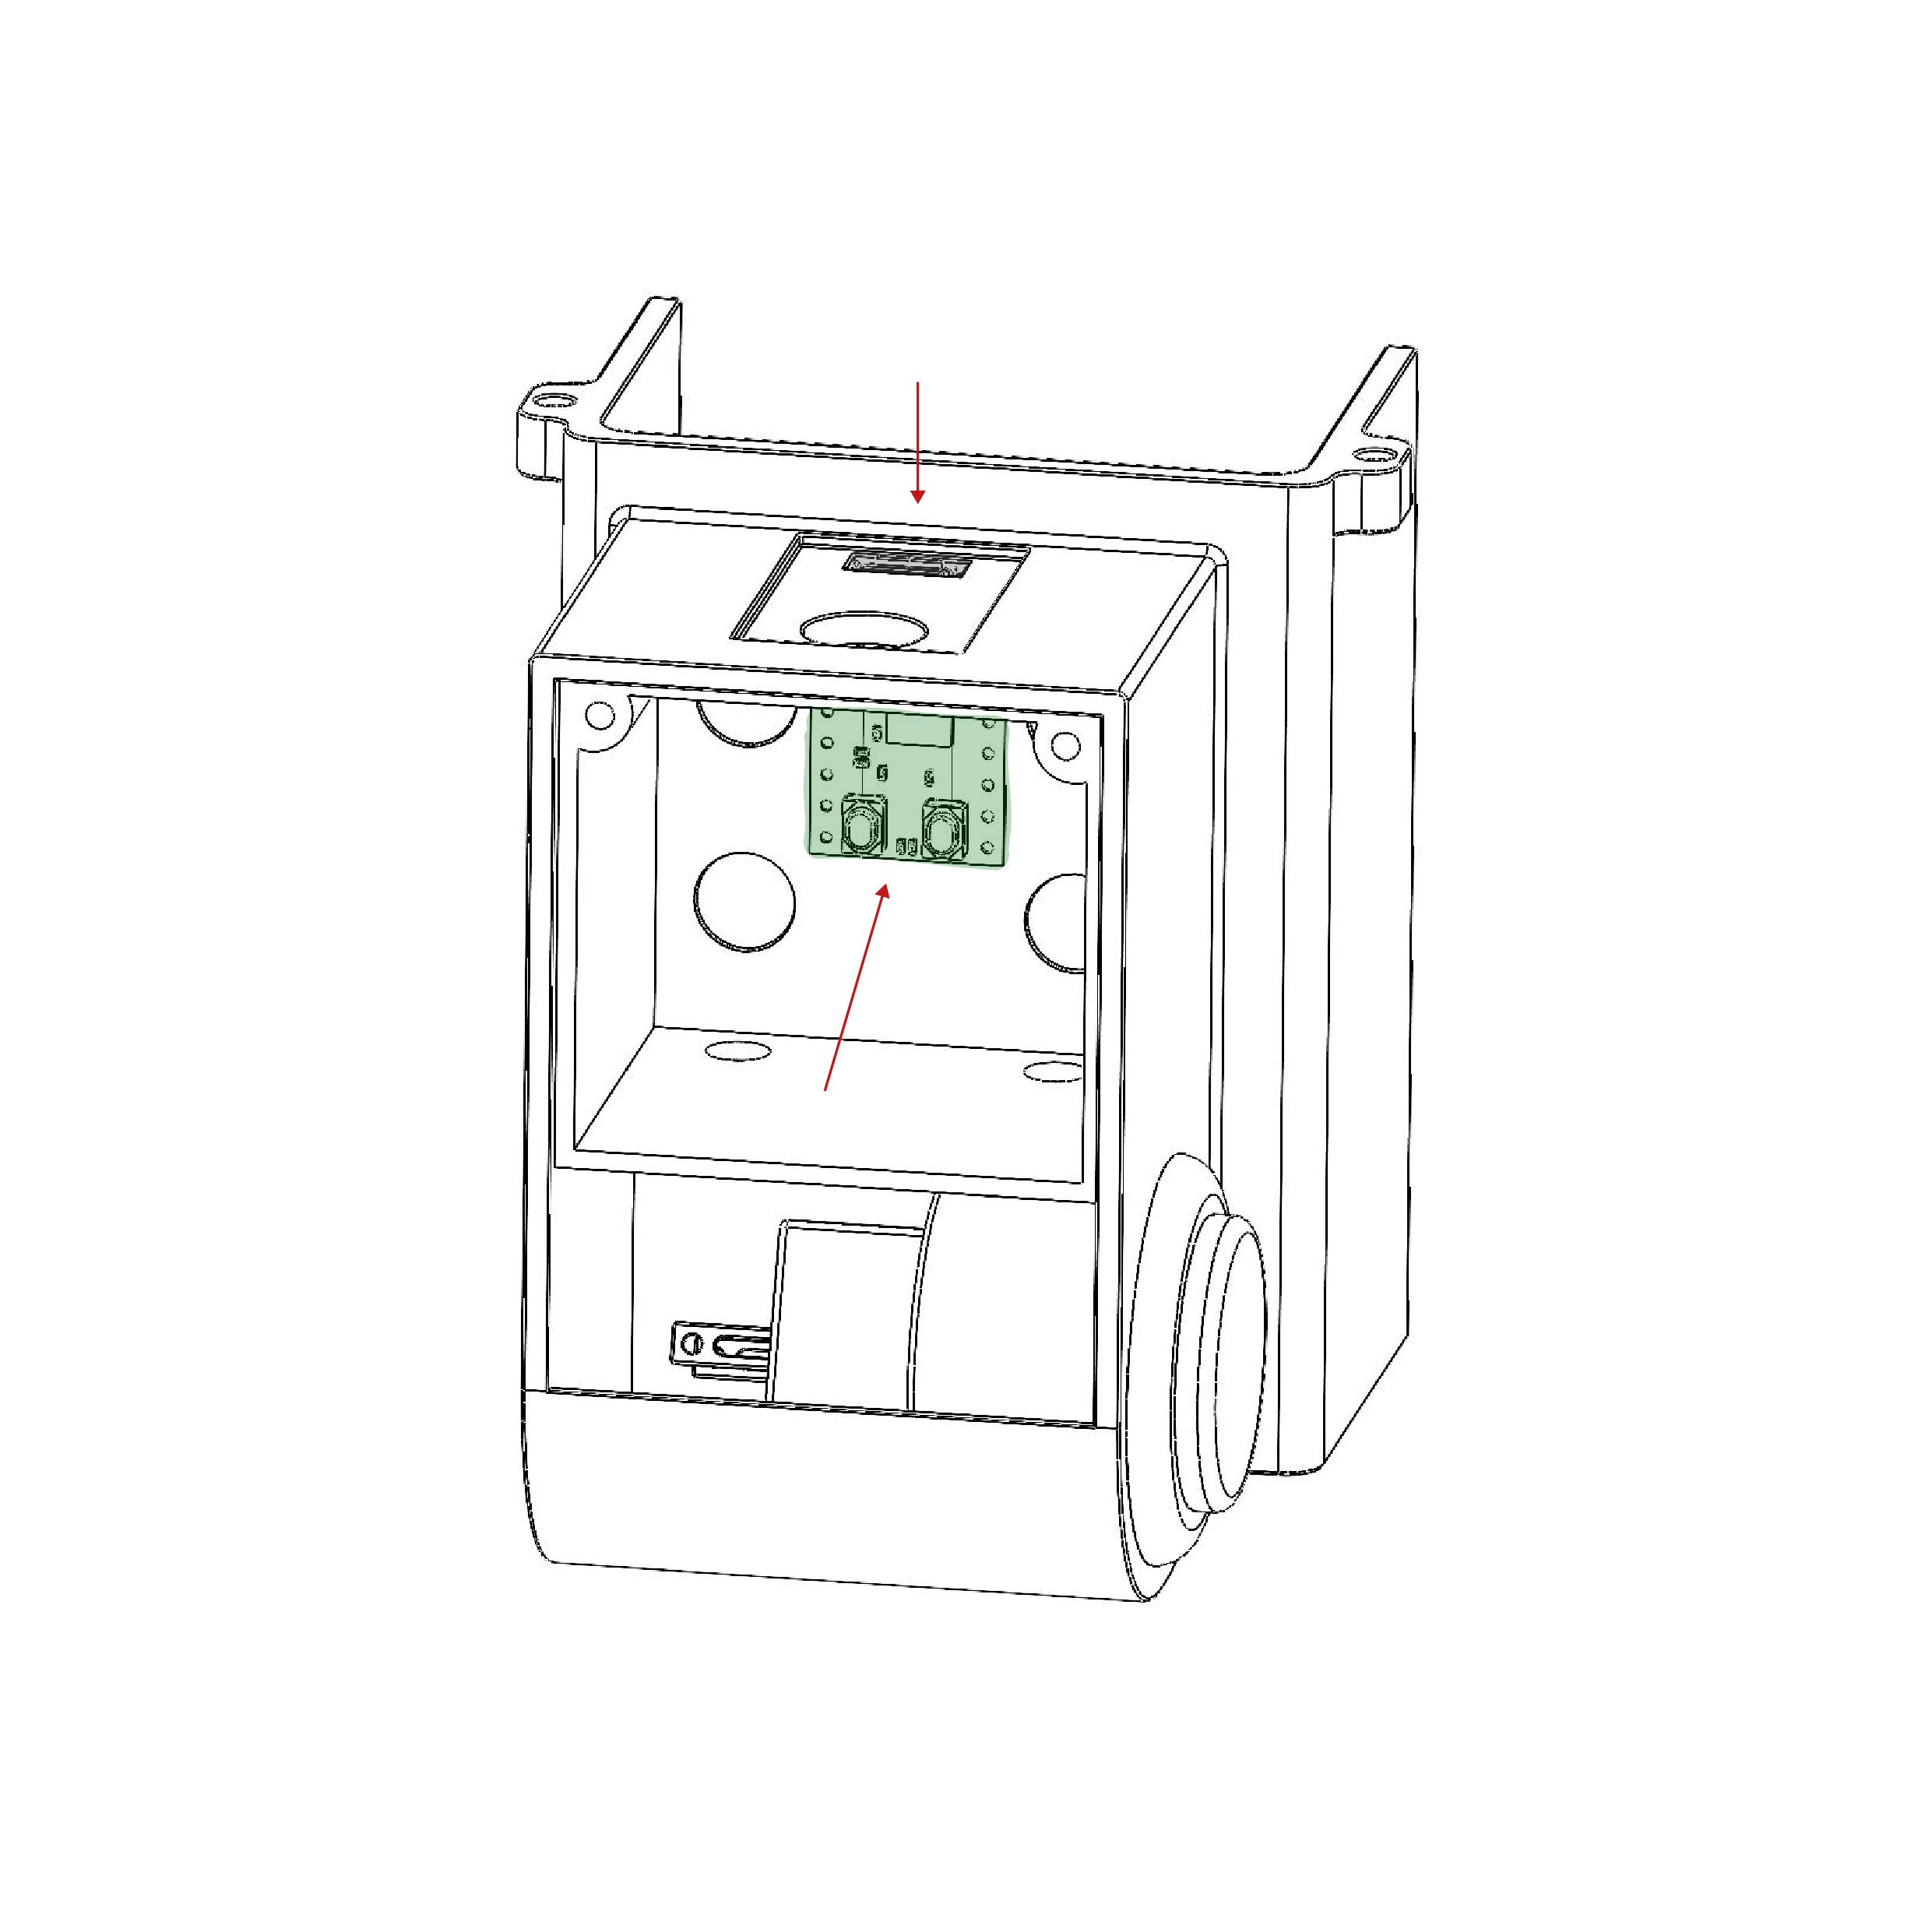
Using a Mounting tape, carefully attach the Arduino to the inner wall with micro USB facing the hole on top.
Place P.L Audio Female Connector
put the P.L connector in place and screw it using the hexagon nut
Close Door
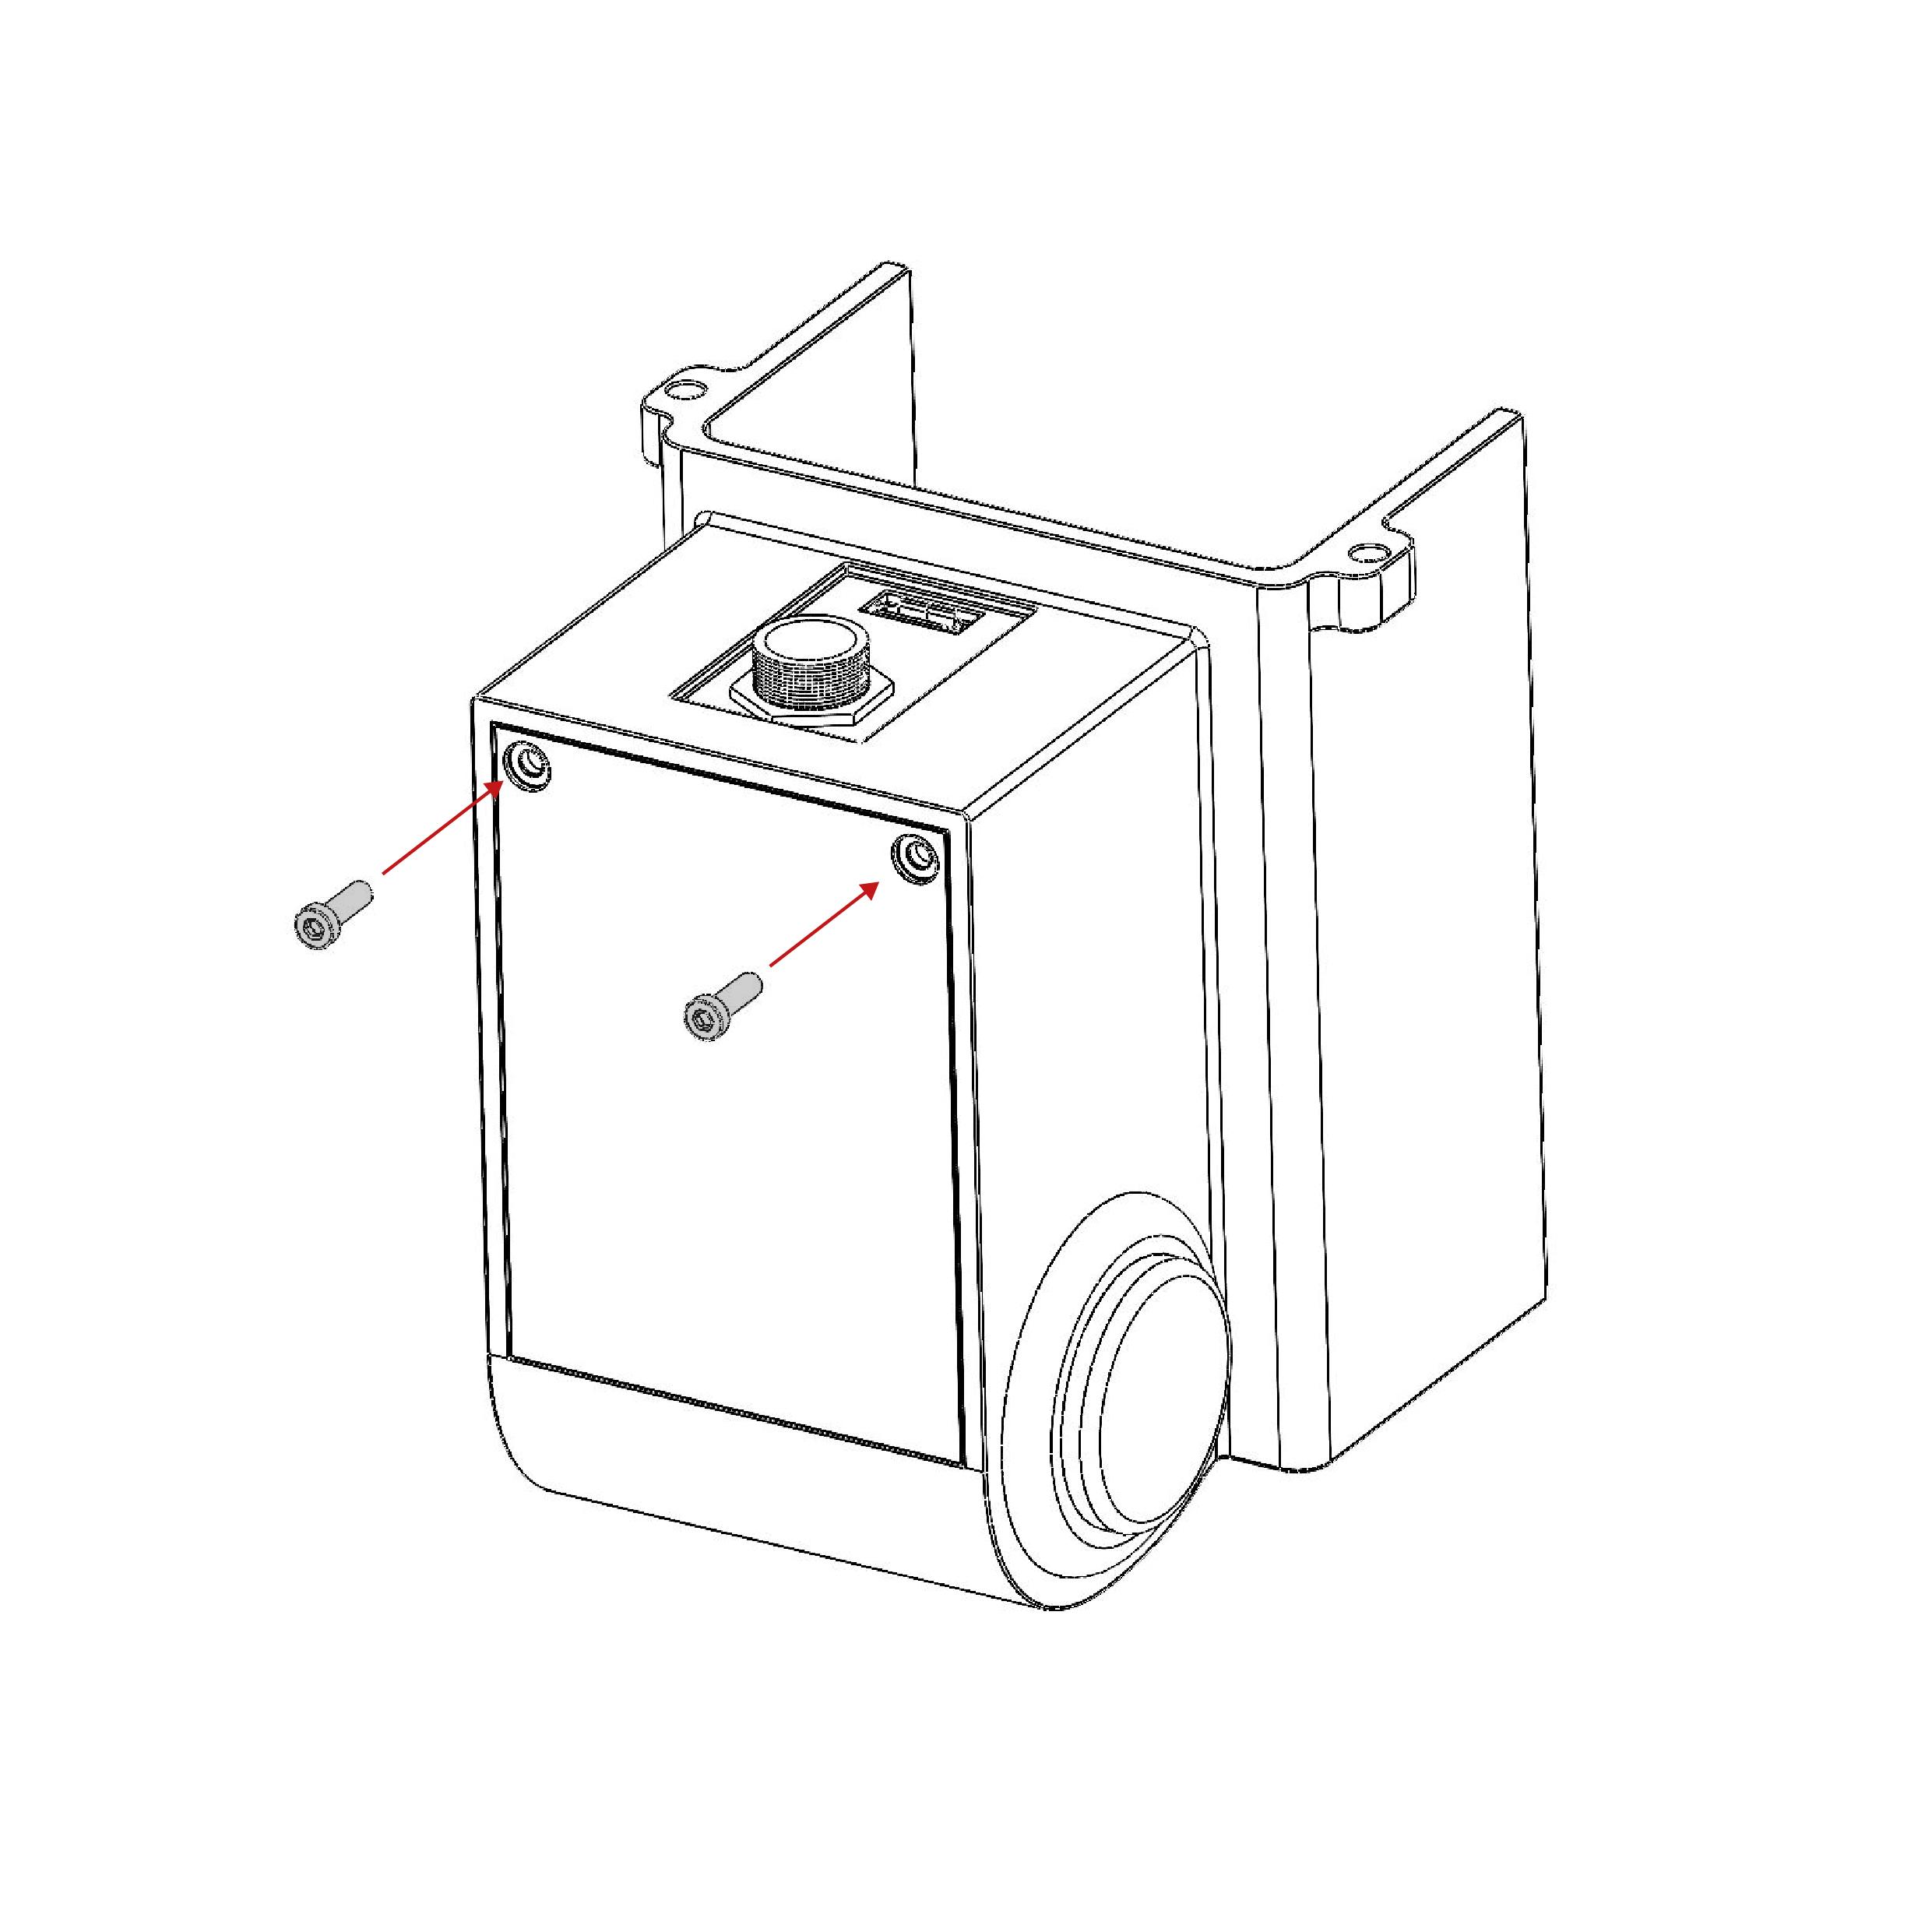
Screw door in place using 2 M2 allen screws and an allen key
Tie the Lace
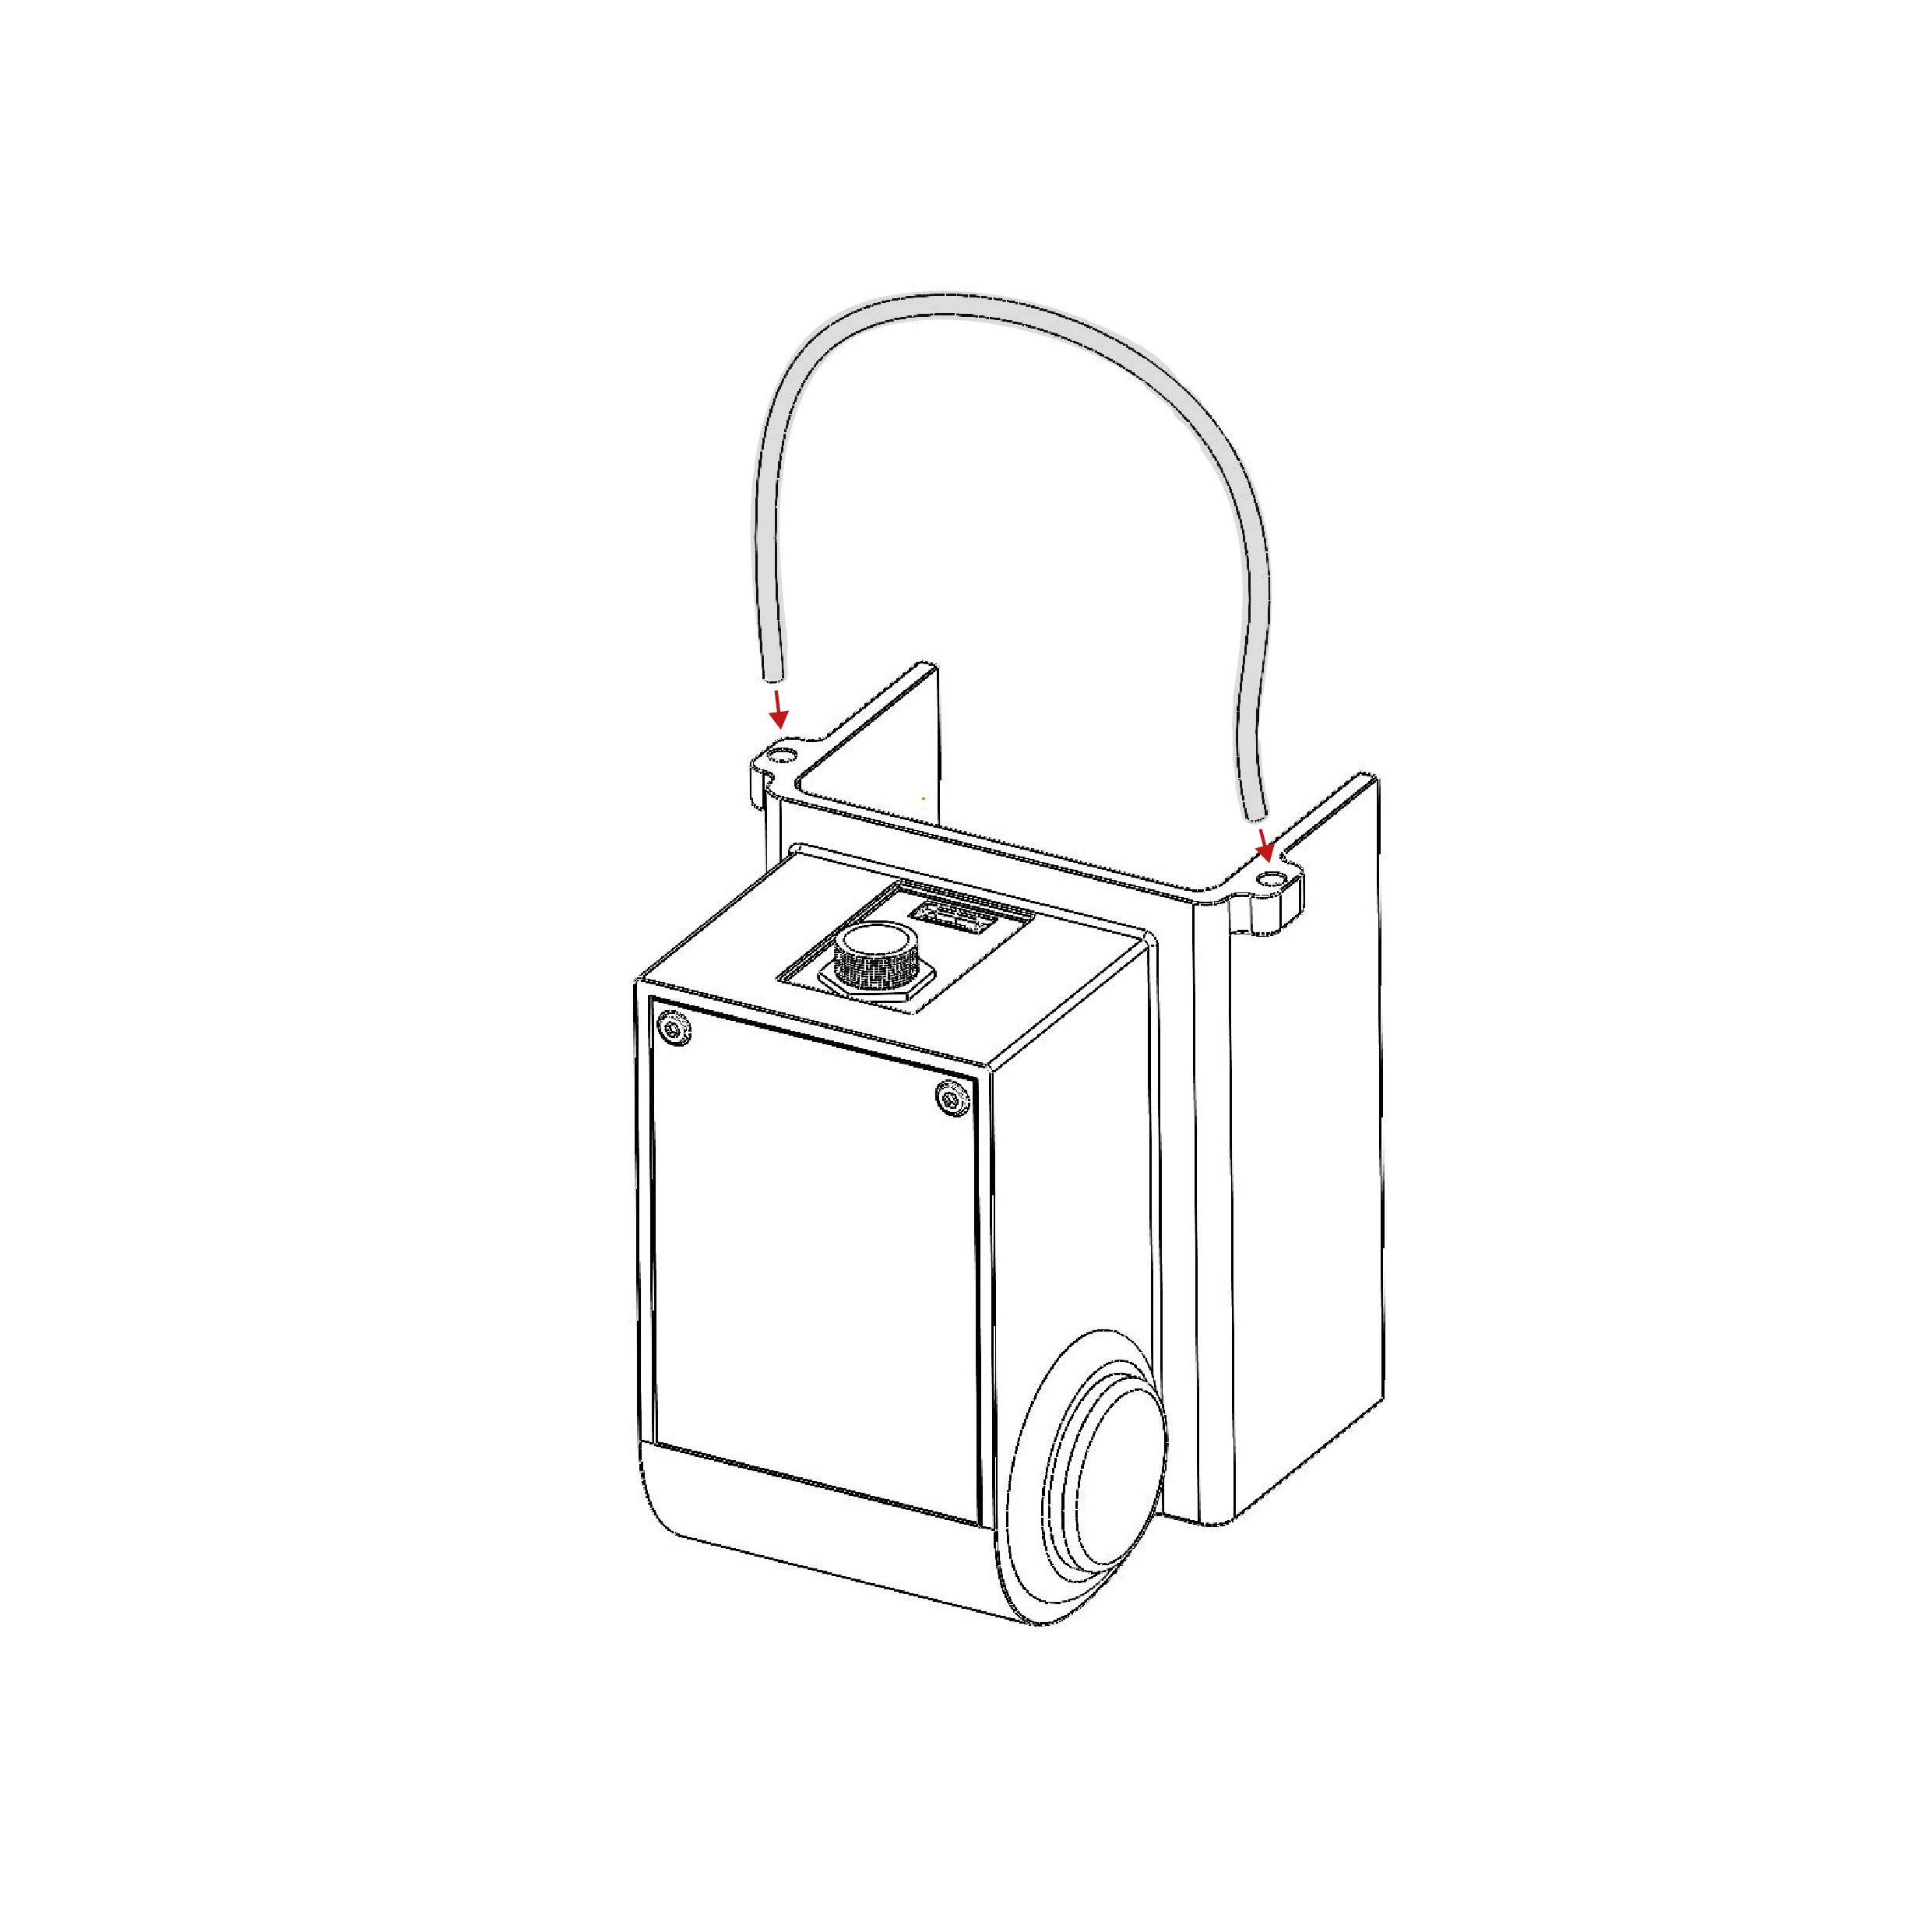
Take a shoe lace, run it through the holes on both sides and tie it to the desired length. cut excess material.
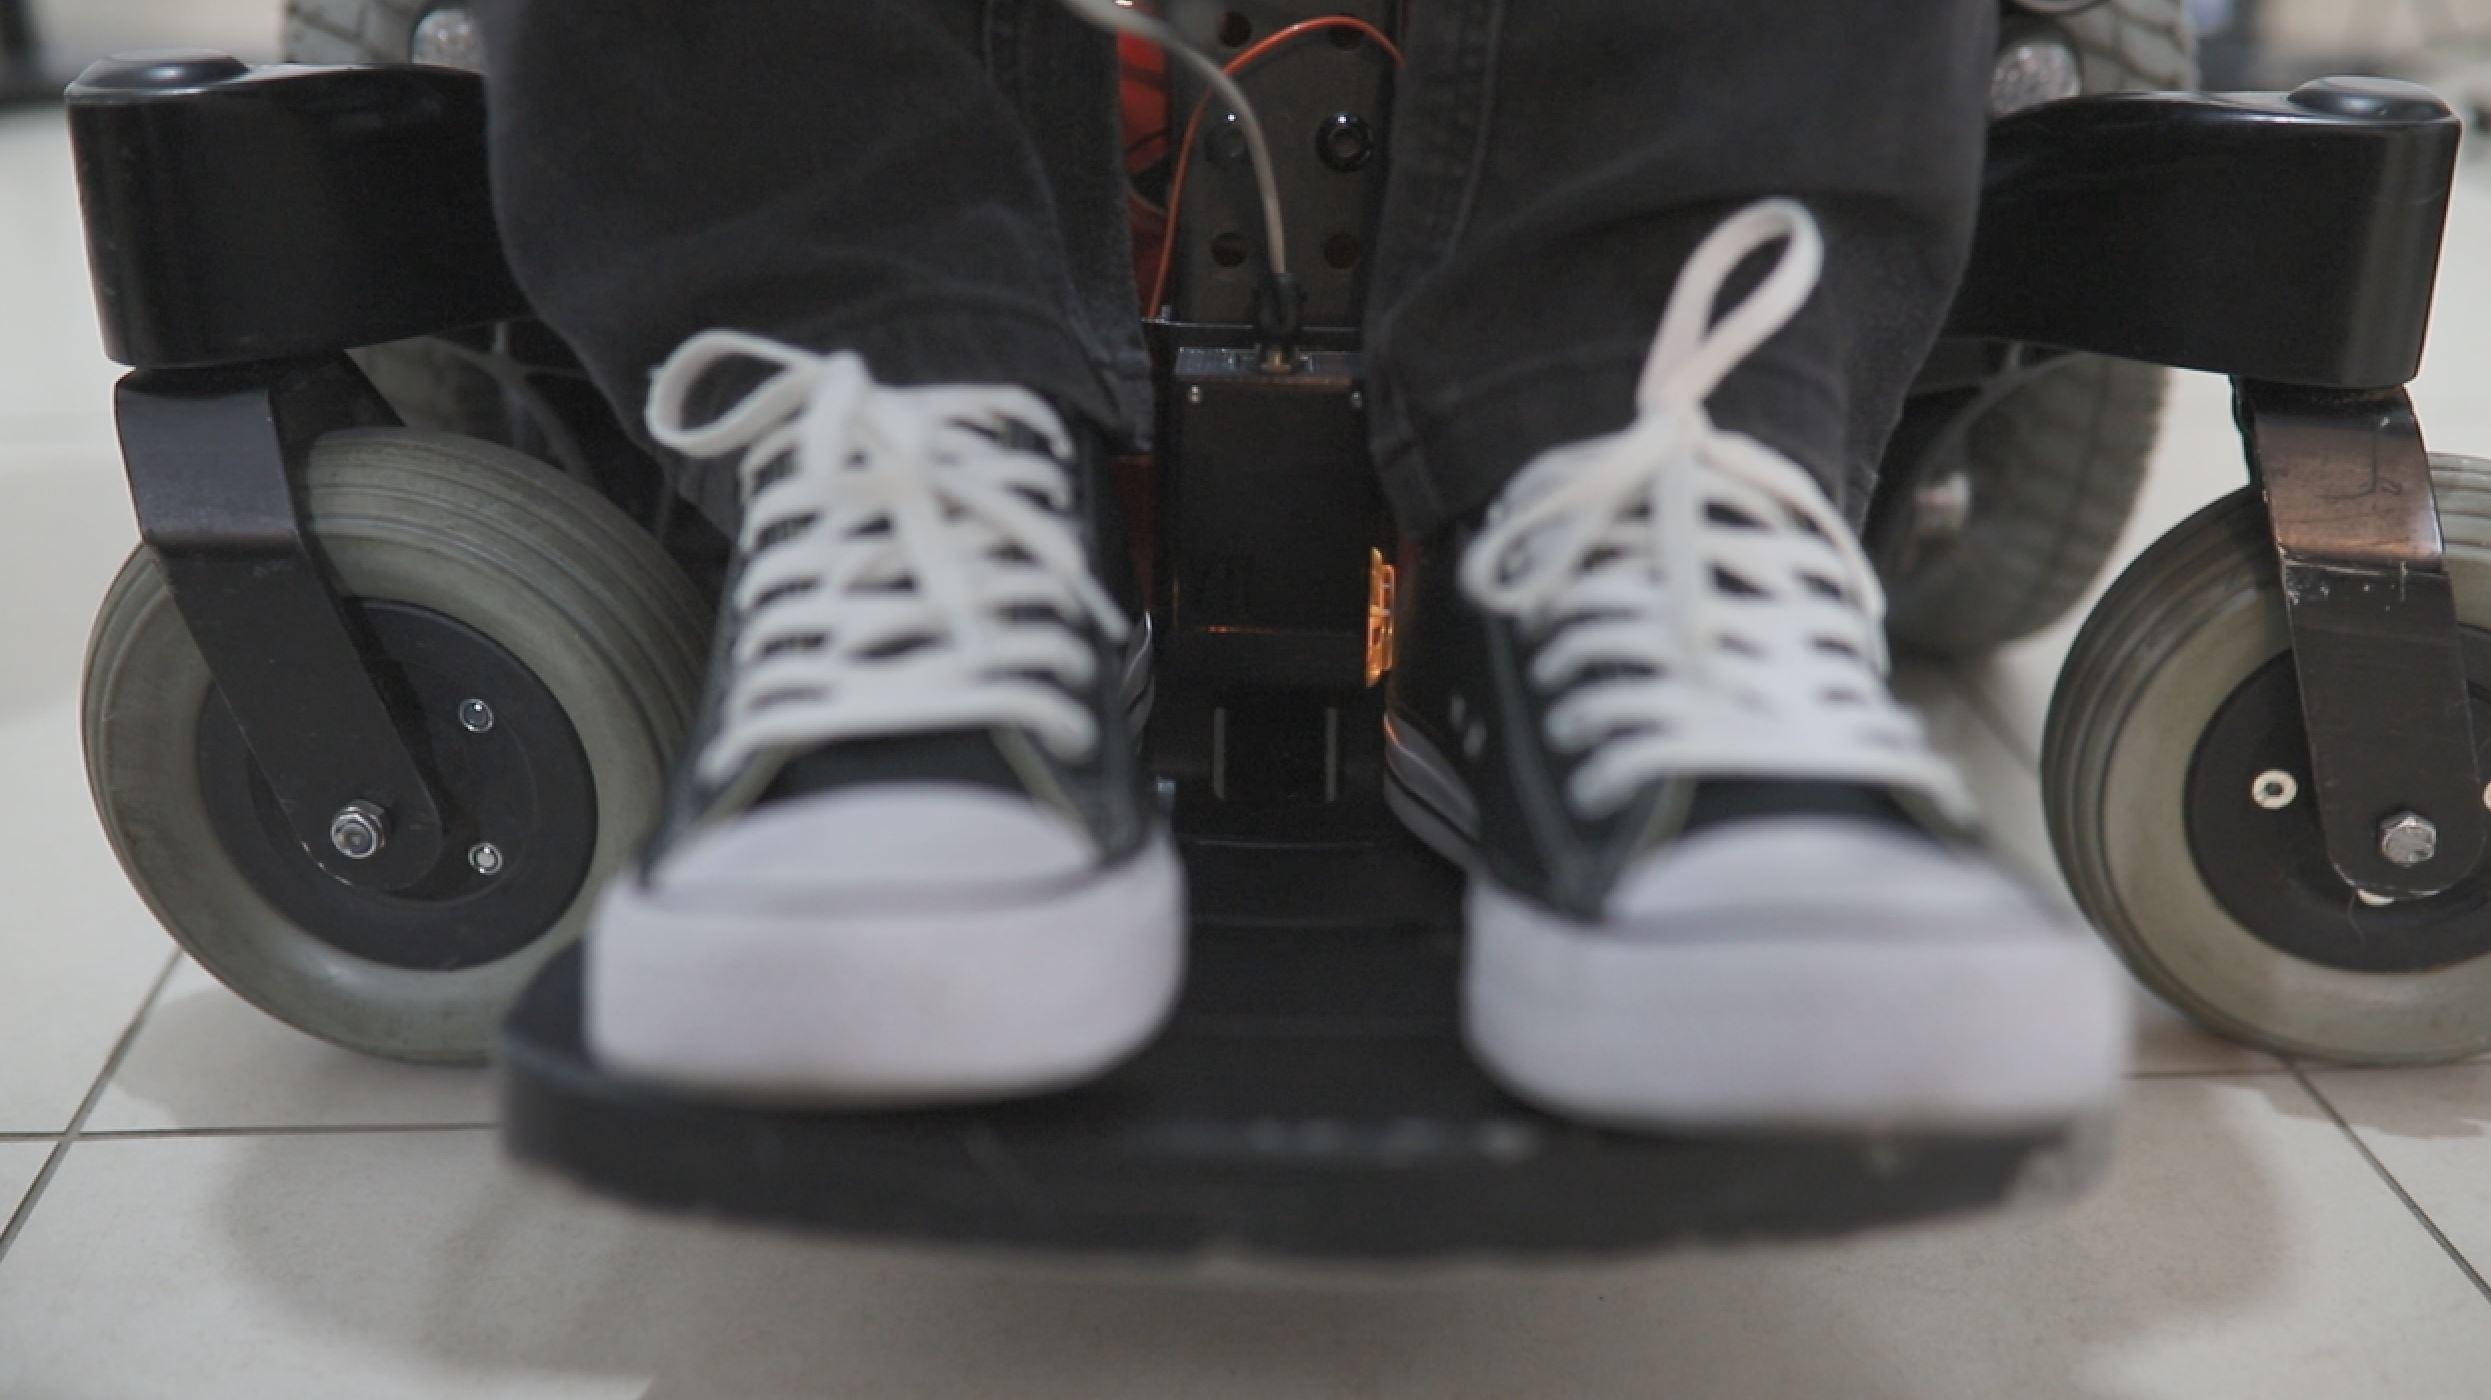
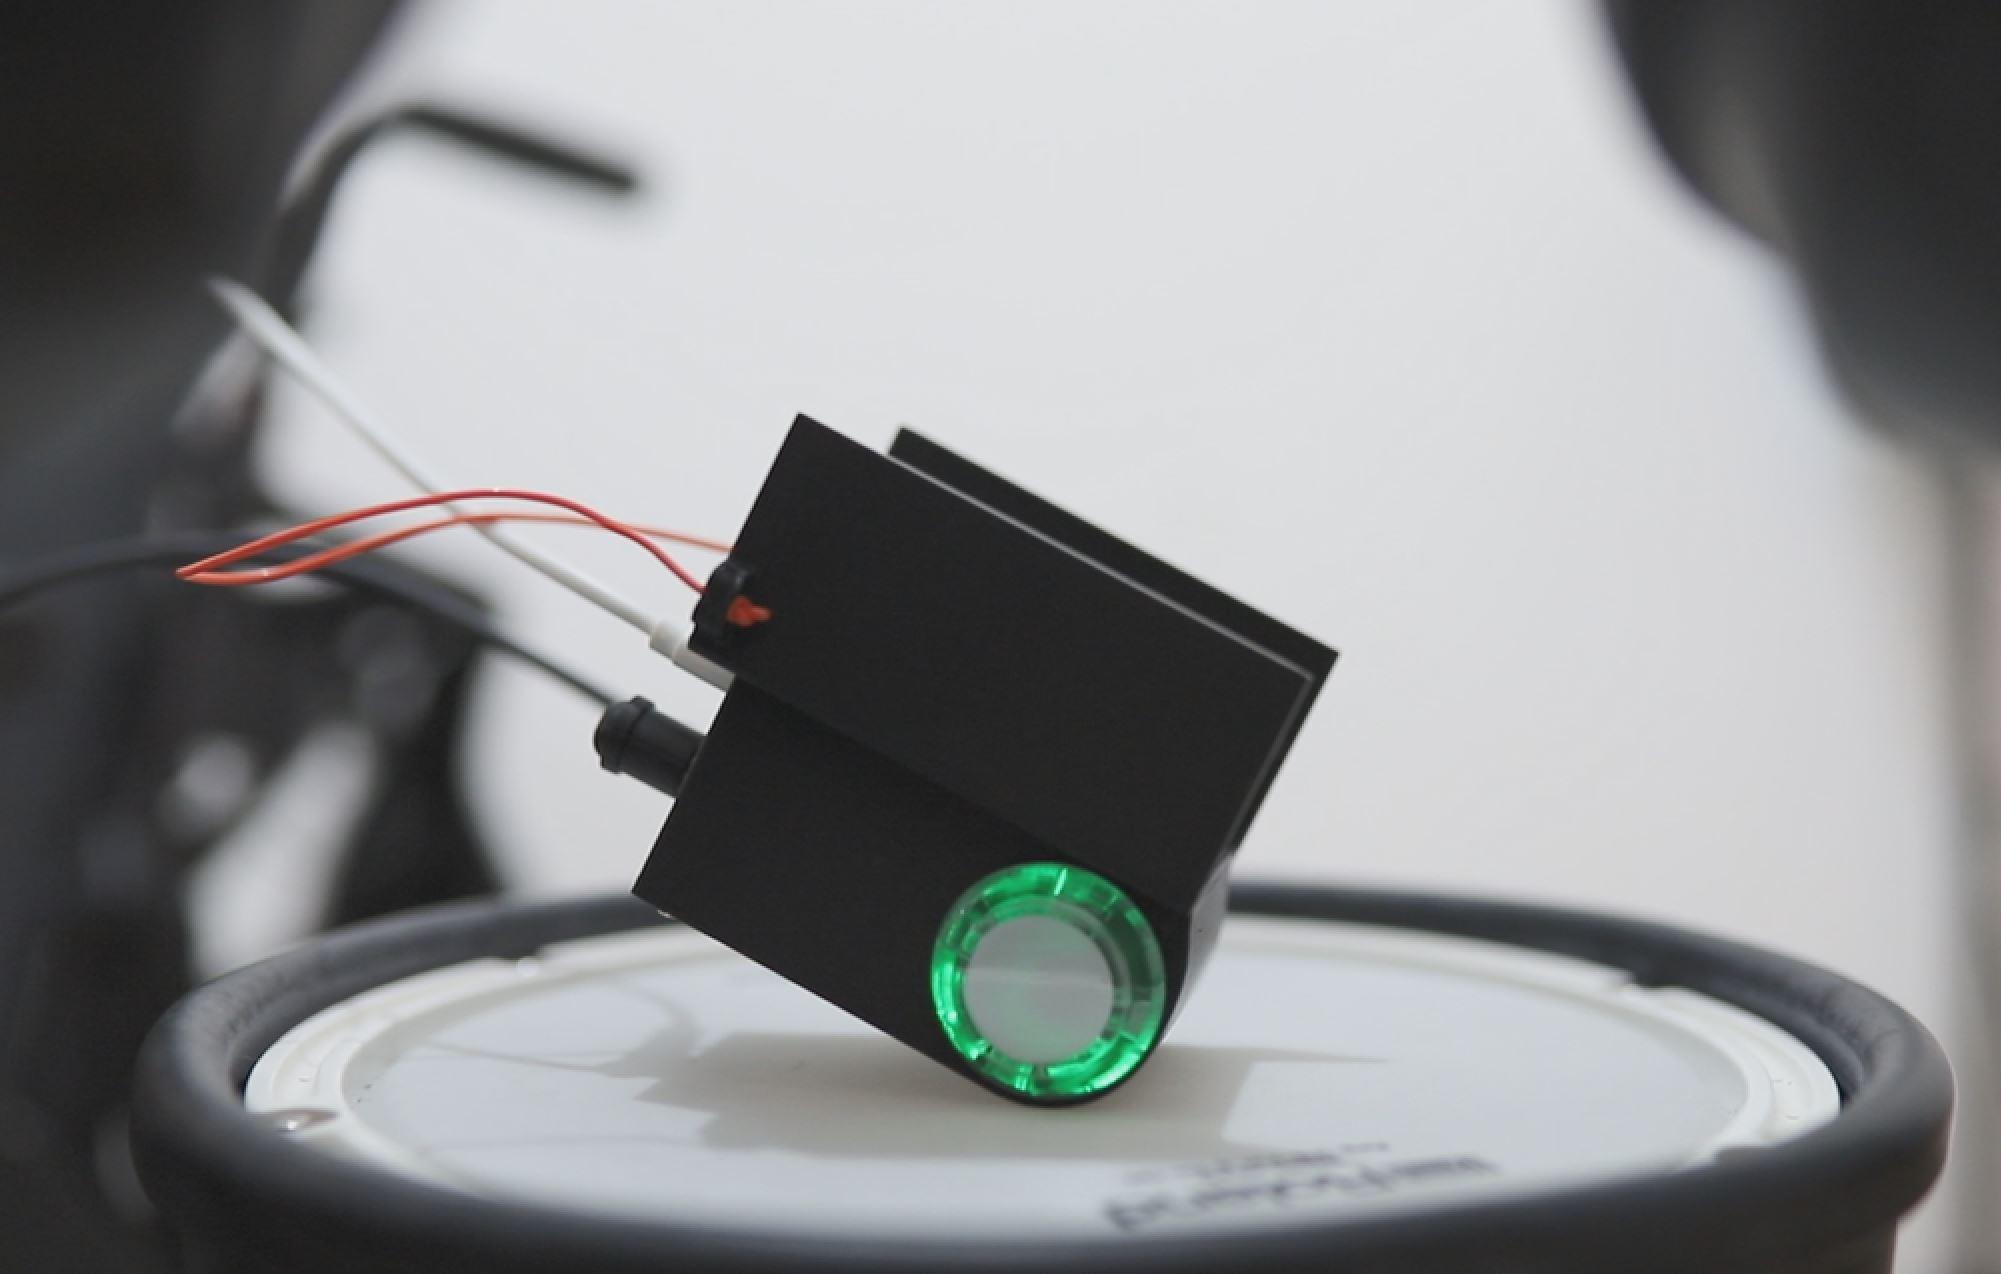
Connect to Drums!
Connect the device straight to the electronic drum kit using the female PL connector and the micro usb to a charger, and you are ready to play!