Lenovo Y700 Unlocking NVMe Gen3 Speeds
by PacoG21 in Circuits > Software
8735 Views, 0 Favorites, 0 Comments
Lenovo Y700 Unlocking NVMe Gen3 Speeds

After a Little research on the topic I found that the Lenovo Y700 is factory set to Nvme gen 2 speeds. A simple google search and you can find various explanations for why thta is. My conclusion is that Lenovo sets it to Gen2 speeds to conserve battery life a little better but in doing so you sacrifice Gen3 Nvme speeds.
So, since you cant change to gen3 using any type of bios update that i know of yet. I had to dig a little deaper into the subject.
I found a bios tool called Insyde H2OUVE. this software is a bios binary editor. more about this software here
https://www.insyde.com/press_news/press-releases/i...
So lets get this tutorial started!
WARNING I DO NOT HOLD MYSELF RESPONSIBLE FOR ANY DAMAGES THAT CAN OCCUR USING THIS GUIDE. PLEASE MAKE THE FOLLOWING CHANGES IN THE BIOS AT YOUR OWN RISK.
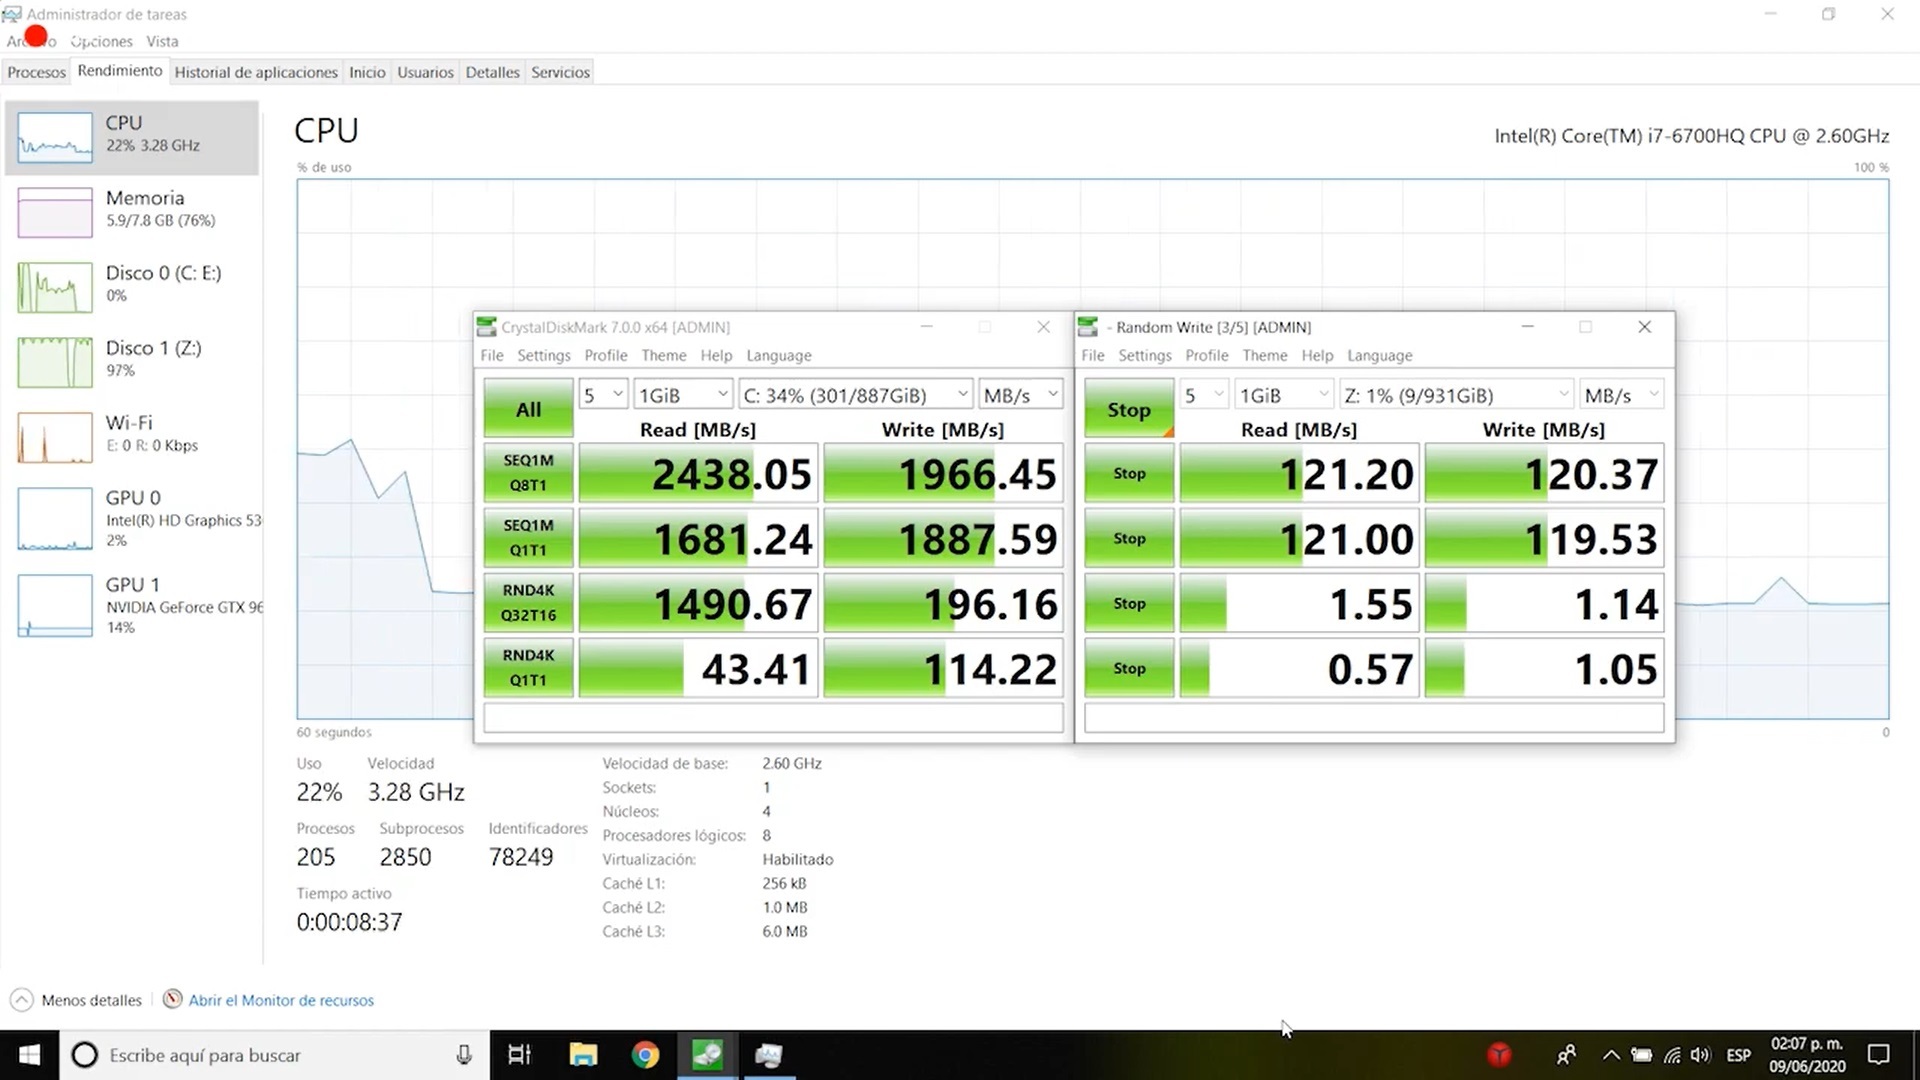
RUN A BENCHMARK TO SEE WHERE YOU SIT IN THE NVME SPEEDS AND TAKE NOTE SO YOU CAN RUN ANOTHER AFTER YOU CHANGE THE BIOS CAP
Supplies
- Nvme M.2 istallled in machine
- crystal disk mark benchmarking to test speeds before and after the bios change
- Insyde H2OUVE
Run H2ouve Software Using Command Prompt
DISABLE ANTIVIRUS INLCUDIING WINDOWS DEFENDER BECAUSE WINDOWS WILL THINK H2OUVE TOOL IS MALWARE.
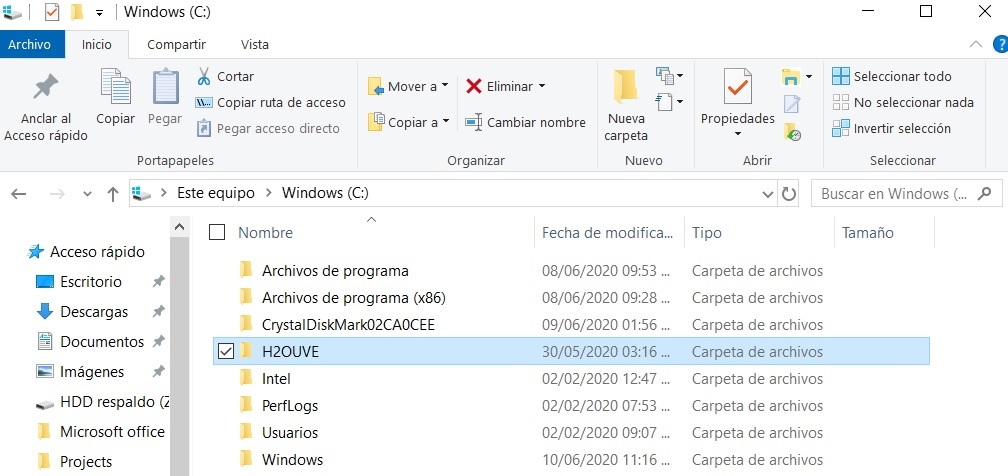
Extract the archive H2OUVE.rar directly on the Desktop and copy the H2OUVE folder directly on the disk C:\
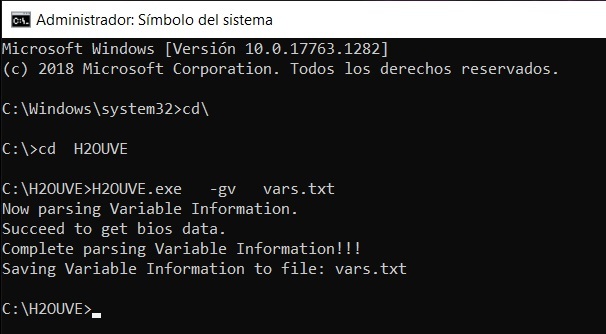
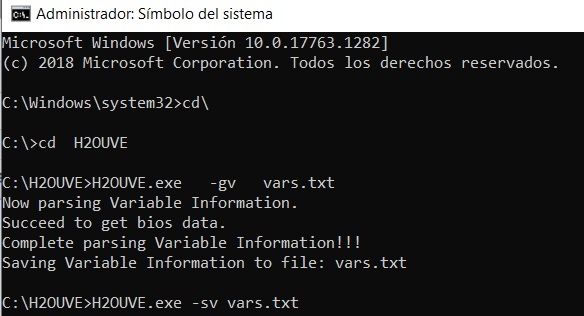
Then run the Command prompt as Administrator and execute these commands:
cd \
cd H2OUVE
H2OUVE.exe -gv vars.txt
After each command press the Enter button.
After that, you'll have the file "vars.txt" in H2OUVE folder.
DO NOT CLOSE COMMAND PROMPT YET
Edit the Variable File
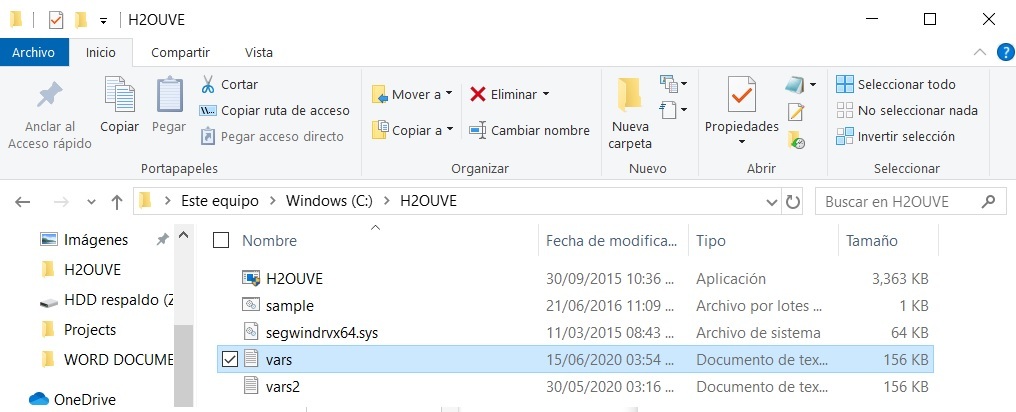
in the C:\ drive where you placed the HOUVE folder there should now be a file called "vars"
Using
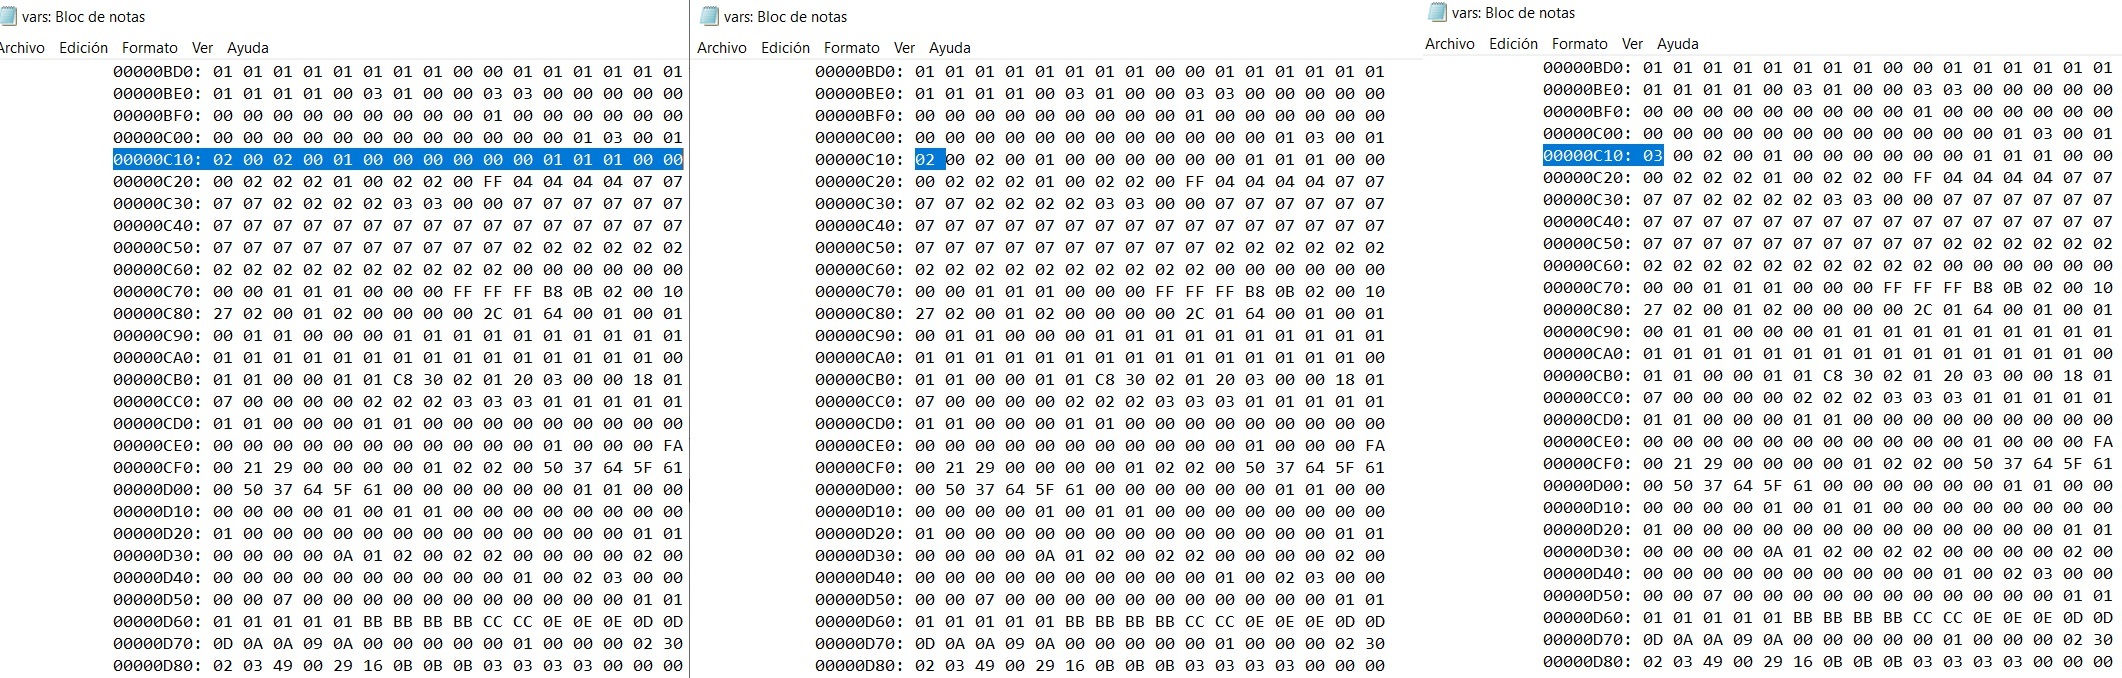
notepad search for "00000C10: 02" verify that it is located in the setup section.
"Setup"
GUID: A04A27F4-DF00-4D42-B552-39511302113D
Attributes: 0x7
DataSize: 0xFA0
This section is near the end of the extracted variable file
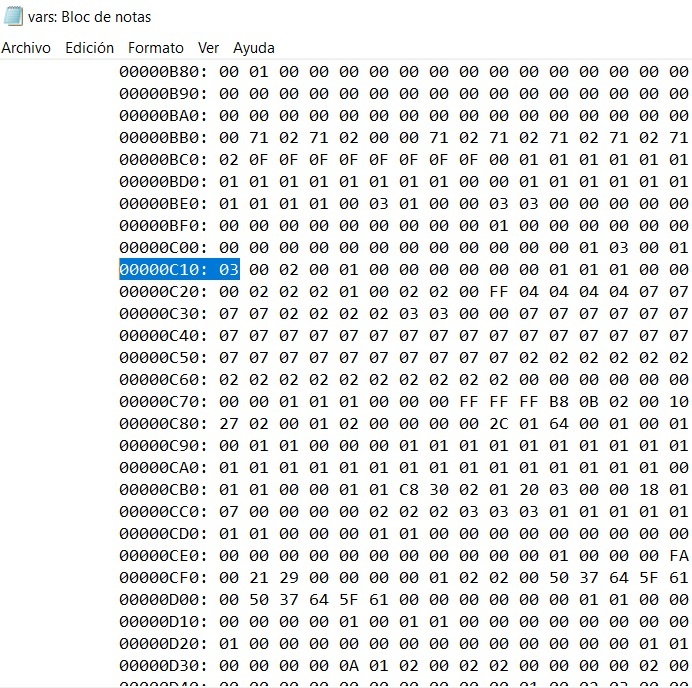
Edit so that it reads "00000C10: 03" DO NOT CHANGE ANYTHING ELSE you have been warned.
save the file
NOTE:
00000C10: 02 is PCi2 Gen2 Nvme speeds changing it to 03 enables it to run and PCi3 Gen 3 speeds. for what i know the lenovo y700 cant be changed to Gen 4 speeds so changing it 04 wont do anything and you run the risk of corrupting the bios
- if you need help changing or figuring out what to change email me the vars file gcmecatronica@gmail.com
Update the Variables
in comand prompt type the following
H2OUVE.exe -sv vars.txt
enter
Some warnings will be show that not all variables could be updated (no choice but to ignore them) lucky that the setup variables was not one of them.
dont close command prompt just yet
Dump the Variables to Confirm That It Was Updated.
in command prompt type the following to check if the bios was updated to Nvme Gen3
H2OUVE.exe -gv vars2.txt
Check that setup variable C10 is now 03, Reboot and enjoy the full performance of your NVMe drive
RUN THE BENCHMARK AFTER REBOOT TO CAMPARE THE RESULTS FORM THE PREVIOUS BENCHMARK.
Finally
no more performance CAP! enjoy.
Also works
for the Y700-17ISK