Lego Attachments: Robocat
by ralphzoontjens in Living > LEGO & K'NEX
1840 Views, 6 Favorites, 0 Comments
Lego Attachments: Robocat
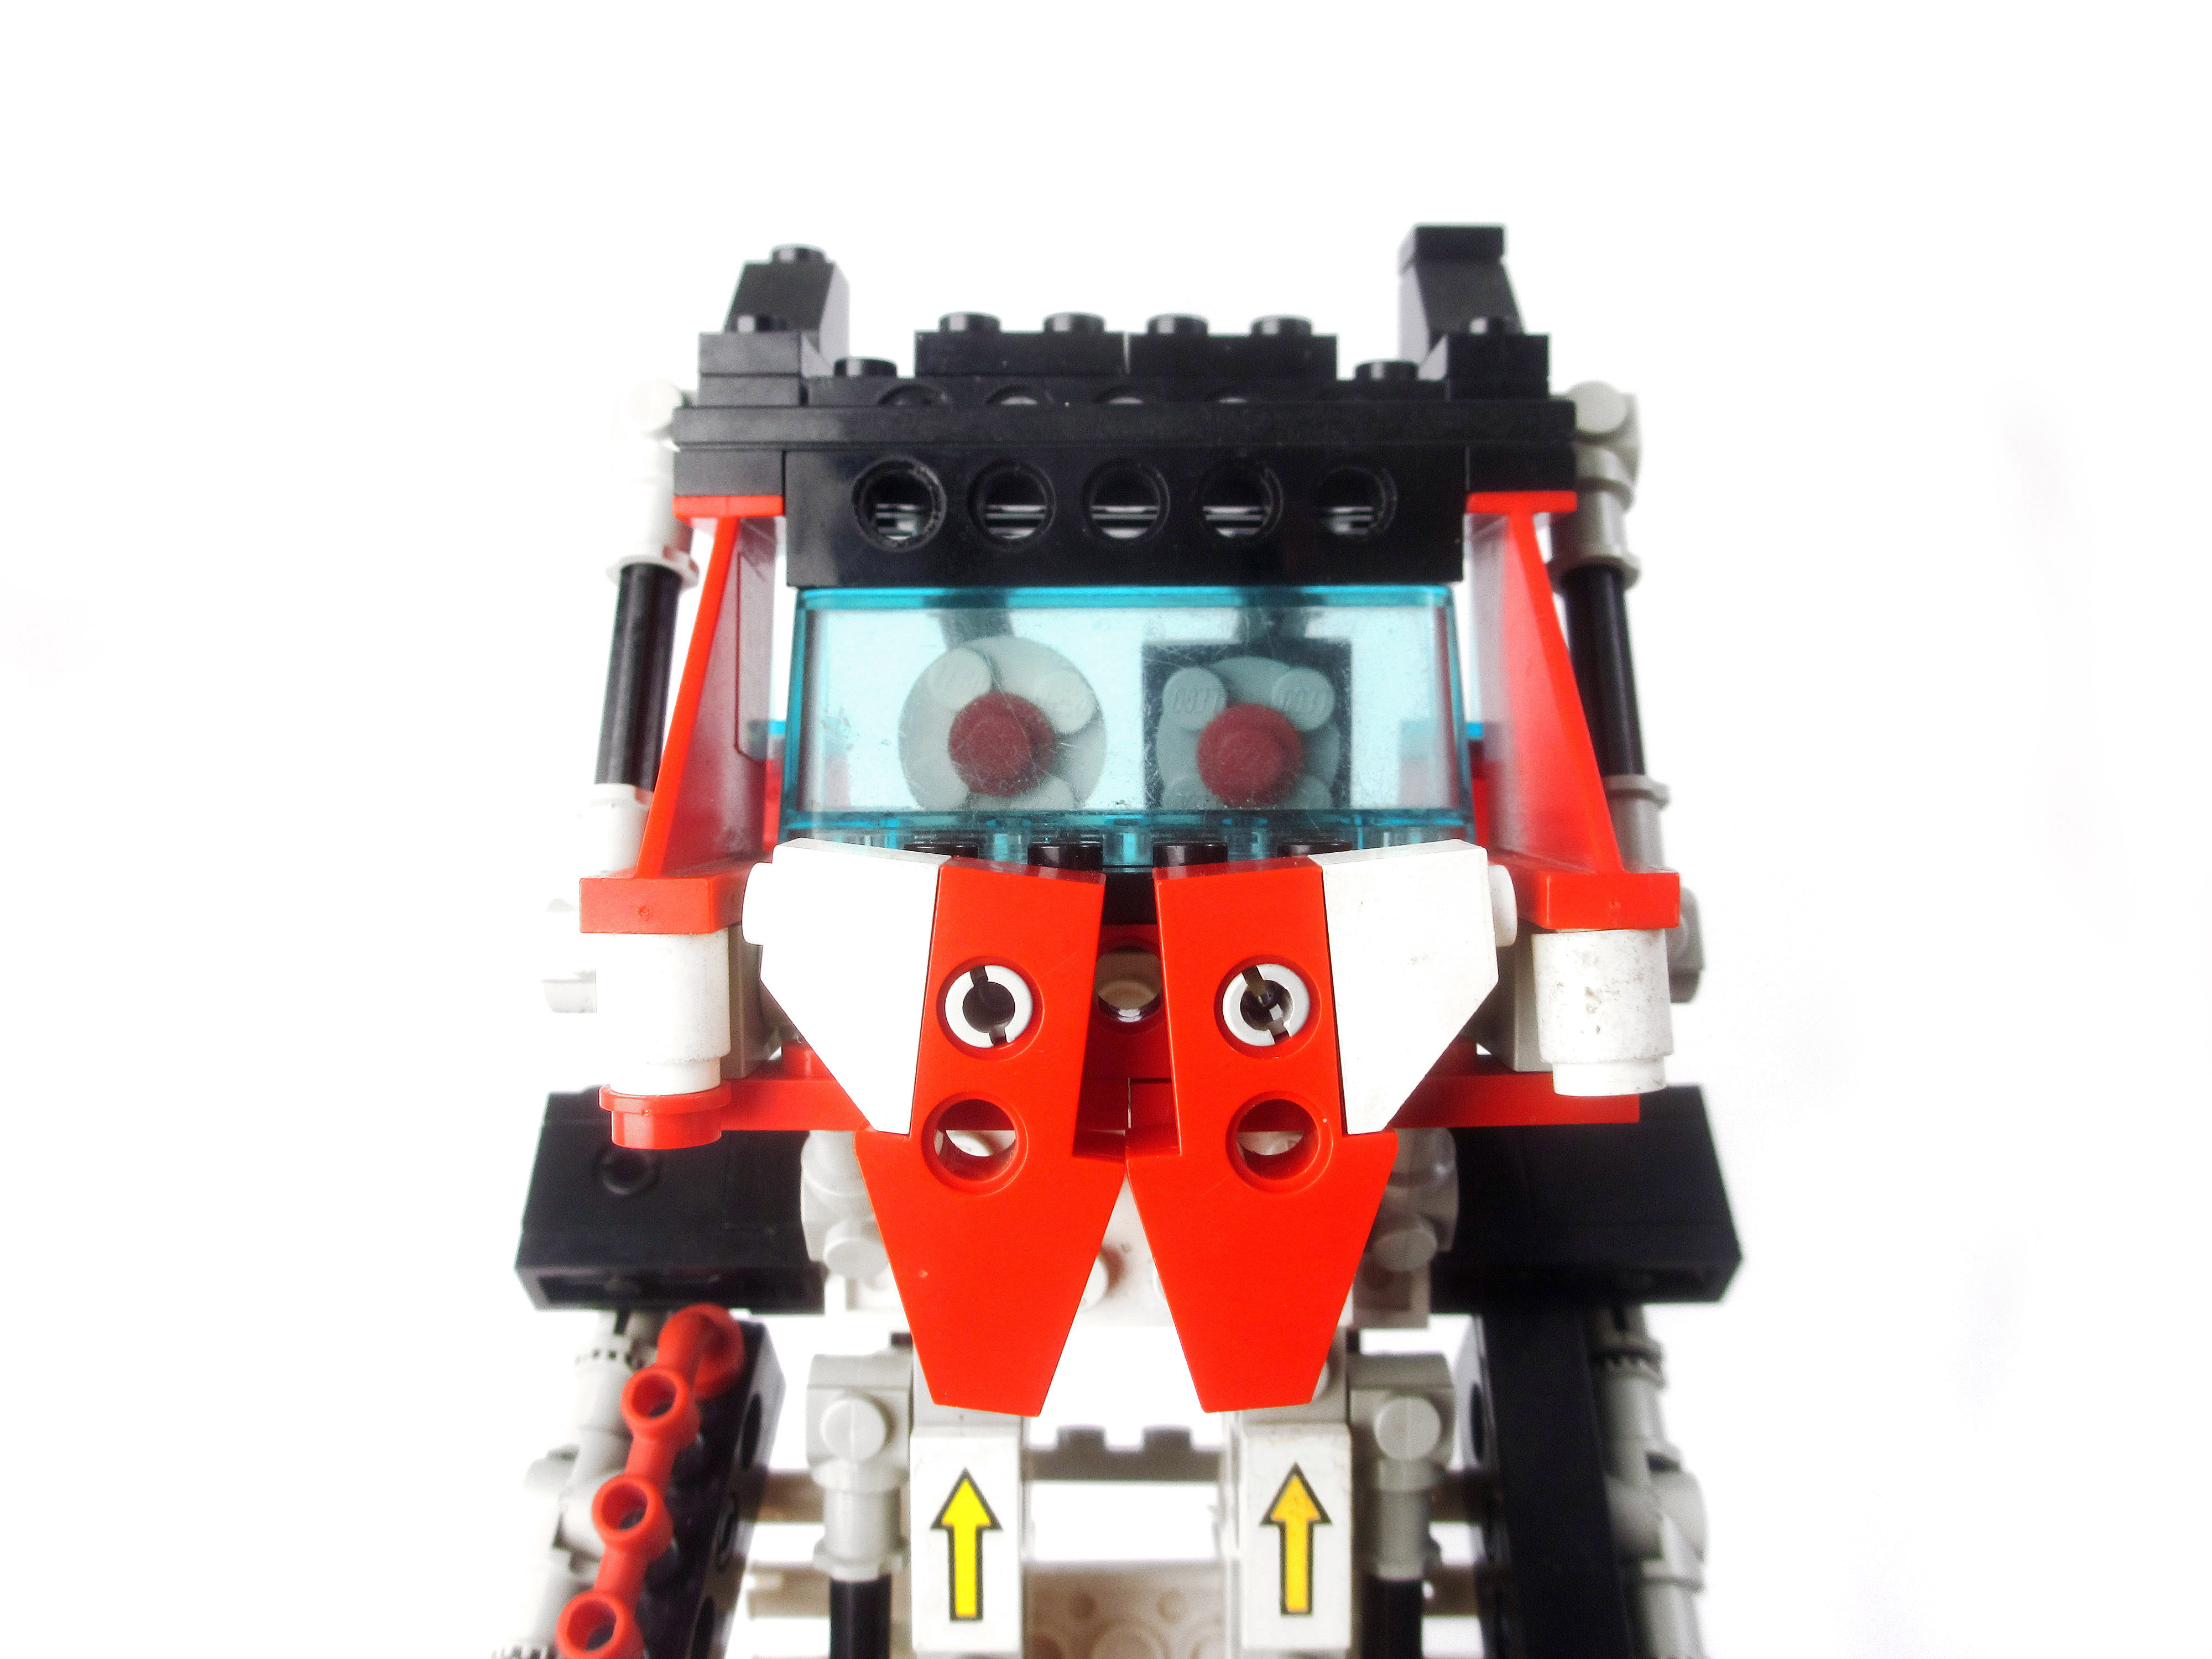
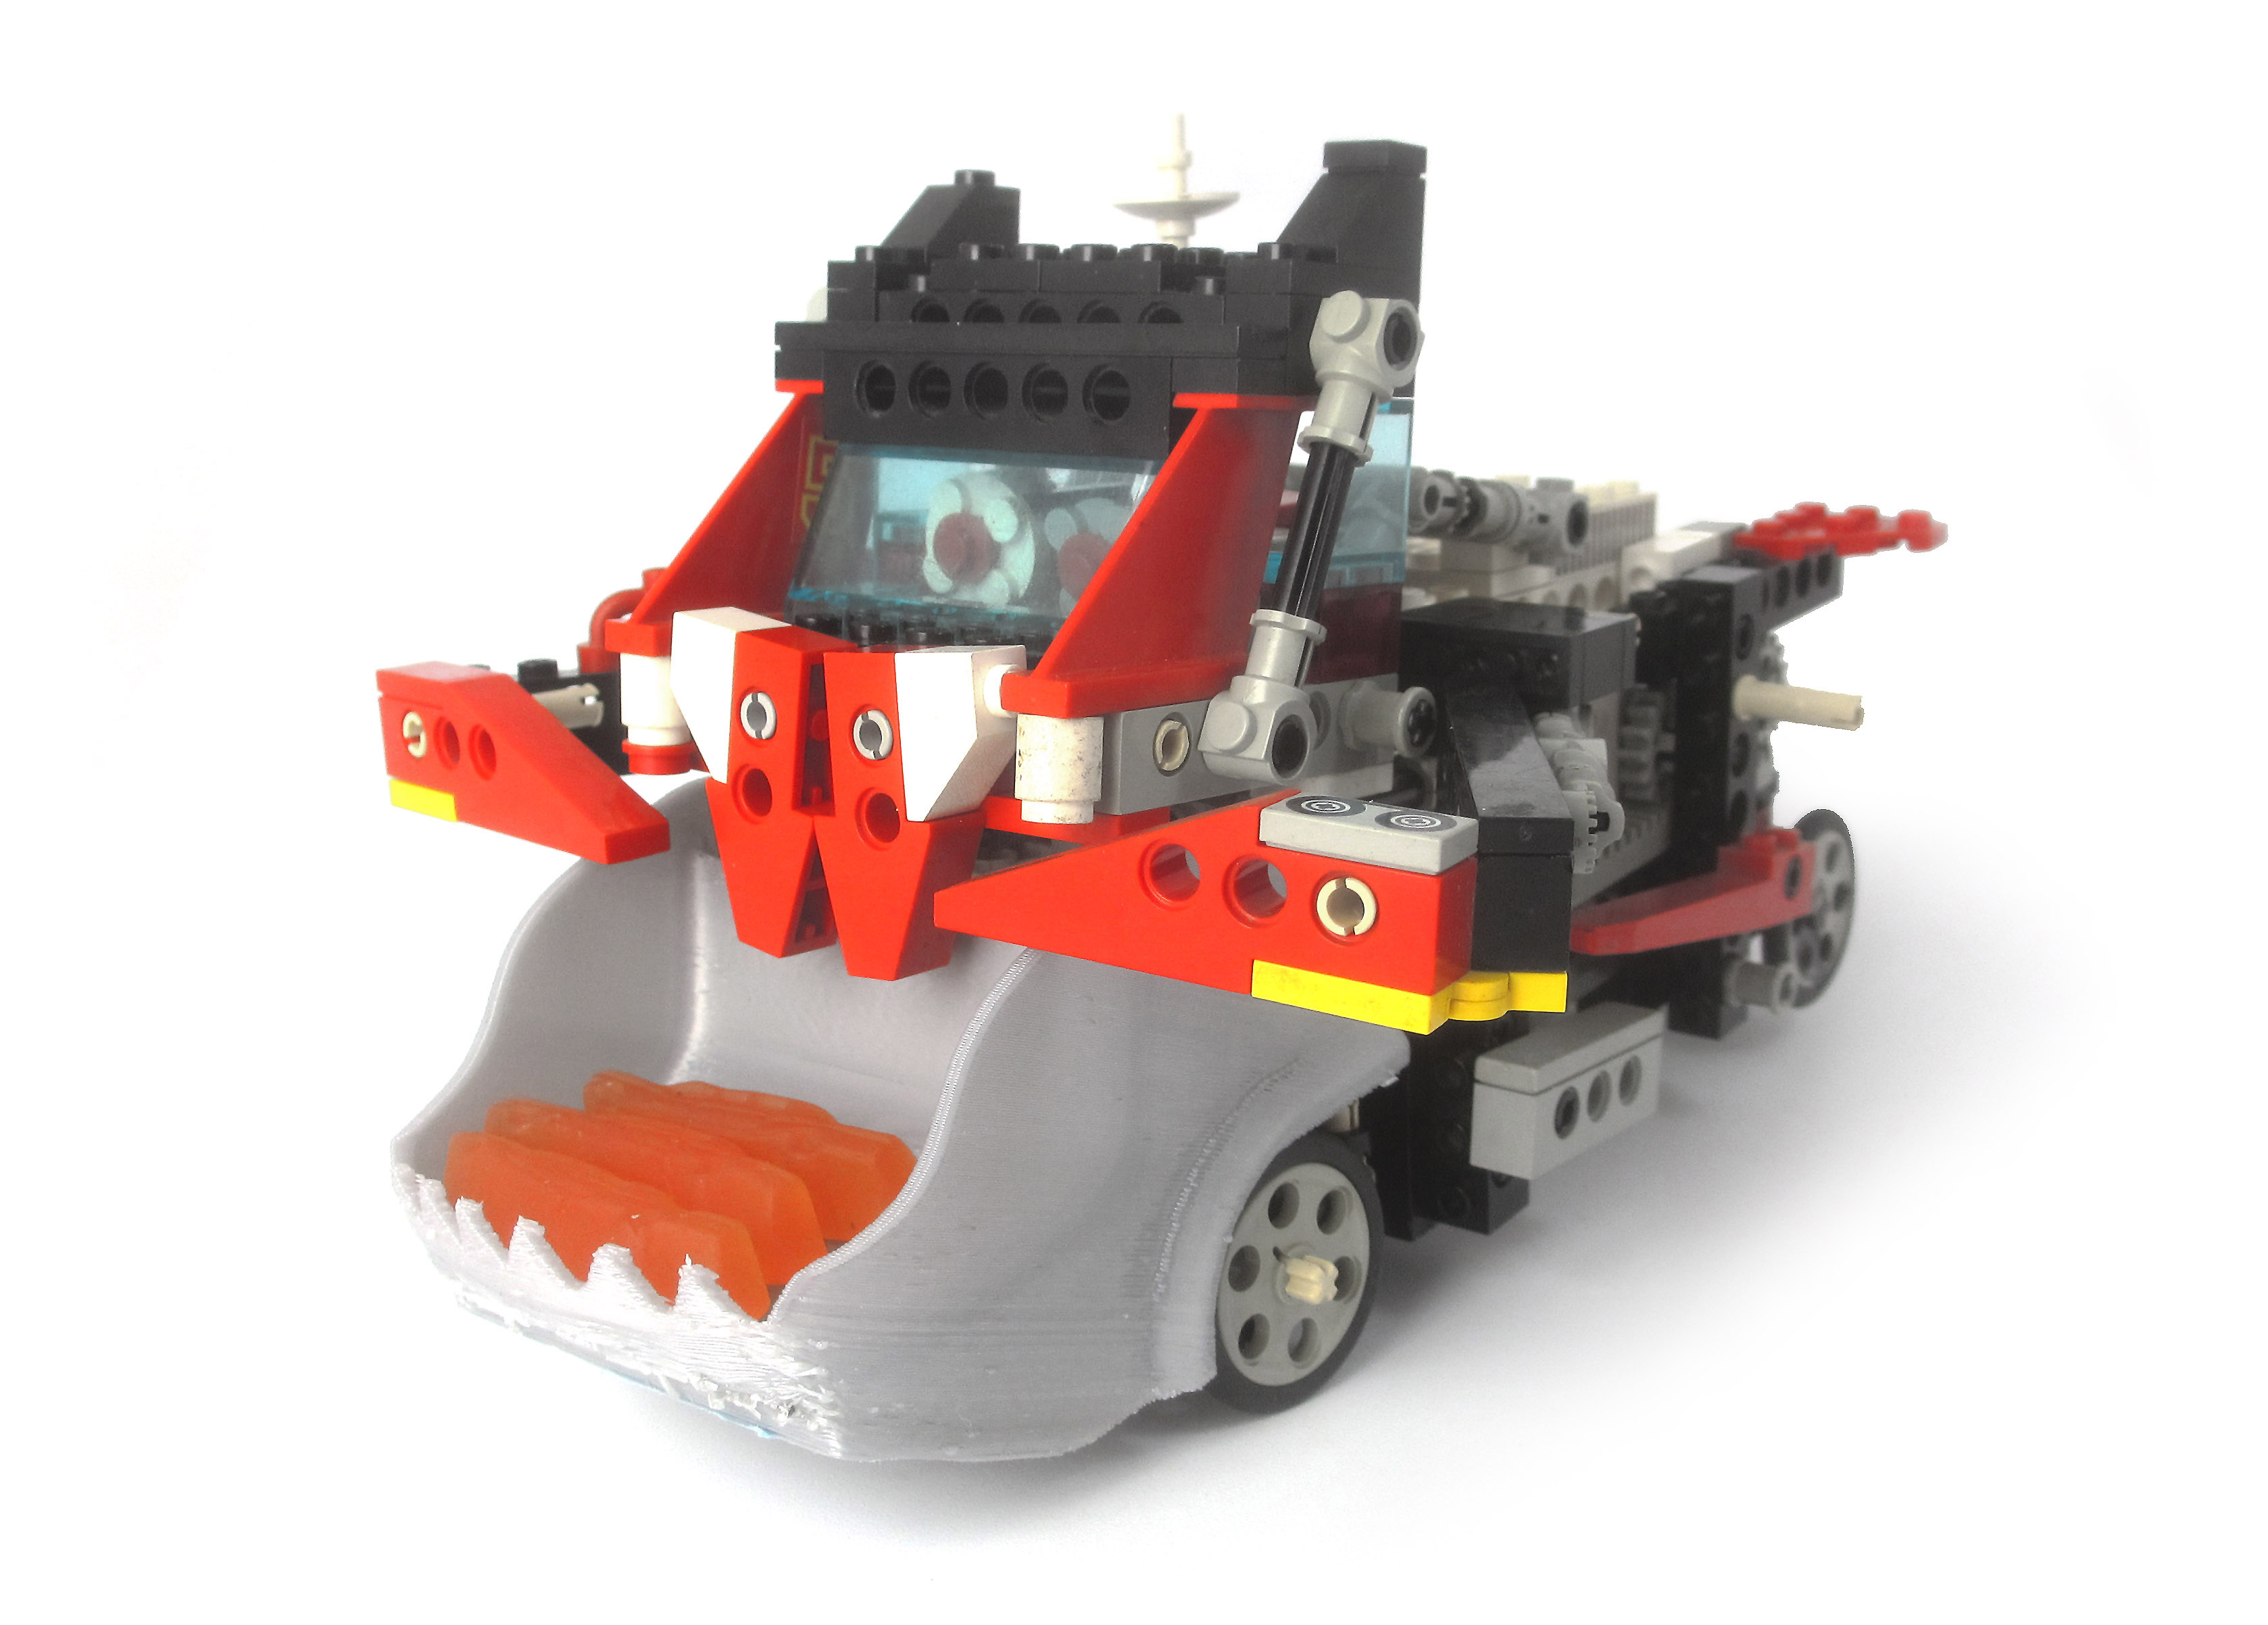
Are you attached to your old Lego sets? Now you can create attachments for these sets using 3D printing!
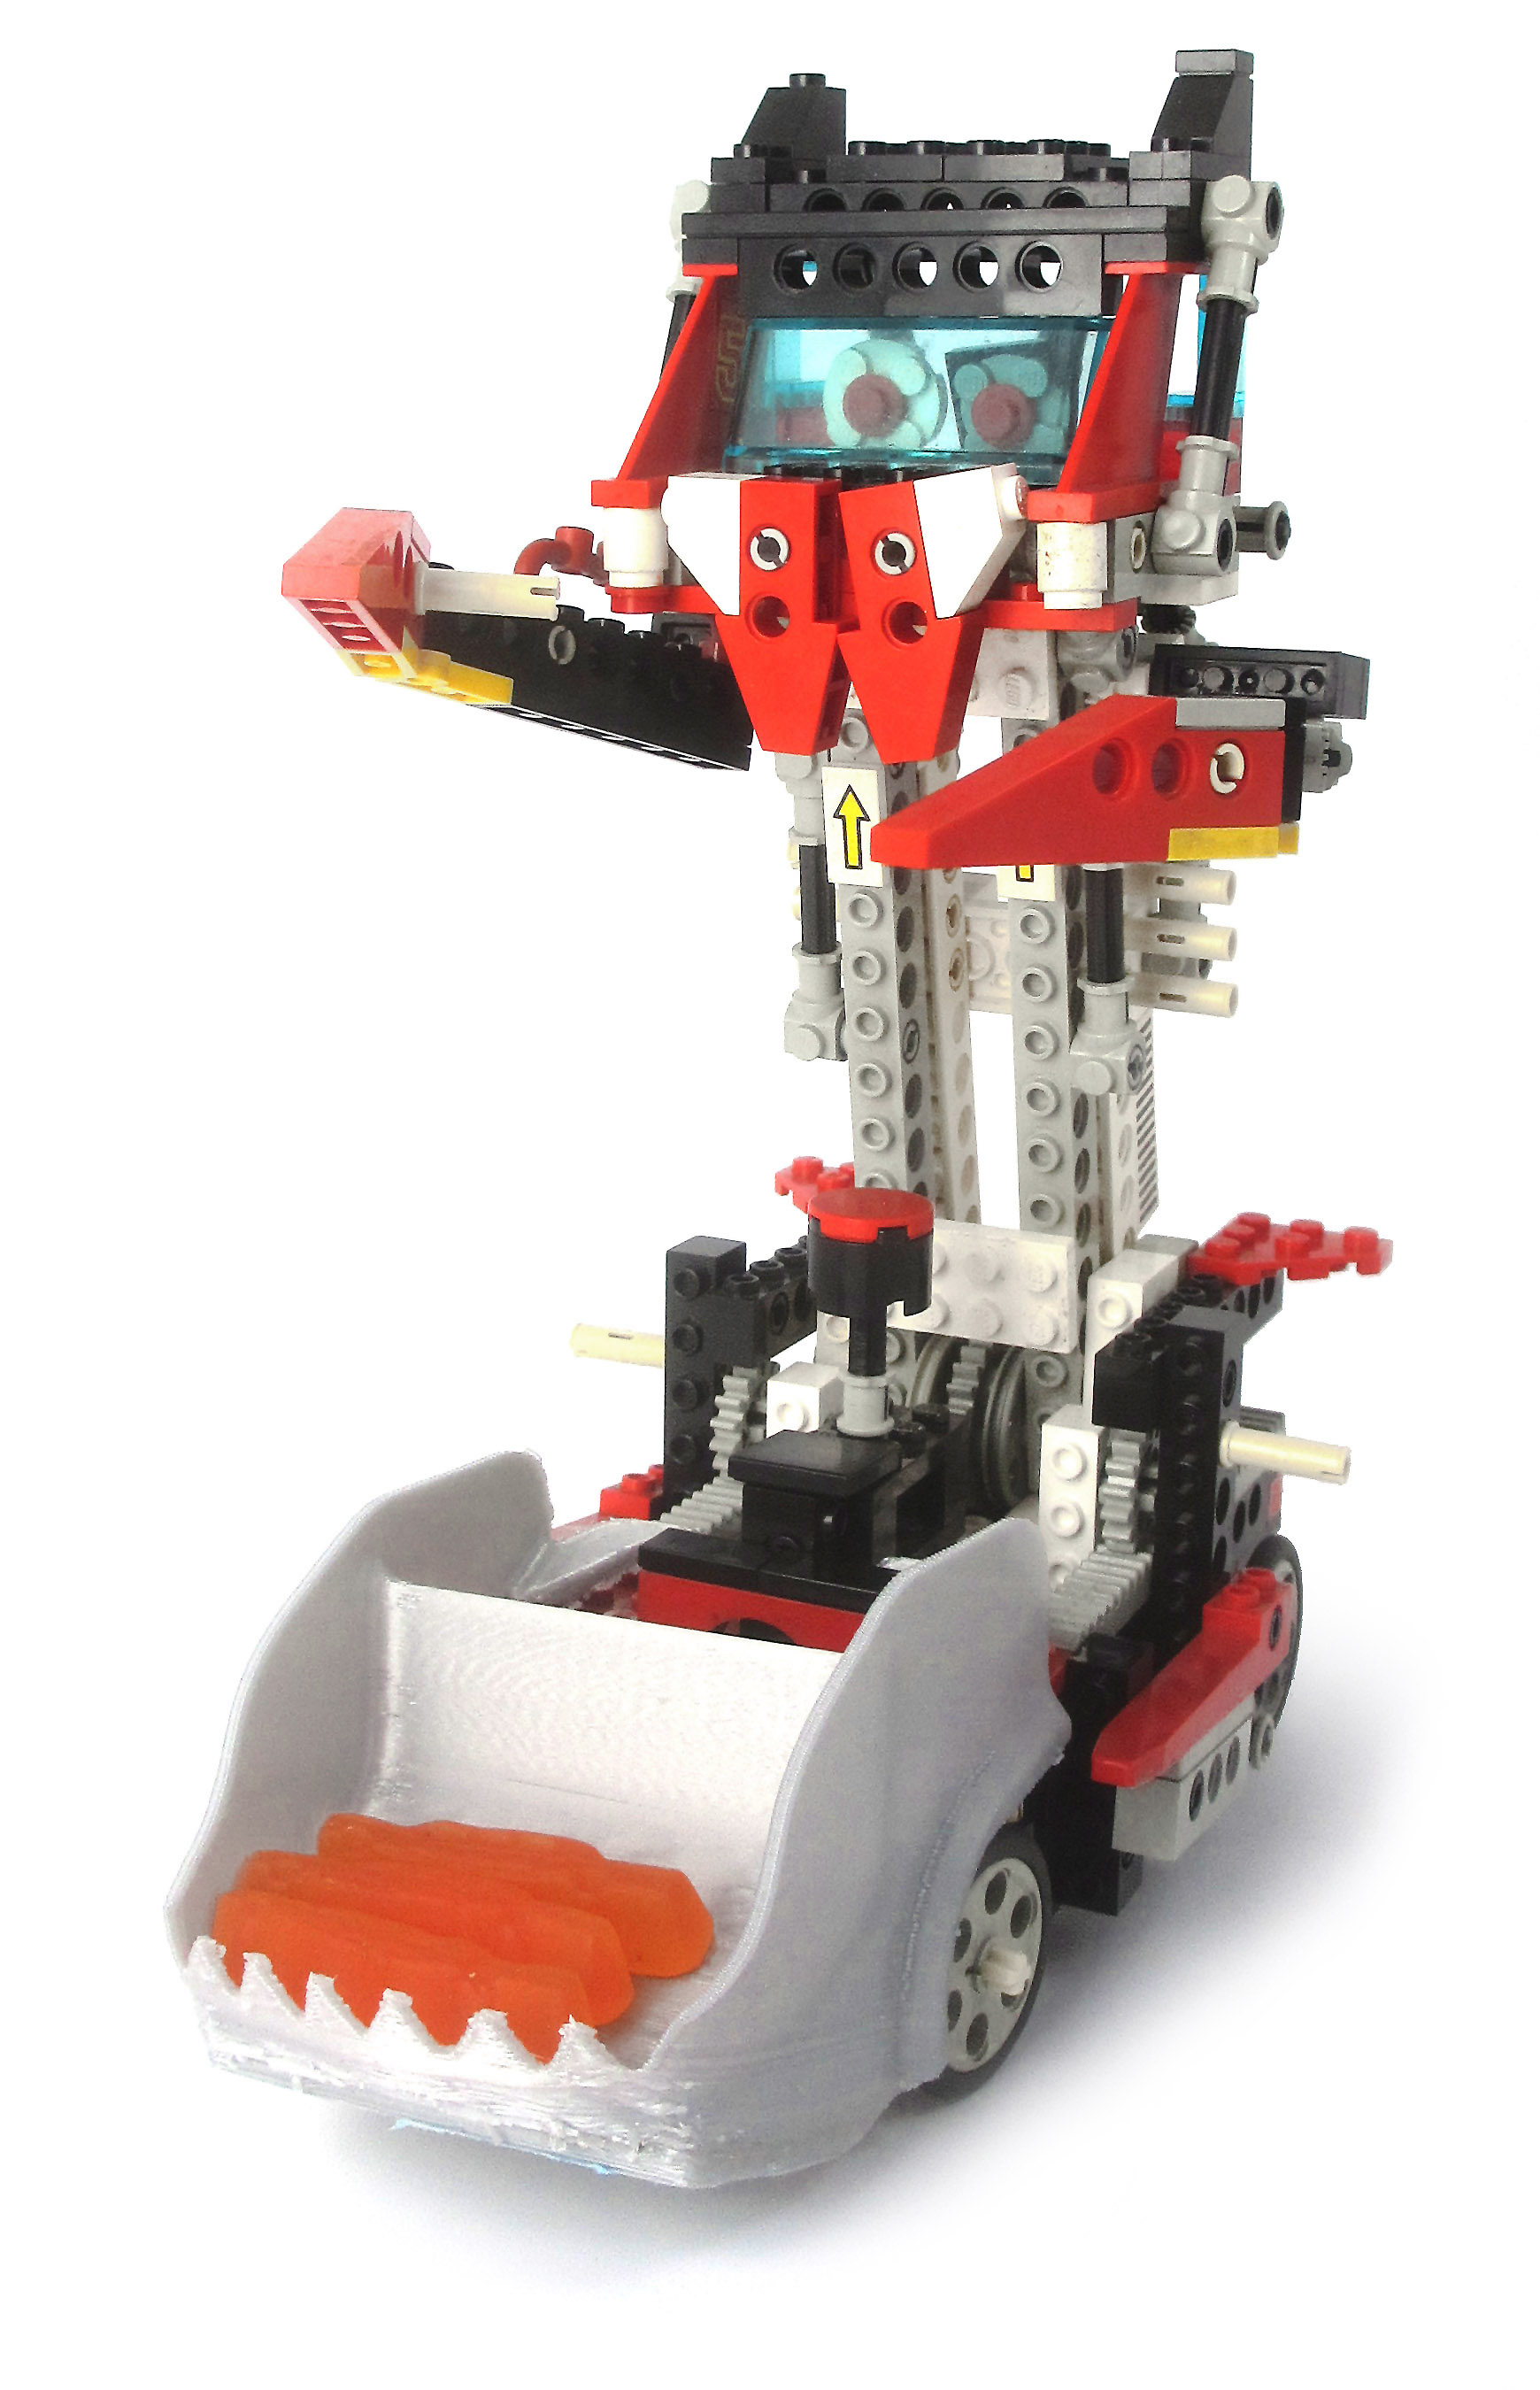
I like the old 1980s and early 90s Lego Technic sets, focused on the mechanical features and using only a basic set of elements to create these. We can now enhance and celebrate our old sets again using our own 3D printer.
The model is based on set 8852, the fantastic Lego Technic robot from 1987, for which the PDF instructions and part list are available here: https://www.toysperiod.com/lego-set-reference/tech...
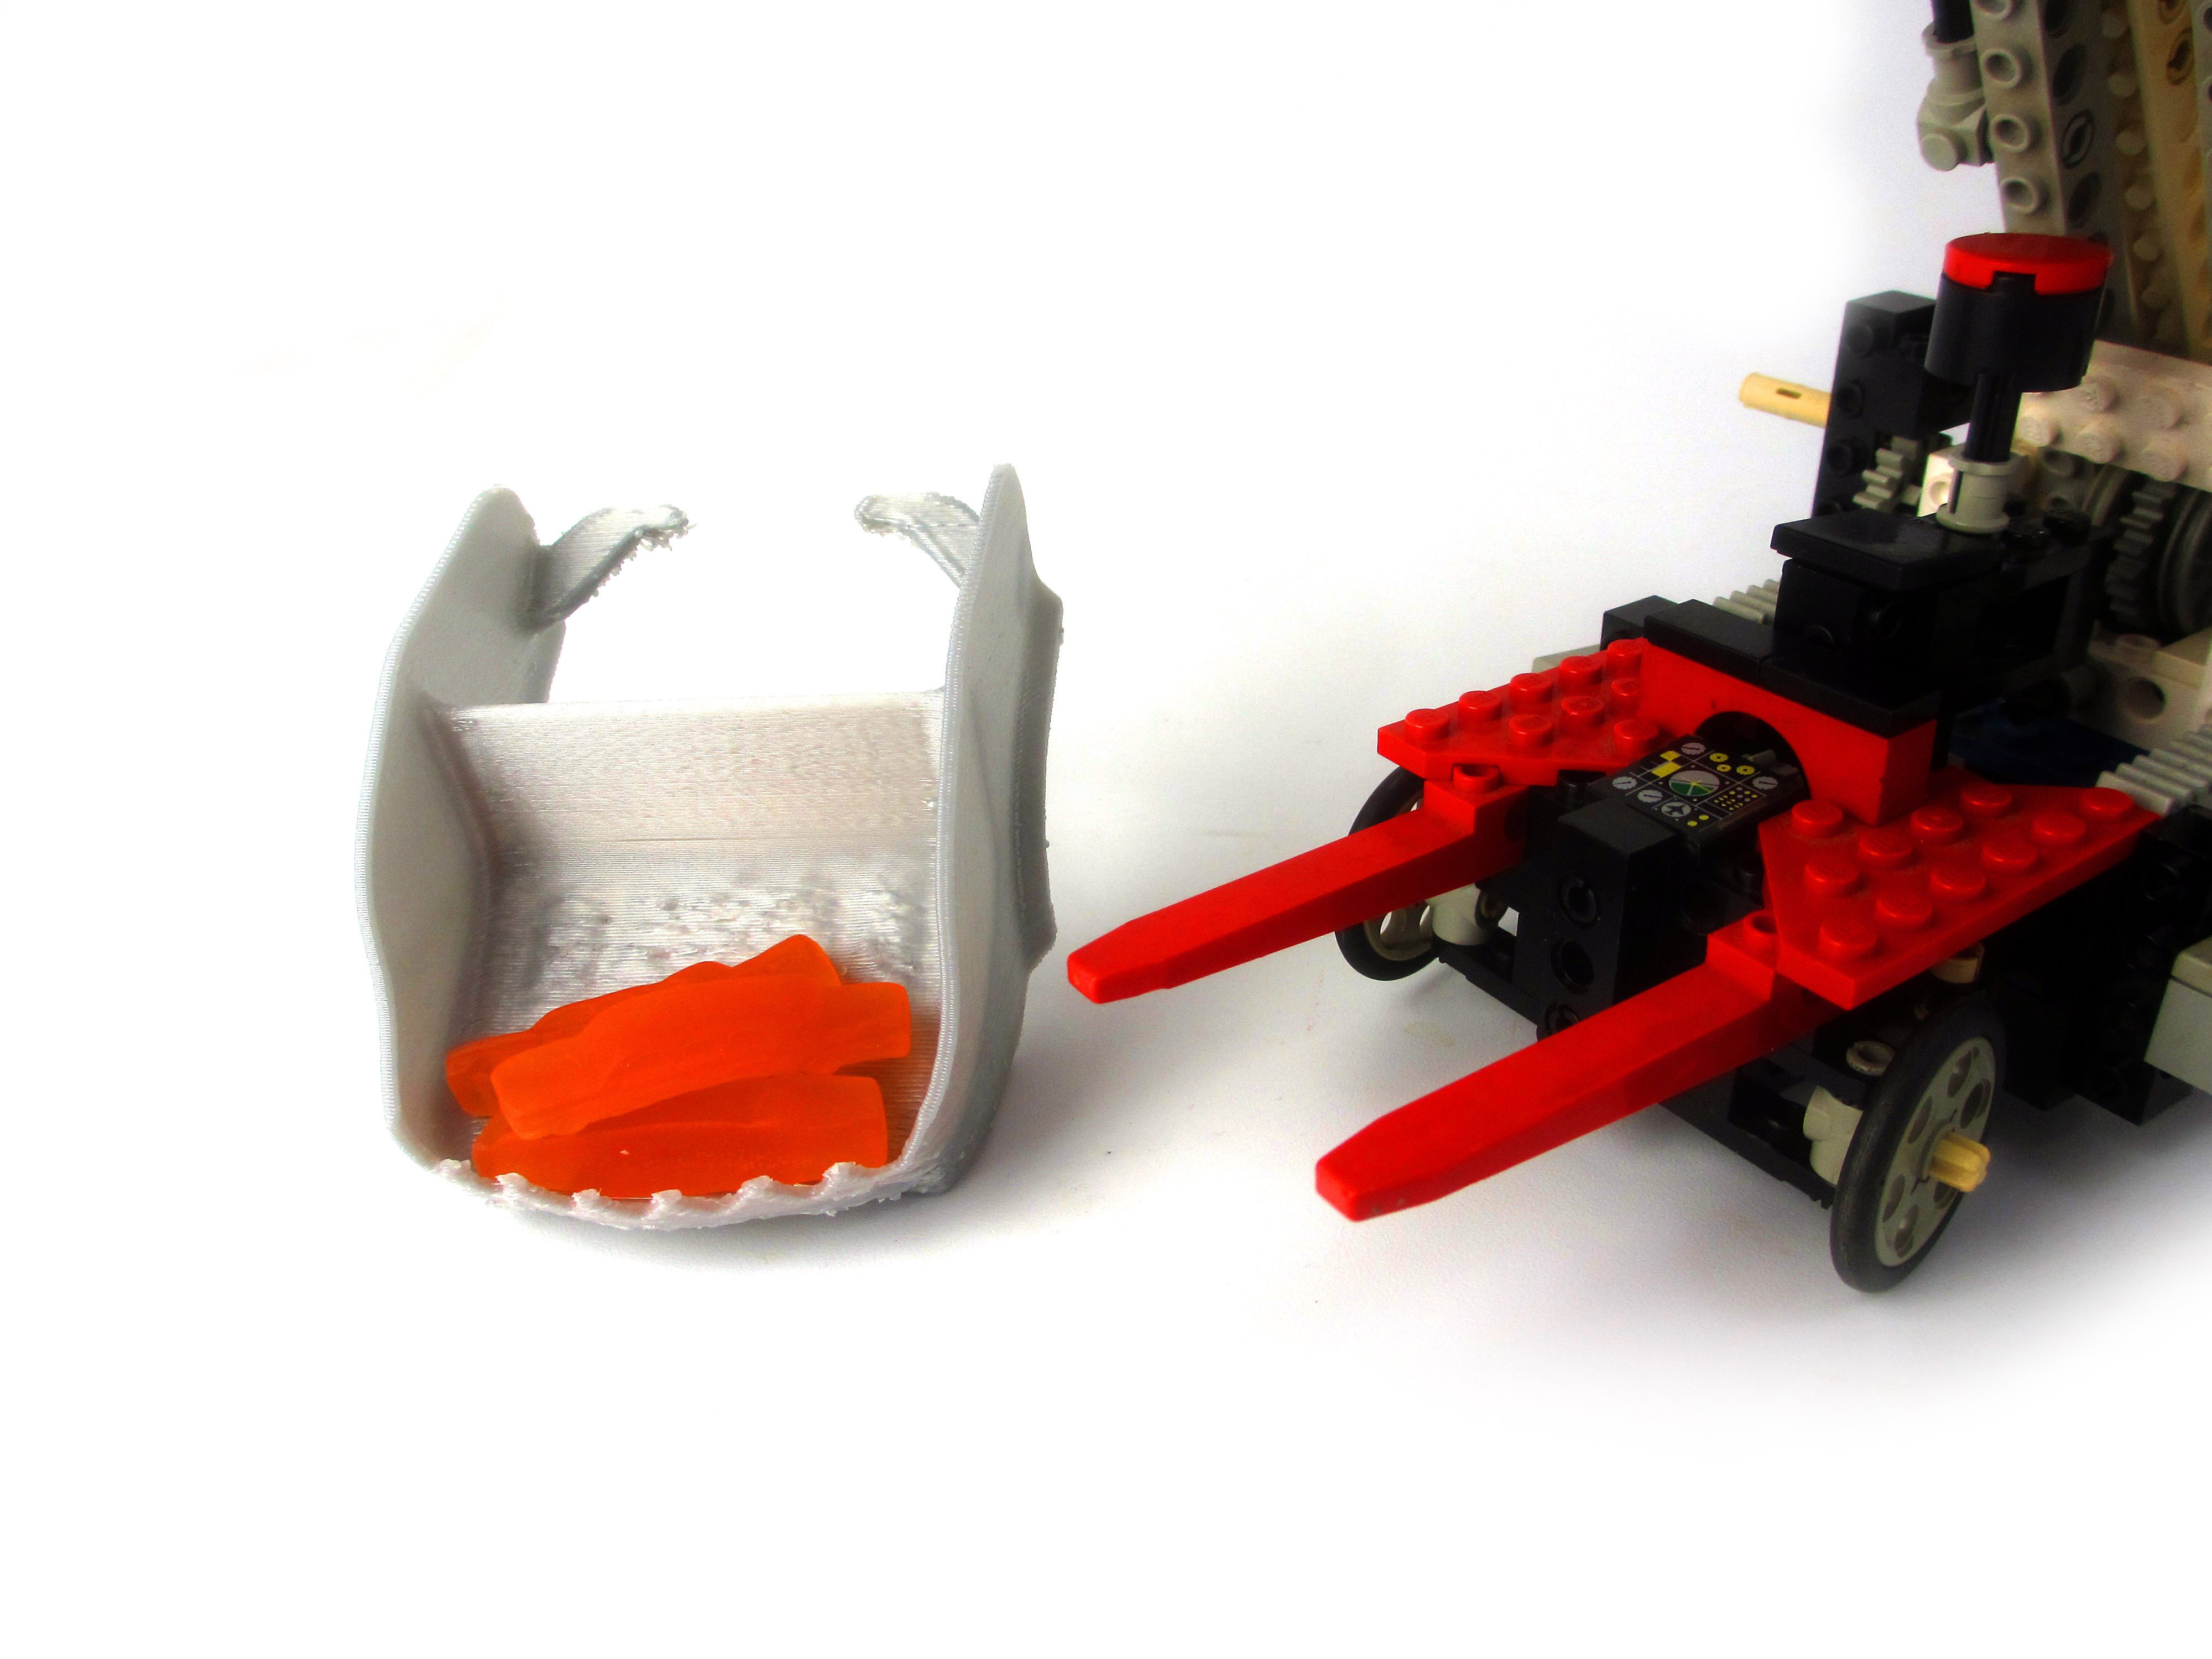
What we will do in this Instructable is model a scoop attachment themed for Halloween that can carry candies.
The part is mounted on the forklift parts from set 8835 and the model is further customized using colors of your choice. The underlying structure is exactly that of set 8852, all the parts transforming it into a frantic vampiric feline zombie are purely cosmetic as you can see.
This Instructable will help you model the attachment with Solidworks.
Modeling the Relevant Lego Structure
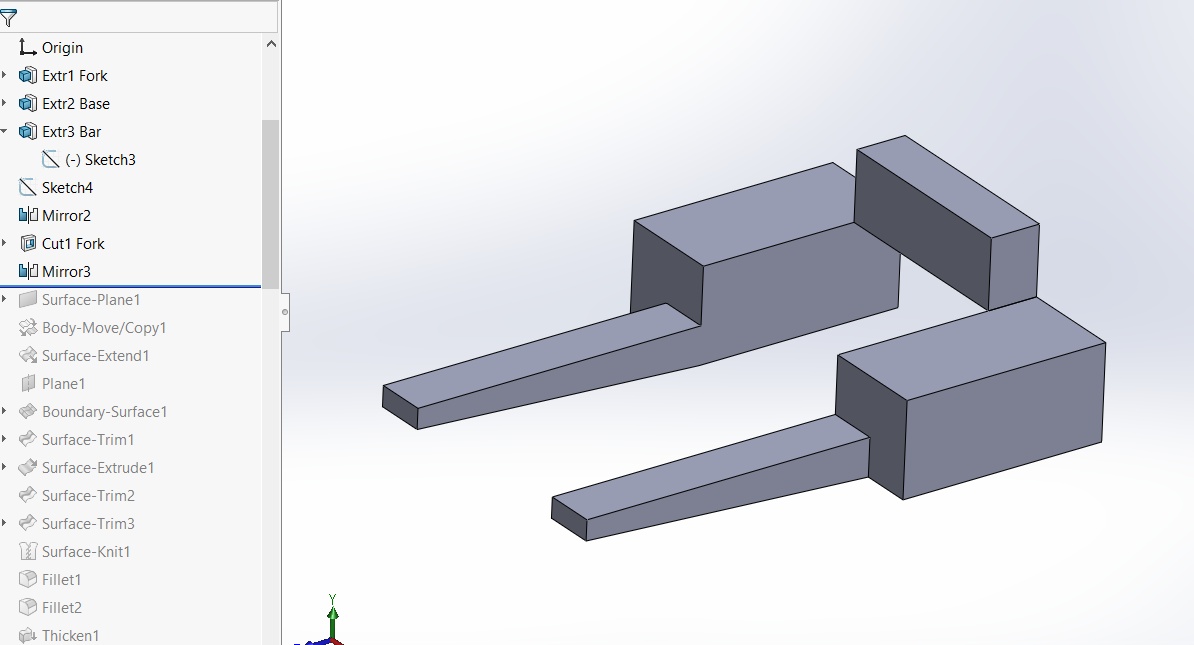
The attachment will be mounted on the LEGO structure, so it makes sense to model the essential surfaces to which the attachment will fit first.
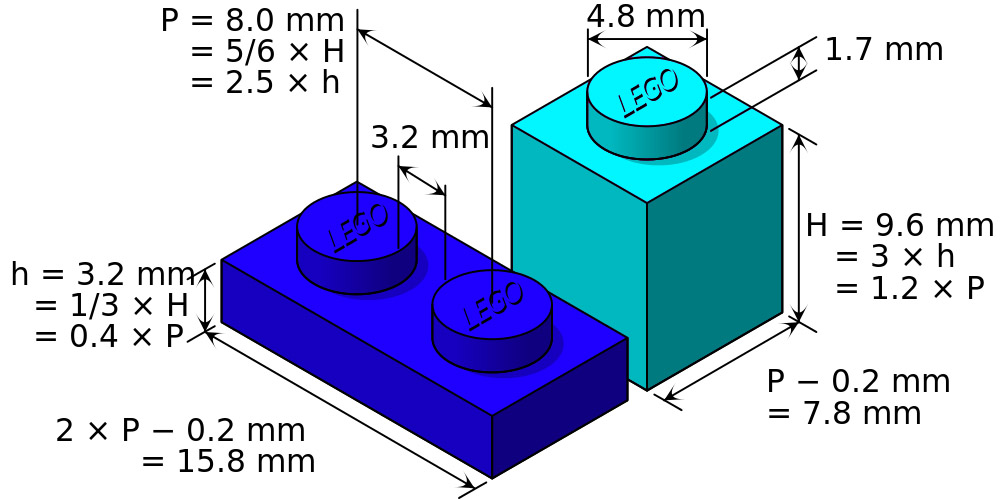
Given the basic dimensions of the elements in the LEGO system, we can easily derive all measurements.
In Solidworks, use planes and extrusions to create the structure. Using the newly created surfaces from extrusions as sketch planes speeds up the process.
Base Surface
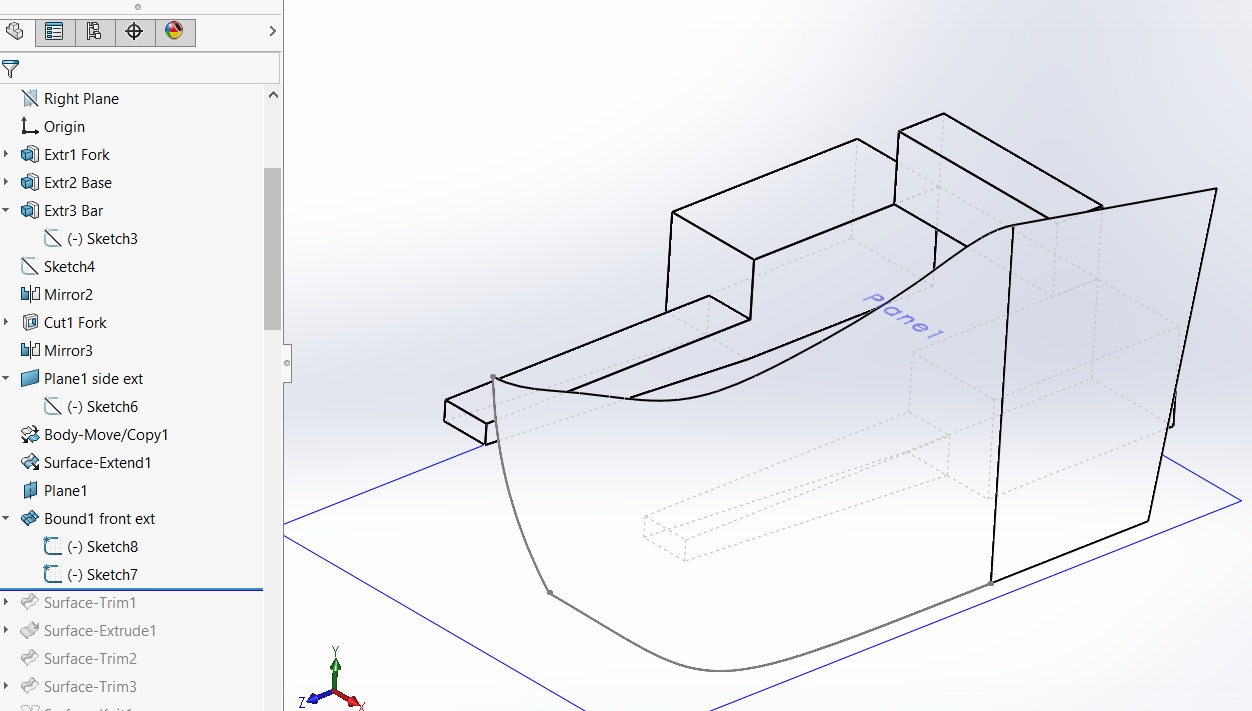
Then we will model the least critical surface of the attachment part: the exterior. This is the least constrained surface because it is mostly independent of the LEGO structure, as long as it has a clearance of all exterior corners and edges.
In this case we use a Planar surface for the side, and a Boundary surface for the curved front that is tangential to the side, using just a profile and base sketch. Make sure you leave a gap between the LEGO structure and the surfaces you create so we can give the part a thickness towards the inside in the next step. You can do that by moving the planar surface outwards 1.5mm before creating the Boundary surface blend.
Don't worry about how the top edge of the new surface looks, we will trim that to shape later.
Completing the Exterior
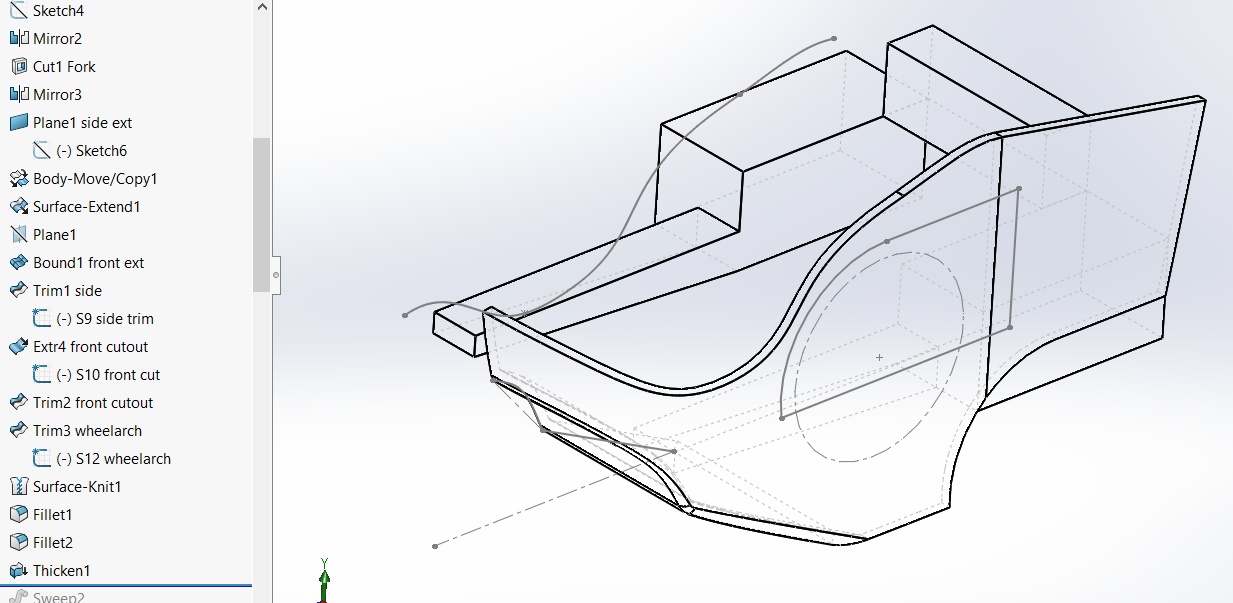
We now create a sketch to trim the top of the surface to shape.
The bottom front edge is done using a surface extrusion and mutual trim with the exterior surface.
In product design, we would always make this surface curved using a Boundary surface (this creates maximum control) or a Sweep over an arc or spline. Yet, because the feature is small and the exterior surface is already double curved, a straight surface intersection will already result in a nice line. Moreover, if we keep the angled section straight we can use this as a flat ground plane for the 3D printer bed.
We then create a wheel arch with a simple cut based on the wheels you will be using. Make sure to leave at least 2mm clearance from the wheels and do not curve the arch around the back of the wheels to allow for steering capabilities.
Then, thicken the surface and complete it with fillet radii. For the large radius where the wheel arch connects to the exterior, use the 'Curvature Continuous' fillet option for a better effect.
Candy Scoop
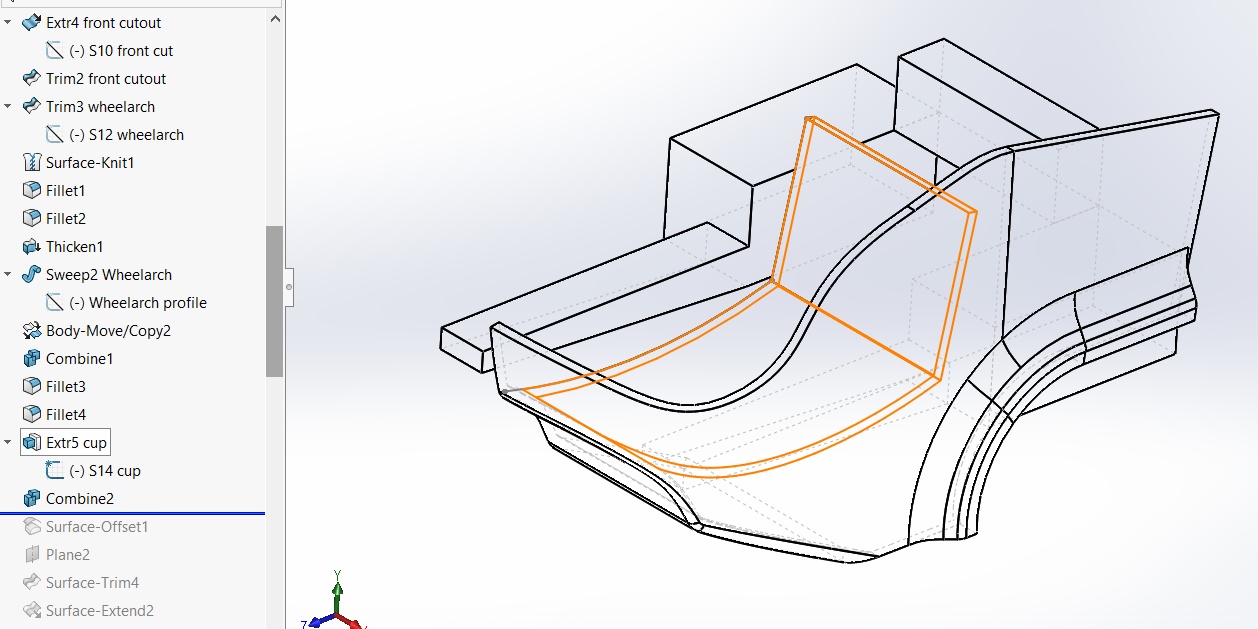
To create the scoop, we draw a sketch on the Right plane and extrude it towards the exterior of the part using the 'Up to Body' and 'Thin feature' options. You can customize the shape to your liking but a smooth bottom surface will make it better 3D printable. Keep the back edge lower than the exterior surface so that the robot's head will fit in when it is in its lowest position. Therefore, it is wise to first build your LEGO set and then start modeling your attachments.
Mounting Sleeve
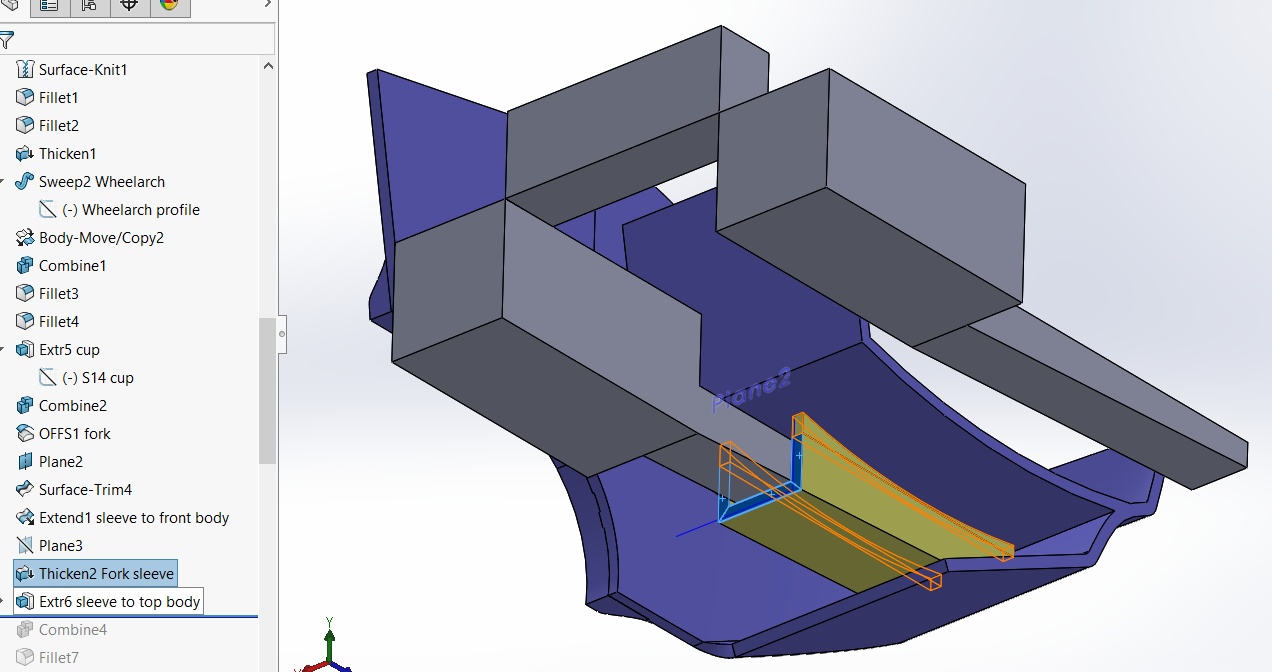
We are now creating a sleeve that the forklift piece will fit into.
First, we offset the forklift piece's side and bottom surfaces by at least 0.5mm to allow for tolerances of your 3D printer. This creates a U-shaped sleeve profile (highlighted in blue, after thickening).
We trim the profile using a plane, and Extend it forward with the option 'Up to Body'.
Then give it a thickness outwards.
You can extrude the top edges by using them as sketch surfaces, then use the surfaces themselves for the 'Convert Entities' option and extrude them upwards with the option 'Up to Body' (highlighted in orange).
Filleting
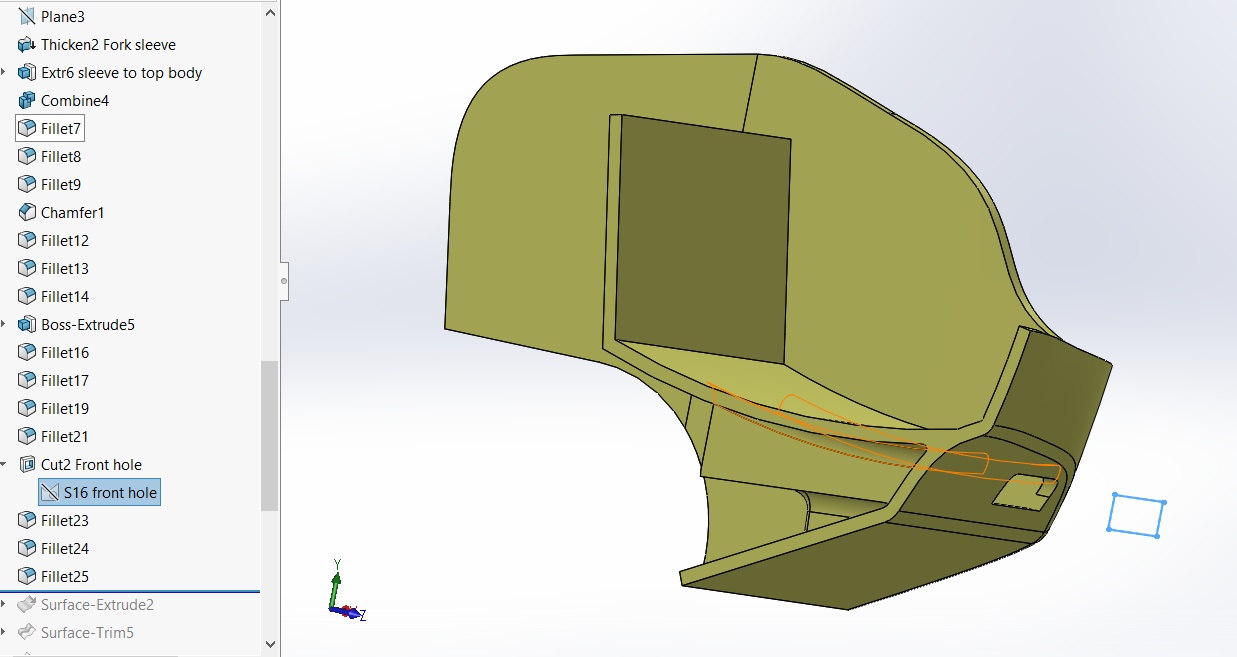
As the main structure is complete, we can now place fillets where we want to. For large fillets, use the option 'Curvature continuous' for a smoother effect.
For surfaces that will be printed horizontally, it is wise to give them a large radius to ease 3D printing (highlighted in orange in the image). We also create a hole in the front giving the appearance of an air intake, all of this is purely cosmetic and optional.
Mounting Hook
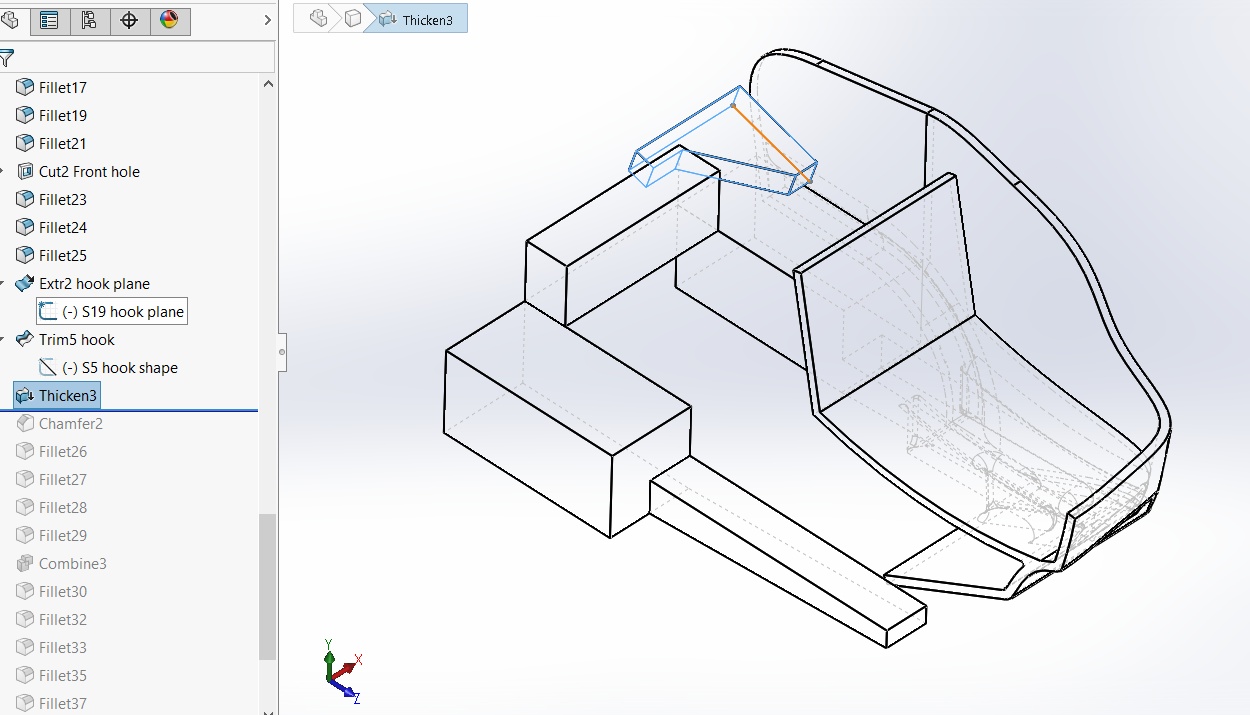
Since the sleeve constrains the attachment in the X and Y directions, we need a hook to also constrain it in the Z direction. First, we create a surface from the side surface inwards on which we will draw the shape of the hook. Make sure this surface is angled a bit (see the orange sketch) which optimizes it for 3D Printing without supports.
Draw the hook shape onto the surface and use Trim to keep only the hook shape. Then thicken this by at least 3 mm. Do not use the option 'Merge result' yet because that would fuse the new shape to the existing part.
Cosmetic Enhancements
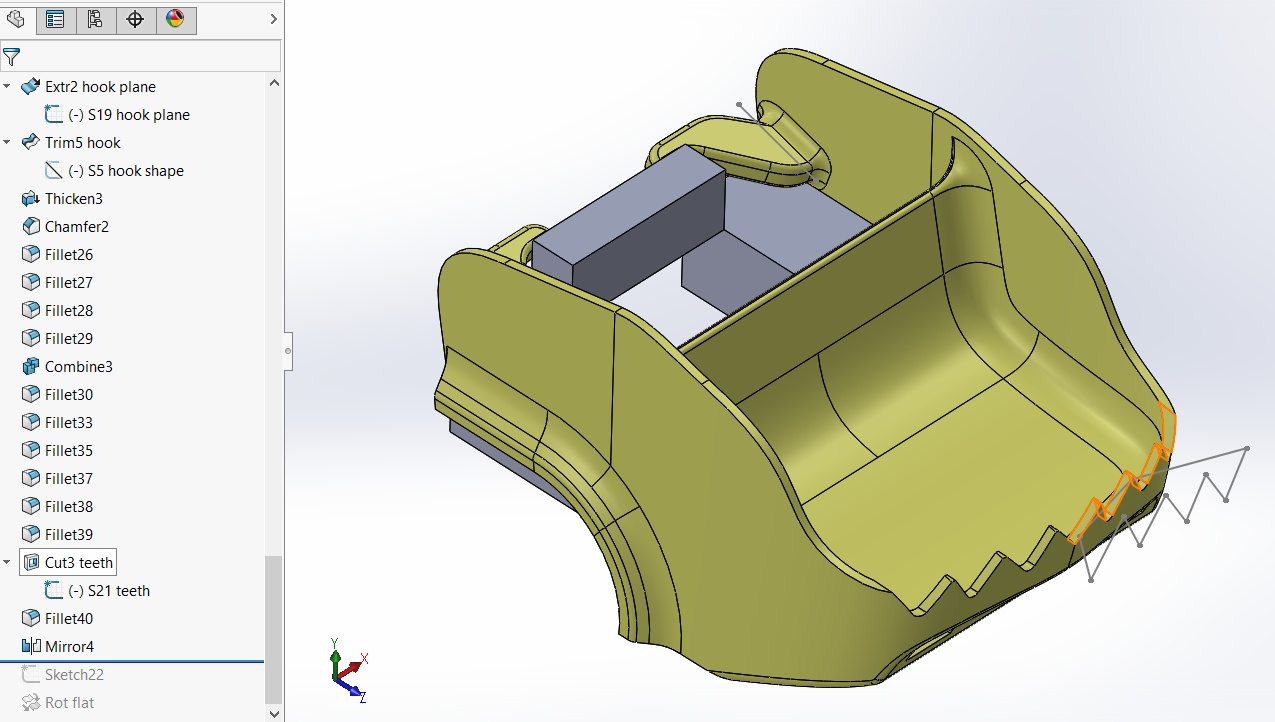
Now, all your parts have been defined! This is a great step because when you have completed this successfully, your design intent has been converted entirely into a Solidworks part.
What you have seen in this tutorial is that for creating parts that may seem complex and organic, we use a structured step by step approach and following this strategy, entire cars and airplanes are modeled as well. You have seen that first we start with the main dimensional constraints of the part, and then model to meet this with the largest and most independent surfaces first. These surfaces do not have to be fully defined to provide the best curvature, and will be trimmed and blended to shape later. Make sure that you do define all your sketches well so that if changes are made to the model in later steps, these sketches are modified alongside to match the new design intent optimally. Also make sure to name the most important if not all features you create for a good overview and to help communicate your modeling process to others.
We can now finish up the part with the Chamfers you see on the mounting hook, and with Fillets to blend all the surfaces together. Again, large fillets on the bottom side of overhanging portions will greatly benefit the 3D print quality. For a better LEGO-themed part leave the visible naked edges unfilleted. Lastly, mirror the part using the option 'Merge Solids'.
3D Printing
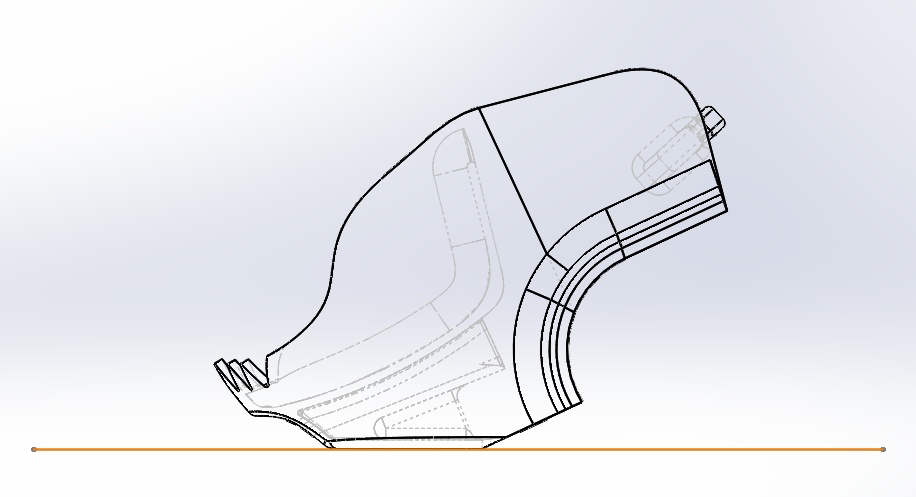
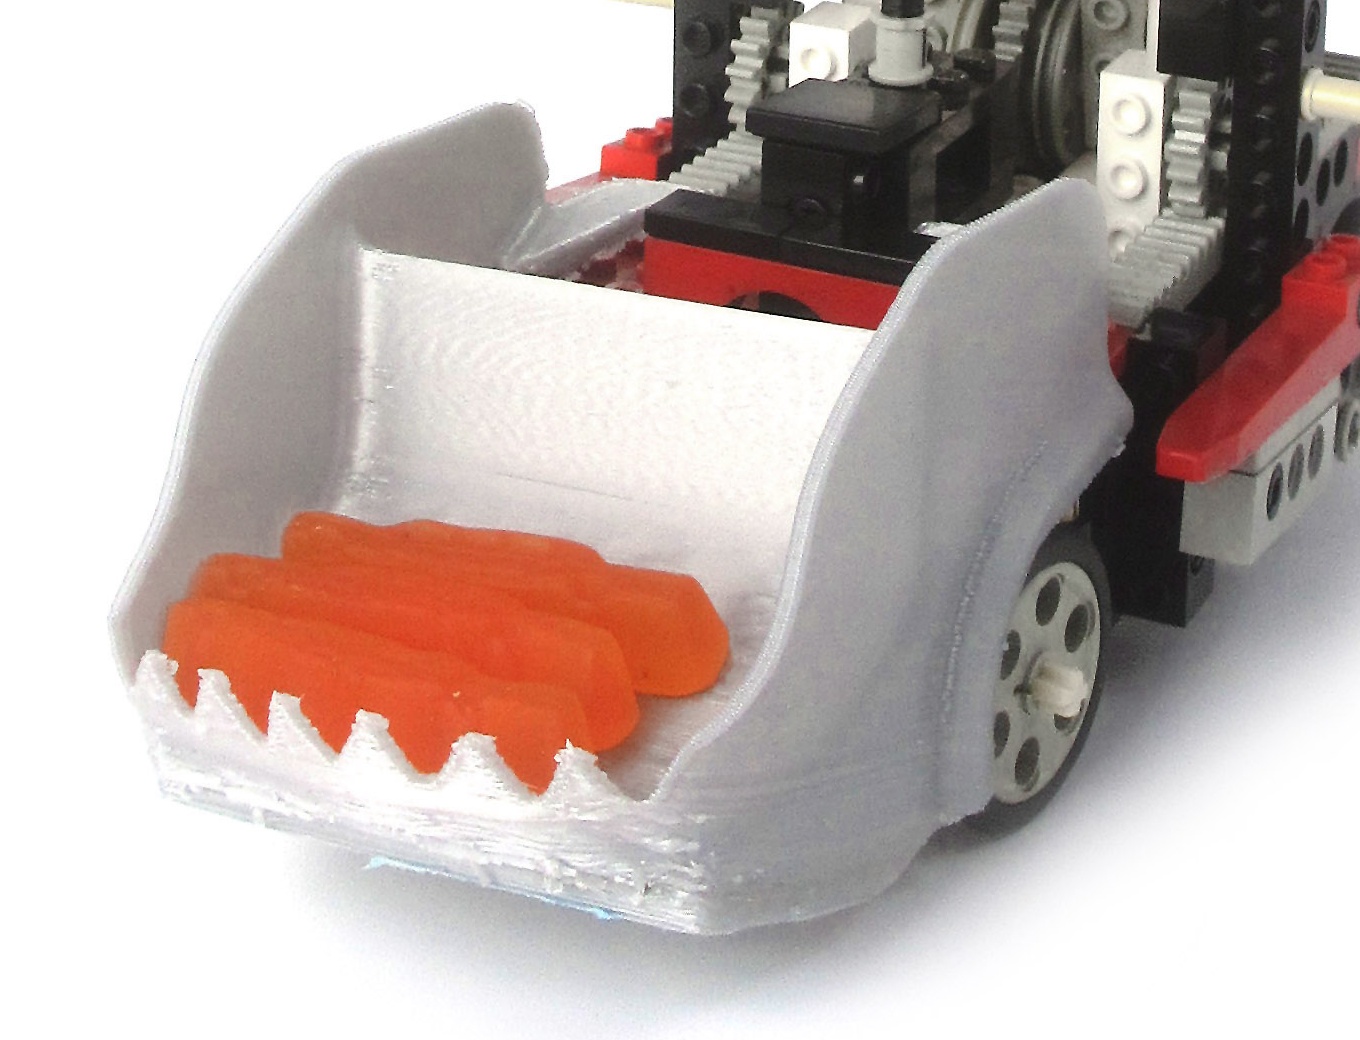
Because we are using the angled bottom edge we created in Step 3 as a ground plane for 3D printing, the entire part will print under an angle and not strictly require support structures. Only part of the hook and the curved section in the front requires it which is why we can print this part with support material only on the outside of the surface, touching the build plate. Make sure you are not printing any internal supports or you will spend a lot of time removing support material from the sleeve cavities we created in Step 5.
Another advantage of printing under an angle is that small features such as the teeth now have a larger layer-to-layer surface area which results in better layer bonding and in the end, a stronger part. And because the area connected to the print bed entirely, we do not require any additional raft or brim structures at all.
Our part was created on the Wanhao Duplicator s5 Mini and completed in 1 hour and 40 minutes with a 0.2 mm resolution and 85 mm/s speed.
Happy printing!