Unique Approach to Leather Dice Tray and Dice Storage
by rustythorn in Craft > Leather
3326 Views, 18 Favorites, 0 Comments
Unique Approach to Leather Dice Tray and Dice Storage

dice trays help keep the dice used for various games on the table. dice trays tend to be more commonly used for TTRPG such as dungeons and dragons.
there are lots of leather dice trays DIY on the web. i would encourage folk to check those out if you need additional help. this instructable is focuses on new options and techniques for leather dice trays and introduces a new and unique approach to building a unit that will be both the dice tray and the dice storage/transport.
These Trays and Storage Units Will Be Configured With Snaps


the snaps used for this project come in two types: push and magnetic. the magnetic snaps used have two flavors: rivet and fold over tabs. most folk are familiar with push snap closures, likely you have some clothes or bags with these employed. magnetic snaps are similar and are also commonly used on many applications. the heavy duty push snaps normally only come in a rivet variety. the two parts are riveted together to hold fast. the magnetic snaps also have a tab option however, the backings of these are not as nice looking as most rivet configurations but they are cheaper and easier to use.
Decorative Snap Options

there are lots of decorative push snaps but very few options for the magnetic snaps, however, they are usually the same size and can be interchanged; here are some links to decorative push snaps
Items/parts Used


if you make the dice trays/storage with leather you will need to cut and punch holes into leather. i used surplus army boot leather from the 90's. there are lots of leather punch options. i used my old army medical scissors to cut the leather. for some other trays/storage units i used rivets to add additional leather layers and to connect the leather sides. other fastener other than rivets can be used such as leather string.
riveting the snaps will require some specialized tools, lots of places will sell kits that have everything you need, however, many times the tools with these kits don't hold to up to a lot of pounding. here is a kit with everything you will need sans the scissors this was on sale at amazon for 18.99 when i got the link
these tray/storage units work best with semi-thick, semi-rigid leather [like boot leather], however, thinner leather could be used with layers or stiffened [eg beeswax]. extremely thick leather can also be used if thinner more flexible leather is used at the bending points.
Basic Dice Tray With Push Snaps


the images above in order show:
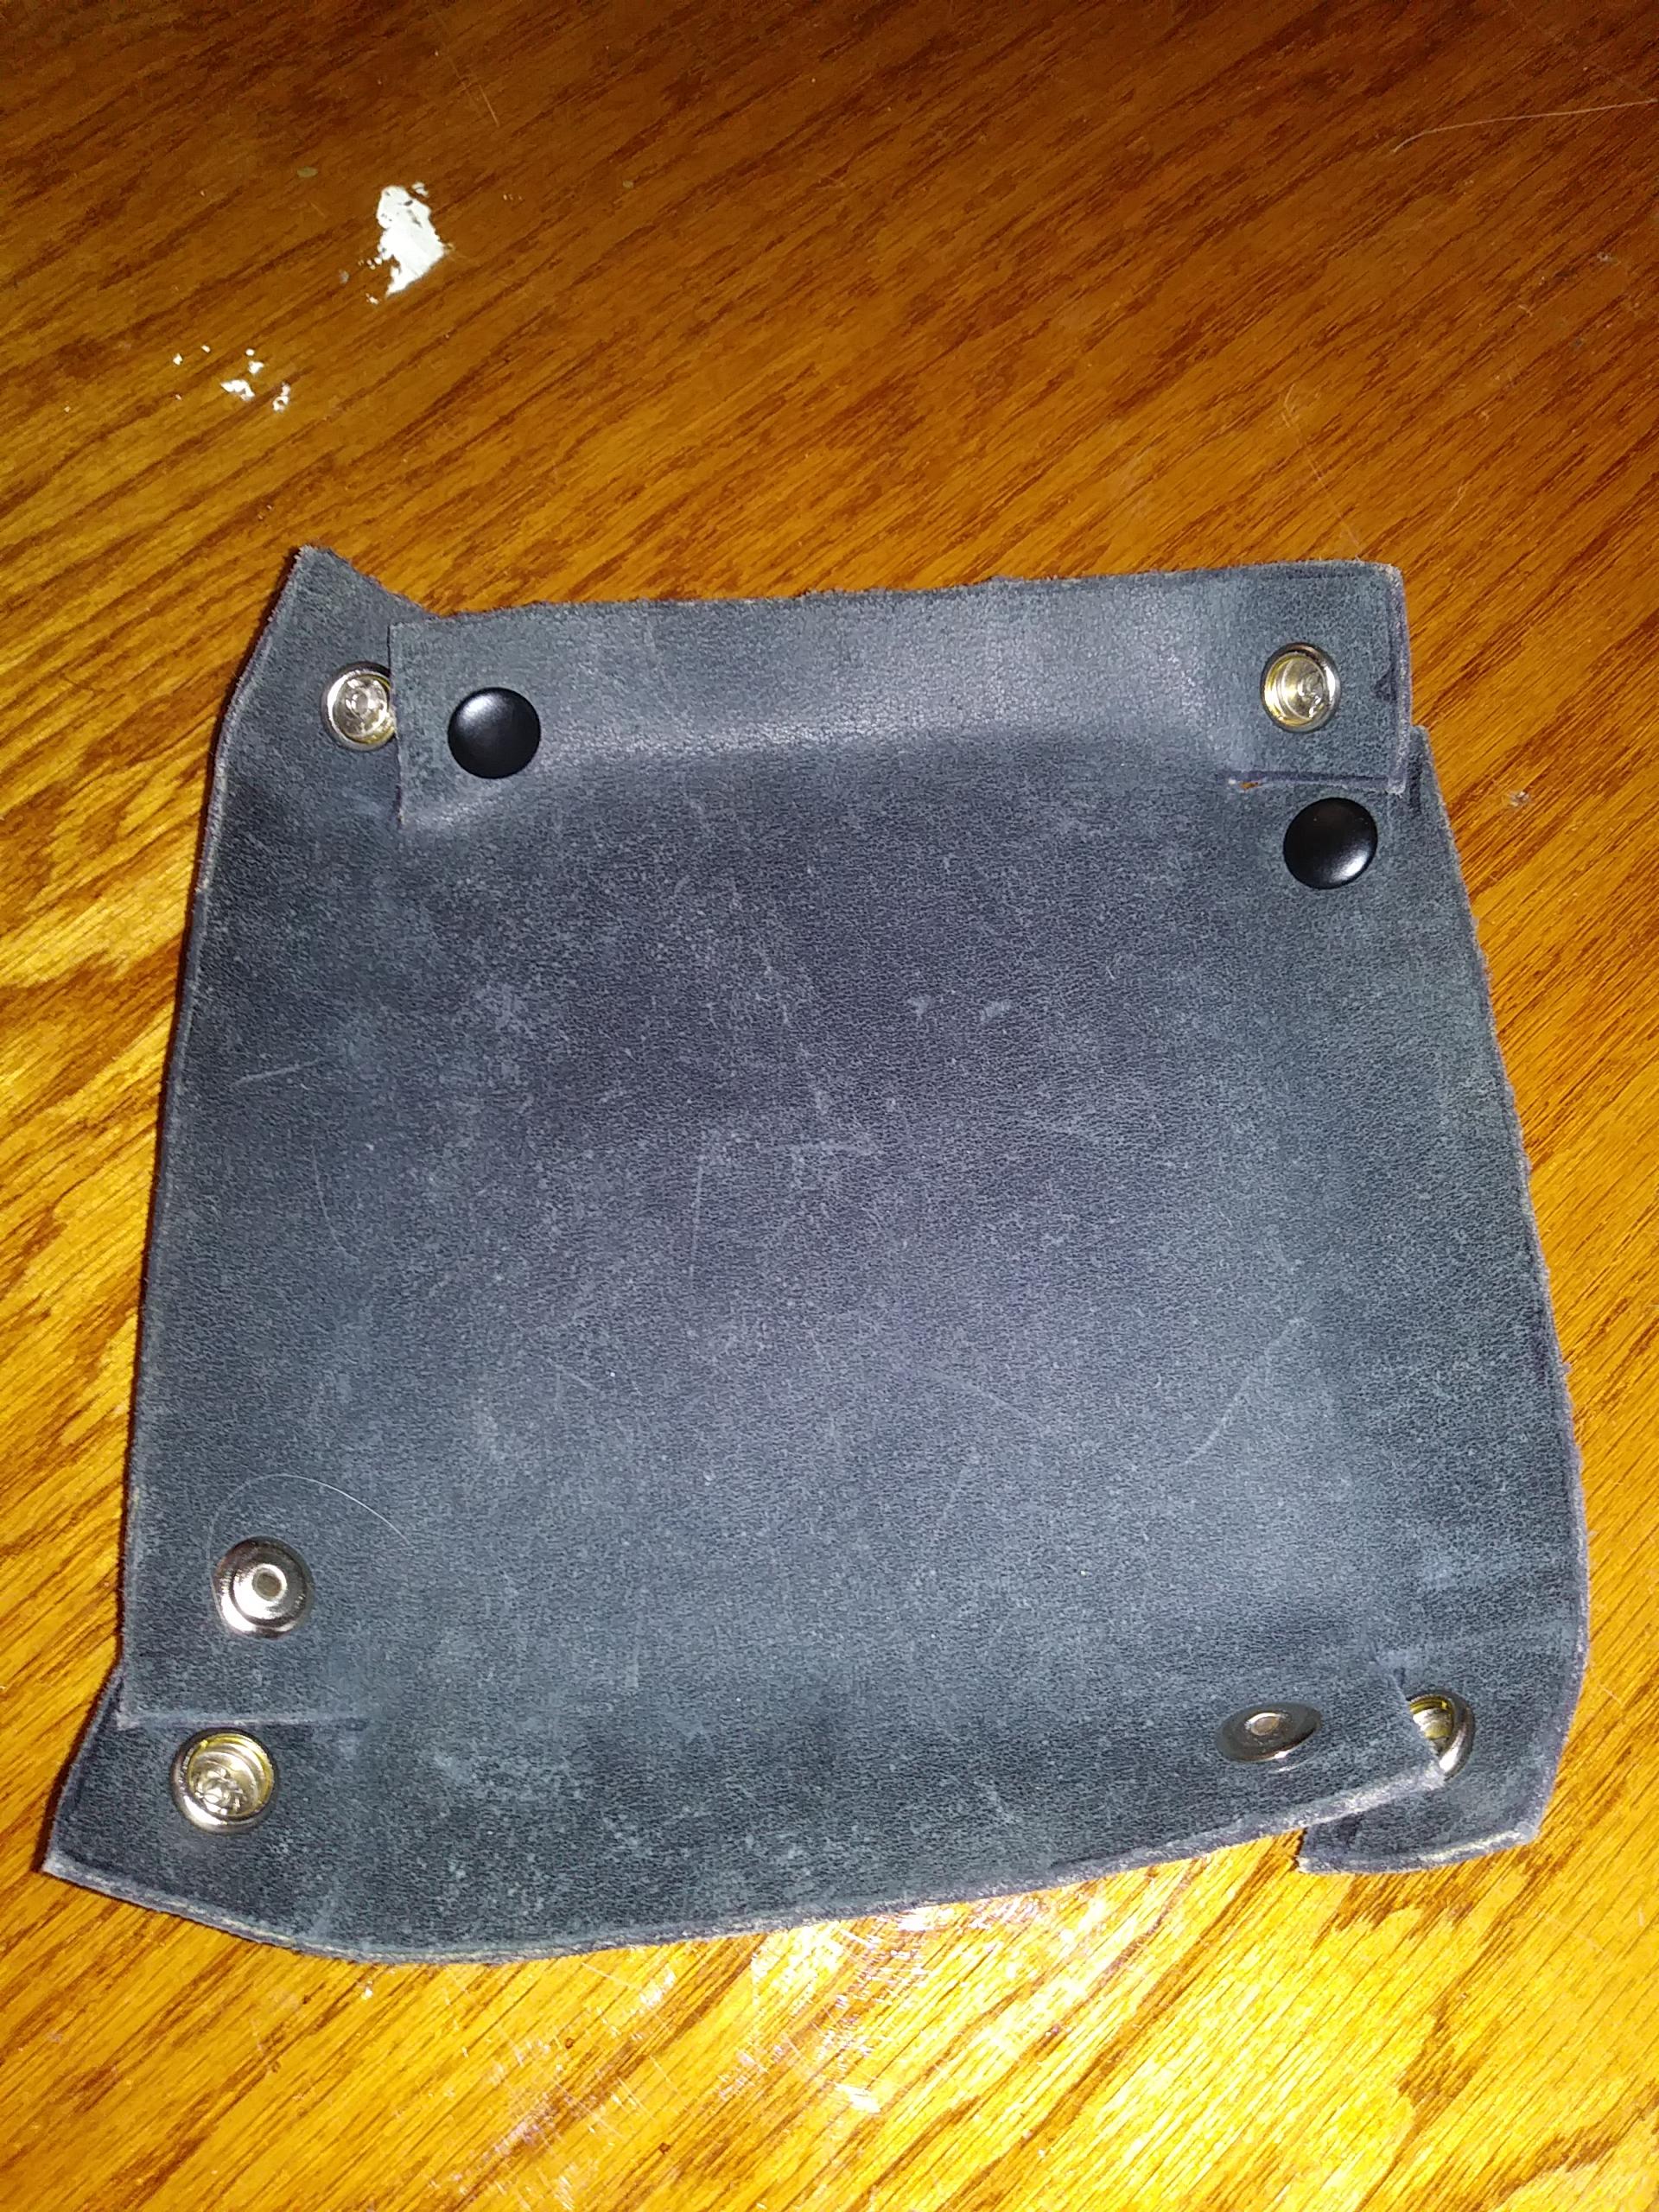
1. tray open [not snapped together] facing up [showing the inside]
2. tray open facing down [showing the back/bottom]
3. tray closed [walls snapped together]
this dice tray does not have hard creases where the walls fold up this results in a more rounded edges
Dice Tray With Reinforced Sides Using Magnetic Snaps


the images above in order show:
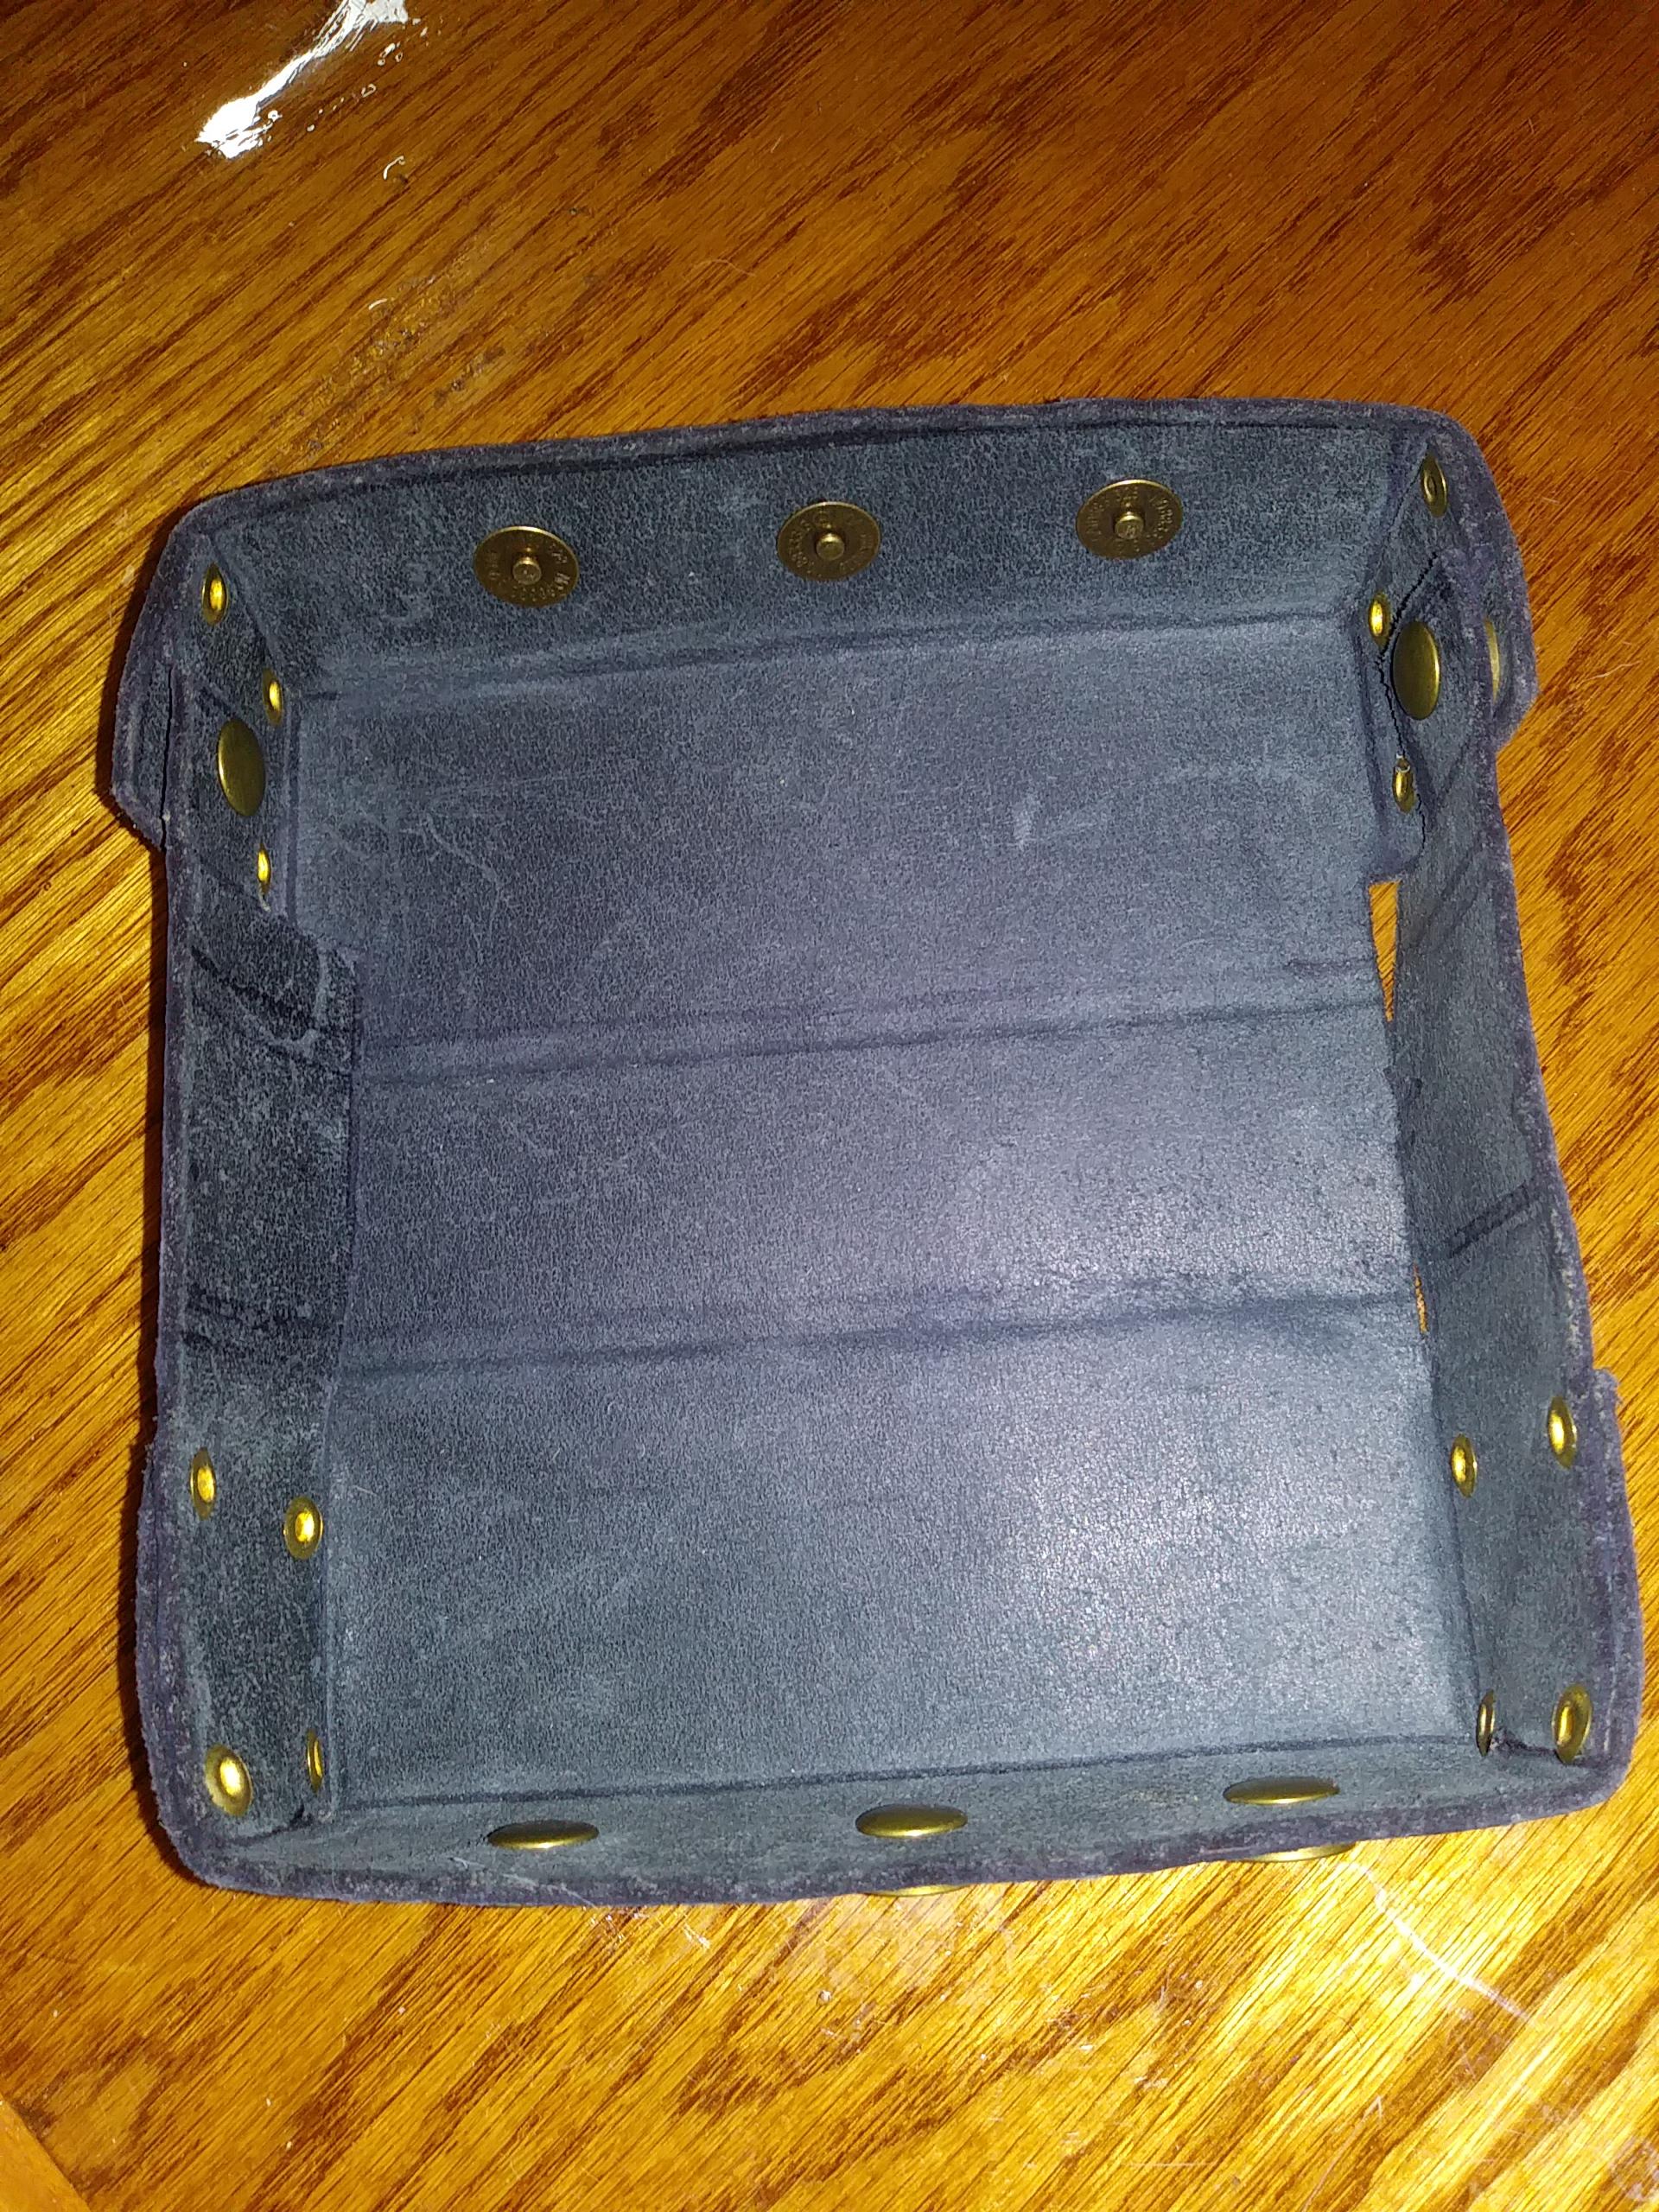
1. tray open [not snapped together] facing up [showing the inside]
2. tray open facing down [showing the back/bottom]
3. tray closed [walls snapped together]
this dice tray does have hard creases where the walls fold up allowing for a more boxy shape. this tray also has reinforced sides [extra leather layer] which help maintain a rigid structure. the second layer is riveted on with several brass rivets. this second layer of leather also covers up the cheaper backing version of the magnetic snaps.
Layout for Dice Trays
i strongly recommend prototyping with paper/cardboard before using something like leather. also do the cutting and folding before attempting to add the rivets and even then only add one side of the rivets line up to mark where the other side will be placed.
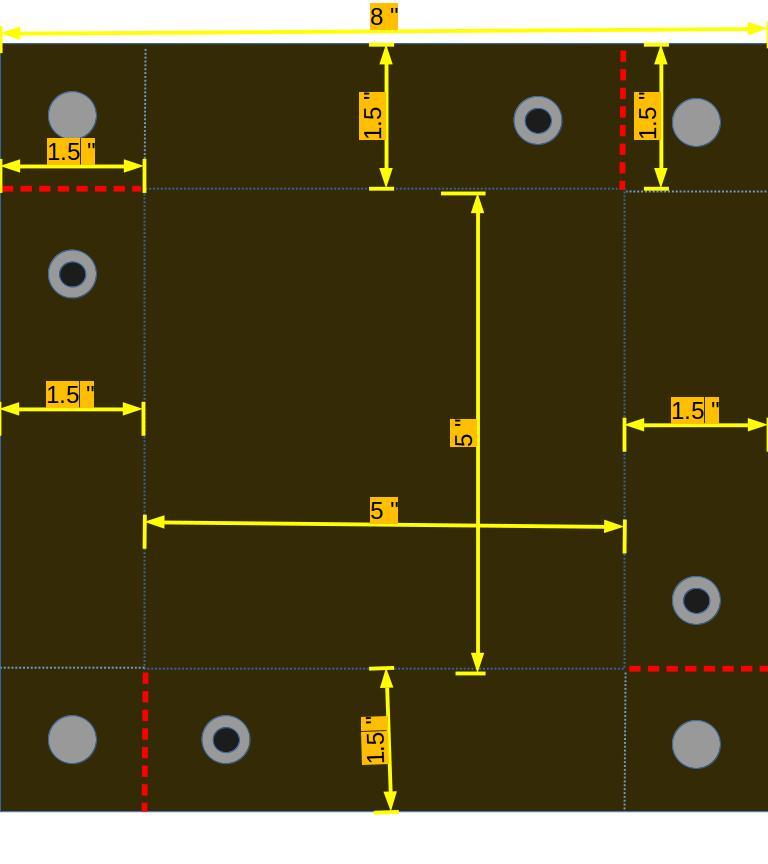
cut along the dashed red lines, fold on the faint dotted lines. the different snap pattern represent male/female configurations, it does not matter which one is on the inside/outside just as long as they are matched up.
this lays flat to a 8" square, i chose this size because it would fit well with any books or papers that would be carried to D&D game.
this pattern was used for both the simple push snap tray and the reinforced magnetic snap tray
Simple Dice Storage Tray


the images above in order show:
1. tray open facing down [showing the back/bottom]
2. tray open [not snapped together] facing up [showing the inside] the side flaps are snapped to each other to make a dice holding area
3. tray half-open with one side flap in place and other other side flap not yet attached.
4. tray setup, ready for use as dice tray [side flaps snapped to walls]
5. tray sealed up as a dice storage
this dice storage tray can hold a sufficient amount of dice and be used as a dice tray
Layout for Dice Trays


again i recommend making this out of paper/cardboard first paying close attention to how the snaps will need to be placed to make the unit work correctly
these dice storage trays can only work with magnetic snaps since folding it up into it's storage configuration will not allow access to push the snaps closed.
Reinforced Dice Storage Tray


the images above in order show:
1. tray open facing down [showing the back/bottom]
2. tray open [not snapped together] facing up [showing the inside] the side flaps are snapped to each other to make a dice holding area
3. tray half-open with one side flap in place and other other side flap not yet attached.
4. tray setup, ready for use as dice tray [side flaps snapped to walls]
5. tray sealed up as a dice storage
6. example of holding dice and a pencil
this dice storage tray can hold a sufficient amount of dice and be used as a dice tray
Short Video Showing Dice Storage Tray Setup and Closing
Layout for Dice Trays


again i recommend making this out of paper/cardboard first paying close attention to how the snaps will need to be placed to make the unit work correctly
these dice storage trays can only work with magnetic snaps since folding it up into it's storage configuration will not allow access to push the snaps closed.
this unit is much more complex and requires the reinforced leather pieces to be added to extend the length of the side flaps and to cover up the backings of the magnetic snaps. it is not readily apparent by the figure but some of the snap placement depends on how they are attached to the reinforced leather pieces and then how the reinforced leather pieces are attached to the main unit. it may take some trial and error to get the configuration right. i will attempt find a better way to represent how i made this but these trays are just examples/suggestions and many other possibilities can be made.