Leather Corset
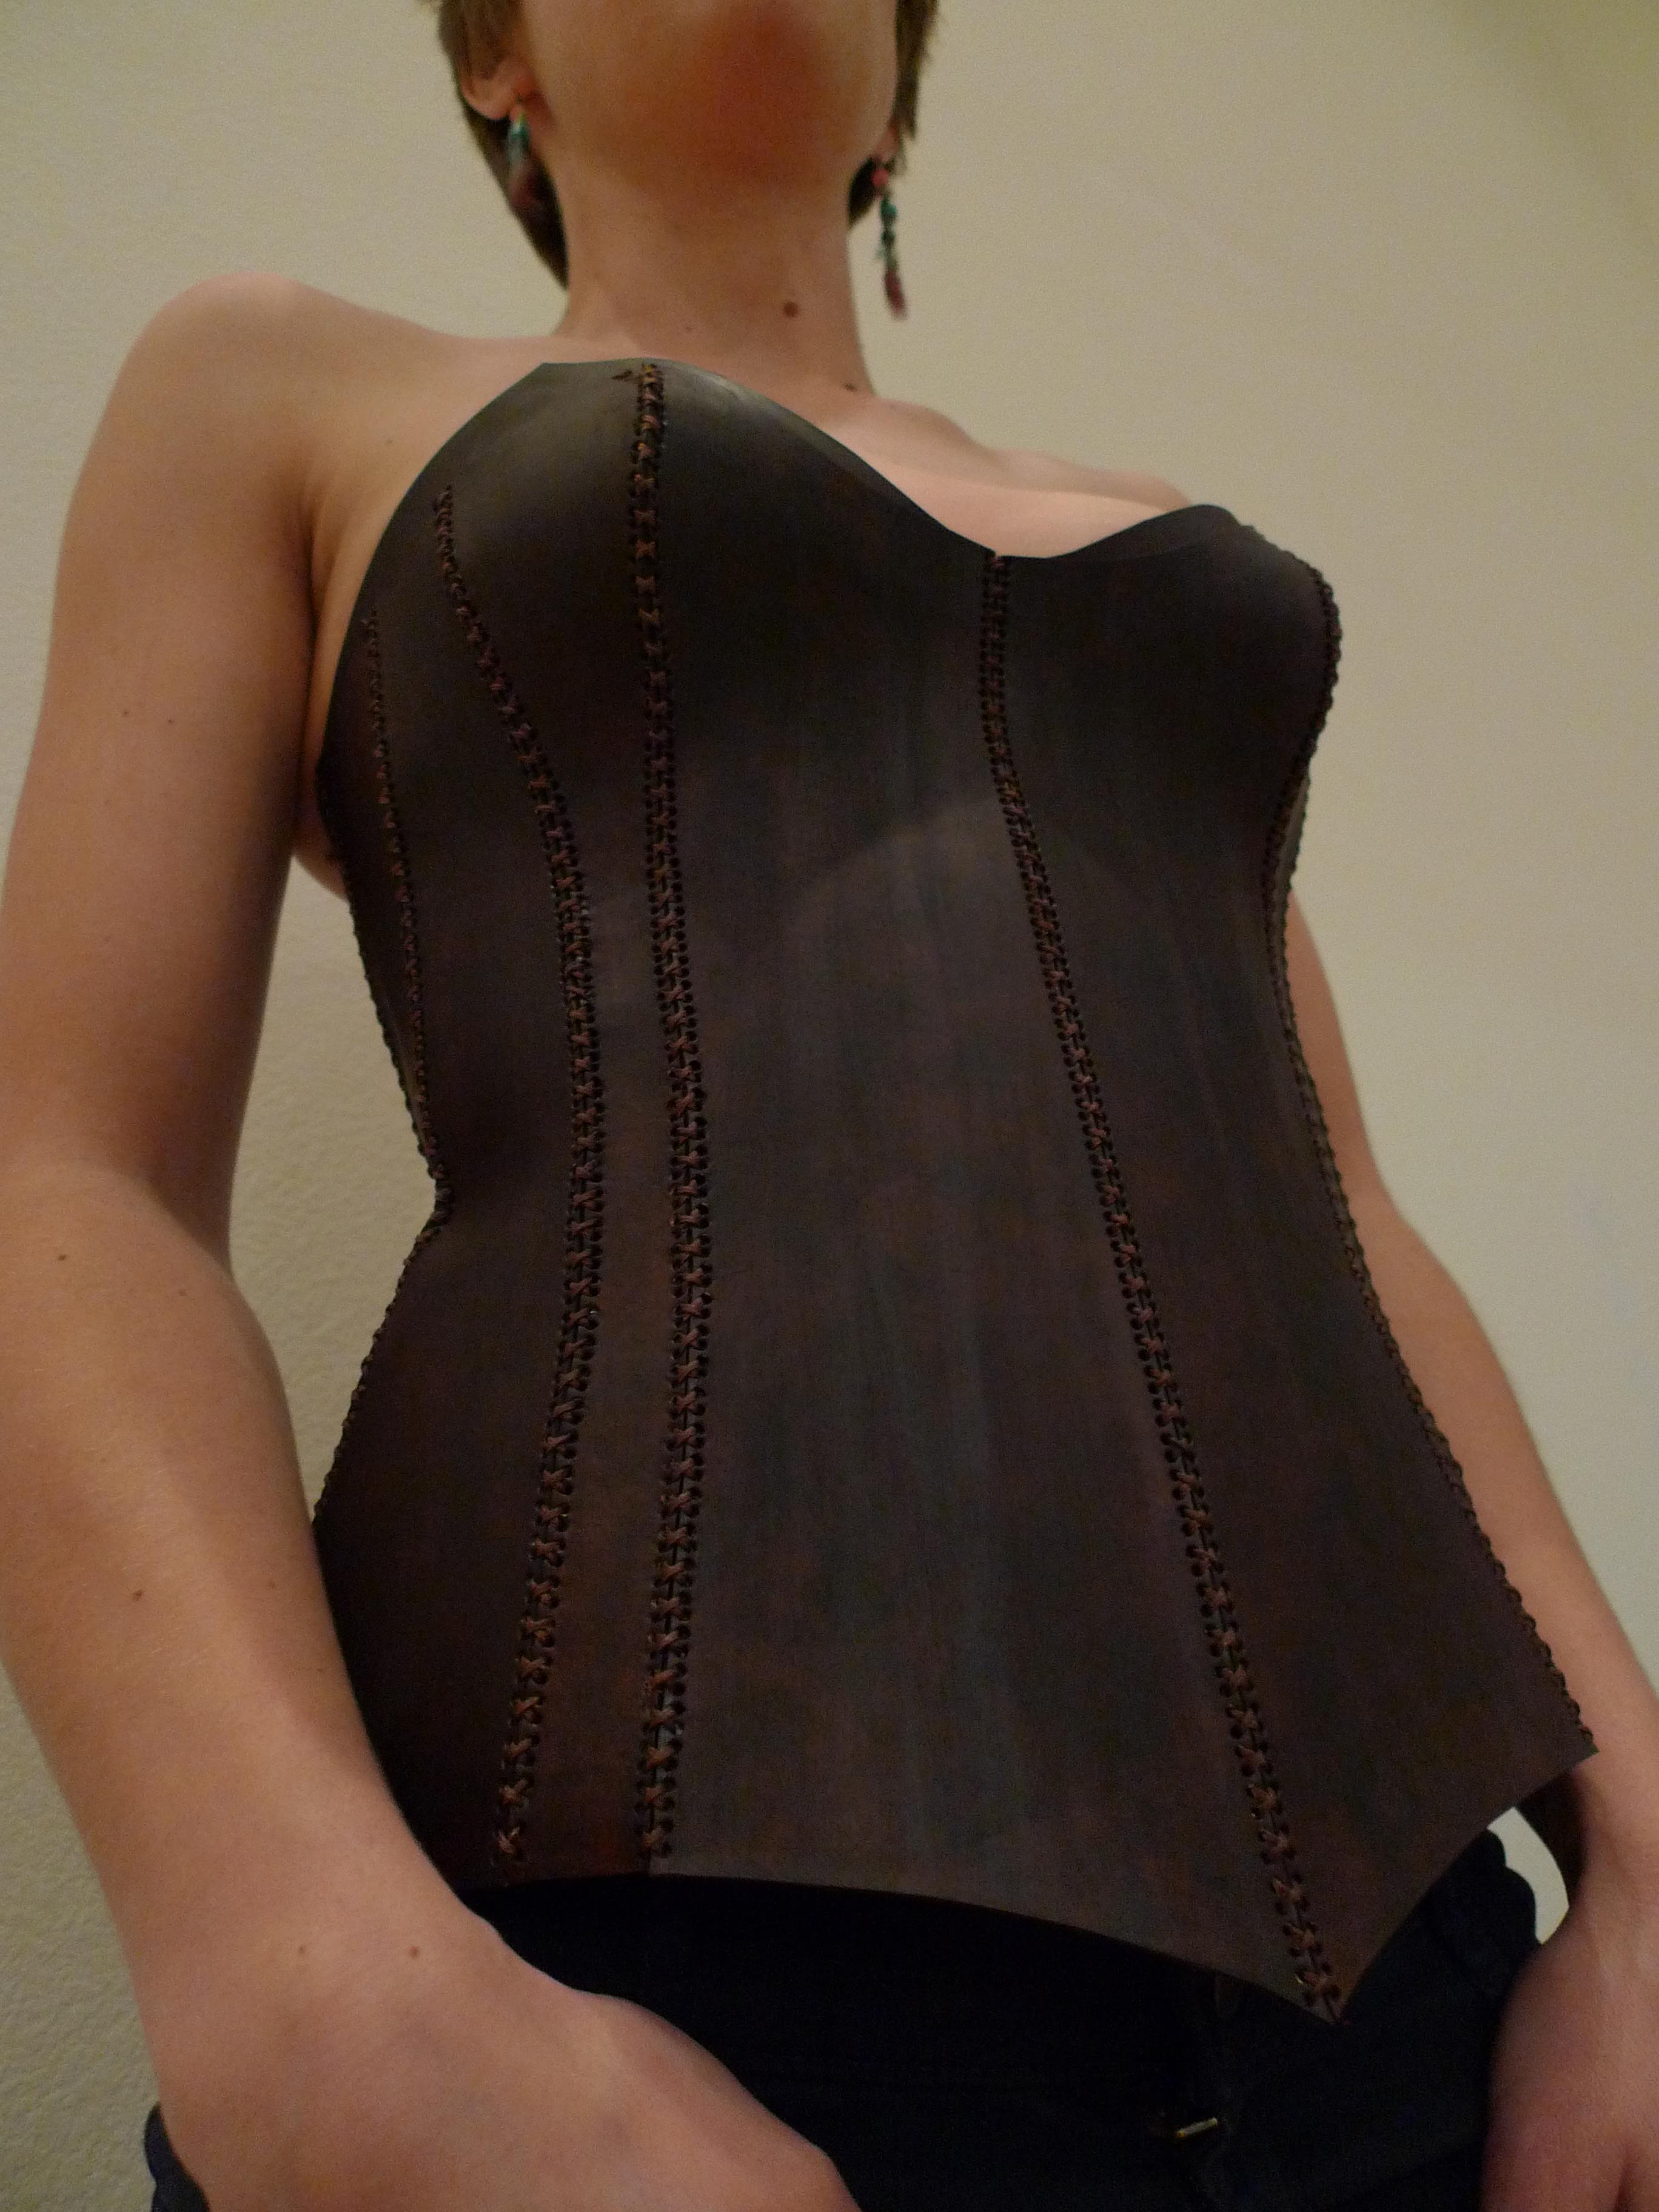


This is my first leather corset, I learned a lot designing and making it.
I'm a leatherworking enthusiast and not a professional, I made some mistakes and I'll give you tips to not make the same!
I tried to describe the steps as well as I could (English is not my first language!)
I hope you enjoy it and try to make it yourself!
Supplies
For this piece you'll need:
A dressform
Vegetable leather
Waxed thread
Light cloth (for the pattern)
Thick paper (for the pattern)
Clingfilm
Eyelets
Ribbon
Leather dye, colour of your choice
Leather finish
Hole puncher
Exacto knife
Natural sponge
Paint brush
Drawing

First draw what you want the end result to look like.
I'm not good at drawing but it helped me visualize the end result.
Created Darts
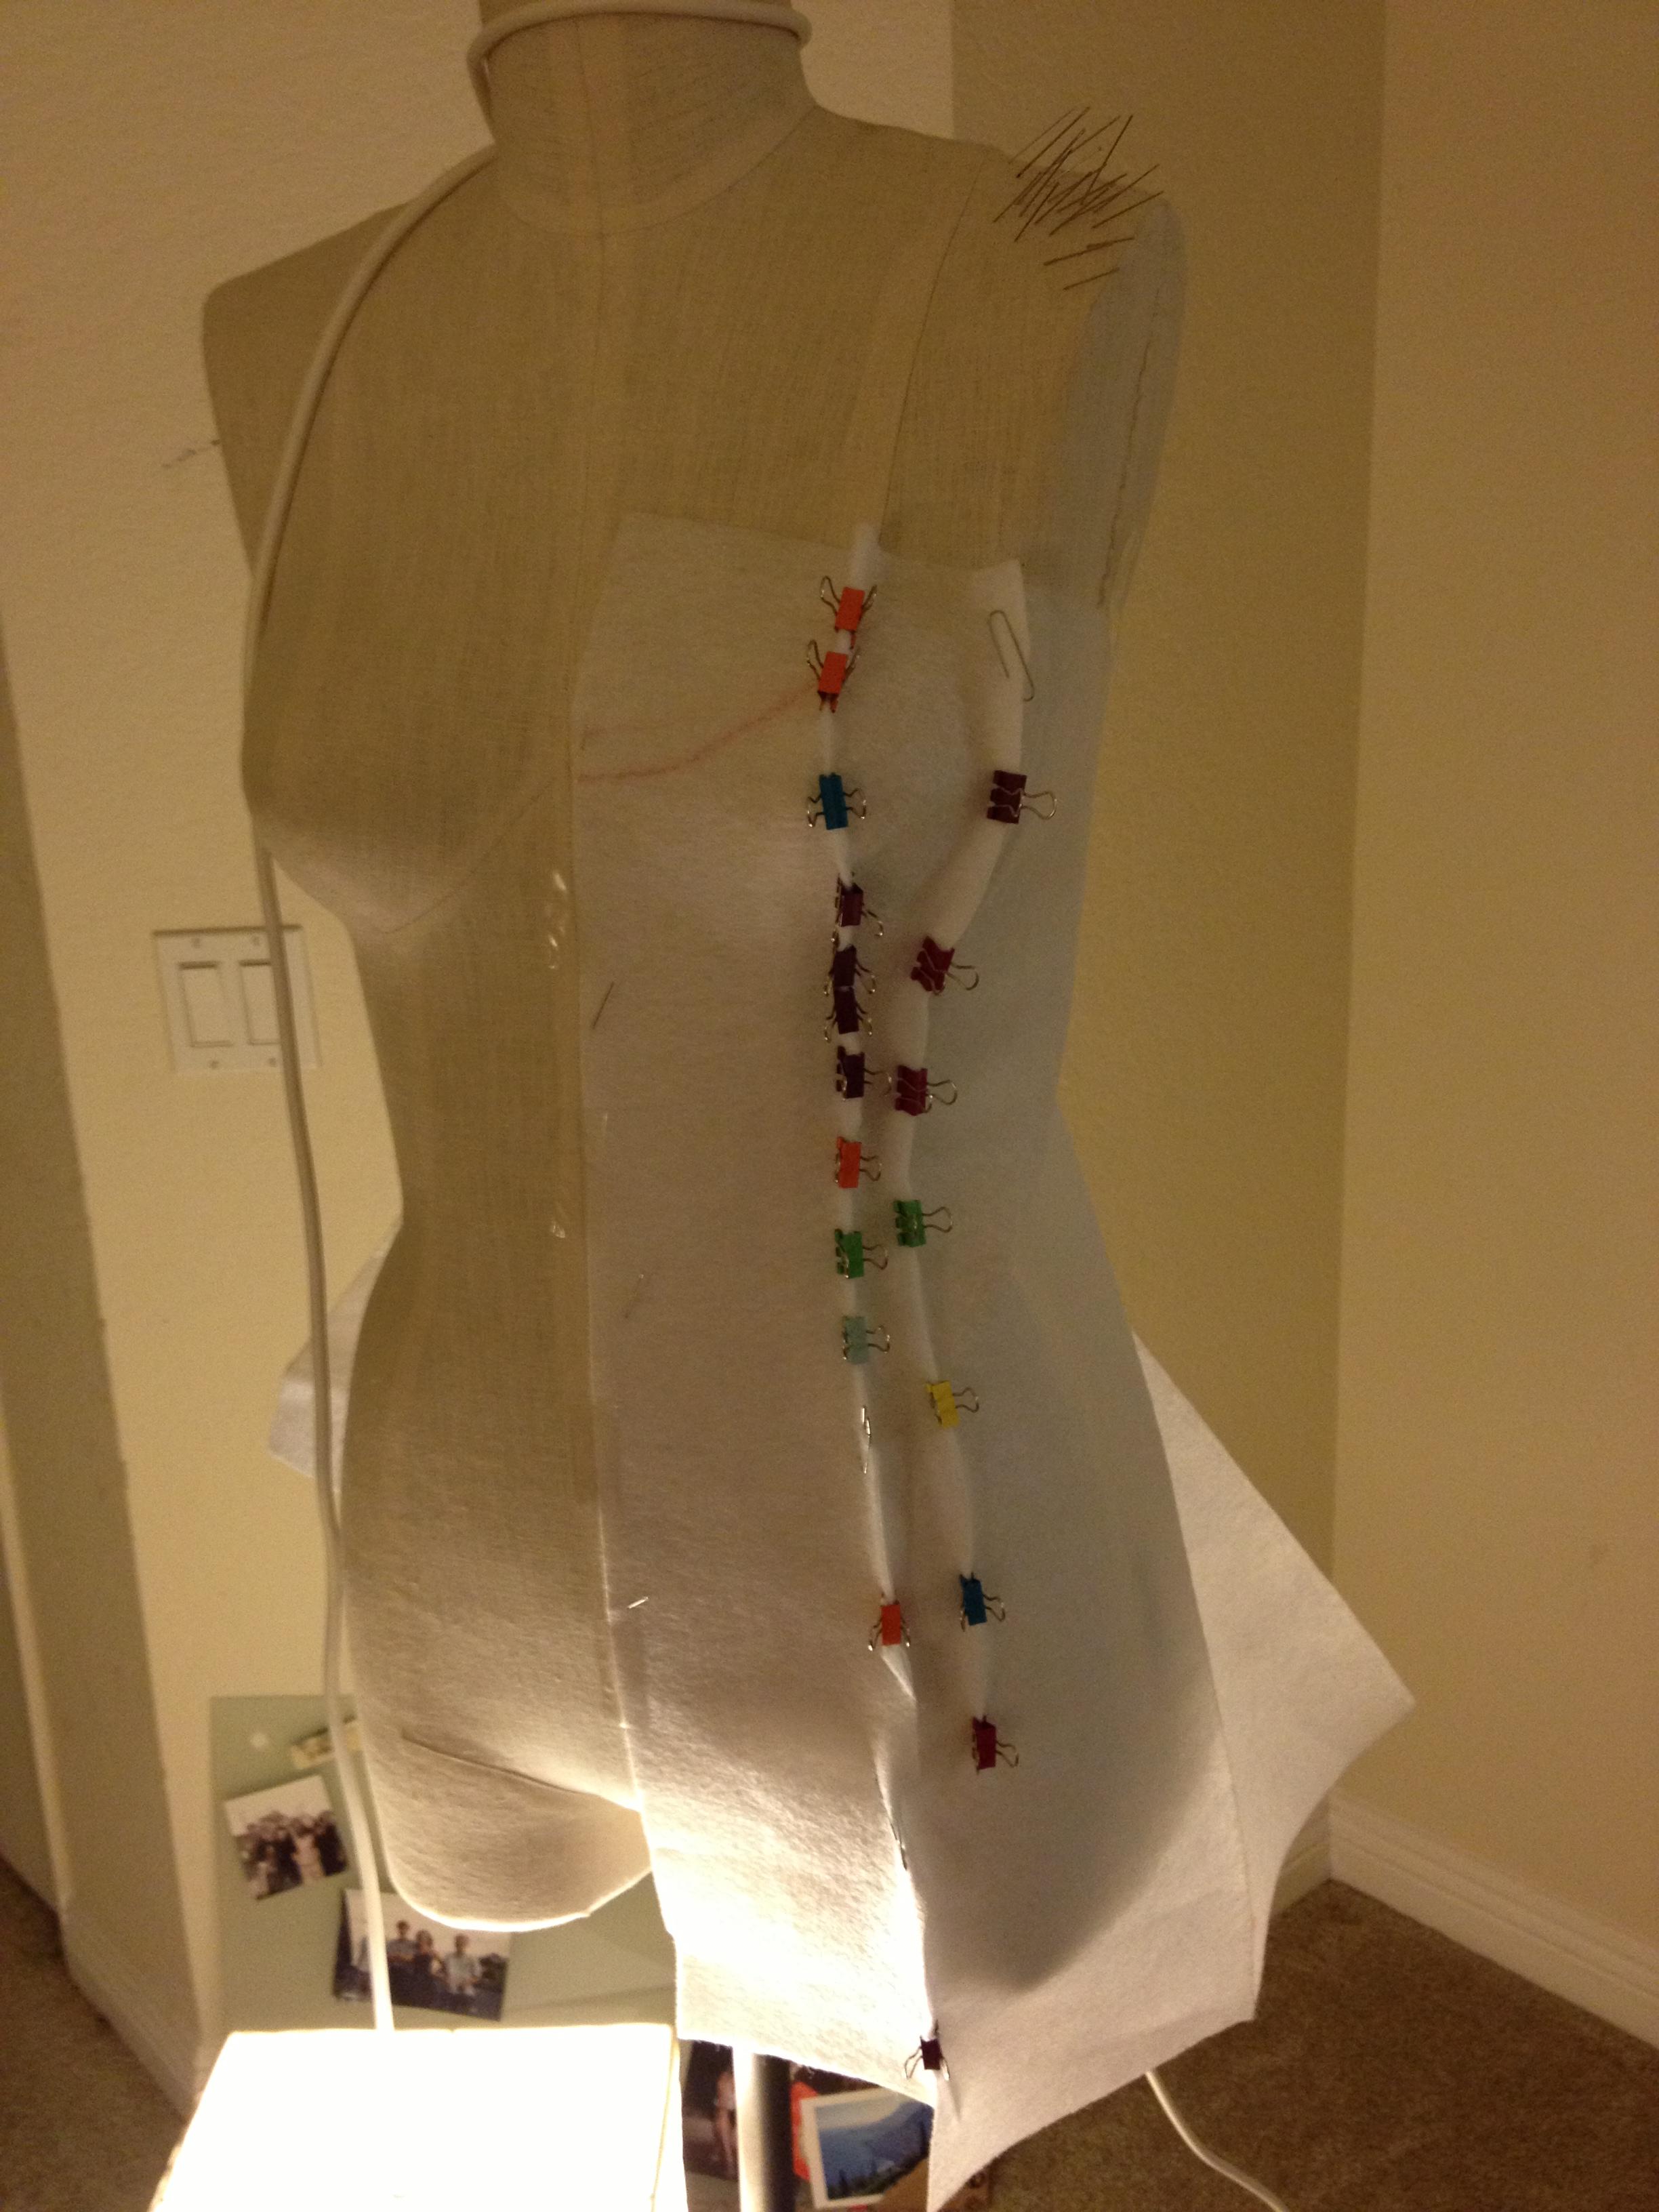

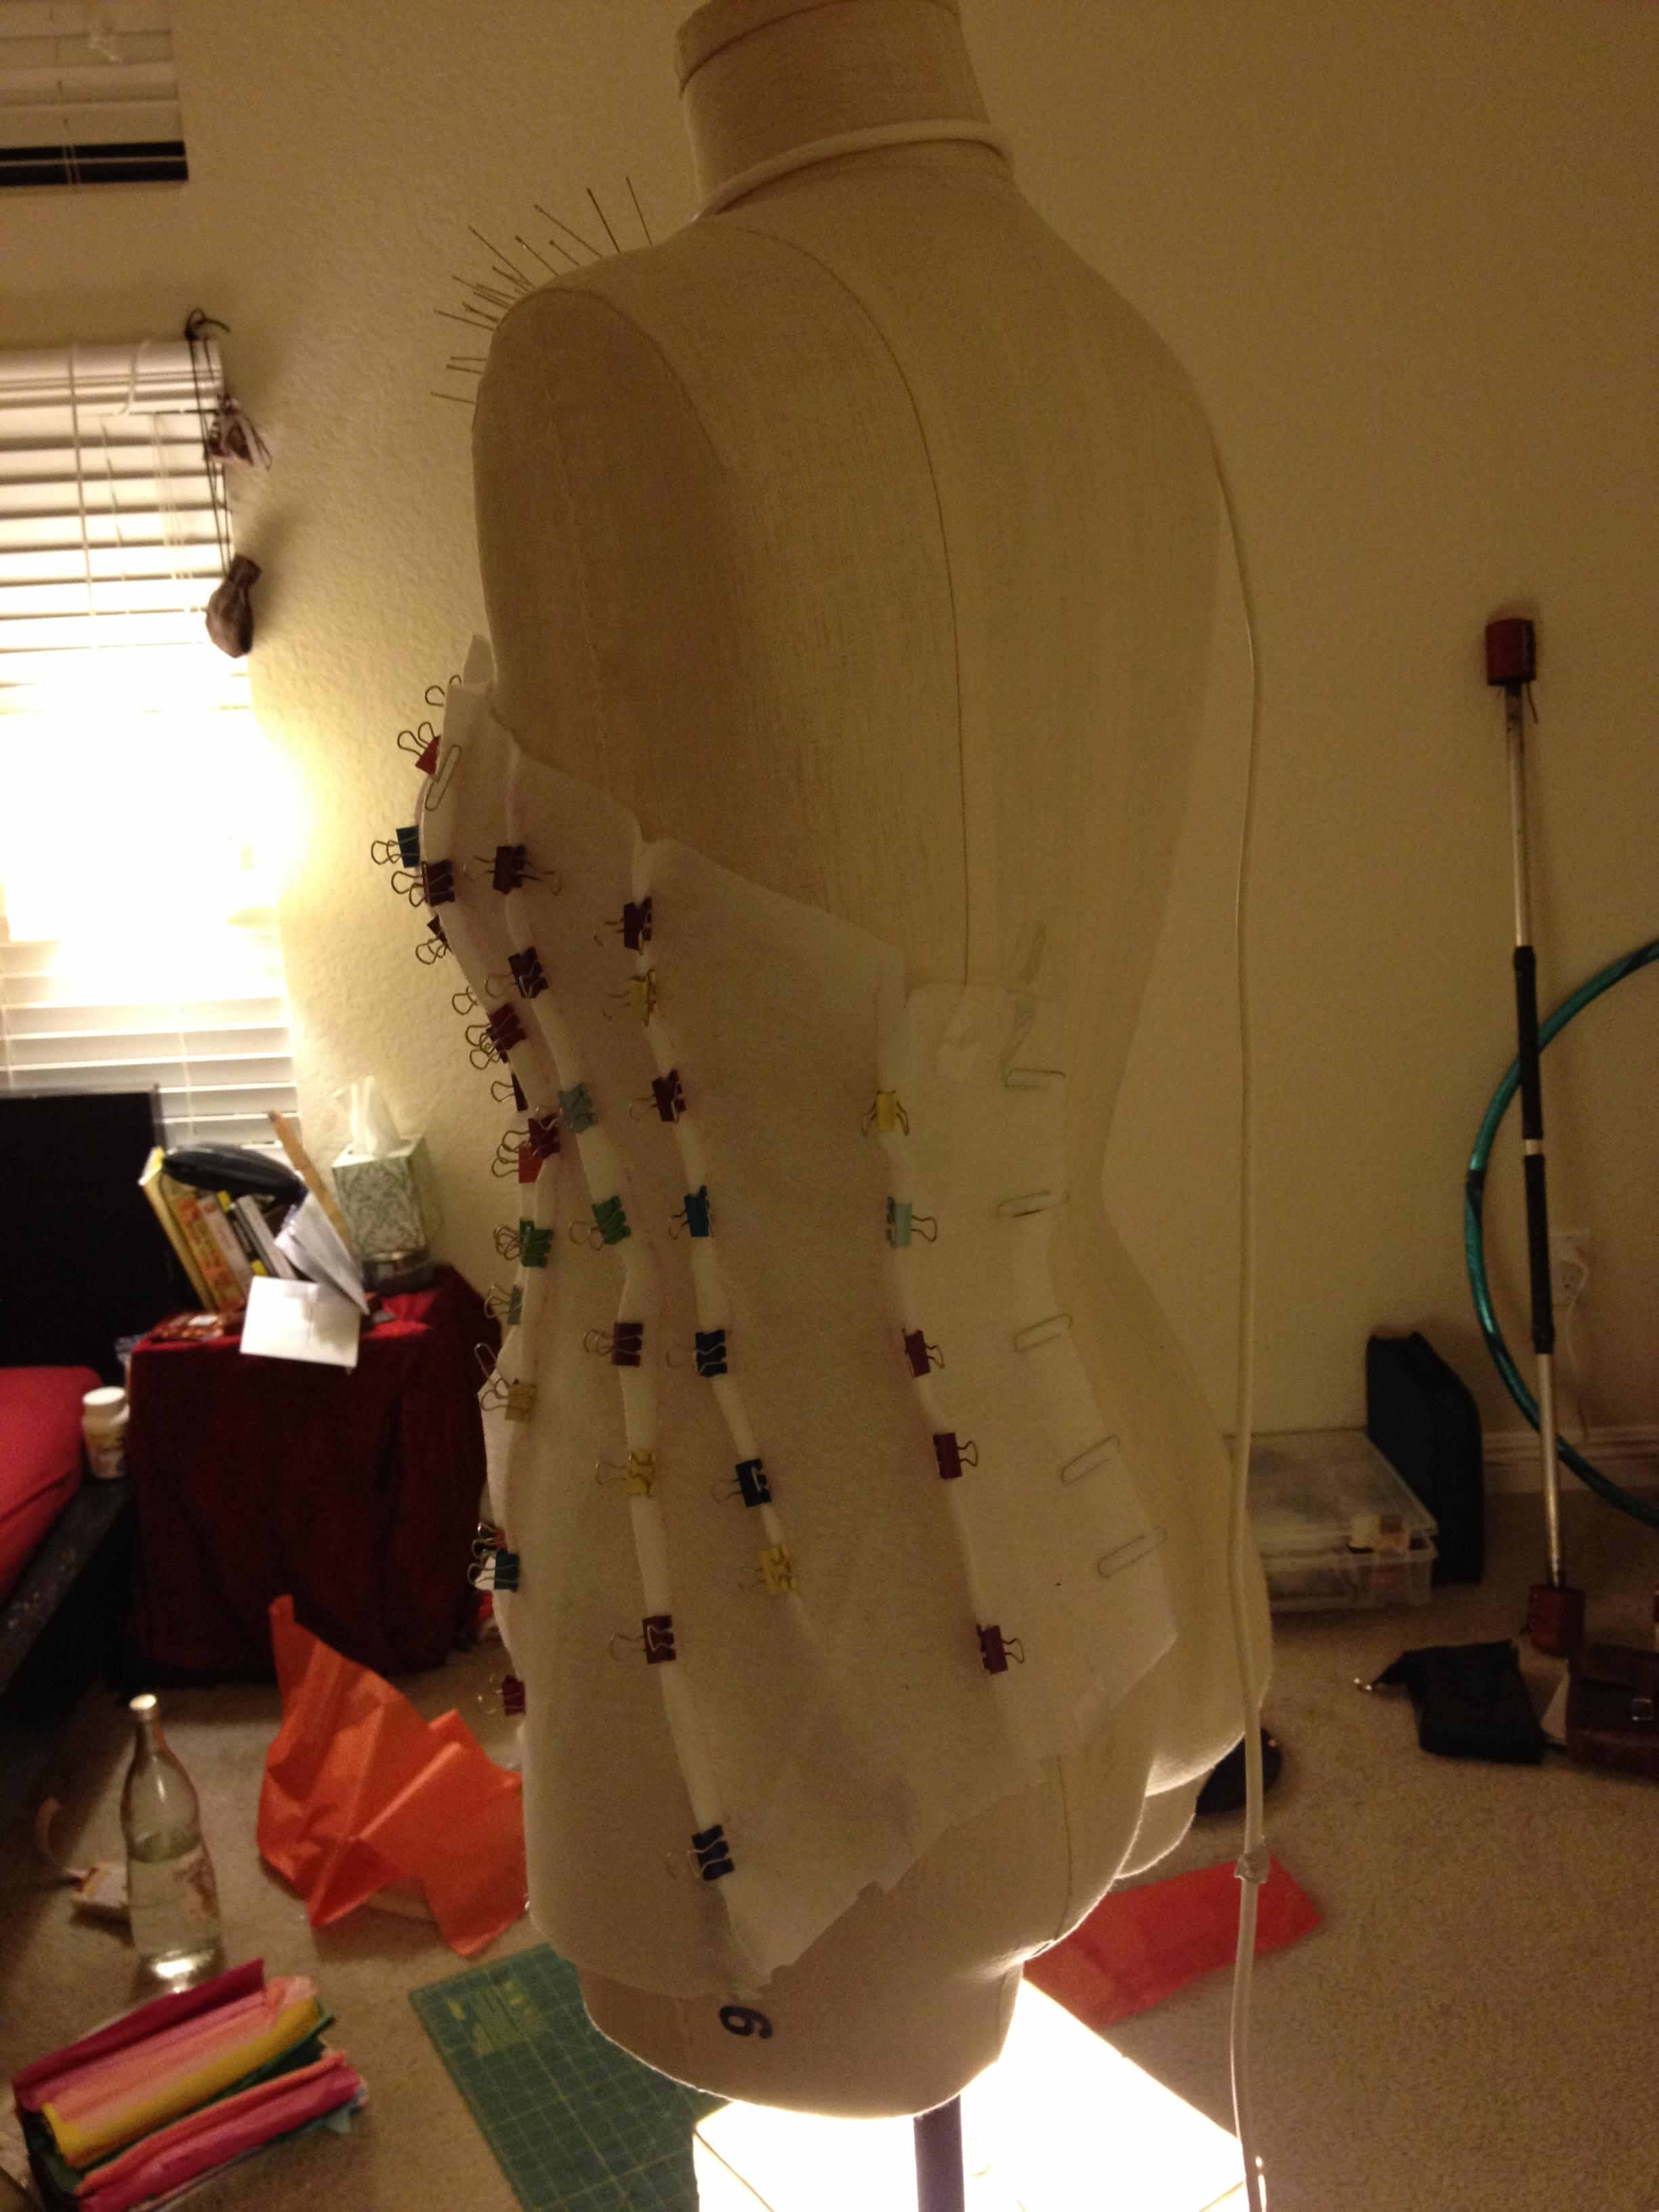
Using very thin cloth on a dressform, create darts: Anywhere the cloth folds, mark it with pins and that will determine the shape of each piece
This was my first time using this technique, it turned out to be easy enough and paramount to make sure the corset will fit.
Transfer to Paper

Once all the darts are created, mark the edge of each piece, cut and transfer to them paper. I use thick paper which is easier to handle and prevents from tearing.
This picture shows the pieces for one side. That's all you need, you can use both sides to create the mirror pieces once you cut the leather.
Tip: Make sure to mark them: right / left and with numbers (they don't make as much sens flat on paper than they did on the dress form, you might get confused! I did and it took me a while to put them back in order!)
Cut and Dye Leather
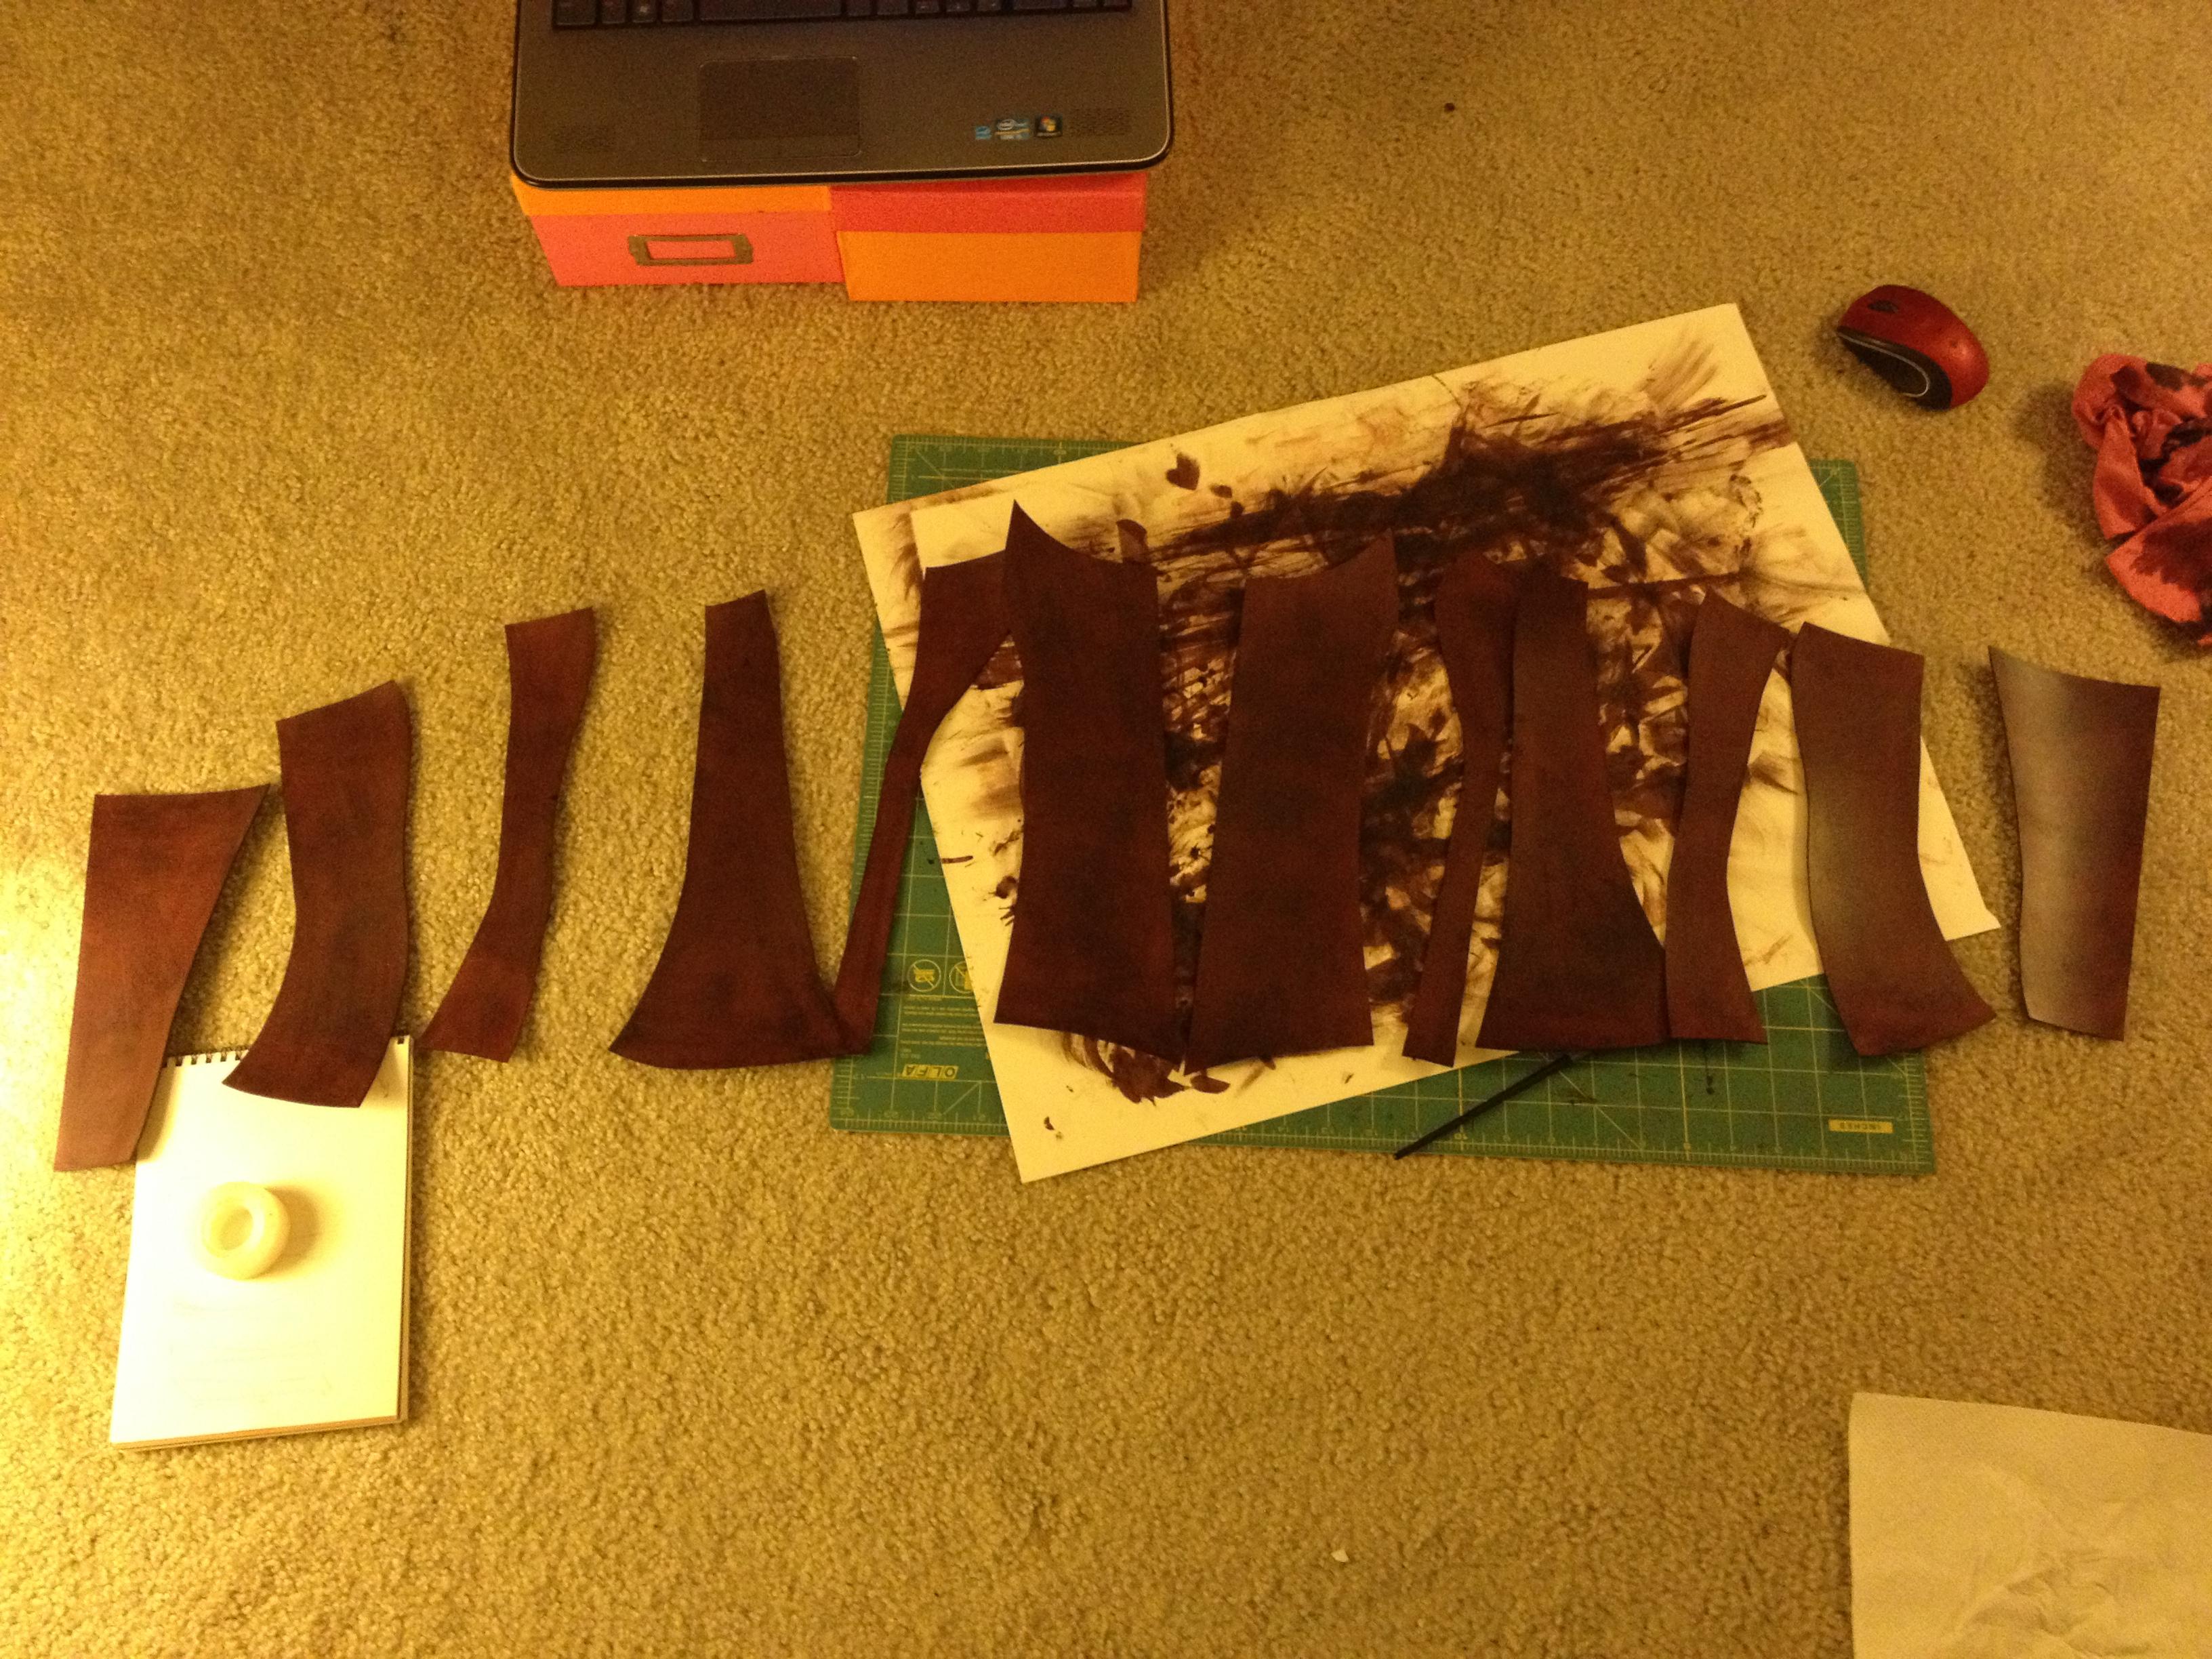
Transfer the paper pattern to your leather. I used vegetable leather and made sure that the thickness is the same one each piece.
As mentionned in the previous step, use both sides of the paper to create the mirror piece.
Then use the dye of your choice. I used a natural sponge and dabbed it to the leather to give it an effect
Once the pieces are dry, apply leather finish with a paint brush
Tip: In retrospect, I used leather that was a bit too thick. The corset ended up pretty rigid, I can still wear it but it could have been a bit more comfortable!
Punch and Stitch


Once the pieces are dry punch holes with a holepunch which you'll use to stitch the pieces together.
Make sure have the same number of holes on both pieces and that they're facing each other. Also try to have an even distance between each whole (the devil's in the details!).
The use waxed thread to connect the pieces. I made crosses because I thought it would be pleasing to the eyes. If you're gonna make the cross pattern, make sure to have a multiple of 4 holes.
Shaping

The leather I used is a bit thick so it needed to bend properly to follow the curves of my body.
I placed the pieces on the dress form, tight into cling film and let it rest overnight.
Tip: I didn't know at the time but it's a lot easier to shape leather:
Before you dye the pieces, get the pieces wet, they'll get very flexible and you can let them dry in the shape you want them to keep
Keep on Stitching!


Use the same process for all the pieces.
It take time because you need to be meticulous
Place the Eyelets
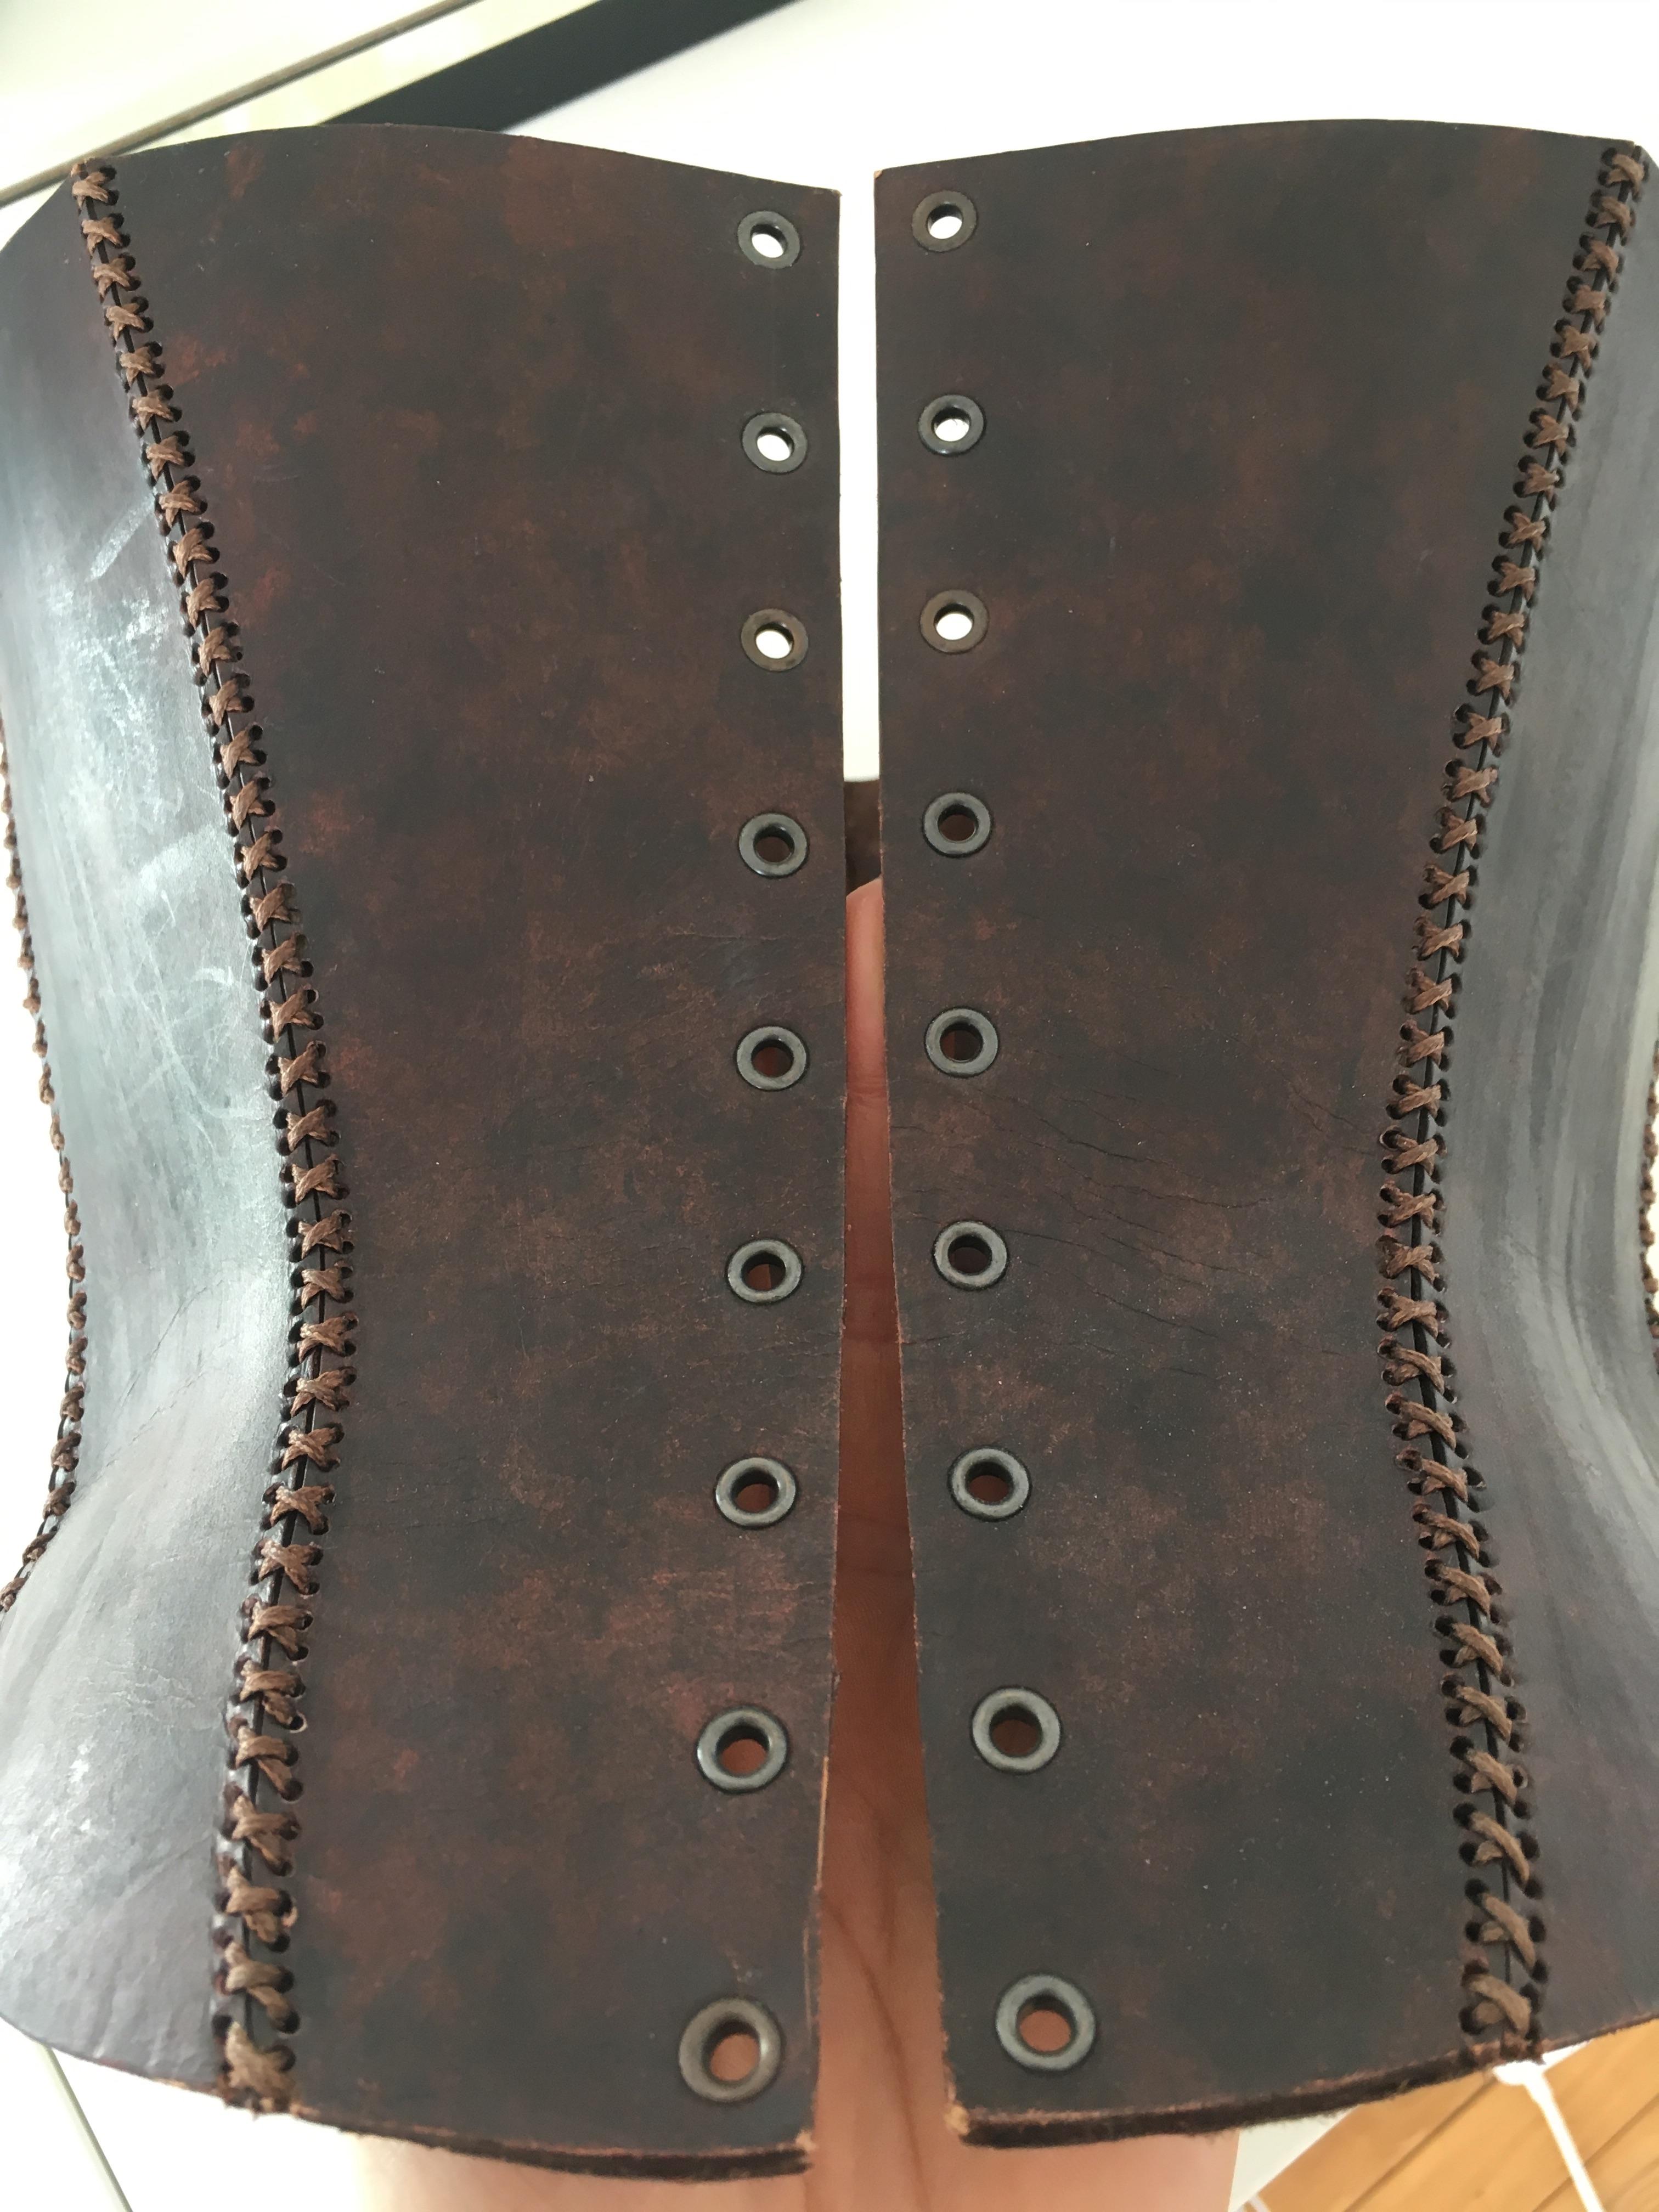
Once you're done, decide where you want to have the eyelets, punch holes and set them on.
Use a ribbon and maybe a friend to get dressed and you are done!
I hope you enjoyed reading about the process
If you use them t make one yourself, let me know I'd love to see the result :)