LeGoPro = Lego® + GoPro®
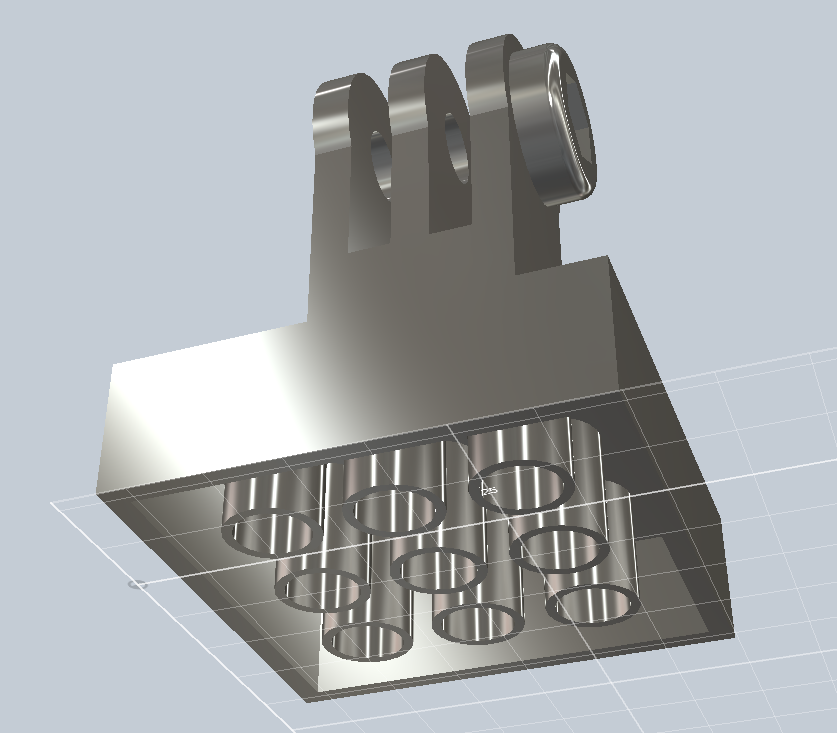
Ever since I was a young lad, yes just a couple years ago, I loved playing with Legos. I could create homes that would take hours to complete and then days later have a city. Fast forward to 2013, being 16 years of age and into the GoPro revolution, I began to like all the mountain bike and ski footage I was getting. However I really was into films from a young age. What if you could timelapse the build from a lego building, or have a third person view outside of that Lego racer, or even fly away on a Star Wars gunner ship? I thought to myself what better way to connect my love for Legos and new found addiction to the GoPro than to create the LeGoPro.
Step 1: the Base
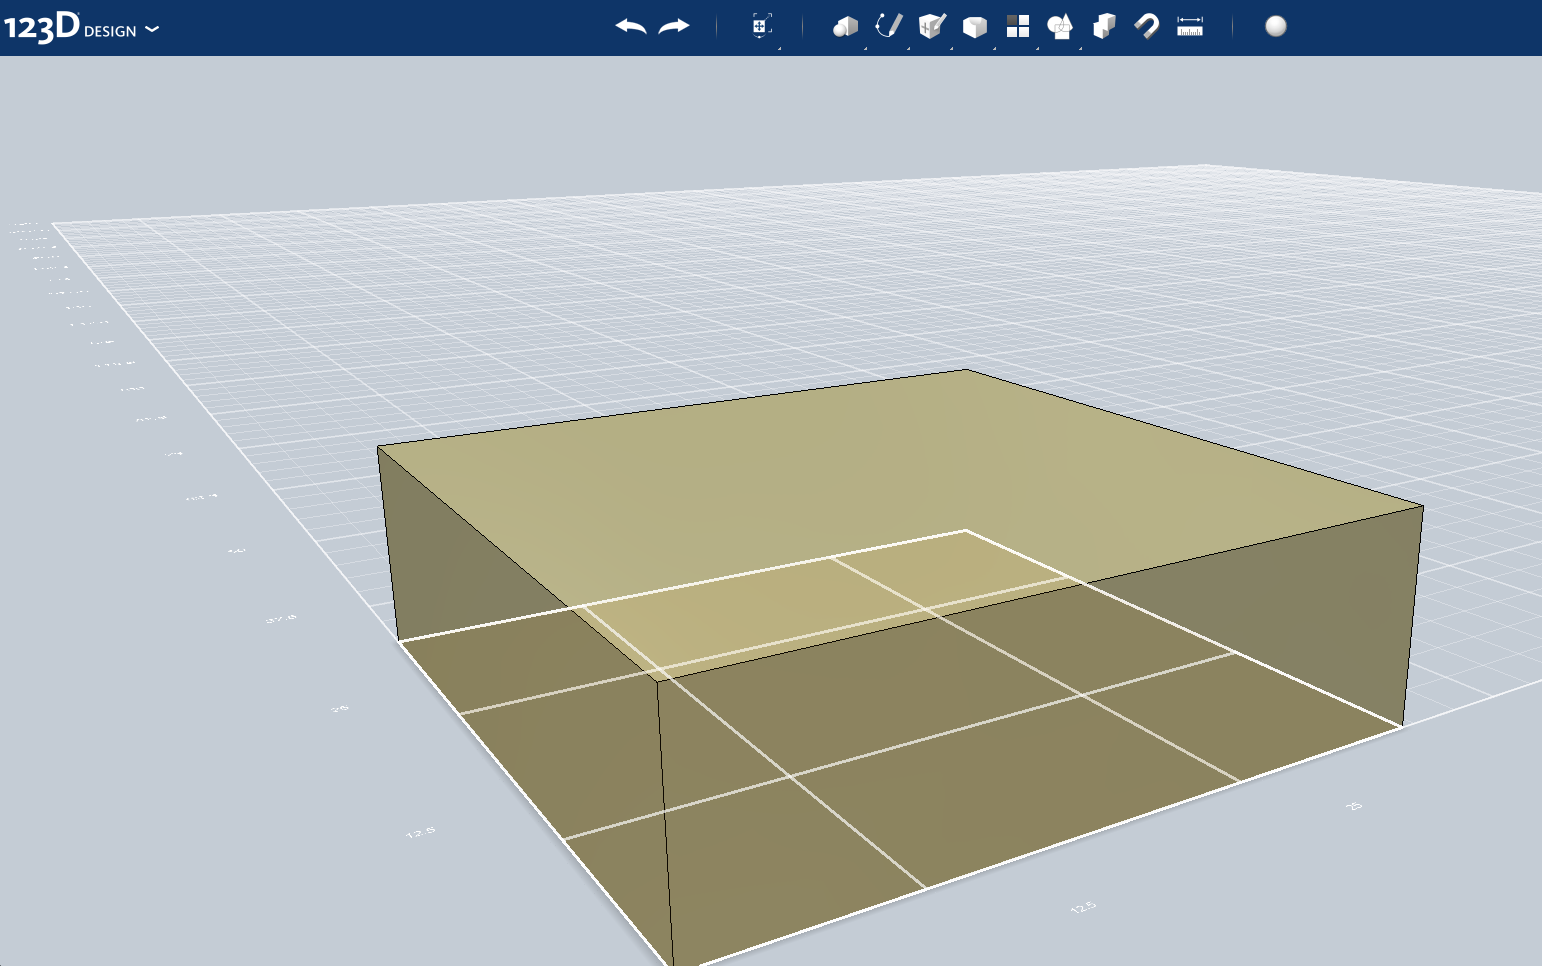
-Create the base by using the Sketch->Rectangle Tool
-The dimensions will be 31.8mmx31.8mm
-Next use the Construct->Extrude Tool to 9.4mm
-The dimensions will be 31.8mmx31.8mm
-Next use the Construct->Extrude Tool to 9.4mm
Step 2: the Walls of the Lego Half
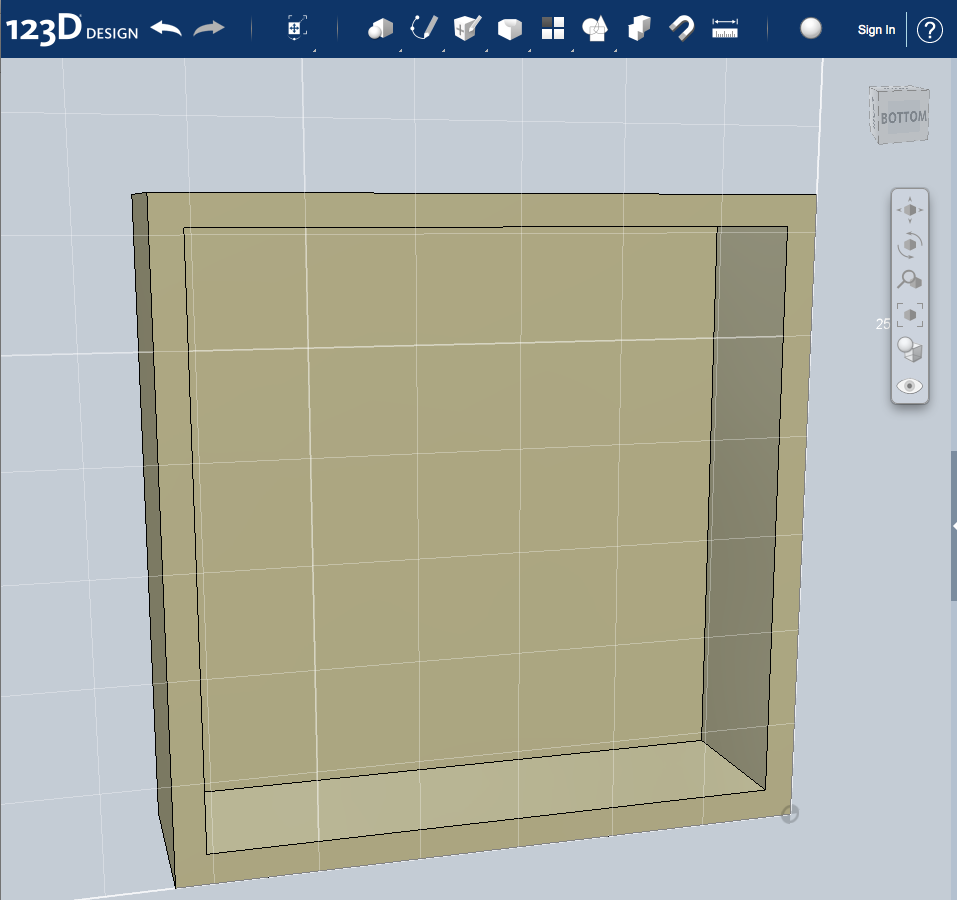


-Next switch to the bottom view
-Go under Modify->Shell and select it
-Set the Thickness Inside to: 1.5mm
-Now hit enter
-It should look just like the image above
-Go under Modify->Shell and select it
-Set the Thickness Inside to: 1.5mm
-Now hit enter
-It should look just like the image above
Step 3: the Cylinder
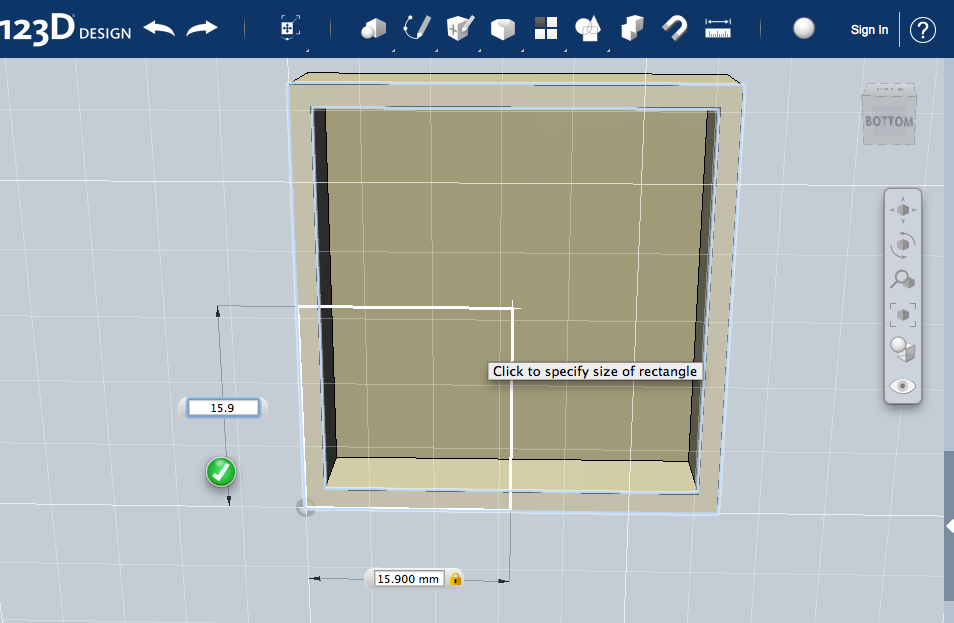
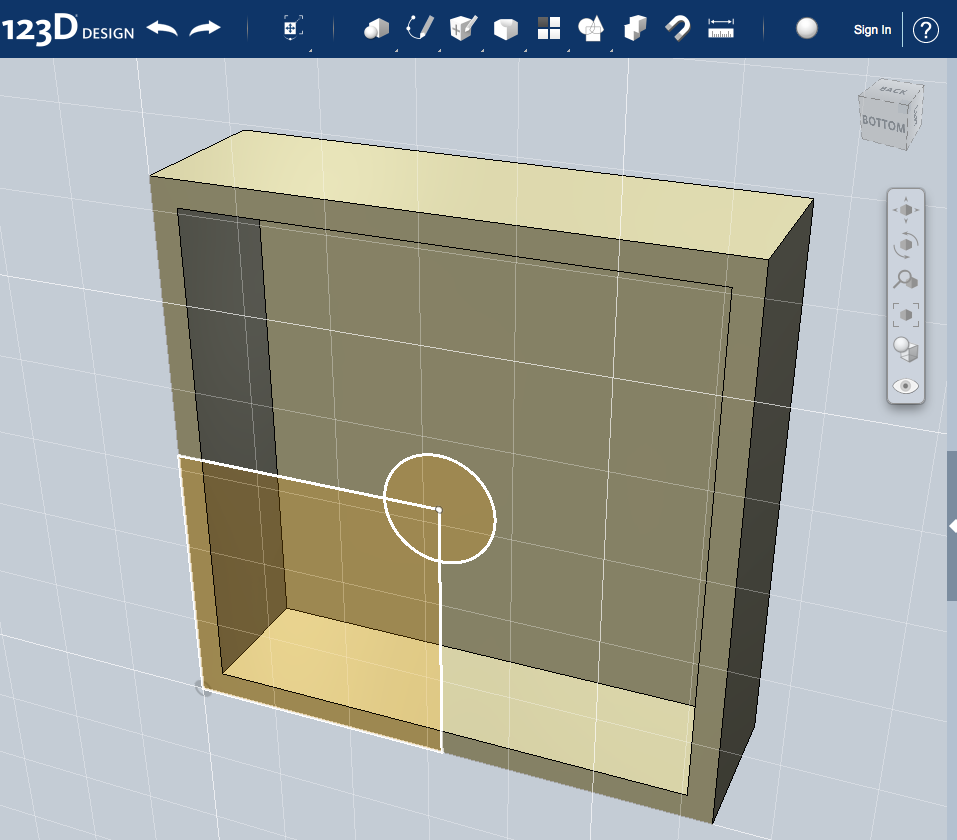
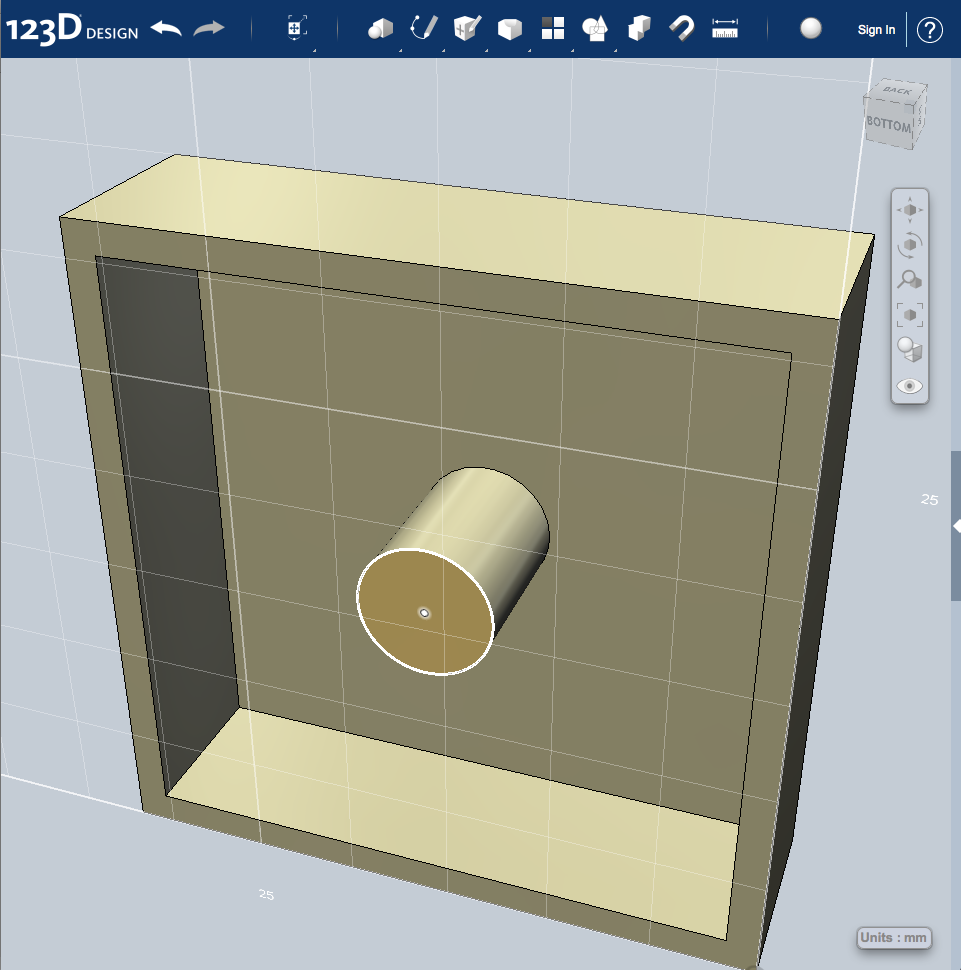
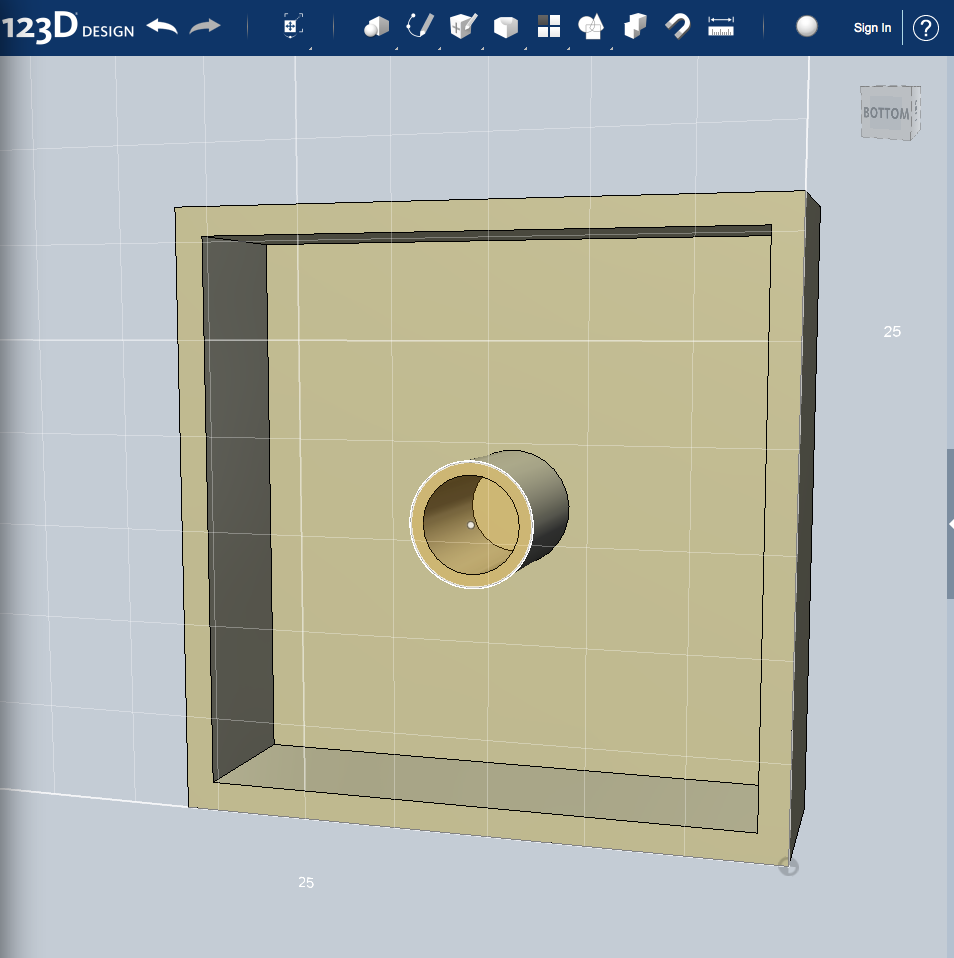
-Create a rectangle under Sketch->Rectangle and start at the bottom left corner of bottom of the lego
-Dimensions will be 15.9mm x 15.9mm
-Next go under Sketch->Circle and add with a diameter of 6.31mm to the top right of the rectangle you created
-Delete the rectangle you created
-Extrude the circle -7.90mm (Extrude menu is found under Construct->Extrude)
-Create an inner circle with a diameter of 4.996mm and extrude it -7.90mm
Step 4: Pattern of Cylinders
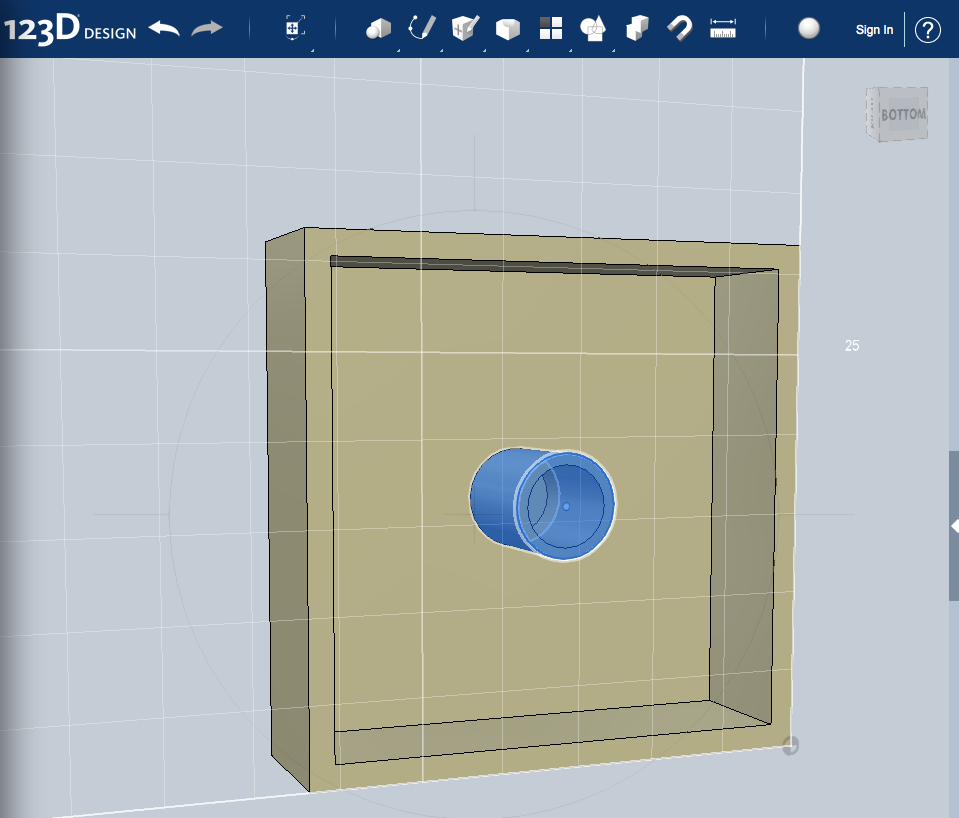
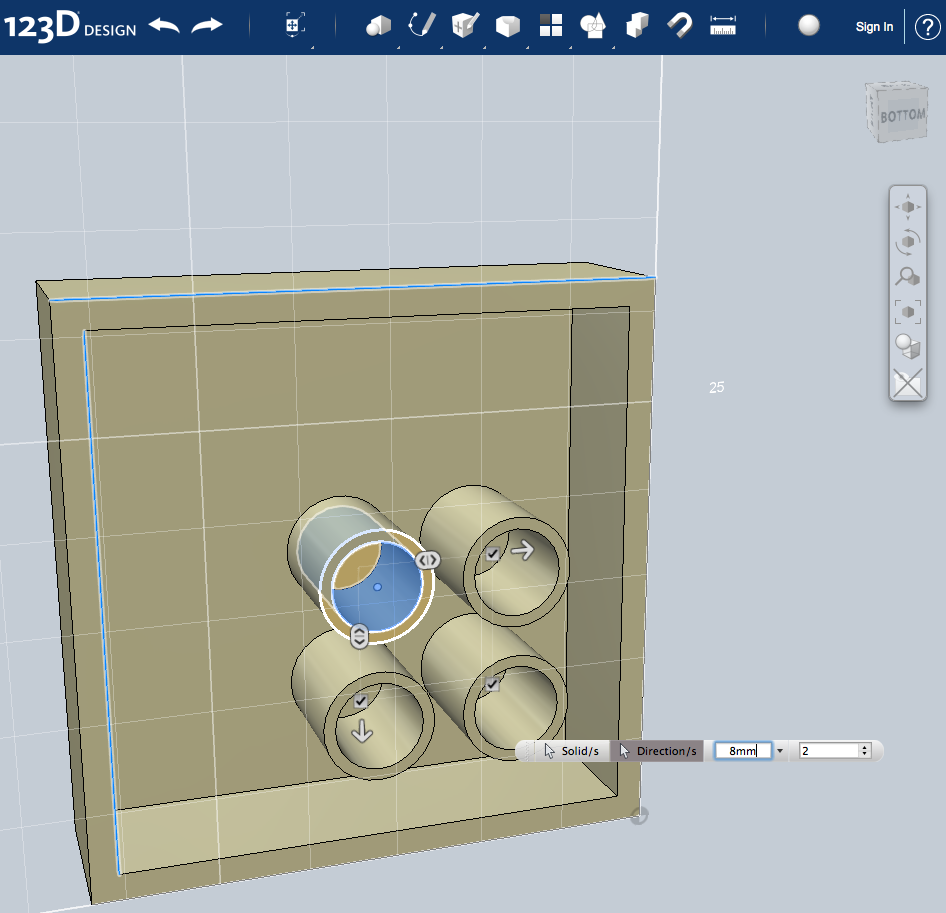
-Next go under Pattern->Rectangular Pattern select it
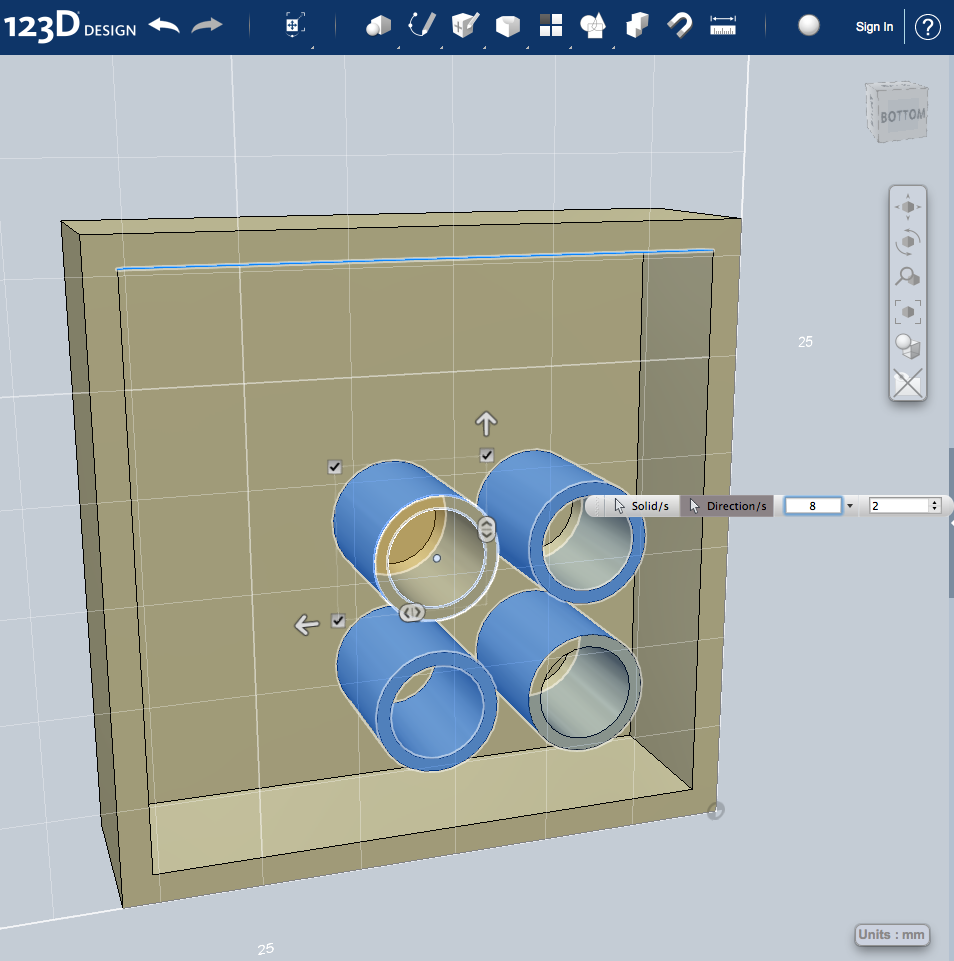
-Hold down shift while left clicking the faces of the cylinder until they all turn blue (see picture below)
-Select the direction box and then click the lines horizontal and vertical around the box
-Then put in 8mm for the distance and 2 for the amount
-You may need to select the arrow to get it in the other direction
-You should get a total of 4 cylinders then press enter
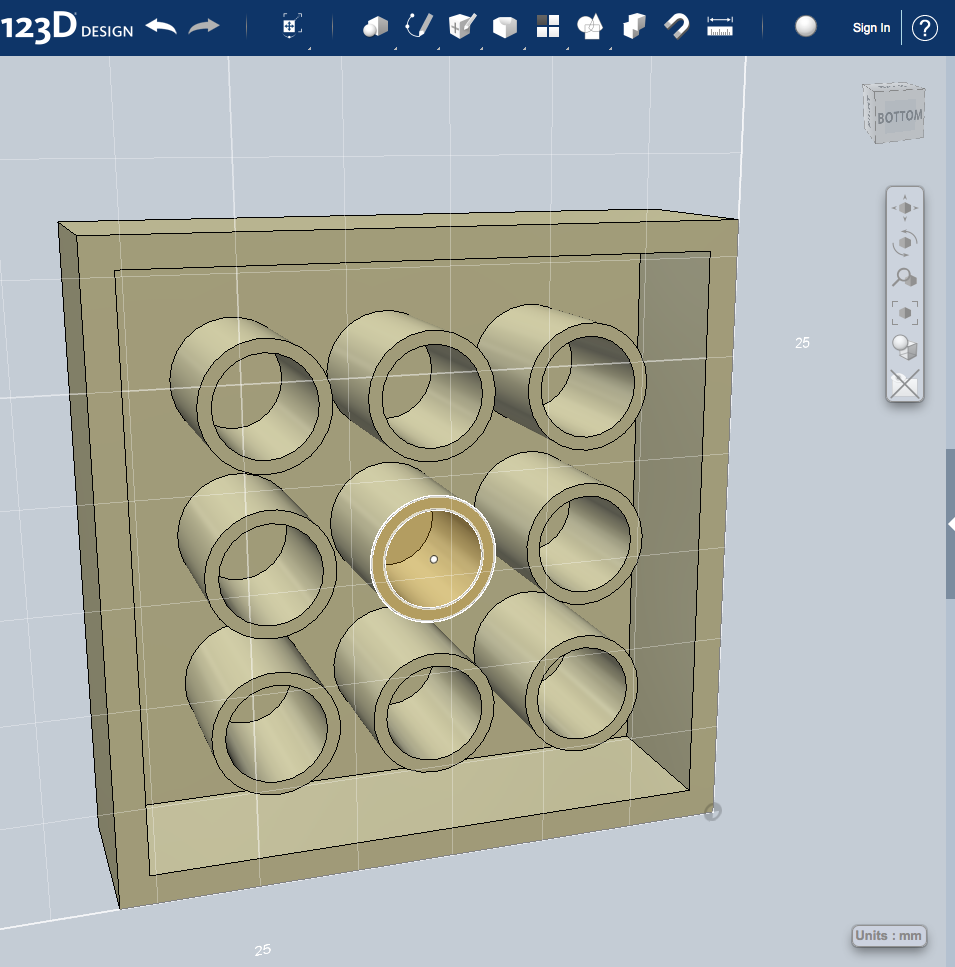
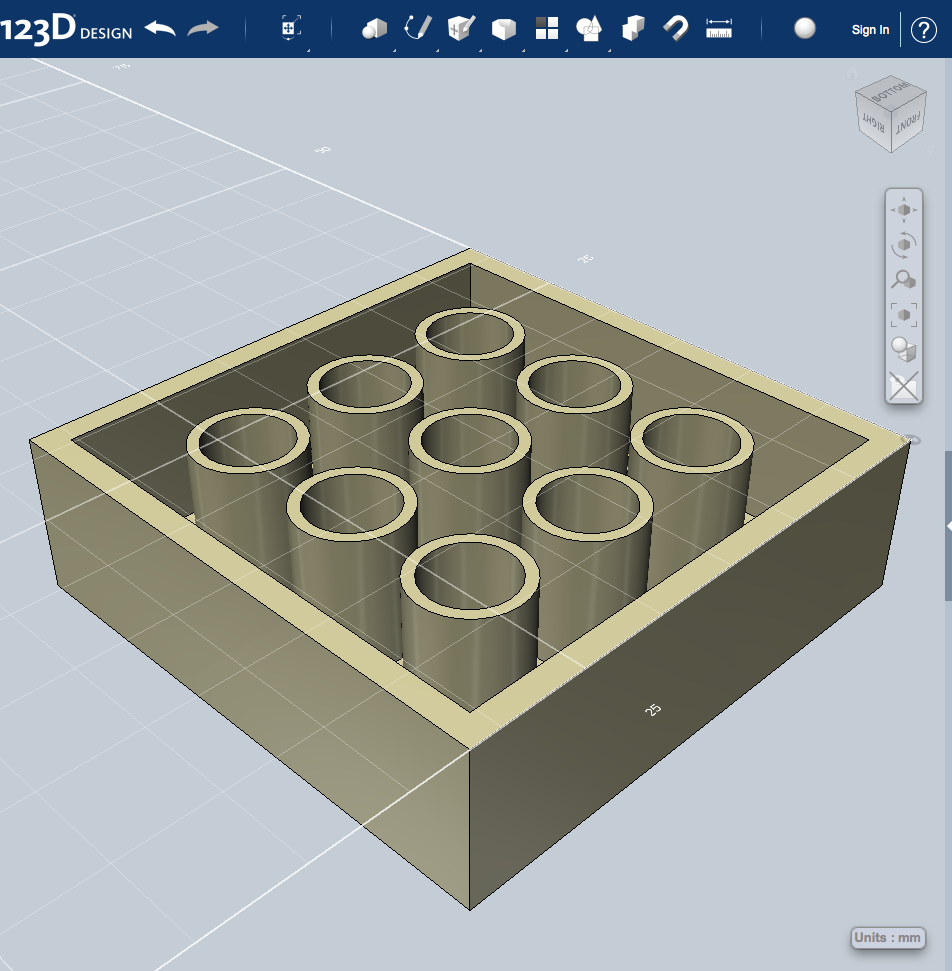
-Next you will repeat the process only now selecting all 4 cylinders and continue the patter until you get a total of 9 cylinders
(you will again do 8mm spacing and 2 for the # of repeats
Step 5: the GoPro Base
.png)
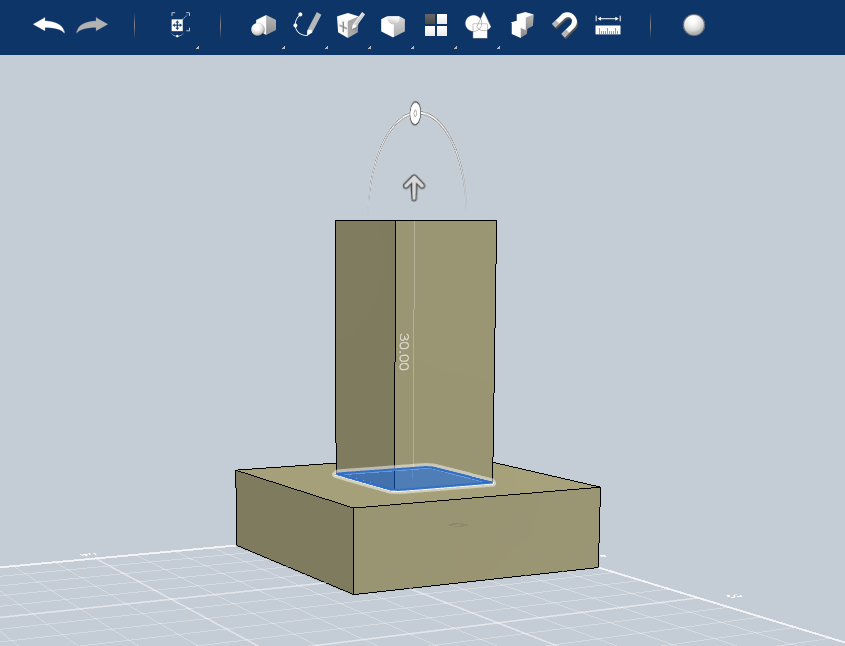
-Now create a rectangle in the center of the top with dimensions of 14.8mm x 13mm
Note: this doesn't need to be perfectly centered but will look better if you do
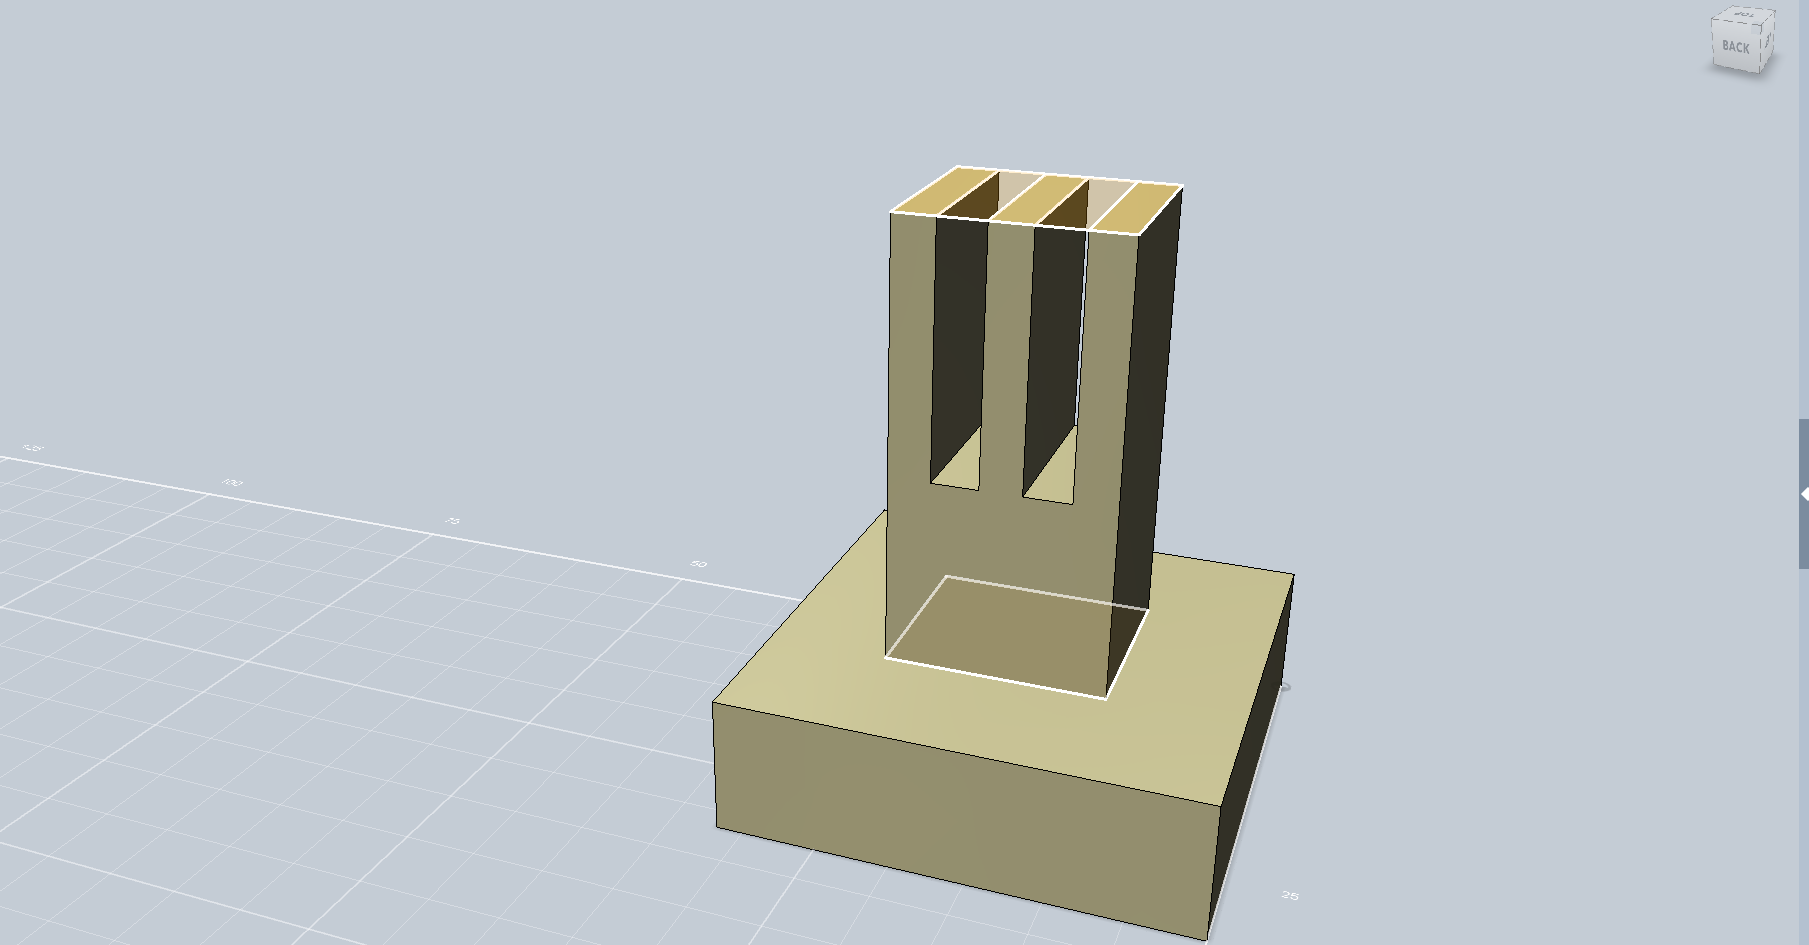
-Extrude the rectangle you just created 30mm
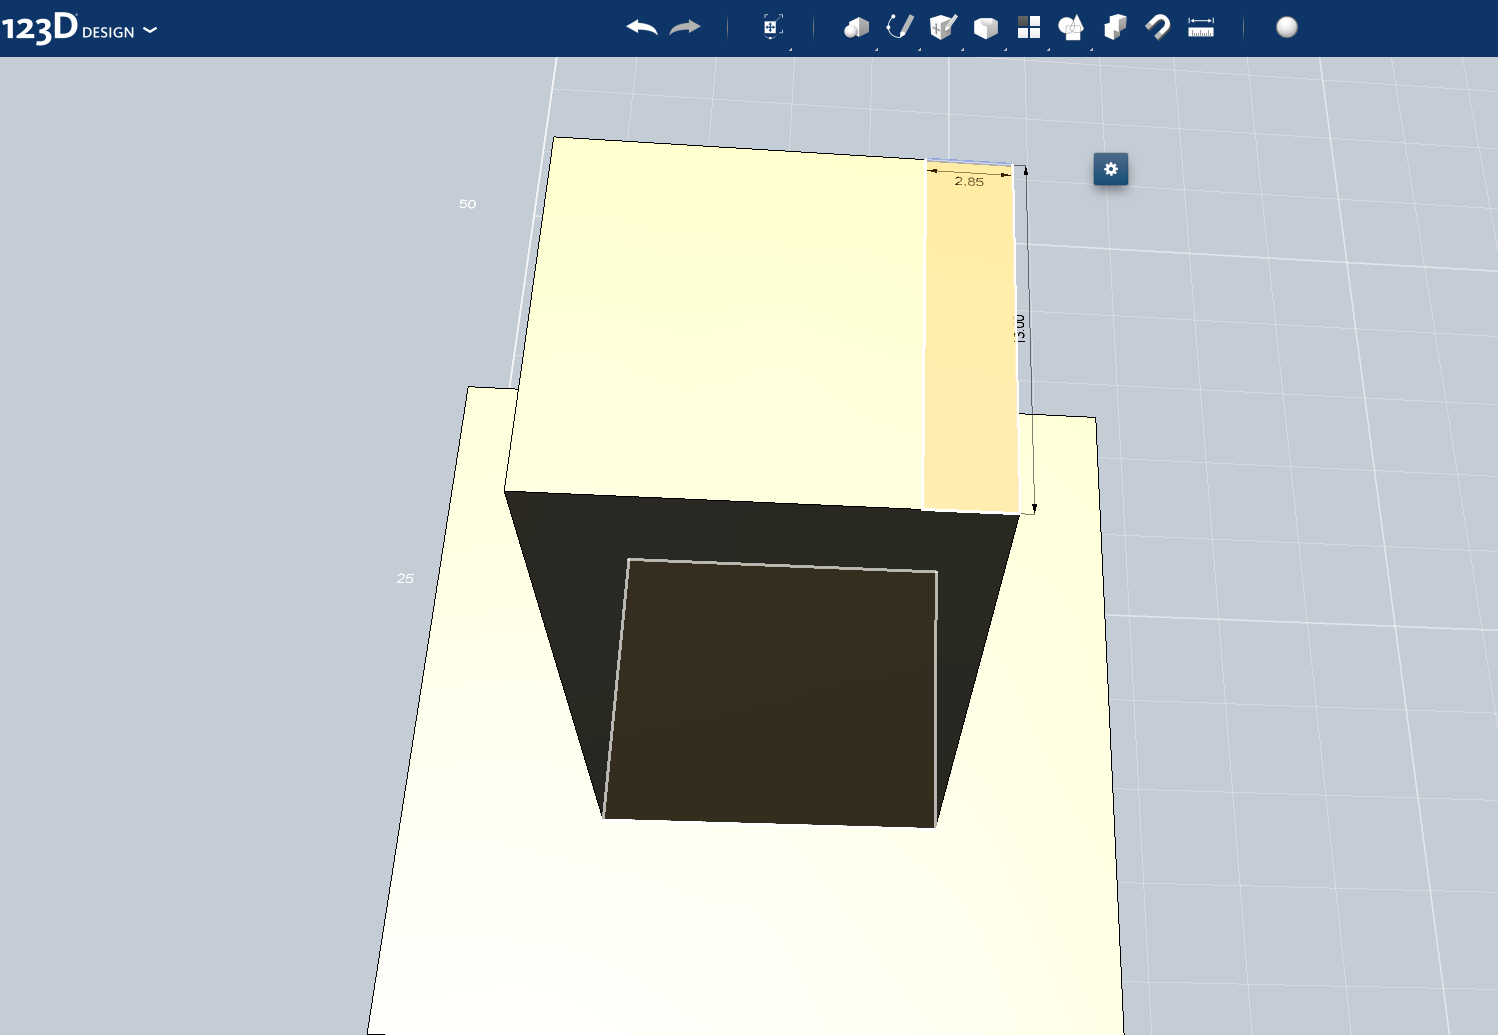
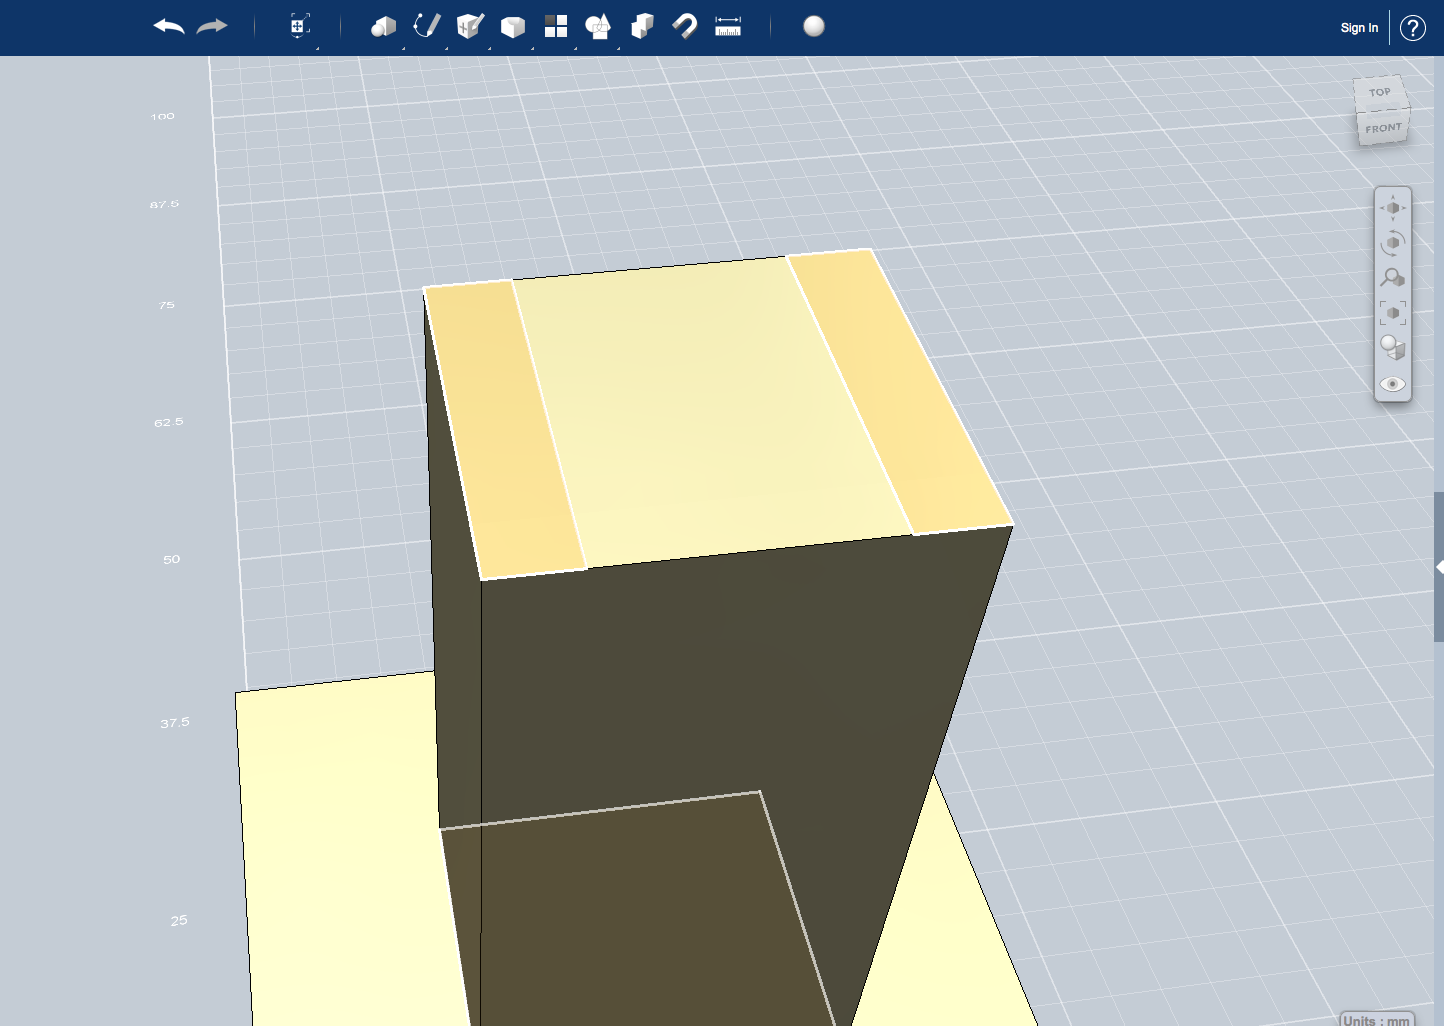
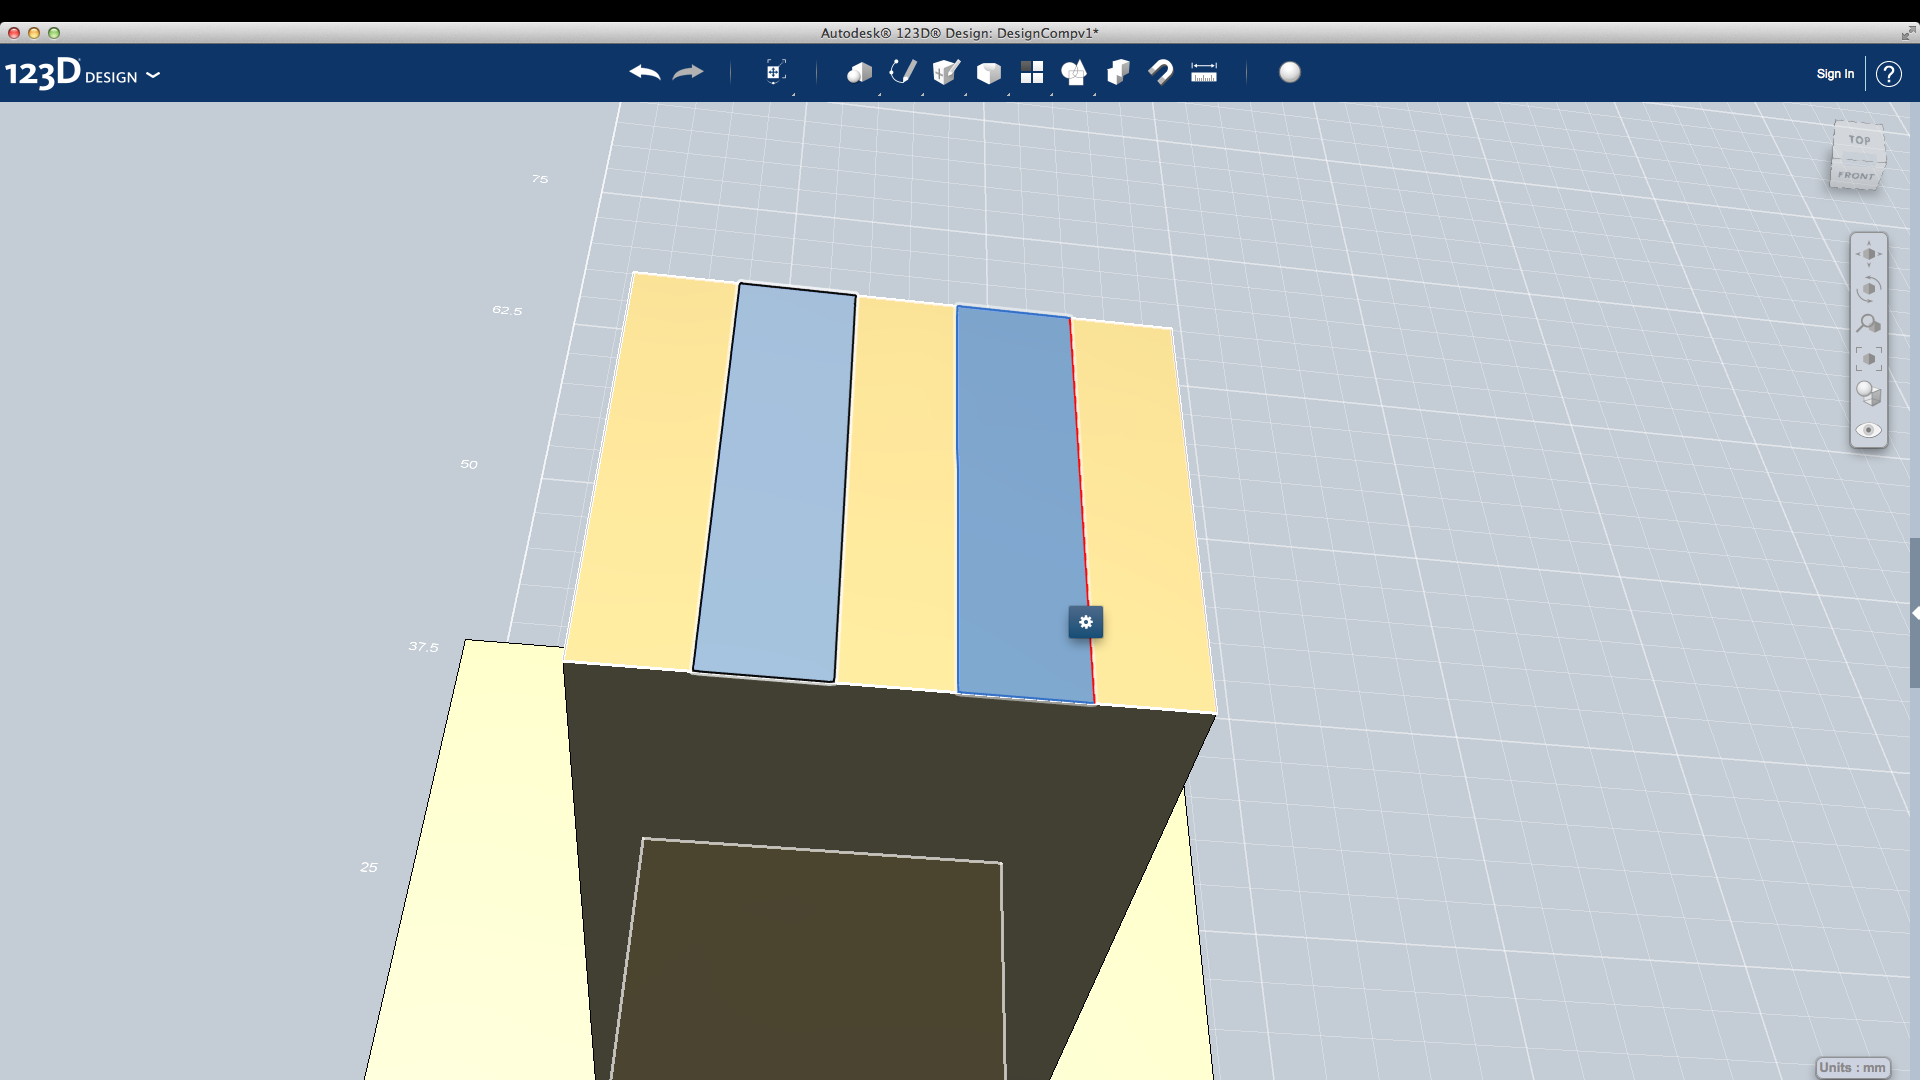
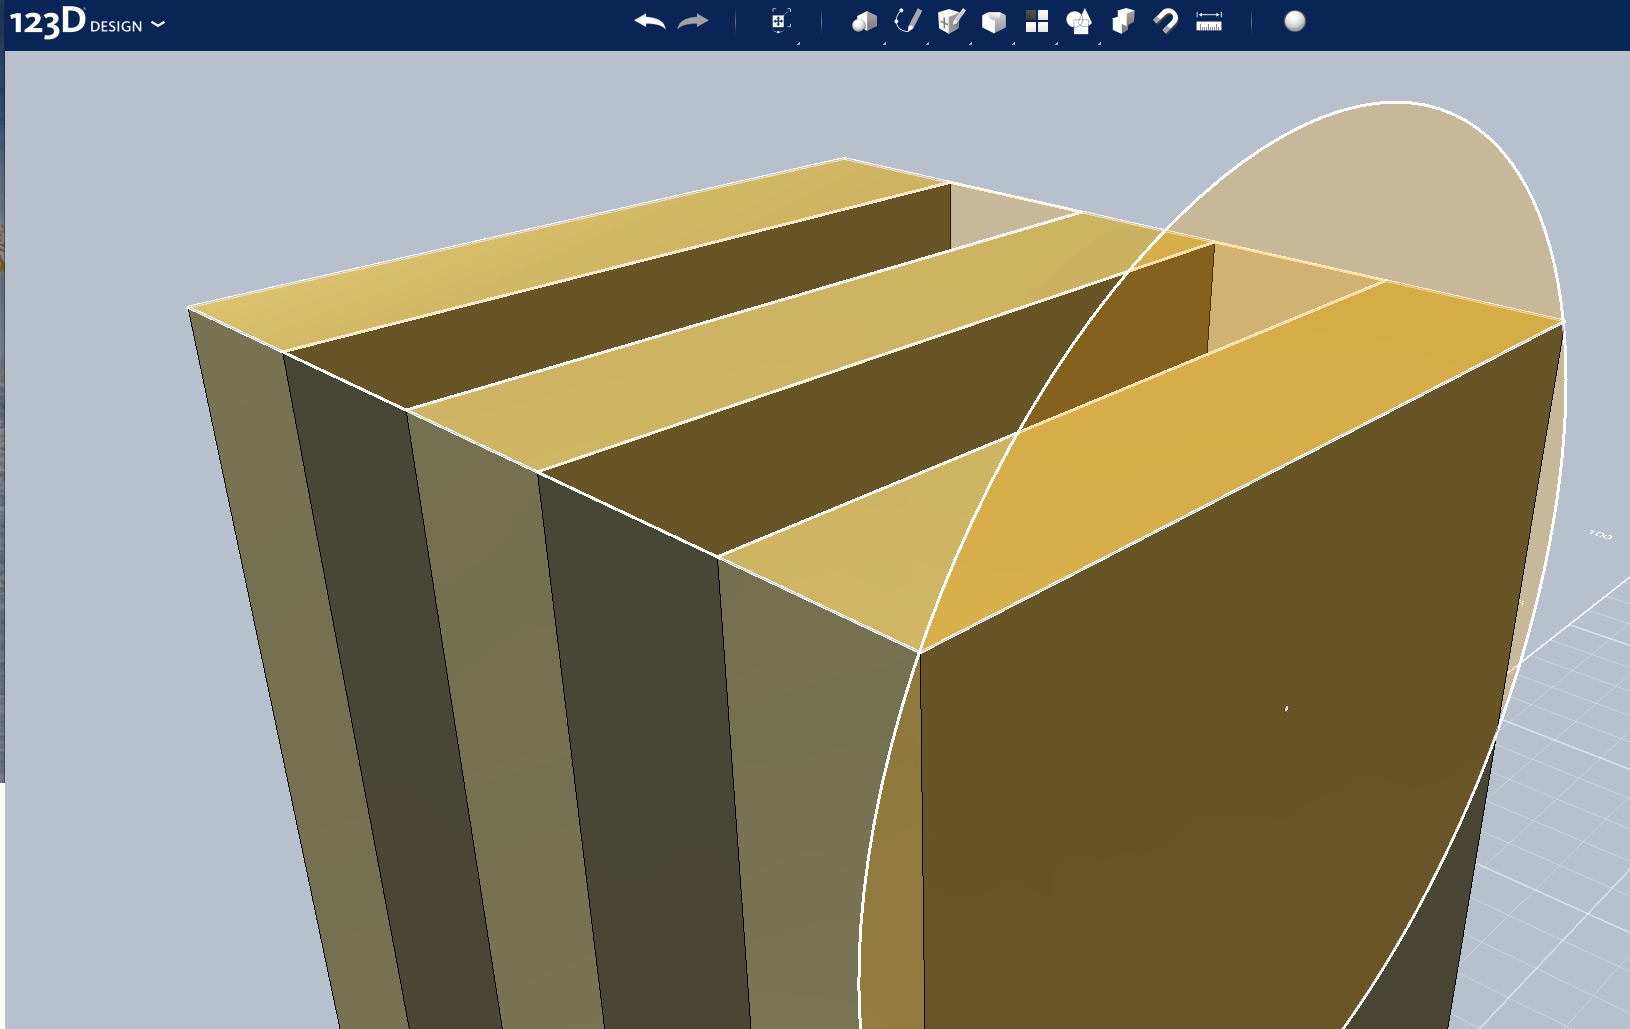
-Select the top plane and create two rectangles on the edges with the lines running parallel to the 13mm side (see pictures) With dimensions of 2.85mm x 13mm
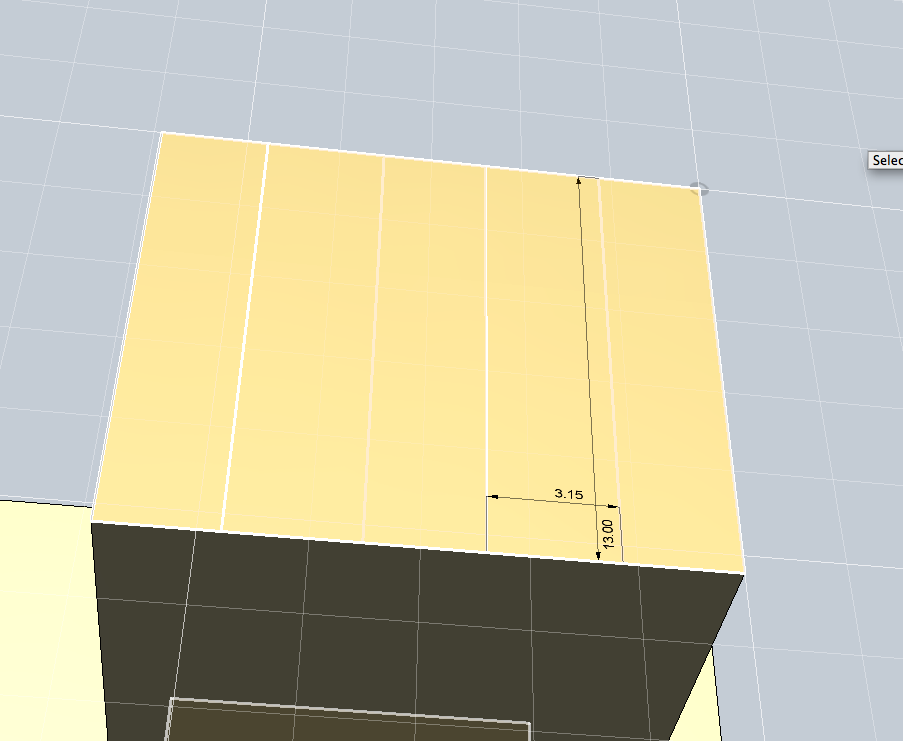
-Create another rectangle on the inside of those two with dimensions of 3.15mm x 13mm (see picture)
-Now extrude the two you just created down (hold shift and click the two) 17mm
Step 6: the Top of the GoPro Mount
.png)
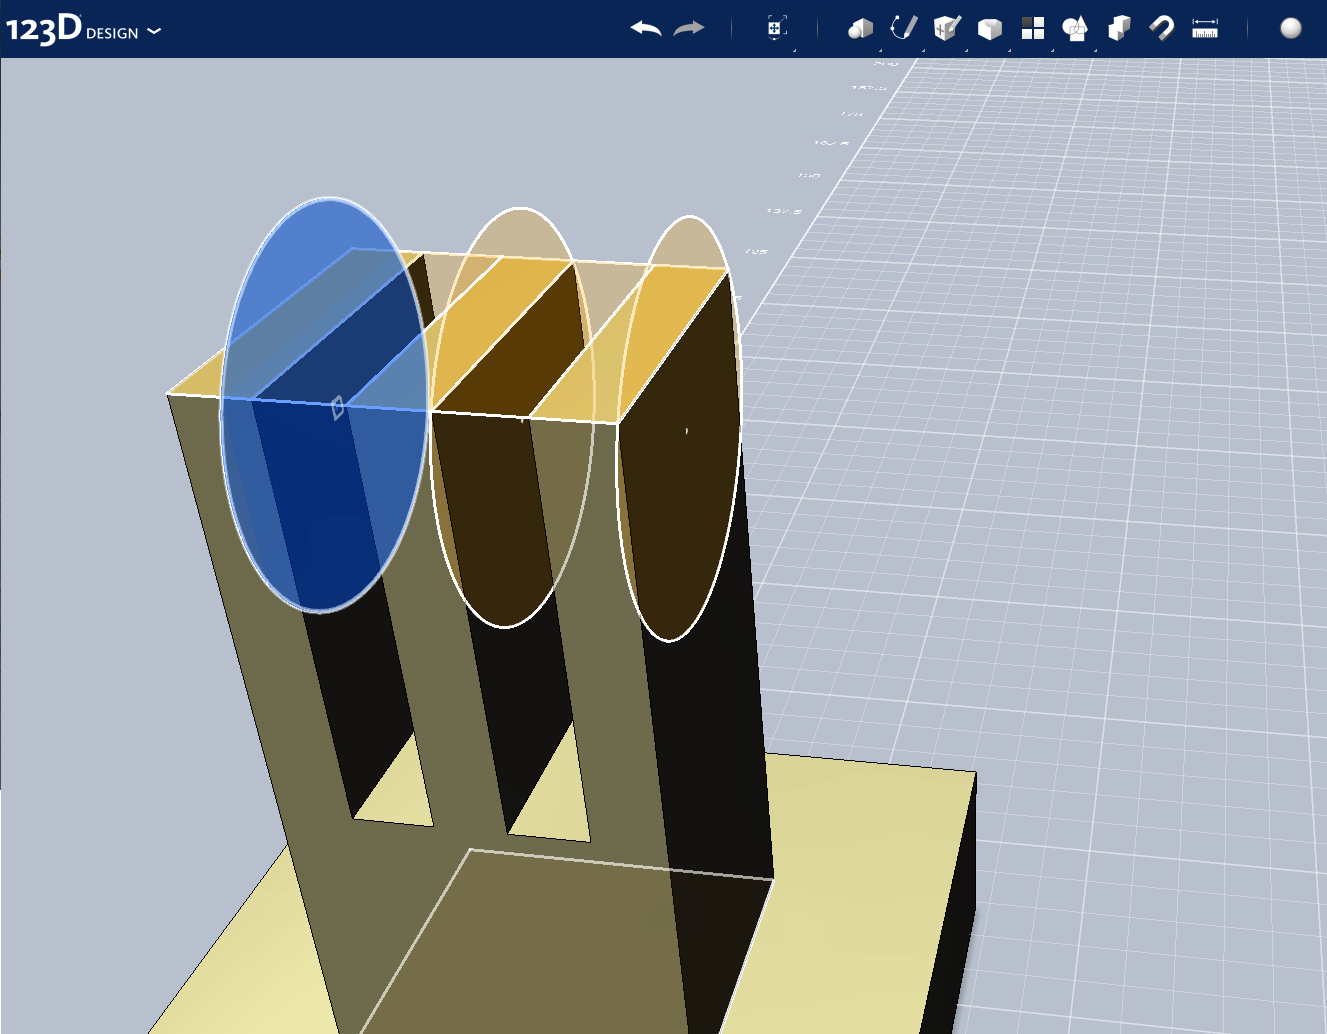
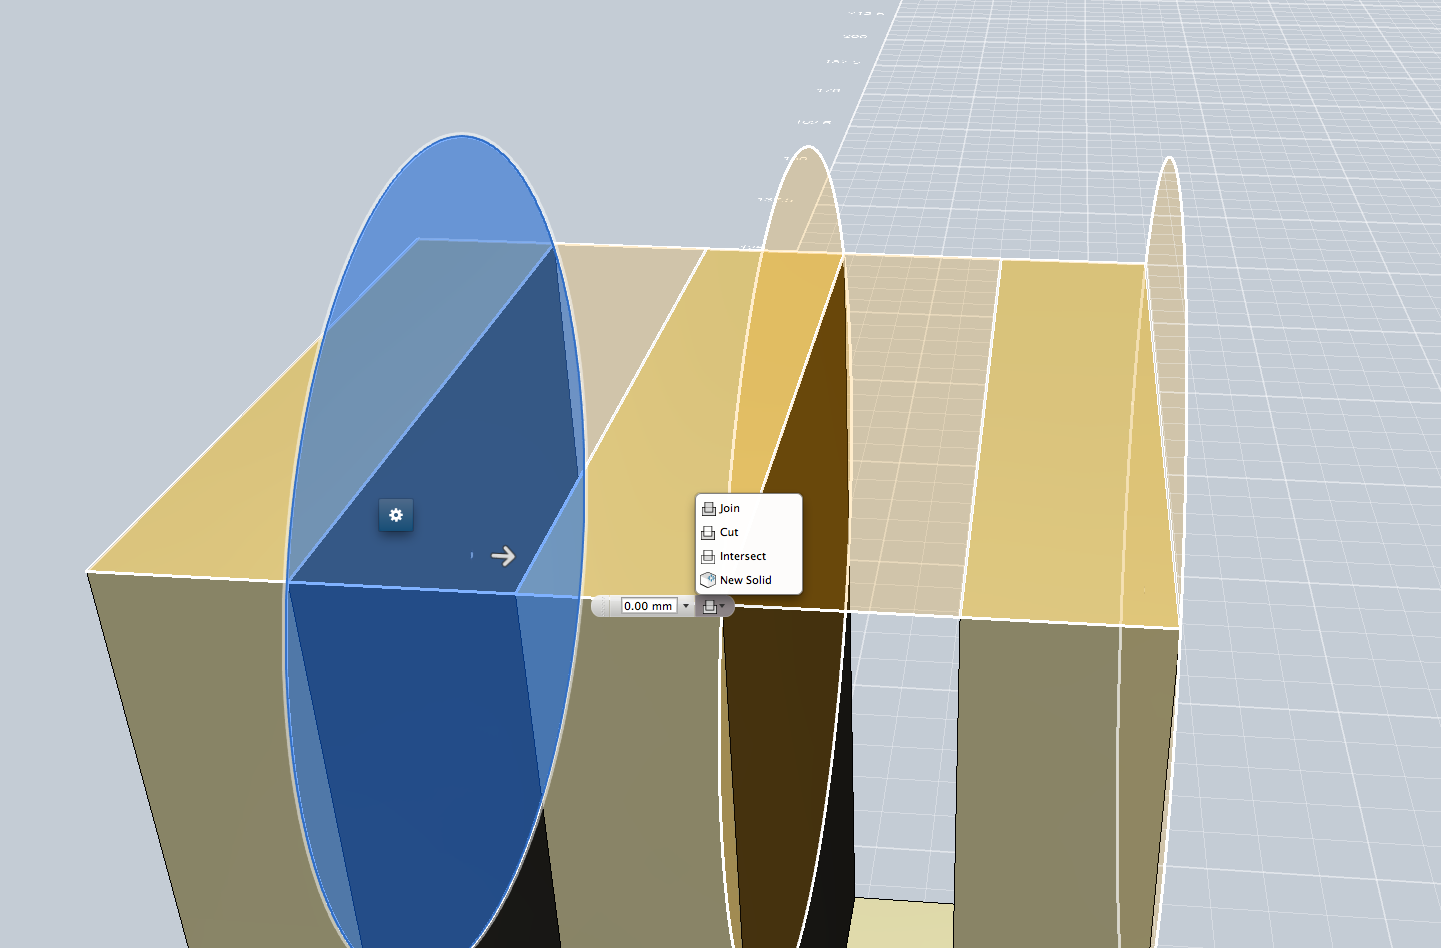
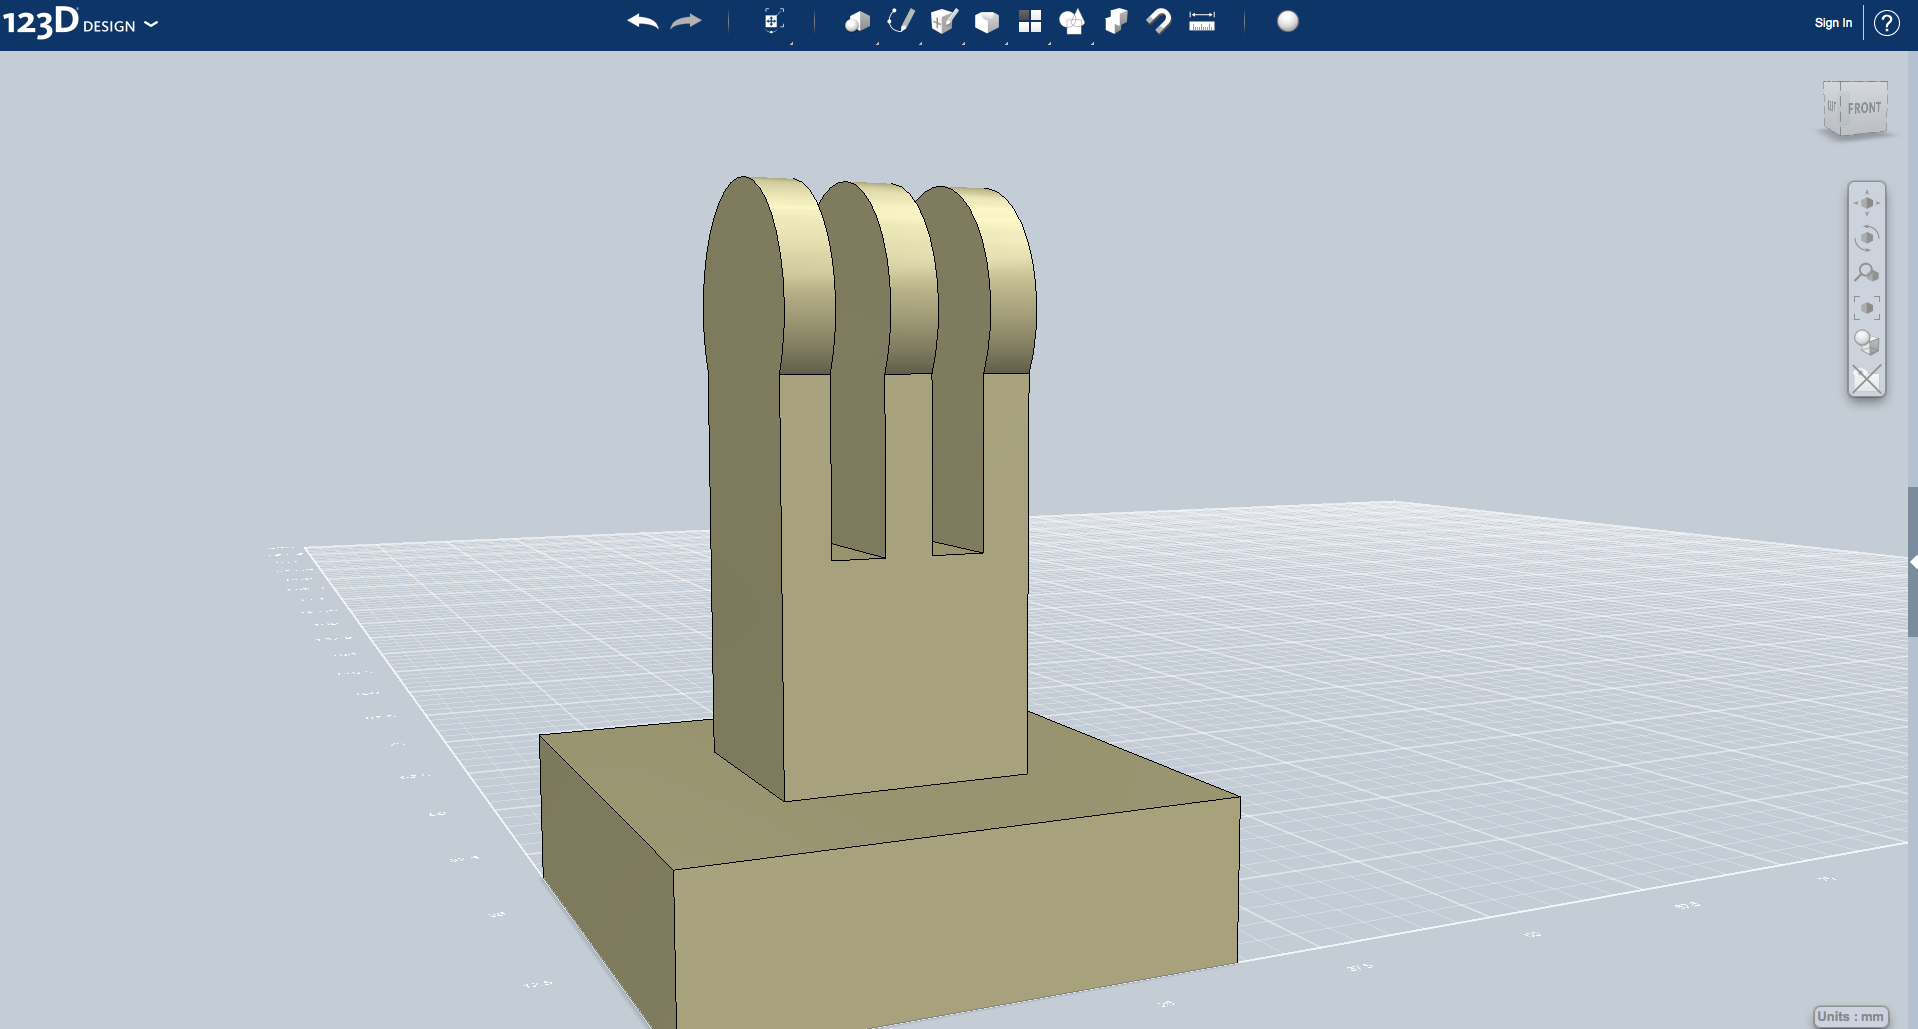
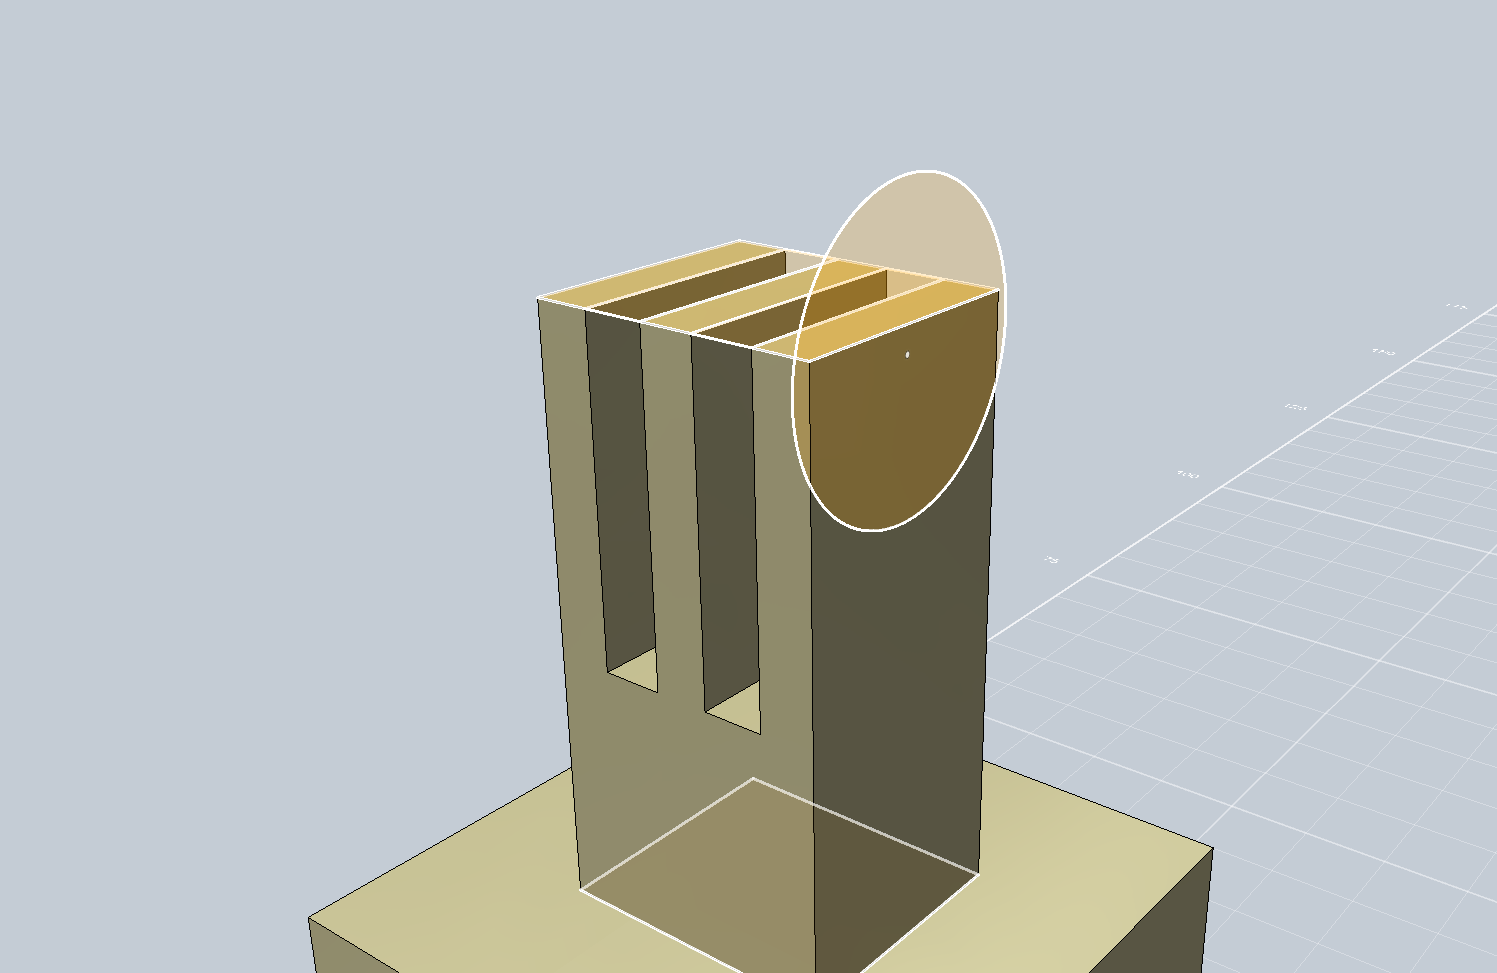
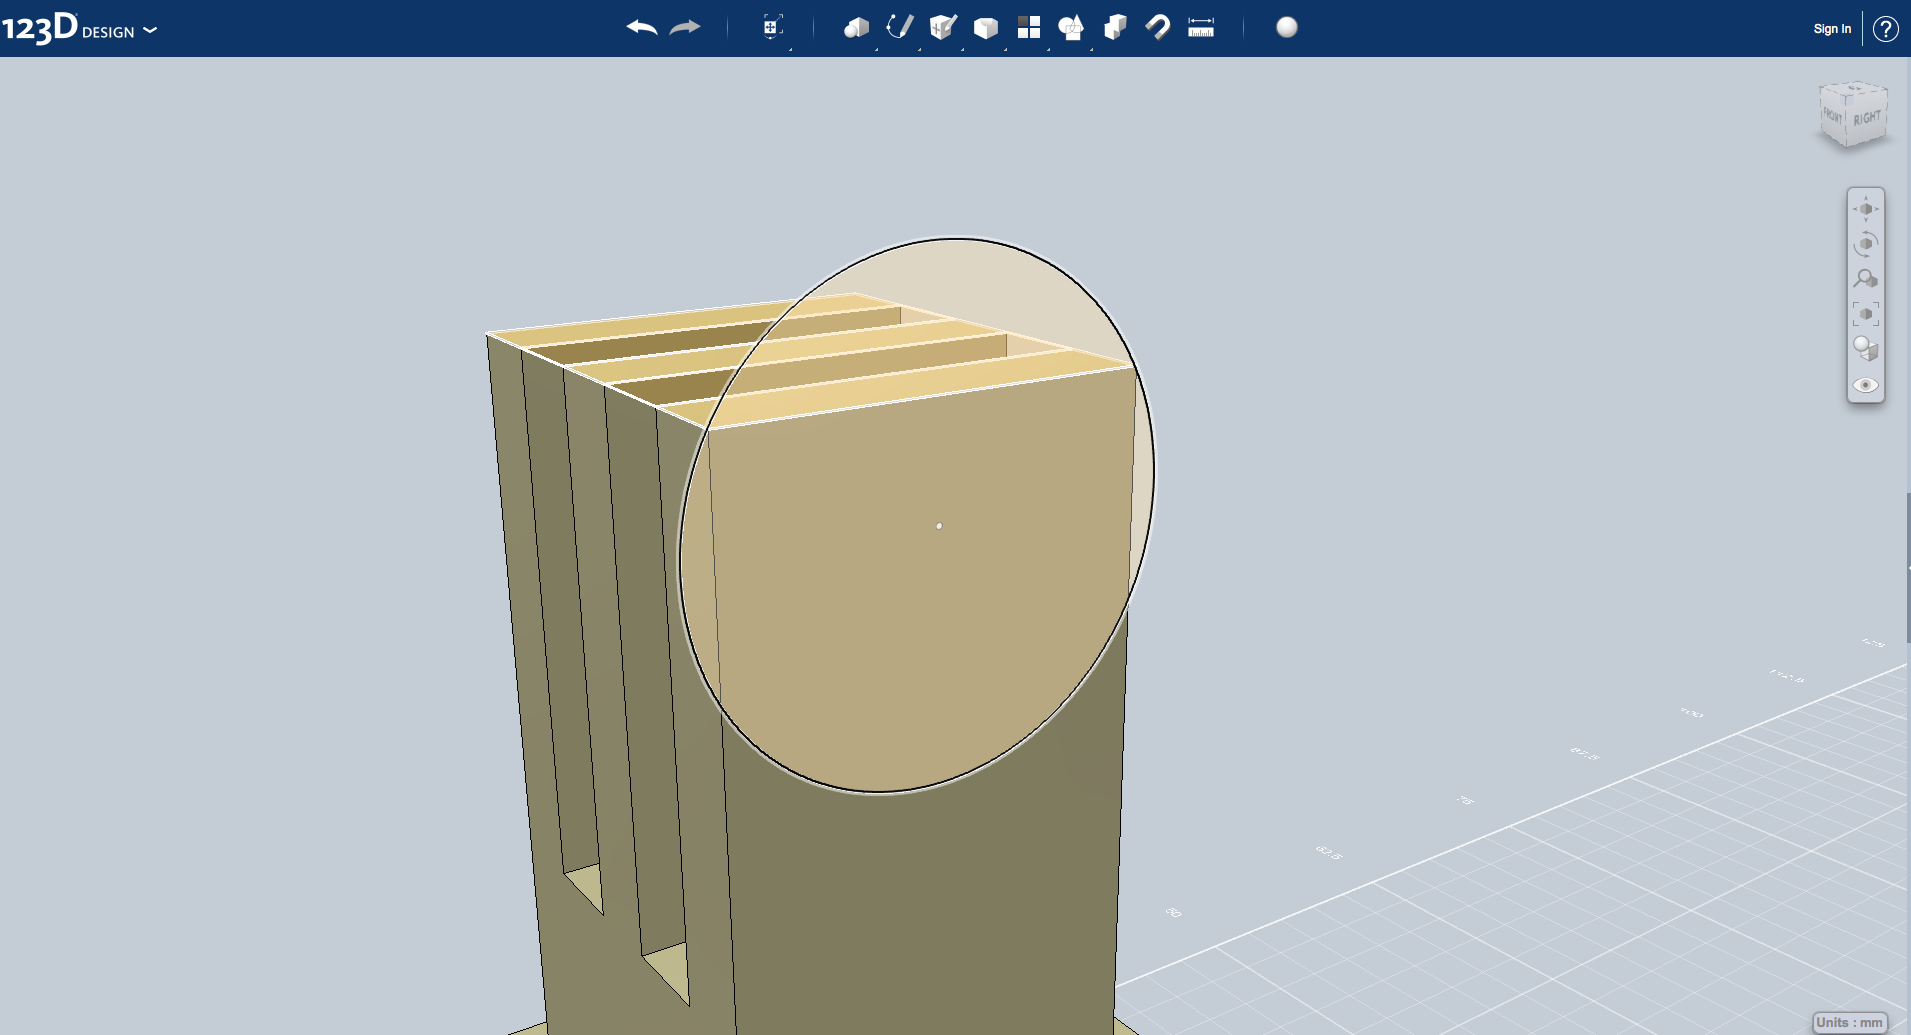
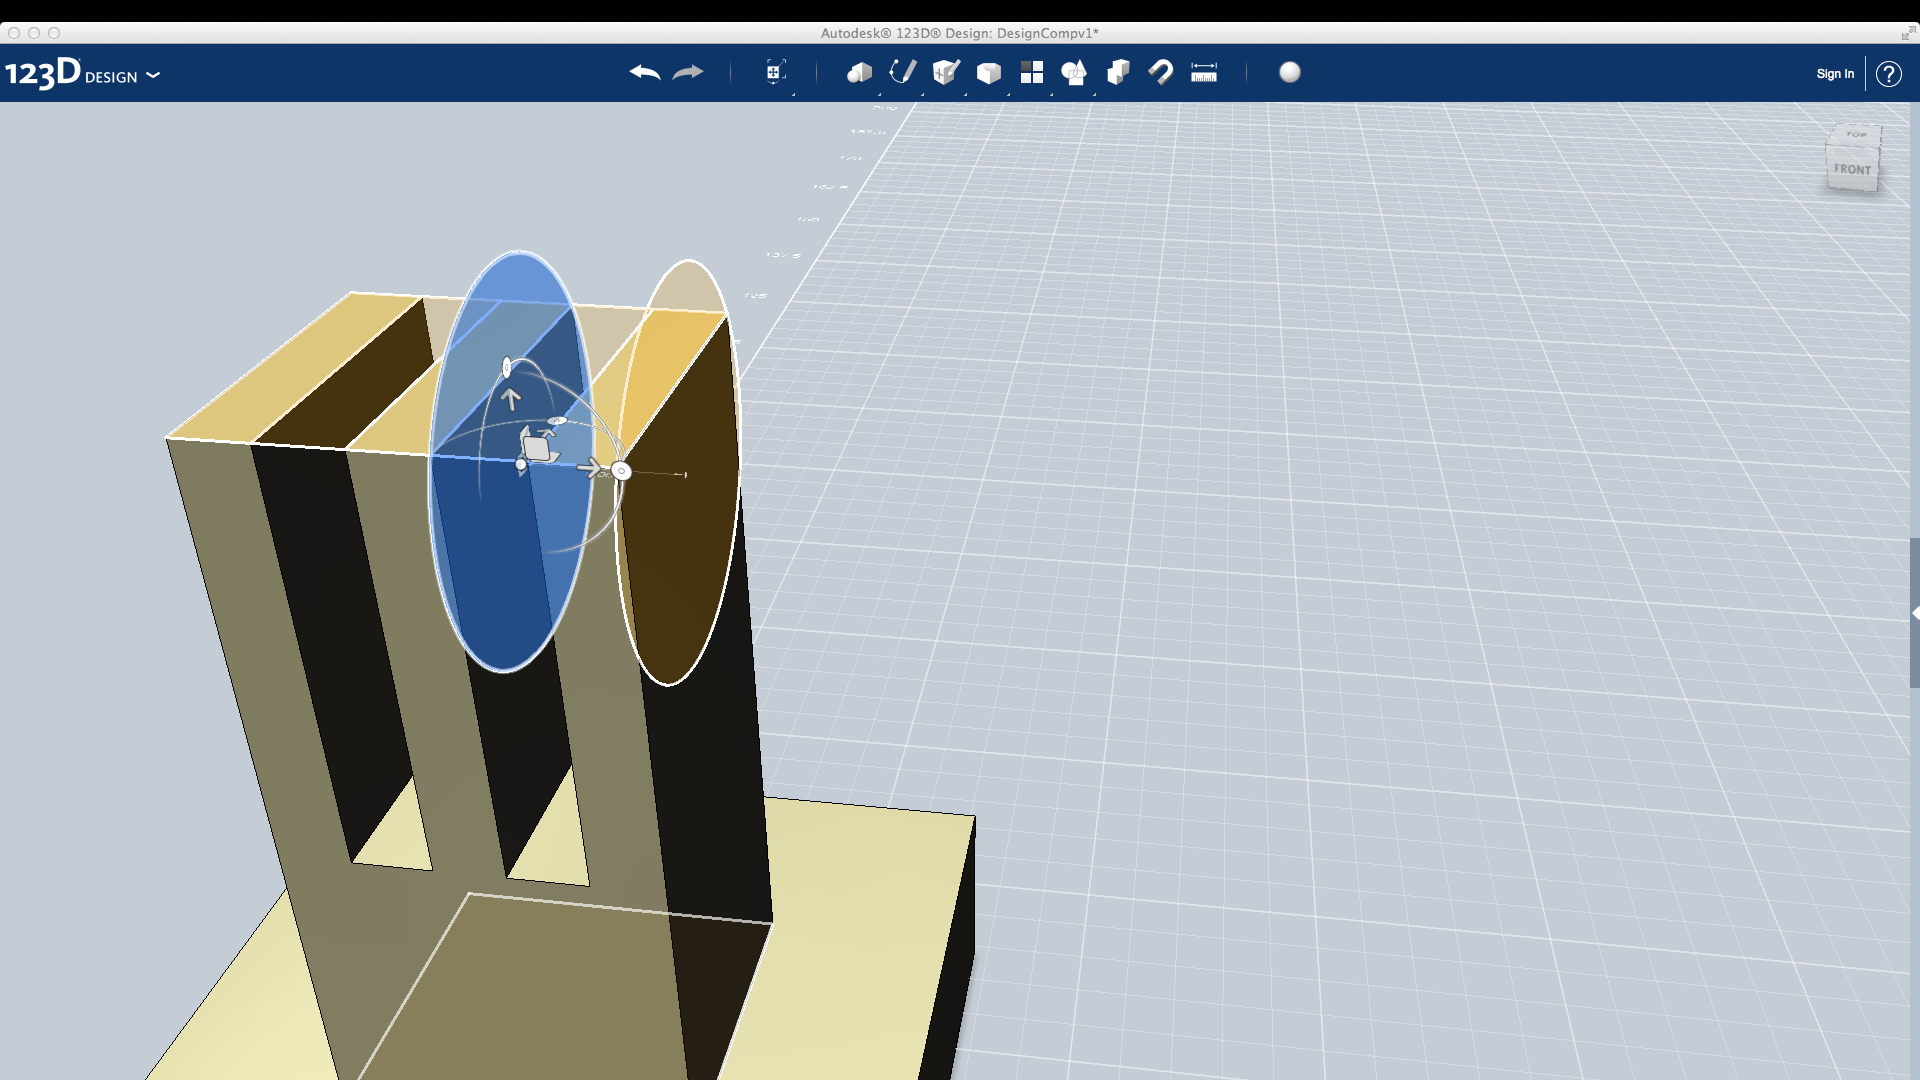
-Next create a circle with a diameter of 14.7mm on the face with a length of 13mm
-Now align the circle with the corners of the rectangular face (see photo below)
-Next select the circle (it will highlight blue) copy it, then paste it
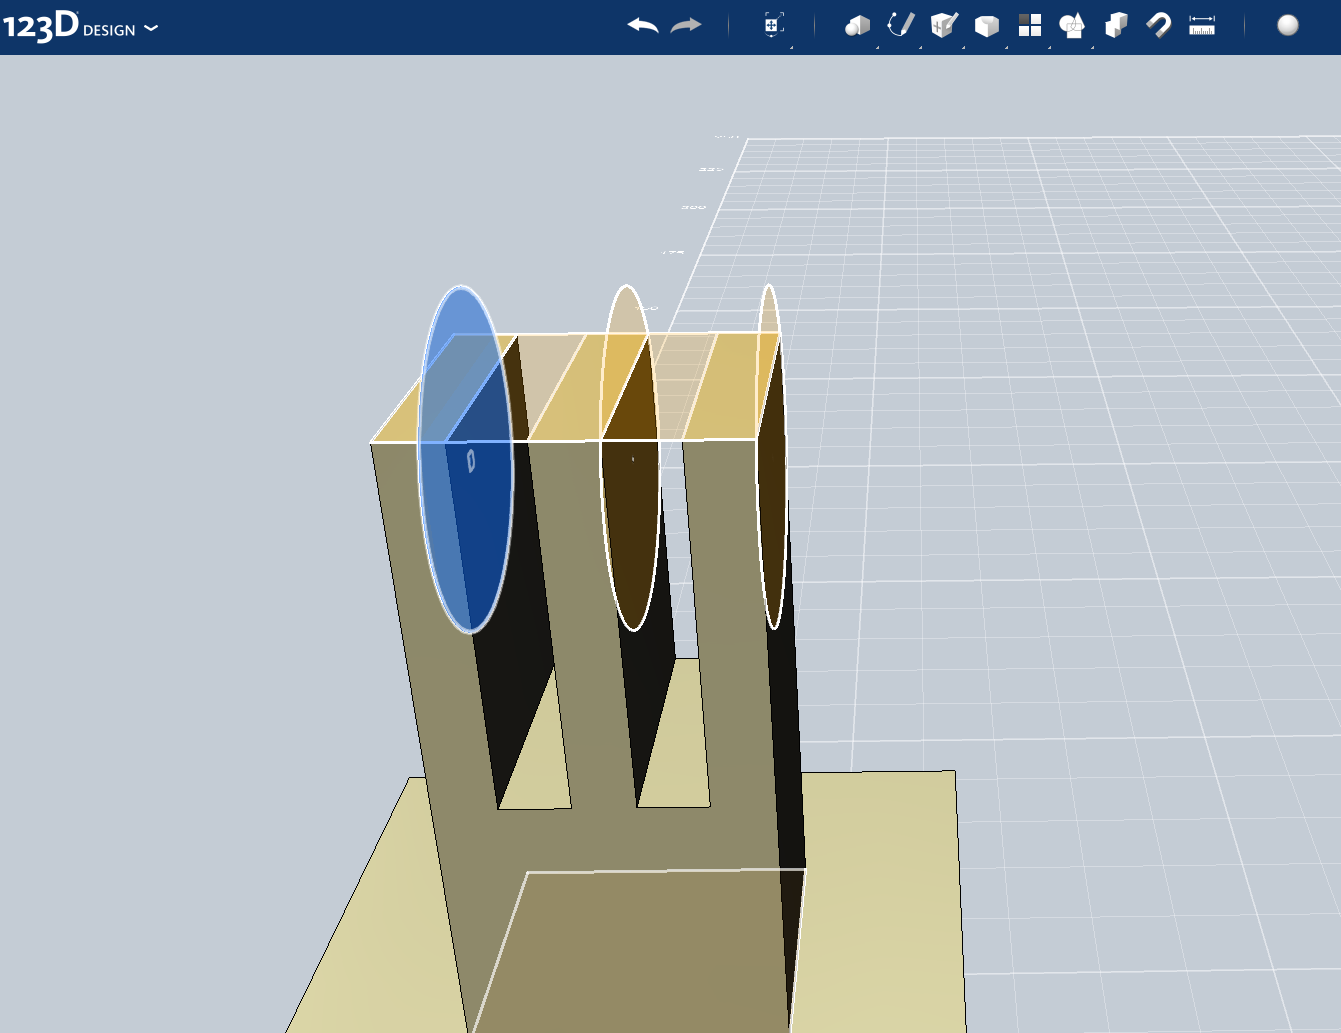
-Move this over 6mm so it touches the face of the middle section
-Now select that circle and copy/paste it and move it over 5.95mm until it touch the third section
-Extrude the two outer circles 2.85mm and the center 2.8mm (Be sure to select join)
Step 7: the Nut & Bolt
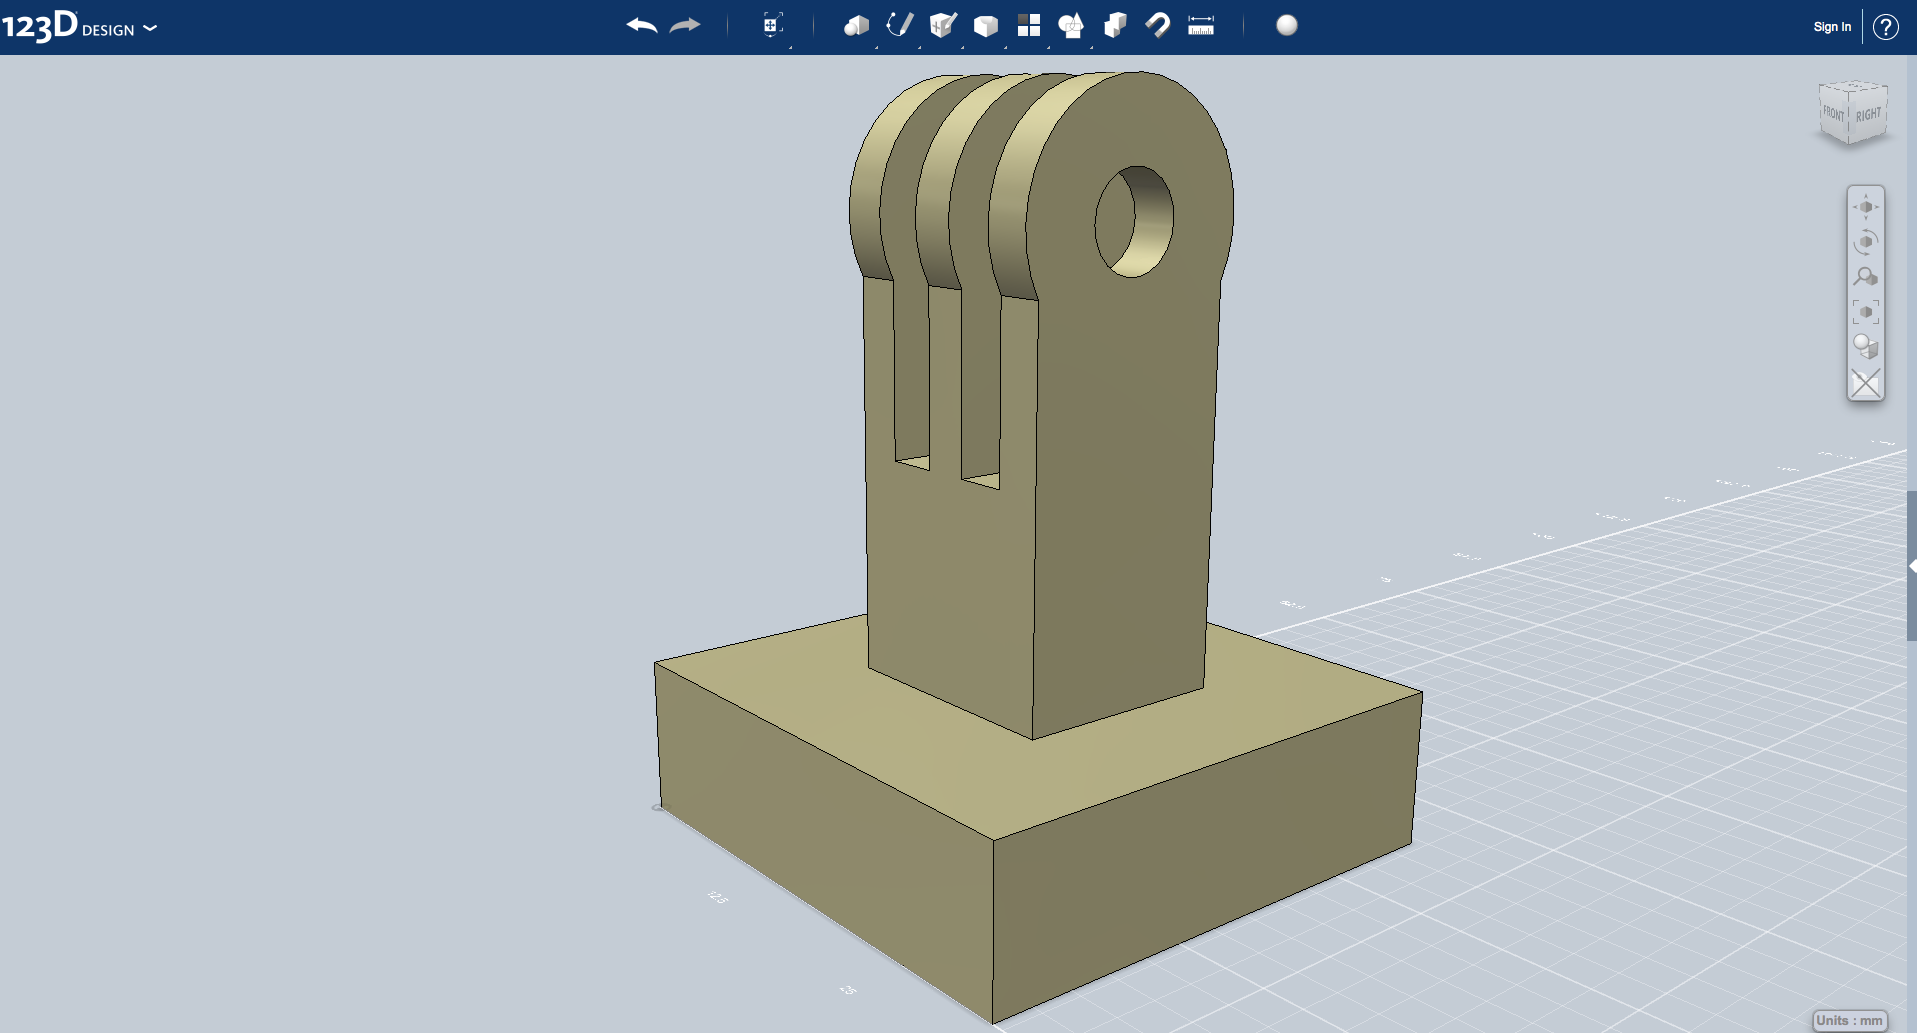
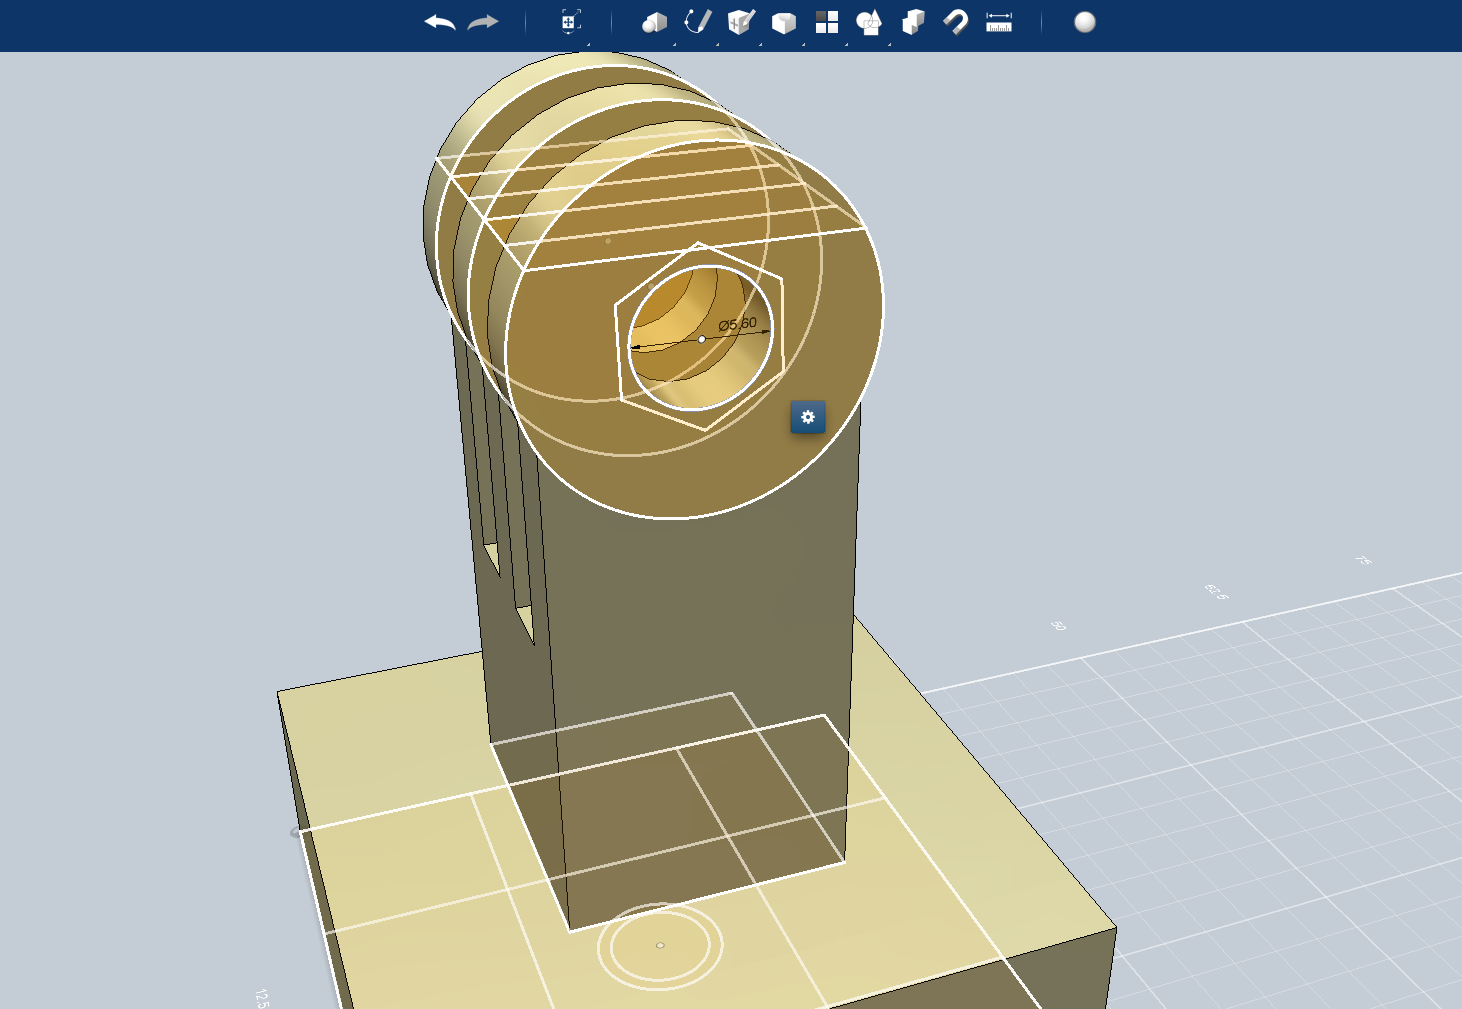
.png)
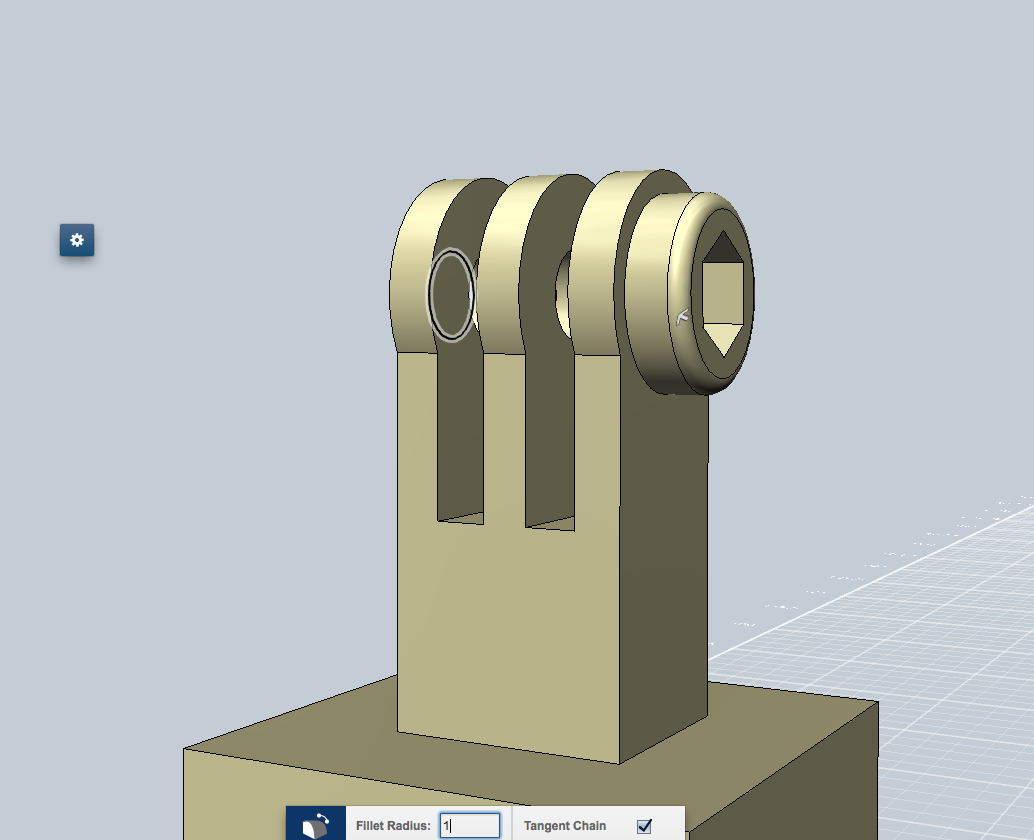
-Next select the dot in the center of the circle on the end
-Create a circle with a diameter of 5.6mm and extrude it -14.8mm using the cut option in the extrude menu
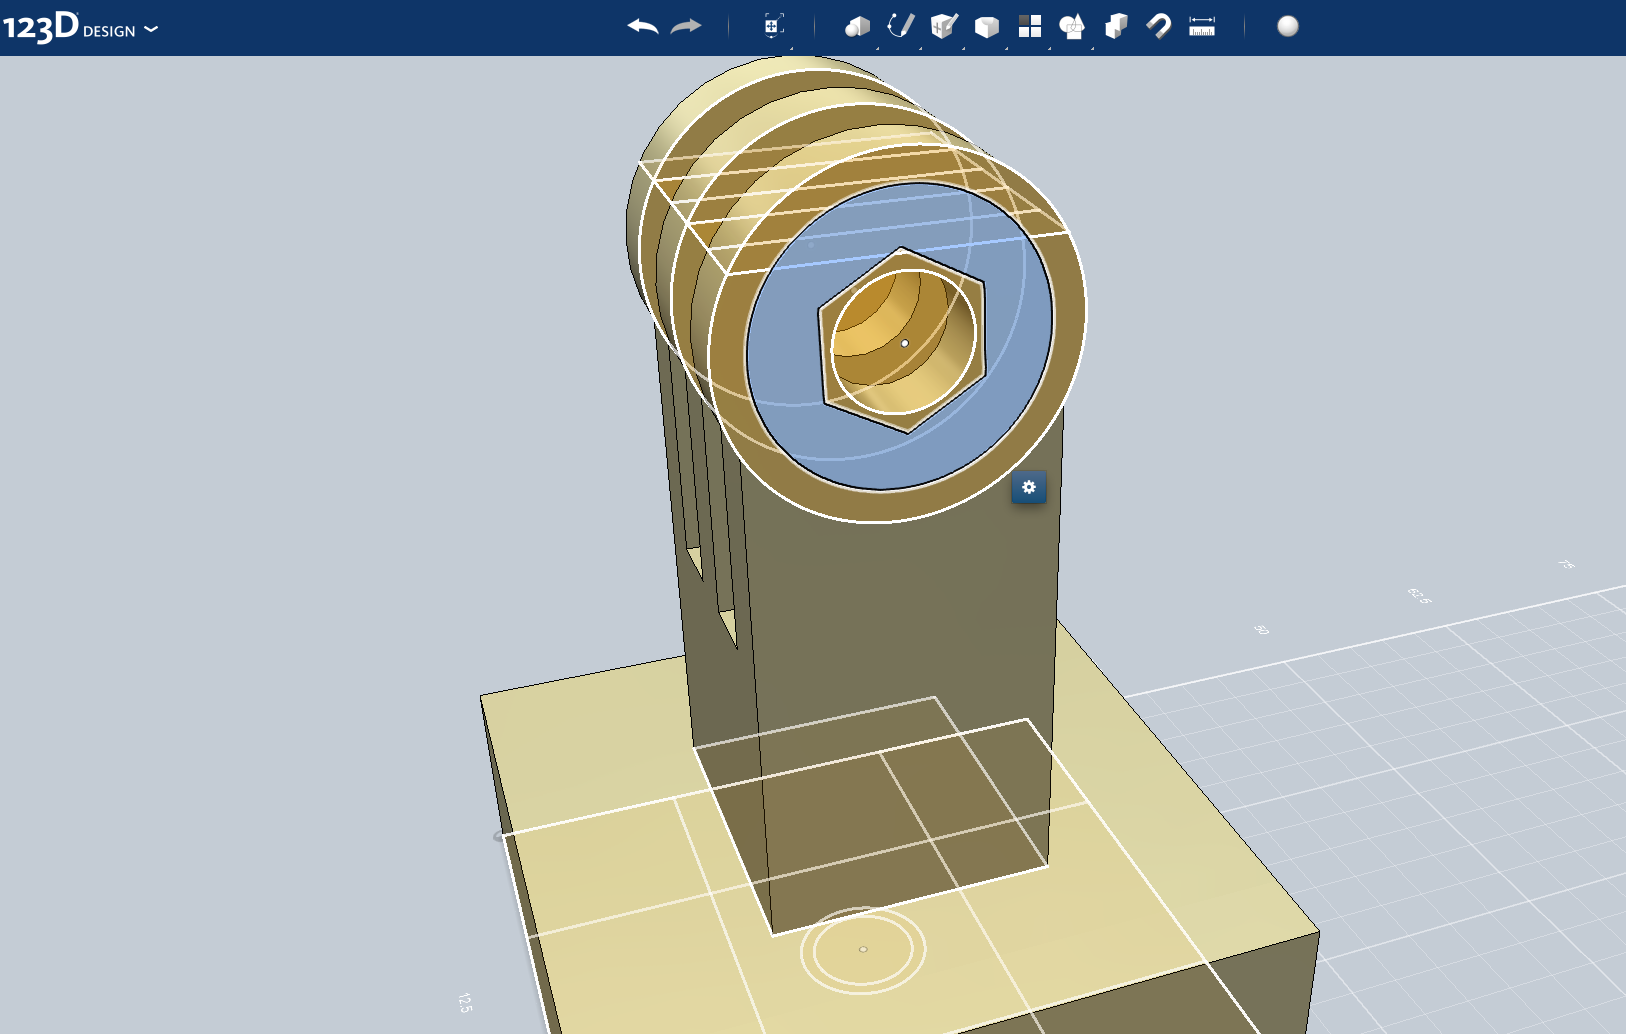
-Now create a hexagon with the polygon tool, set its center at the dot in the center of the circle, the radius will be about 3.7mm
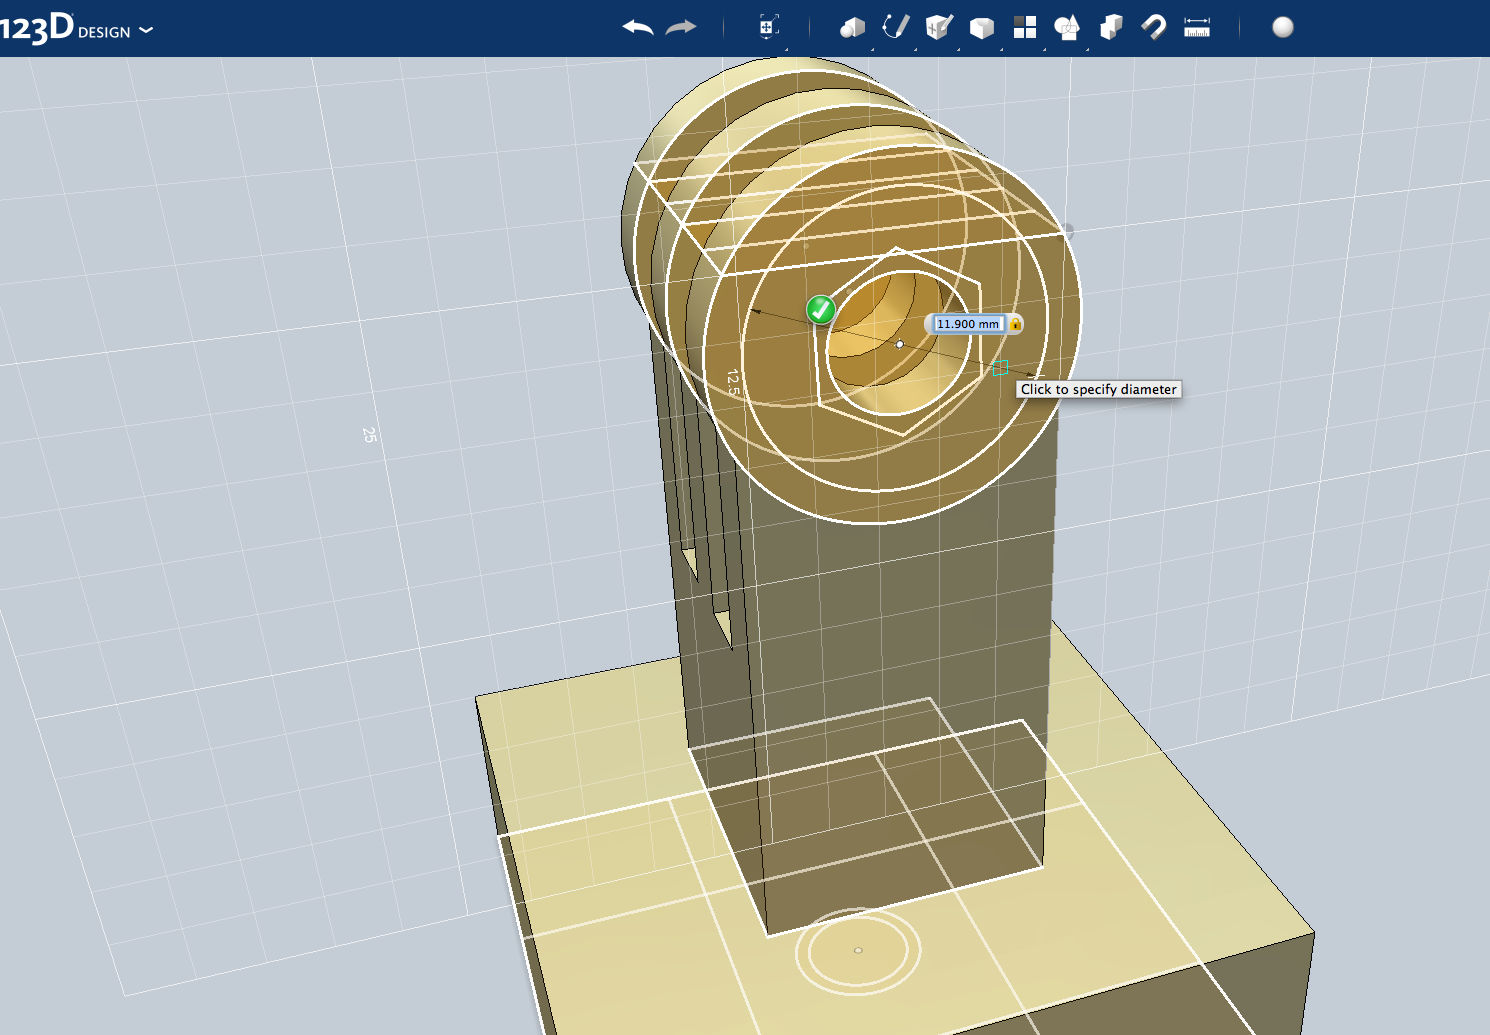
-Create another circle but with a diameter of 11.9mm and extrude this away 3.6mm from the model
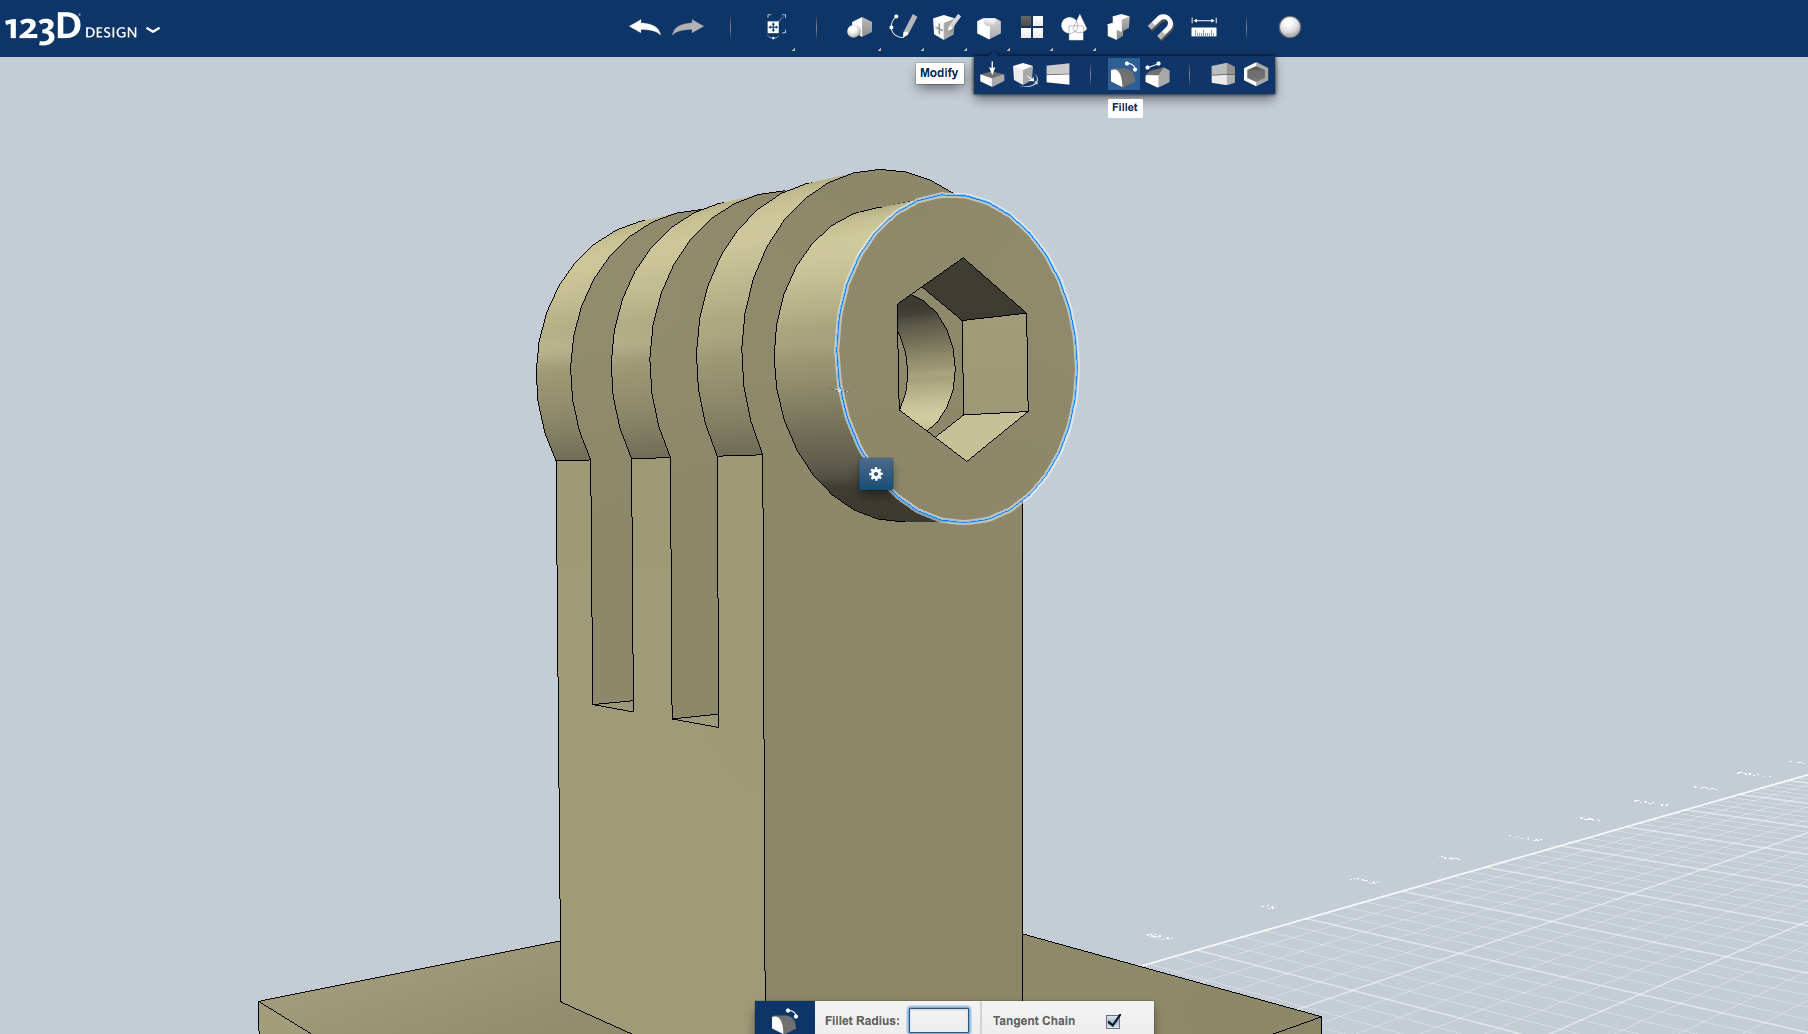
-Select the circle's edge and filet the edge with a filet radius of 1mm
Step 8: What Next?
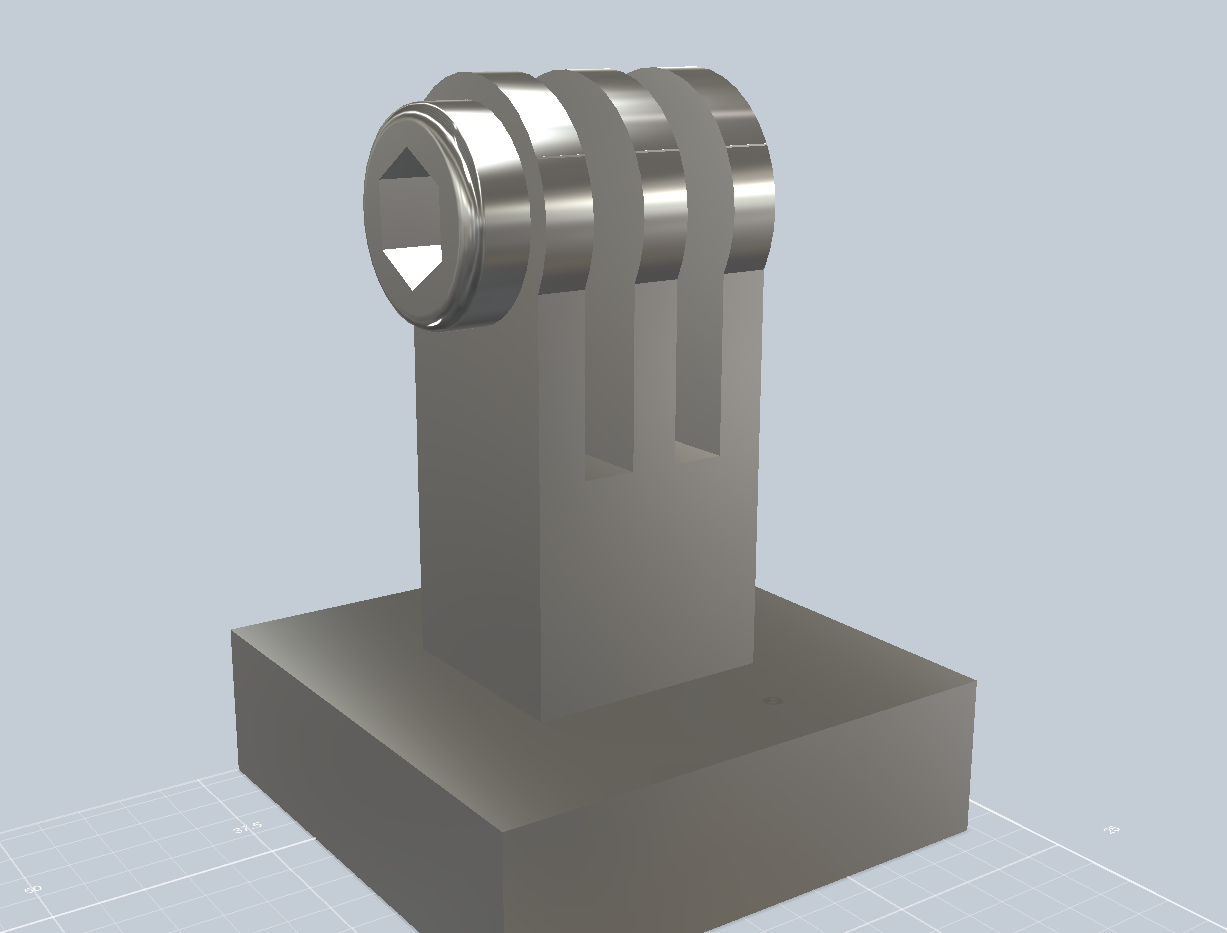
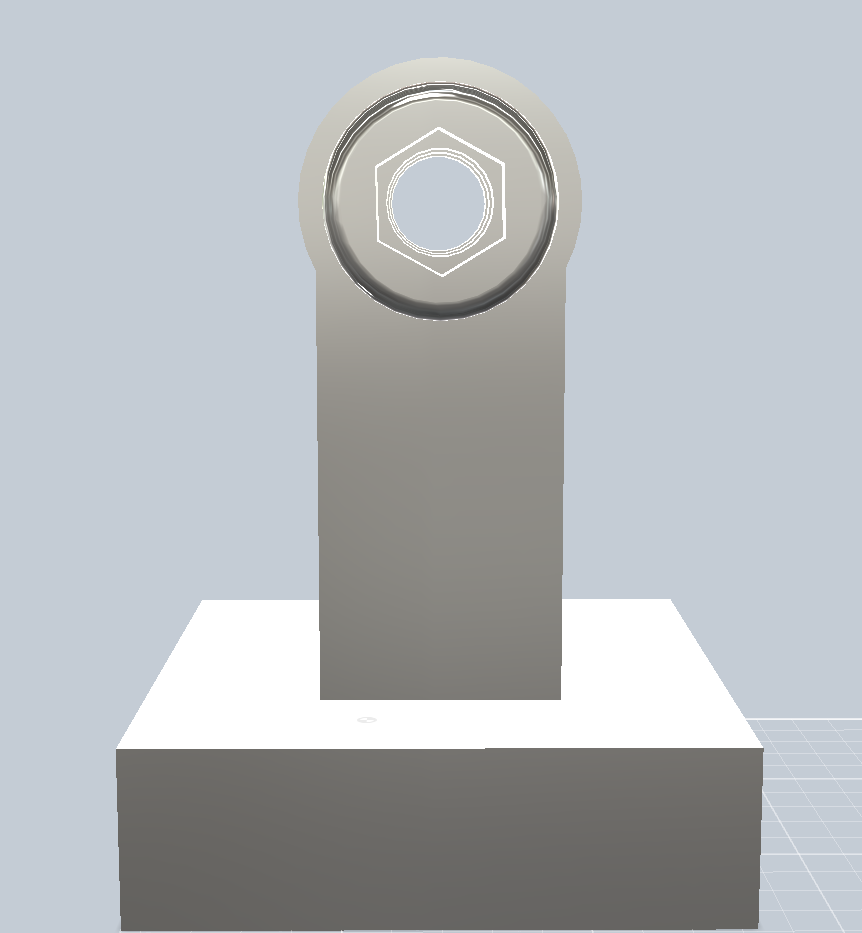
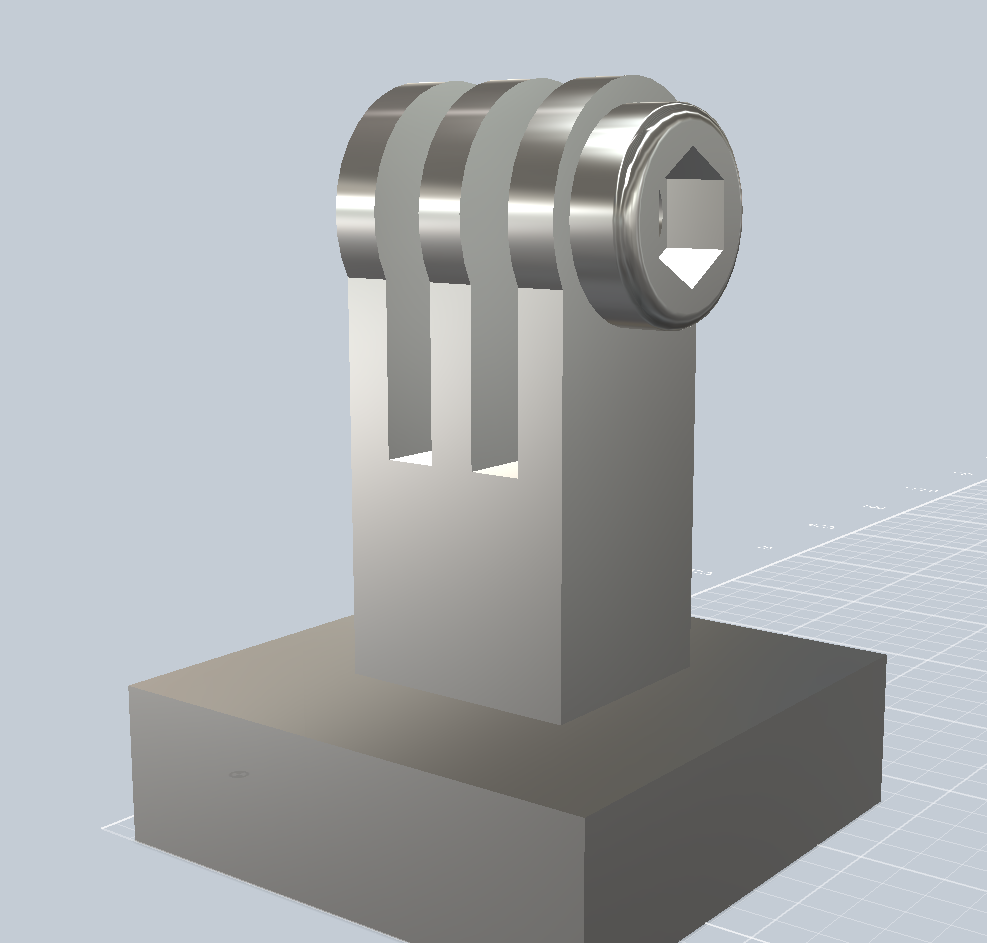
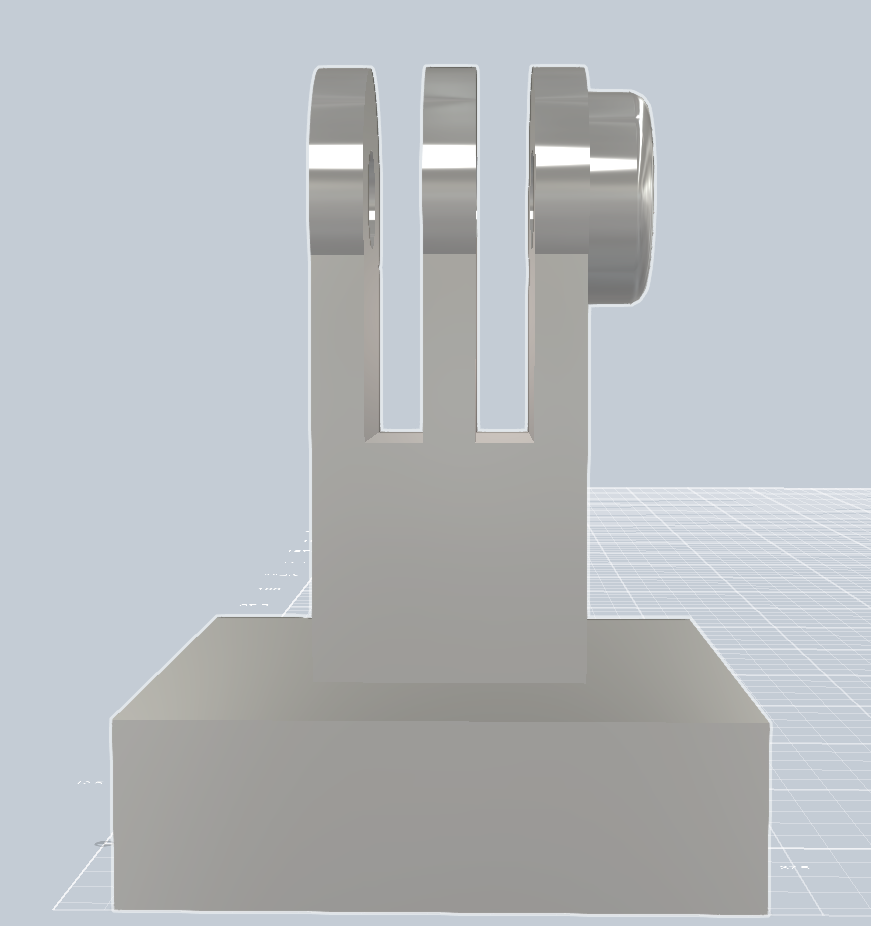
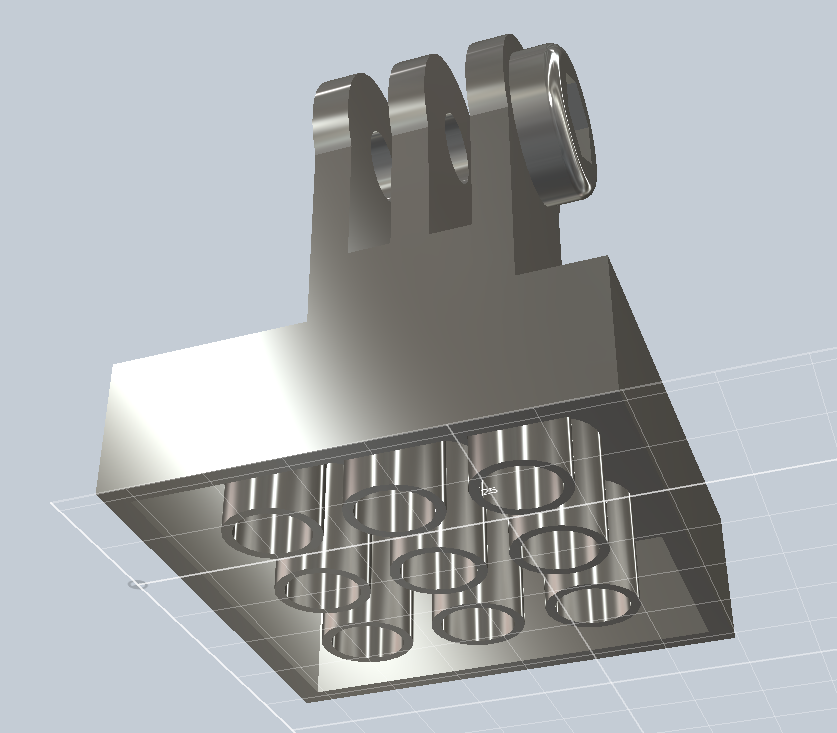
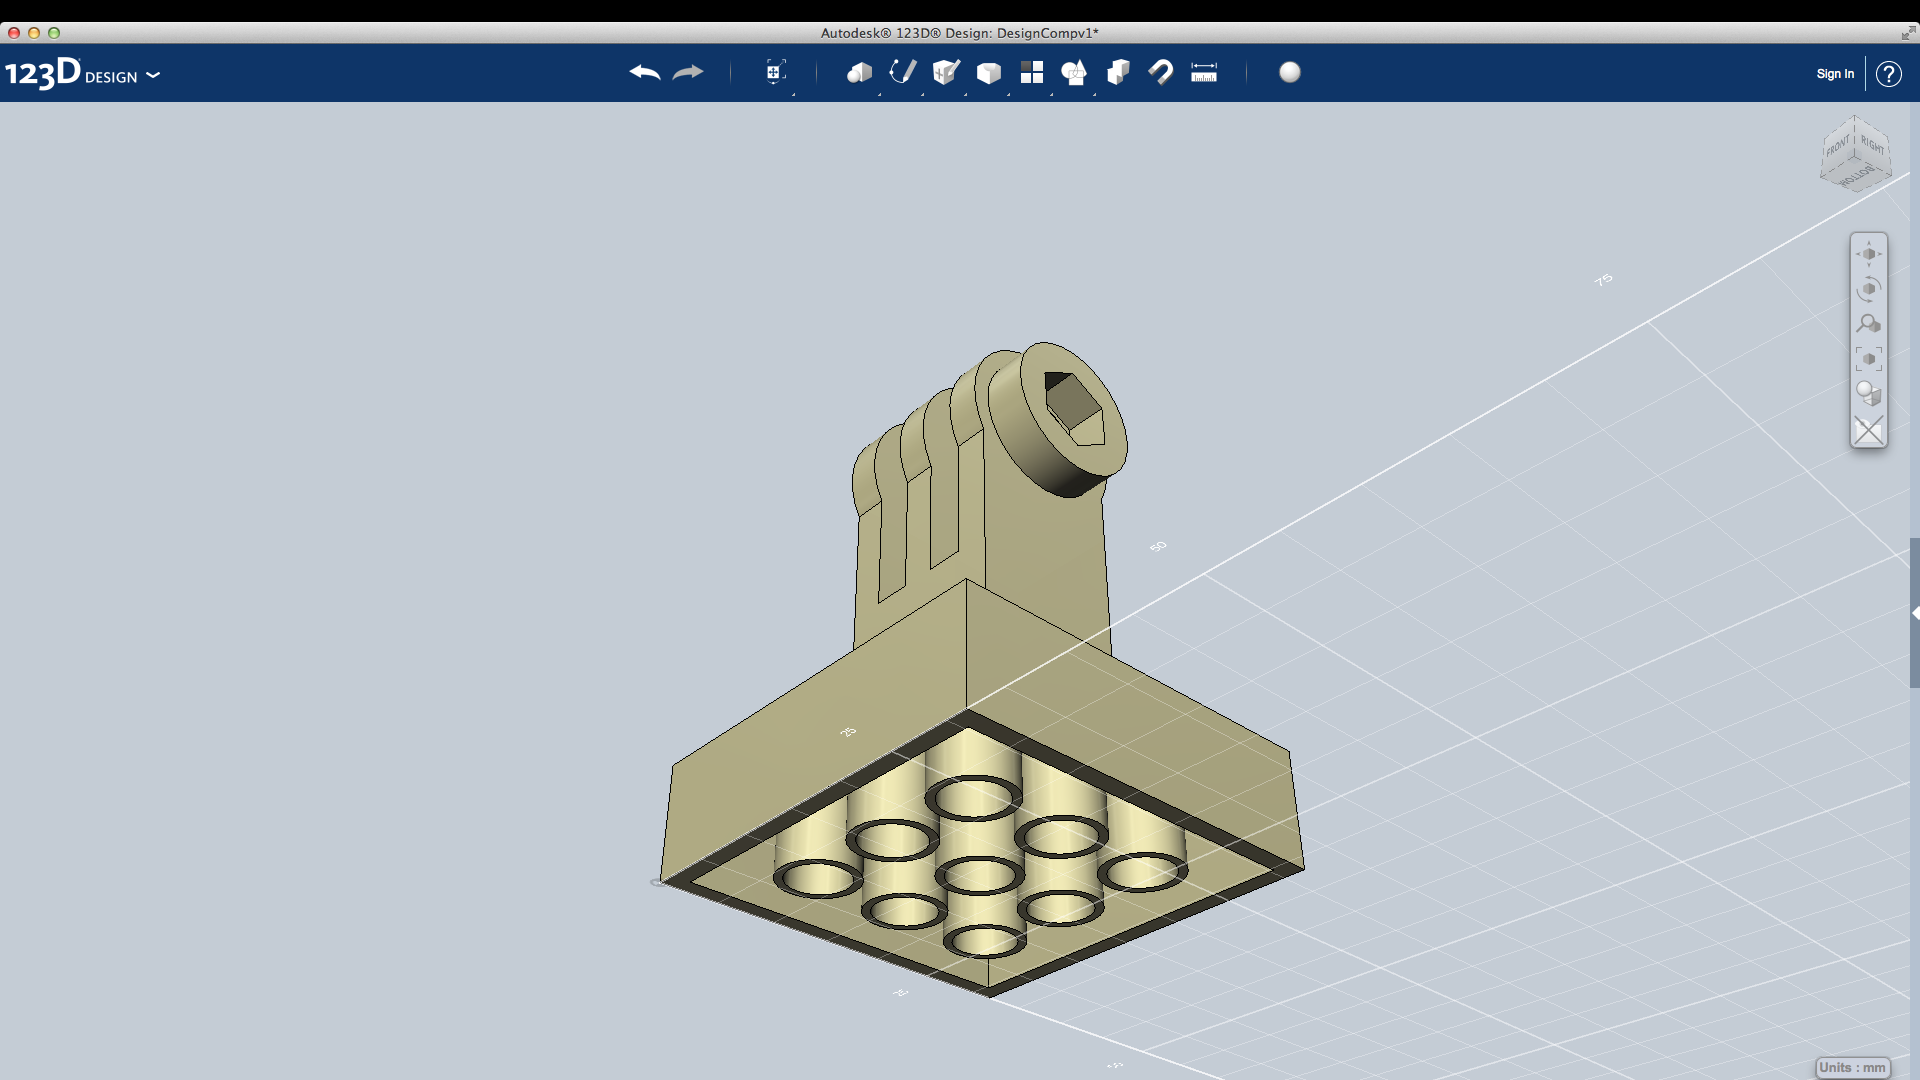
Now that we have created this Lego GoPro mount it is ready for the next step. If you would like to 3D Print this export it as an STL and open in your favorite Slicing program, and send to your 3D Printer. This model may need to be adjusted based on your 3D printer tolerances or a little sanding and filing never hurt anyone. Hope you enjoy the creativity that may come from this.
Thanks,
Mini_Styx
Download Link to Modify:
http://www.4shared.com/file/rljT58wt/LeGoPro.html
Thanks,
Mini_Styx
Download Link to Modify:
http://www.4shared.com/file/rljT58wt/LeGoPro.html