Lasercutting Business Cards: Empty Space
by emilyshore in Circuits > Lasers
1544 Views, 14 Favorites, 0 Comments
Lasercutting Business Cards: Empty Space
I made it at Techshop....!
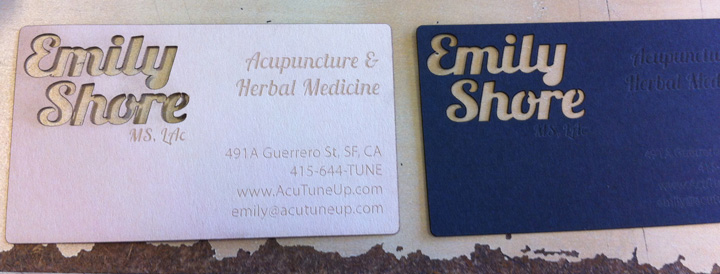
What makes these business cards unique is that my name is cut out from the card, creating what I think is a really cool effect that makes them stand out despite their overall simple and earthy feel. I've had people take my card just because they like how it looks.
Review: When laser cutting, there is etching (bitmap/raster/pixels, makes a mark on the paper but doesn't cut through it, think of it as a grayscale...) and vectoring (which cuts through the material leaving it an open space on your business card.)
For the etching there is nothing unique in this tutorial. Just write out your text, or insert and image, and it will etch it into your material.
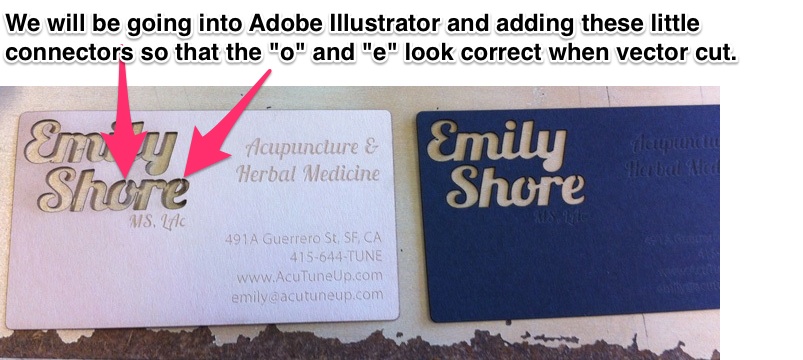
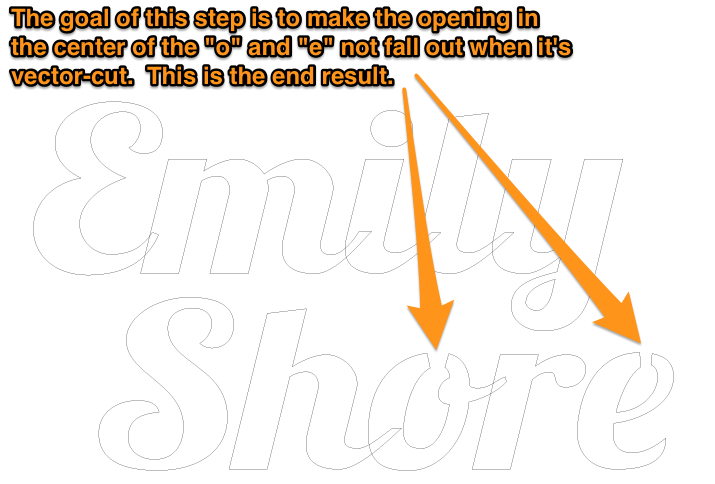
For vectoring, you will have to go into Illustrator and "fix" letters that have a hole in the middle. For instance, a lower case "e", left unchanged, cut as a vector will leave a big hole in the center of the e. So ( in most mainstream fonts) the following letters will have to be fixed in Illustrator before it can successfully be vectored.
These Letters Will Need to Be Fixed
Materials:
1. Card stock
2. Lasercutting machine
3. Computer with Adobe Illustrator
What makes these business cards unique is that my name is cut out from the card, creating what I think is a really cool effect that makes them stand out despite their overall simple and earthy feel. I've had people take my card just because they like how it looks.
Review: When laser cutting, there is etching (bitmap/raster/pixels, makes a mark on the paper but doesn't cut through it, think of it as a grayscale...) and vectoring (which cuts through the material leaving it an open space on your business card.)
For the etching there is nothing unique in this tutorial. Just write out your text, or insert and image, and it will etch it into your material.
For vectoring, you will have to go into Illustrator and "fix" letters that have a hole in the middle. For instance, a lower case "e", left unchanged, cut as a vector will leave a big hole in the center of the e. So ( in most mainstream fonts) the following letters will have to be fixed in Illustrator before it can successfully be vectored.
These Letters Will Need to Be Fixed
Lower Case:
a, b, d, e, g, o, p, q,
Upper Case:
A, B, D, O, P, Q, R,
a, b, d, e, g, o, p, q,
Upper Case:
A, B, D, O, P, Q, R,
Materials:
1. Card stock
2. Lasercutting machine
3. Computer with Adobe Illustrator
Edit Your Type in Illustrator So It Can Be Vector Cut
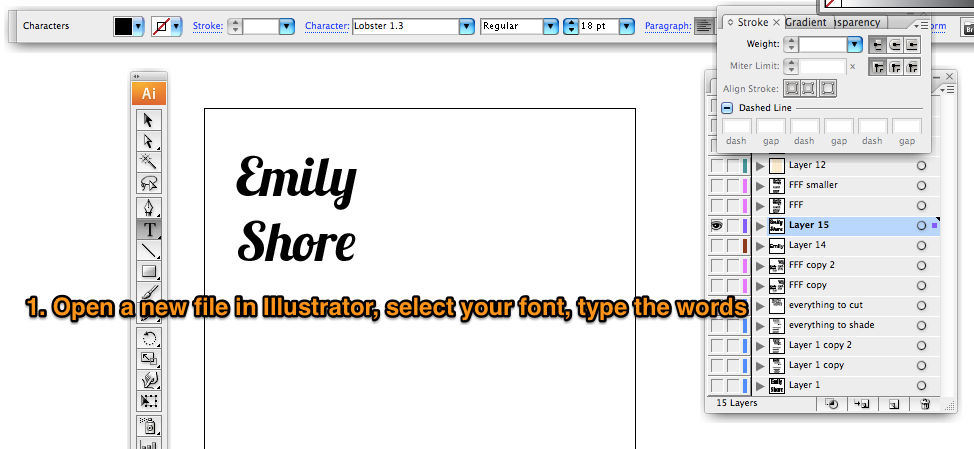
First, I found a cursive font I liked. Why cursive? So that it is easy to connect the letters together, making each word "one hole". (A cursive font is optional, of course. If you don't like the cursive look this will still work for you.)
Type out the words you will be vector-cutting.
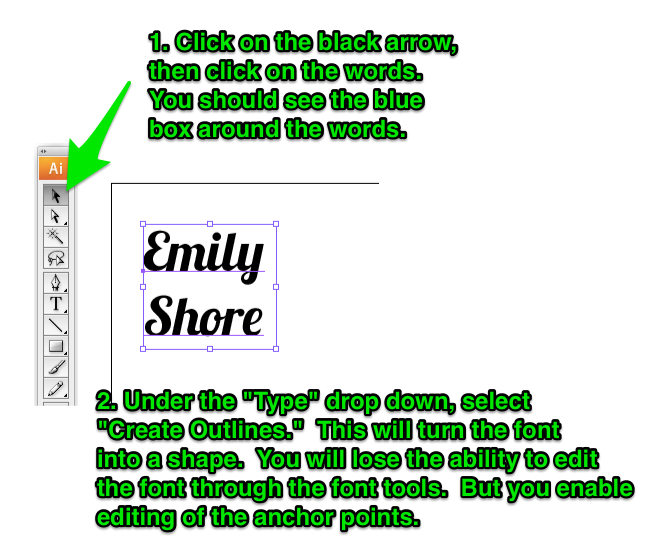
Select the words with the black arrow.
Then go to the drop down menu "type" and select "create outlines." This turns the font into a shape. (If you want to play around with kerning or anything in the font tools you should do that before you create outlines.)
We will be preparing the "o" and lower case "e" to be vector-cut. The other letters don't need it because there aren't any holes in the middle of those letters.
Type out the words you will be vector-cutting.
Select the words with the black arrow.
Then go to the drop down menu "type" and select "create outlines." This turns the font into a shape. (If you want to play around with kerning or anything in the font tools you should do that before you create outlines.)
We will be preparing the "o" and lower case "e" to be vector-cut. The other letters don't need it because there aren't any holes in the middle of those letters.
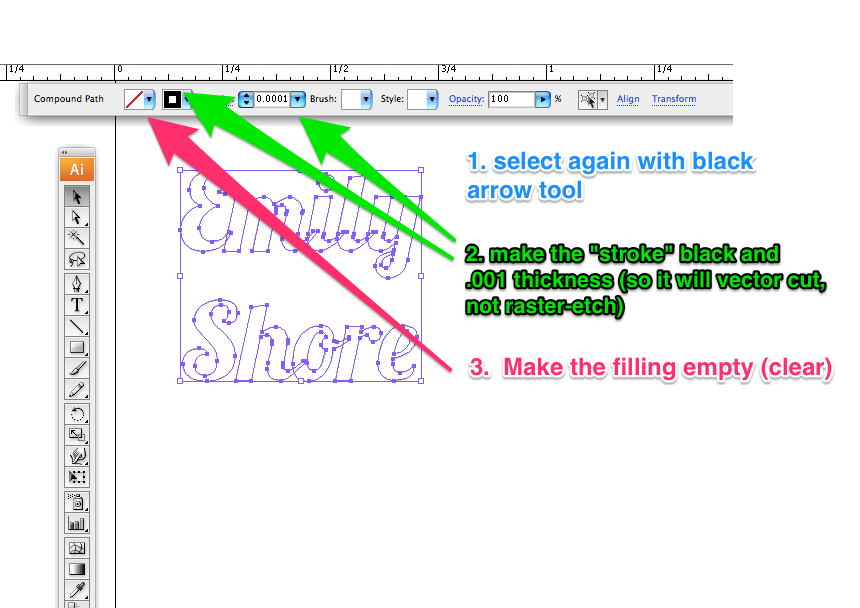
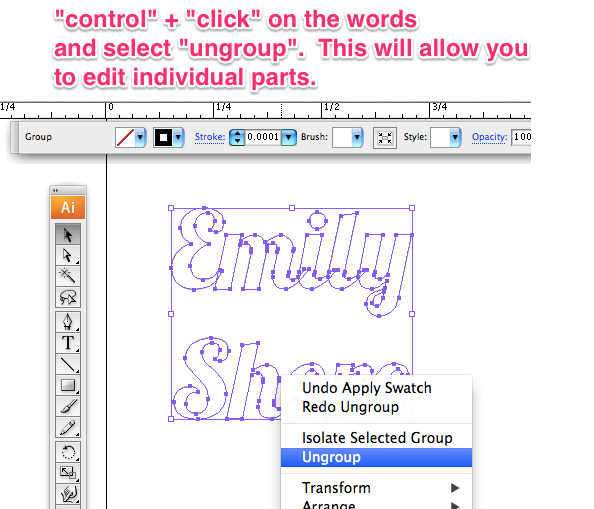
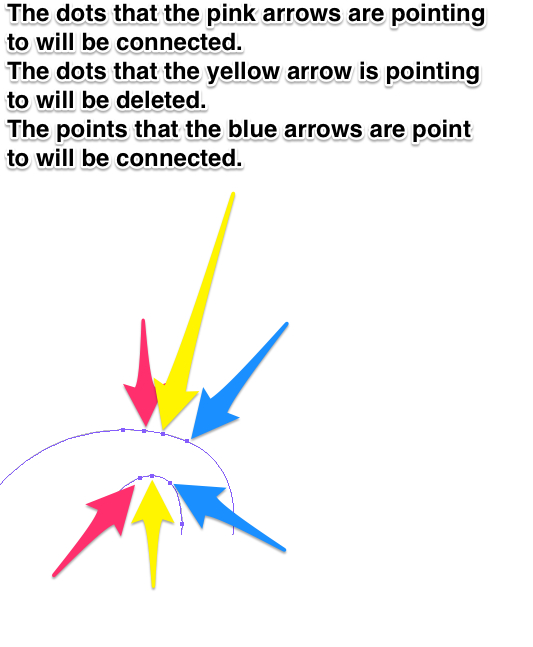
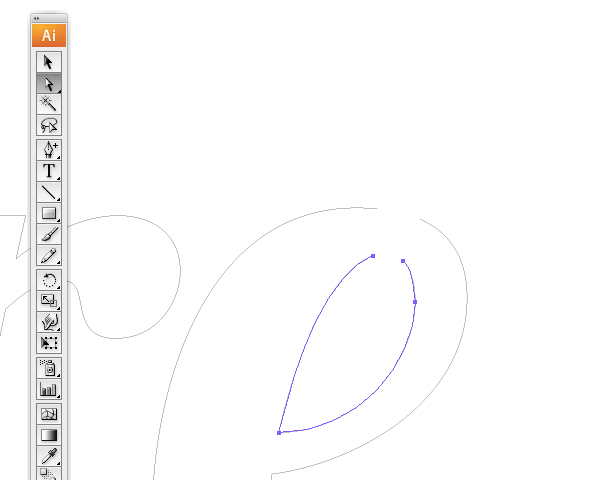
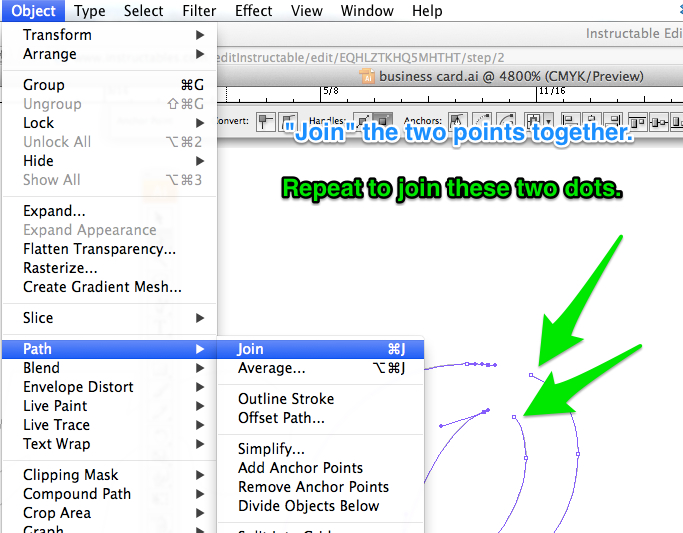
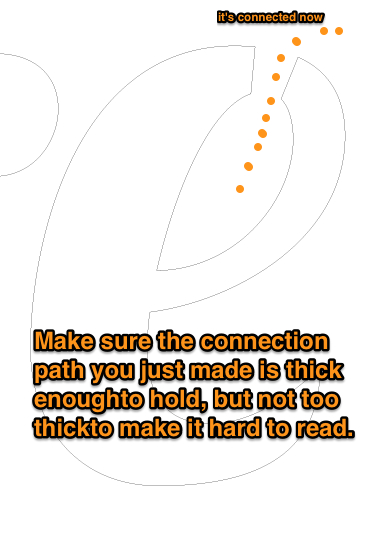
Continuing to Prepare the Letters With "holes" to Be Vector-cut
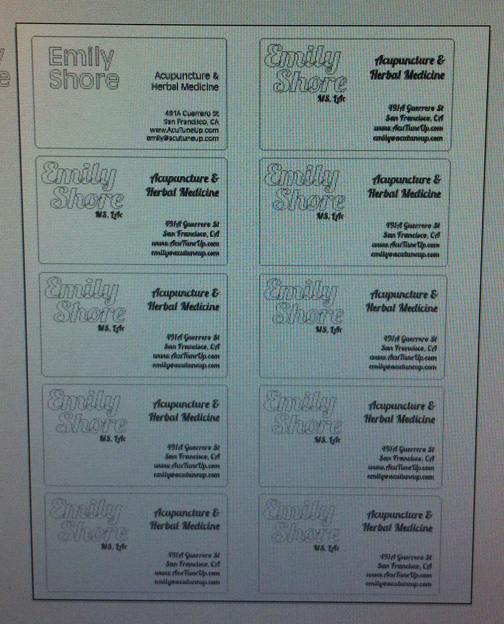
Duplicate Cards So That They Fit on Your 8.5 X 11" Paper
Finish one business card design. "Group" it together.
Duplicate. (Copy and paste).
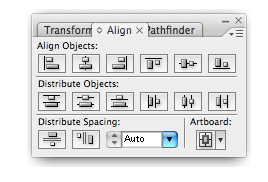
Space them roughly evenly, then use the align tools to make them exactly lined up. (This will help the vectoring be more efficient (thus faster) by making it need to take fewer passes. It's not necessary though. )
Now you've completed the graphic design part.
Duplicate. (Copy and paste).
Space them roughly evenly, then use the align tools to make them exactly lined up. (This will help the vectoring be more efficient (thus faster) by making it need to take fewer passes. It's not necessary though. )
Now you've completed the graphic design part.
Print Settings
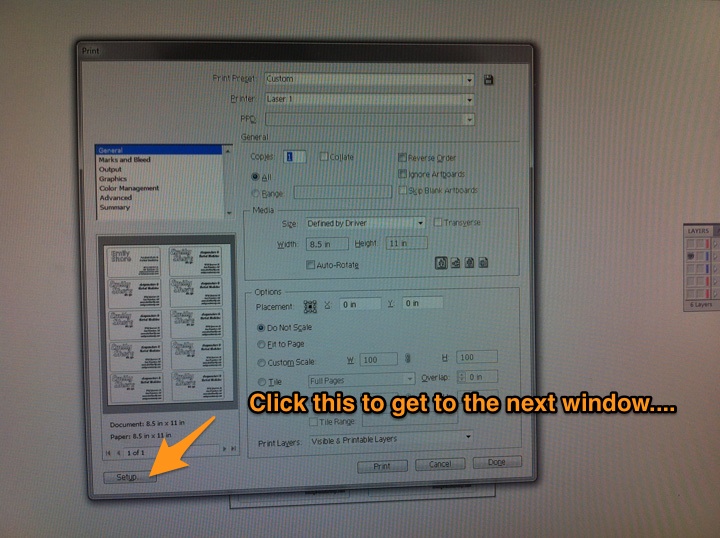
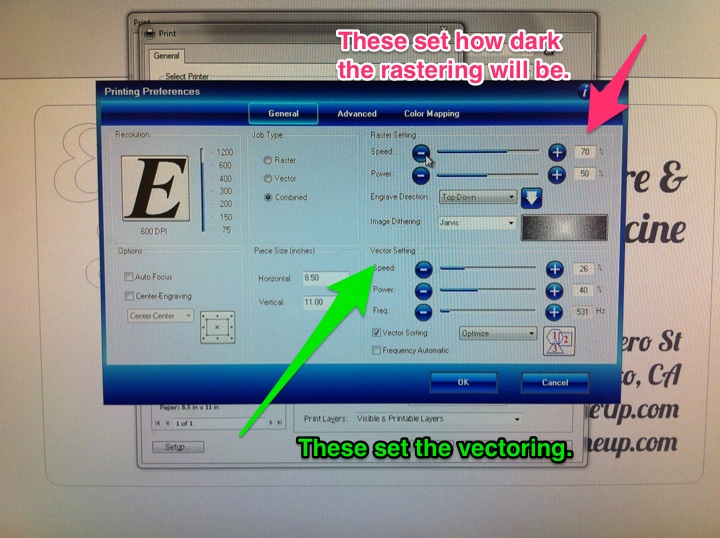
Send your print job, adjust your settings as shown in the pictures, and then hit the button on the laser cutting machine to print the job!
As always, you're going to want to experiment with the settings. Even the same machine can be different from day to day.
As always, you're going to want to experiment with the settings. Even the same machine can be different from day to day.
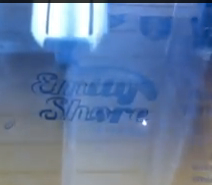
Watch It Etch Then Vector-cut!
You're done! Please post in my comments section any similar projects you make!