Lasercut: Street Maps
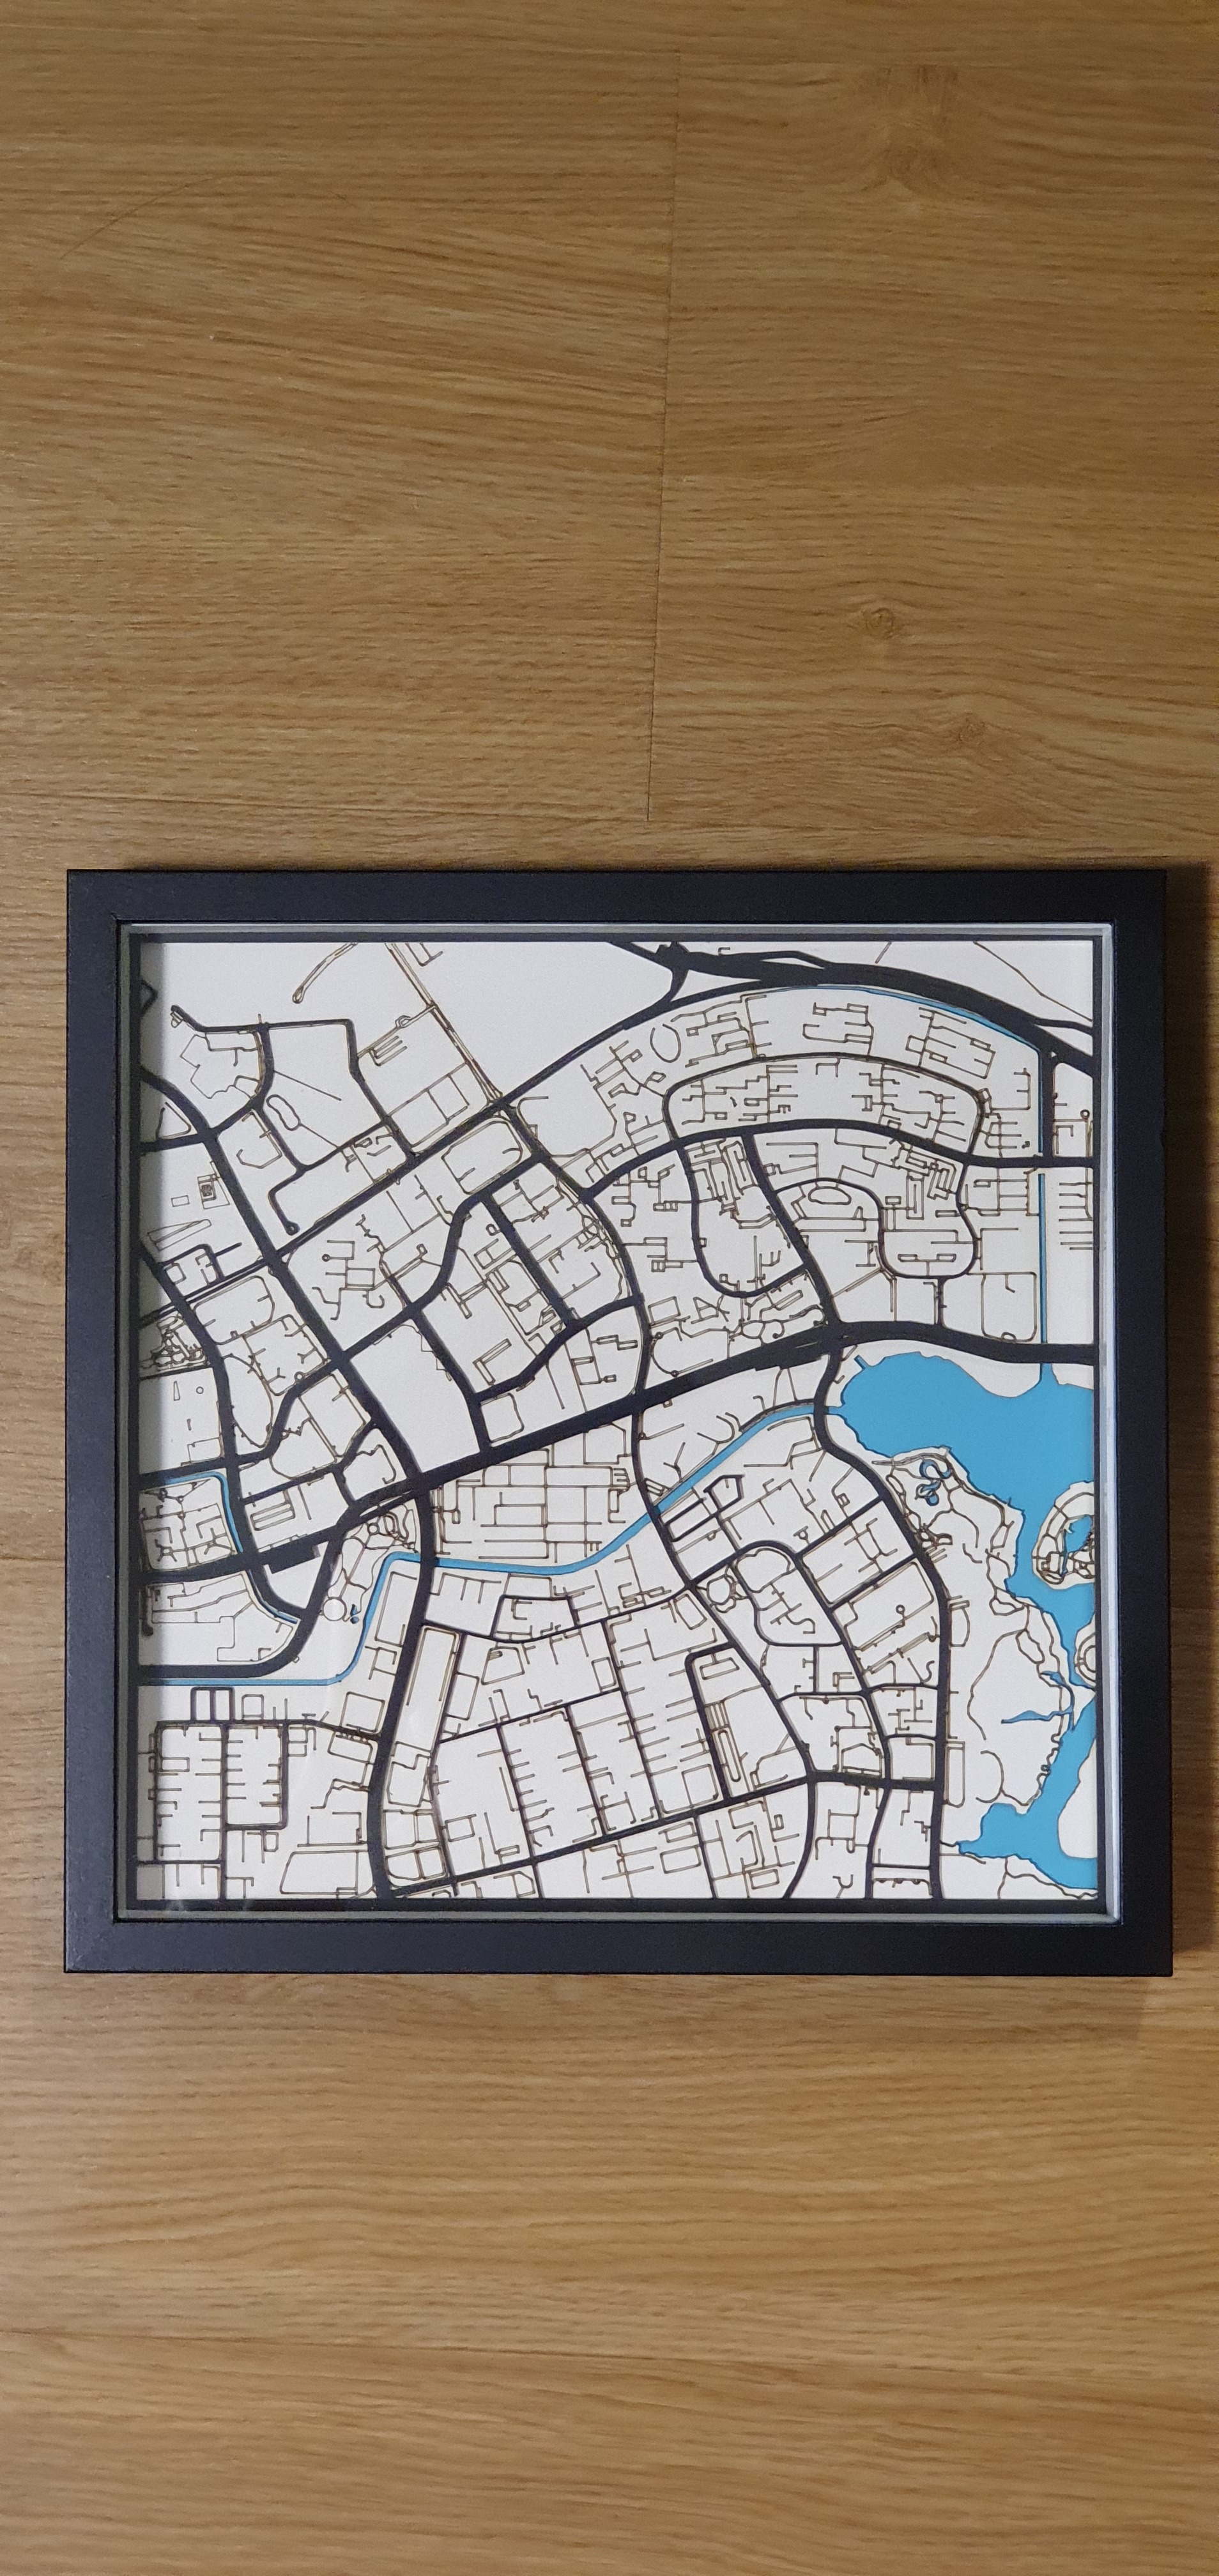
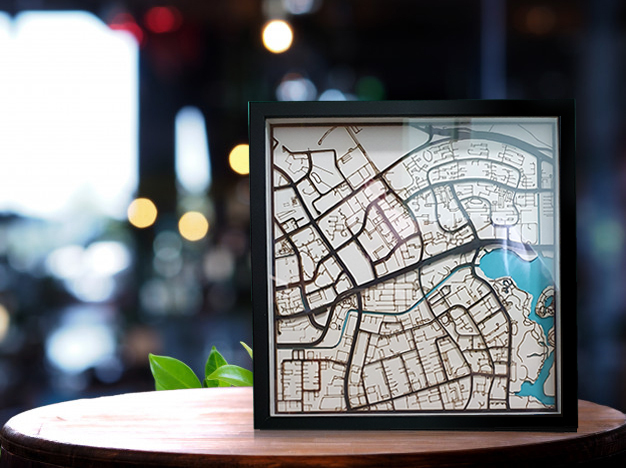
I made this project a few weeks ago when the Covid-19 "Circuit Breaker" was still active in Singapore. When I was studying in the US, I was inspired by wooden laser-cut maps that people were selling online and thought to myself. Wouldn't it be great if I were to represent the local districts of Singapore in an abstract form too? These decorative maps serve as conversational pieces for visitors into your home and I thought it would be great to experiment making one for my district too.
I'll start with the software used in my system:
1. Snazzy Maps (https://snazzymaps.com/build-a-map)
Supplies
- 1 x Picture/Photo-Frame
- 1 x Black Spray Paint
- 1 x Lacquer Spray Paint
- 3 x 1mm Wooden Sheet (Layering)
- 1 x Lasercutting Machine/Printer (For Graphic)
Selecting Map Style: Epilog (Thin Lines)
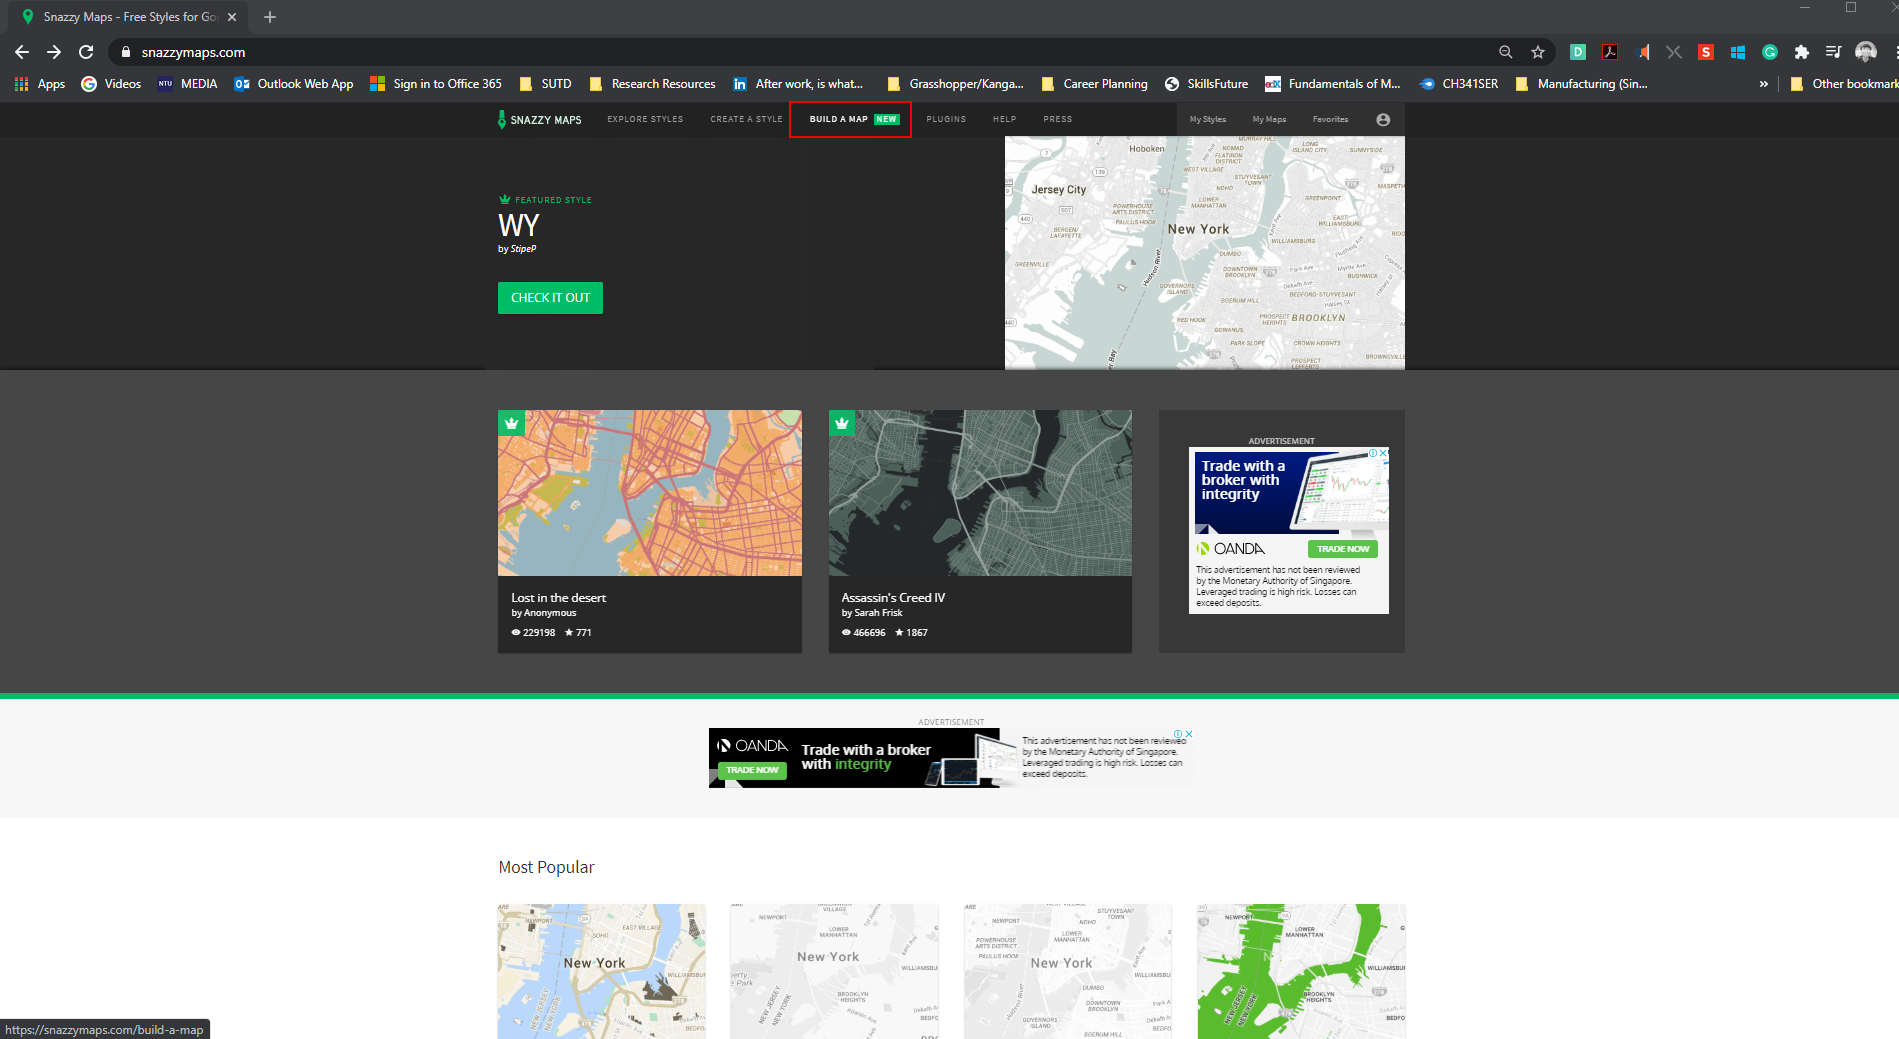
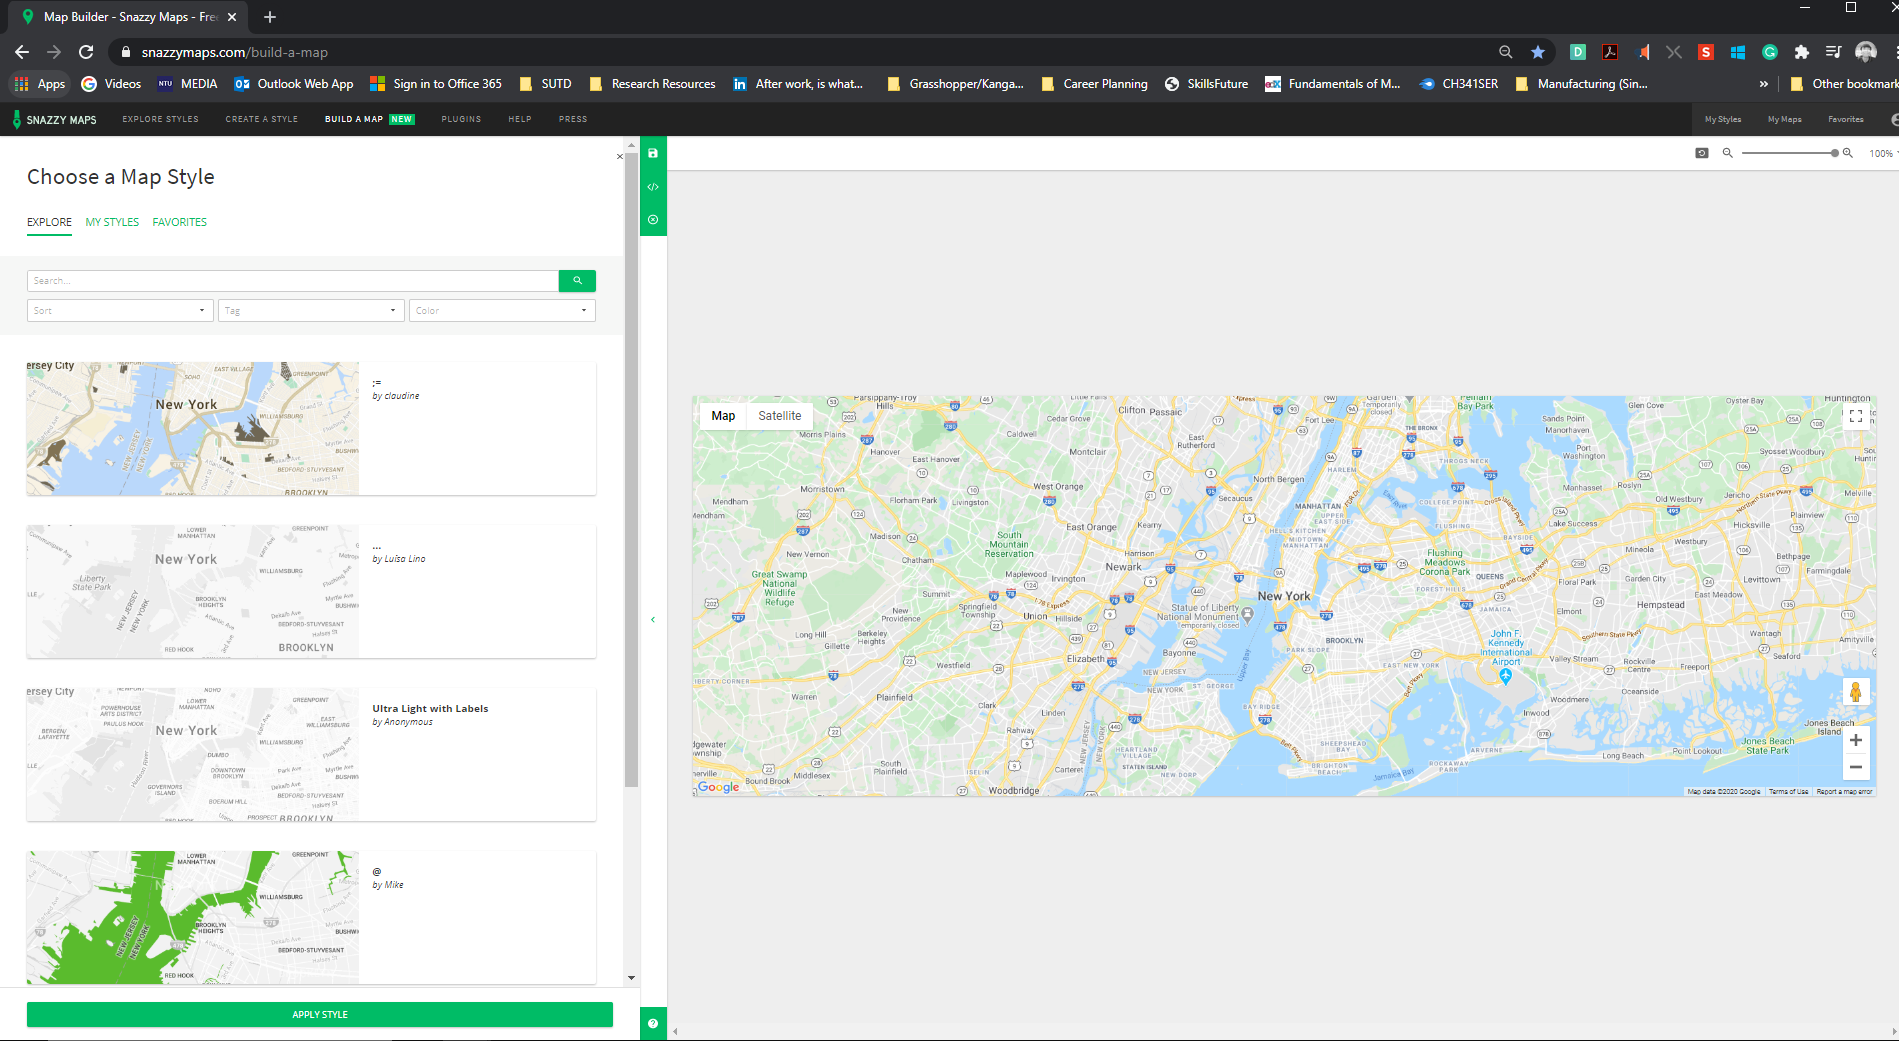
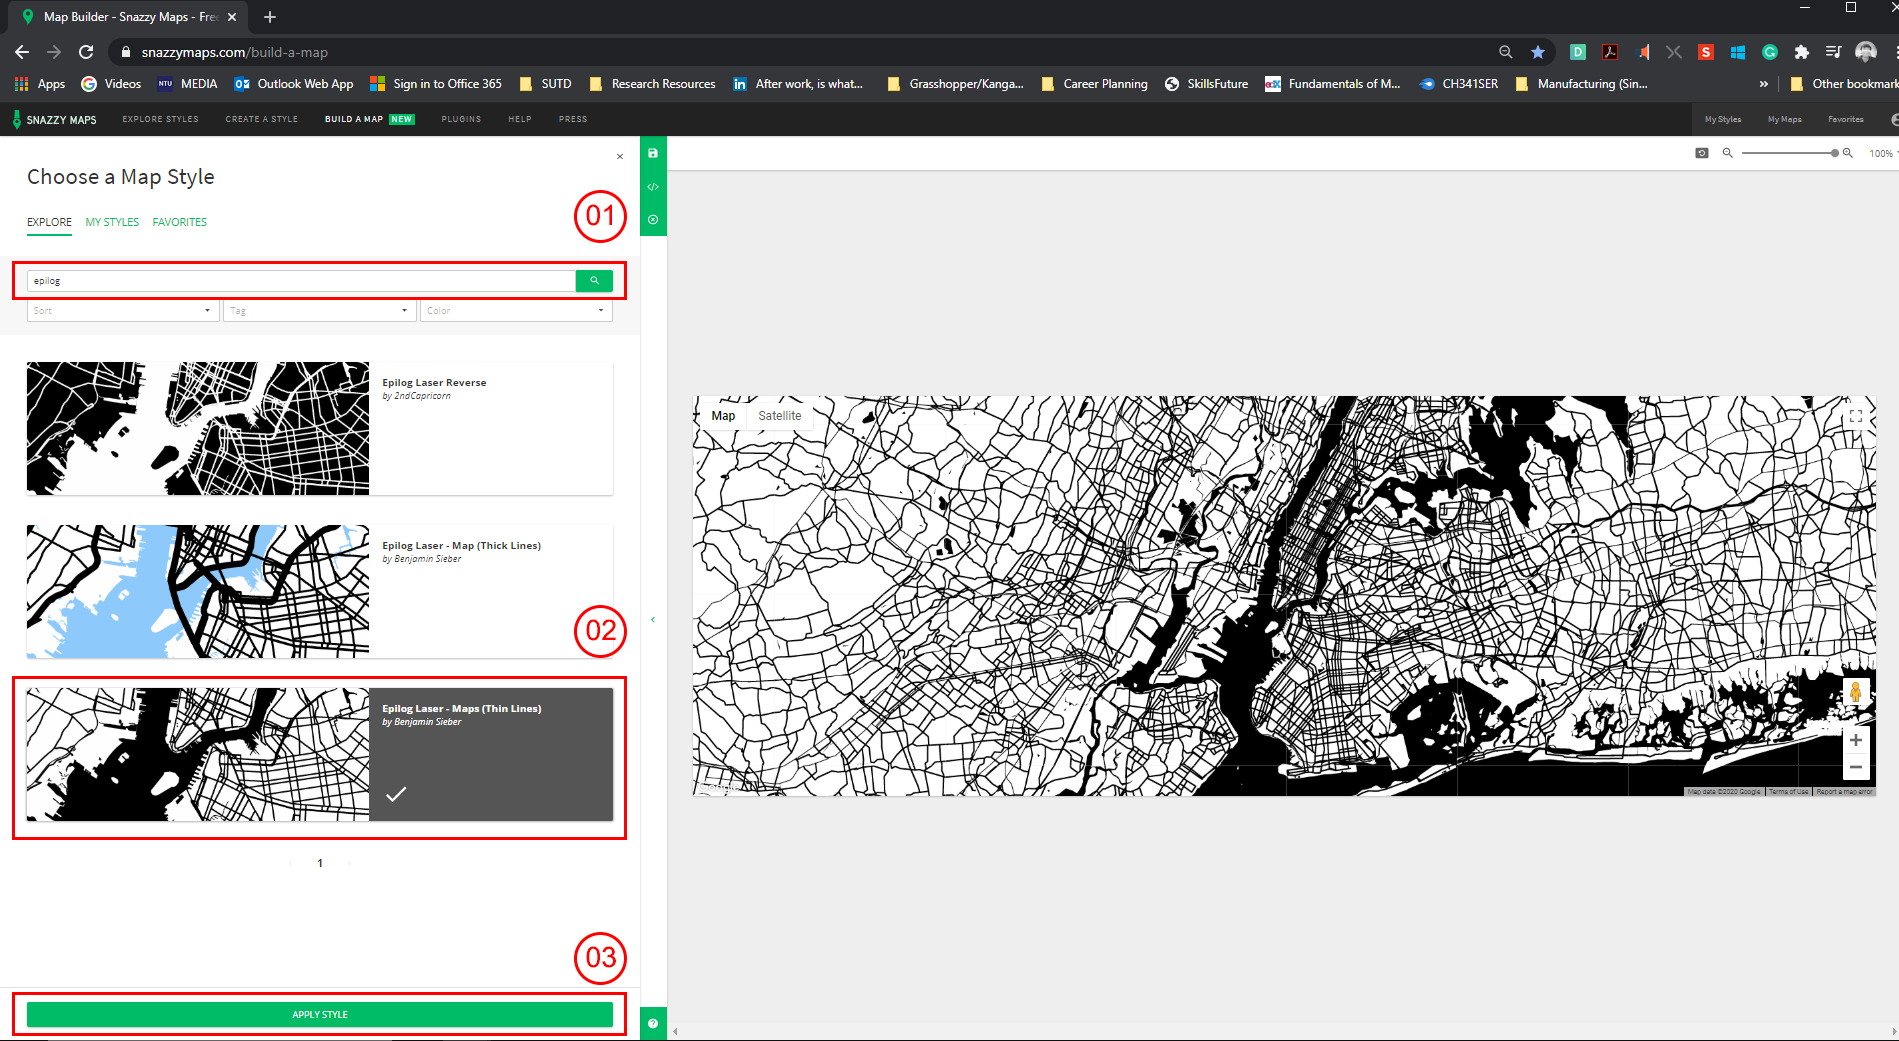
To begin generating your maps, you need a reference file of the world map. To do this, we are using a free-to-use website at snazzy maps.
Steps:
- Click on "Build a Map" at the top of the webpage.
- Under Choose a Map Style, type "Epilog"
- Search for "Epilog Laser - Maps (Thin Lines)" style
- Click on "Apply" to apply the style
You will see the world map style change after applying these steps. What this map style does is that it applies different layers and outlines onto the categories within the system (e.g. railroads, highways, tertiary highways etc.). There are different types of styles made by the public that you can search and apply to.
*Tip: If you have created an account you may click on "Create Style" at the home page to create your own design (e.g. varying line width etc.).
Resize the Map to 100% View
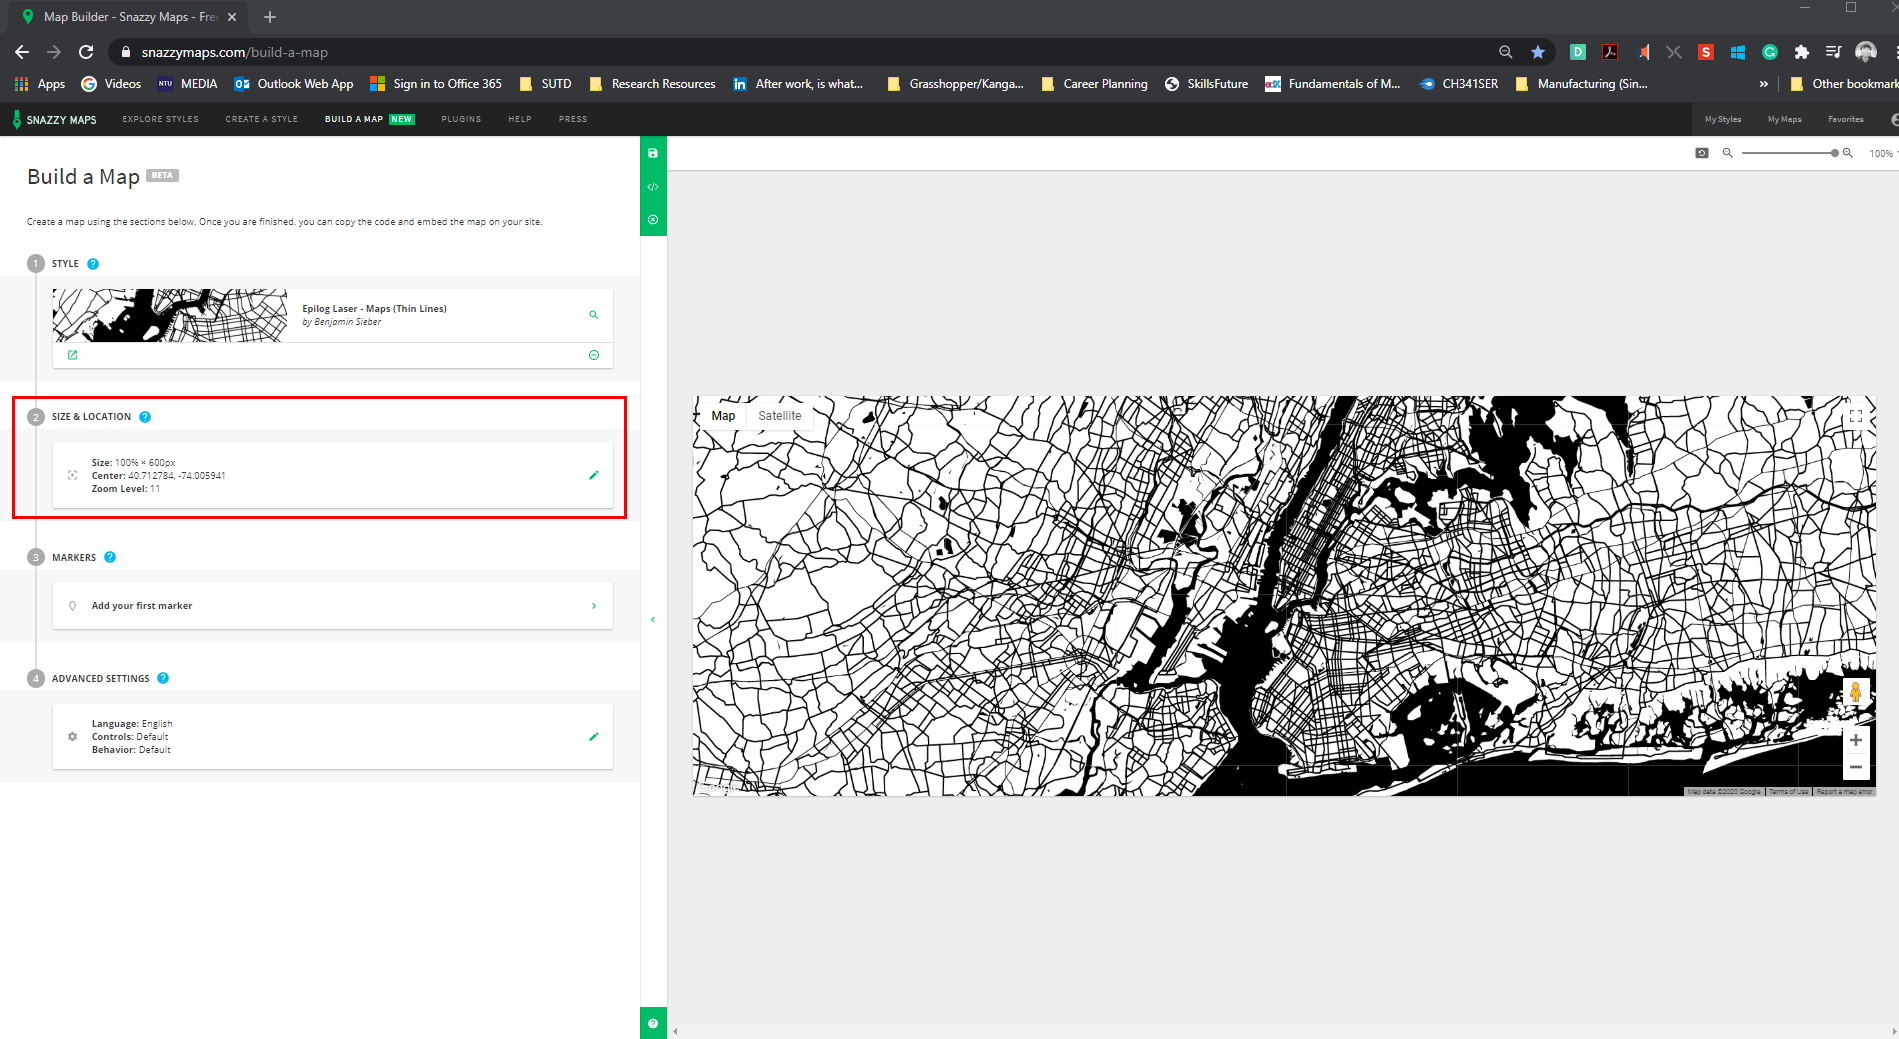
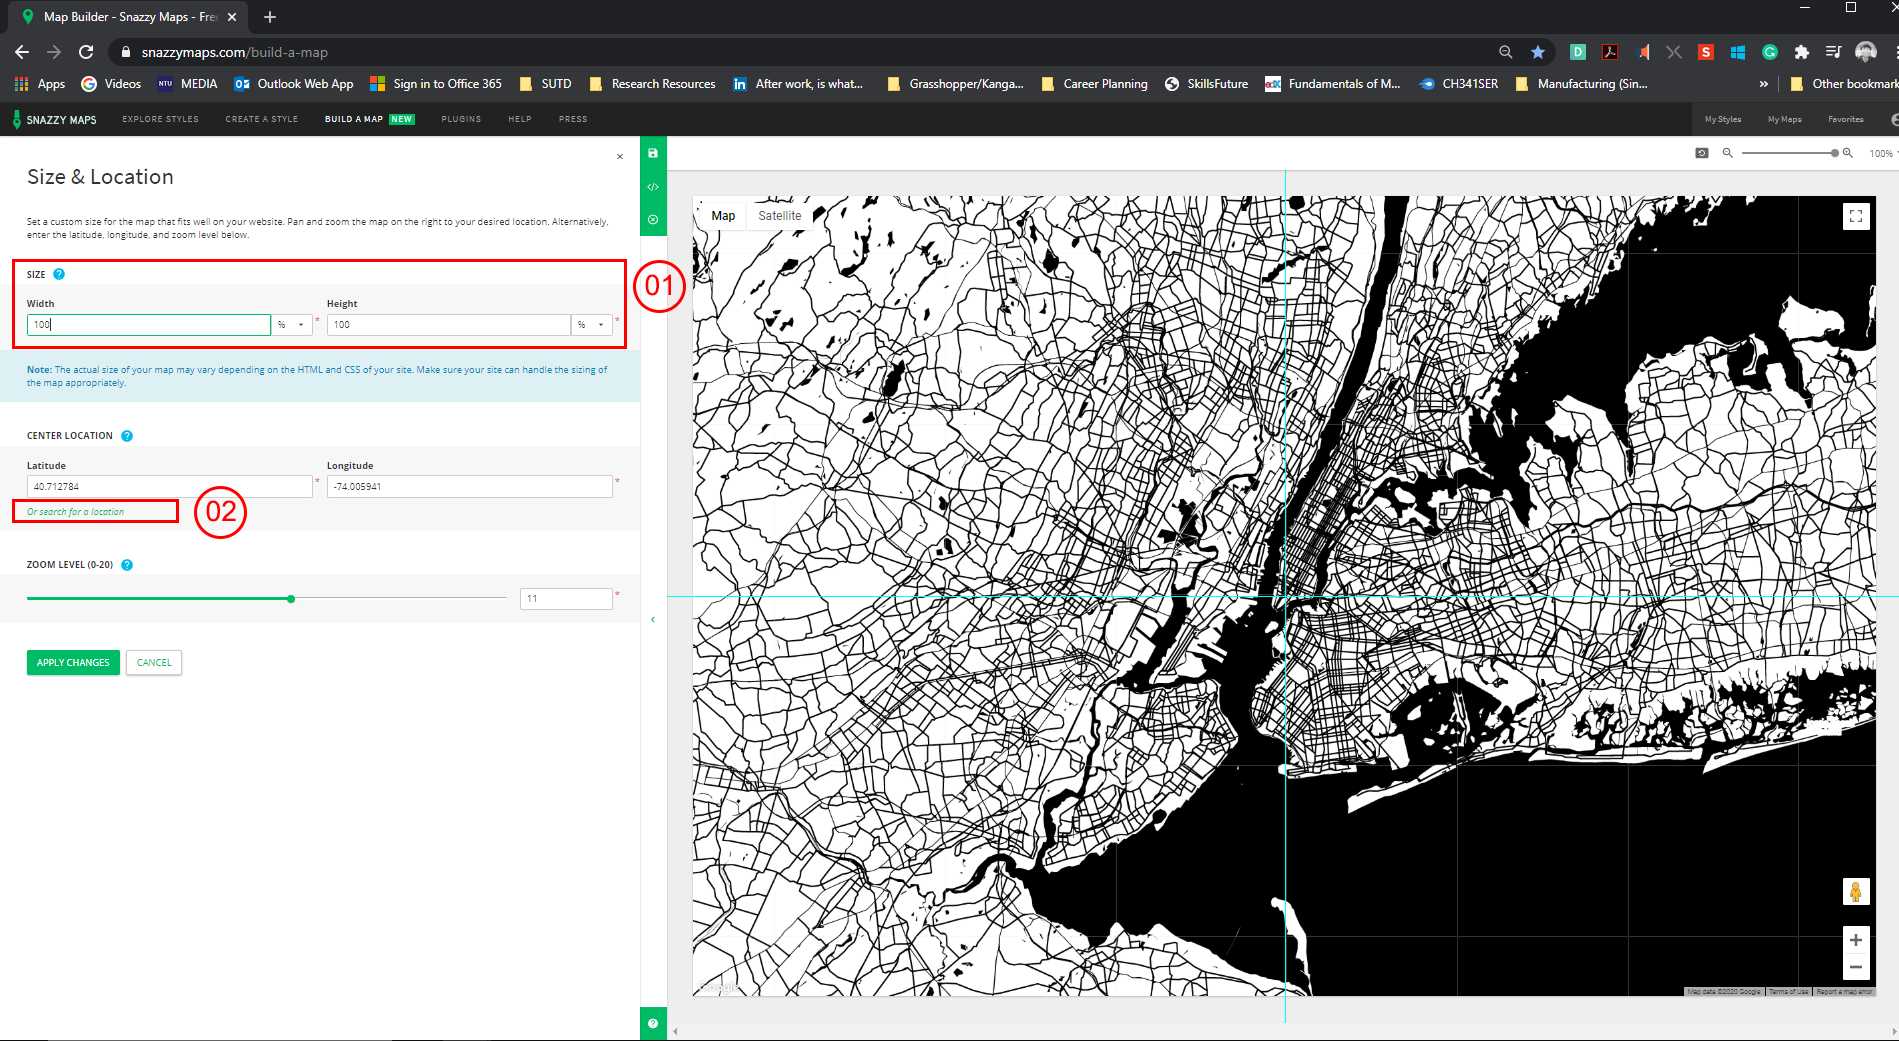
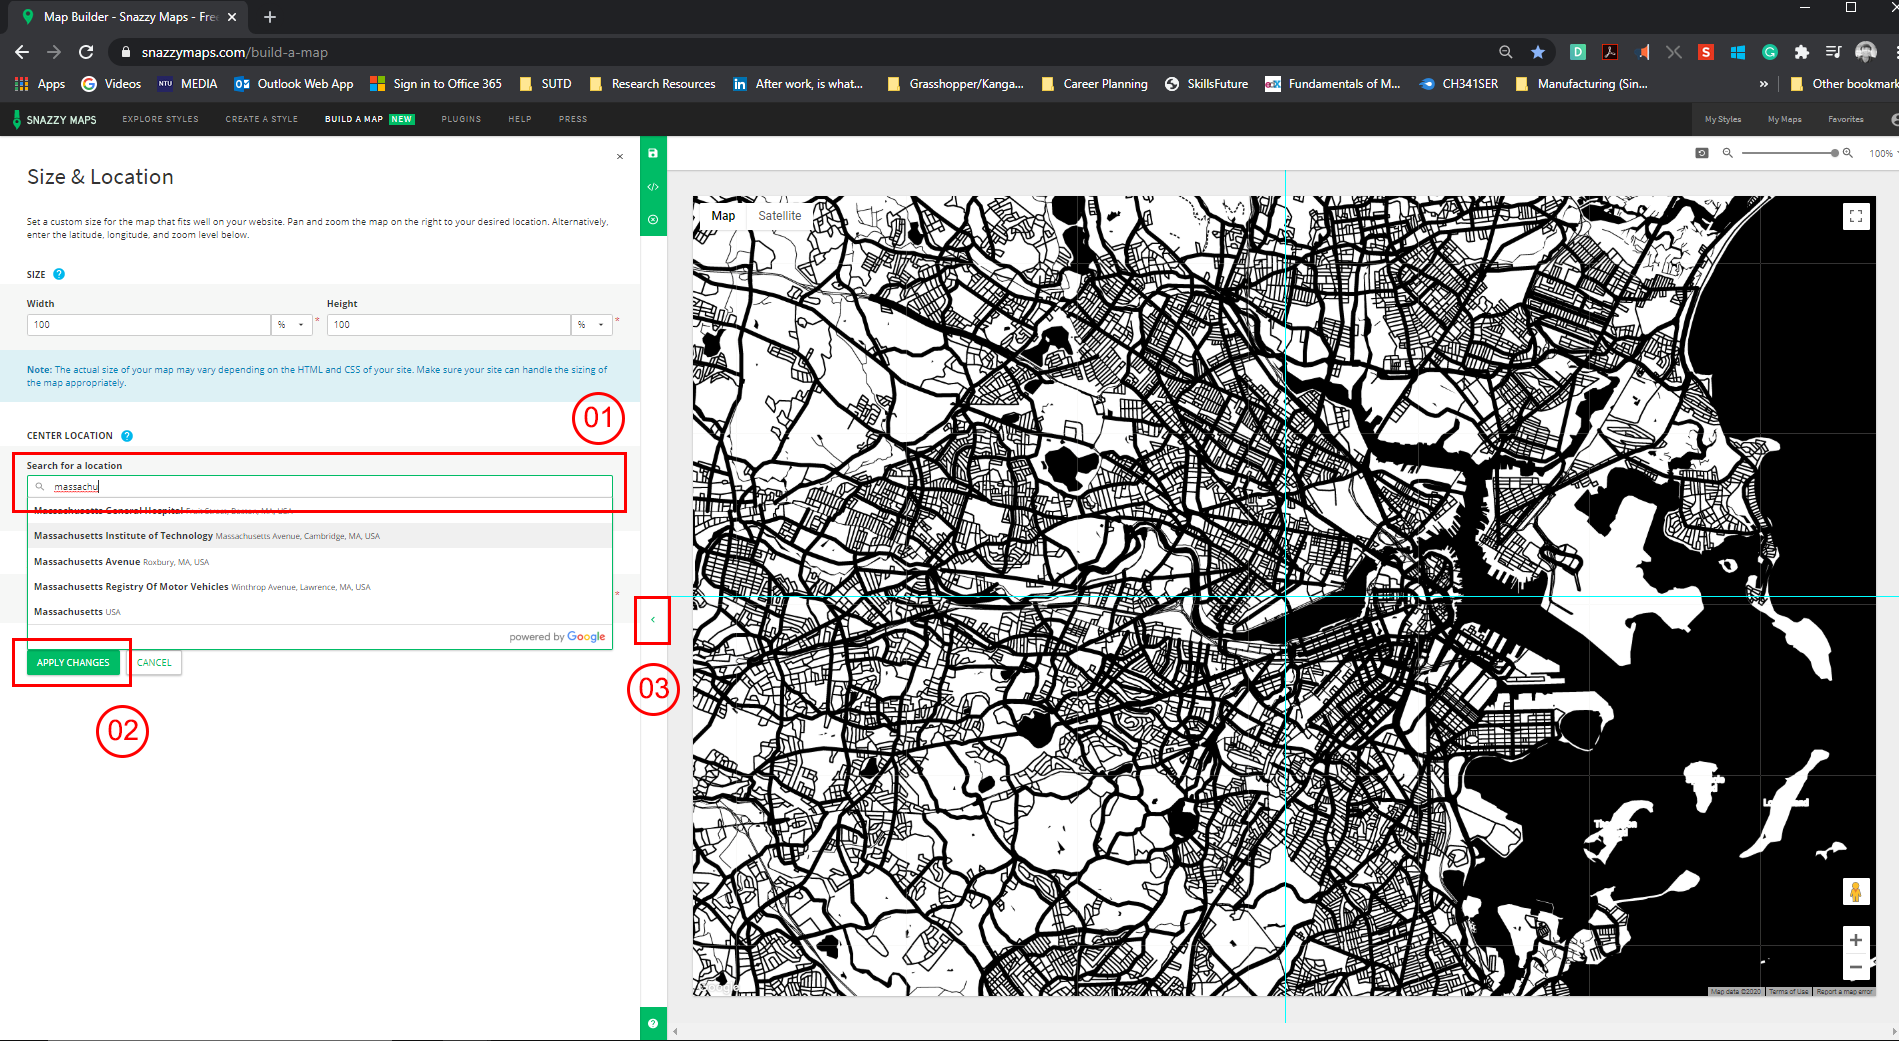
To obtain a clean image for referencing later, click under "Size and Location" tab.
Steps:
- Under "Size" tab, make all height and width 100%.
- To centre your desired location, search under "Center Location", "Select your location"
- Key in the desired location you wish to capture
- Click on "Apply Changes"
- Close the controls panel by clicking the side panel arrow key
You should observe your map preview filling your preview screen giving you an expanded view of the map.
Hide All Controls and Take a Picture!
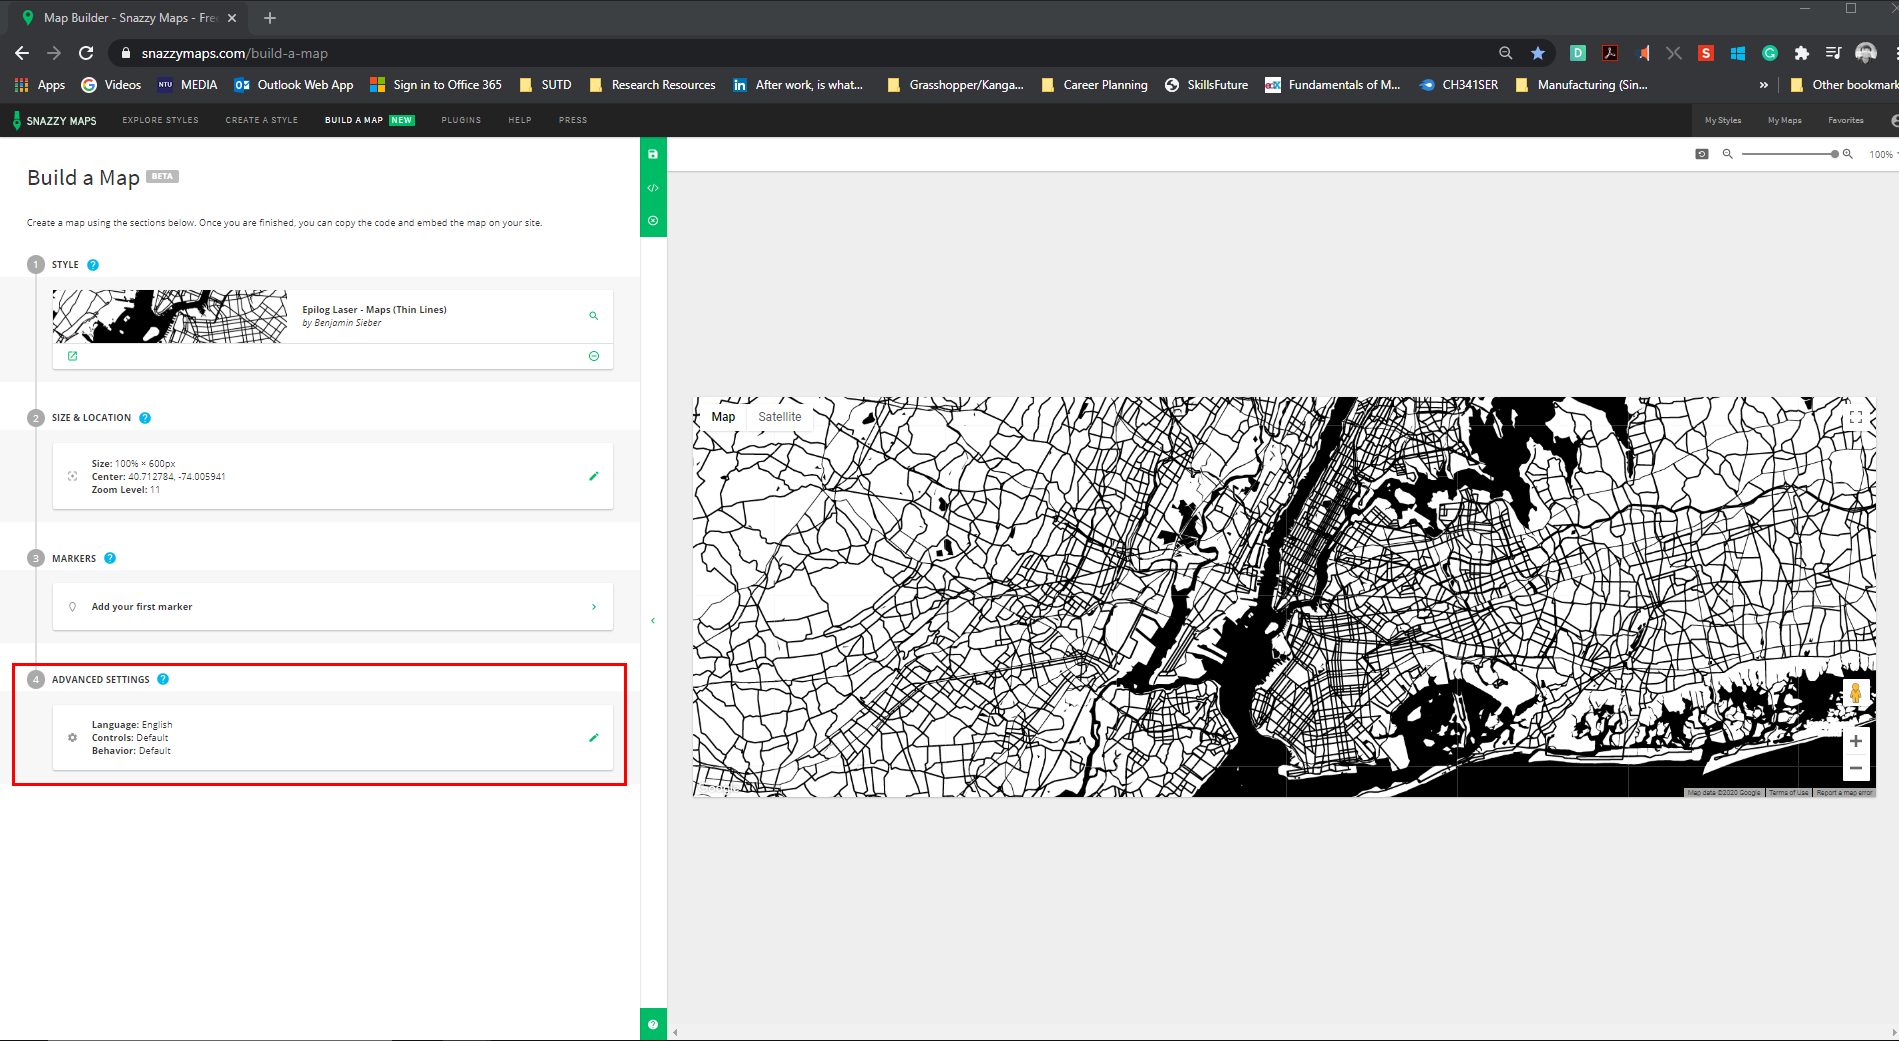
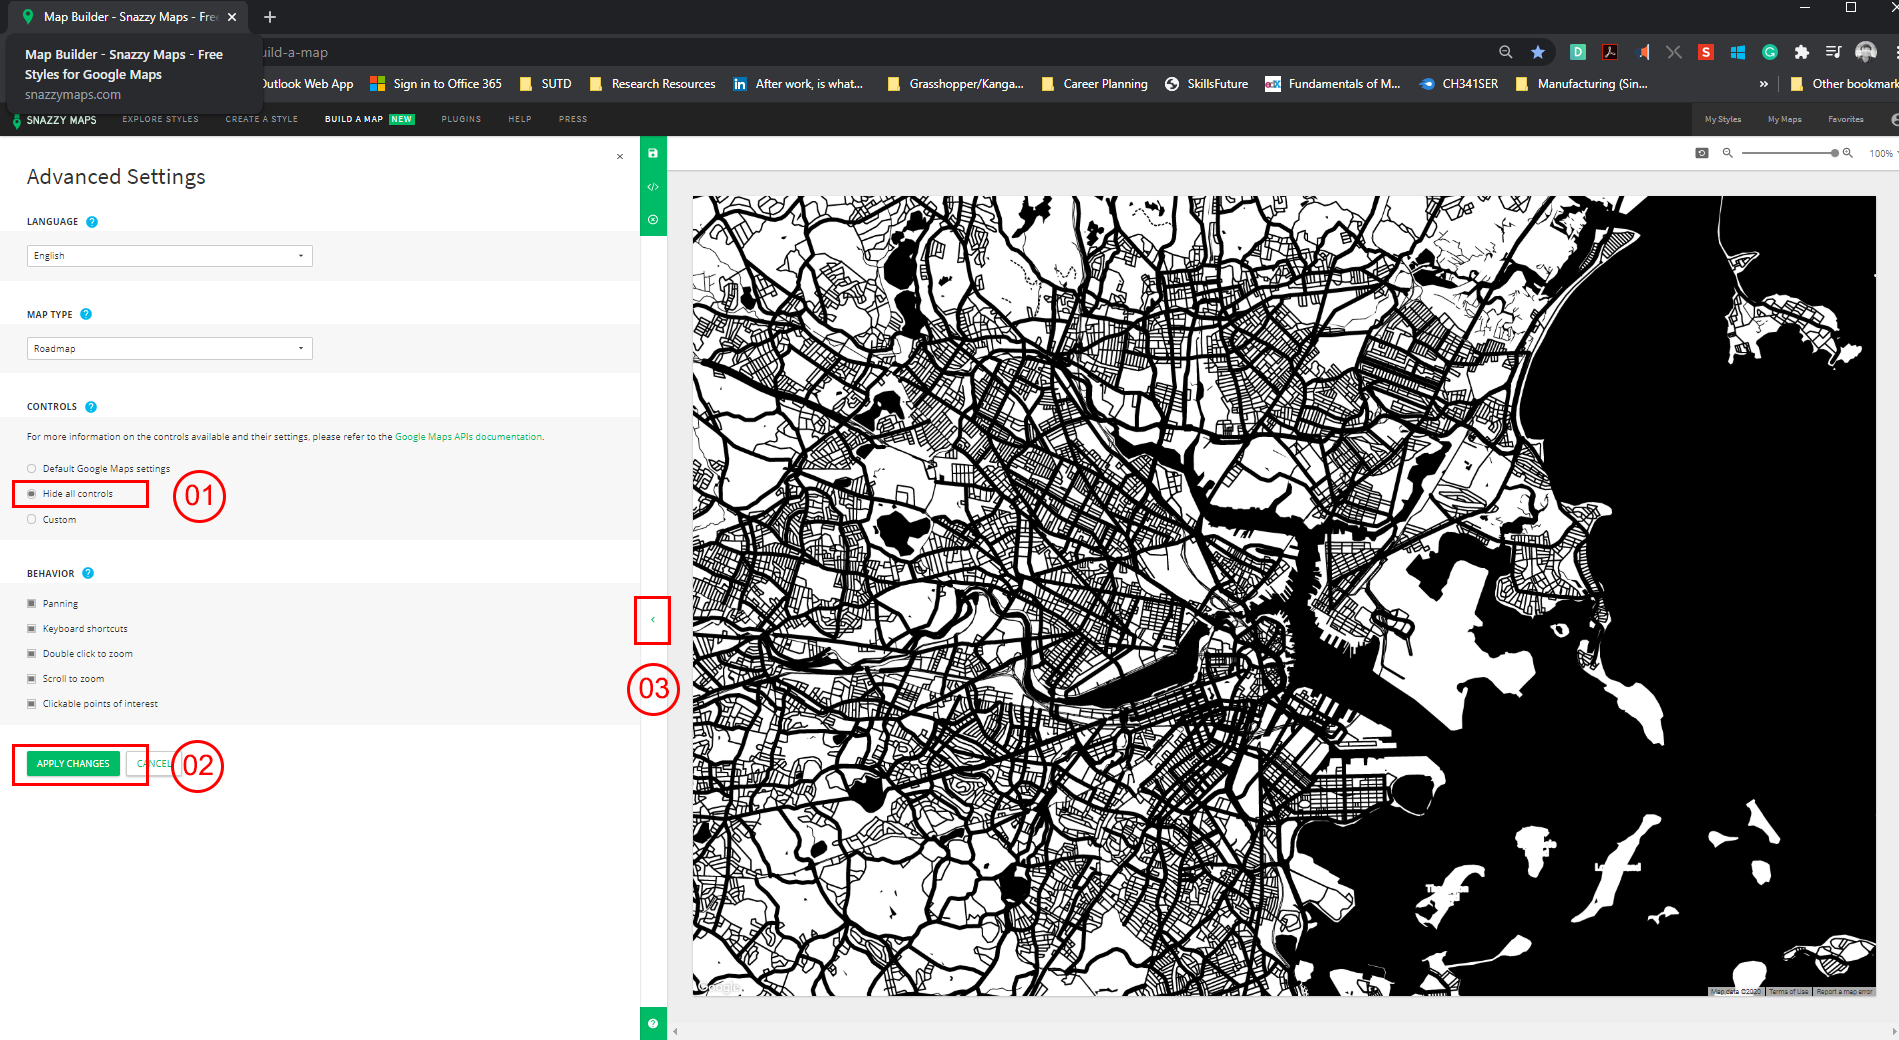
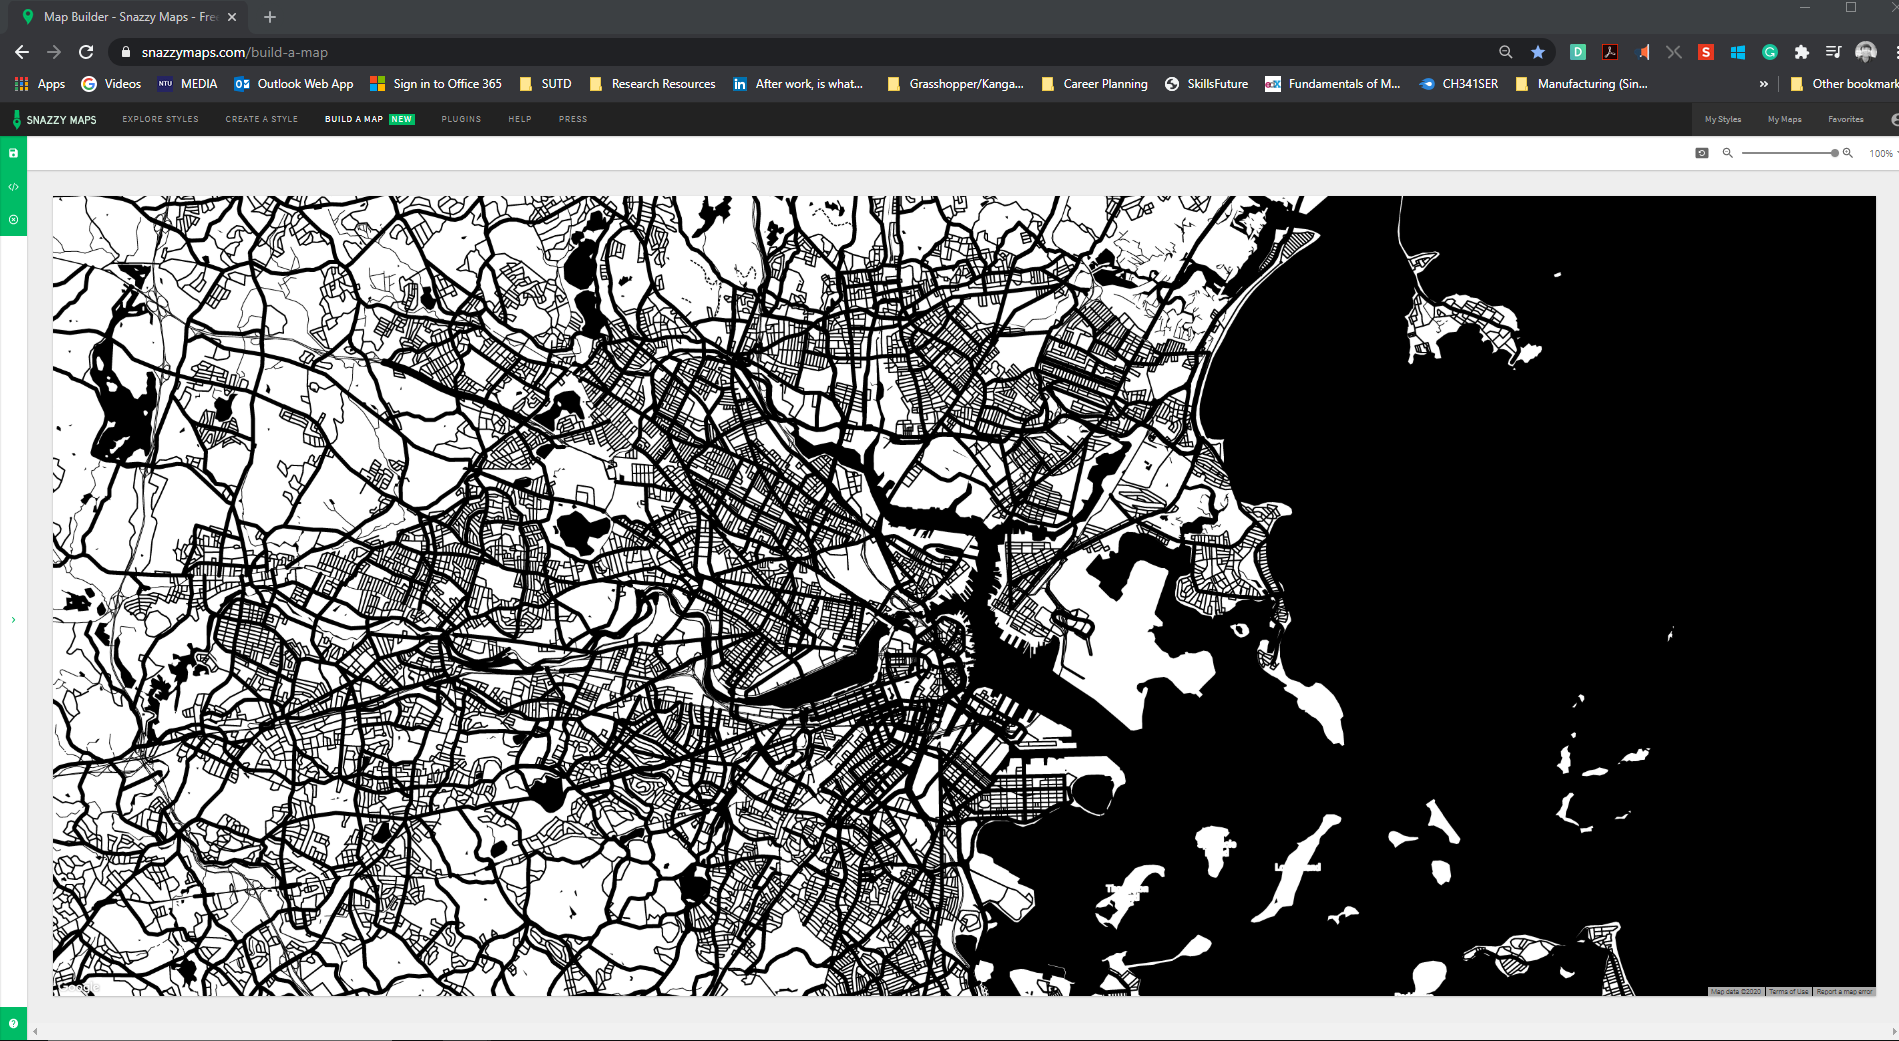
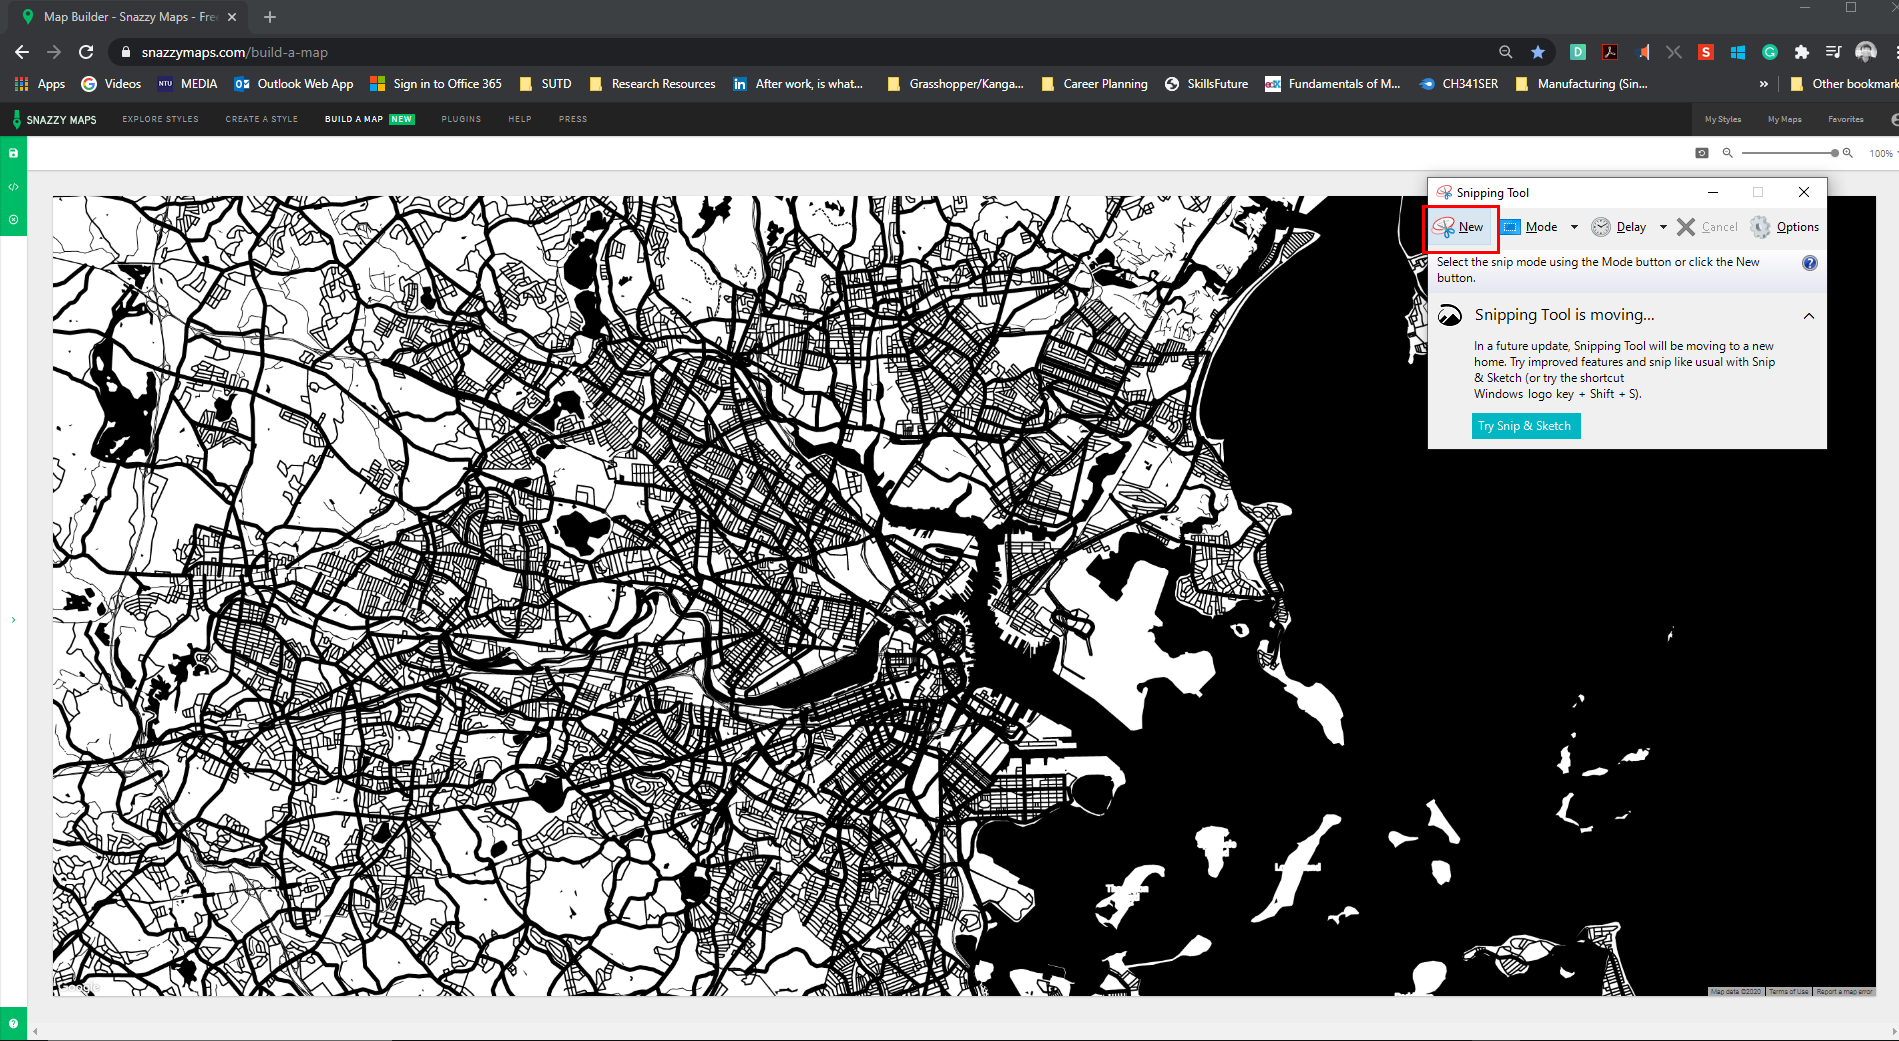
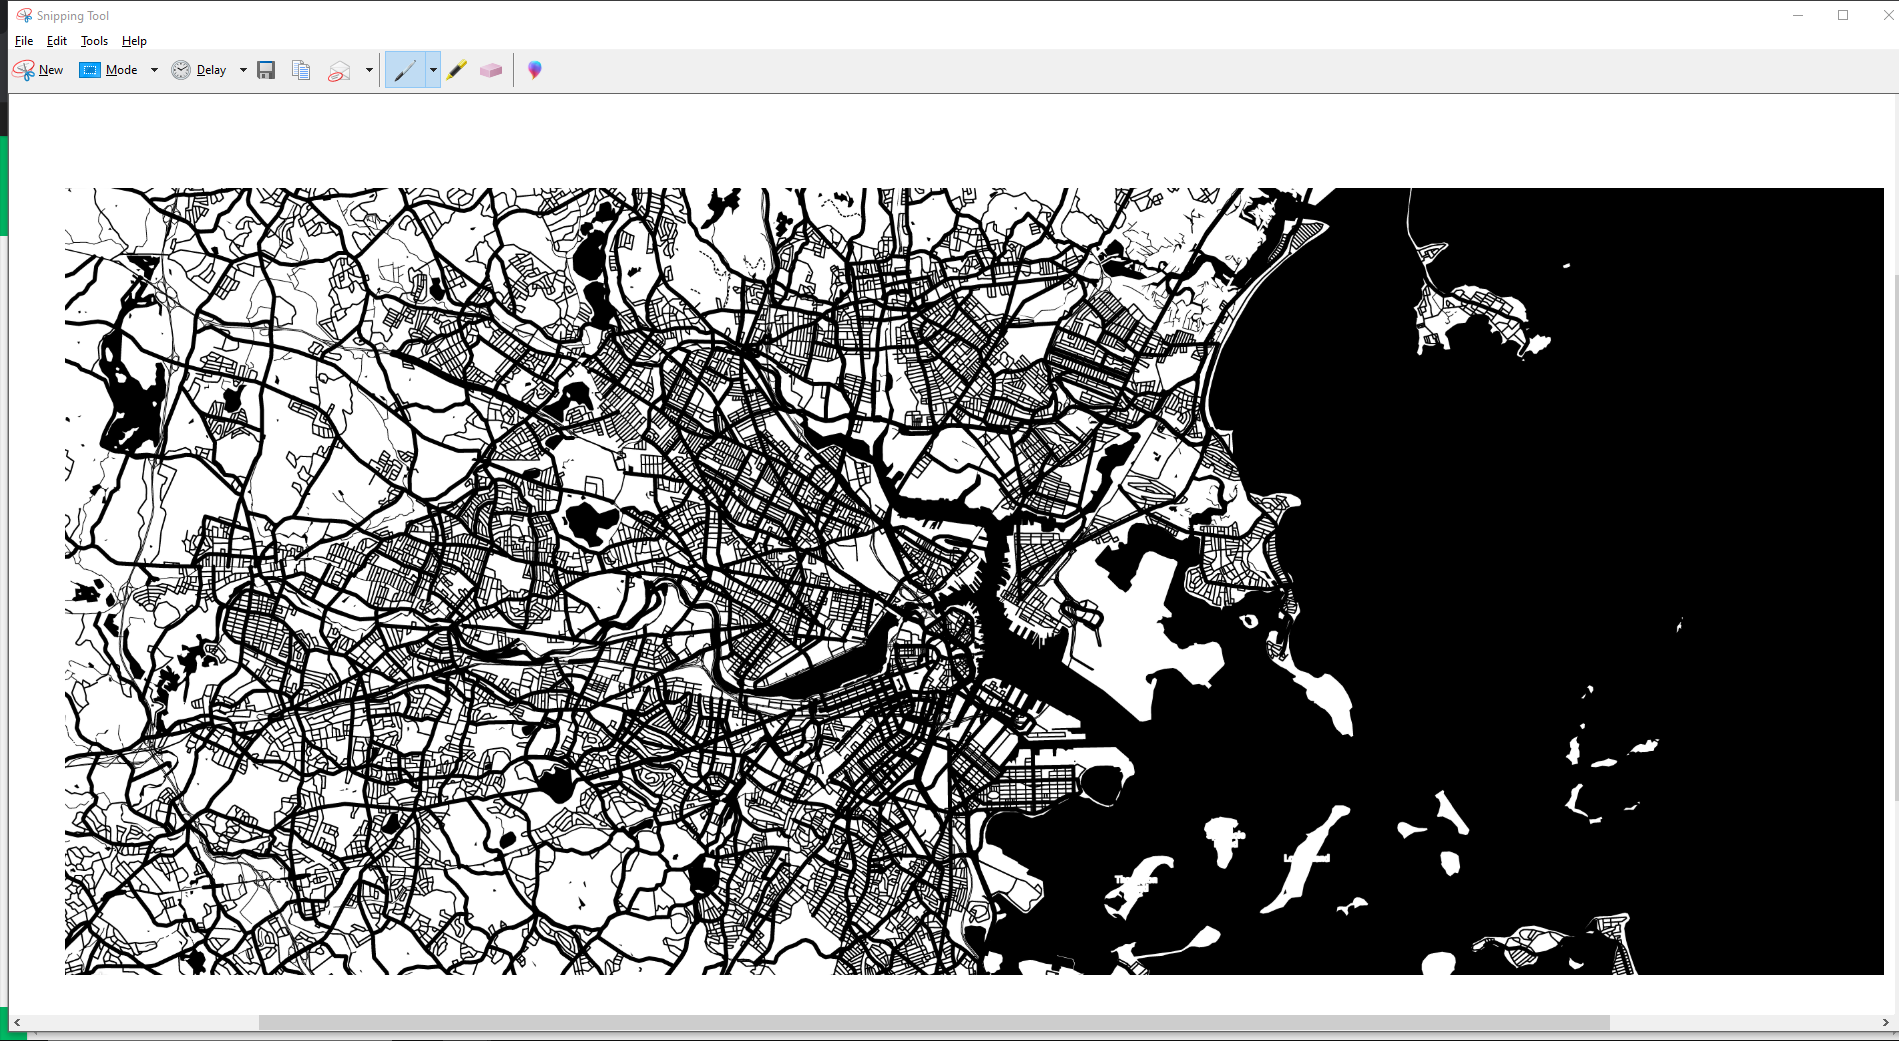
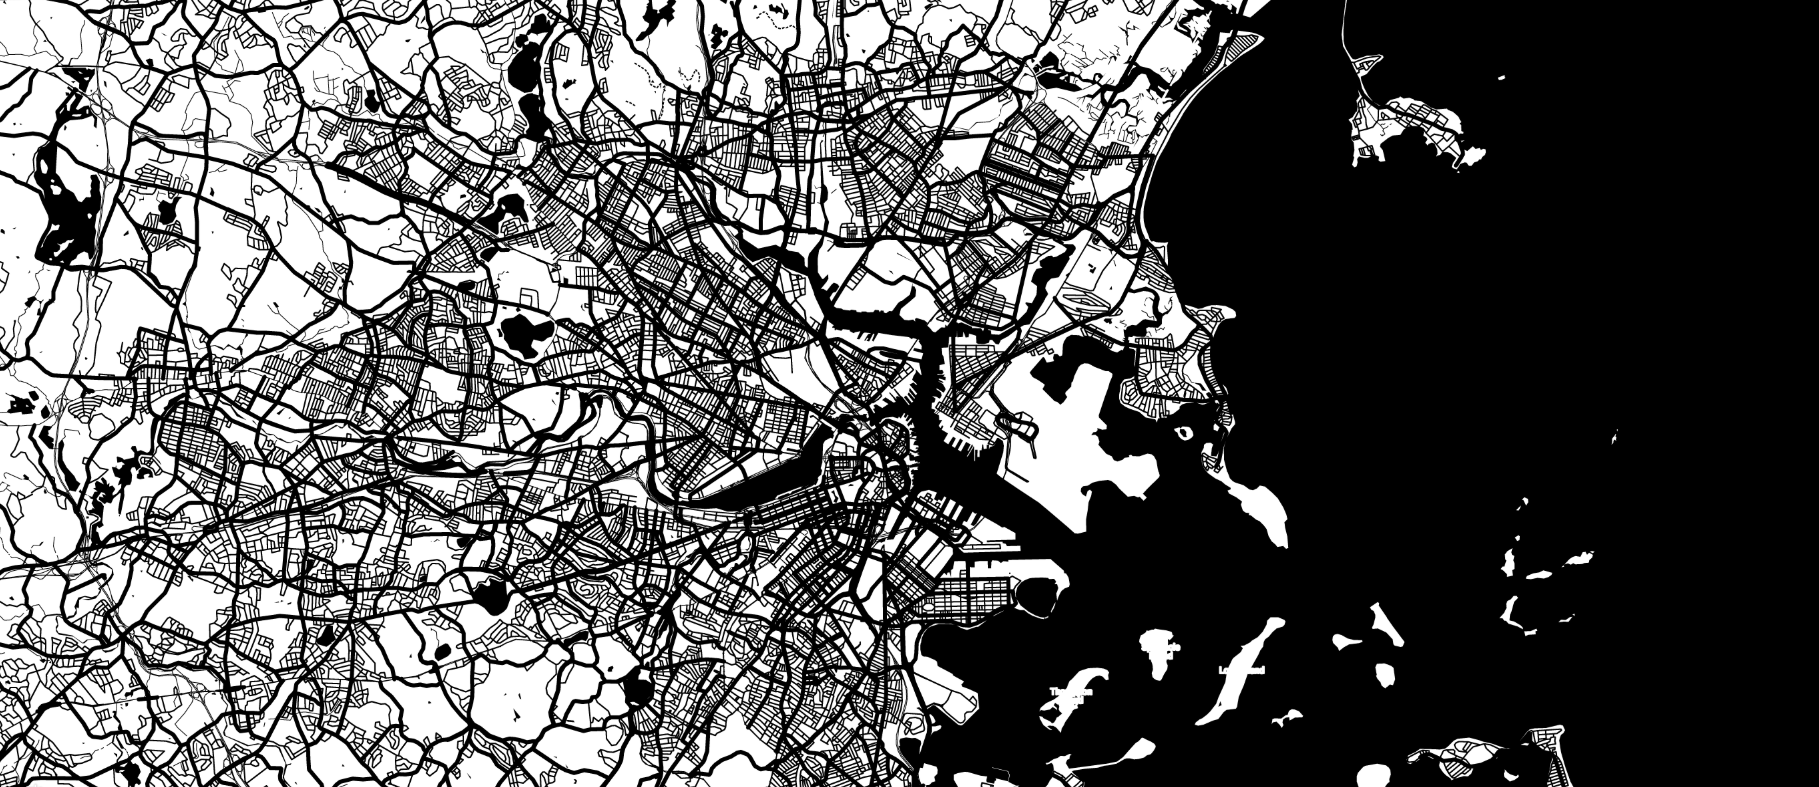
Once directed back to the main preview page, click on "Advanced Settings". In this step, you will be preparing to create an even extended map for screenshot. You want the image to be as clear as possible. Make sure the zoom settings have already been set up properly so that your lines are crystal clear. I would recommend 13%.
Steps:
- Click on "Advanced Settings".
- Under "Controls", check "Hide all Controls".
- Click on "Apply Changes".
- Close the controls panel by clicking the side panel arrow key.
- Bring up the Windows Snipping Tool (you may use screenshot function).
- Snap a picture of the entire map as shown.
- Save the image as PNG (retains a reasonable amount of data for post-processing)
To pull up the snipping tool, press the Windows key and type in "Snipping Tool" to search for the app. It should appear.
Adobe Illustrator: Crop Image
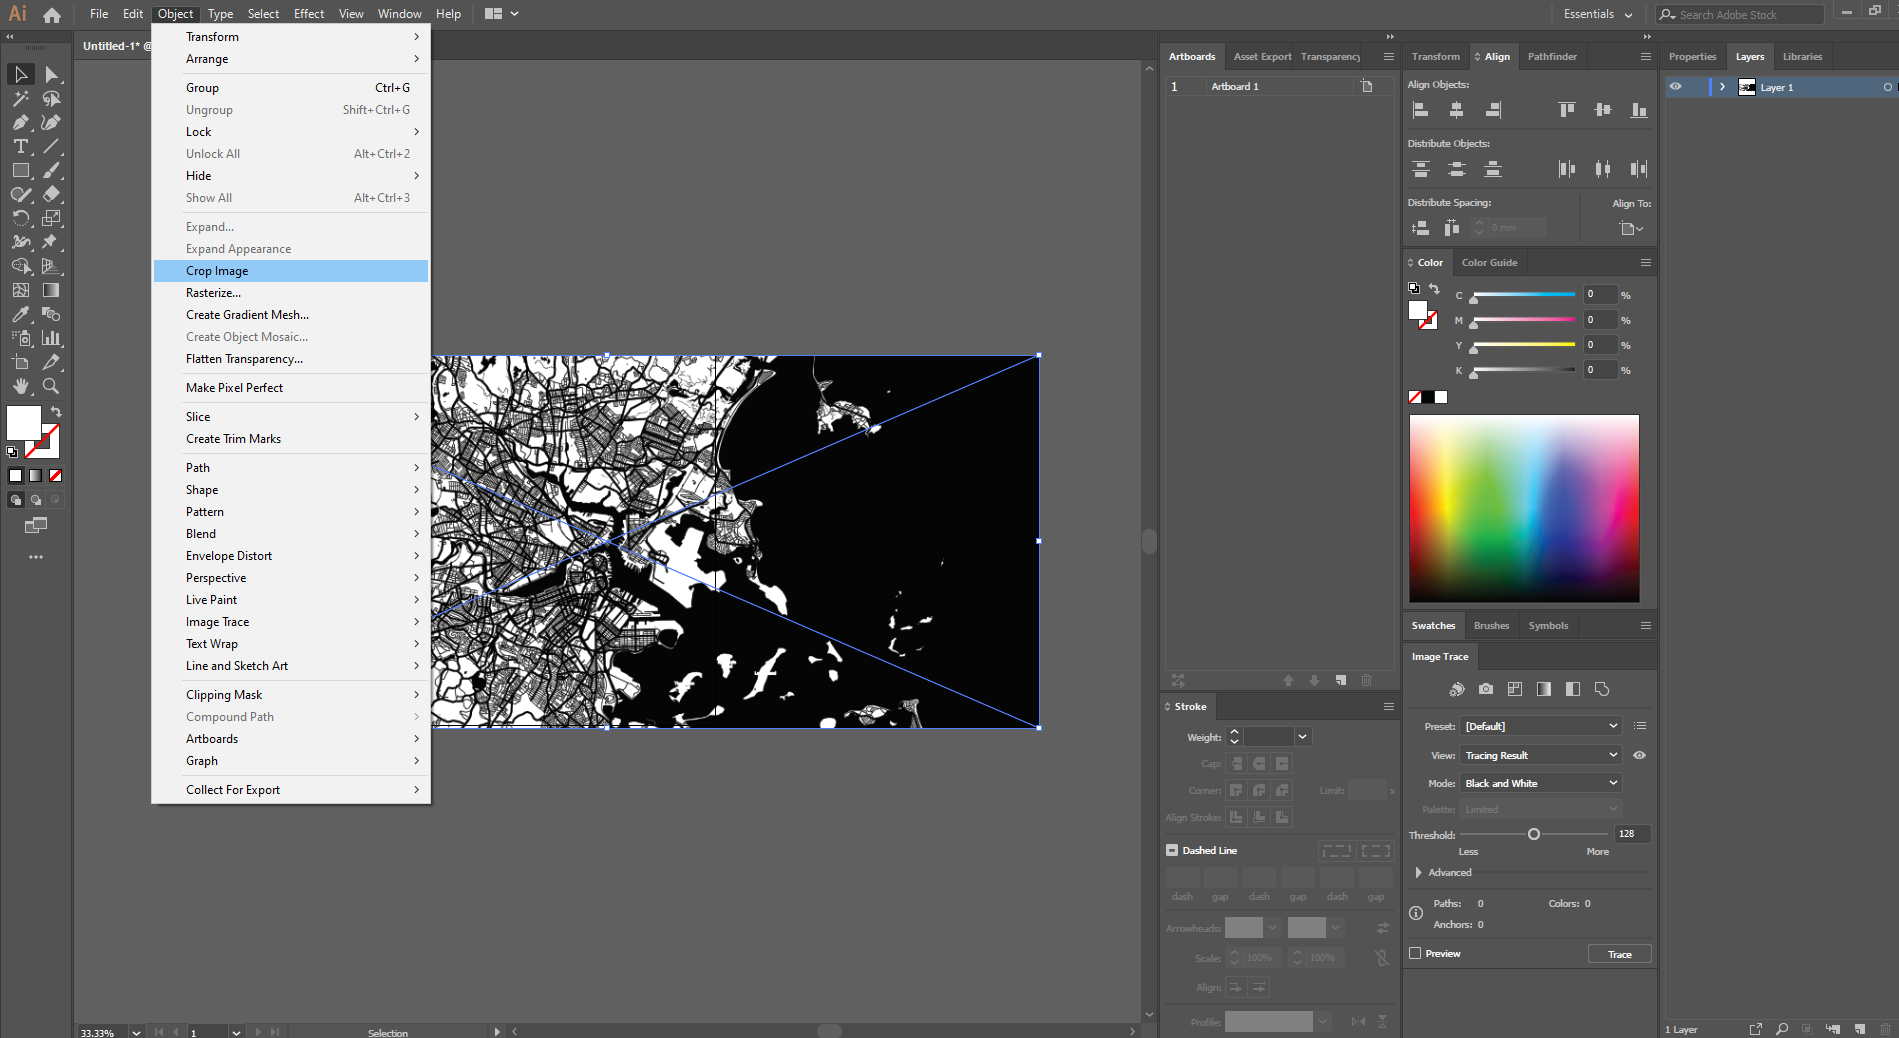
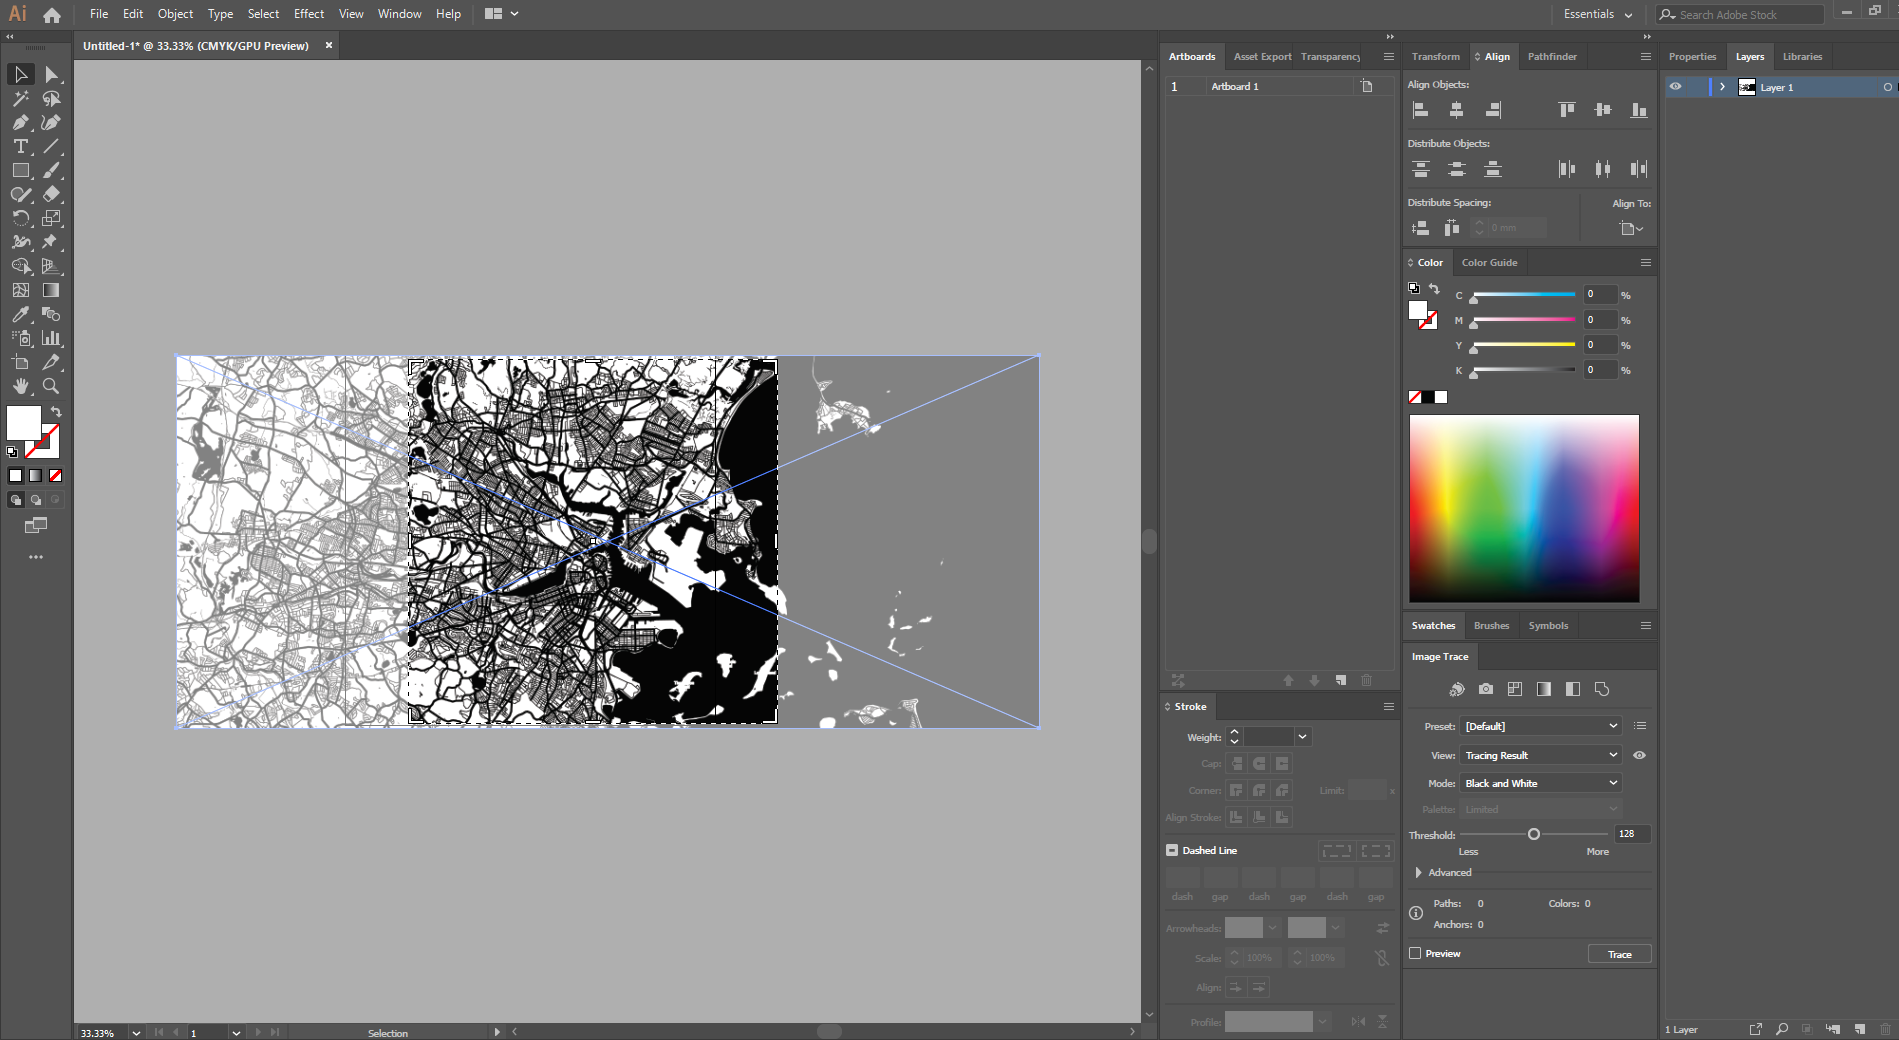
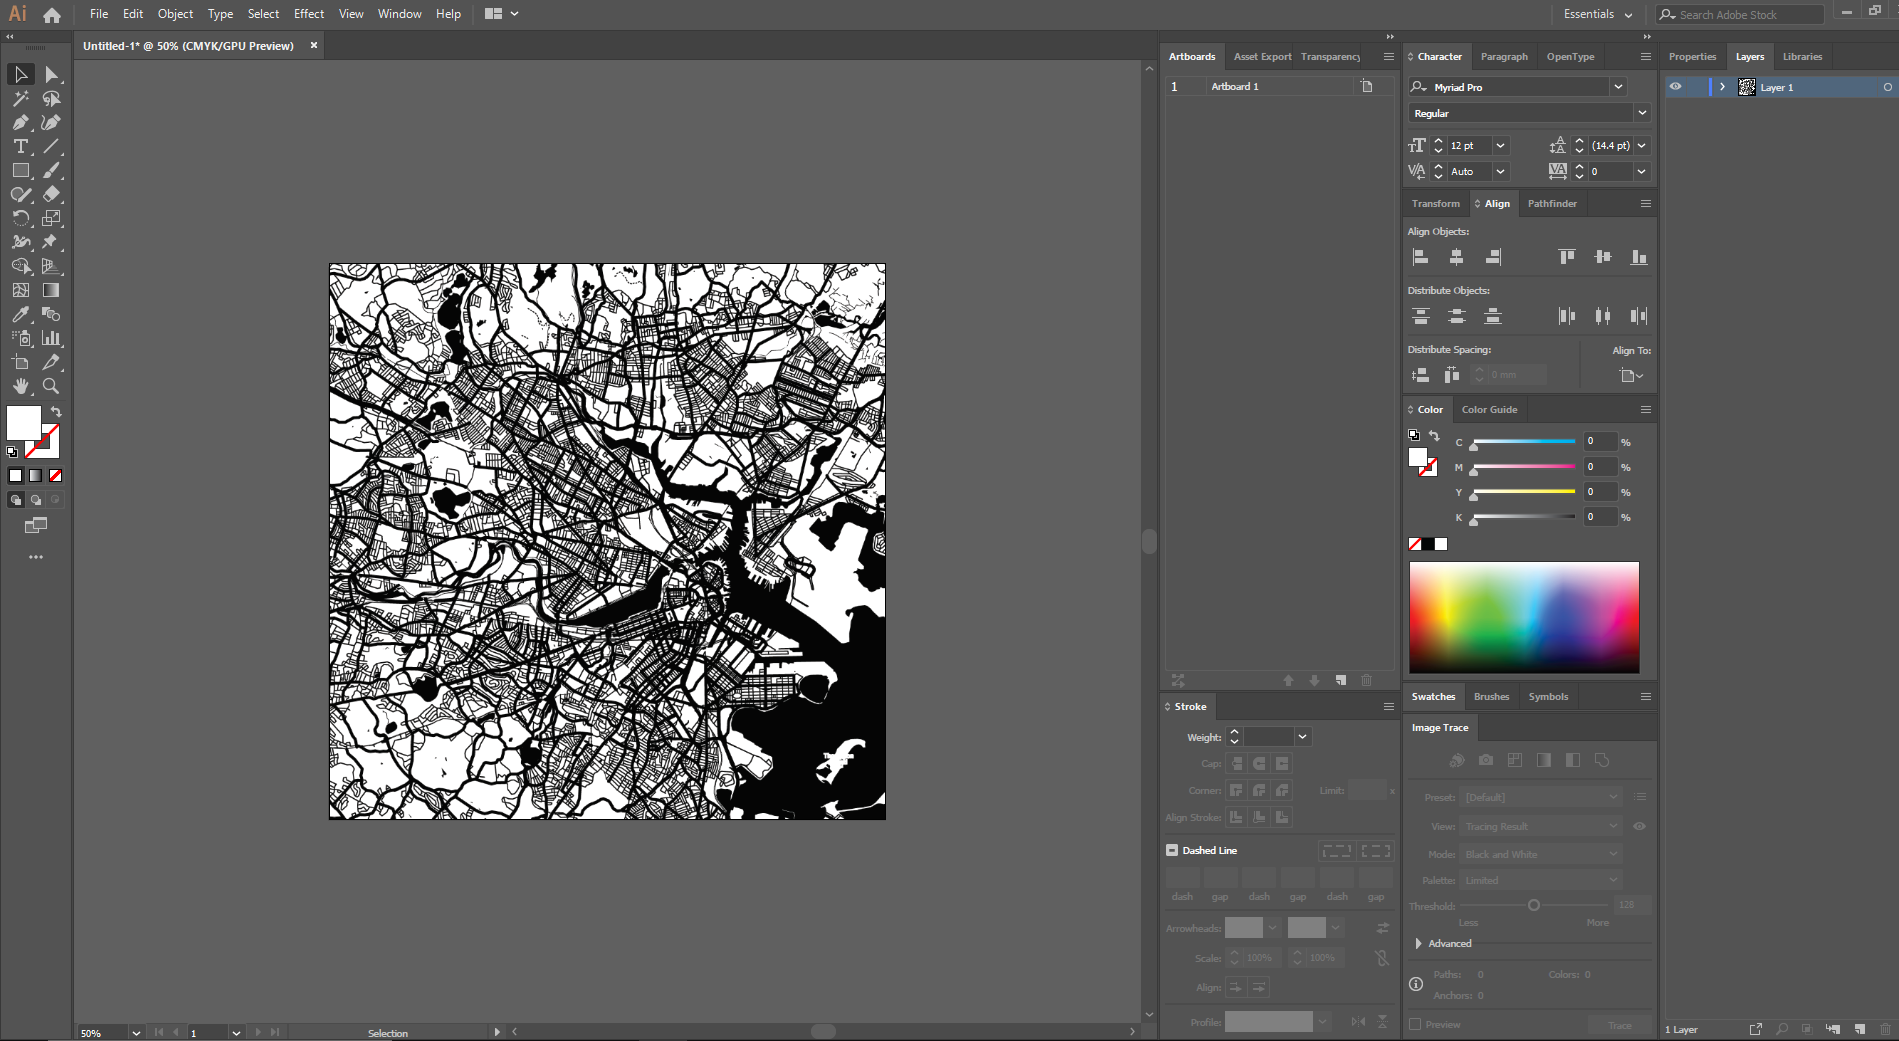
Now, we will post-process the image to convert the rasterized files into vector files. For machines like laser cutters and Cricut machines, they have accompanying software that converts .dxf files into machine code. For our project, we would like to vector cut. Thus, we need to extract outlines off the map.
For engraving on a laser-cutter, you can import the .png files directly and conduct the engraving (e.g. dithering etc.). Each laser-cutter has its own software interface (e.g. Coreldraw, RDworks etc.).
Steps:
- Create a new file to your desired dimensions. Mine's a square.
- Import .png file into art-board within Adobe Illustrator using the "Place"/"Import" function.
- Under "Object" > "Crop Image" to crop.
- In "Crop Image" mode, adjust the crop handle to size.
- Press enter to complete cropping and exit the "Crop Image" mode.
Tip: Ctrl+z helps to undo changes should you make any mistakes while Ctrl+Shift+z redo changes.
Adobe Illustrator: Image Trace, Convert to Vector
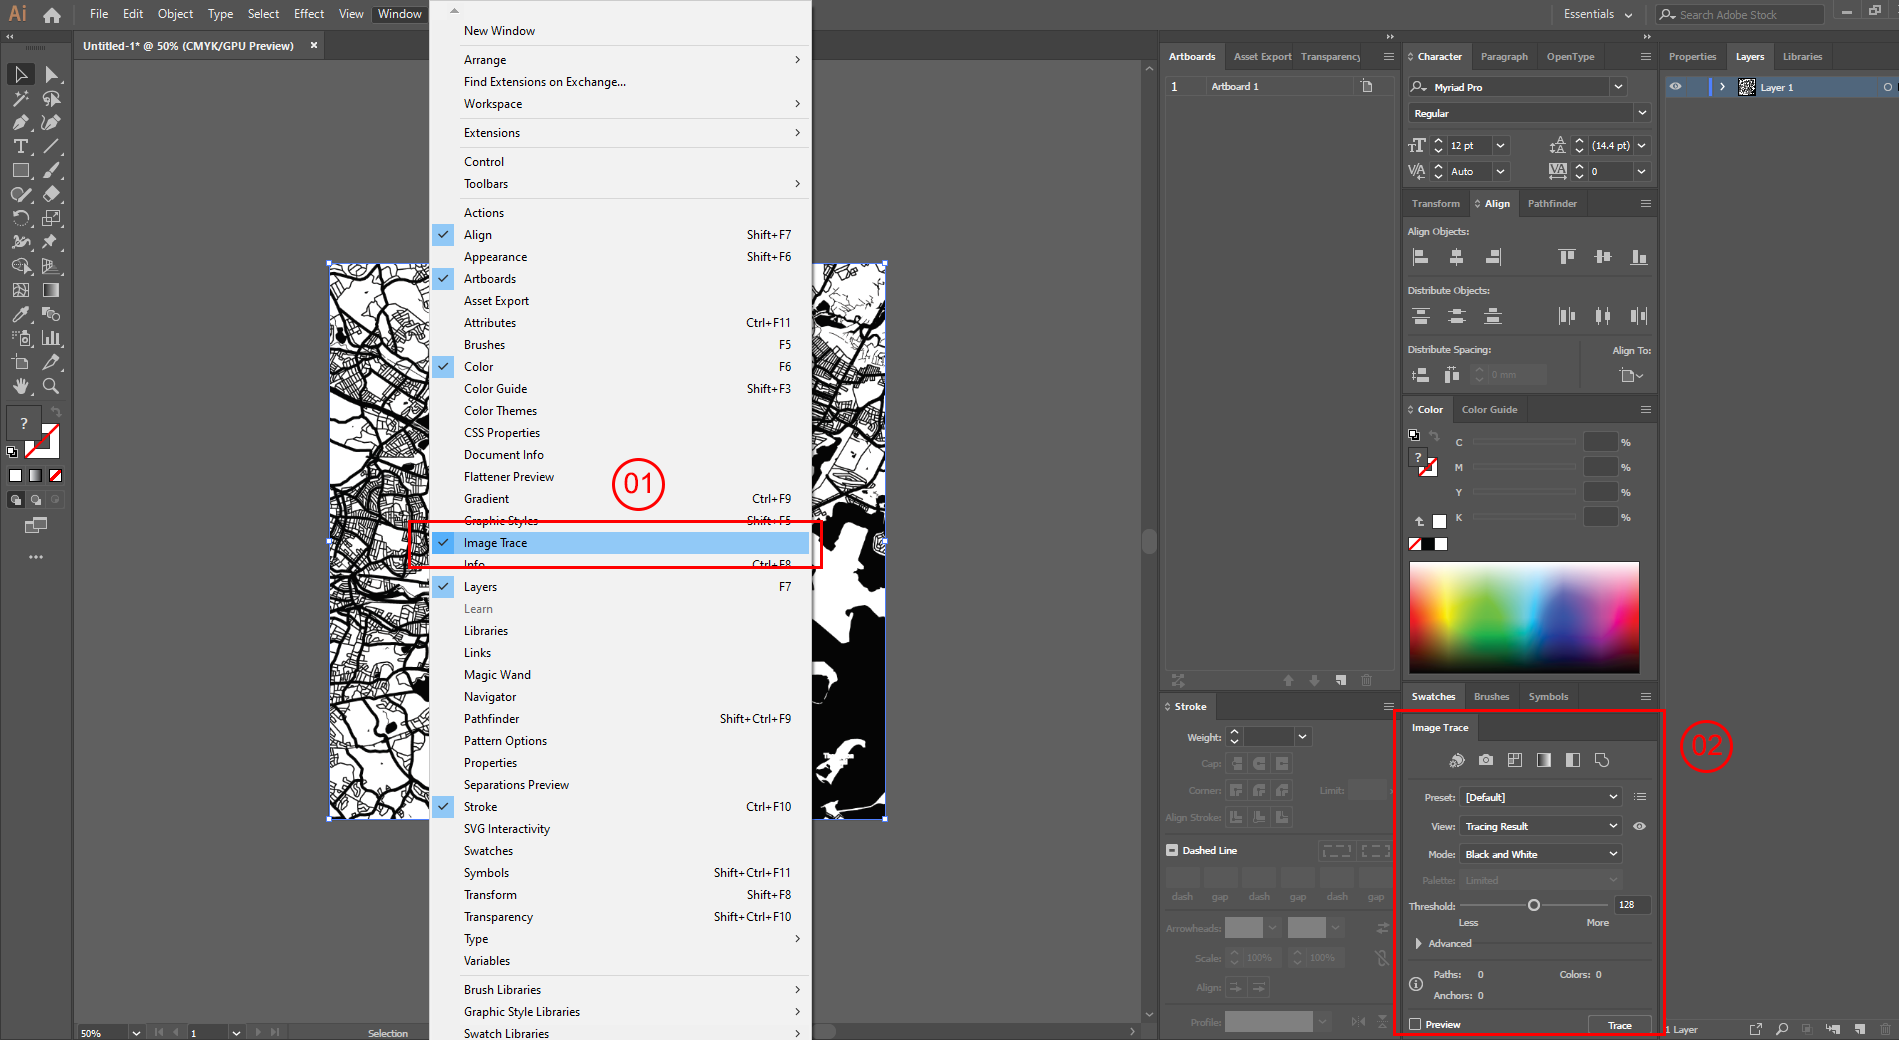
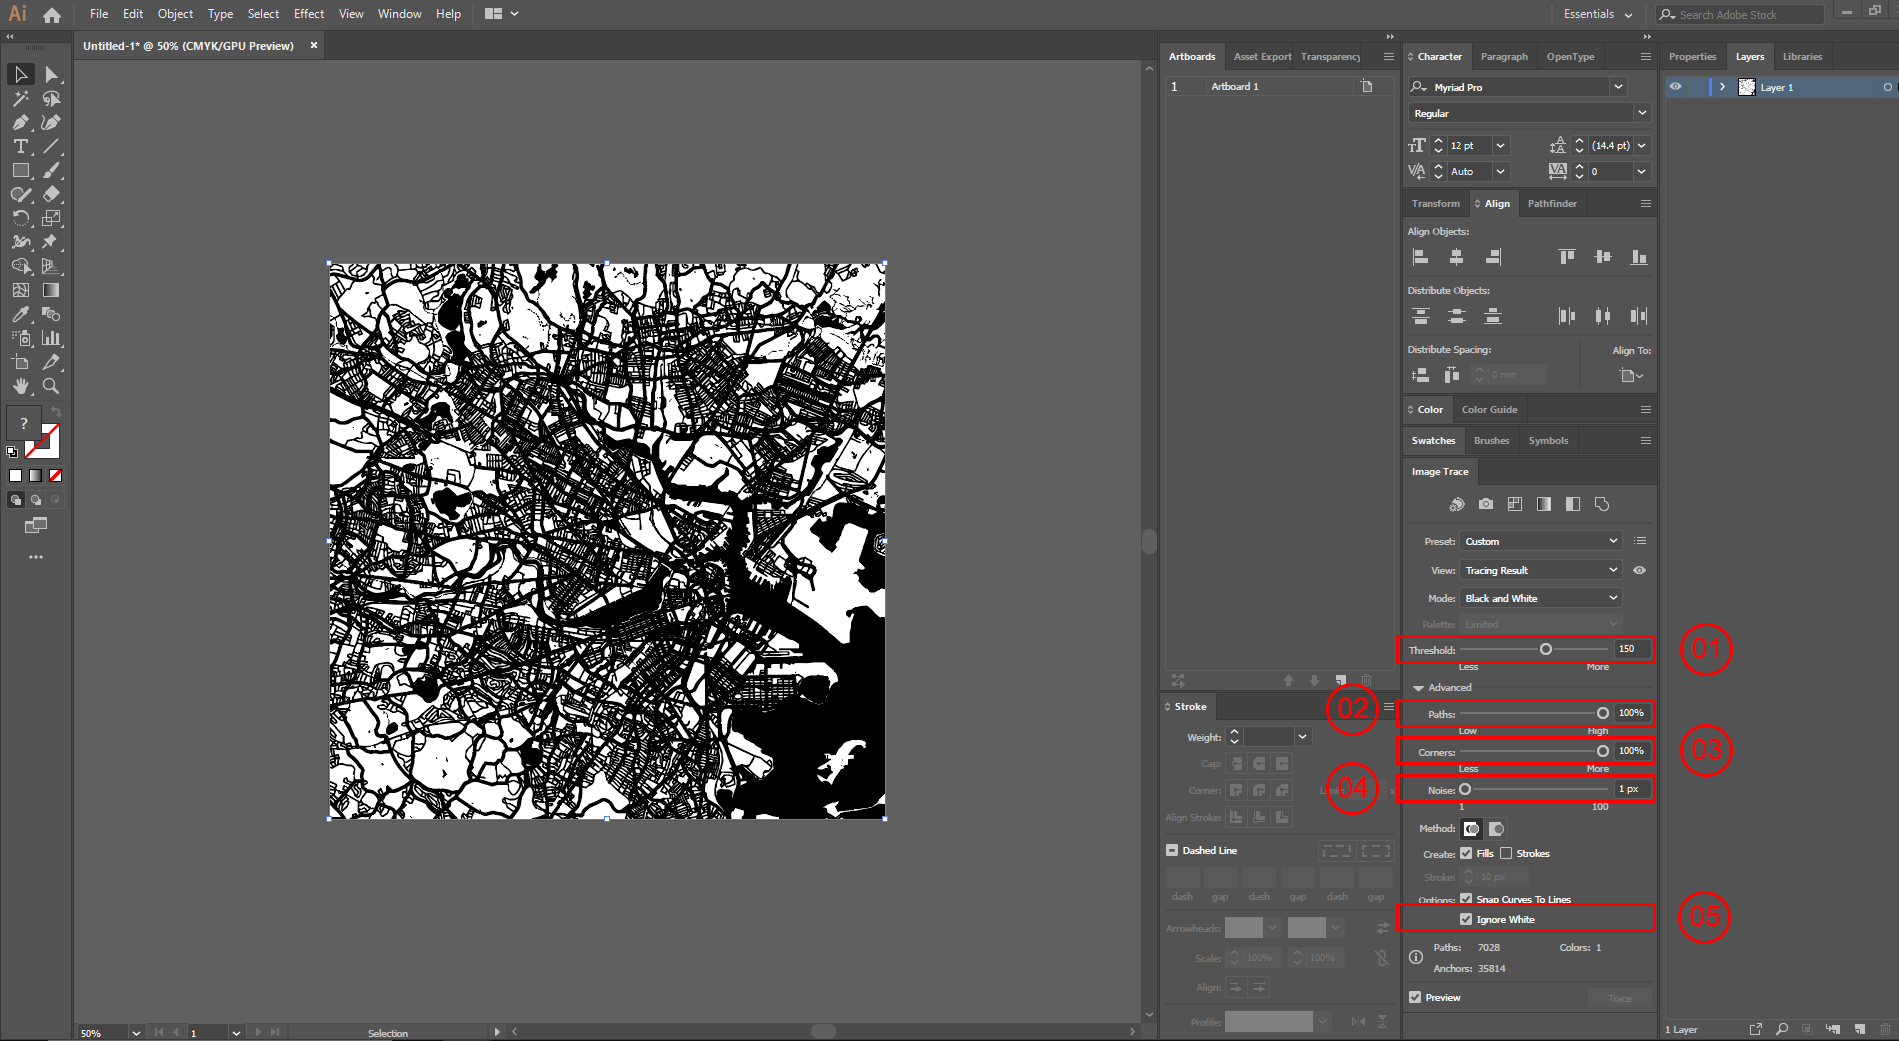
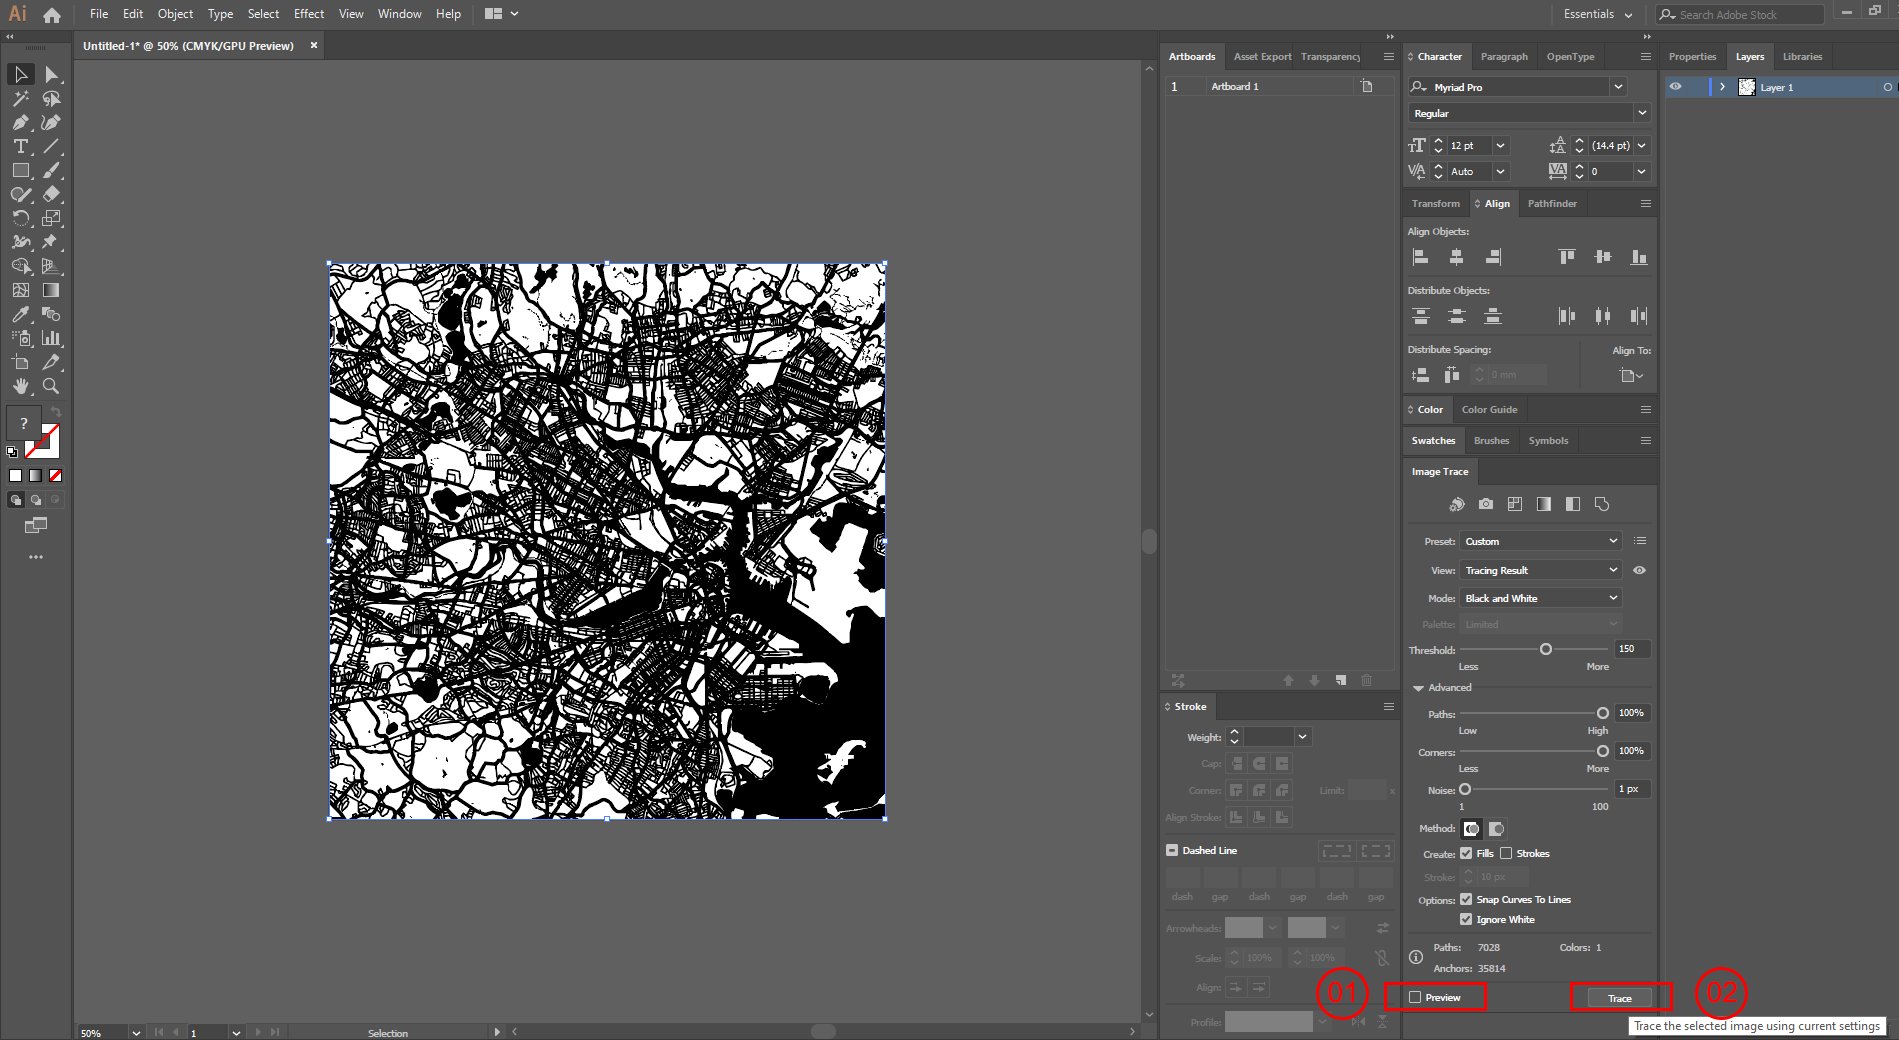
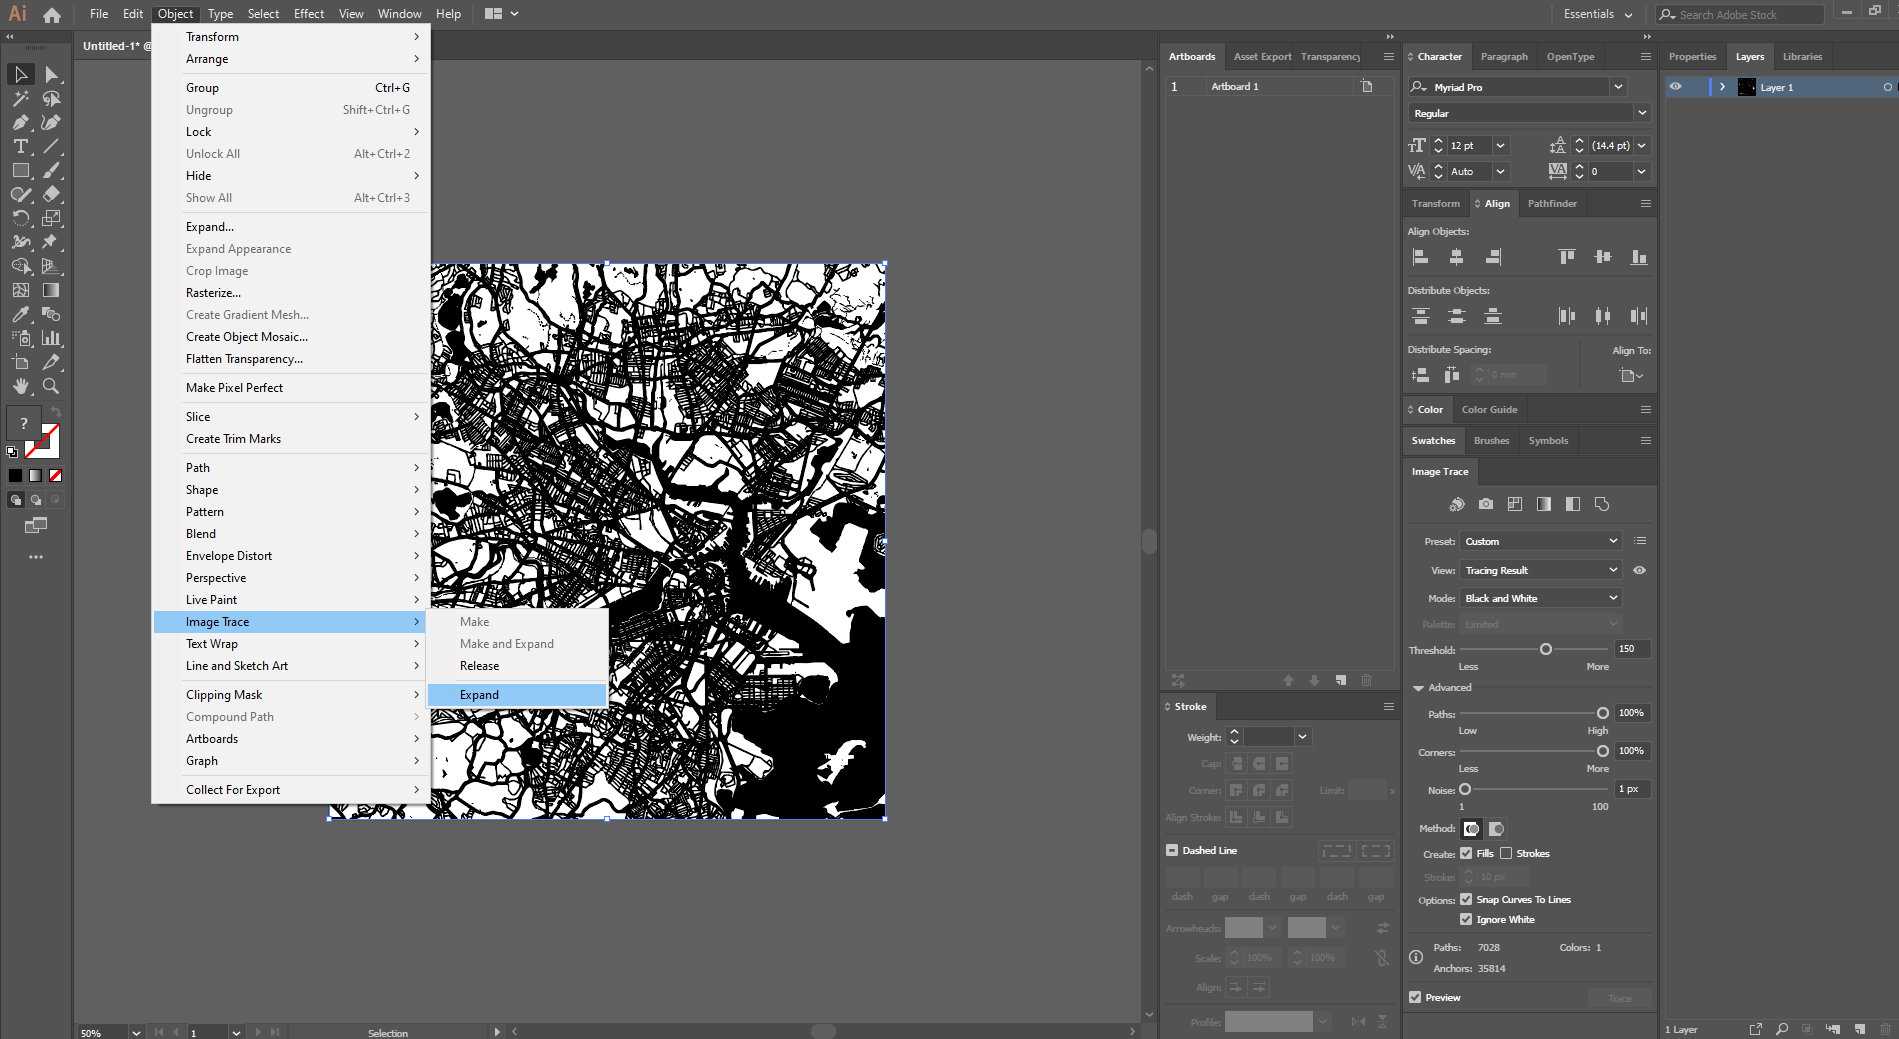
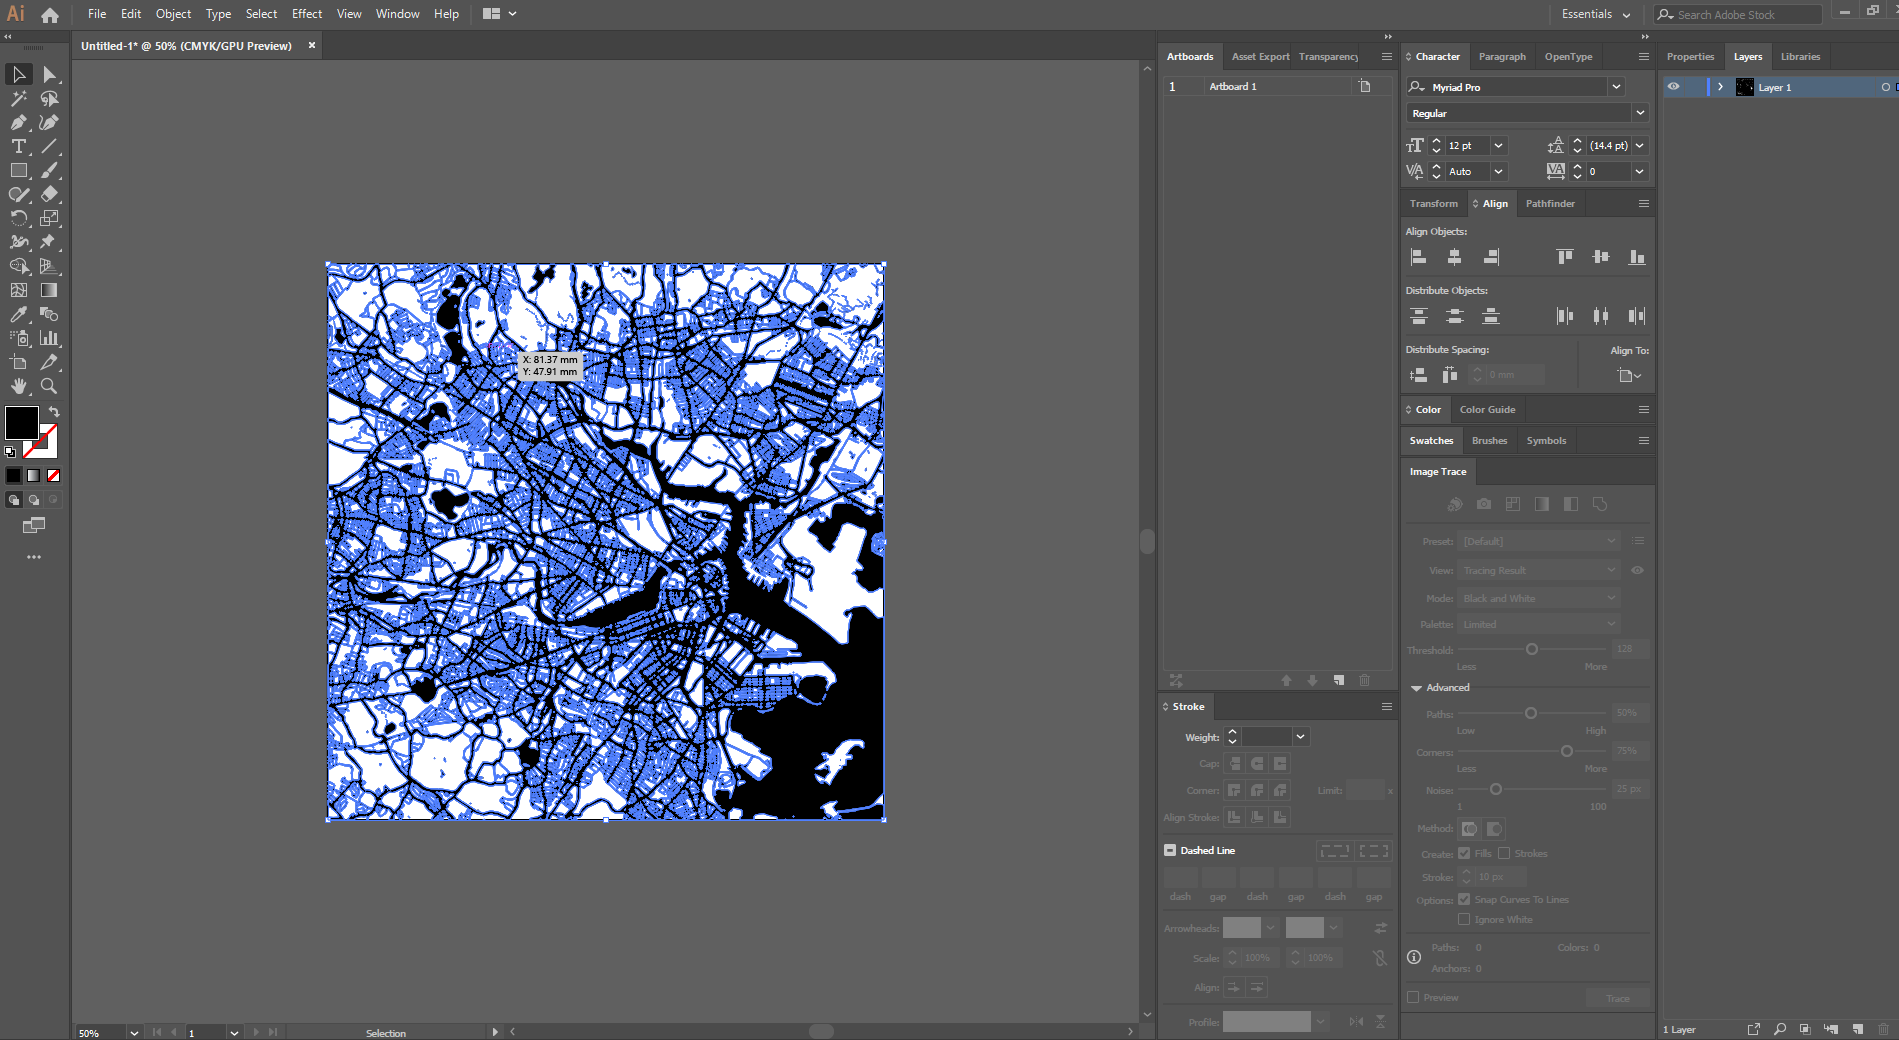
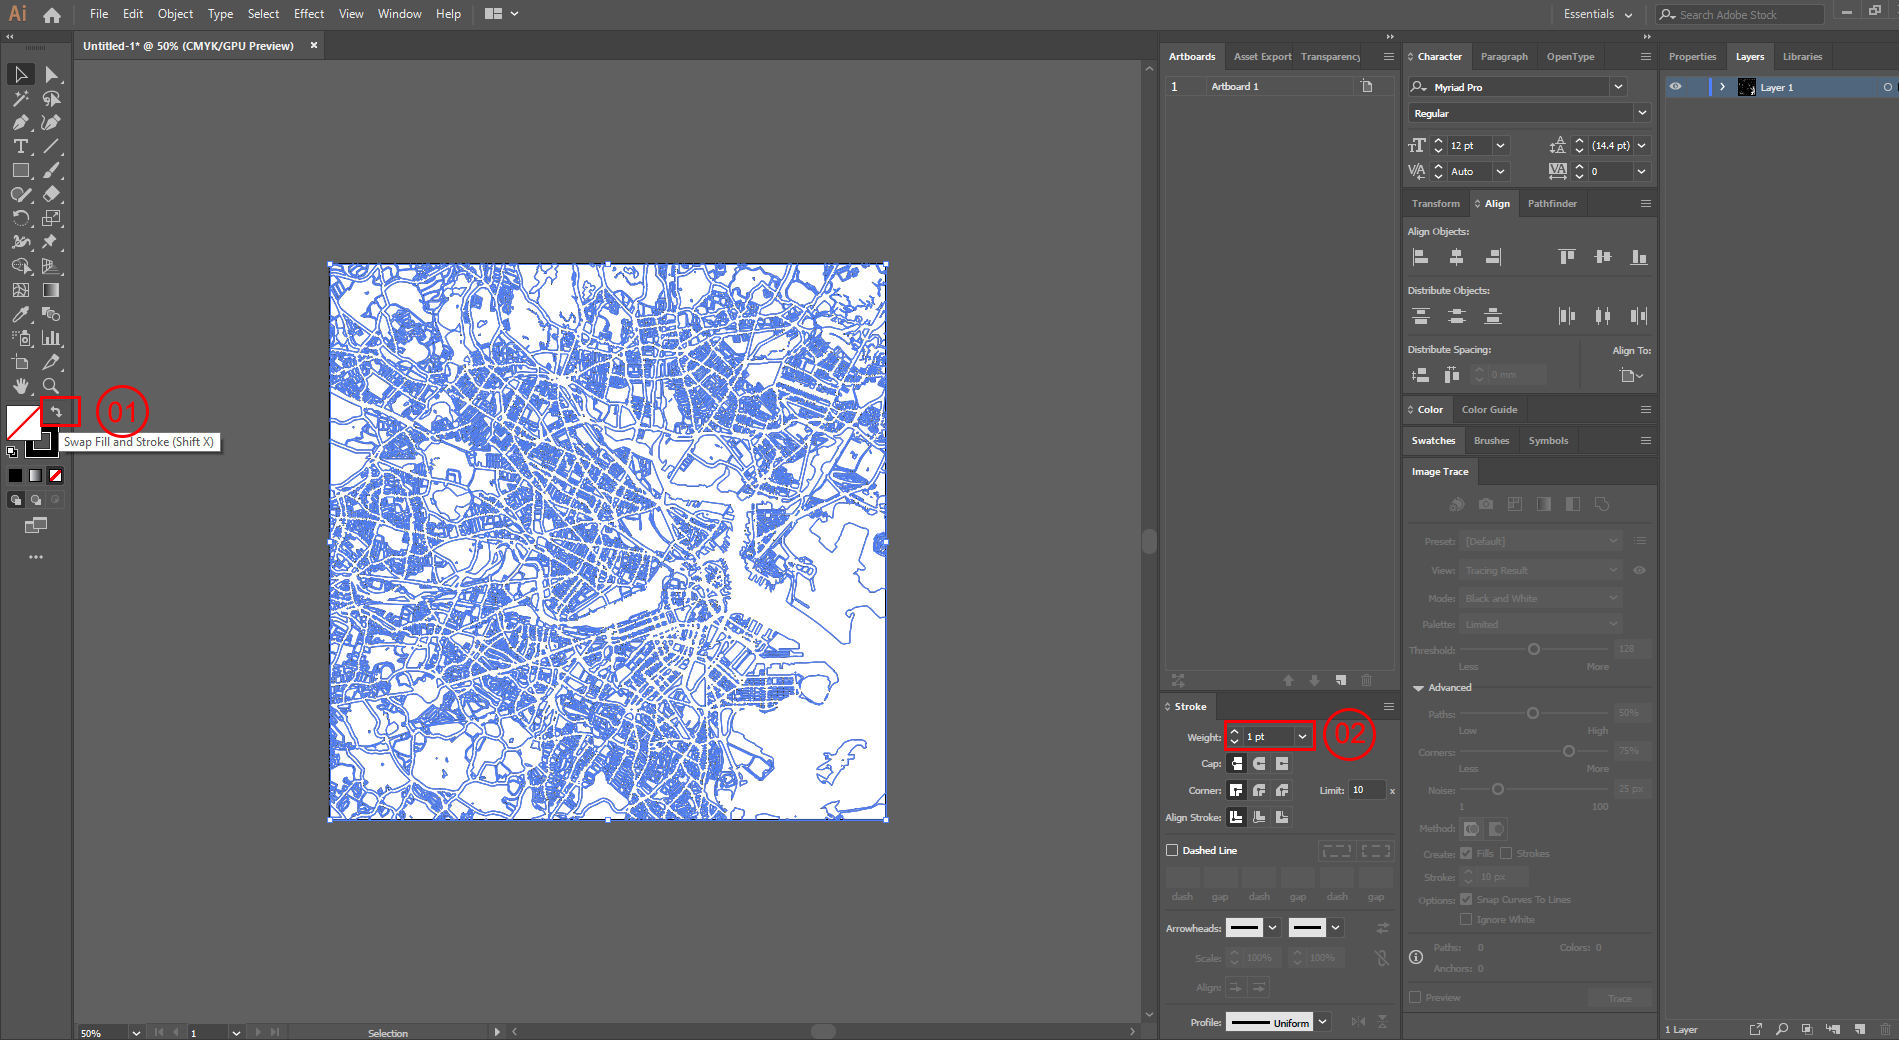
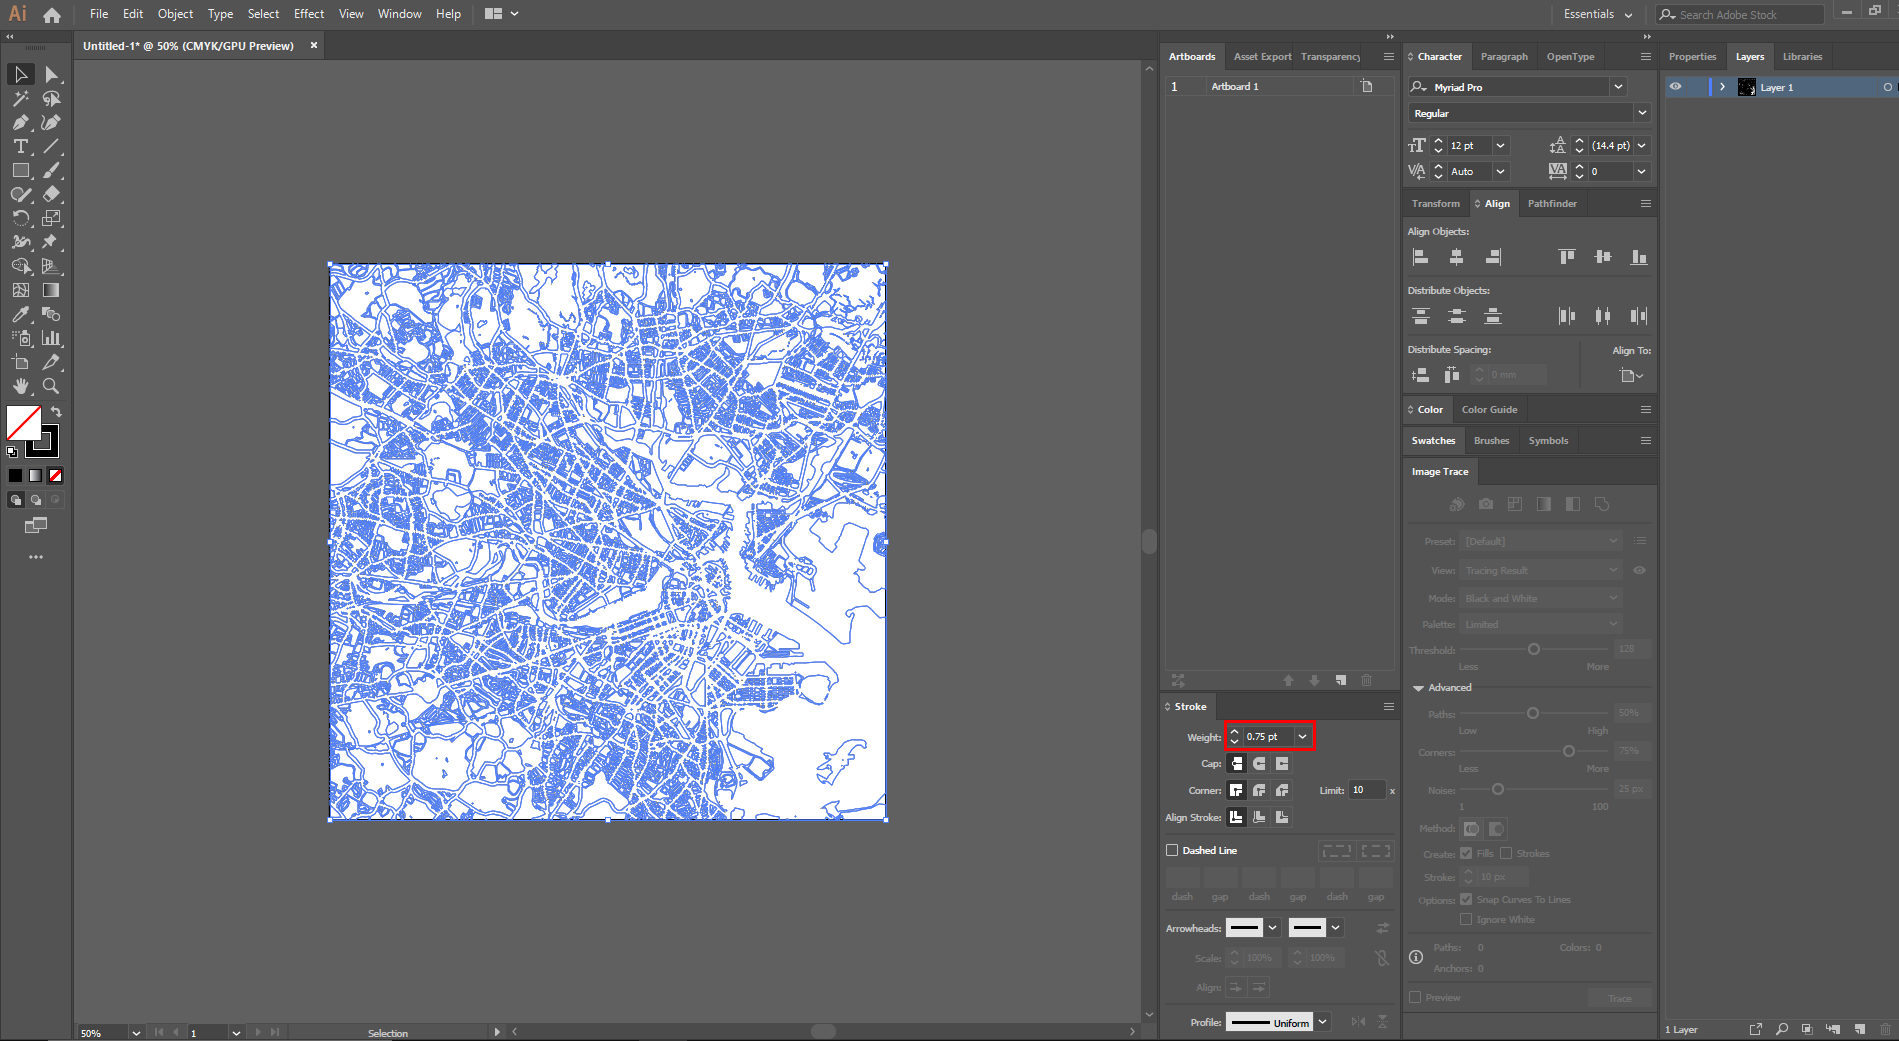
This is a final step of image processing where we convert a raster image to a vector image. For this, we will use the function Image Trace.
Steps:
- Select the cropped image.
- Go to "Windows" and check the "Image Trace" panel to reveal.
- In the "Image Trace" panel, click on the "Advance" sub-panel and set the necessary settings (see Image 2).
- Uncheck the "Preview" tab and click on "Trace" to begin the process.
- Go to "Objects" > "Expand". This breaks up the traced image into vector shapes.
- Click on "Swap Fill and Stroke" to make the Fill as transparent and Stroke, colored.
- Change the stroke to 0.75pt to reveal thin outlines.
Now your file is ready for exportation into a .dxf file for the cutting process.
Adobe Illustrator: Export Dxf
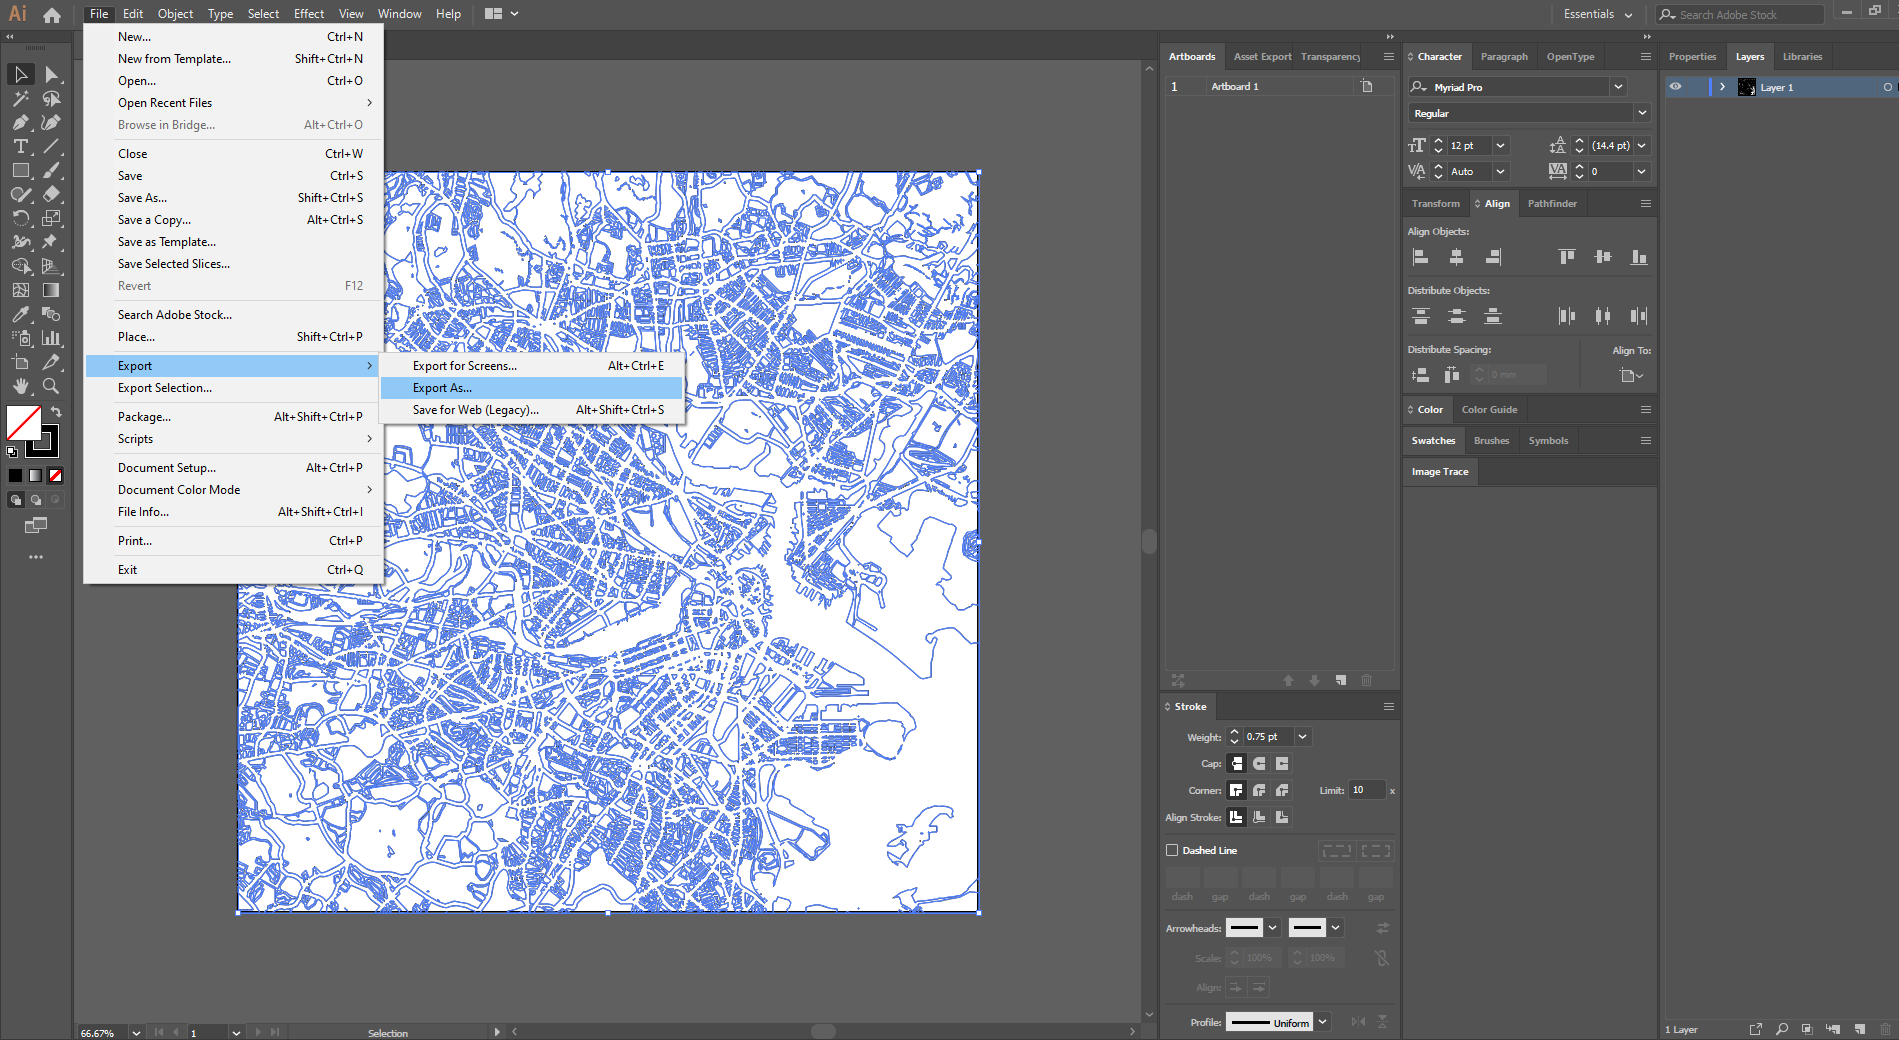
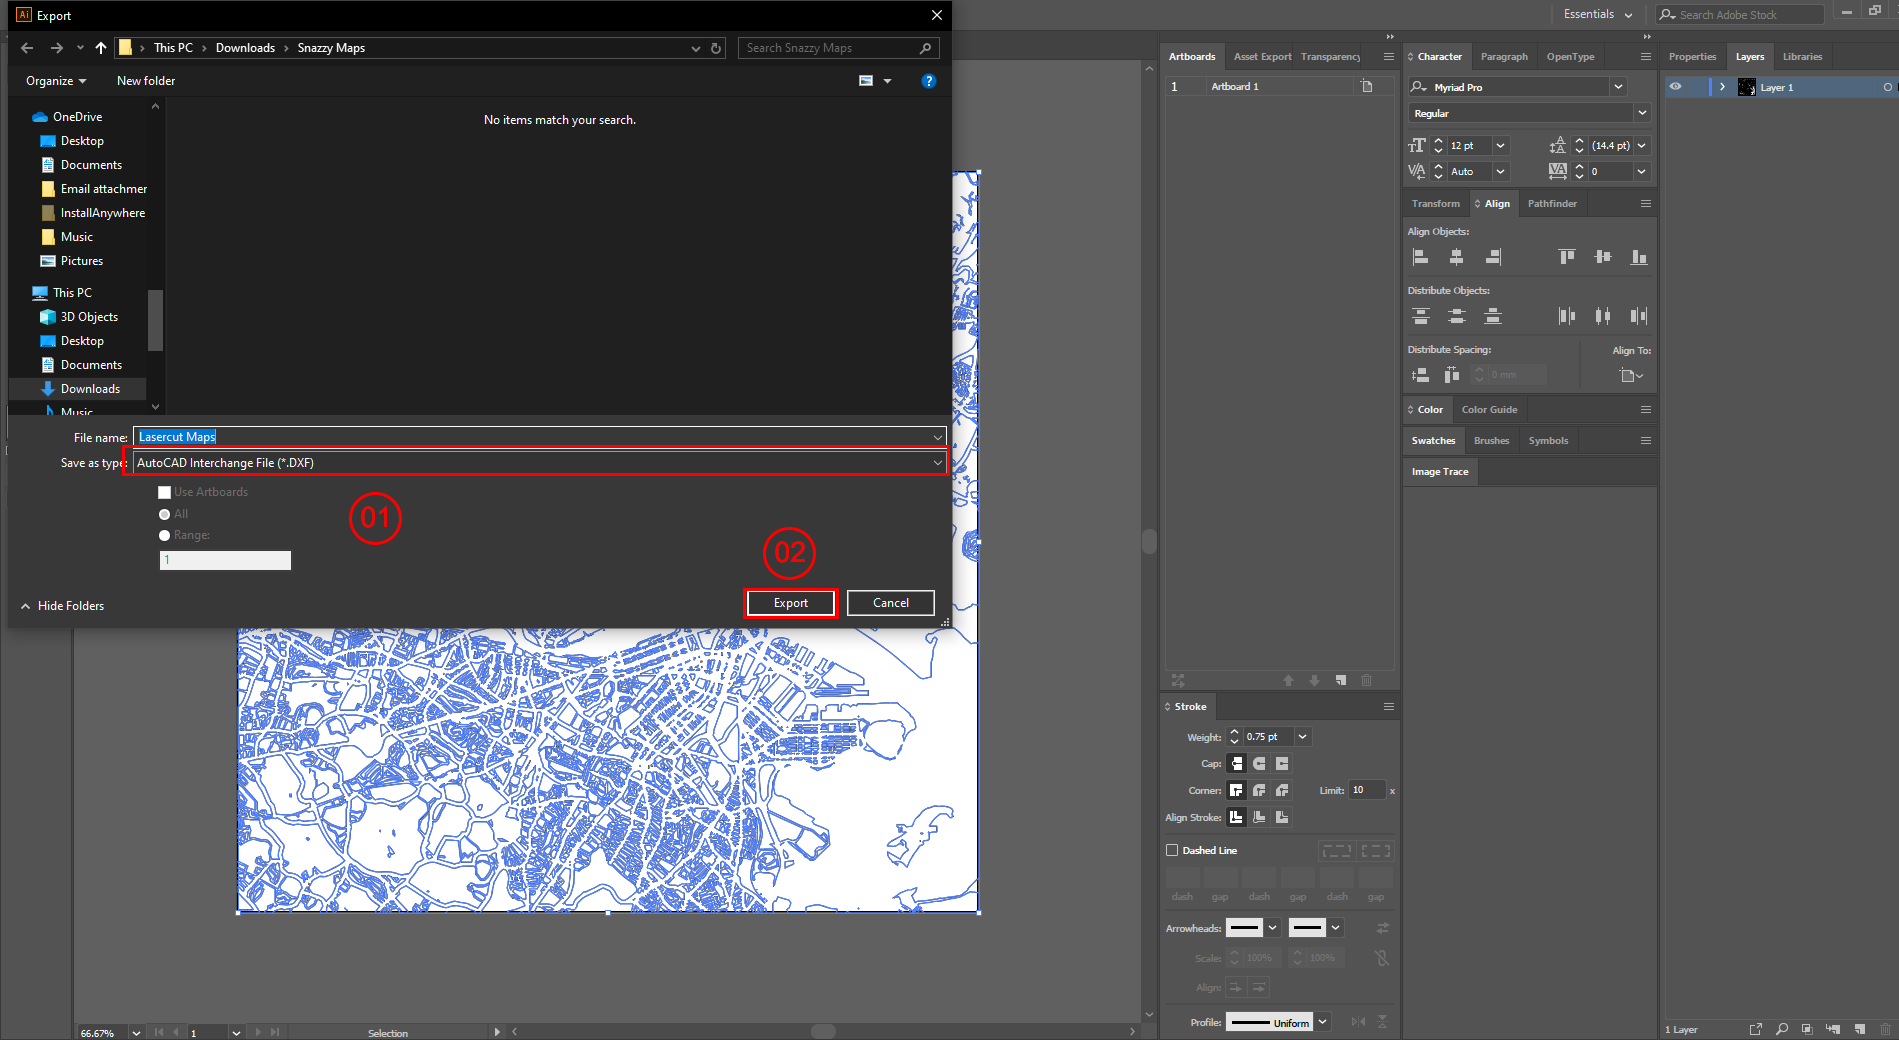
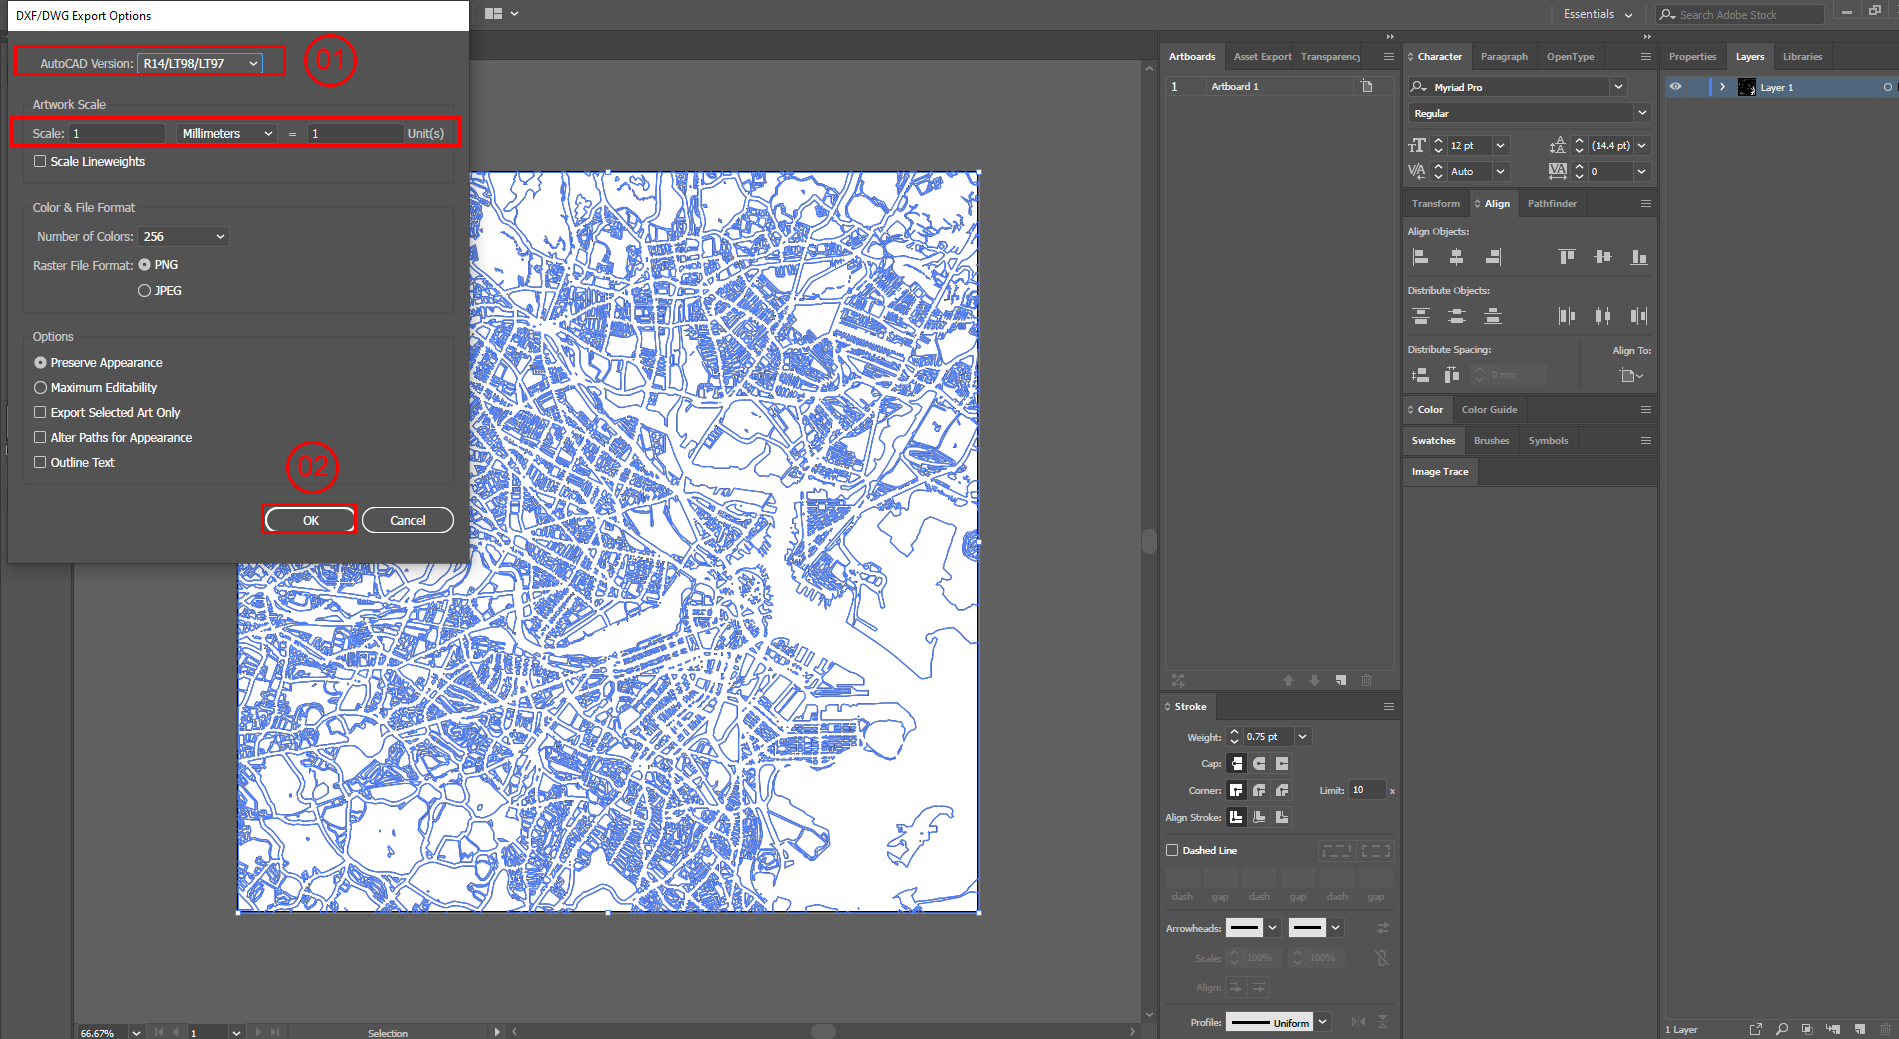
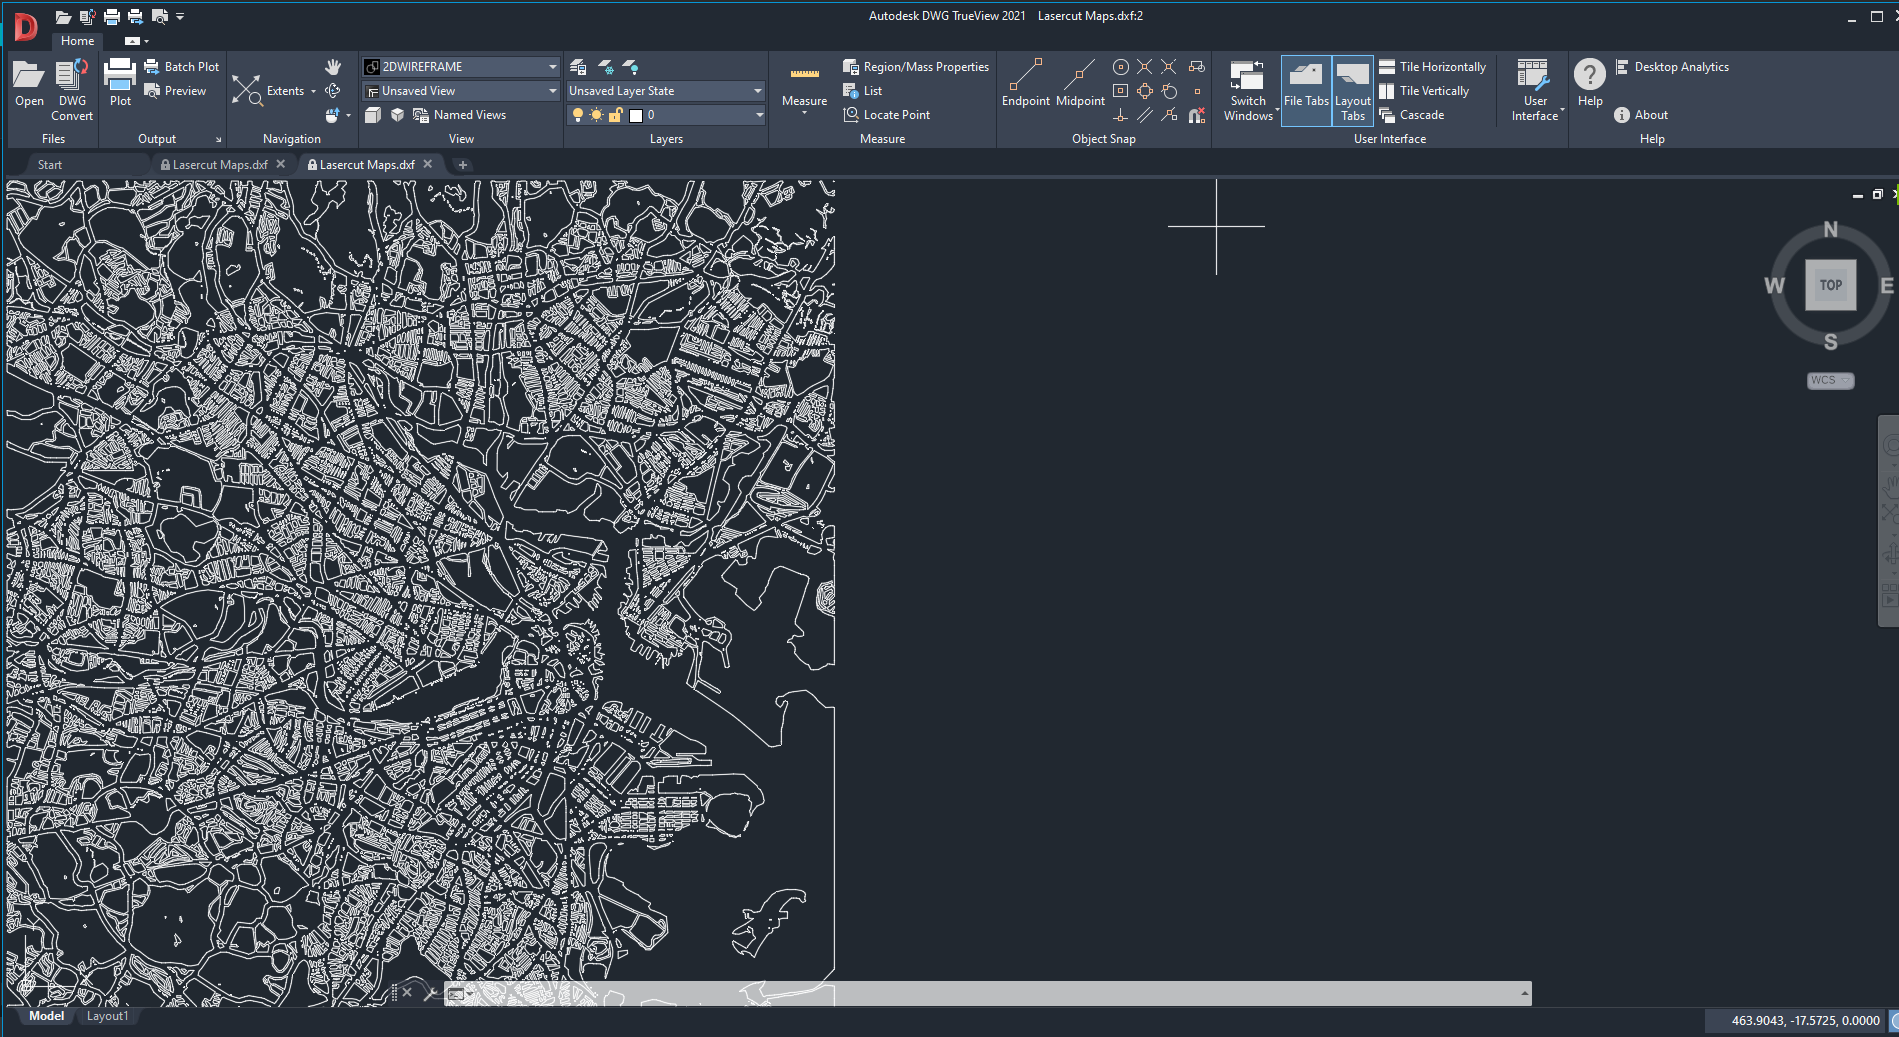
This will be the home-run my friends. Let's start.
Steps:
- Make sure your image is selected and centered int the art-board.
- Click on "File" > "Export" > "Export As".
- Click on "Save as Type" to reveal the drop-down menu.
- Under the drop-down menu select "AutoCAD Interchange File (.dxf)".
- Click "Export" and a .dxf settings page will appear
- Check and ensure the settings are the same as shown in Image 3.
- Save the .dxf file in your desired location
Now you have a .dxf file that your cutting machine software is able to cutout or make further edits with another suitable program. In fact, you are able to add borders or texts with Adobe Illustrator to further enhance the graphic. Drop a marker to your best spots for example!
Start Building: Getting Your Parts Sorted
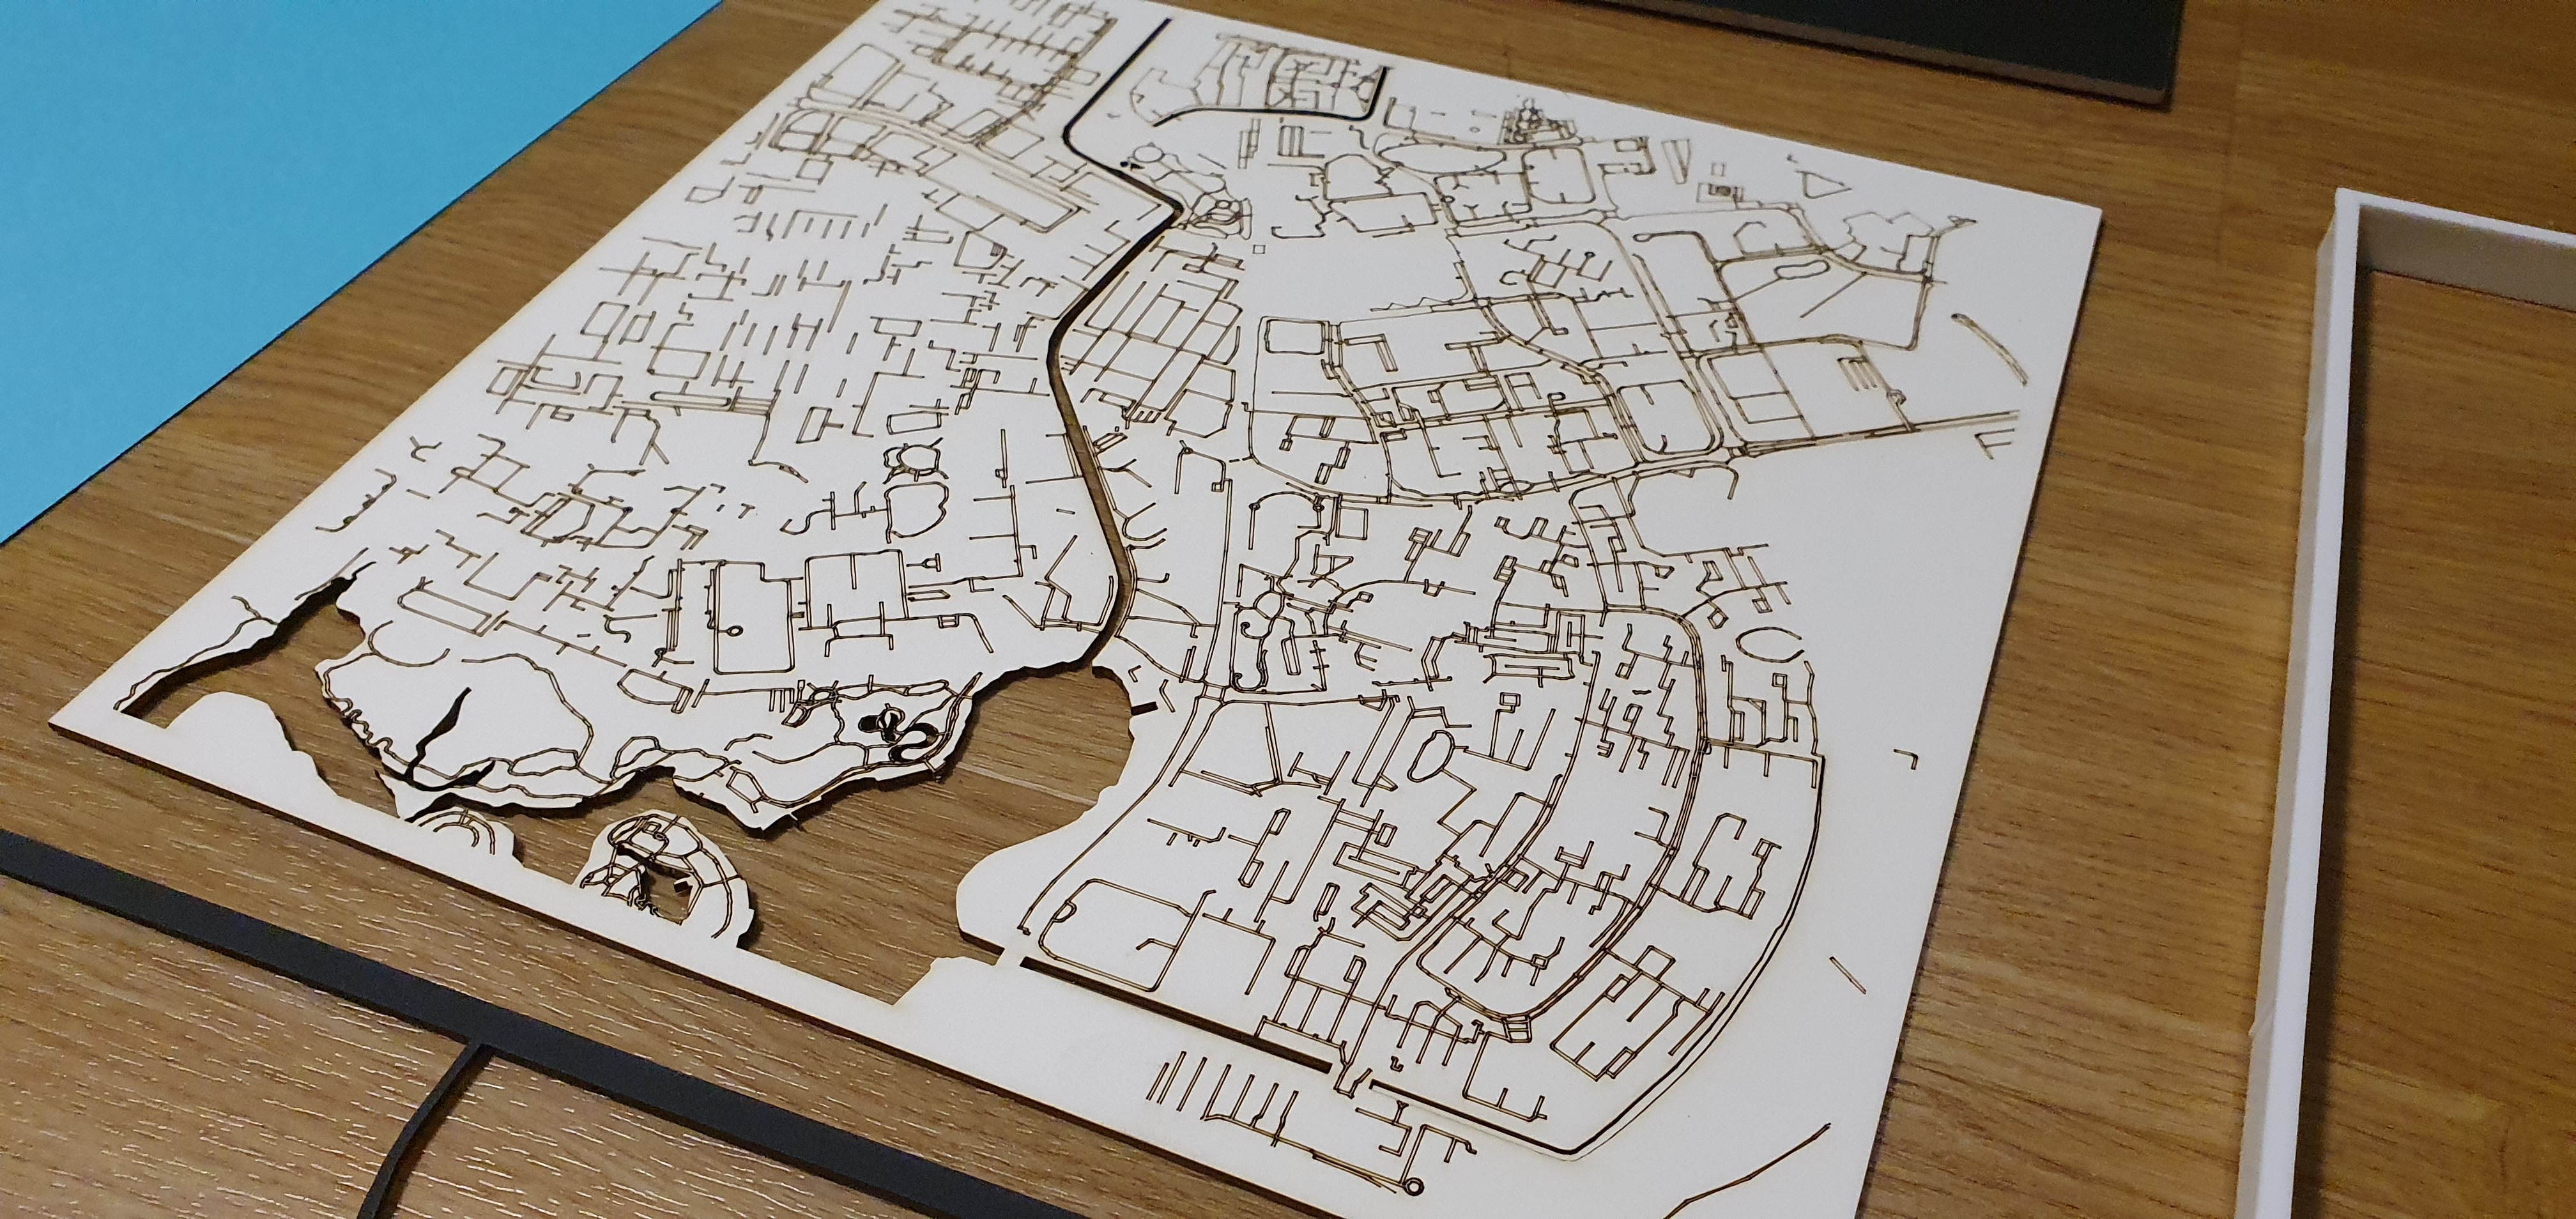
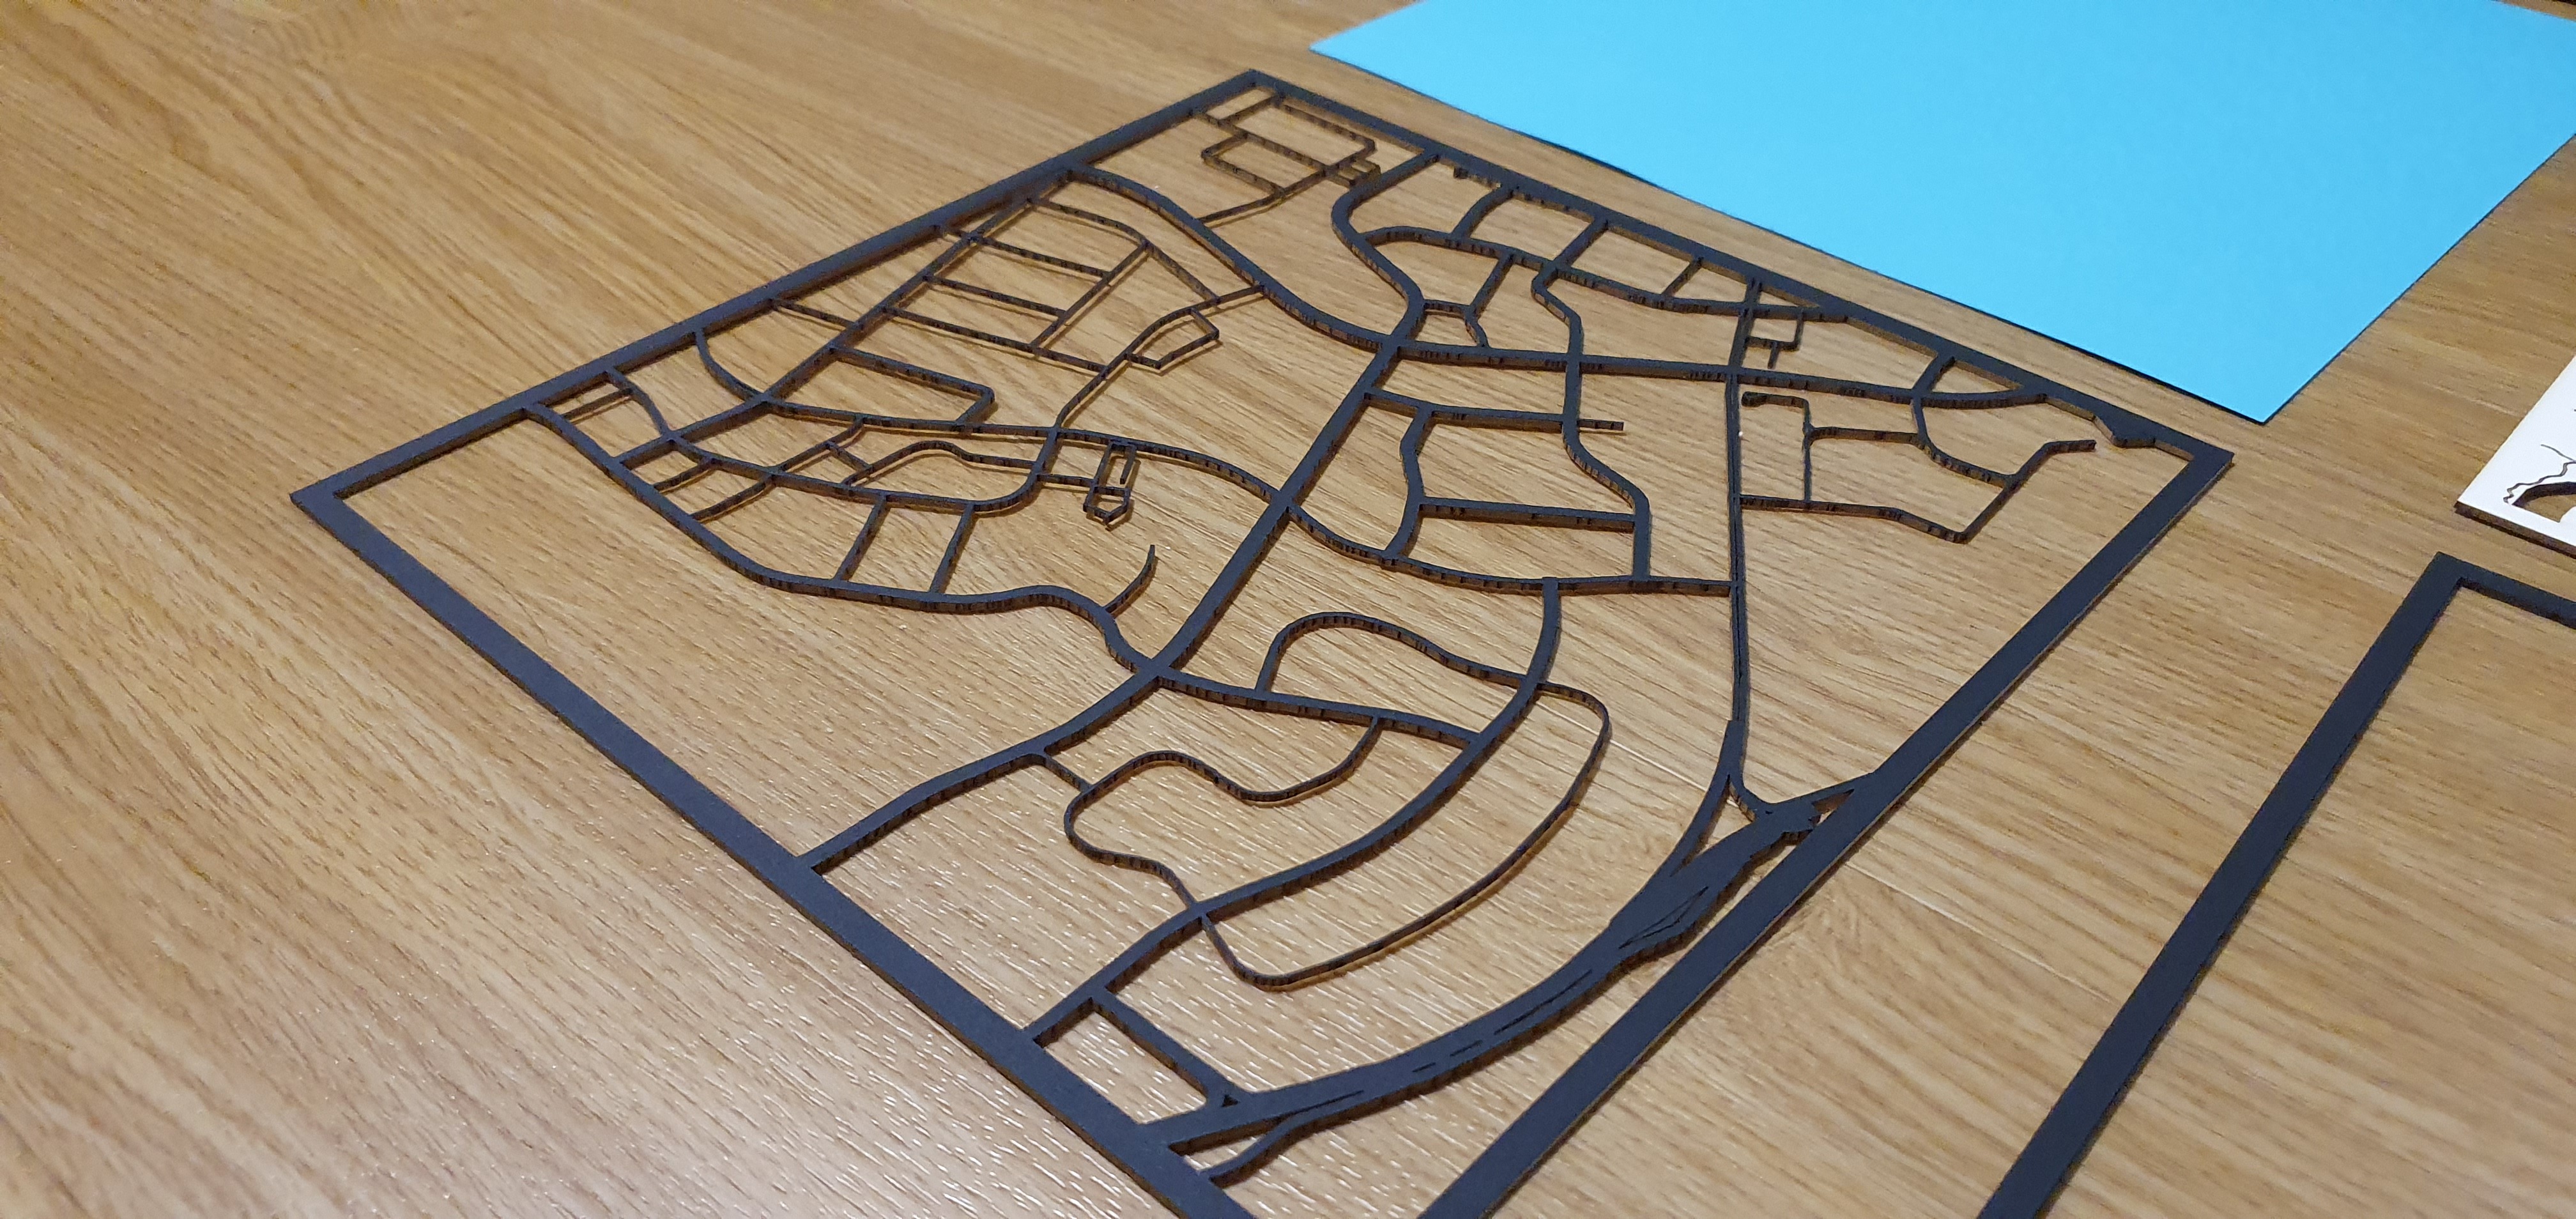
For my art piece, I have selected Jurong West as my location of choice. Next, I have sent the .dxf files into a laser cutter for cutting. My material of choice will be either sheets of 1mm wood or paper pulp. These layers will then be stacked together to create a 3D piece.
For my design, I have separated different strokes to different layers and assigning each layer to a different materials. This created a multi-dimensional look and makes the artwork more vibrant while remaining minimalistic. I have separated the waterbodies, routes, highways and railroads.
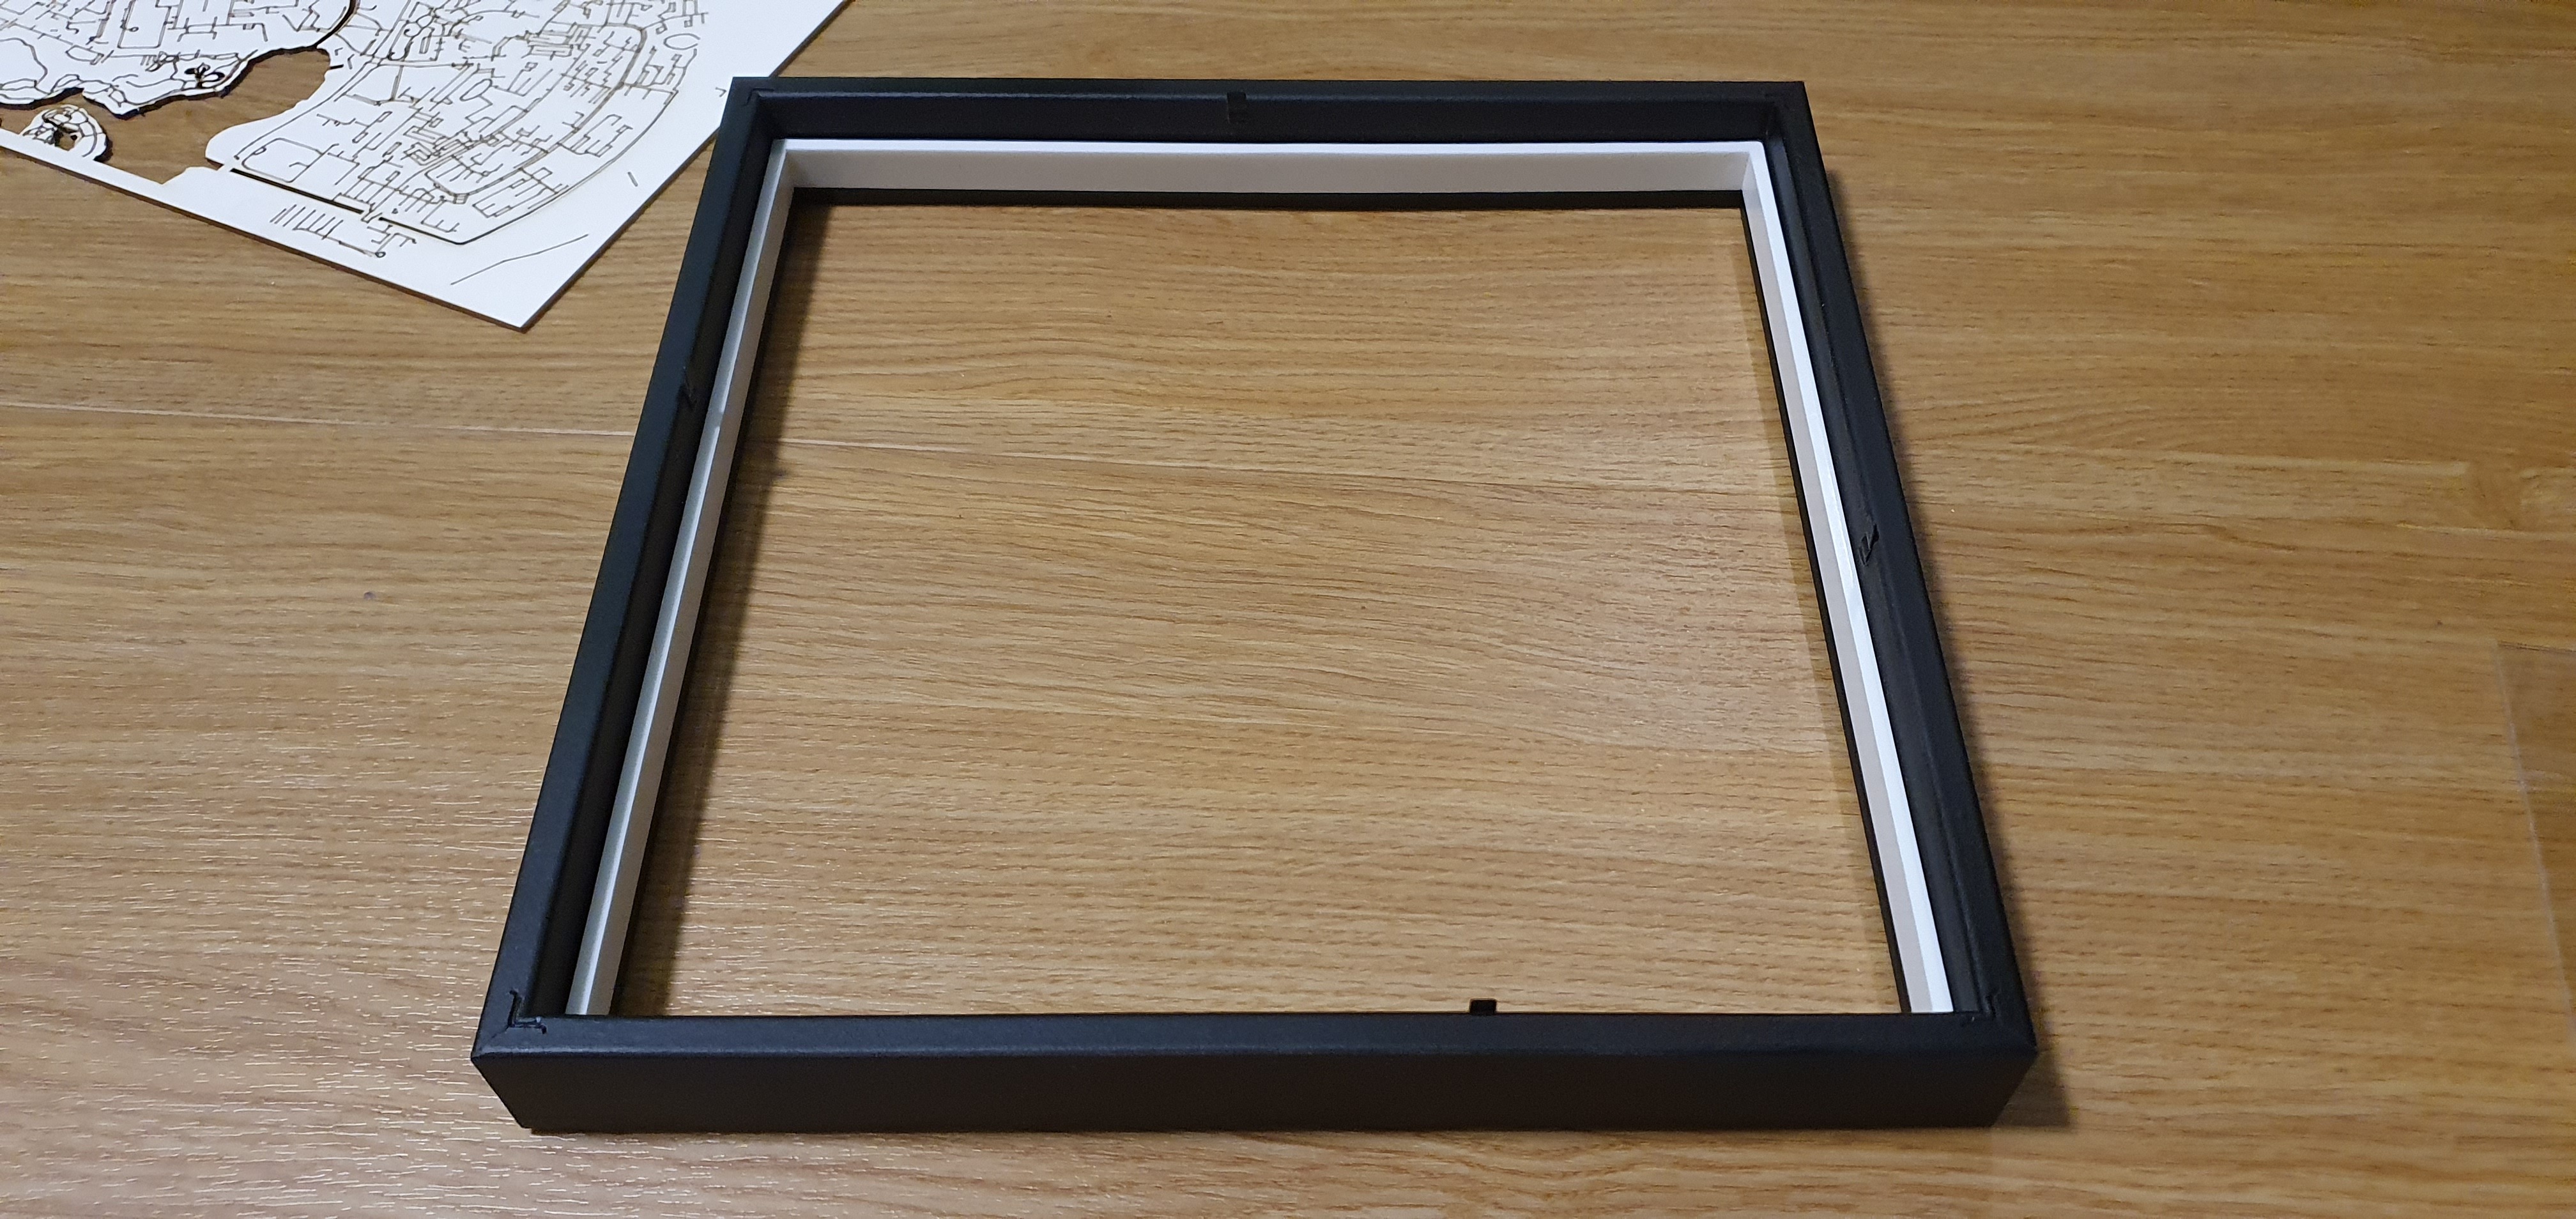
For my frames I have used a picture frame that was lying around the house and painted it black. Alternatively, the easiest is to order them from IKEA. They have a variety of frames which you can get at different price points. It's up to you to mix and match.
The combinations are endless! Go crazy with it!
Completed!
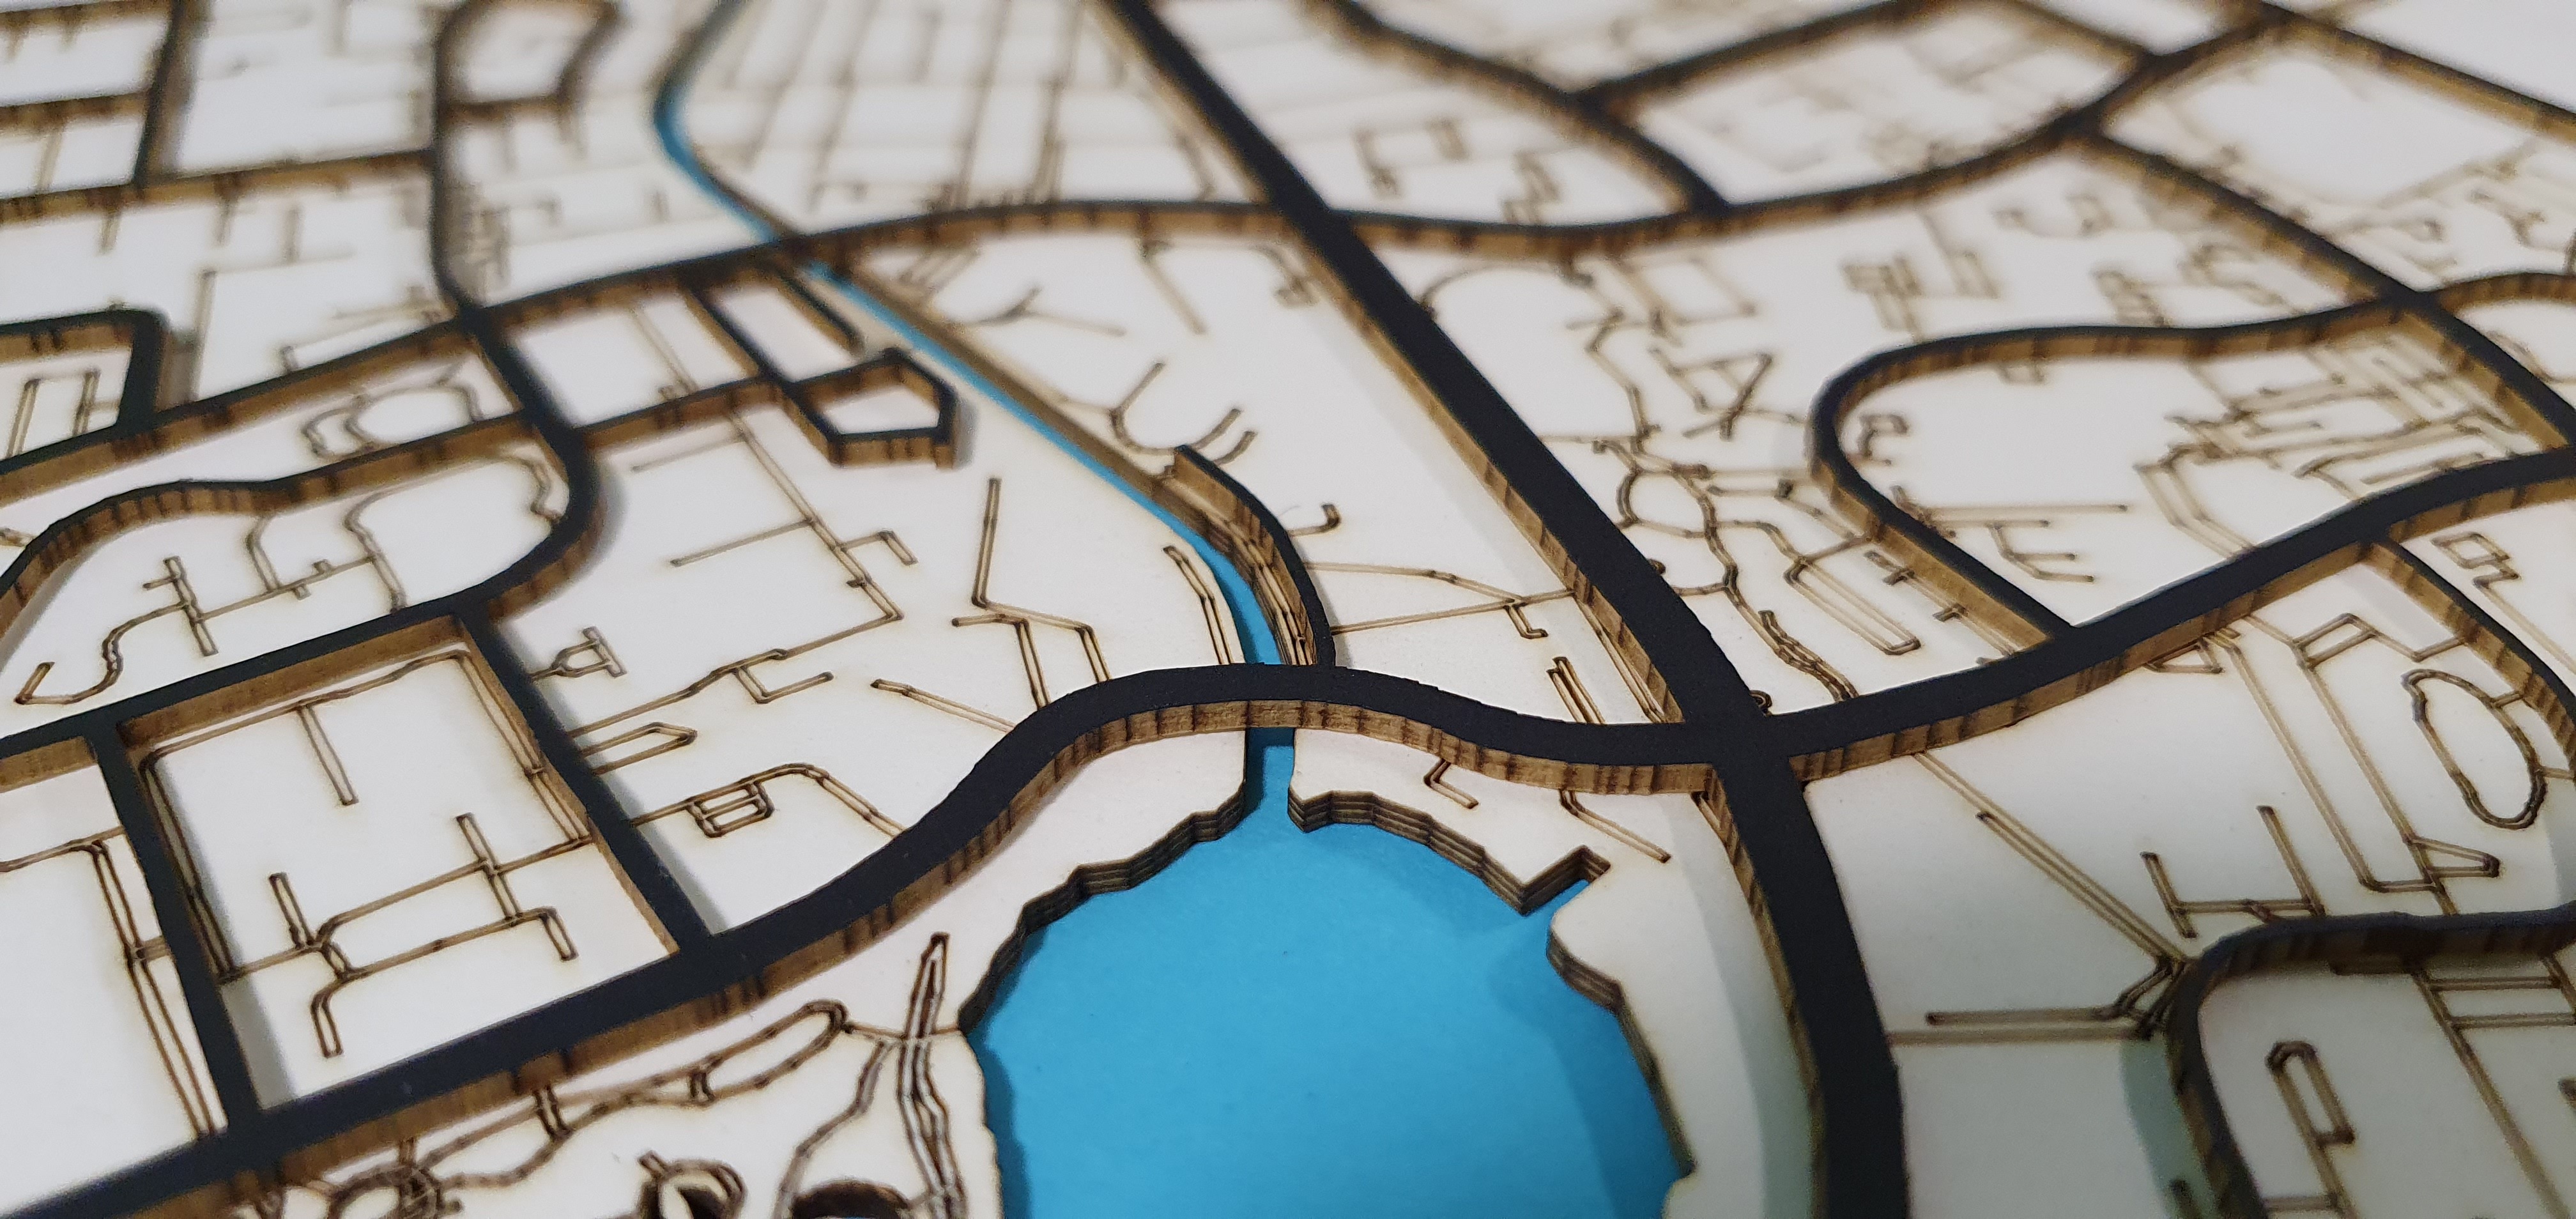
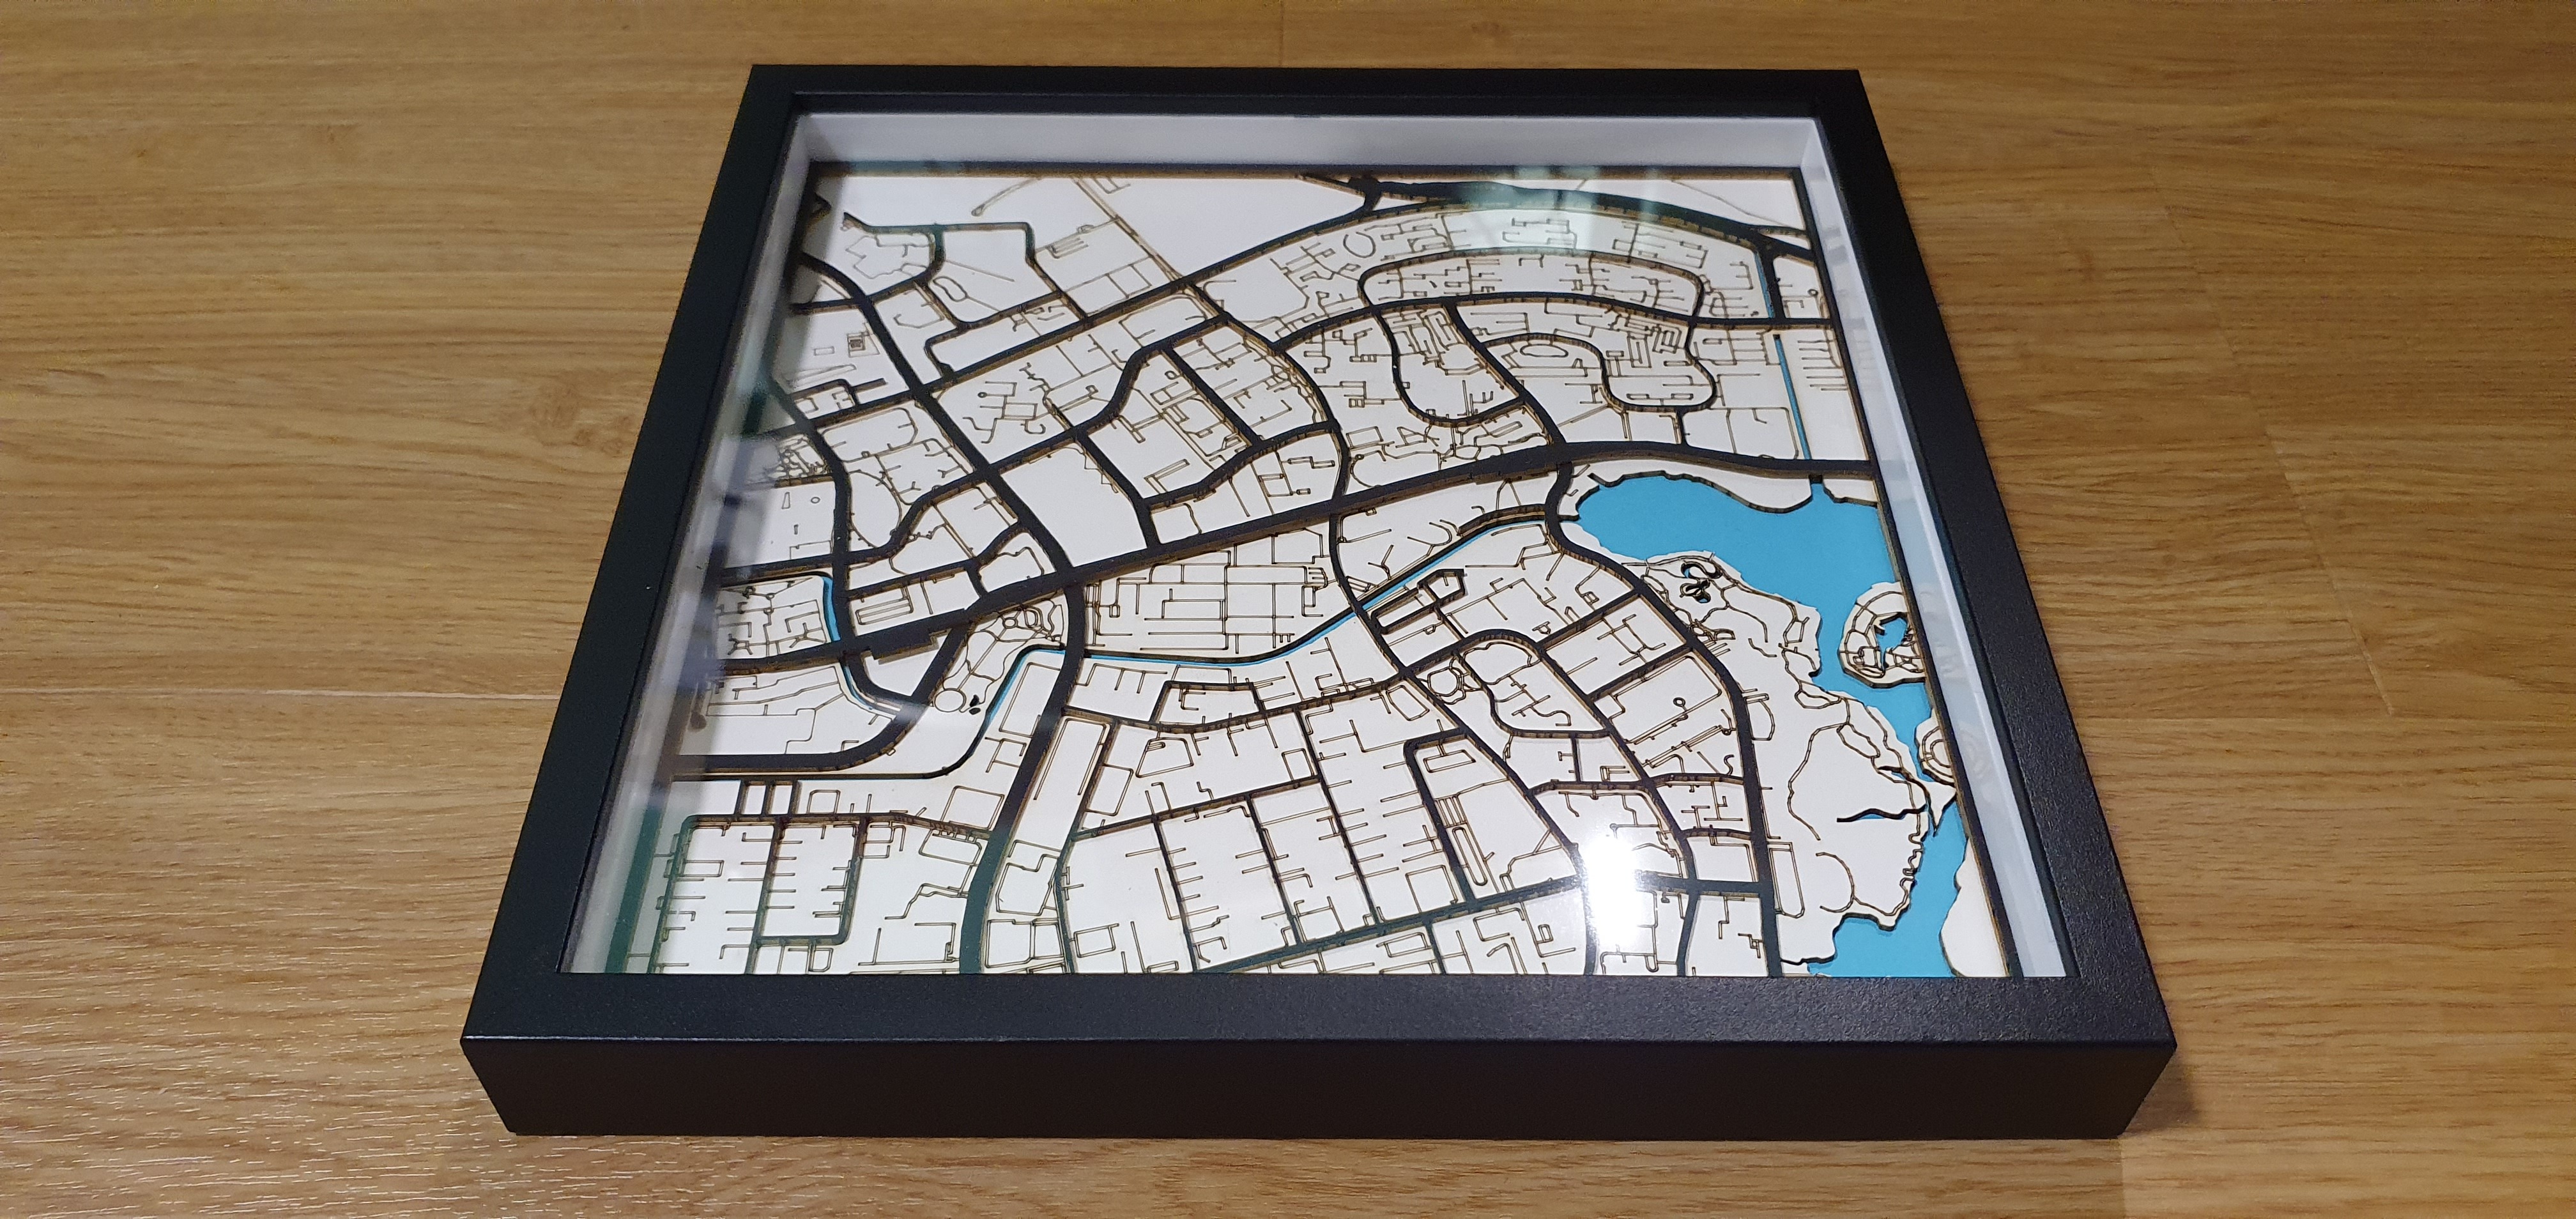
And with that, we have completed a basic introduction on how to create a customized and impressive looking 3D-2D display piece. I am very satisfied at how it turned out and have new ideas on how to further this.
If you find this Instructable useful, do LIKE and SHARE this post and I will be submitting it to a Maps design challenge! Do vote for me here!
Do also check out my Youtube channel for more interesting design and engineering stuff.