Laser-cutting an Image to Make Moulds for Pewter Casting
by MrShaw-EIG in Workshop > Laser Cutting
3632 Views, 35 Favorites, 0 Comments
Laser-cutting an Image to Make Moulds for Pewter Casting
WARNING: Having written this Instructable, I have received messages about the dangers of laser-cutting polyurethane. Guidance on this seems very mixed on the internet. This link seems to highlights the confusion: https://chemistry.stackexchange.com/questions/7862...
As a precaution, I WILL NO LONGER BE USING POLYURETHANE FOAM WHEN LASER-CUTTING.
Thanks to mrchaddavis for his advice. He also suggested to use MDF for mould making, pre-heating it to 300 degrees before casting. I look forward to trying-out his suggestion...
_________________________________________________________________________________________
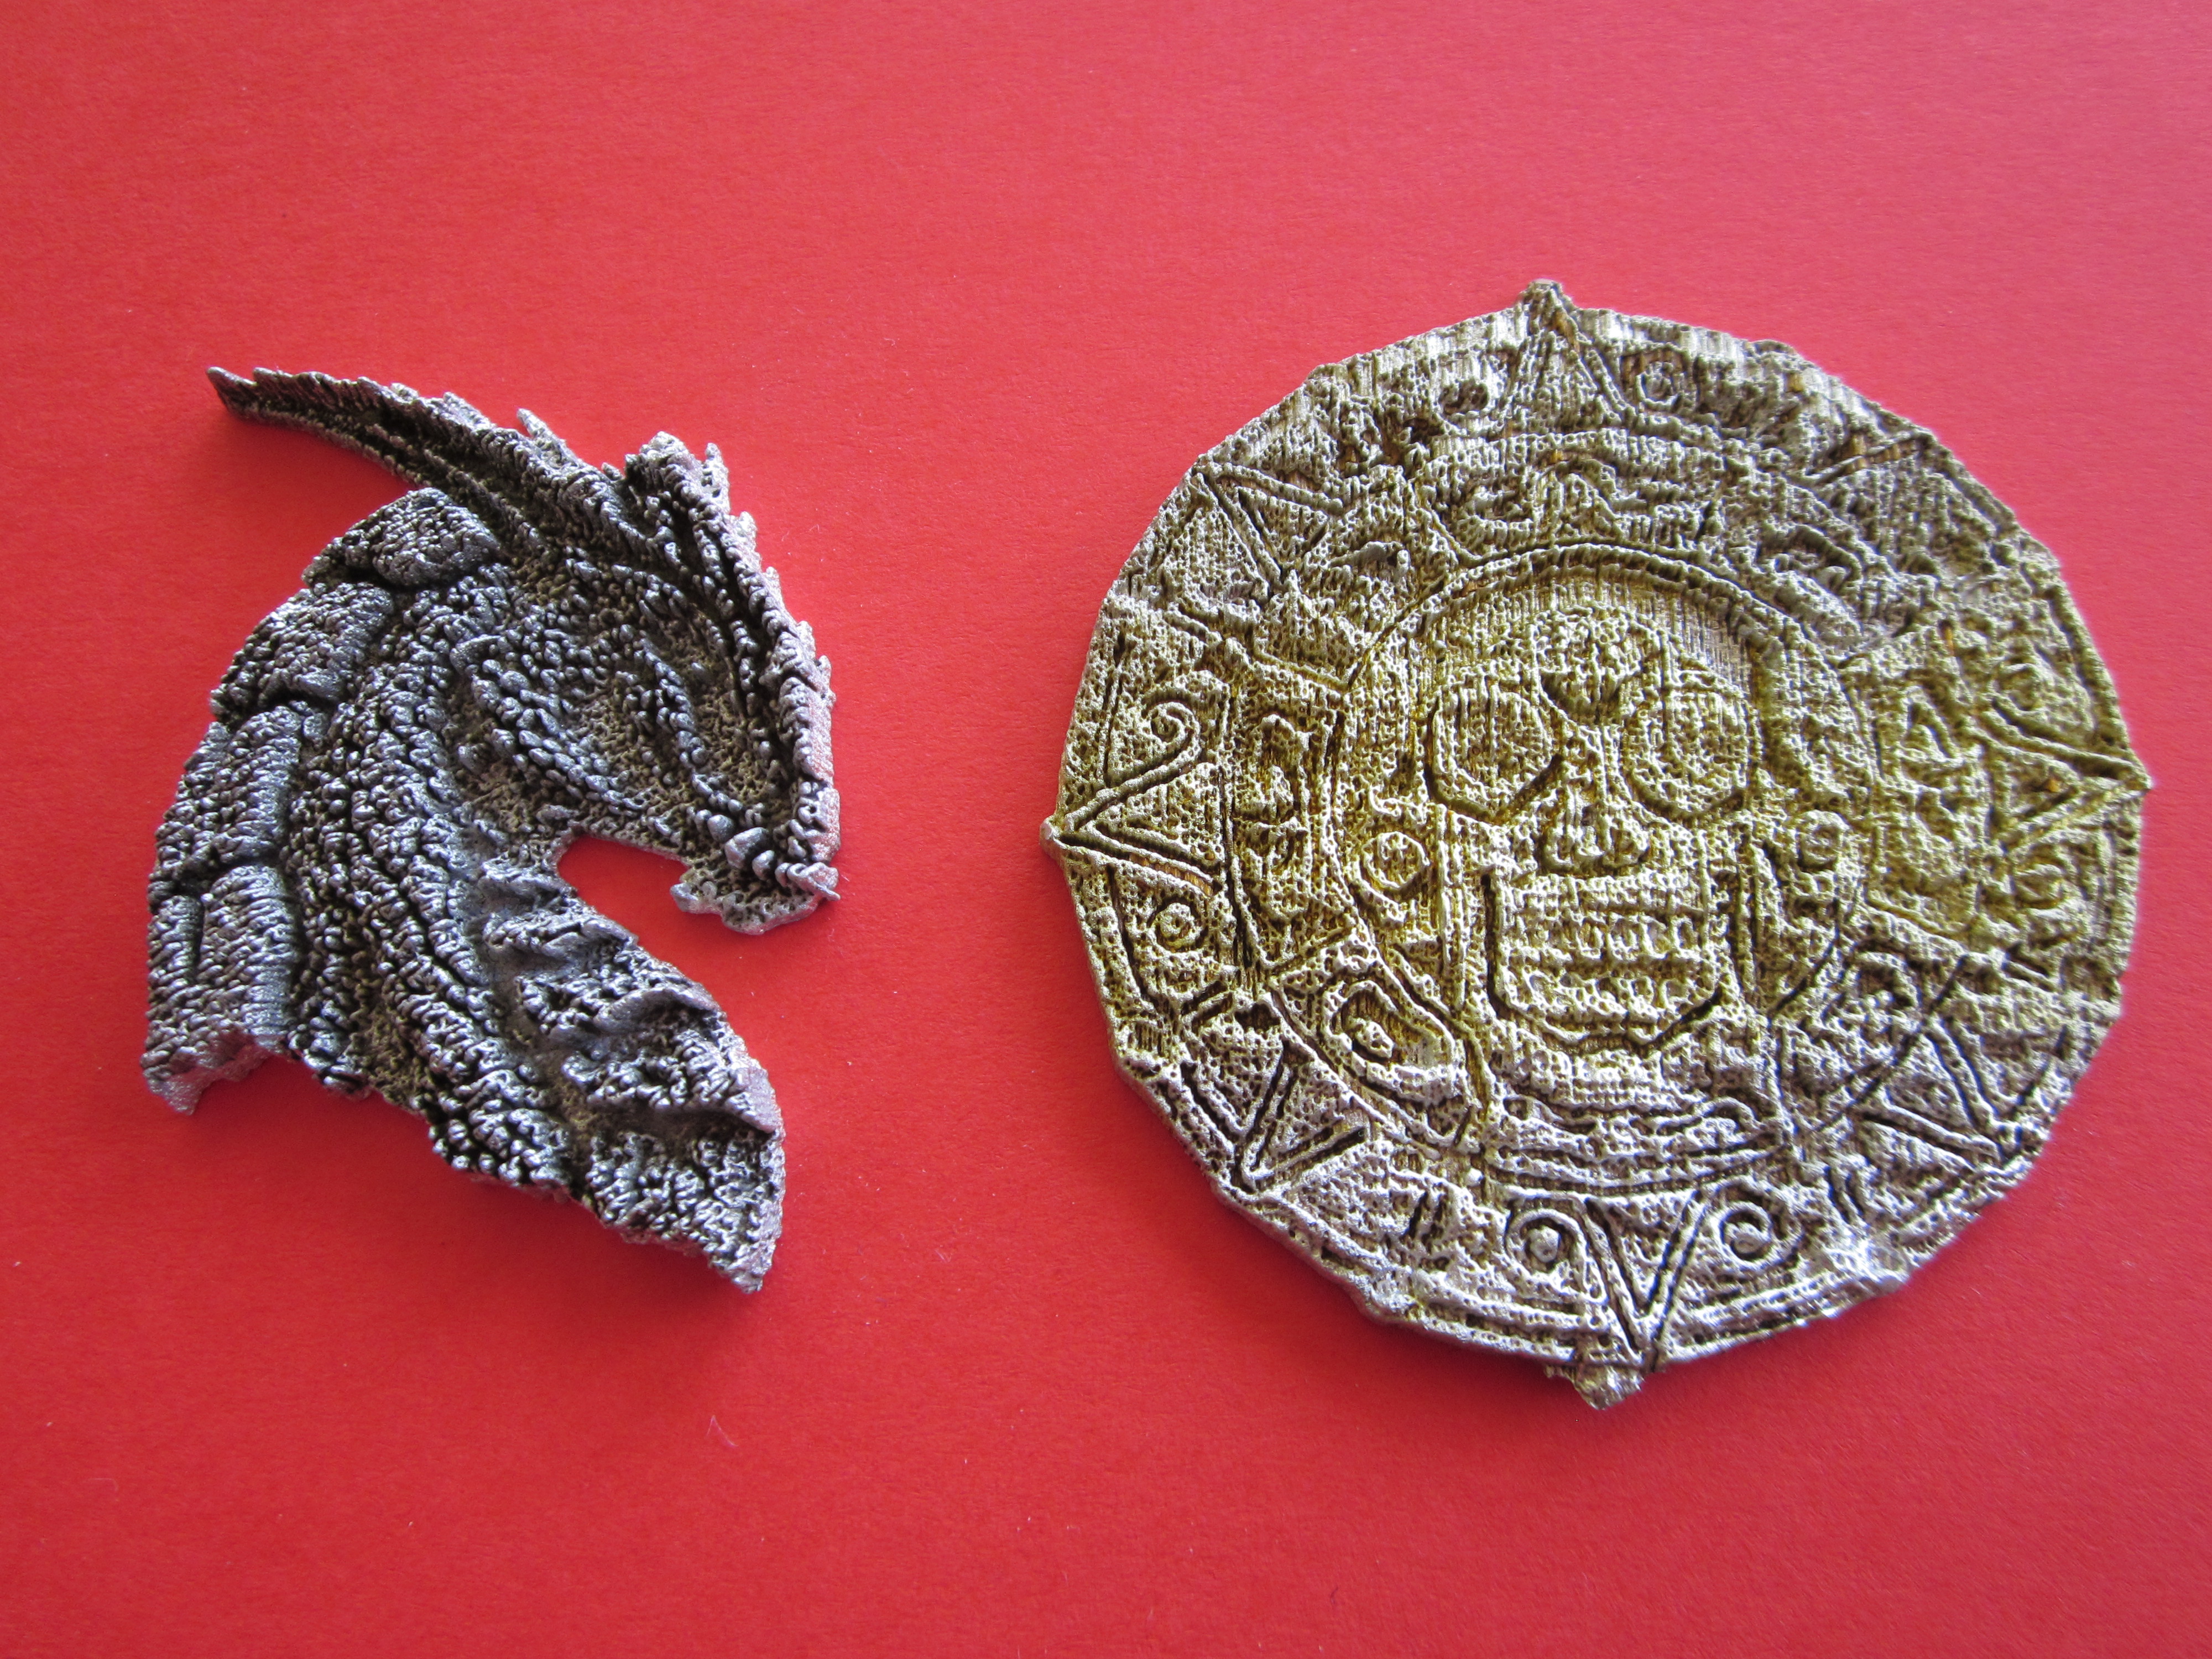
I will be showing you how I made this pewter-cast dragon head and cursed Aztec coin. Both use the same basic techniques. All that changes are the materials for mould creation and the settings of the laser-cutter (power and feed speed).
Equipment: -
- Paint.net (or any suitable photo-editing software) to clean-up and mask images.
- 2D Design software to create the CAD file and control the laser-cutter.
- 2D Design is an educational CAD application frequently found in UK schools.
- I imagine you could use other software like Illustrator. The important thing is for the software to be able to convert grey-scale images into beem-power profiles.
- Laser-cutter (ours can be controlled by 2D Design).
- High density rigid polyurethane block (not suggested, see above)
- Laser-grade MDF might be better than polyurethane (I need to investigate further...)
- Jelutong
- Low temperature casting system (this is safe for educational use).
- Lead free pewter
- Dremel with an abrasive tool.
- 50mm Bulldog clips.
- 4mm MDF backing plates.
- Thin-nose pliers.
- Heat-proof safety gloves, goggles and apron (for casting).
- Side-cutters.
- Junior hacksaw.
Prepare the Image to Be Pewter Cast
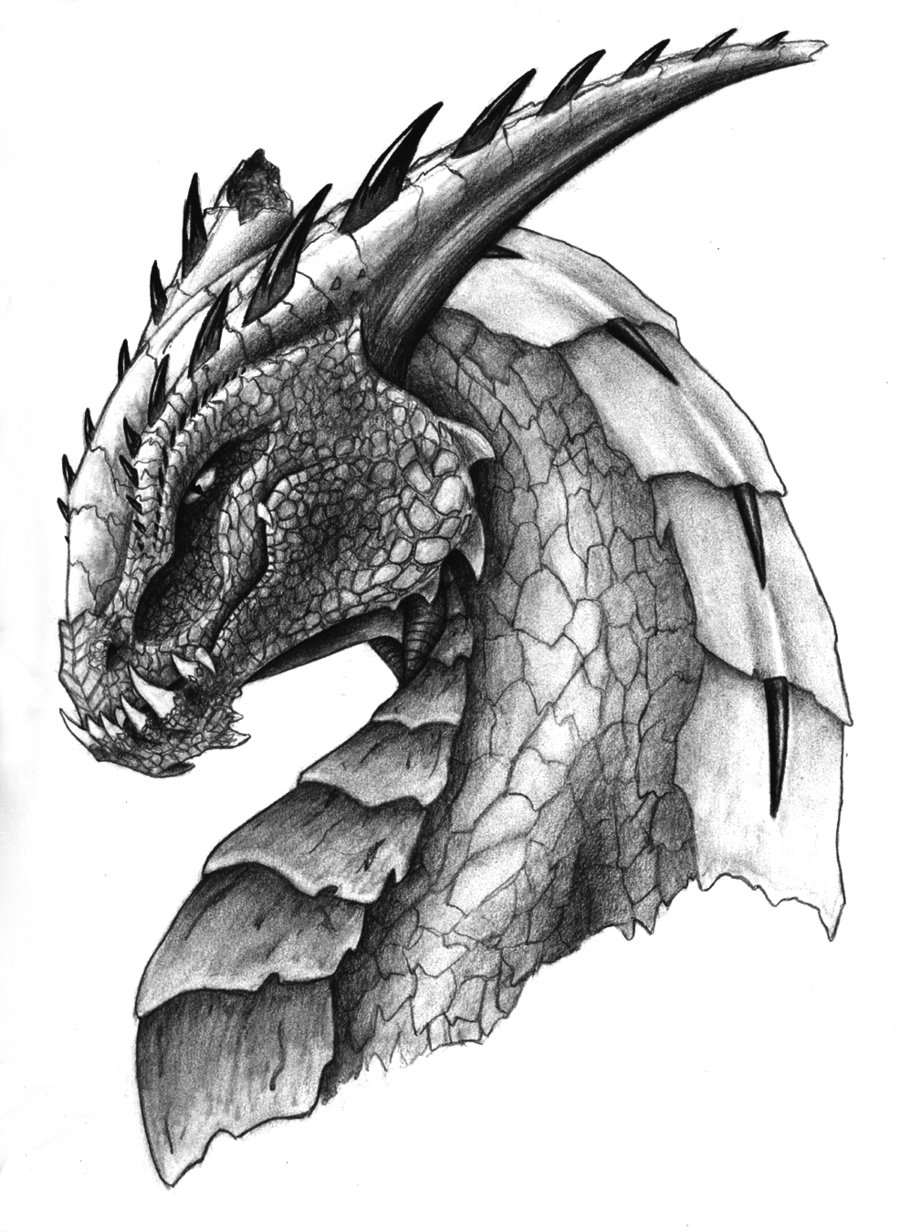
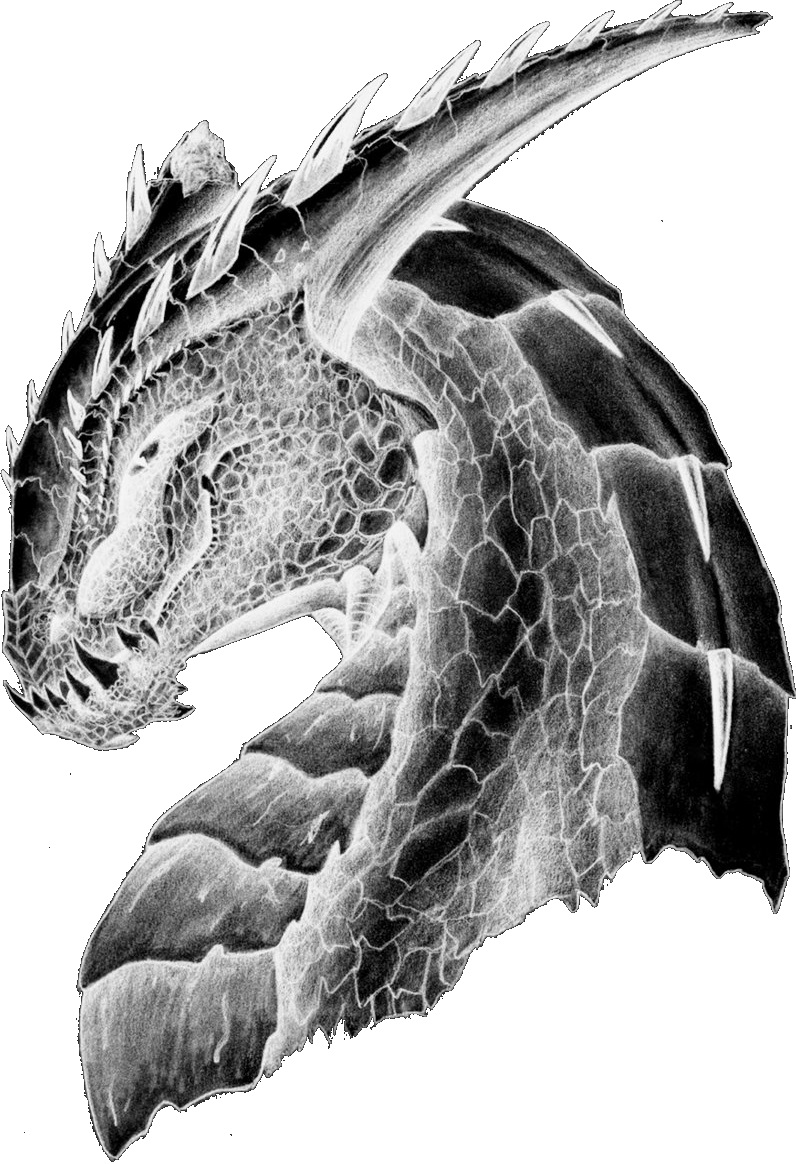
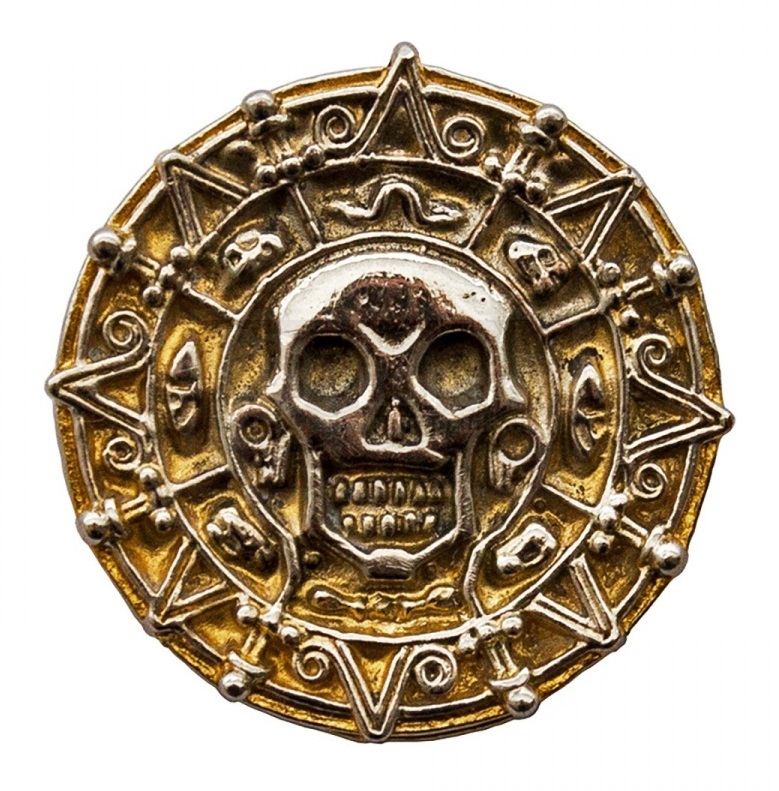
This could be any raster-image. The ideal here would be to draw your own image, but for this instructable I used two images that I downloaded.
Both images are suitable primarily because they have blank backgrounds that allows you to use Paint.Net's magic-wand tool to cut-out the desired image. I strongly suggest that you use Image > Crop to Selection in order to remove any margins in the design. This will allow you to import the image to 2D Design with exact dimensions.
Before you save your image, you may want to consider using Adjustments > Invert Colours. This is because when the laser-cutter engraves the image, the beam-strength is determined by the depth of grey. Therefore, darker shading will generate a deeper profile in the mould, resulting in a thicker pewter casting at these points. Note that we don't have to convert the images to grey-scale; the 2D Design laser-cutter driver does this for us.
2D Design loves BMP files (Bitmaps). When you save your processed image from Paint.Net, make sure that you save it as a BMP for the best compatibility with 2D Design. You may want to save it as a pdn file for later editing.
Insert the Image Into 2D Design
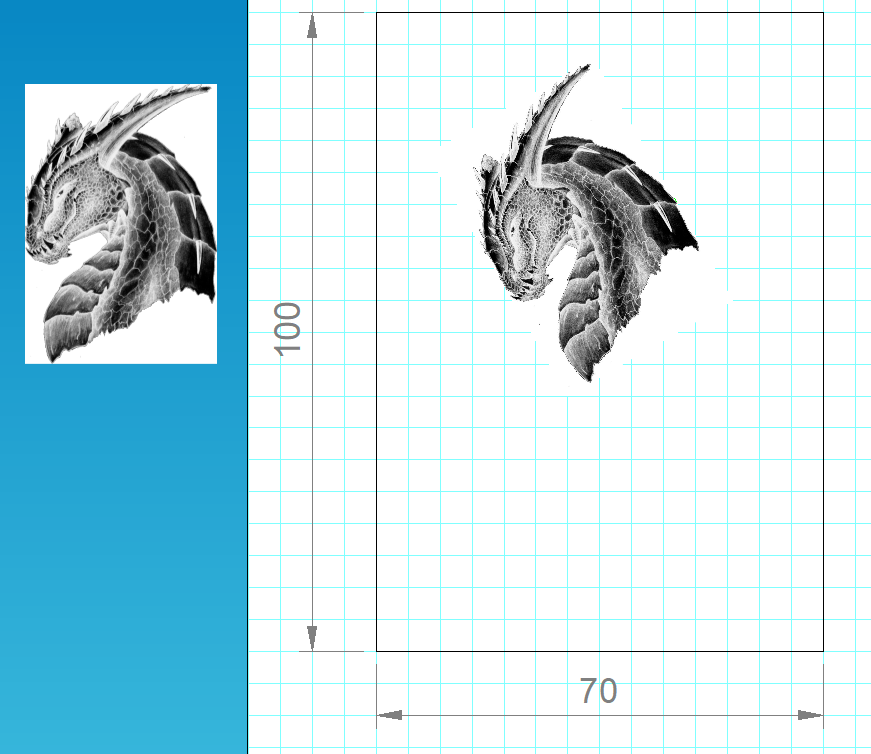
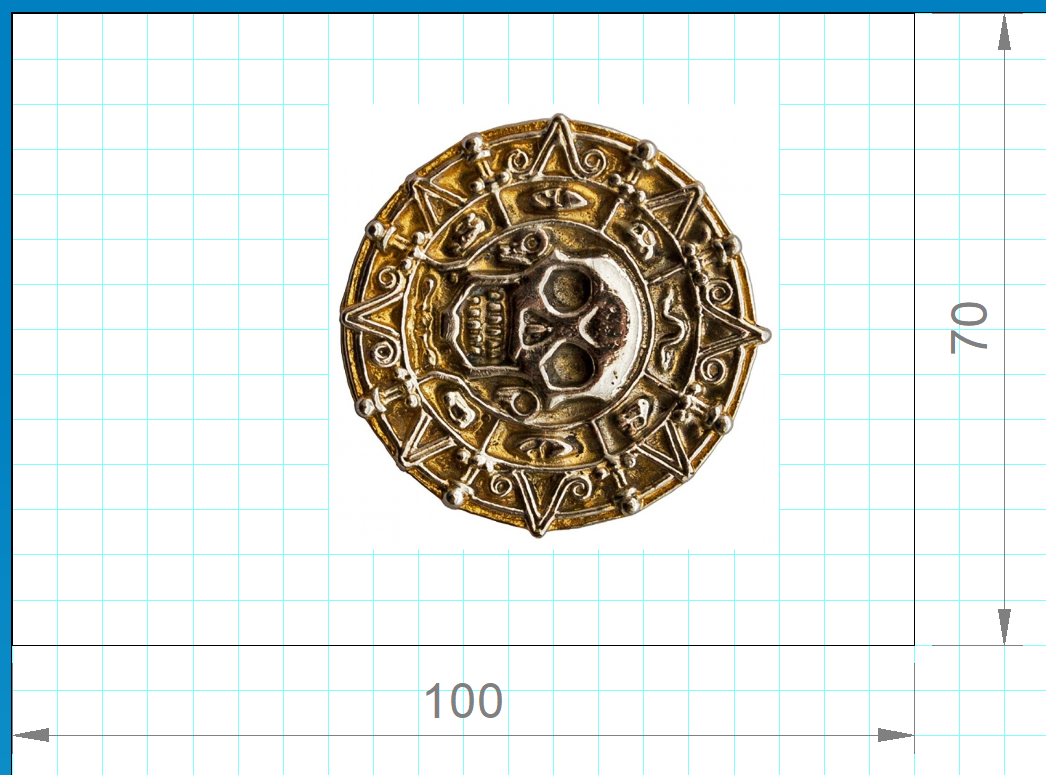
Use Bitmap > Import Image...
Use the dialogue box to specify your desired width or height for the siize of the pewter casting. Removing any margins around the image in the previous step makes the sizing process much easier.
Draw a rectangle that represents the exact size of the rigid polyurethane block or Jelutong. Using Grid Lock and the coordinate system of 2D Design will greatly help here.
Move the imported image into the rectangle. Position the image at one end, with at least 10mm of space between any point of the image and the edge of the rectangle. Leave one end of the rectanlge clear to add wells, runners and risers (see later).
IMPORTANT: When moving the image, make sure Grid Lock or Step Lock are turned on.
The orientation of the image in the mould is very important. You need to imagine the pewter flowing into the mould and the air trying to excape. Therefore, make sure the point at which the pewter will run into the mould has no restirctions. Additionally, it should be a point in the design where there are minimum fine details. Lastly consider choosing a point which is not a focal point of the design, or where slight imperfections may go unnoticed.
IMPORTANT: When rotating the image, make sure to use the rotate transformation tool, choose a memorable point of rotation and record the degrees. You will need these later...
Prepare the Image Mask to Create the Depth of the Pewter Casting

It is highly likely that parts of your image contain white areas. These areas will result in no engraving depth in the mould. This may block the flow of pewter to some areas. If you are concerned about this then it is important to create a blank mask of the profile of your image.
- Go back to your image in Paint.Net.
- Use the Magic Wand tool to select the background.
- Invert > Invert Selection
- Use a large Paintbrush to paint your image black.
- Save As... your file as a new BMP.
Insert, Vectorise and Position Your Image Mask
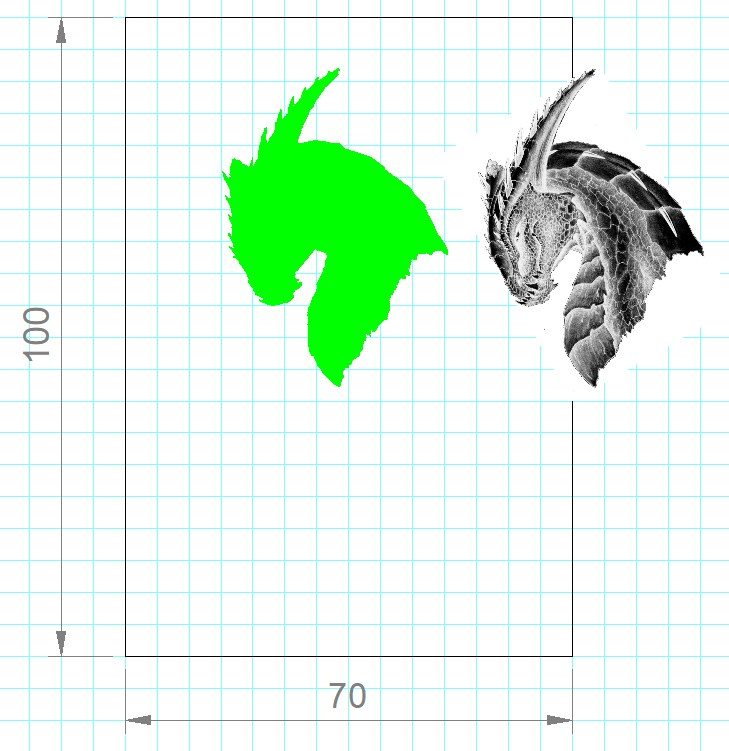
Refer to Step 4 for most instructions required here. You are wanting to position the masked and vectorised image in exactly the same position in the mould as the current BMP.
The only difference here is the need to vectorise the masked BMP so that the laser-cutter can pre-engrave a depth to the mould for pewter to flow freely.
Vectorising a BMP is achived by going to: -
- Bitmaps > Vectorise Bitmaps
- Choose Monochrome, then OK
- Choose Custom Settings and Conversion Resolution to maximum, then OK
The BMP mask is now a filled Vector.
I changed the fill of this new polygon to green (0,255,0). This is because I configure this RGB value on the laser-cutter driver to provide a shallow, consistent engraved depth in the mould. Make sure the outline of the polygon stays black, as I configure the laser cutter to ignore black lines.
I then placed the original BMP over the polygon and arranged it to the front.
Add the Well, Runner and Risers
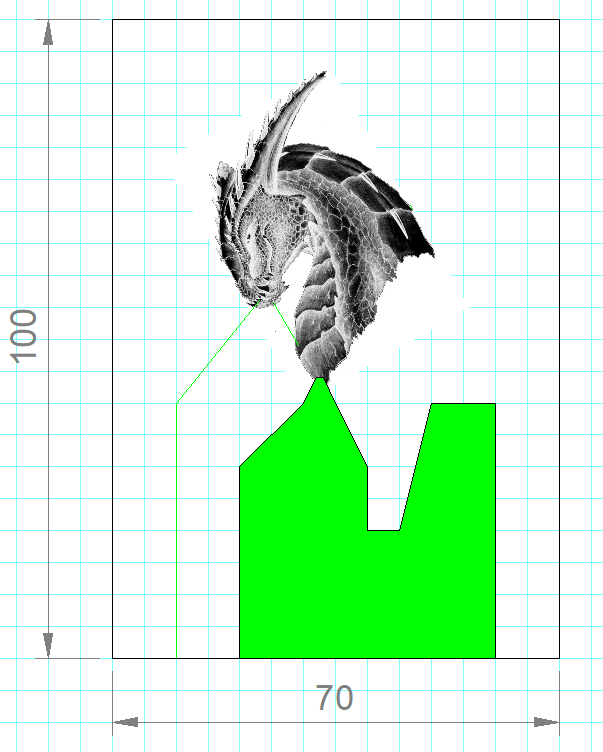
The well and runner is a closed black polyline with a green (0,255,0) fill.
The pewter will be poured into the well first, allowing it to cool slightly and then run smoothly down the runner and into the mould cavity. Without the well, the pewter can overheat in the cavity, causing discolouration of the casting.
The opening of the runner into the cavity needs is important. Too big and you may damage the casting. Too small and the pewter may become blocked.
The runner quickly widens to allow a mass of pewter to build-up. This helps remove air-pockets from the cavity.
The risers are open green polylines. They are used to let air escape while the pewter is being poured. It is a good idea to add them in locations where air-pockets may become trapped; such as the muzzle of the dragon. I added two runners in this case, although I think the smaller of the two may have been unnecessary.
Laser-cut the CAD Files and Open the Wells and Runners
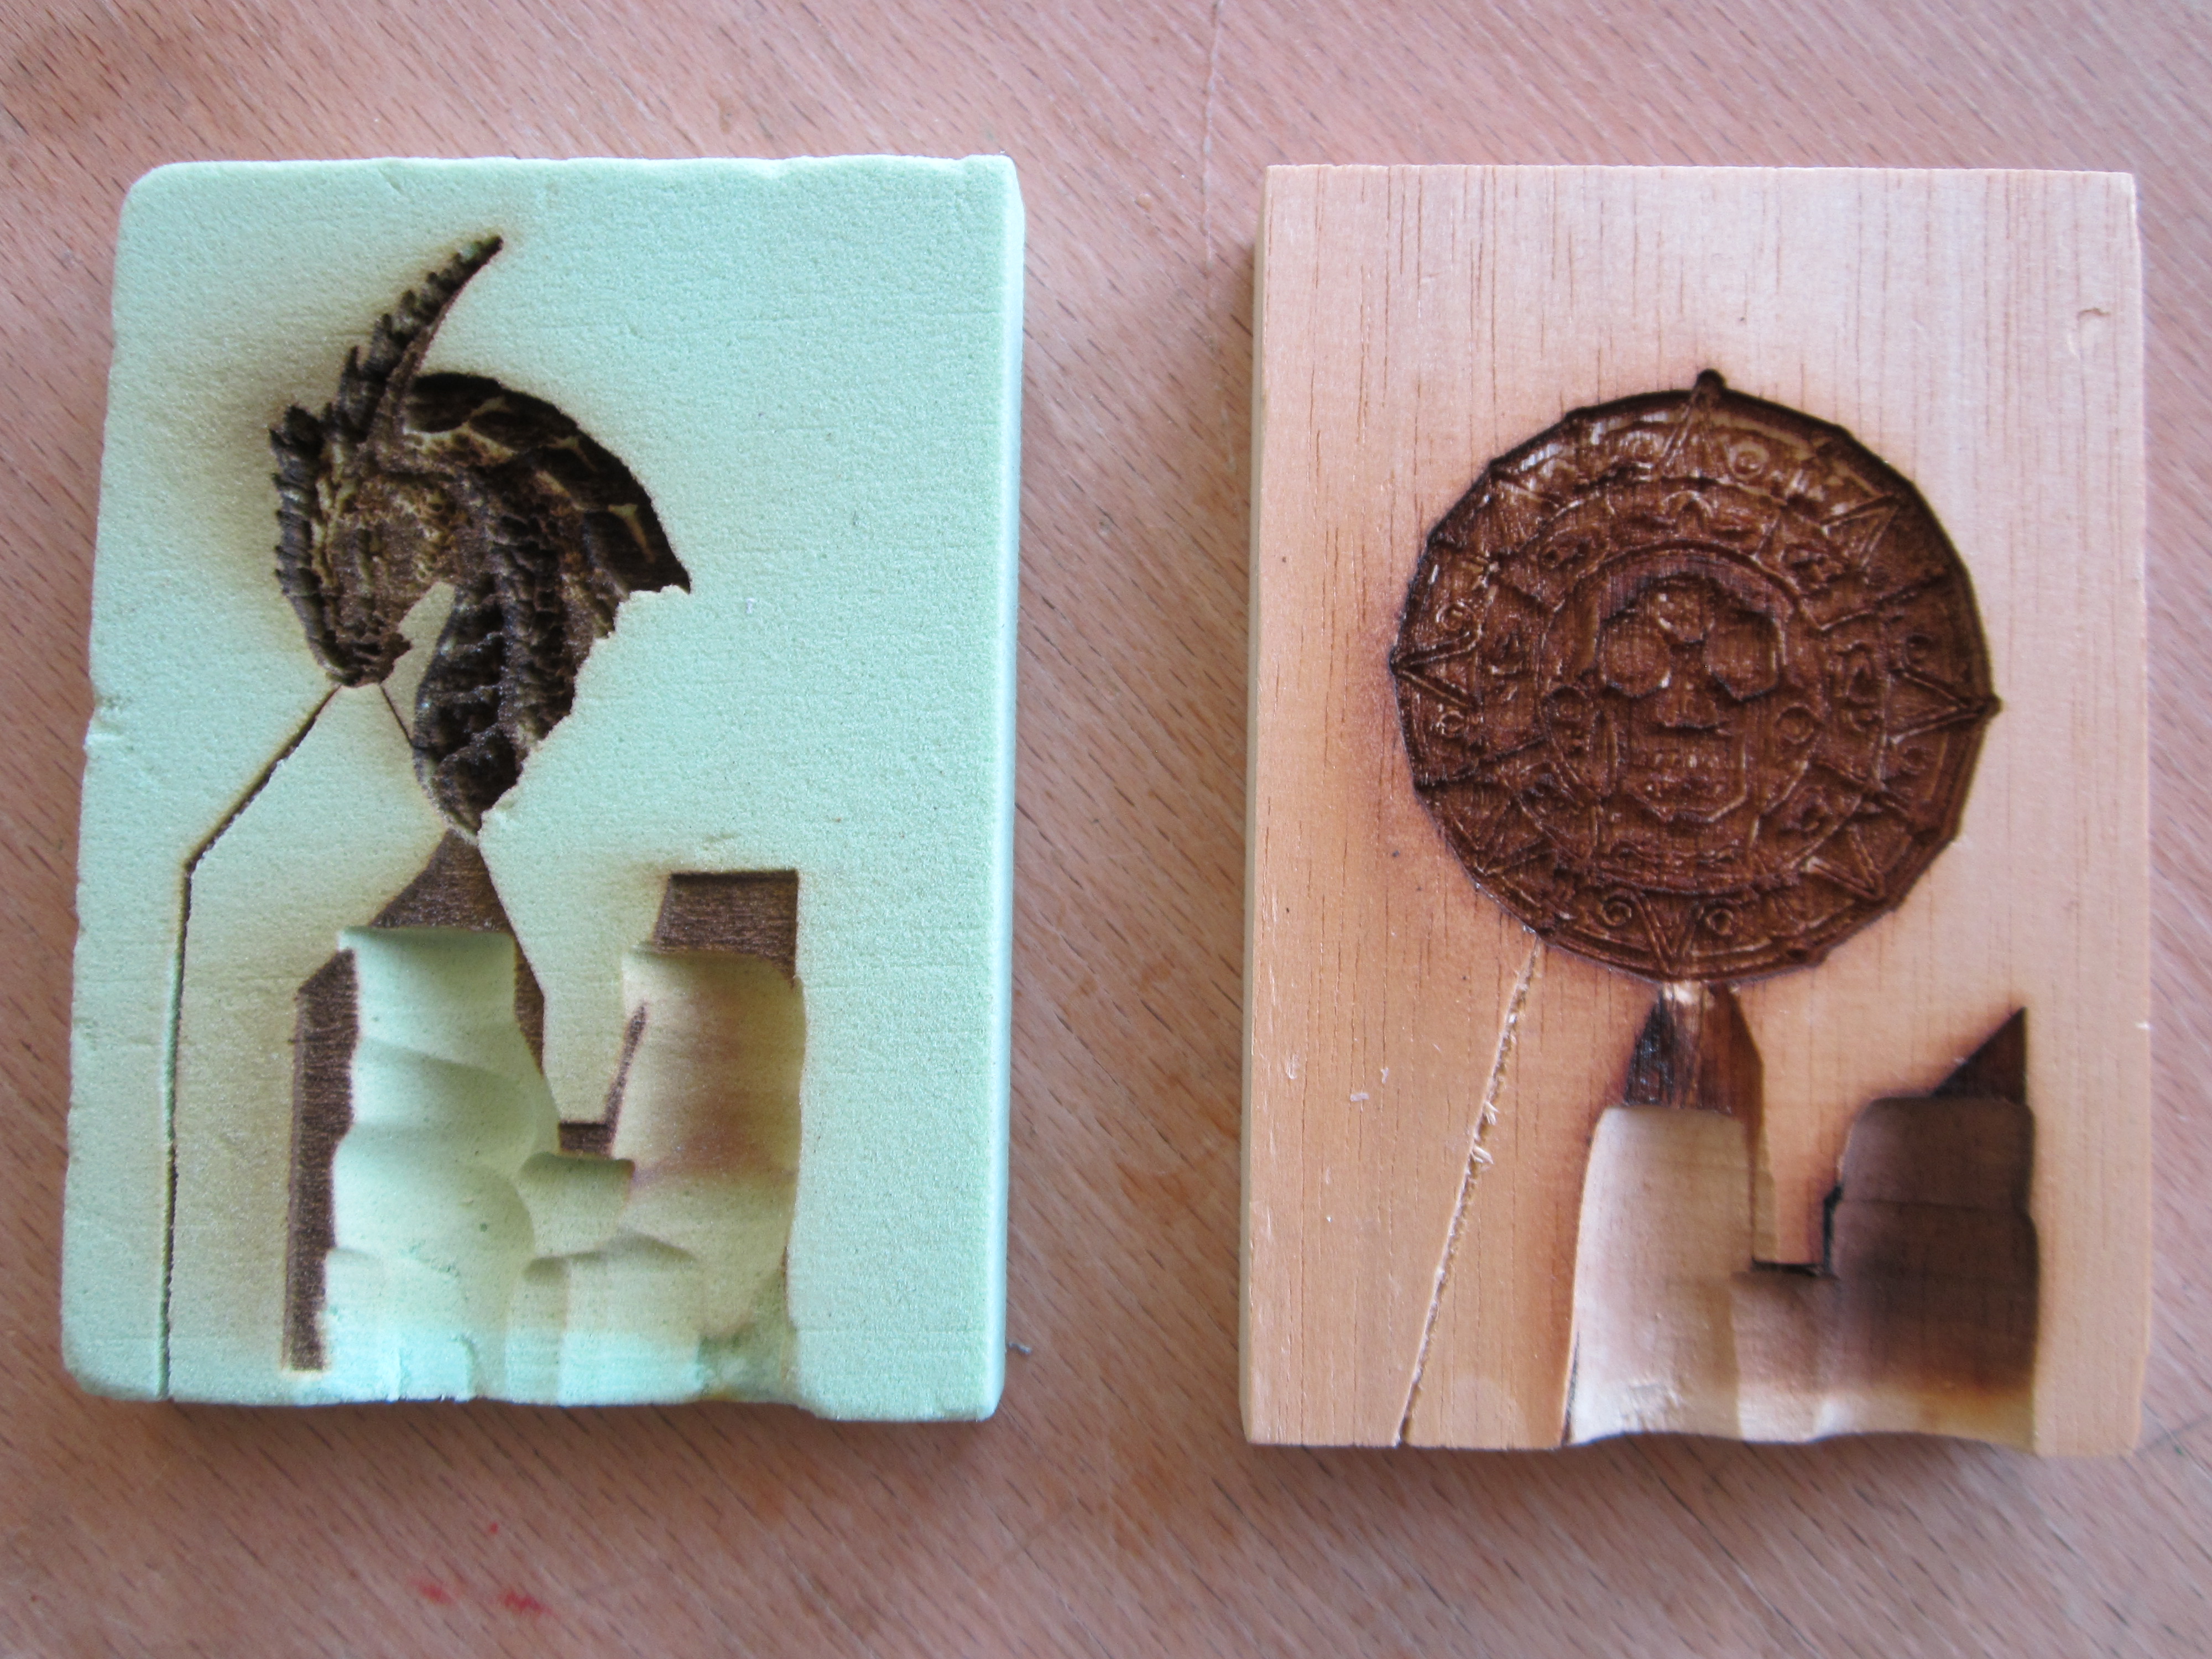
The dragon was laser-engraved on high density rigid polyurethane block. The Aztec coin on jelutong.
Changing the beam power and feed-speed will allow you to determine the depth of engraving.
- Increasing the power of green engravings will result in a greater overall thickness of casting.
- Increasing the poser of black engravings will result in an exaggeration of the grey-scale depth variation.
I used a Dremel with an abrasive head to increase the depth of the well and runner, making sure I did not damage the mould cavity.
Pewter Cast
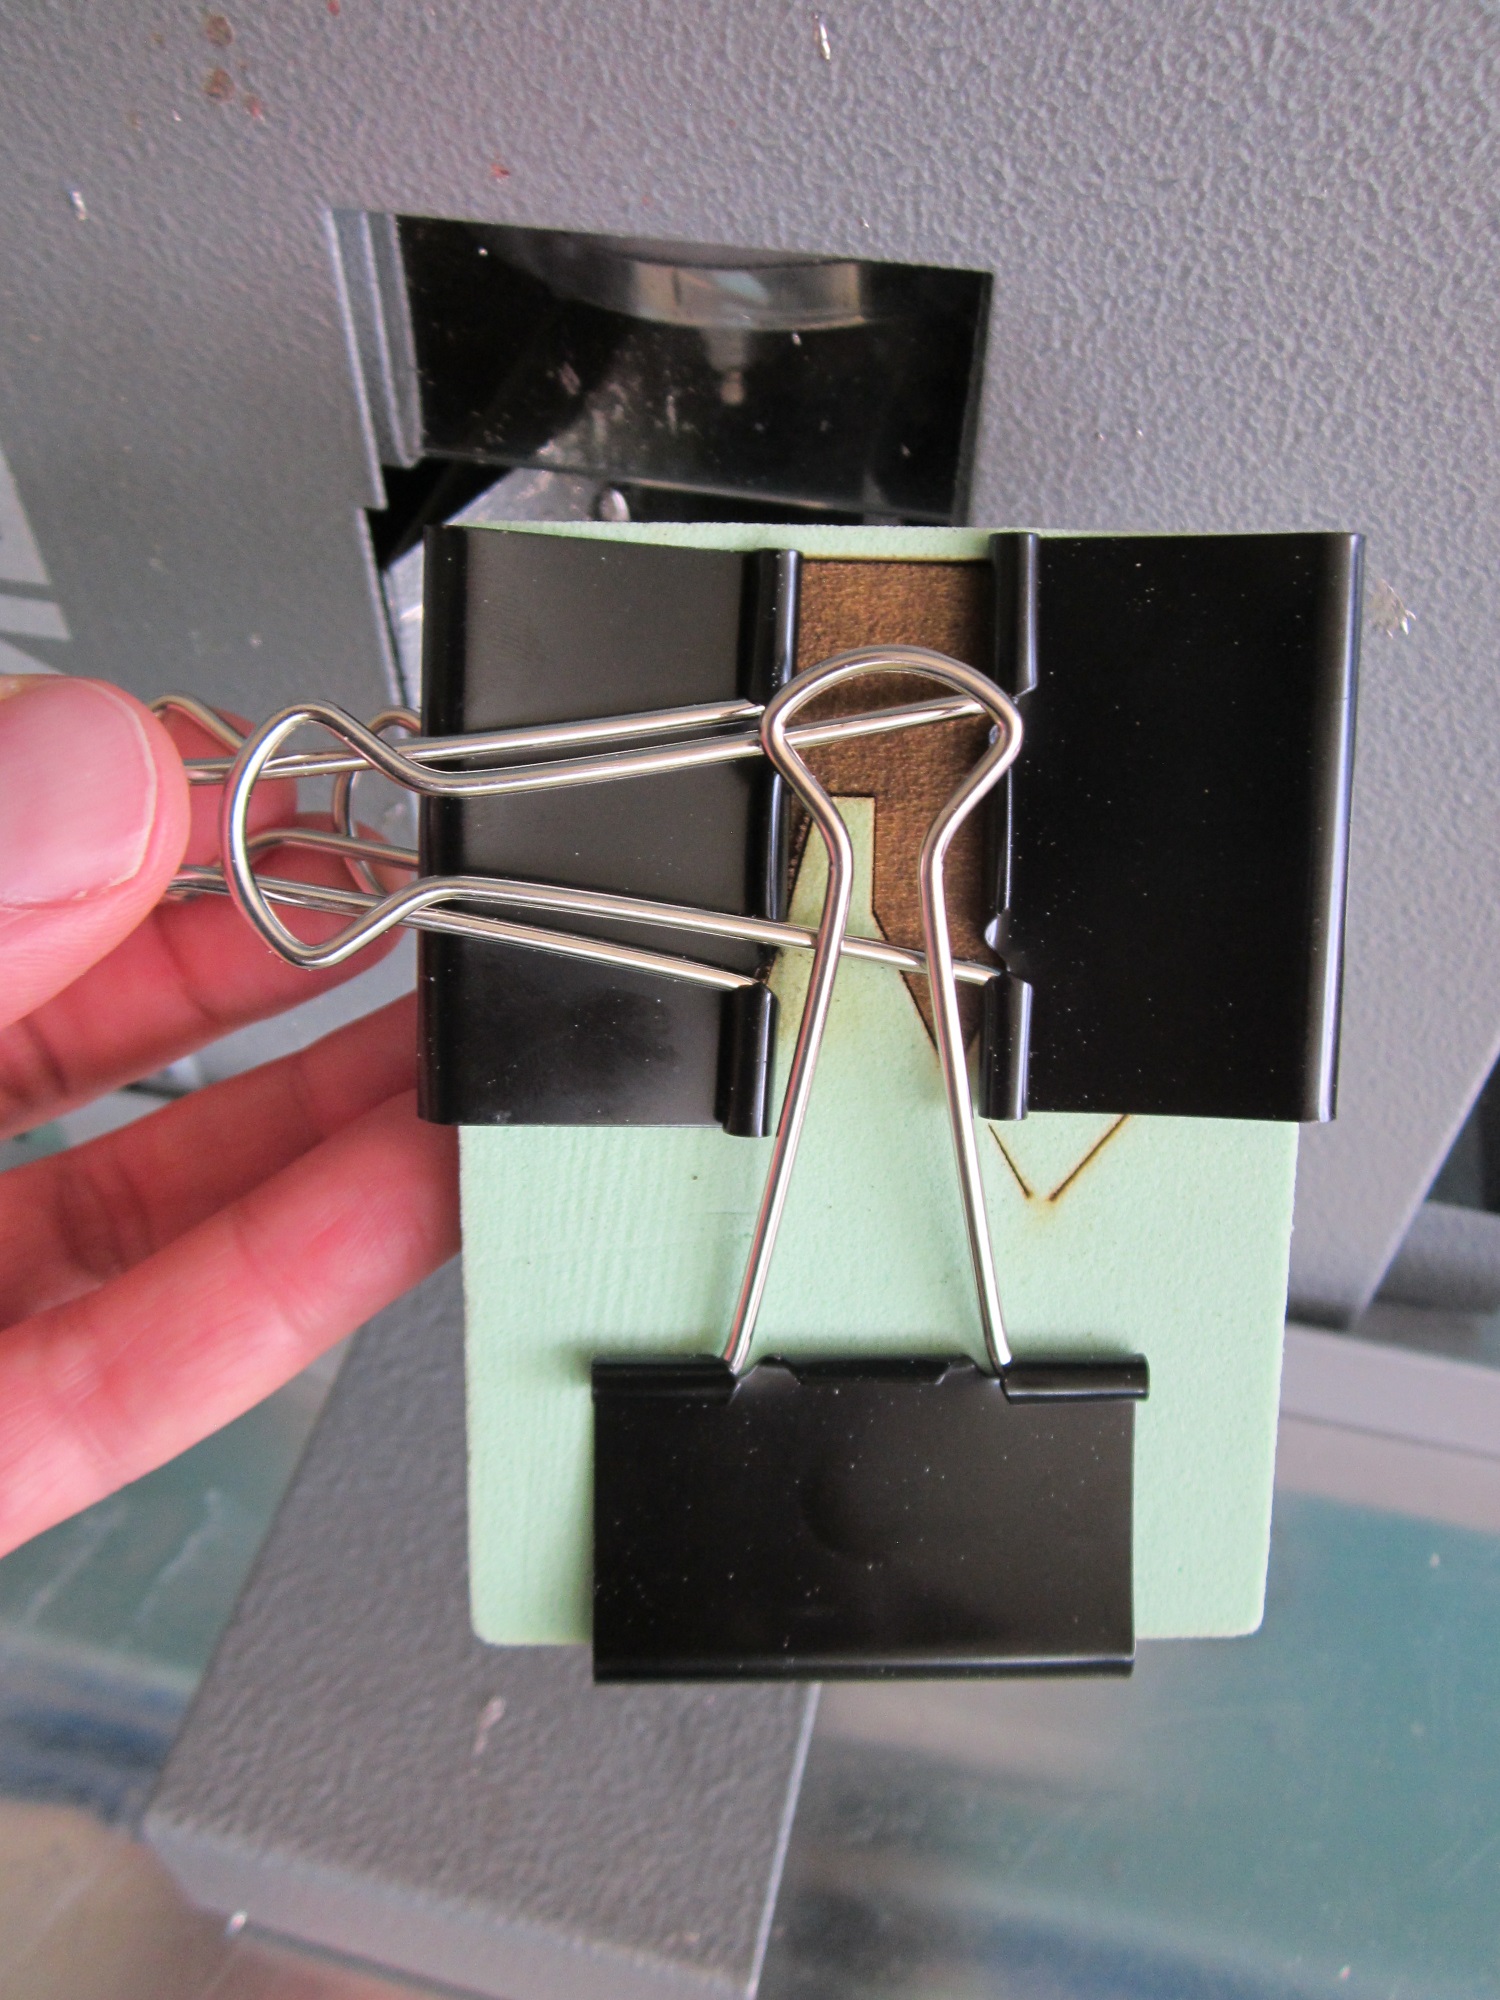
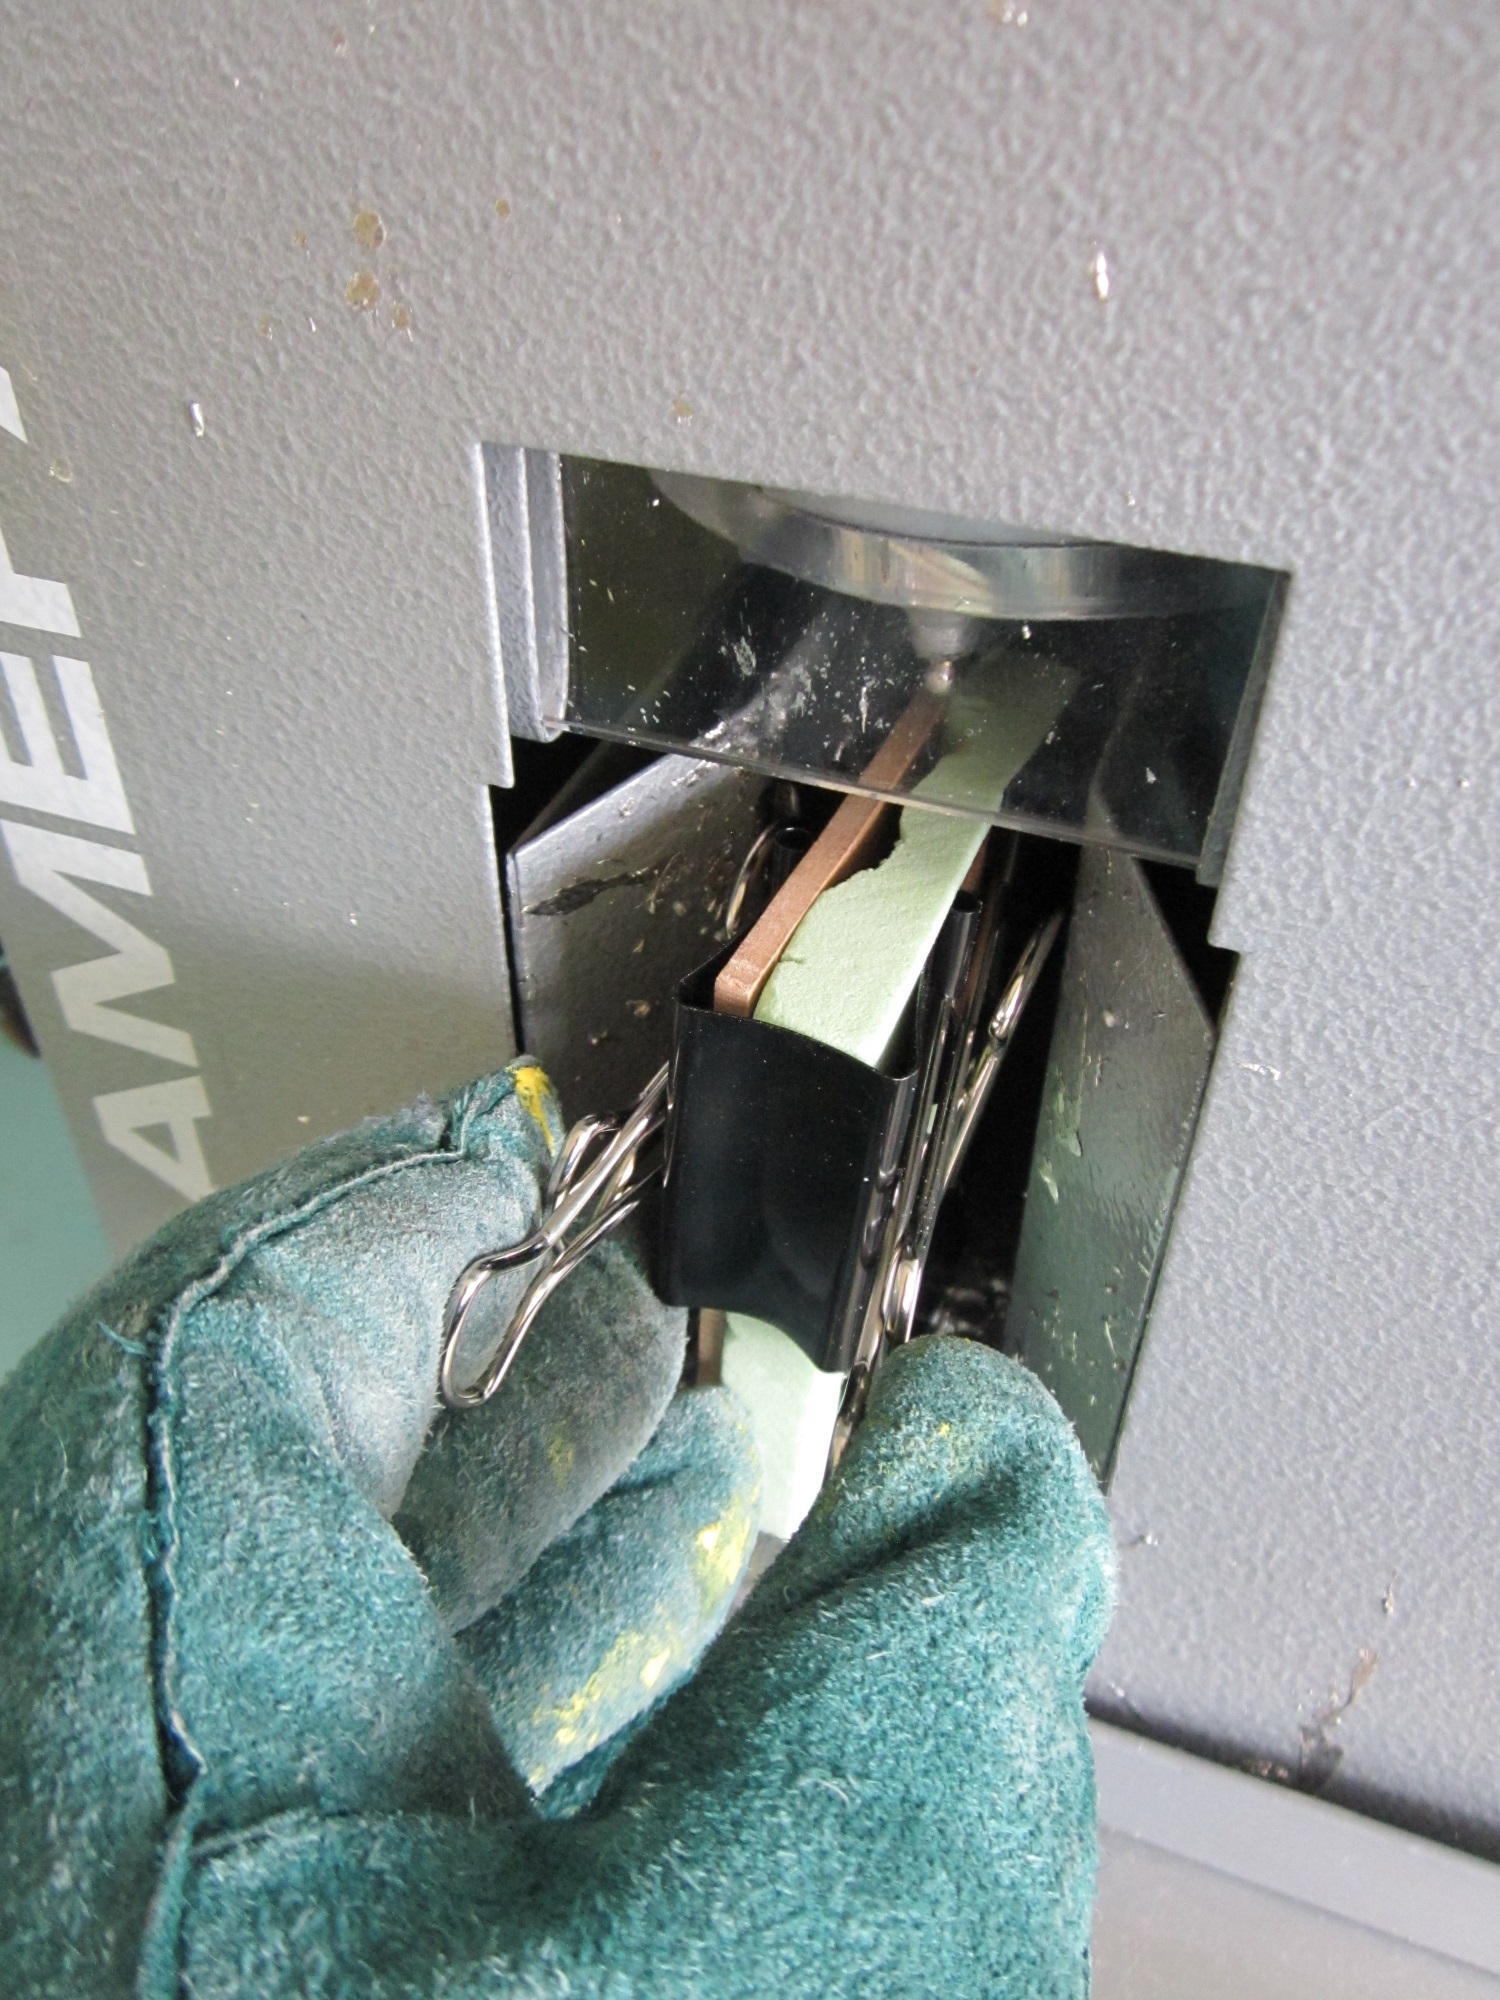
Use 50mm bulldog clips to secure a 4mm MDF backing plate over the cavity, wells, runners and risers. Make sure the backing plate covers the whole of the mould surface and that there are no gaps where pewter can escape. The bulldog clips do a great job of holding the backing plate over the mould, as well as acting as heat-sinks to allow the pewter to cool more quickly.
Make sure you are wearing heat-proof safety gloves, goggles and an apron (covered legs and feet are also important).
Before you cast, make sure you have a suitable location to stand the mould while the pewter cools and sets.
With an adult supervisor, pour the pewter carefully into the well, until the well and runner are almost full (but not overflowing).
If there are any problems, stop casting immediately and leave the mould to cool.
The Last Step!
Leave the pewter to cool for at least 10 minutes (possibly more depending of the volume of the cavity).
Keeping the heat-proof gloves on remove the bulldog clips and carefully slide-off the MDF backing plate.
Use thin-nose pliers to grab the pewter sprue and carefully pull the casting out of the mould. There is a technique here; avoid bending the pewter. If the sprue breaks you may need to use a small slot-head screwdriver to help prise the casting from the mould.
Side-cutters and/or a junior hacksaw can be used to remove the sprue. Use a needle-file to clean-up the edge left behind.
Reflection

I added a black ink-wash to the dragon head to highlight the depth of casting.
For the cursed Aztec coin I tried a number of different ink-washes (green at the top, yellow in the middle and black at the bottom). Because the Aztec coin was laser-engraved in jelutong, there is a rather nice wood-grain effect in its top surface.
Of the two prototypes I think I prefer the coin because of the use of Jelutong, which resulted in a finer depth of engravement and the subtle wood-grain finish. Of course, I would need to adjust beam-power and feed-speed to explore different effects.
I would like to explore using two moulds back-to-back to create double-sided castings. This will need some way of ensuring the the two cavities align perfectly with each other.
I hope you found this Instructable informative.