Laser-cut 3D Anatomical Wood Sculpture Using Slicer for Fusion360
by maecrab in Workshop > Laser Cutting
8885 Views, 33 Favorites, 0 Comments
Laser-cut 3D Anatomical Wood Sculpture Using Slicer for Fusion360
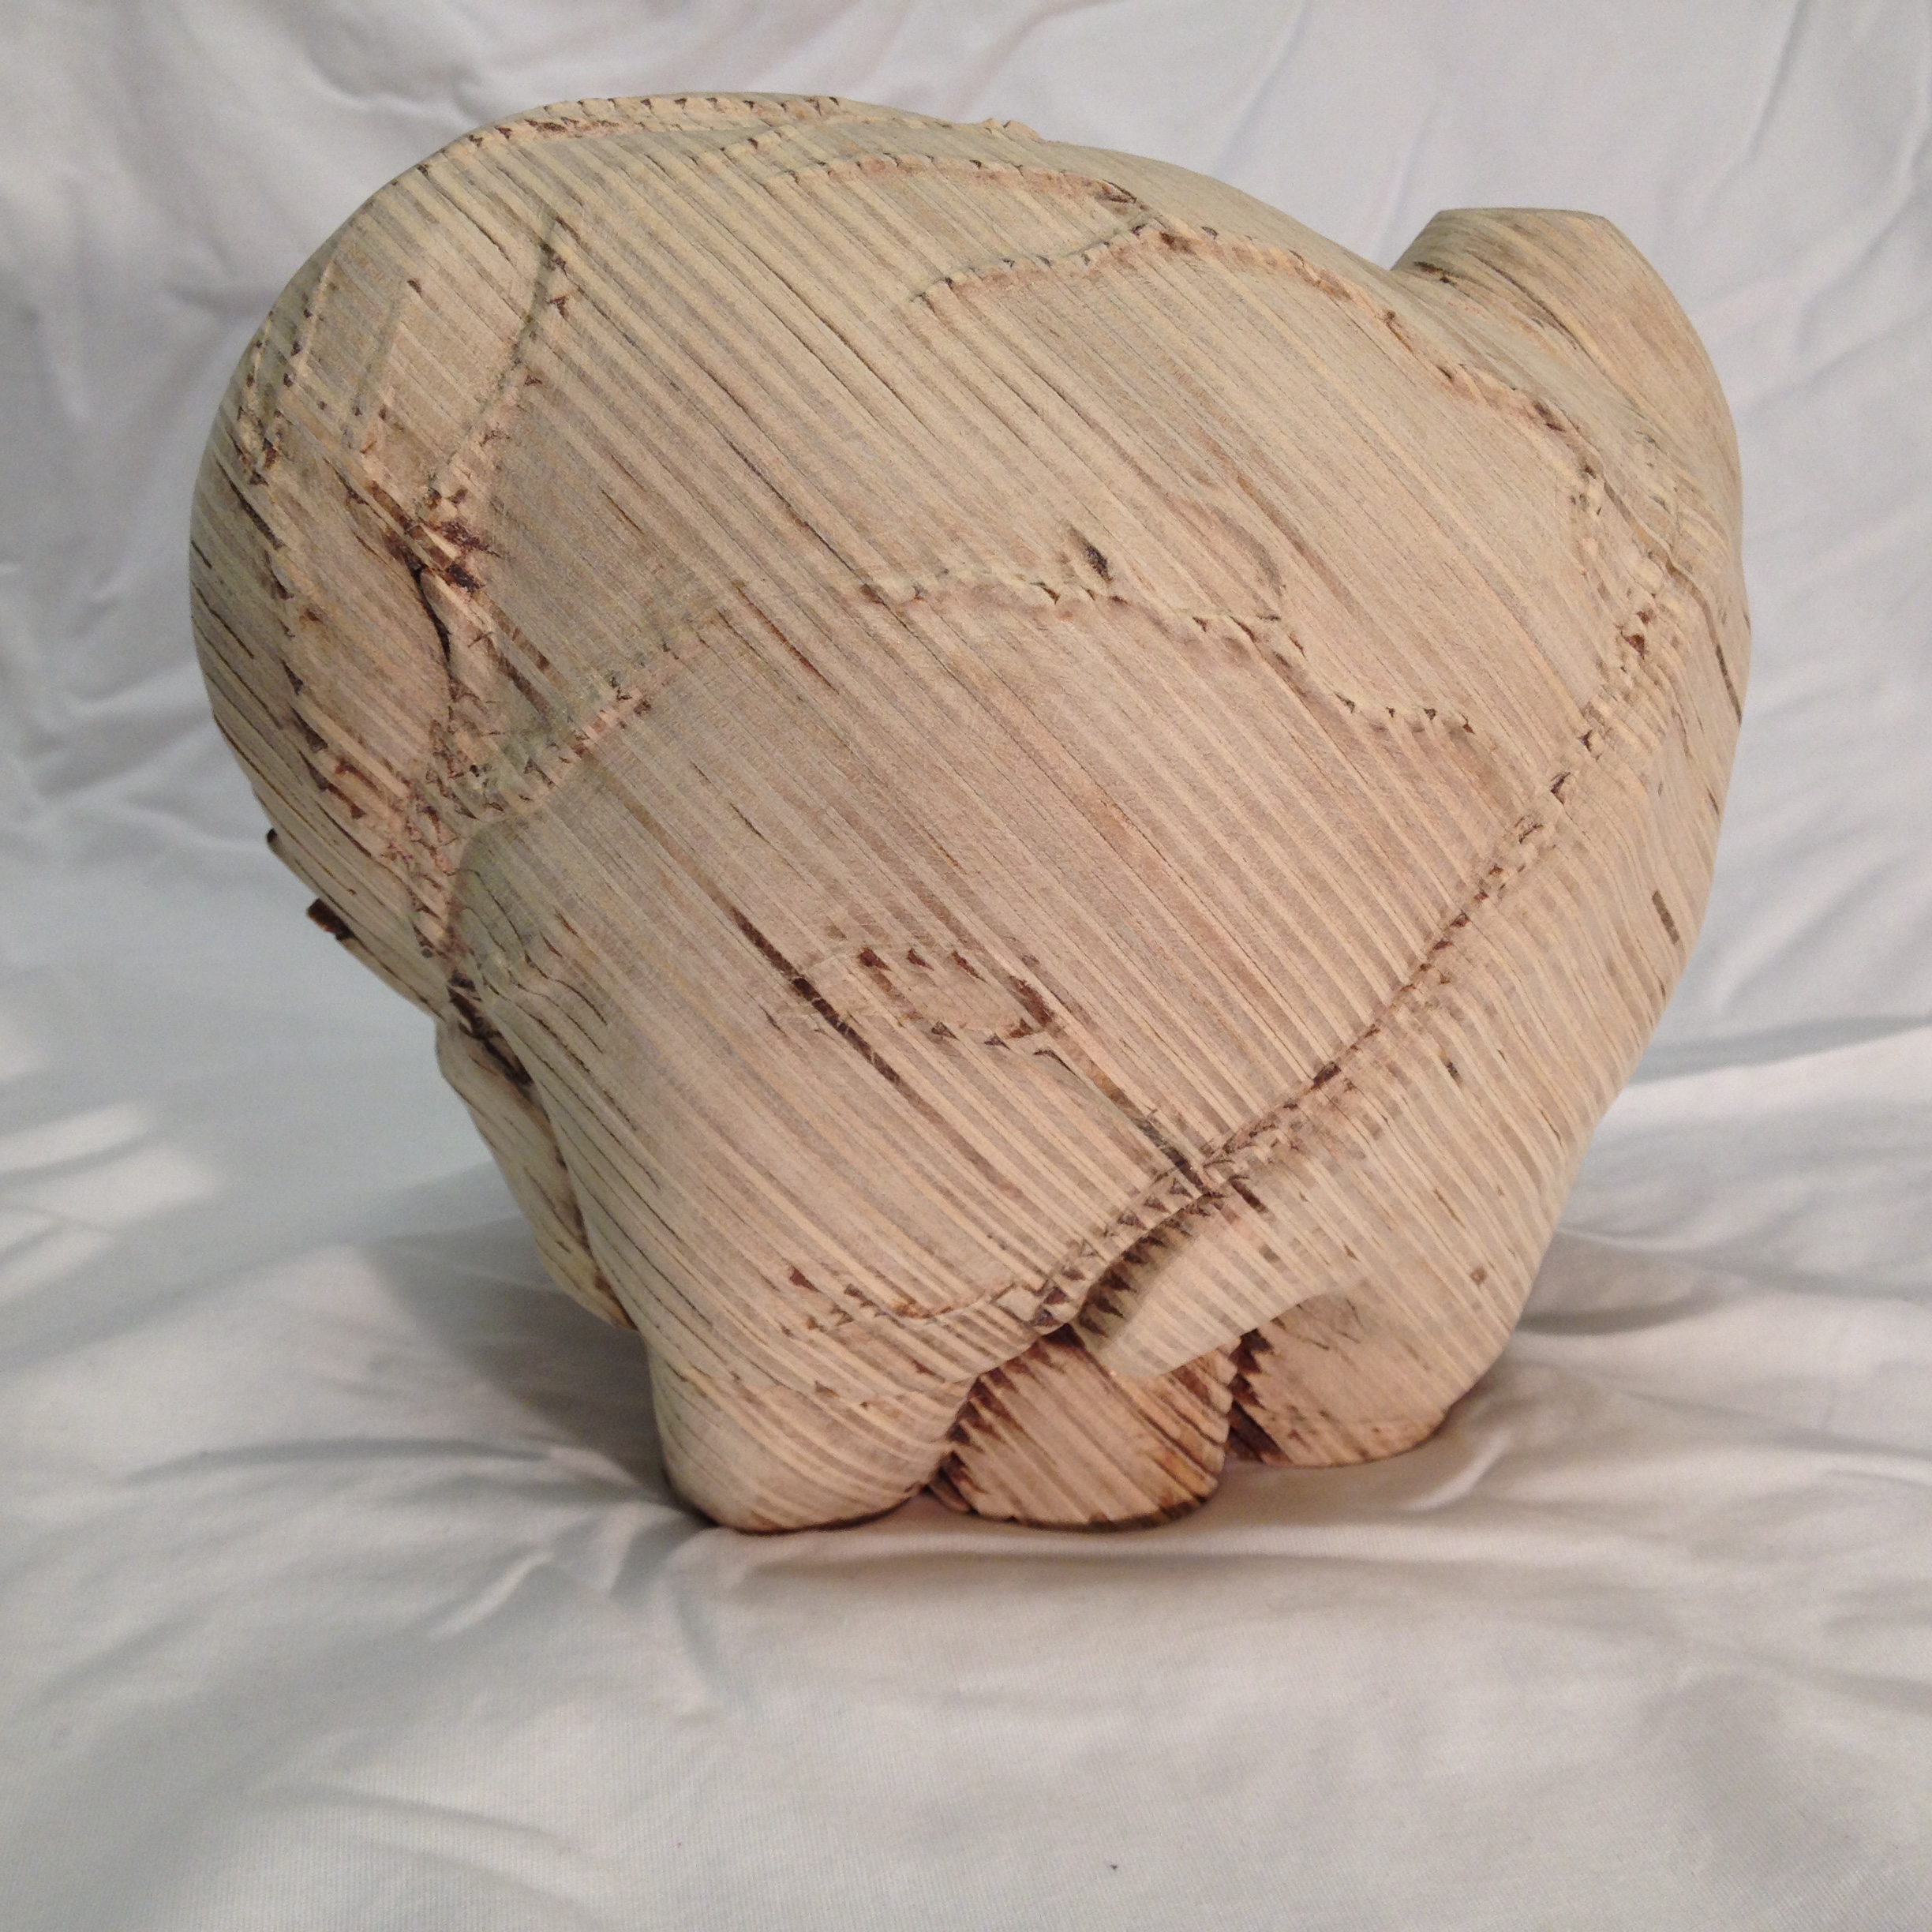
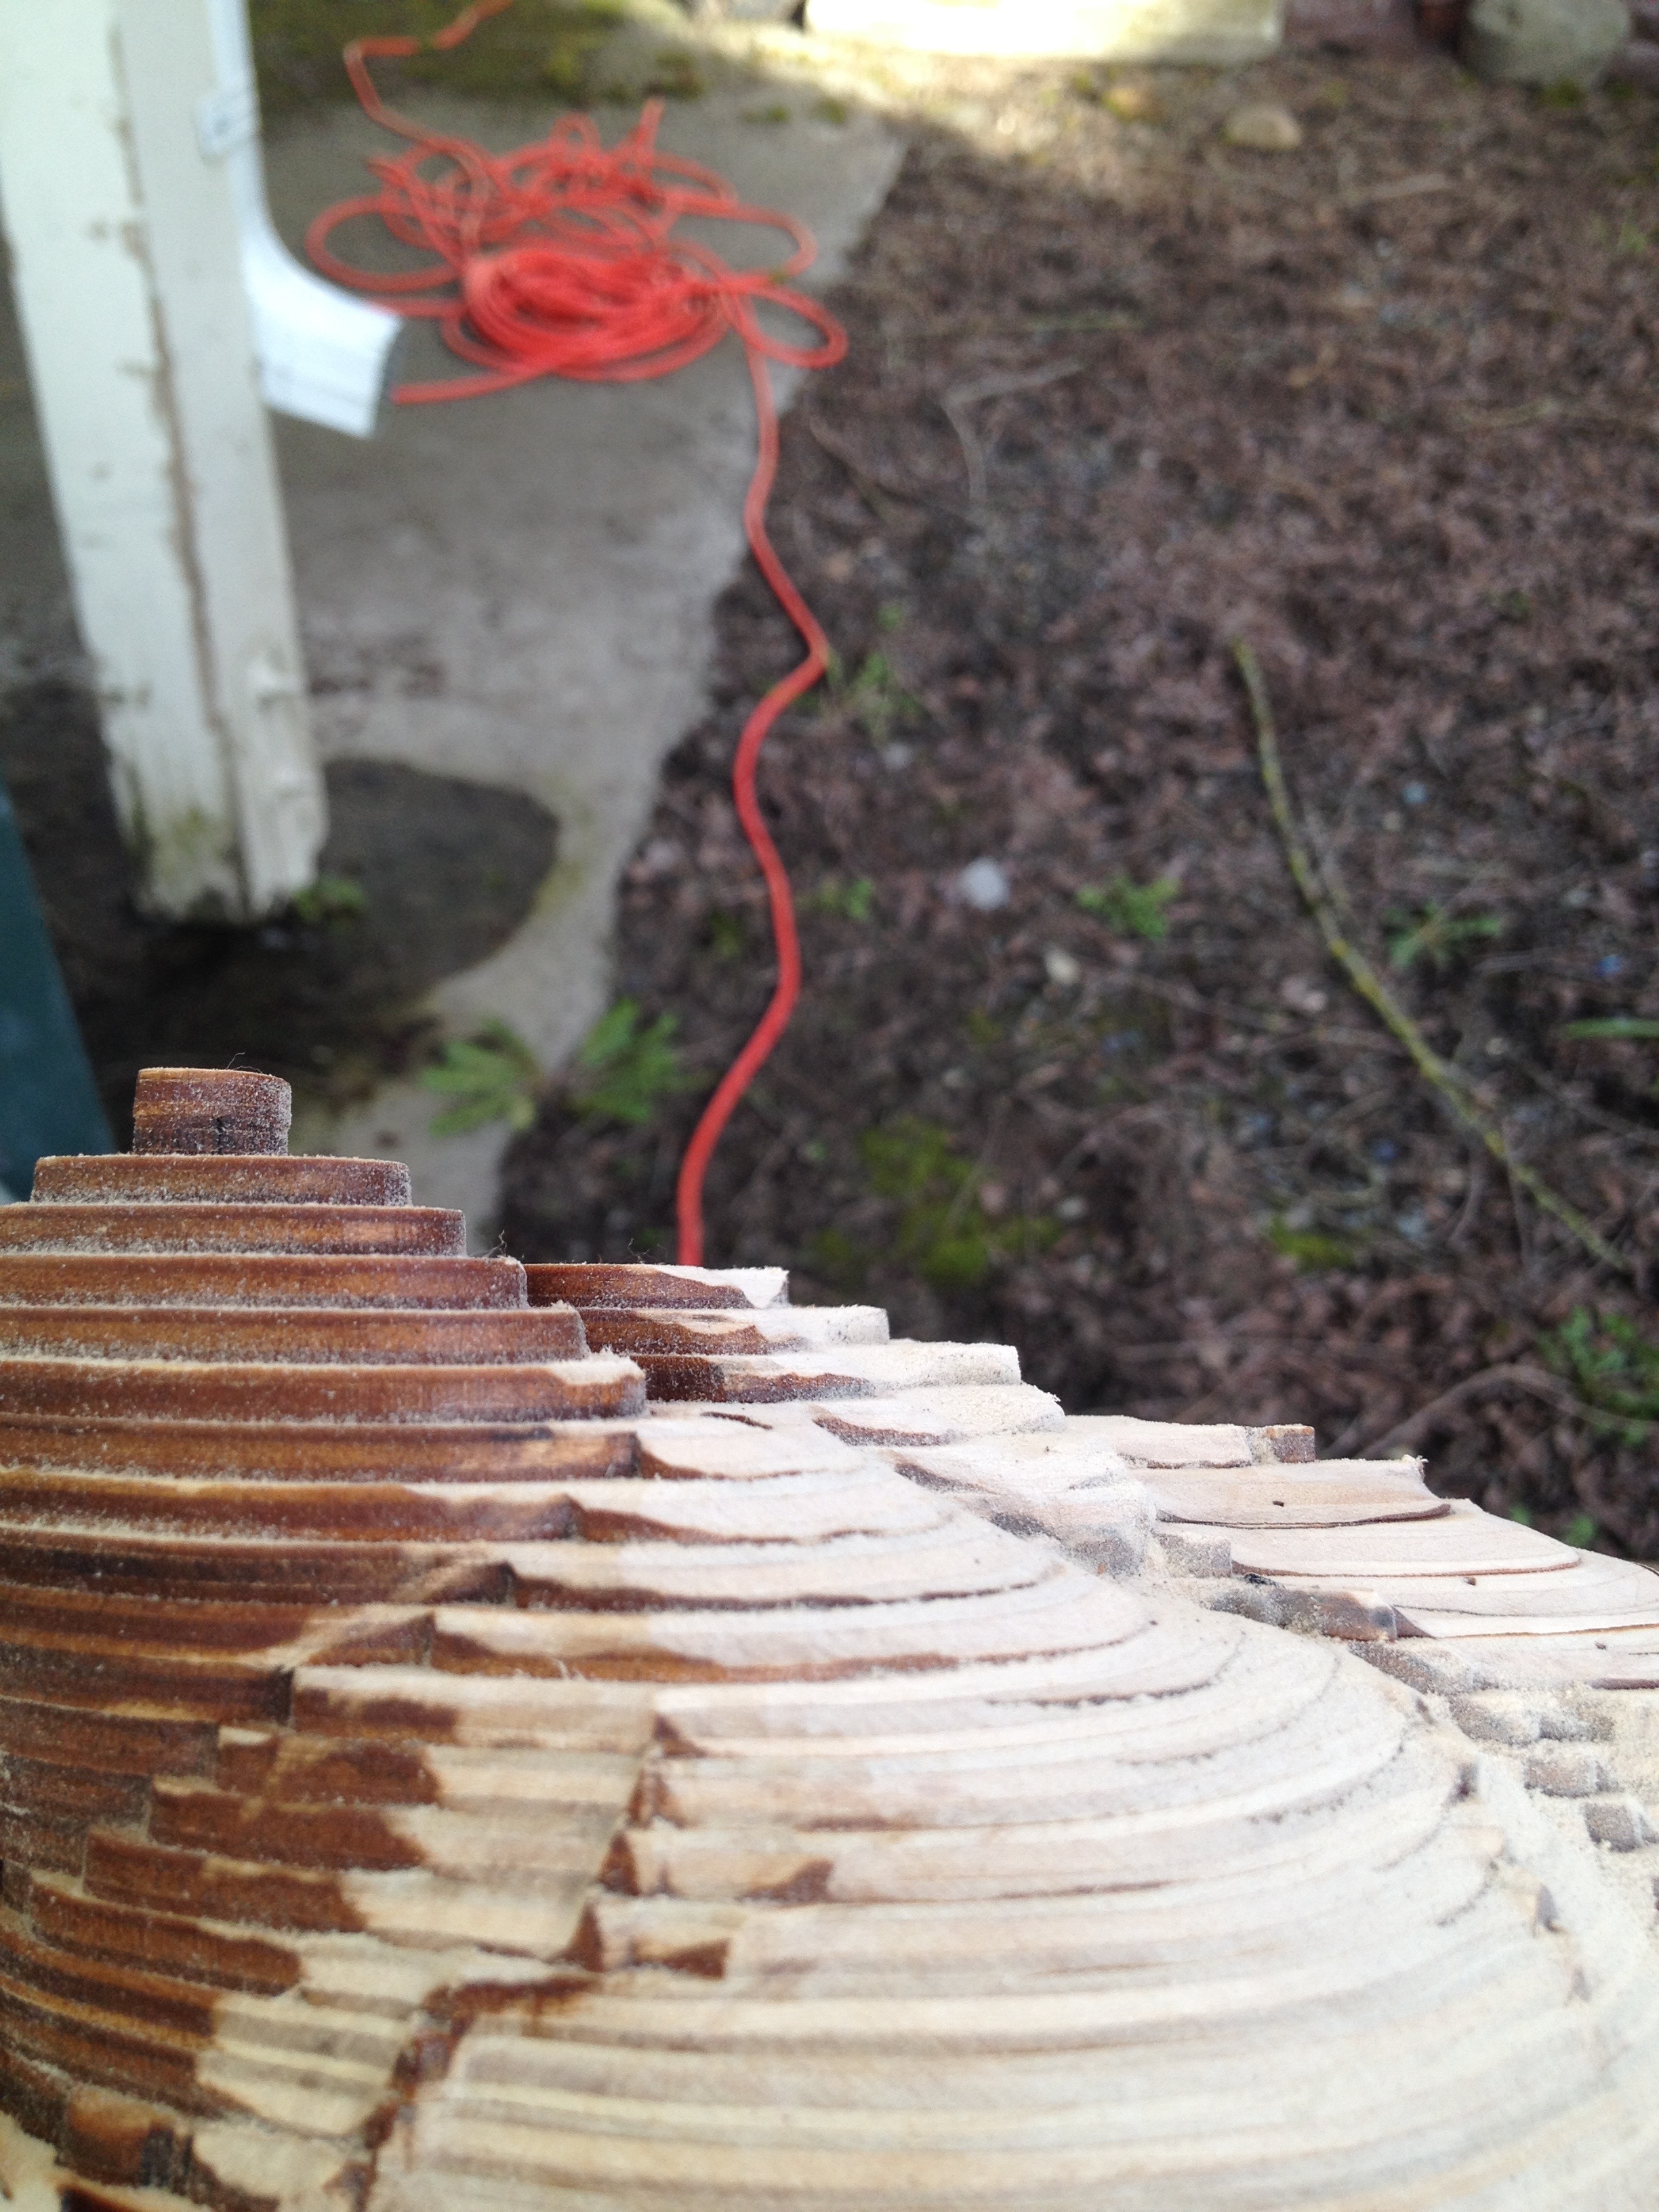
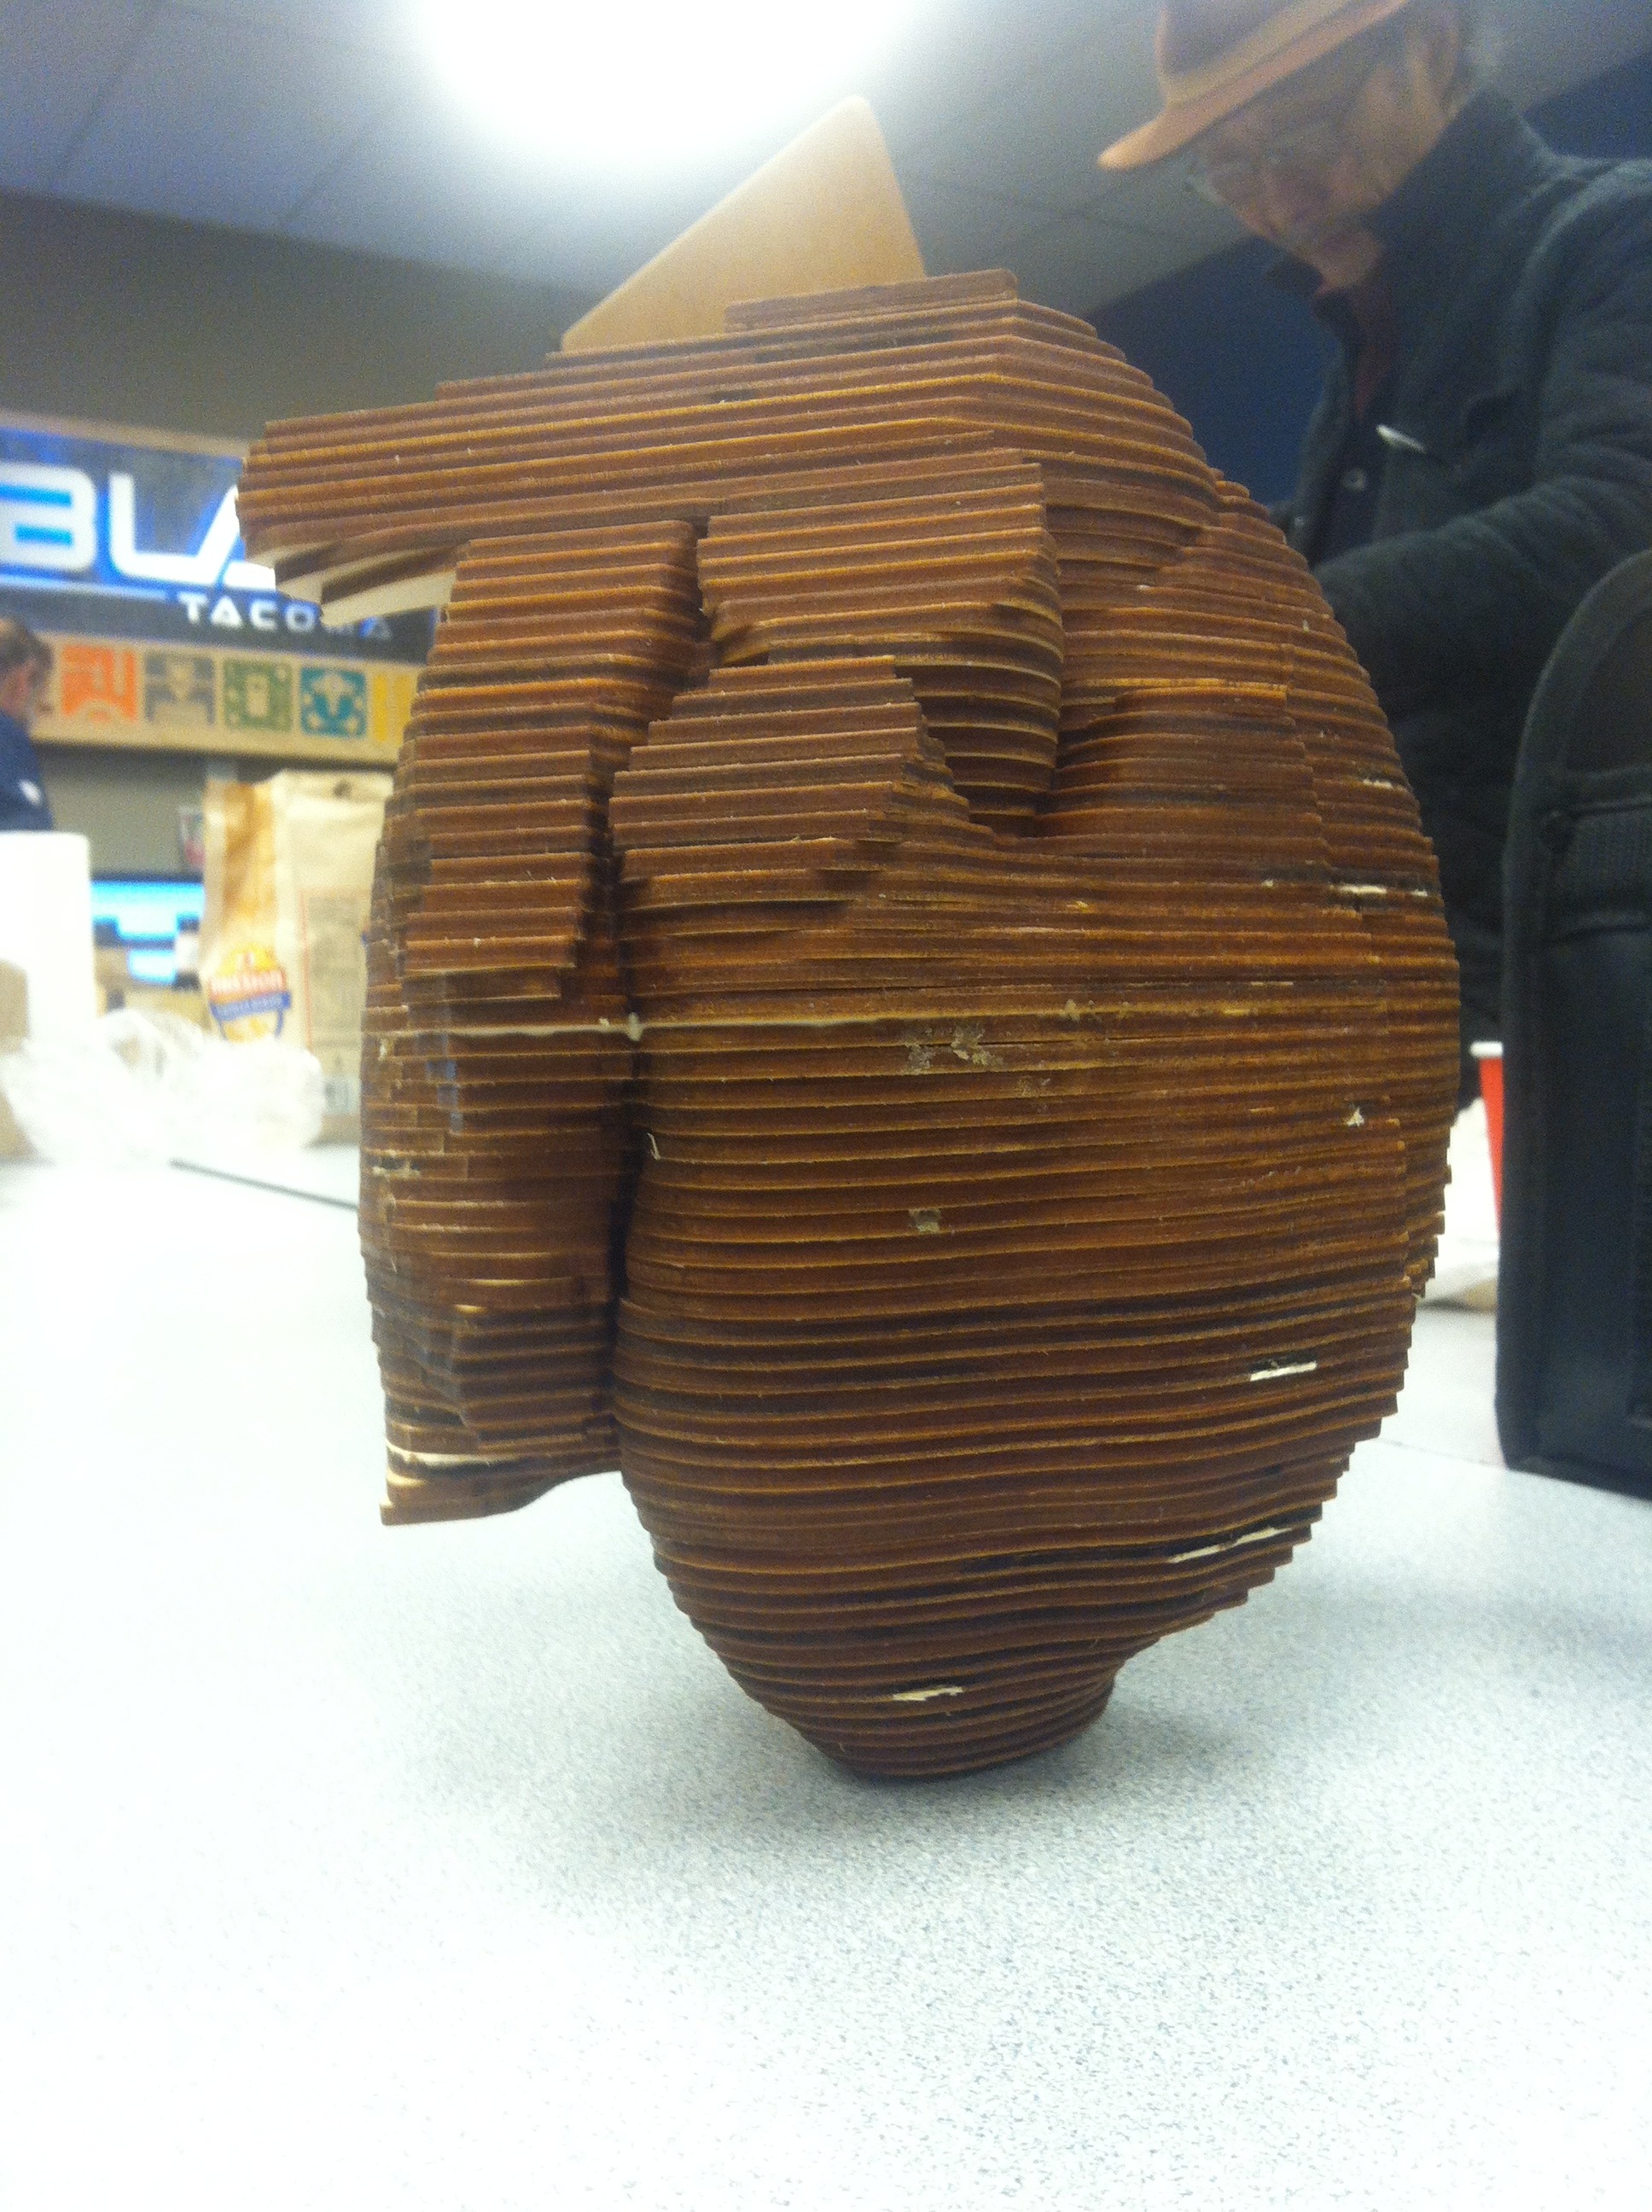
Have you ever wanted to cradle a giant human heart in your arms like the dragon eggs in Harry Potter and the Goblet of Fire? Well now you can! I'll be showing you how to use a free program called Slicer for Fusion 360 from Autodesk to turn 3D .stl files into laser-cuttable PDF files, from choosing your STL to sanding your finished piece!
This technique works well for other 3D objects, but I recommend for finishing purposes that you pick a model without a lot of concavities, since they will be difficult to sand effectively.
This was one of my first creative projects using the laser cutter waaaaay back in the fall of 2015, but I'm just now writing it up. The possibilities for sculpture using this technique are incredible! I'd love to make a life-sized Operation game someday. And thankfully both technology and my technique have improved since then! Since I've learned a lot, this Instructable is more how I would do it now than how I ACTUALLY did it a couple years back.
Software:
Slicer for Fusion 360. I HIGHLY recommend Fusion 360 for 3D modeling, and I will provide instructions for using Slicer, even though that's not how I made this specific model. This was made using 123D Make, which is no longer available from Autodesk.
Inkscape for 2D design layout
CorelDraw (if using an Epilog laser)
Supplies:
1/8" baltic birch plywood (I used 3 36x24" sheets, with some room left over, but since I am not using a smaller laser, settings shown are for a 50 Watt 24x18" Epilog Helix)
Wood glue
Disposable paintbrushes
Grinding and sanding mandrels and sanding cylinders for a Dremel or other rotary tool
(Optional) wood stain, finishing oil, and/or polyurethane finish*
Tools:
Bastard file
Rattail files
File cleaner
Medium-coarse (120-220) and fine (400-600) sandpaper
Wood block/shim/paint stirrer for sandpaper (optional, helpful)
Rotary tool and coarse sandpaper barrels/mandrel
Hand power sander
Dust mask
Vacuum
Goggles/safety glasses
*this heart is NOT FINISHED with any kind of stain, oil, or polish—before applying any of these things, test them ON THE EDGE GRAIN (the edges of the wood where all the layers of veneer are visible) of your wood. Edge grain absorbs these products VERY differently than the face grain of a piece of wood does, and treatment of any kind can emphasize the natural color differences between layers and pieces of wood. If you plan on taking your object on display where it can be handled and exposed to temperature differences, I recommend treating it with an oil such as Tung Oil or rub-on polyurethane, to keep it from absorbing moisture (expansion and contraction of the layers will gradually cause them to separate) and dirt and oil from hands (plus the ever-present threat of coffee stains etc.). I don't recommend spray-on finishes as these will tend to collect in crevices and give it a shiny, plasticy look.
First: Find Your File!
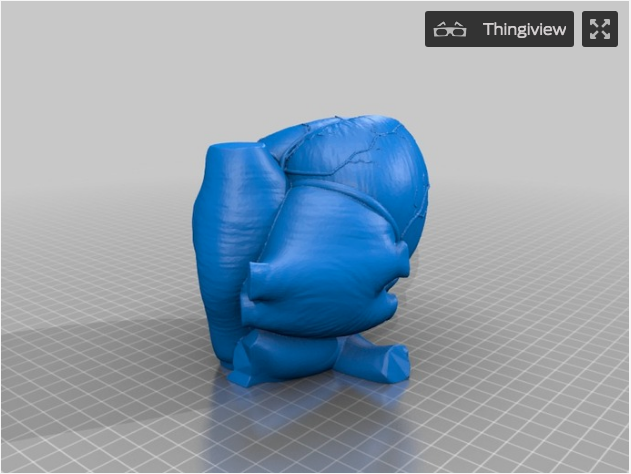
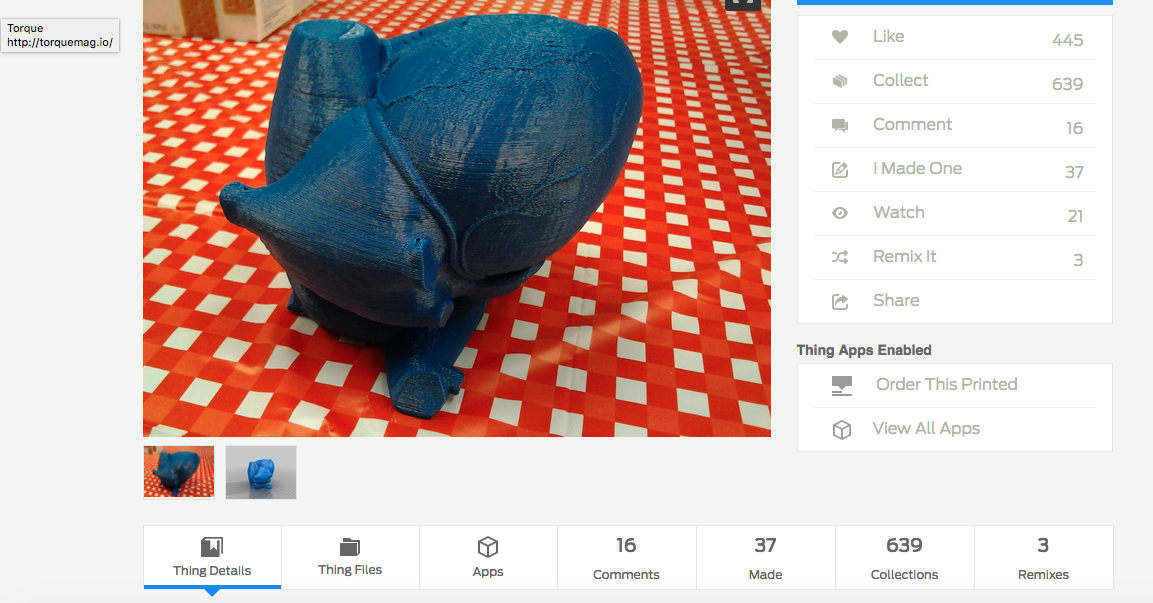
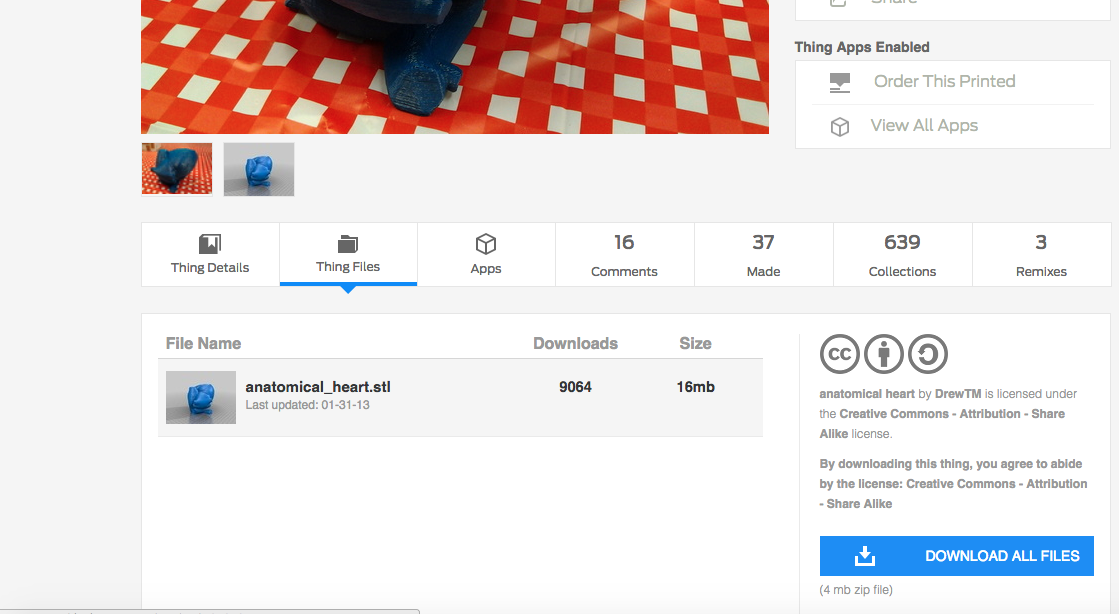
I checked Thingiverse for an anatomical 3D model of a heart, and found this model by user DrewTM, who says: "An anatomical model of a human heart, painstakingly assembled from obj files taken from BodyParts3D's database. They claim that I have to say this: "BodyParts3D, The Database Center for Life Science licensed under CC Attribution-Share Alike 2.1 Japan"". This file is available under the Creative License Attribution-Share Alike license. This means that as I am sharing my files derived from this object, if you choose to make this project you should attribute it to myself and to DrewTM.
I chose this model because I wanted one that was anatomically accurate, based on biology, not stylized, and this was the best file available at the time. I took a quick look through Thingiverse and I still think it's the best for these purposes, especially since it doesn't have too many/too large veins over the surface (which again would be difficult to sand)
To download files, click on the "Thing Files" tab, and then on the title of the file (clicking will automatically start the download). You do not need a Thingiverse account to download files, but I recommend making an account so you can save files, make yourself helpful lists, provide valuable feedback to give back to the community, and to say that you made one and add to the original author's stats!
Plan Your Slice!
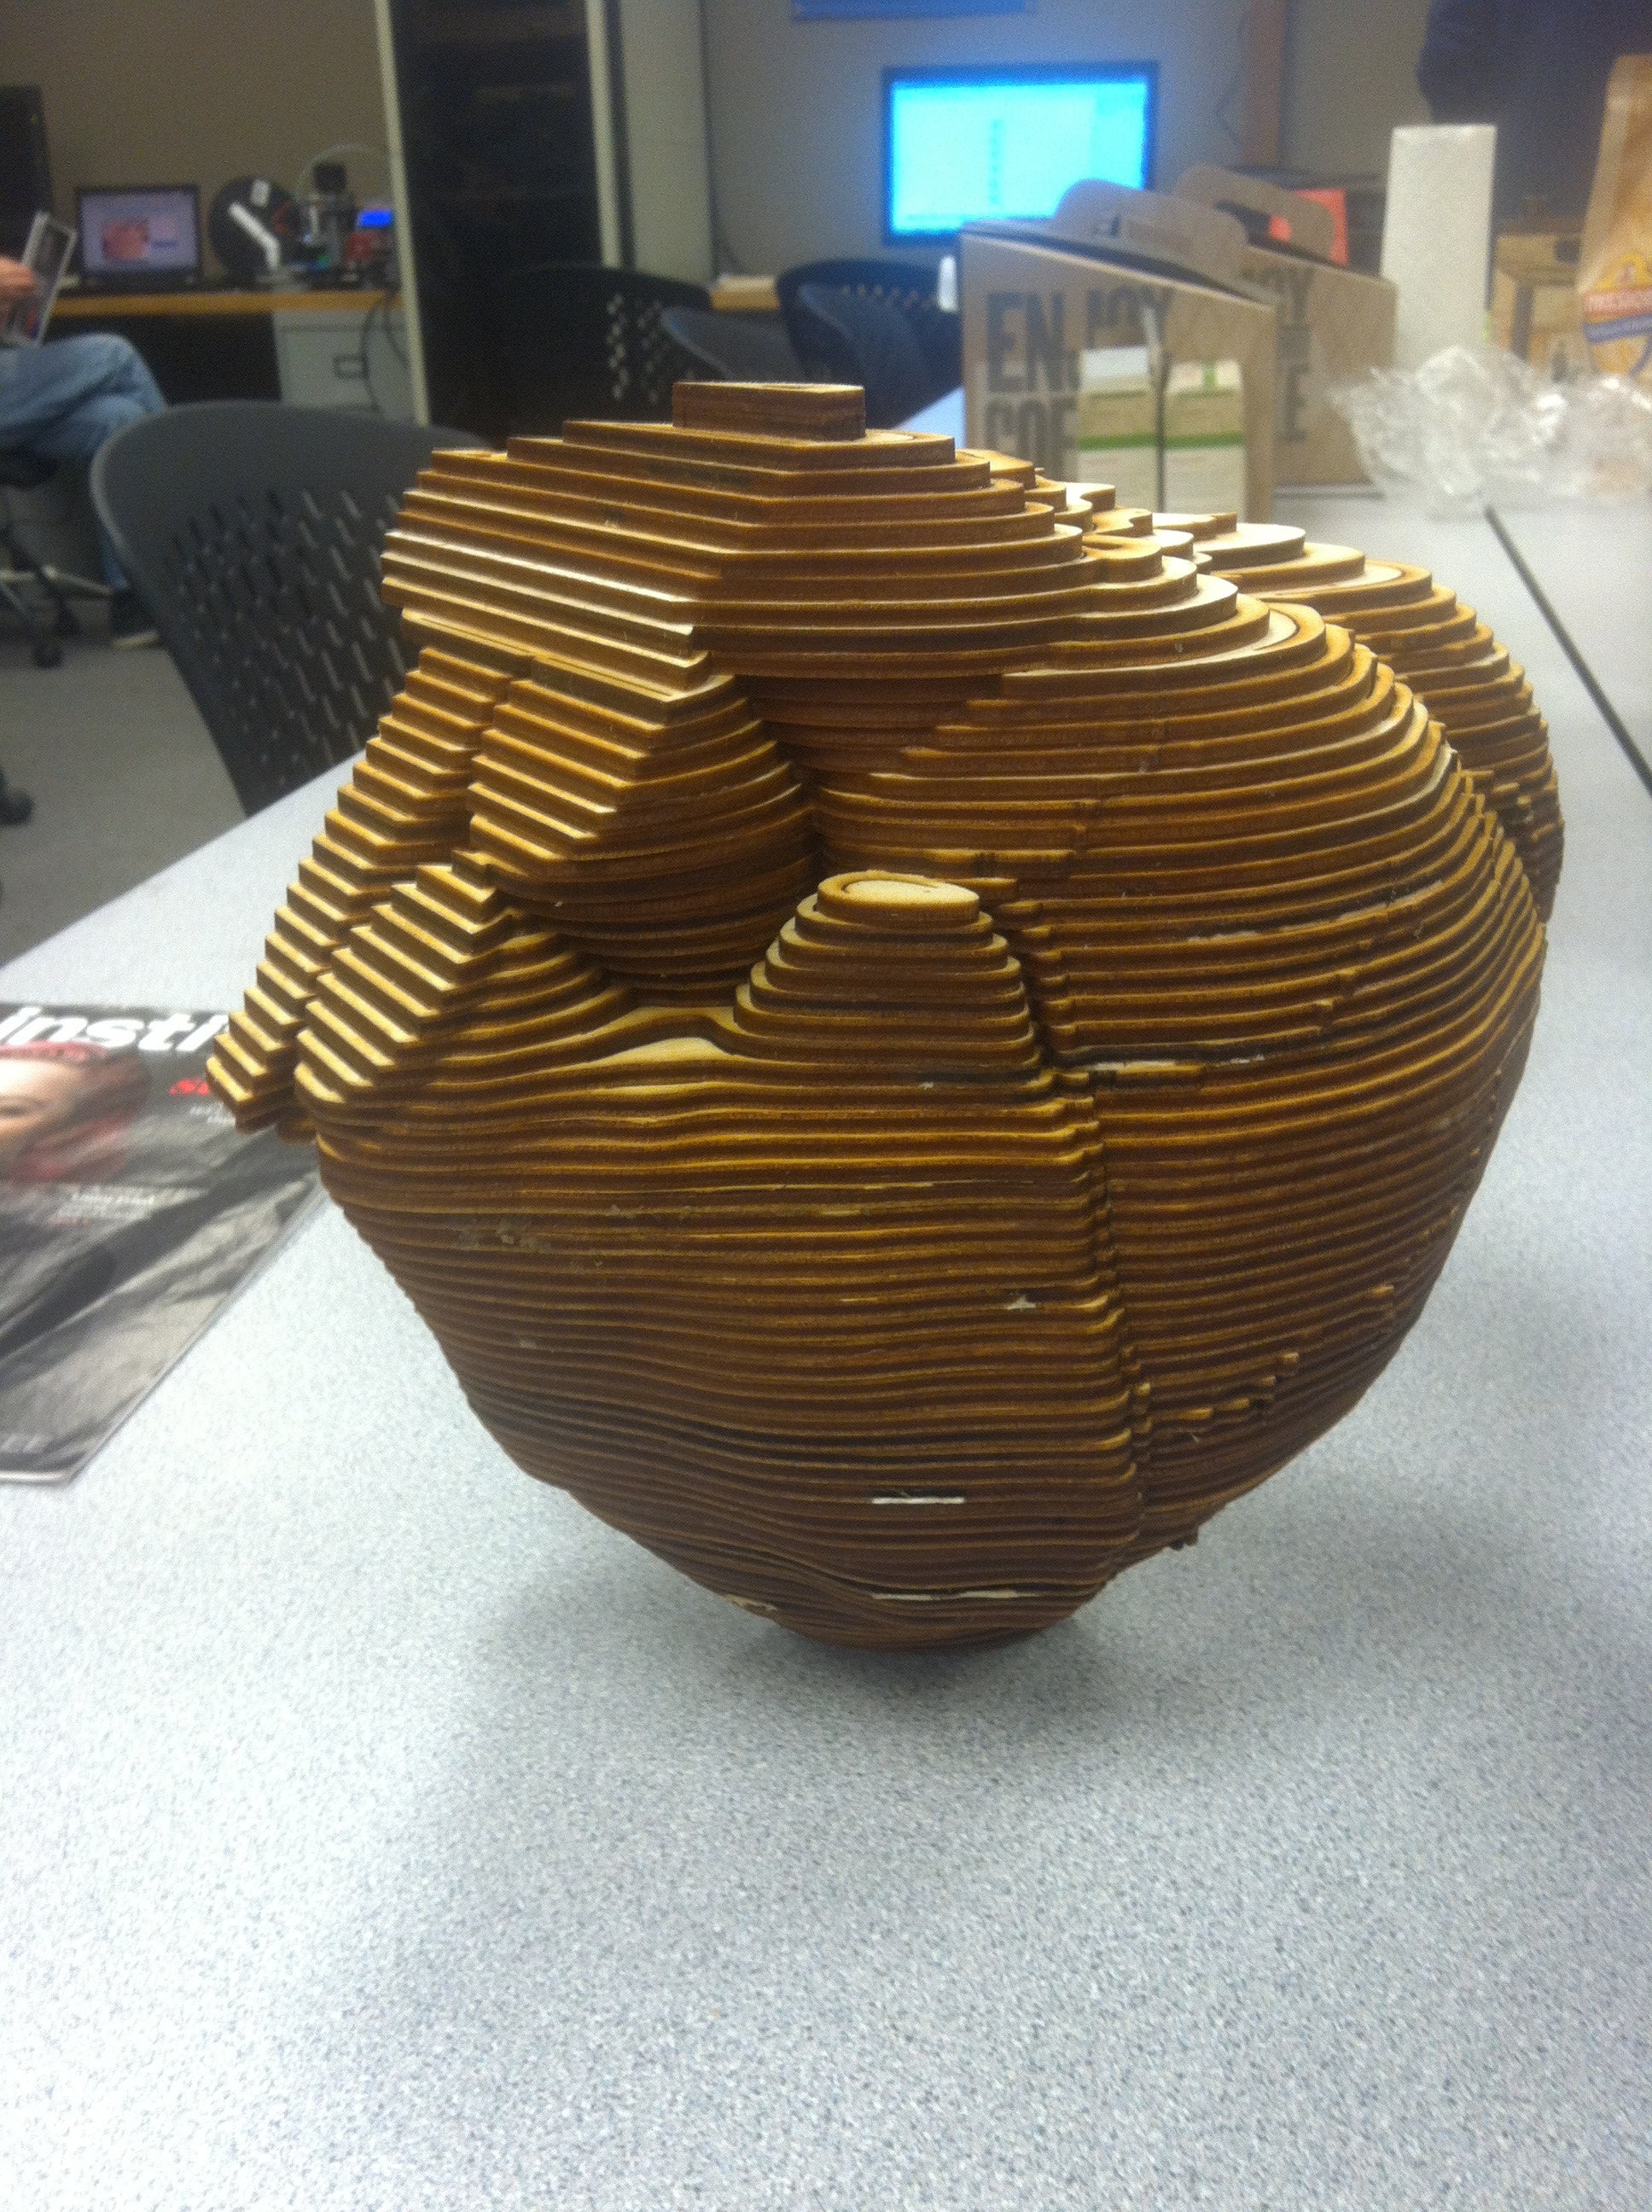
Before slicing your file, you need to know:
1. What is the finished size you want your object? The larger your object, the better the "resolution," so to speak, of your finished object. If it's too small, you will lose the surface detail and smooth contours. For a complex object I don't recommend a diameter on the largest axis of less than 8". The largest maximum cross-section should be no larger than what can fit on a sheet of material, which itself depends on the bed size of your laser. The second factor here is:
2. What is the thickness of your material? Using thicker wood means fewer layers and less work, but will capture significantly less detail in the final model. Some lasers won't be able to cut wood that is thicker than 1/8", and for some wood may be too dense. You can also cut MDF or 3 mil cardboard as a replacement for 1/8" wood, but they will not finish the way wood does—mdf can be smoothed, but I don't like the appearance or texture of it. Cardboard cannot be sanded/filed effectively, but it can be laboriously contoured with a knife, and/or add a layer of papier mache strips over the top to make a hard shell, which can then be sanded and painted. Neither of those methods are likely to capture the finer surface details, such as the veins on the surface of this heart model.
3. What is the size of sheet your laser can handle? I cut this file on an Epilog Legend with a bed size of 36x24", but your sheet size will determine your layout choices. This is also a factor in #1, as I explained.
Slice It!
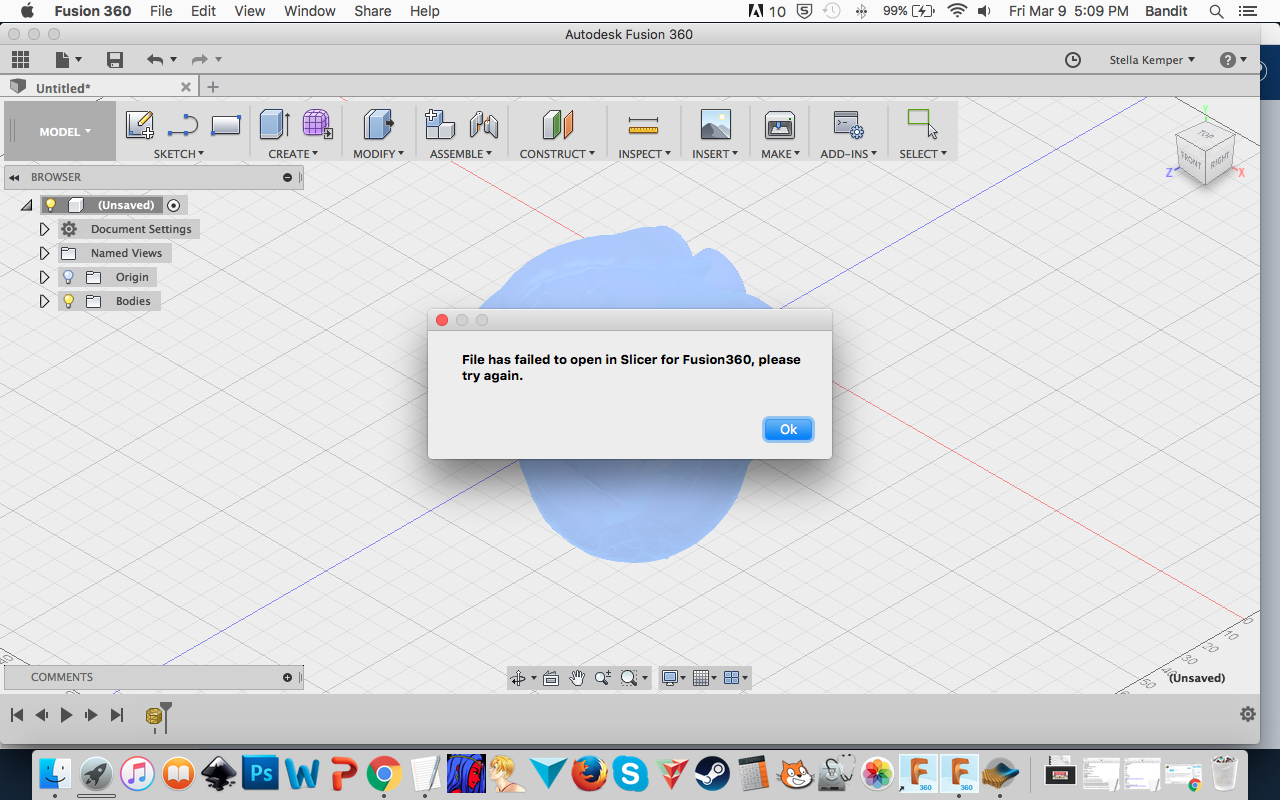


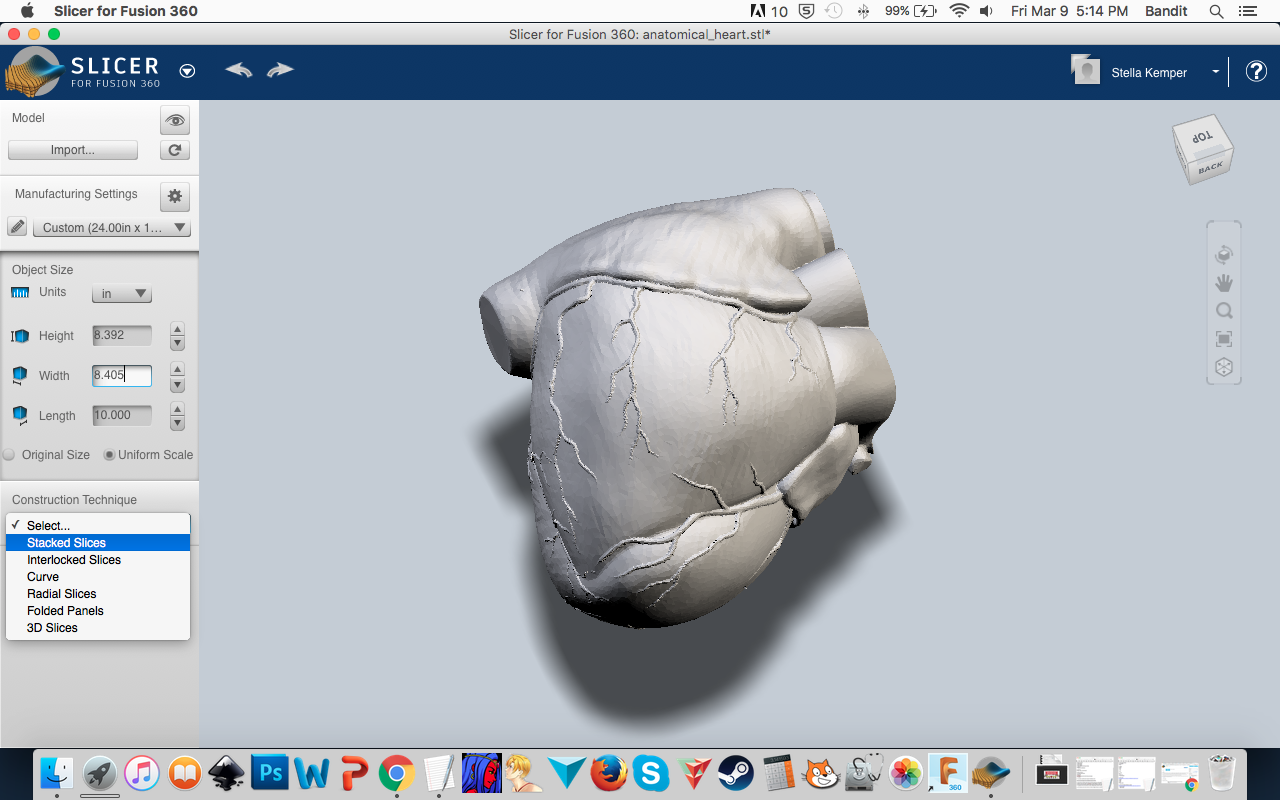
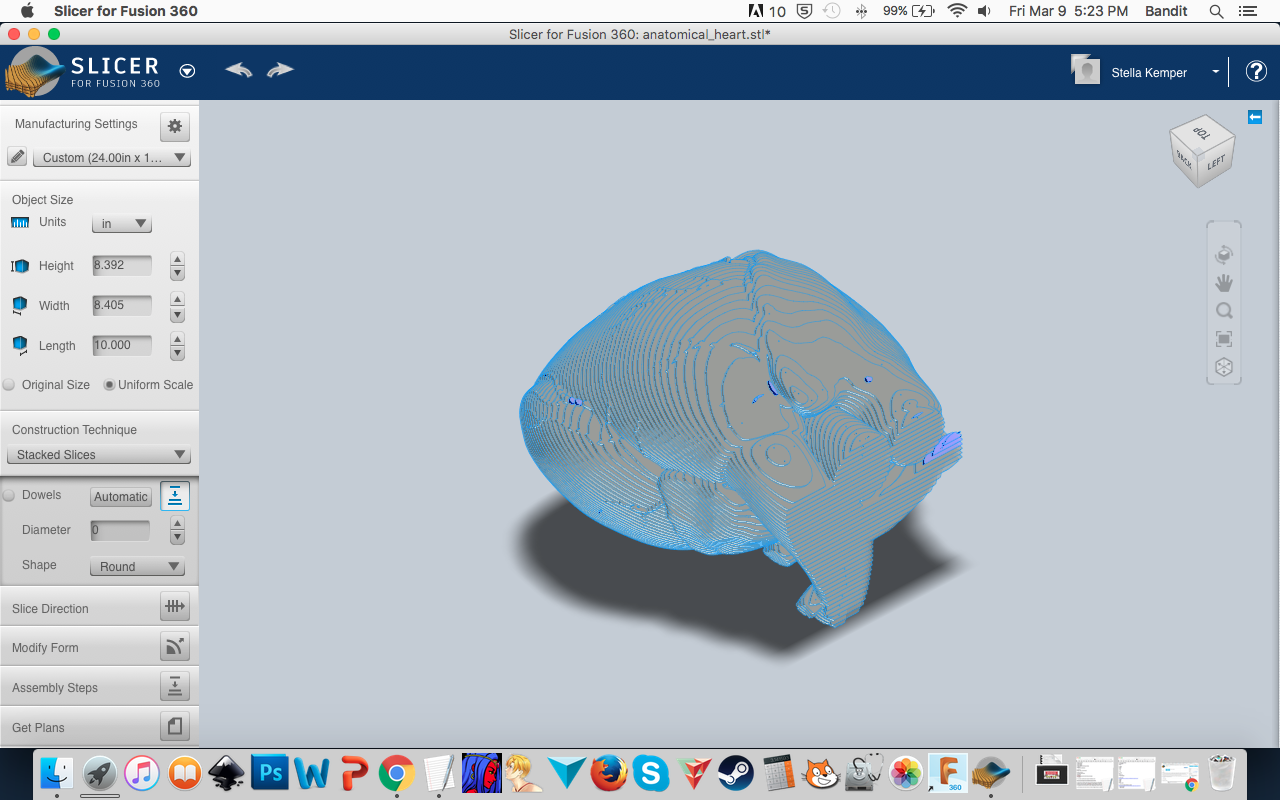
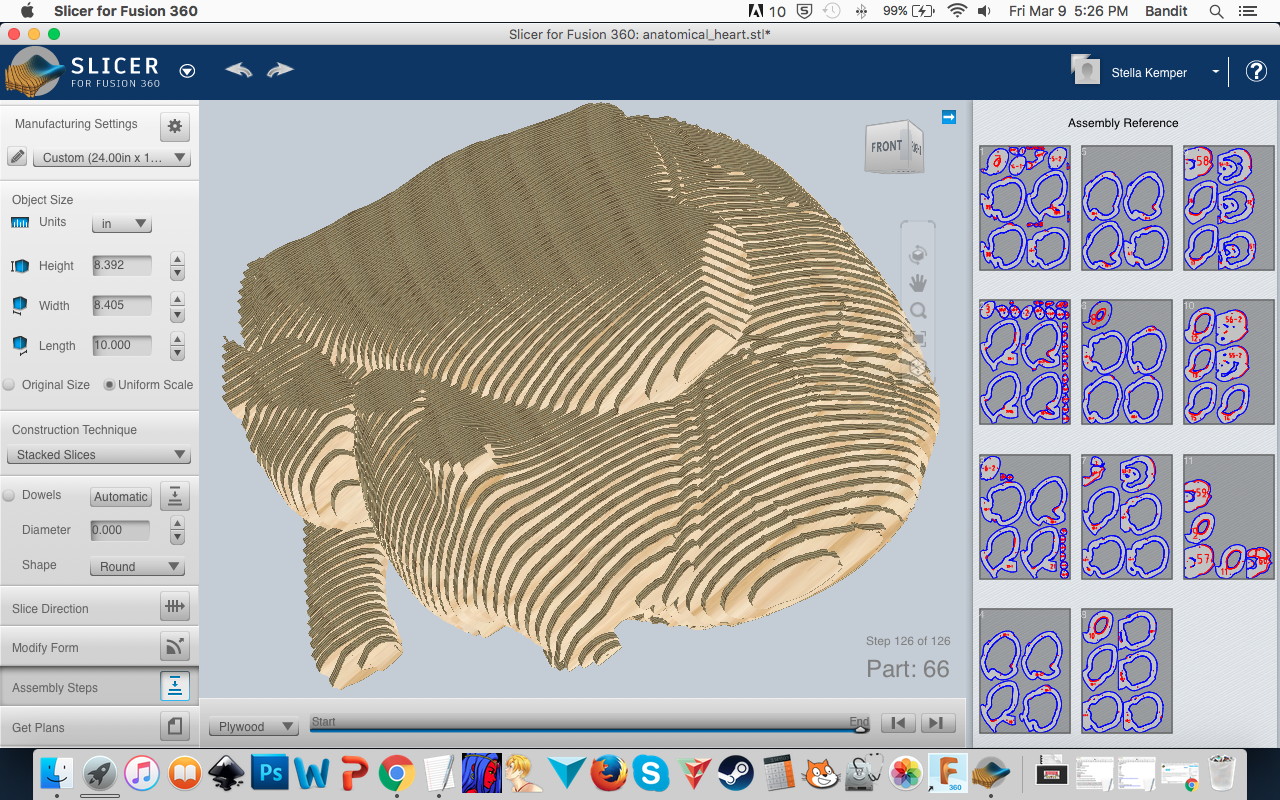
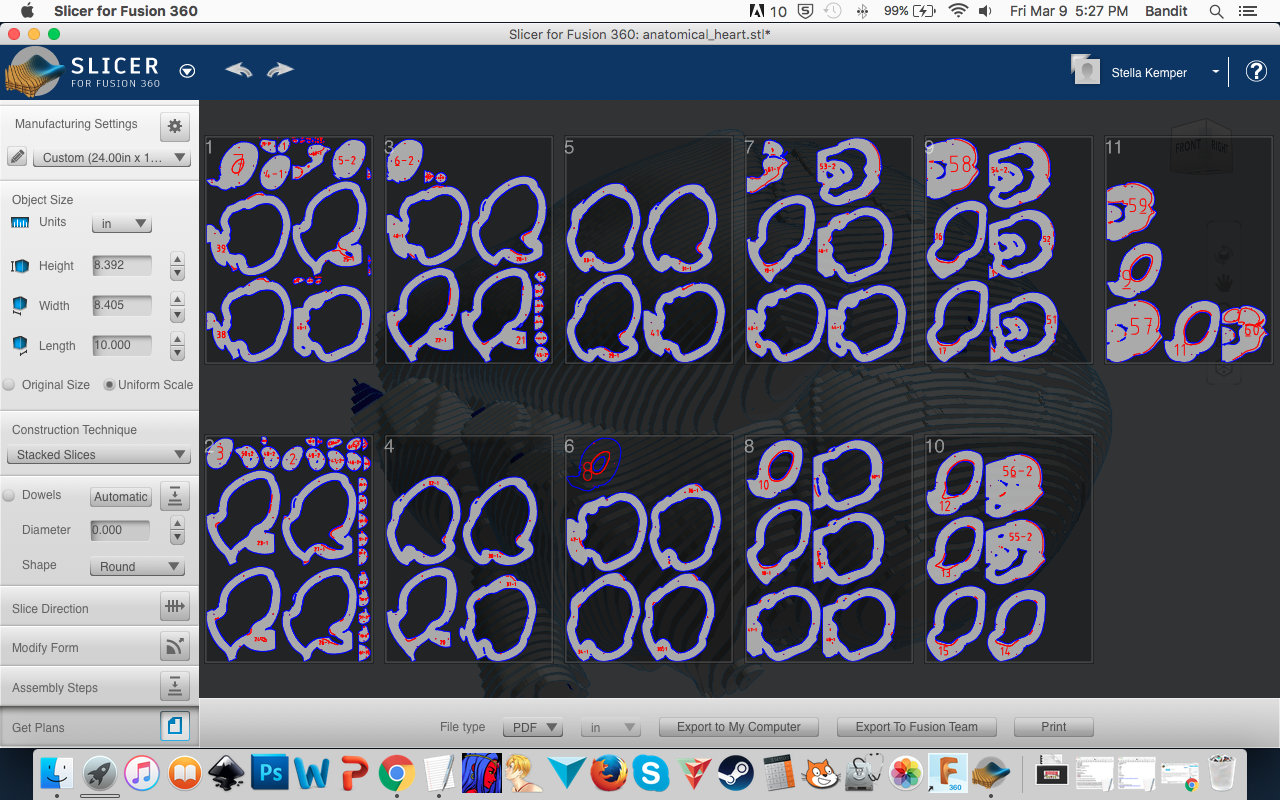
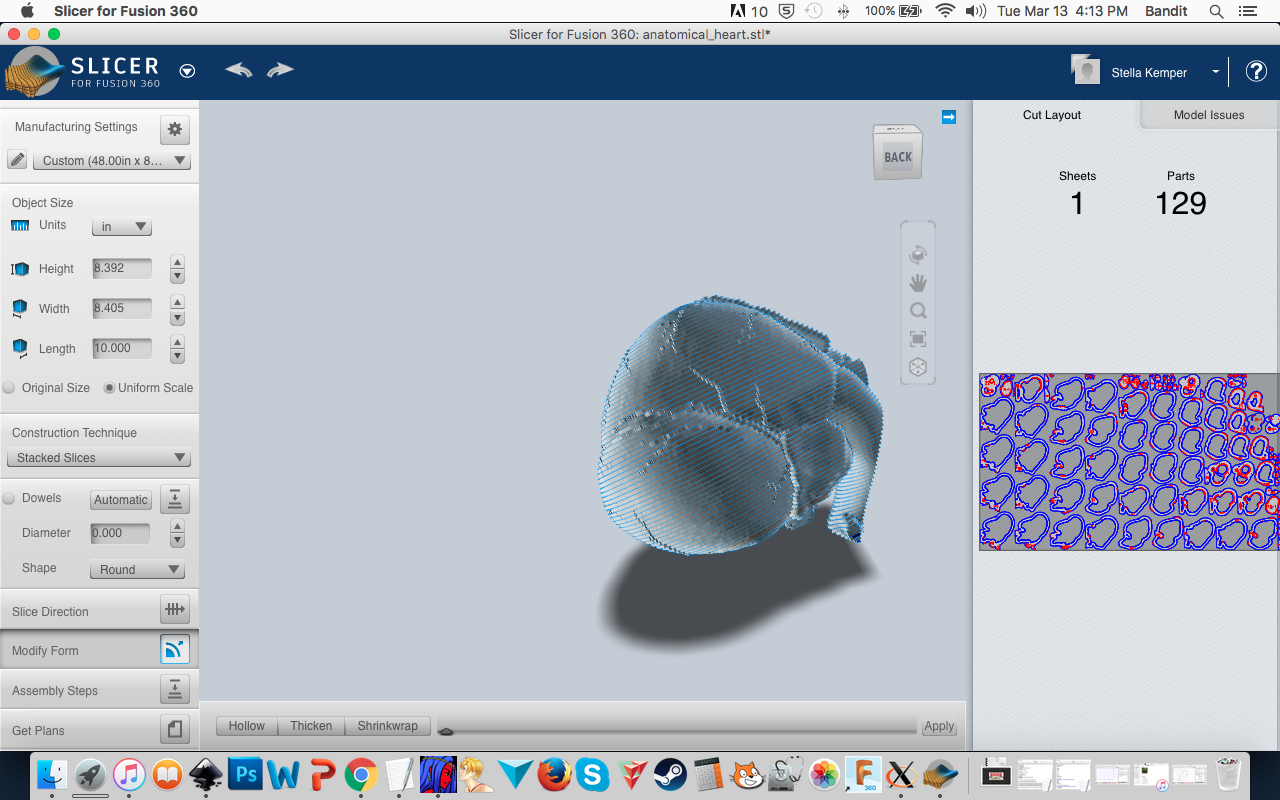
So, you can theoretically use Slicer as an app within Fusion360, where you send the file over automatically, but this didn't work for me (see screenshot for error, I looked online and apparently others have this problem and all they could recommend was trying it repeatedly until it works?). You can also open Slicer as a stand-alone application, and that's what I did here. Autodesk has a handy little quick-start guide here. If you ever used 123D Make, there is almost no difference in the interface.
NOTE: all instructions and screenshots are from MacOS version of software; I don't know if it's different across platforms.
1. Open Slicer, and import model.
2. Change your material settings on the bottom bar of the window to match your material specifications, and then click on the material settings on the left—when you select "custom" at the bottom it will save your settings as a custom setting.
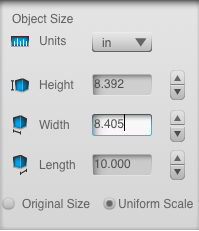
3. Change your model size to be the size you want your finished object to be. Keep in mind that this is PRE sanding, and the final dimensions will be as much as .5" smaller in diameter.
4. Select your Construction Technique—for this project, it's stacked slices (this is where setting up your material FIRST becomes important!)
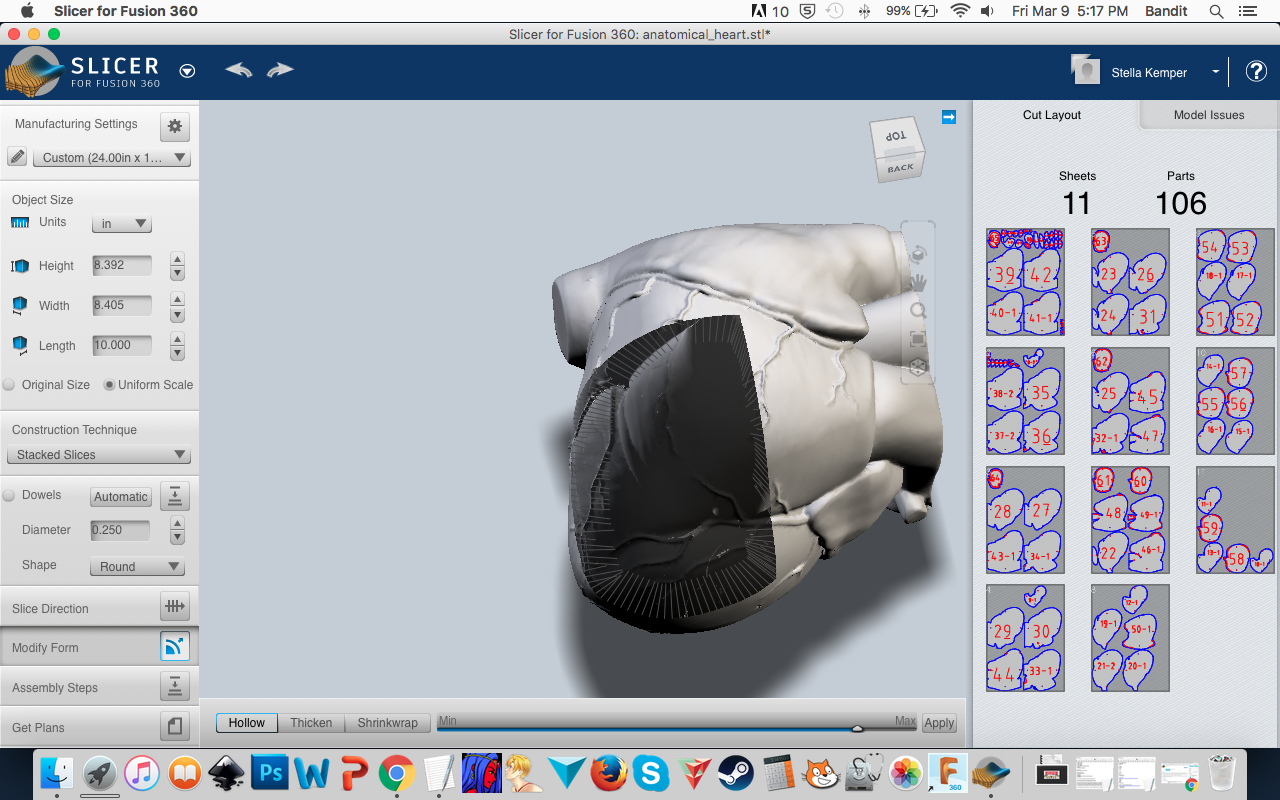
5. Select Modify Form on the left, and use the bottom slider to make your heart hollow. This is optional, but will allow you to nest your smaller slices inside larger ones and save material.
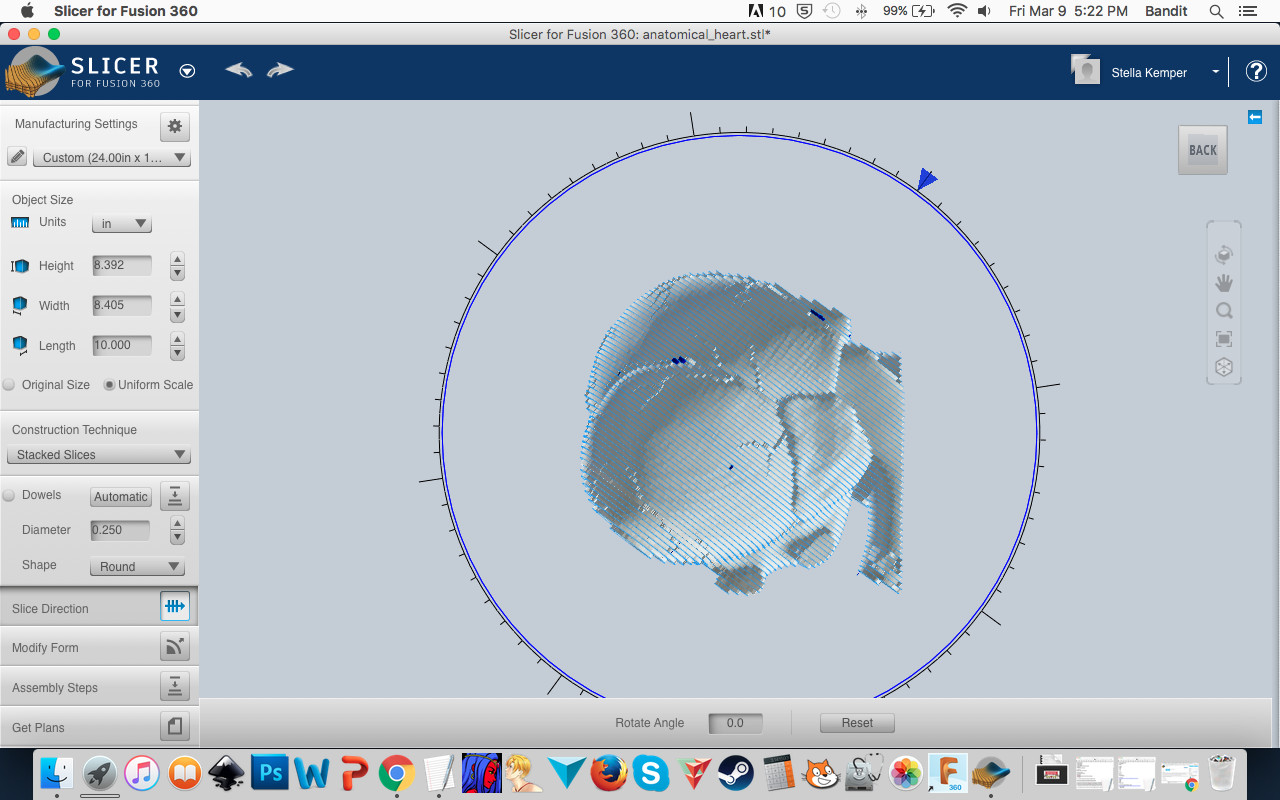
6. Select Slice Direction on the left, and use the blue arrow to change the orientation of your slices to capture the most optimal amount of detail. Note that the rotational axes are fixed, so orbit around the model with your mouse (right click and drag with a 3-button mouse, which I highly recommend for any digital design work) until you have the best view of the plane you're rotating along. You can only rotate on 2, perpendicular planes. You might want to experiment with a few different angles, and note how that changes the number of slices produced, as well. I rotated my model until the veins popped out in the best relief possible.
9. When you export your document, it will automatically create a multi-page PDF with the dimensions based on your material settings. It is easier for importing into Inkscape to, after seeing how many pages your model takes up, go back and set the sheet size to the size of all the sheets combined (ie, 11 24 x 18" sheets become 1 48 x 108" sheet, down to 48 x 80" sheet since there is more efficient packing with a larger sheet). The benefit of this is that, since you'll be rearranging them all anyway (if you follow the next steps), you only have to import 1 document into Inkscape instead of each sheet and don't risk duplicate shapes. Another benefit to this, is Slicer automatically sorts with the smaller shapes to the right, so pairing up shapes to nest is easier with this method.
8. Select Assembly Steps to preview your cut files and assembly, and then Get Plans, and on the bottom bar select your export settings. Make sure the units you choose are those consistent with the dimensions you set for your model (ie if you sized it and your material in inches, make sure to export in inches!). I recommend a PDF filetype to easily transfer to Inkscape in the next step.
Downloads
Edit Layout
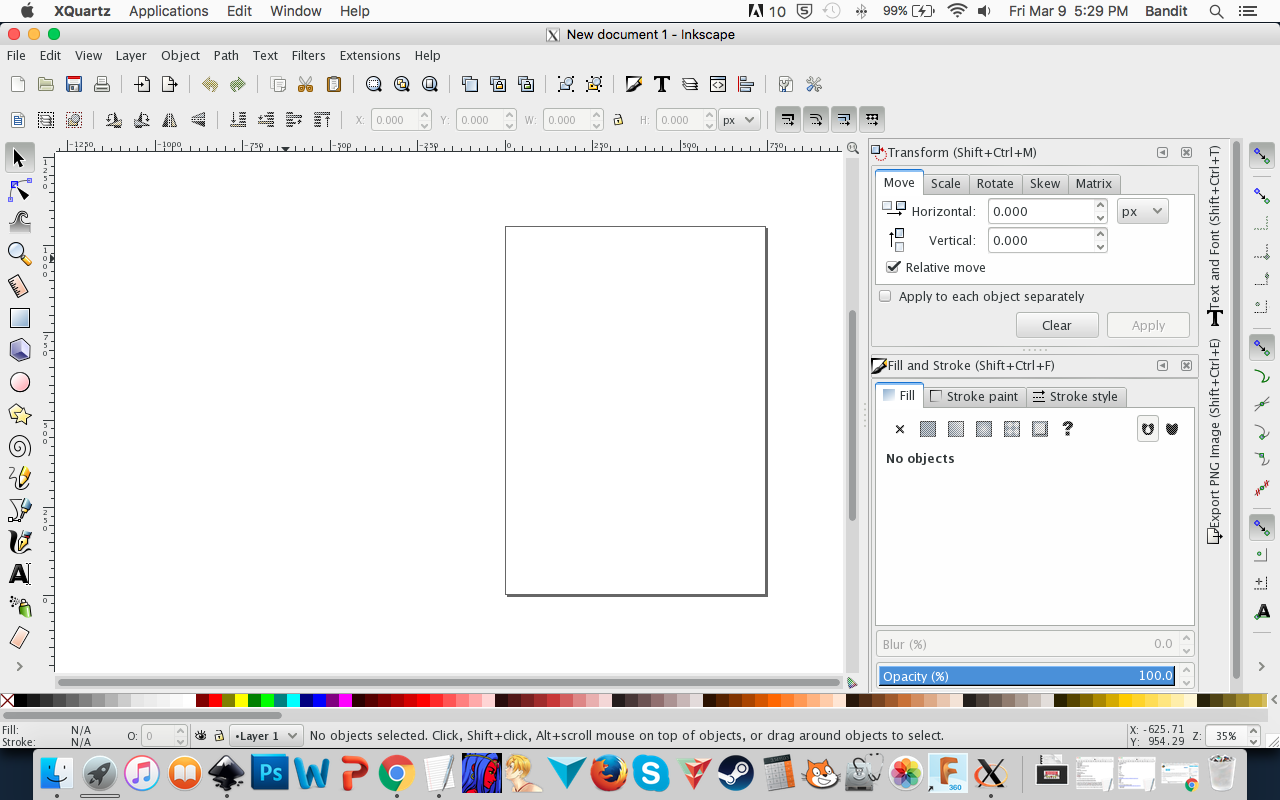
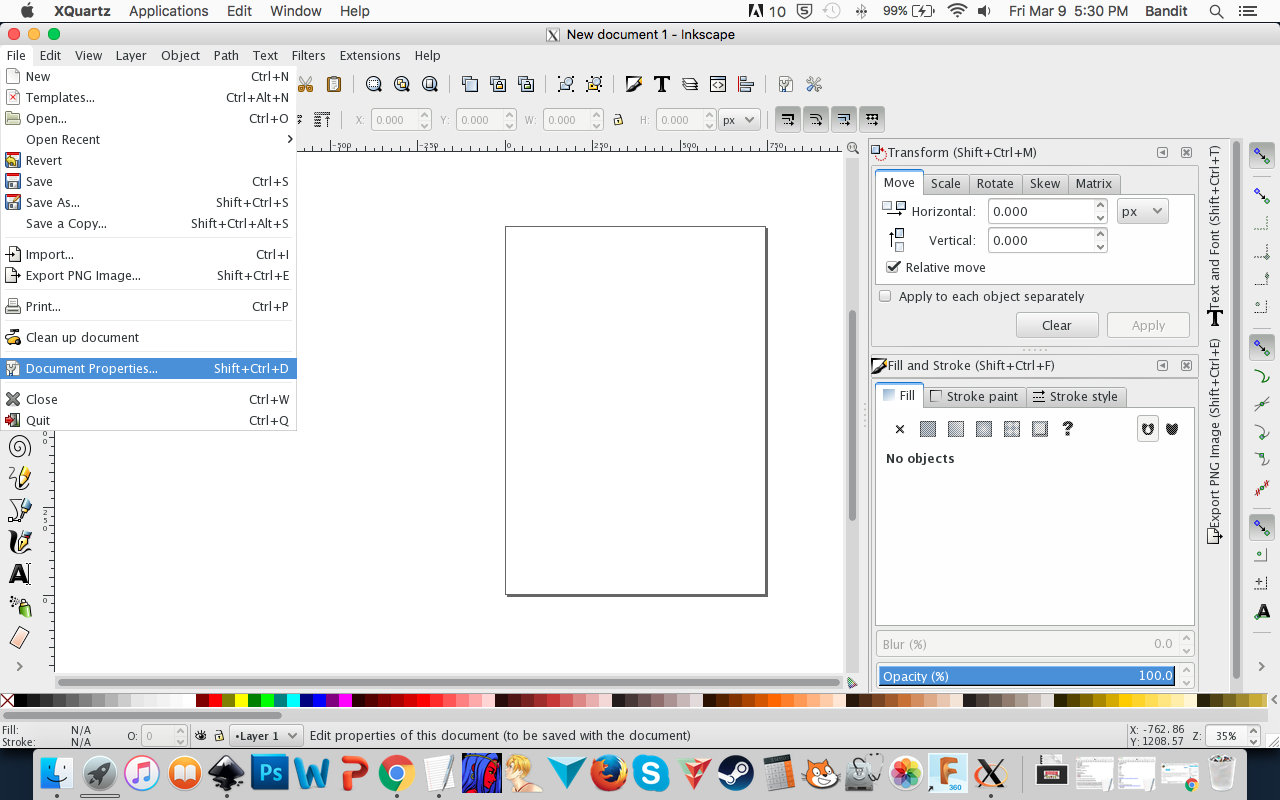
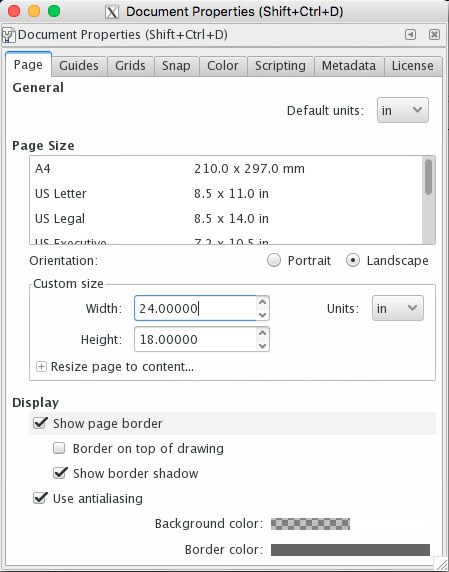
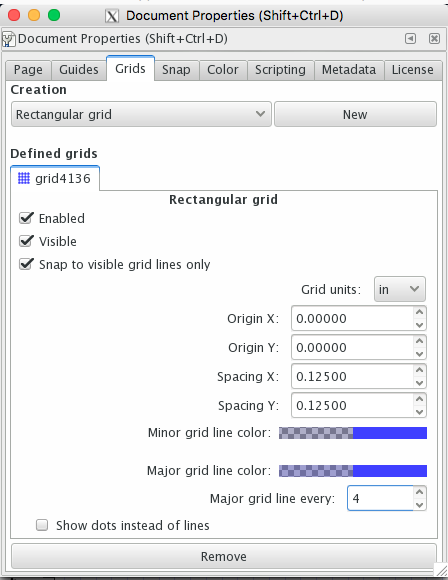
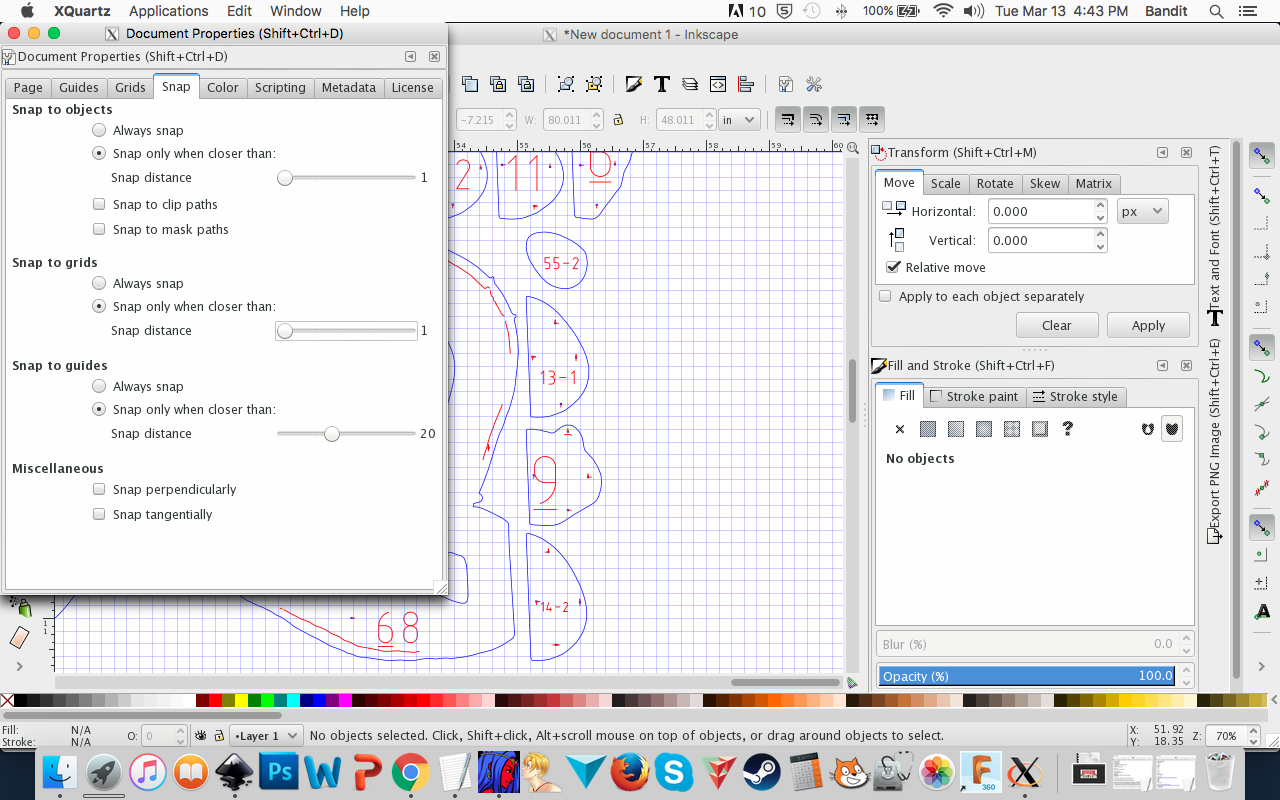
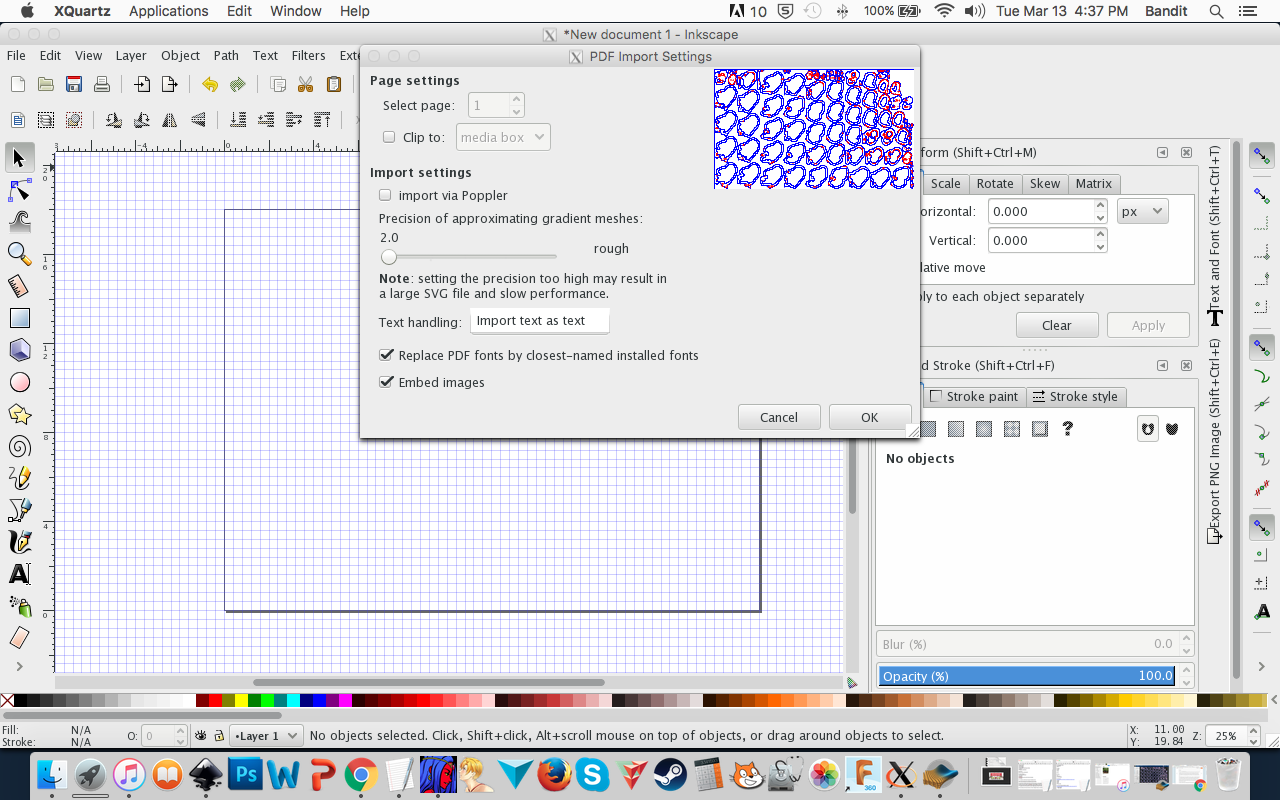
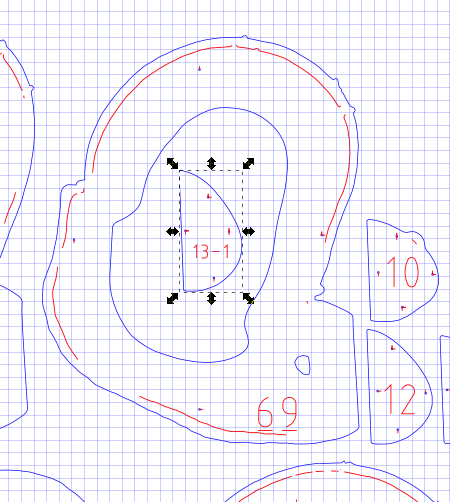
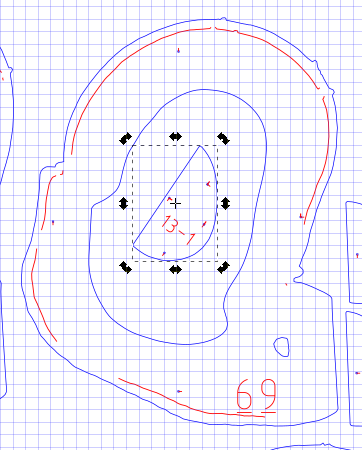
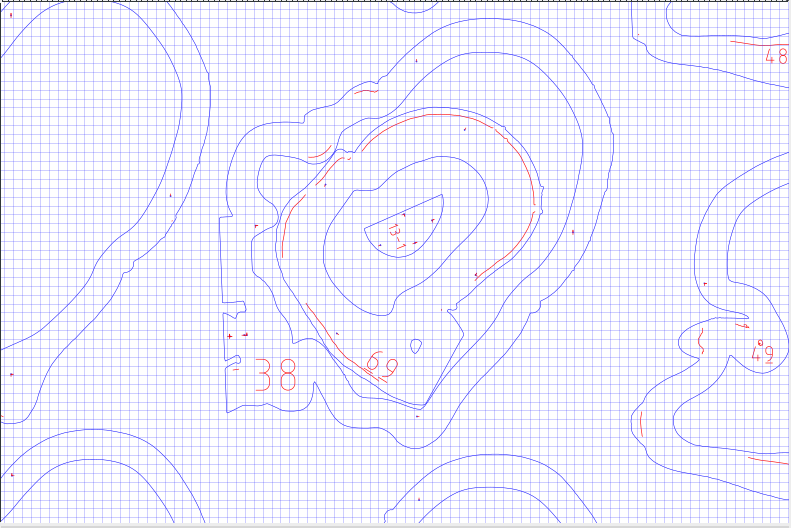
To arrange your pieces for maximum material usage, you should consider nesting your smaller slices inside your larger slices. I don't recommend flipping the slices, even if it helps them fit together better, because it will get pretty confusing later on when you have a hundred slices. I suggest a 1/4" border on the sides of the sheet as well, to make sure you don't accidentally engrave your rulers, cut off your file, or scorch the edge of your sheet.
1. Your first step should always be to set up your document. I recommend changing your units to the real-world units you're using (inches, in my case), changing your document size to your "print" size (24x18" for me), creating a grid with 1/8" spacing, and eliminating snapping to objects or grids (since you shouldn't want any overlap of your lines).
2. Now that your document is set up, you can import your file.
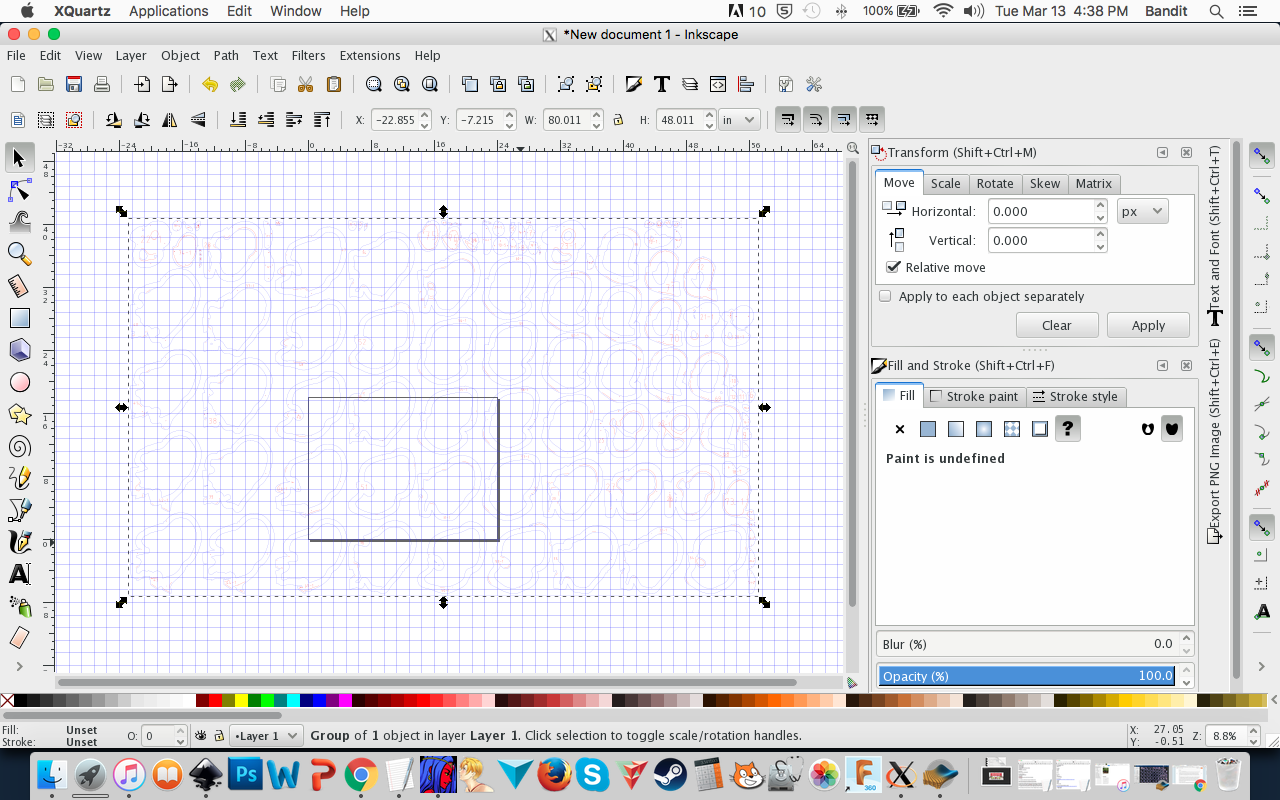
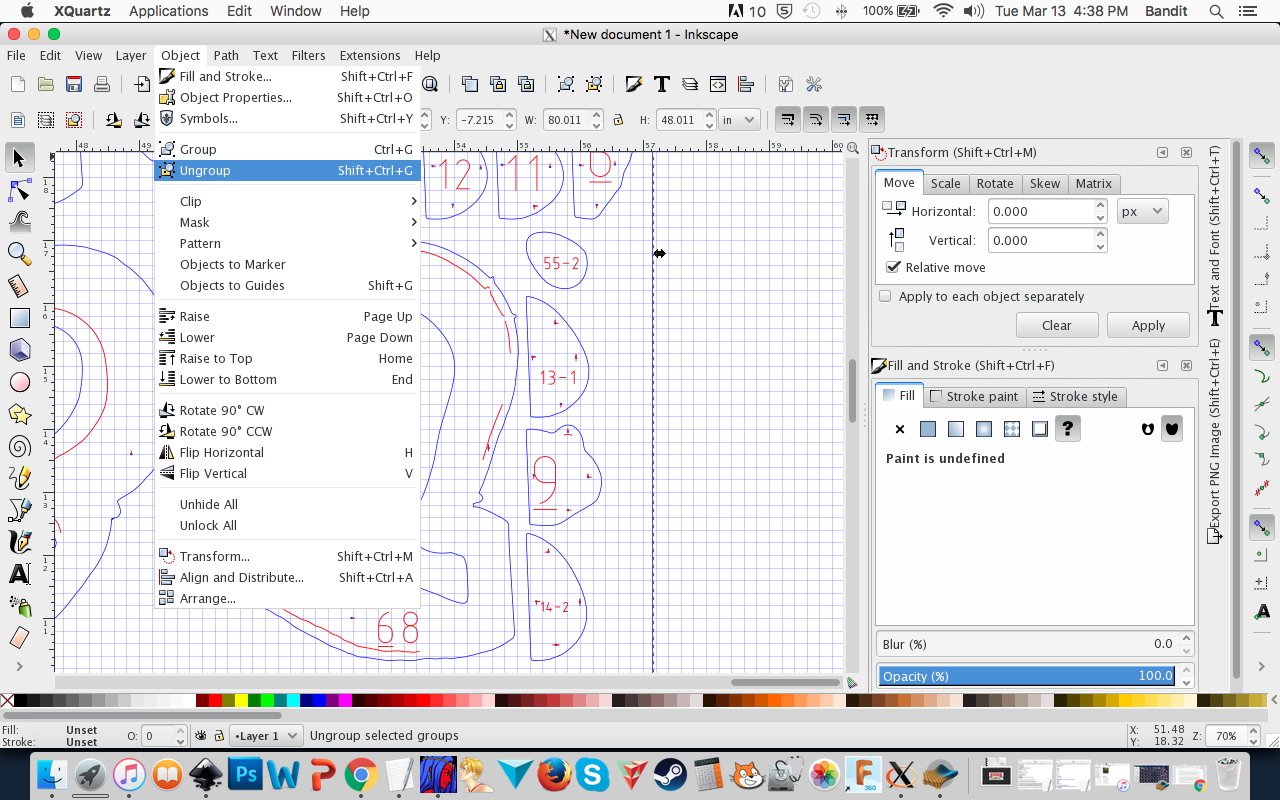
3. To start the editing process, first you'll need to ungroup the files, which will all operate as a single object at first. Select "Ungroup" from the "Object" drop-down menu at the top of the screen. You may need to do this a couple of times. Don't ungroup so many times that the inner and outer lines, number tags, etc. for each slice come ungrouped!
4. Delete the page outline.
5. Start from the far right side of the page, with the smallest pieces. Move them into the insides of the larger slices, rotate as needed for ideal positioning. Some you can maybe nest 3 at a time.
6. Once you've condensed your slices as much as possible, move all the slices outside your document area. If needed, change the stroke thickness temporarily by selecting all with ctrl+a and changing the "stroke style" under the "fill and stroke" menu. Arrange pages with the maximum density of slices one at a time. When you have a page arranged, select all in the page, group it, and move it aside.
7. Before this next step, save your file as an svg. Delete all the pages except the one currently in the document, reset line thickness to .001 (will read as Hairline in Corel), export as a pdf called "___ pg1", undo your delete and re-export with the next page, repeat until you've exported all the sheets you have.
TIPS:
While CorelDraw has been used at both makerspaces I've used to run the lasers, in both situations the amount of time I could spend designing on Corel was limited. For my personal design work, I use Inkscape. It's helpful when you're transferring from Inkscape to CorelDraw to first export your Inkscape files (SVG format) as PDFs. When you do so, make sure you export all of your text as curves, otherwise when it is replaced with a known font in CorelDraw it may be either too big or too small to be visible on your pieces, or could otherwise wreak havoc. Once you do this, the text will no longer be editable as text, since it is now read as plain shapes, so check for typos before exporting. I usually keep my SVG as a 'master' document to edit for future versions if needed, and treat my PDF exports as snapshots.
I always suggest setting up a document and then importing your files into it. The benefit of this, over just opening your document, as that if your editing goes awry you can always delete it all and re-import the original, no harm done. Also, if you LIKE your edits, you can save it as a new version while preserving the original, and if you hit save out of habit it won't write over your original.
DON'T change the colors of the lines—we'll use these for color mapping our cuts in the next step. If you're not capable of color mapping with your laser, or unsure of trying it out, *AFTER* you've done all your page layouts you can ungroup everything, select everything red in an individual page and group it, and change it to black. Then do the same for the blue lines in that page. Repeat with the other pages as you export them. This will let you easily select one group at a time to cut at different power levels with your laser.
LAZER TIME
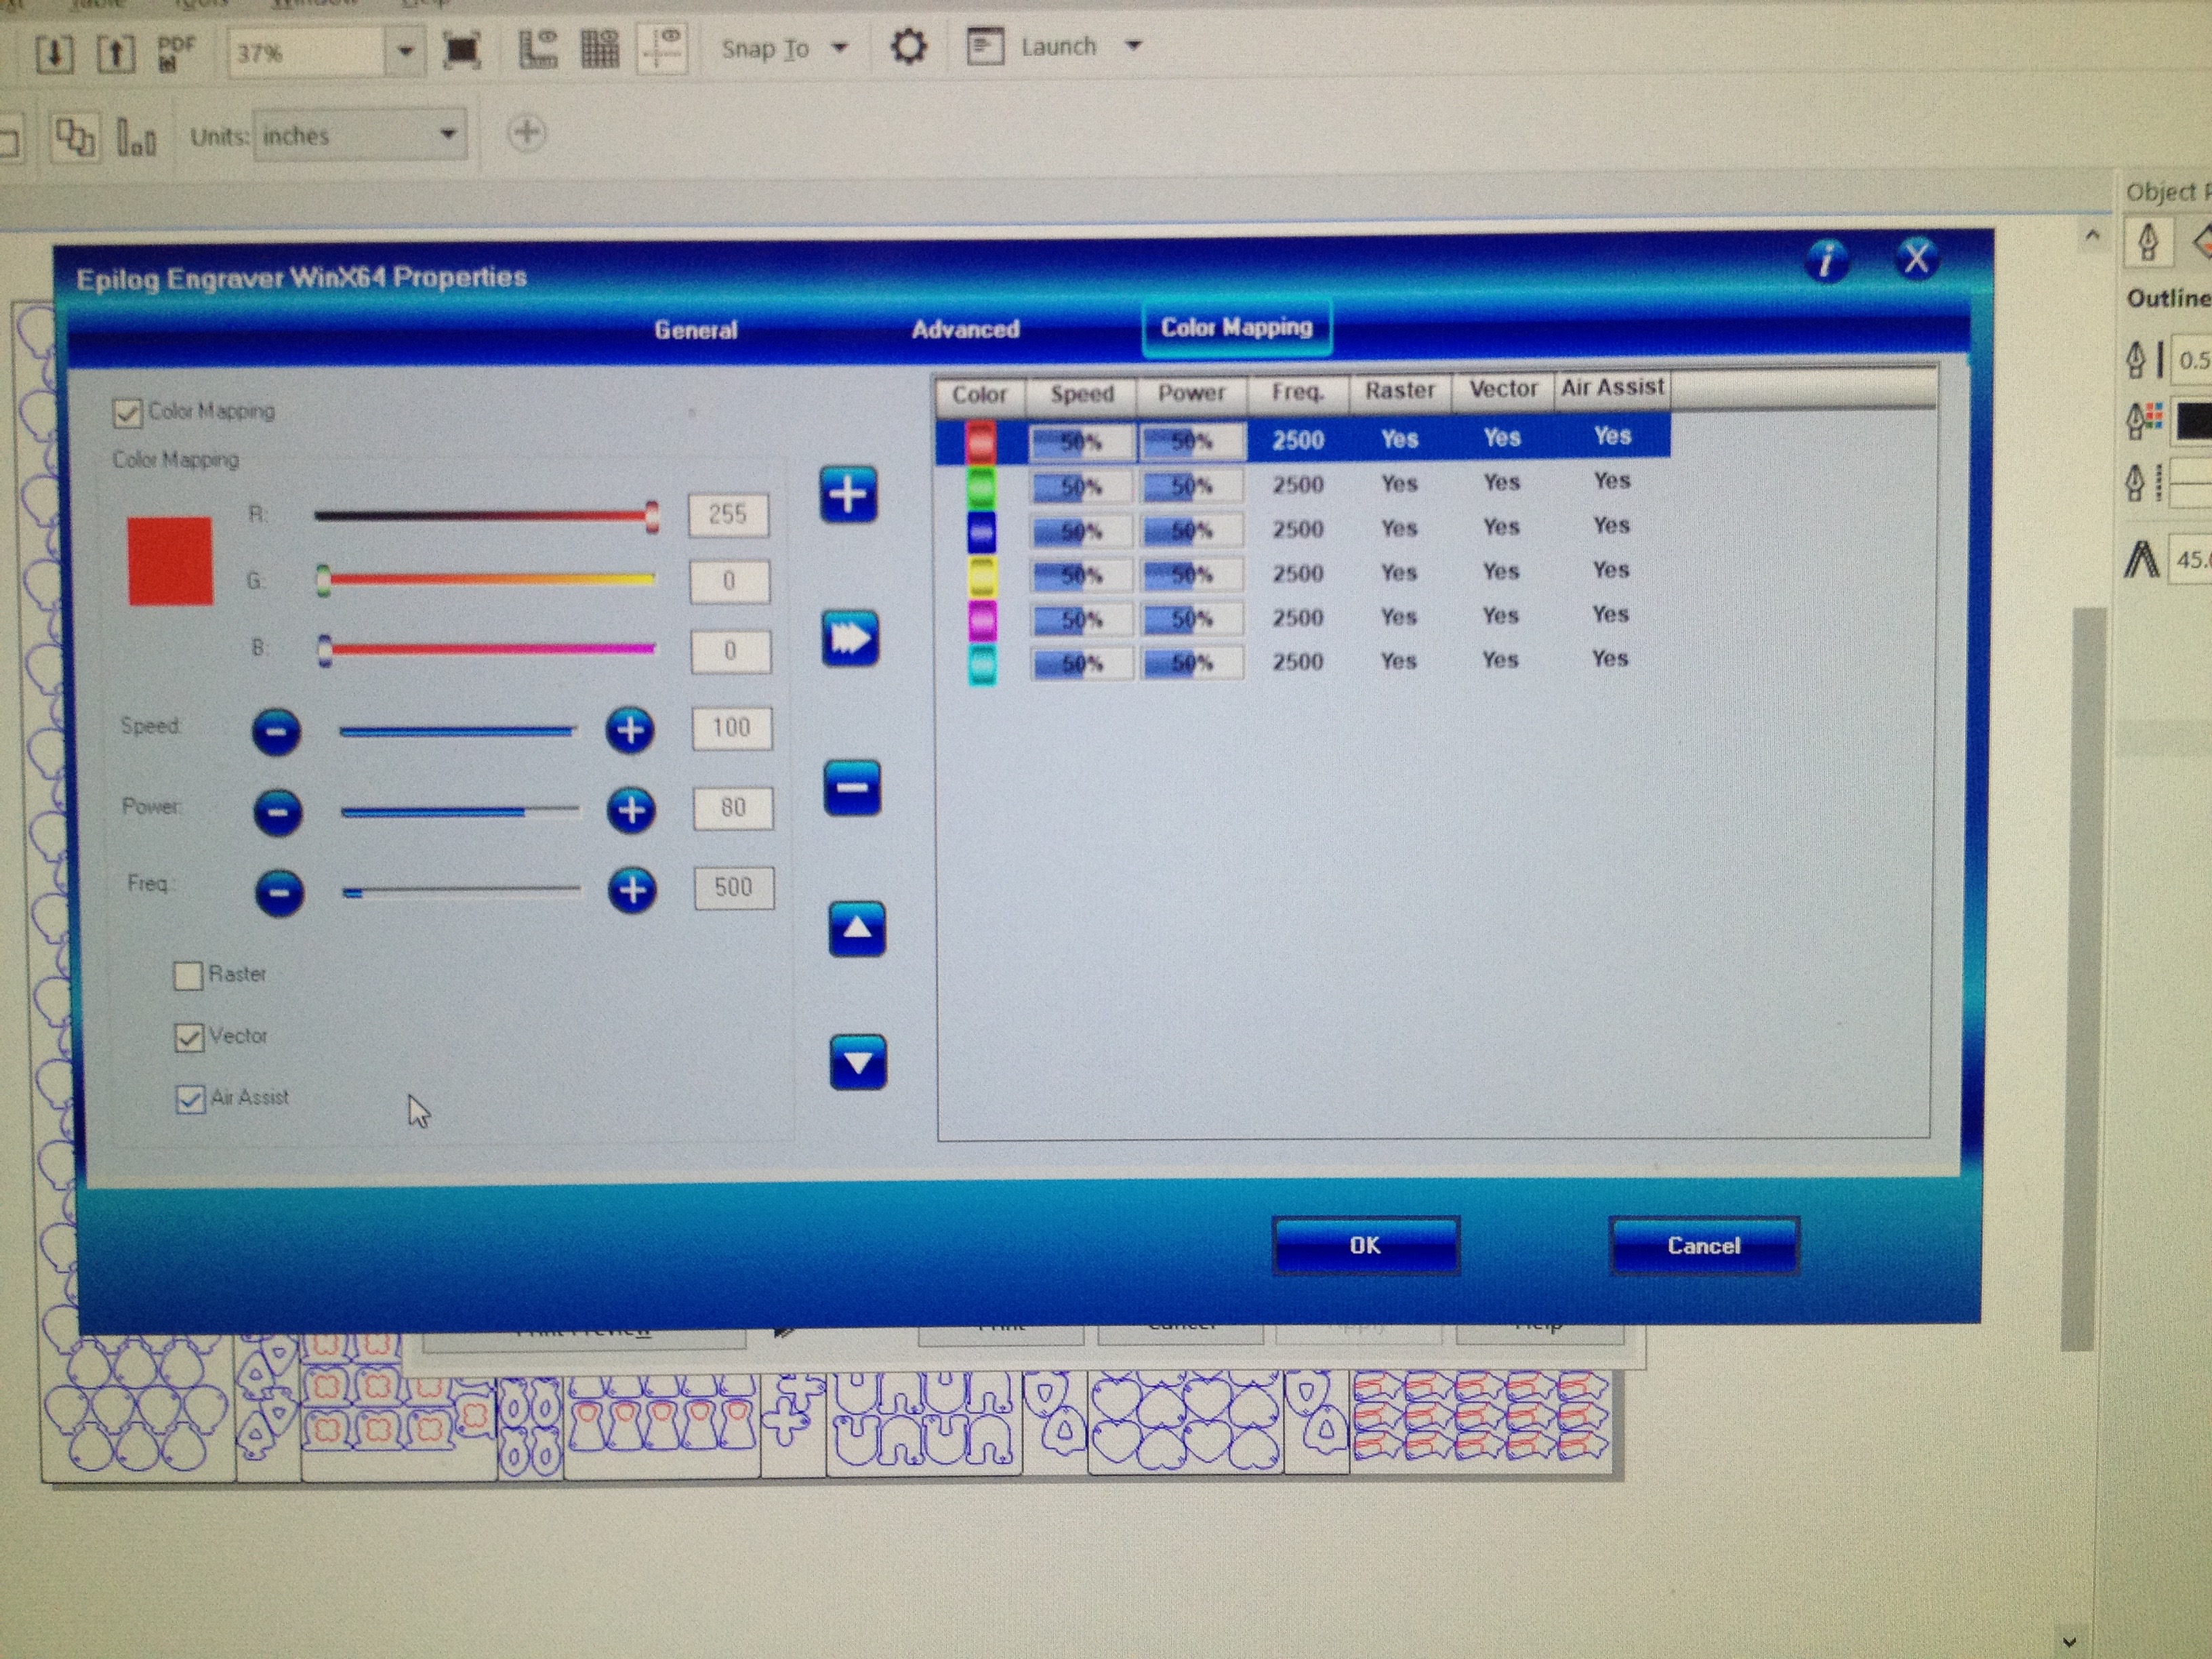
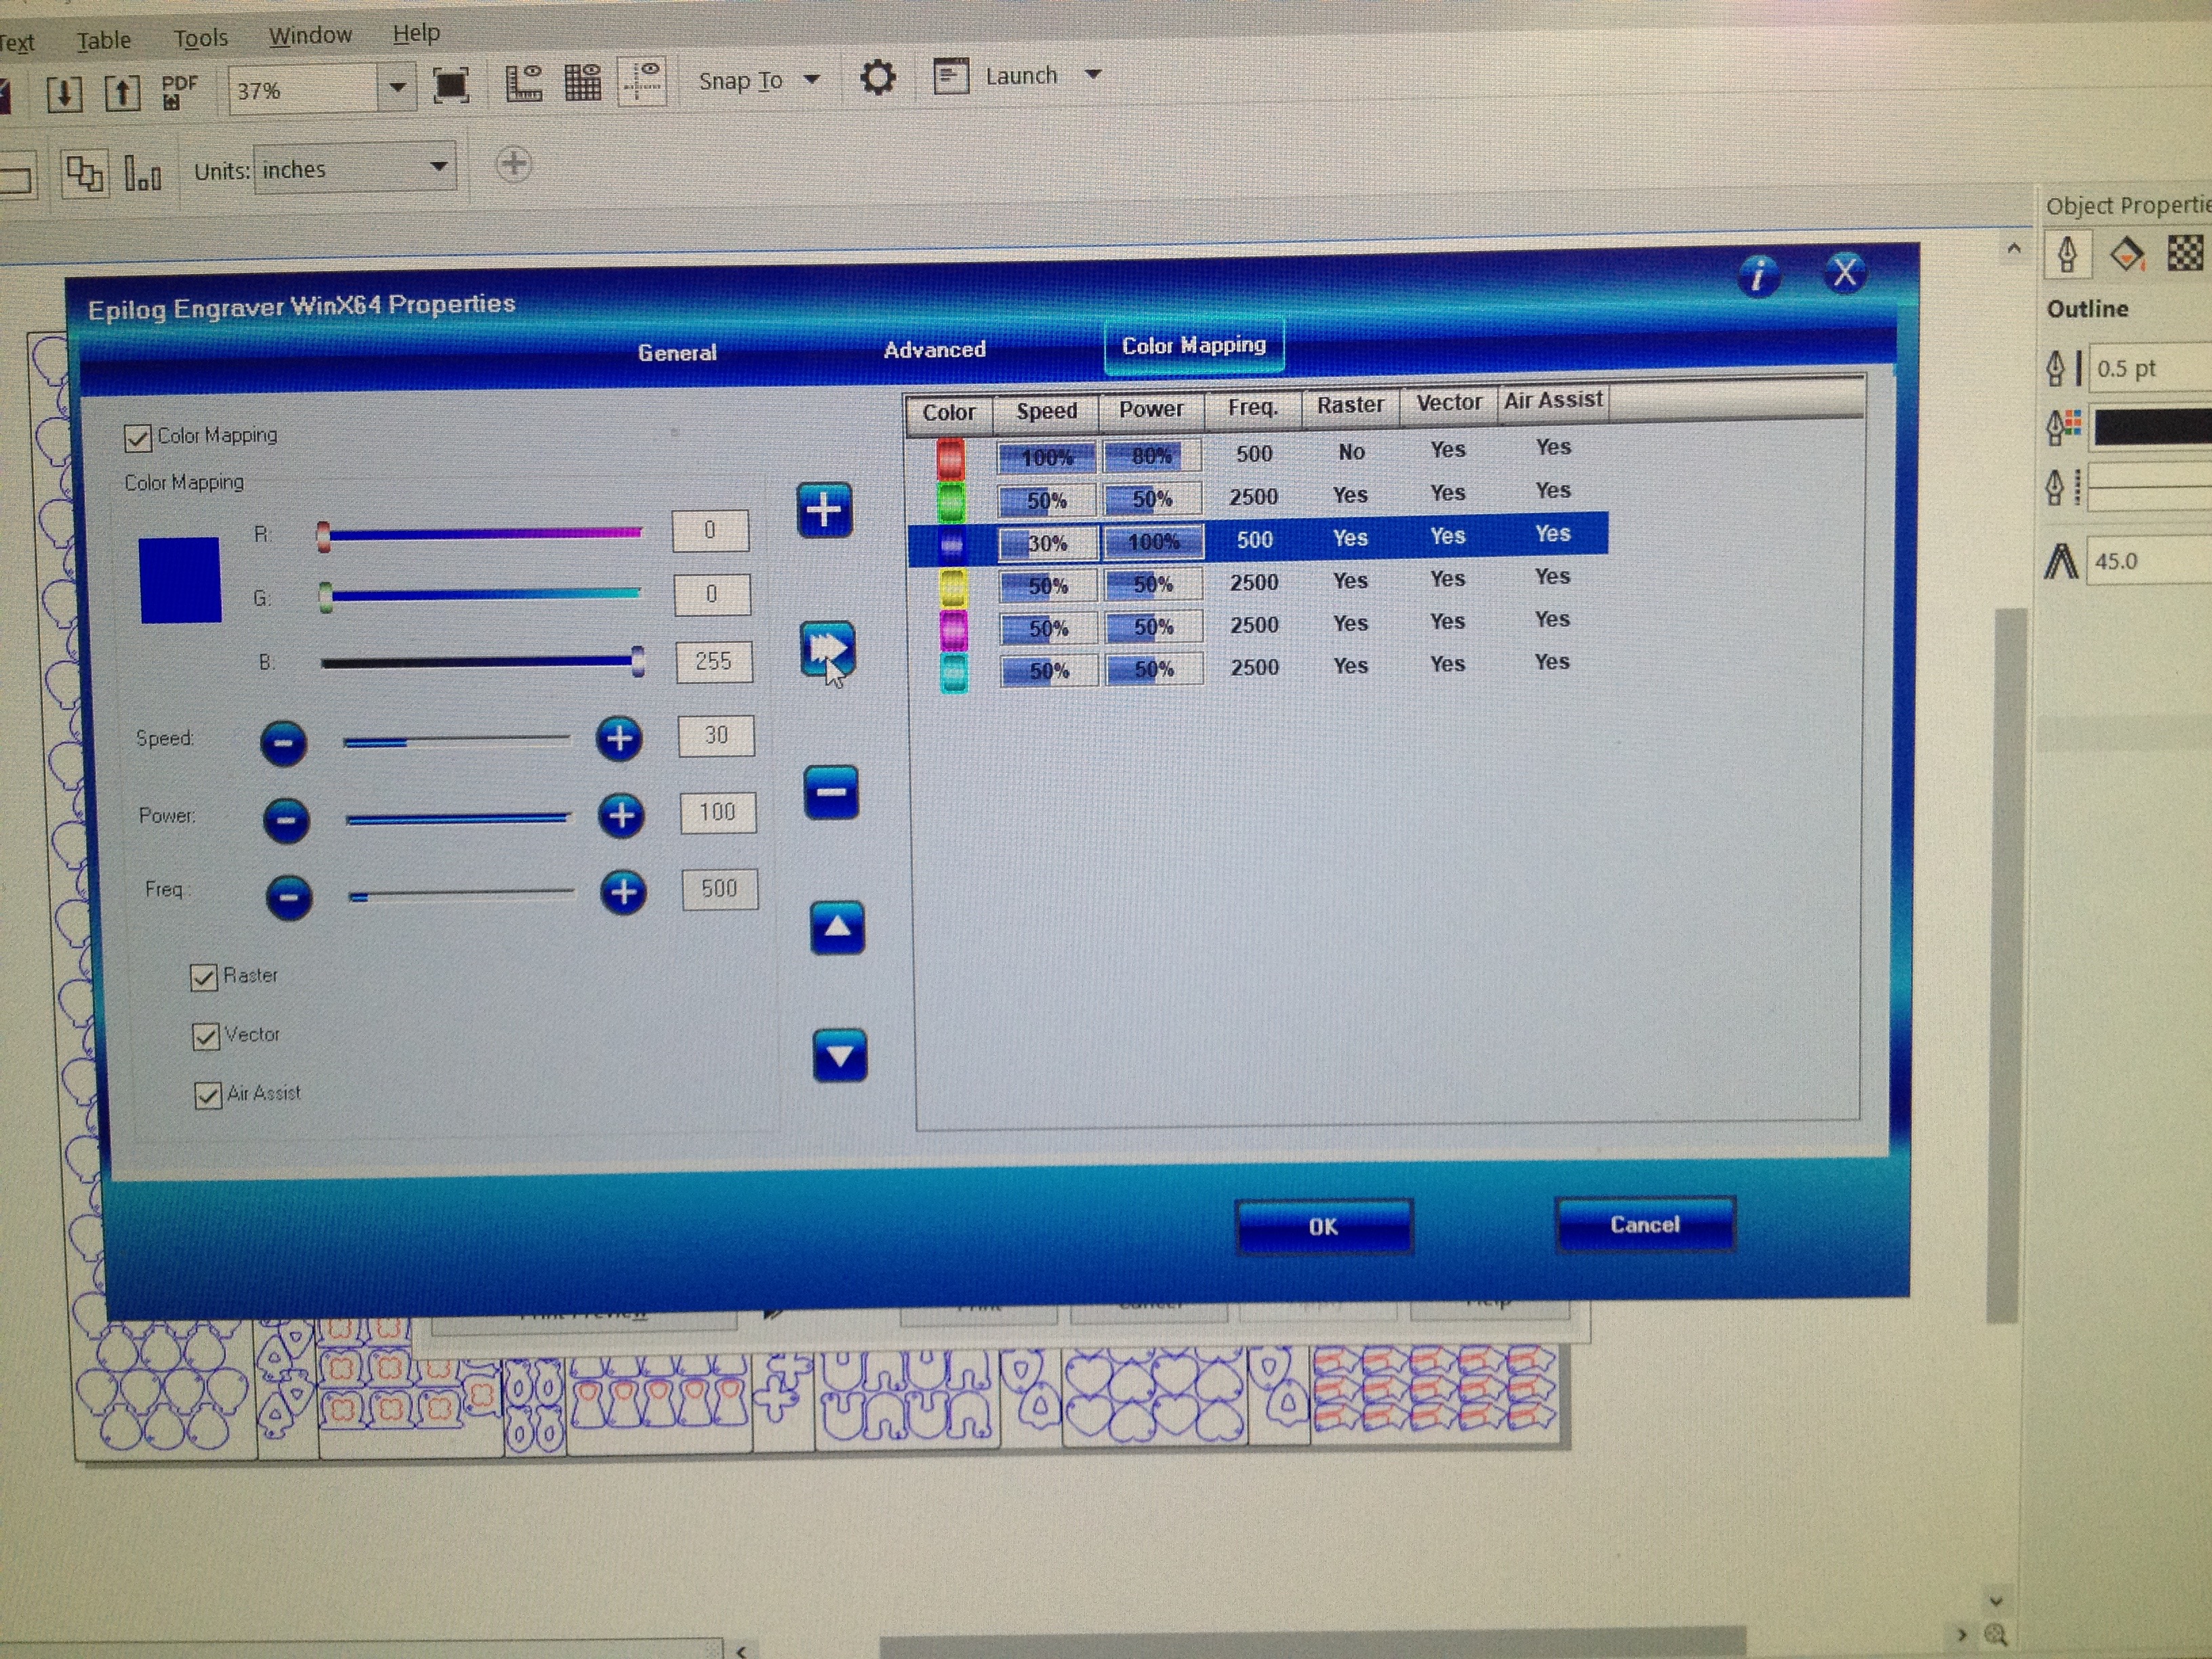
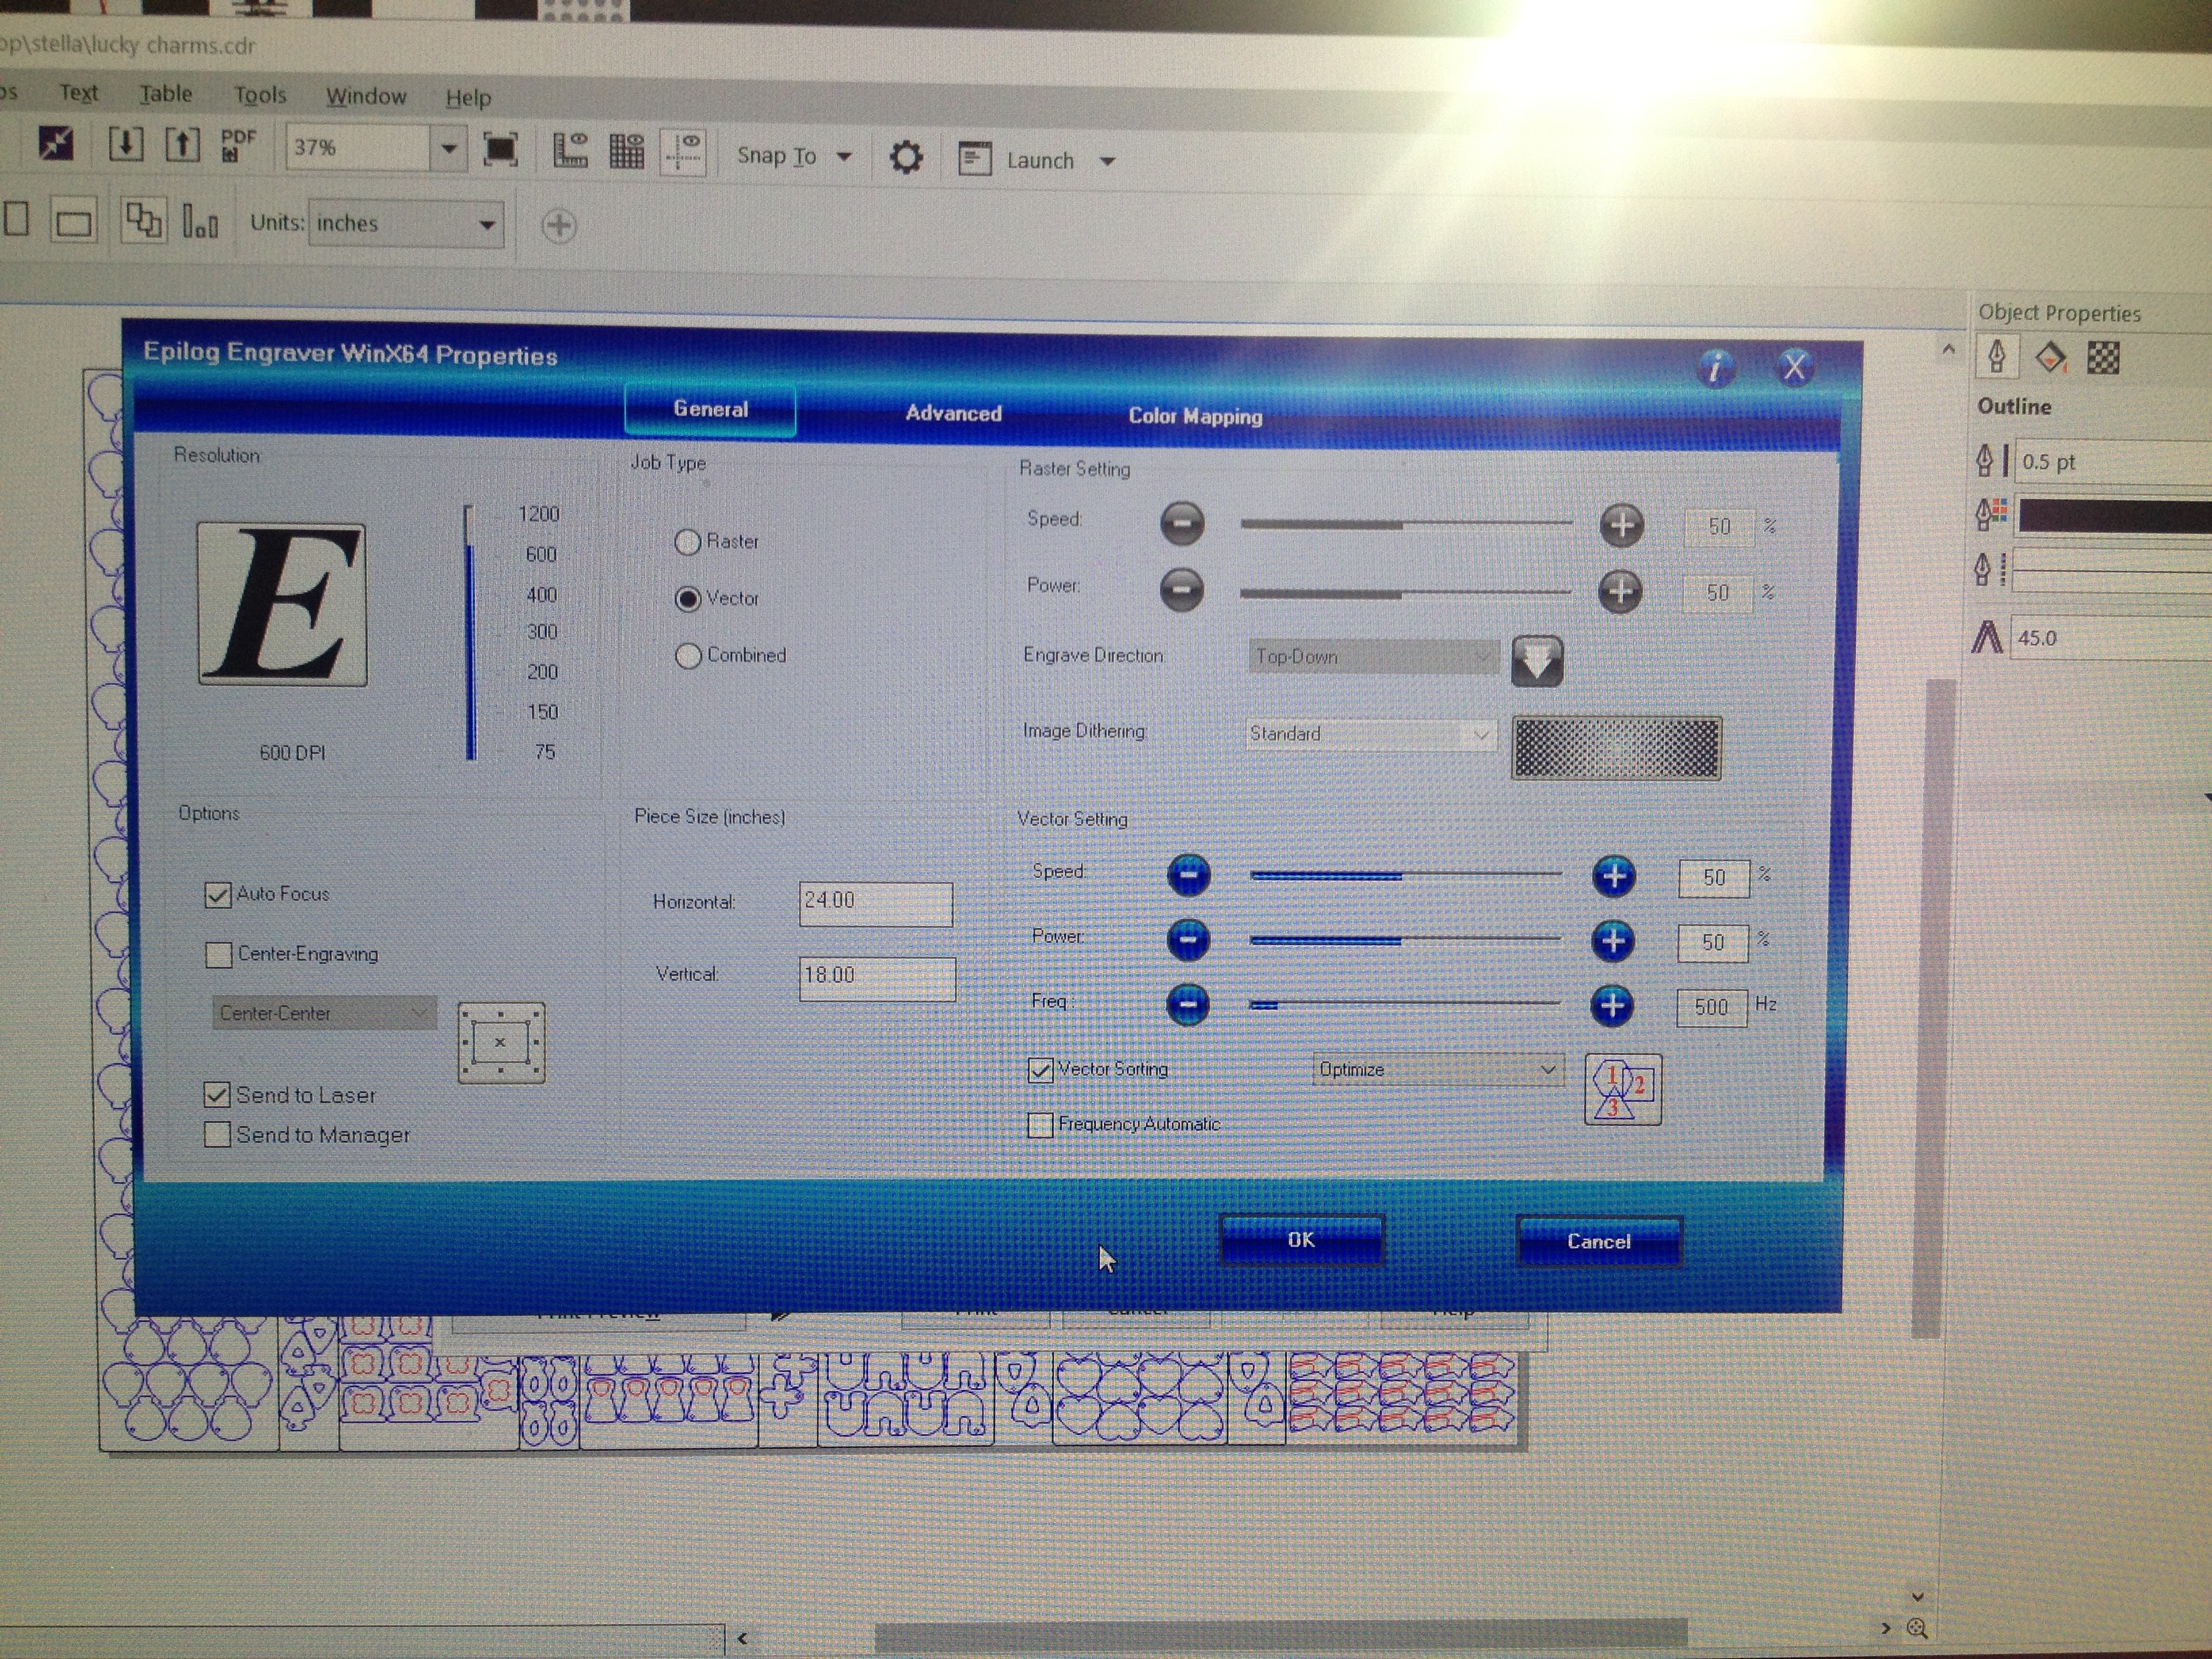
I will give you information on using an Epilog laser. The pics/screenshot shown are from using an Epilog Helix with a 24x18" bed, so slightly different from the larger machine I used to originally cut the heart (the Helix is the laser I currently use at the Auburn Makerspace in Auburn, WA).
First, open a new document in CorelDraw (the recommended software to use to cut with an Epilog laser). Immediately set your document size to the dimensions of your pages/cutting bed, and ensure your units match with those you were designing with.
Next, import your first PDF. Make sure it is centered to your page, more or less.
Color mapping is a very useful feature that will allow you to attach different settings to different colors. Go to File—Print—Print Preferences—Color Mapping to set this up. In the color mapping menu, you have to click the check box at the top before it will let you start making edits.
The values I recommend for cutting through 1/8" Baltic Birch plywood is 30 speed/100 power (go down to 25 or 20 speed on a warped board, or a laser that needs to be cleaned or has a worn out tube), 500 frequency. Select these values for the color blue, and make sure that air assist and vector are both selected. To apply this setting, click n the arrow to the right of the settings. After clicking the arrow you should see the settings updated on the right side of the window. For the red settings, select vector and air assist, however go with a speed of 100 and 80 power, 500 frequency. This means the red lines will engrave, so your pieces are helpfully marked, but those markings can be sanded out later. Click the arrow to apply the settings.
Returning to the main Print Settings menu, make sure the document size is the same as the page size you set in Corel. Make sure air assist and auto-focus are on. DPI should be 600.
The benefit of this method over changing the red line thickness to slightly larger and raster engraving these markings is that you'll save a lot of time; the downside is that rastering is always safer if you're afraid of cutting too deep. If you choose to go the route of raster engraving your red markings, then you can go ahead and select the red group and change the line thickness to .5 pt, and change the color to black. Change the blue lines to black, and make sure they're a hairline thickness. My recommendation for raster settings to engrave the red group is the same, 100/80.
To save your settings when you're finished, click "Apply," or just "Print" if you're ready to cut.
After your first sheet is finished, delete your page and import your next page. Center it and double-check your line thicknesses and you should be ready to go without redoing the settings. Repeat for all sheets.
TIPS:
1. The rulers on the top and sides of the laser bed can be used as clamps, however, if your cut doesn't burn all the way through the first time (which is common when you're vector cutting a whole sheet, due to small variations in the wood from resin pockets, patches, warping, etc.), if you move your sheet the TINIEST bit you will never get it re-registered ever again. This I promise you. SO when you're vector cutting a whole sheet at once, I recommend getting a nice flat sheet and just snuggin' it up into the upper left corner so you won't have problems.
2. If all you have is a warped board (and even an uplift of 1/8" is PLENTY to mis-focus the laser enough to not cut through), I suggest cutting one half of a sheet at a time, weighing down the other side with something heavy that won't snag the x-axis carriage (which while cutting sits only a couple of inches over the wood). Steel plates, carefully cleaned so they don't leave an oily or grimy residue, work well, but I also use hammers, tin snips, and other heavy, flattish tools. To cut a half sheet at a time, I usually just save my file, delete the left or right side, cut it, then ctrl+z (undo), delete the other half, and cut the 2nd half. DON'T SAVE while doing this.
3. The ratio of speed to power is more important than the exact settings with the Epilog; with that in mind, set the ratio so it will always be cutting as fast as possible. This will reduce the use-time on the laser, air compressor, and exhaust, and depending on how you pay for your laser time can save you some serious money, and at least time.
4. The Epilog print window in CorelDraw can be a little disorienting; I like to think of it as a clock face, and I always start at "6," with the page size, and then work my way clockwise.
5. Try to sort scrap from your slices as you go. Remember that you will have about 100 slices, so the scrap can really get it the way.
I'm including a handy checklist to print out and keep by your Epilog laser that I made for my makerspace, including the standard recommended settings for 1/8" baltic birch plywood, which is what this heart was cut from!
Downloads
Assemble!
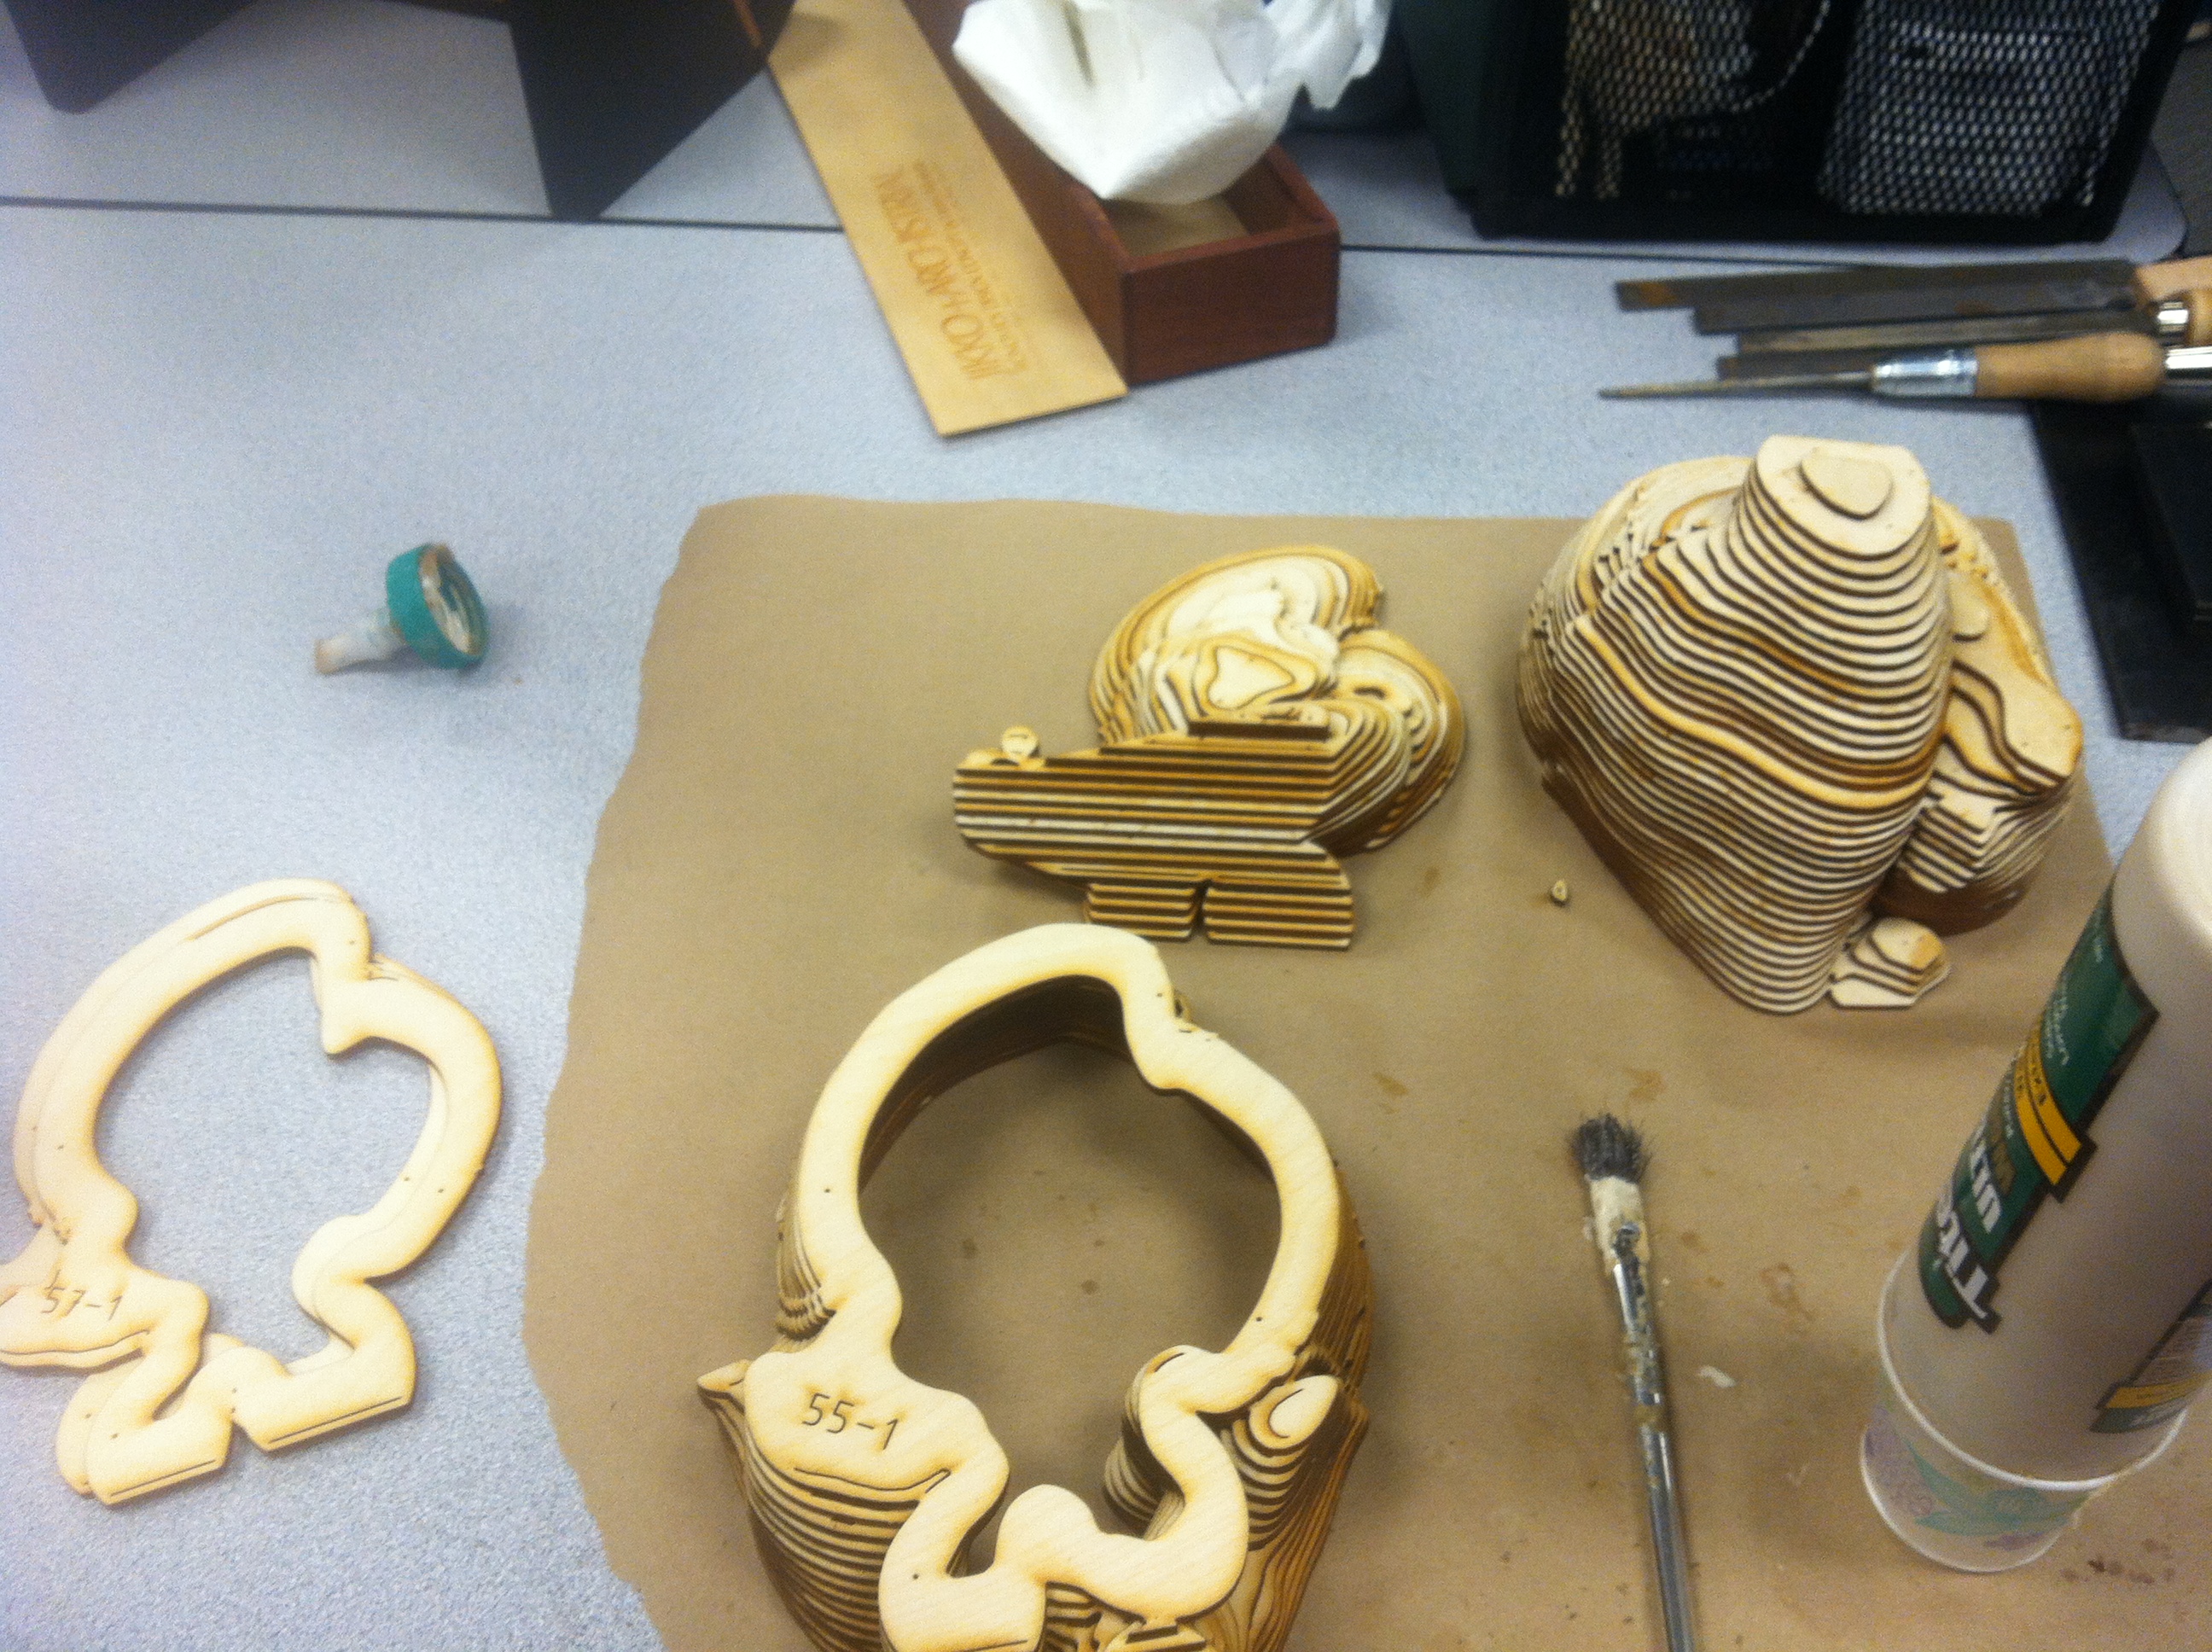
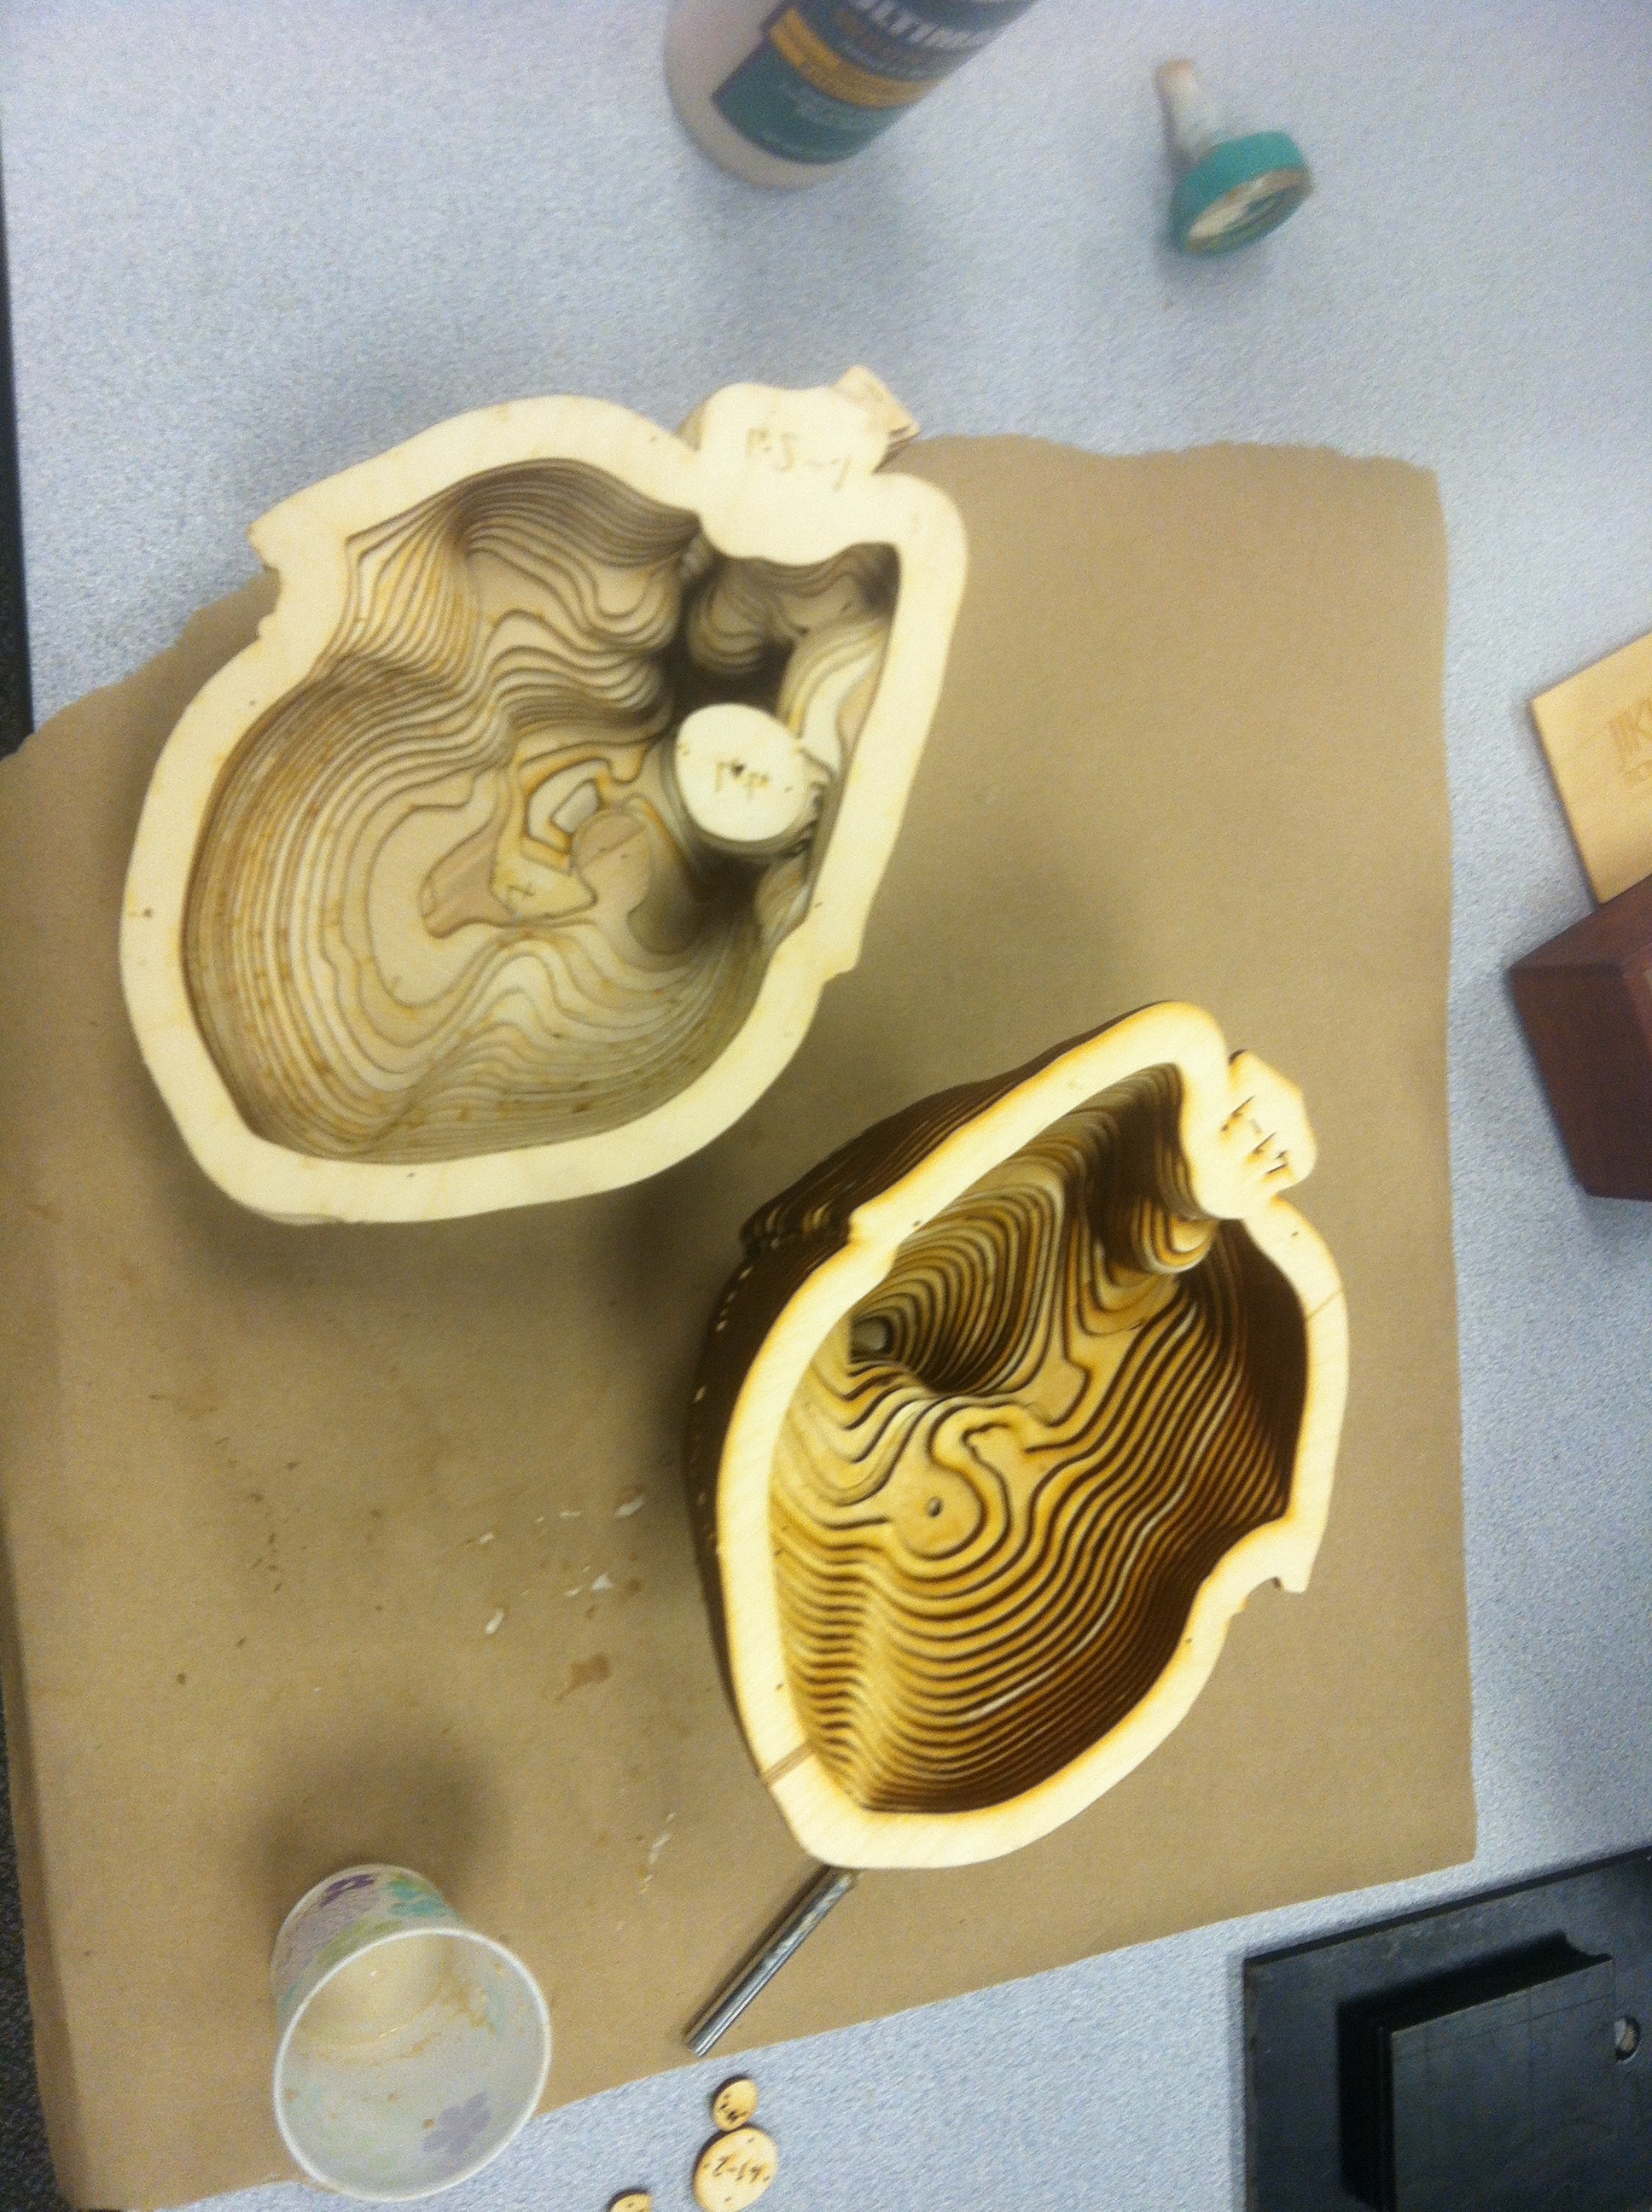
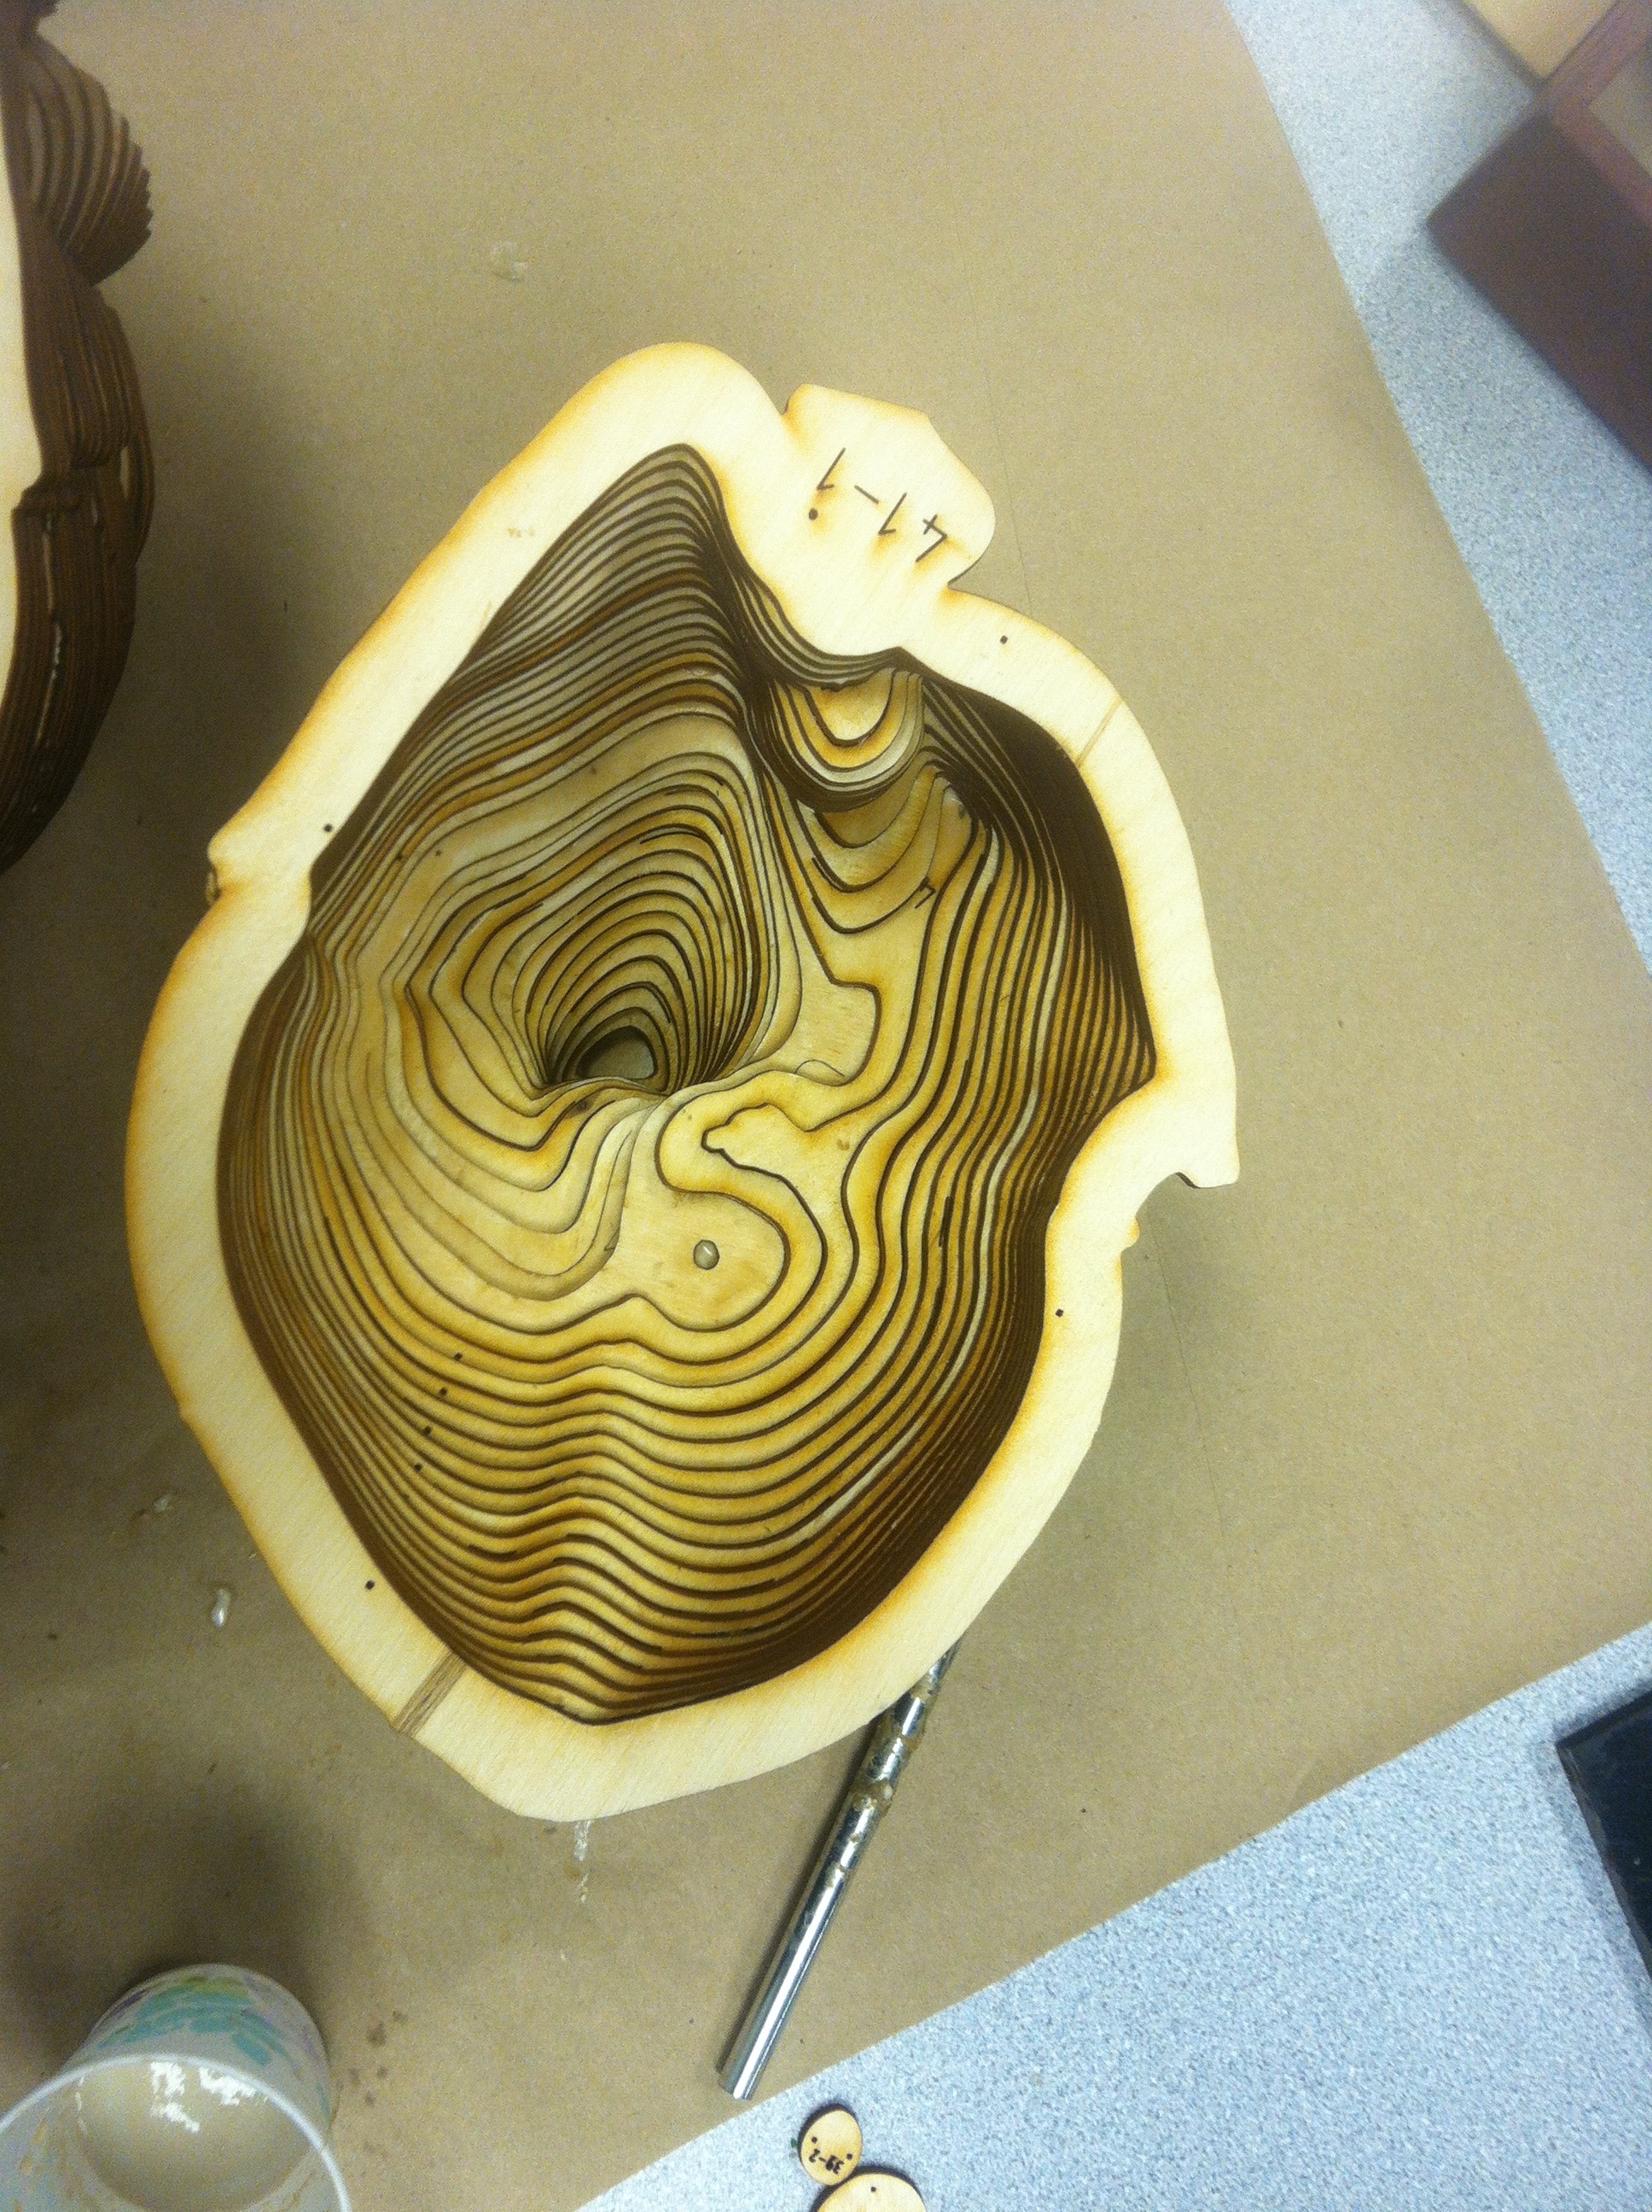
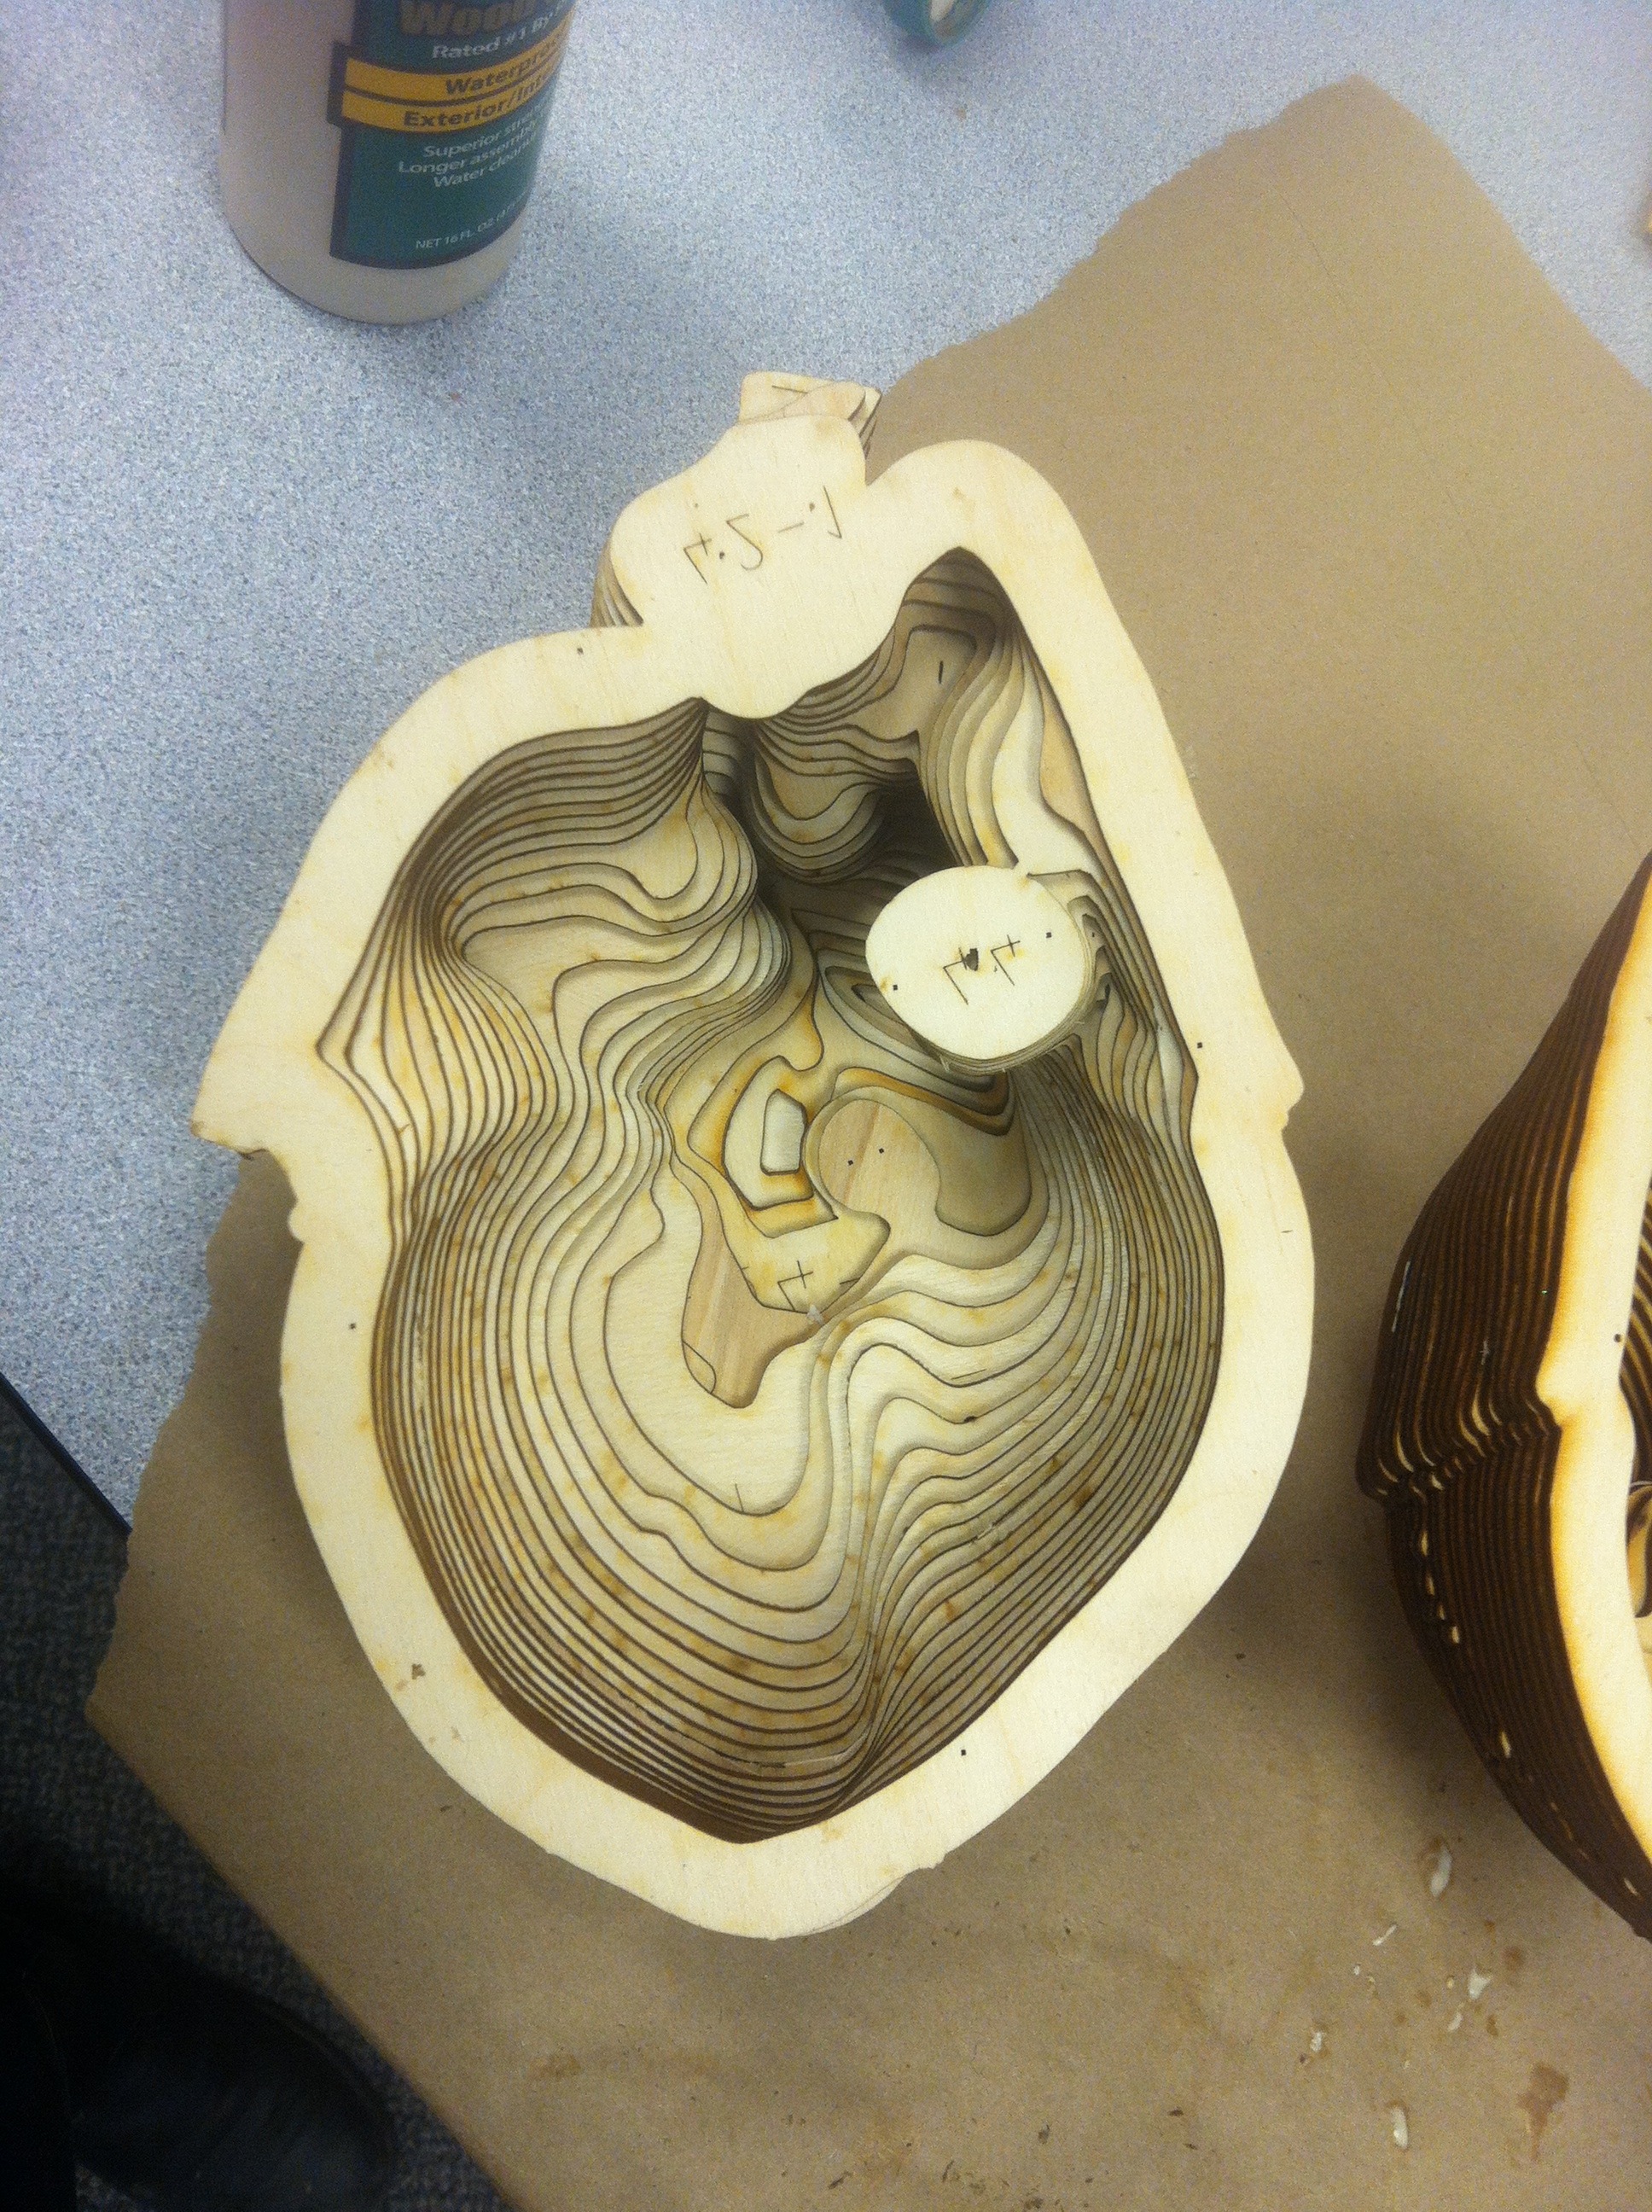
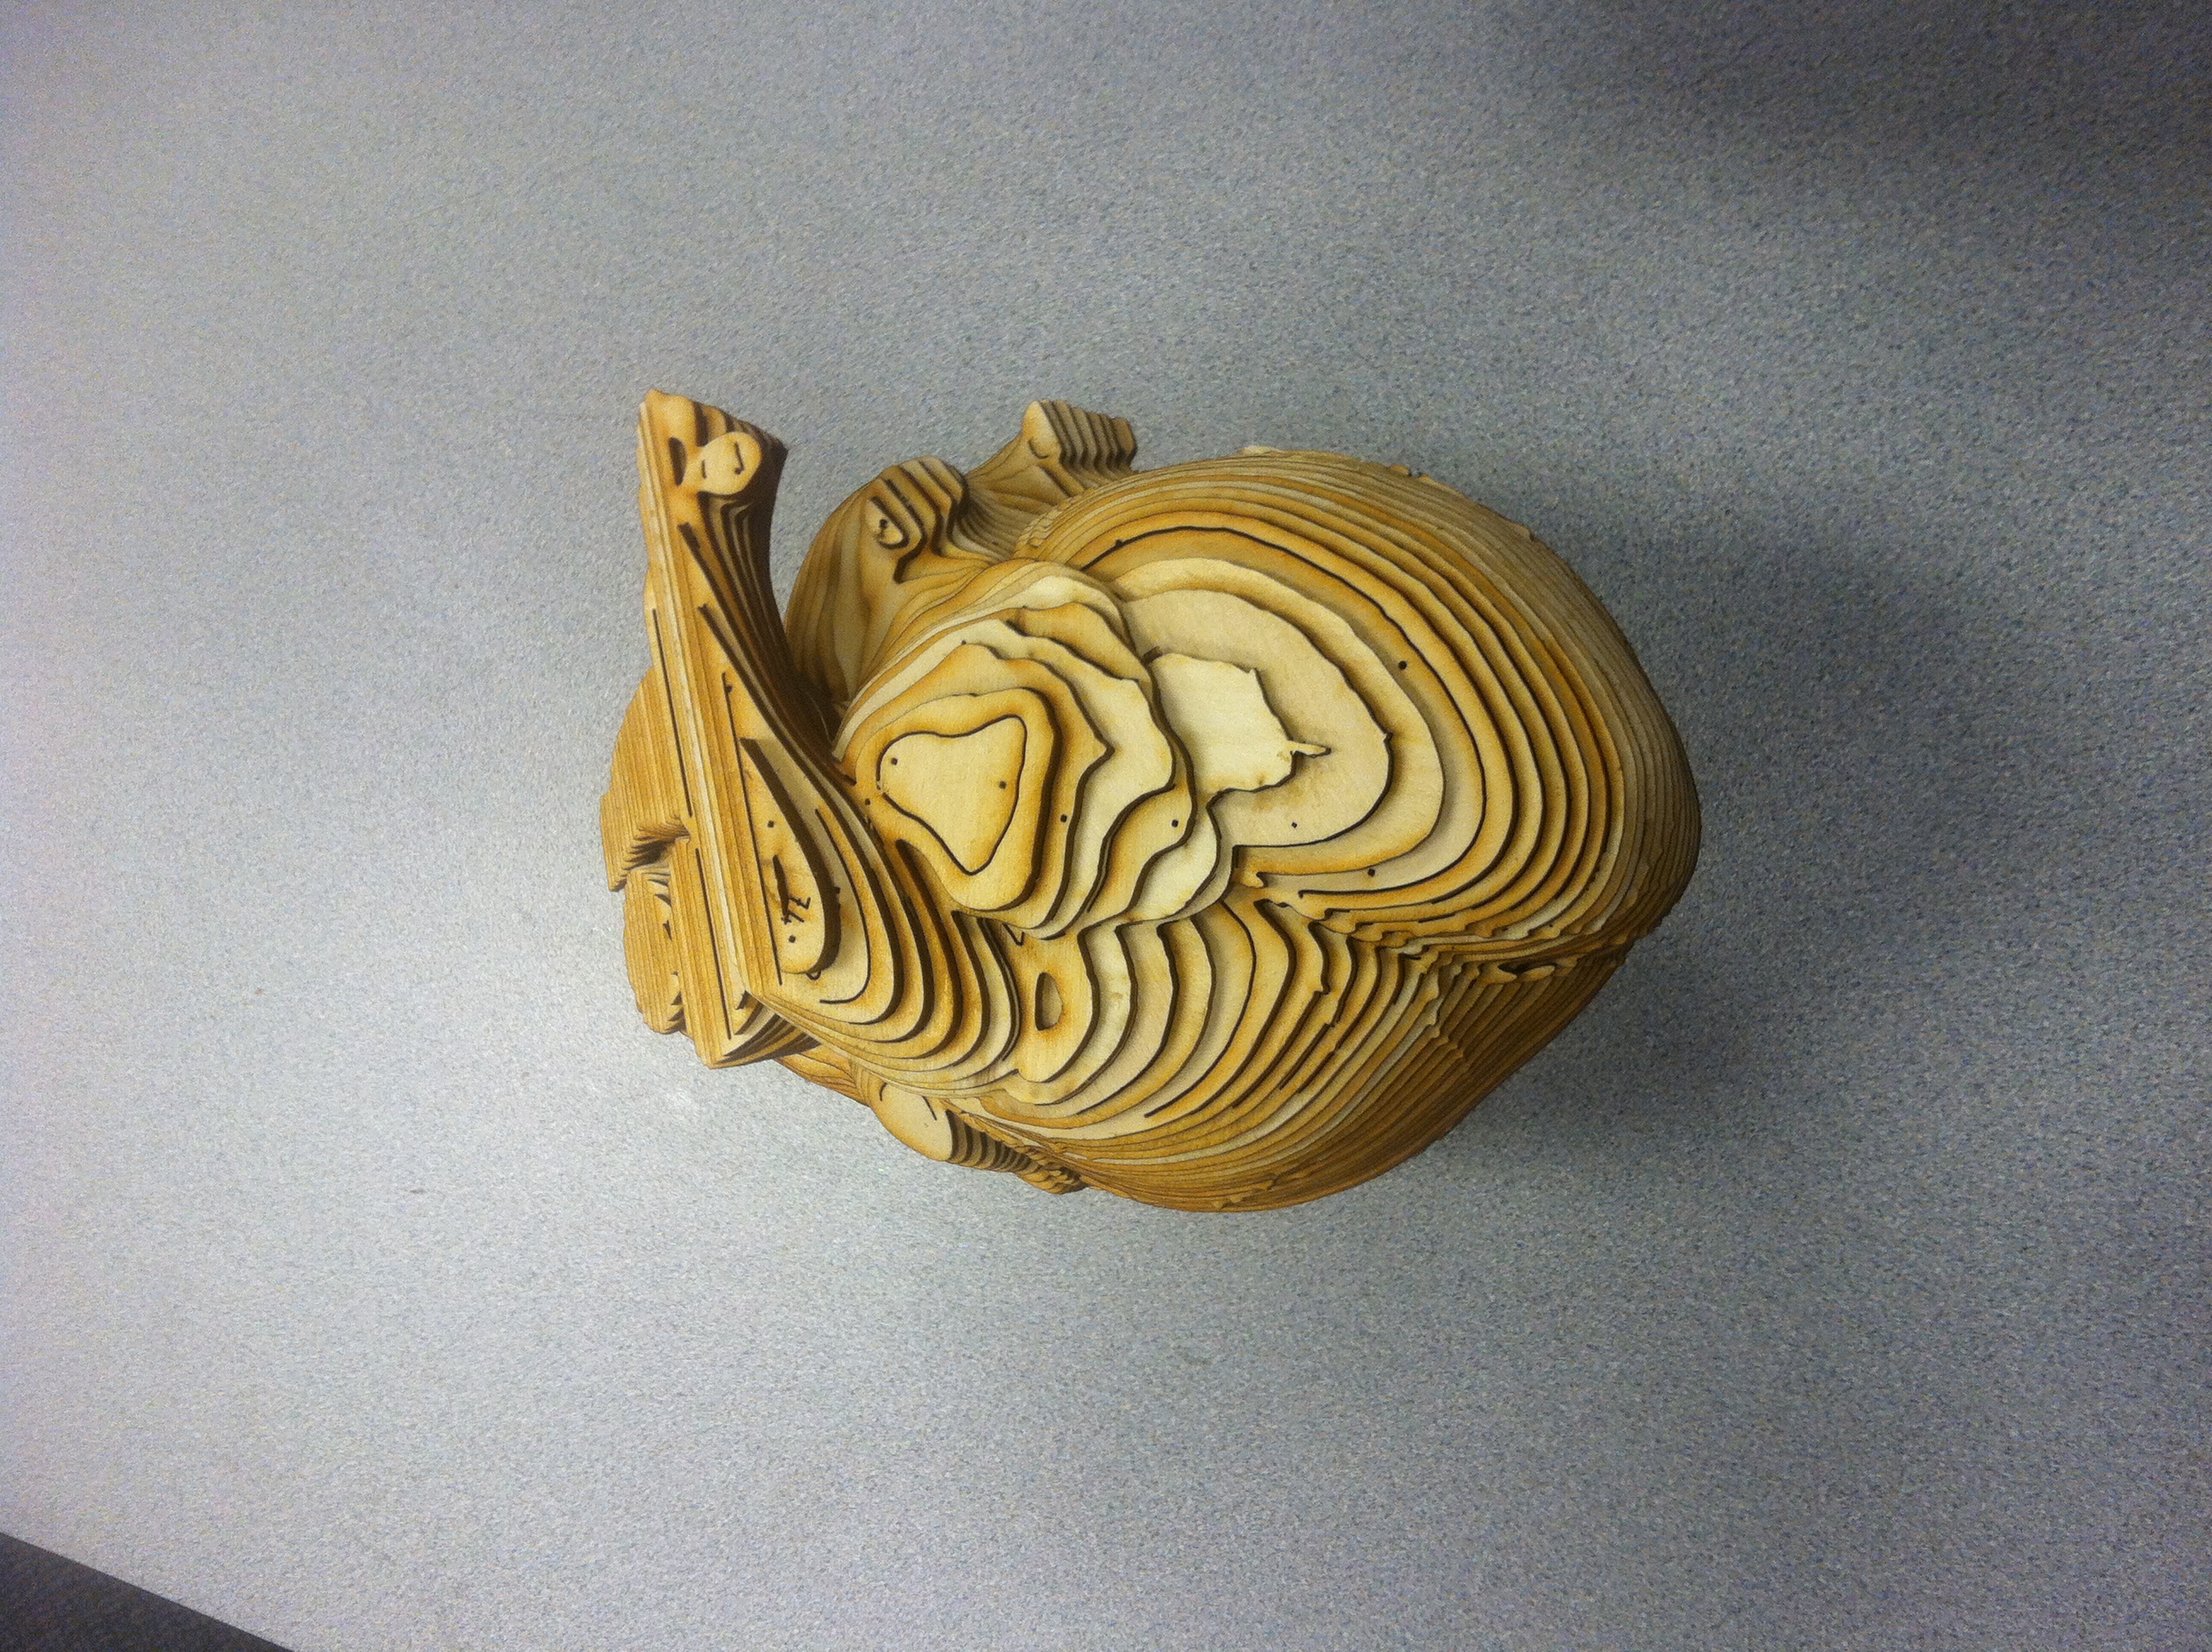
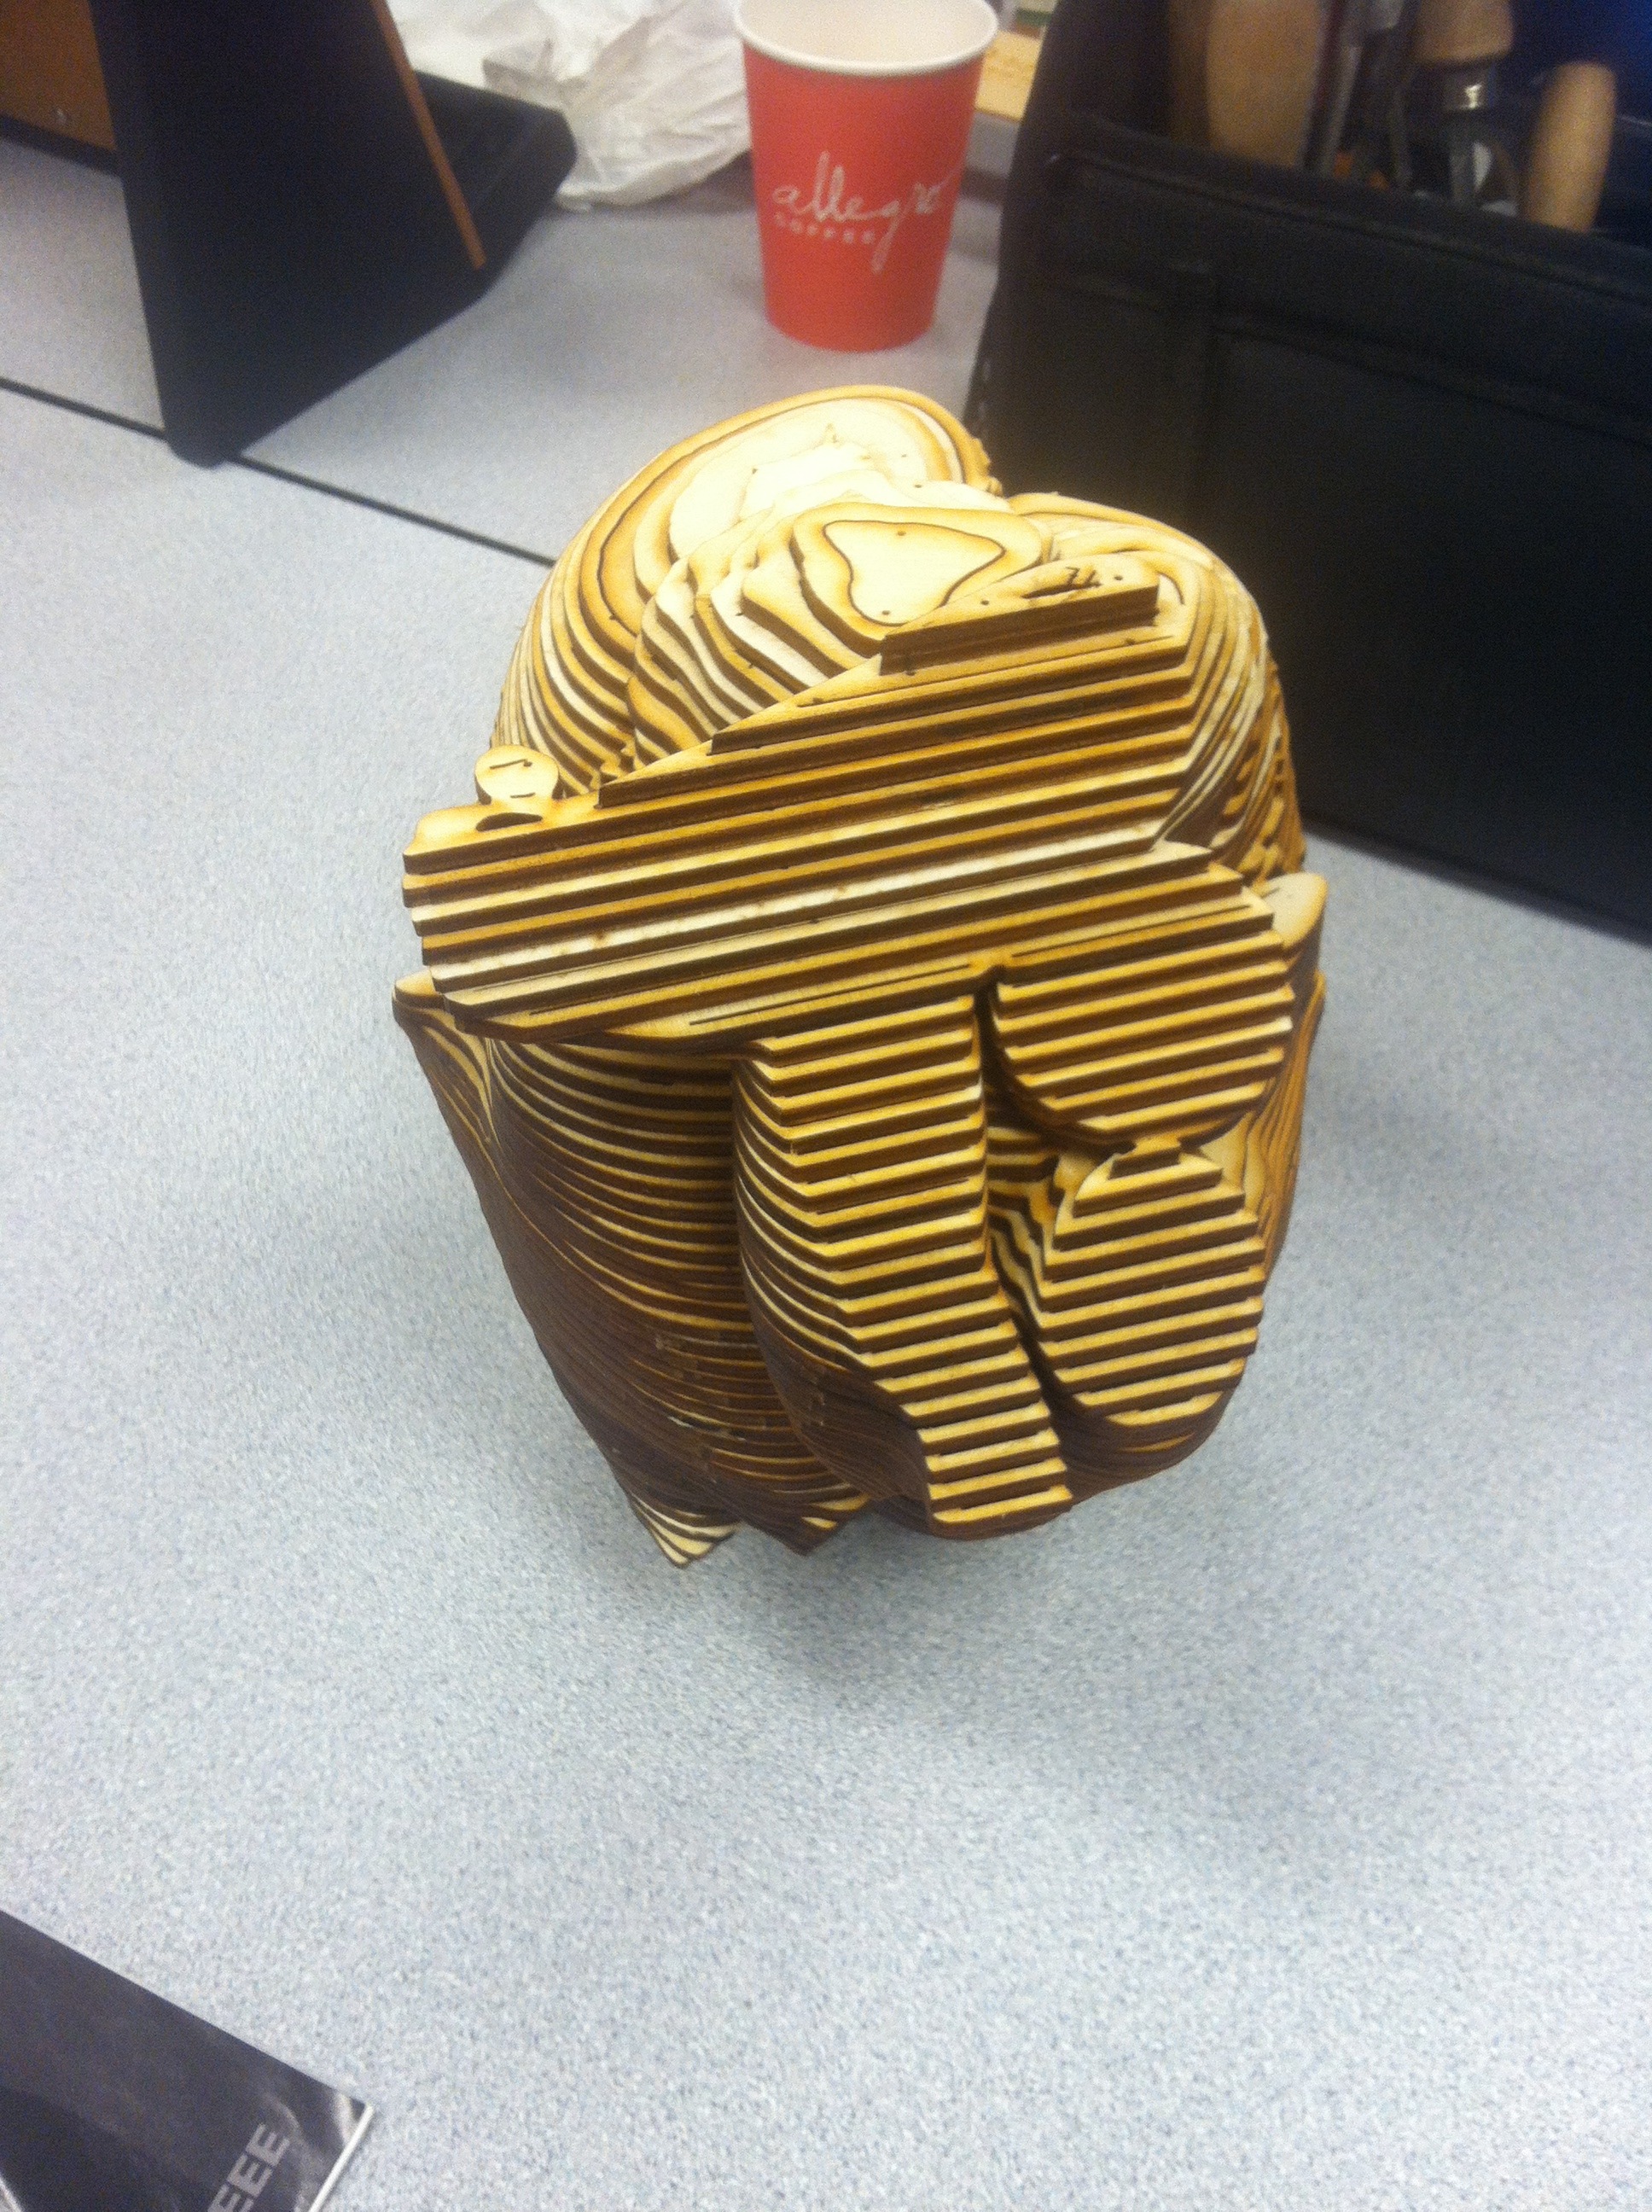
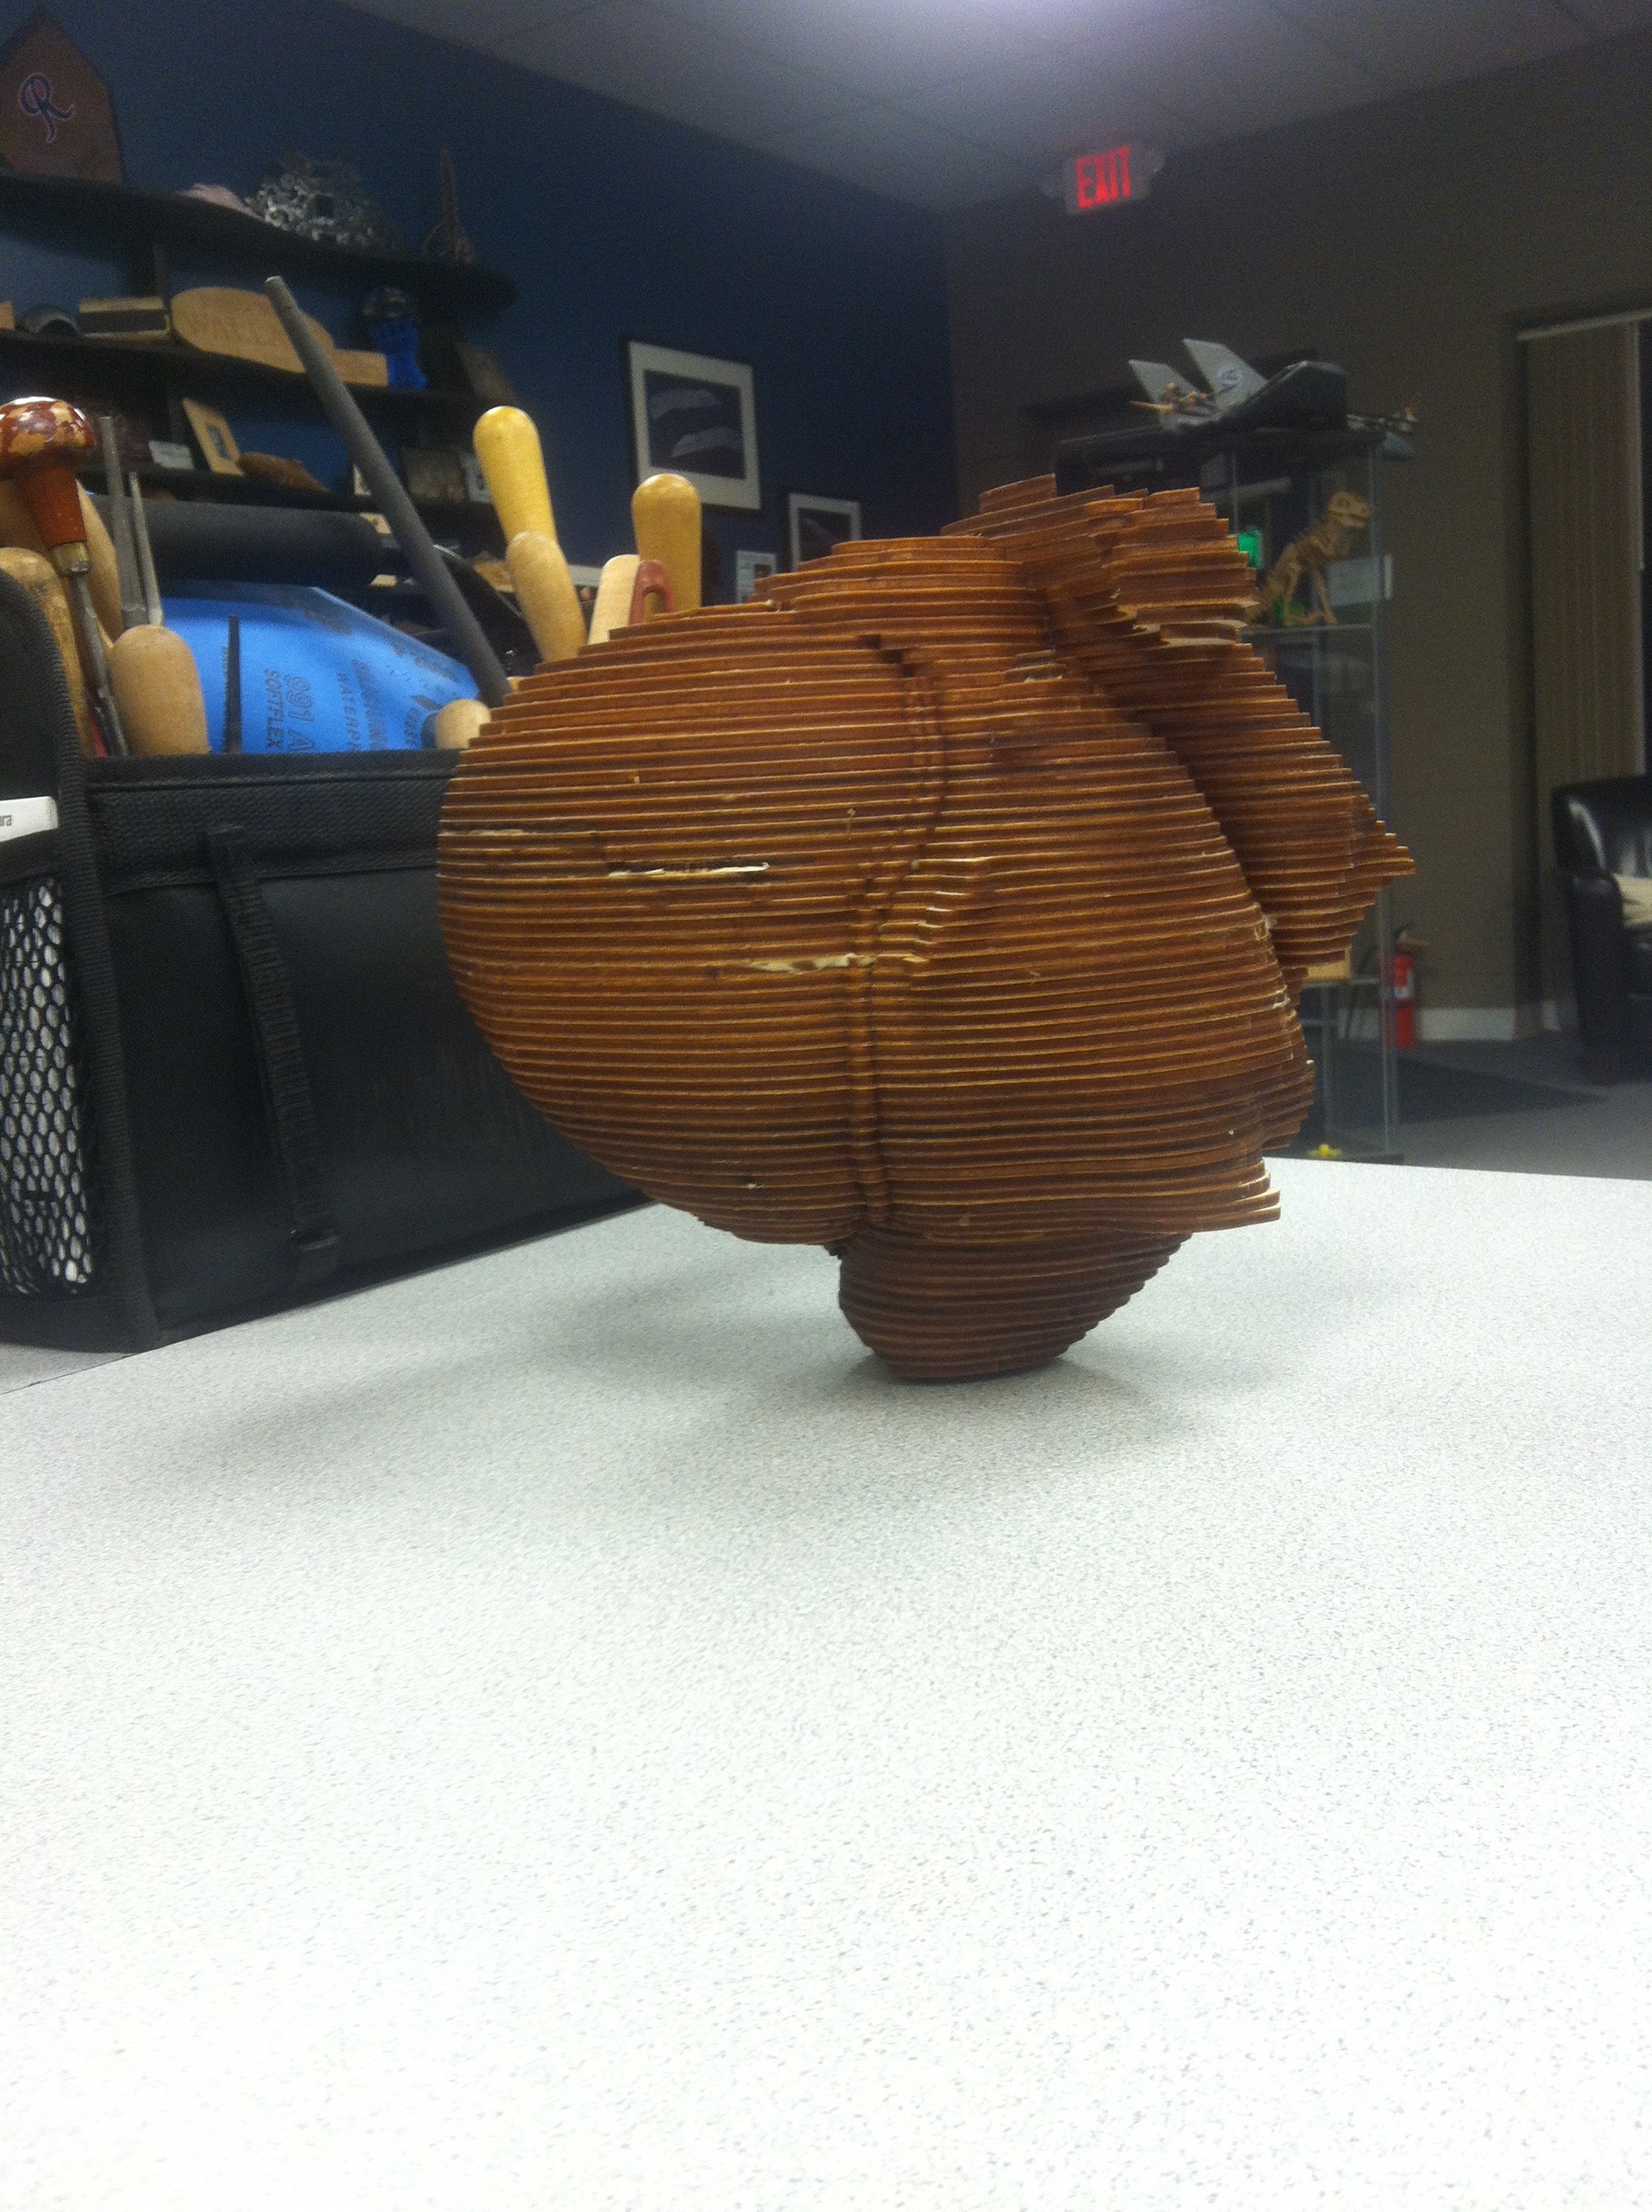
Step 1 is to sort your actual pieces from your scraps if you didn't sort as you cut your sheets. Since I nested smaller pieces inside of larger pieces, it's not super obvious! This is a major benefit to the numbered slices. The other benefit is, of course, in telling you what order it goes together!
Step 2 is to set up your work area. Since you'll be using wood glue, it's a good idea to lay down some protective covering. I like cardboard because I can squirt the glue directly onto it in a little puddle and it won't warp and break like paper will. I use a brush to apply the glue, since I only need a thin layer at a time, and wood glue bottles are not known for their precision.
Step 3 is to line up your pieces. This heart has way too many pieces to sift through the pile for the next layer constantly. It's better to assemble your model ahead of time, ideally in two halves (for stability, so the pile doesn't fall apart and scatter everywhere). I recommend arranging your pieces and glueing them together in one session to prevent errors. It took me about 3 hours to carefully assemble it all.
Step 4 is to get gluein'. Only your god can help you now. I suggest snacks.
*NOTE* you can assemble the two halves and not glue the halves together to make a box, if you want! Could be cool, I dunno.
Sand It Real Good (if You Want)
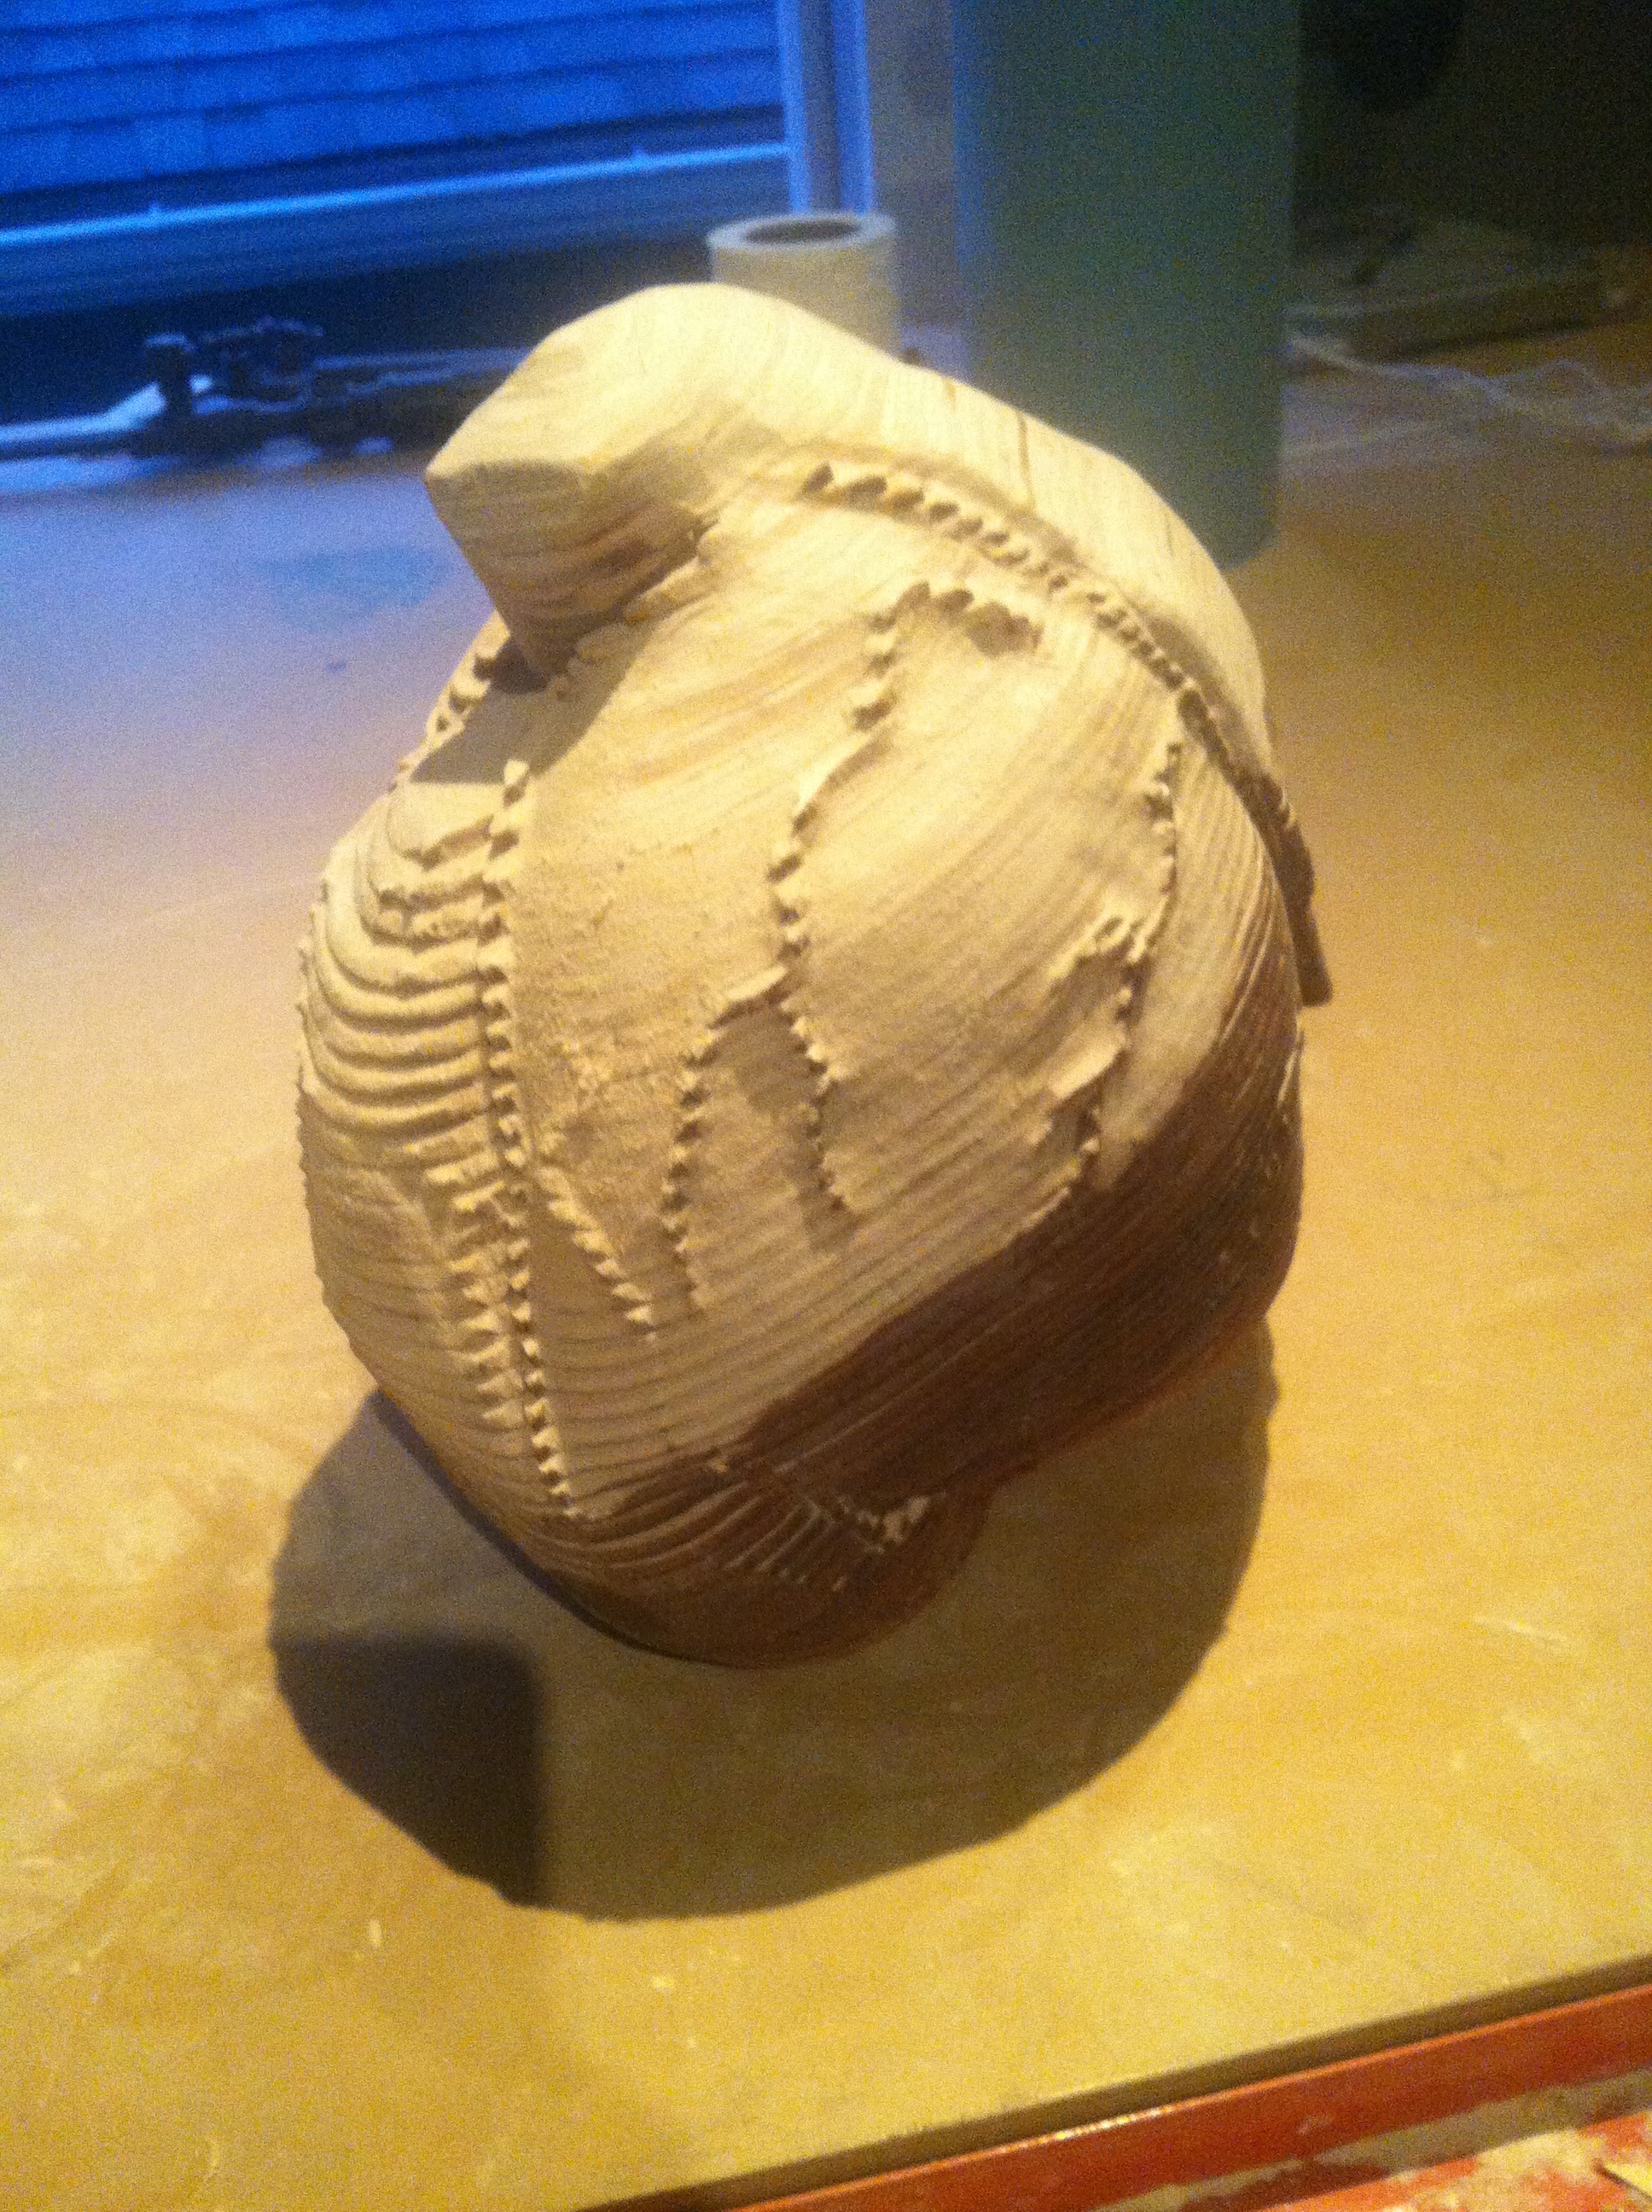
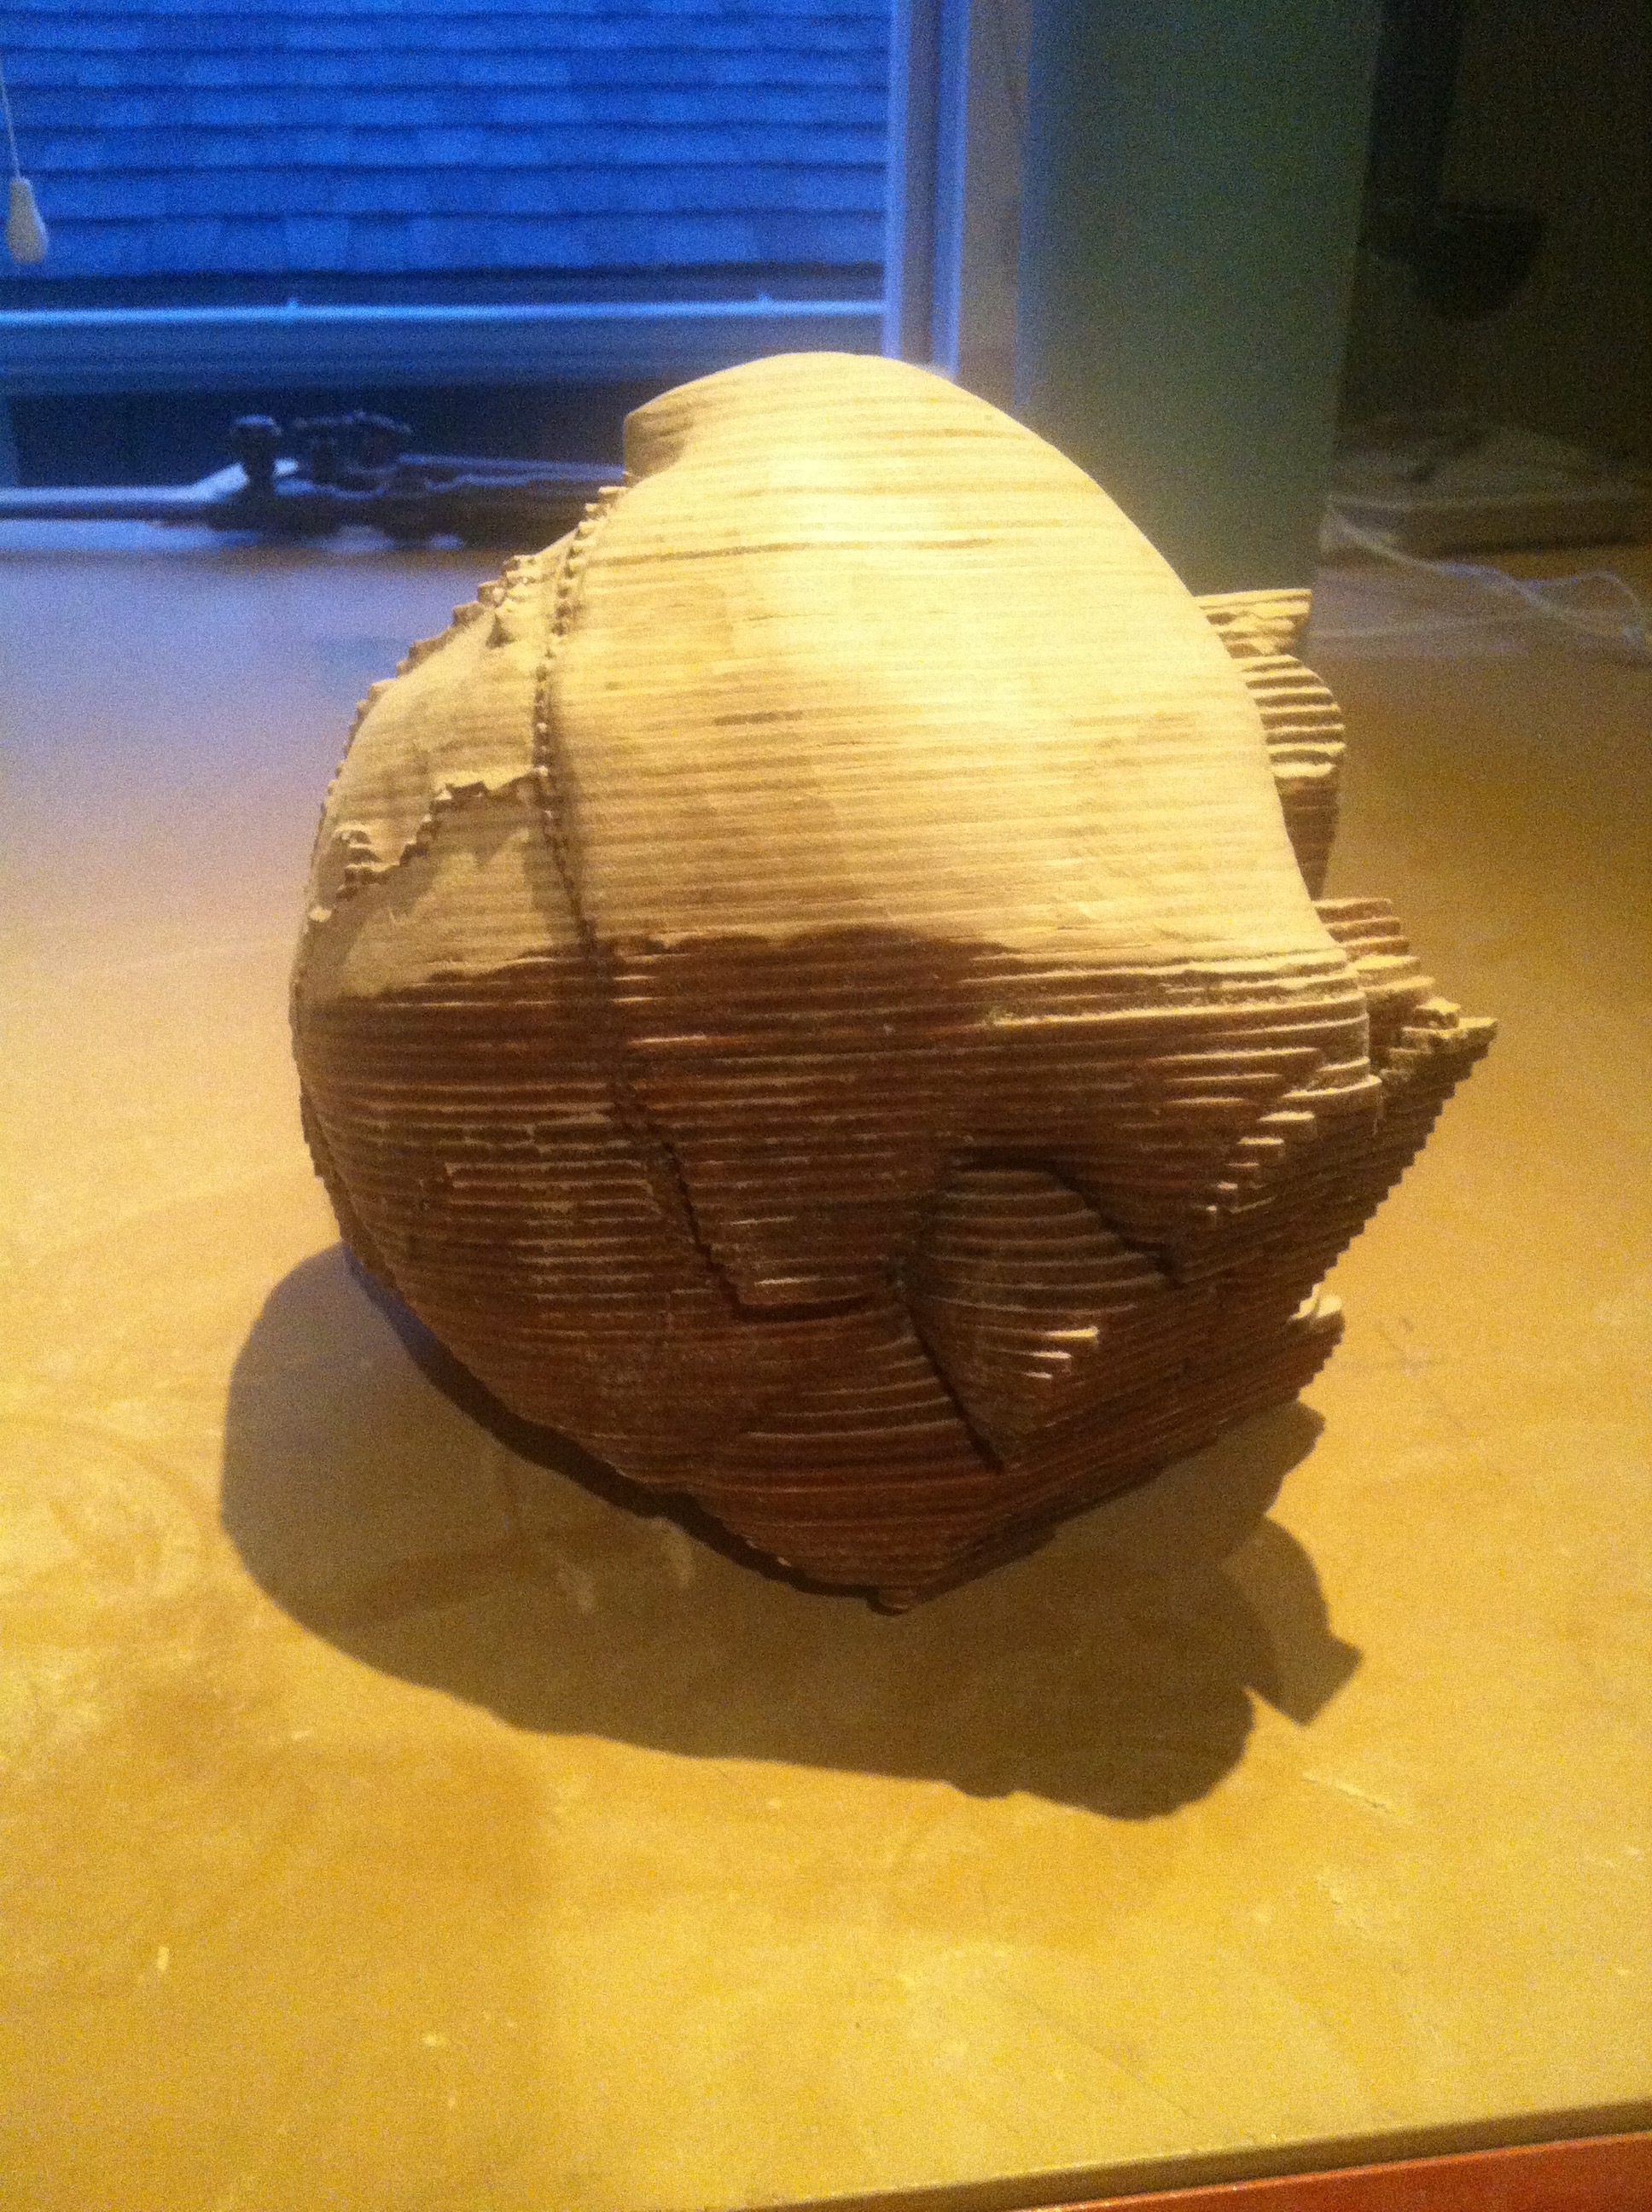
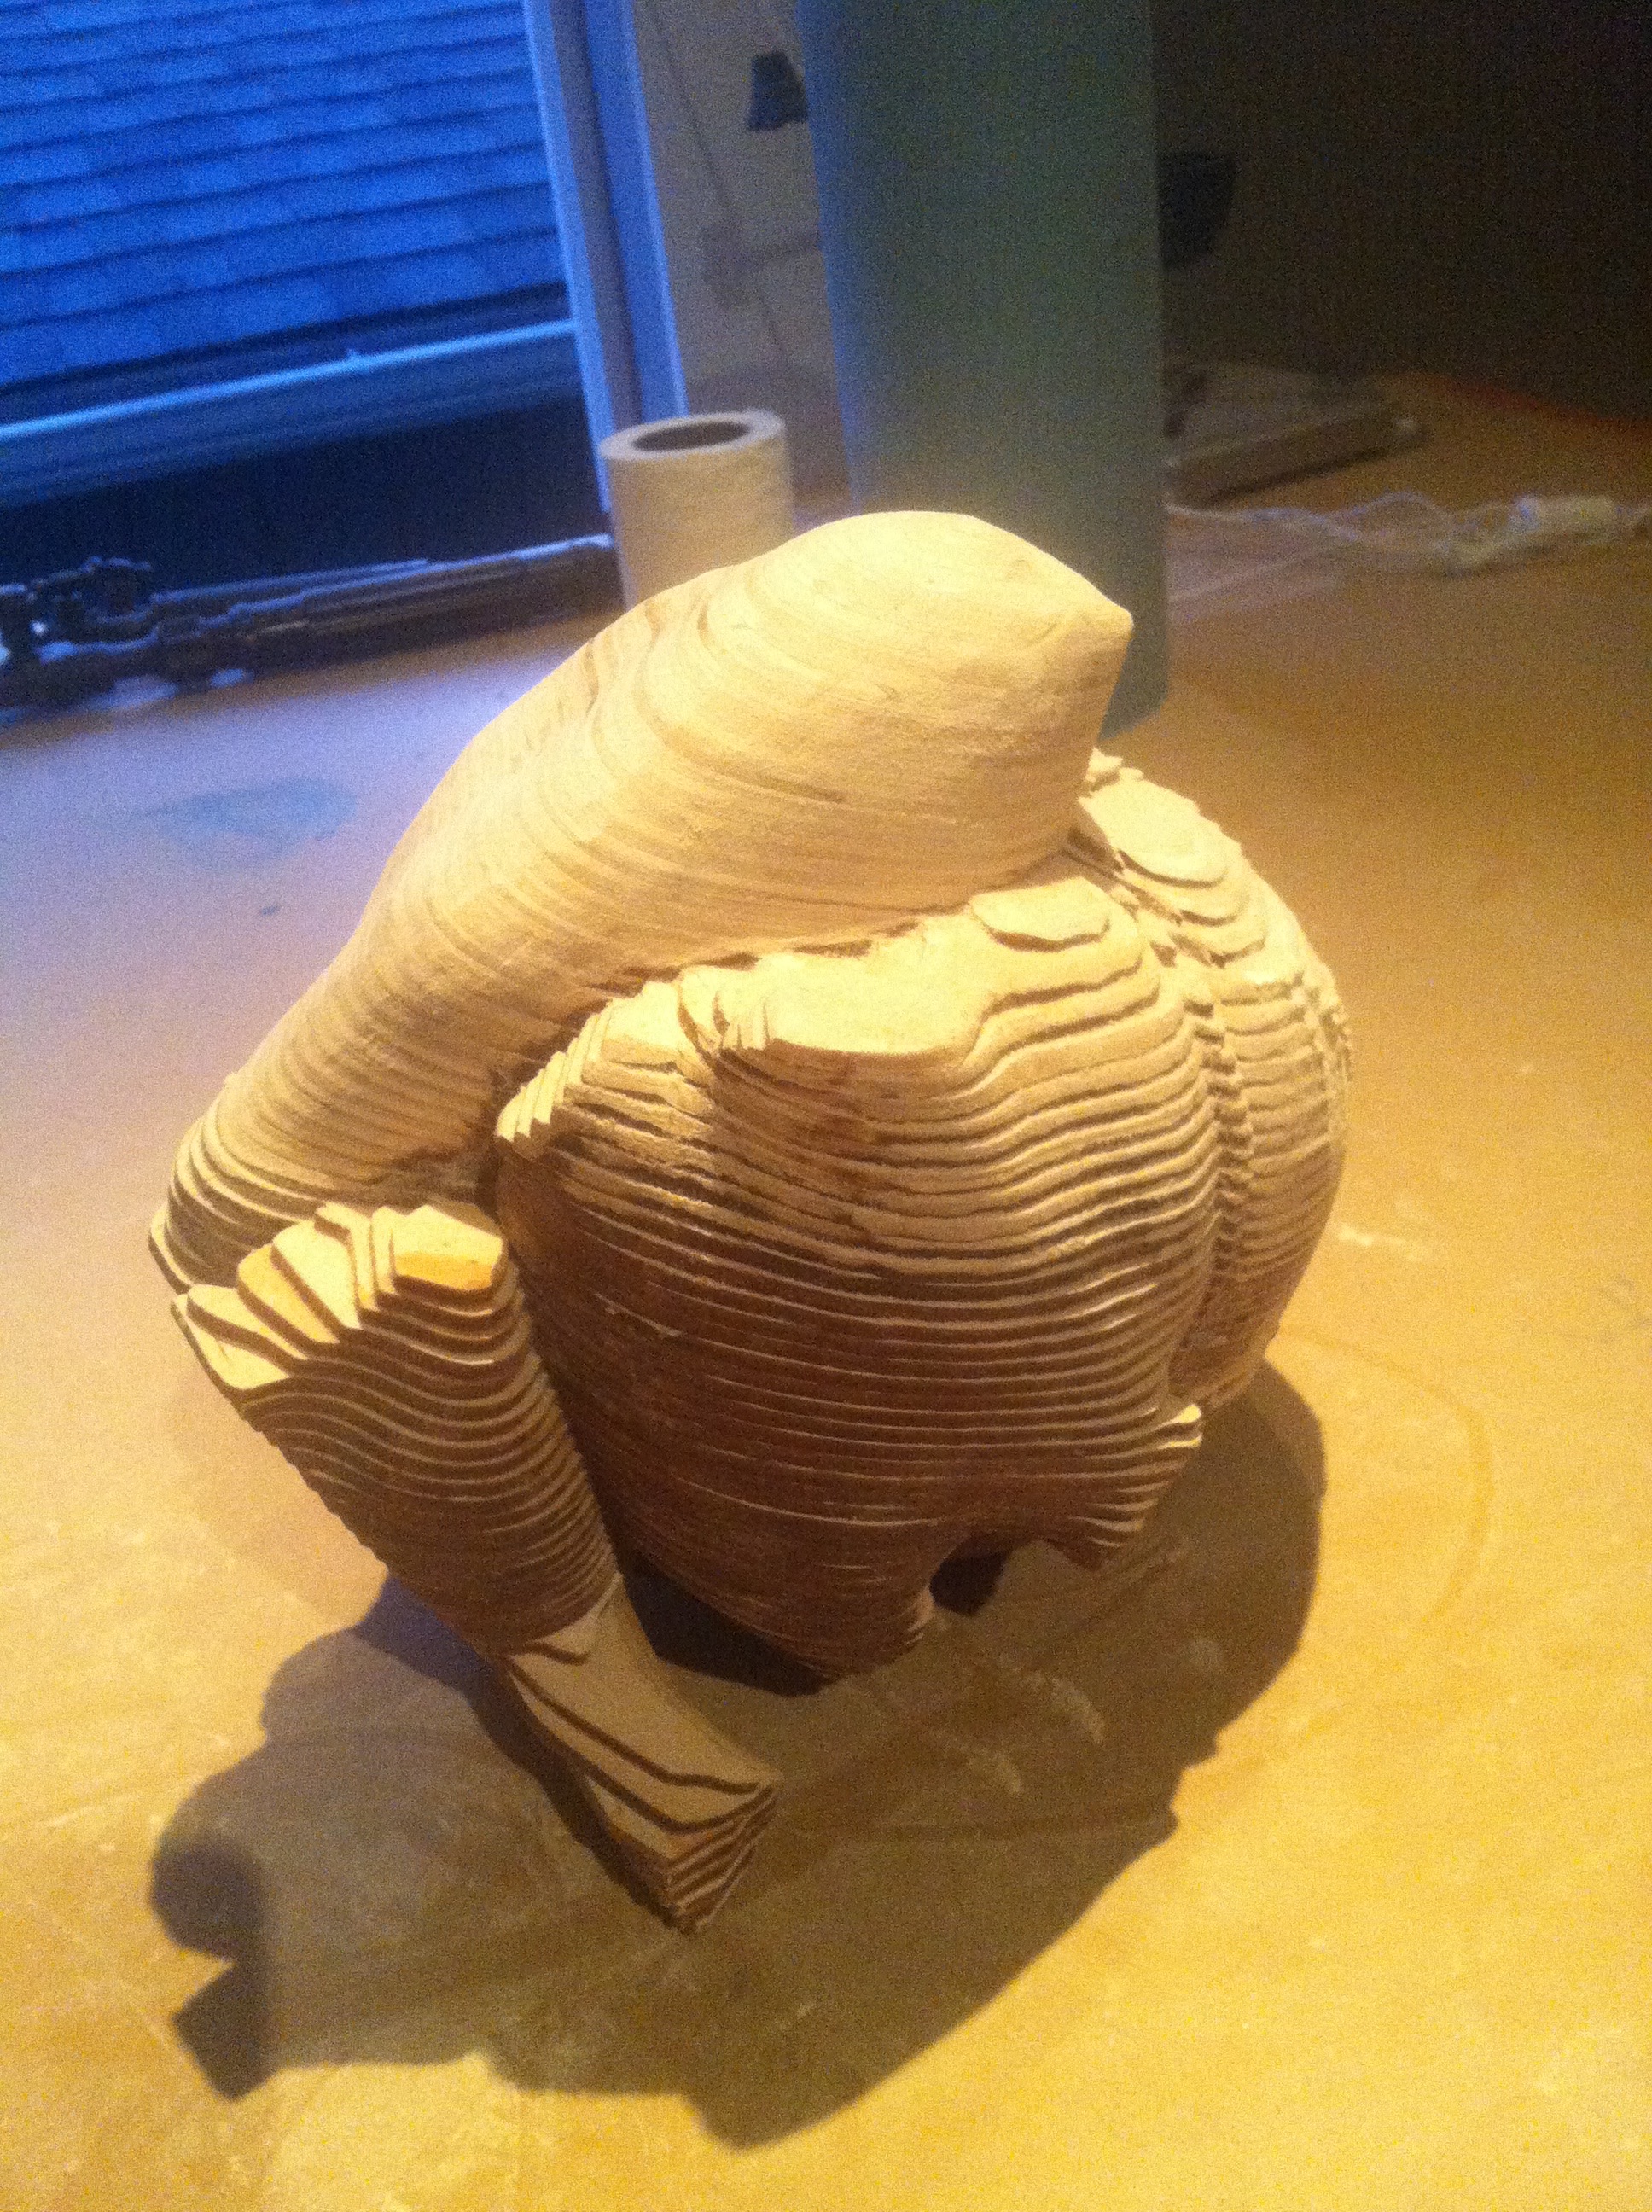
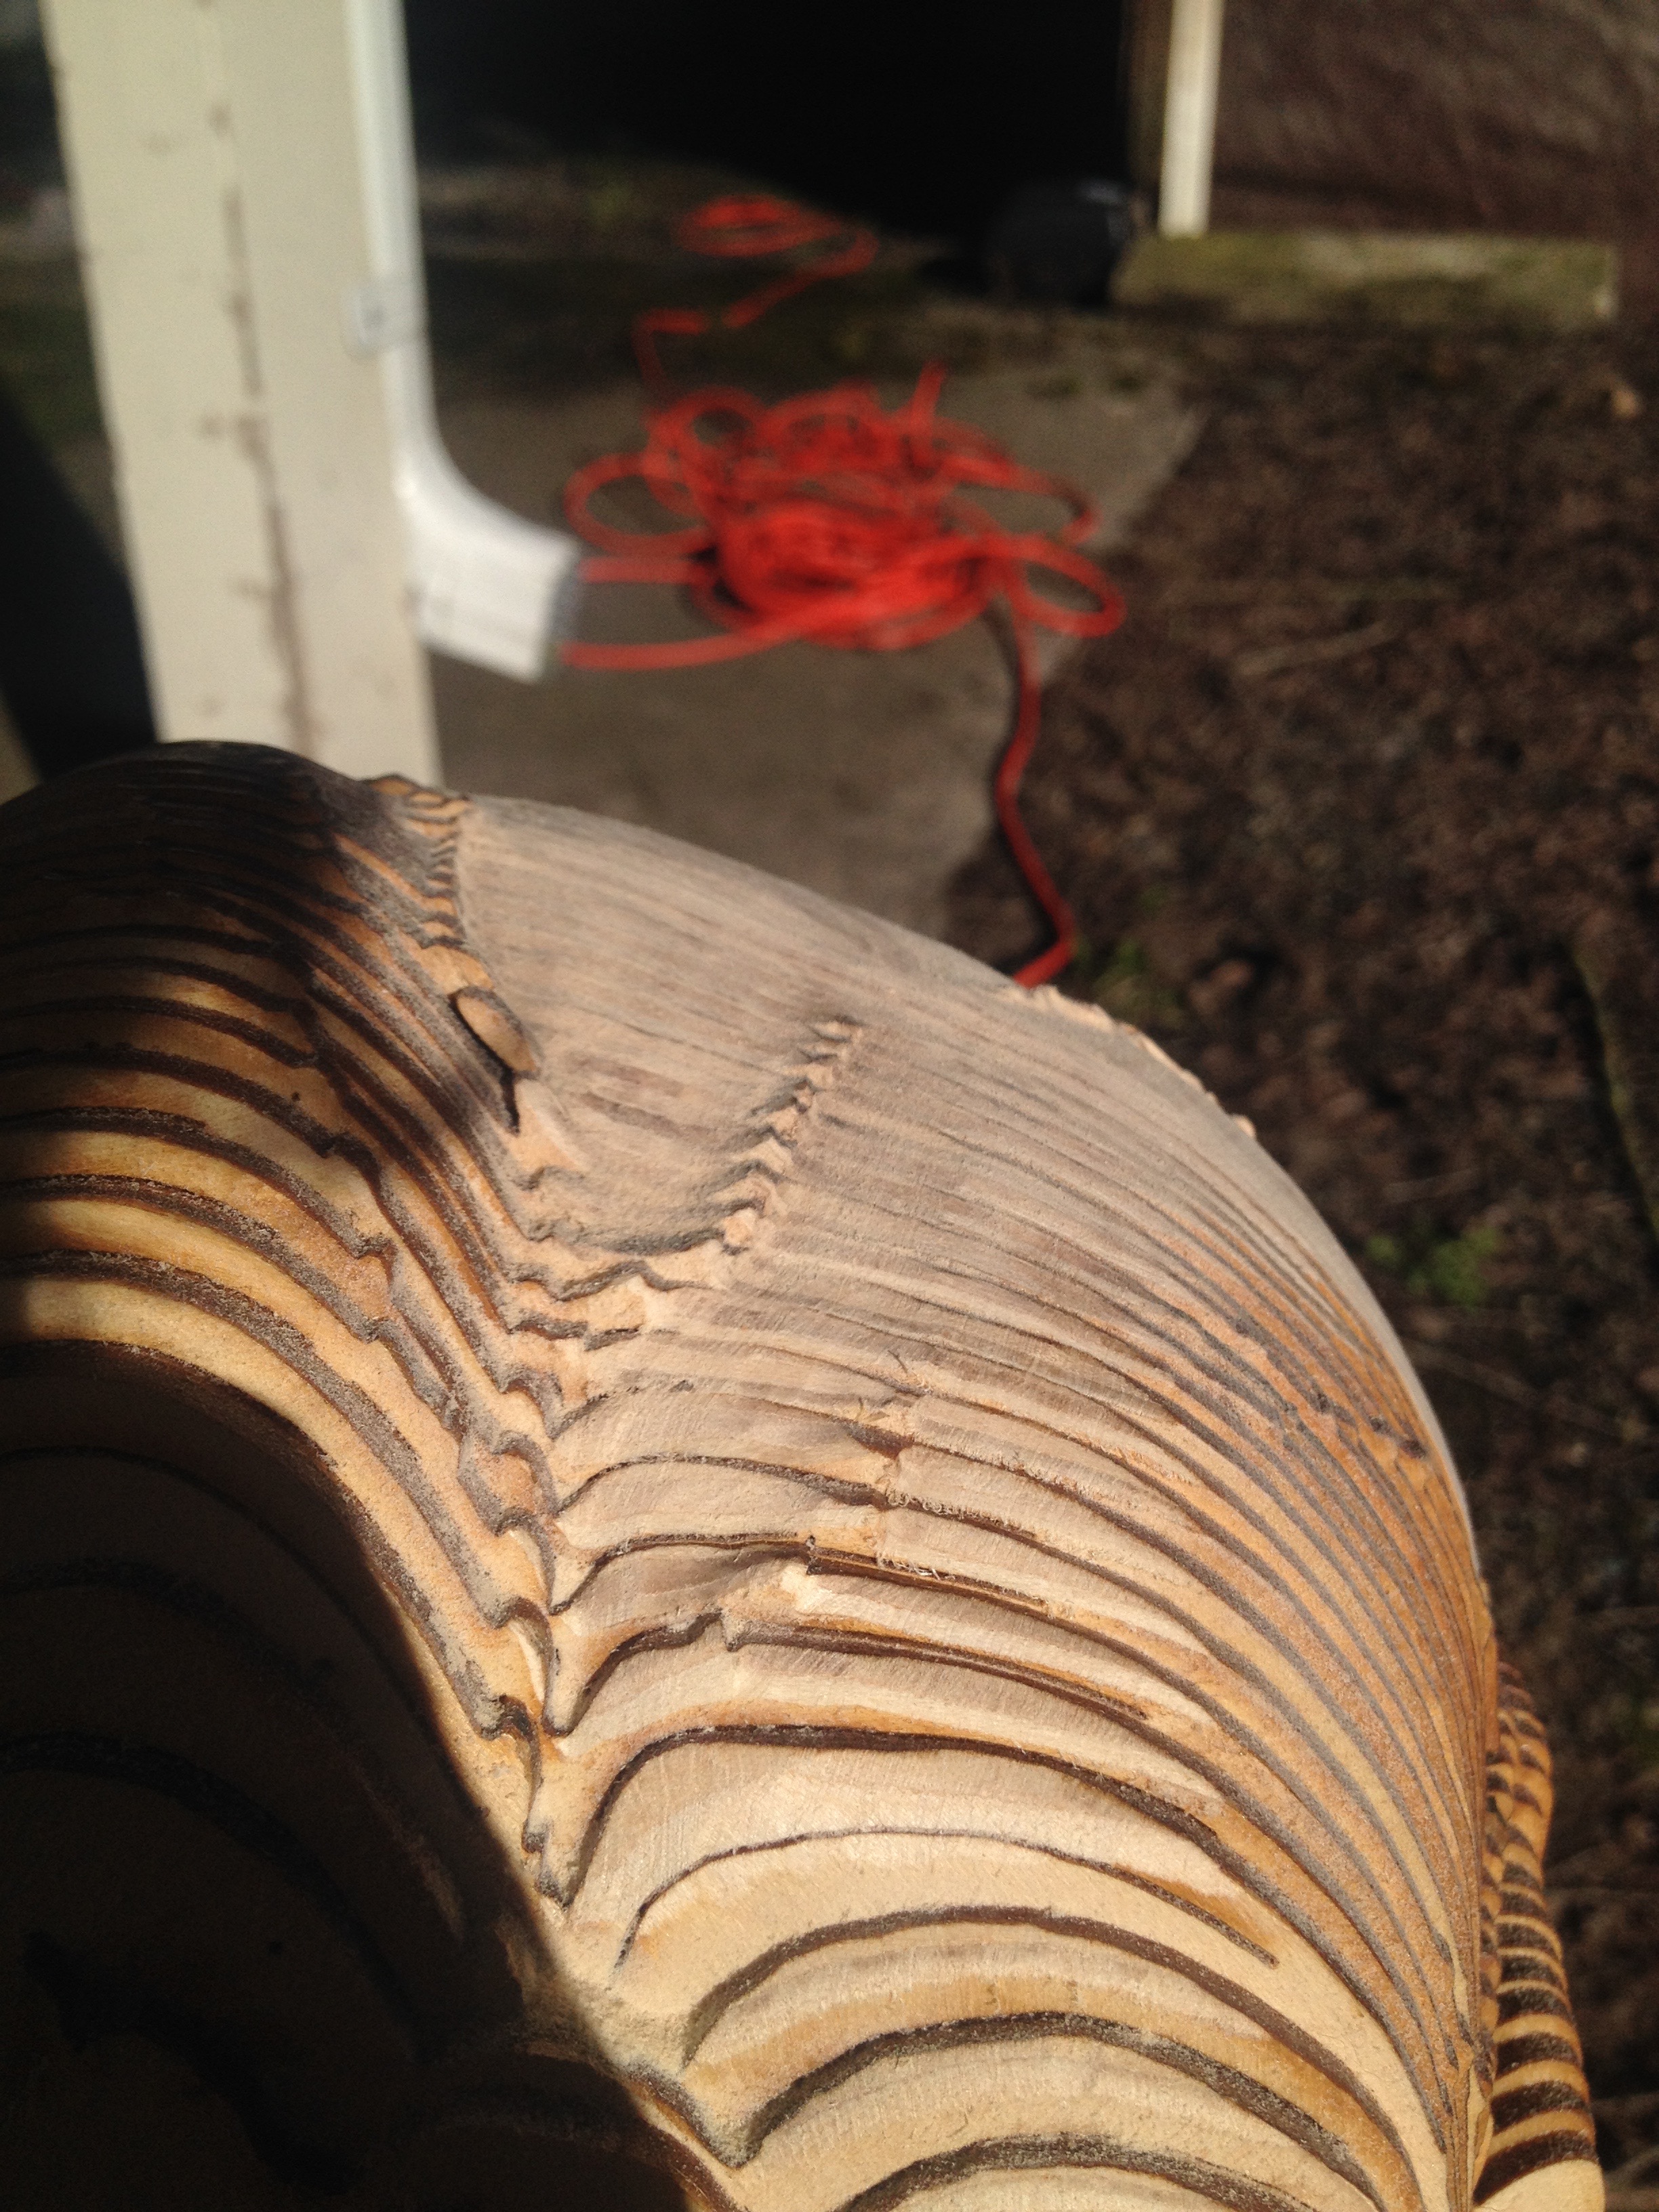
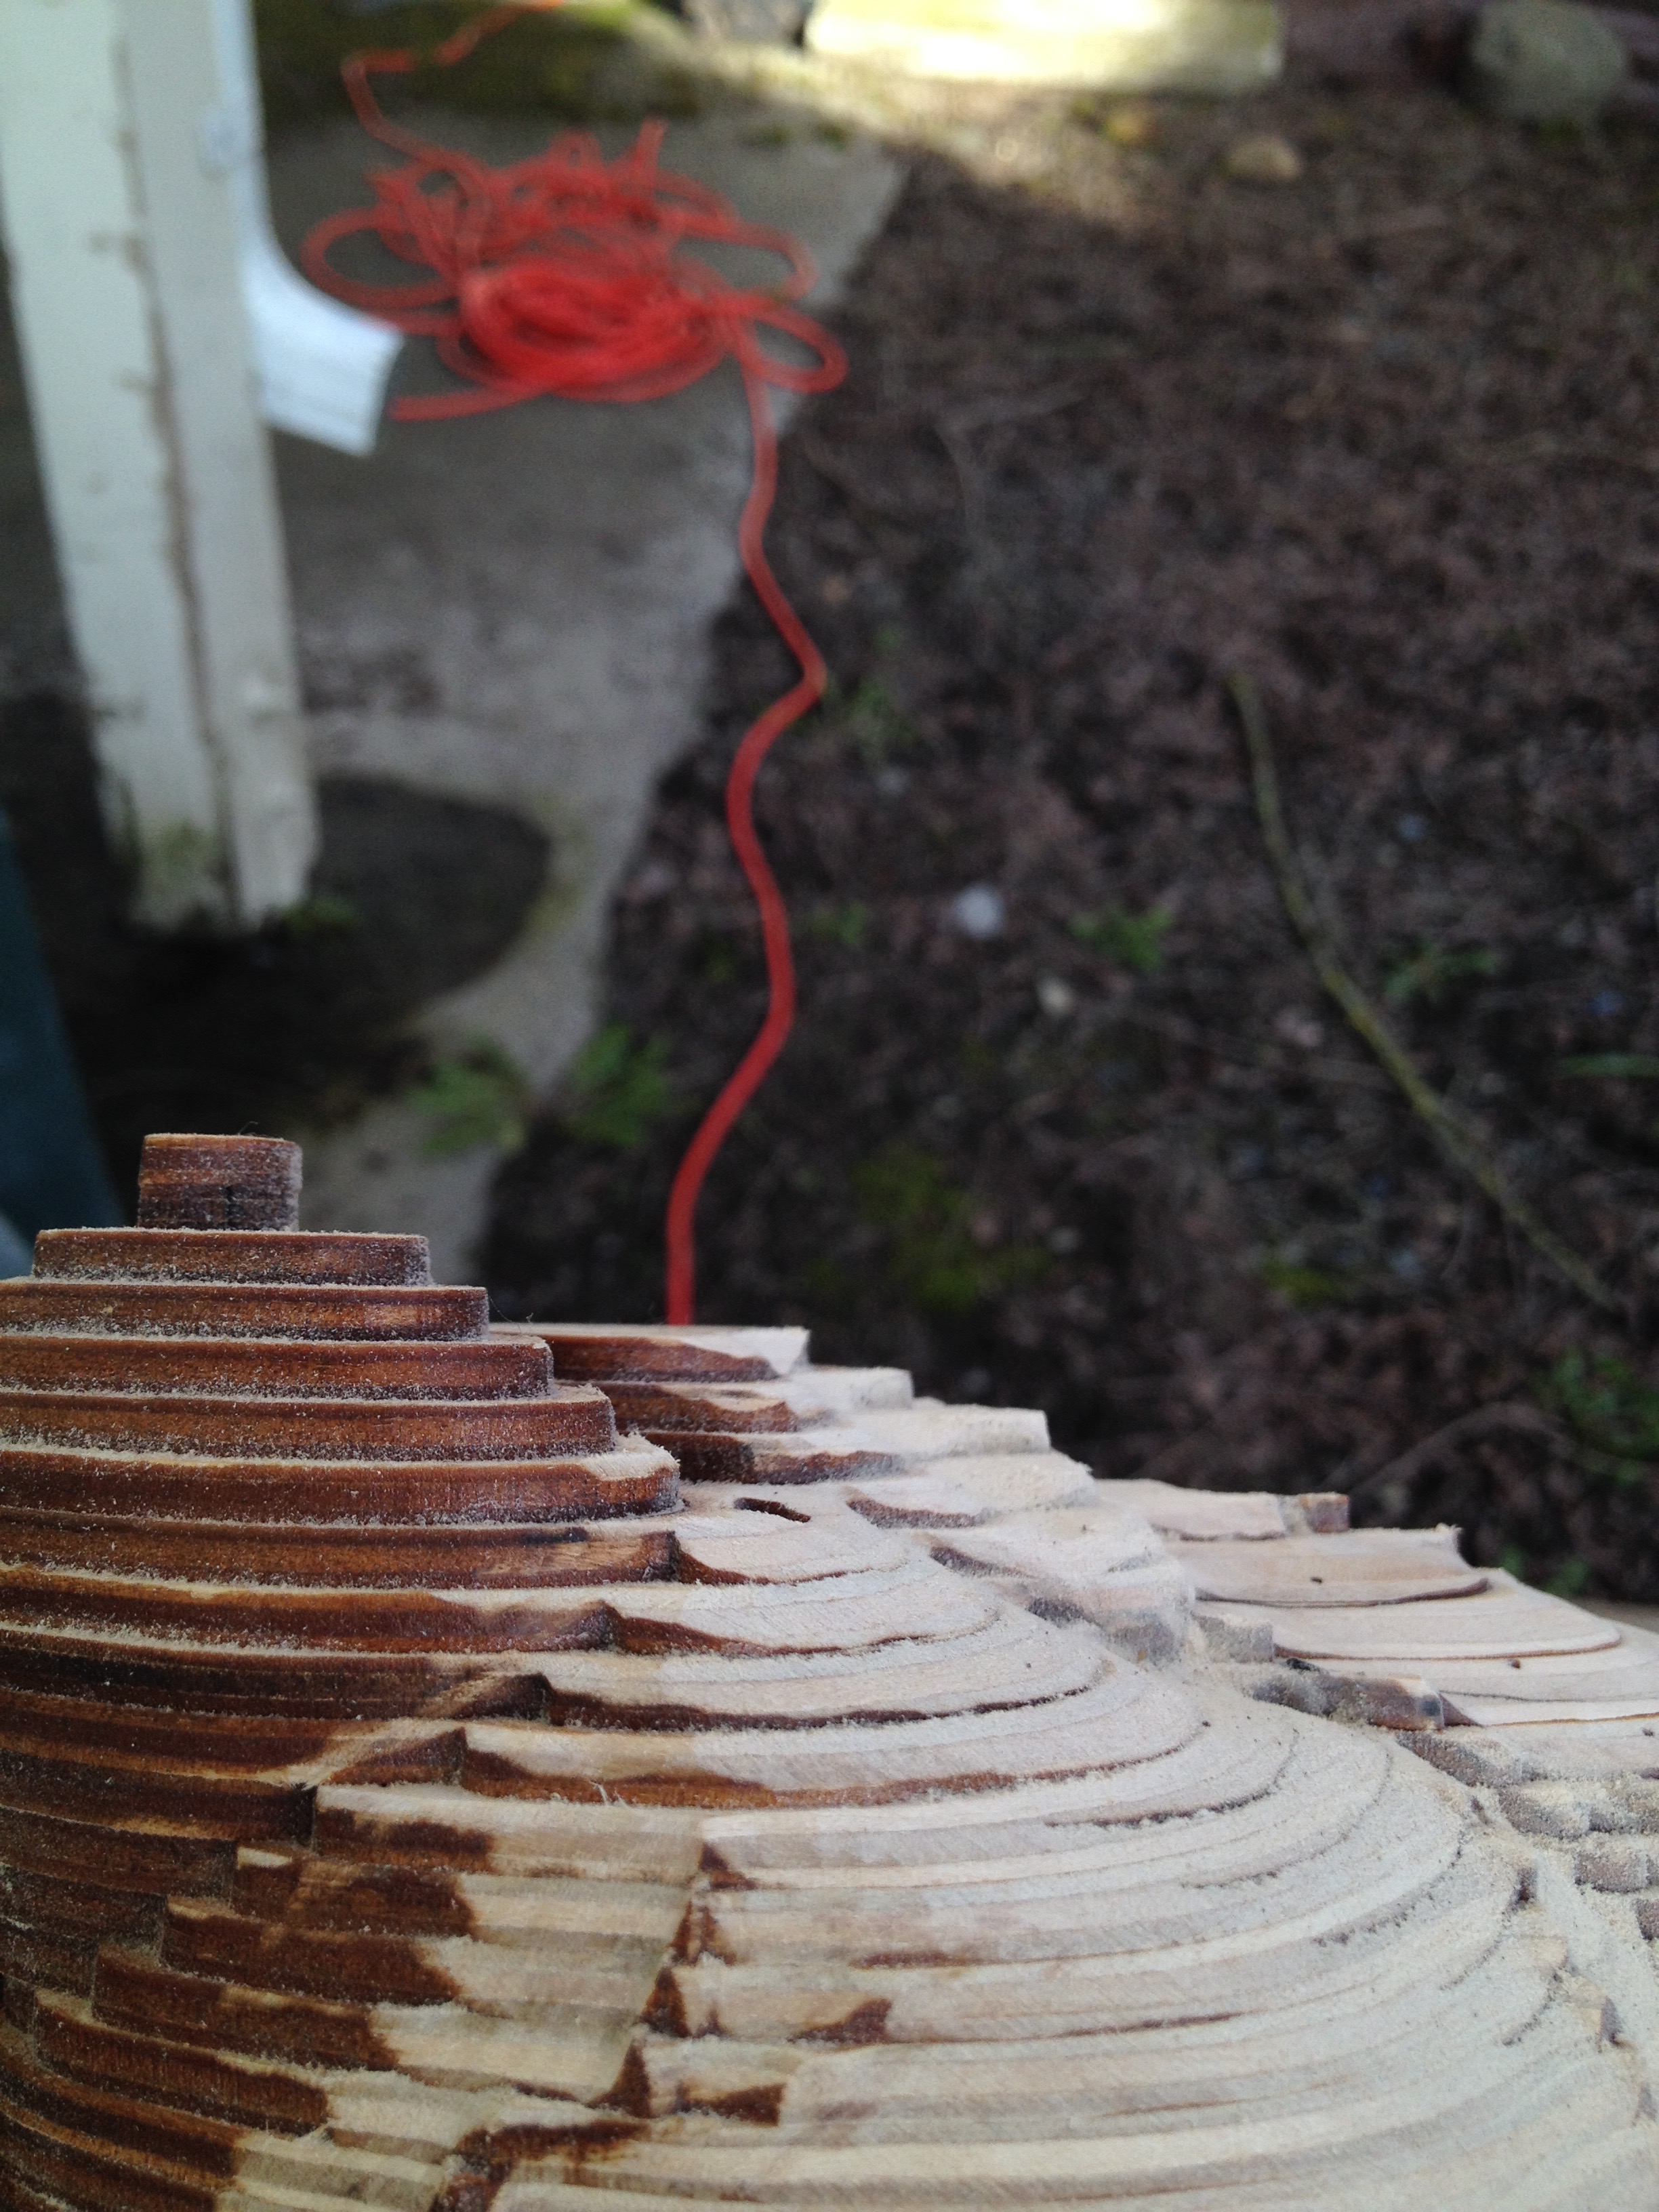
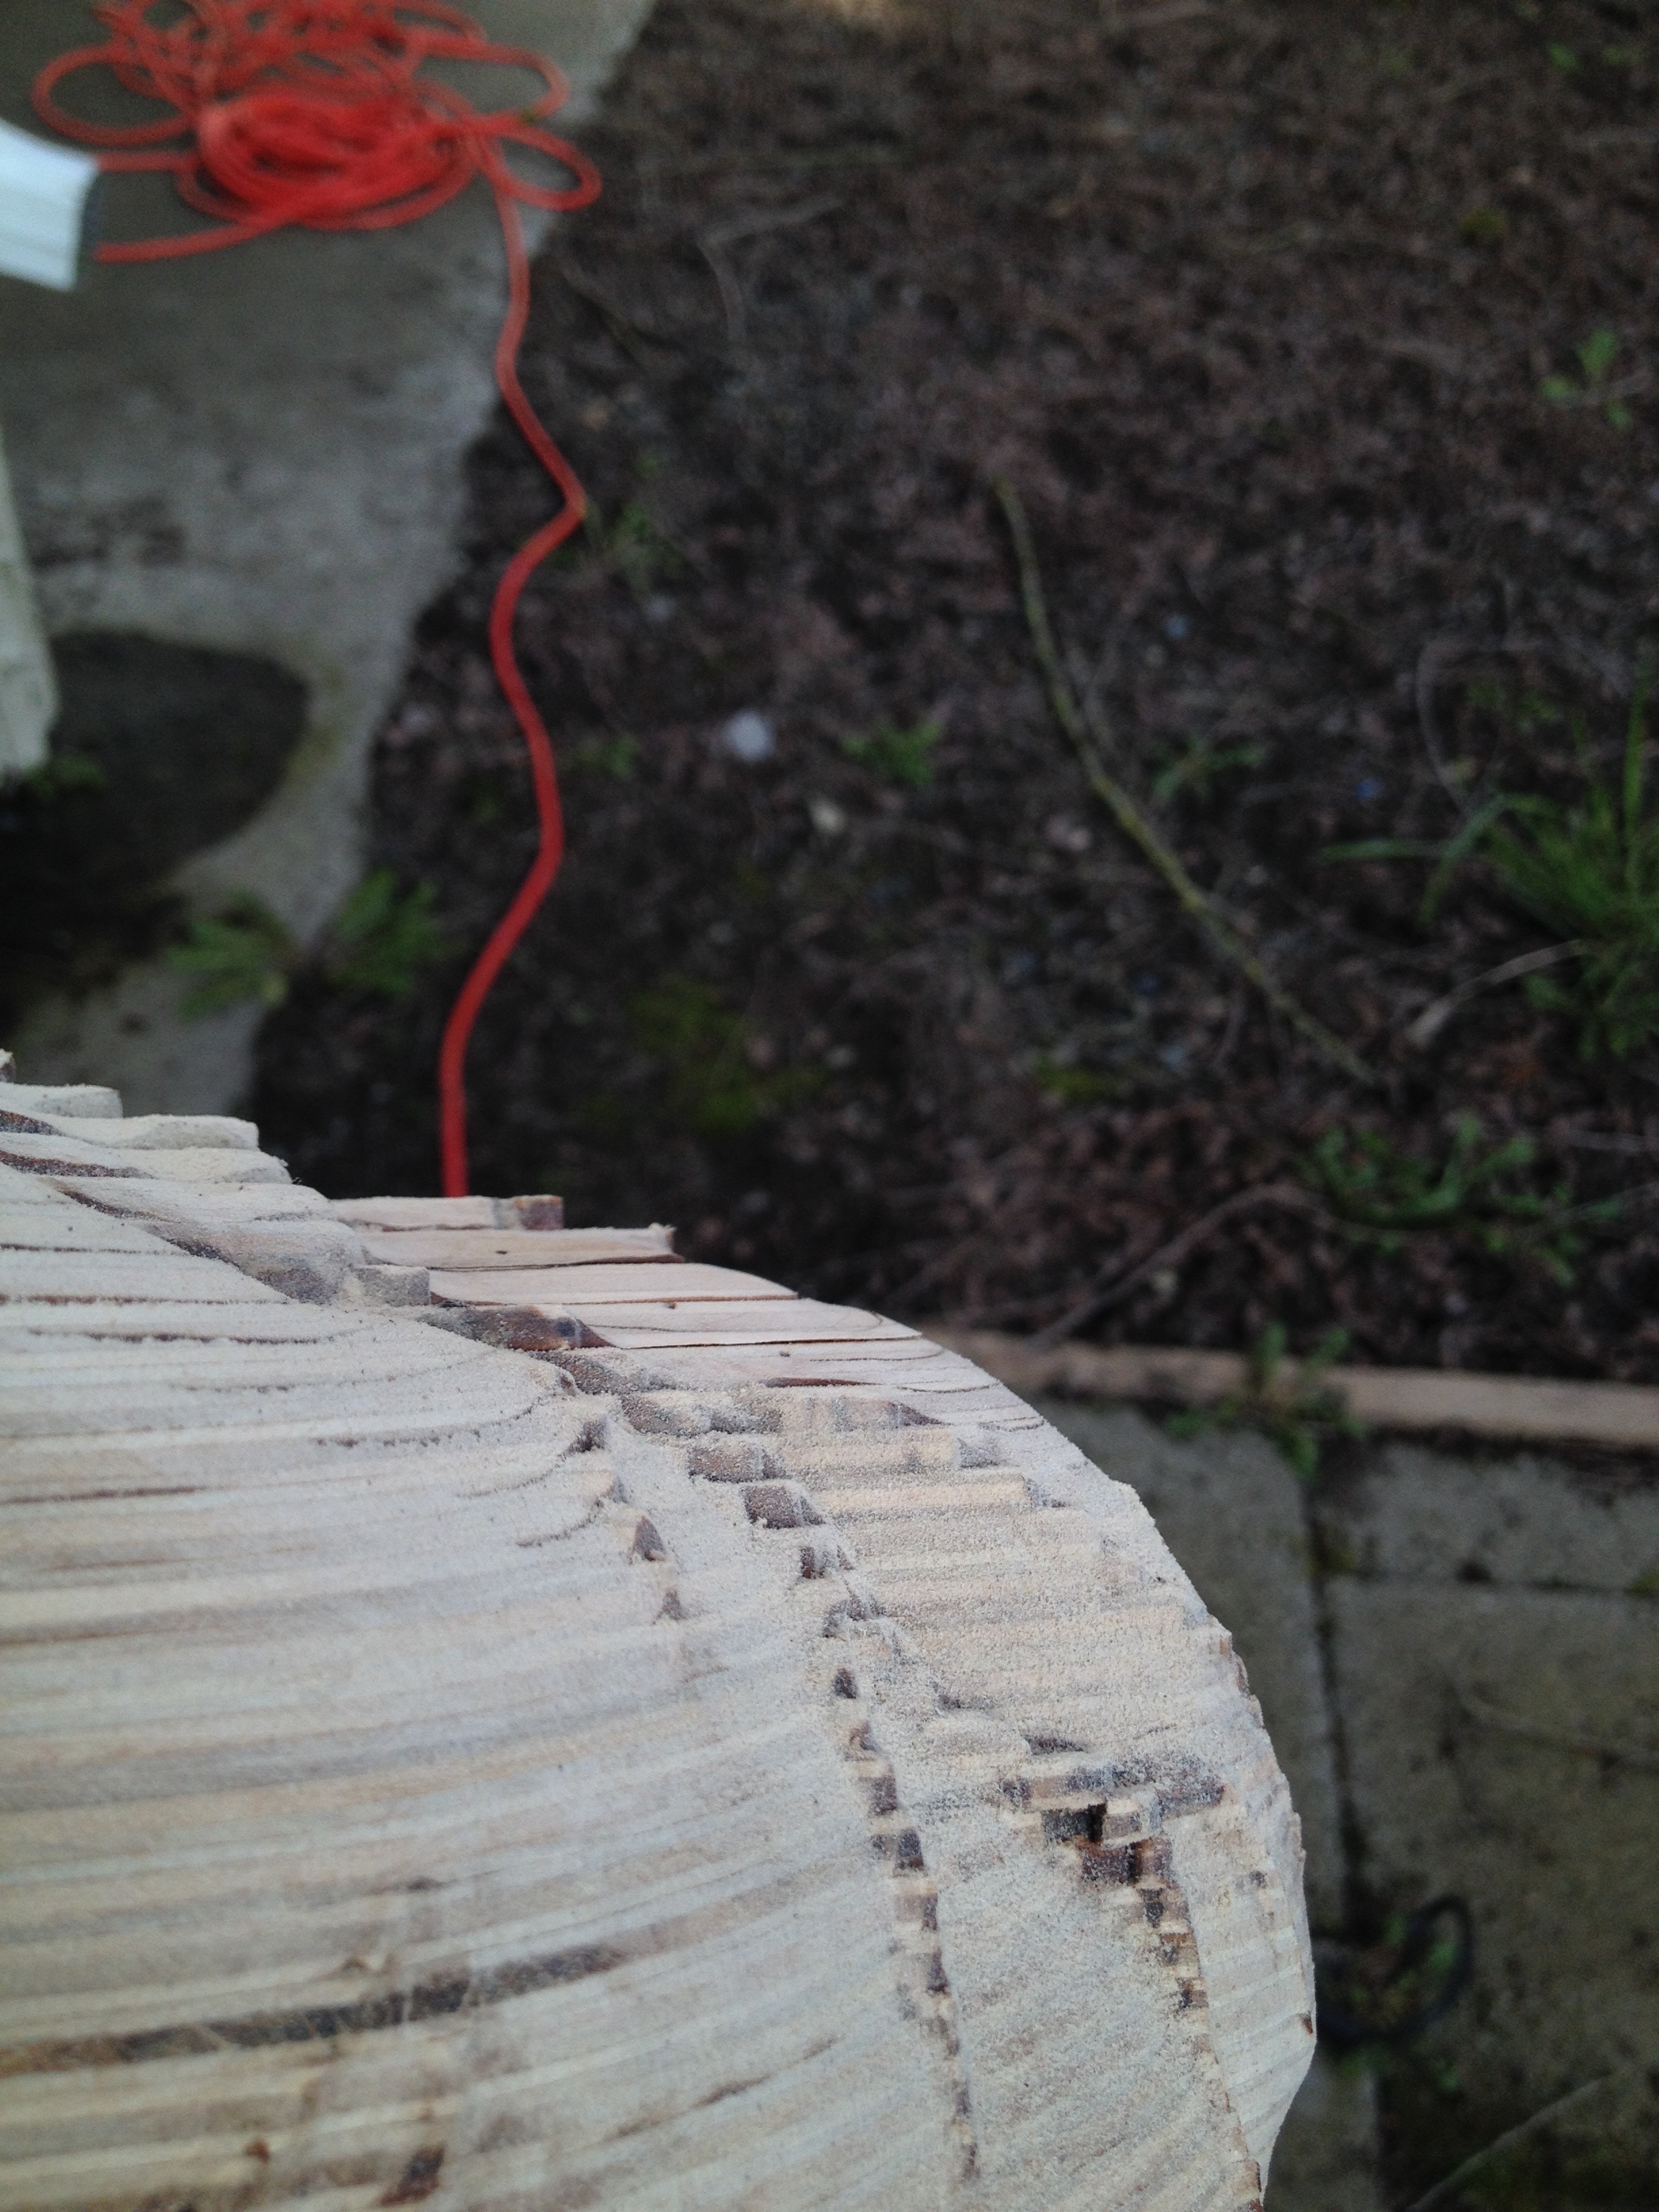
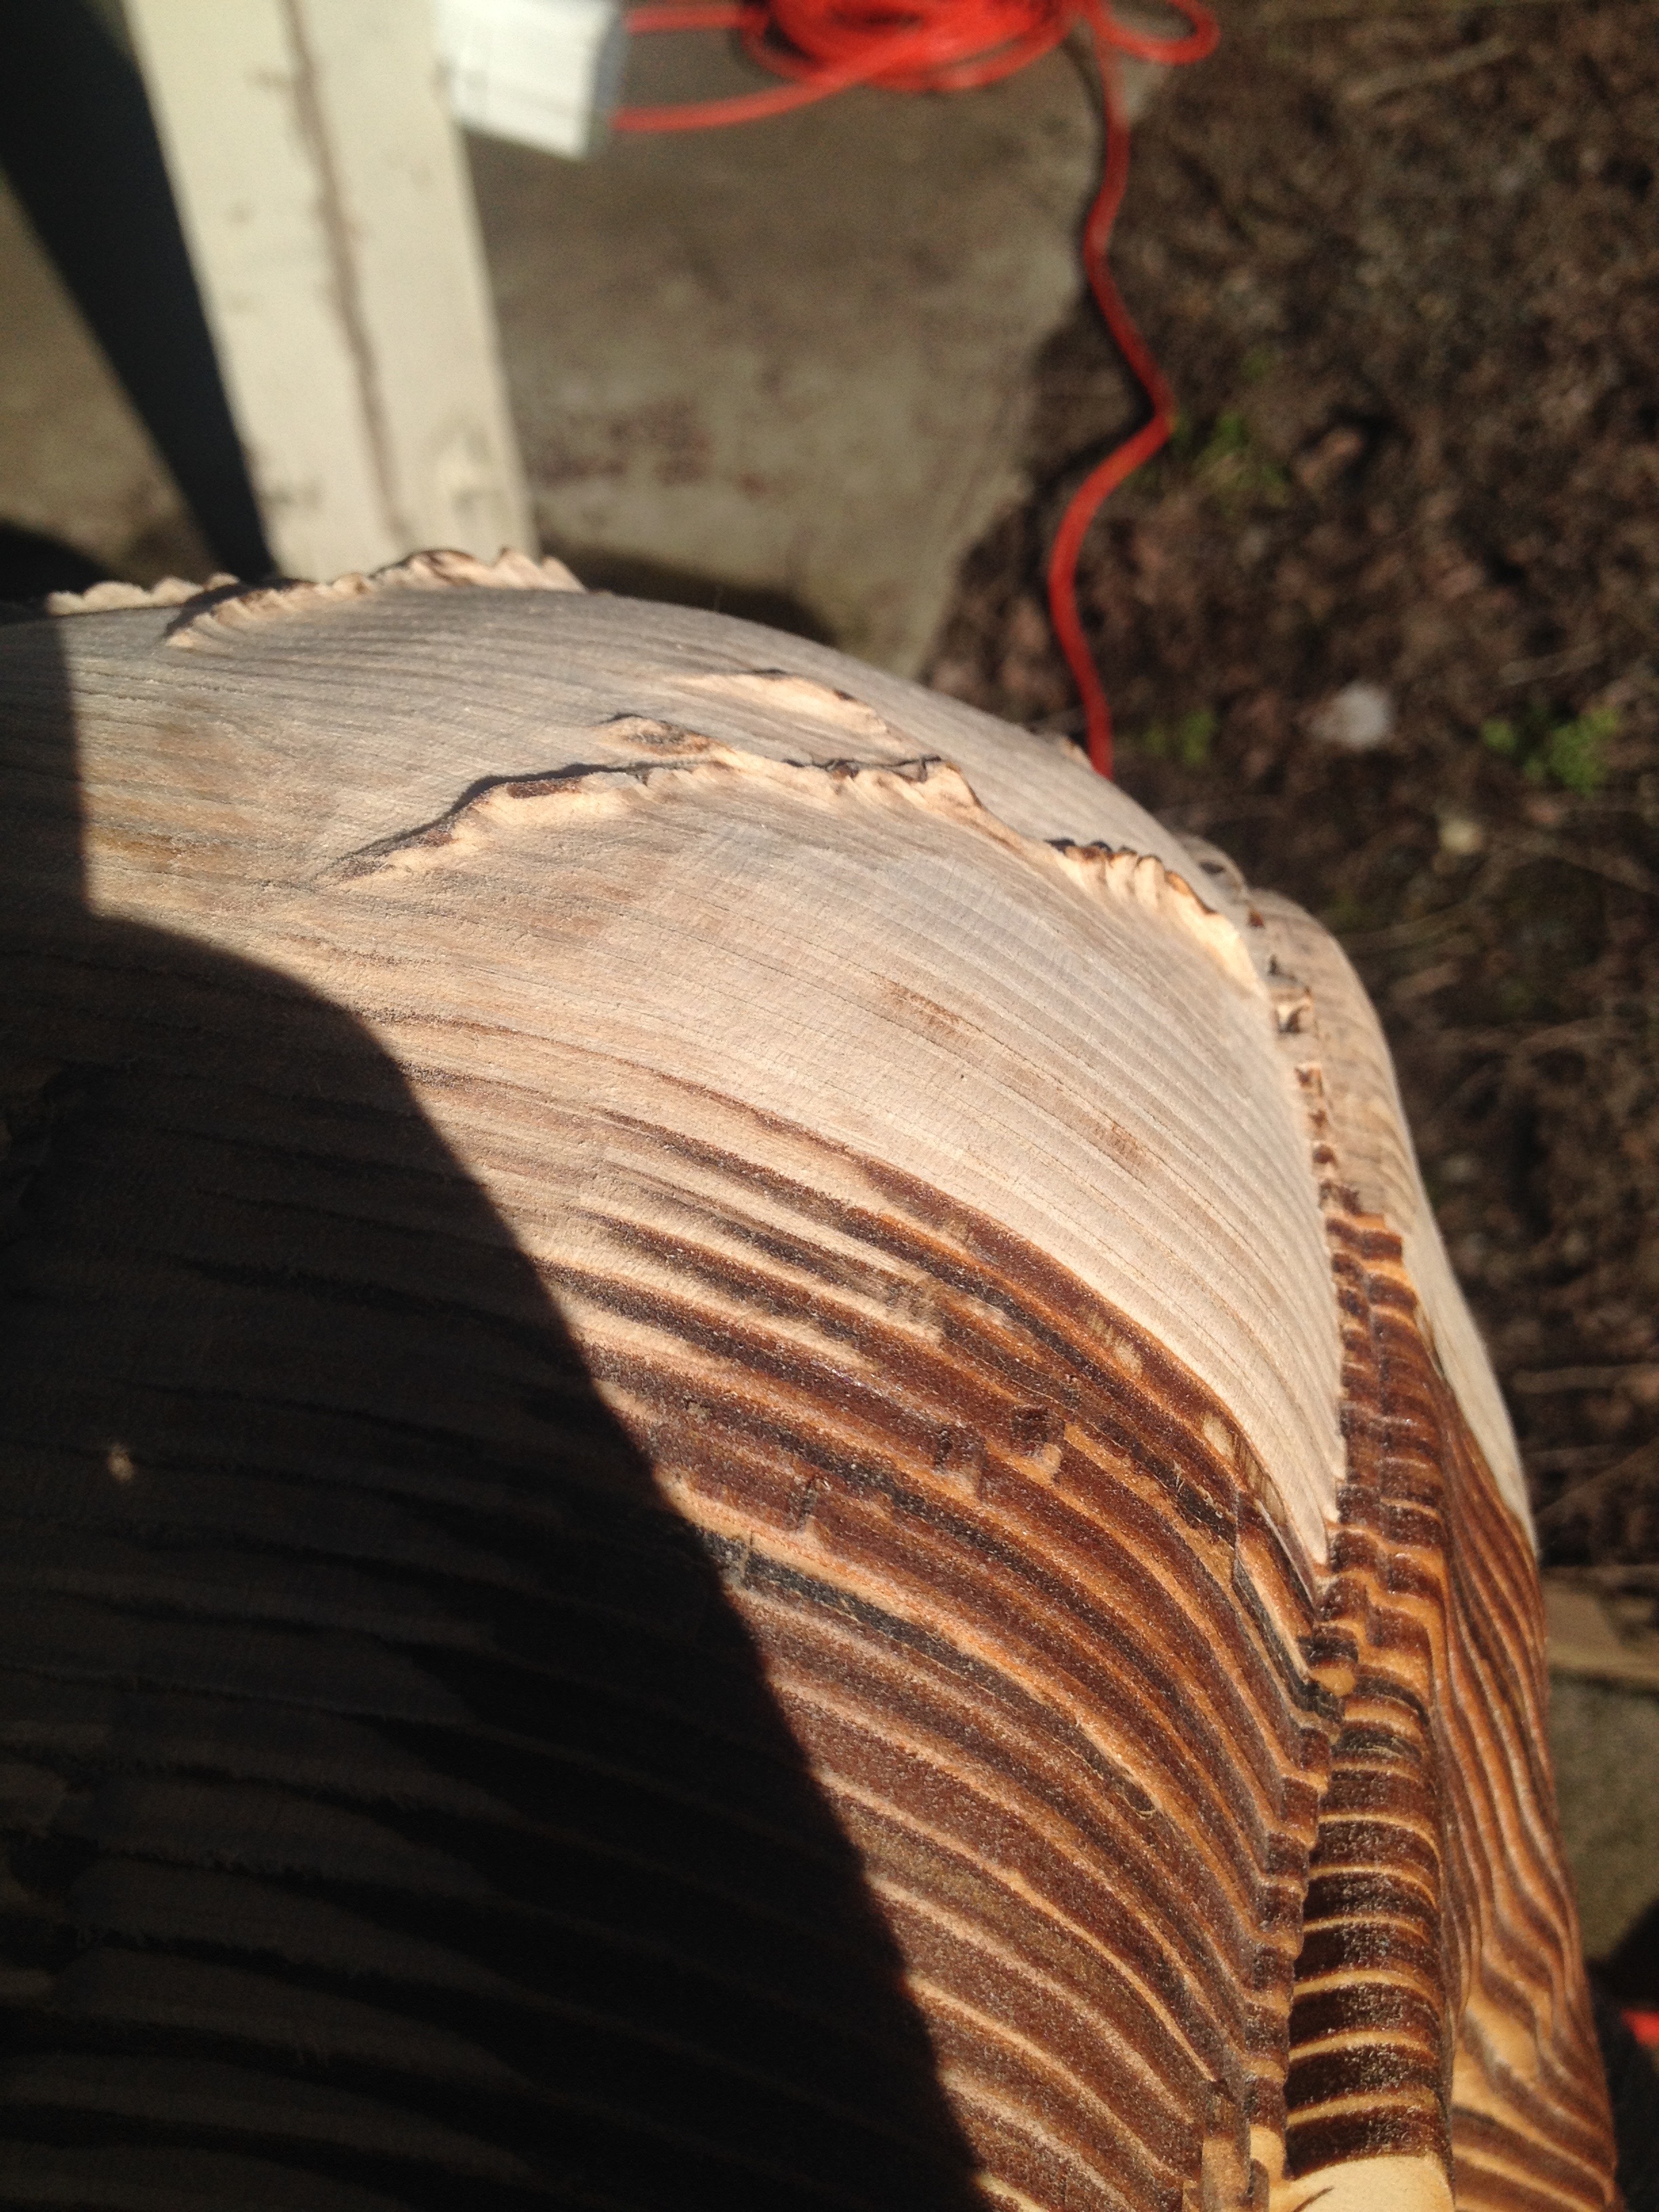
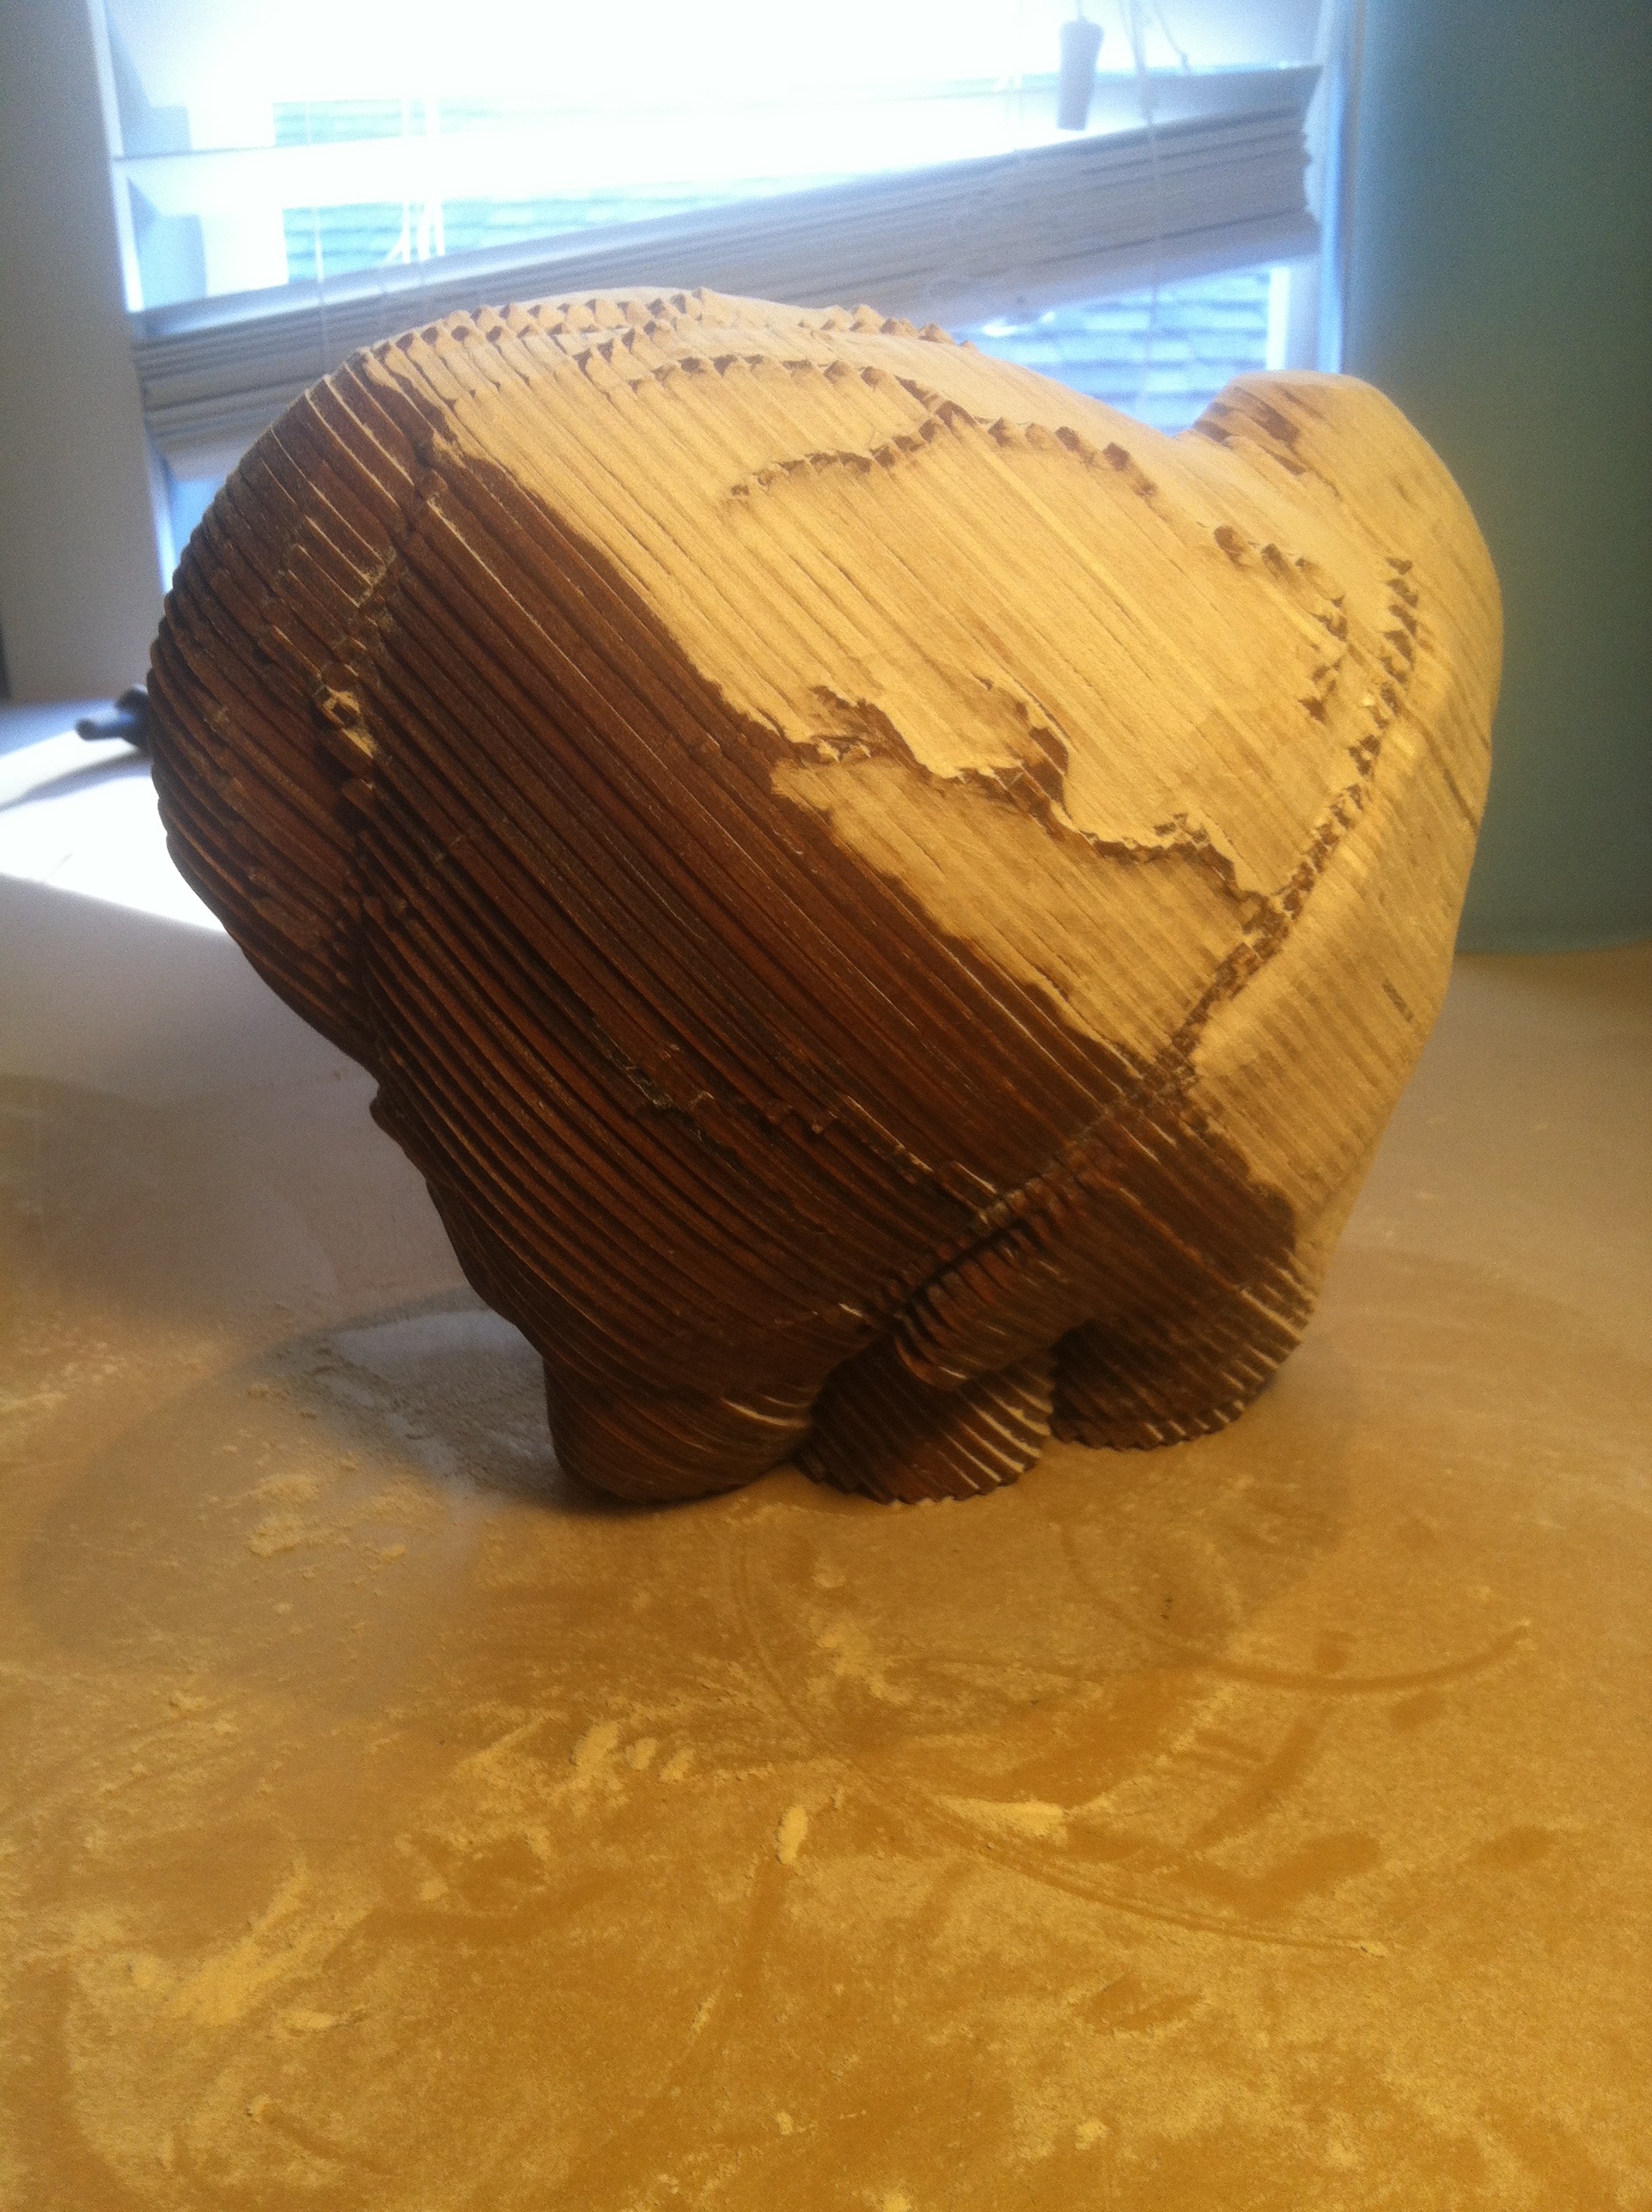
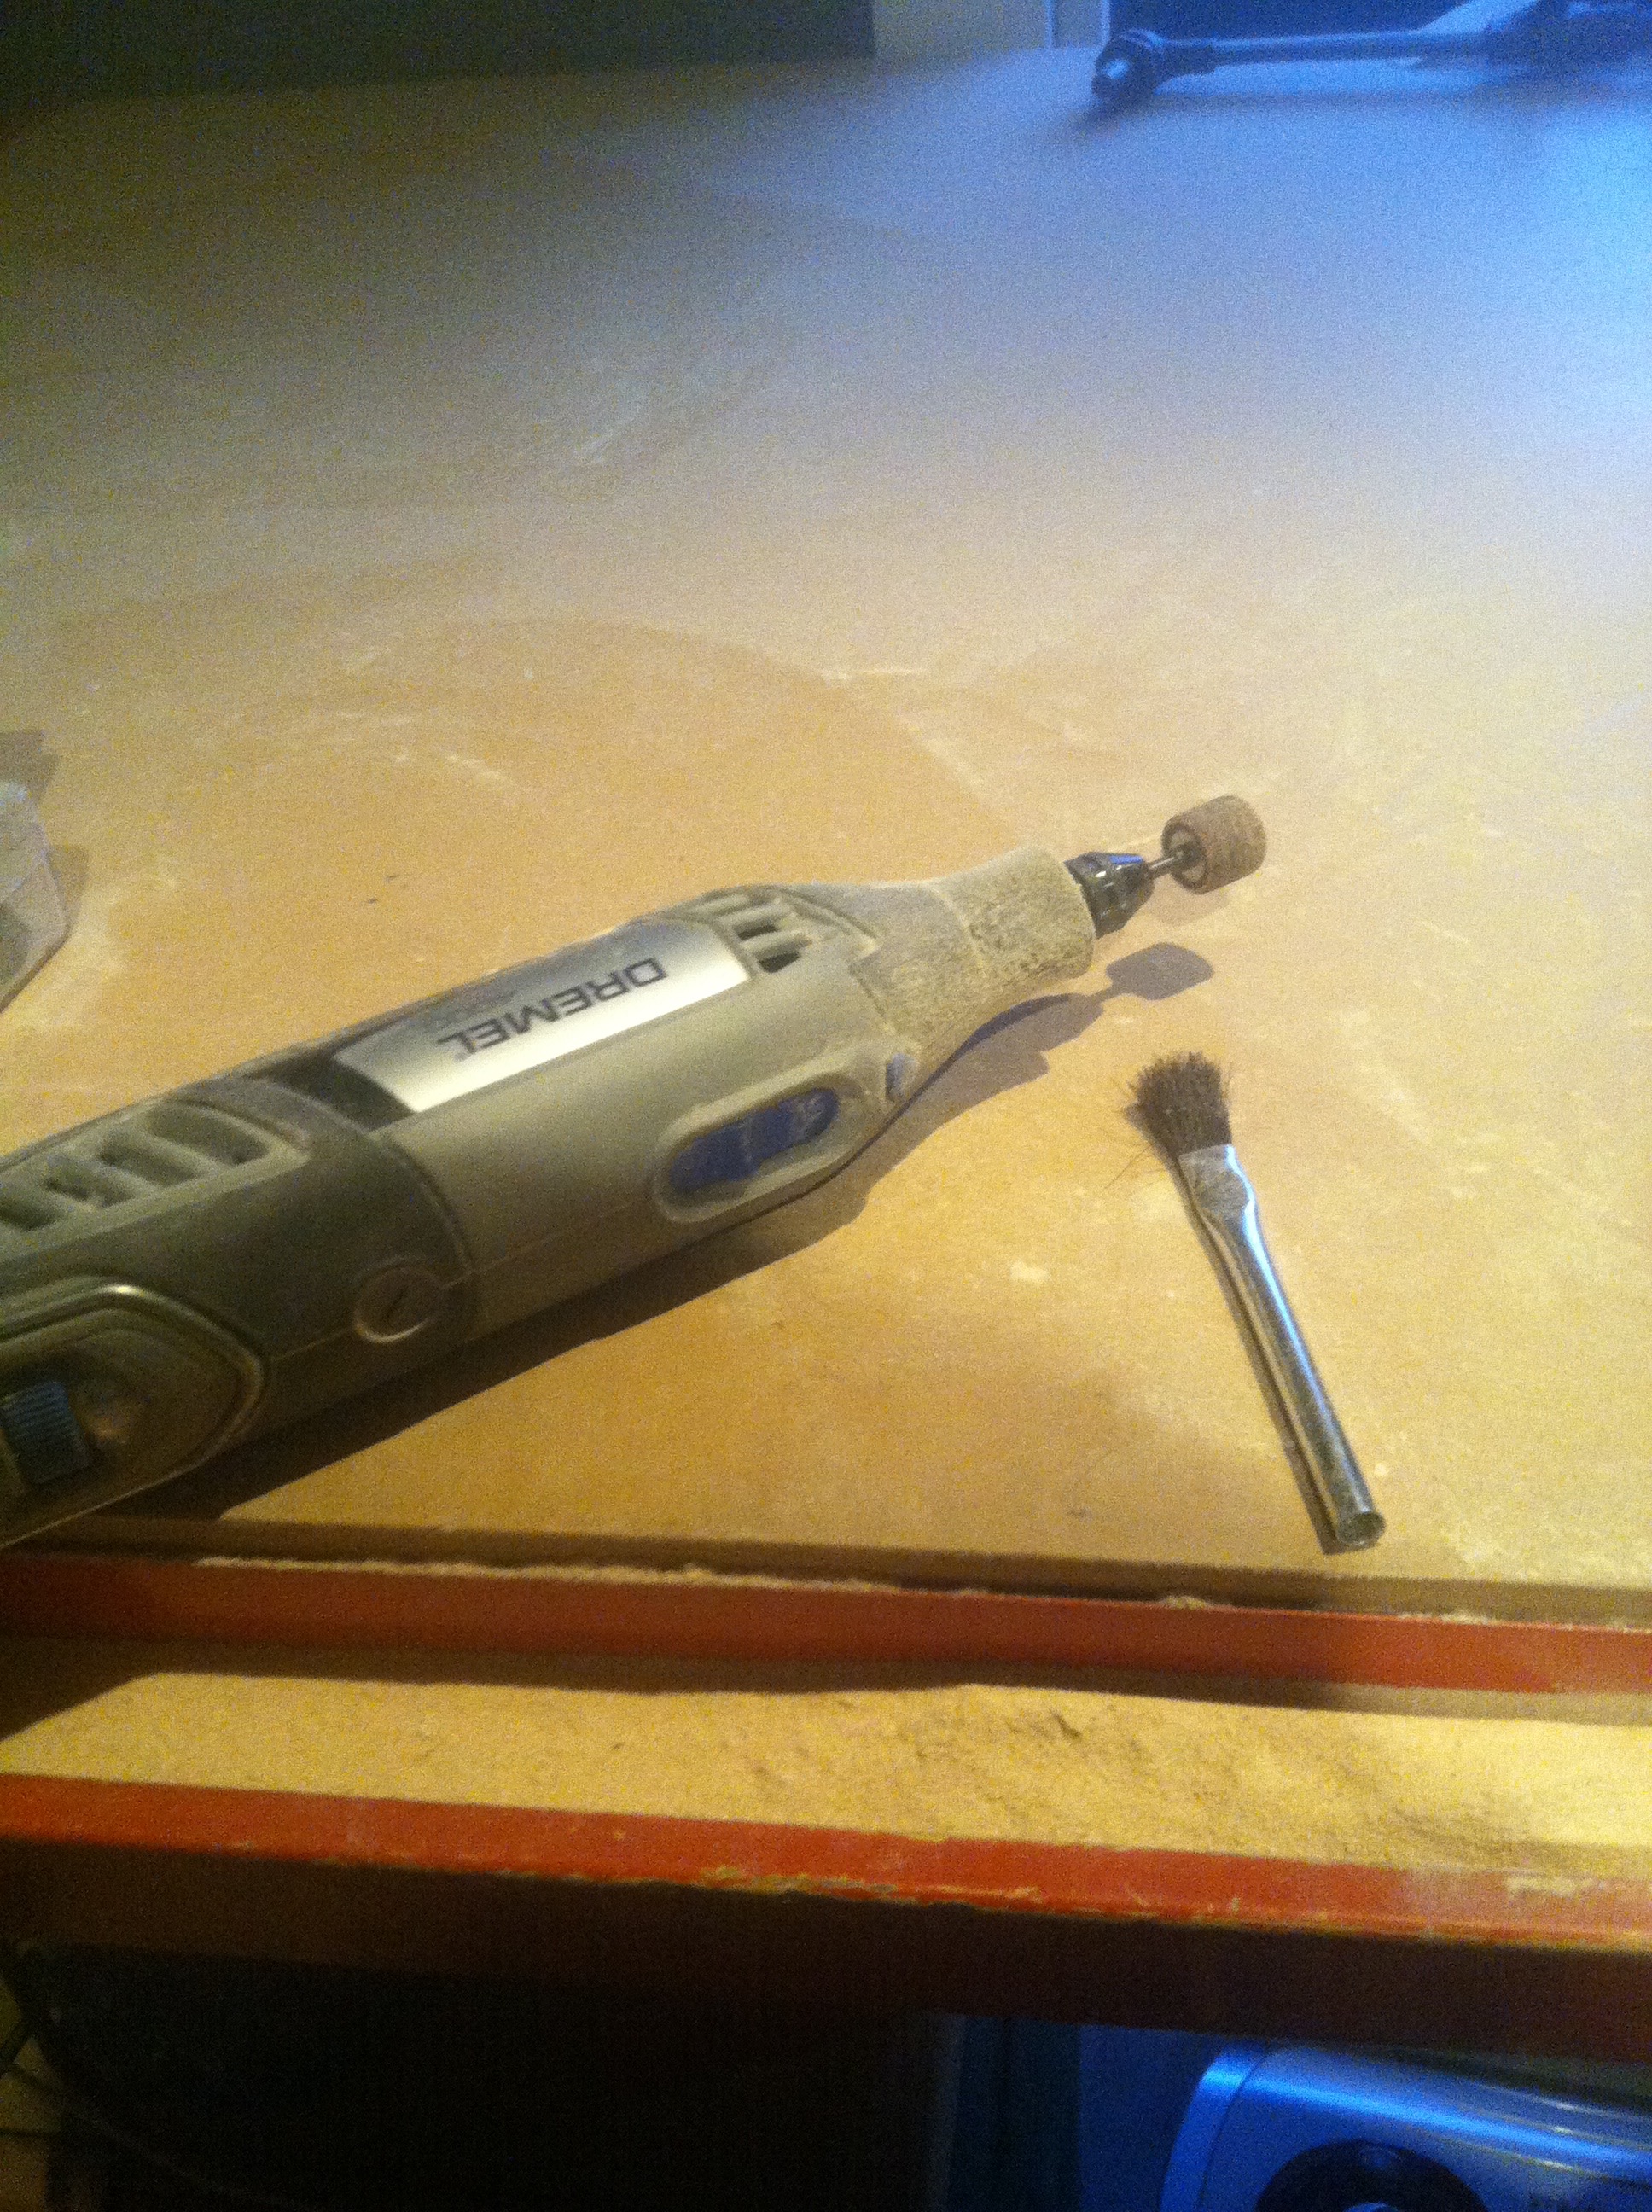
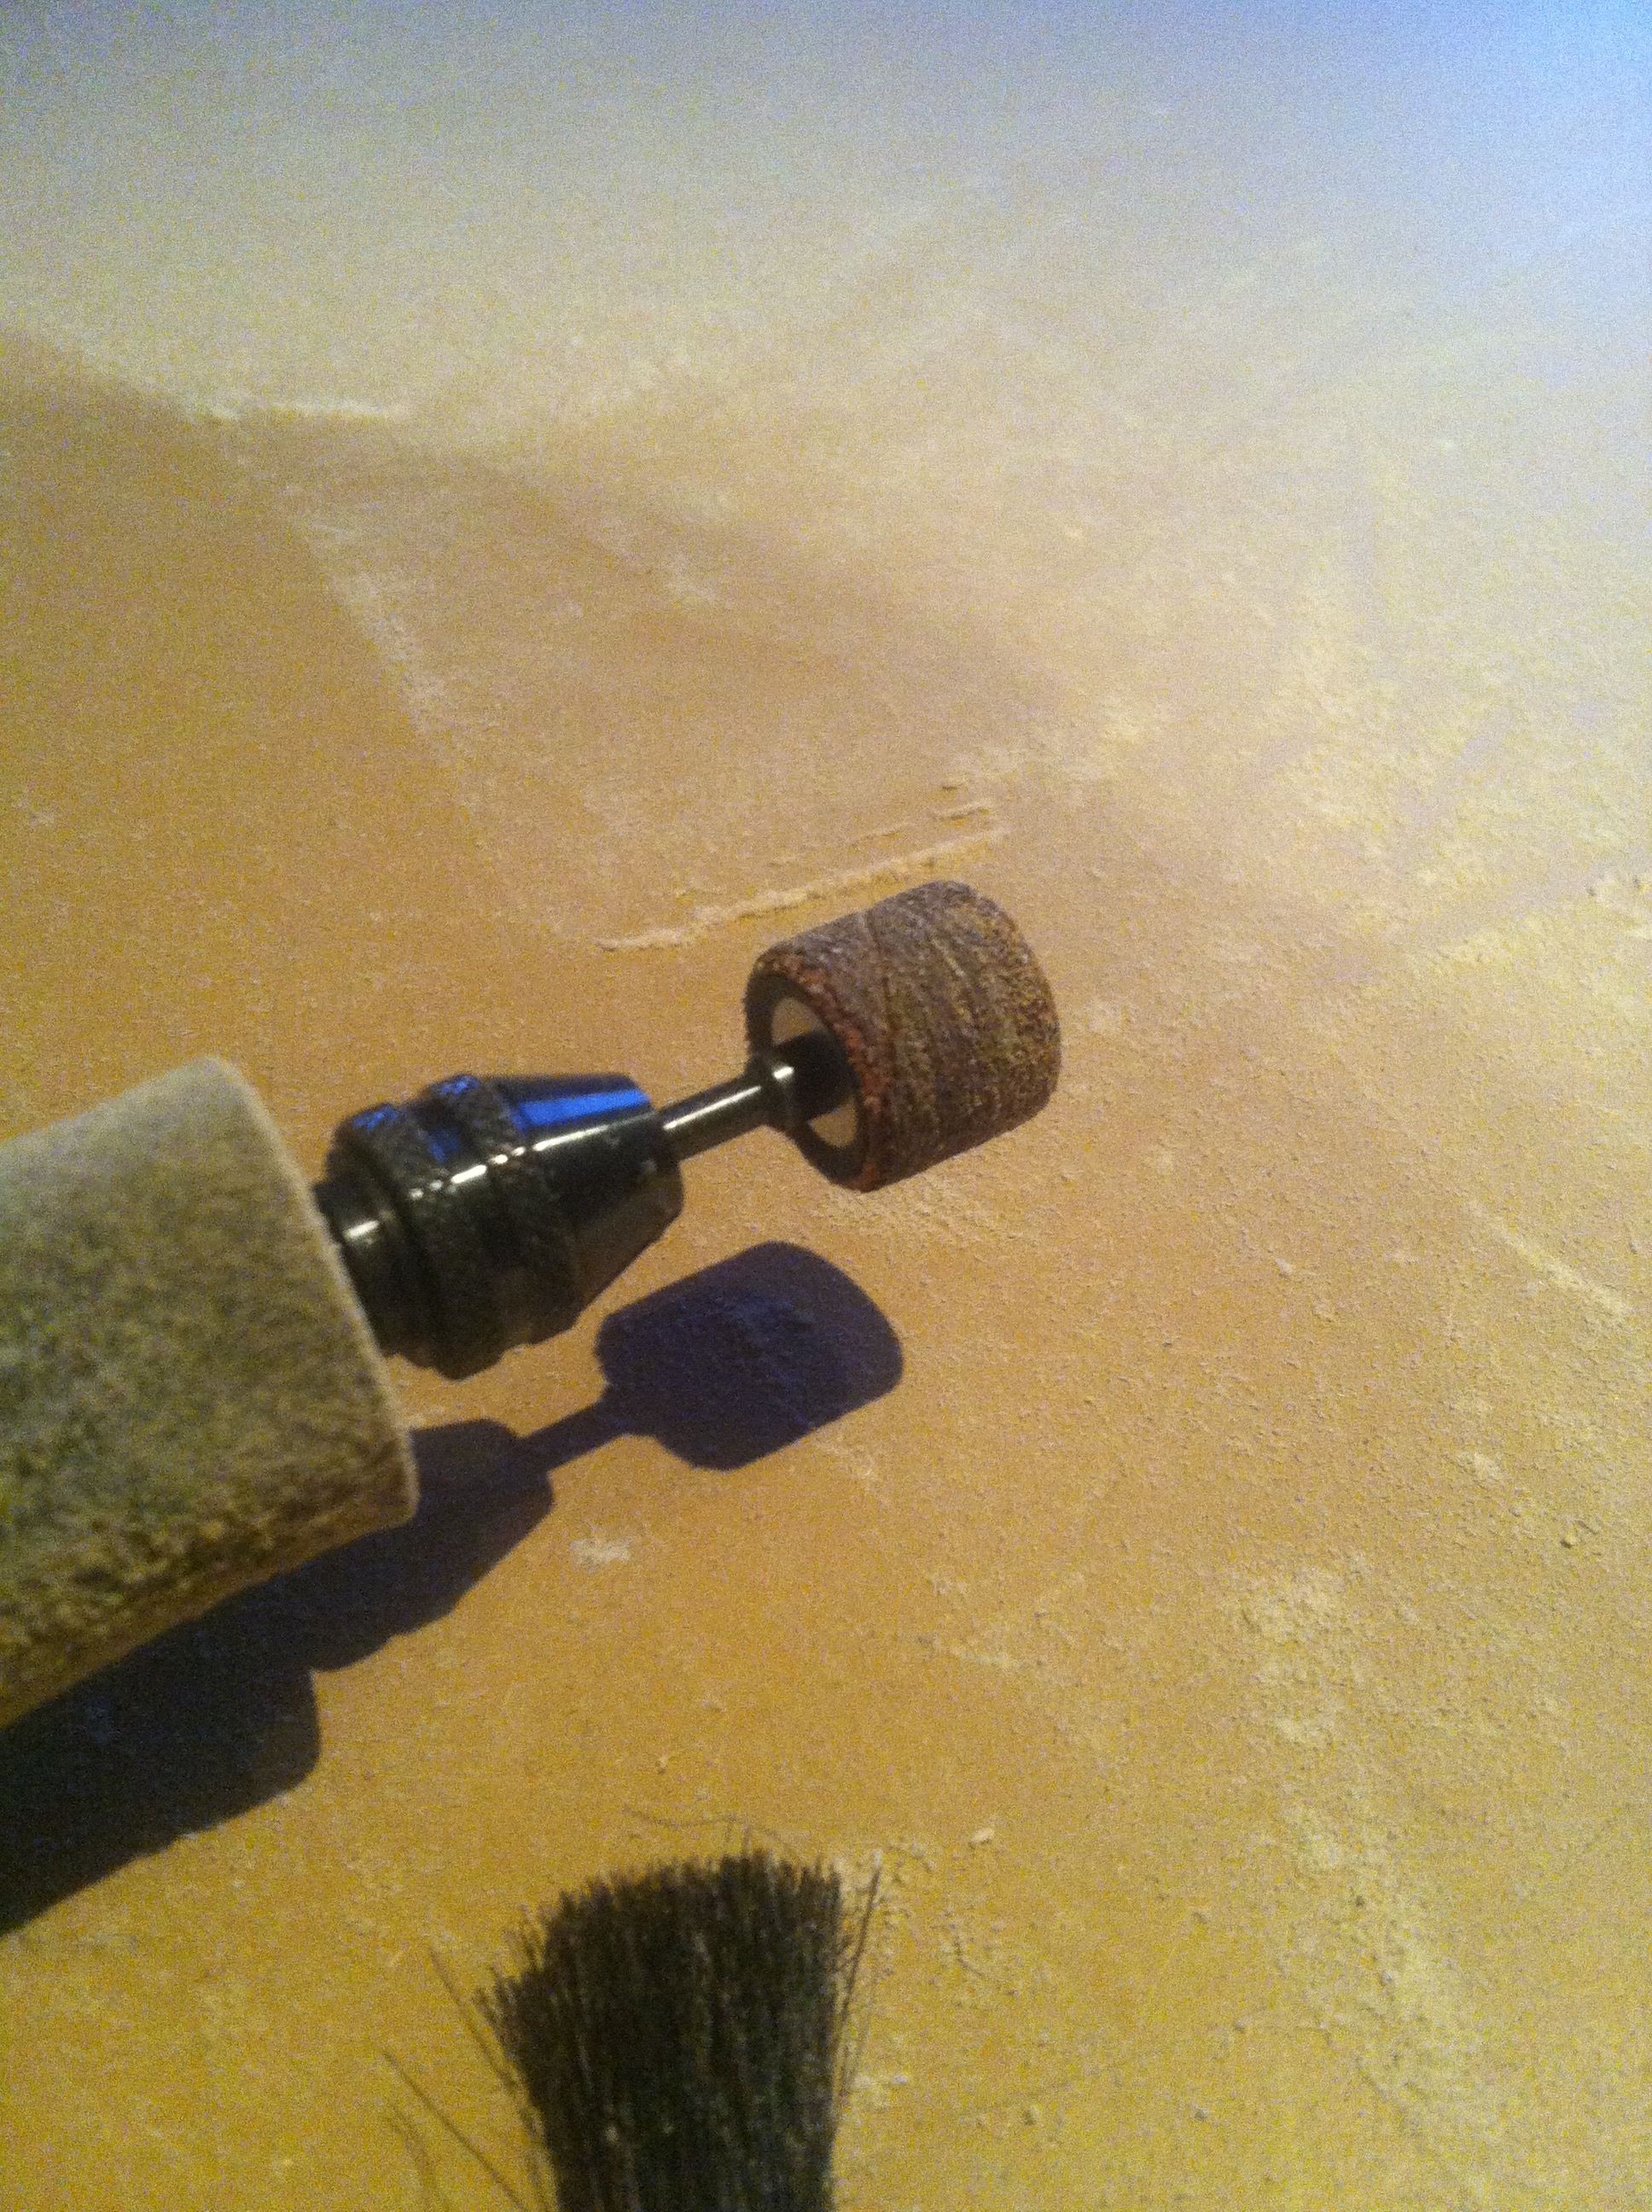
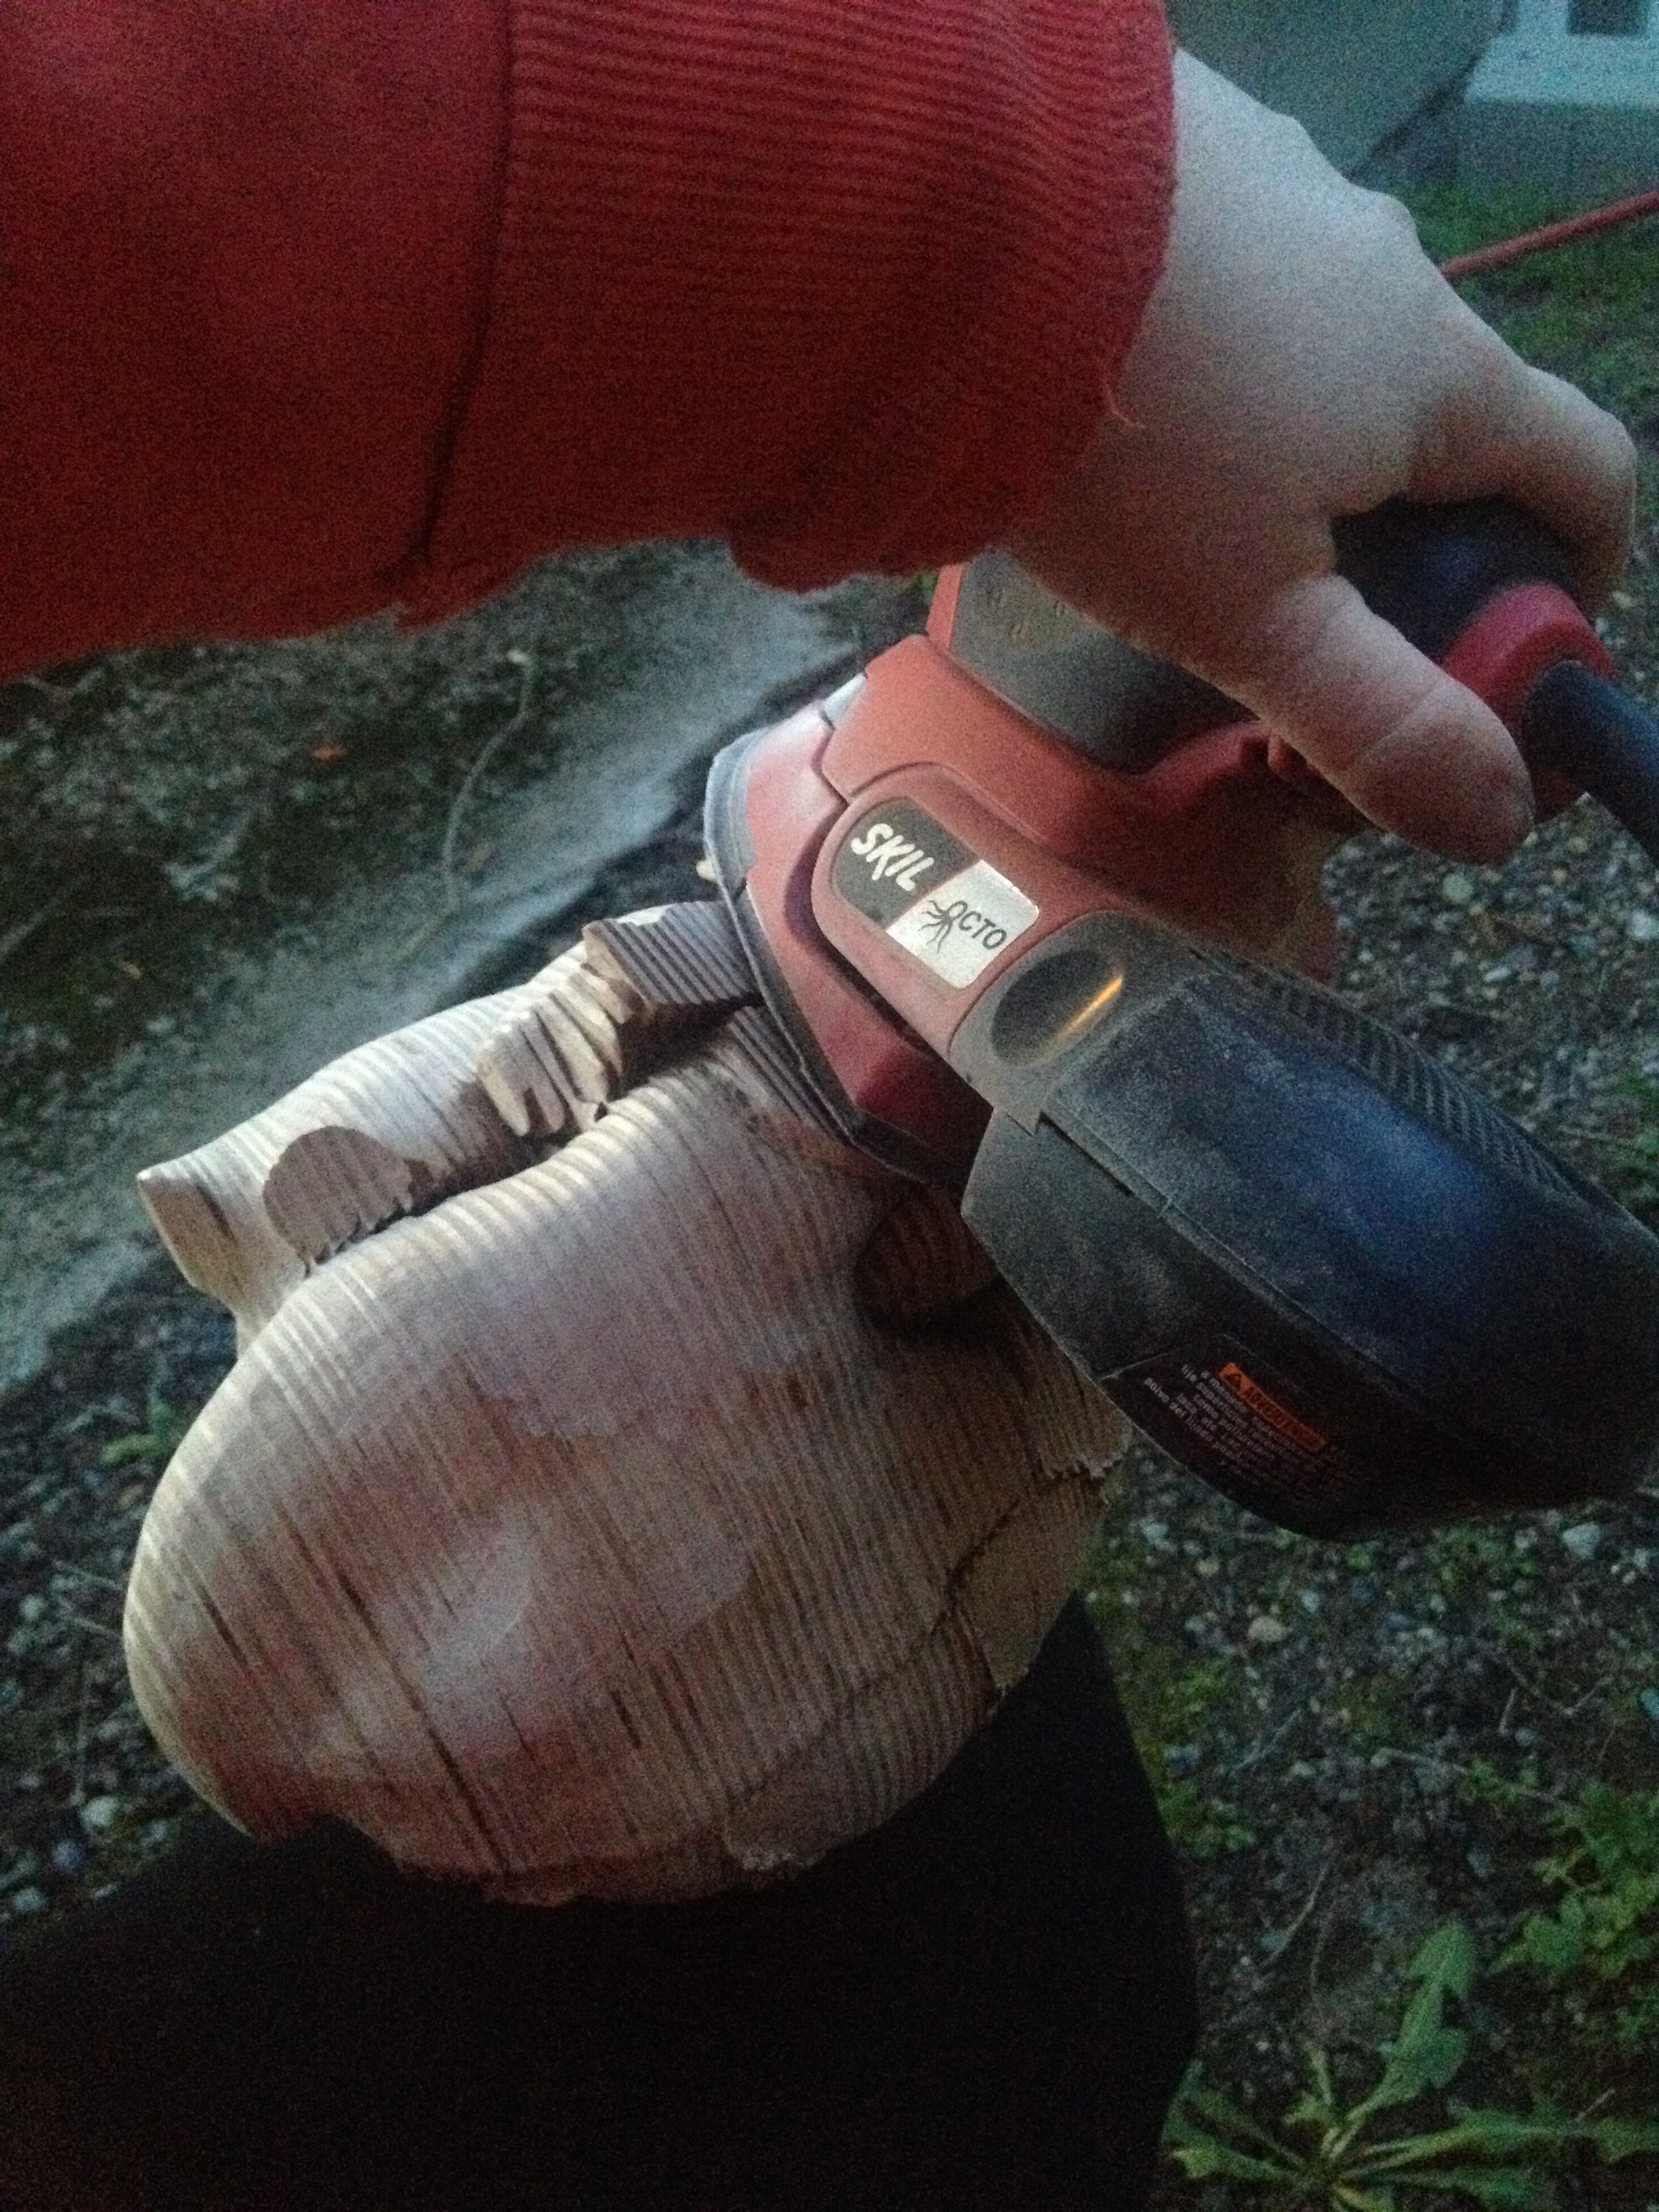
To be clear, if you made your print large enough, it should look rad already and have decent resolution. The burnt edges of the wood are an interesting contrast to the birch, and really put each layer into relief. I kept mine half-finished for a long time to use as an example in the workshops I teach and at promotional events, to more clearly demonstrate the technique, but eventually my own curiosity to see how it would look finished overtook my laziness :)
My main technique was as follows:
—Start at one end with the rotary tool, and move in sections about 3" square.
—Since the veins will tend to disappear given half a chance, I used the rotary to "outline" them first. If you can't see them, try feeling along the edges. I sanded the layer "stepping" down on either side of the veins to make them rise more prominently over the surface.
—Next I targeted the more broadly curved areas between veins.
—Then, after removing a significant amount of material over the non-veined areas, it's much easier to get the detailed contours around sharp angles, and define the veins in greater detail.
—When moving onto the next patch, leave the veins untouched, along with any other hard-to-get-to areas. This phase is for removing the bulk of material, not getting it perfect.
—Use a power hand sander to flatten out the flat plane of the heart, where there is a lot of stepping. I also used it to smooth larger areas, especially those closer to each end where the curve changed more dramatically between layers.
—After you've removed the bulk of the material from most of it, go back in with hand sandpaper, rattail files, sanding burs on the dremel, whatever you can get into the crannies with.
This isn't complicated, just incredibly tedious. If you don't like meticulous, detail-oriented, never-ending work, this isn't a great fit for you. If you, like me, actually LIKE to make your own chain by hand and routinely polish your hammers to a mirror finish, then this might be a fun way to spend some sunny afternoons :)
TIPS:
PLEASE NOTE that wood dust is very dangerous to breathe in, and you'll be making A LOT of it! Ideally, do this in a well-ventilated environment, preferably outdoors or open-air. No matter what, wear a good dust mask. If you're sanding indoors, plan AHEAD of time for your clean-up. Ideally, clean up with a vacuum or a wet cloth, not compressed air or a broom, which both throw dust into the air where you'll breathe it in more.
This takes a very, very long time. Like, 12 hours. I did all of this with about half a dozen fat sanding cylinders on a dremel tool. I kept a paintbrush on hand to brush off dust that liked to cling to the crevices and keep me from seeing where more sanding was needed.
On the larger curved areas, a large, coarse flat bastard file is pretty helpful to generalize the smoothly curved surfaces; it will get clogged with sawdust quickly, so make sure you have a file cleaner on hand if you're doing this. I don't recommend using a wood rasp, since it will bite deeper and have a tendency to chip out the corners of the cut wood.
The small sanding barrels tend to leave their own kind of texture, which can be undesirable, so using the file or sandpaper sheets is helpful. Use the flexible sheets in your hand to get into concave areas, or glue/wrap the sandpaper around paint stirrers or narrow shims to give a firm flat surface similar to the file.
YAY!
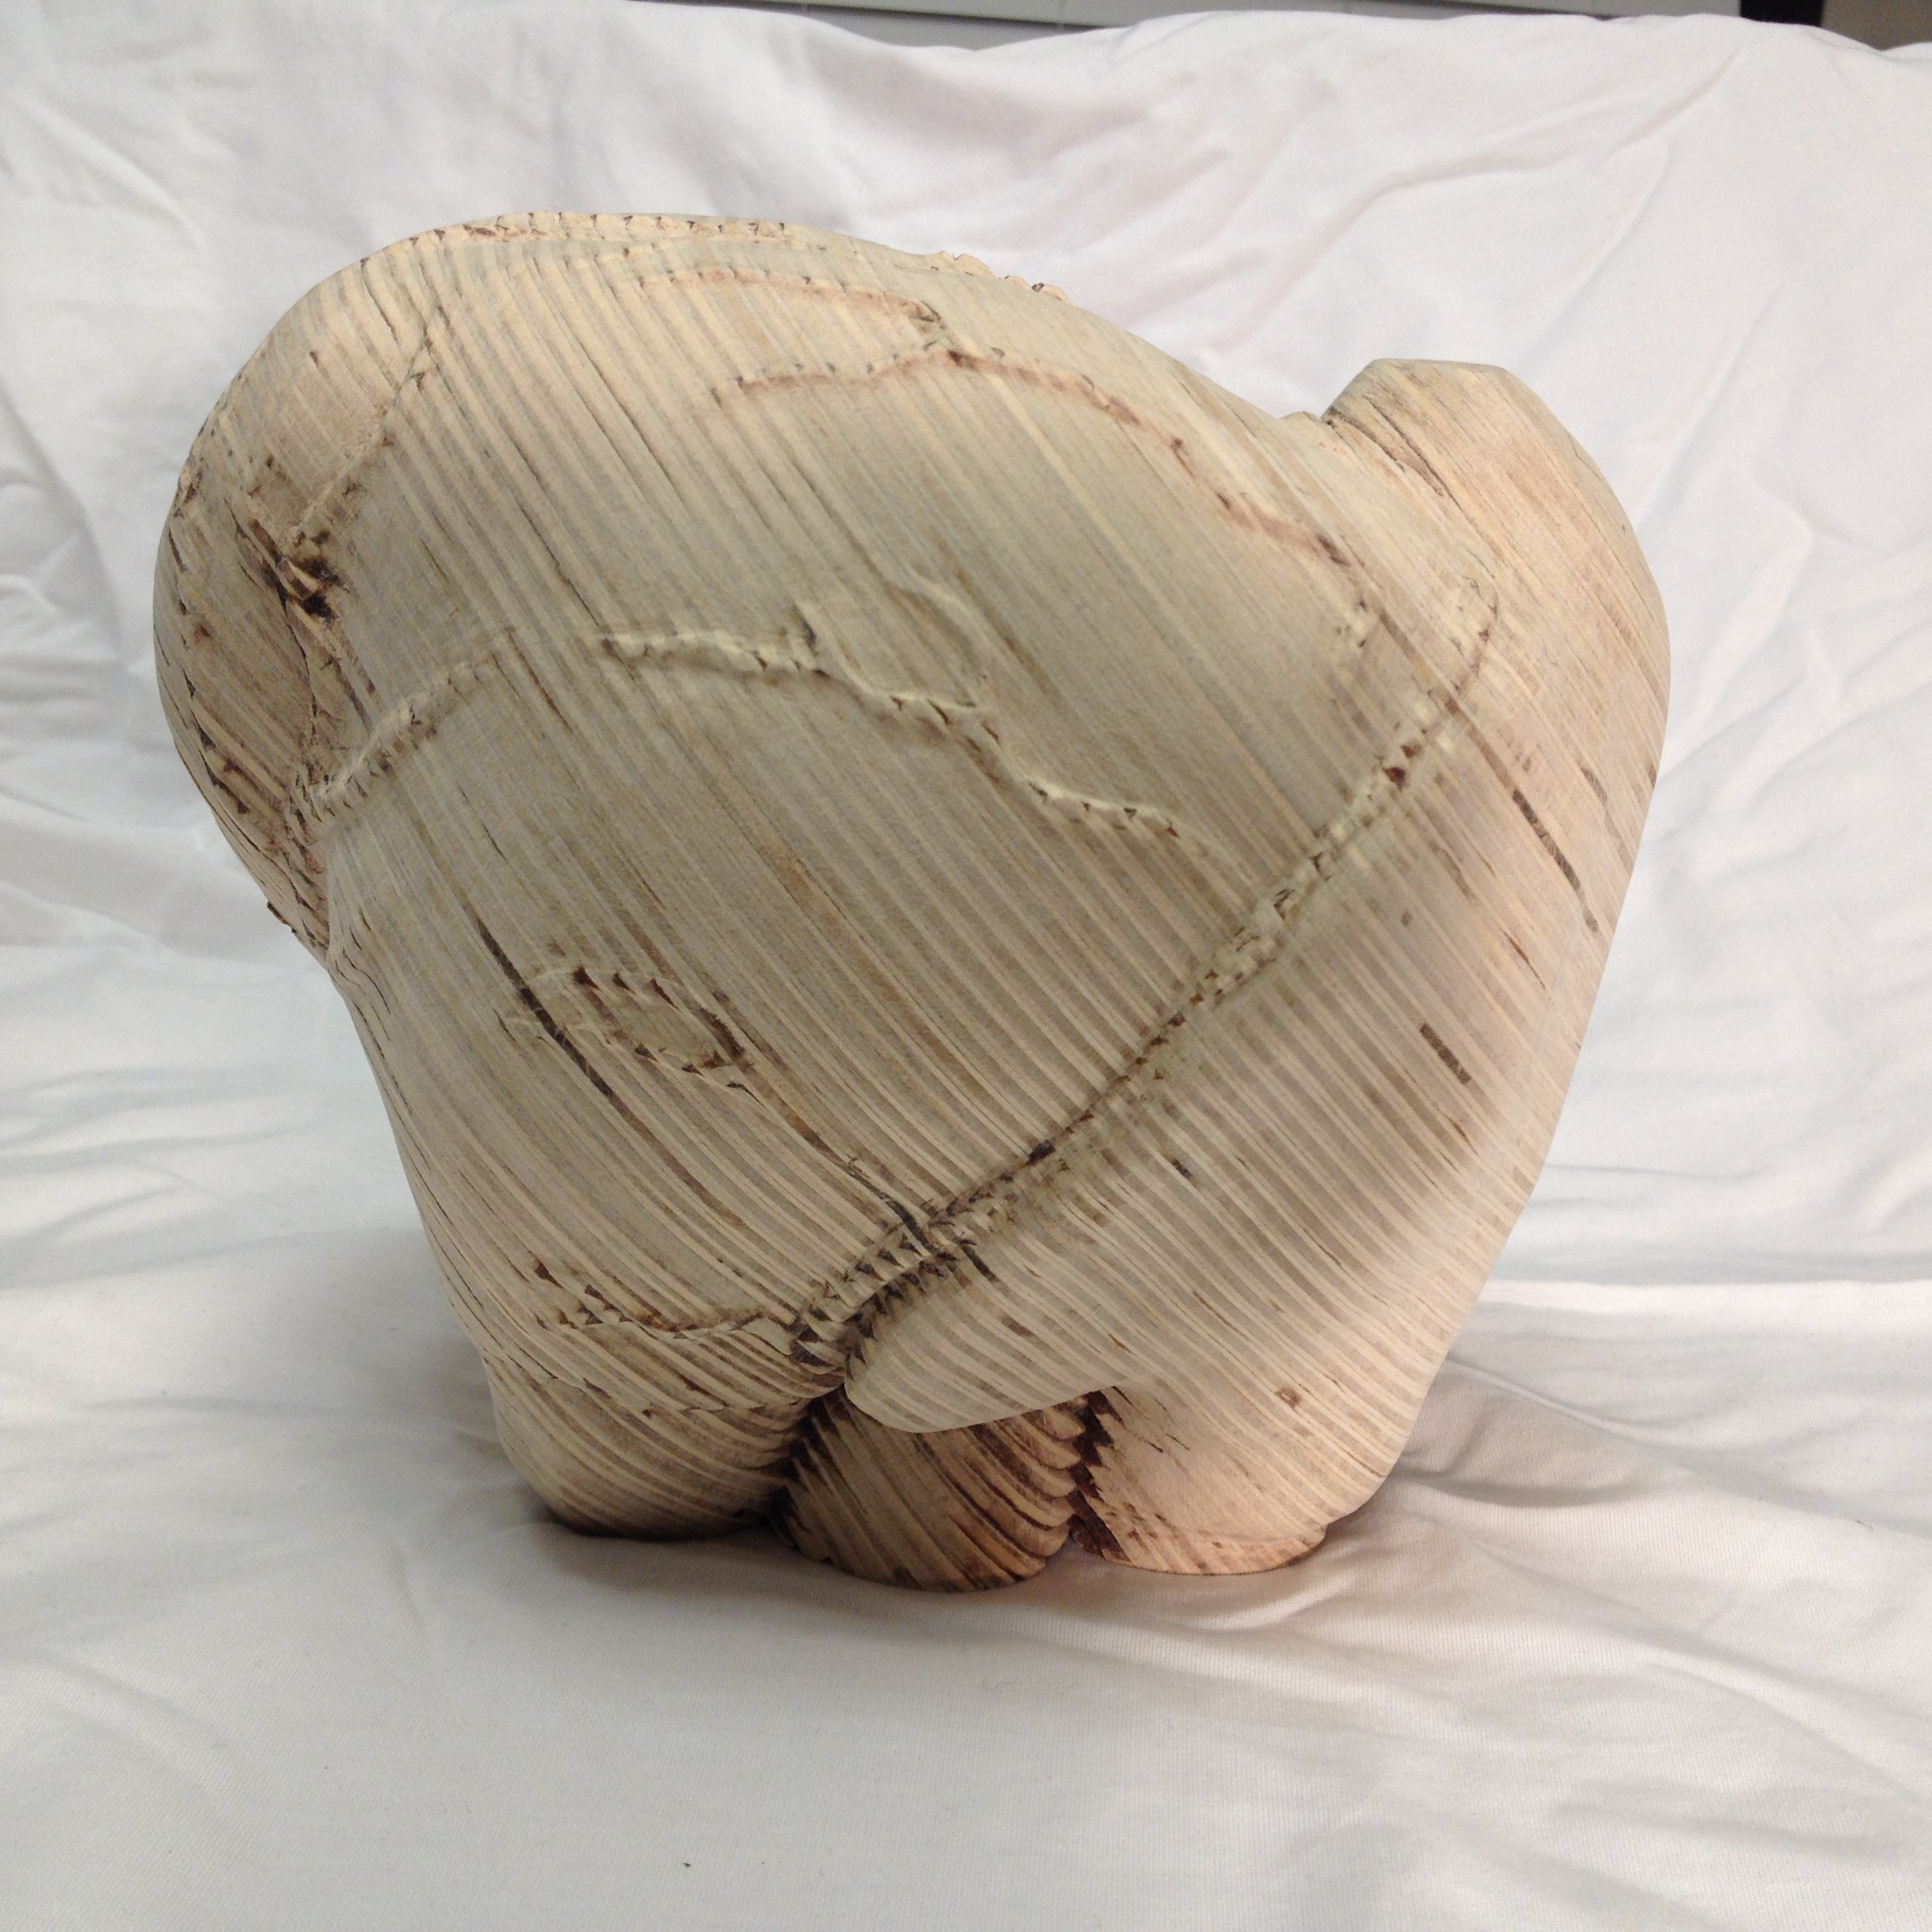
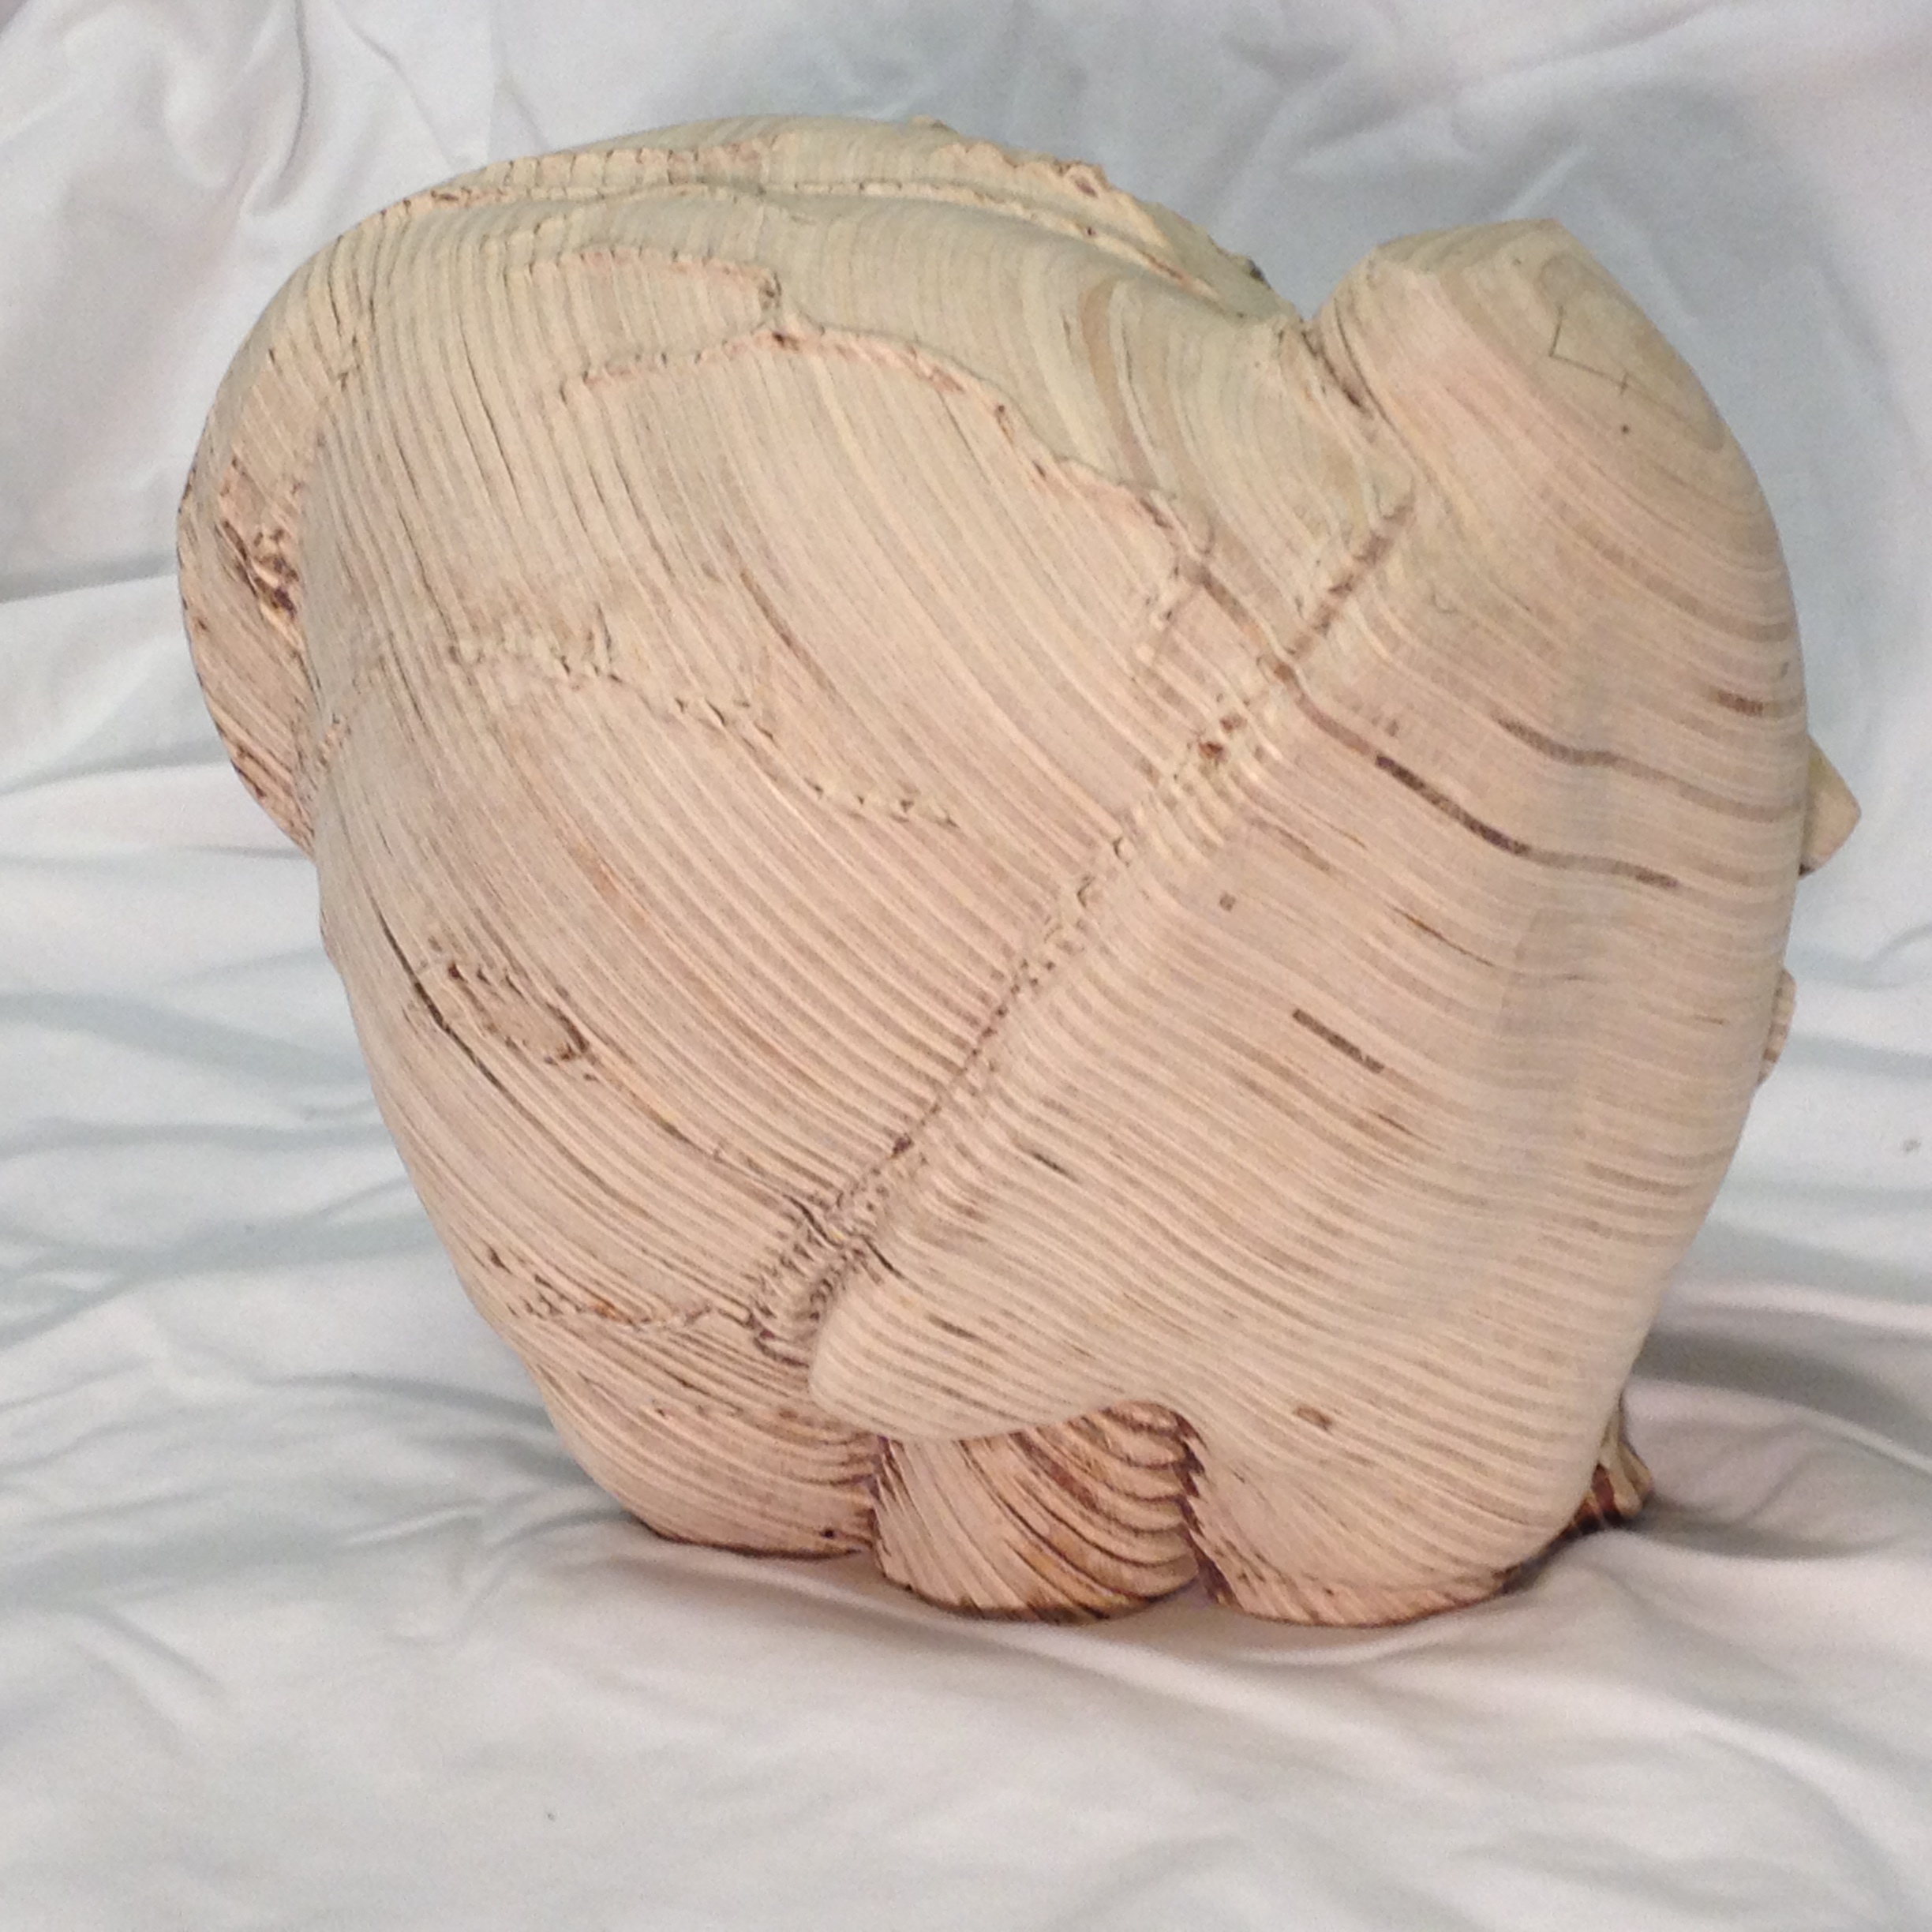
Now show it to friends, loved ones, and strangers and let them know...
...
...
...
....they've touched your heart <3