Laser Etching Anodized Aluminum
by saratogadude in Workshop > Laser Cutting
116016 Views, 85 Favorites, 0 Comments
Laser Etching Anodized Aluminum
This Instructable will show you how to use a laser cutter to etch anodized aluminum. I live near a DIY workshop called TechShop - they have $1M worth of equipment that I can get access to for about $100 a month. One piece of equipment they have is the Epilog laser cutter. Etching aluminum with simple text or customized artwork is virtually as simple as printing on an inkjet printer.
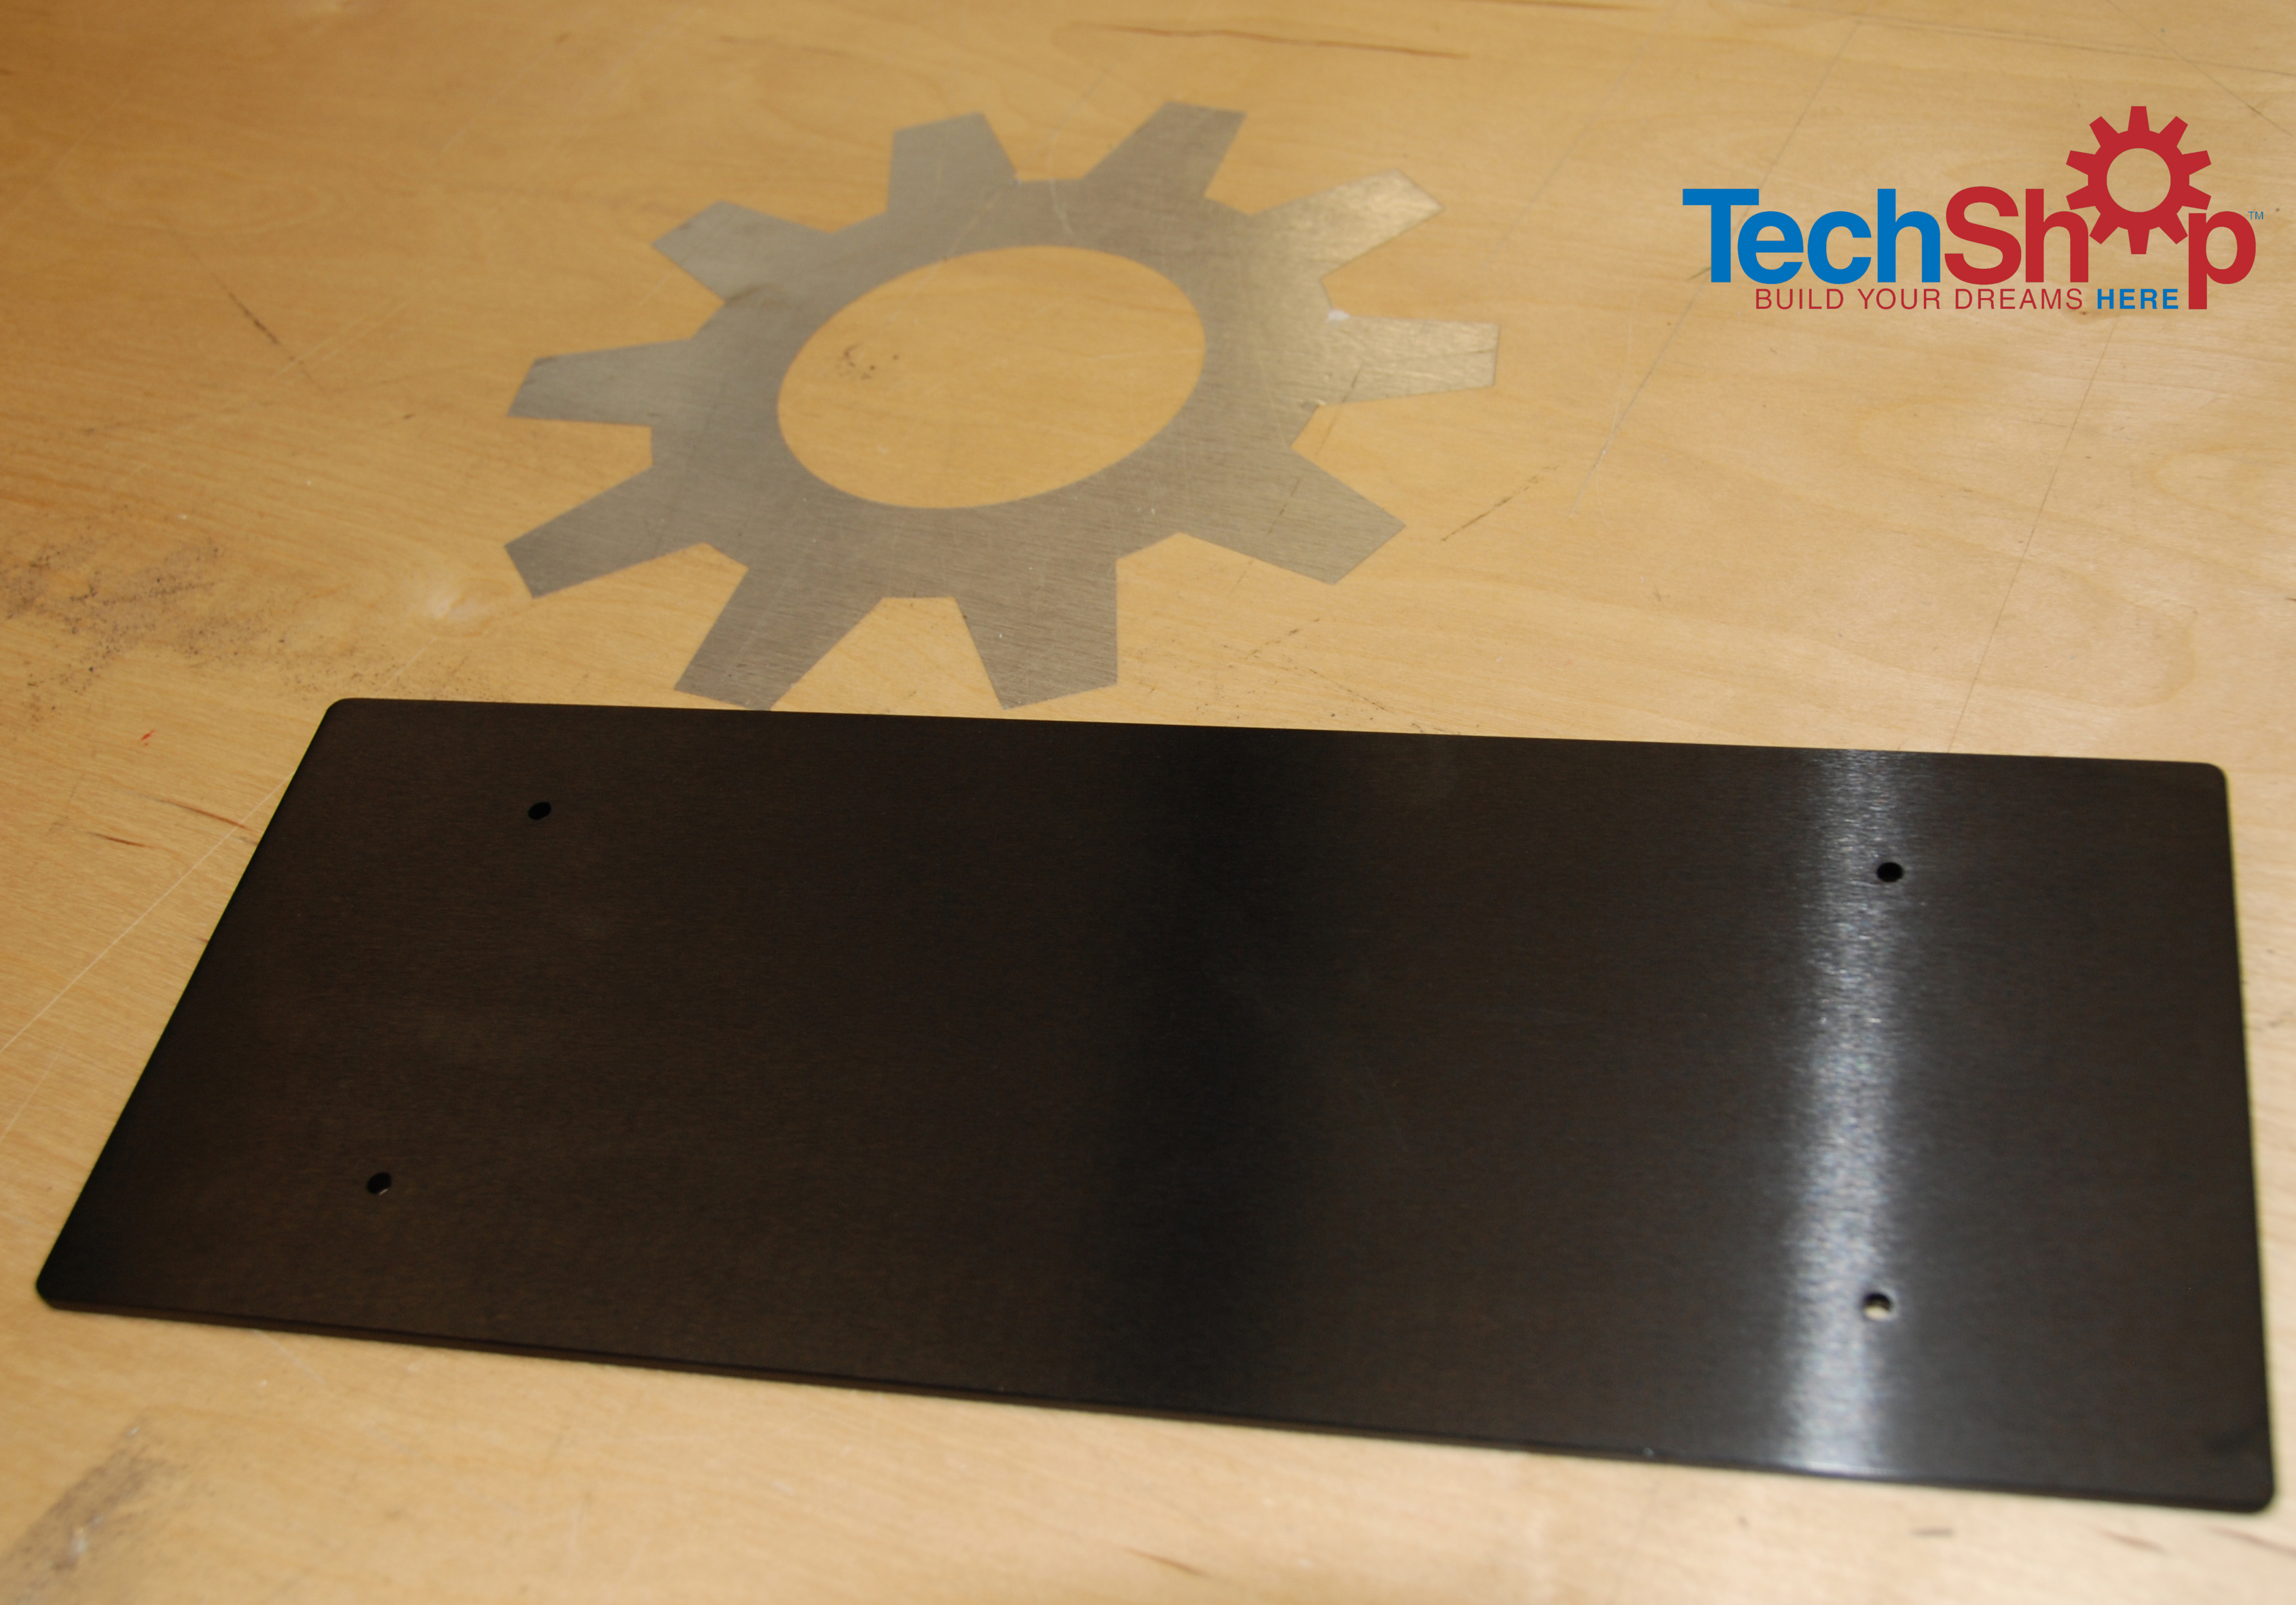
I start here with the blank, black, anodized aluminum faceplate for my DIY home power amplifier.
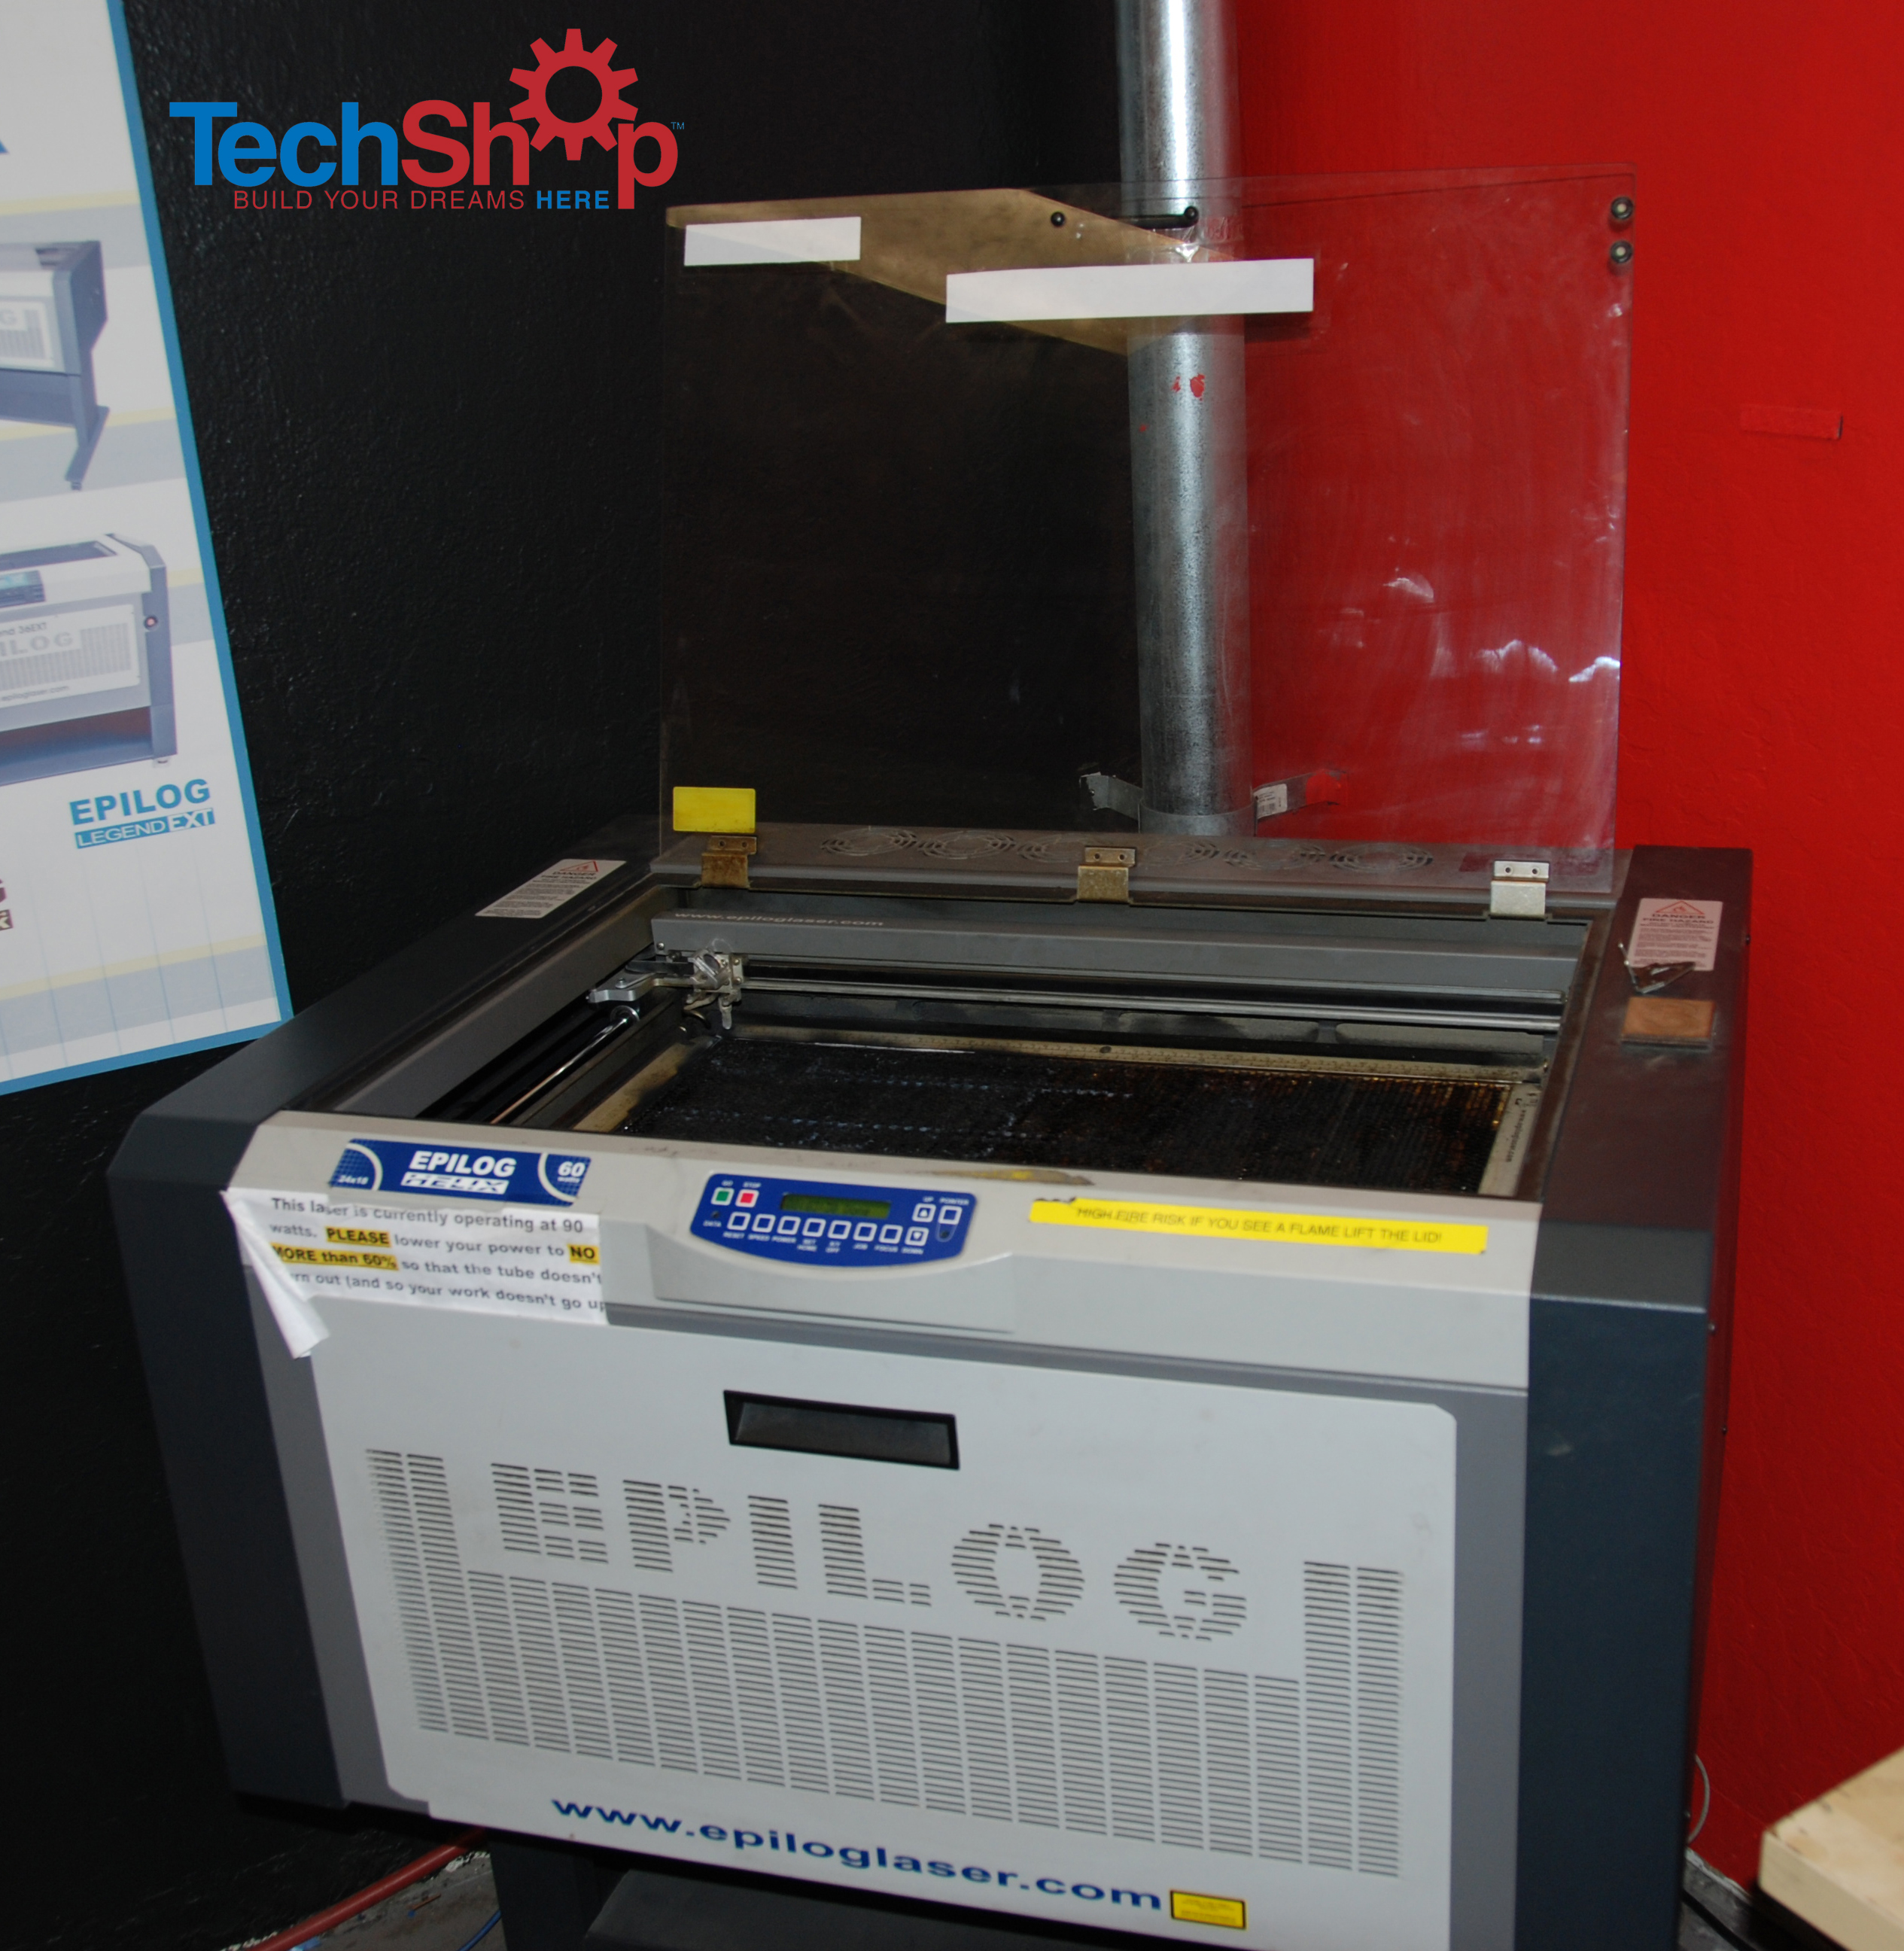
Here is the machine I will use - an Epilog 45 Watt laser. Inside the laser is an 18" x 24" bed that holds whatever pieces you will be working on. This bed can be moved up or down, enabling you to laser etch materials or pieces of widely varying thickness.
The laser acts like a CNC (Computer Numerically Controlled) router, using a laser beam to cut or etch your chosen material. In this case, since I am just etching simple text, it acts more like an inkjet printer, burning the text onto the aluminum, dot by dot, just as an inkjet printer does on paper.
The laser acts like a CNC (Computer Numerically Controlled) router, using a laser beam to cut or etch your chosen material. In this case, since I am just etching simple text, it acts more like an inkjet printer, burning the text onto the aluminum, dot by dot, just as an inkjet printer does on paper.
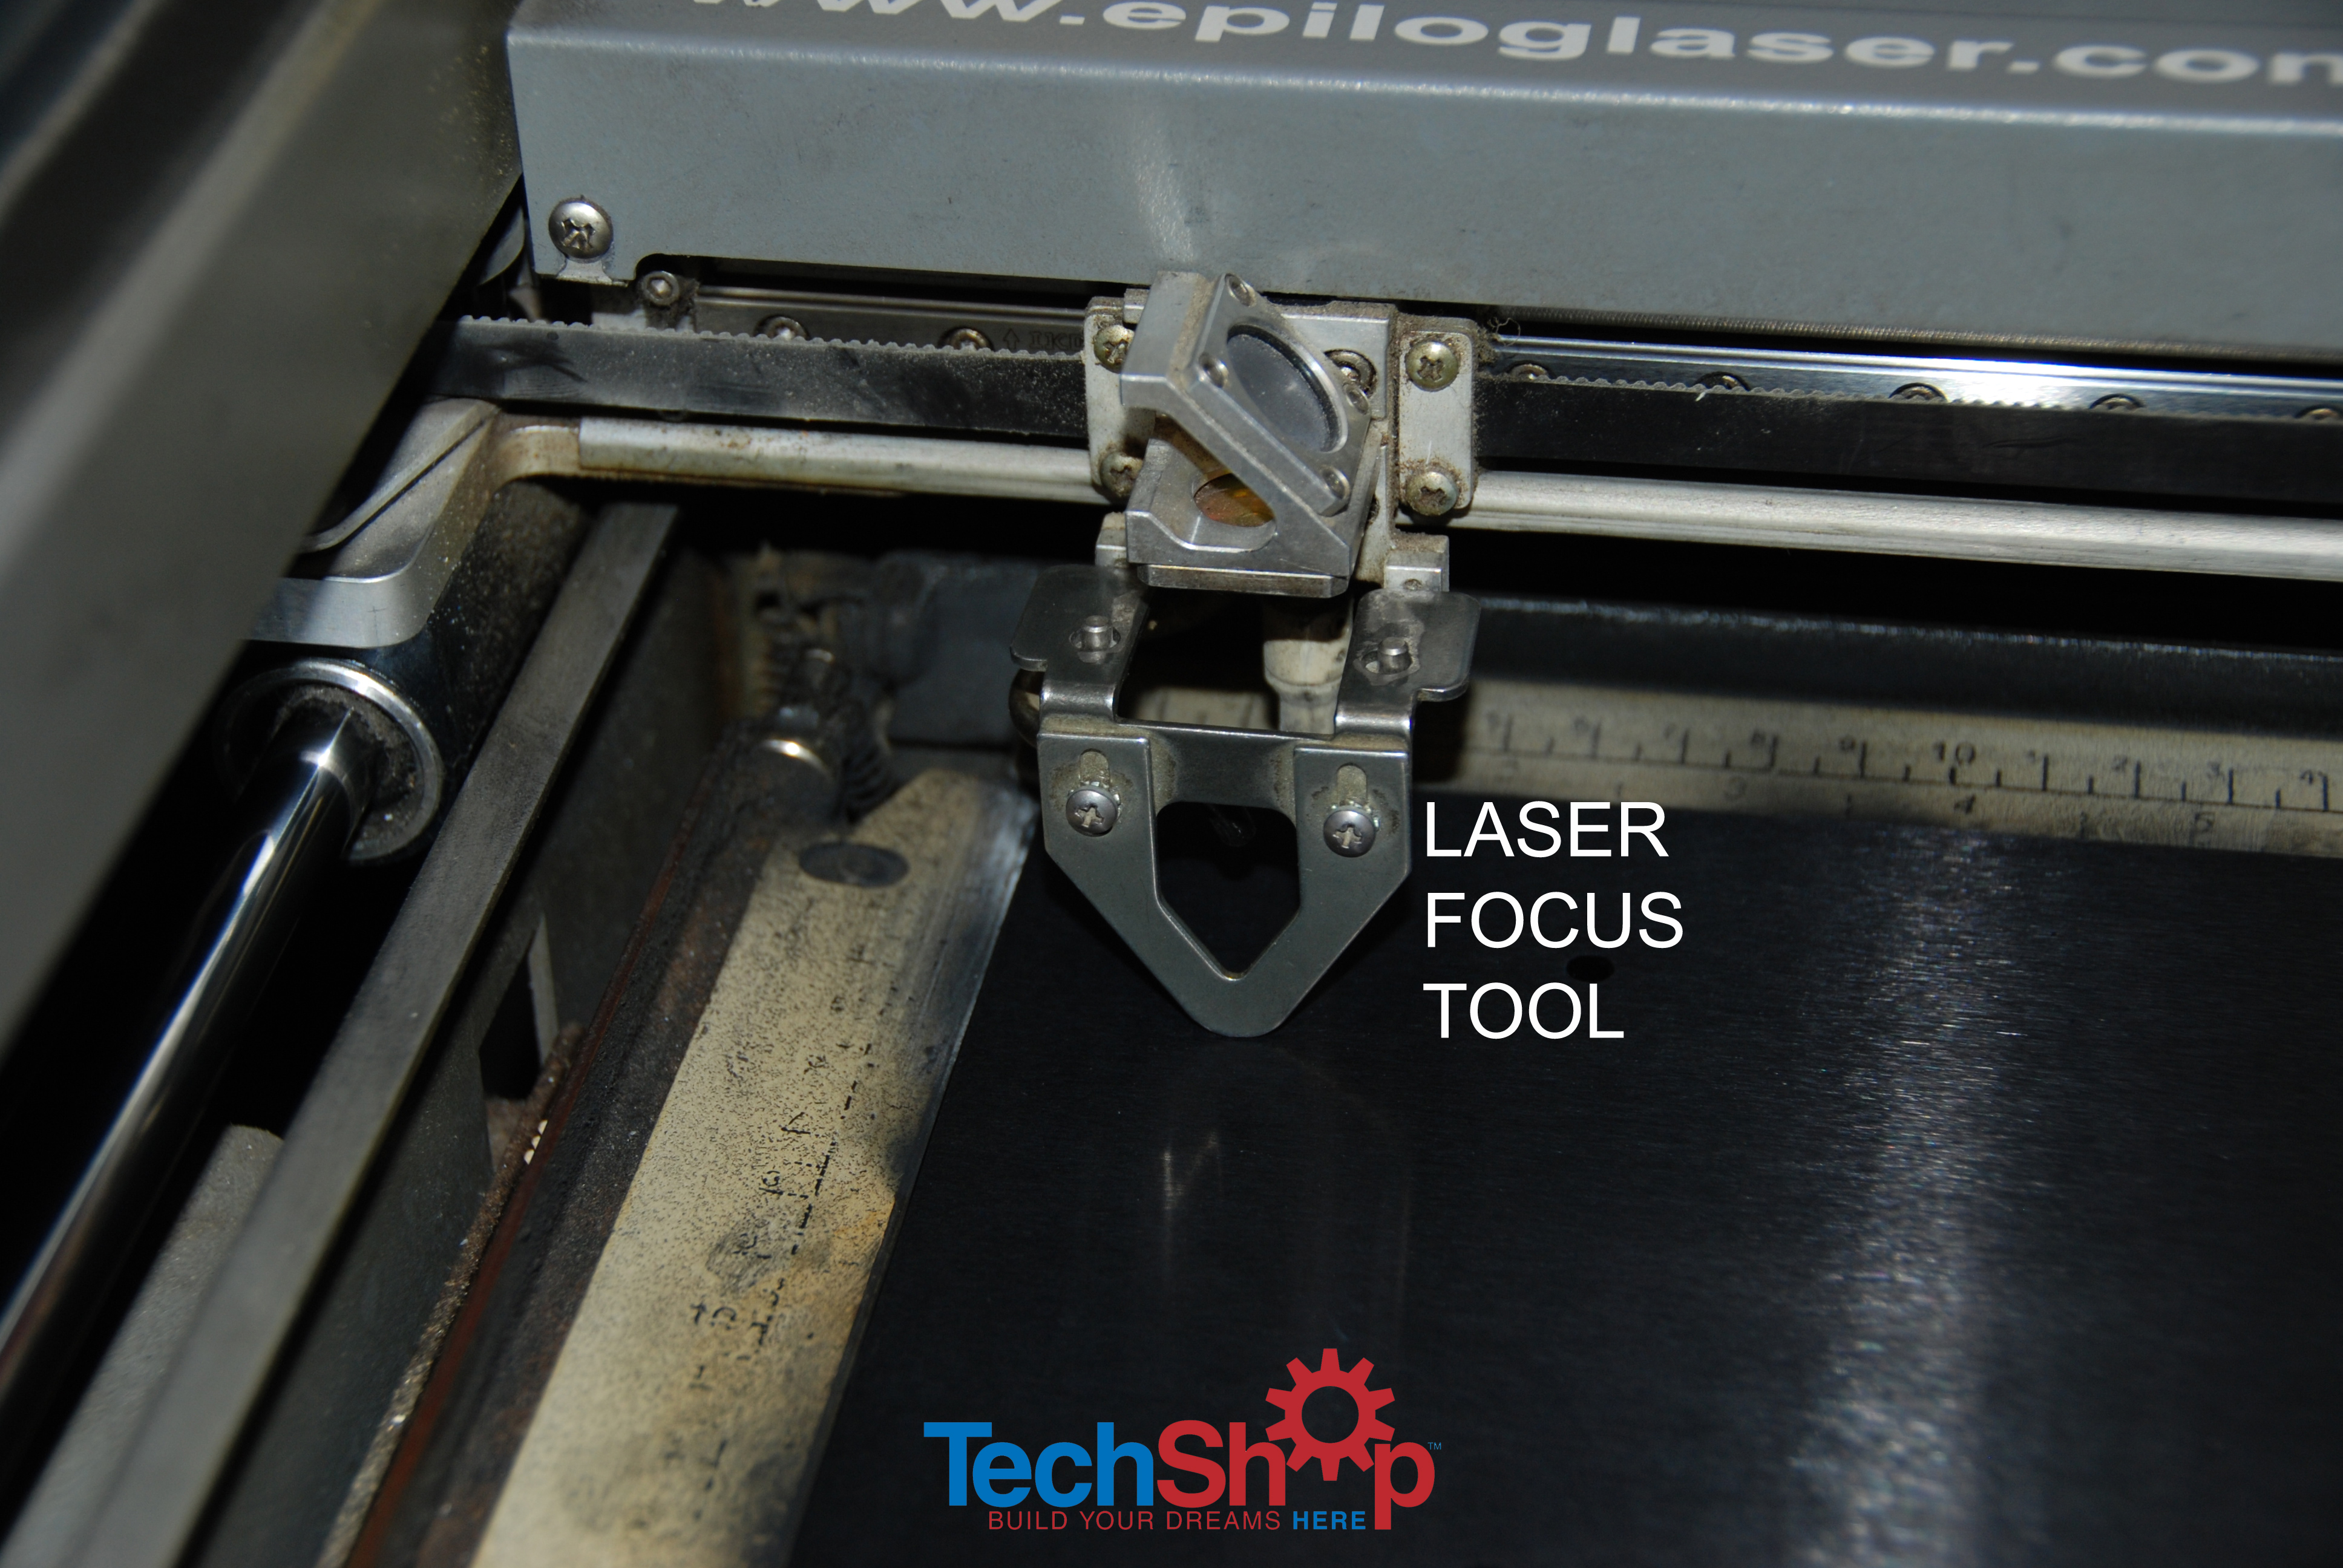
First, you place your piece in the far left corner. You insert a tool for focusing the laser as seen in the picture.
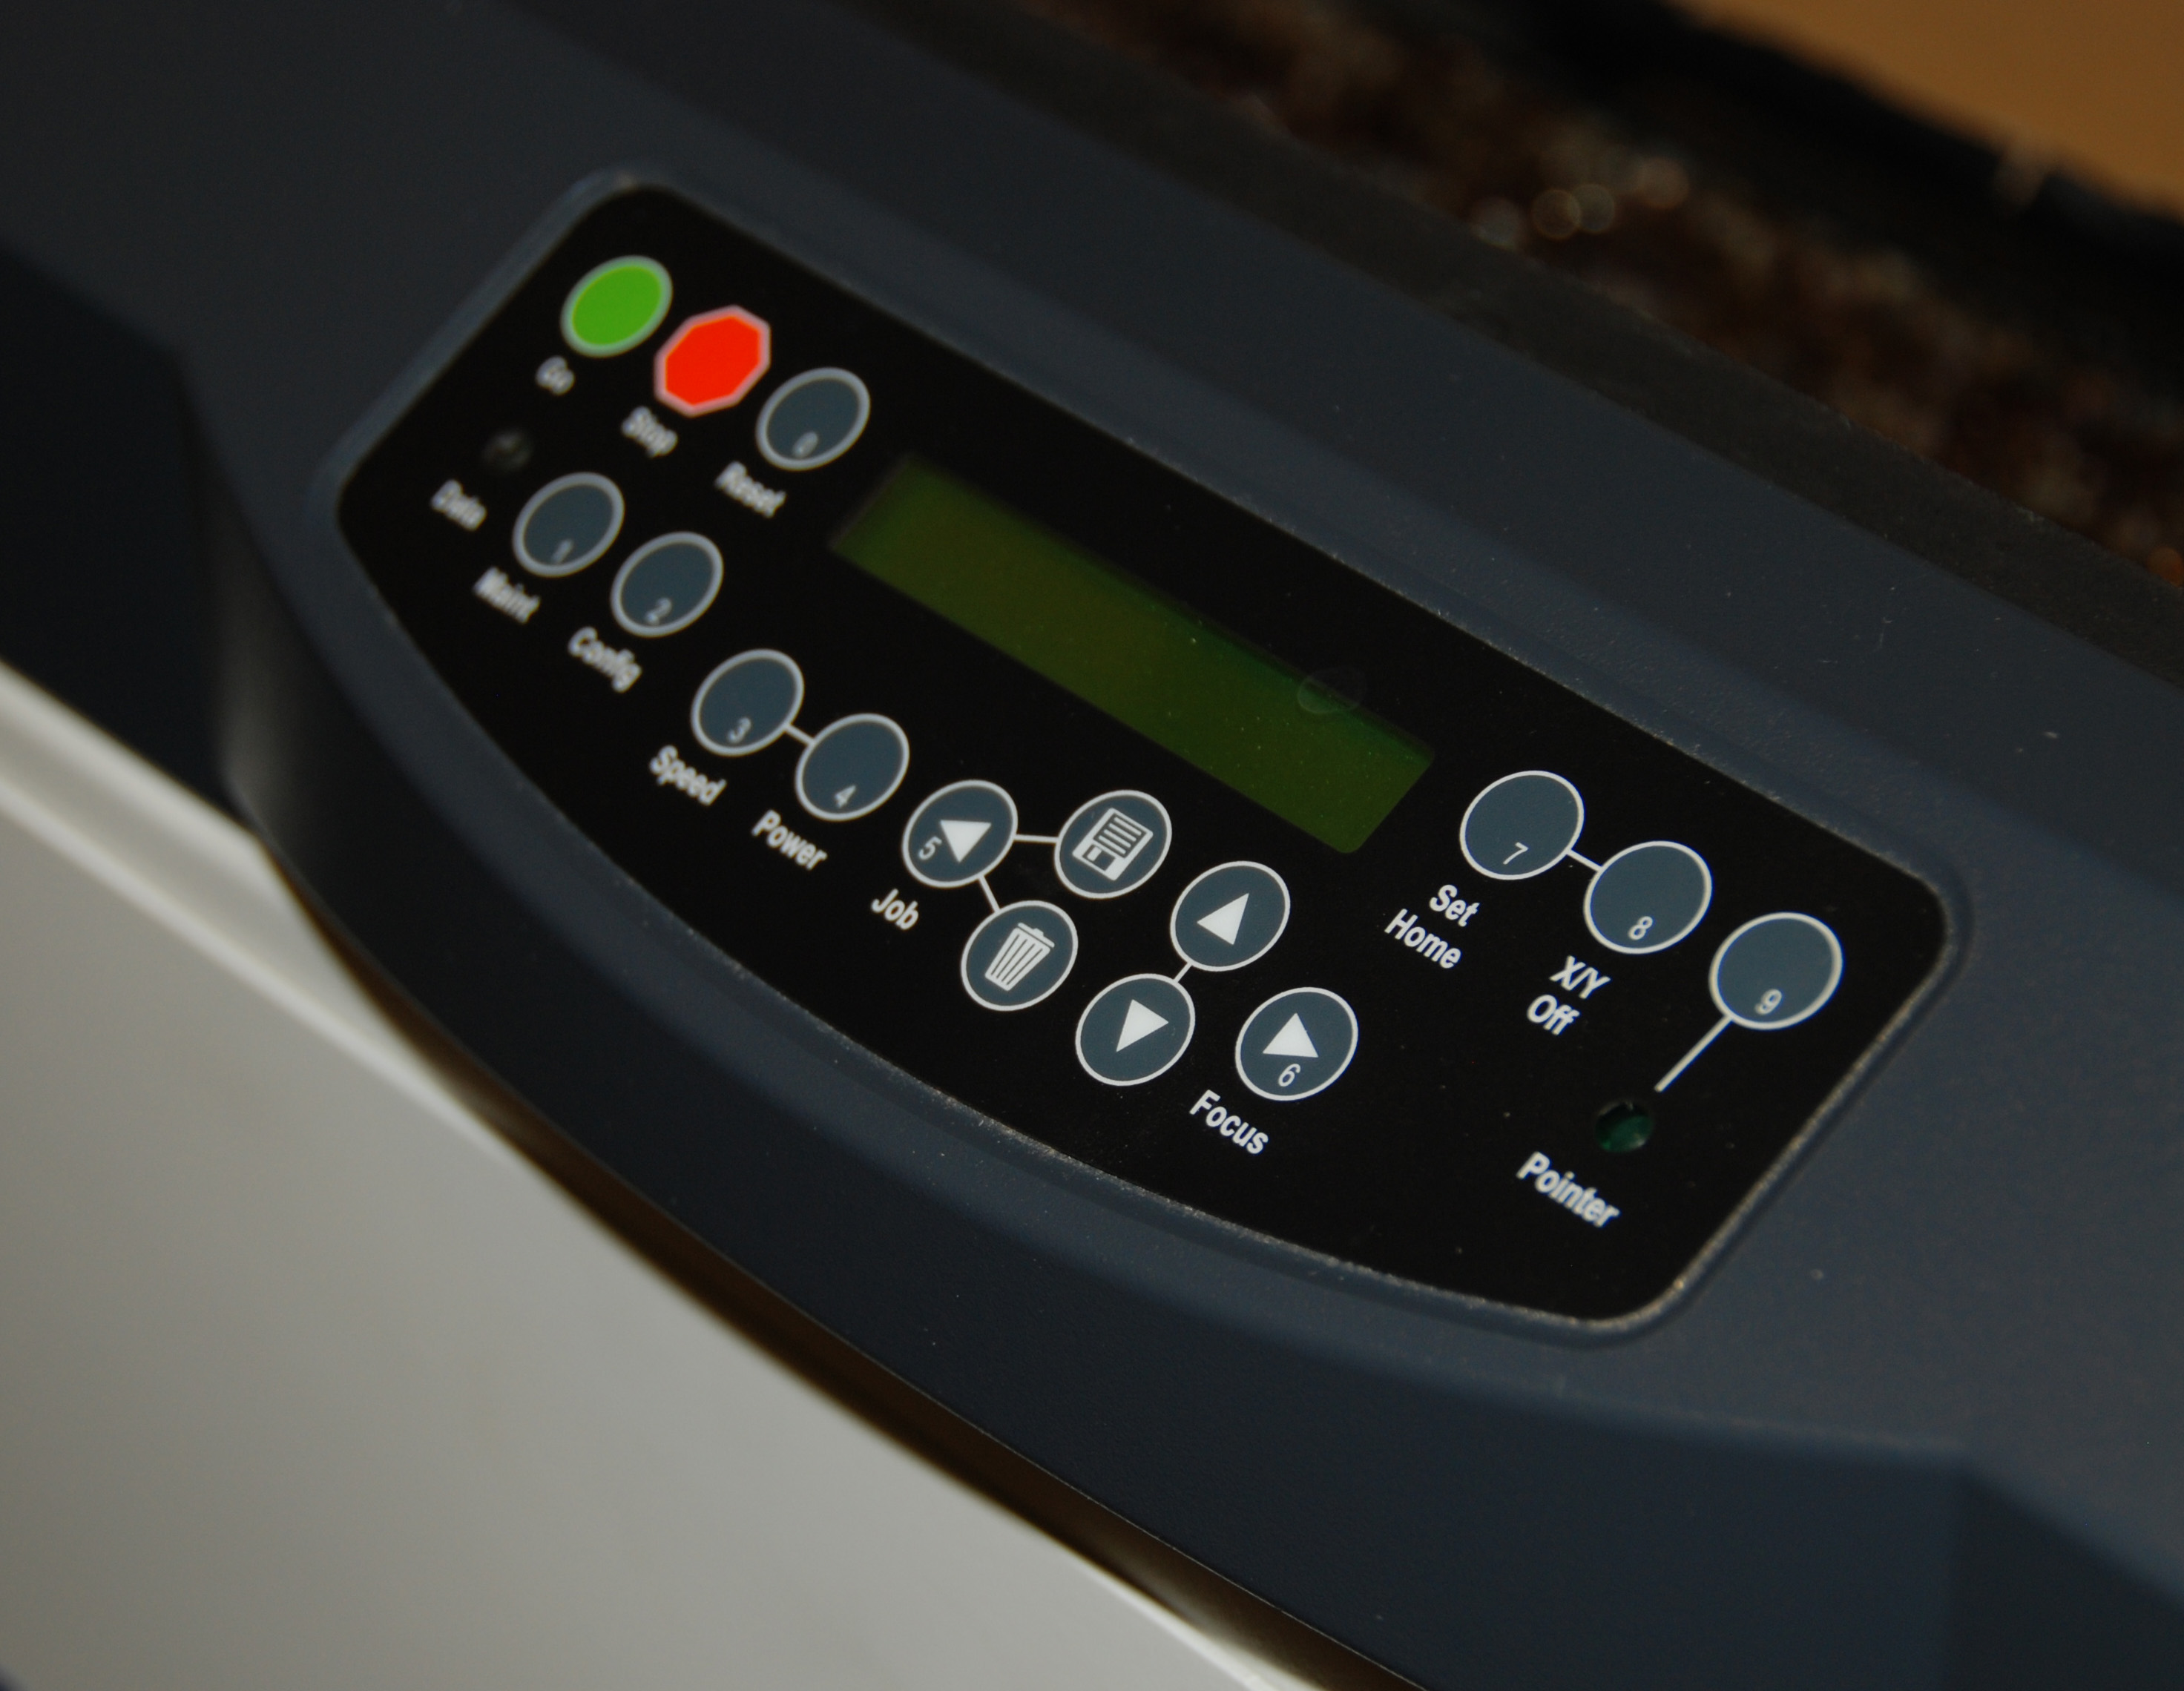
You use the control panel on the front of the laser to do the focusing by setting the distance that the laser is above your material. You push the "focus" button on the front panel to enable the up and down buttons (up and down arrows next to the focus button). You then use the up arrow and down keys to adjust the work holding panel up or down, so that your material just touches the lens focus tool. You then remove the lens focusing tool and either set it aside, or you can mount it on top of the laser head assembly for storage. Finally, you hit the reset button on the front panel, which removes the laser from focus mode, moves the laser head assembly to its standard starting X/Y position ready to begin.
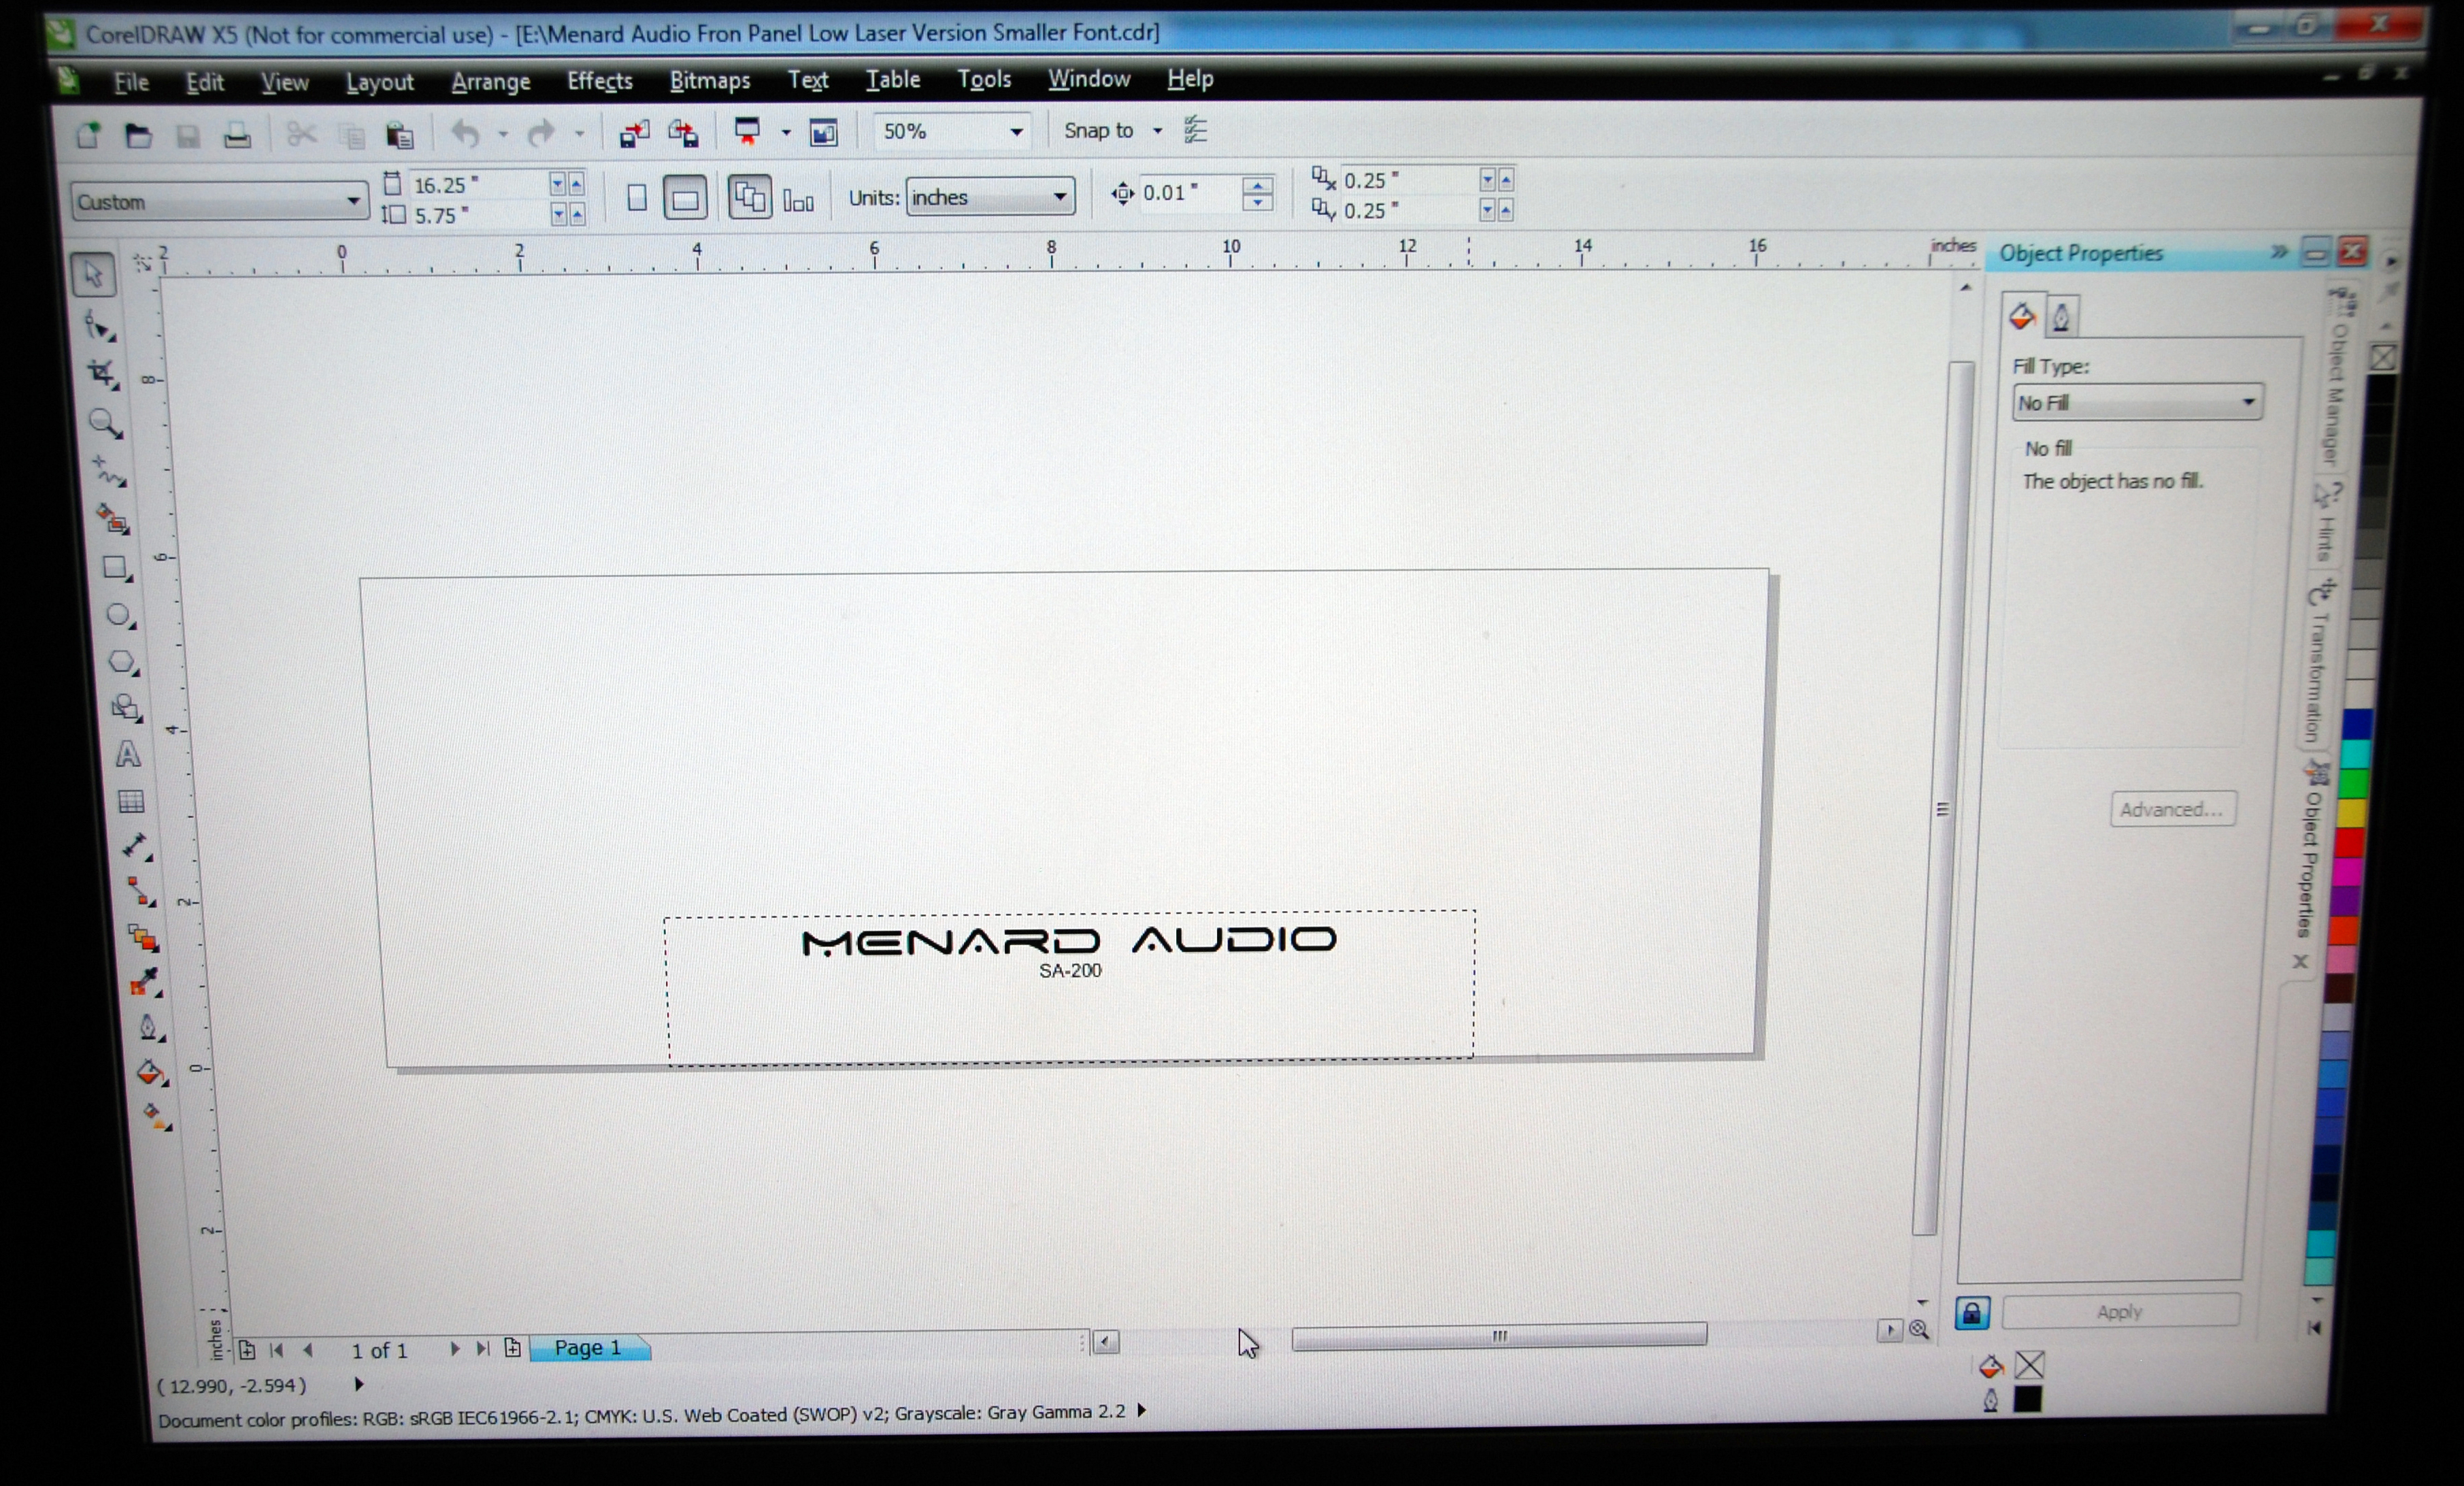
Next you bring your file into a graphical editor, in this case CorelDRAW.
This front panel was actually designed in AutoCAD as part of a sheet metal design and imported into Coreldraw using a .dxf file. But you can start by doing your drawing entirely in CorelDRAW or Adobe Illustrator.
This front panel was actually designed in AutoCAD as part of a sheet metal design and imported into Coreldraw using a .dxf file. But you can start by doing your drawing entirely in CorelDRAW or Adobe Illustrator.
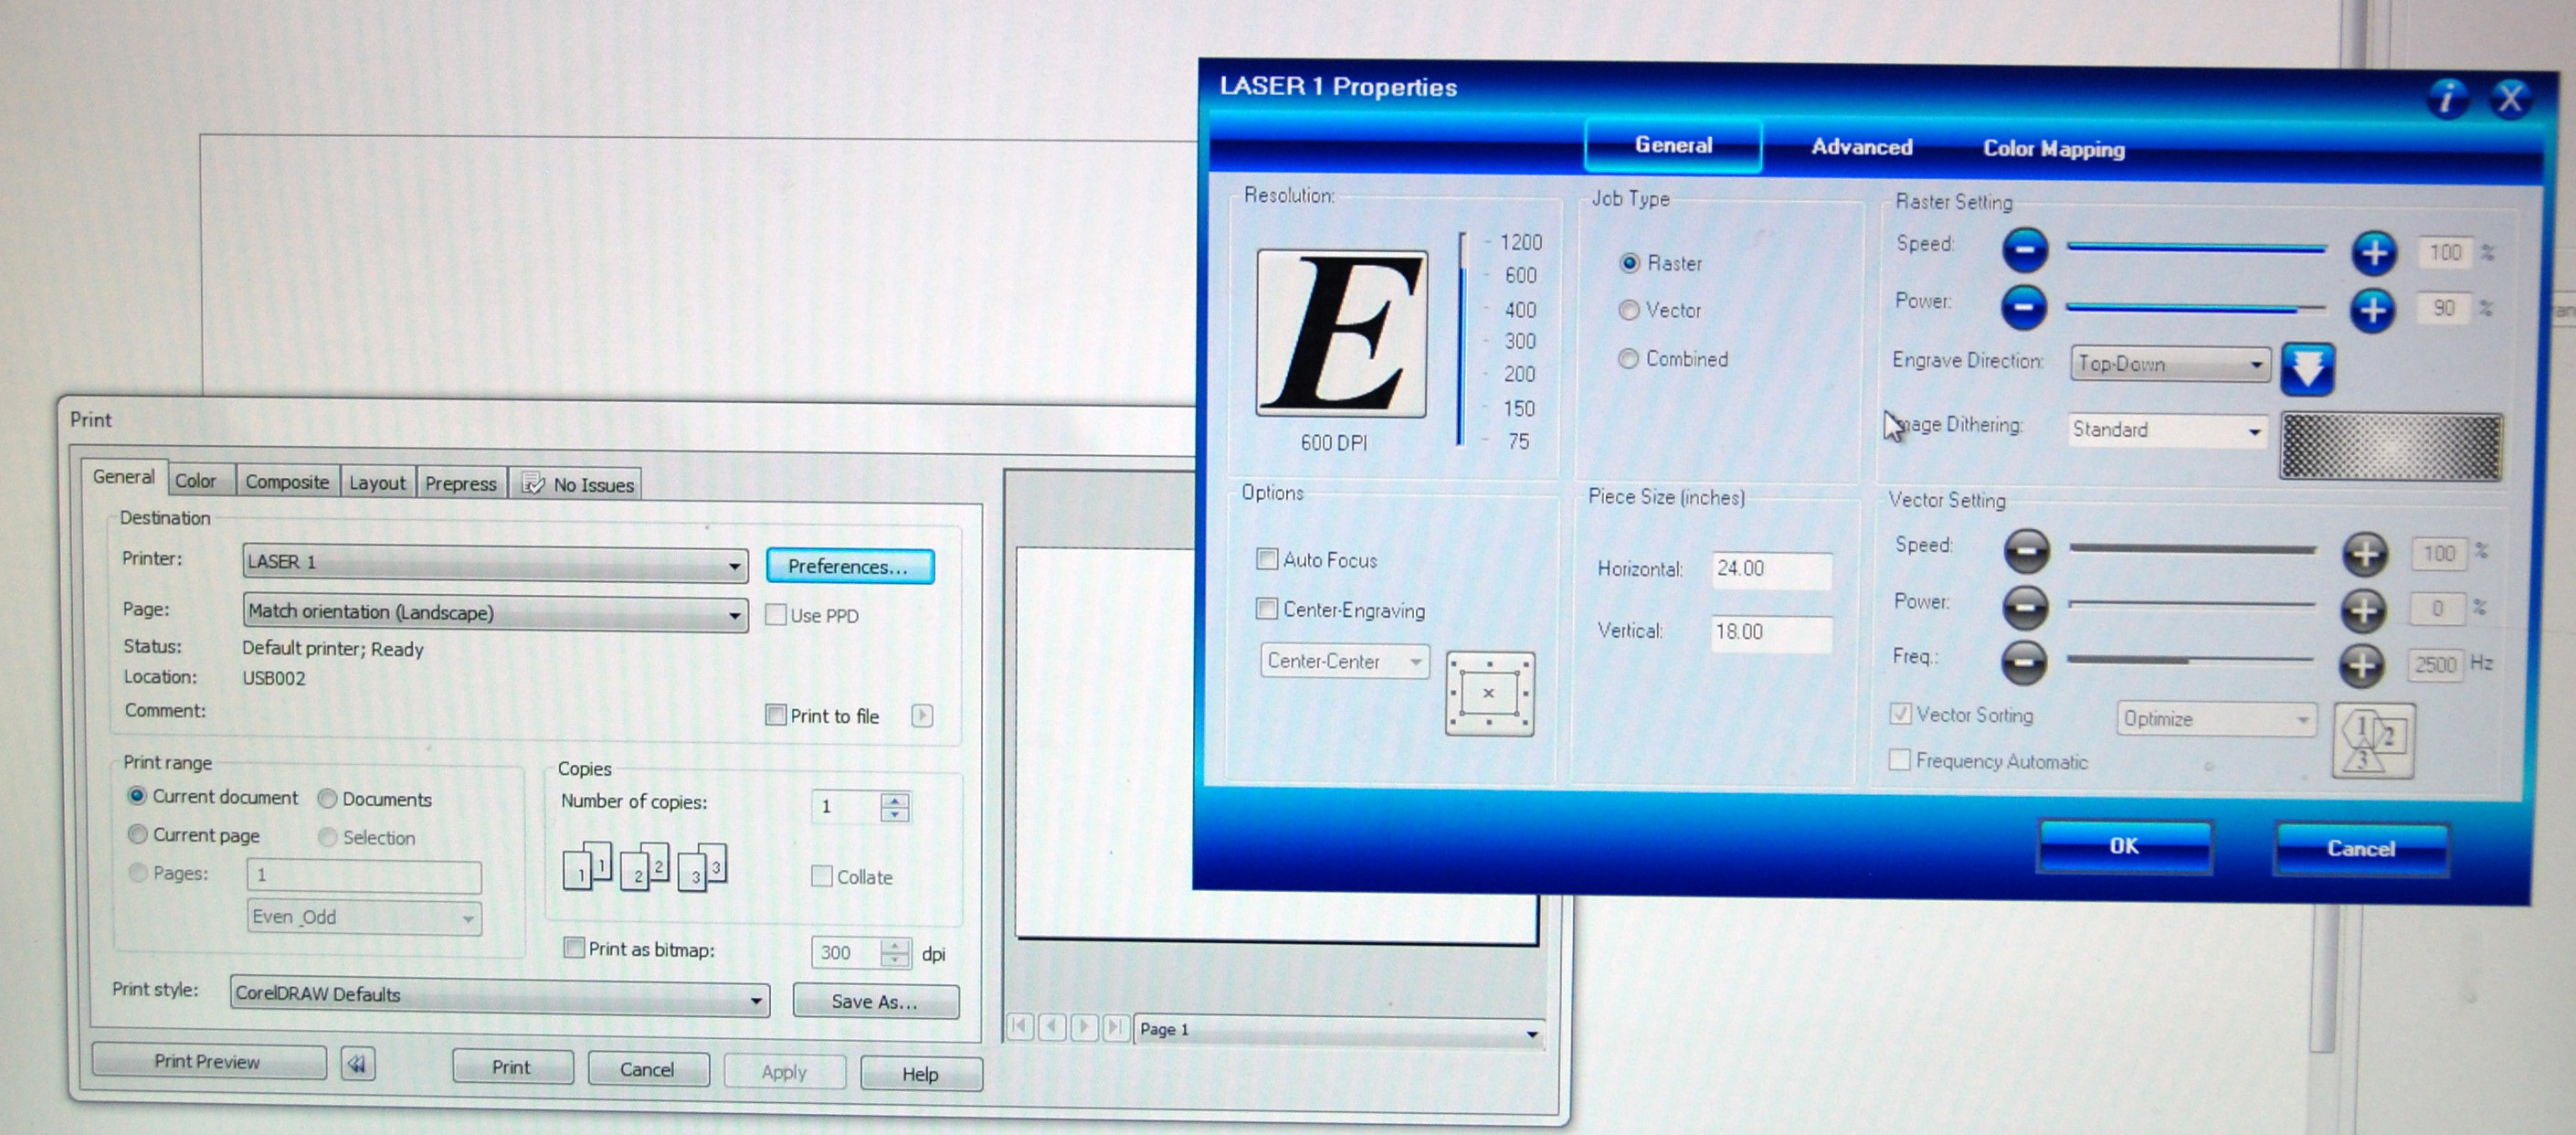
Next, hit print like you would in any application. This brings up a typical windows print dialog box. Click on preferences. (Apologies if pictures are a bit blurry, I uploaded them at a high resolution).
In the upper left corner of this window, near the "E", set the mode to raster and 600 dpi (the laser cutter can also do vector art).
Next, set the power and speed that the laser cutter will use. On the upper right area, where the blue bars are, set the speed to 100% and the power to 90%. These settings come from a reference sheet supplied by TechShop that tells you exactly what settings to use for different kinds of lasering applications (if you were cutting through 1/8" acrylic, you would use very different settings, for example).
Finally, set the height and width of your material (middle bottom on screen - width is 16.25" and height is 6.25"). This tells the laser cutter the dimensions of your part so it knows exactly where to print the text.
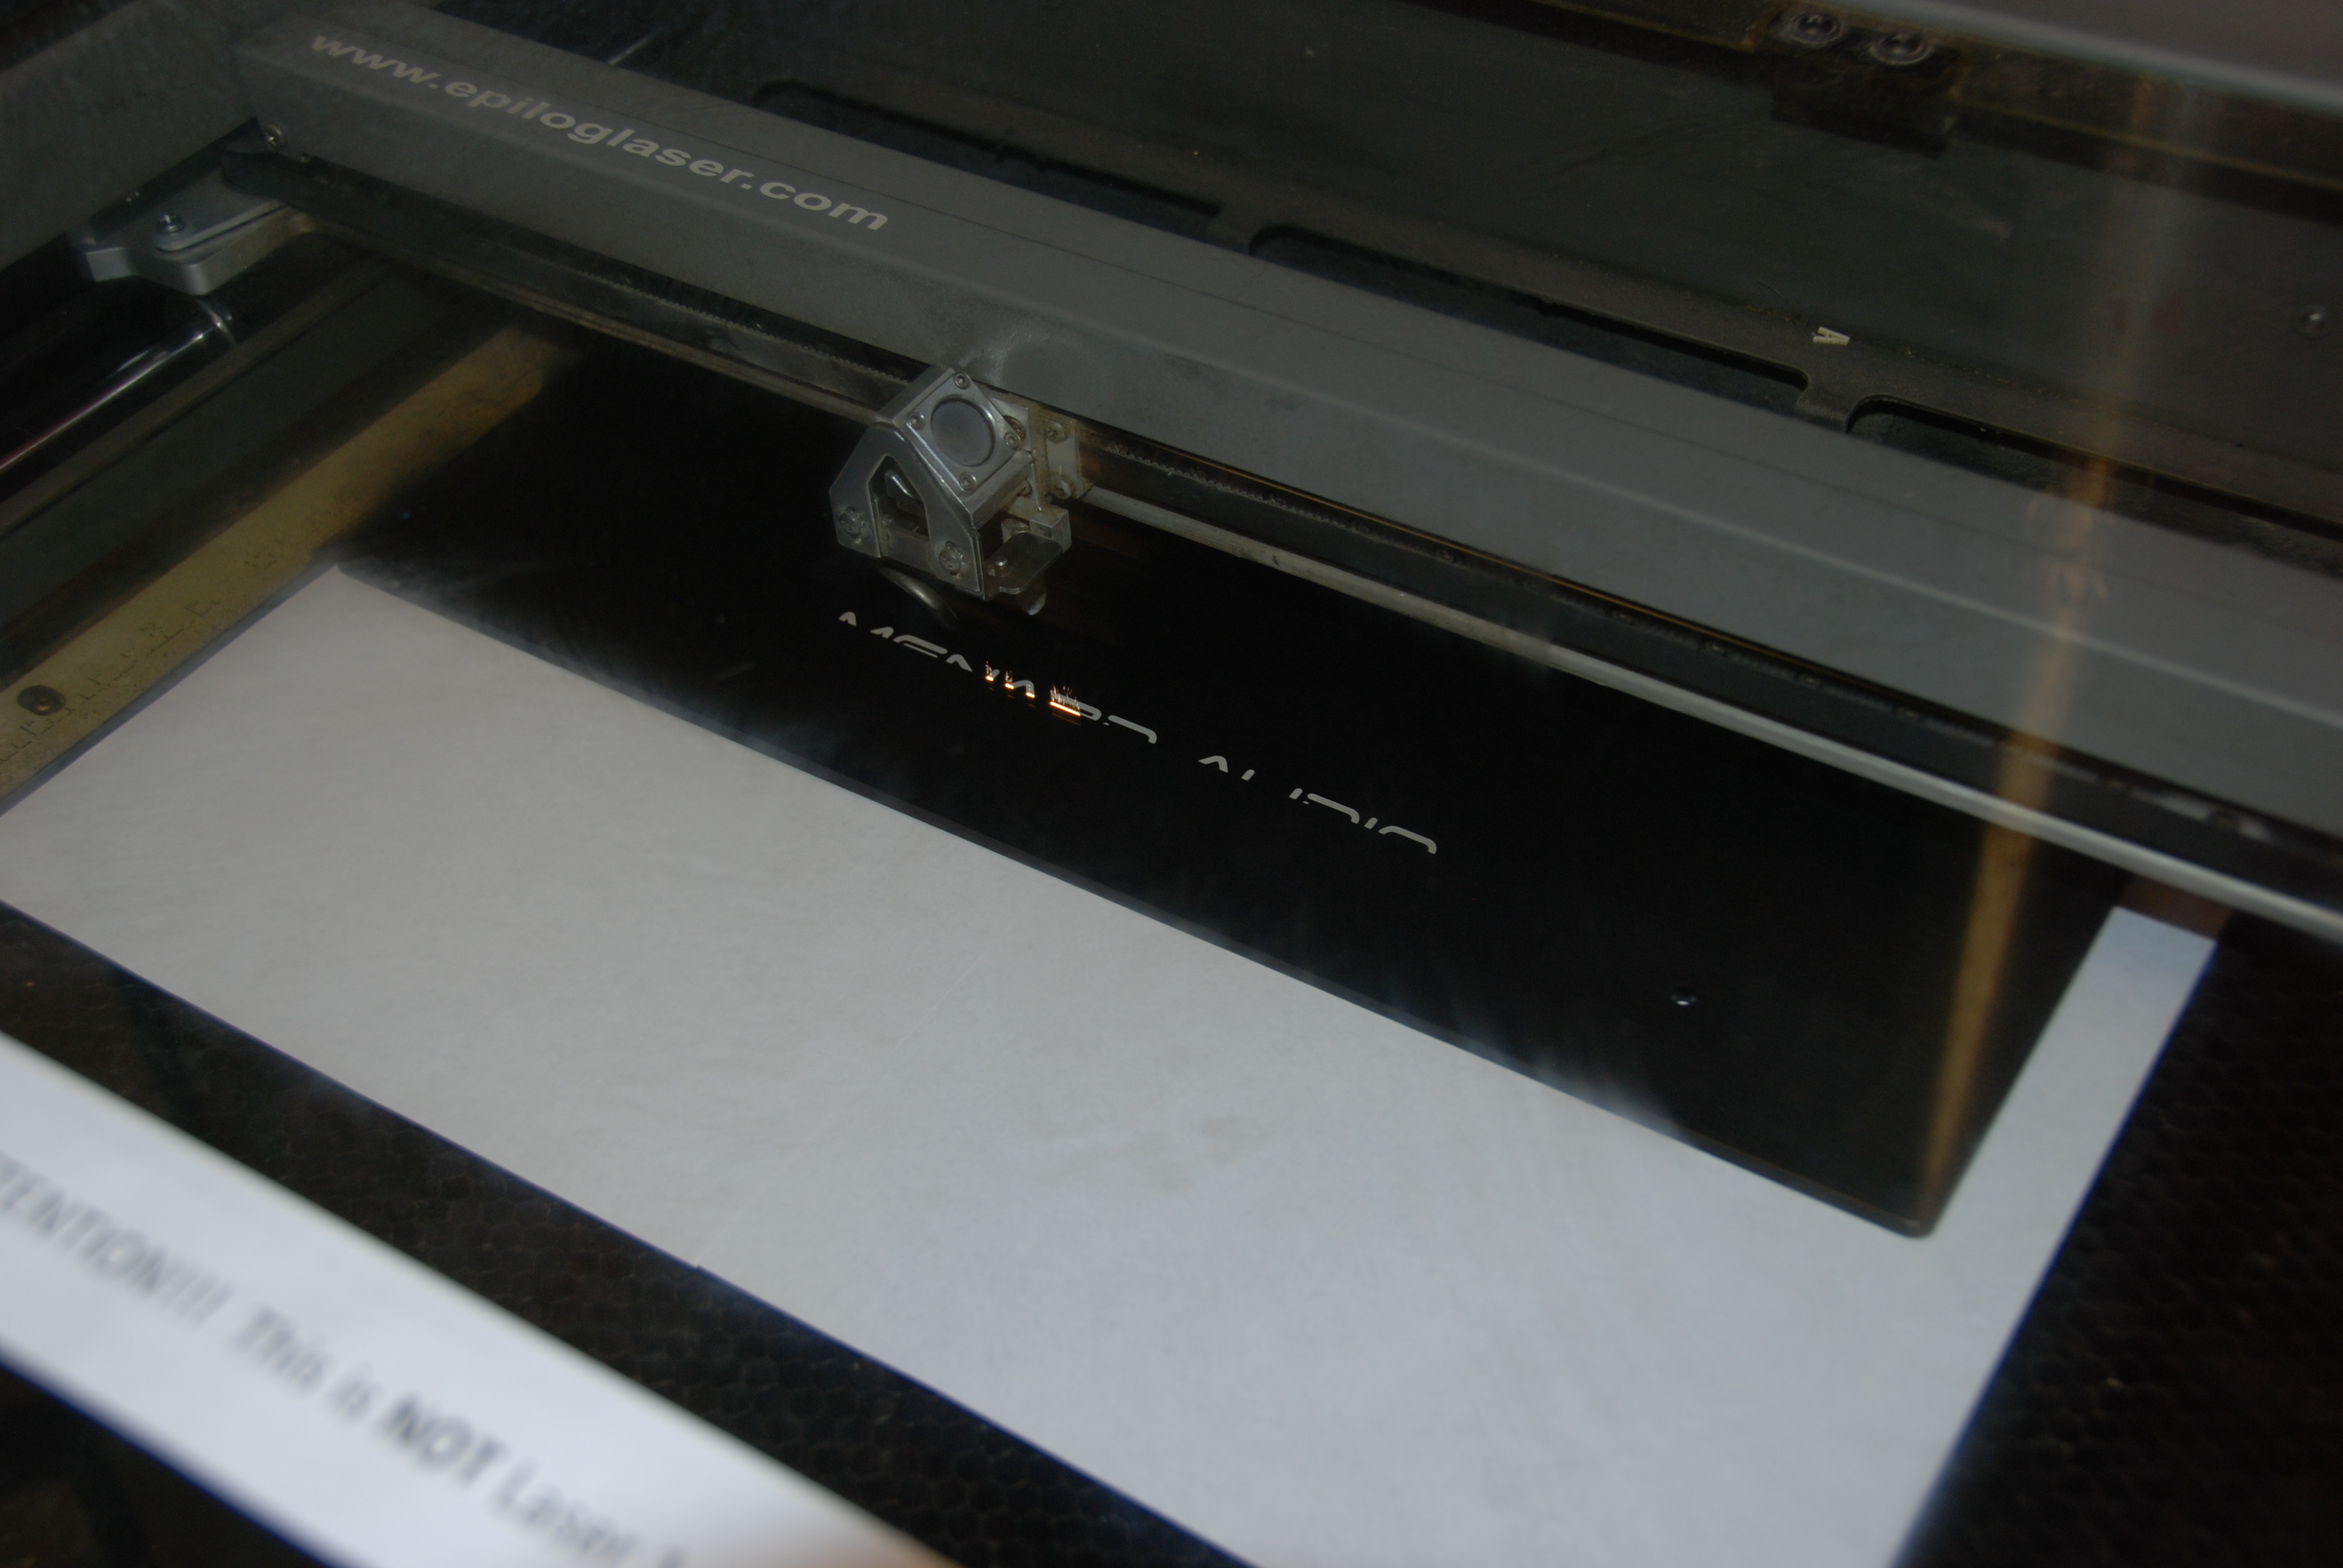
You click print, go to the laser cutter and swing the plexiglass cover down over the work area, and then push the Go button on the laser cutter front panel. The laser springs into action, etching my logo in just the same way as an inkjet printer would, dot by dot. The laser head assembly goes back and forth, line by line, firing a laser burst for each pixel it should.
The elapsed time of doing the etching was less than a minute.
The elapsed time of doing the etching was less than a minute.
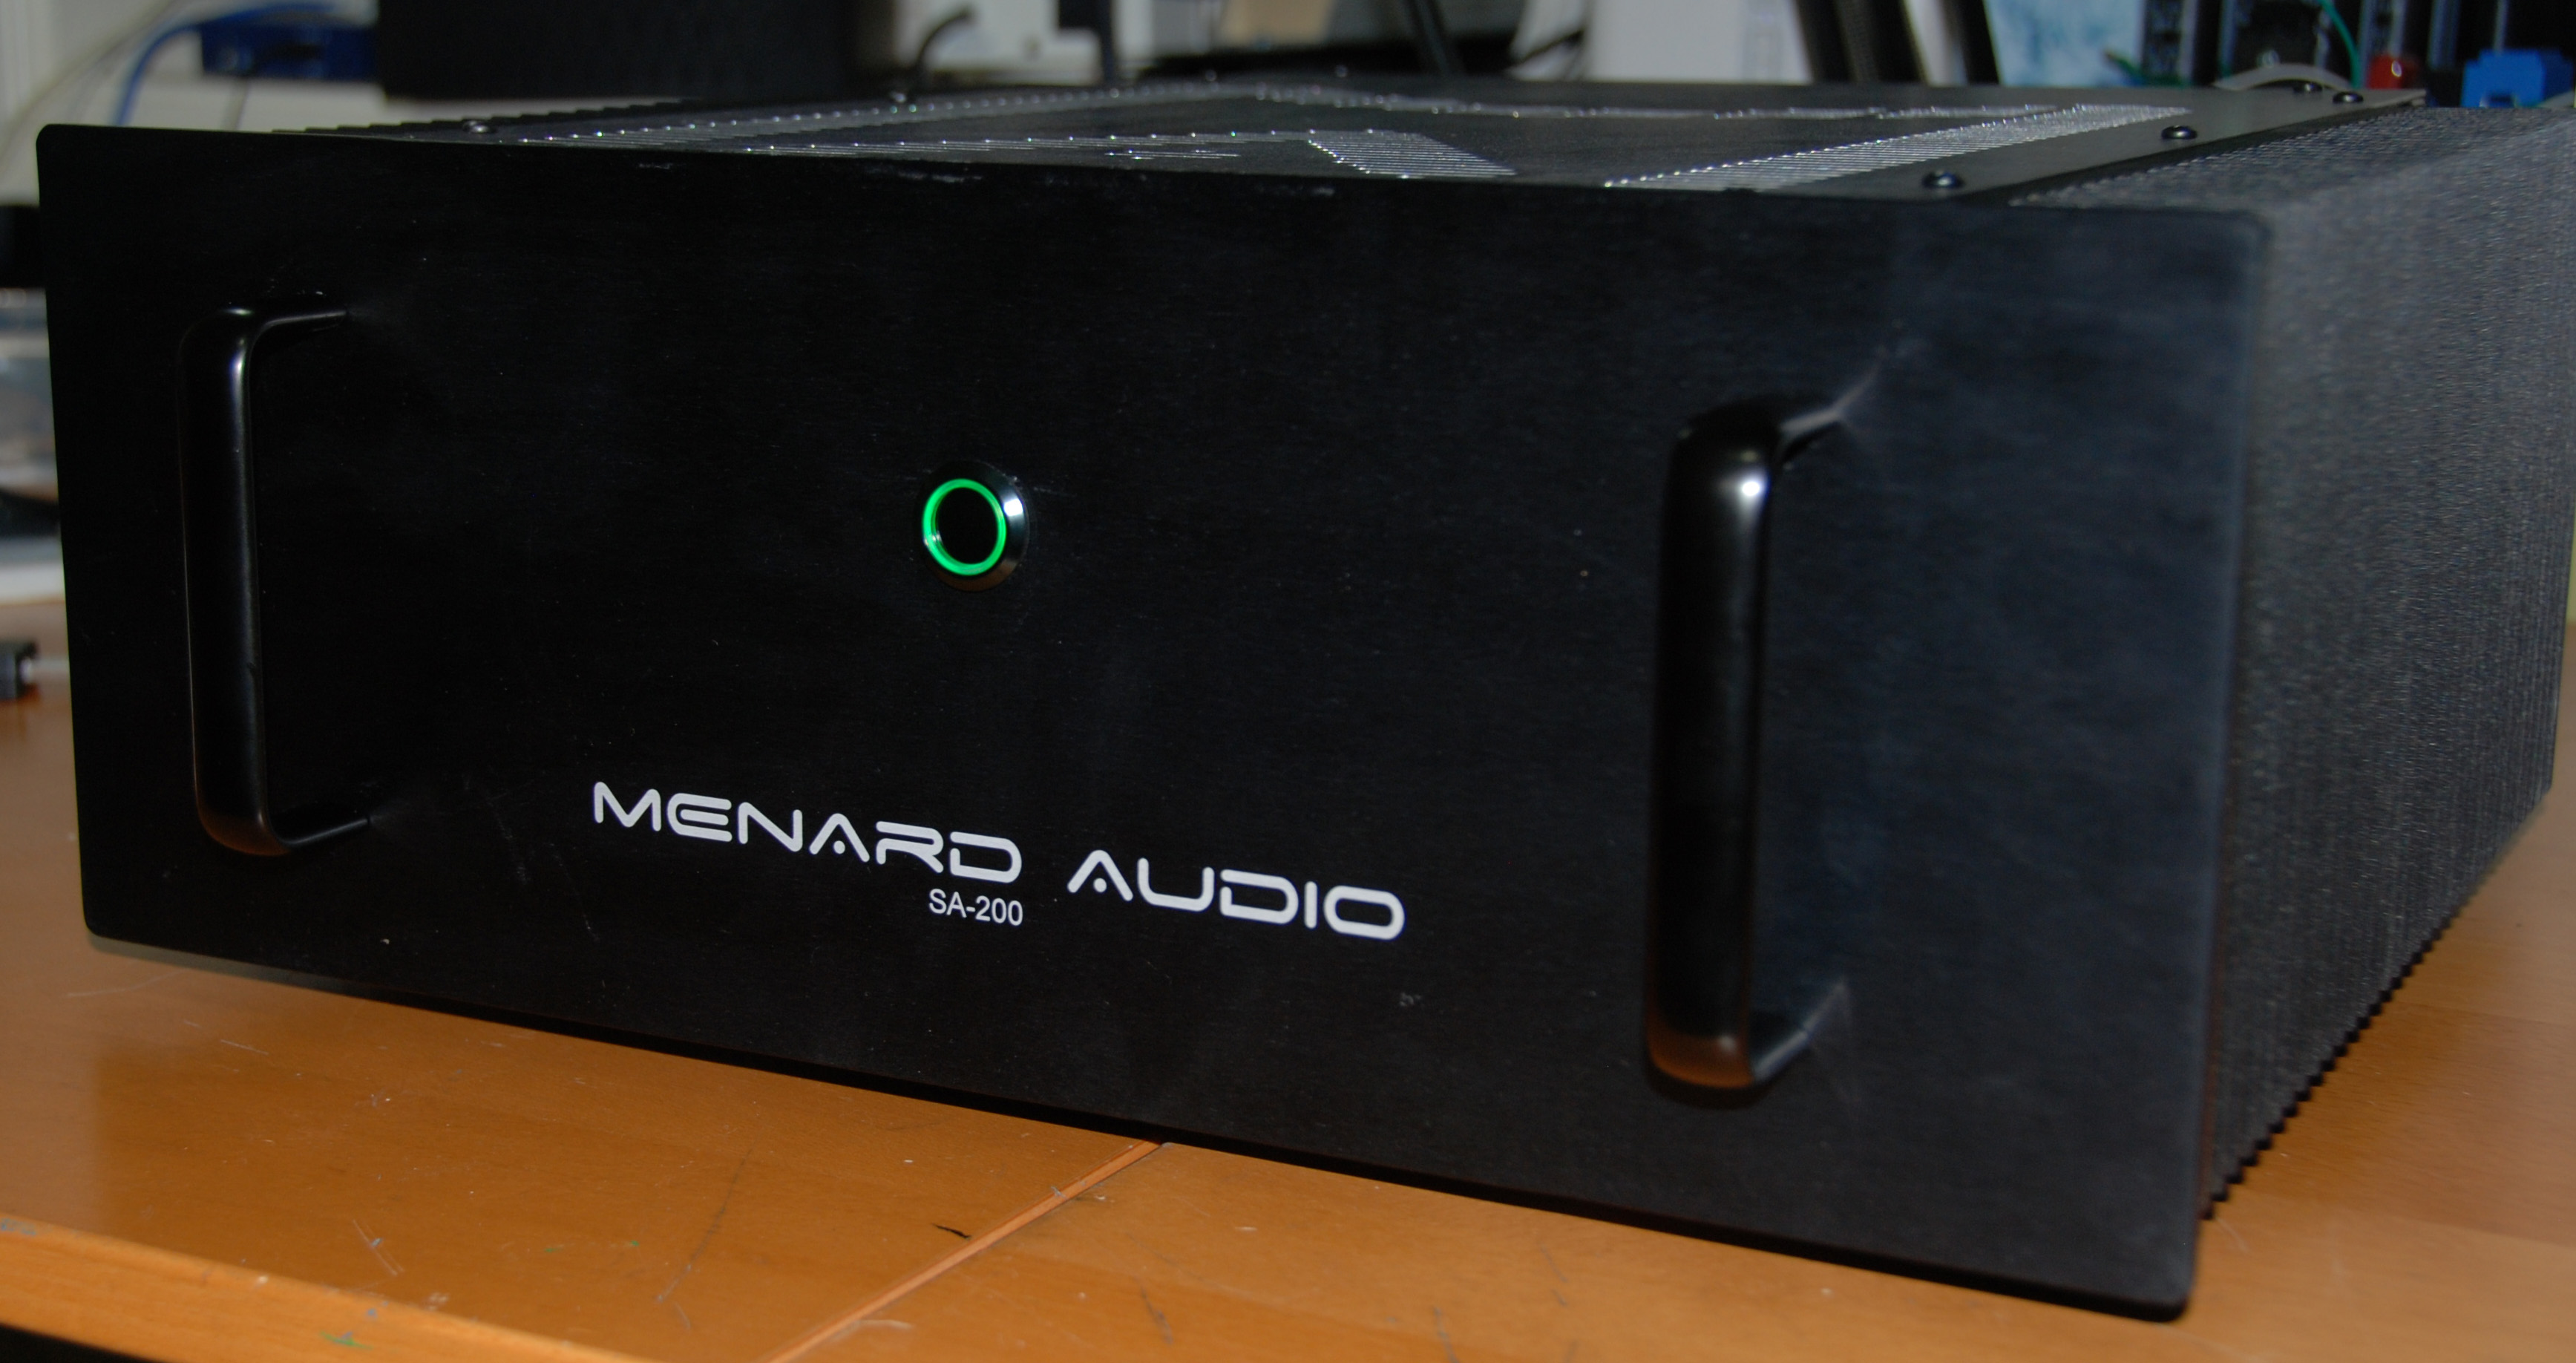
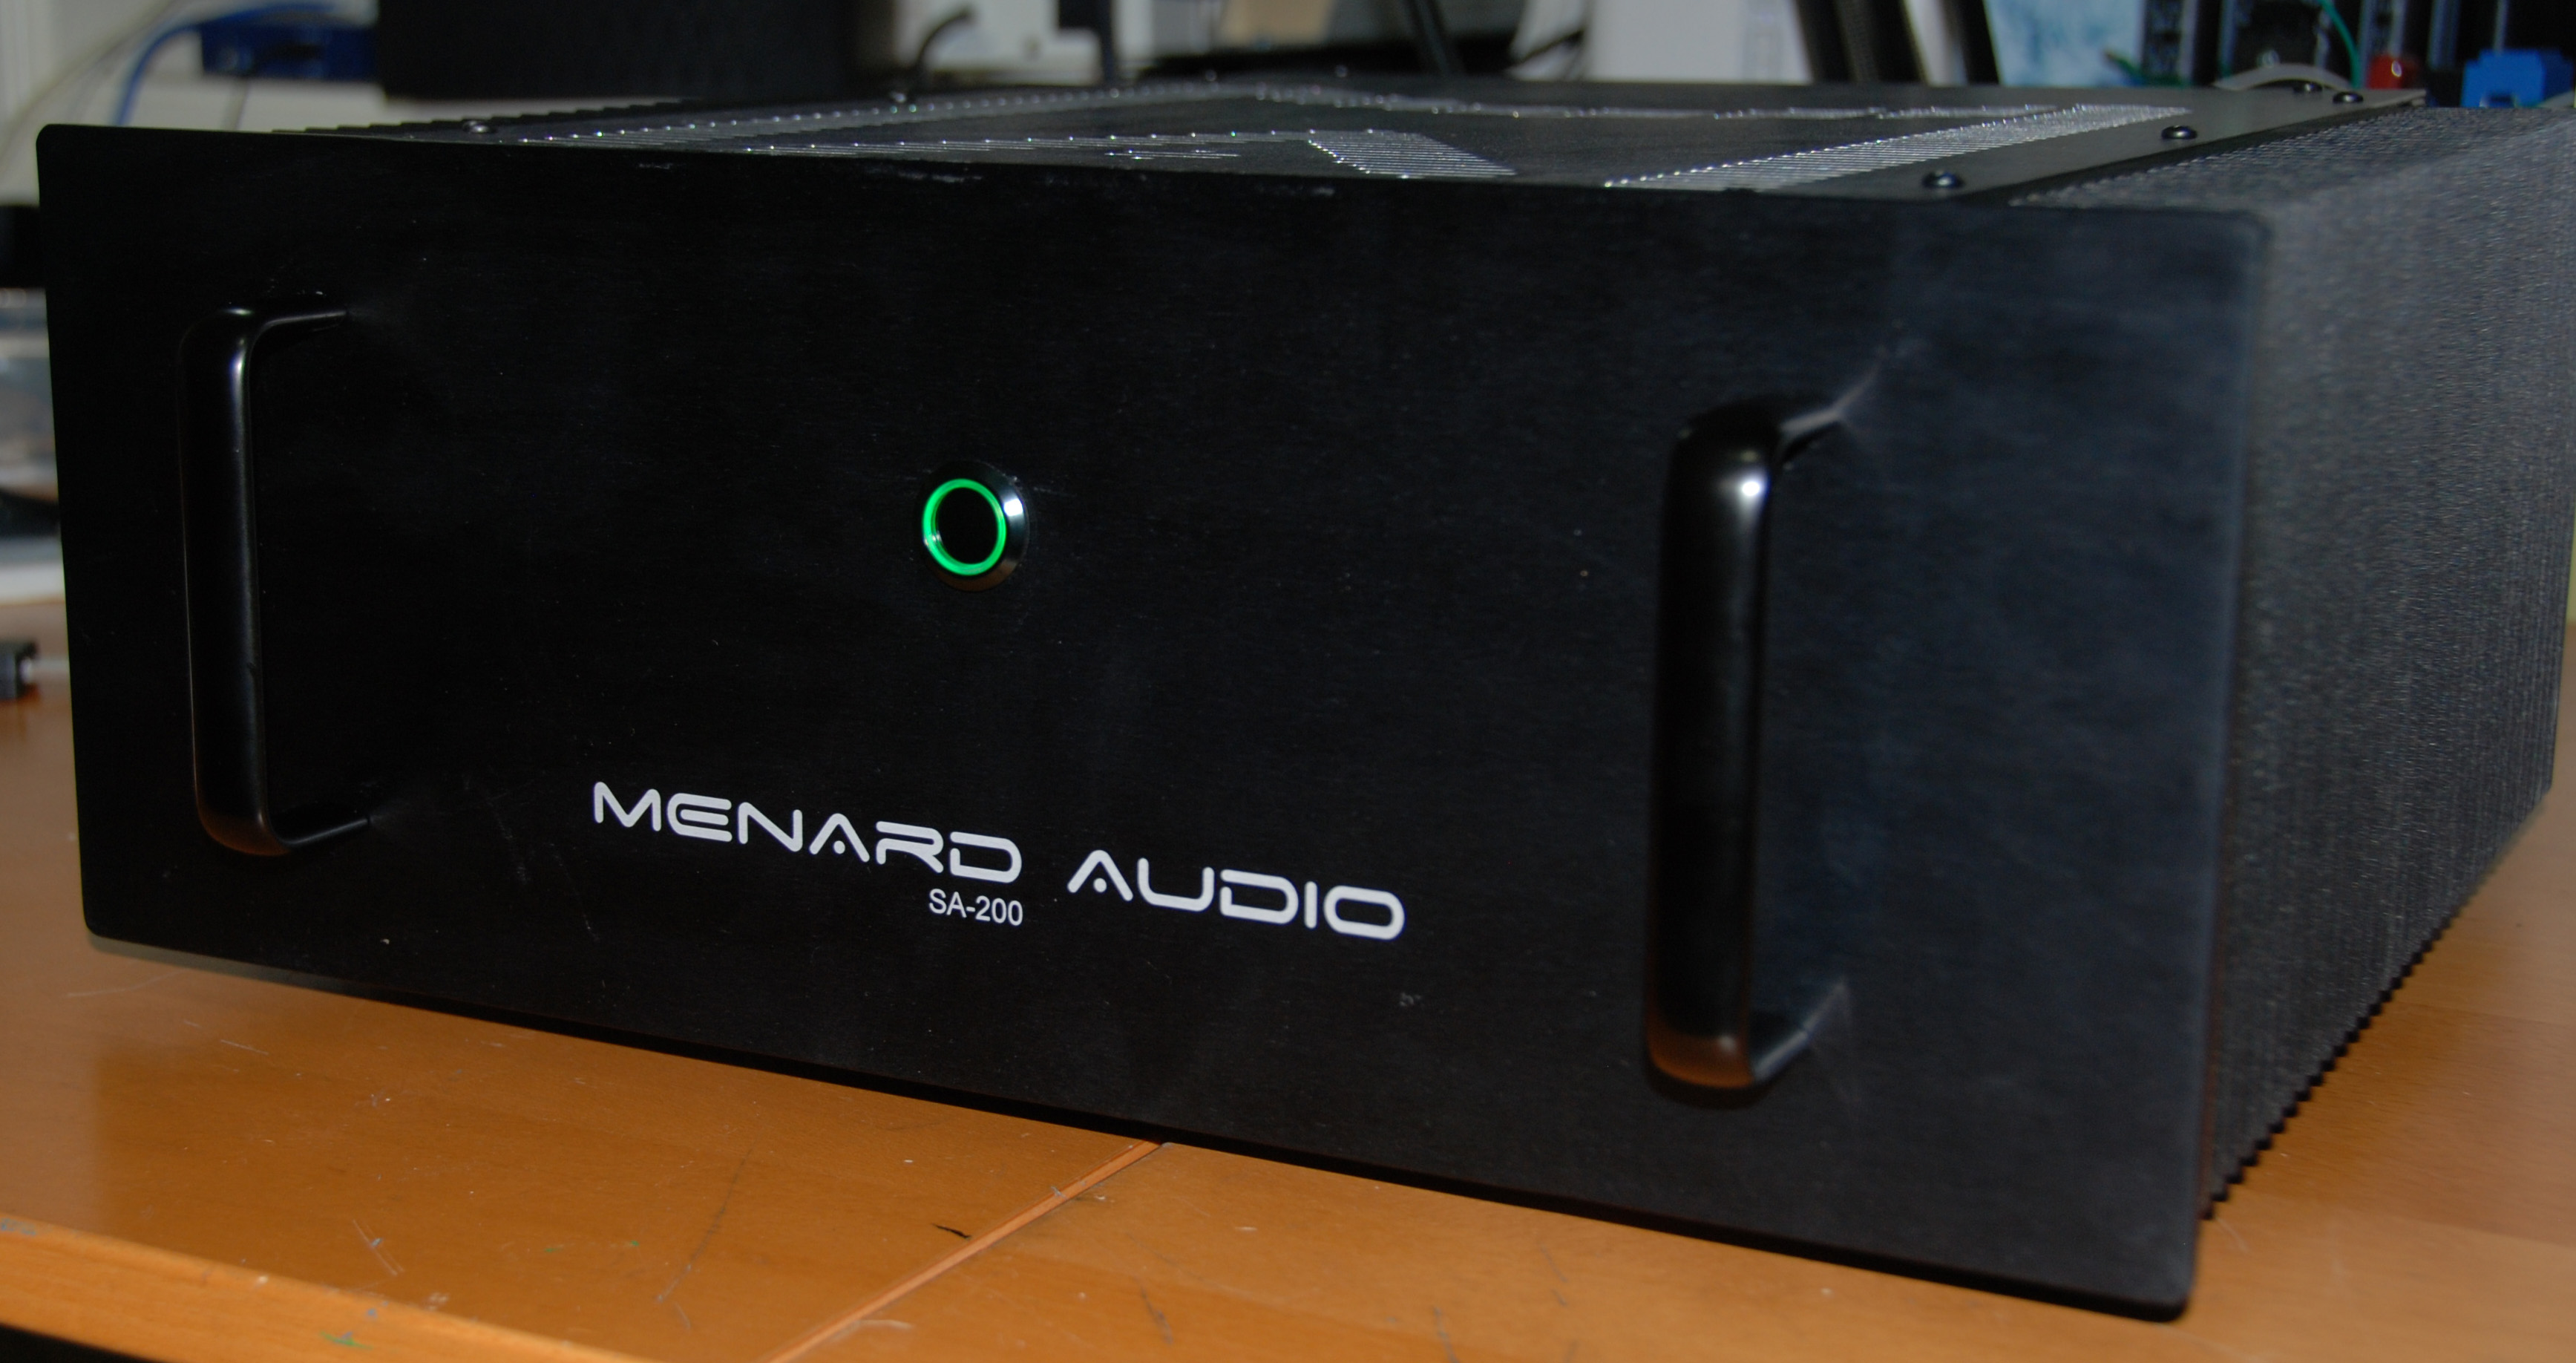
Here is the final result, a professional looking front panel (it looks like it was professionally silk screened) installed on the "Menard Audio" power amplifier.