Laser Etched Wooden Puzzle
by jjlessin in Workshop > Laser Cutting
317 Views, 2 Favorites, 0 Comments
Laser Etched Wooden Puzzle

This project walks through the basic design steps needed to use Adobe Illustrator to design a 9 piece puzzle. The instructions then outline how to use a laser etcher to create the design. The final phase tells how to utilize a scroll saw to cut out the individual puzzle pieces.
This tutorial is designed for grades 9-12 (age 14+).
Objectives
- 1. To gain an entry level understanding of Adobe Illustrator and the design capabilities of the software.
- 2. To understand the basics of laser etching and to become familiar with how the laser interacts with design software.
- 3. To safely create a physical product with power tools such as a scroll saw.
STEL's
Key Standards, Practices, and Concepts incorporated into this tutorial.
- STEL-7: Design in Technology and Engineering Education: Design is a very iterative process that requires a range of skills and abilities to complete thoroughly. In order to complete this tutorial the user must utilize many different design and making and doing skills in order to create a quality product.
- STEL-8: Applying, Maintaining, and Assessing Technological Products and Systems: Technological literacy is a major advantage when it comes to design and making and doing. As you complete the tutorial, having a more comprehensive knowledge of technology and design will allow for more creativity and quality within the creation of the product.
- TEP-2: Creativity: Creativity is a crucial component in design. Users of this tutorial will have to use creativity when designing their puzzle, as well as when troubleshooting is needed in their design.
- TEP-3: Making and Doing: Making and doing an excellent way to learn the ins and outs of a technology or system. This tutorial focuses on the creation of a product through making and doing, giving the users of the tutorial an improved technological literacy with the products and systems needed to complete the project.
- TEC-2: Material Conversion and Processing: The materials and tools used throughout this tutorial are selected to better the user's technological and engineering literacy as they are processed and transformed into a desirable product.
Supplies


- Laser Cutter / Etcher
- Scroll Saw
- Computer with Internet Access (this tutorial was created using a Windows device)
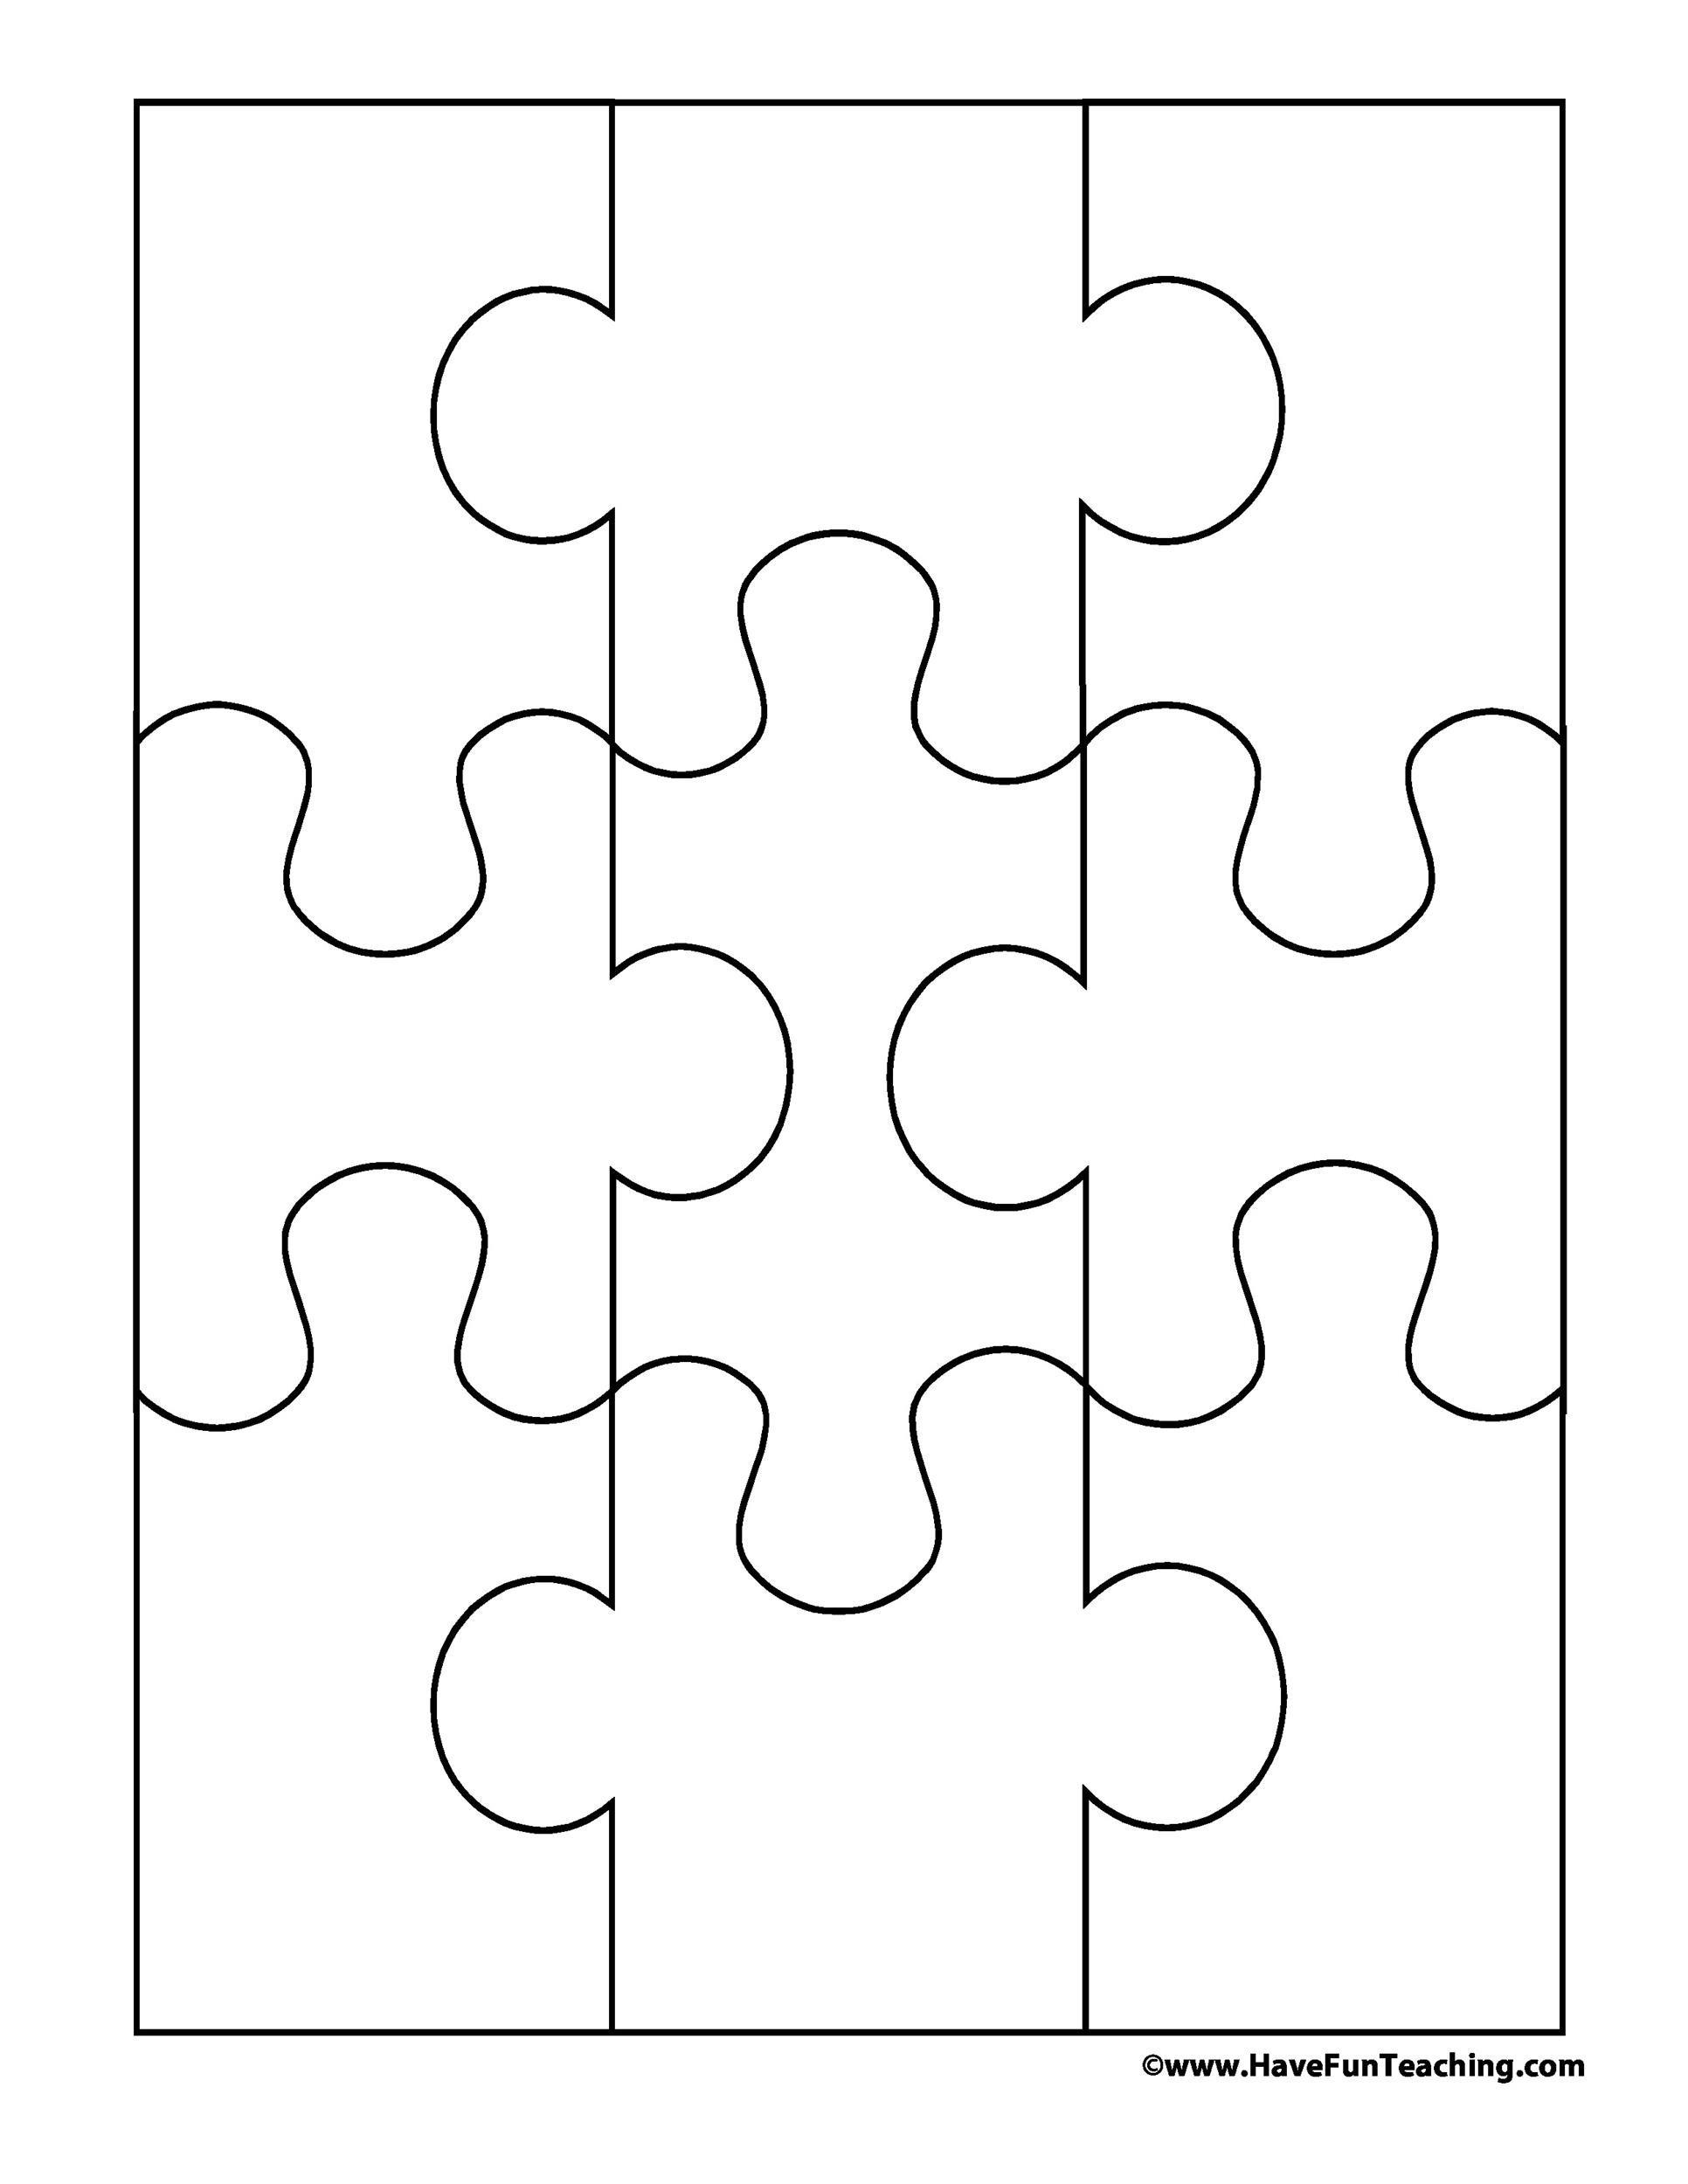
- 2 Template Images (Download from Supplies {these are in the instructable})
- Access to Adobe Illustrator (previous knowledge in Illustrator is a plus, but not required)
- Roughly 10" x 7" x 0.25" sized material compatible with laser cutter
Adobe Illustrator: Setup
NOTE: Images placed throughout this tutorial correspond to the step immediately preceding the image.
1. Download the two images in the SUPPLIES section of this tutorial. To download them, simply click on each image and press the DOWNLOAD ORIGINAL icon in the bottom left corner of the image.
2. Upon clicking the download icon, the image will open in a new browser tab. To download the image, right click on the puzzle and select SAVE IMAGE AS... from the dropdown menu. You will need to access the images in later steps, so be sure to download them somewhere you will be able to find. Normally, they will default to download to your computer's Downloads folder.
3. Open Adobe Illustrator on your computer
4. On the left side of your screen, select the OPEN button, below the blue New file button. You can also navigate to open with FILE->OPEN in the top left corner of the screen.
4. Your computer's File Explorer will open. Navigate to the location you downloaded the puzzle template jpg file. Select the file and click OPEN.
5. You will be greeted with a screen similar to the one pictured below. The light gray box in the middle of the screen is known as an ARTBOARD. Currently, the image is much larger than the artboard, and is far outside it's bounds. We will fix this in a later step.
6. The workspace you see around your artboard may appear to be different from the ones pictured in this tutorial. This tutorial uses the ESSENTIALS CLASSIC workspace. To switch workspace setups, navigate to the top right hand corner of the window and click the SWITCH WORKSPACE icon. Select ESSENTIALS CLASSIC if you would like to match the workspaces of this tutorial. If you are familiar with another workspace setup, feel free to use whichever you prefer.
***If you choose to use a different workspace setup, be warned that certain settings and menus may be in locations other than what is described throughout this tutorial.***
Note: If you are not familiar with the commands and controls of Adobe Illustrator, use this link (also pasted below) to find any basic commands you may need in this tutorial.
https://helpx.adobe.com/illustrator/using/default-keyboard-shortcuts.html
Adobe Illustrator: Setting Up Your Puzzle Template
1. Select the puzzle template image. With the image selected, in the top ribbon find the IMAGE TRACE button. Select the carrot next to this image to see the Image Trace dropdown menu. Select the LINE ART option from the menu. This will convert the image from a raster file (the default image file type) to a vector file (a file Illustrator and the laser etcher can read). The image trace tool may take a moment to complete.
2. With the image still selected, you will see the ribbon menu along the top of the workspace has changed to the Image Tracing settings. In this ribbon, find the EXPAND button. Click EXPAND. This breaks the vector image into its individual components.
3. Select the puzzle outline. Click the PROPERTIES toolbar on the right side of the screen. Under the TRANSFORM section of this toolbar, ensure the proportions of the template are linked by checking the LINK icon (should match the icon in the image below). Then change image the WIDTH (W) to 495 pt (~6.75 inches). This should change your template’s width and height proportionally (height should read ~678 pt or ~9.25 inches). Click away from the puzzle outline.
4. Double click the puzzle template to edit the image. You will see a layer indicator appear below the toolbar (circled in red). Select the text in the bottom right corner of the image, and remove it by clicking the DELETE or BACKSPACE key on your keyboard.
5. To exit this layer editor, click the ESCAPE key (I recommend clicking escape multiple times to ensure you are all the way back). Your artboard should look similar to the one pictured below.
Placing Your Puzzle Graphic
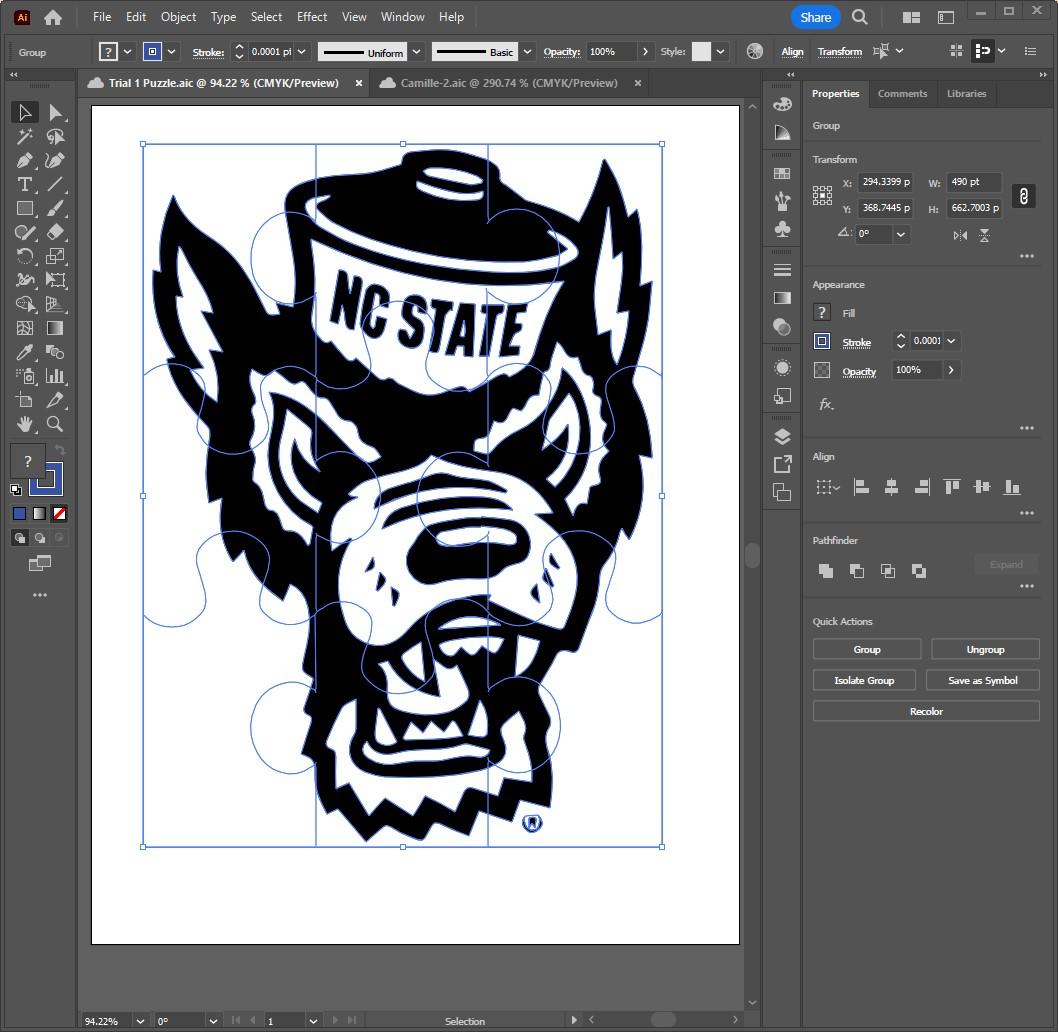
1. Now it is time to place your design image on the puzzle. Select FILE, PLACE, and place the image you want to use. An NC State Tuffy logo was provided in the SUPPLIES section of the tutorial. This is the file that will be used as an example for the remainder of the tutorial. If you are comfortable finding your own image to use, feel free to do so.
**Remember, the laser cutter will only be able to represent two colors, so it is recommended that you use a black and white image if you choose to upload your own image**
2. To place the image click and drag an area to about the size of the puzzle outline.
3. Again, select the carrot besides the image trace button. This time, select SILHOUETTE image trace option. This will convert the image to a black and white vector file with no background.
4. With the logo selected, click EXPAND in the Image Trace ribbon. This will complete the conversion of the image from a raster to a vector file, breaking the image into its components.
5. Scale the image to fill the puzzle template. Click and drag the corner of the logo to scale the logo to your liking. To keep the image’s dimensions proportional, hold SHIFT while dragging. This will keep the image from becoming unintentionally stretched or compressed. Your artboard should look similar to the image below.
6. If you would like to center the logo with the puzzle template, select both the logo and the puzzle template (click and drag). Once both are selected, look over in the ALIGN section of the properties menu and select HORIZONTAL ALIGN CENTER, and then VERTICAL ALIGN CENTER.
7. With both the image and the template still selected, look in the APPEARANCE section of the properties tab. Select the box next to the STROKE label. This will open up the color pallet menu for the stroke. Select the COLOR MIXER tab at the top of the pop-out window.
8. In the color mixer window, you will not have a color selected. Above the gradient, select the black box (1). This will give your stroke (the borders and lines in the image) a color. However, this will not put the image in the correct color mode. To fix this, select the 3 lined properties icon in the top right hand corner of the pop-out window (2). This will open a dropdown menu with many different color modes. The one we want for this project is RGB (Red Green Blue). Select the RGB color mode (3).
9. Change the stroke color to R-0, G-0, B-255. This should change all the lines in your selection to a royal blue color. Blue tells the laser to etch, red tells it to cut, and black tells it to raster. We want all the border of this logo to be etched, as well as the puzzle template. This will give the lines a very crisp resolution on the laser. We will leave the fill of the logo black, telling the laser to raster these areas.
10. Now back in the Appearance section of the selection properties tab, alter the line weight to be 0.0001 pt. This will allow the laser to etch these sections. **The lines will be almost invisible**
11. Once the puzzle template and image are scaled, positioned, and appropriately colored, save the file as an .SVG file (FILE->SAVE AS-> .SVG).
**If you have had any troubles with the illustrator section of this tutorial, or would like to complete the tutorial but do not have access to Adobe Illustrator, there is a downloadable file attached to this step with everything up to this point completed.**
Laser Etching Setup
**This tutorial is based on the operation and safety instruction for the Universal Laser Systems laser in the NC State Poe 102 lab space. A more comprehensive instruction set for the laser etcher should also be available on site.**
1. Make sure the laser is plugged in and powered on. Upon powering up, the laser should trigger the ventilation system to turn on.
2. Once the laser has power and the ventilation system is on, turn on the compressed air supply to the laser. There is a small, brass, valve that is located at the end of the line, next to the coupler. To allow air to pass you must turn the handle vertically, as the handle being horizontal will shut off the flow of air to the laser. DO NOT turn the T- shaped handle attached to a gauge located next to the on/off valve. That is a pressure regulator and not to be adjusted by anyone except the instructors or maintenance personnel.
3. Print the .SVG file using CTRL+P. This will send it to the Universal Laser Systems (ULS) software. If the screen does not appear upon printing it, there will be a small red and yellow icon in the bottom right corner of the toolbar. Click this icon. The screen pictured below should appear. Do not mind the red lines surrounding the puzzle in the image. If you have completed the tutorial correctly to this point, the boarder of your puzzle should appear blue.
4. The file should have blue lines showing the puzzle piece outlines and the outline of the logo and black areas filling in some of the logo. The black areas (raster) will take much more time to fill in than the blue areas will to etch.
5. Take your material and use a ruler and pencil to lightly mark the center of the material. Draw an X shape from corner to corner, and use the intersection as the center of the material.
6. Open the lid of the laser cutter and make sure the nozzle, bed and gantry are free of any soot buildup or debris.
7. Load the material into the laser, pushing it into the upper left corner of the laser bed. Make sure the corner is flush with both sides of the corner of the printer bed.
8. Using the arrows in the ULS software on the computer, move the laser to align with the center of the material. Use the red dot to help align the laser.
9. Once the laser is in place, select the move button in the software (signified by arrows crossing in a “t” shape). Be sure that the center node of the image is selected (it will appear blue when selected). Then, select TO POINTER. This will align the center of the image to the center of the material.
Laser Etch
1. Within the ULS software, select SETTINGS in the bottom right hand corner. Navigate to the MATERIAL PROPERTIES tab. Find the material you are using (for example: Natural-> Wood -> Medium Woods-> General Medium Woods).
2. Enter the thickness of the material in decimal form.
3. On the right side of the screen, increase the vector raster and etch sliders about 15%-20%. Ensure that none of the SKIP boxes are checked unintentionally. Click APPLY when you have the settings set correctly. Then click OK to exit.
4. With the material loaded, laser set, material properties setup, and the image uploaded correctly, you should be ready to etch. Close the laser’s door. Click the green PLAY BUTTON in the top right corner of the window to begin the etch.
5. When the laser is done and the smoke has been evacuated from the chamber, open the lid and remove your material. Turn off the machine. Your final product should look similar to the result pictured below.
Scroll Saw Cuts
- Use the Scroll Saw to cut out the puzzle pieces along the laser etched template.
- If you are unfamiliar with scroll saw safety and operations, walk through these quick videos for a refresher on proper tool use. https://www.iteea.org/Resources/Safety/Scroll_Saw.htm
- Here is another quick video demonstrating how to use the scroll saw to cut out the puzzle pieces. (https://drive.google.com/file/d/1S7dolTyggjbjpI26mNpKVM9Y5gA0mln-/view?usp=sharing)
- Tips for an effective cut:
- Take the cuts slow. Keep in mind that the blade of the saw points towards the user. Rotate the wood around the blade to keep the cut path in line with the end of the blade.
- Utilize the air nozzle to keep the cut line clean. Adjust the nozzle arm to blow on the area in front of the blade.
- It is not crucial to stay exactly on the etched template line. Utilize these as a guide, but it is okay if you deviate from them slightly. Deviation will actually give the pieces a more unique fit.
- Remember, TAKE IT SLOW. It may take a couple cuts to get comfortable with this machine. Finding control and using a steady hand is key.
- Recommended Cut Path: Cut along the red line first to cut out the columns. Then cut along the green lines to cut out the individual pieces.