Laser Etched Flames on Denim Jeans
by AndrewC24 in Craft > Fashion
5683 Views, 61 Favorites, 0 Comments
Laser Etched Flames on Denim Jeans
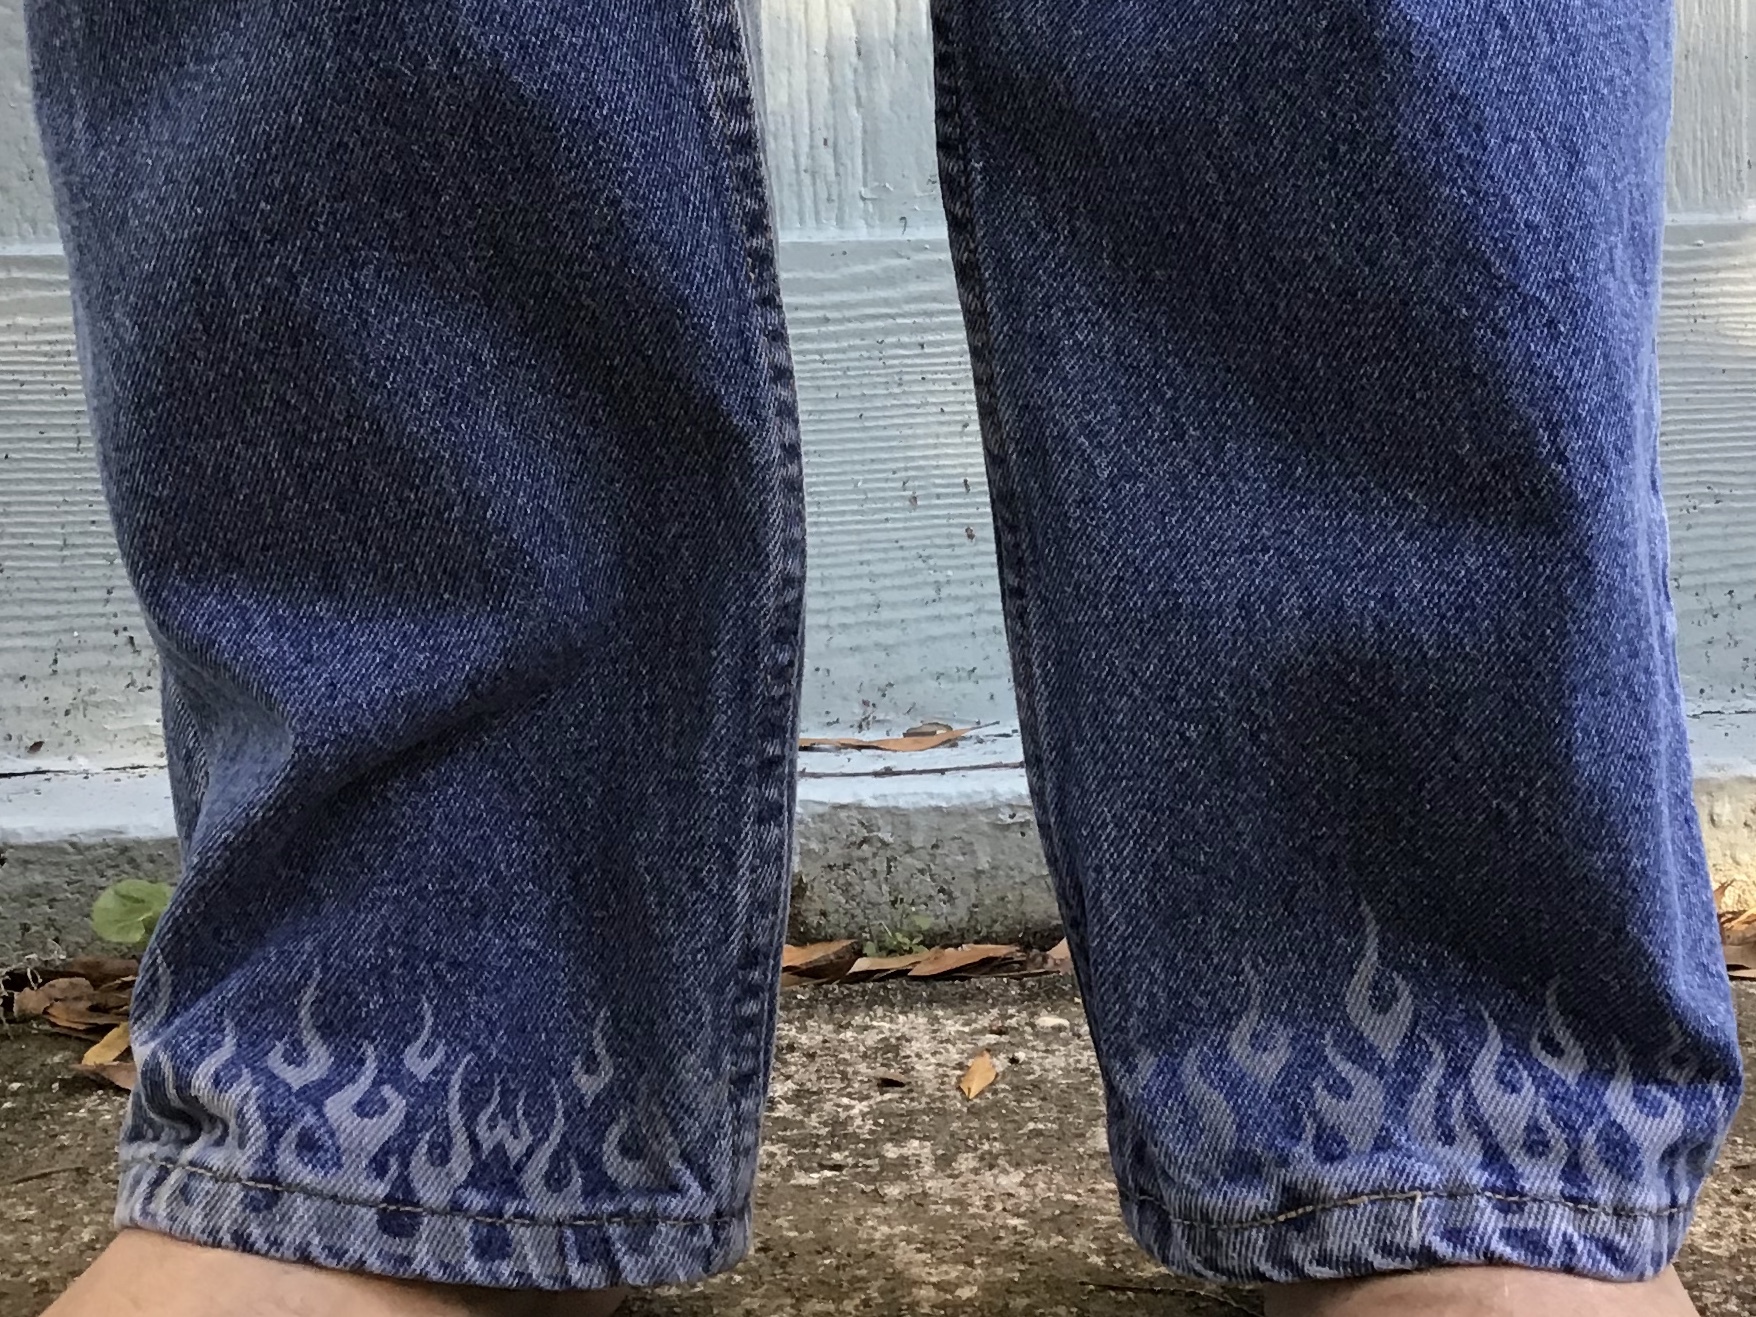
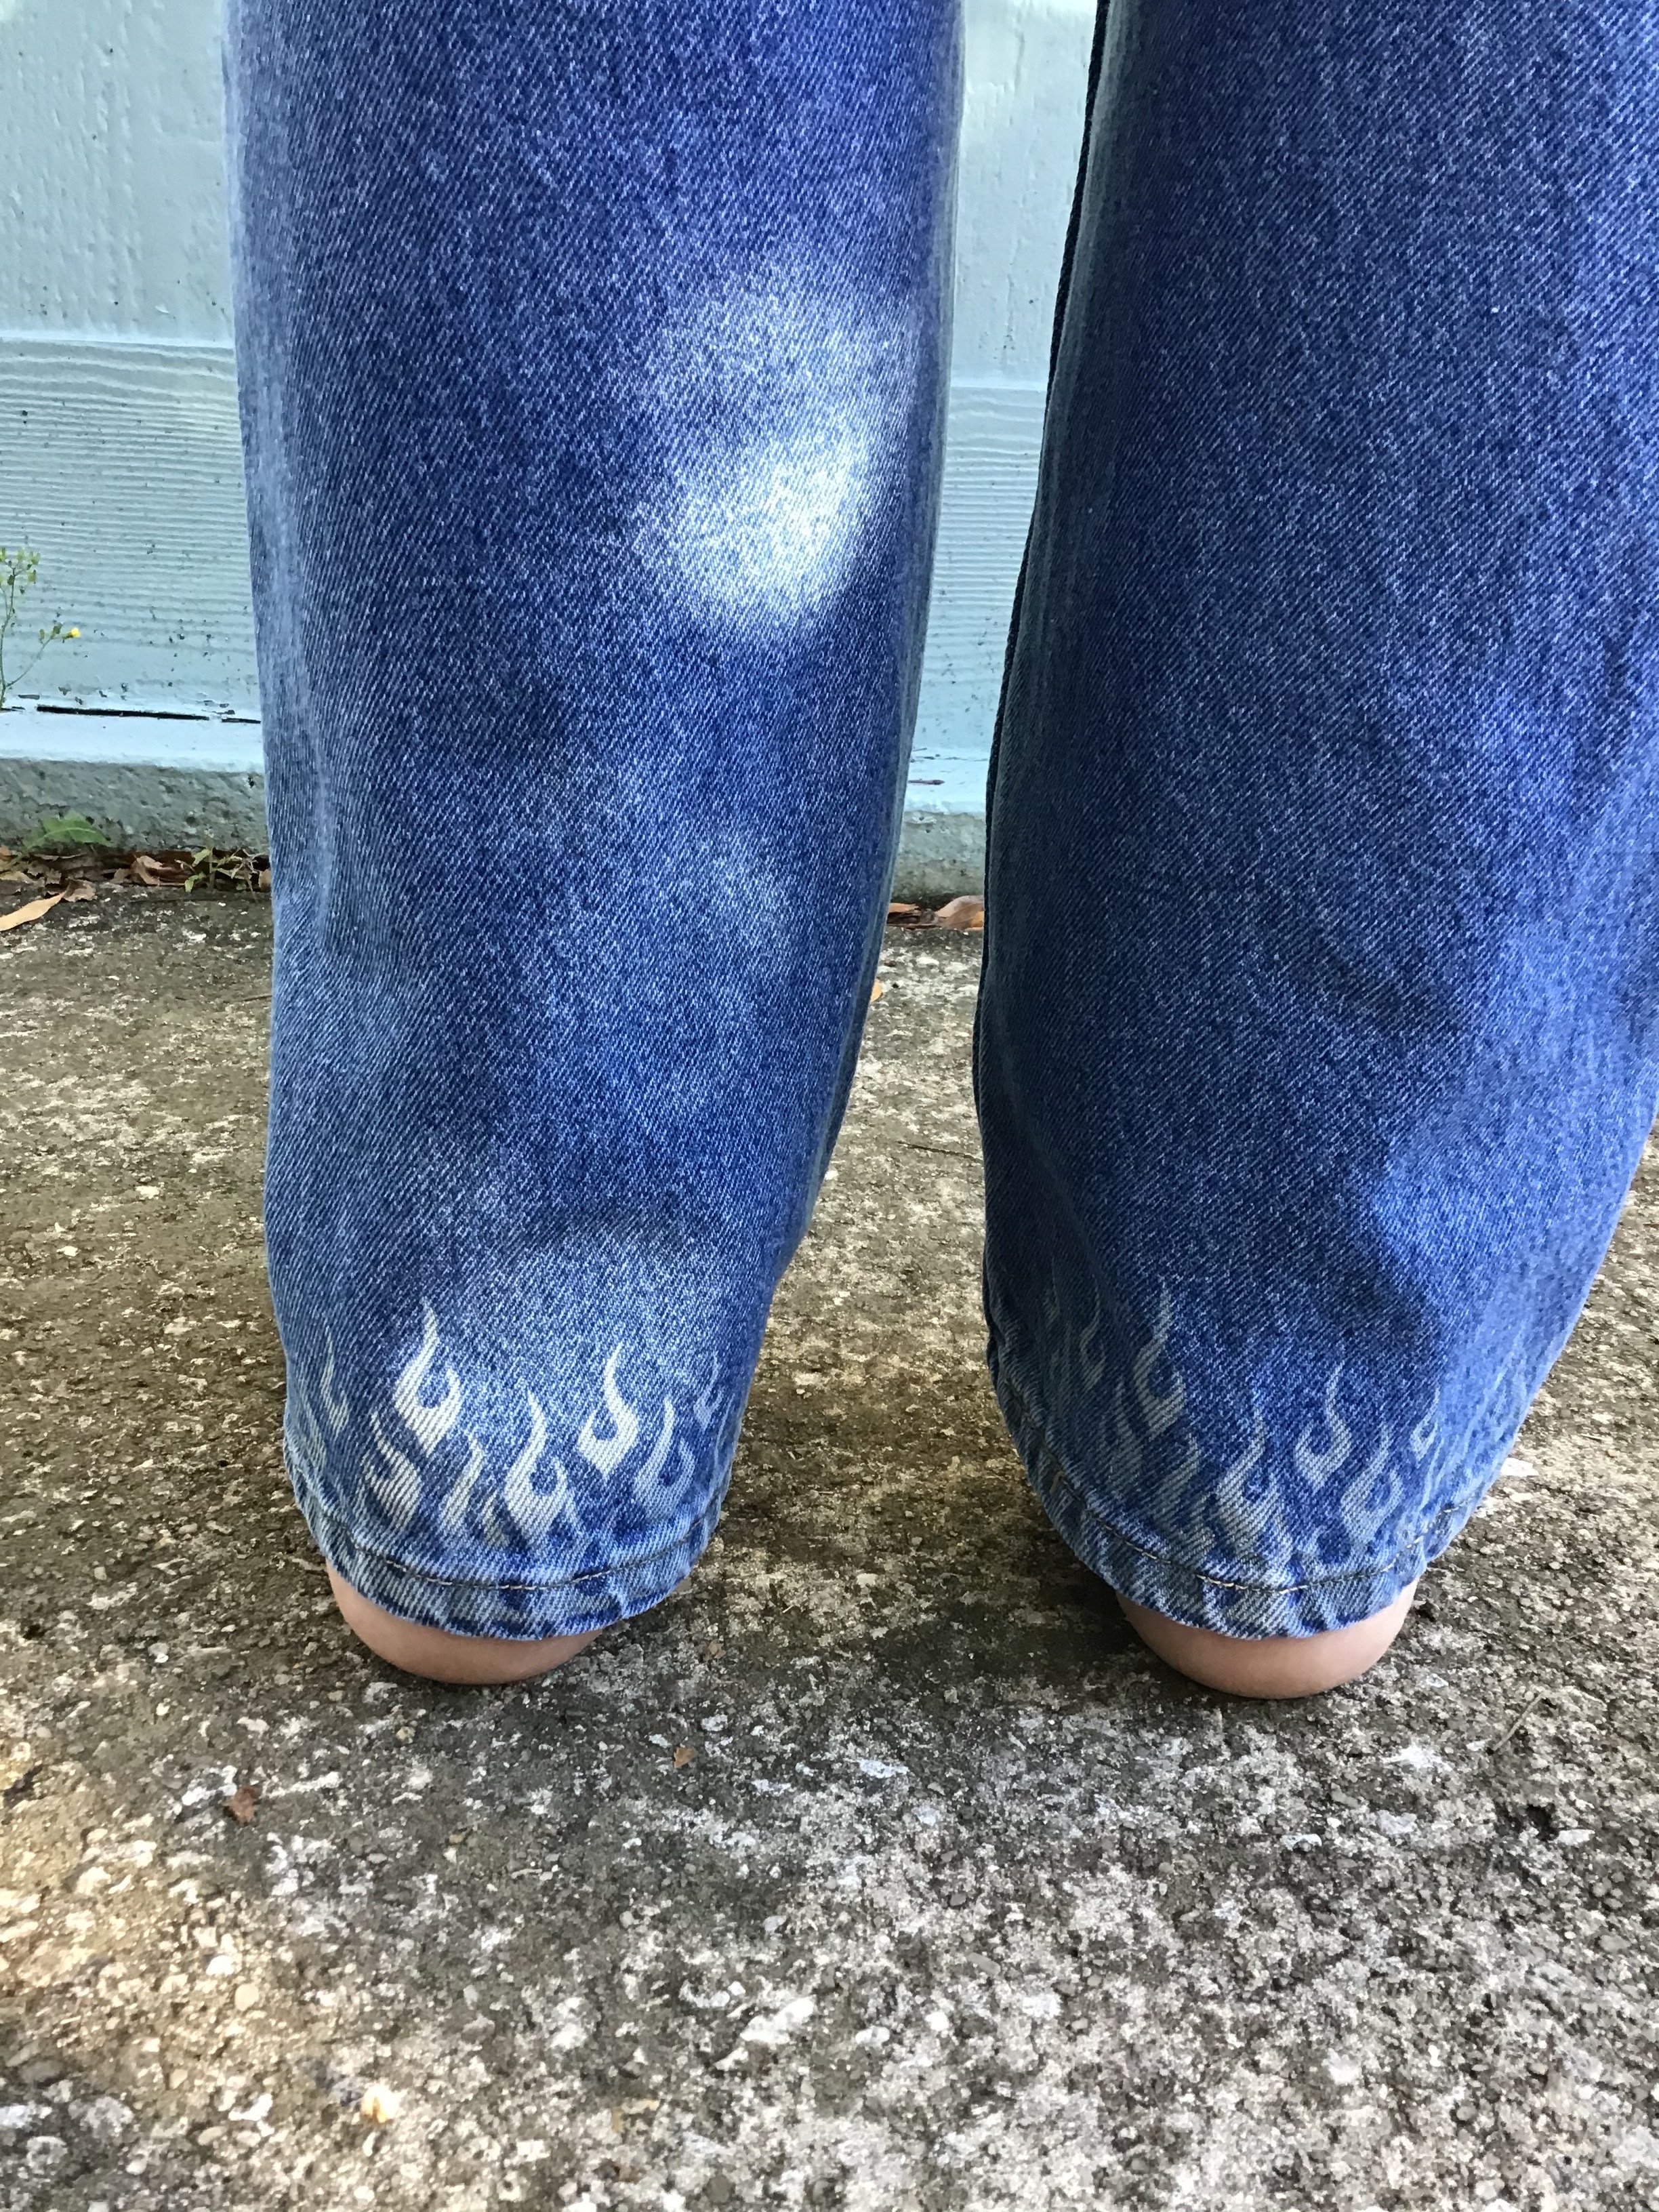
I wanted to see if I could customize a pair of denim jeans by using a laser to burn off the pigment in the dye.
I did a little research and found out that once you figure out the timing and power of the laser then you can etch pretty much any design on your jeans. Of course the results will vary depending on your image, the details and the material you are etching.
I went to the thrift store for some sample material and decided to go with the brands that are durable, so I tried to use Levi, Wrangler or Lee jeans and the darker the better. I will be trying this technique on other colored jeans as soon as I find them.
As far as images make sure to pick good outlined images and/or silhouettes as they seem to work the best. You can always do a test run on card stock.
Set up an area with a table that will have space for your garment and equipment. The garment your are etching can be bulky, so give yourself some space to work.
Most importantly follow all safety rules stated in the laser’s instruction guide. I will be repeating this often...
Supplies
NEJE master 3500 mw laser etcher and safety gear. (googles)
Computer
Denim jeans
Smartphone is optional for uploading images
Good size work table big enough
Supplies
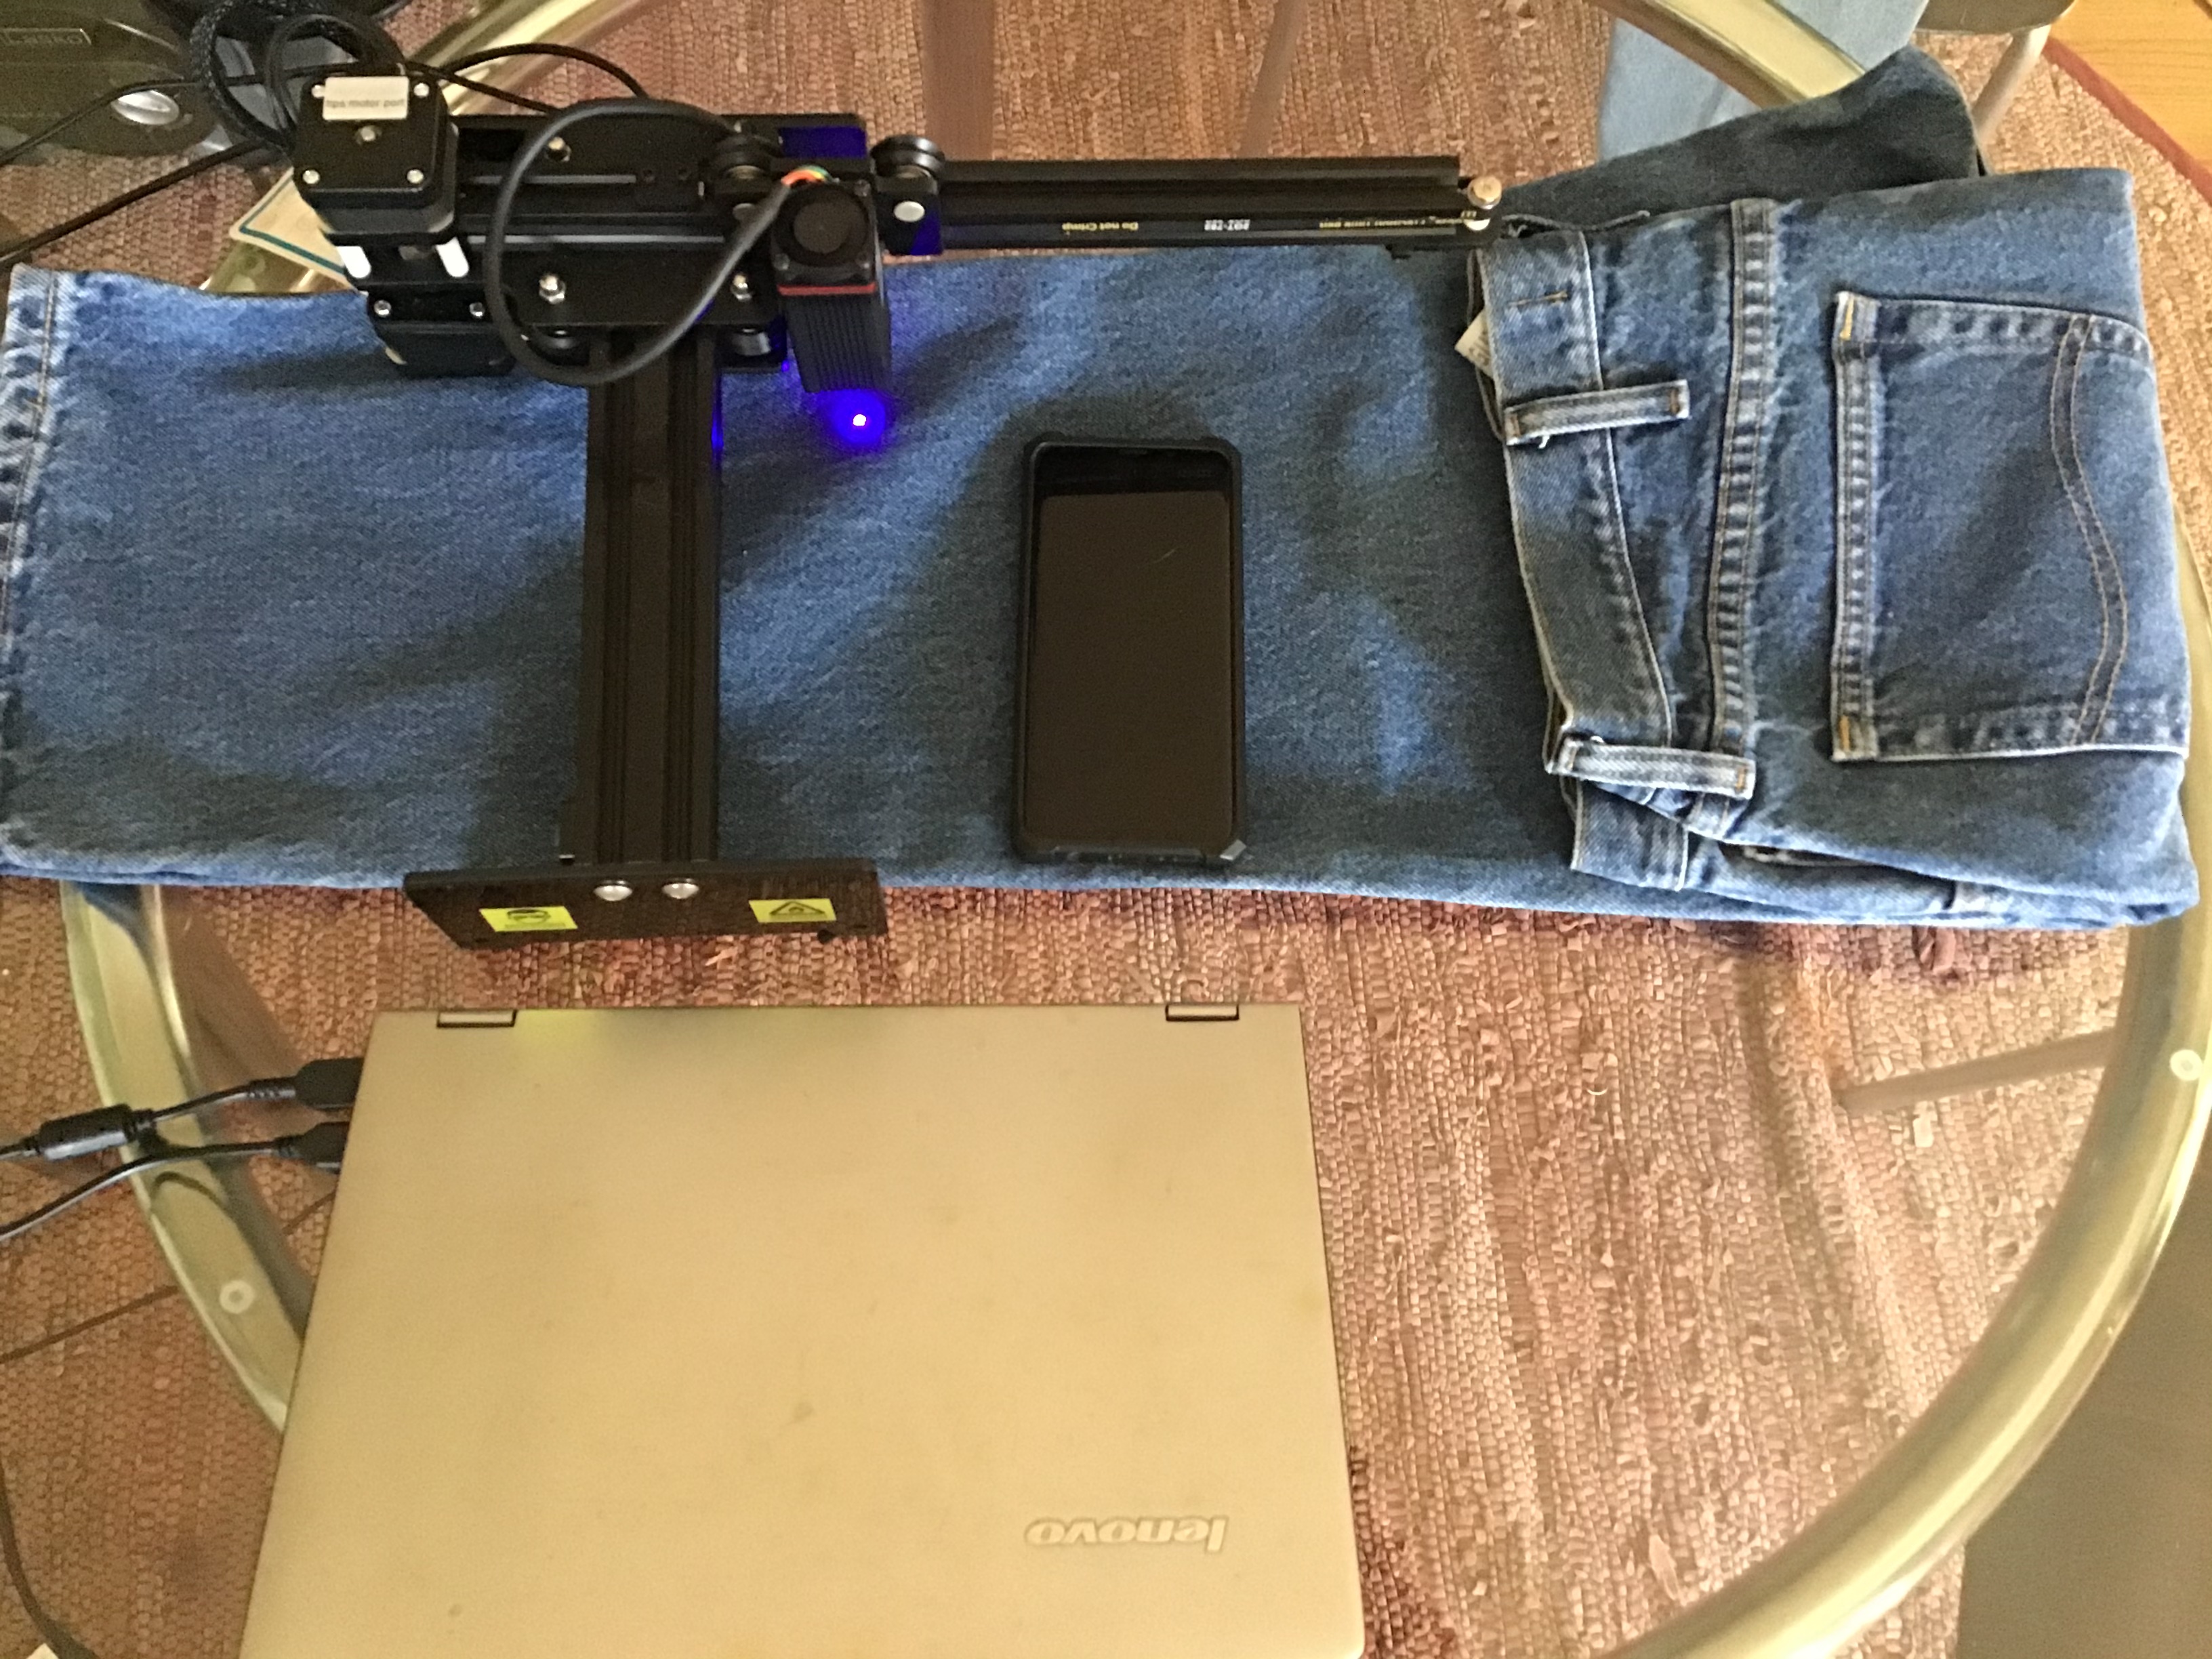
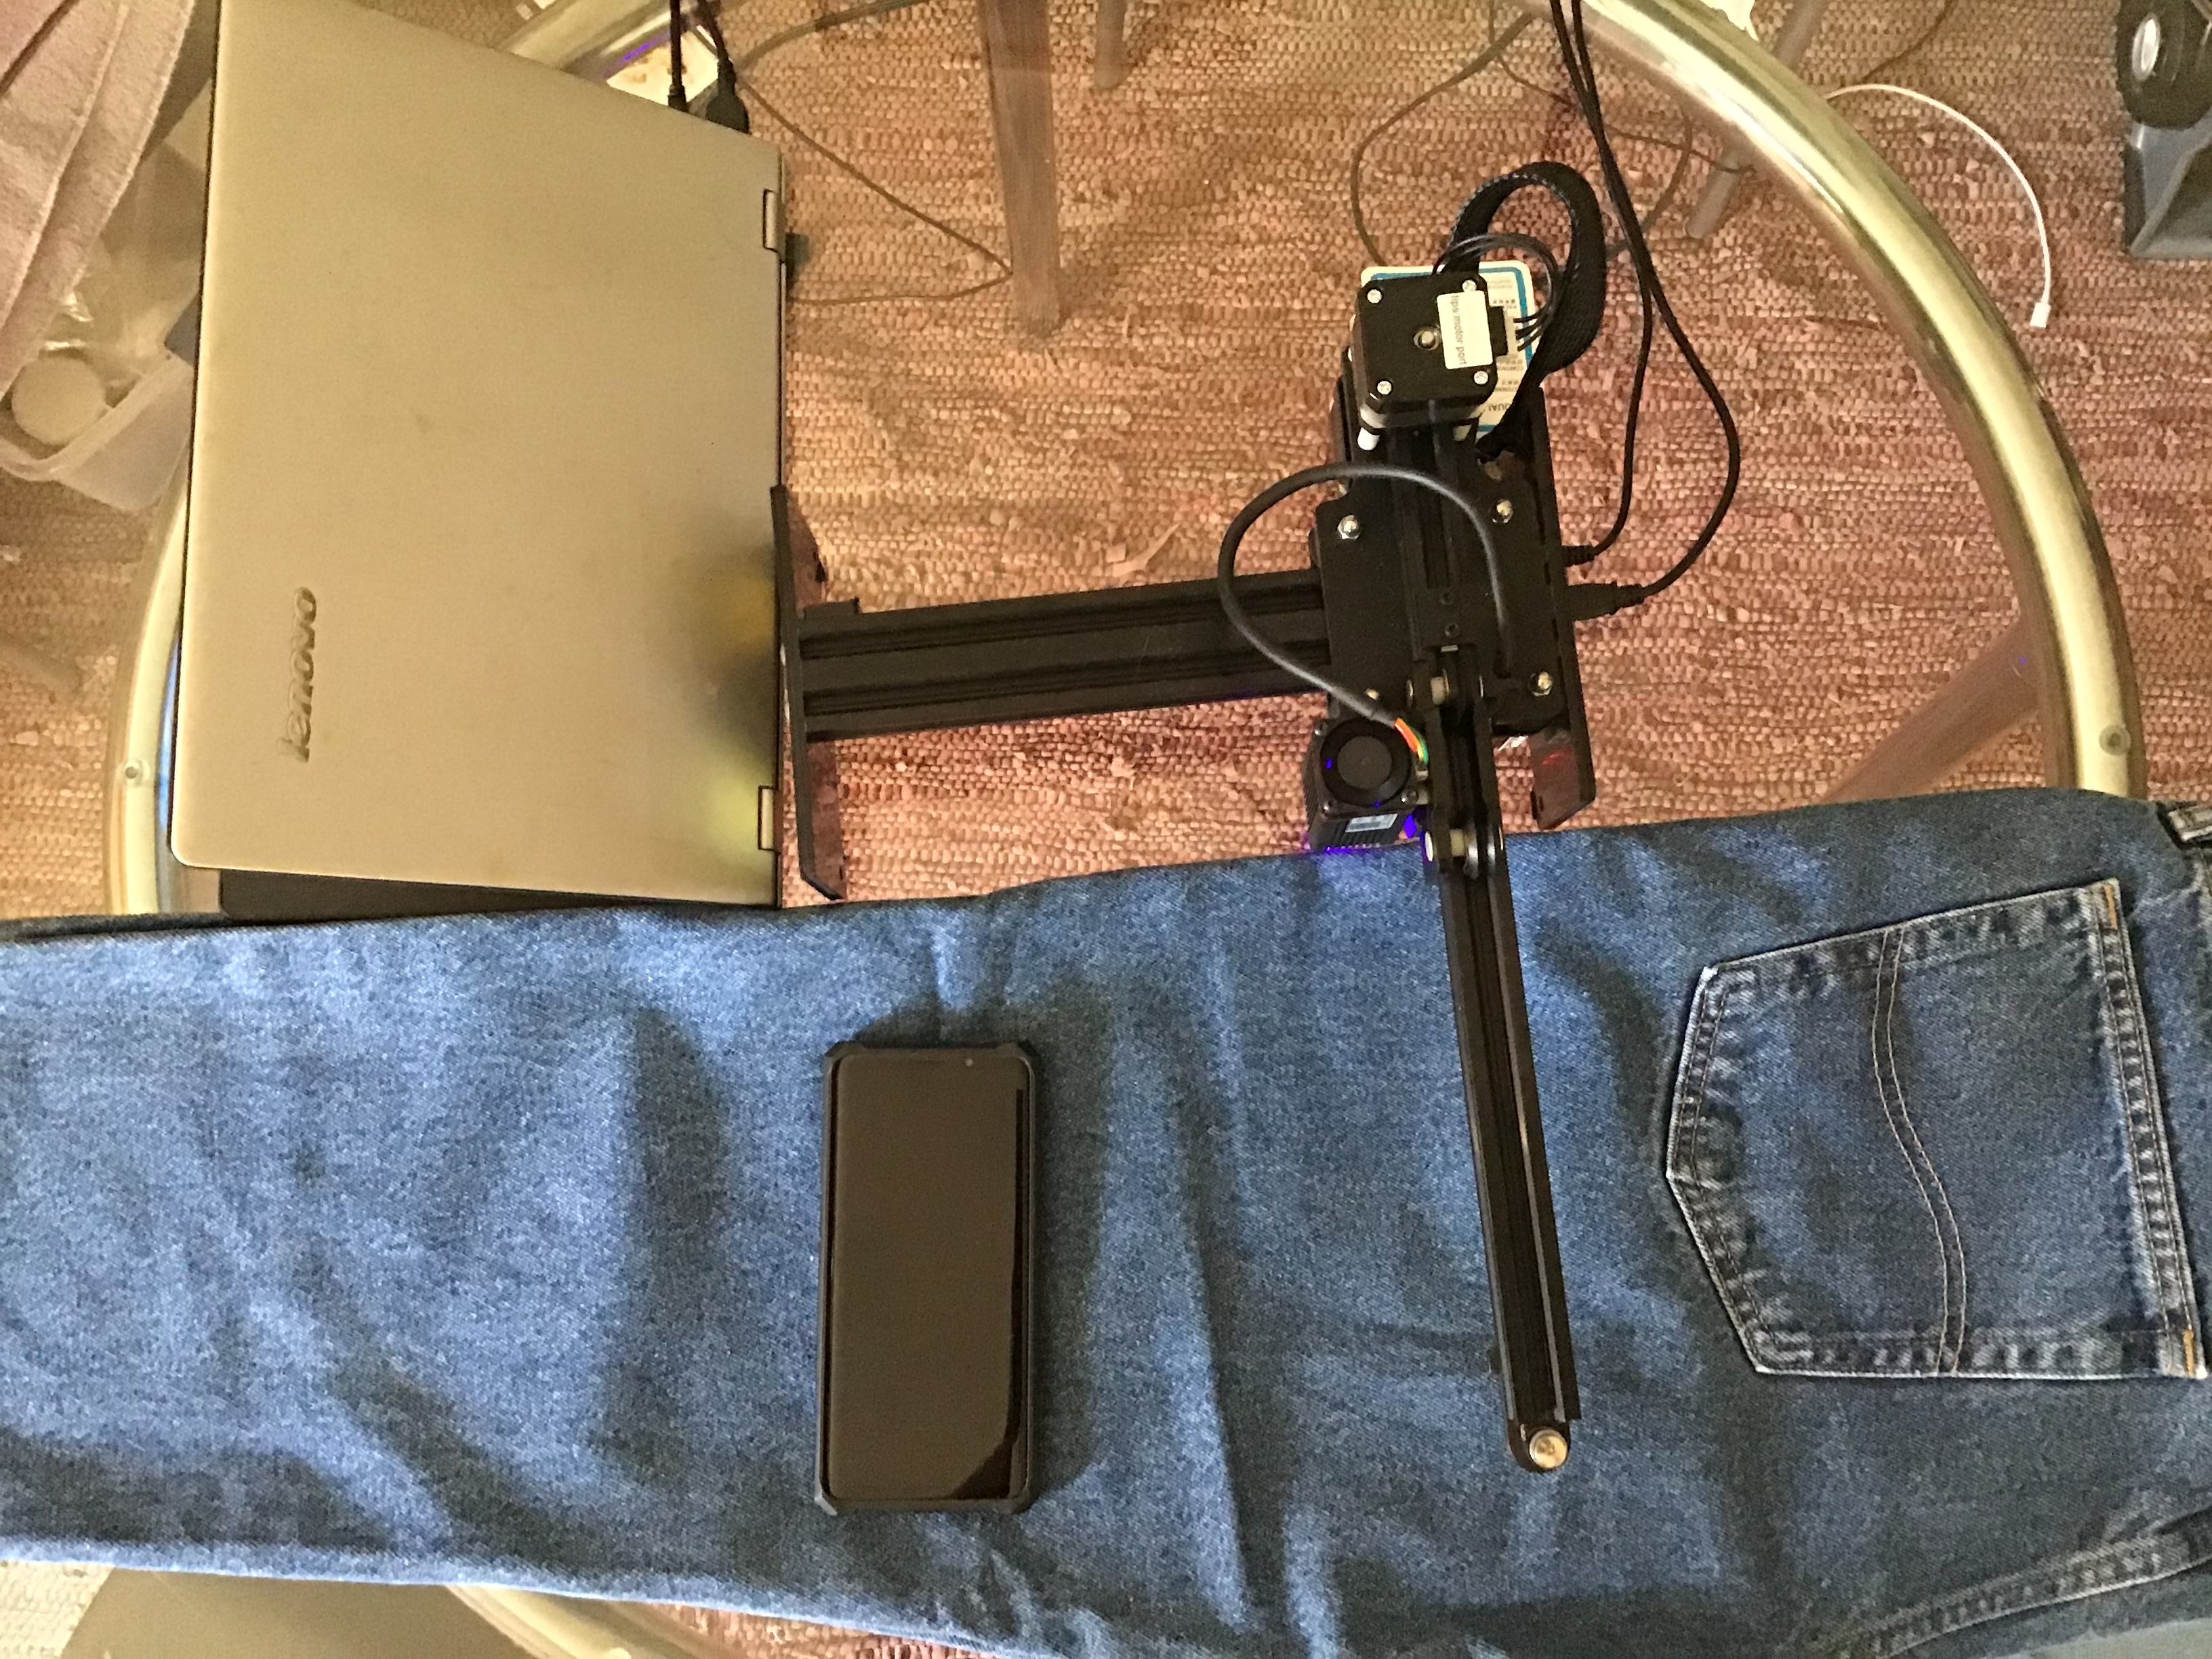
Neje master 3500 mw laser etcher
Denim jeans
Computer
Smartphone. Optional
Workspace large enough for your computer, laser and pants.
Setting Up the Laser and Connecting It to the Computer.
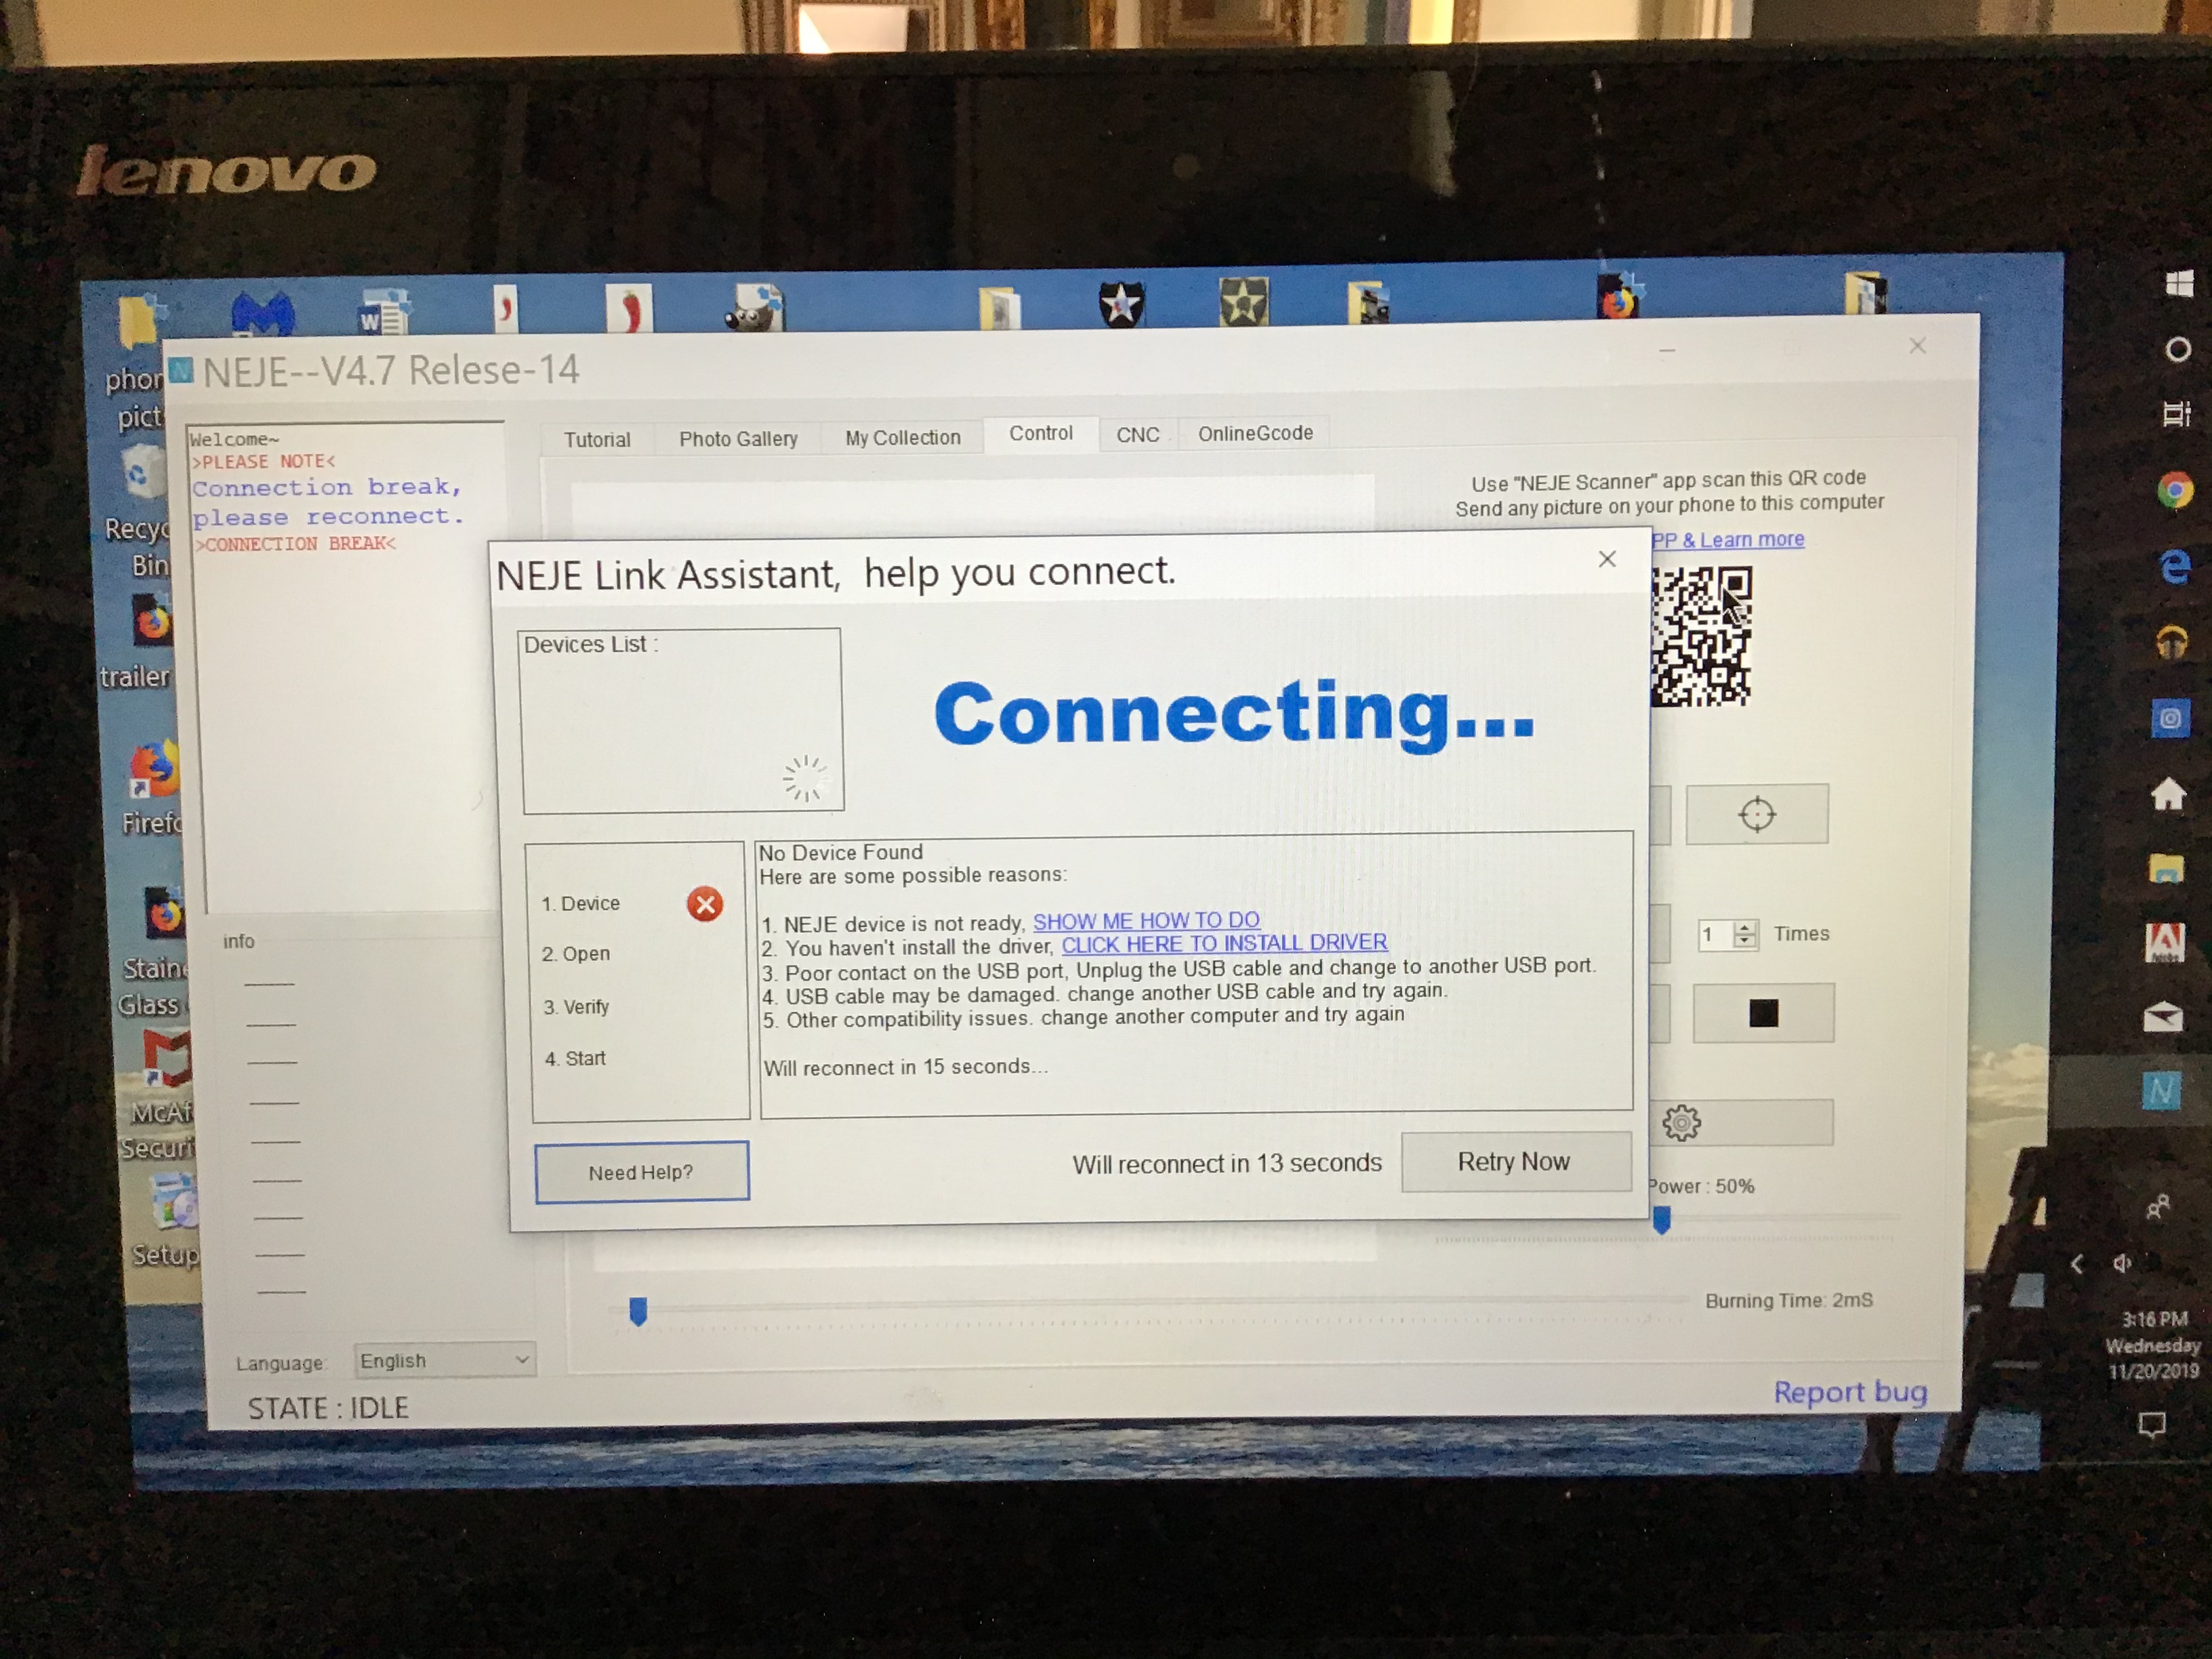
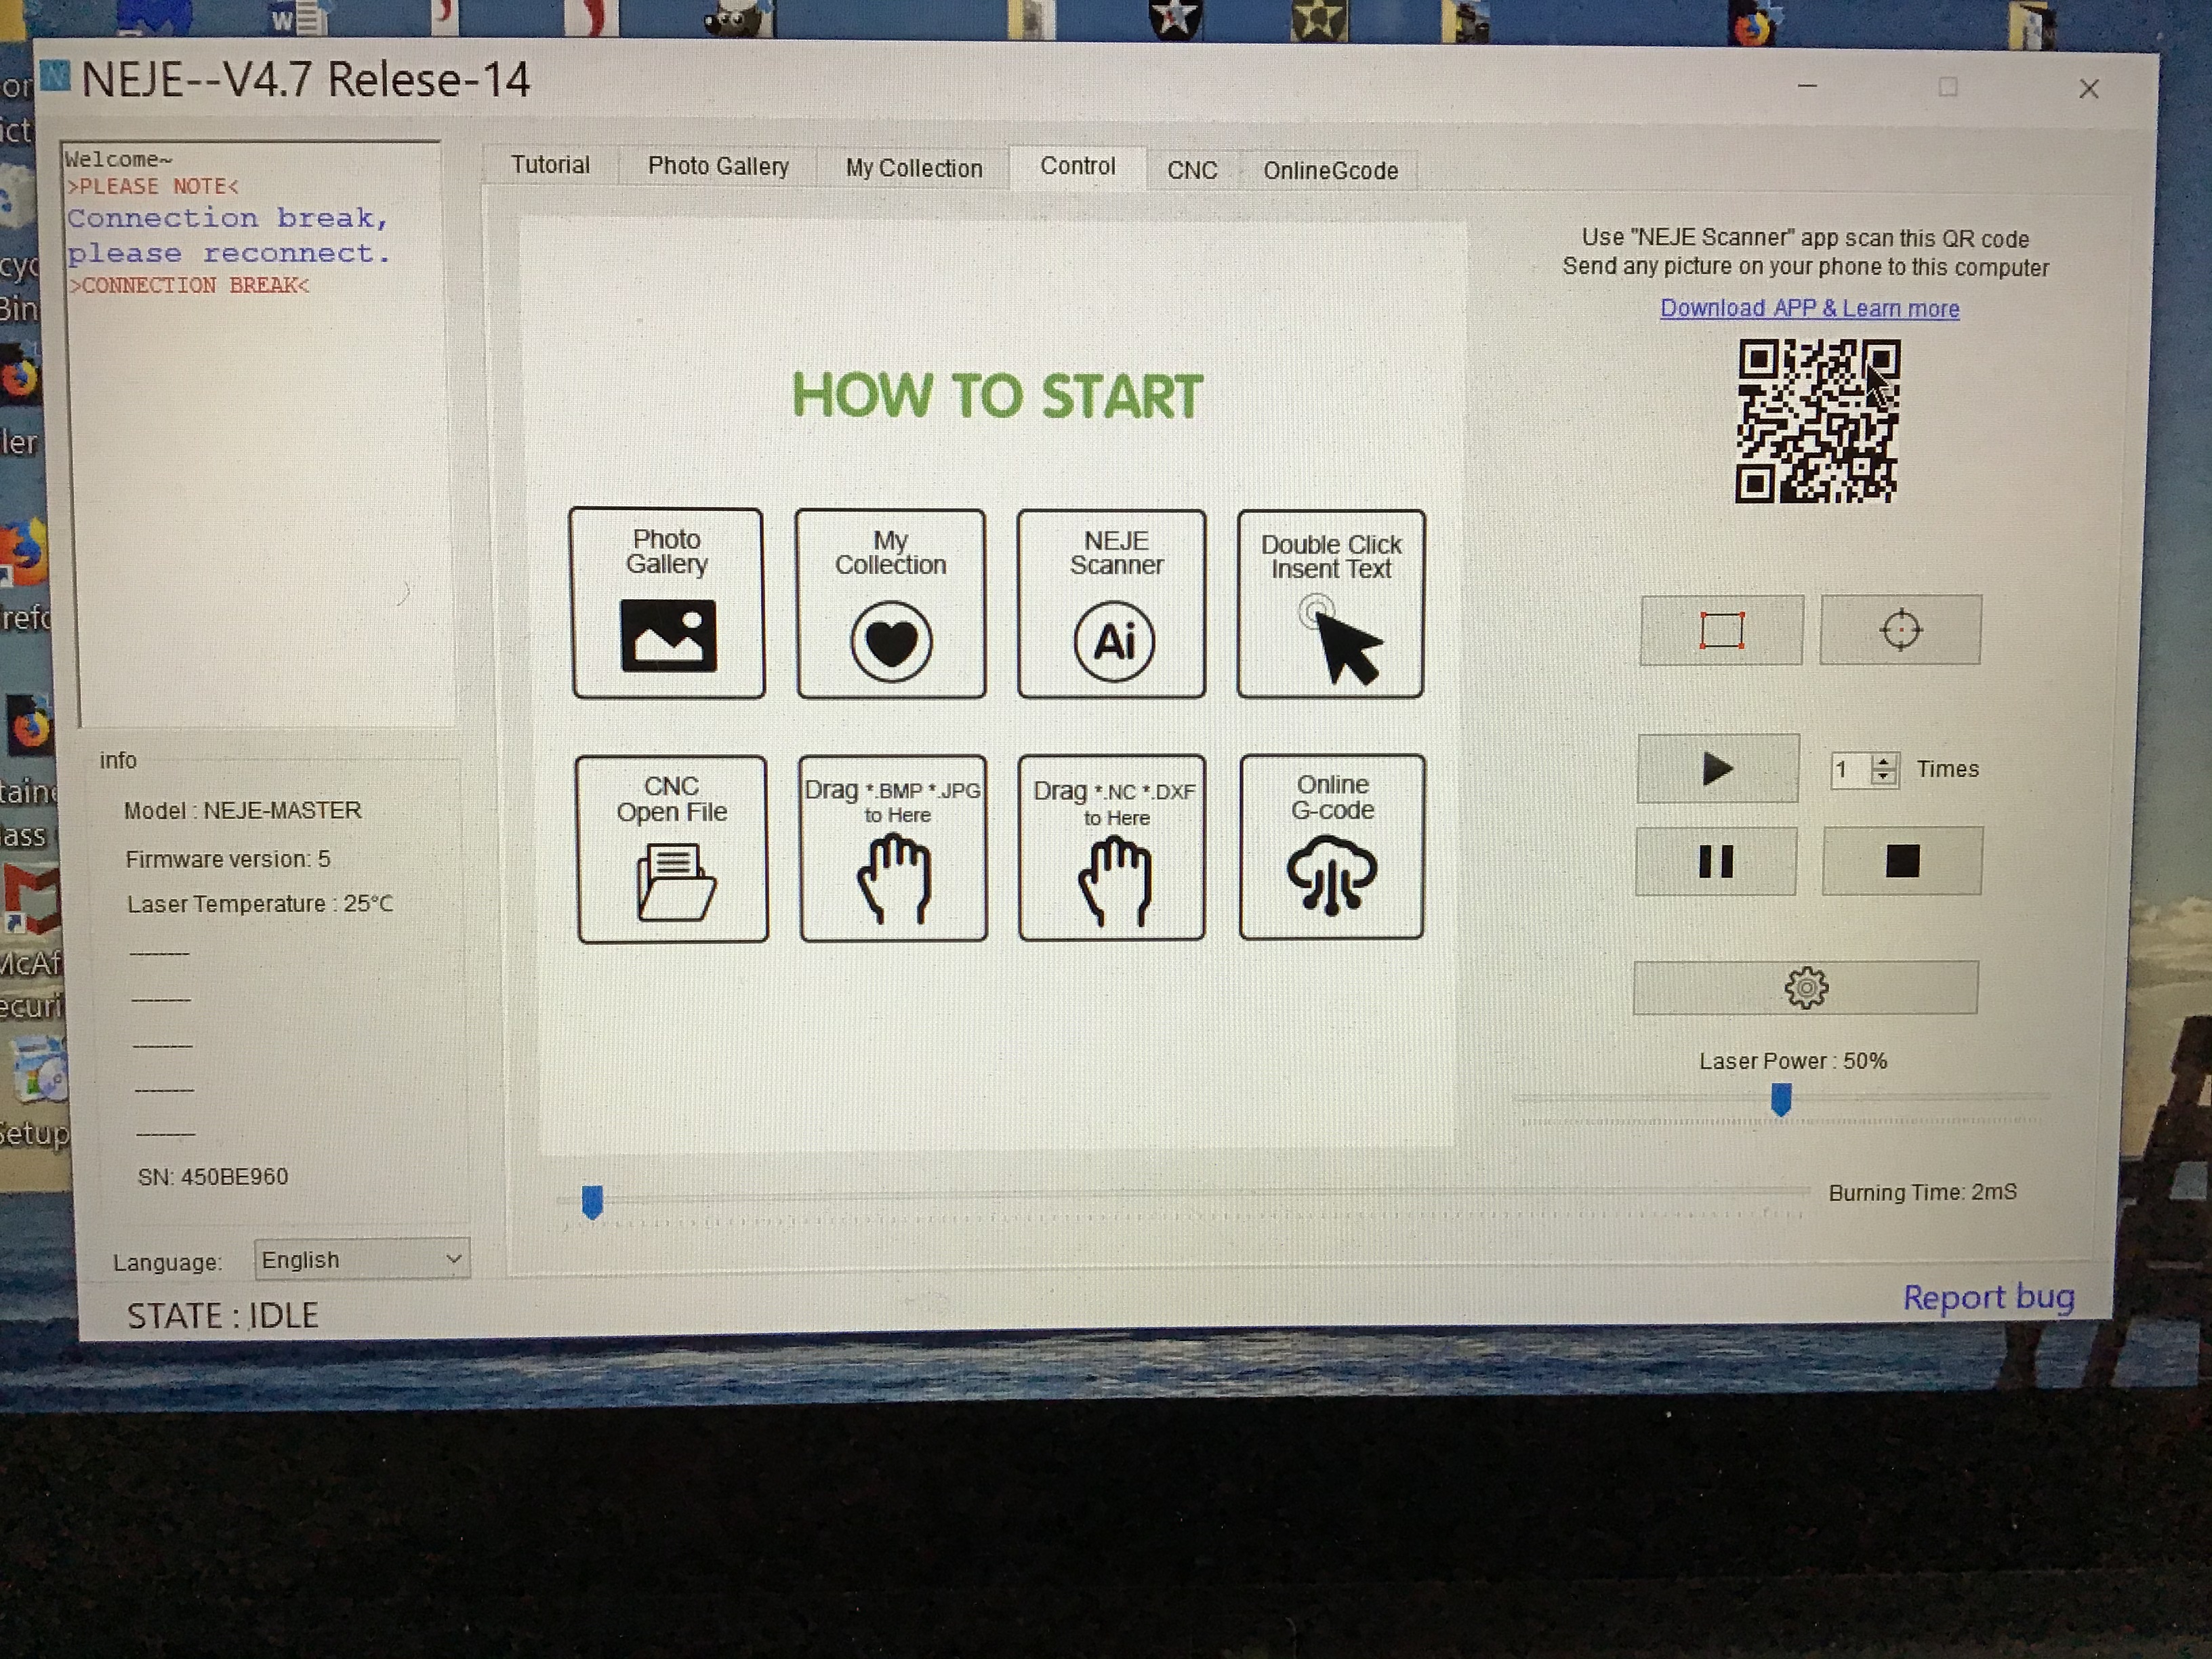
Set up the laser according to the instructions.
You will need to download the software from the wikineje site listed in the instructions.
The software is an app and you have to access it to start. So power up your computer and open the neje app.
Plug in the power and usb connecting the computer to the laser.
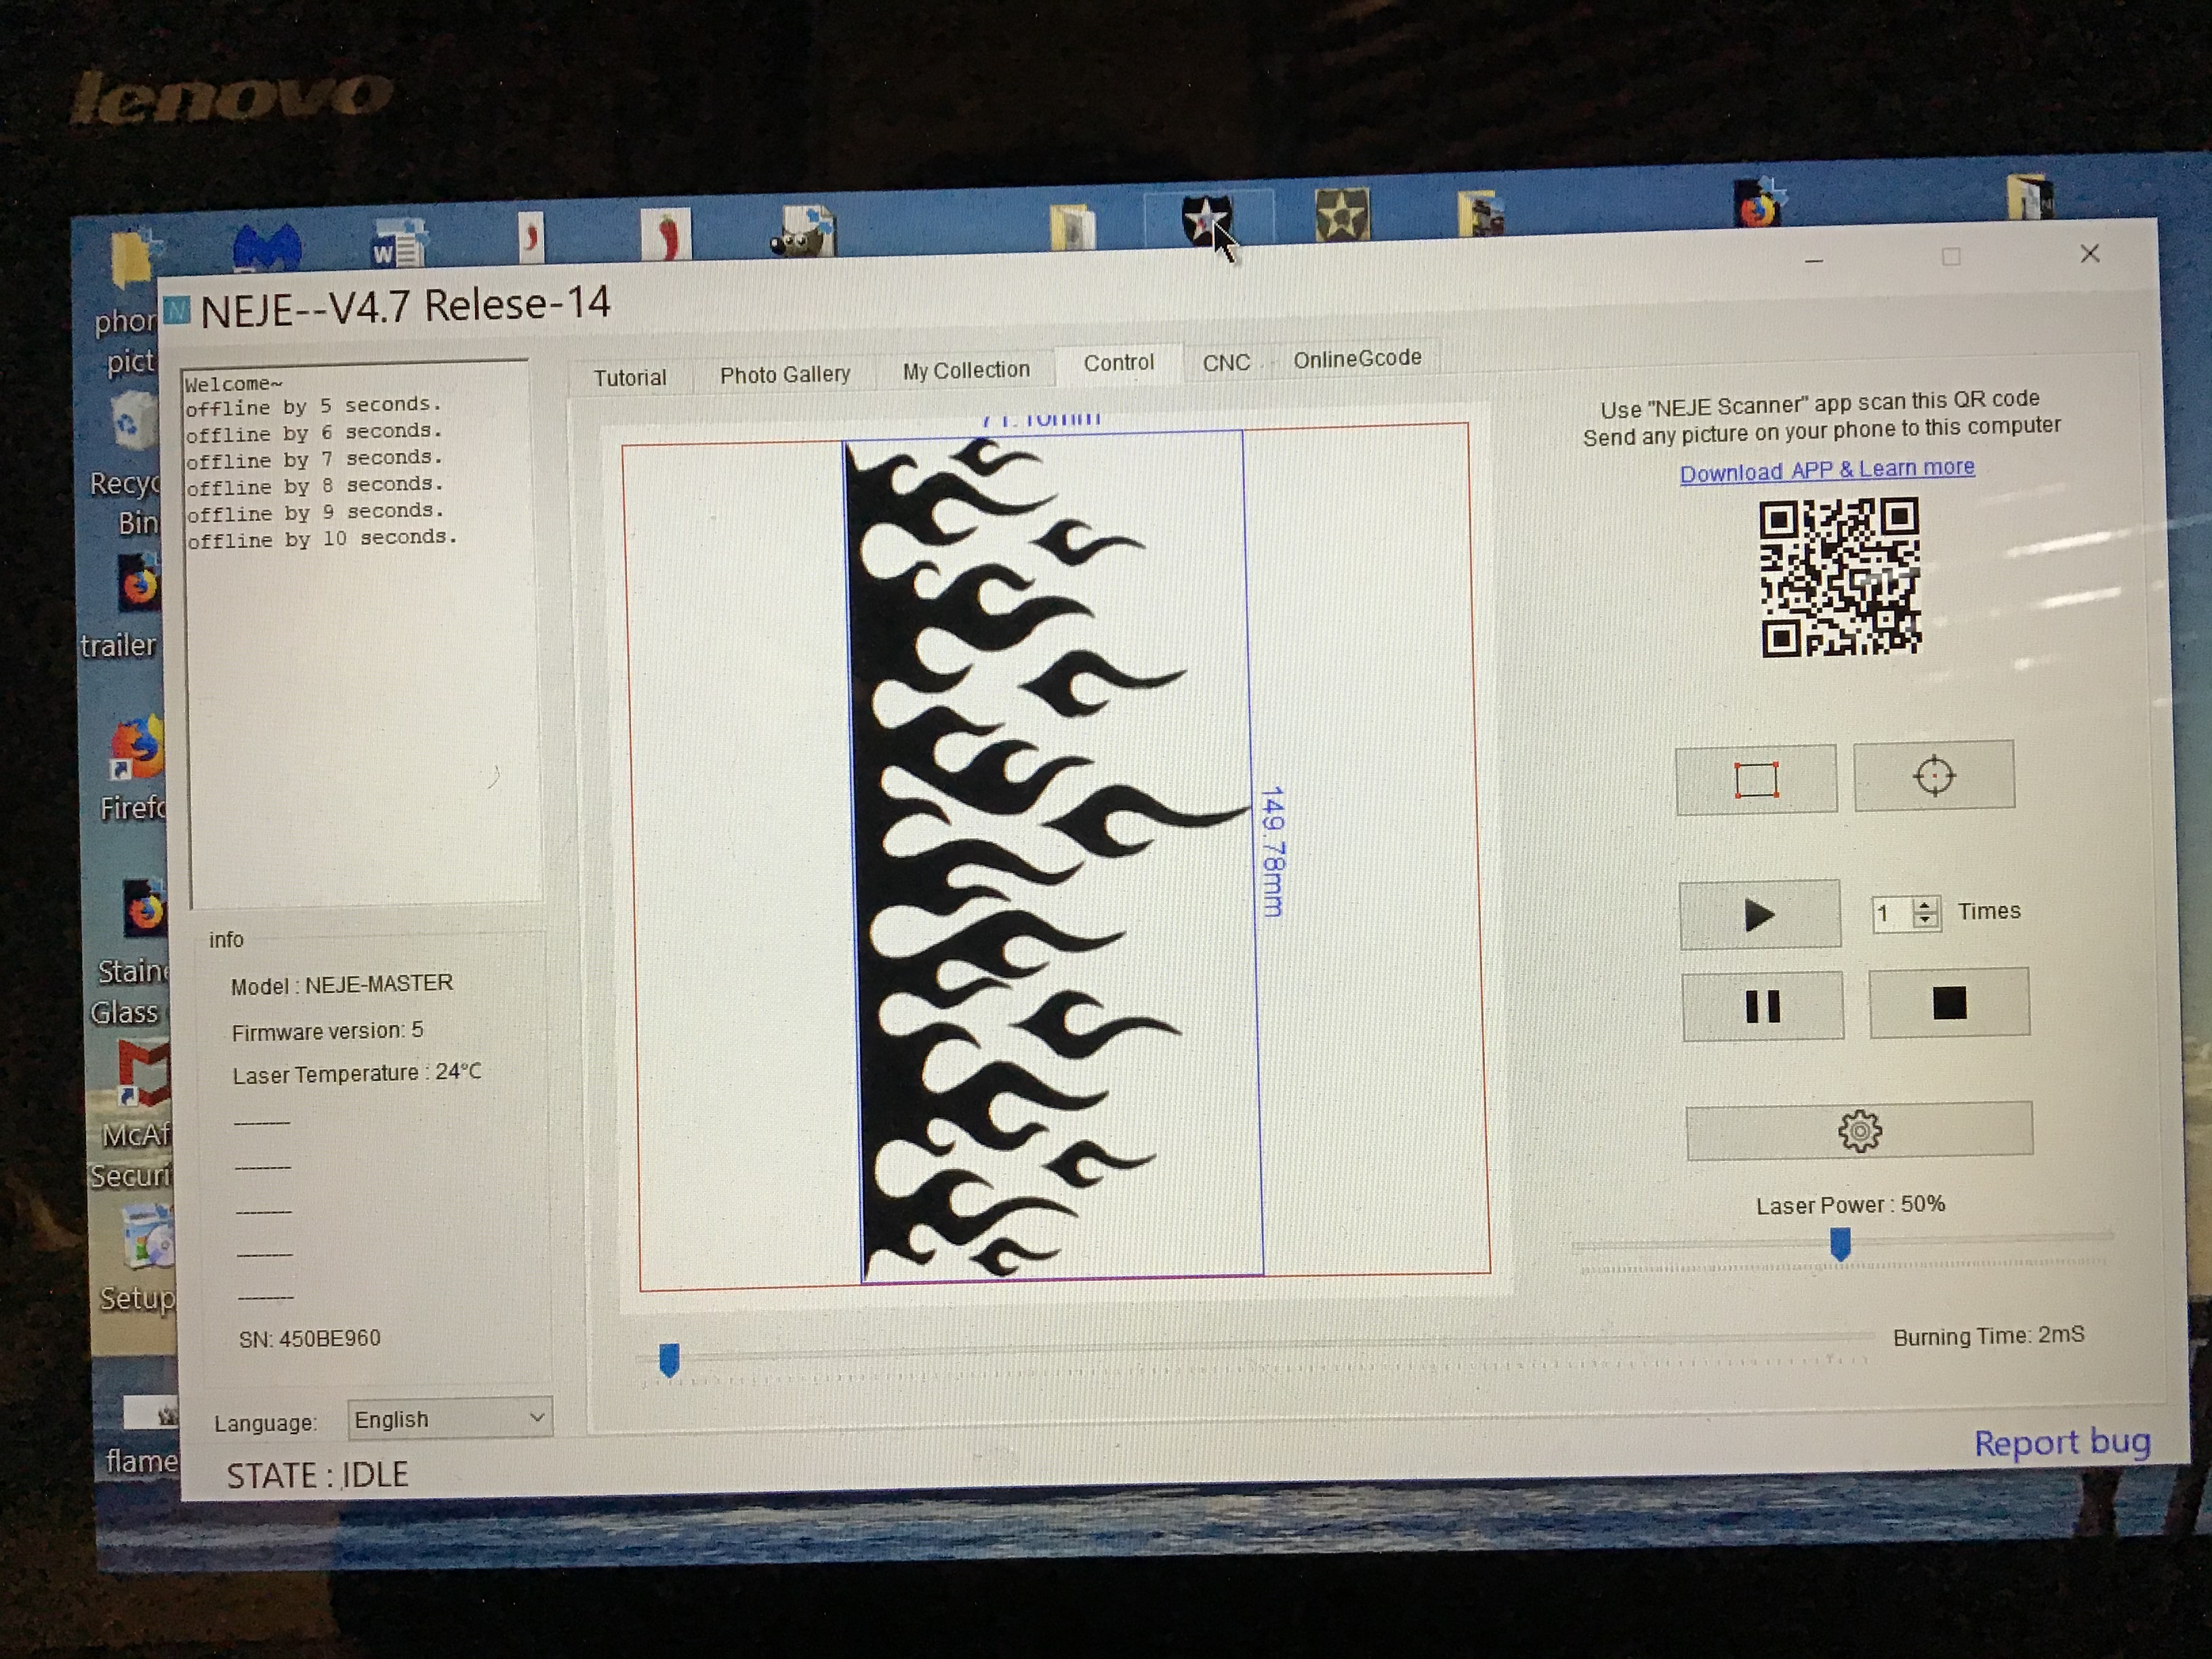
The connecting screen will appear and let you know when it is ready.
the laser will activate and move to the ready position.
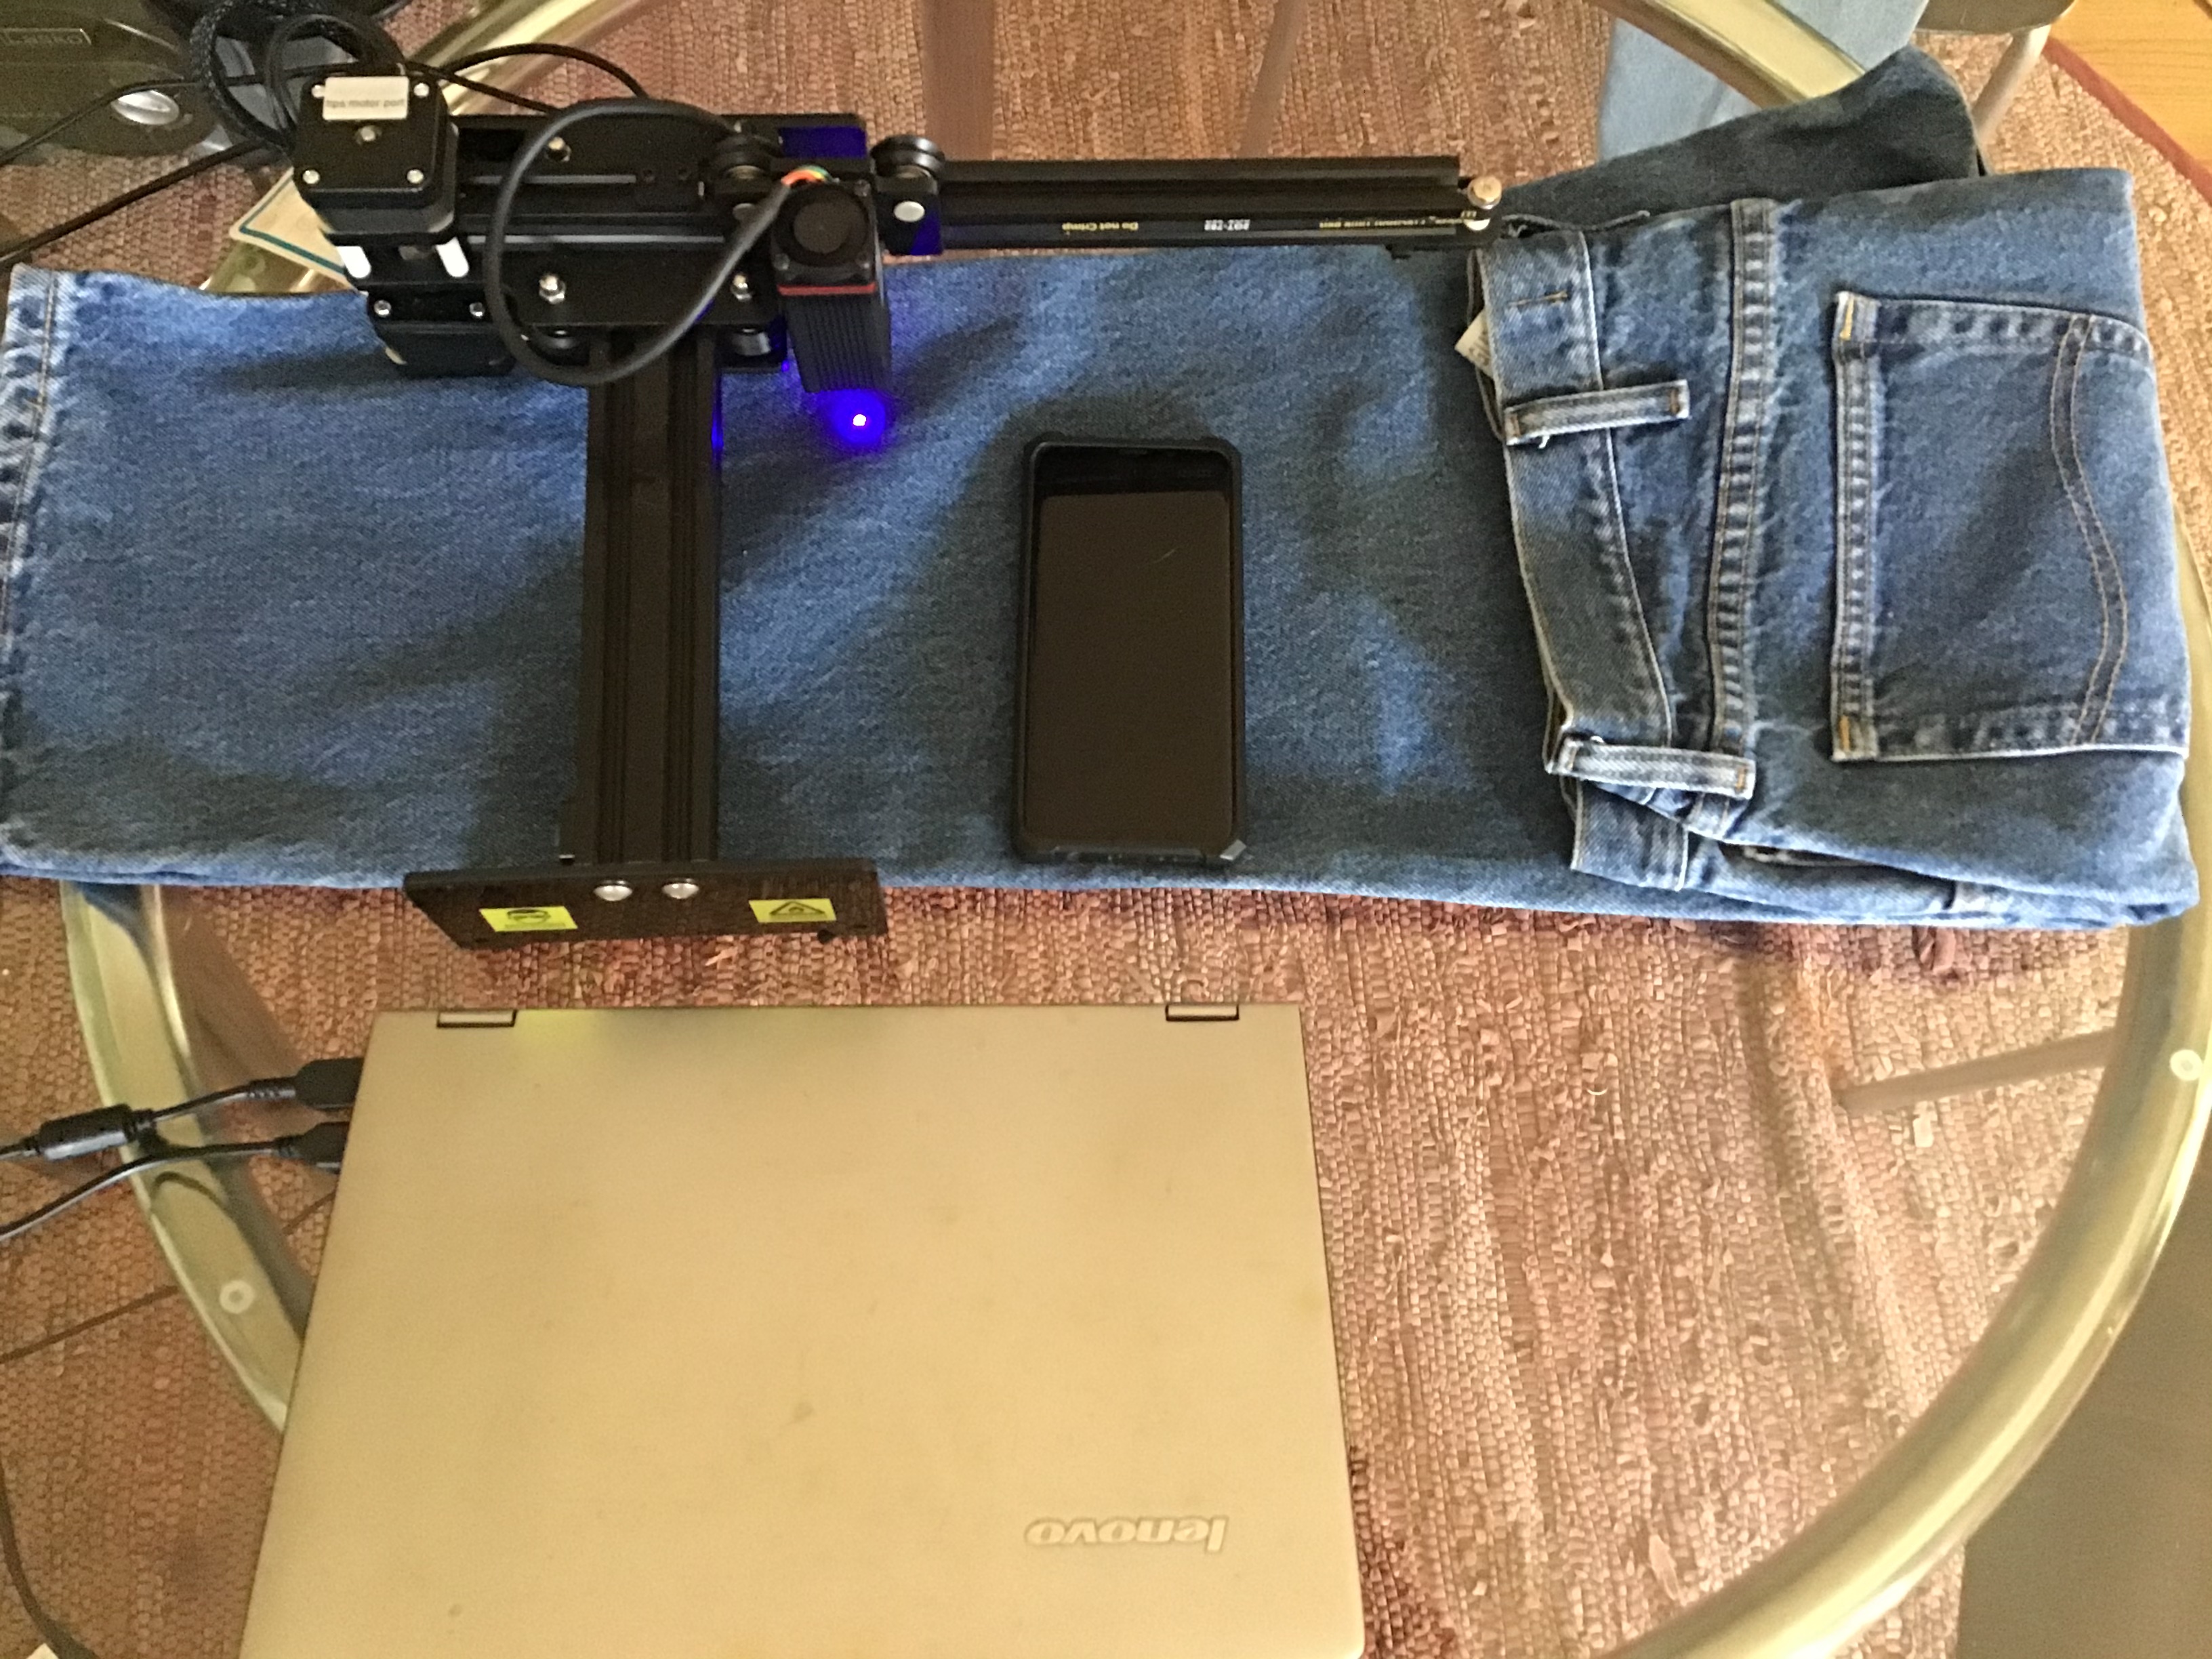
The second picture is the laser and computer connected and ready to use.
***Note*** the Facebook group neje lasers is awesome for sharing ideas, how tos, troubleshooting and also sharing files.
Drag and Drop the File Want to Etch.
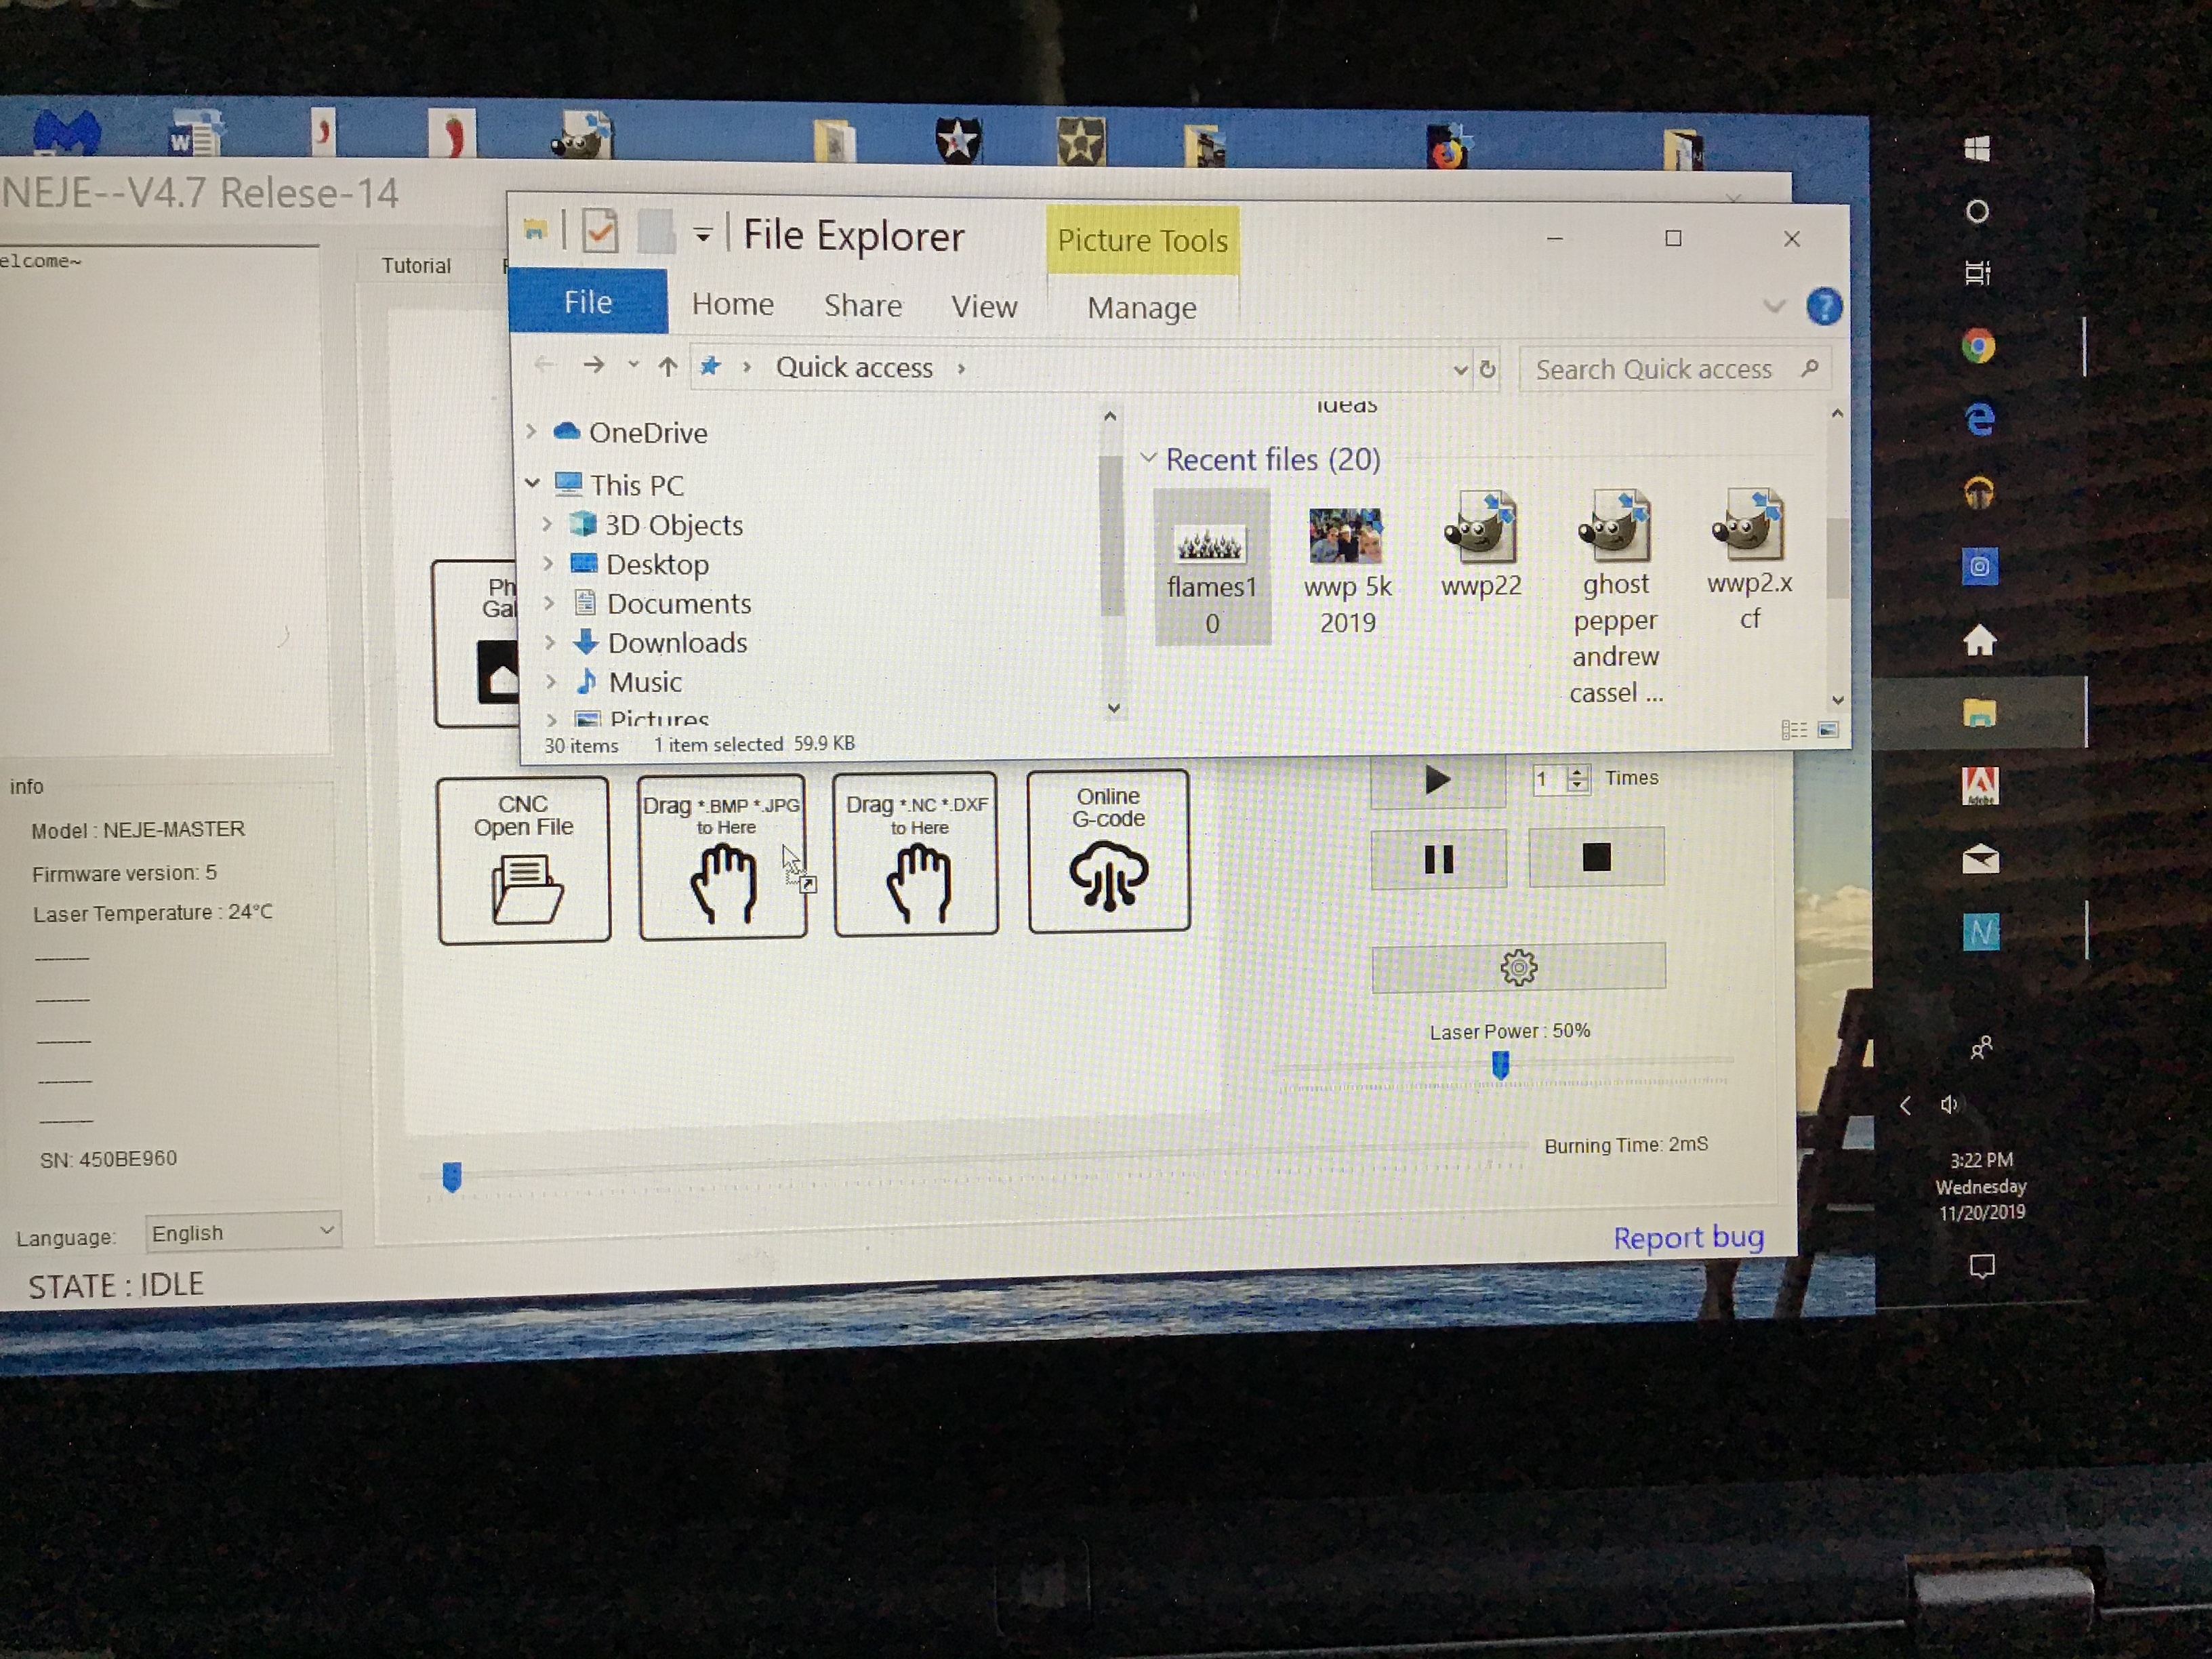
Getting the image to the laser etcher.
We are going to drag and drop an image to the laser for etching.
have the neje app screen open in the background and open the file with your image.
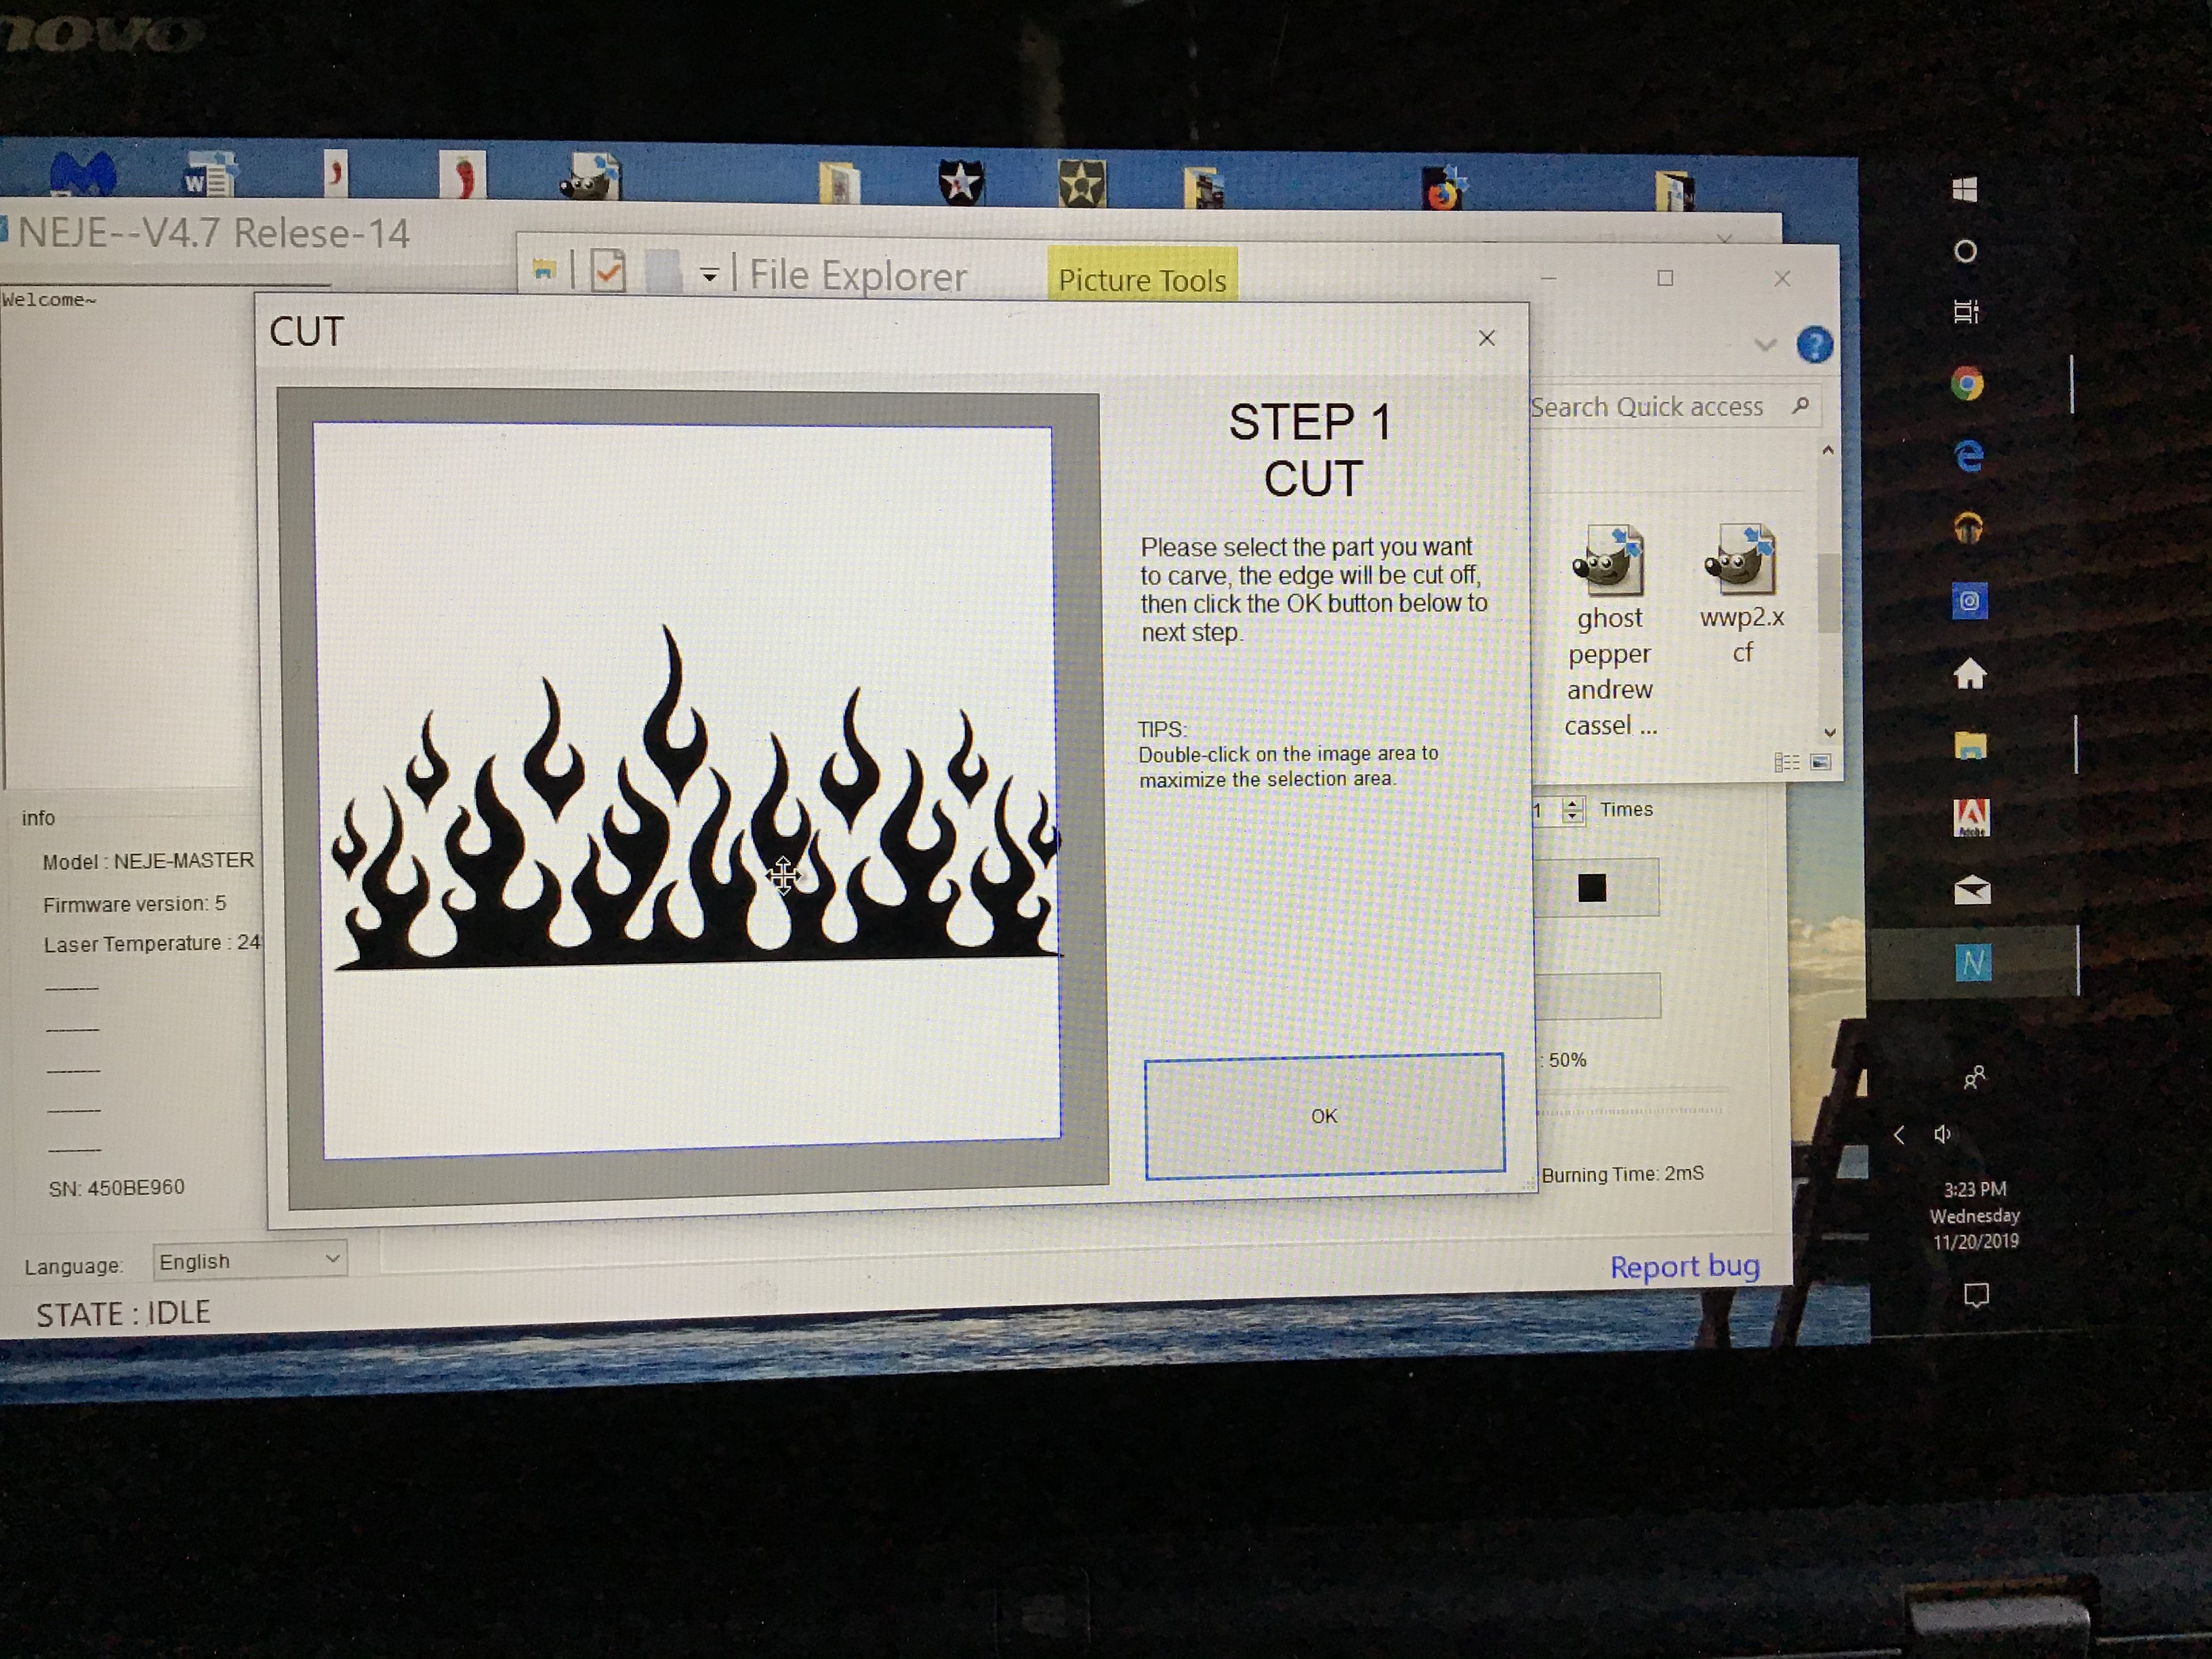
Drag and drop to the “Drag *bmp *jpg to here” icon and your image will appear in the “STEP 1 CUT” window. Success so far.
Now we start editing the images.
“STEP 1 CUT” Is the next screen and it allows you to edit/crop the image and also adjust the outside perimeter.
FOR OUR PROJECT: I double clicked the center of the box to expand the edges all the way. Click ok.
*** Note ***The only drawback to this method is that the image is not stored in the Neje files for quick and easy access.
Adjusting the Size of Your Image.
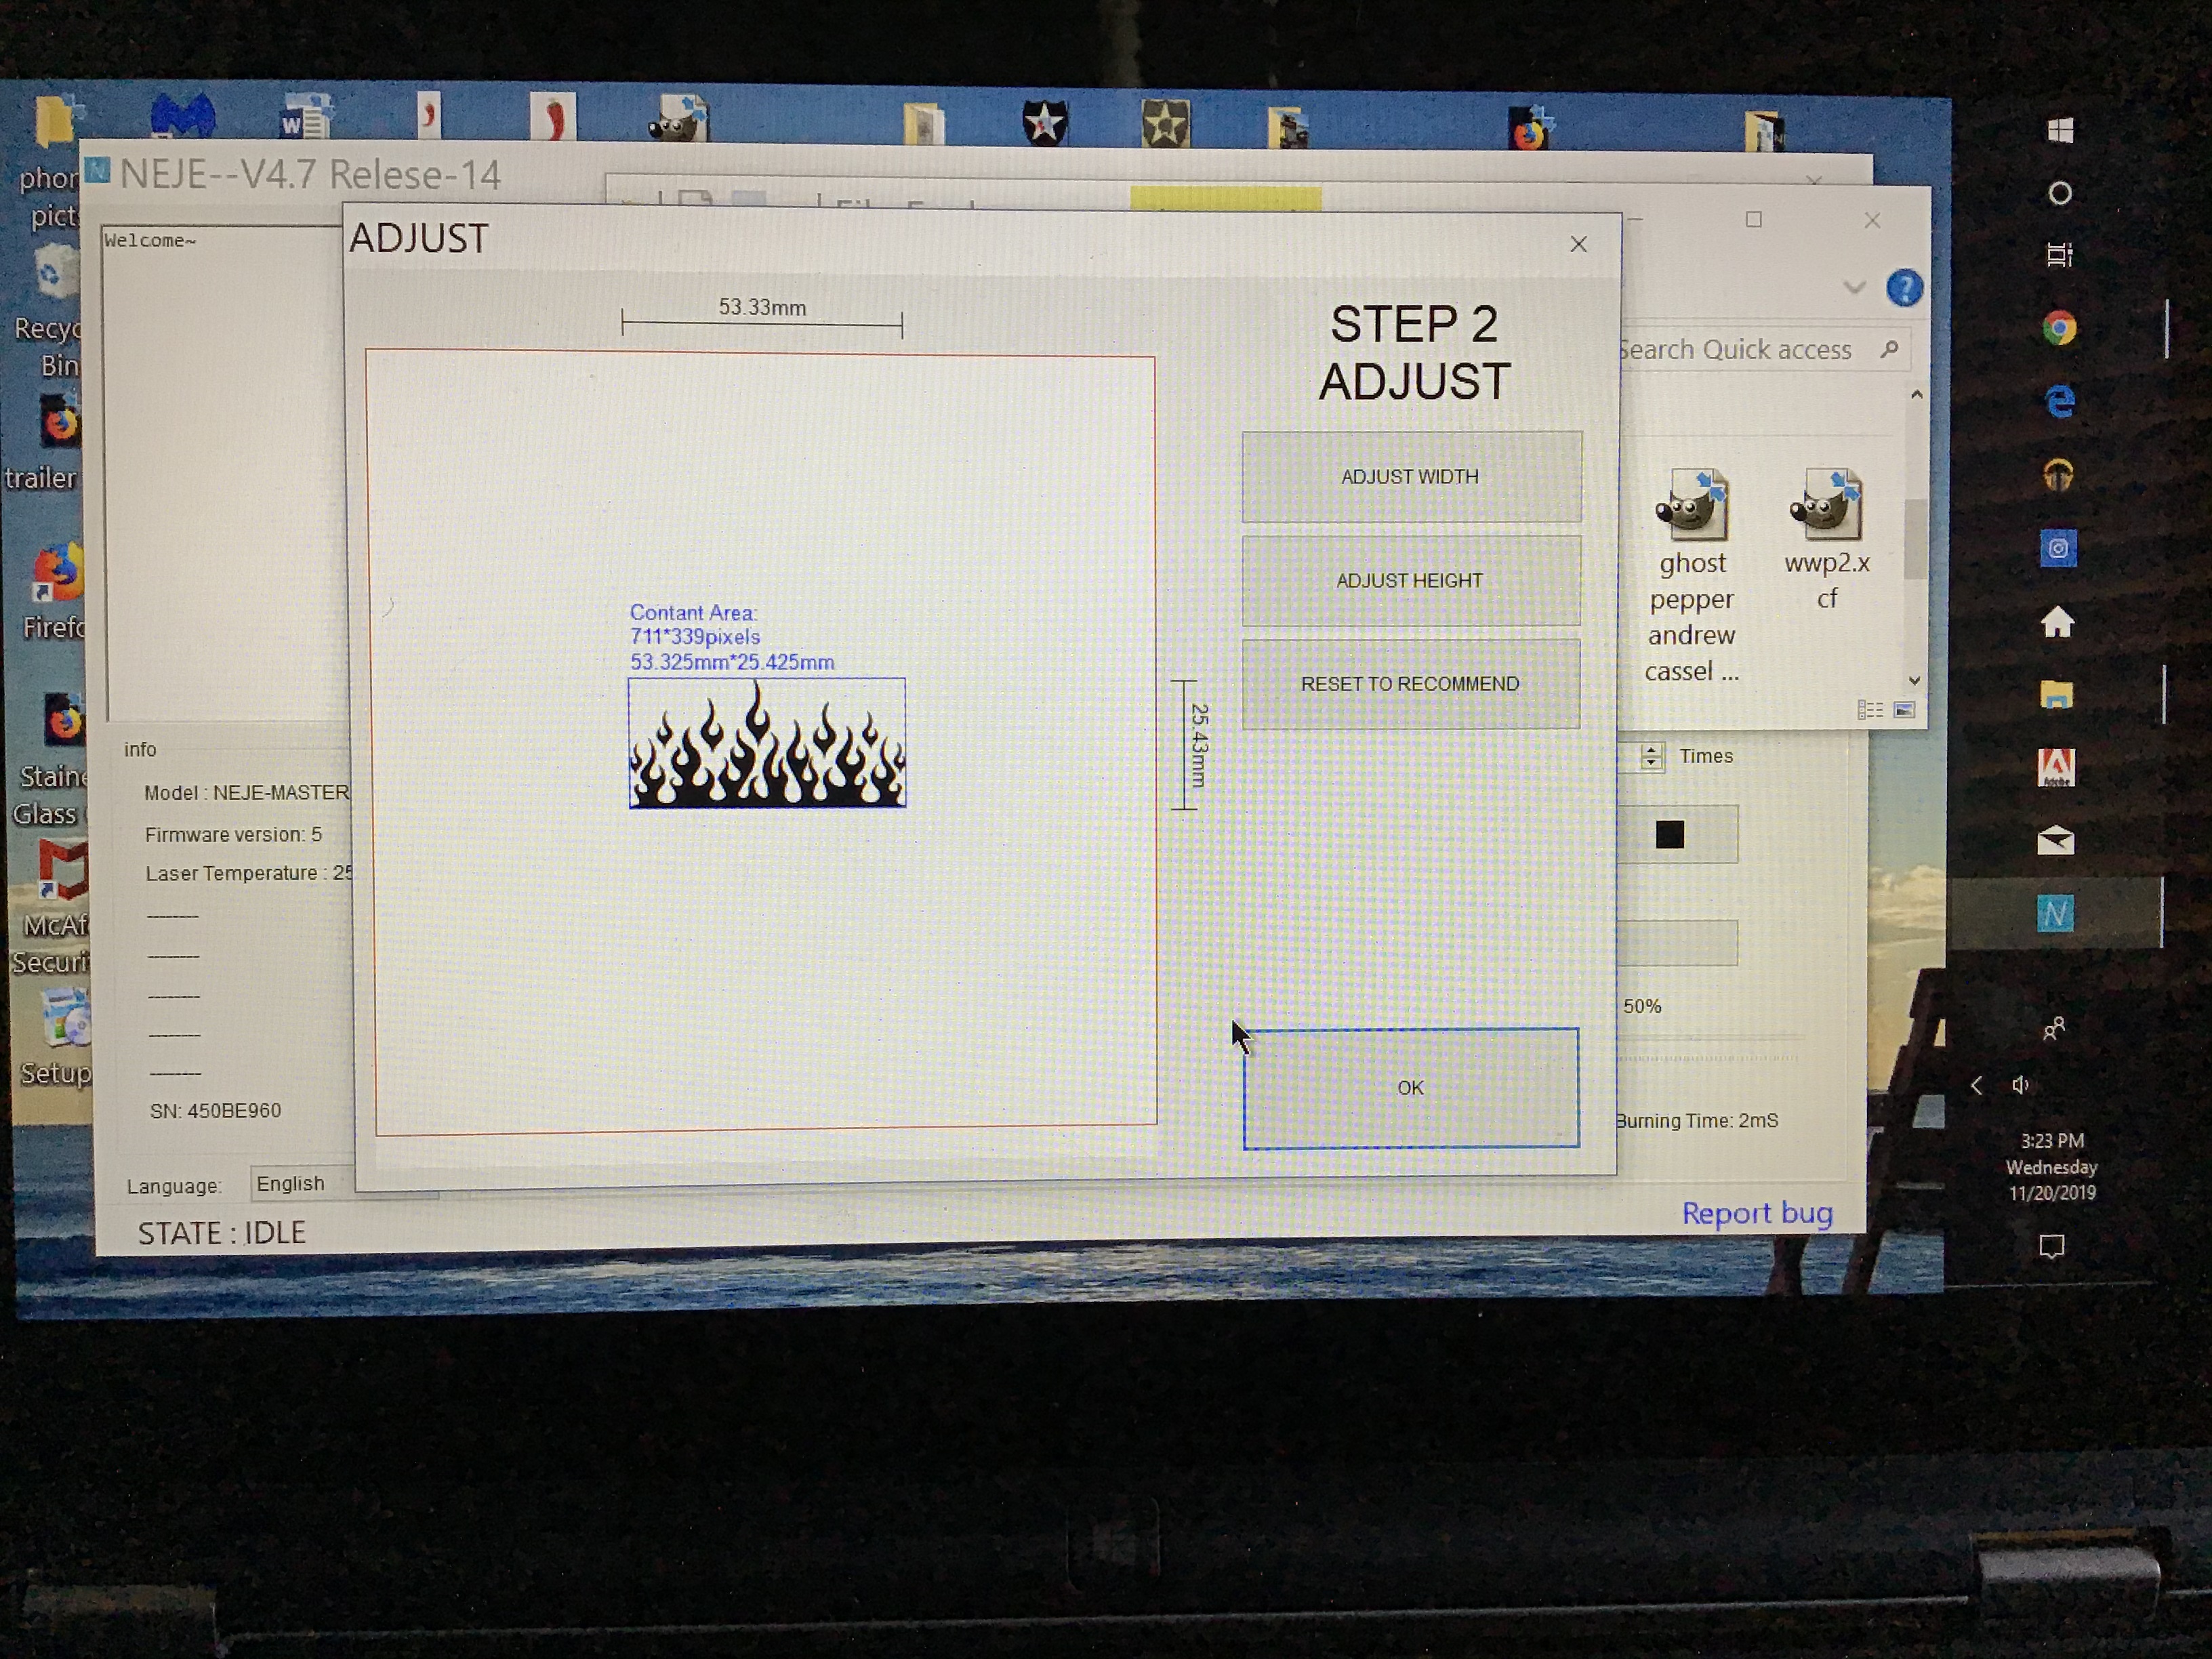
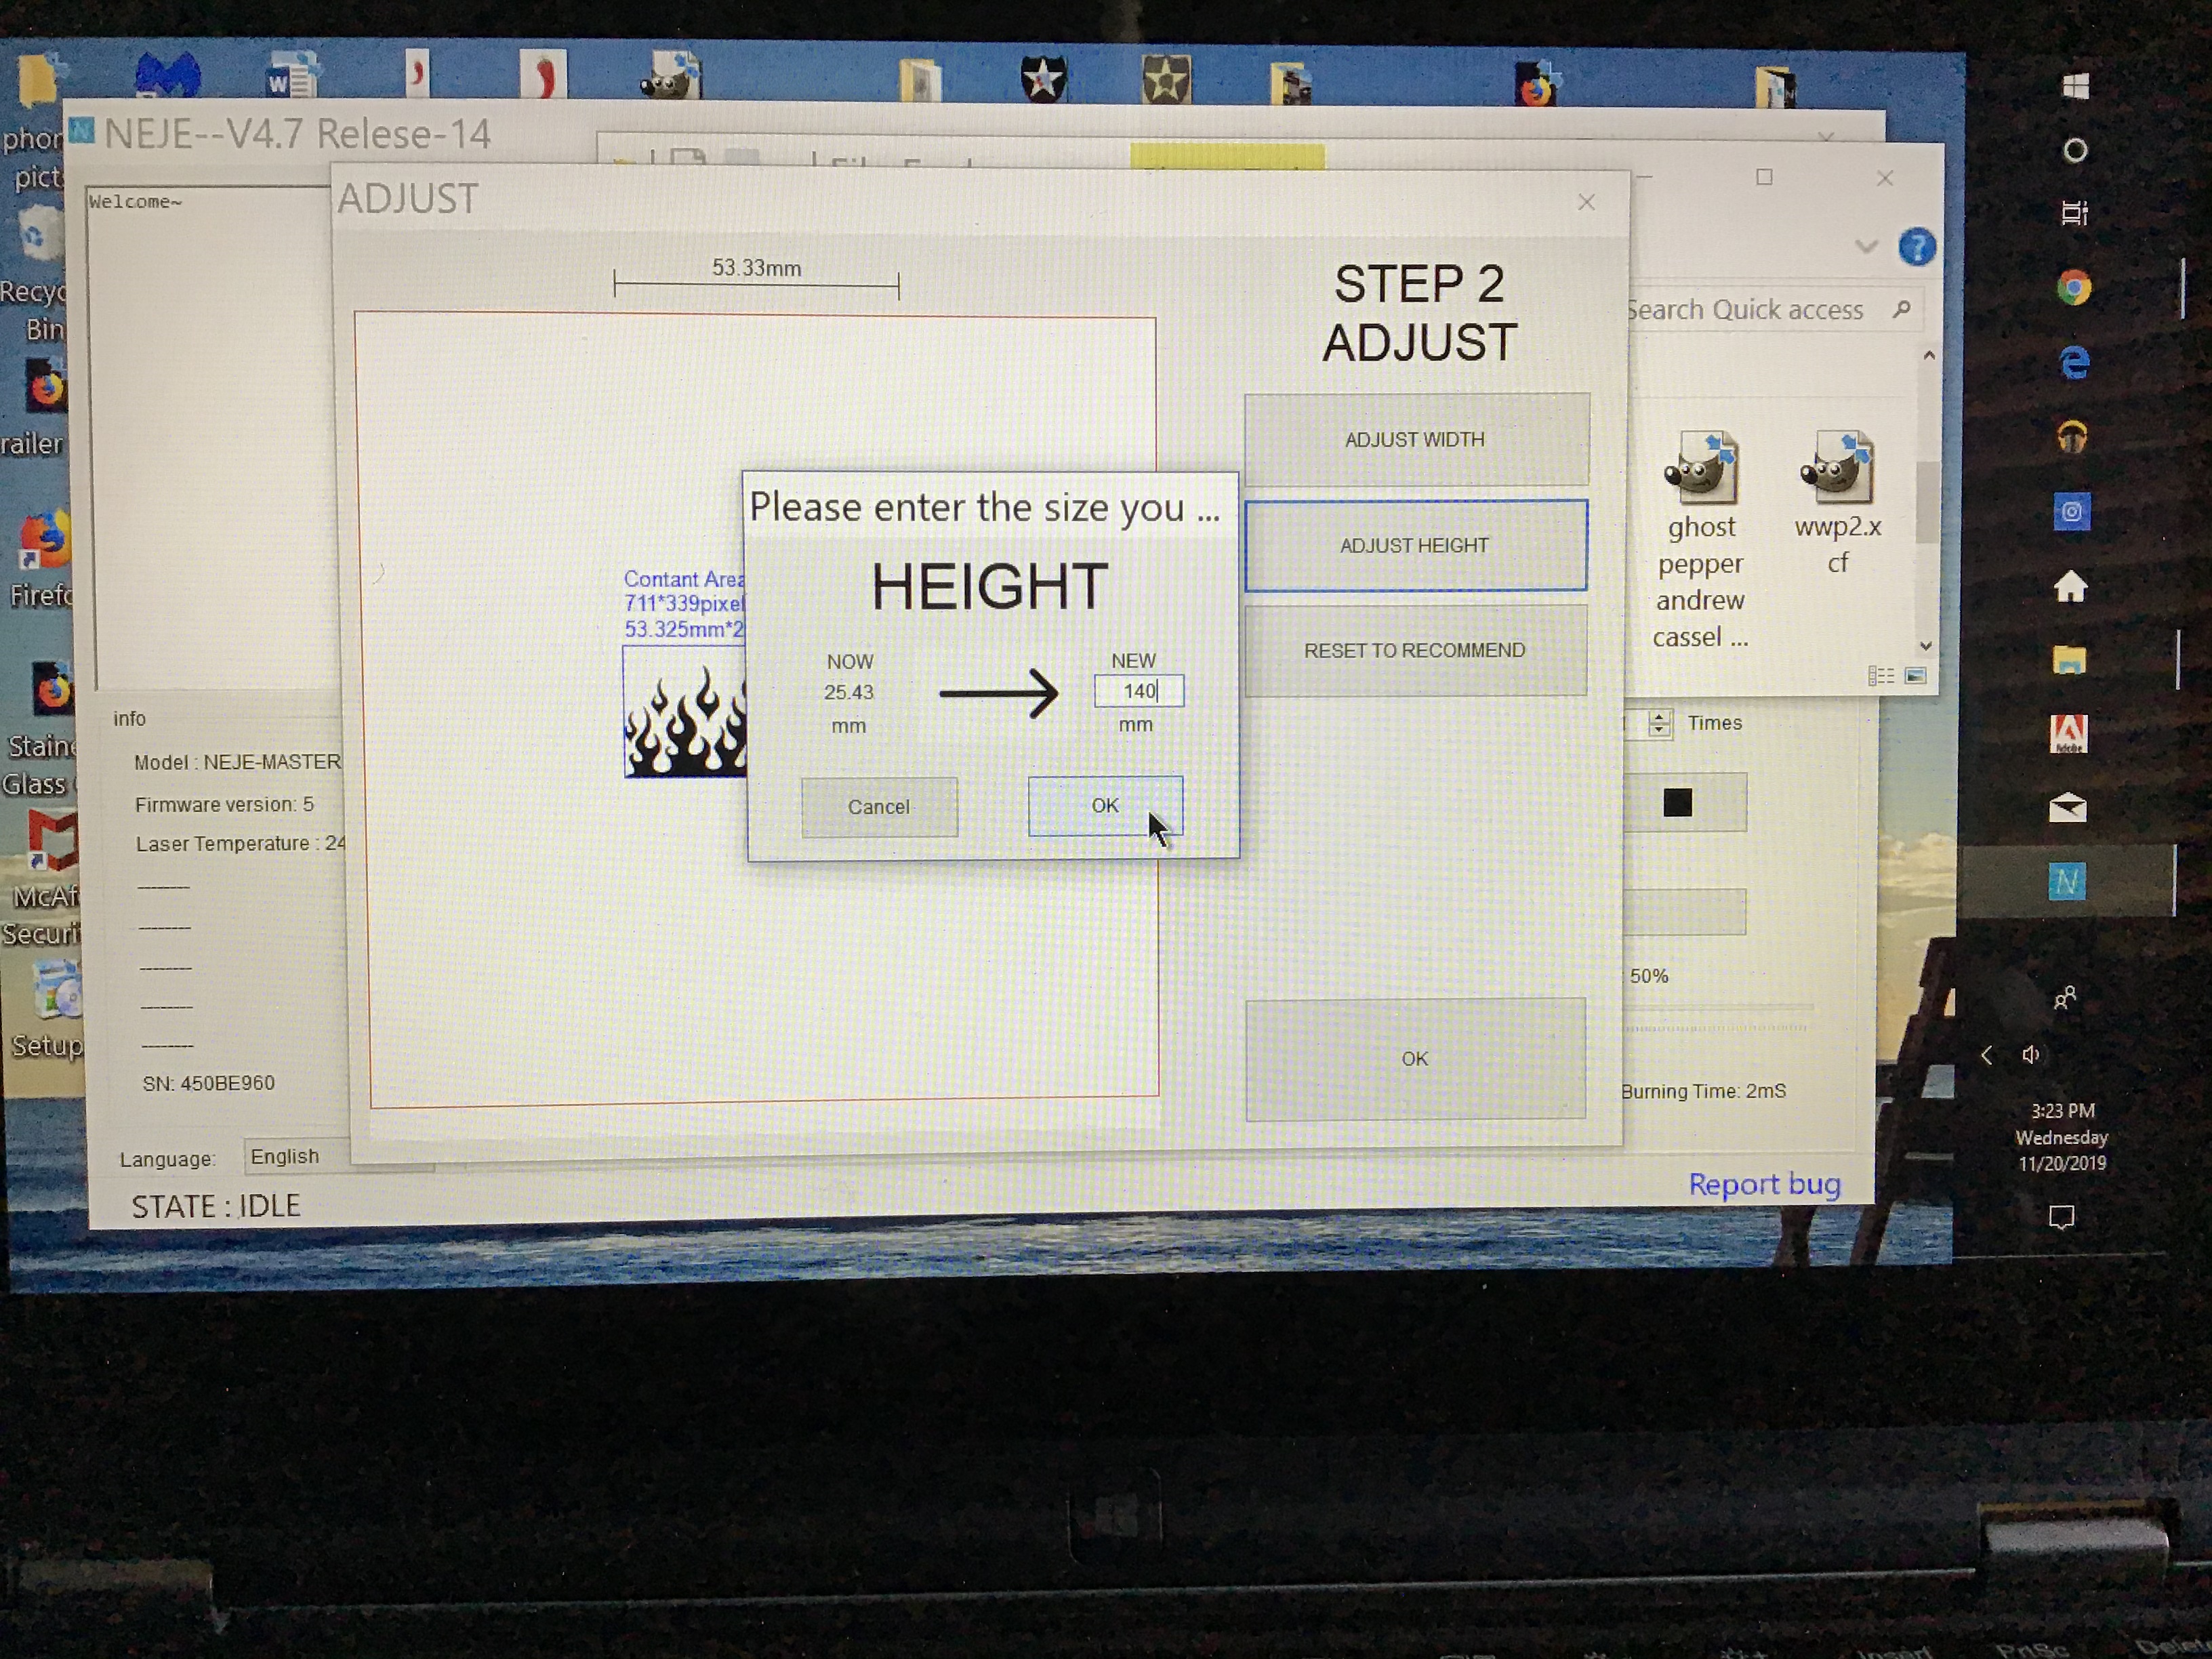
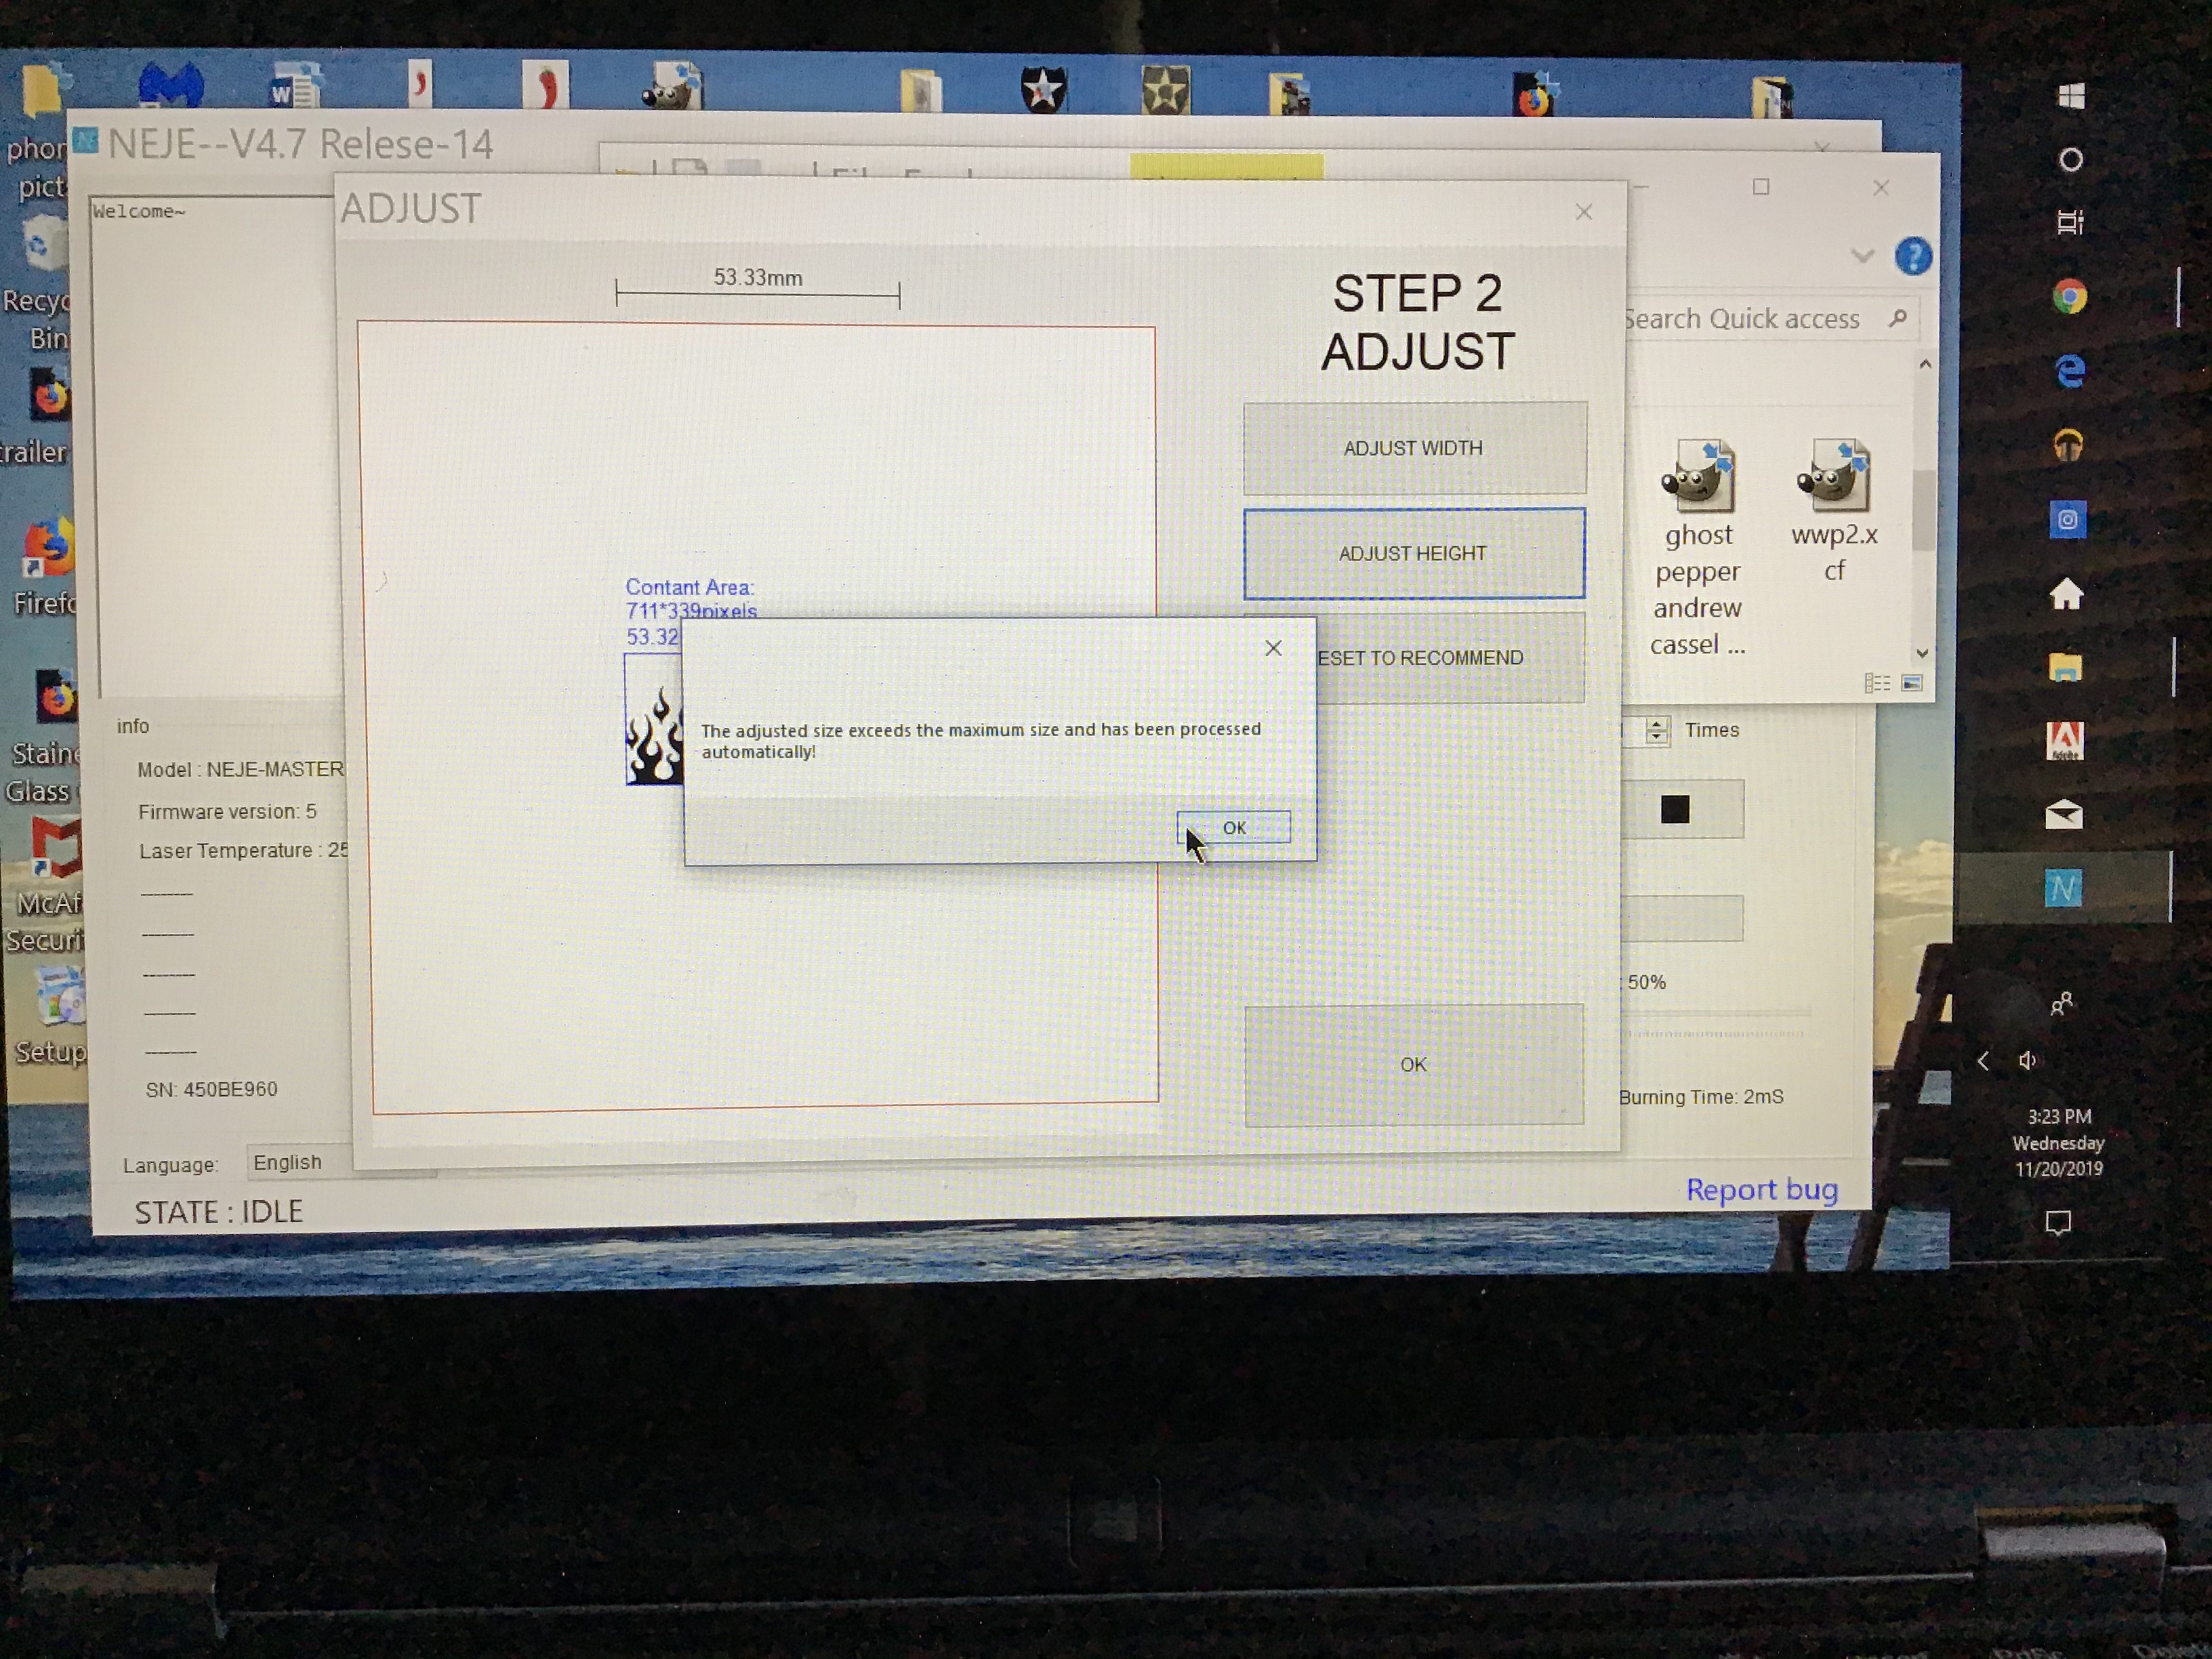
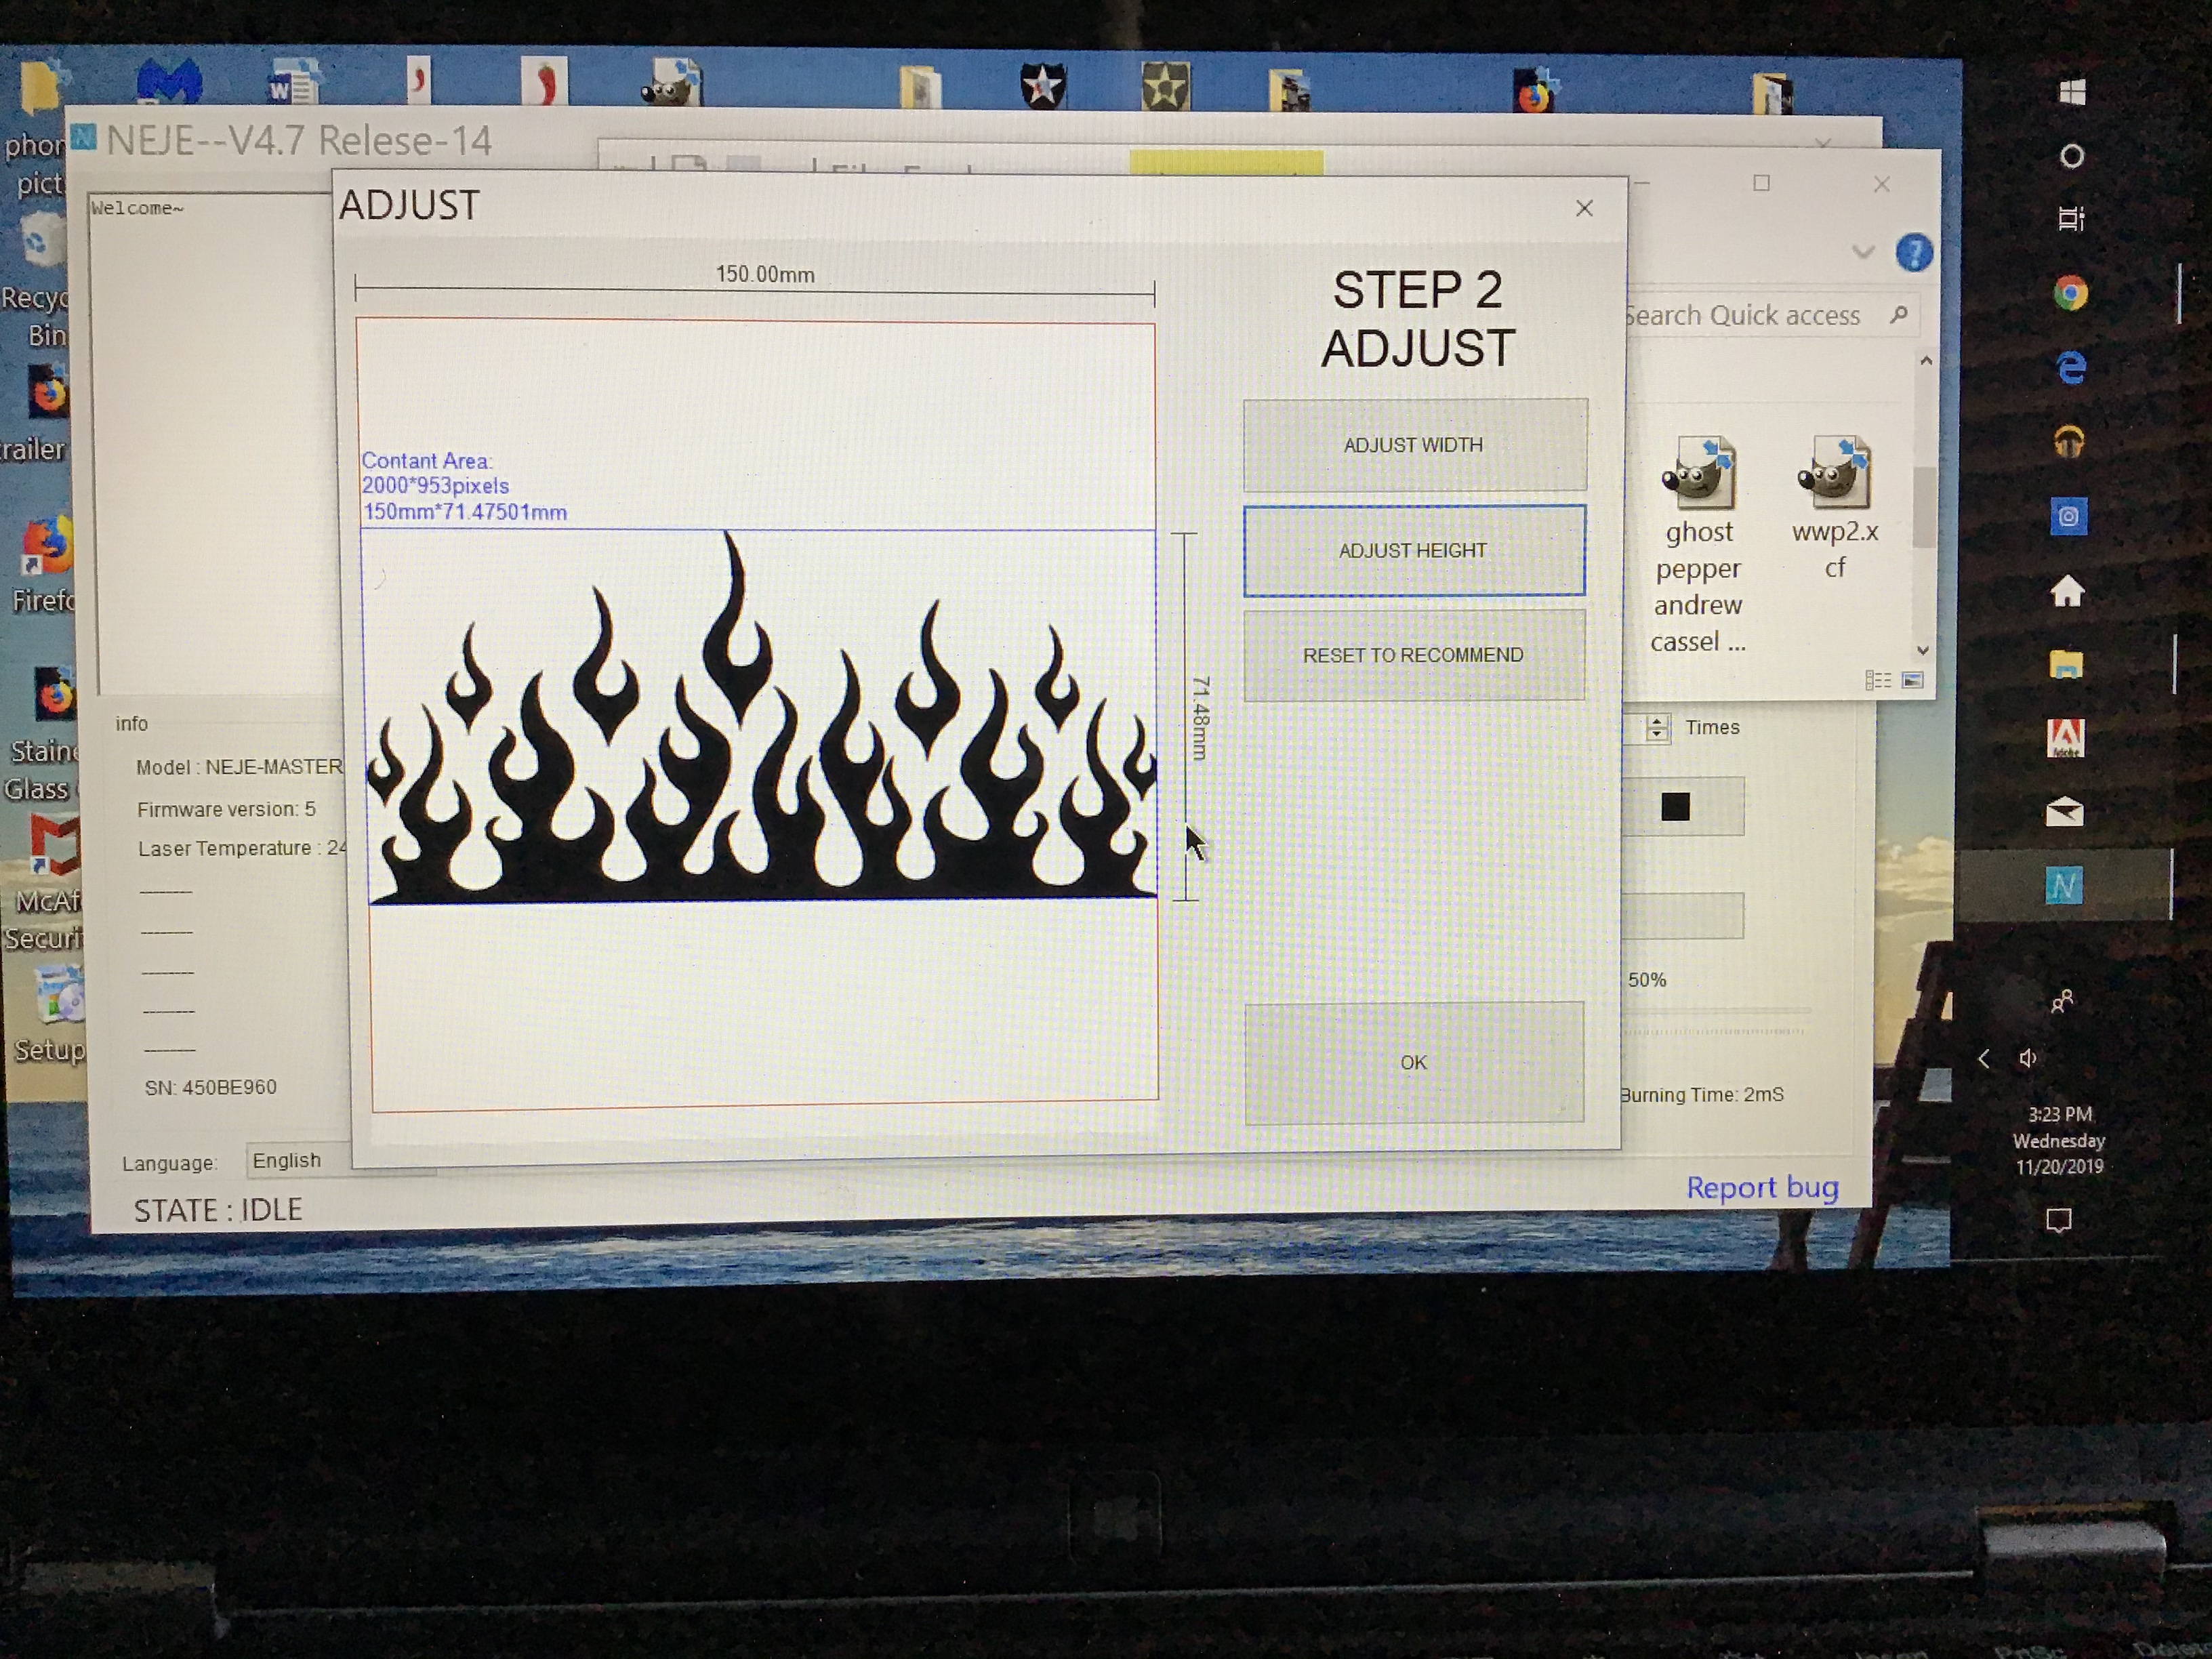
Adjusting the image size.
This is the screen where we adjust the height or width of your image before etching.
This is a pretty easy screen as you can only adjust your image up to 150 mm x 150 mm and the program will also help with a recommended size.
FOR OUR PROJECT : Click on the height and set it 140 mm. Click ok.
So how did I come to this measurement? The pant legs measured 220 mm in the program only does 150 mm at a time. I decided to let the whole image run because of two reasons: first reason was that the flames were a decent height and I only had to match the pattern once. The second reason is I didn’t want the flames to be too high as I just want to going to highlight the bottom seam.
Next screen will have a message if your image is too large on one side or another and the program will automatically adjust your image to the size the program can handle. Click ok.
The final screen on Step 2 will show your resized image.
You can always adjust the size to your own liking on this screen.
Choosing Your Etching Style
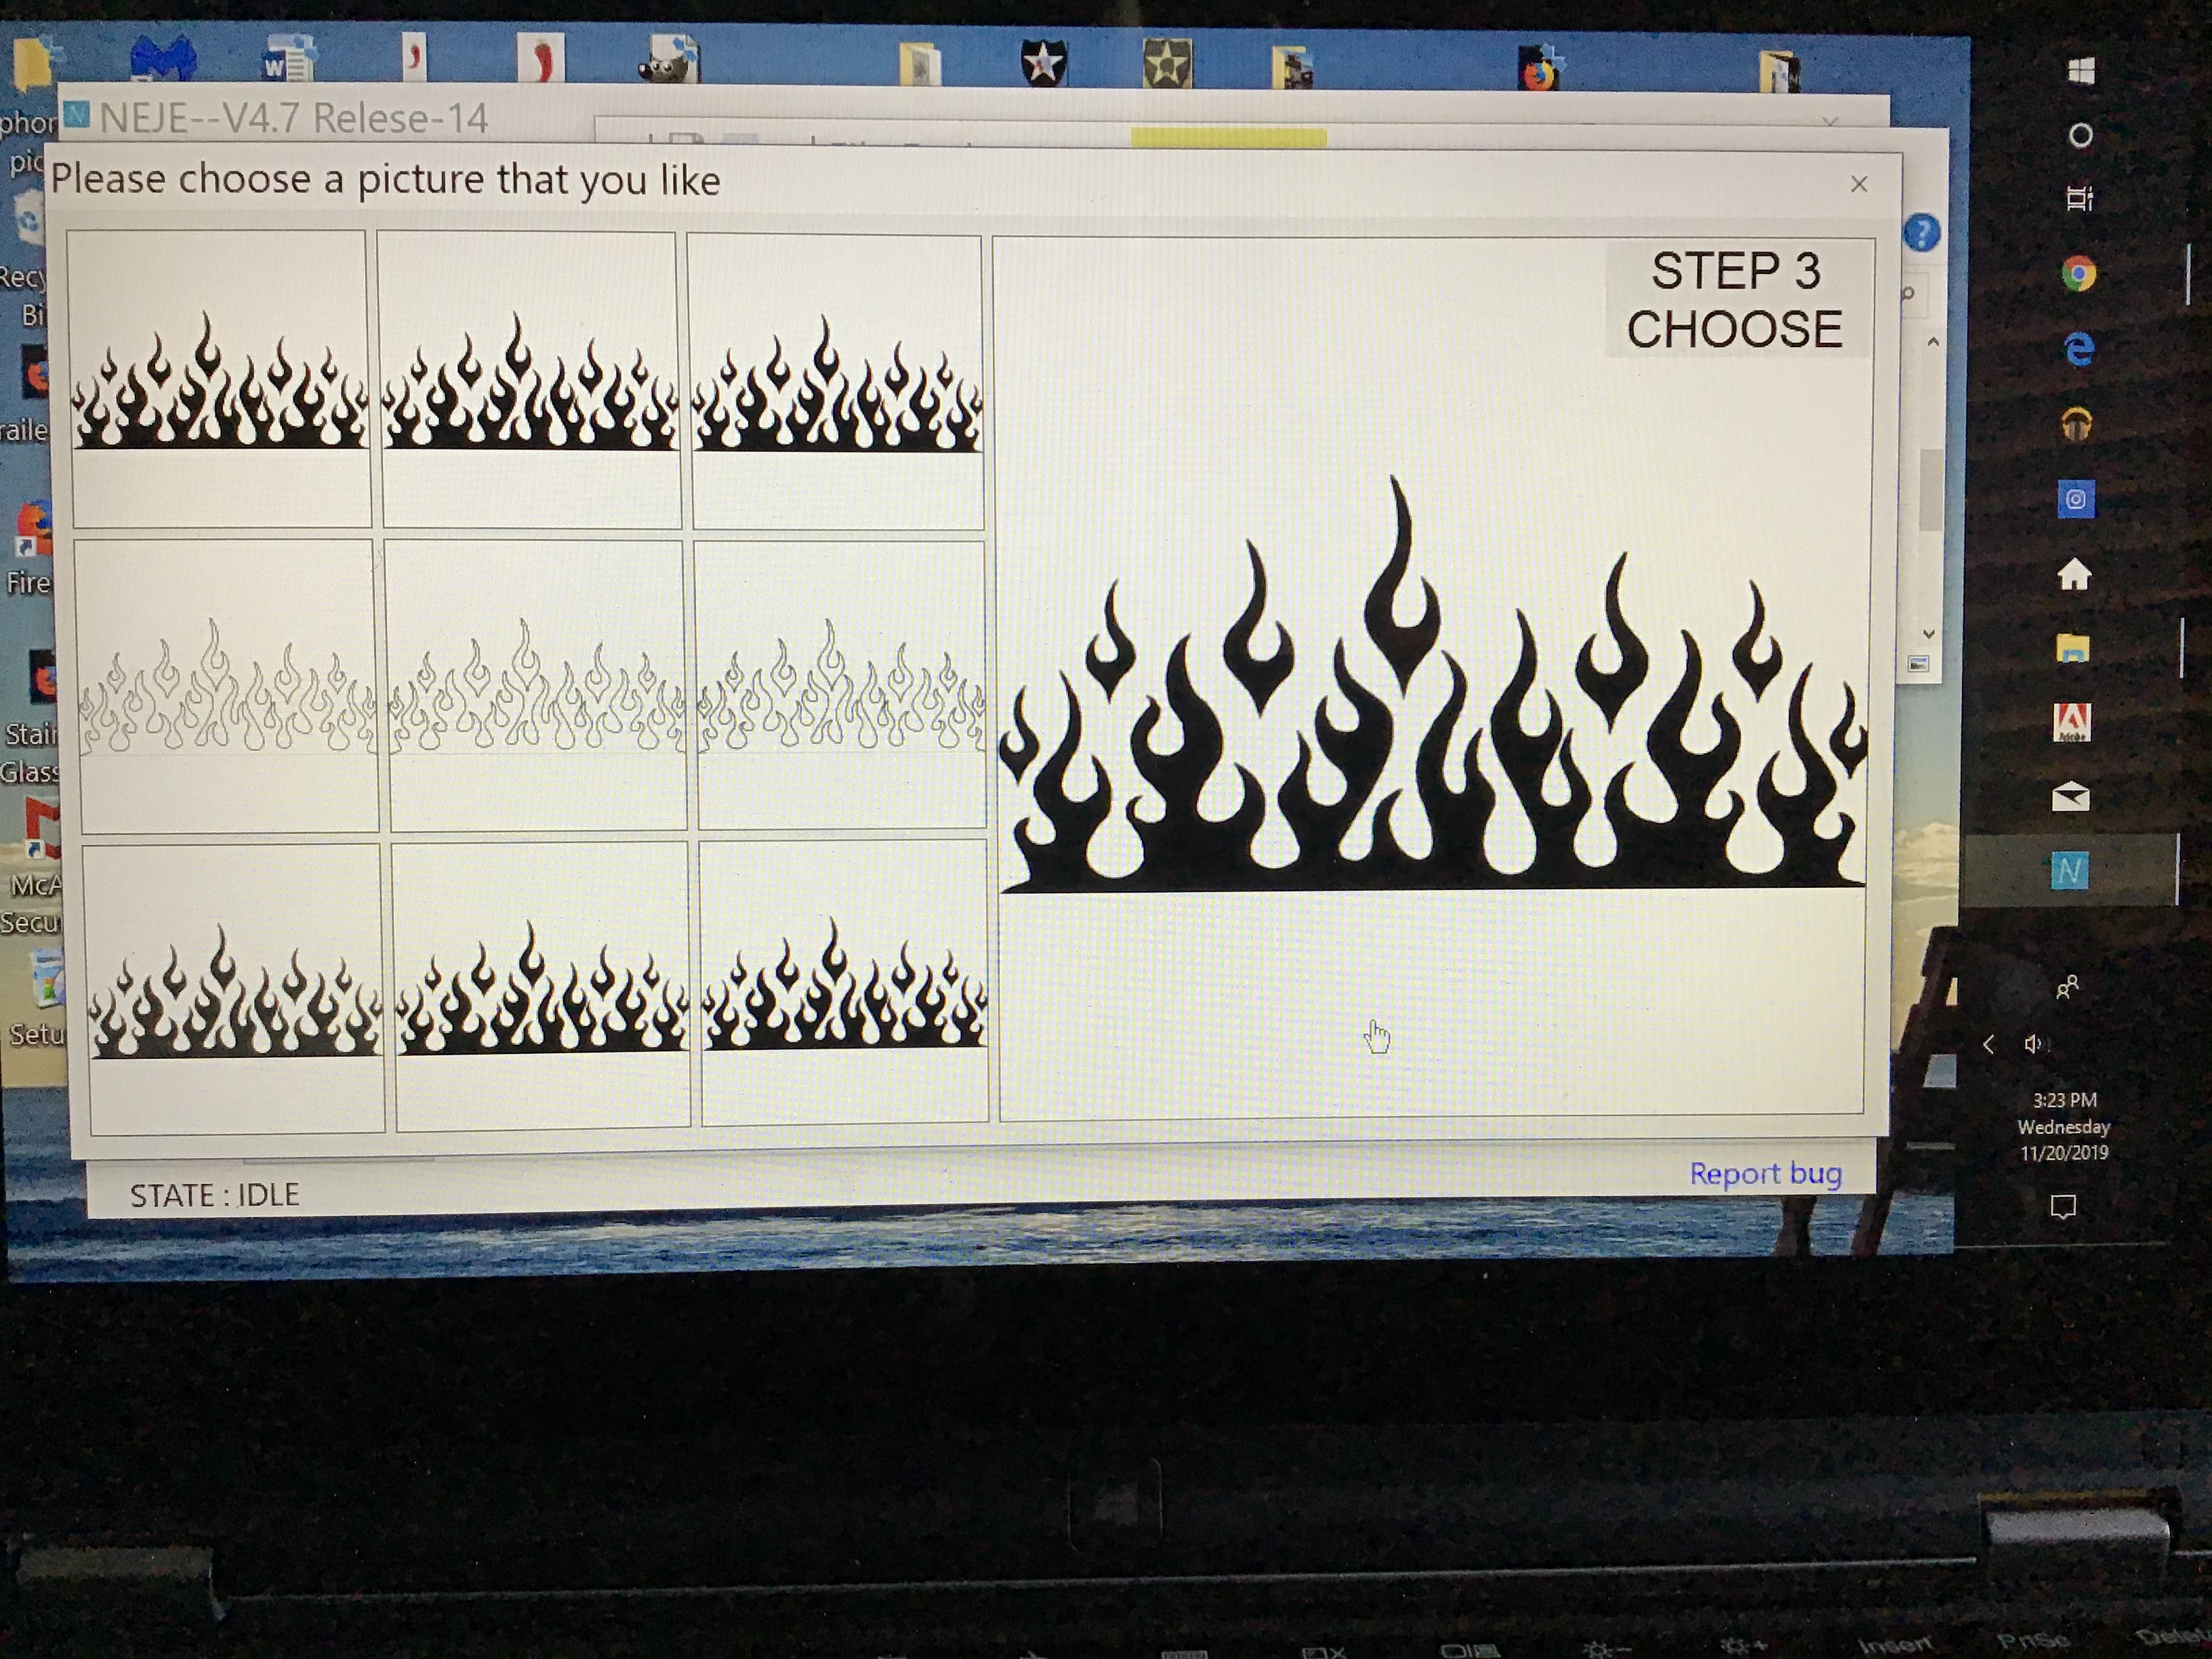
Choosing your etching style.
This is one of the easiest screens is it will show you nine different variations of the photo/image and you just have to choose which one you like.
The styles that they offer go from grayscale, to an outline or your full etching.
FOR OUR PROJECT: I chose the top middle as I didn’t want to burn the seam threads, just the pigment in the fabric.
Final Edit
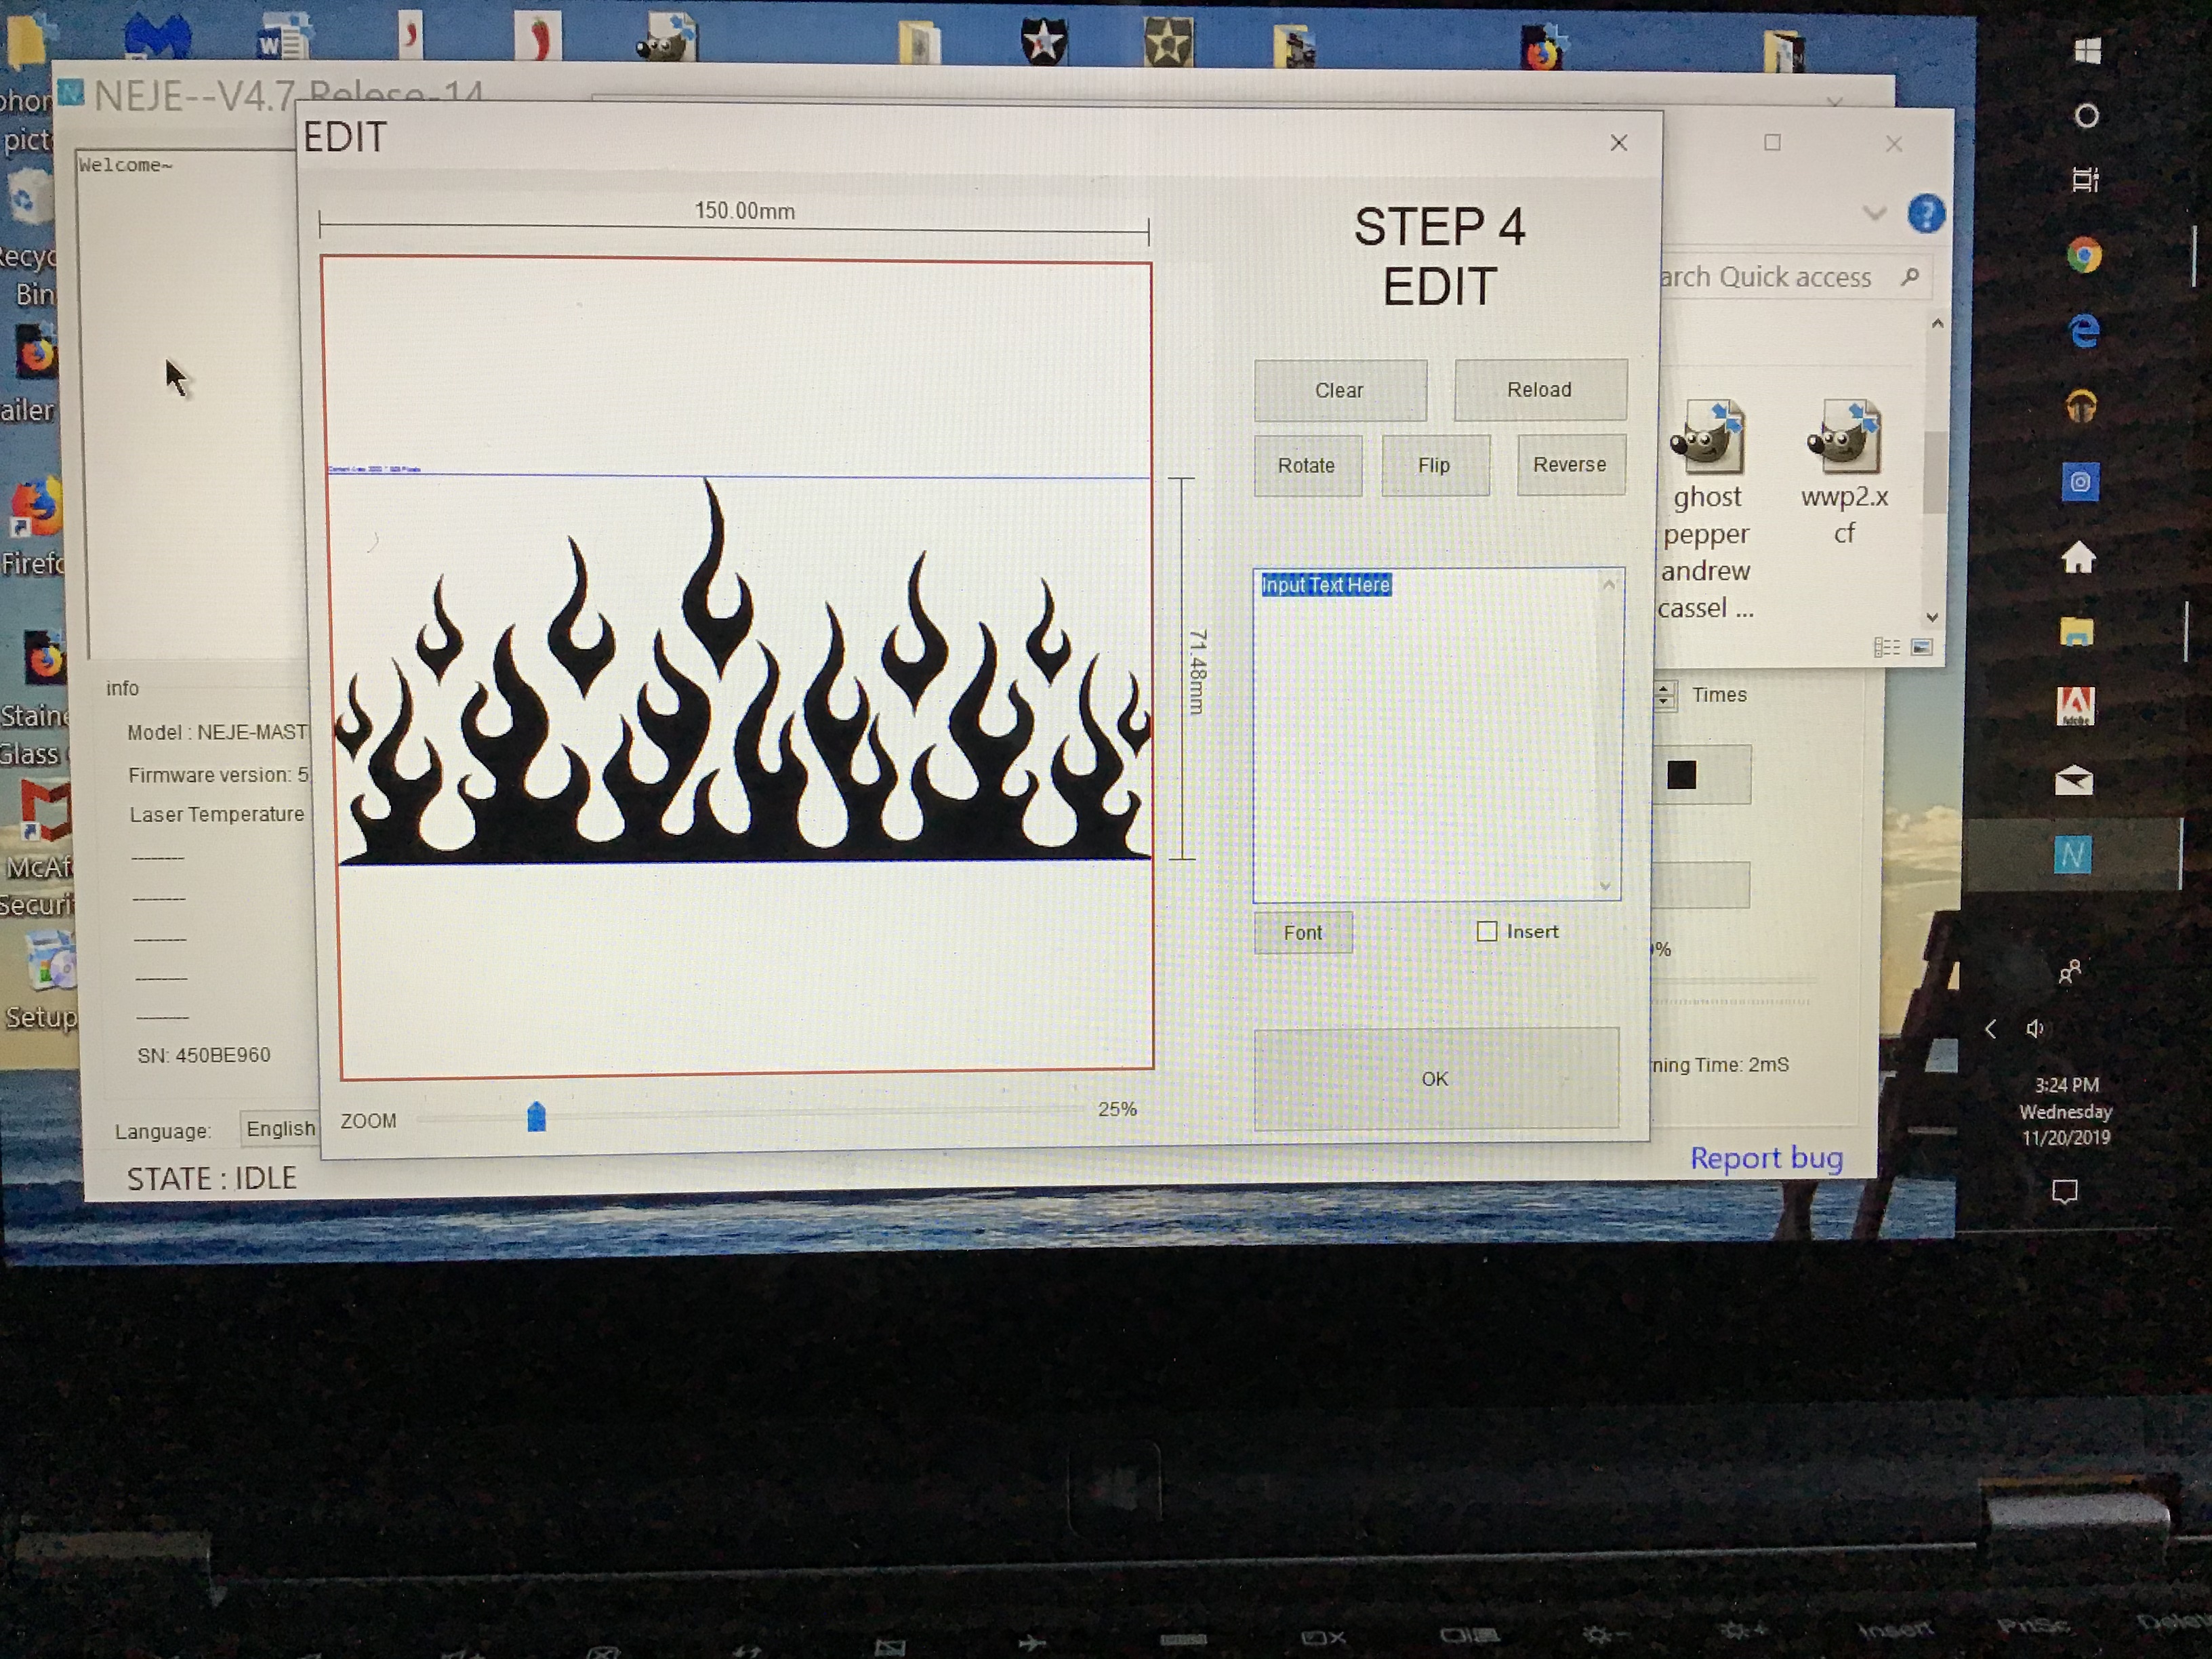
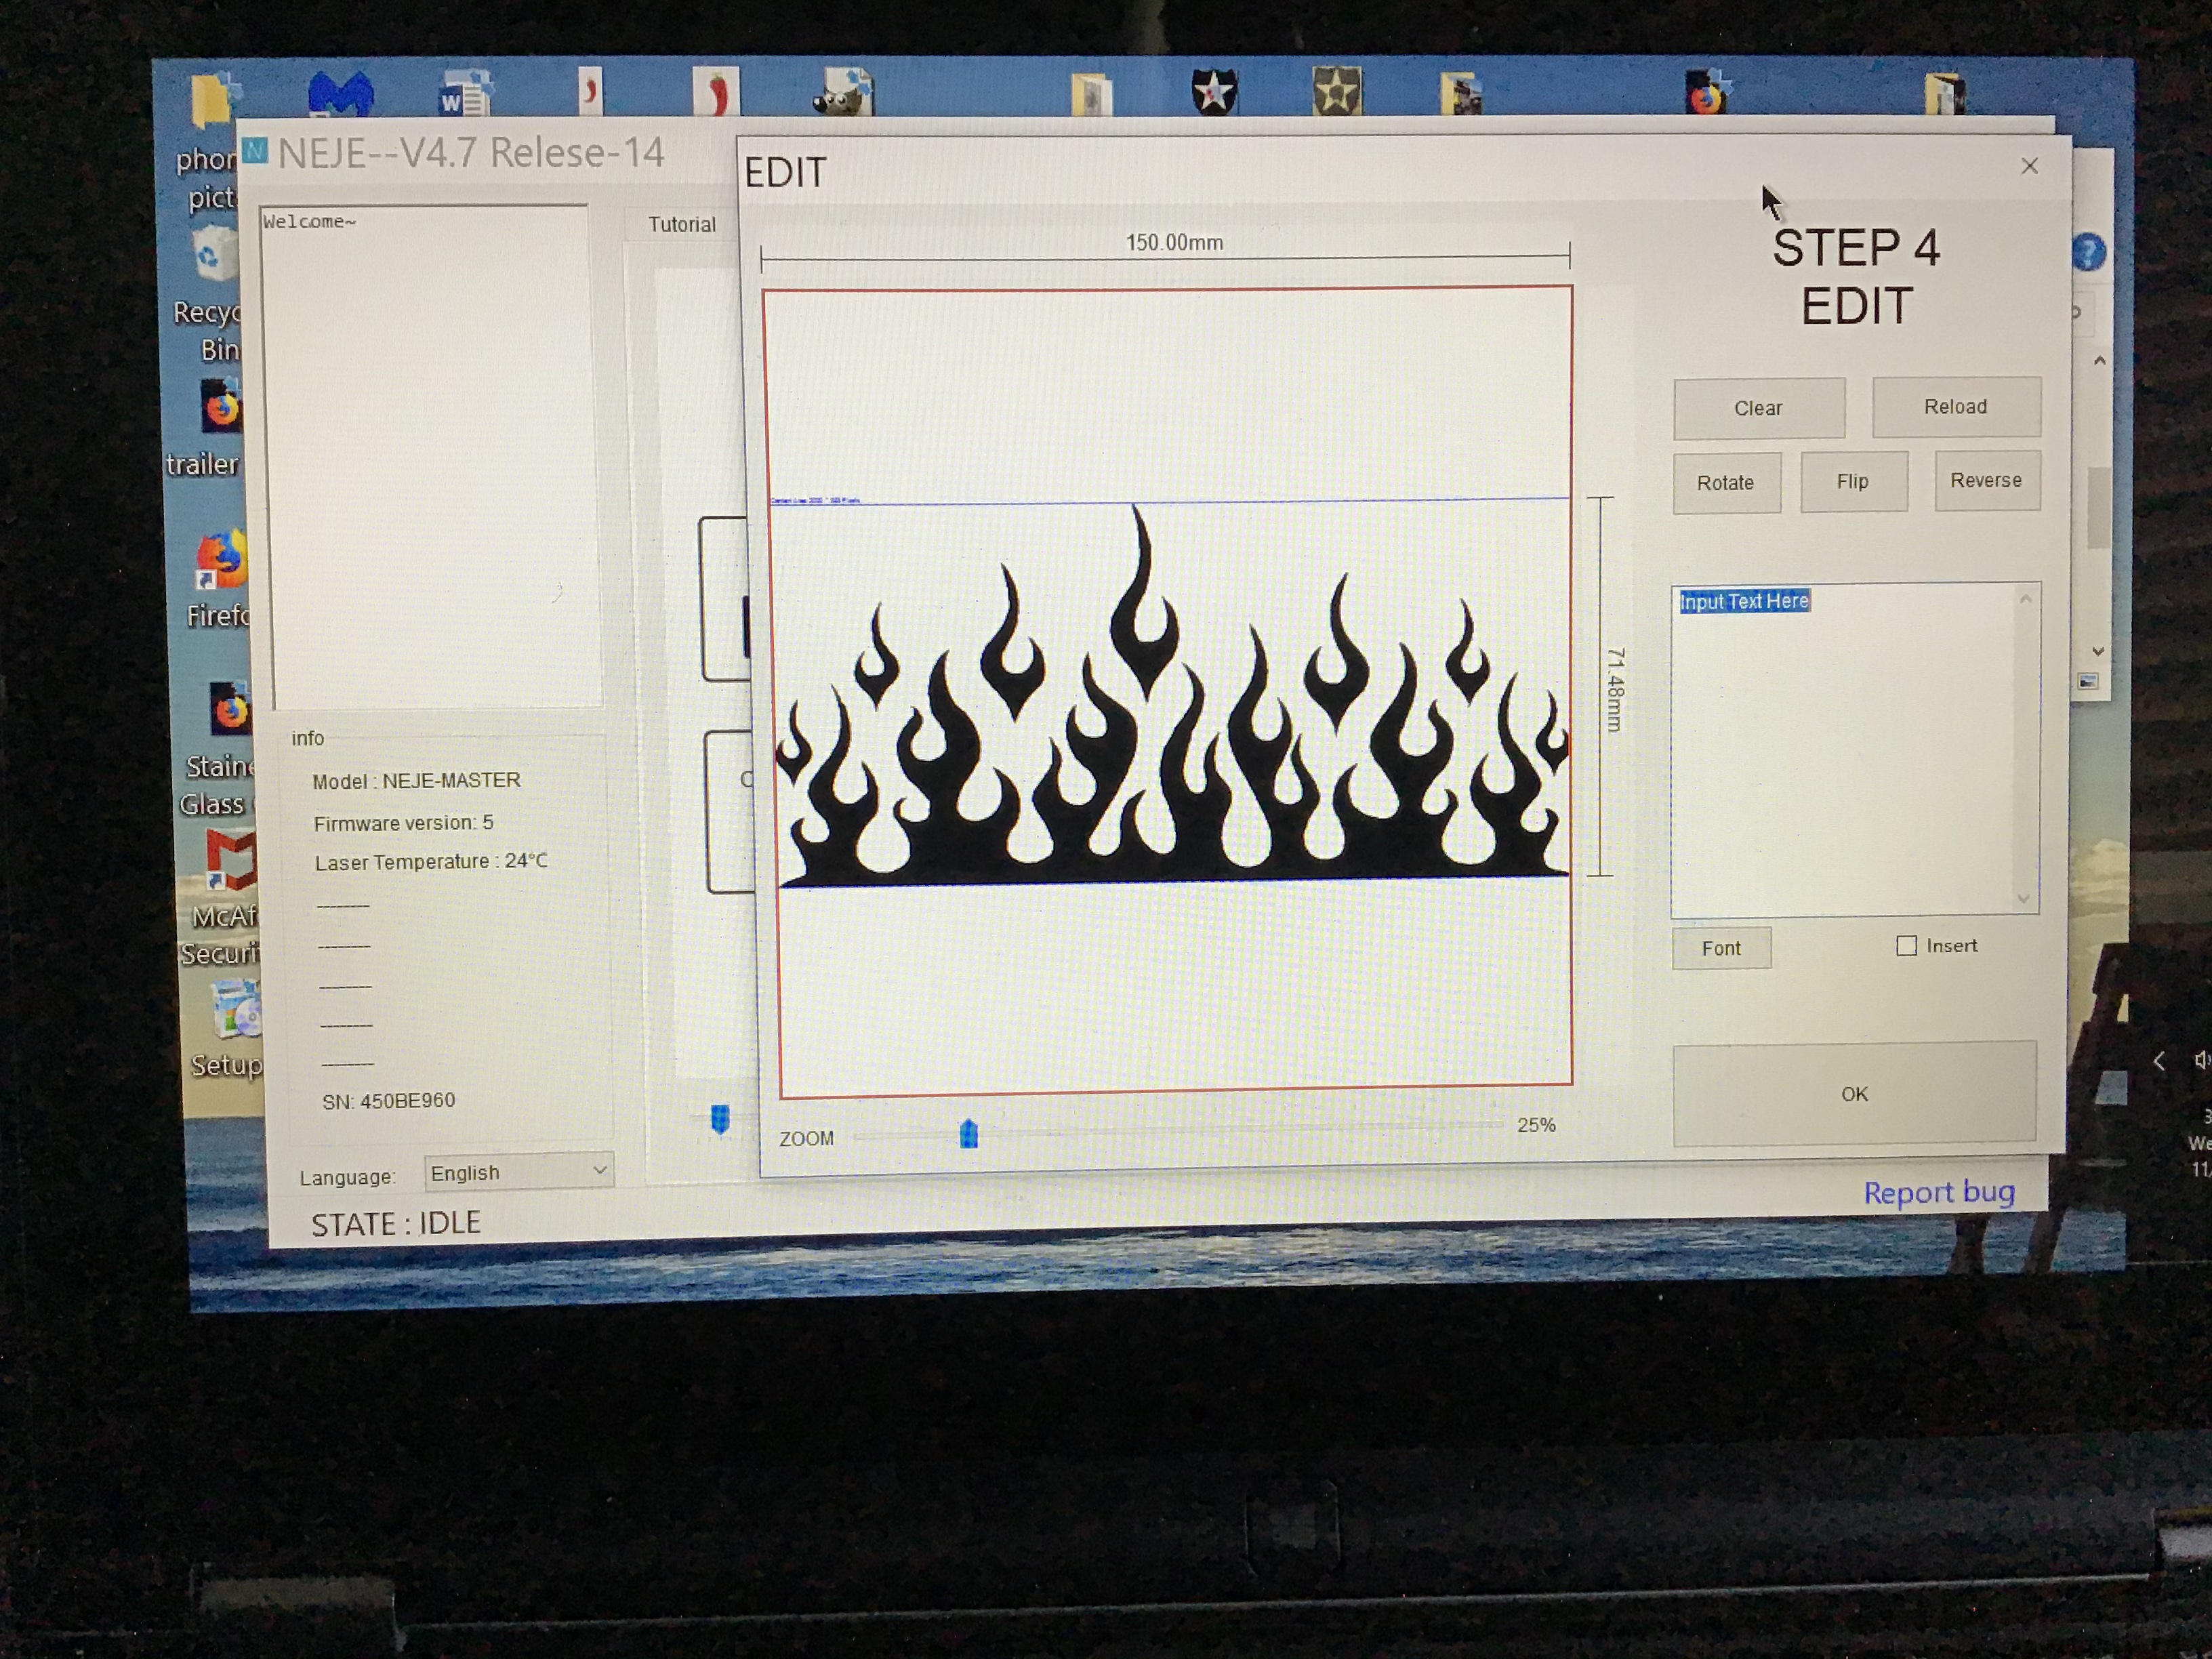
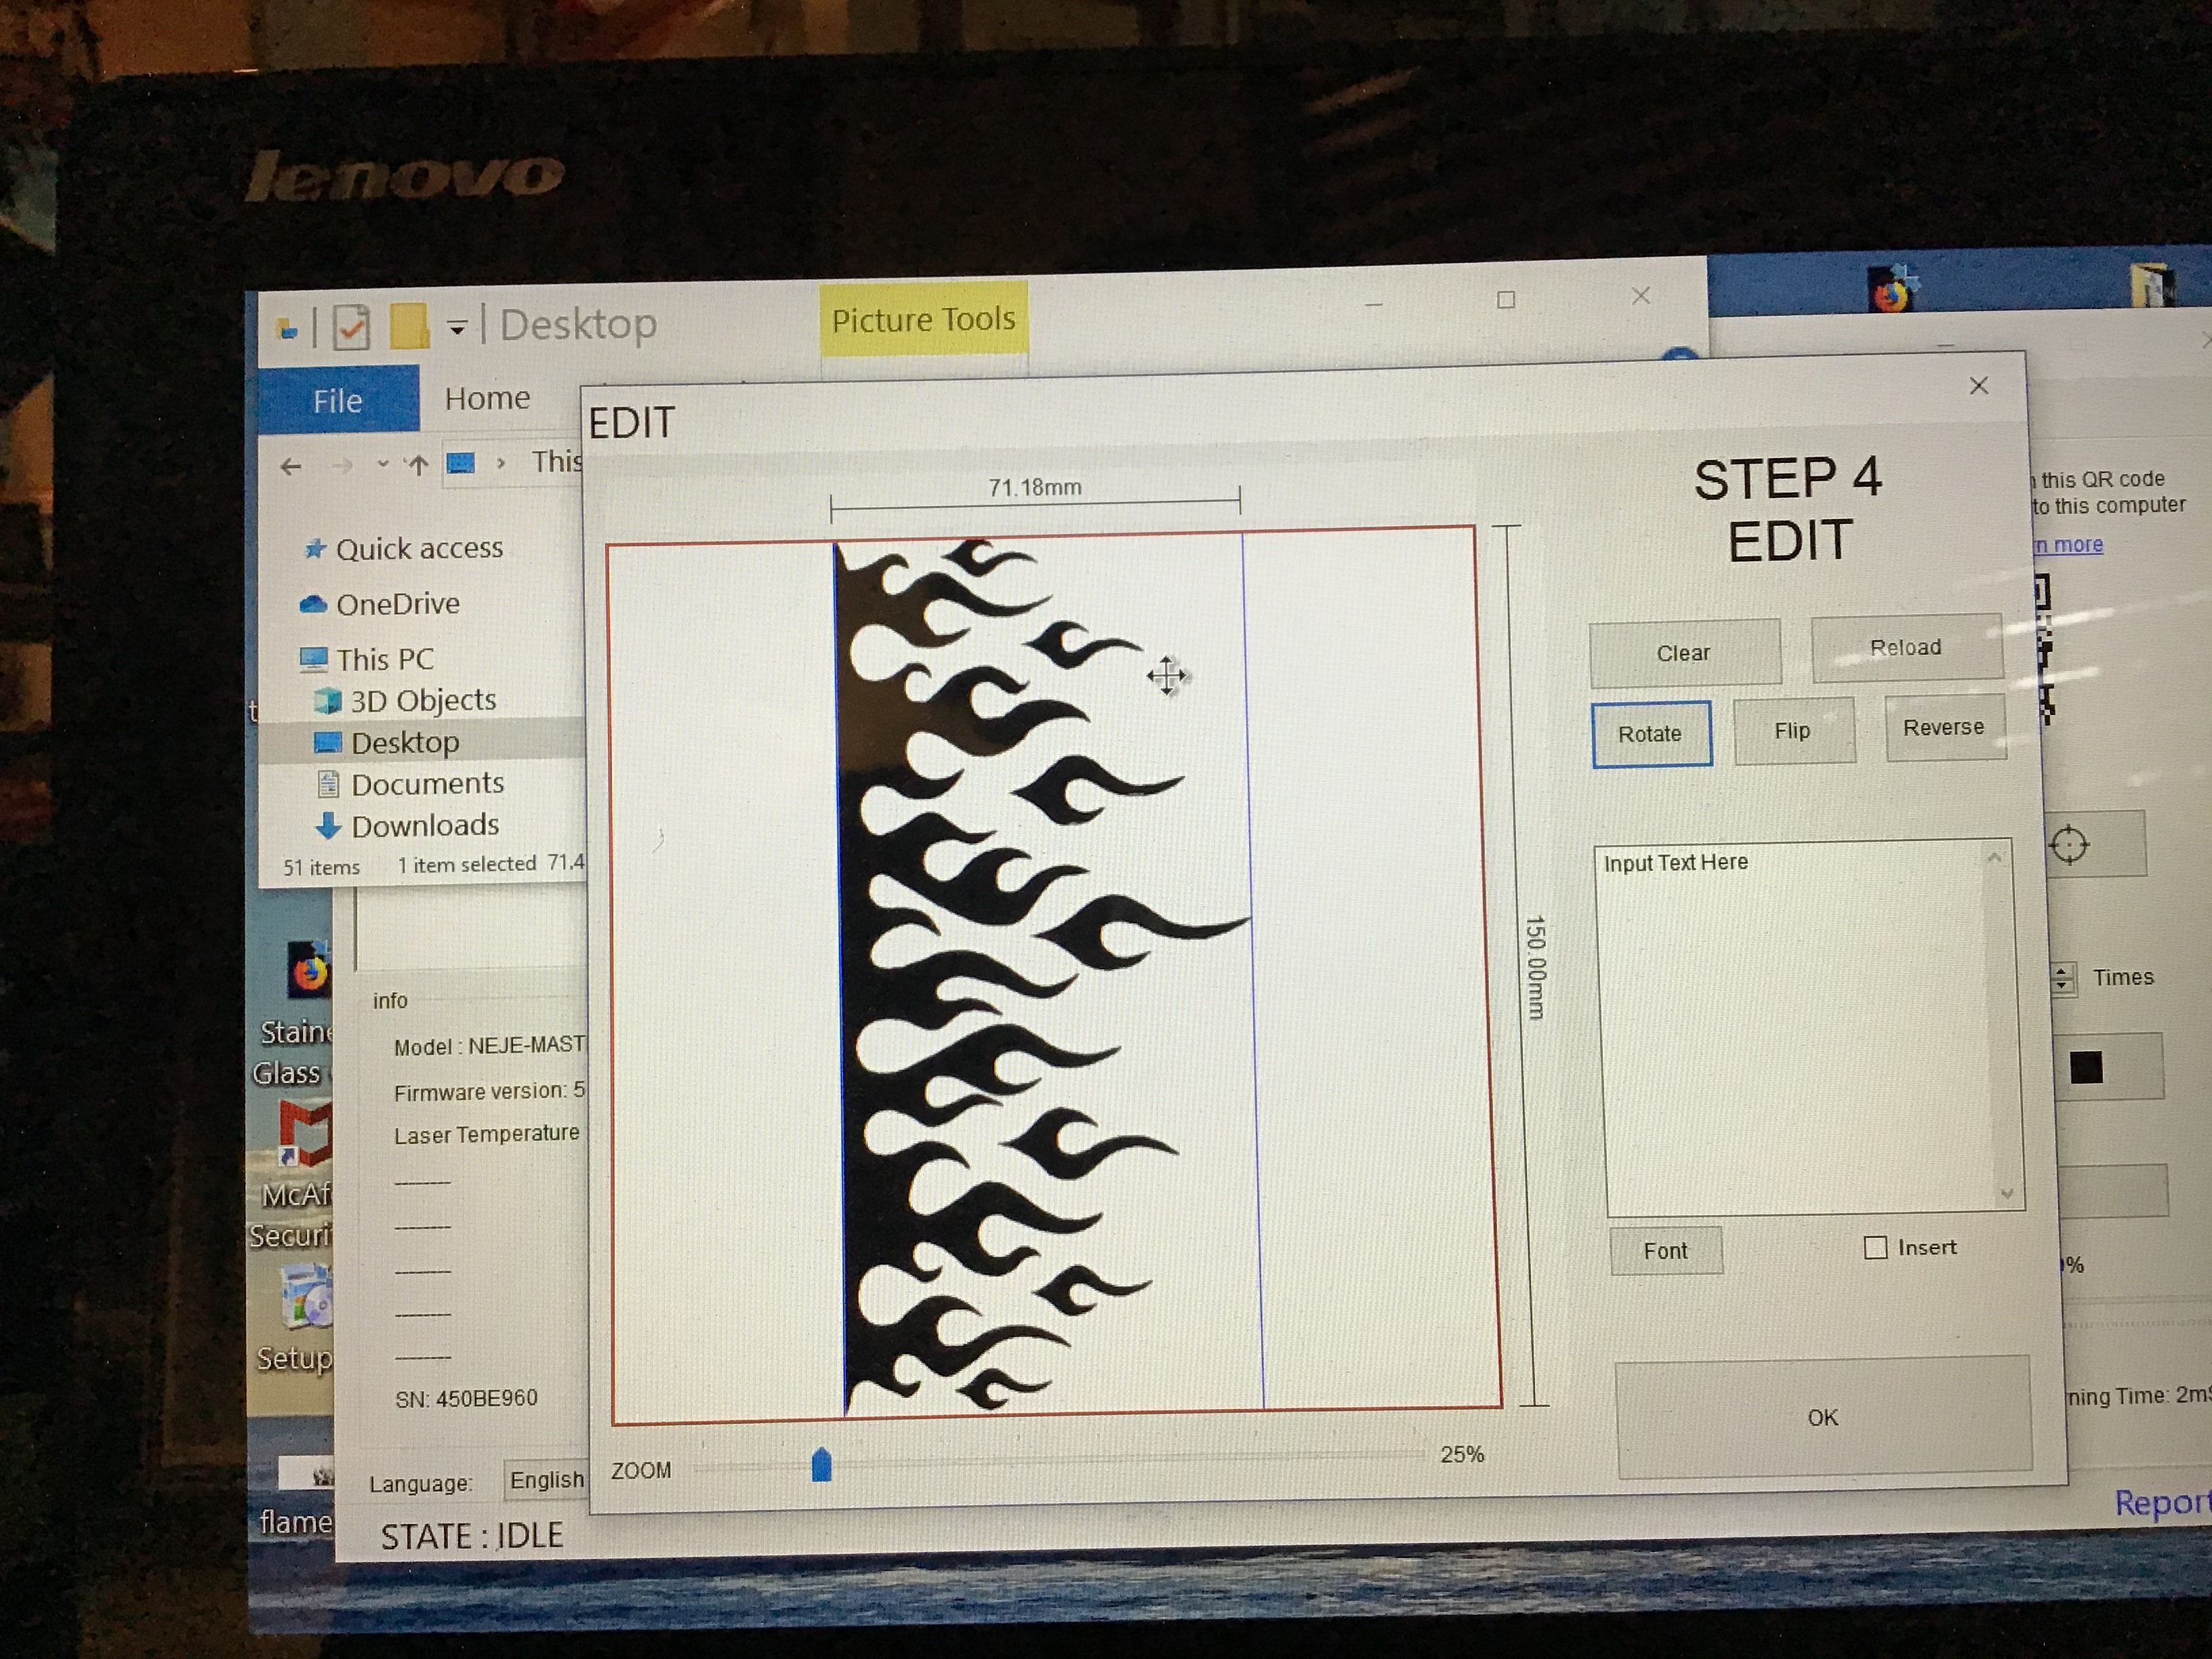
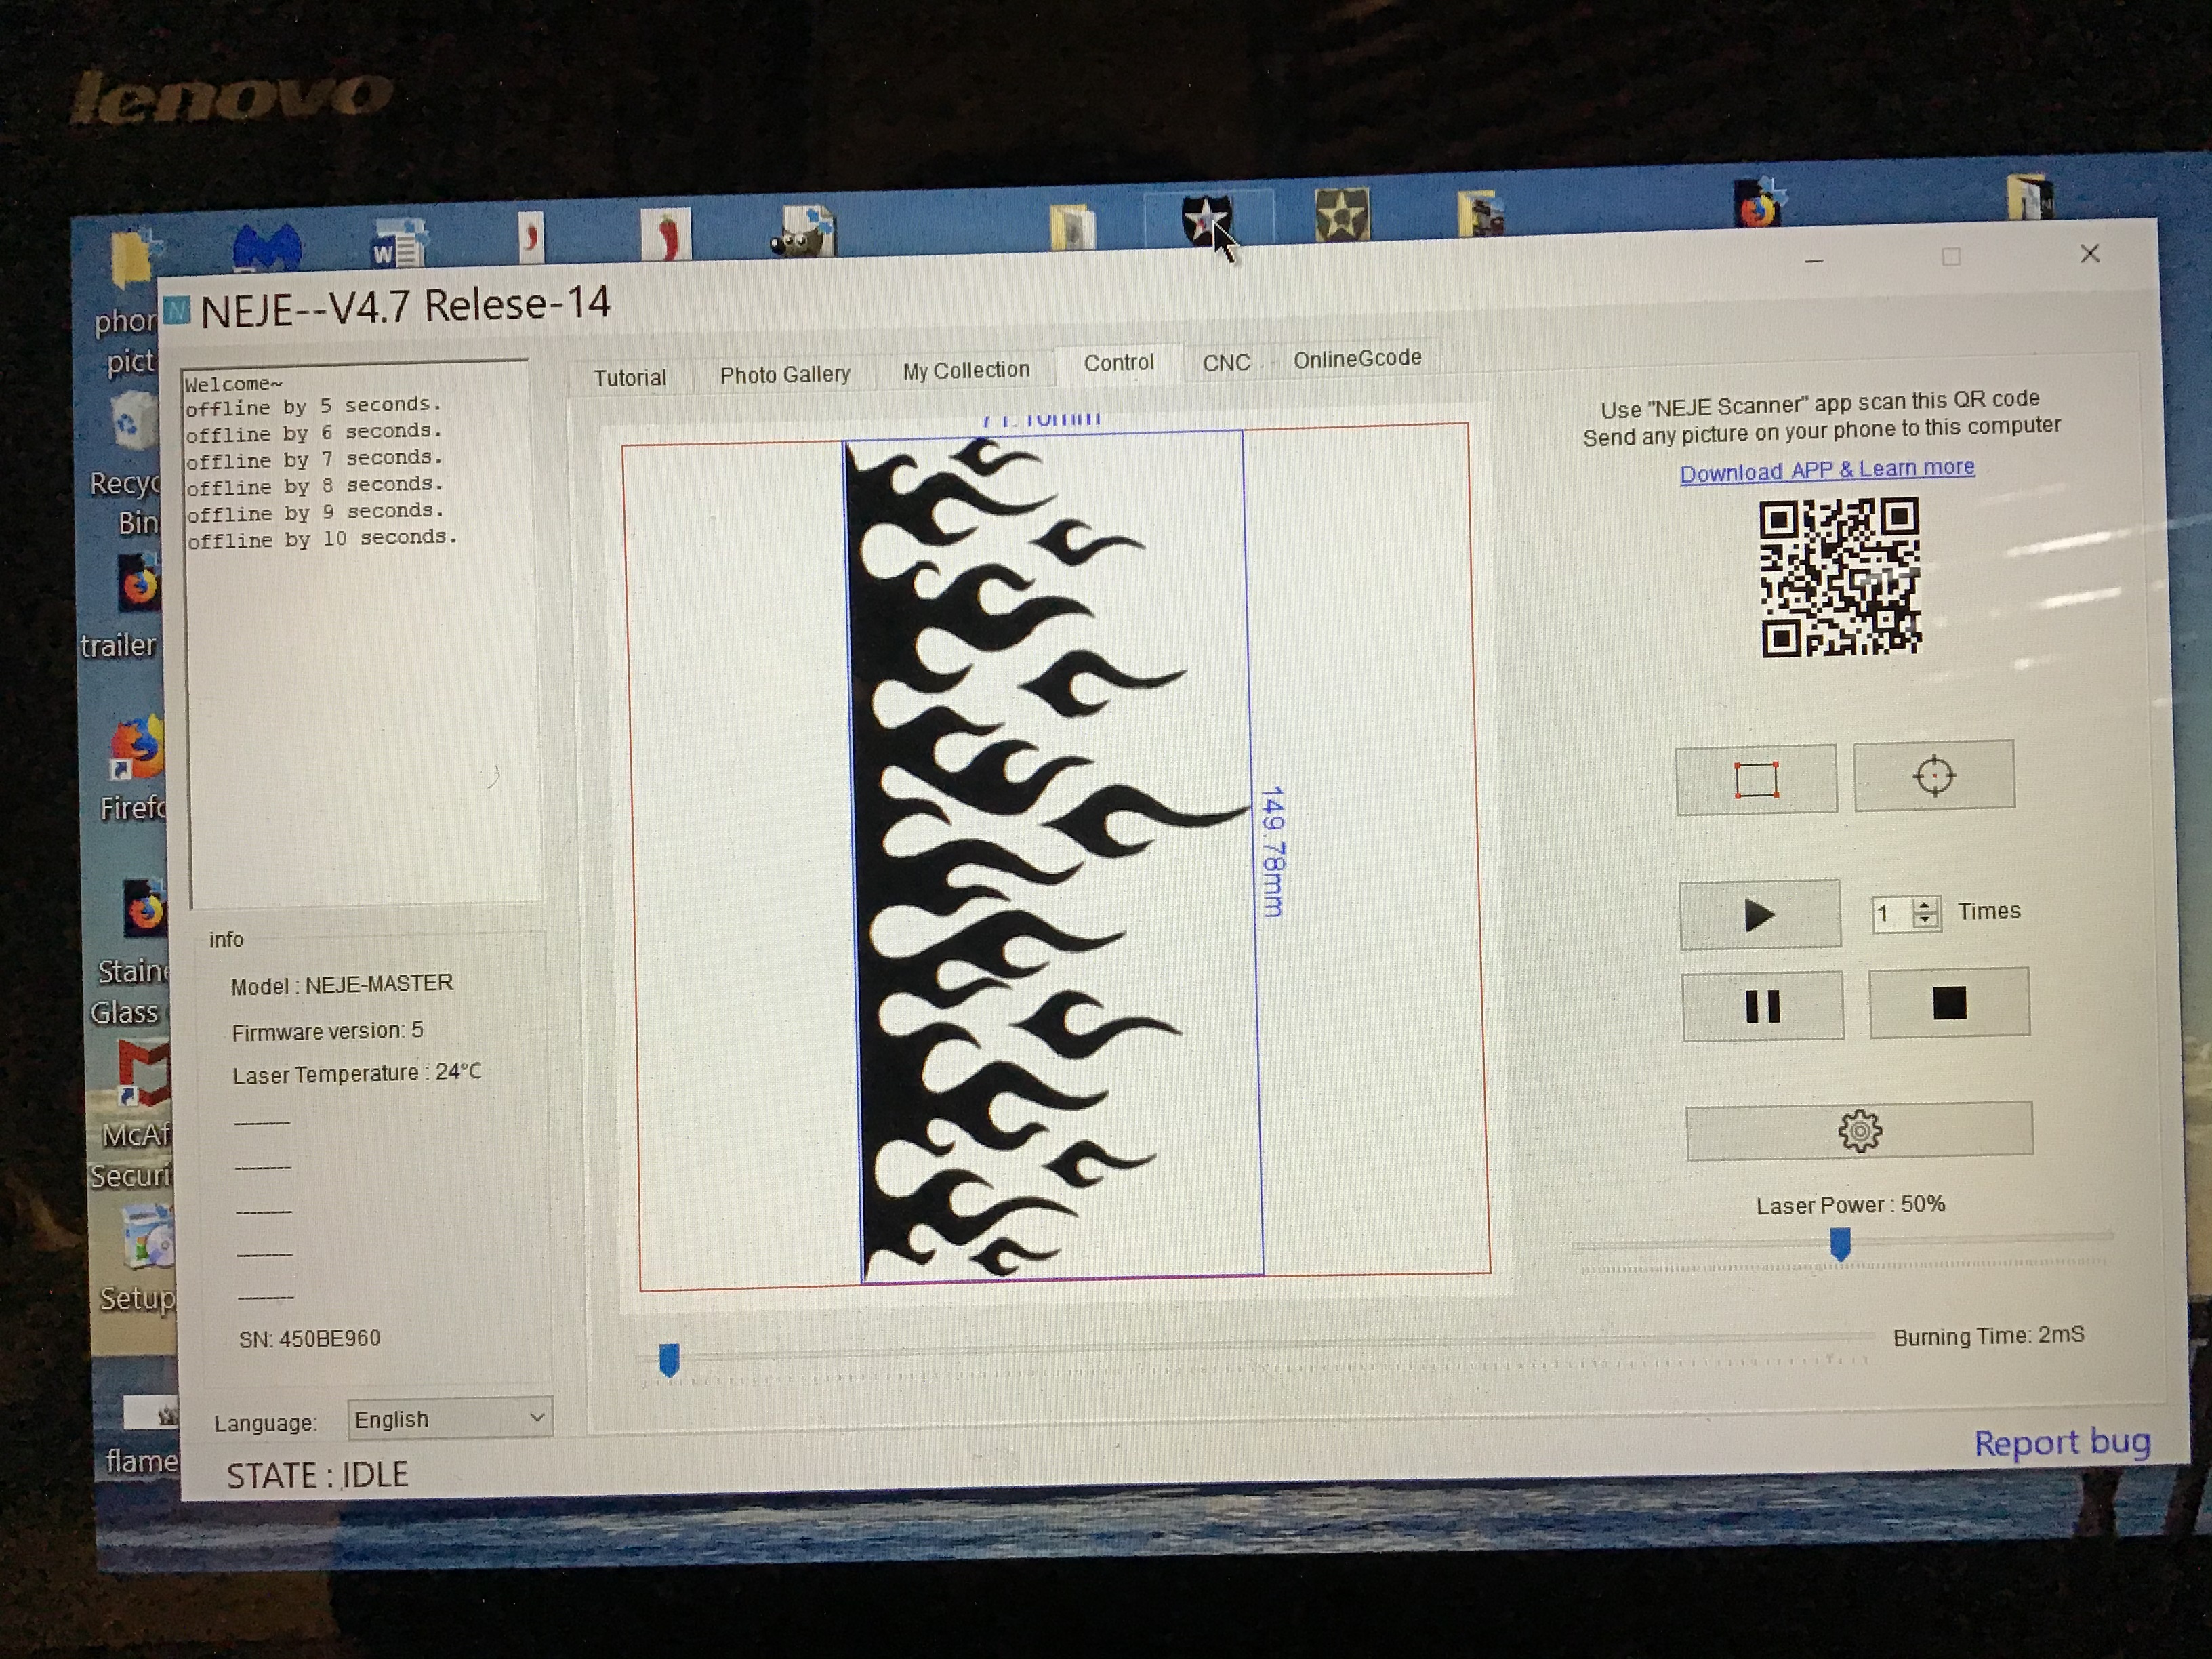
The final edit.
This is the final edit screen. This is where you can add text, rotate your image, invert your image and flip your image. You can also adjust where you want your image in the borders.
FOR OUR PROJECT: Line up in the image in the box. I needed to rotate the image so it would etch in the correct direction.
** *NOTE *** This is super important, The program prints from the top down so you have to make sure that what you are etching is lined up correctly under the laser so it prints correctly. Remember you can do a trial run with scrap card stock.
Since I put the pant leg in the way I did with the bottom of the pant leg right under the laser. I had to have the image rotated so it would etch correctly.
Lining Up the Laser the Denim Jeans.
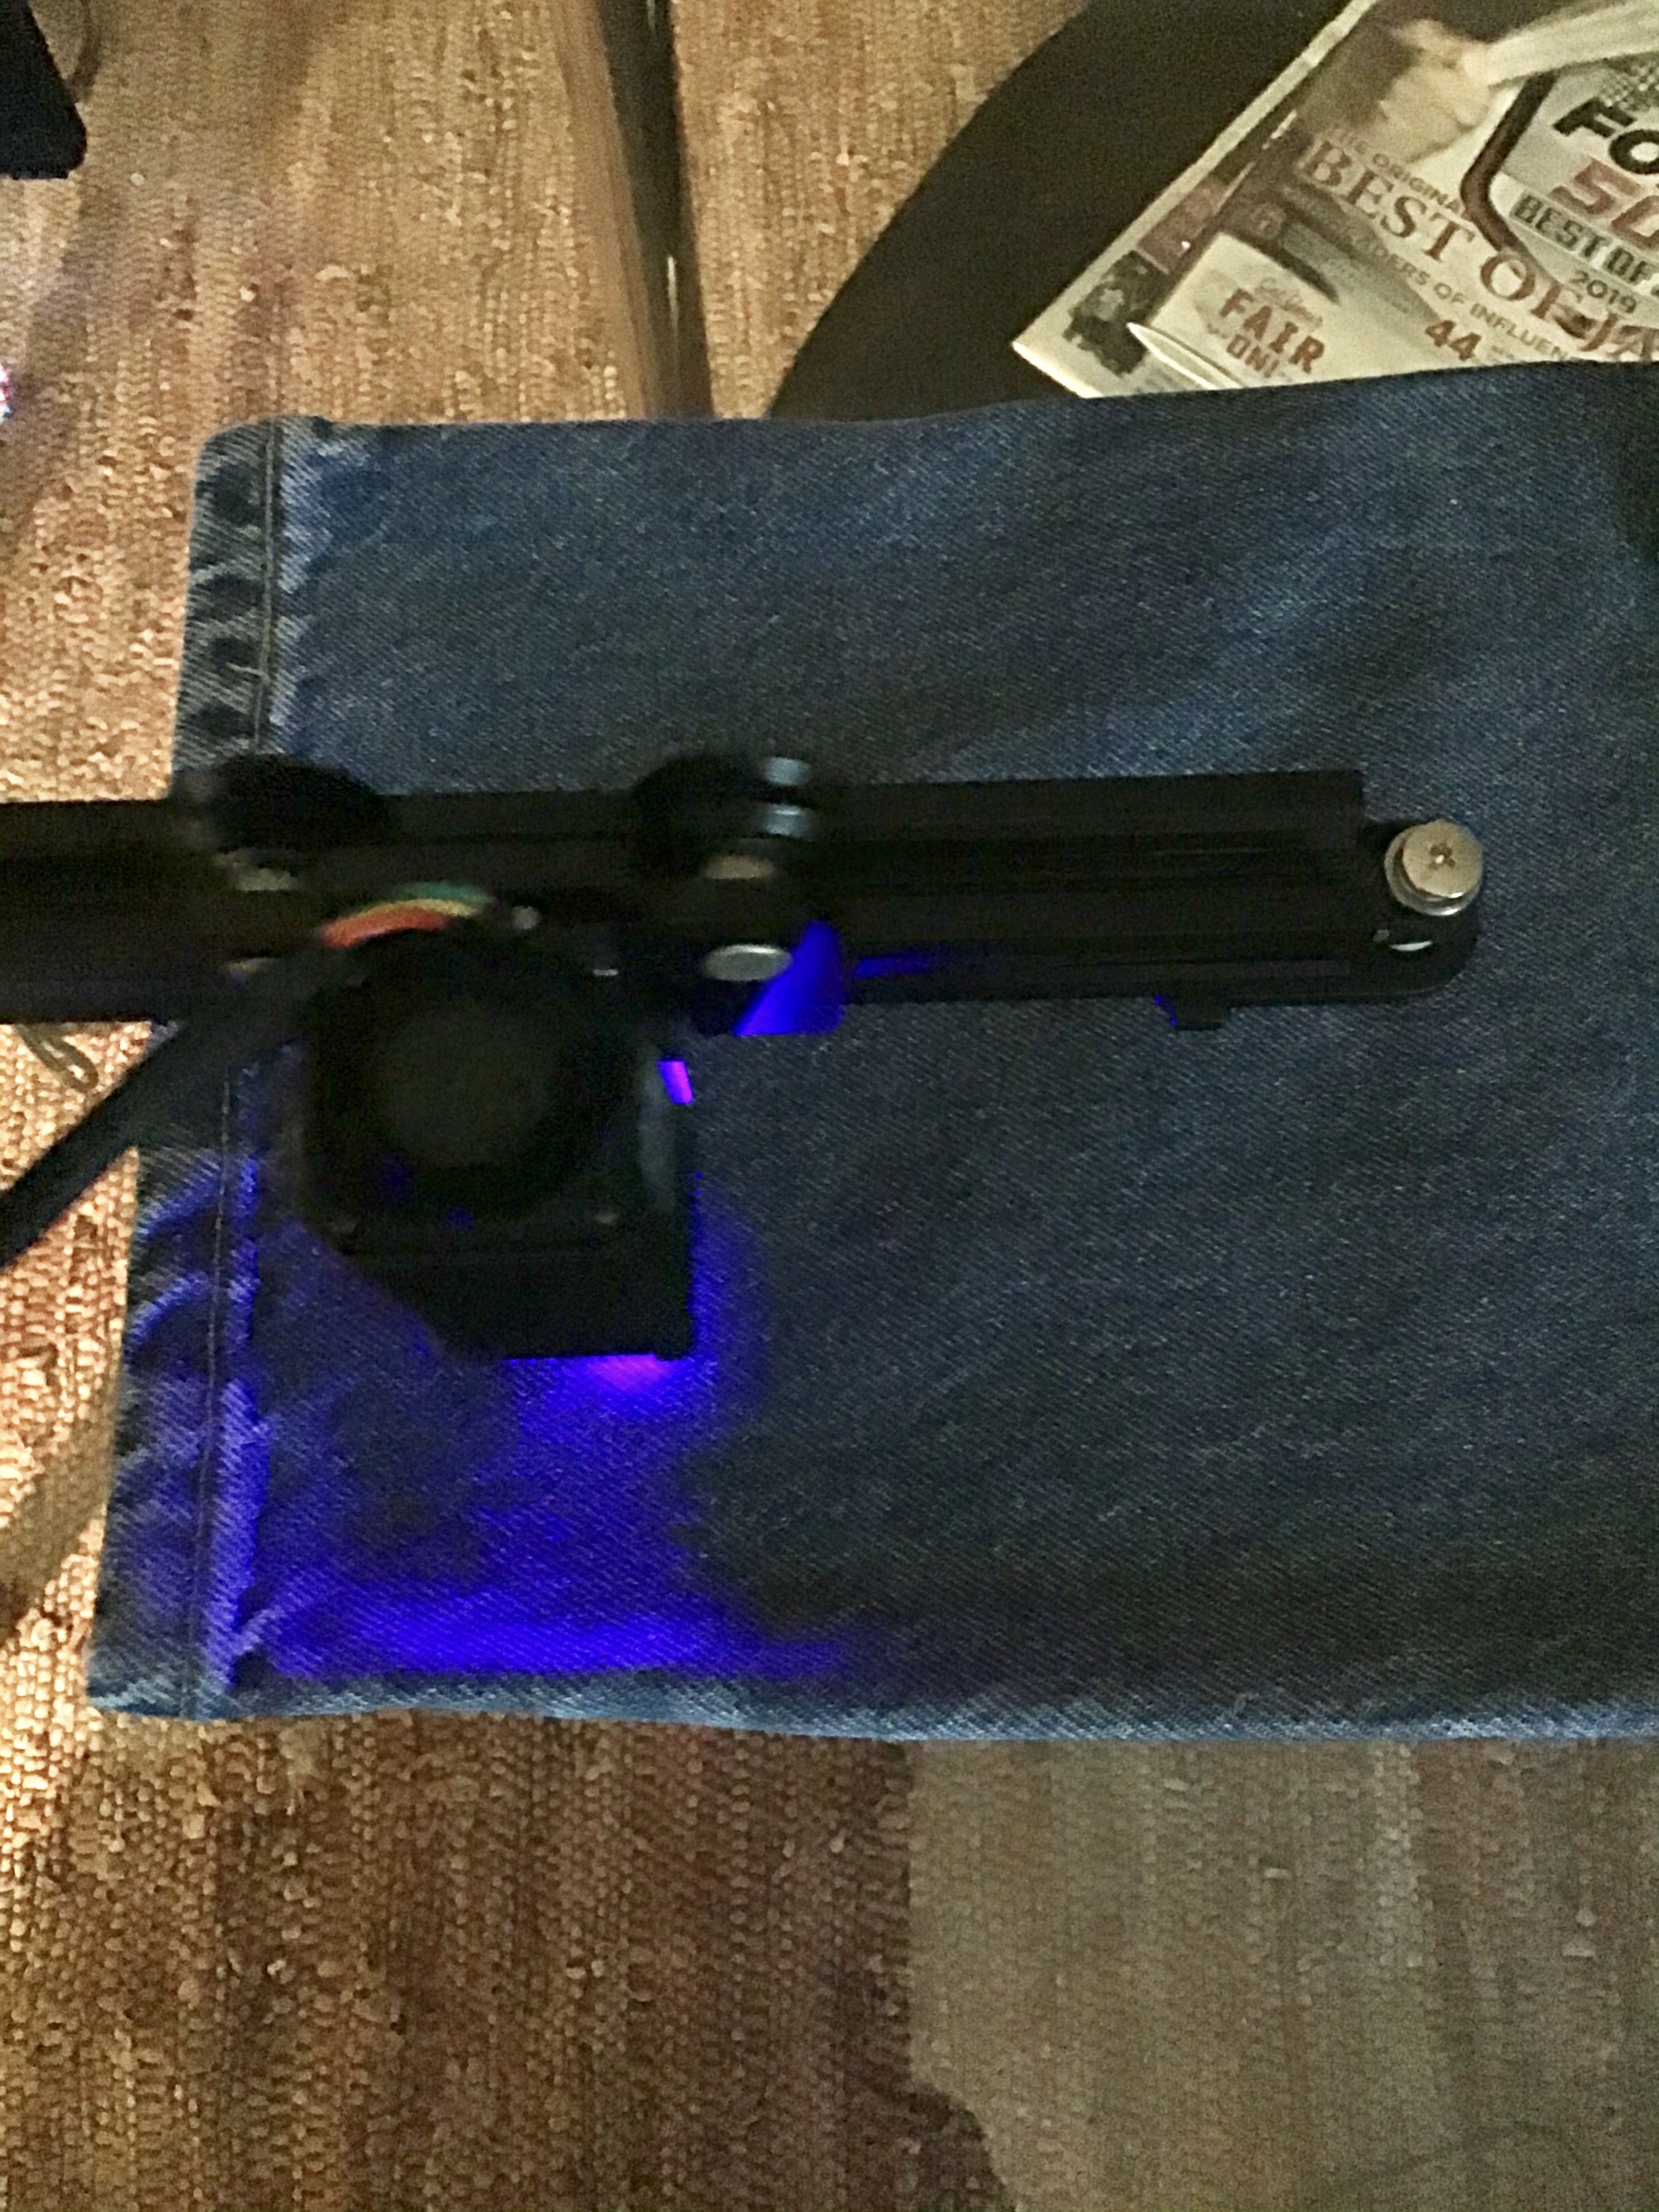
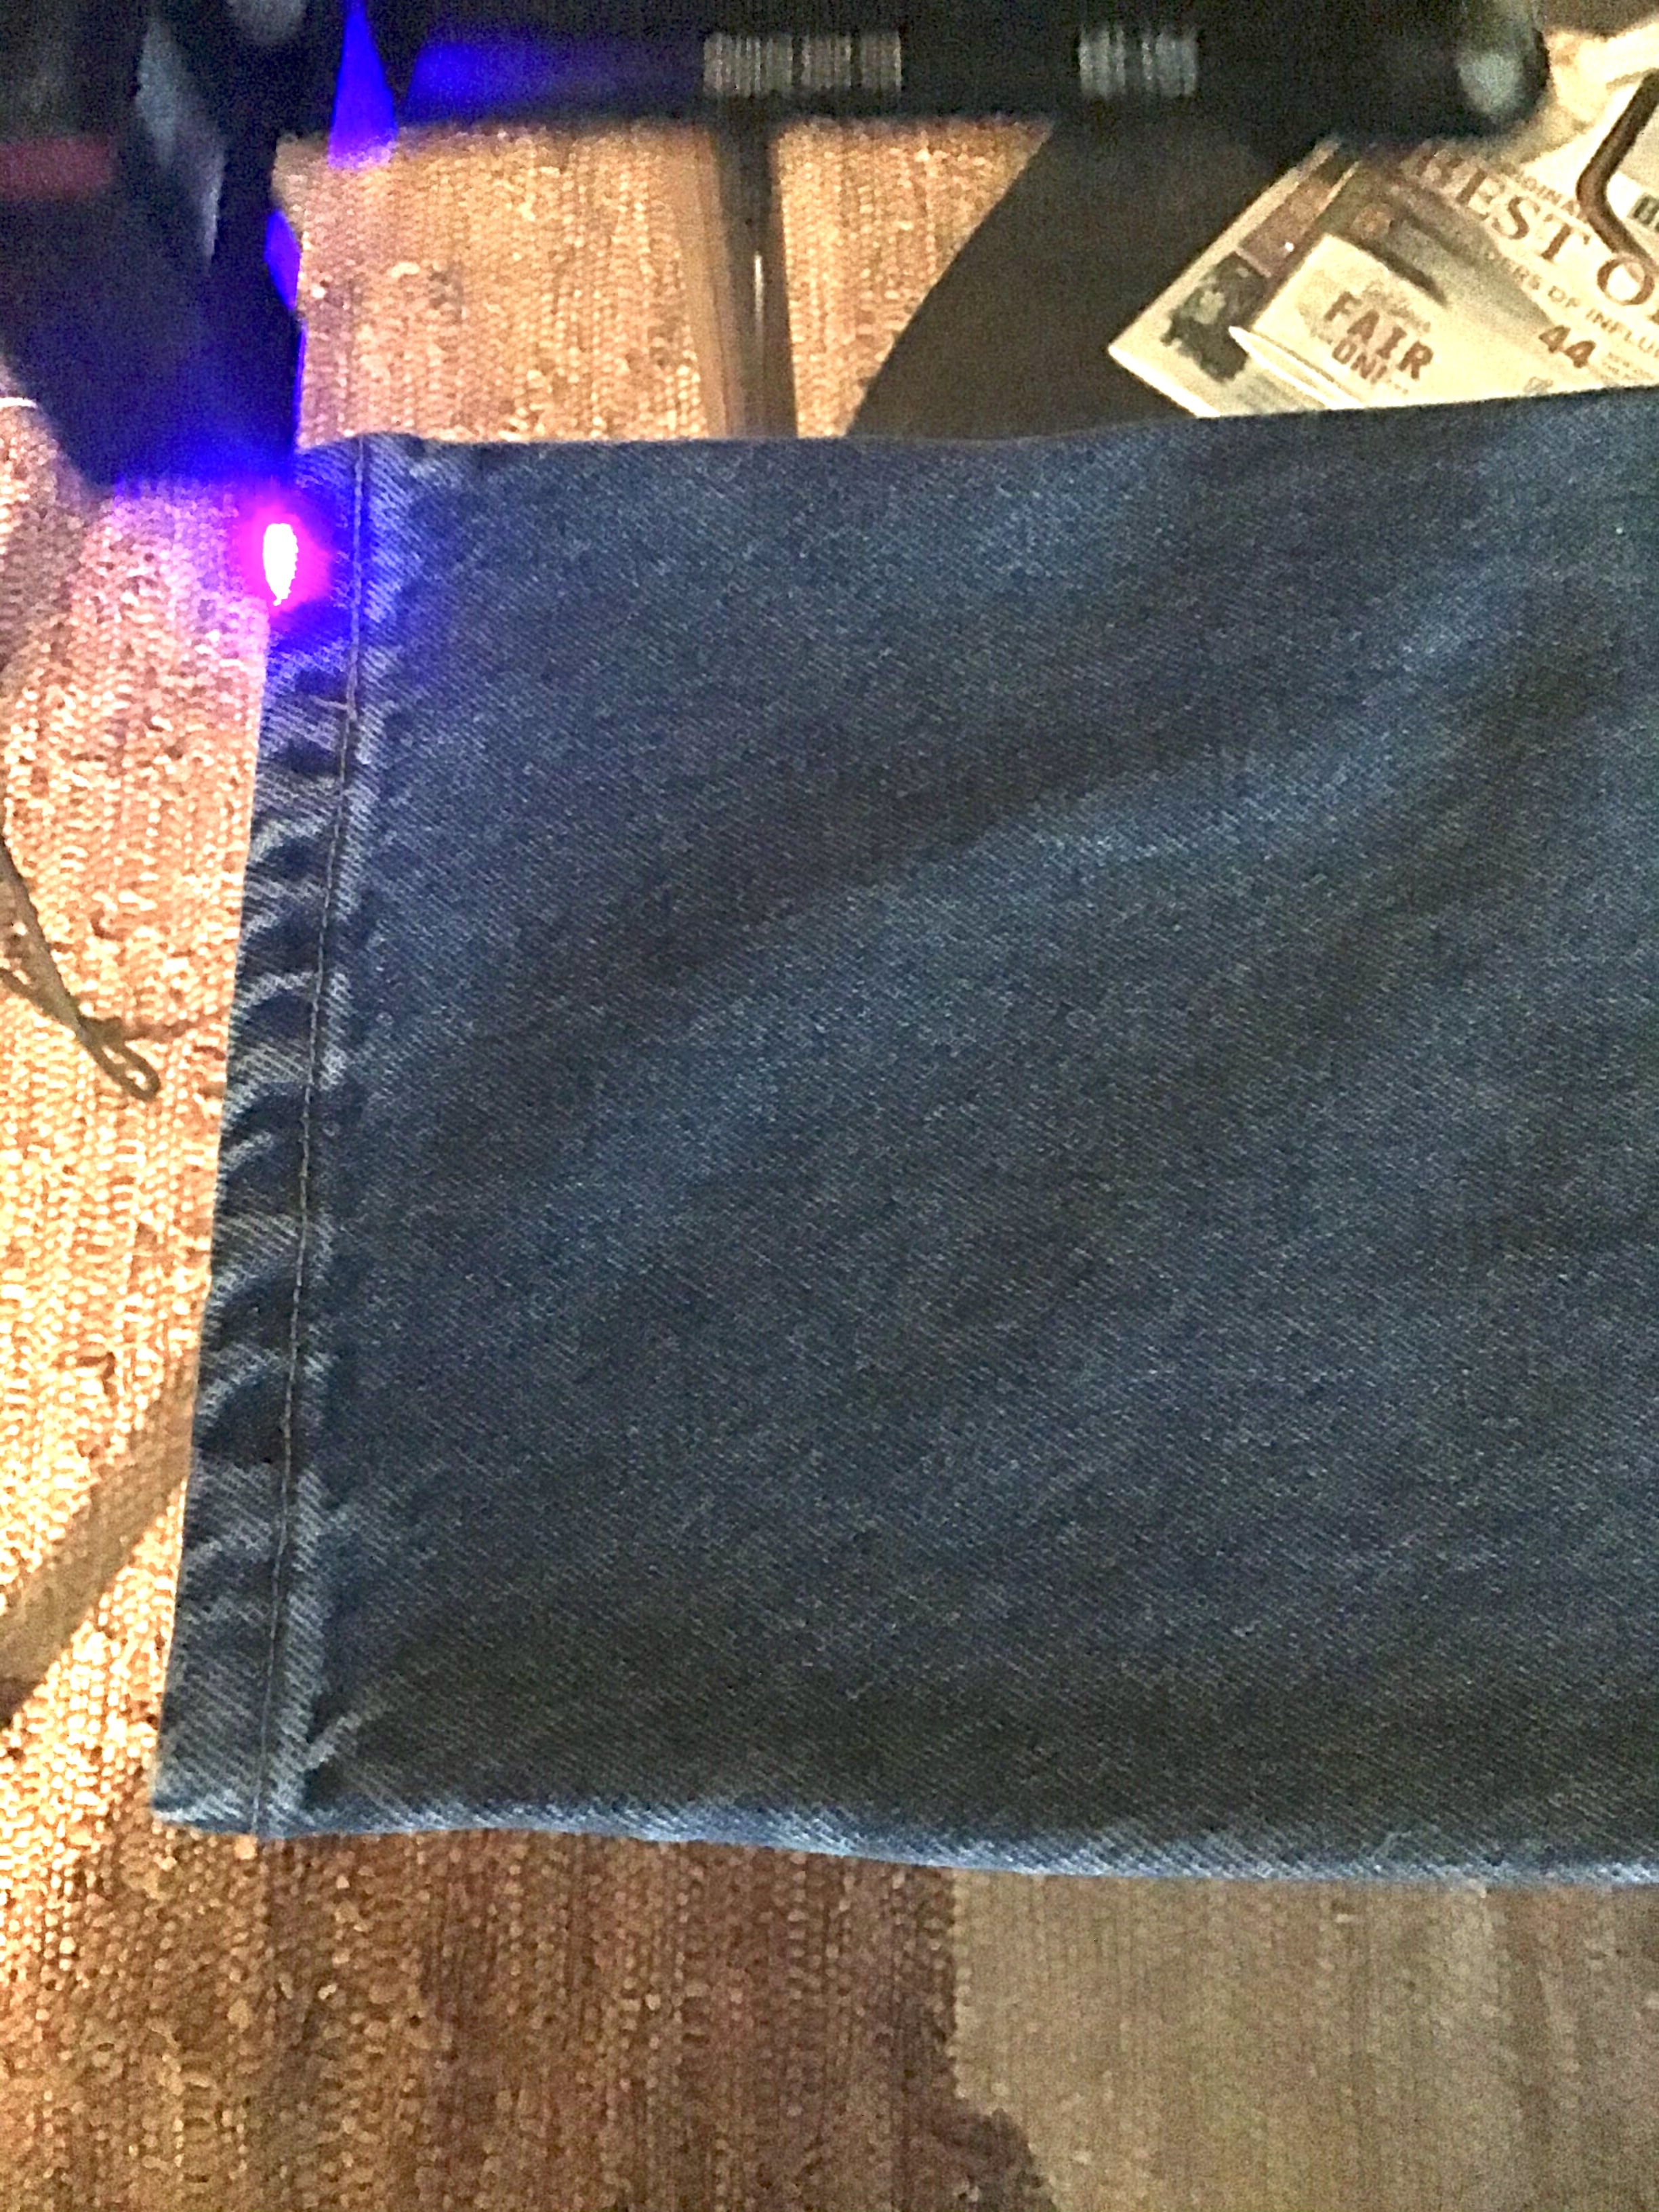
Final preparation before laser etching.
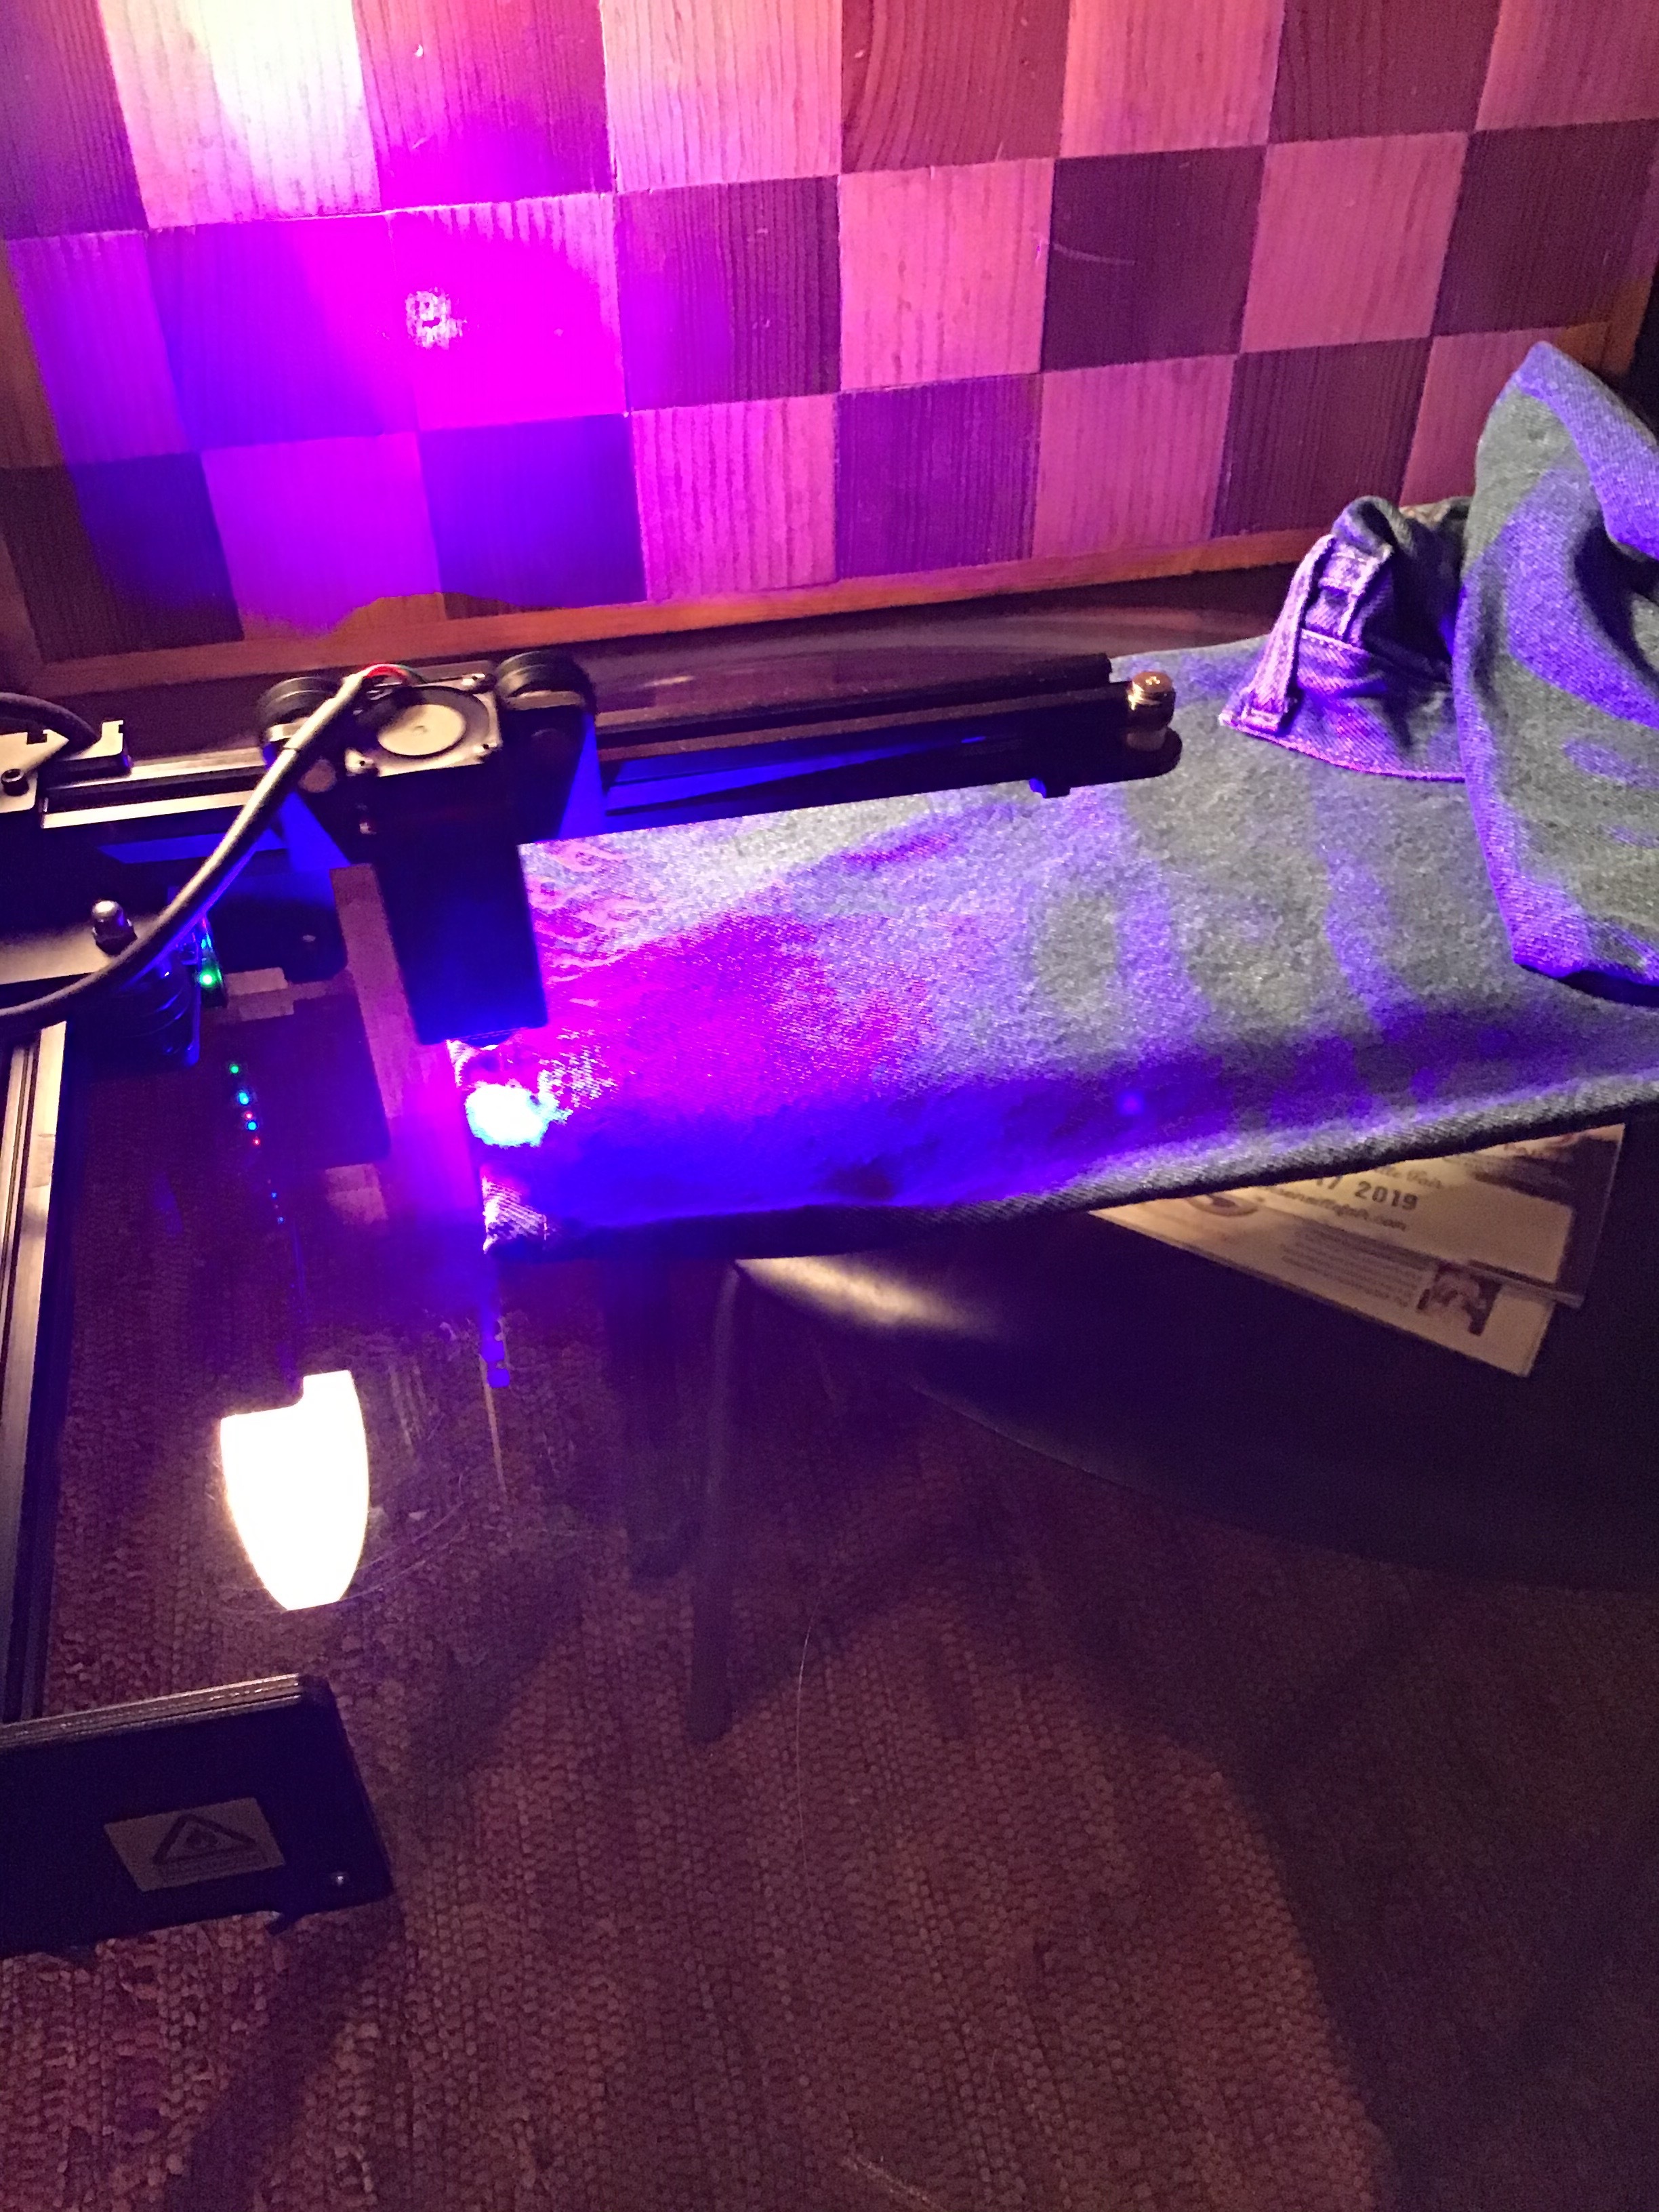
FOR OUR PROJECT: Place the pant leg under the laser make sure that the Laser’s arms can move freely and the pants are supported so they will not move.
Click on the rotate button and the laser will start to move around the border of the area to be etched. This is when you line up the pant leg with the laser, make sure to wear your safety glasses.
I wanted the laser to etch pants at the seam and you can see in the picture where I lined up the jeans.
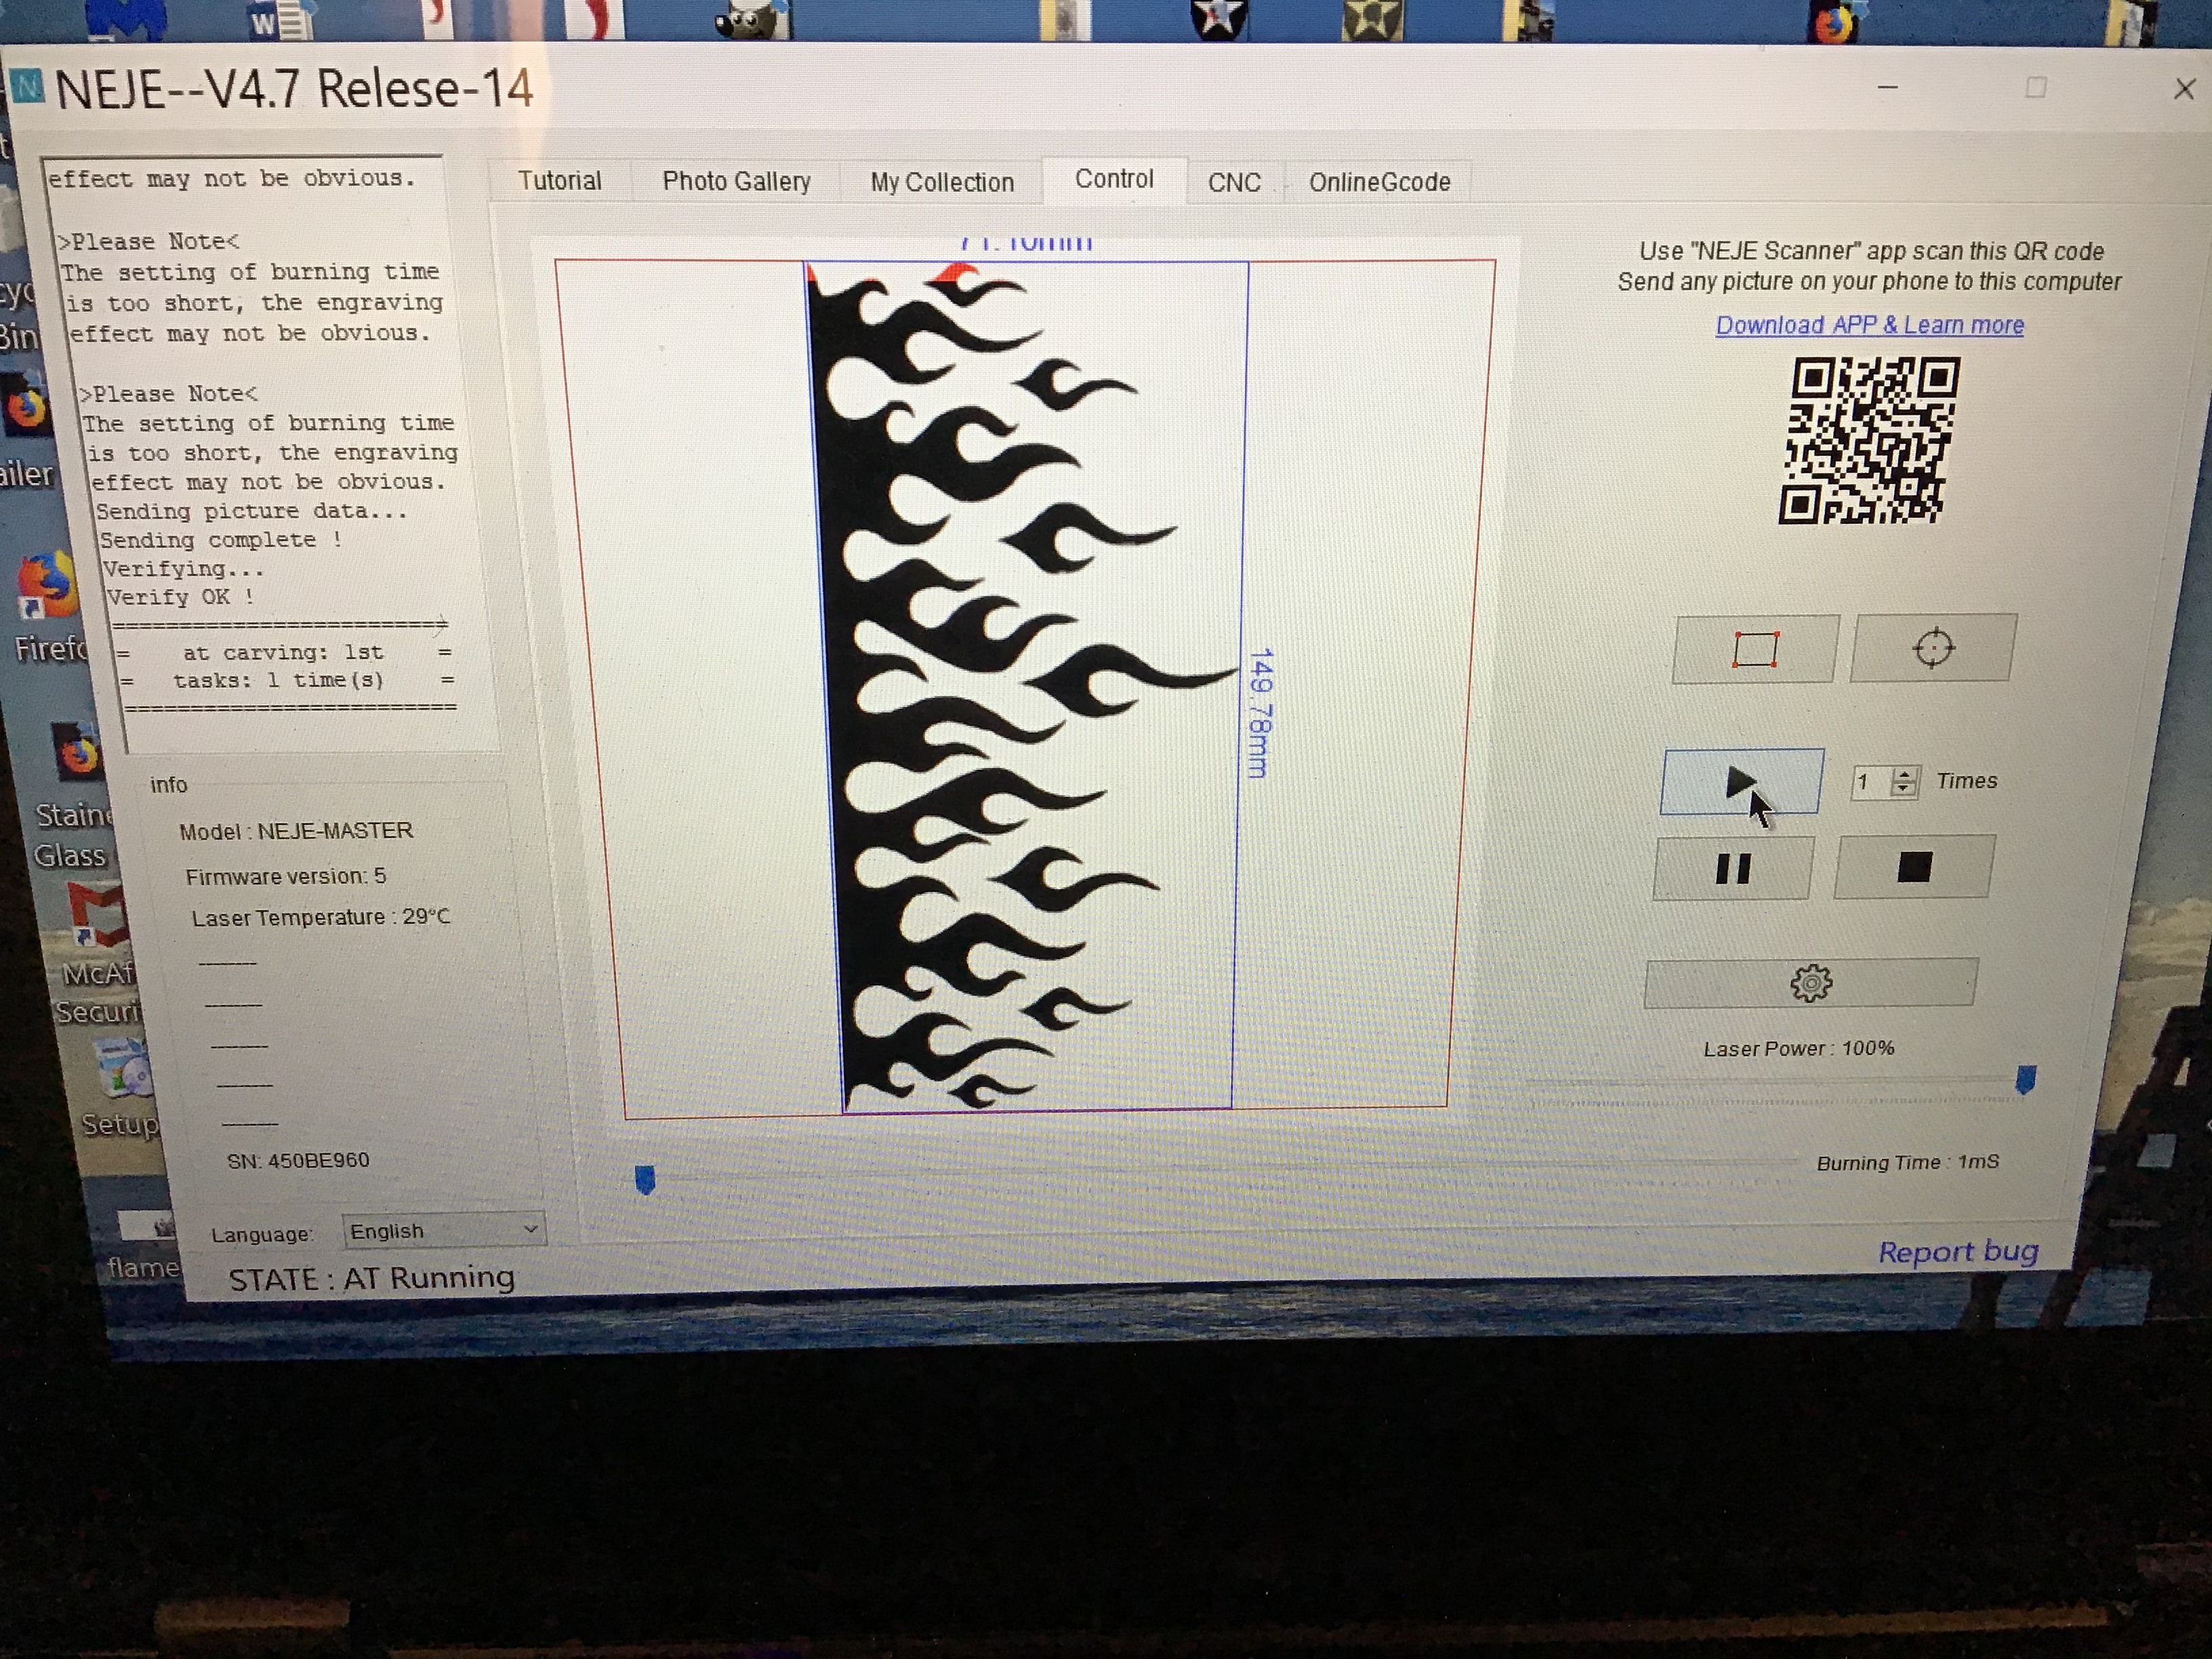
***. IMPORTANT *** you must set the laser power and the time (m/s) of the burn. I only want to burn off the pigment in the jeans and not burn the threads. For this pair of jeans I went with 50% laser power with 2 m/s burn time. Press the ▶️ button to start the laser.
To start the etching press the “▶️“ button and the program will start to laser etch.
You can pause the printing by pressing the “⏸” button, pressing ▶️ Will continue where you left off. Pressing the ⏹ button will stop the etching process and ask if you want it to end.
The laser will start and work it’s magic. Remember to WEAR YOUR SAFETY GOGGLES!
The last picture shows the progress of the laser in red so you can control it as needed.
Let the full program run. The full program will complete about 70% of the leg, just go to the same screen and click on rotate and realign the pants just overlapping the base of the design. I let it run and checked it as it got close to the end of the leg. When the laser went far enough I hit the ⏸ button to check. If you like where it ended press the stop ⏹ button and end to carving. If you need some more etching to finish the press the ▶️ Button again and it will continue where the laser left off.
Remember to experiment with images and burn times for different results. I will give you the settings used for this application.
After Laser Etching
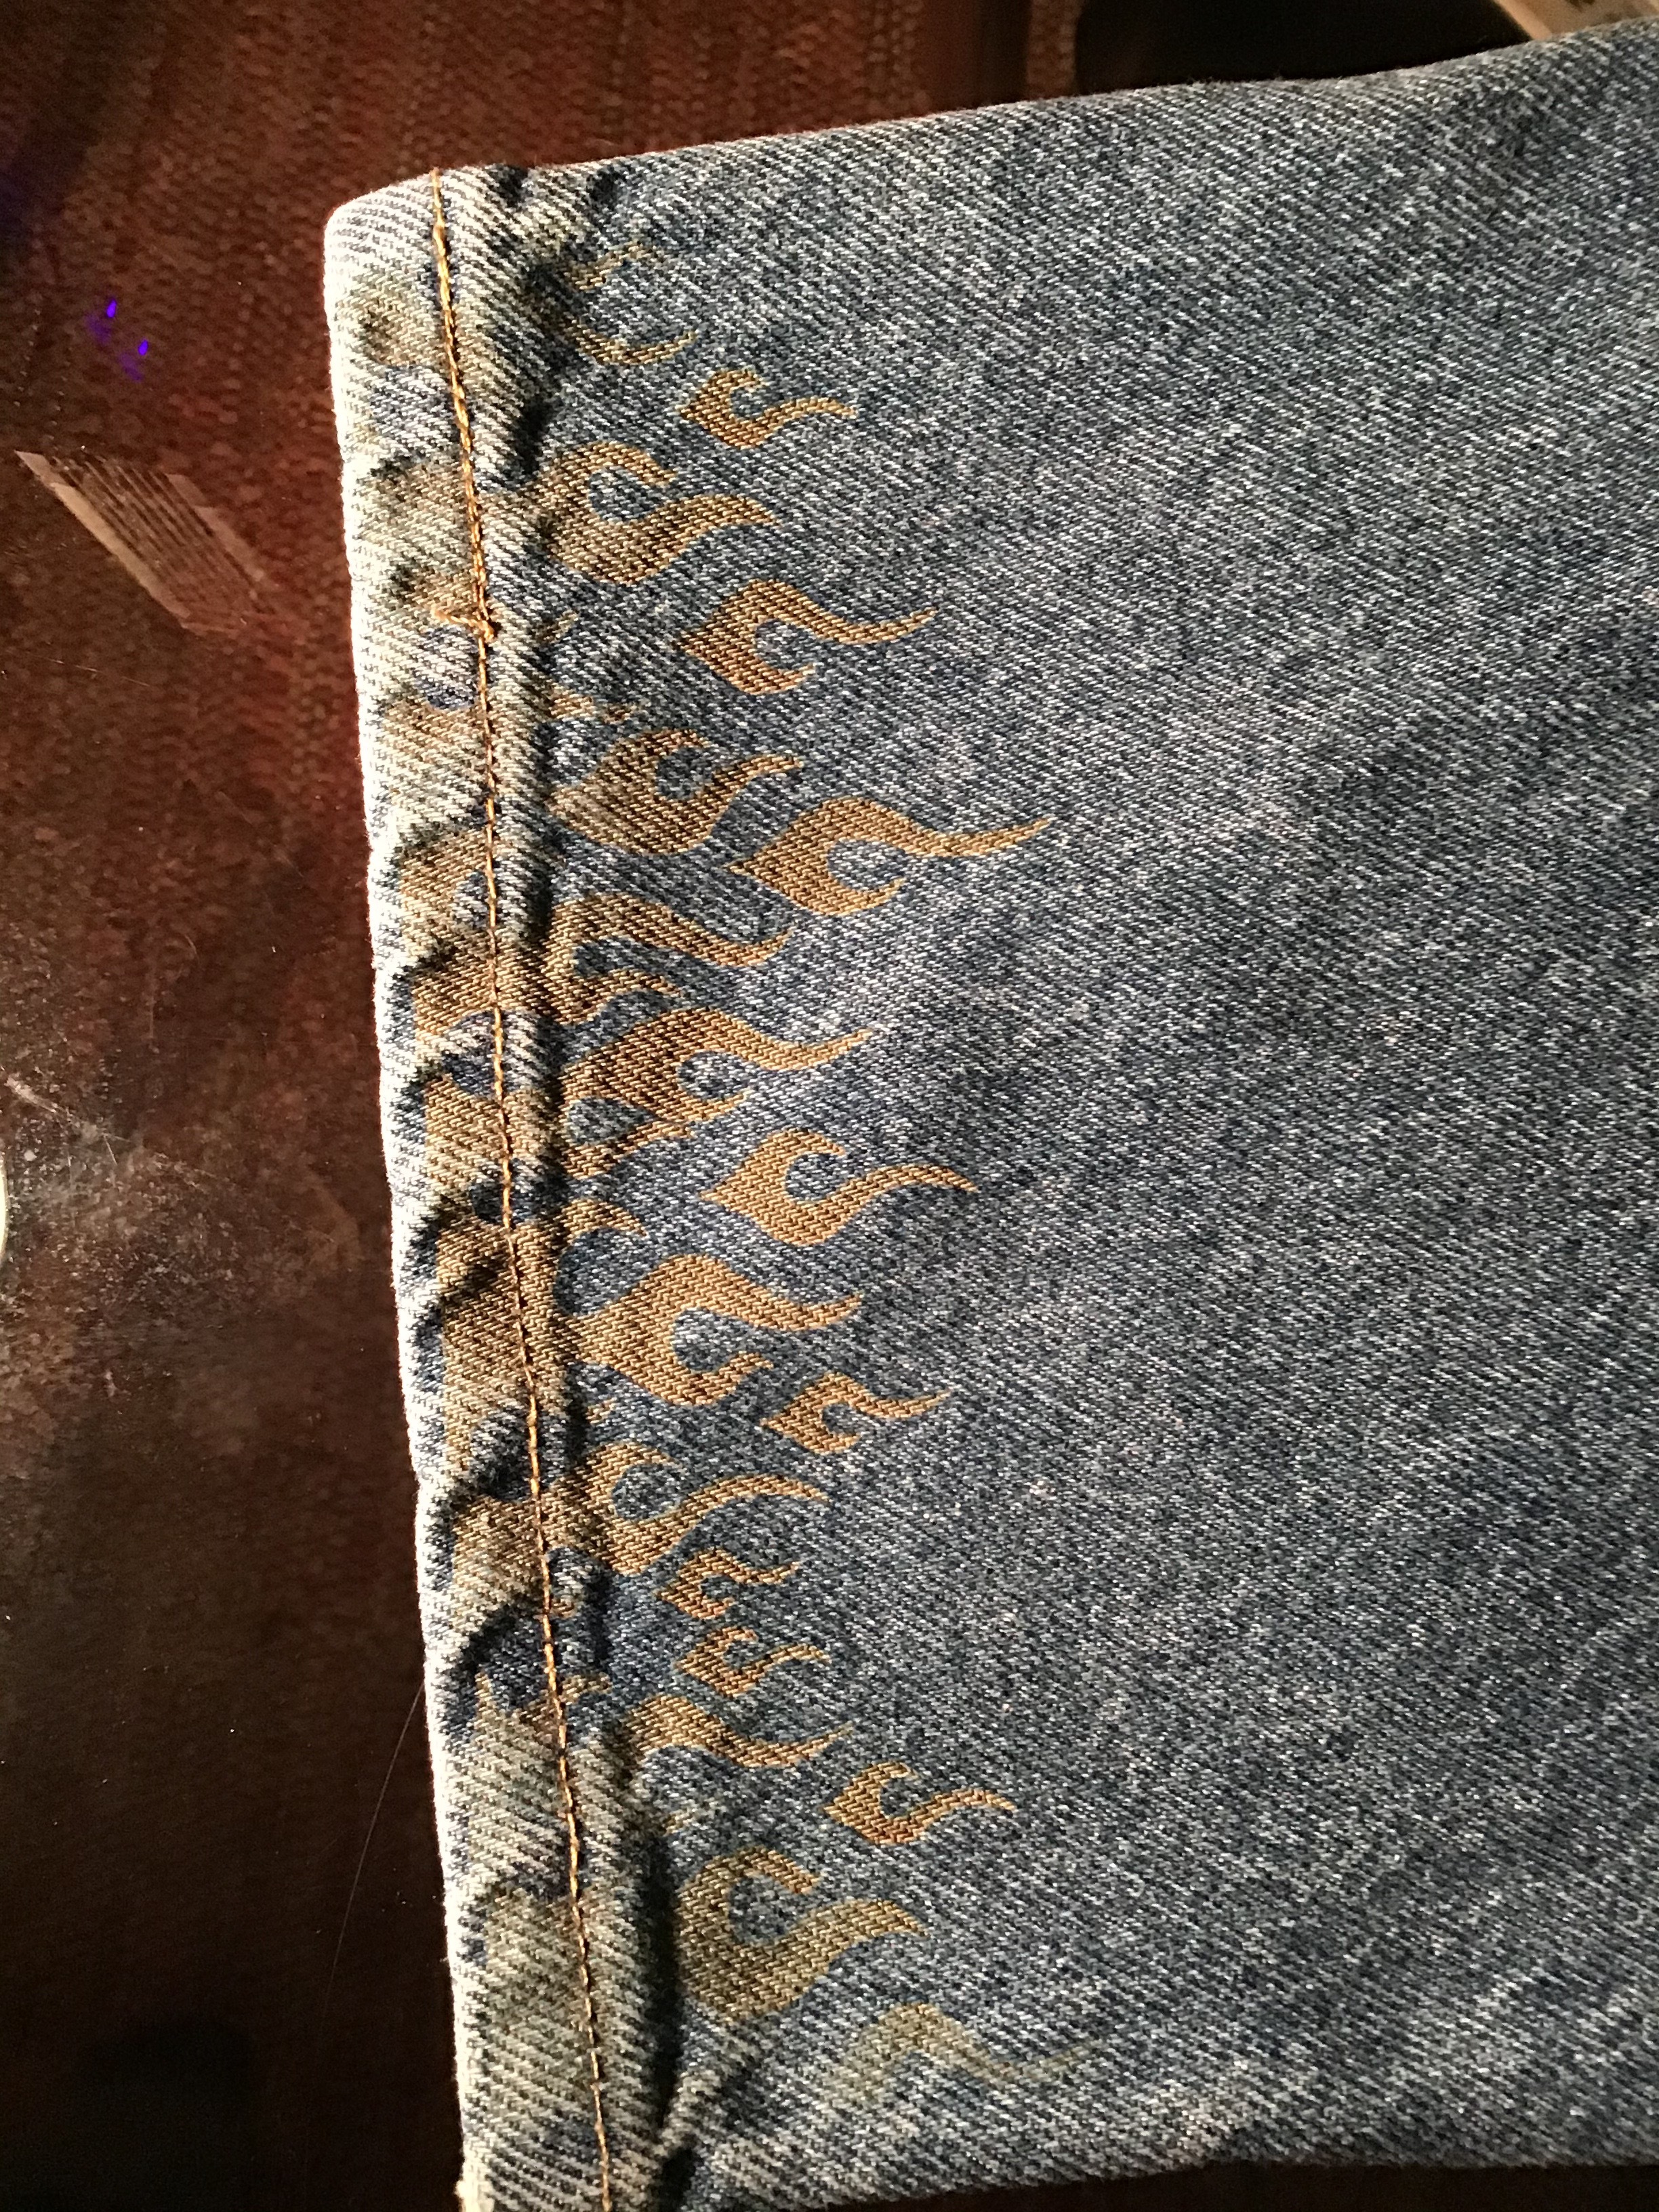
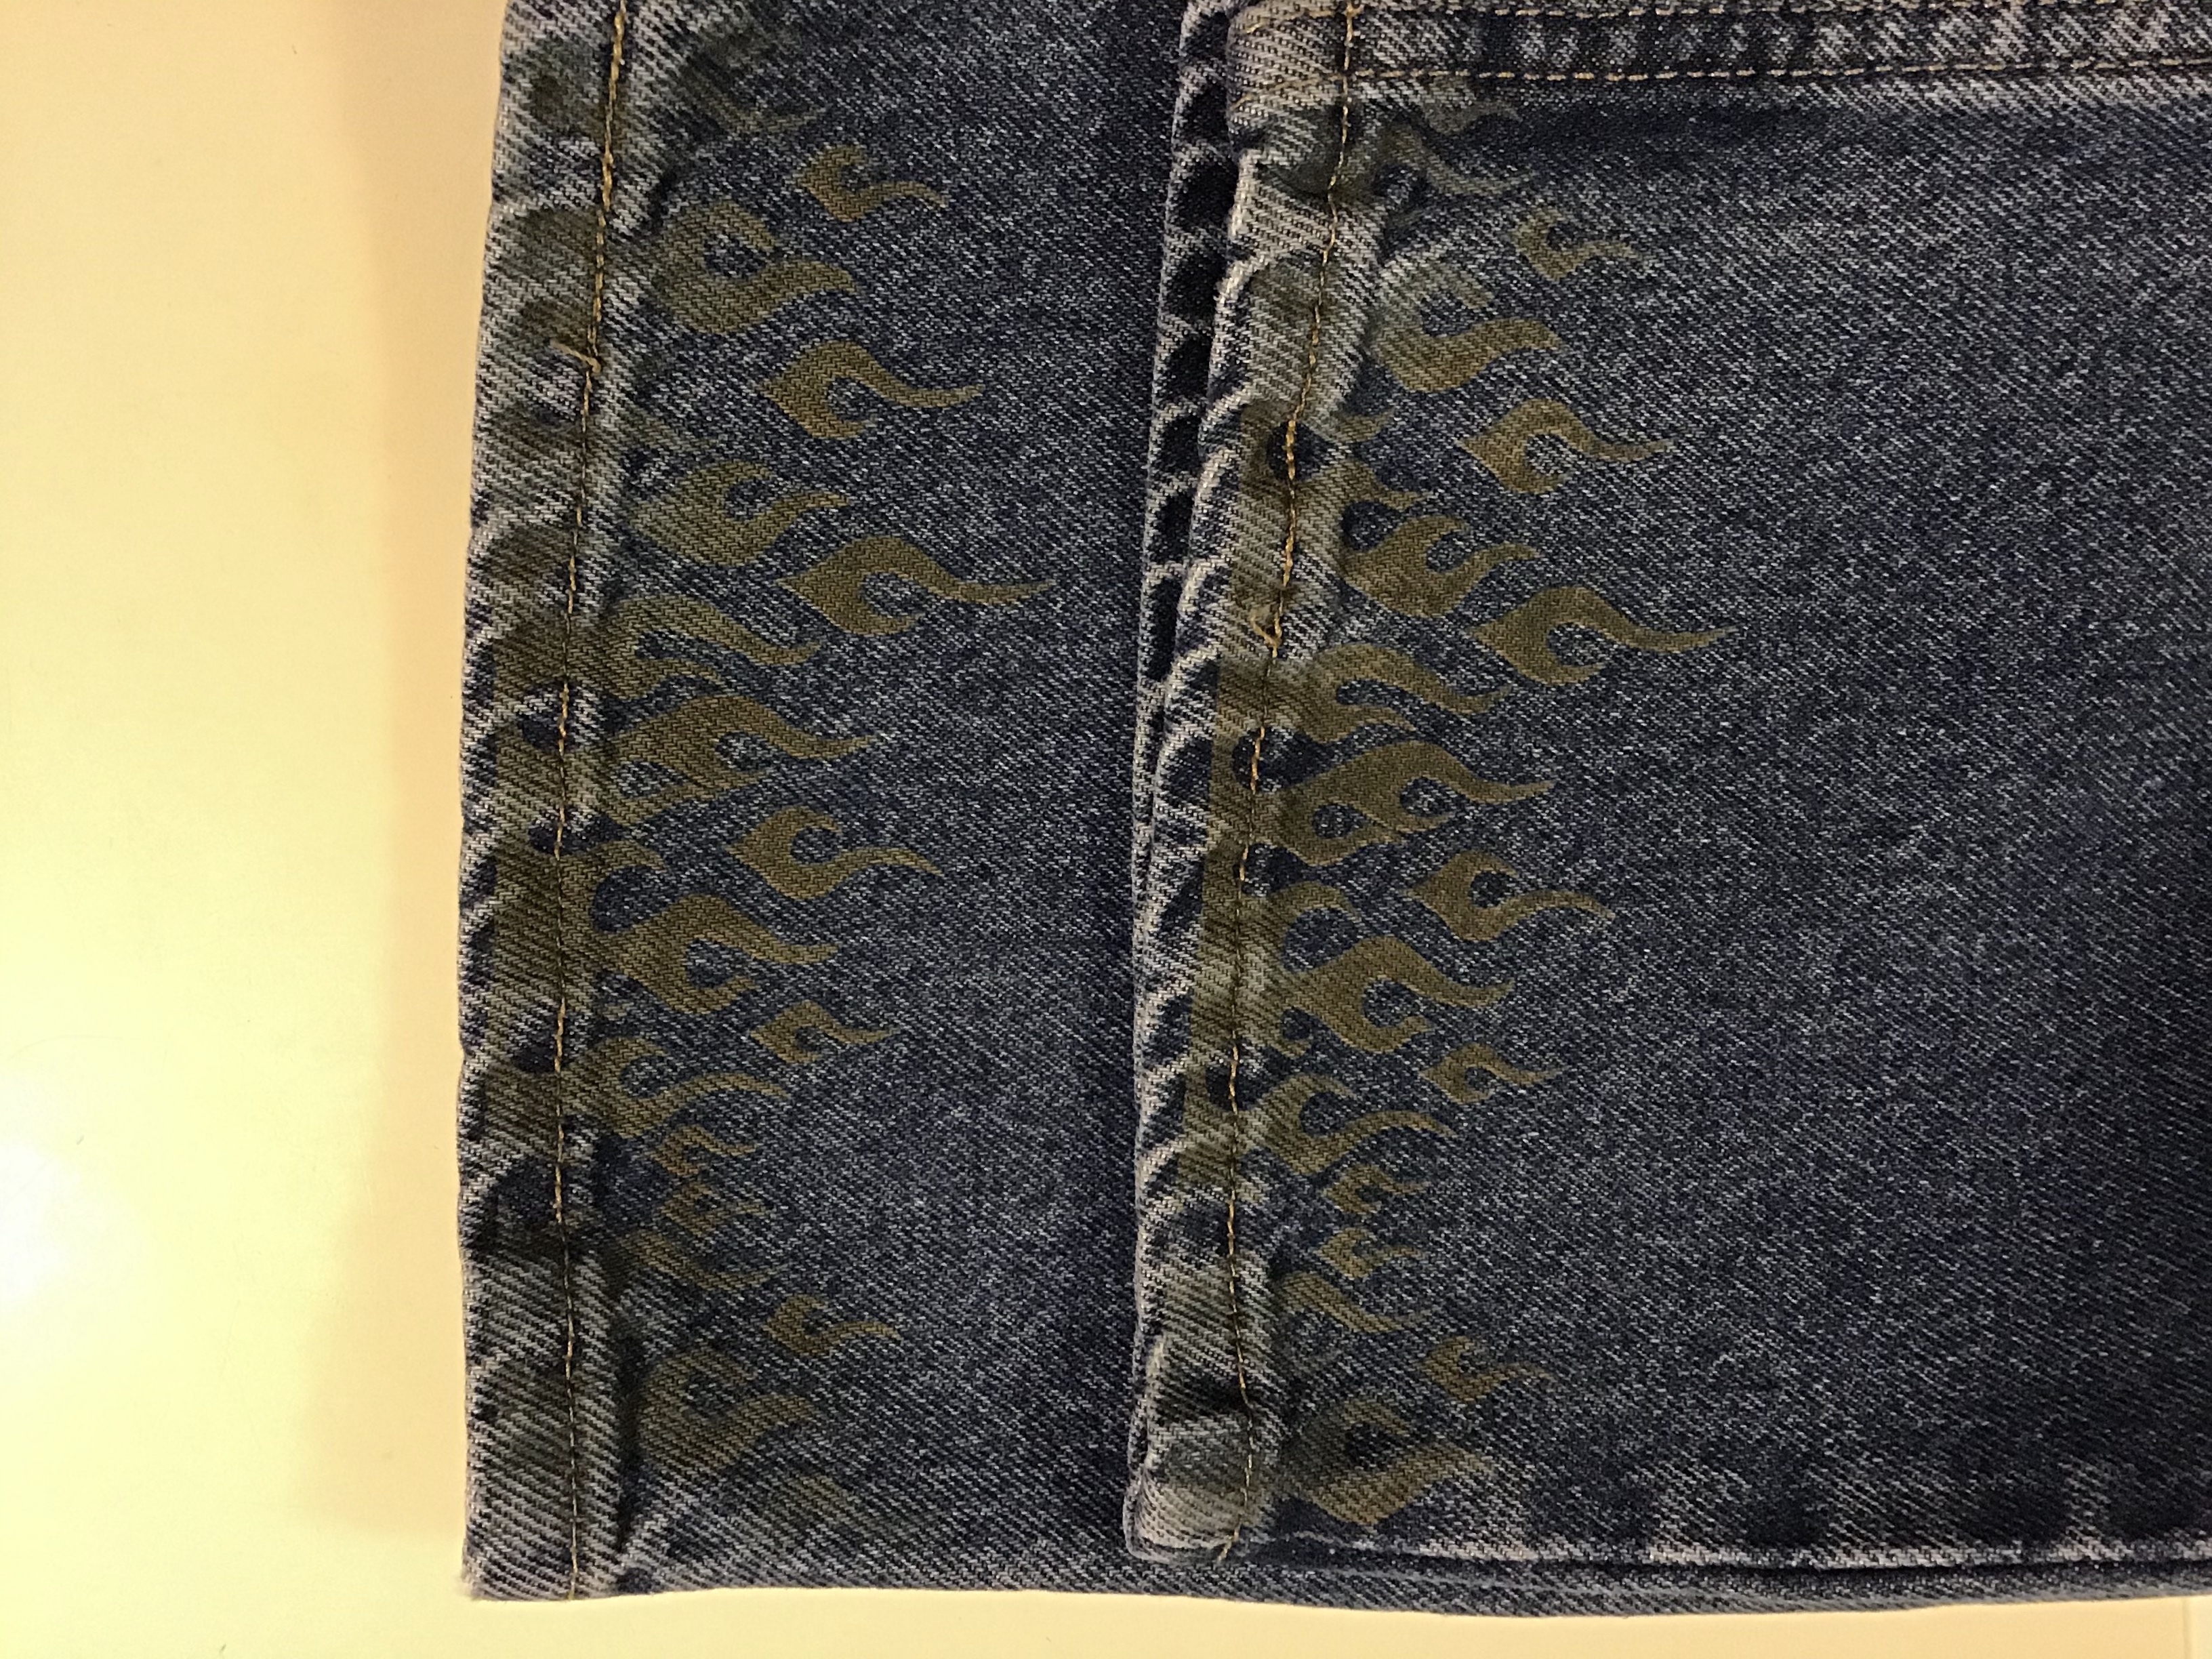
After the etching is completed
Once you have etched your design on your jeans the etching will have a golden color to the design. This is the burned pigment and hopefully not the fabric.
I took the jeans and laundered them as normal.
Washing will remove the gold color leaving the finished color.
Finished Jeans
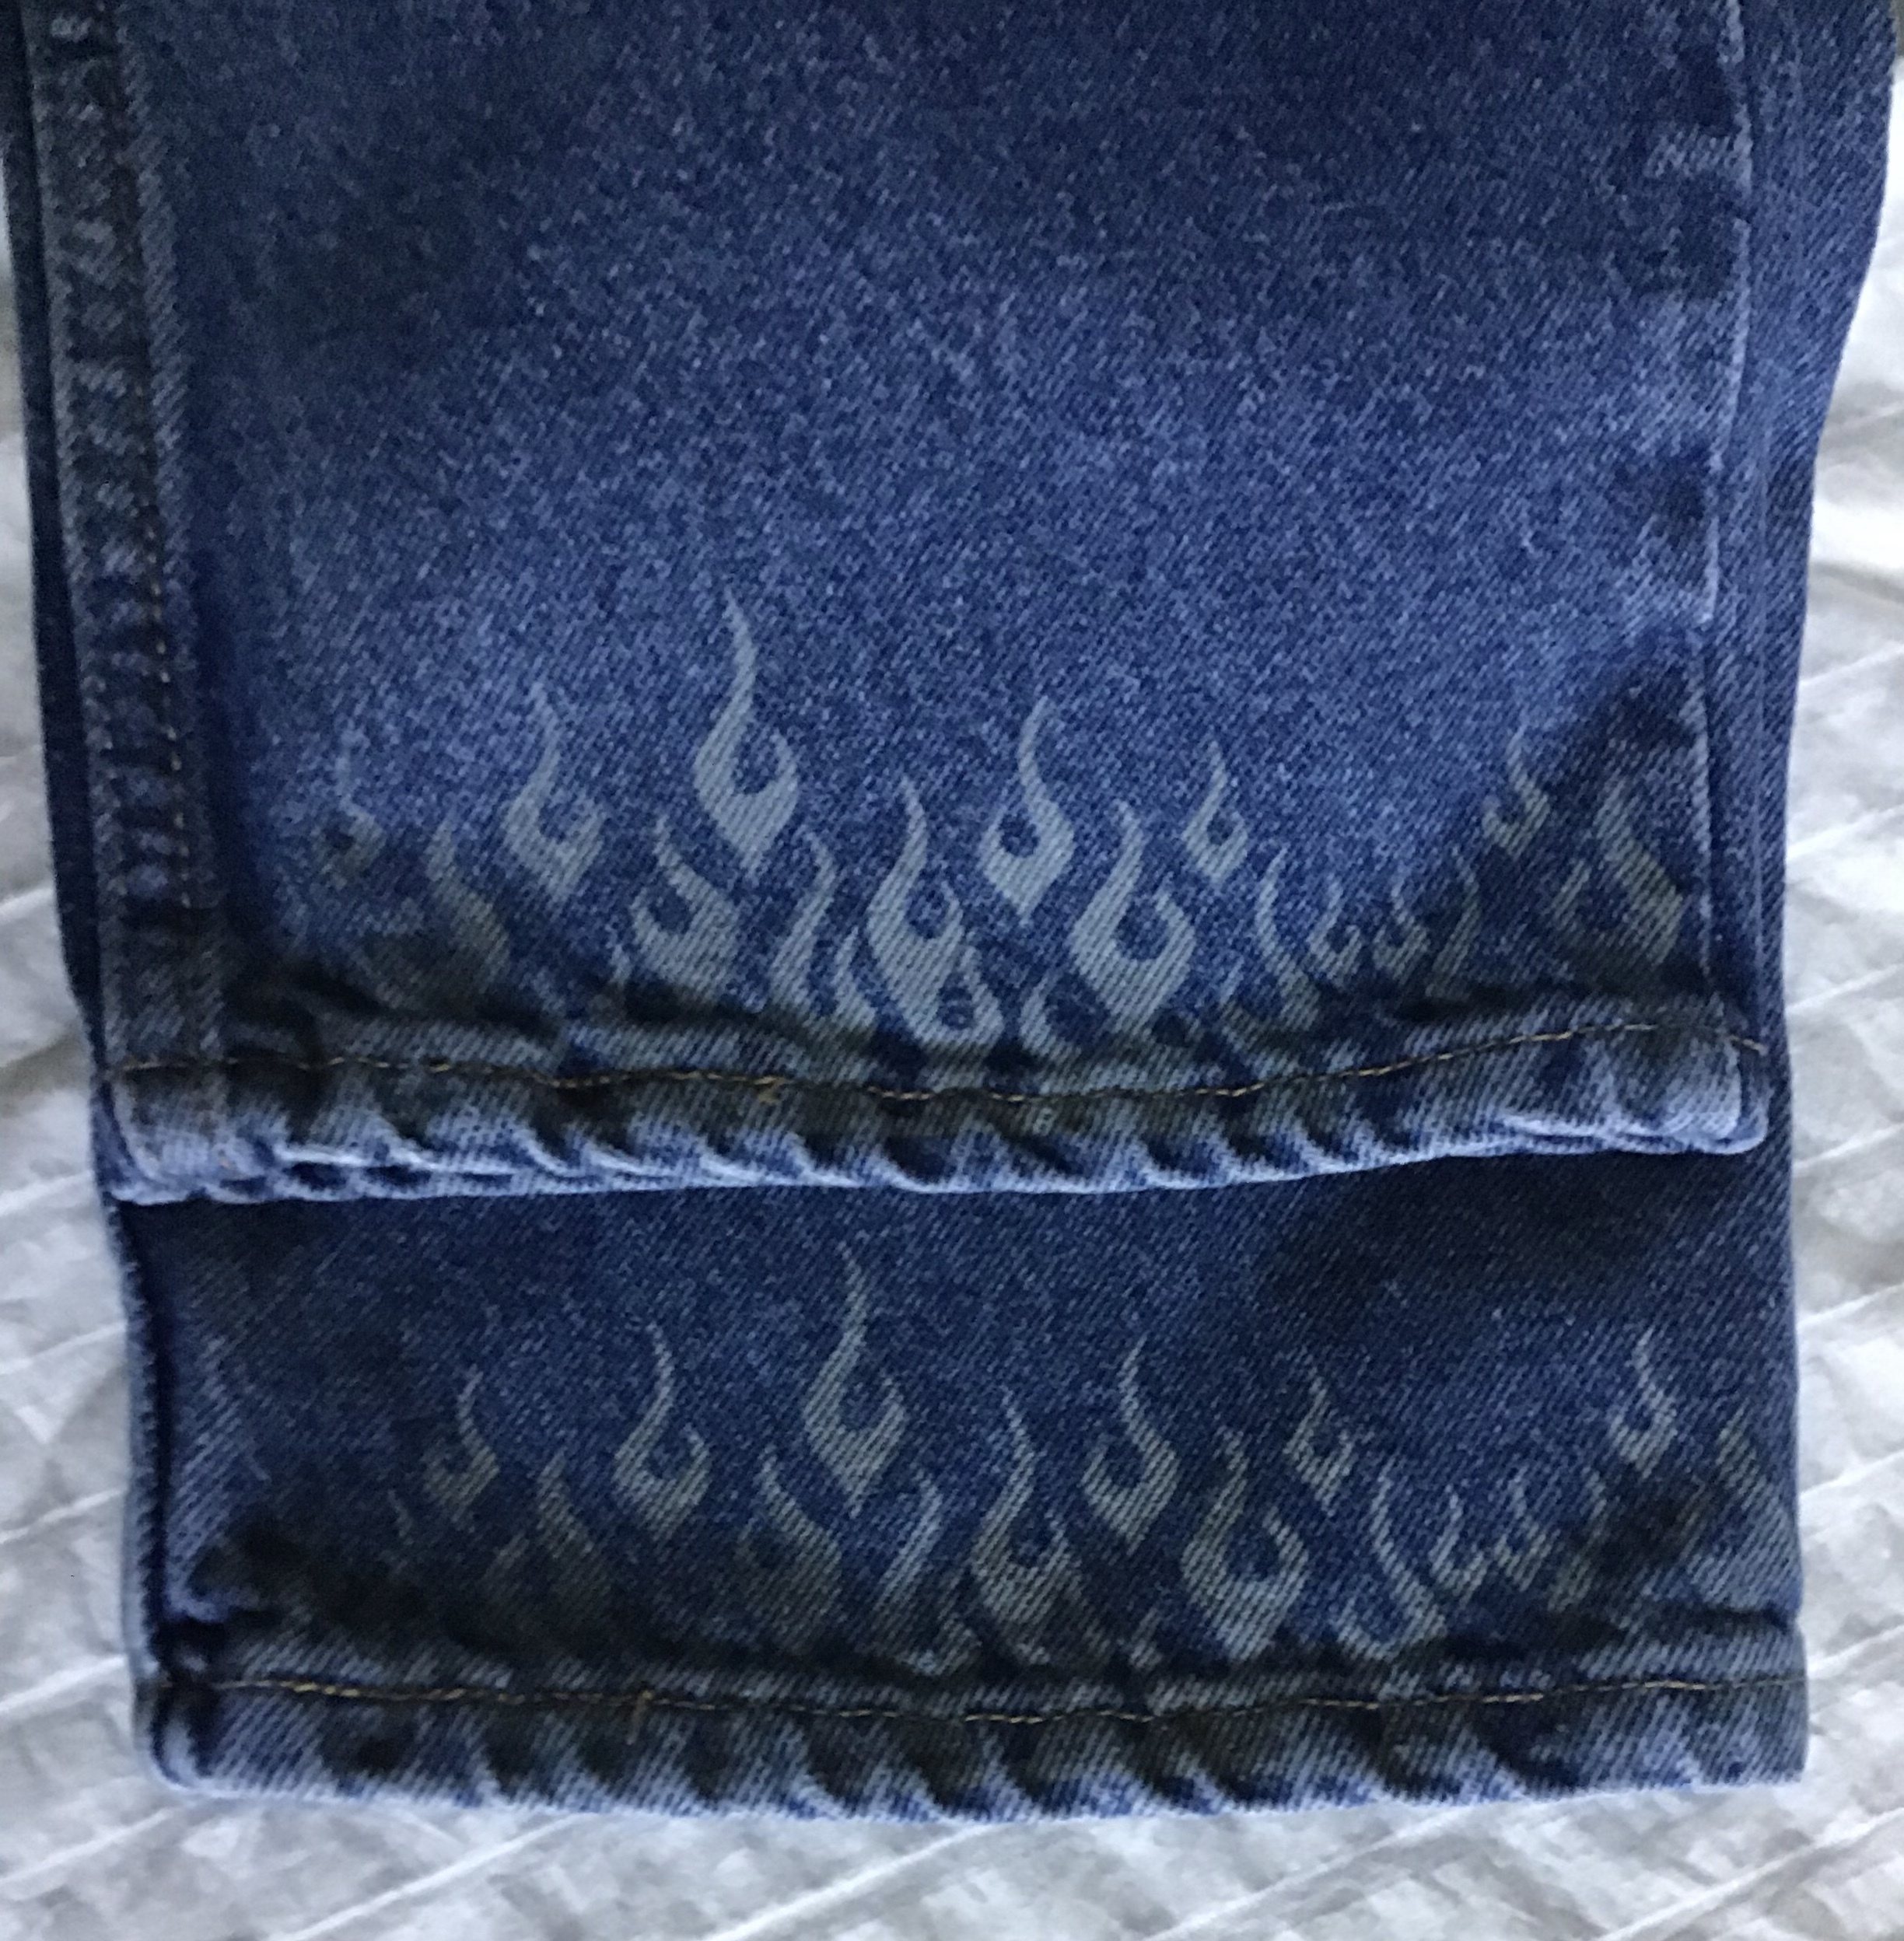
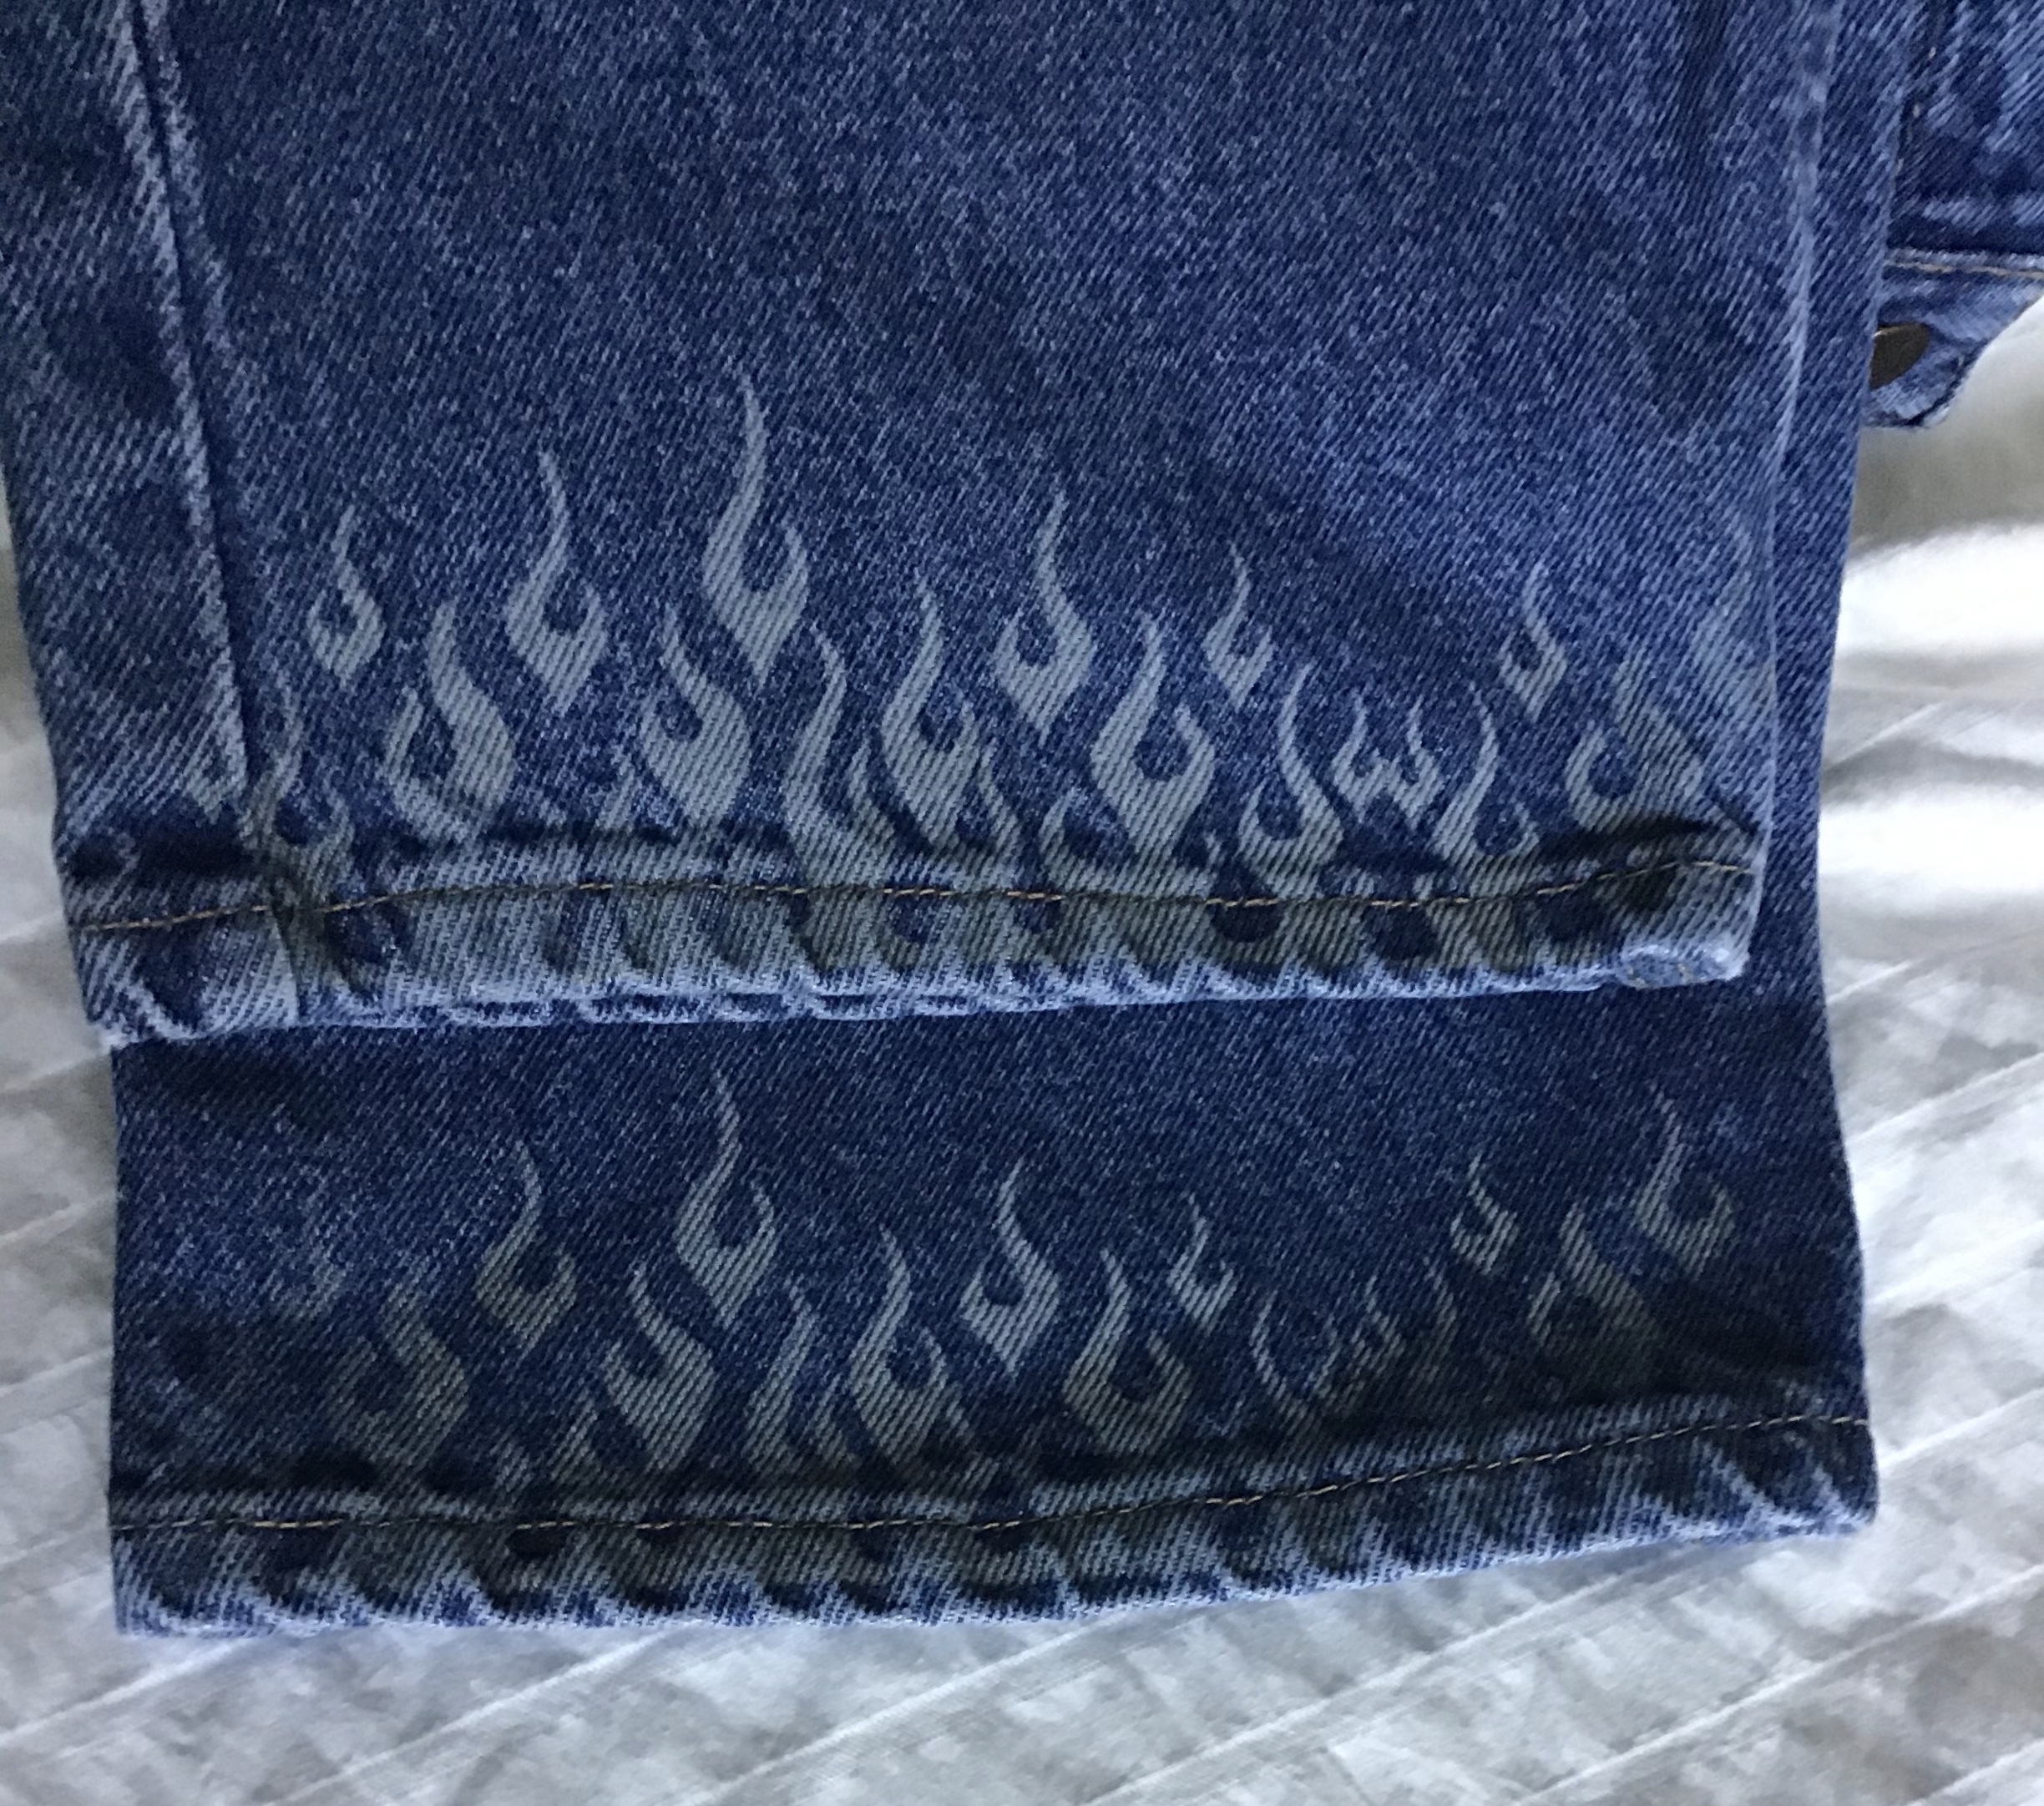
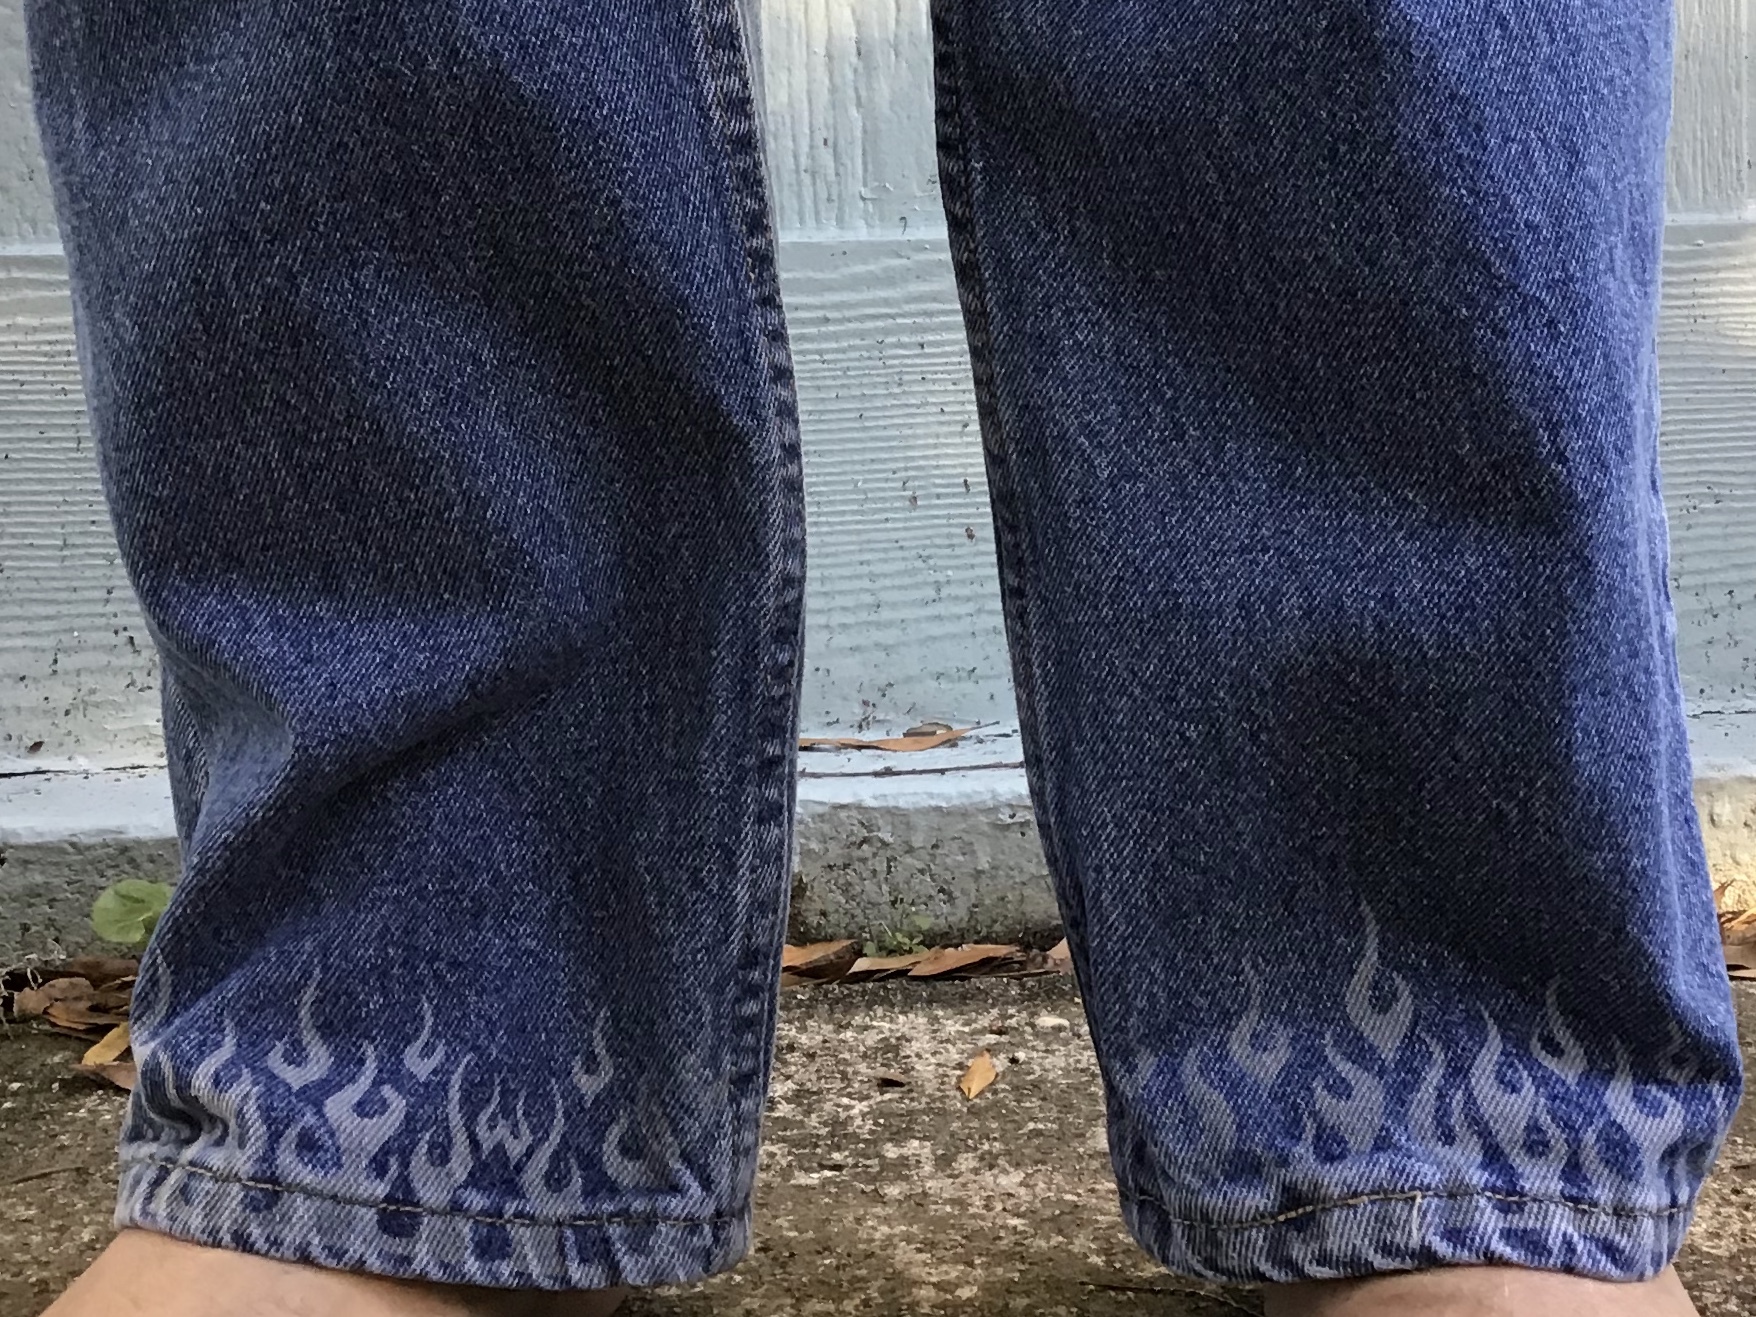
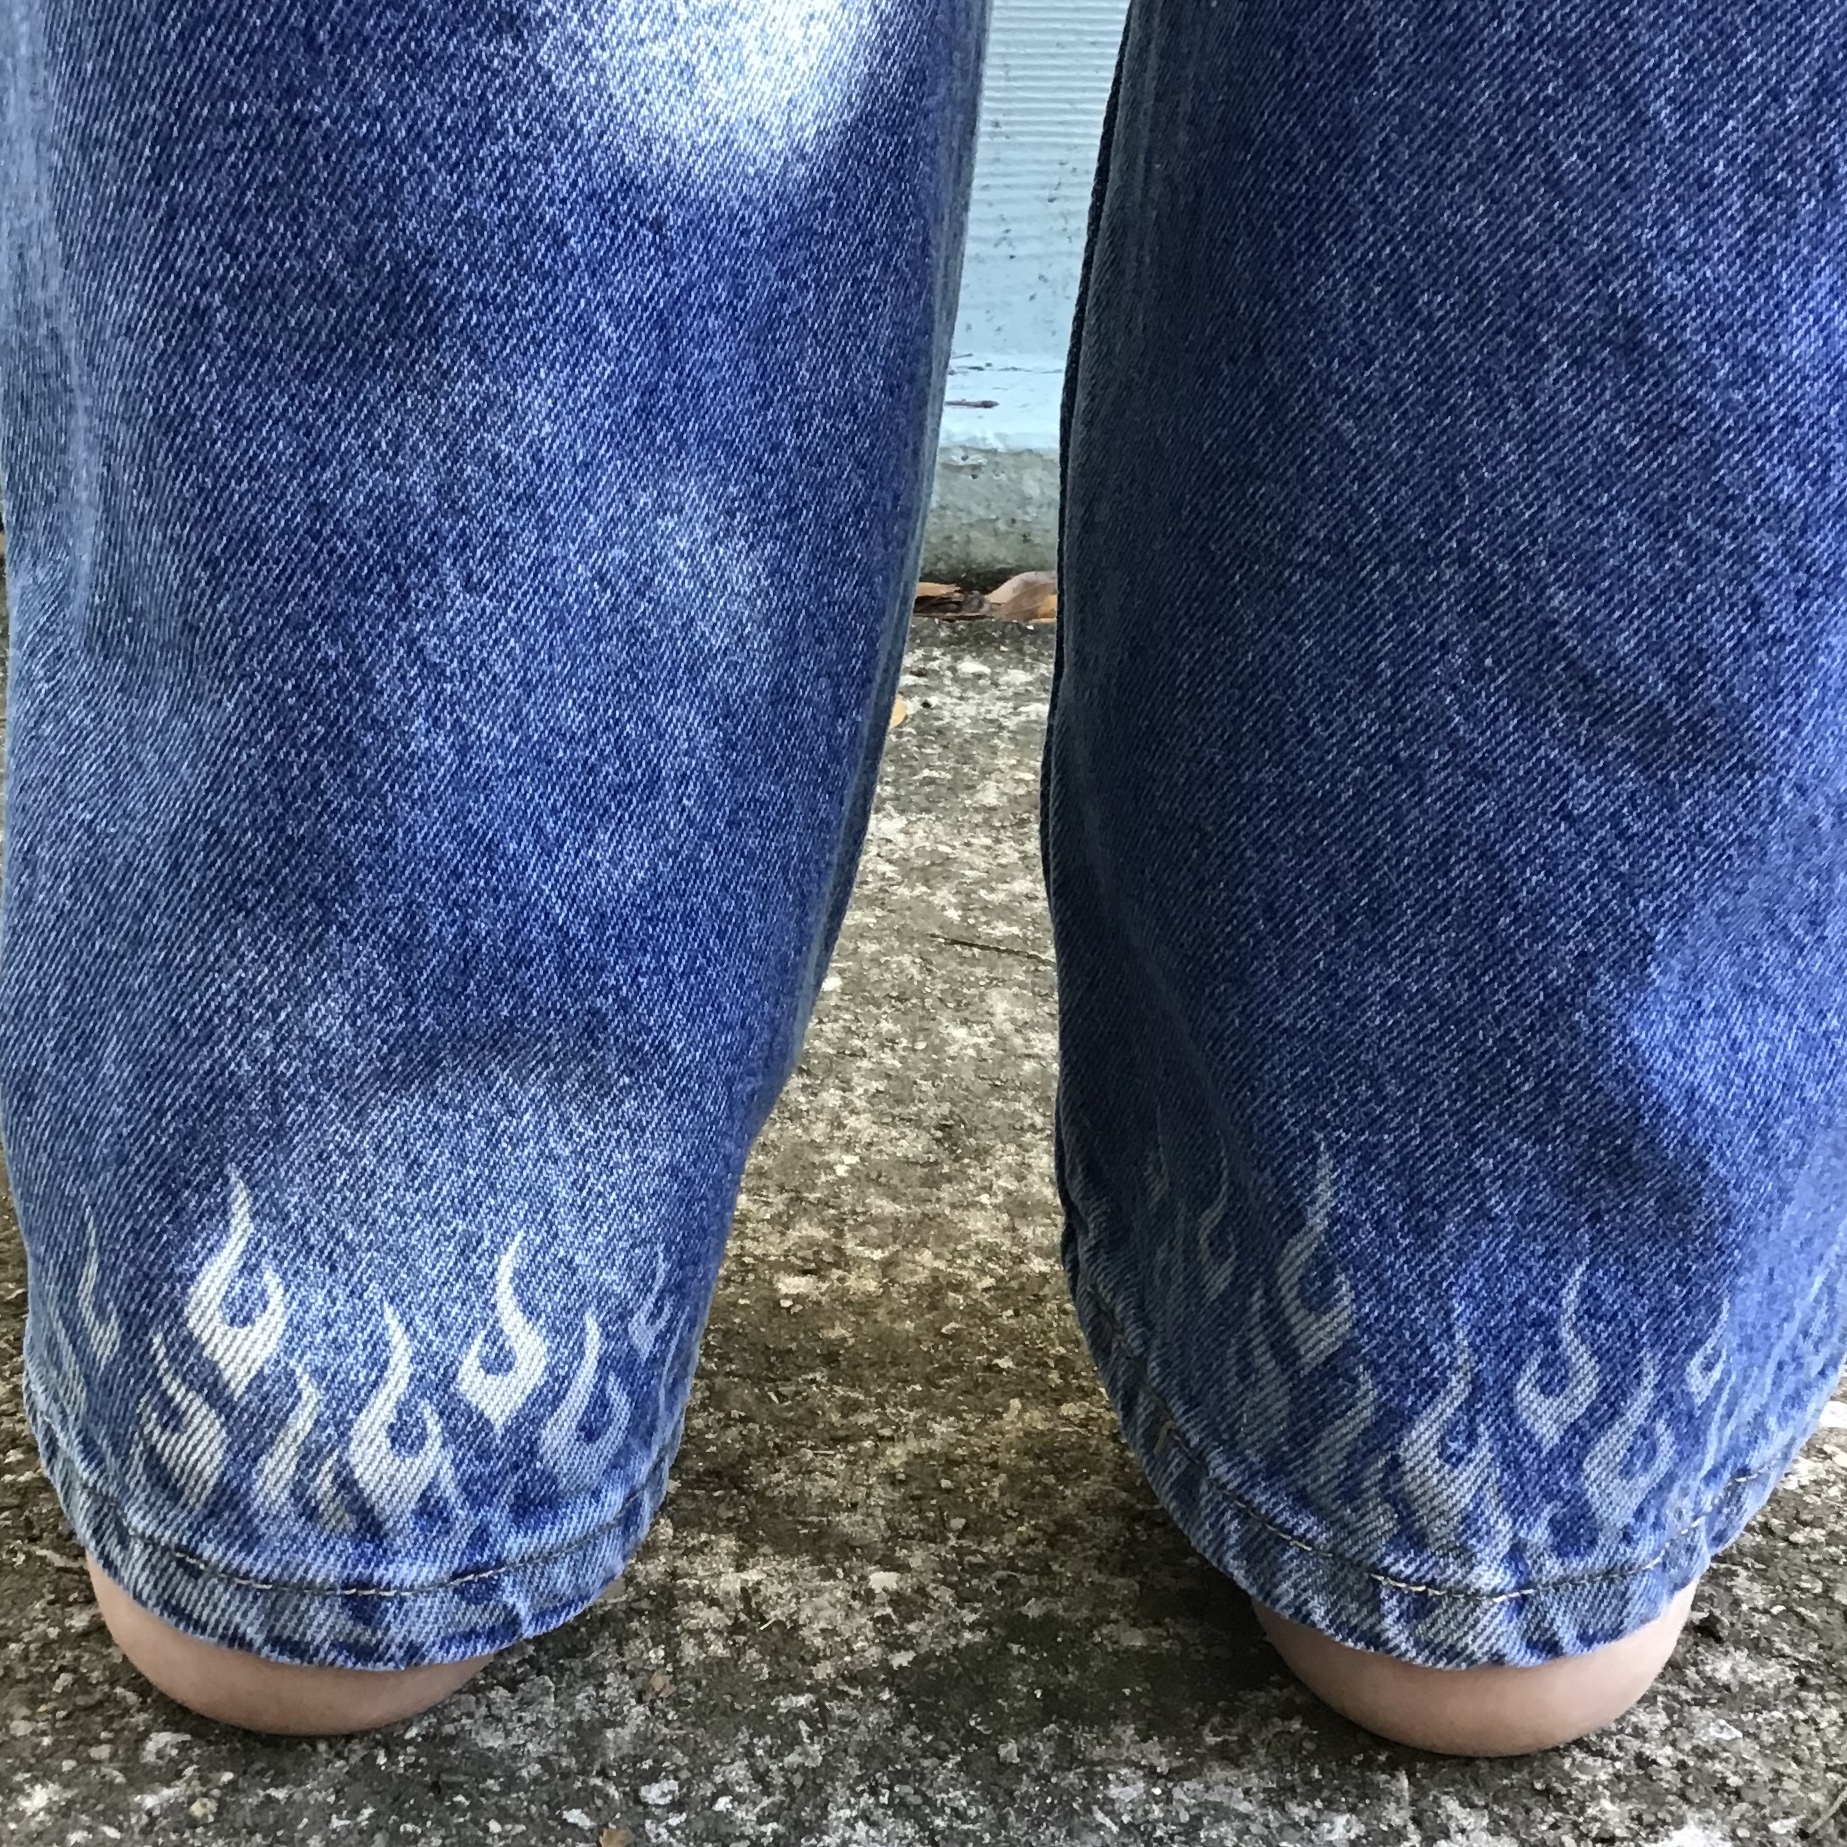
Finished product
After laundering the jeans here is the finished product.
This is a cool way to customize your jeans if you have a laser etcher. The price of these Chinese lasers are getting more and more affordable.
I bought these jeans at the local thrift store for under $5.00 and if you follow my instructable you now can have a priceless, custom piece of couture made by your very own exclusive designer, you!
Thanks for checking this out and PLEASE VOTE FOR ME IN THE FASHION CONTEST.
I am open to all questions and comments if I missed anything.