Laser Etched 16mm Film Animation
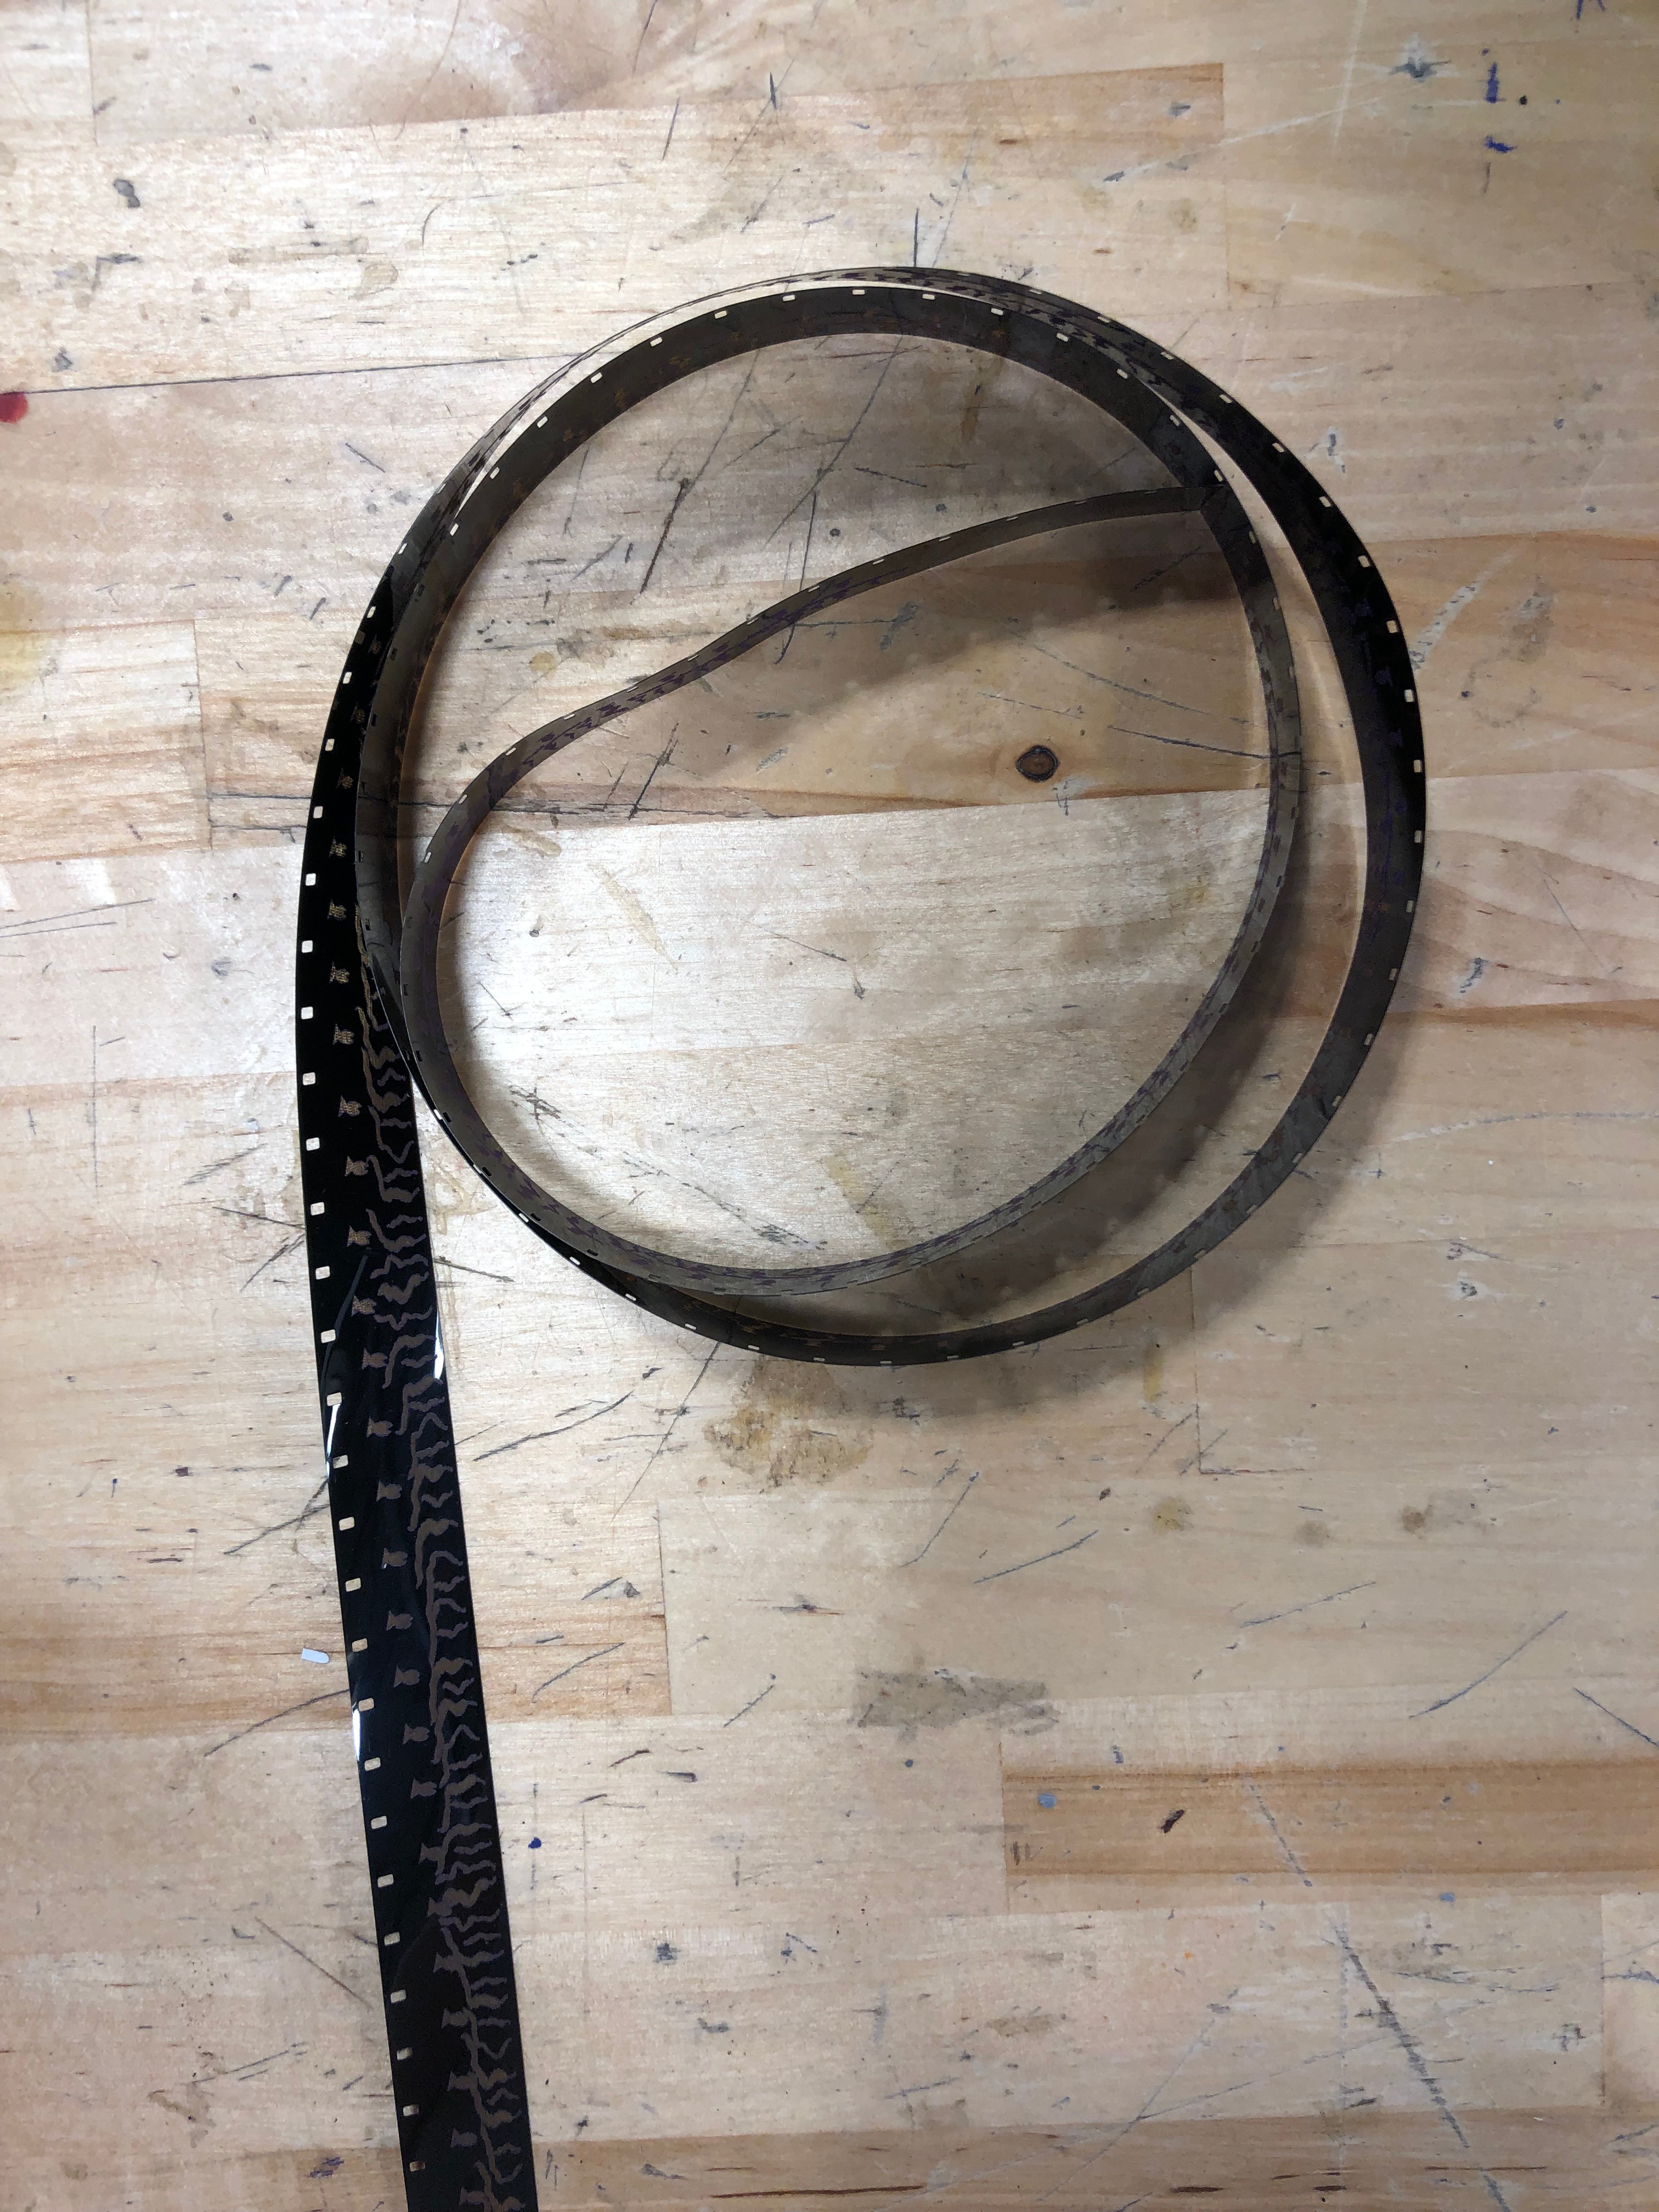
Today we will be using a laser cutter to etch a strip of 16mm film to create a short animation. The animation I have created is of a fish swimming in some seaweed, however you will be able to create your own design if you wish.
Materials:
- Computer with Adobe Illustrator or other design software
- A strip of 16mm film, the strip I am using is approximately 3 ft long but you can use any length
- Access to a laser cutter and appropriate software
- A film projector to view your final animation
- A piece of wood to use as a template during the laser cutting stage
- Tape
Orient Yourself With the Film
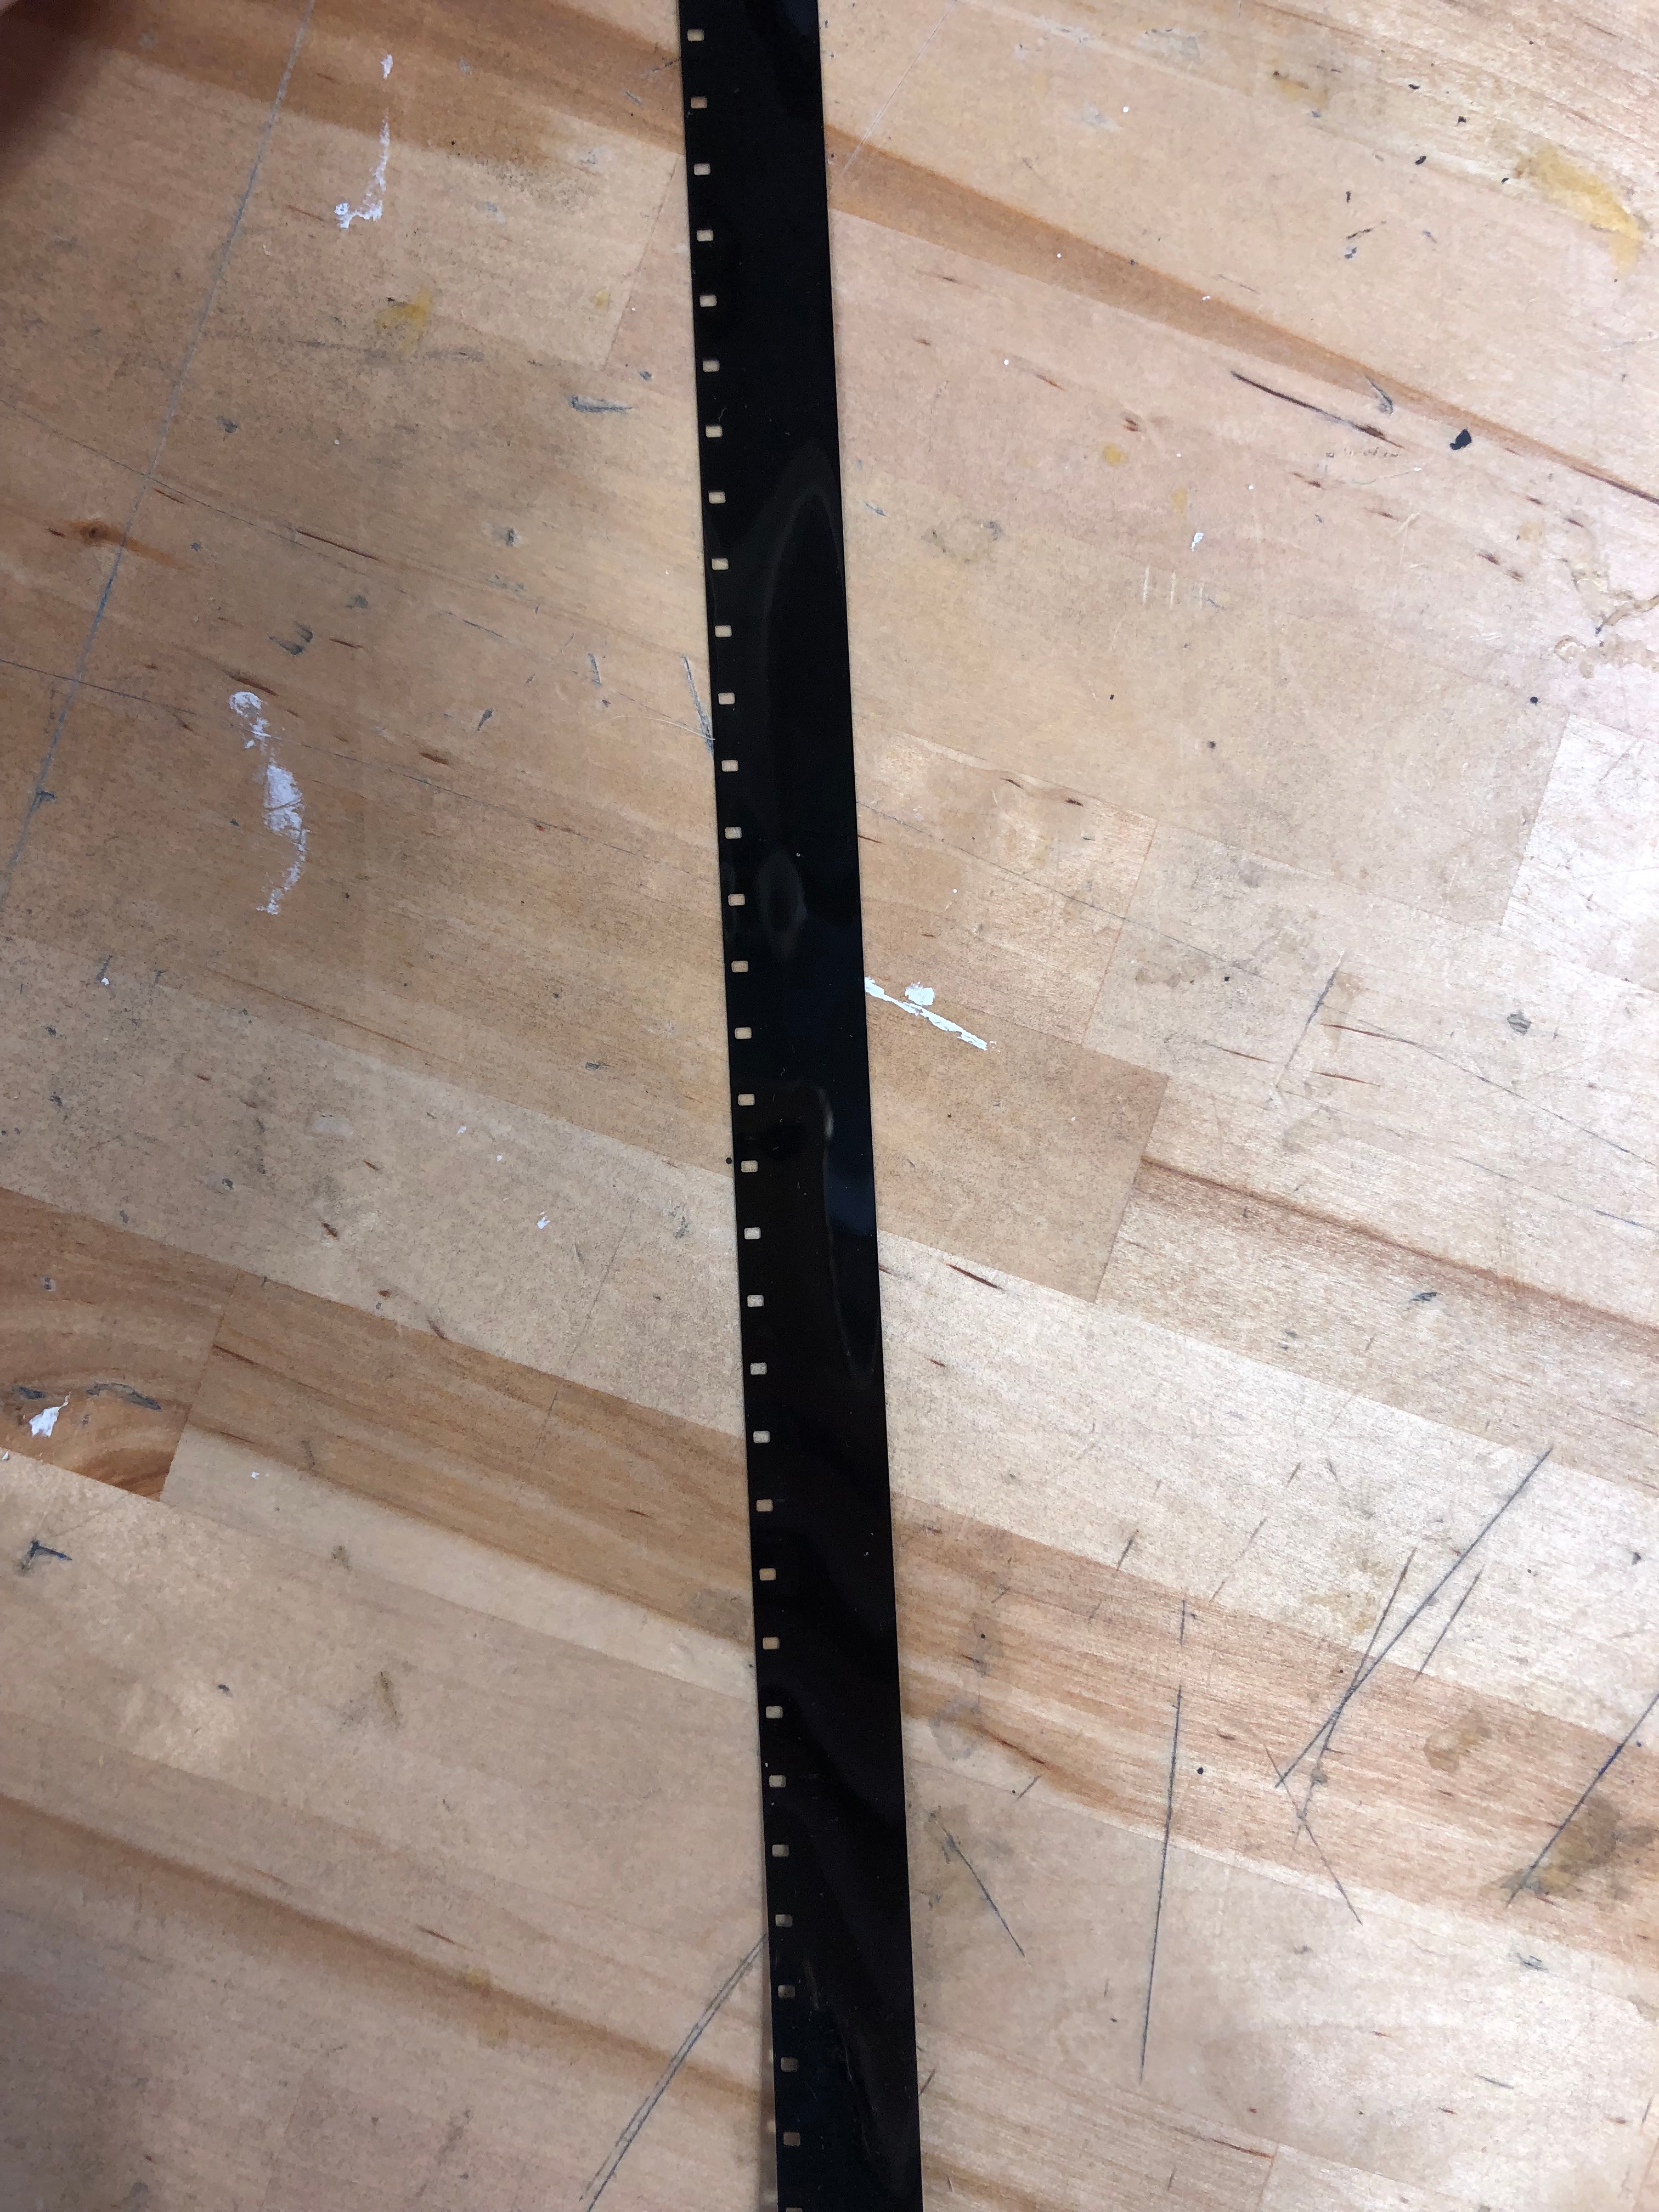
Look at your film. You will notice that one side is shinier, while the other side is slightly duller. The duller side will also be a little sticky. If you're having trouble telling the two sides apart you can gently touch your tongue to the film to determine which is the "sticky" side. The shiny side is your base, while the duller, sticky side is your emulsion side. You will be using the laser cutter to cut the emulsion side.
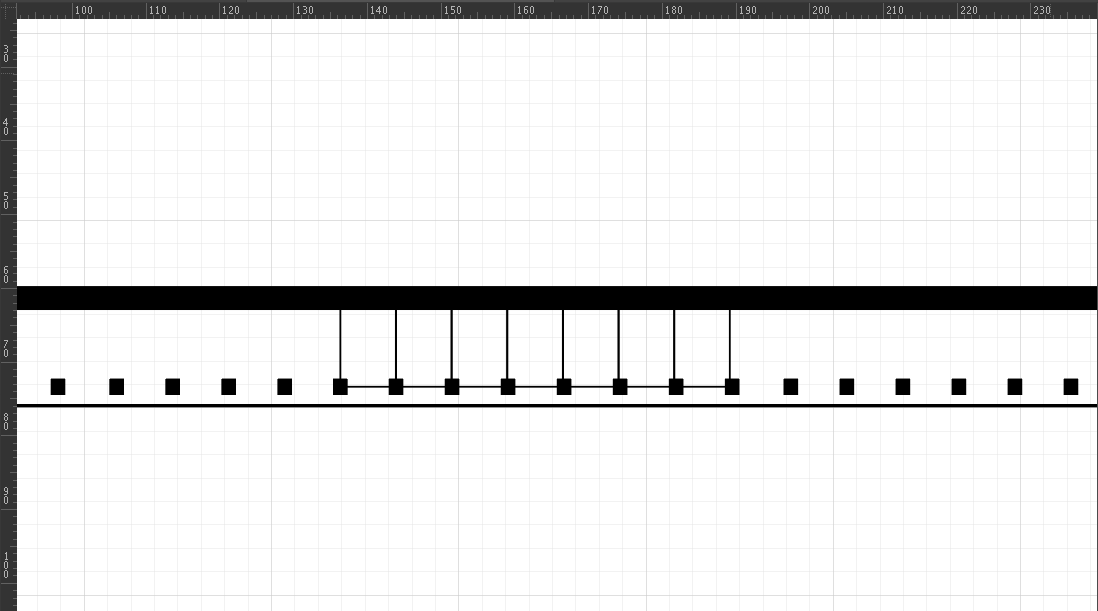
Once you have identified the emulsion side rotate the film so that it is vertical with the holes on the left side (in the photo they are on the bottom). The holes are called sprocket holes. These are where the projector will grip the film to rotate it. Think of them as pegs for a gear to fit into. On the side opposite to the sprocket holes you have the sound strip. This is the right-most strip of the film, the same width as the sprocket holes. This is where sound can be put into the animation, although we won't be going into that today. For our purposes you just need to know that anything etched in that strip (in the photo the solid black bar on the top) will be cut off.
Now identify your "work space" on the film. Each frame is a rectangle that is between the two sprocket holes. In the photo some frames have been marked with thin lines running between the sprocket holes and up to the sound strip. Objects that are within a single frame will show up as discrete images in the animation. Objects that span multiple frames (in other words, cross over the "lines" of the frame) will also show up, but may be distorted or more abstract.
Work from the top most frame down (or left most frame across if you are oriented horizontally like in the picture). The top frame will be your first frame.
Note that most projectors will project at 24 frames per second. This means that if you want an object to appear for one whole second, it must appear in 24 consecutive frames. It is also good to note that the aspect ratio is 4:3. For those unfamiliar with film, this just means the projected image will be square.
Create Your Concept and Design
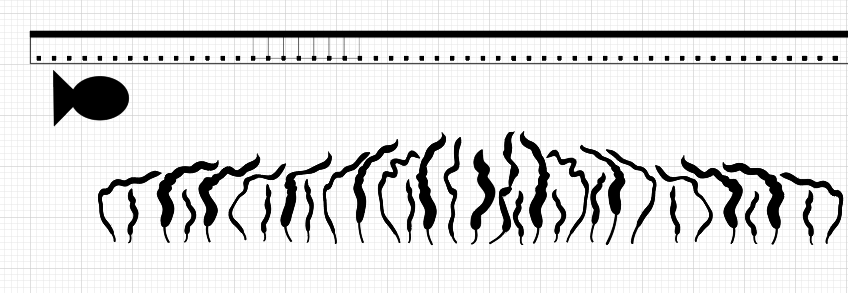
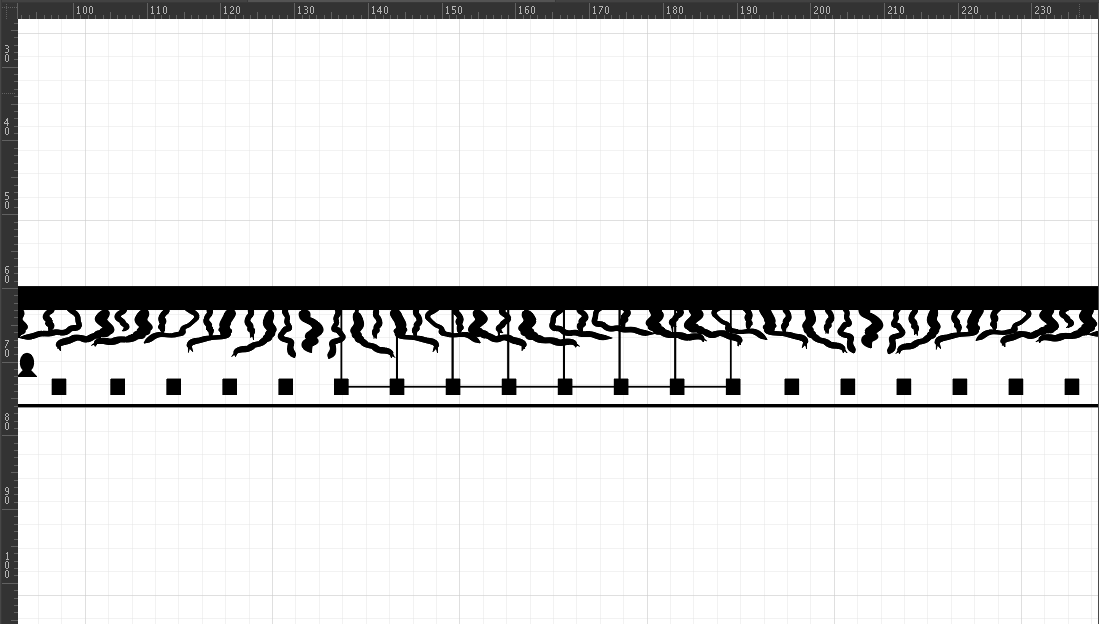
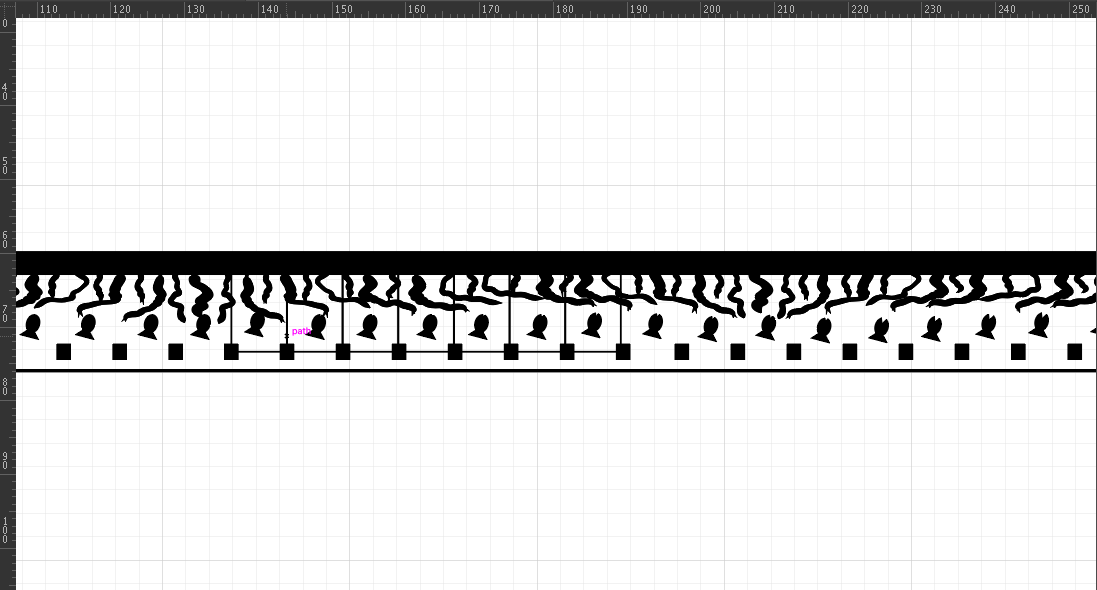
Start by opening a new file in Adobe Illustrator (you can use other design software however I will be speaking specifically about Adobe in this tutorial since that is what I use and am most familiar with). Either create your own film template or use the one I have provided.
A few notes about your animation and design:
- I find it easiest to create my designs outside of the film template and then resize and move them once I am done, however feel free to design directly on the template.
- Images that are simple in form are clearest when projected. Because the laser cutter does not etch at a very high resolution, anything etched will look "pixelated", so small details do not show up well. Think about simple shapes that can be moved or manipulated. In my case, that is the fish.
- Again, remember that shapes within one frame will show up as discrete objects. Shapes that span multiple frames will be animated in a different way. It's hard to tell what they will do before seeing the film projected, but this opens up a lot of room for more abstract animations
- There are 24 frames per second, so think about how fast you want your animation to move. If you want movement to be slower, you want to have more frames per "movement". In other words, if you want a character to move across the frame very fast, you would have fewer frames of that movement than if you want it to move slowly.
- On the same vein, if you want text to show up and be legible you want the text to be identical in several frames in order for it to appear long enough to be read
- Objects that only appear in one or a few frames will move too quickly to be registered by the human eye
- It is easiest to create a simple shape that you can manipulate using tools such as transform, rotate, or scale
As you can see I have created two basic shapes: the fish, and the seaweed. You can either create your own objects or use objects created by others by searching for "[object] ai file" (or whatever file format you are working with).
Once you have your basic shapes, duplicate and manipulate the duplicates to start to create the animation. I manipulated the location and angle (rotation) of the fish, and later in the animation gave it a mouth that opens and closes. I also changed the seaweed's angle, shape, and size. Note that in my animation the fish will be a shape within each frame, while the seaweed will span the length of the film. I am intentionally creating an animation that has discrete shapes (the fish) and more abstract movement (the seaweed).
Once you have your objects, resize and move them onto the template. Be aware of where your objects are in relation to the frames.
Downloads
Get Ready to Laser Cut
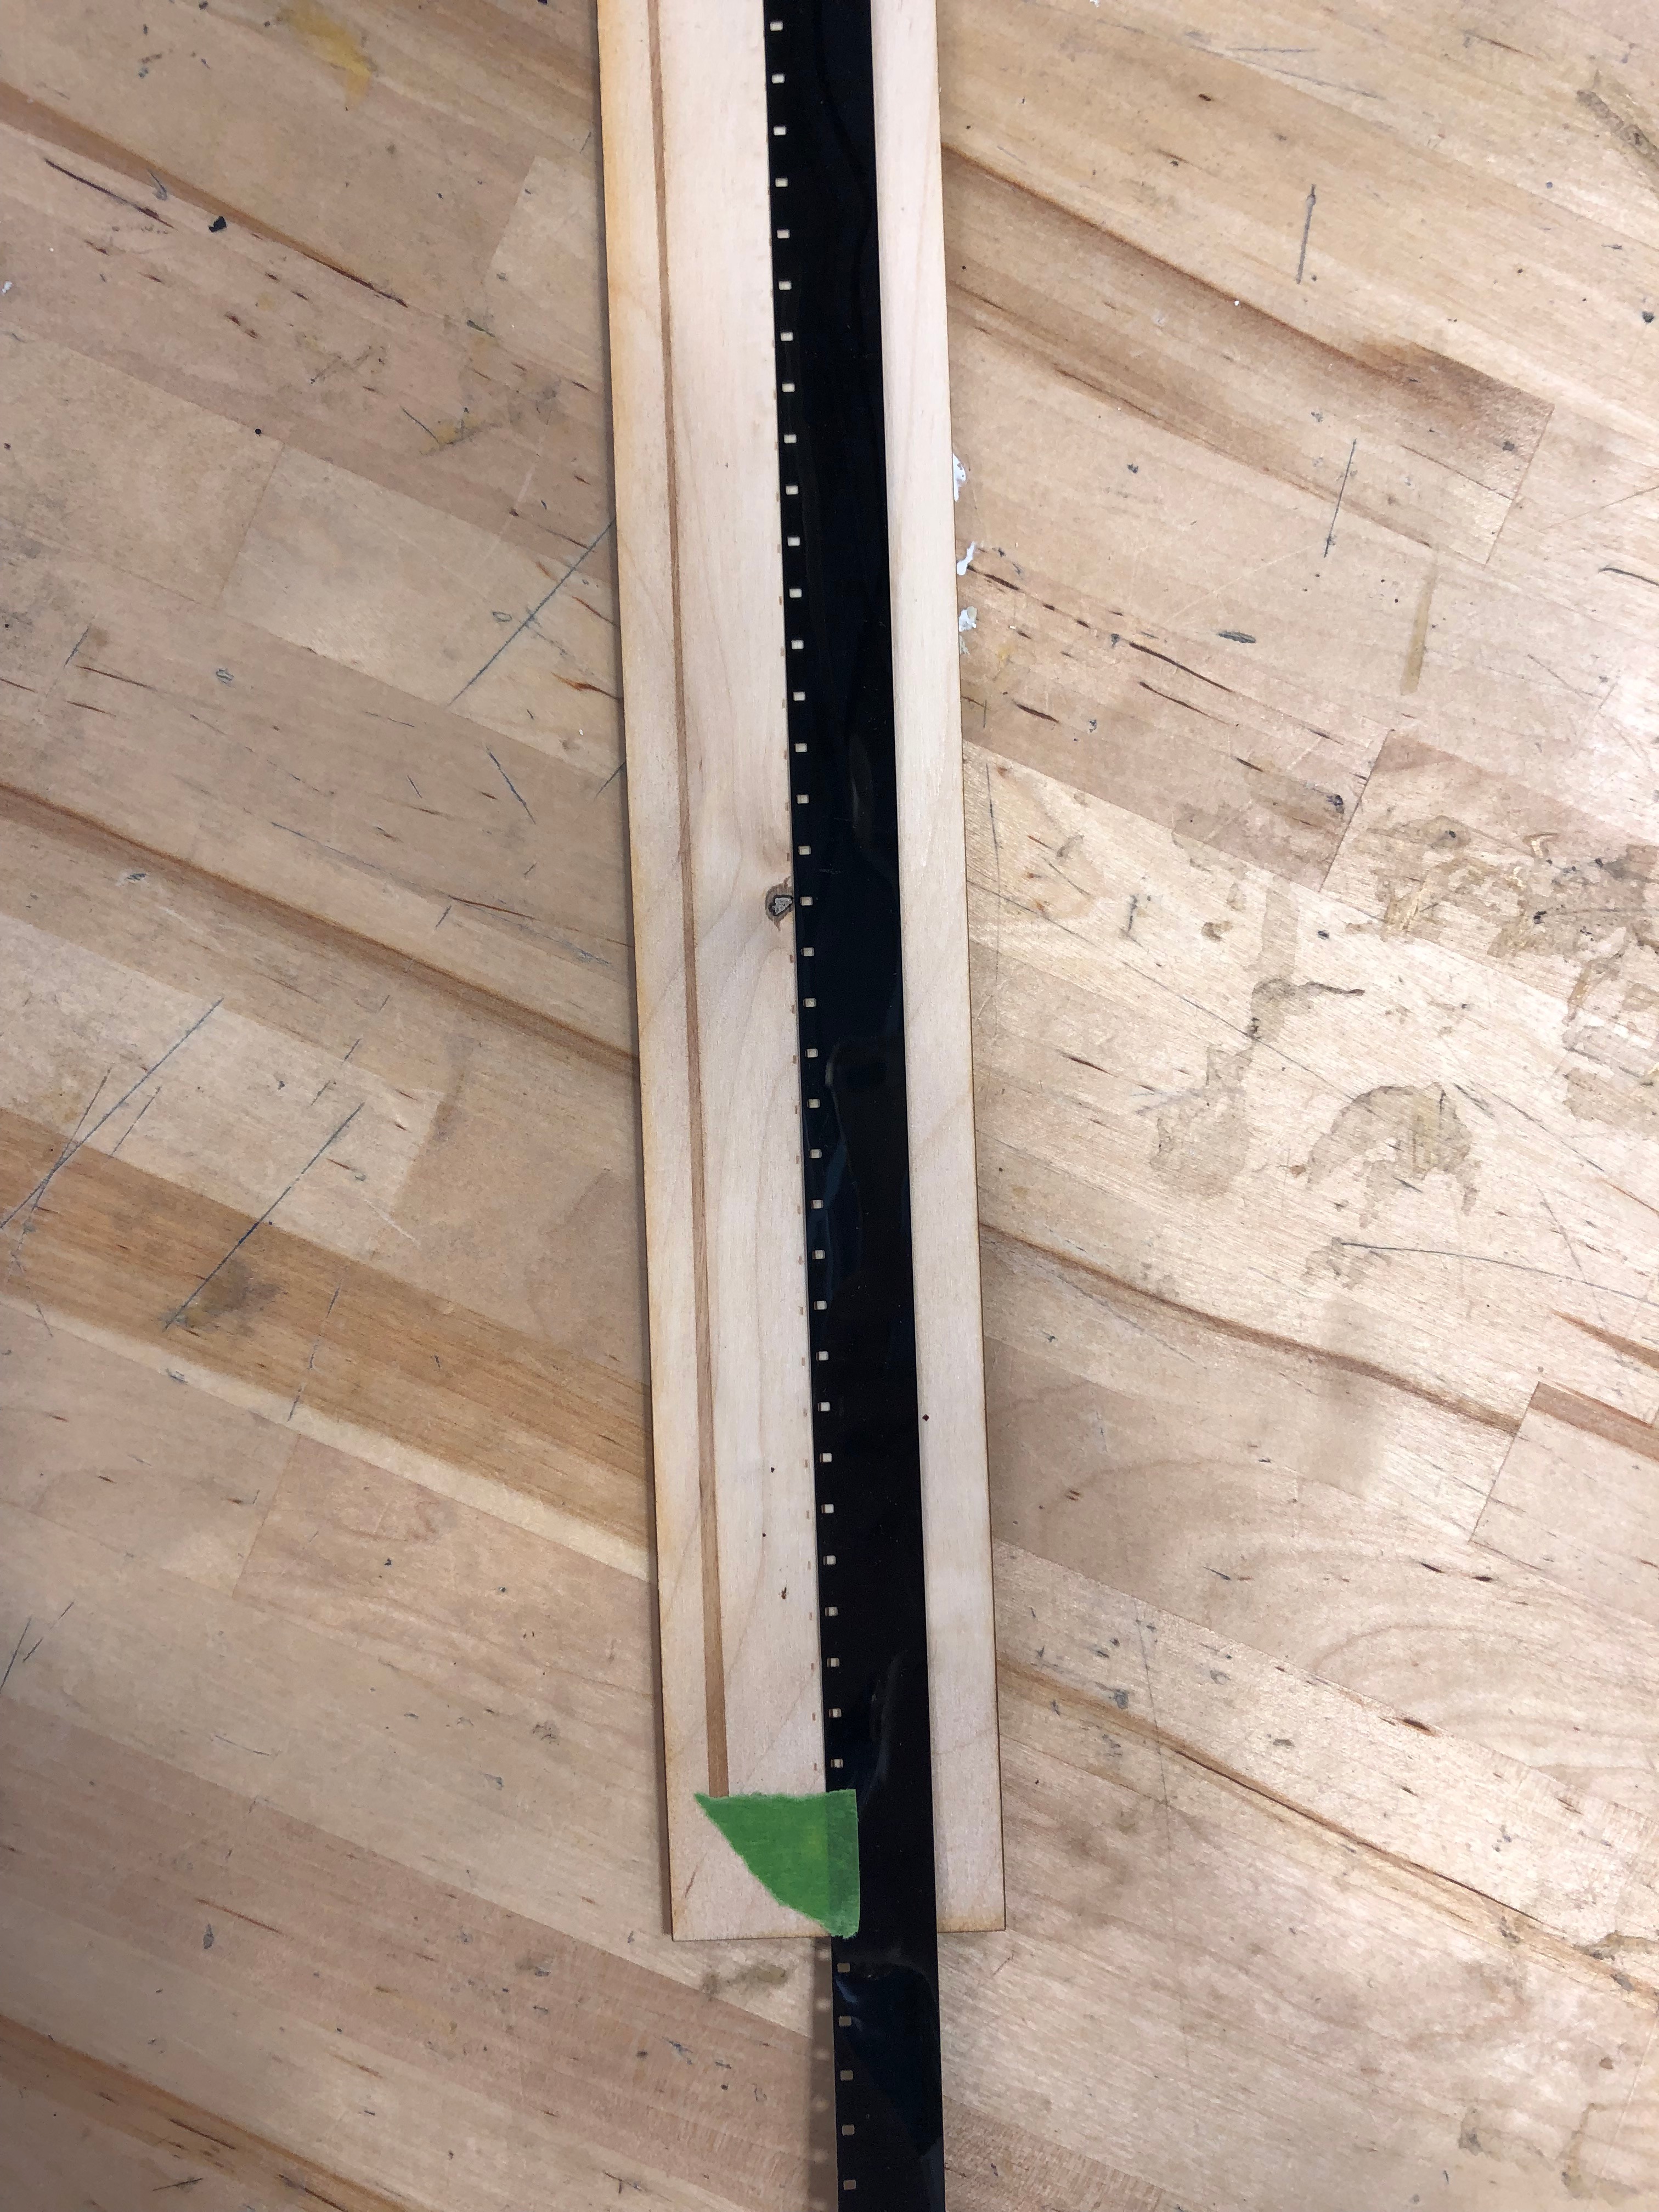
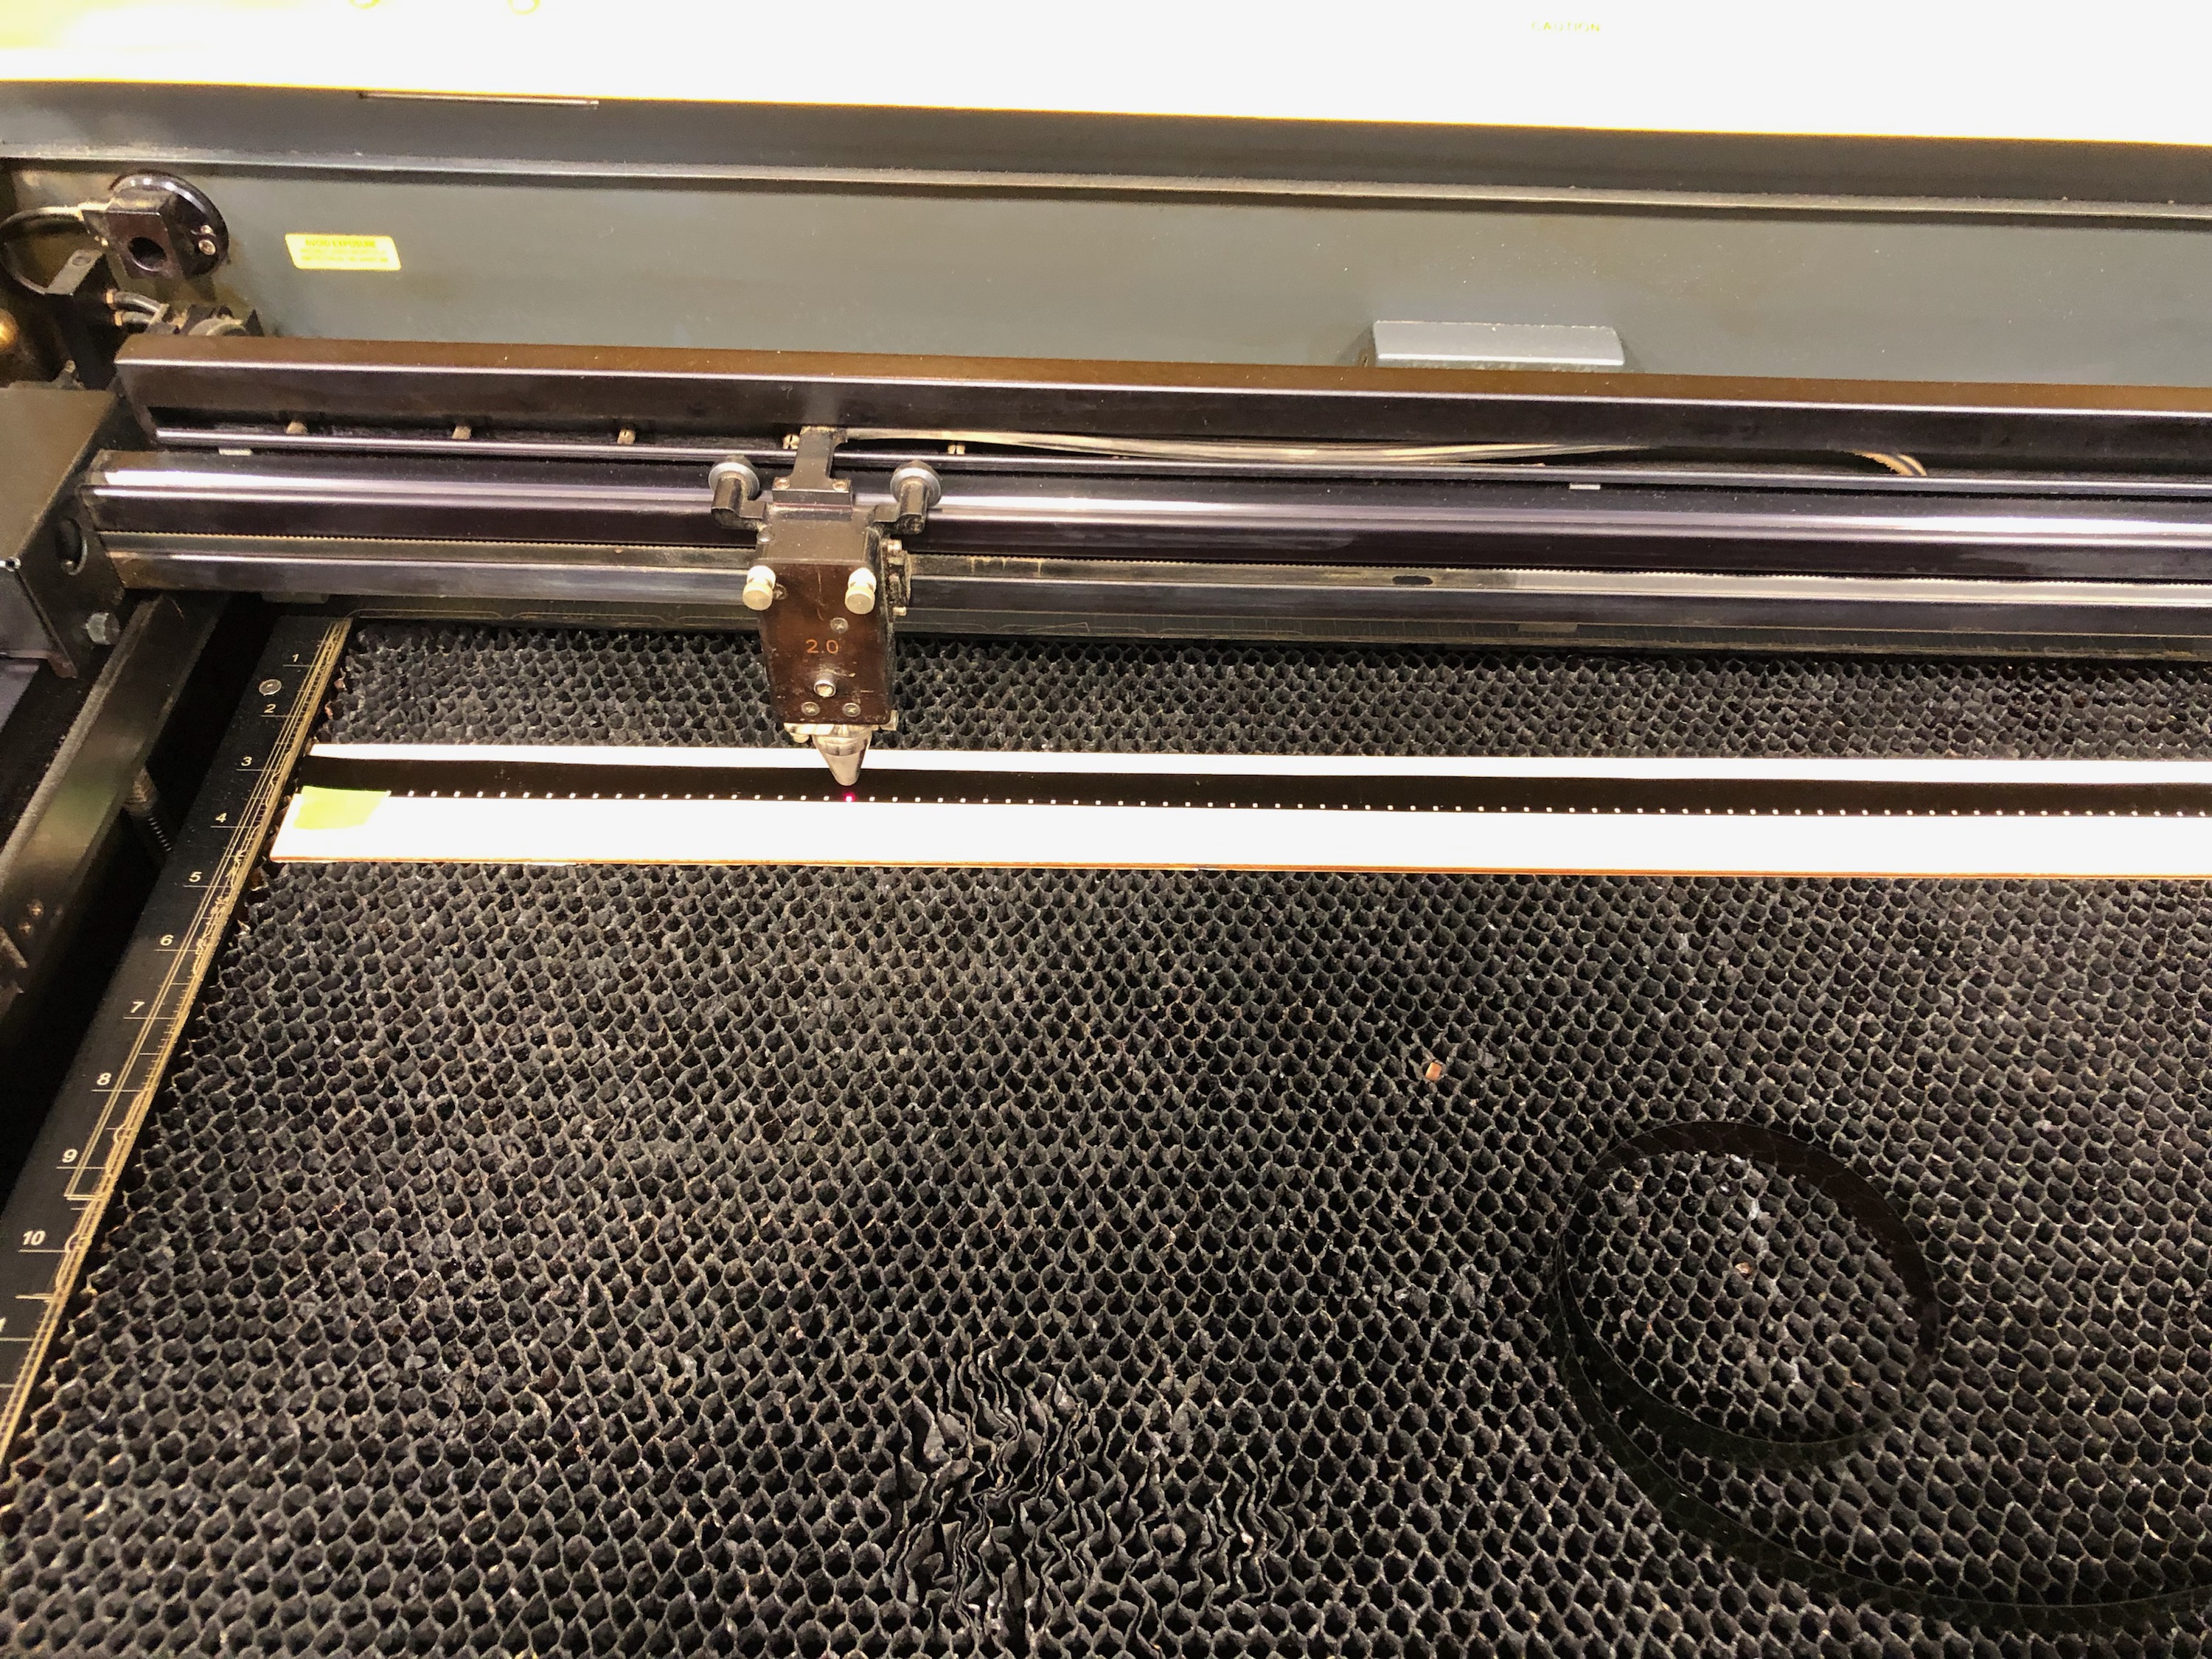
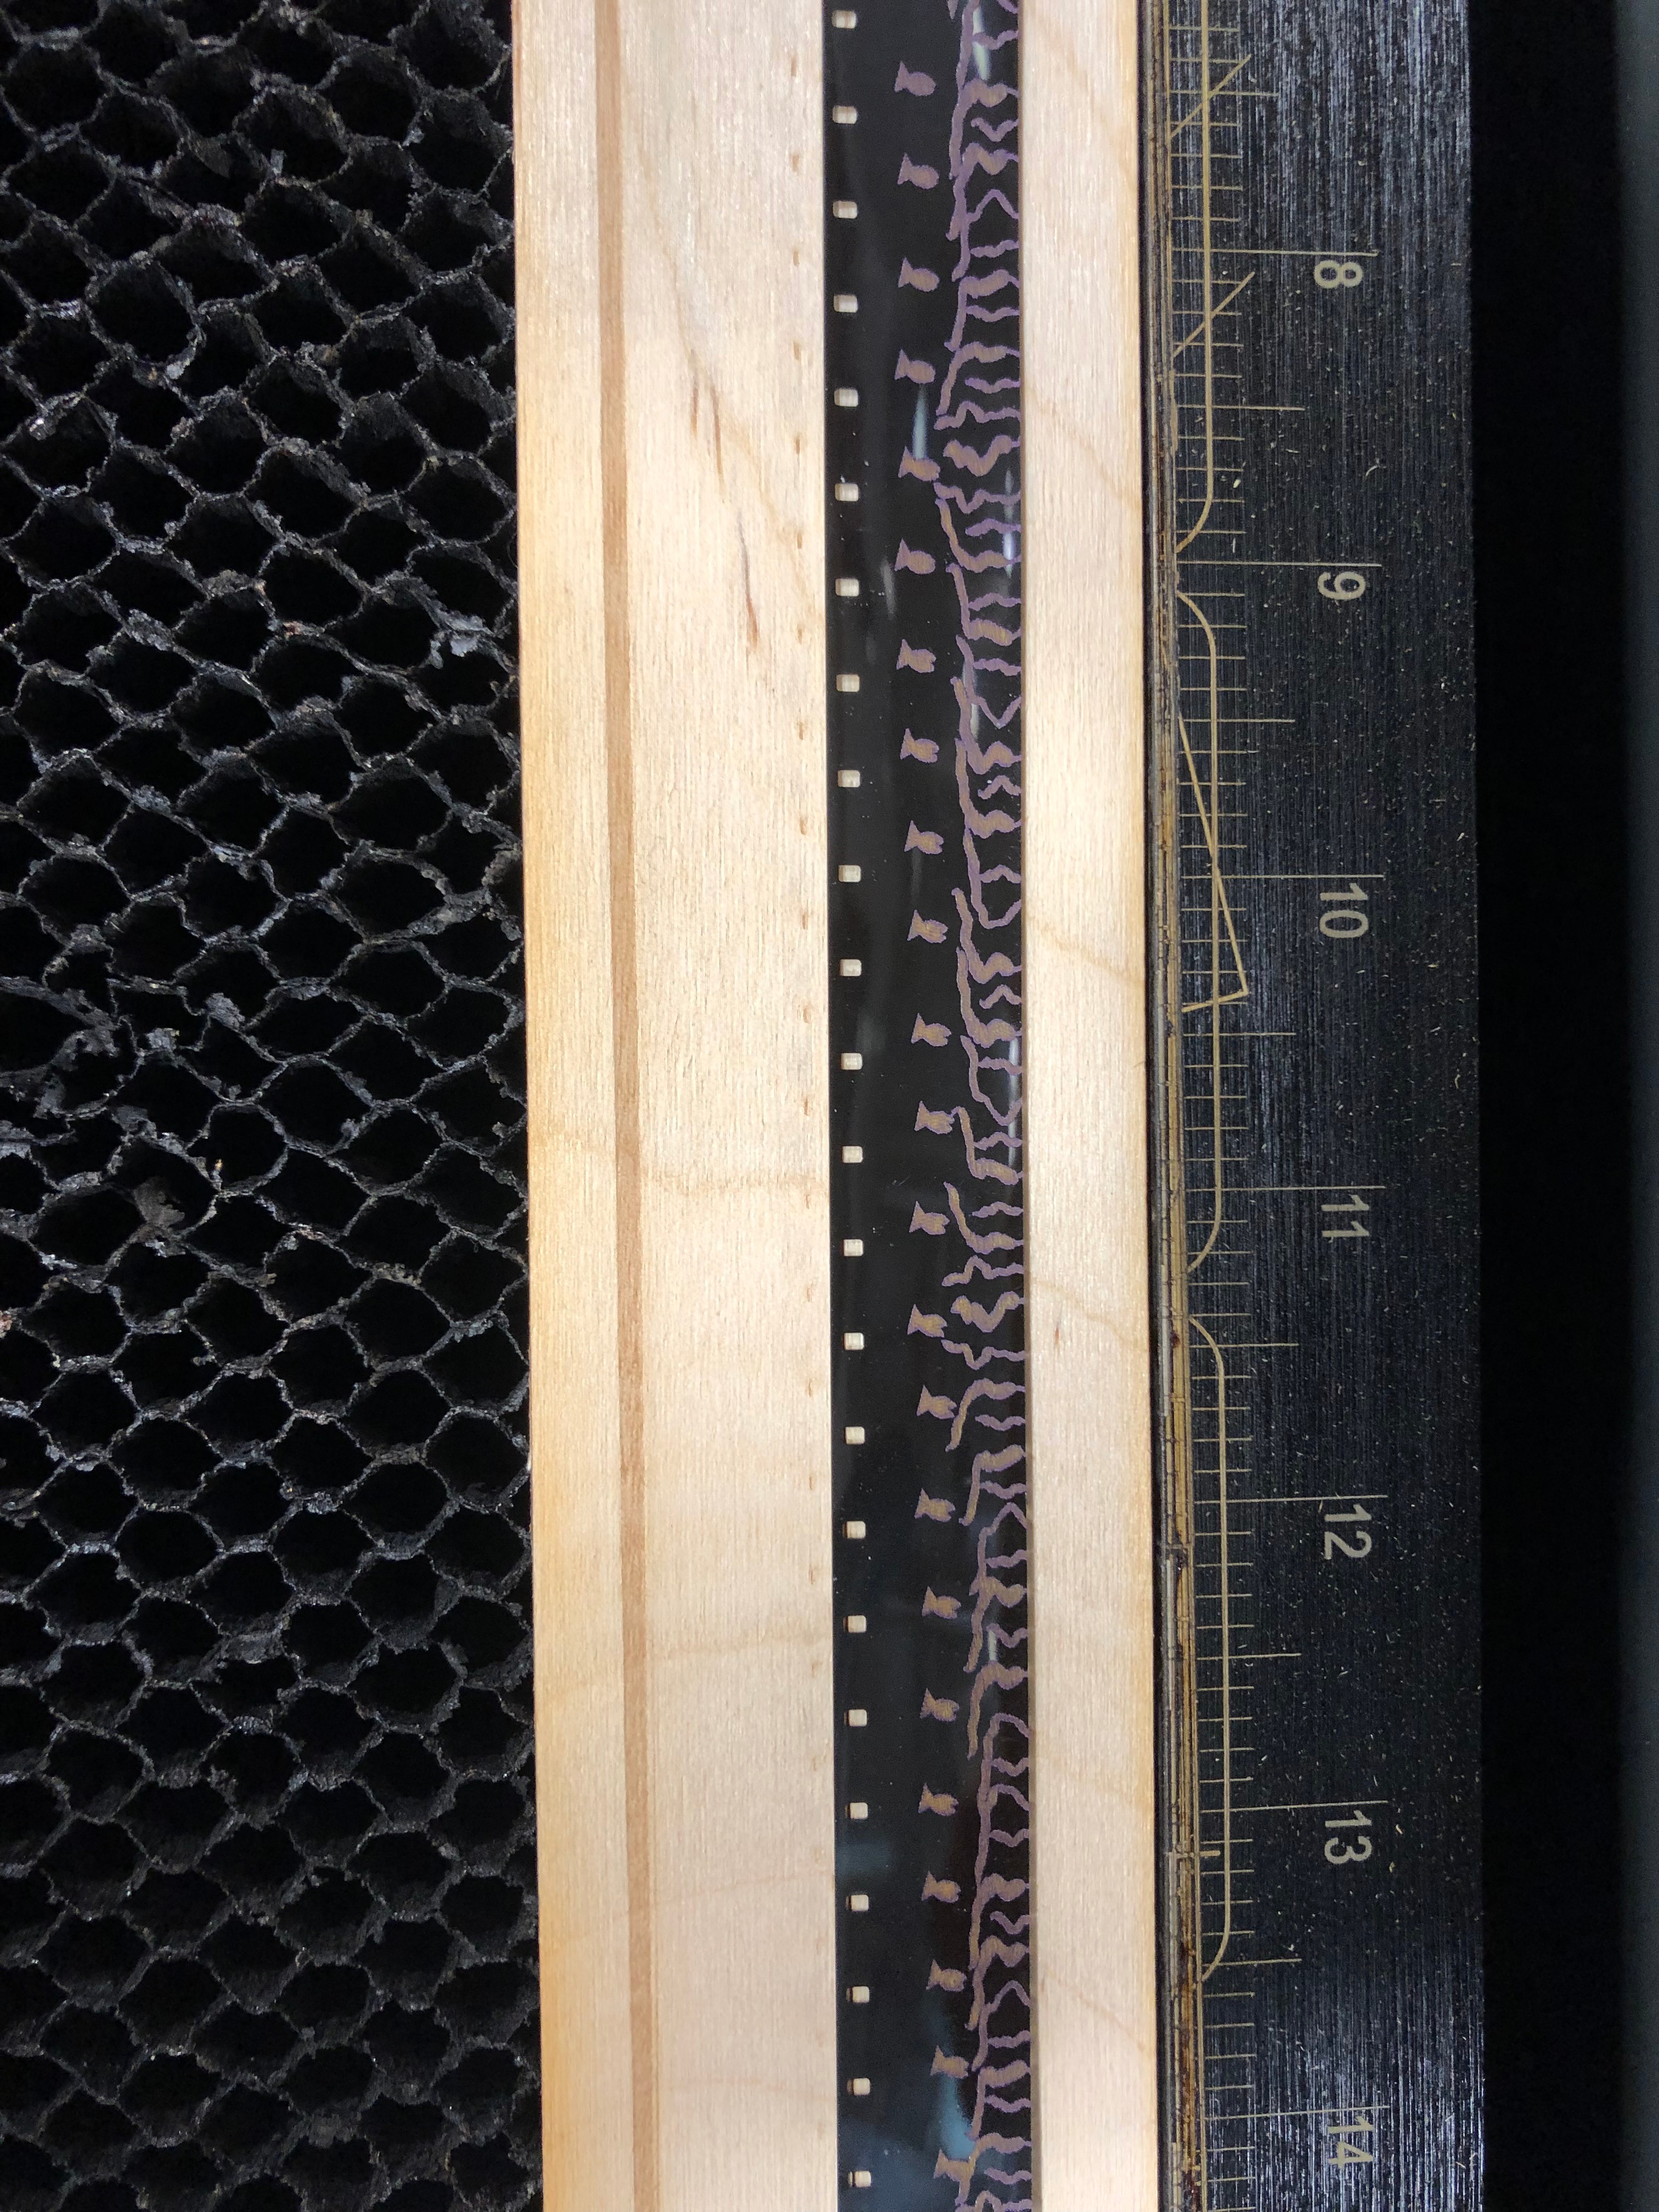
Once your file is done you are ready to head to the laser cutter. You do NOT want to laser etch the film template, just your objects, so either make those a non-RGB color or turn those layers off. Please note that this is not a laser cutting tutorial, so I am skimming over how to use the laser cutter and associated software.
Place the film on a piece of wood to act as a base. Use a small piece of tape to secure the film to the wood, emulsion (dull) side UP. This is super important! If you etch on the wrong side, your animation will not work.
In the laser cutter settings you want to select preset/ plastic/ polyester/ mylar.
Make sure to center the laser and check that the design lines up with the film. You can do this by clicking somewhere on your design on the file and checking that the laser shows up on the film in the same place (I find it easiest to check using the location of the sprocket holes).
Once you are sure that everything is lined up, go ahead and print! Your film will likely be longer than the width of the laser cutter bed, so you will likely need to etch one strip, then move the film down on the wooden base and etch the next section and repeat until you have etched the whole length of the strip.
Watch Your Animation Come to Life!
Once your film is etched load it into a film projector and watch your hard work come to life!