Laser Engraved Christmas Card
by Trotec Laser Canada in Craft > Cards
4043 Views, 30 Favorites, 0 Comments
Laser Engraved Christmas Card
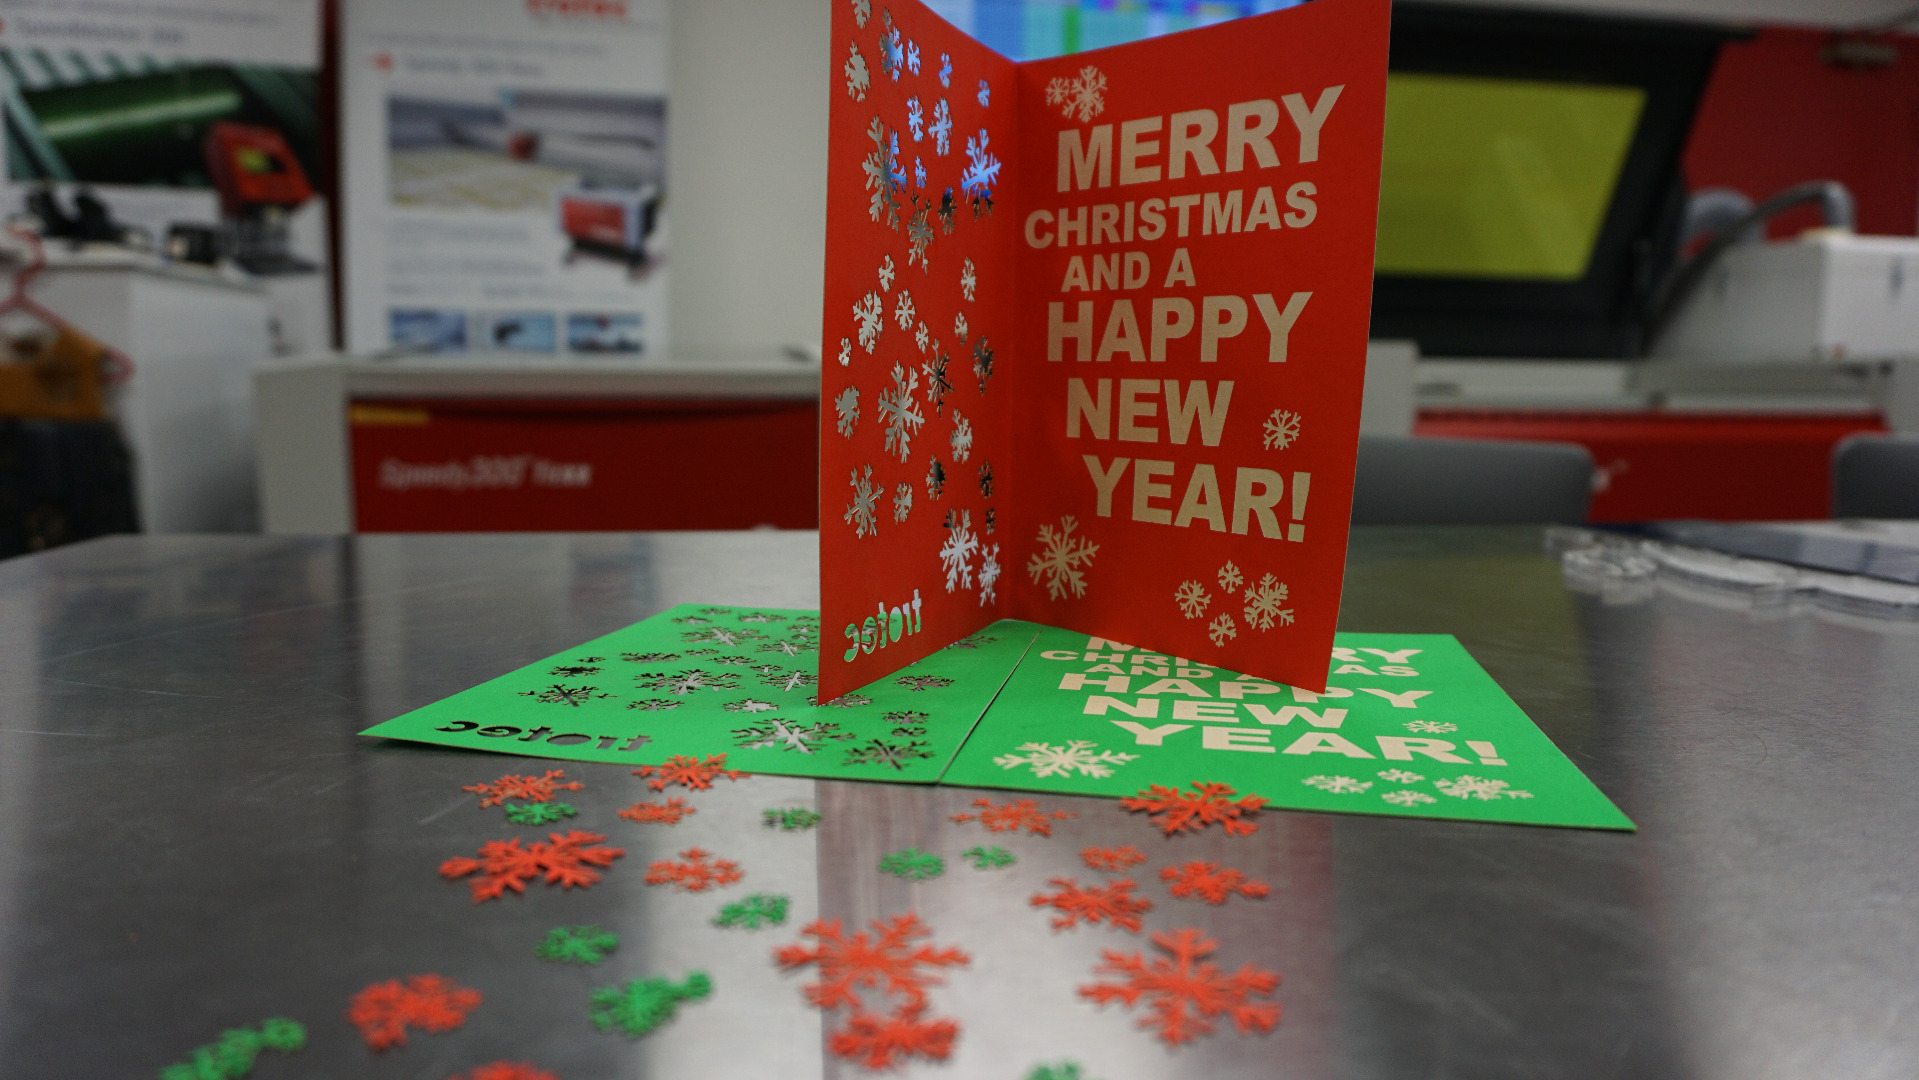
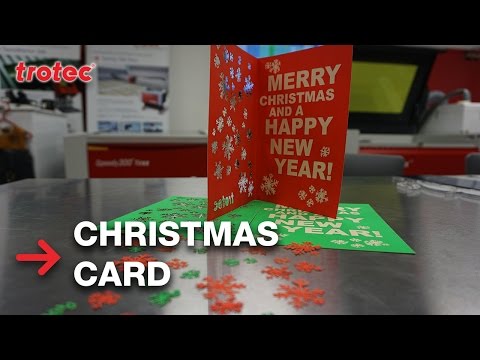
Christmas is just around the corner. Trotec Laser Canada would like to give our viewers and subscribers a gift, a hand-made Christmas card that was engraved and cut on a Speedy 400 Laser.
We hand-drew snow flakes on a white piece of paper, then photographed it, imported to our design software (CorelDraw), and then vectorized it in order to cut and engrave the design onto our laser machines.
Have a Merry Christmas and a Happy New Year!
Trotec Canada Team
Downloads
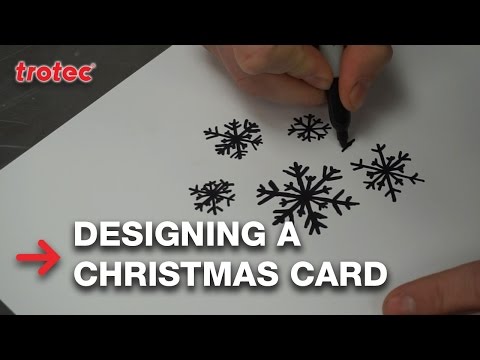
Draw Designs
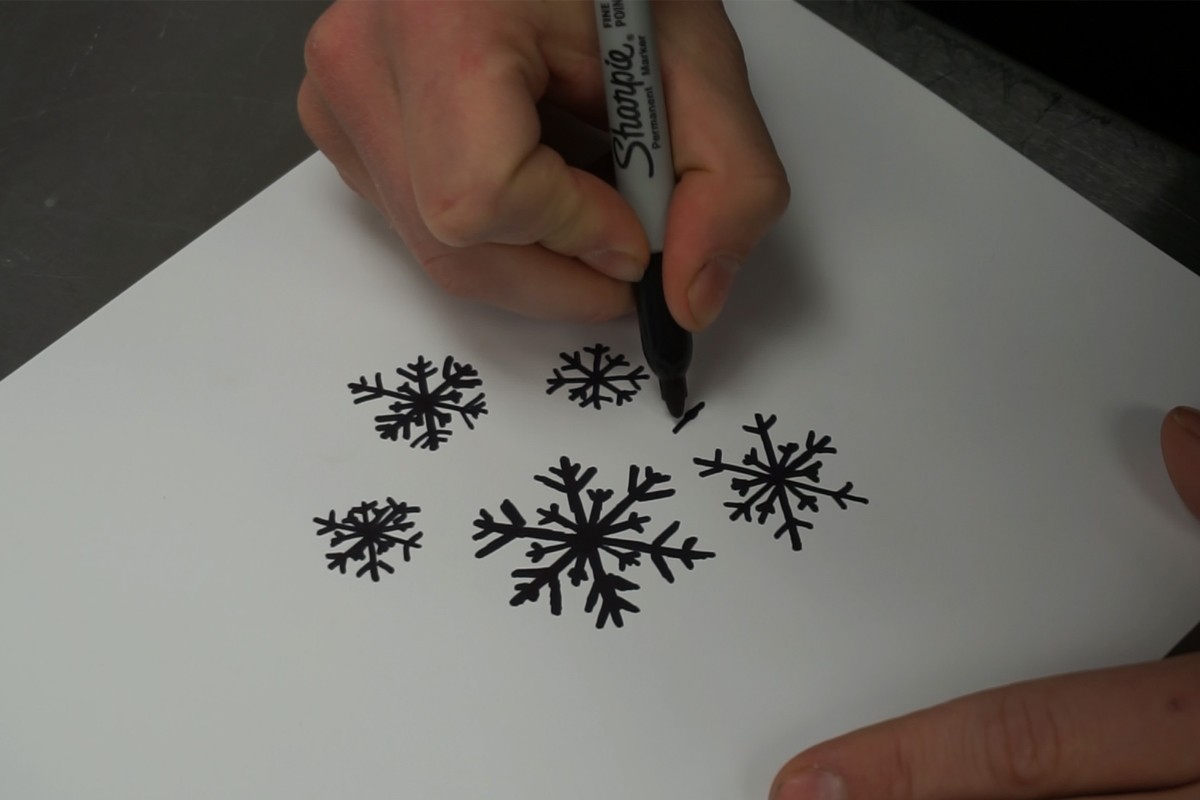
Draw whatever designs you would like onto a white piece of paper. It's better to use a thick marker than a pen or pencil. In our example we are drawing snow flakes.
Import the Photograph
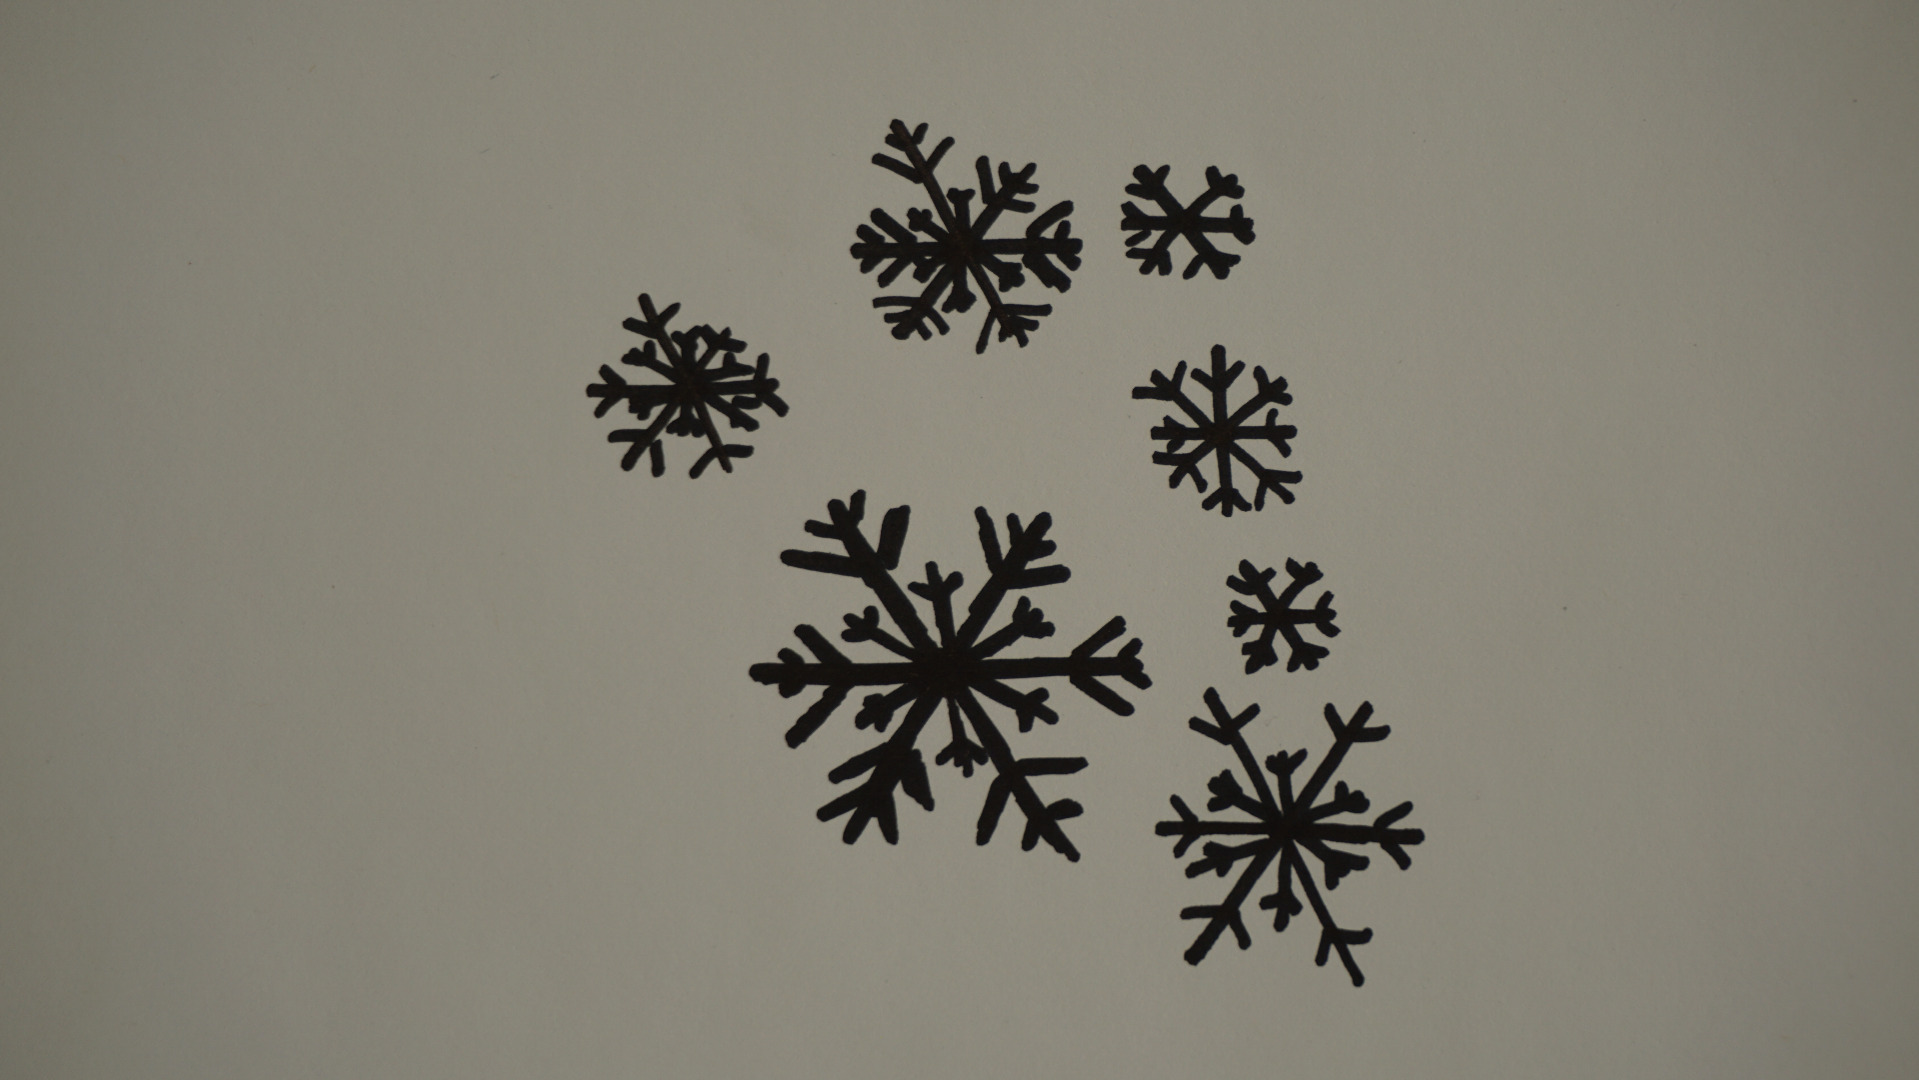
Take a photograph of your drawing, see our attached JPEG file, and import it into your design software (in our case CorelDraw).
Convert the Image to Black and White
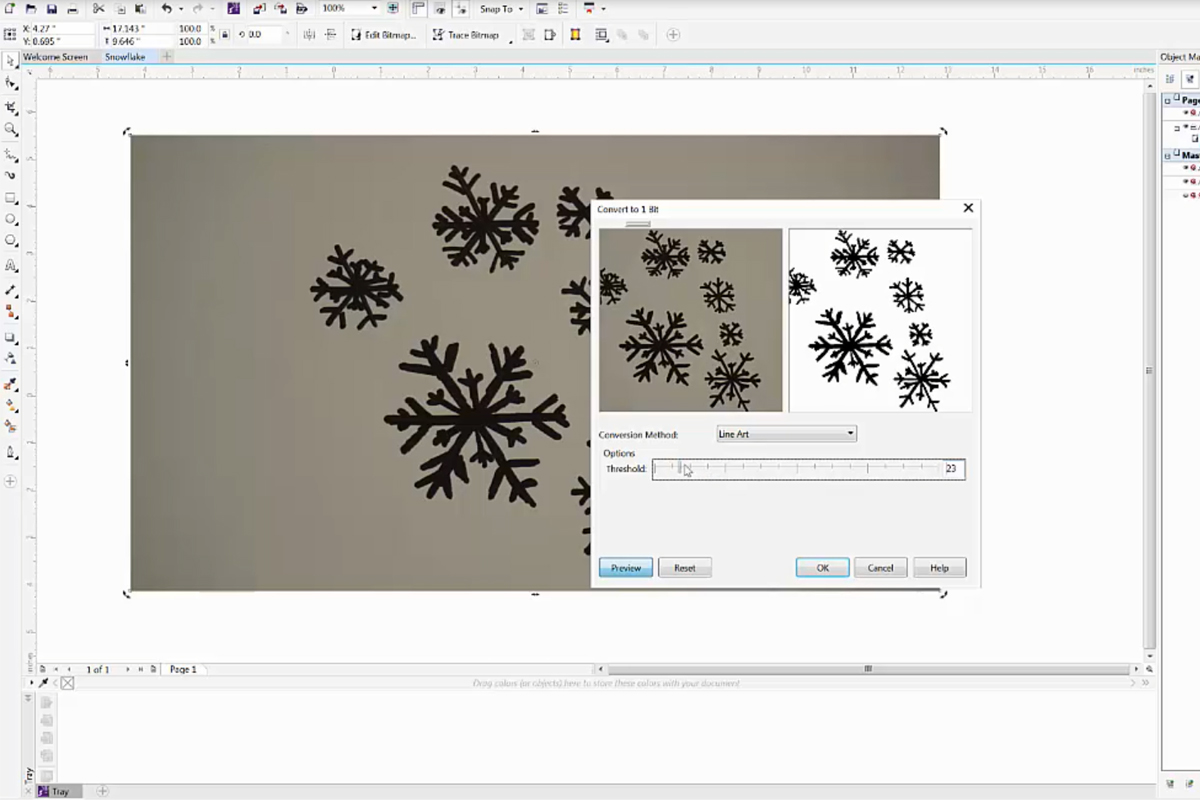
Convert the image to black and white. In CorelDraw, you would go to Bitmaps > Mode > Black and White. We use the Line Art Method.
We then decrease the threshold so only the black snow flakes are left.
Vectorizing the Image
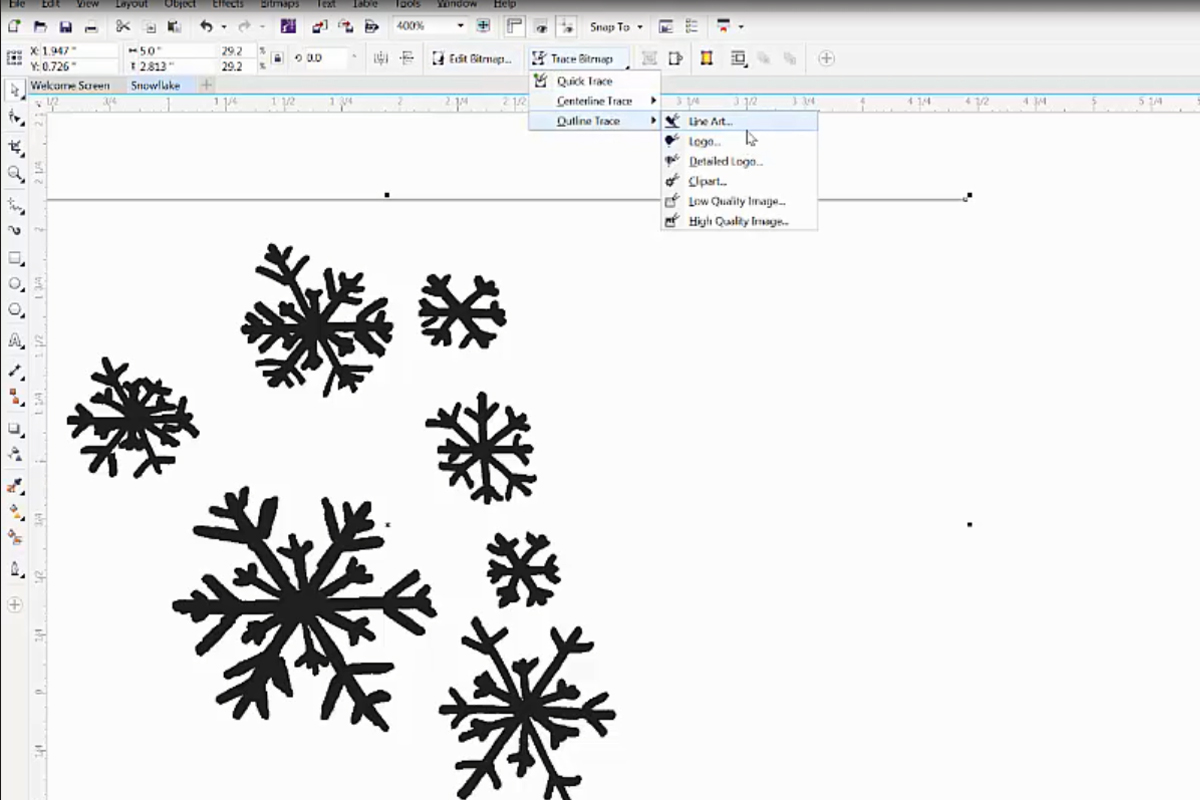
Then we vectorize the file by clicking on Trace Bitmap, Outline Trace, and we’ll use the Line Art option.
Once the vector is created we delete the original image
Setting the Cut and Engrave Colours
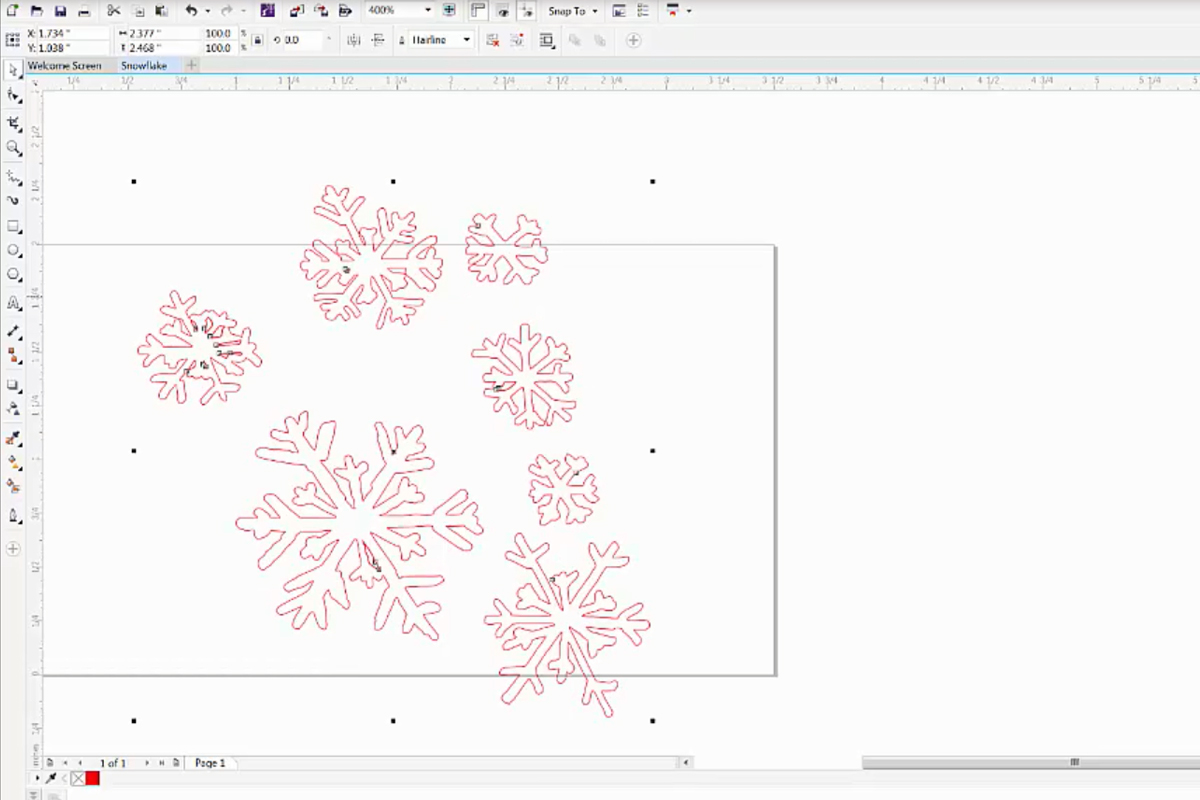
We right-click on our RGB Red and left-click on the no-fill colour option. Make sure that the red outline is a hairline thickness so the laser will know that it’s a cut.
Duplicate the Image Throughout
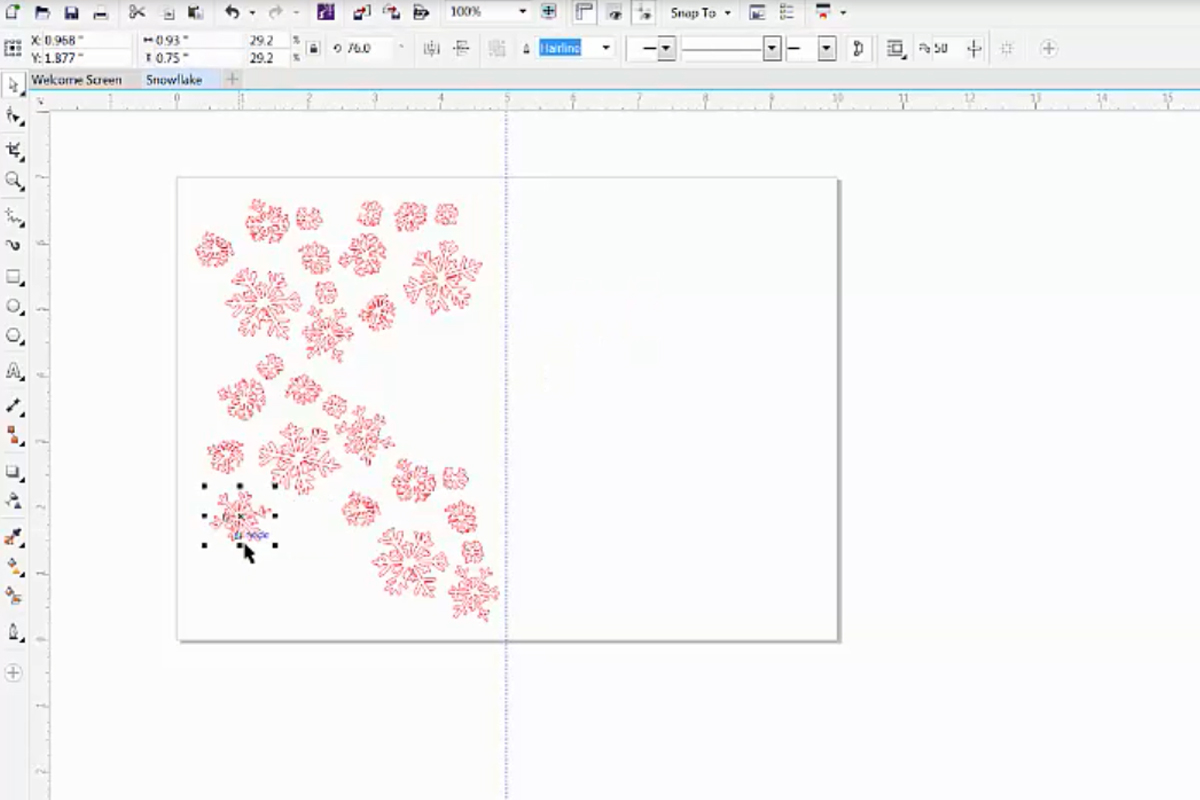
The we copy and paste our design and spread it randomly all over the card’s left section
Adding a Fold Line
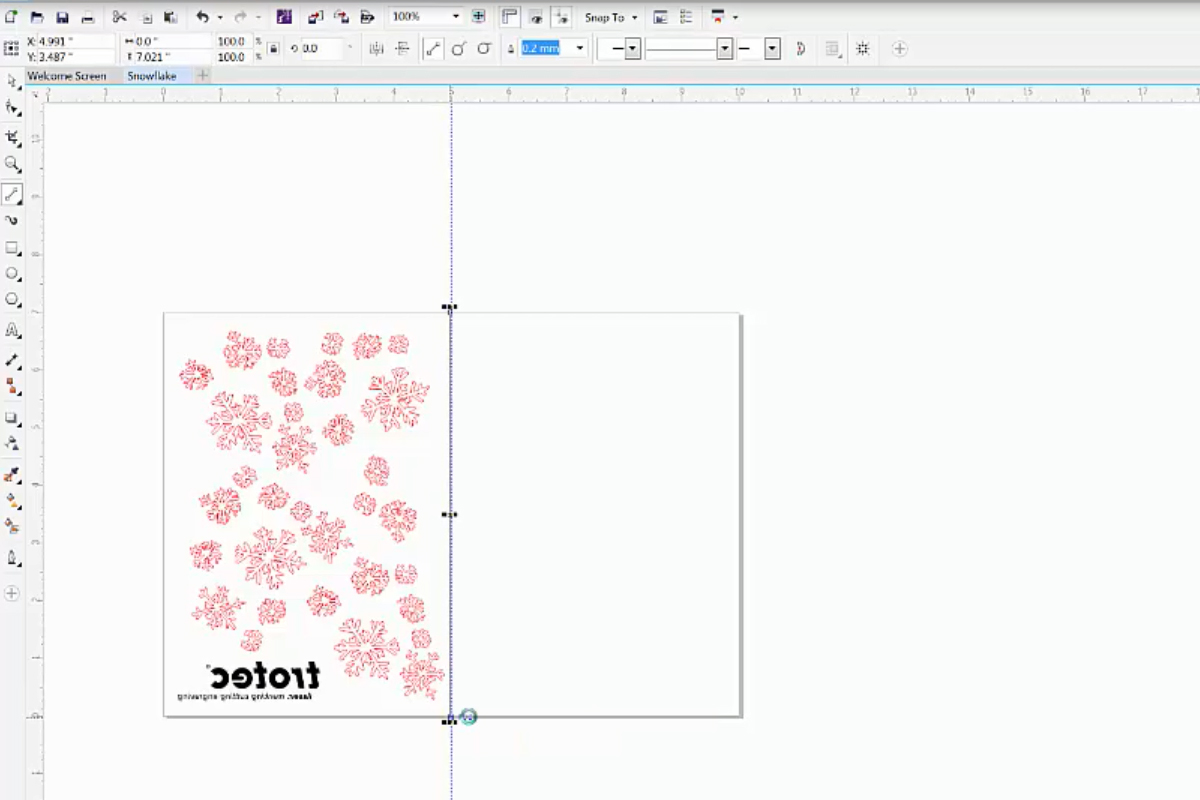
We then create a blue line, which is hairline in thickness. This line will be our fold line, once we send it to the laser we will decrease the power to about 5%, with a 2 Speed.
Outline and Content
We add a red outline box, again hairline in thickness which will cut out our card from the main Bristol board. We also added our text in black. Anything that is black-fill colour will be engraved while red hairline will be cut.
Send to Laser
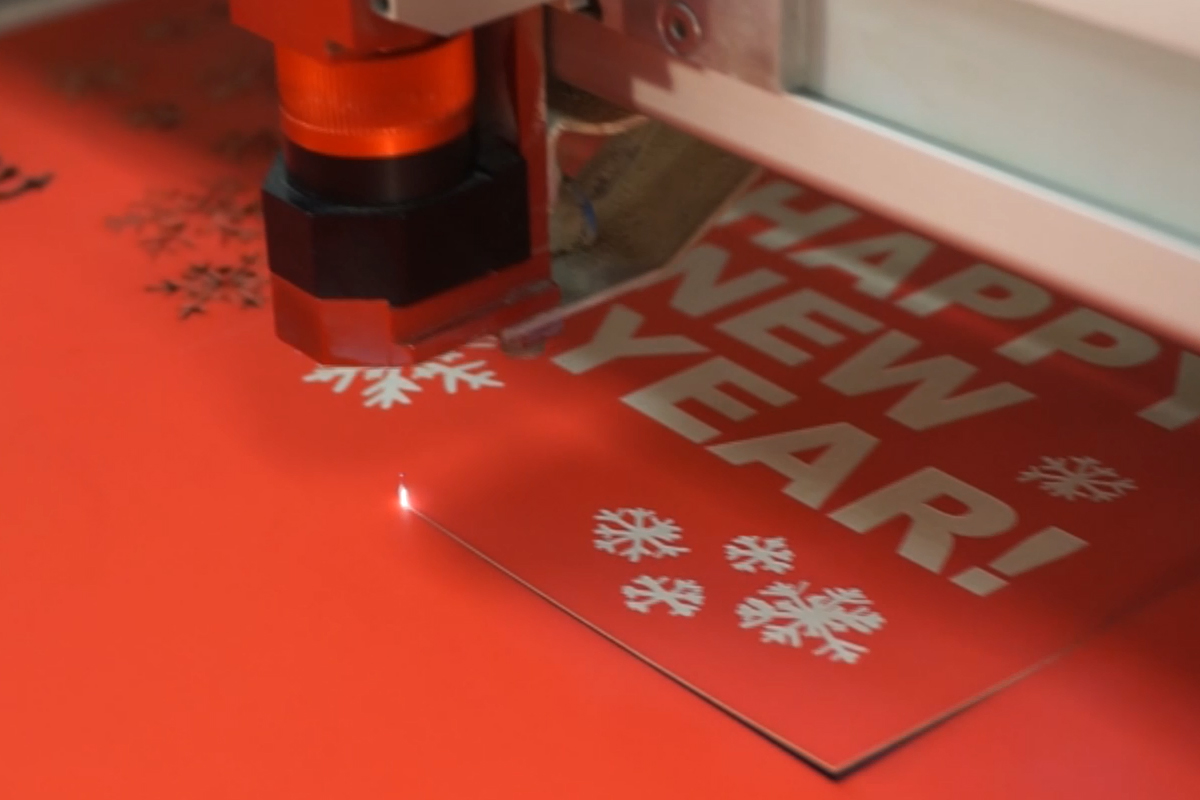
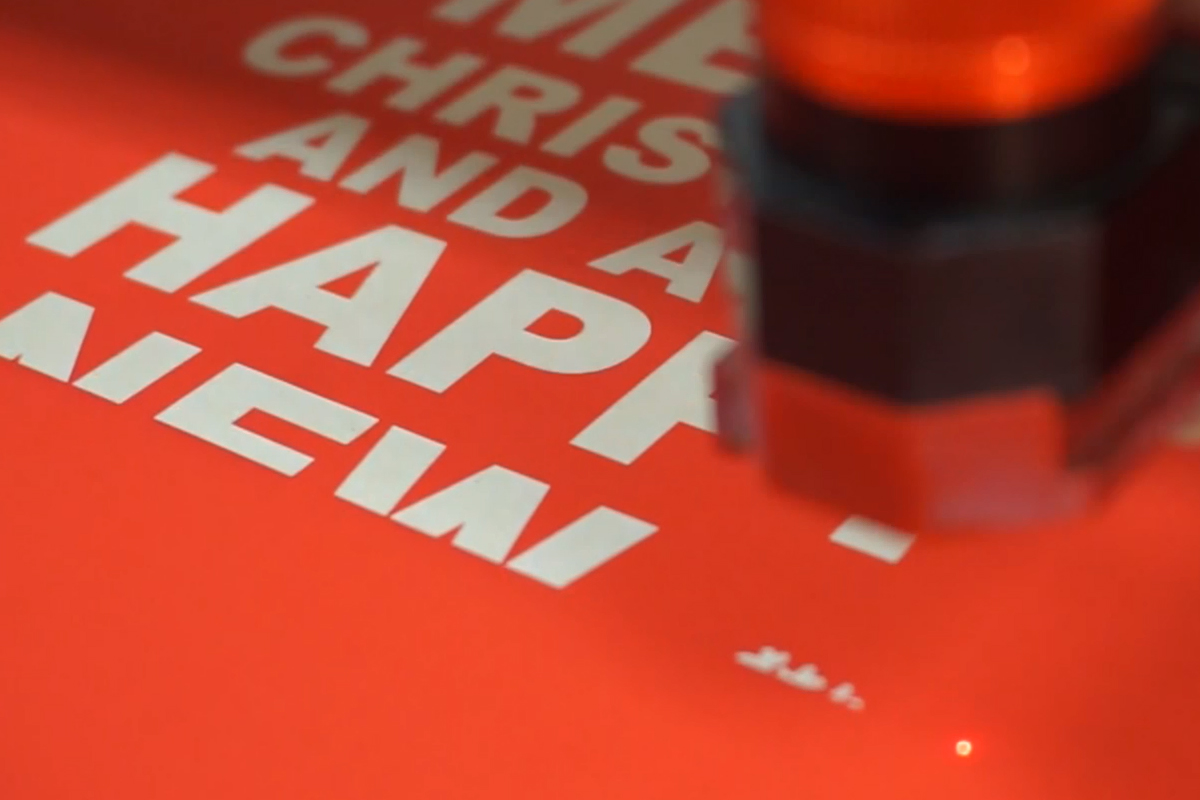
Send it to the laser by clicking print. For engraving we used 100 speed and 45 power, for cutting we used 2 speed and 40 power. For the fold-line we used 2 speed and 5 power.