Laser-Cut Paper Lantern
by tatiang in Workshop > Laser Cutting
11251 Views, 104 Favorites, 0 Comments
Laser-Cut Paper Lantern
Summary: This will take you through the steps required to create a laser-cut paper lantern that can house an LED tea light.
Note: This Instructable is based on Making a Laser Cut Zen Lantern.
Materials: cardboard (ideally, cut to 24" x 18") or wood (e.g. 1/8" baltic birch; ideally, cut to 24" x 18"), vellum paper (two 8.5" x 11" pieces), one LED tea light and glass tea light holder (optional), hot glue, modge podge or Elmer's glue, small paintbrush or Q-tip.
Tools: laser cutter, hot glue gun
Software: Adobe Illustrator (these directions are specific to Adobe Illustrator CS6 but may work in other versions)
Time: 30 minutes to create the design plus 30 minutes to cut and assemble
Here is a video of the final product:
Here is a video of the steps that follow (no audio):
Specify Box Dimensions
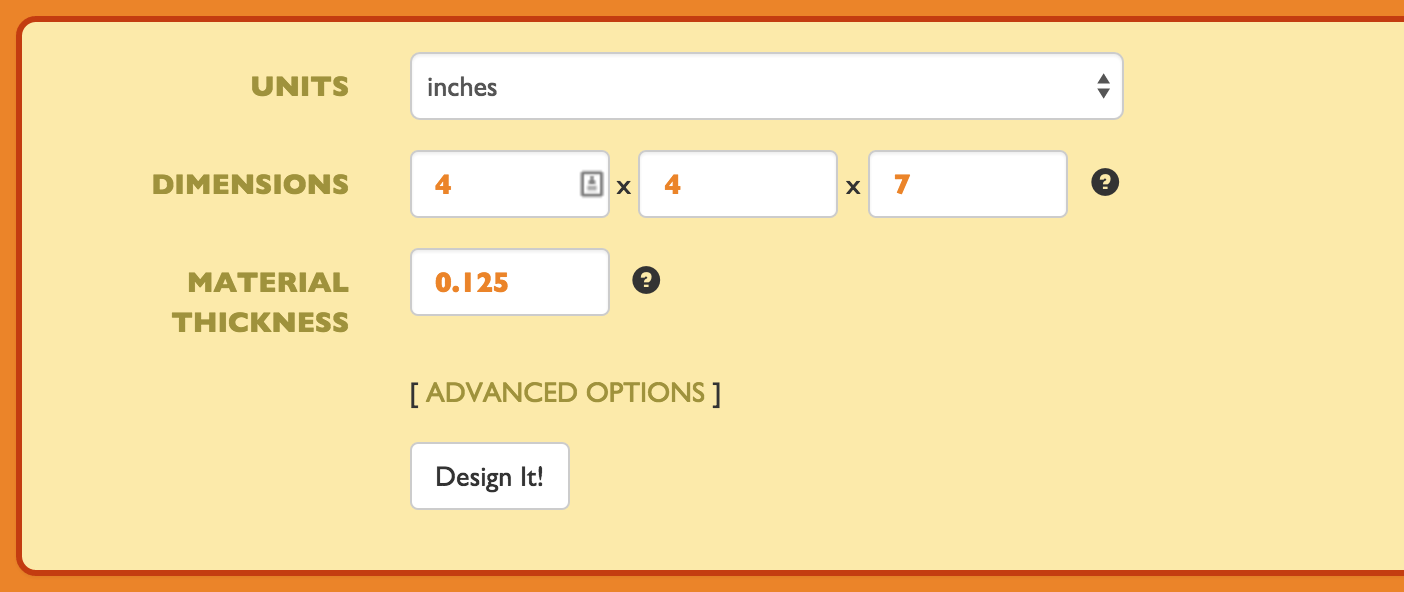
BoxMaker is a site that allows you to enter the dimensions of a box and download a PDF with outlines of each piece, including interlocking tabs.
1. Using BoxMaker, create a box with dimensions 4“ x 4” x 7” with material thickness 0.125” (for cardboard) or about 0.118” for 1/8" thick wood) and click Design It! to download a PDF.
Import Into Adobe Illustrator

Note: throughout these directions, I use the notation "Click File-->Open..." to mean "Click on the File menu and then click on the Open... command."
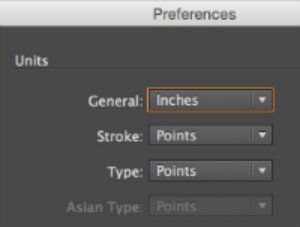
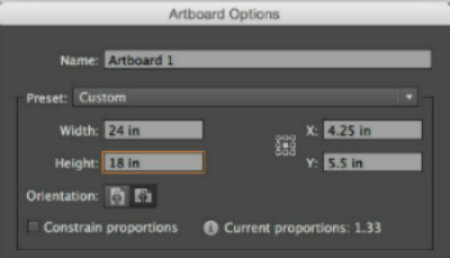
2. Open Adobe Illustrator. Click File-->Open... and open the PDF that you downloaded in the last step. Click on Illustrator-->Preferences-->Units... Change the General drop-down menu to Inches and click OK. Double-click on the Artboard Tool. Change the width to 24 inches and the height to 18 inches. Click OK.
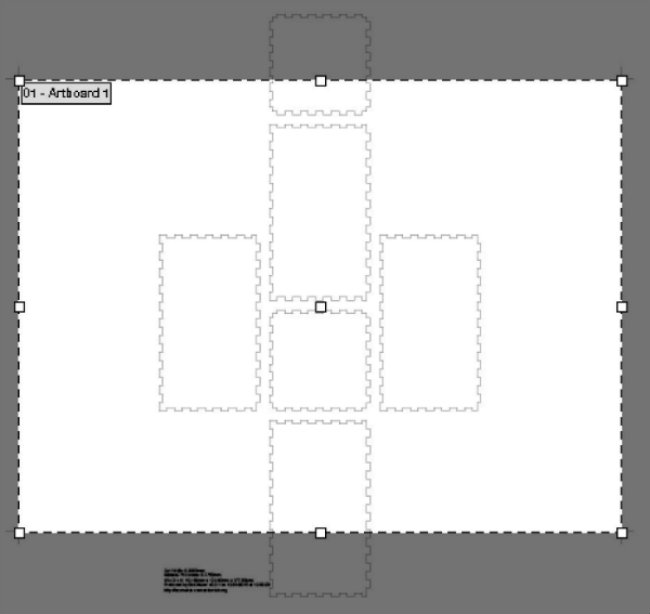
3. Click View-->Zoom Out (or Zoom In) one or more times until all of the box pieces are visible. It's okay for the pieces to extend beyond the artboard/canvas for now.
Group and Fill the Pieces
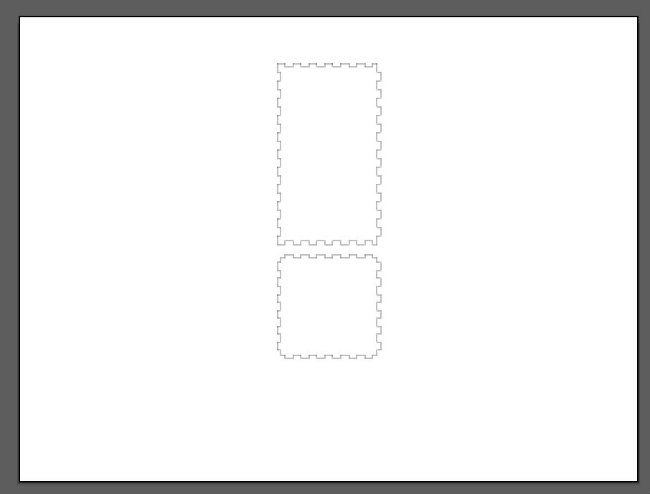
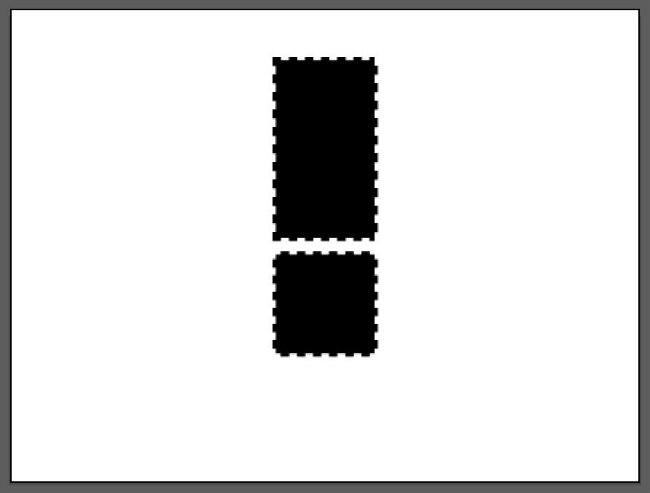
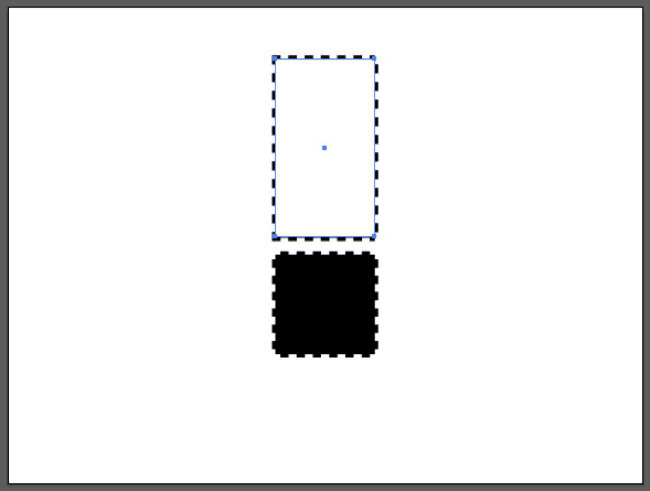
4. Click on the Selection Tool (black arrow). Click and drag a rectangle around pieces to select them. Delete the box top (either of the smaller pieces) and the text. Delete all but one side (the large piece).
5. Using the Selection Tool, click and drag a rectangle around each piece and then group it by clicking Object-->Group.
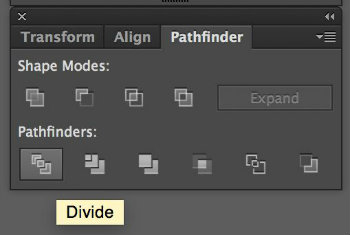
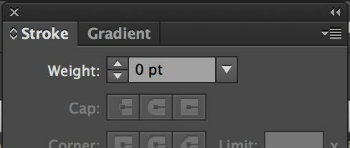
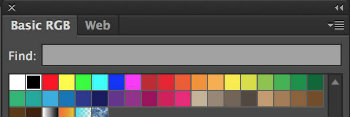
6. Click on the outline of the side piece to select it. Click Window-->Pathfinder-->Divide. Click Window-->Swatch Libraries-->Default Swatches-->Basic RGB and click on the black square to set the fill color to black. Click Window-->Stroke and set the stroke weight to 0 (press return to save the value).
7. Repeat step 6 for the bottom piece.
Create the Frame
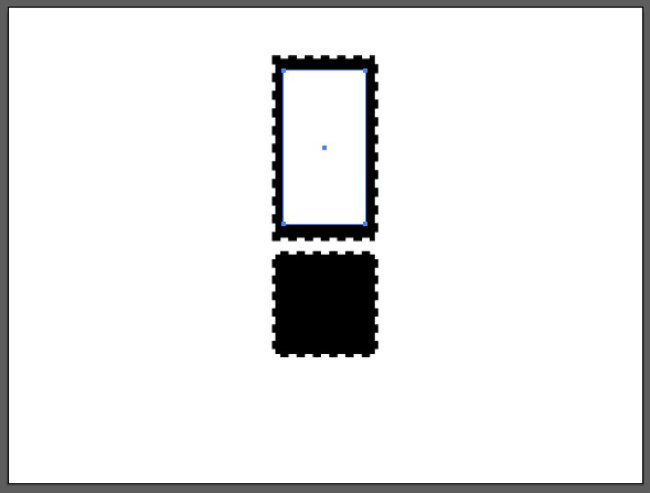
8. Click on the Rectangle Tool. Click and drag to create a rectangle the size of the inner borders of the side piece. Set the fill to white and the stroke to 0. Click on the Selection Tool and -- while holding down the option key -- click one of the corner points of the rectangle and drag towards the middle of the piece to scale it down so that a thick black border is showing around it.
9. Using the Selection Tool, click and drag a rectangle around the entire side piece. Click Window-->Pathfinder-->Merge. Click Select-->Deselect.
Draw Lines to Create a Pattern

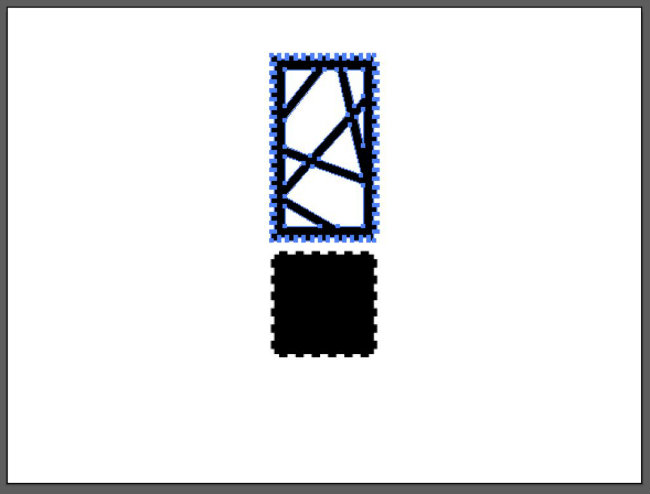
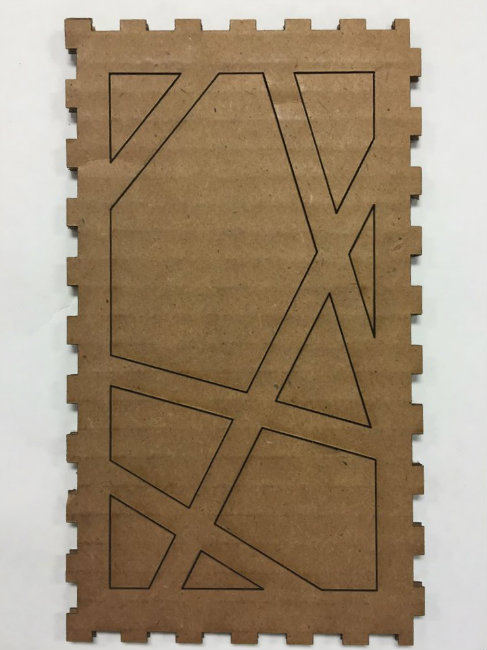
10. Click on the Line Segment Tool. Set the stroke weight to 24 pt (or another weight if you prefer). Click and drag to draw lines across the white rectangle, making sure that the end points overlap with the black border but do not extend beyond it. The black lines will eventually be the cardboard (or wood) pattern while the white background will be where the light shines through vellum paper. Note: To move or resize an existing line, use the Selection Tool.
Note: It is possible to use the Paintbrush Tool and Window-->Brush Libraries-->[any library] to draw with artistic brushes instead of straight lines. If using brushes, you will need to select each brush stroke and click Object-->Expand Appearance before moving on to step 11. I find this method to be quite tricky, however!
11. Using the Selection Tool, click and drag a rectangle around the entire side piece. Click Object-->Expand... Click OK. This will convert the lines to outlined shapes that can be vector cut with the laser cutter.
12. With the piece still selected, Click Window-->Pathfinder-->Merge to combine the shapes into one object. Click Window-->Pathfinder-->Minus Front (technical note: this removes duplicate vector lines that would cause a longer cut time). Note: If Minus Front deletes visible parts of the design, try Minus Back instead.
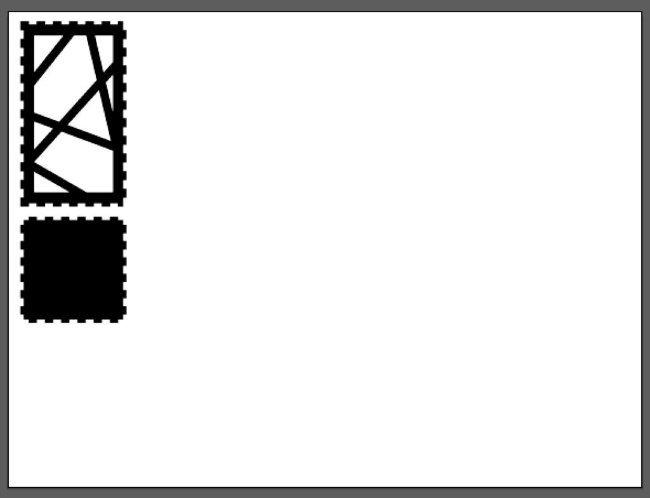
13. Click Select-->All to select the side and bottom pieces. Set the stroke weight to 0.1.
14. Drag the pieces to the top-left of the page. Click Select-->Deselect.
Duplicate the Side
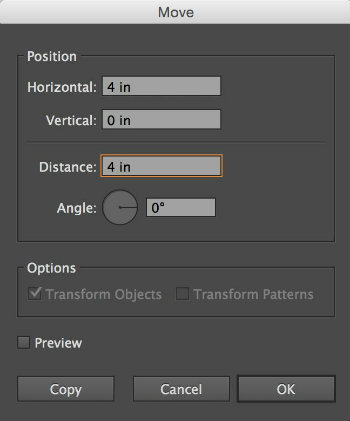
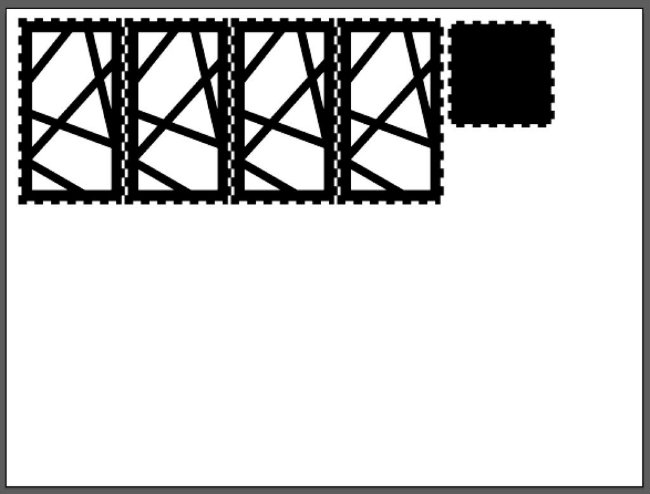
15. Using the Selection Tool, click and drag a rectangle around the entire side piece. Click on Object-->Transform-->Move... Set Horizontal to 4 and Vertical to 0. Click Copy. Click Object-->Transform-->Transform Again. Repeat Object-->Transform-->Transform Again two more times until there are four side pieces. The pieces will be very close together.
16. Click Select-->Deselect. Using the Selection Tool, click the bottom piece and move it so that it is next to the last side piece.
Save
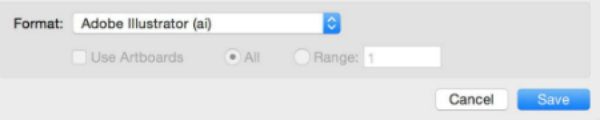
17. Click File-->Save As... Name the file (e.g. Abby’s Lantern). Click the Format drop-down menu and change the Format to Adobe Illustrator (ai). Click Save. Click OK.
Laser Cutting the Pieces
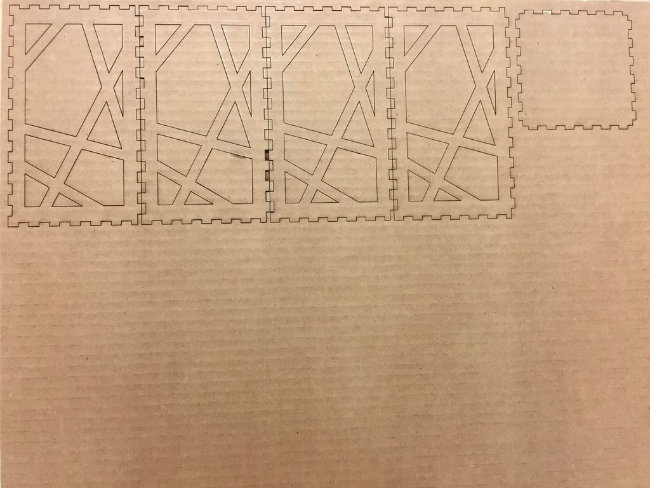
18. "Print" the saved file to the laser cutter using the suggested settings for that particular machine. For an Epilog Helix 50 watt laser cutter, we use 50 Speed, 65 Power, and 500 Frequency for cardboard.
Assemble the Lantern

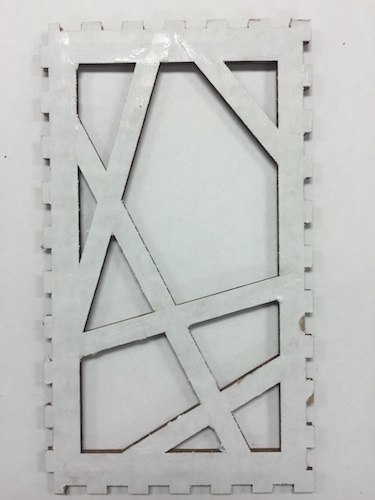
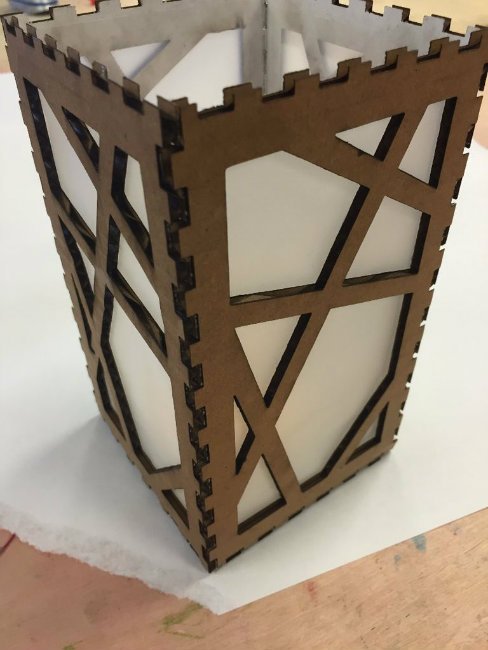
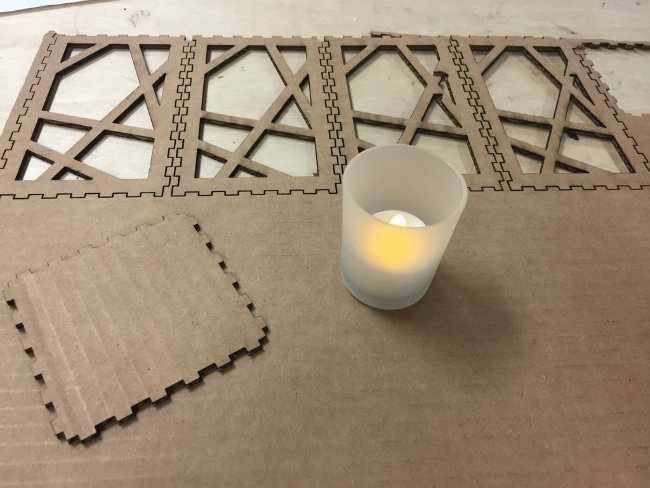
19. Detach the four side pieces and bottom piece from the cardboard or wood. Pop out all of the interior pieces (the white background areas of the design).
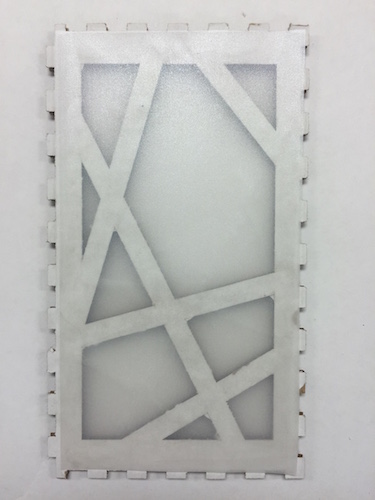
20. Cut the vellum into four 3.5" x 6.5" pieces.
21. Using Mod Podge (or Elmer's glue), brush a thin coat of glue onto the insides of the lines on one side piece (I used cardboard that is white on one side so I applied the glue to the white side that would face inward on the finished lantern). Lay a piece of vellum onto the border of that side and press down and rub gently to seal the glue. Check the outside of the side piece and remove any stray glue with a Q-tip.
22. Repeat step 21 for the remaining sides.
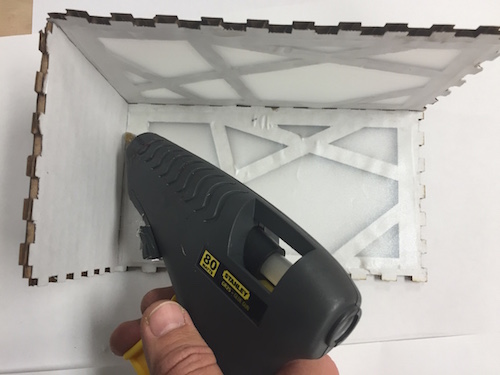
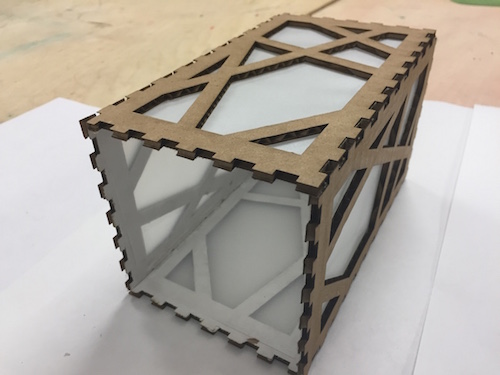
23. Connect the side pieces and bottom piece using the tabs and grooves as guides.
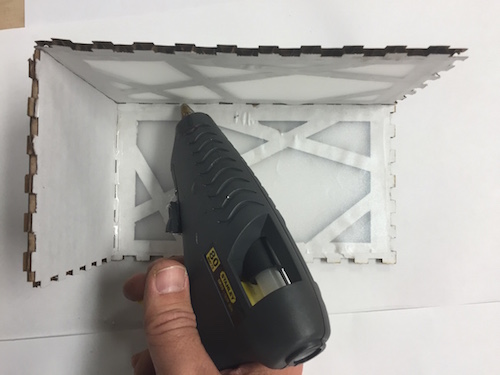
21. Using a hot glue gun, glue the bottom edges from above. Allow to dry briefly.
22. Glue the inside intersections where the sides meet. Allow to dry briefly.
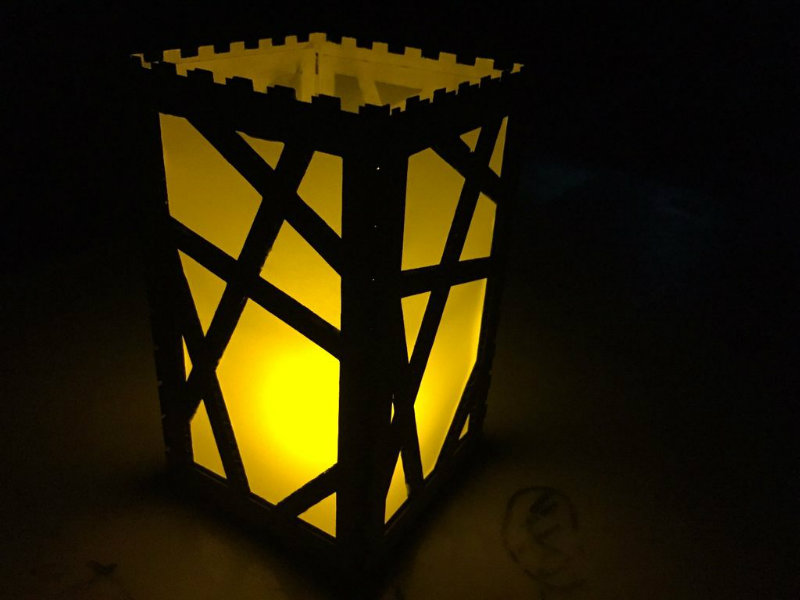
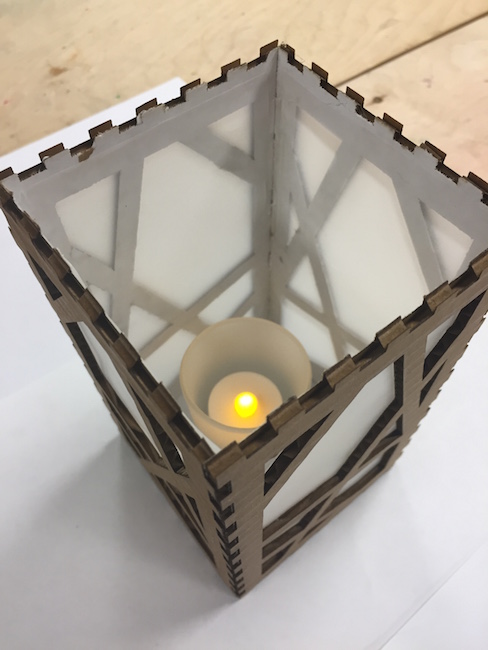
26. Place an LED tea light (we do NOT recommend using an actual tea light or candle because of fire danger) in a frosted tea light holder (optional) and carefully place it on top of the bottom piece inside the lantern.
27. Enjoy! The effect is best experienced at night or in a darkened room.